(this is a repost of a build I did back in 2015)
Hi all!
Sometimes it is fun to work on something a little different from the steel navy ships I usually build…
I’d picked up Pyro’s old Christopher Columbus’ Niña on the cheap years ago. At the time I wasn’t particularly impressed with the heavy detailing and generally toy-like appearance of the parts, so it had gone straight to the back of my stash. Casting about recently for a quick project, I decided to give it a go.
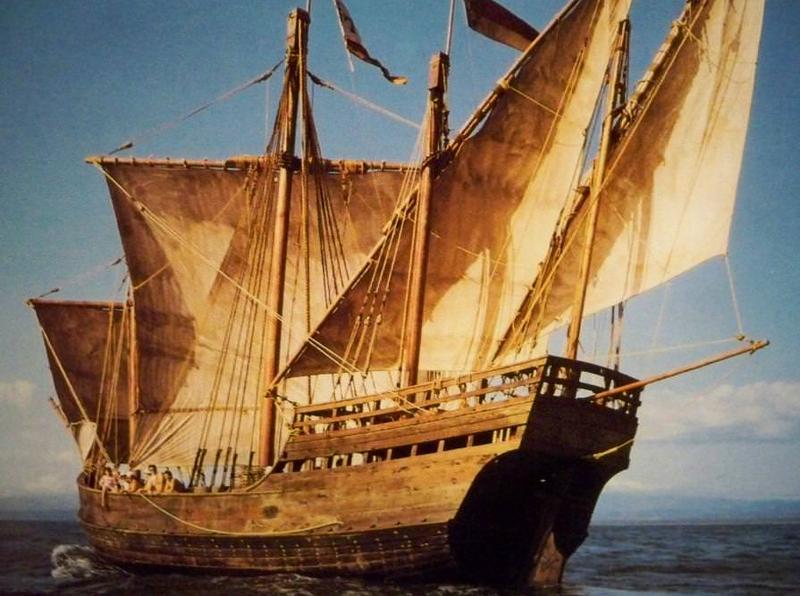
Actually named the Santa Clara, the ship was owned by Juan Niño de Moguer, from which the ship’s nickname Niña (little girl) was derived. Though the smallest among the three ships on Columbus’ first voyage of discovery, the Niña was his favorite, and he sailed aboard her on the way home. In fact, the ship eventually logged over 25,000 miles under Columbus’ command. She must have been a handy little vessel; in 1493 she survived a storm off the Azores that so nearly capsized the ship that Columbus and the crew swore to perform religious pilgrimages upon their safe return to Spain. During the second voyage, the Niña was Columbus’ flagship on an exploratory side trip to Cuba, and she was the only vessel in the West Indies (of a fleet of 17) to survive the hurricane of 1495. The next year she brought Columbus and 120 passengers back to Spain – which must have been a miserably crowded passage. I visited aboard a replica of the Niña a while back; I remember thinking at the time that at only about 60 feet in length, the 24 man crew would have been packed pretty closely. One can only imagine what it must have been like crossing the Atlantic with an additional 120 people aboard! In 1497, while engaged in a cargo run from Cadiz to Rome, the ship was captured off Sardinia by pirates - and then recaptured by her captain and some of the crew who had escaped, stolen a boat, and re-boarded the ship. Niña sailed again for the New World the next year as part of Columbus’ third voyage, during which Columbus’s men became the first Europeans to set foot on the South American continent. The last record of the Niña is of a 1501 trading voyage to the Pearl Coast of Venezuela, after which she disappears from history…
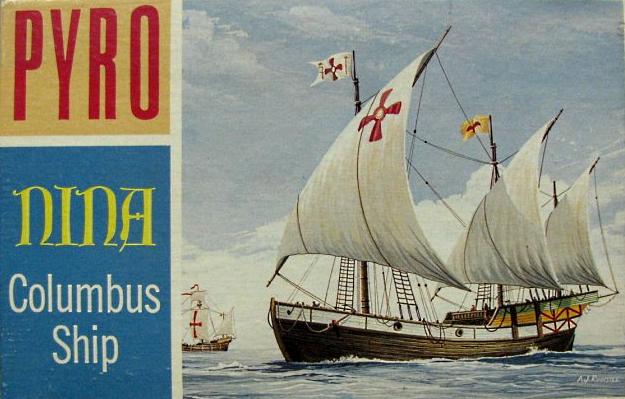
Tempting as it is to do my usual go-nuts–with–detailing-and-take-forever-to-finish thing, this one will be a simple out of the box relaxation build. I usually find this impossible, but the old Pyro kit may be just the thing for it. This little Niña was part of Pyro’s “Antique Ships” series of simplified sailing ship models from the 1960s. Designed with younger modelers in mind, these models featured basic, fast construction and a minimum of parts. They were later marketed by Life-Like in the ‘70s, and some of them (including the Niña) have been issued again more recently by Lindberg. The copy I have is one of the original Pyro moldings; according to the instruction sheet, it was issued in 1966 and retailed then for the princely sum of 60 cents!
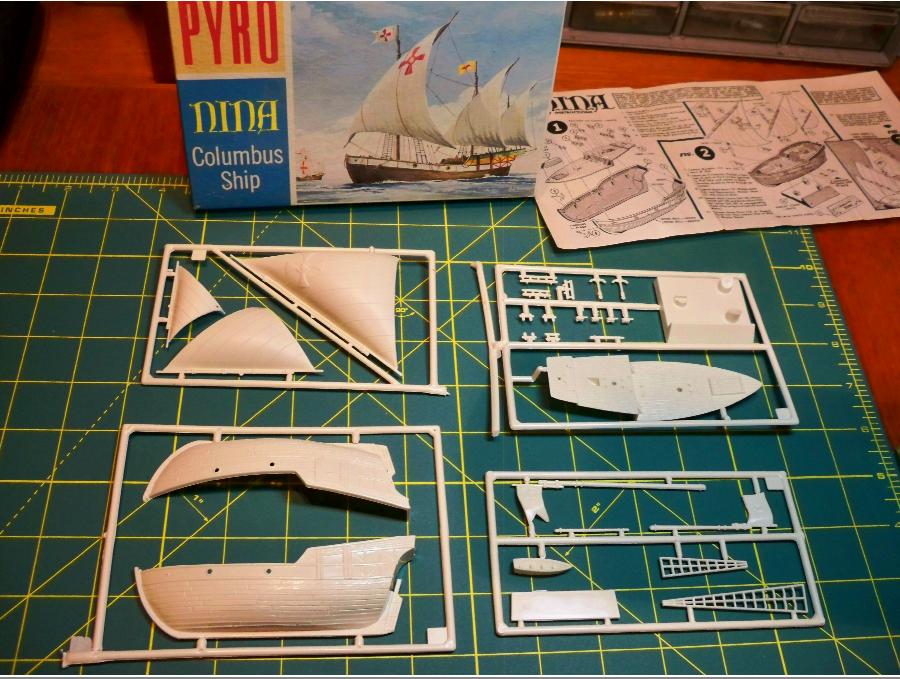
Despite its simplicity, the model appears generally to match what little is known about 15th Century caravels. The bow at the foredeck should probably rake upwards a little more, and I’d bet the hatch should be located more centrally, but it isn’t too far off published sources (‘The Ships of Christopher Columbus’ from the Anatomy of the Ship series). Niña is depicted as lateen rigged rather than square rigged as she appeared when she reached the New World under Columbus, but the rig is correct for the beginning of the expedition and earlier. The billowing sails, molded integrally with the spars, look surprisingly good. Some smaller parts such as the launch, anchors, and guns are decently done as well, although the Lombard cannon mounts shouldn’t be wheeled. This "box scale” ship (i.e., sized to fit the standardized kit boxes in the series rather than to any standard scale) comes to about 1/150. Surface detailing throughout is very heavy, especially the raised wood grain, but everything fits well and it builds up quickly.
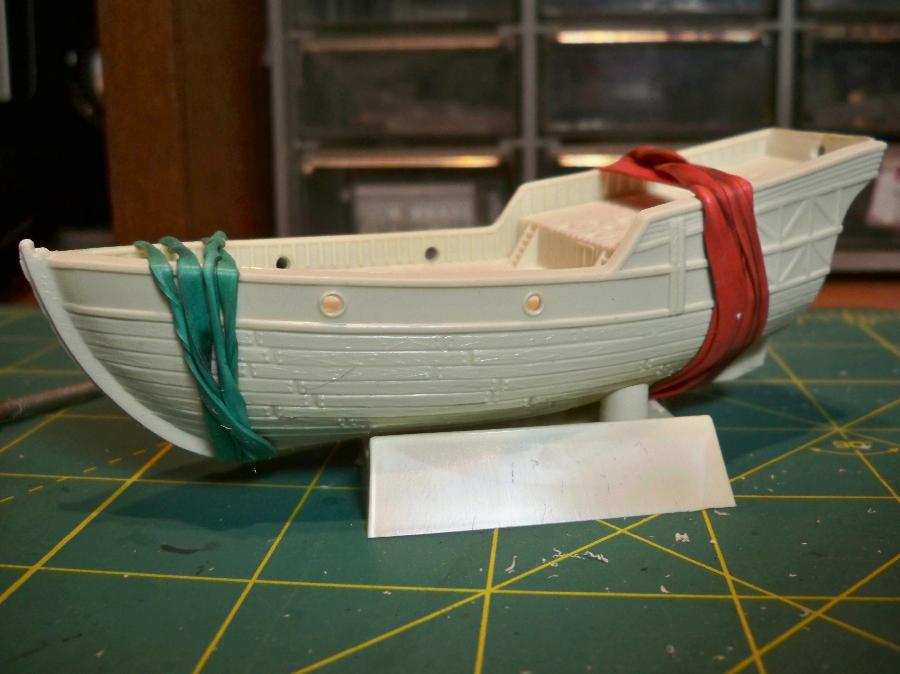
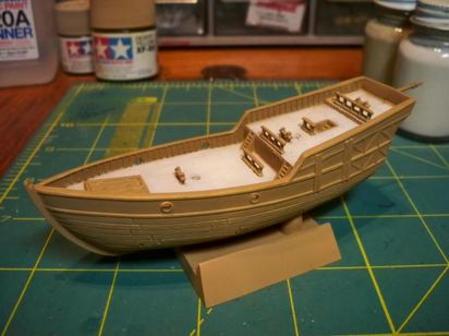
I started with the hull, which was simplicity itself – just two hull halves and the deck! Clean up was minimal, and I had it completely assembled in a matter of minutes.
Masts and sails are next. The masts are heavily done but not bad (although I’m not at all sure about those goofy molded-on flags), and the sails have some nice stitching represented by raised lines.
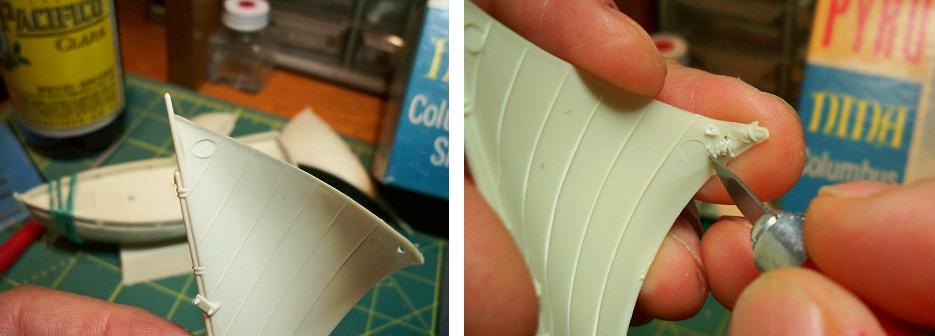
The injection molded sails came pre shaped and attached to the yards – which sounds terrible – but they actually look reasonably good in this small scale. I certainly like them better than those vacuform things that usually come with plastic model sailing ships. The only problems were some knockout pin marks on the inner surfaces which I scraped off with a curved x-acto blade and smoothed with steel wool. I also filled in the small holes for attaching rigging.
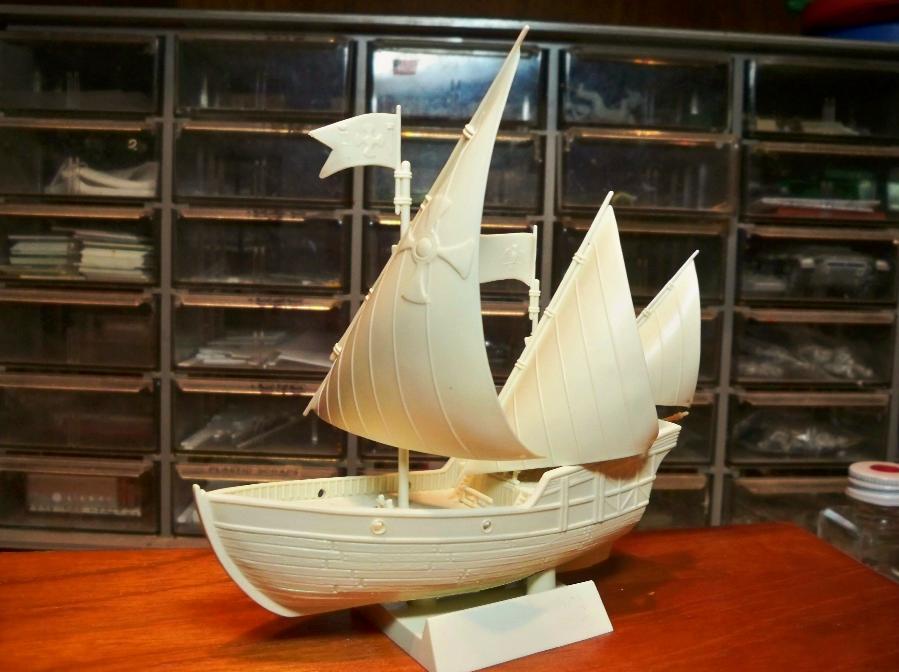
Attached to the masts and test fitted, the wind filled sails bring the little vessel to life. Yeah, the detail is pretty heavy and the flags are ridiculously thick, but I’ll see if I can make things look better with paint.
One of the benefits of having such a small investment up to this point is that I can bring myself to try out new (at least for me) techniques. In this case, I resolved to overcome my fear and loathing of acrylic paints! I’ve built models for many years, but I’ve always shied away from acrylics. I mean, if it isn’t a messy, highly toxic, slow drying petroleum based ecohazard – it can’t be trusted, right?
Still, I have almost no experience depicting wood effects and had read that acrylics could be very effective. So I bit the bullet and bought some Tamiya paints.
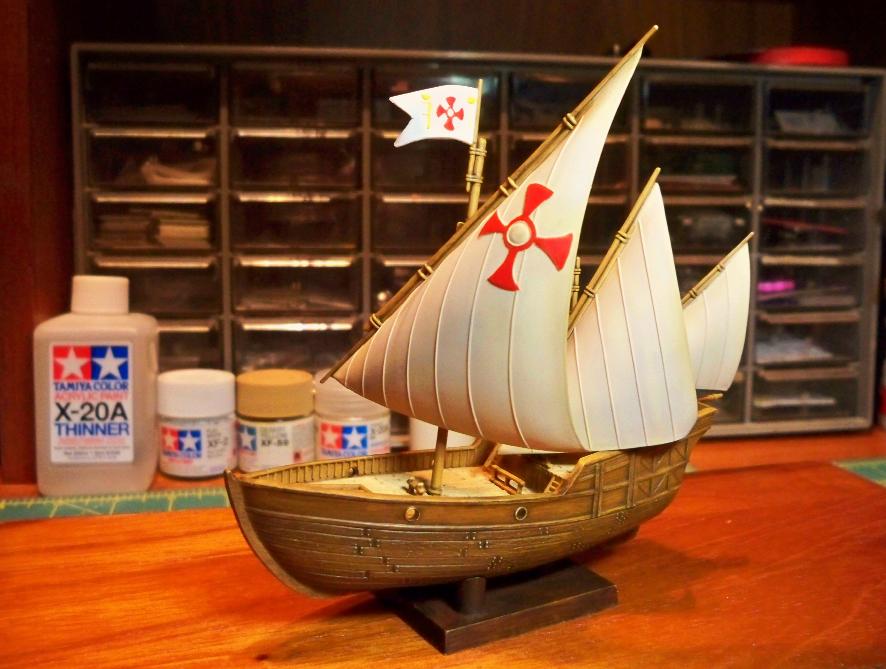
The hull got a coat of Tamiya Desert Yellow XF-59 with a light tan (XF-57 Buff and XF-59 White mix) deck.

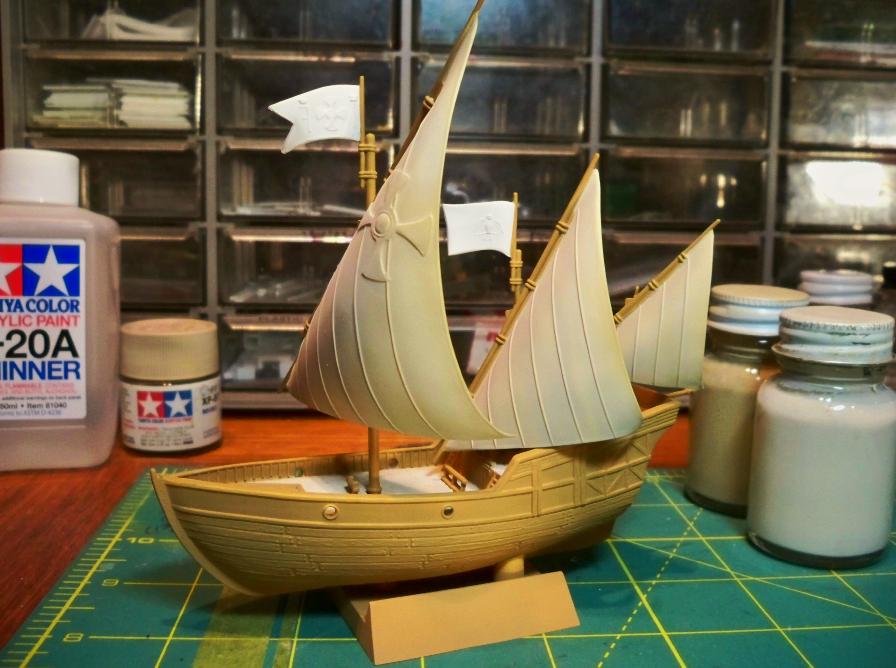
After brush painting the masts and spars Desert Yellow, the sails got an airbrushed coat of the same light tan as the deck. I also shot a darker version of the same color along the vertical raised “seams”. The contrast is subtle (you can see the two colors on the bottles in the background in the picture), but it does give the sails a little more depth.
The results look good so far. The water based acrylics were disconcertingly easy to use, covered well, and dried almost immediately. Hmmmm.
Now for the scary part! I hadn’t tried this before, a World War One aircraft builder in my model club told me he had achieved some great natural wood effects on plastic using artist’s oil colors over Tamiya acrylics; it seems that one of the advantages of these water based paints over my usual enamels is their resistance to oil based thinners… so I put his method it to the test by slathering Grumbacher Raw Umber all over that neatly painted hull.

…and it looked absolutely awful!
Just as advertised, though, the oil paint covered but didn’t attack the base colors. When I took a thinner-dampened towel and wiped the oil paint away, it left dark brown shadows in the recessed areas and a nice brownish filter over the rest of the “wood” of both the hull sides and the lighter decks. I was delighted!
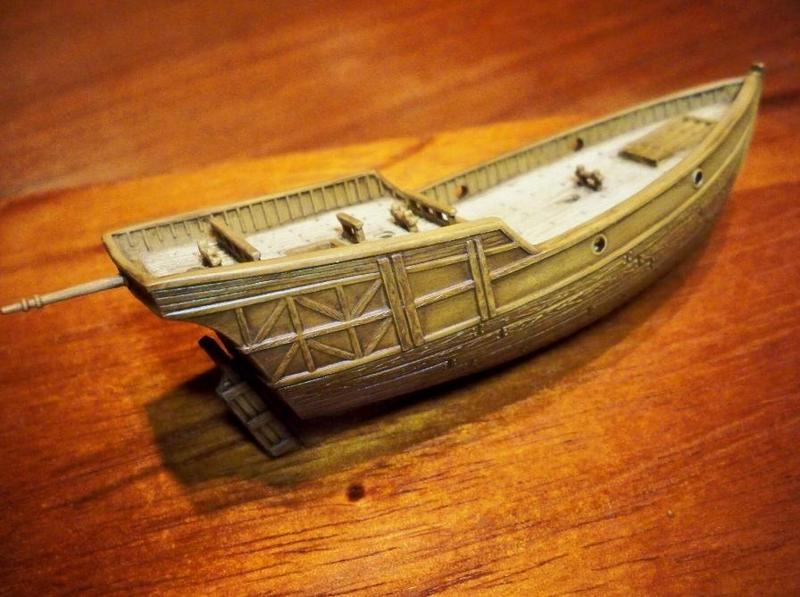
I did the same thing on the base, nameplate, masts, and yards. It was super easy! And even though my technique is still a little ham fisted, it worked well on the heavy-ish detail on the kit. Now to wait for it to dry. My friend told me to be patient, as artist’s oils can take up to a week…
Ok… I know I’m supposed to be patient and leave things alone until the artist’s oil paint dries, but I couldn’t resist doing a little more during the wait. Even though the stain on the attached yards is still tacky, the sails are dry, so I figured I could safely handle them while painting the flags.
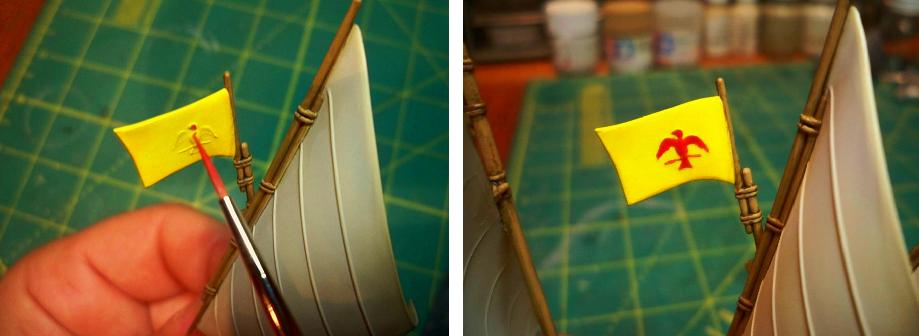
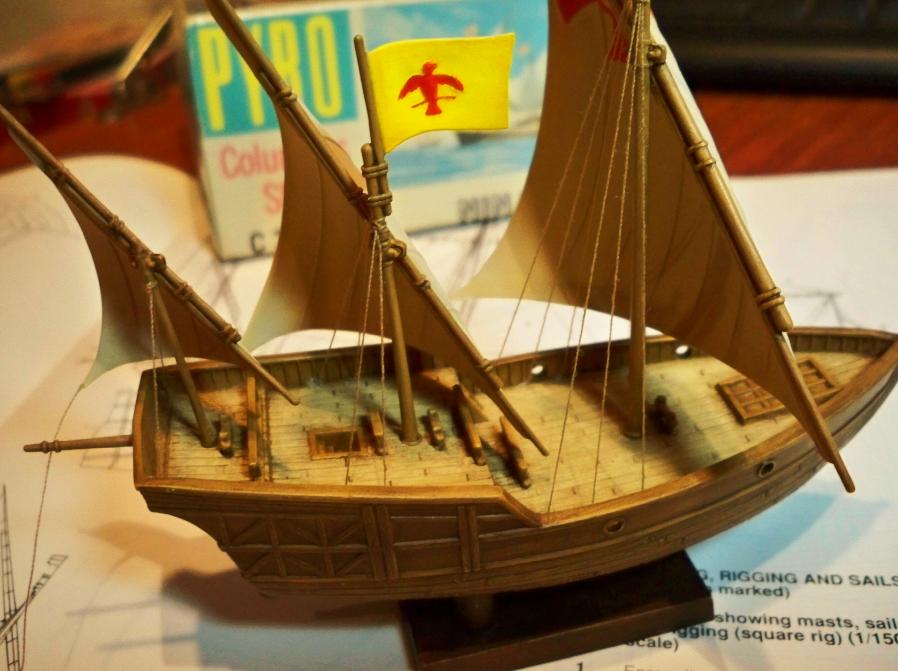
I’d considered replacing these clunky, over thick banners, but in the spirit of the out of the box quick build I just left them as they were and set to painting them. I painted the aft one yellow with the bird in red following the boxtop illustration. I have no idea if this was authentic or not, couldn’t find documentation of it anywhere. Perhaps it was the personal ensign of the Niña’s captain? It was probably just from the Pyro boxtop artist’s imagination… but it still looked cool!
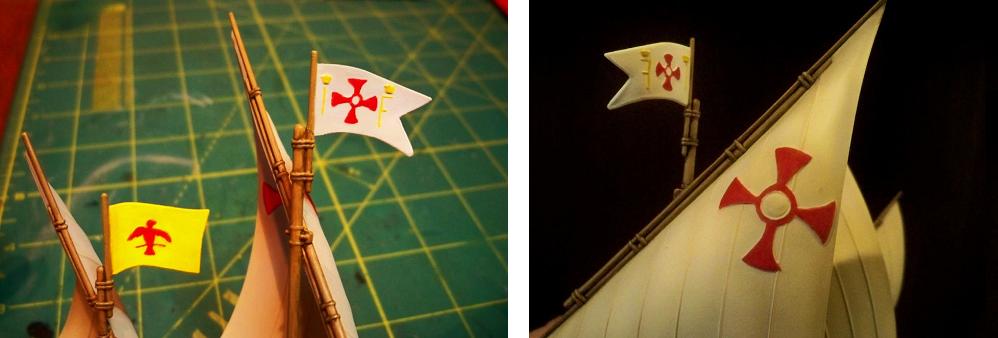
I followed the boxtop in painting the Expeditionary Banner too. The “I” is for Ysabel, the “F” for Fernando (Queen Isabella and King Ferdinand). After I painted the flags, I found out that the artist got it wrong, though: The “I” should be a “Y”, and the letters and cross should be in green. And would the reverse of the flag really have had a backwards “F”…? Oh well. I may change it later, but it looks good for now. At least everyone seems to agree that the crosses on the sail were red!
Meanwhile, the hull and other ”wood” parts are still not dry to the touch…
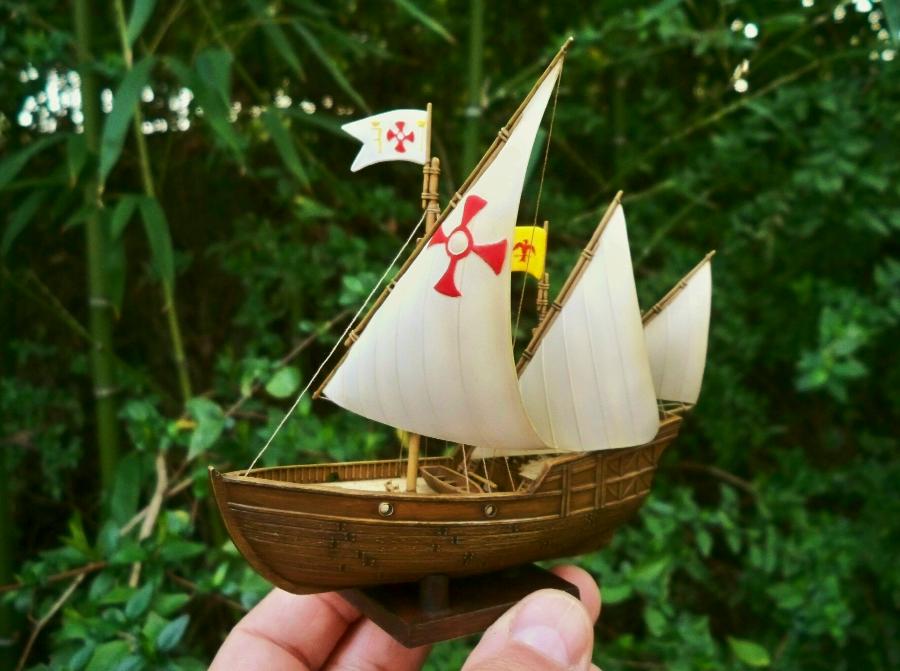
Here’s how she looks thus far with the masts test fitted:
I used a different wood color over the Tamiya Desert Yellow base coat on the stand, Winsor & Newton Burnt Umber artist’s oil. The slightly darker tone makes a nice contrast with the hull.
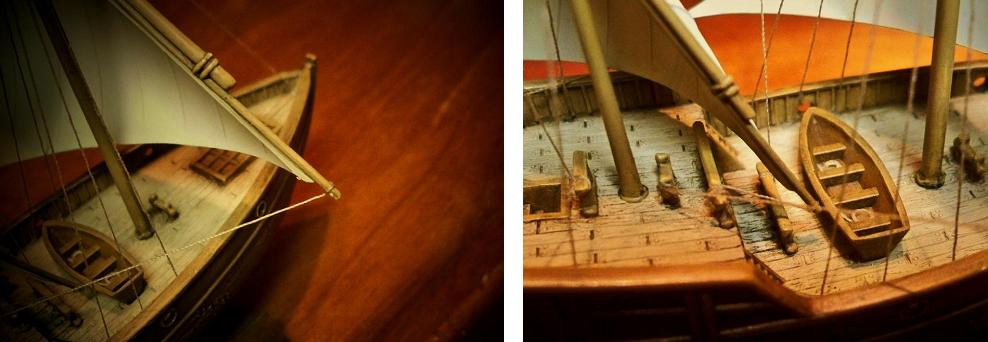
Before attaching the masts and rigging it makes sense to sort out Niña’s deck hardware. These small Pyro kits are pretty basic affairs, with most of the deck detail simply molded into the single deck piece, but there are some separate parts too. I had previously attached the rails and cleats and painted them up along with the hull. There are also anchors, cannons, and a launch.
The kit anchors are decent, but they seem too big for the Niña. According to the Libro de Armadas in the Archivo General de las Indias in Seville, Niña received new 200 pound anchors for the voyage. These small fittings probably resembled those of the larger Santa Maria, whose anchor has survived and is on display in Haiti at the Museé du Pantheon National Haitien:

Niña’s anchors were smaller than that, perhaps small enough to be stowed on deck or even below decks rather than alongside the hull as the Pyro boxtop illustrates. I can either go ahead and use the oversized kit parts or maybe scratch some new ones…I’ll figure this out later.
The four cannons provided in the kit look good, but they seem more appropriate for a 19th Century Ship of the Line than a 15th Century caravel:

The Libro de Armadas documents that Niña had aboard ten breech loading “bombardas”, or swivel guns. These smaller weapons were mounted to the gunwales rather than on the heavy deck mounts as depicted by Pyro. Since they were stowable when not in use, I’ll just put the kit parts in the spares box and call it a day.


As for the launch, the part provided in the kit doesn’t look much like the drawings in my main reference, Xavier Pastor’s The Ships of Christopher Columbus (Anatomy of the Ship), but it looked reasonable to me so I painted it up along with the other wood parts. Pyro would have it attached over the main hatch forward, but this doesn’t seem logical to me; to deploy it, the crew would have had to manhandle it aft past the mainmast to the lowest part of the deck amidships to get it over the side. I set this decision aside too, but I’ll probably install it in the open area amidships aft of the mast instead.
Now for the rigging!
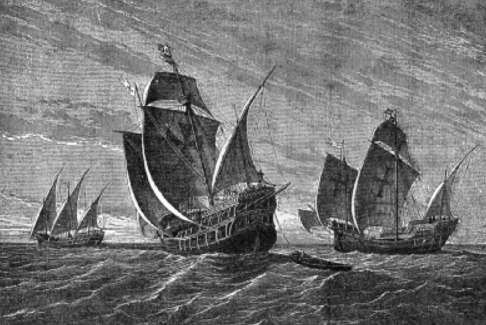
When Columbus left Spain on the voyage of discovery on 3 August 1492, the Niña sported the lateen rig with those angled yards and graceful triangular sails we have all come to associate with her. I was surprised to learn that she actually looked completely different by the time she reached America! Columbus noted in his log that the fleet stopped at the Canary Islands on 9 August to take on provisions and to address some rudder problems on the Pinta. By the time they proceeded across the Atlantic on 6 September, “The Niña, which had been lateen rigged, was fitted with square sails.” I guess the square rig must have been more efficient at capturing the ocean trade winds than the lateen arrangement, which I understand was more useful for tacking and beating against the variable winds more typically found inshore.
Pyro depicted the ship in her initial lateen configuration, which is fine with me. I like the square arrangement of the Pinta and Santa Maria well enough, but I always thought the Niña’s angled rig was so much more elegant!
Anyway, now that the paint is finally dry (after nearly a week!), I’m able to attach the masts and get to the rigging. Given the simplified nature of the kit and my desire to keep this a quick build, I decided to keep the rig simple as well. I’ll make no attempt to reproduce a complete rig plan with accurate blocks, parrels, pulleys, and such. Rather, my goal is to provide the Niña with a basic set of lines that convey a credible impression without bogging down the build too much.
I started with the standing rigging – that is, the fixed lines that hold the masts in place. The kit provides molded shrouds with ratlines for each of the two larger masts:
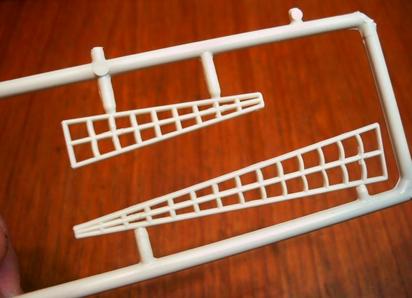
In addition to being way too thick, these parts also appear to be inaccurate since only one side is provided per mast, and lateen rigged vessels don’t typically have ratlines (the horizontal bits used for climbing). I opted to replace these kit parts with black sewing thread. Each shroud was first tied to the mast, then the ends were attached to the deck edges on either side below. There really should be complex tightening tackle with deadeyes and attachment fittings at the base of each one, but for simplicity I just super glued them down at the deck/gunwale join. There also should probably be more of them; the full-sized Columbus Foundation Niña replica has six per side, the model in the Museo Maritím de Barcelona has four, but I’ve also seen other reconstructions with as few as three. I went with three.

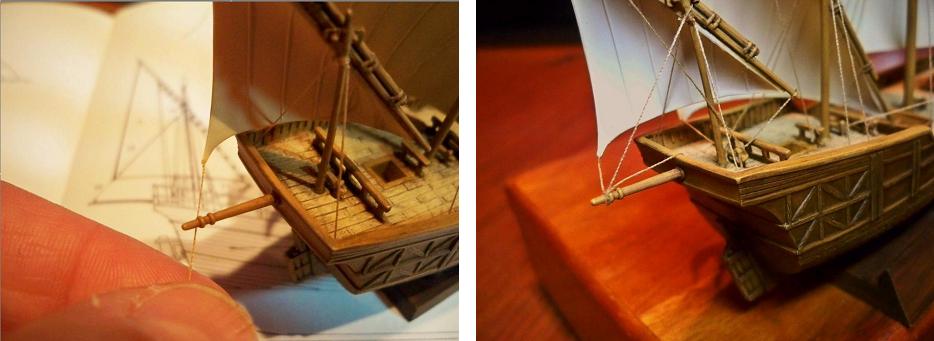
Although they look good in the picture, in person the black shrouds looked too stark and seemed to overwhelm the little model. Looking again at images of the Columbus Foundation replica Niña and at the Barcelona museum model, I could see that these shrouds aren’t black but are actually the same tan as the rest of the rigging. So even though I hate redoing work, I took off the offending lines and replaced them with tan polyester sewing thread:
Much better!
The running rigging to control the sails comes next.
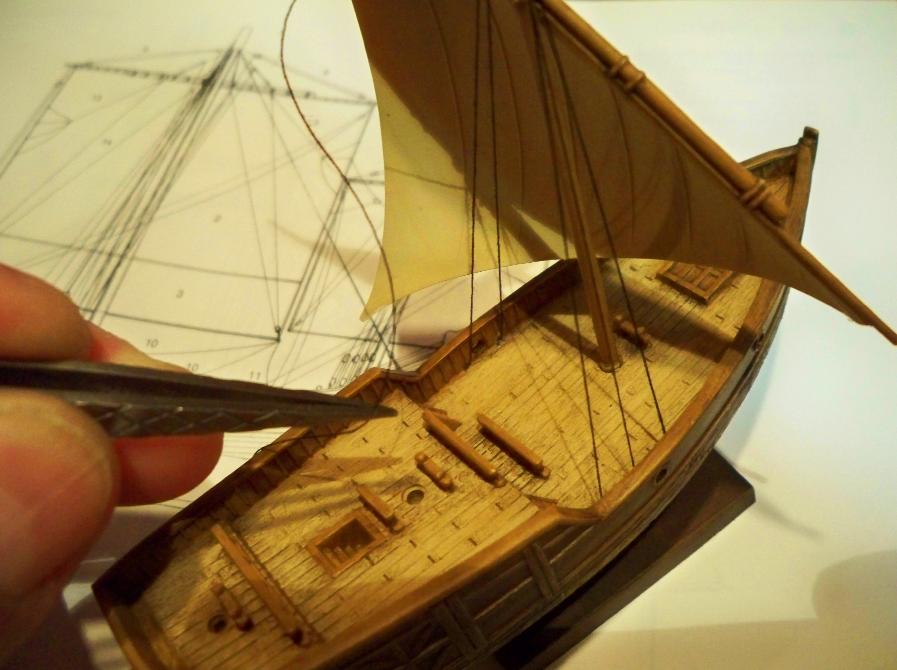
I started with the mizzen sheet line to the boomkin. The kit sails come with little holes to tie these lines on (which I had filled in), so I attached the lines to the sails with super glue. Then the line was tied to the boomkin.
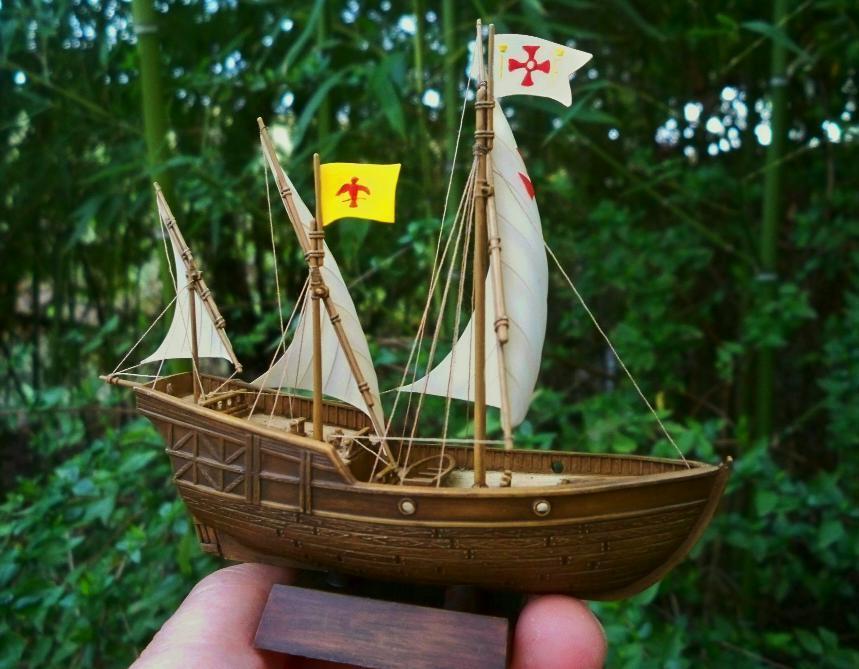
The abbreviated rig consists of just tacks (lines at the ends of the yards), sheets (lines at the ends of the sails), and vangs (lines from the gaff peaks to the rail, used to steady the gaff). These were looped around the cleats on deck and tied off. I had a heck of a time tying clove hitches that small, but the model is only 4½ inches long, so I could get away with just a few representative lines. Full respect to the guys who take on those big, complex sailing ship models!
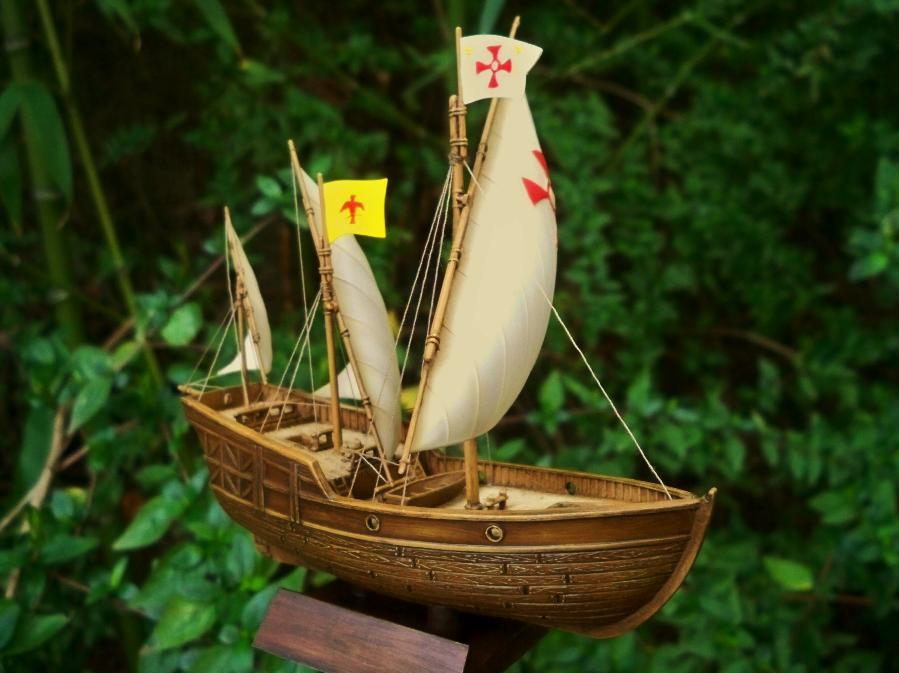
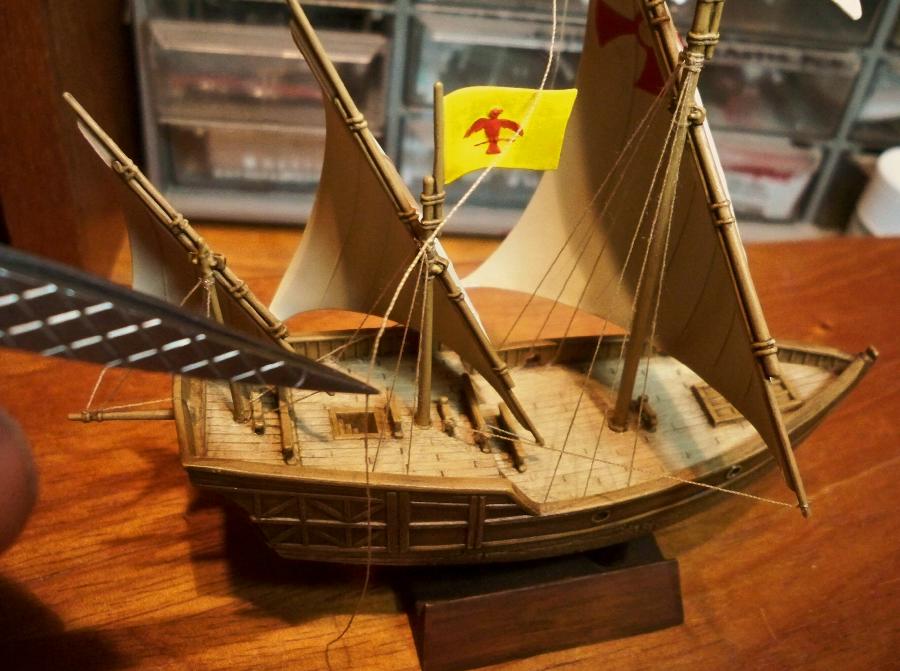
The simplified rigging completes what was for me a lightning fast build – start to finish in just under two weeks!
These little Pyro beauties might not be the best detailed or most accurate models out there, but they can still be a lot of fun. In fact, I enjoyed this one so much that I bought a couple more last week while waiting for the Niña’s paint to dry:
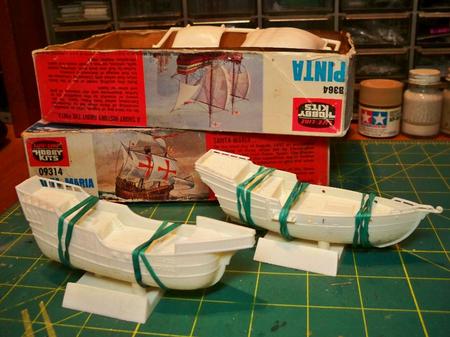
but that is another story…
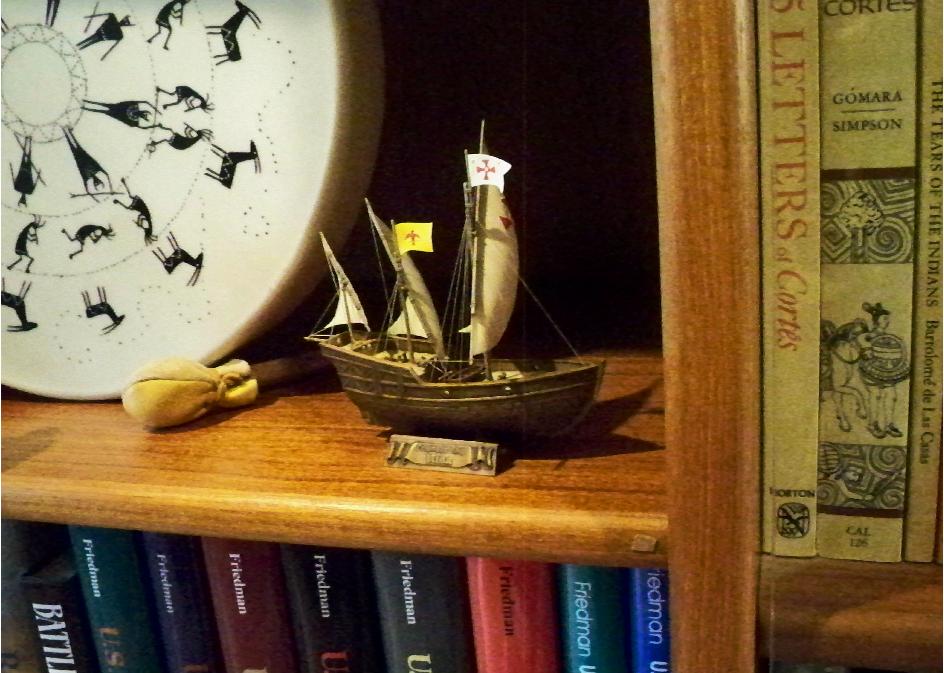
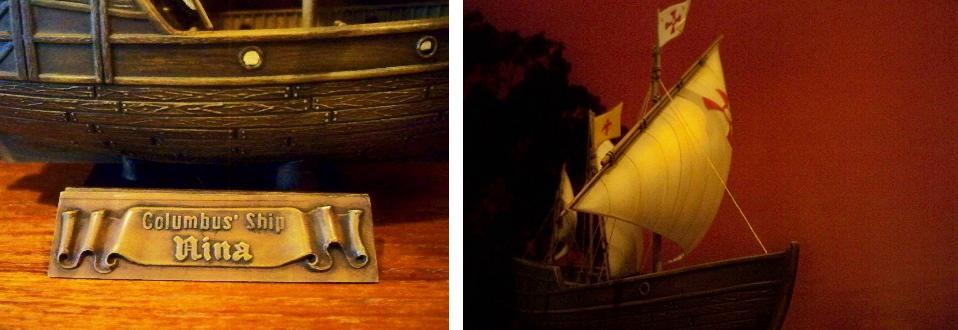
For now, my little 1966 Pyro Niña, after patiently waiting nearly 50 years, proudly takes her place on my bookshelf.

After taking the pictures, I also added the Niña kit nameplate. Pronounced ”neen-ya” rather than “nee-na”, the “n” should really have a tilde (that little squiggle on top), but hey, the fancy lettering is still appealing!