Hi Tim,
EXCELLENT work as usual! jsut love all the scratch improvements
Cheers,.
Thanks Joe. I’ve tried my best to keep this build as out-of-the-box as I could, but some changes just cry out to be made!

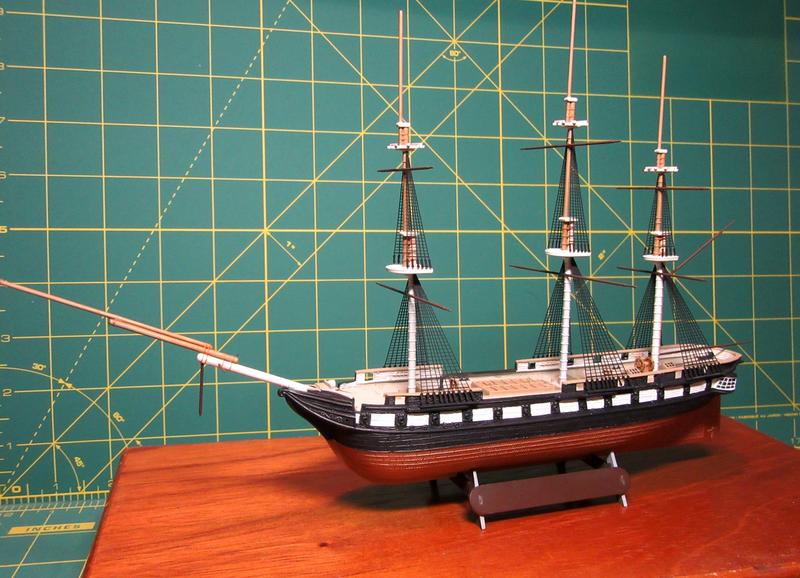
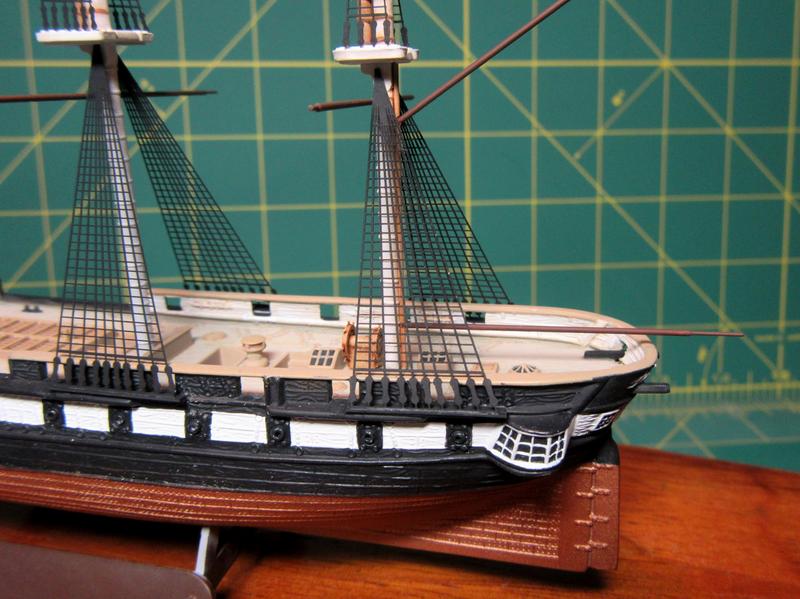
The yards have been glued to the masts and painted Tamiya acrylic Red Brown (XF-64).
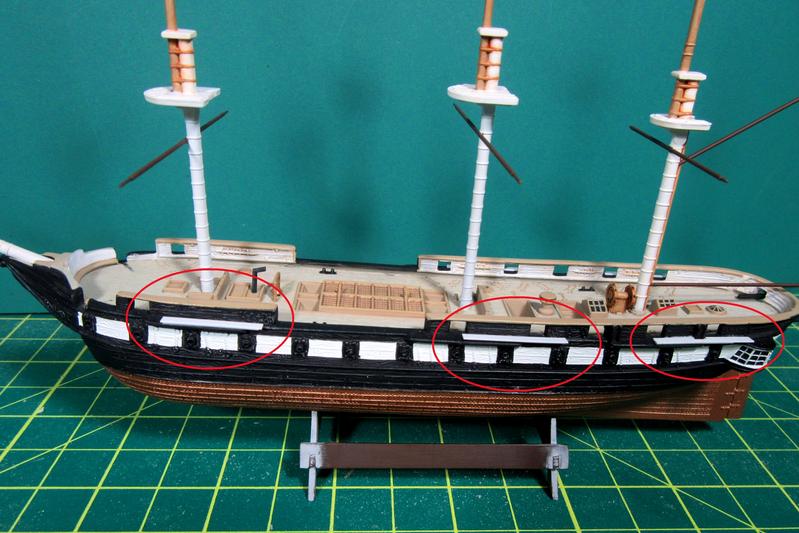
Also, the six white plastic channels (circled in red) have been fitted to the hull. Channels (originally called “chain wales”) were timbers placed along the sides so as to lead the shrouds clear of the upper bulwarks of the ship and distribute the pressure on the ship’s sides.
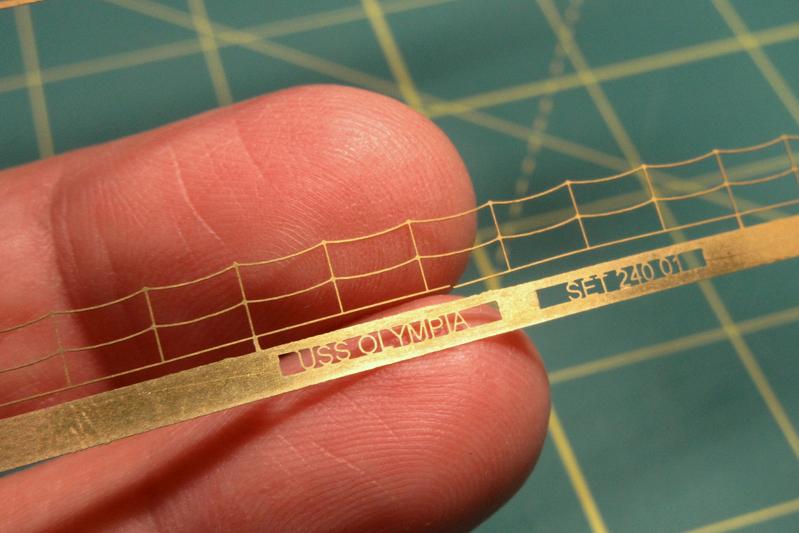
These .010 X .080 inch plastic strip channels will be the bases for the etched shrouds/ratlines.
3 Likes
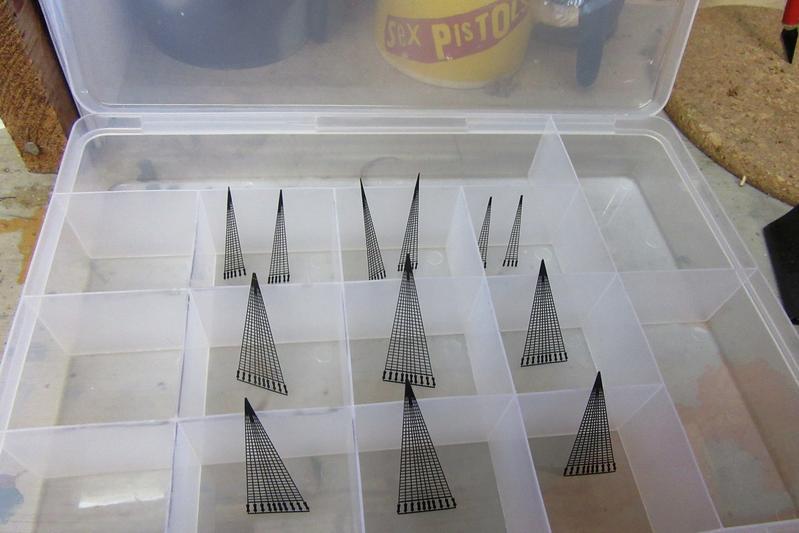
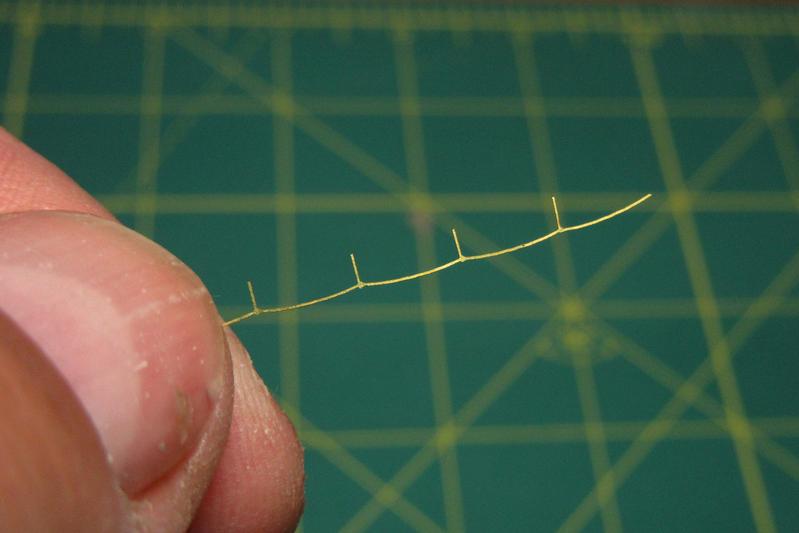
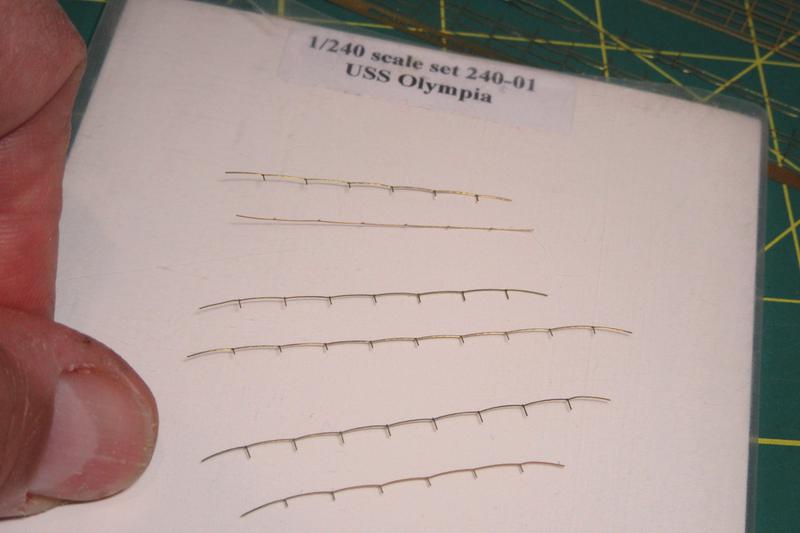
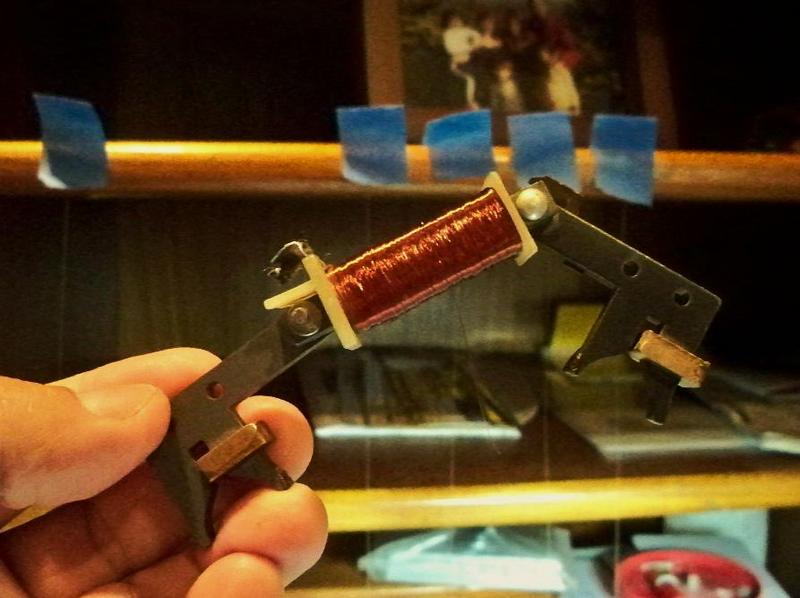
After trimming the delicate etched brass shrouds/ratlines to fit in their specific locations, I airbrushed them with flat black enamel.
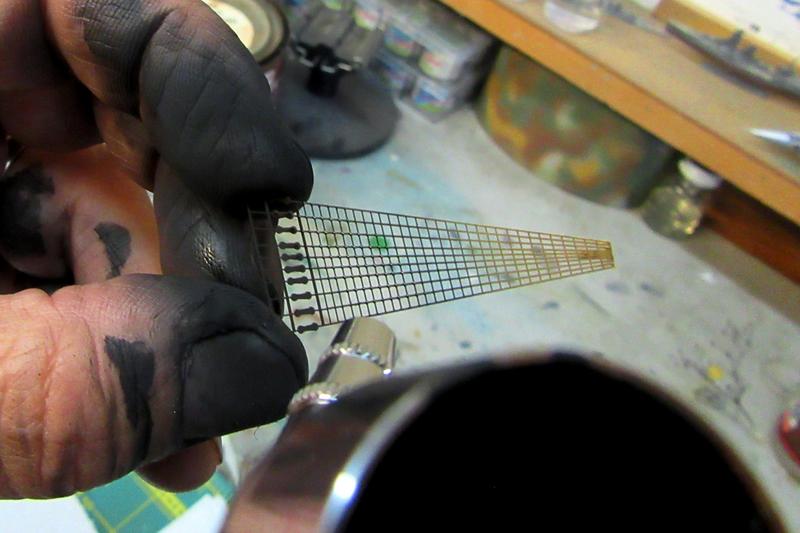
This was a surprisingly delicate (and messy!) process. I wanted to make sure to leave absolutely no brass showing, so they had to be shot from various angles to fully cover the intricate structure. Holding and turning them by hand while spraying turned out to be the best way to hit all the surfaces.
I actually got some of the paint on the ratlines too!
2 Likes
Really liking the Goth manicure Tim !
3 Likes
"do all the “boring” guy activities…without fear of trying the patience of loved ones. It was great! "
I bet it was!
Love your Pyro builds. Old model kits are a lot of fun. You make them look so good. 
1 Like
"do all the “boring” guy activities…without fear of trying the patience of loved ones. It was great! "
I bet it was!
Love your Pyro builds. Old model kits are a lot of fun. You make them look so good.
Thanks Fred - I’ve always thought those old Pyro kits were underrated.
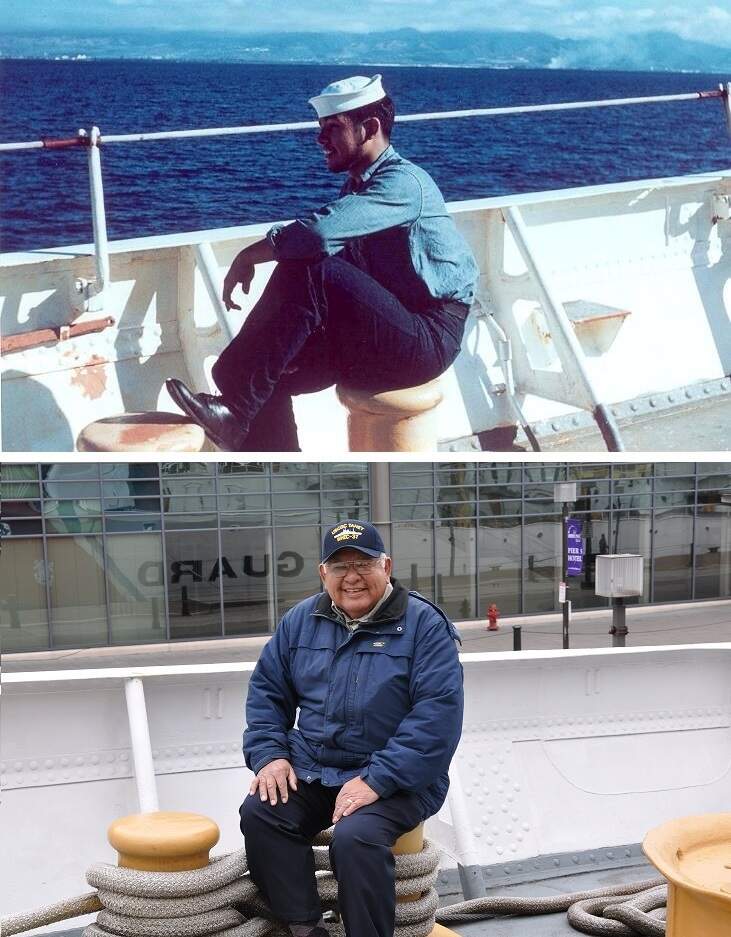
That trip with my dad was special; the Constellation was certainly a highlight, but the best part was that he got to see the his old ship, the USCGC Taney, for the first time in over fifty years!

![]()
5 Likes
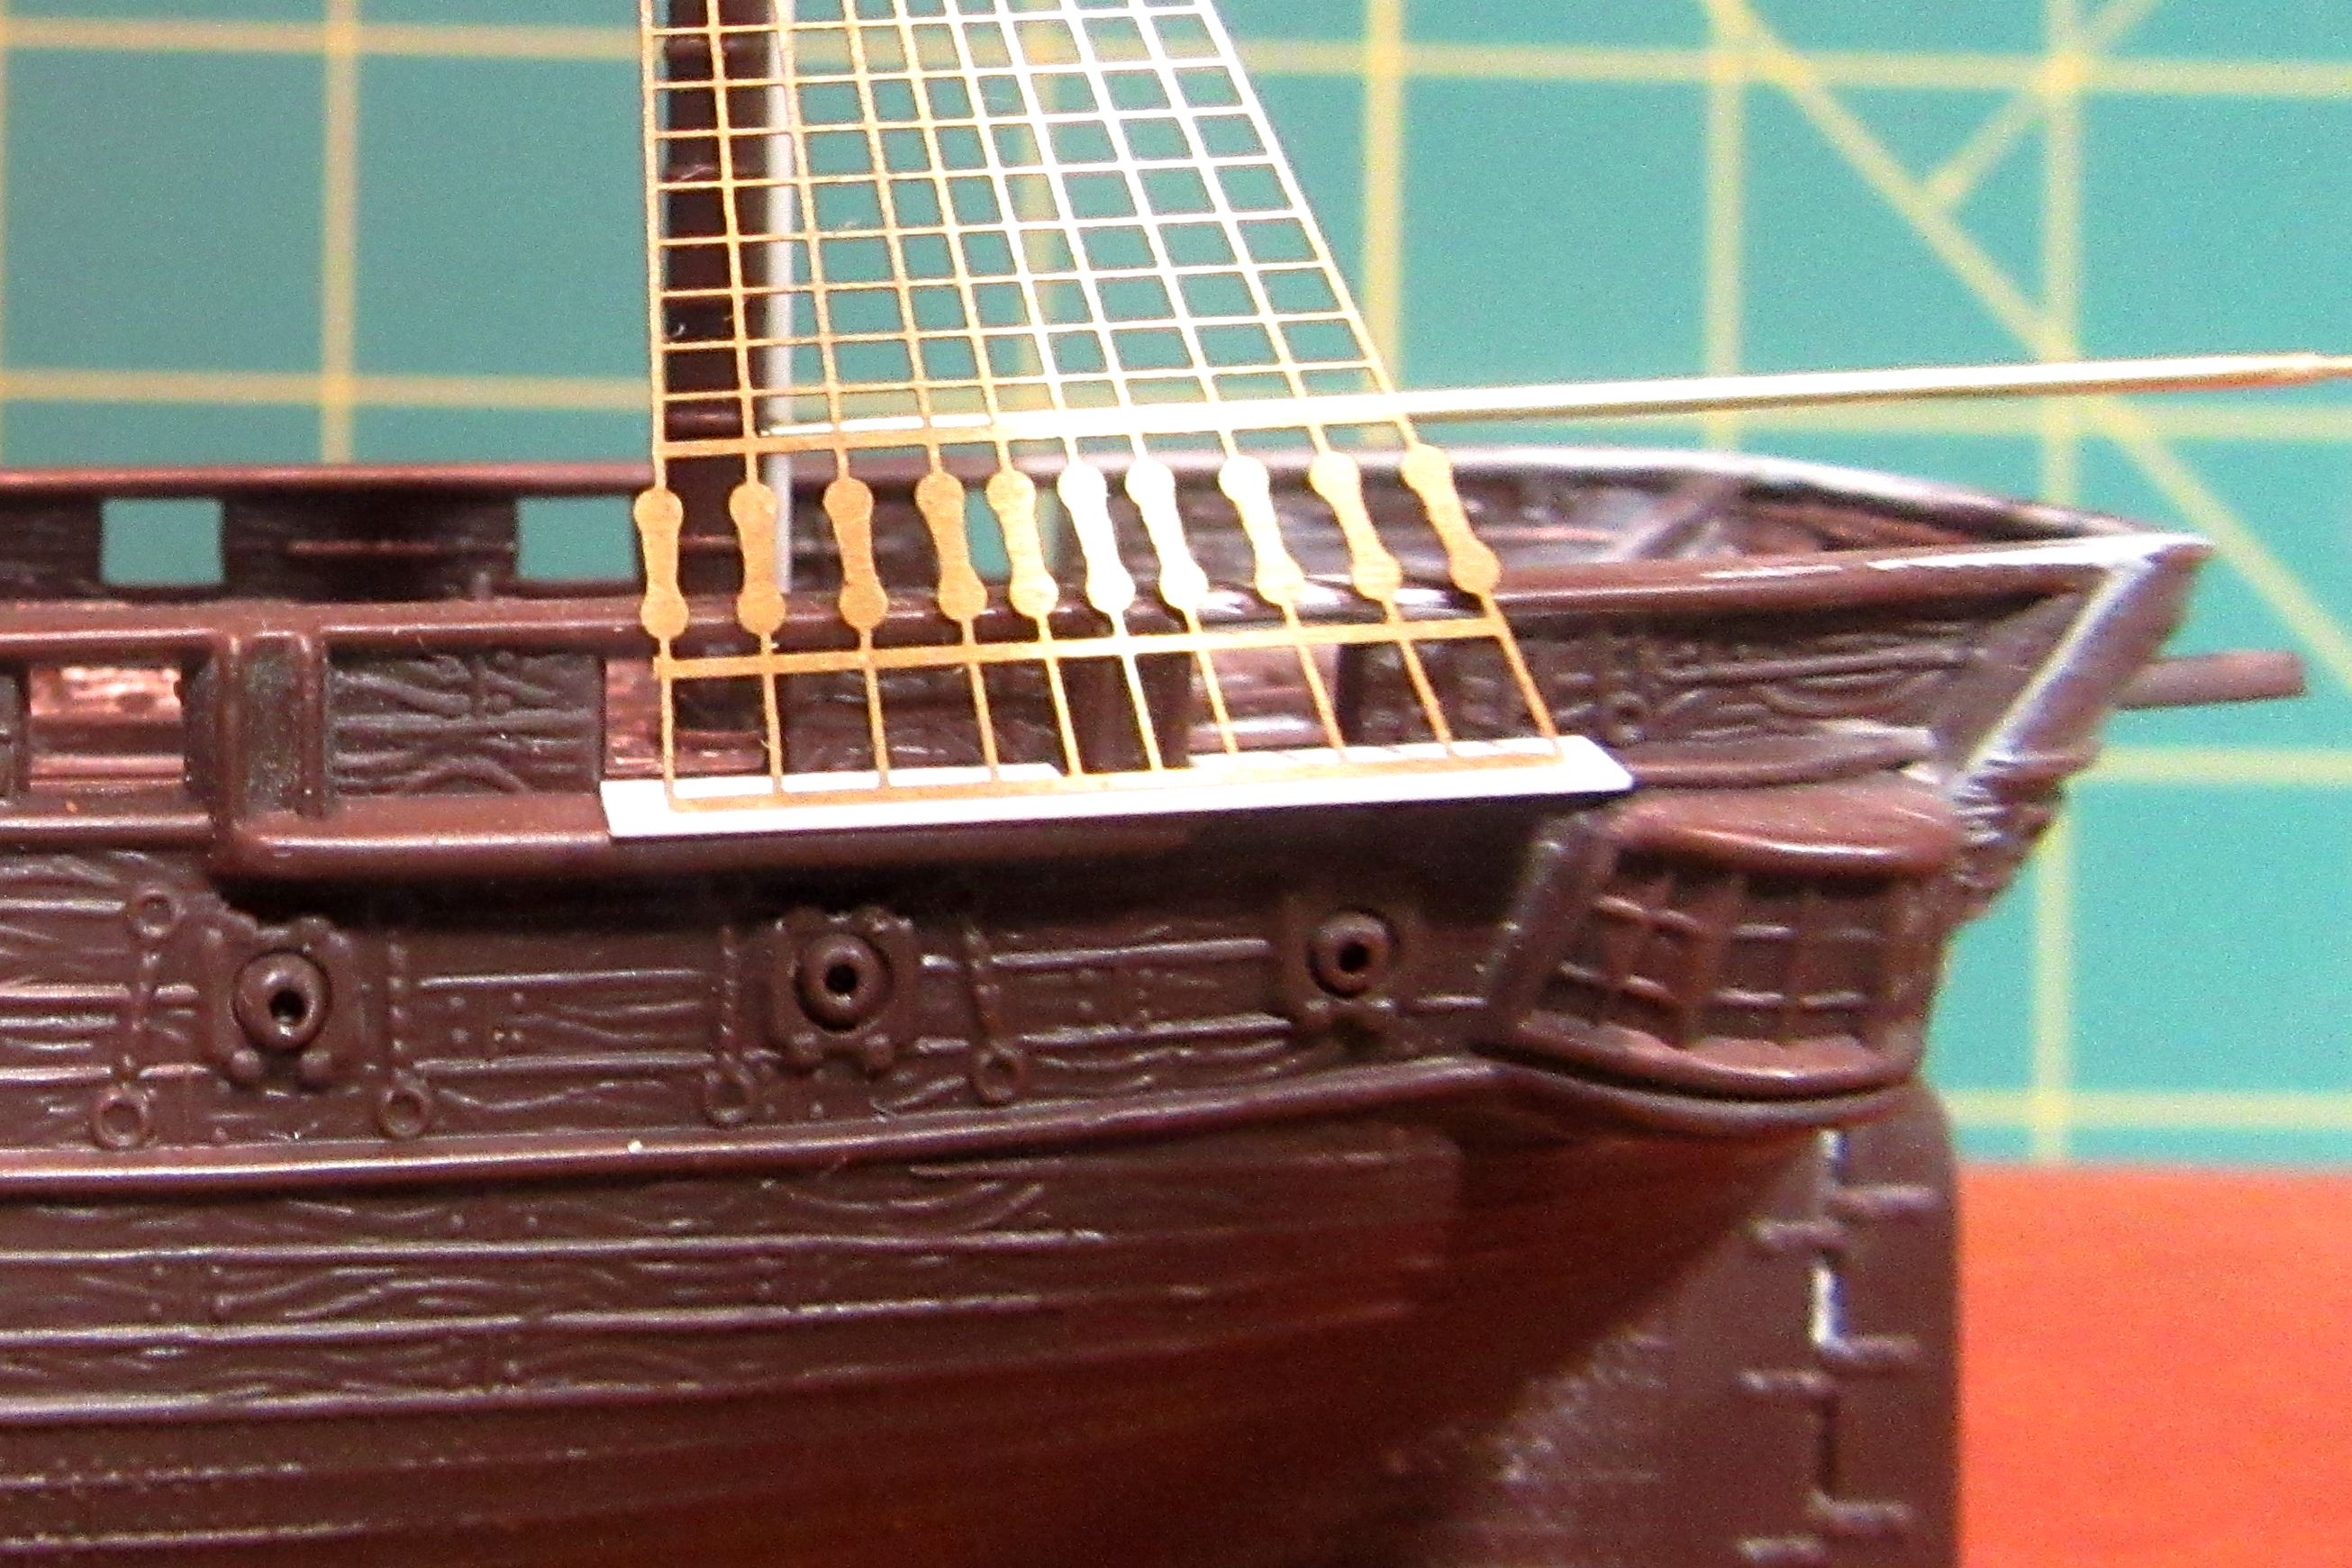
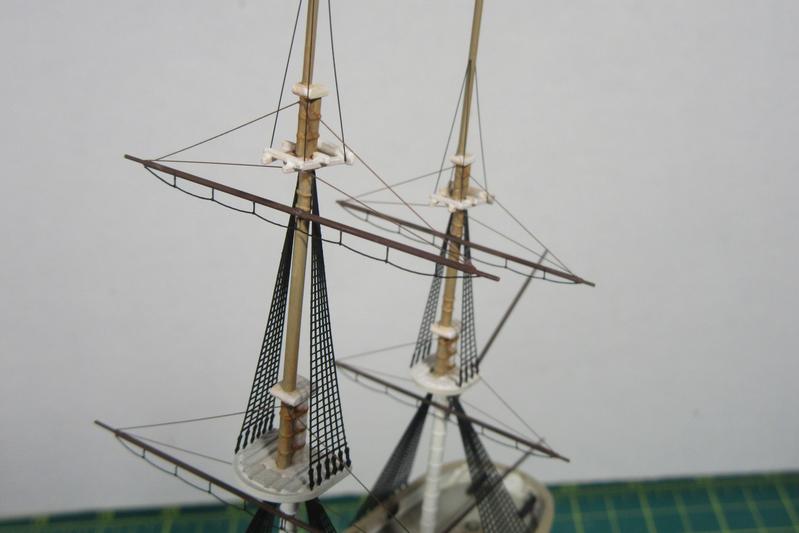
With all the prep completed, actual installation of the completed ratlines was a snap.
I attached them to the ship with polyvinyl acetate (PVA) white glue thinned with water and applied with a paintbrush.
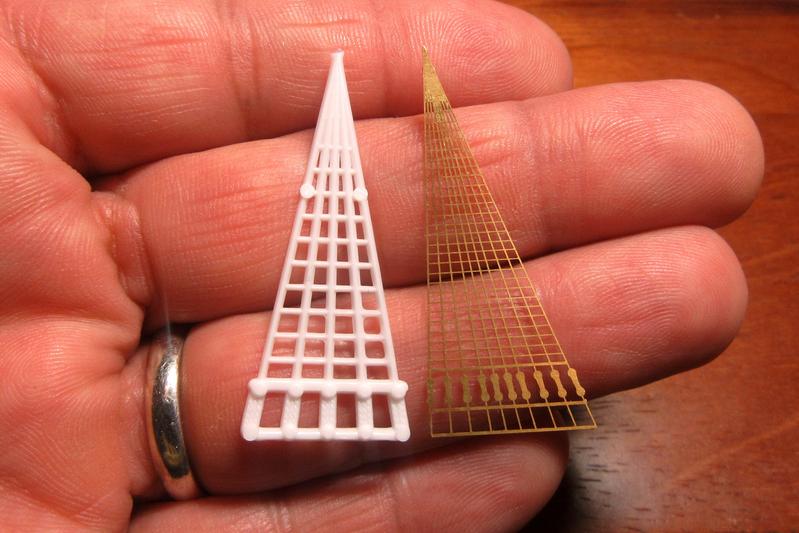
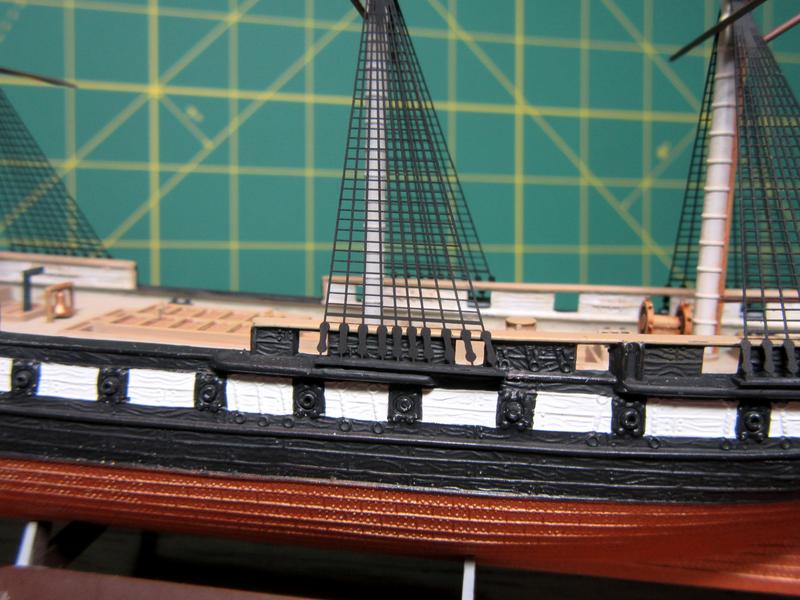
The etched parts are a huge improvement over the molded kit parts – kudos again to Peter Hall for his wonderful Atlantic Models Ratlines for Sailing Ships set!
4 Likes
Looks great Tim.
Really nice colours and build.
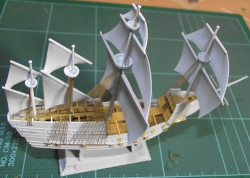
Today I picked up the Airfix’s new tool 1/400 Mary Rose. A small kit but very nicely done. It’s very much in the spirit of these small scale sailing ships from the 60’s. Moulded sails, simplified cannons, low part count, etc… But with the improvements of modern tooling, Airfix have really pulled it off quite well. Never built a sailing ship before, so I’ll be using your builds for reference.
I’m hoping I can find a set of etch ratlines like your Constellation. It’s about all I think it needs.
Wow it’s so much easier to get blown off course on this new site & I just have to say what a superb build this is & the way you present it. Awesome work Tim, when I grow up I’d like to get back into maritime - my last effort was Heller’s Royal Louis a couple of years ago…um 1973 to be exact. By coincidence your shrouds also got my attention, having just made my first DIY photo-etch brass part – see Op. Anthropoid in Dioramas. Interested? 
Fantastic work, Tim!
You make those old little jewels shine, looks awesome! Those ratlines are a huge improvement.
Cheers
Jan
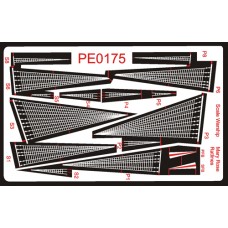
Stephen, you are in luck!
![]()
https://www.scalewarship.com/store/index.php?route=product/product&product_id=570&search=mary+rose

https://www.scalewarship.com/store/index.php?route=product/product&product_id=571&search=mary+rose
2 Likes
Fantastic! Thanks for finding those.
Wow it’s so much easier to get blown off course on this new site & I just have to say what a superb build this is & the way you present it. Awesome work Tim, when I grow up I’d like to get back into maritime - my last effort was Heller’s Royal Louis a couple of years ago…um 1973 to be exact. By coincidence your shrouds also got my attention, having just made my first DIY photo-etch brass part – see Op. Anthropoid in Dioramas. Interested?
Thanks Tim, much appreciated! My compliments on your Operation Anthropoid effort - it is first rate work!
Now if you are looking for maritime etch ideas, I certainly have a few…!
![]()
![]()
Fantastic work, Tim!
You make those old little jewels shine, looks awesome! Those ratlines are a huge improvement.
Cheers
Jan
Thanks Jan, I appreciate your kind words! I agree about the etch; the discovery of those etch ratlines was why I finally decided to go ahead and take this kit out of my stash and build it.
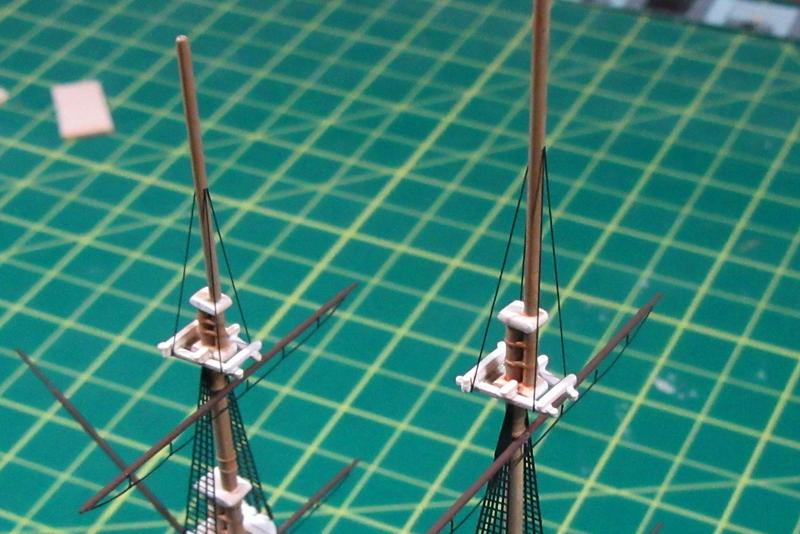
After completing the etched brass shrouds/ratlines, it made sense to add the footropes to the yards.
On a square rigged sailing ship each yard is equipped with footropes for sailors to stand on while setting or stowing the sails. I wanted to portray these, but the Atlantic Models brass ratlines set didn’t include them, and to my knowledge there is no comparable “generic” set of footropes. I first thought of adapting leftover etched railing for them, but most of the straight rails in my stash lacked the distinctive droop of the footropes. I did have some 1/350 Imperial Japanese Navy rails with the right general shape, but the upright stanchions were too close together.
I ultimately found something suitable in Tom’s Modelworks 1/240 scale USS Olympia handrails set. These rails showed the droop I was looking for, and the larger scale created the appropriate spacing too. I cut out six lengths of them with each one sized to fit a specific yard.
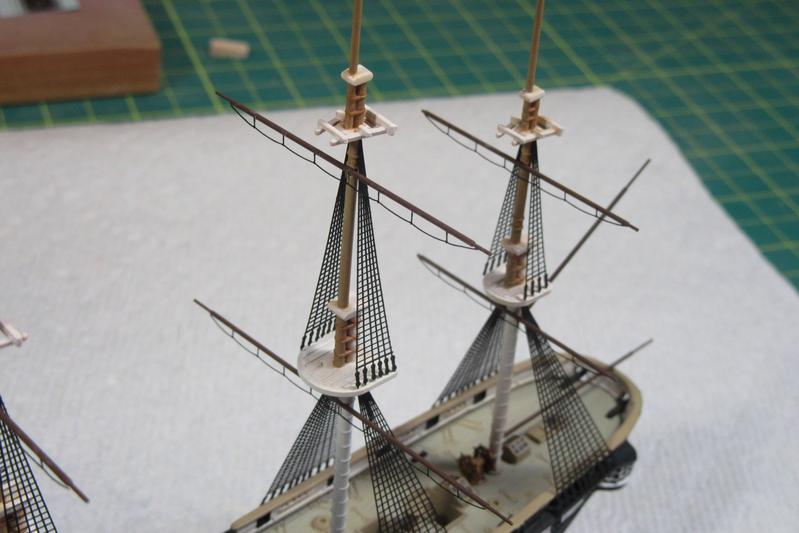
Painted flat black and attached with tiny dabs of PVA glue, the foot ropes add a touch of complexity to the rather plain yards.
4 Likes
Tim, there might be a listing in the DSM for what ails you. 
Fantastic work!
Tim, there might be a listing in the DSM for what ails you.
Fantastic work!
Thanks Mark. I don’t know if AMS (Advanced Modeler’s Syndrome) is yet listed in the DSM, but you may have a point… ![]()
…really, I am making an effort to keep my build of this fairly basic kit as simple as possible!
1 Like
So far so good, but with all the photoetch options used up, it is time to figure out the rest of the rigging. Now I’ve done a few sailing ships before, but nothing this complex; frankly, I find the prospect of rigging this thing daunting!
Model Shipways’ The Neophyte Shipmodeller’s Jackstay offers some encouragement:
“It has been truly said that the rankest amateur modeler can successfully rig, though he know not his mast from a hole in the ground. Rigging is basically simple, the progressive addition of a number of details, each logical and uncomplicated.”
Ok. The first task is to figure out the material for the rigging. I’ve had good luck with sewing thread before, but even the finest fiber thread wouldn’t look sharp enough in this small scale. I’ve also had success with flexible EZ line (a kind of very fine rubber string often used by model railroaders to represent scale power lines and such), but I didn’t want to risk pulling the delicately attached yards off the masts!
I finally settled on wire. This spool of copper wire, which my then-toddler daughter found on the street while we were on a walk in our neighborhood, is some of the finest wire I’ve ever seen. Stretched straight and painted, it makes for petite, consistent width, temperature-stable rigging. I’ve been using it to rig my model steel navy ships for some twenty five years now!
I started with the topgallant shrouds. These were lines fixed to the uppermost crosstrees to support the highest masts, the topgallants. Since they were fixed standing rigging and protected with tar, I painted them black.
4 Likes
Next I added the lifts.
The lifts were lines used for supporting the ends of the yards to prevent them from sagging under their own weight.
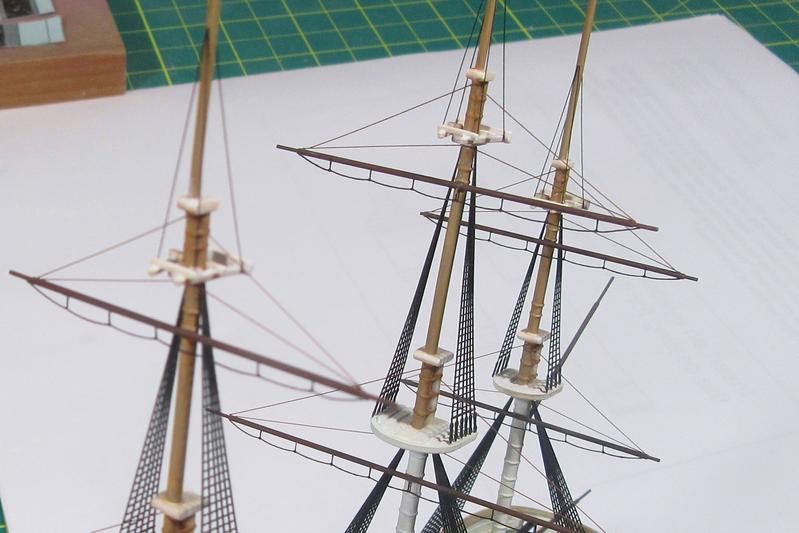
Since they were adjustable and had to be able to run through blocks (pulleys), these lines were not tarred. I painted them with Model Master Military Brown enamel.
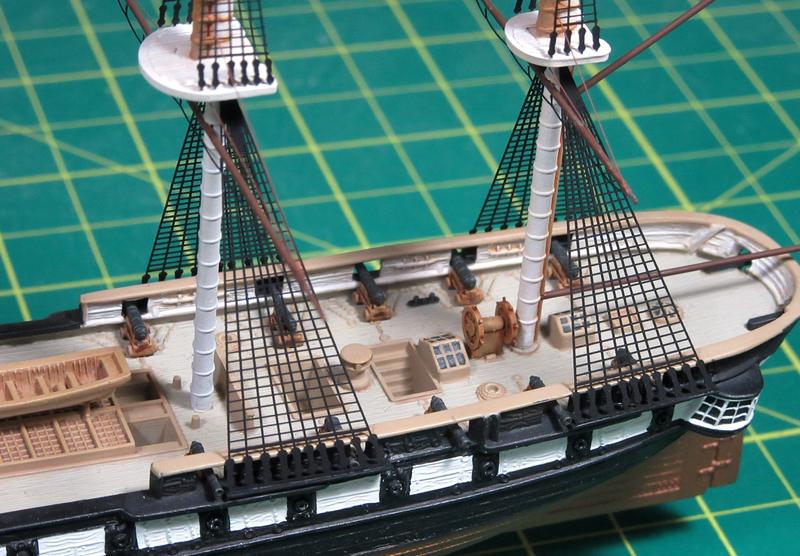
I also installed the ship’s boat and deck cannons – these spots will be harder to access as rigging continues.

HAPPY THANKSGIVING!
5 Likes
Wow, you really turned a sow’s ear into a silk purse. When I started veiwing this thread I thought to myself “ain’t no way”, that’s a scrubby looking little model, but I gotta give you a thumbs up you’ve done a great job upgrading this “sheet hanger”. It’s just in our nature it seems to take an ole peice of . . . well you know, and make it shine. And it does glow! Good job my son.
1 Like