Hey Tim! 
So great to see this one back underway!
Very nice progress indeed and a good recovery on the deck!
Of course, following along with interest!
Hey Tim!
So great to see this one back underway!
Very nice progress indeed and a good recovery on the deck!
Of course, following along with interest!
Looks great. The rigging is very neat.
Terry, Russ, and Stephen, thanks!
Terry, I have to admit, I have always been drawn to somewhat “scrubby looking little model” kits like this. They not only give plenty of scope for improvement, but they also enable me to justify to myself limiting the added details too!

Russ, I started this one two years ago - but that debacle with the deck almost made me abandon it for good! I’m cranking away on it again trying to finish as a Christmas gift for my dad.
Stephen, yes the rigging seems to be working so far, but that wire is a b#%* to work with! I’ve used it in the past for modern ships, but the more complicated rigging of a square rigged sailing ship is challenging both my skills and my patience!

Tim,
Awesome build, mate!
I’m sure The Old Sailor will be extremely happy with his Christmas present!

Awesome build, mate!
I’m sure The Old Sailor will be extremely happy with his Christmas present!
Thanks Angel! I guess I should sort out that rigging…
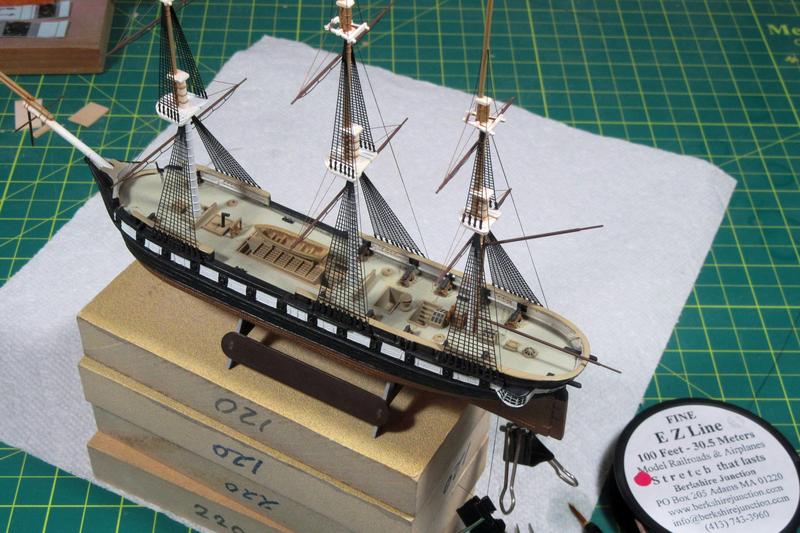
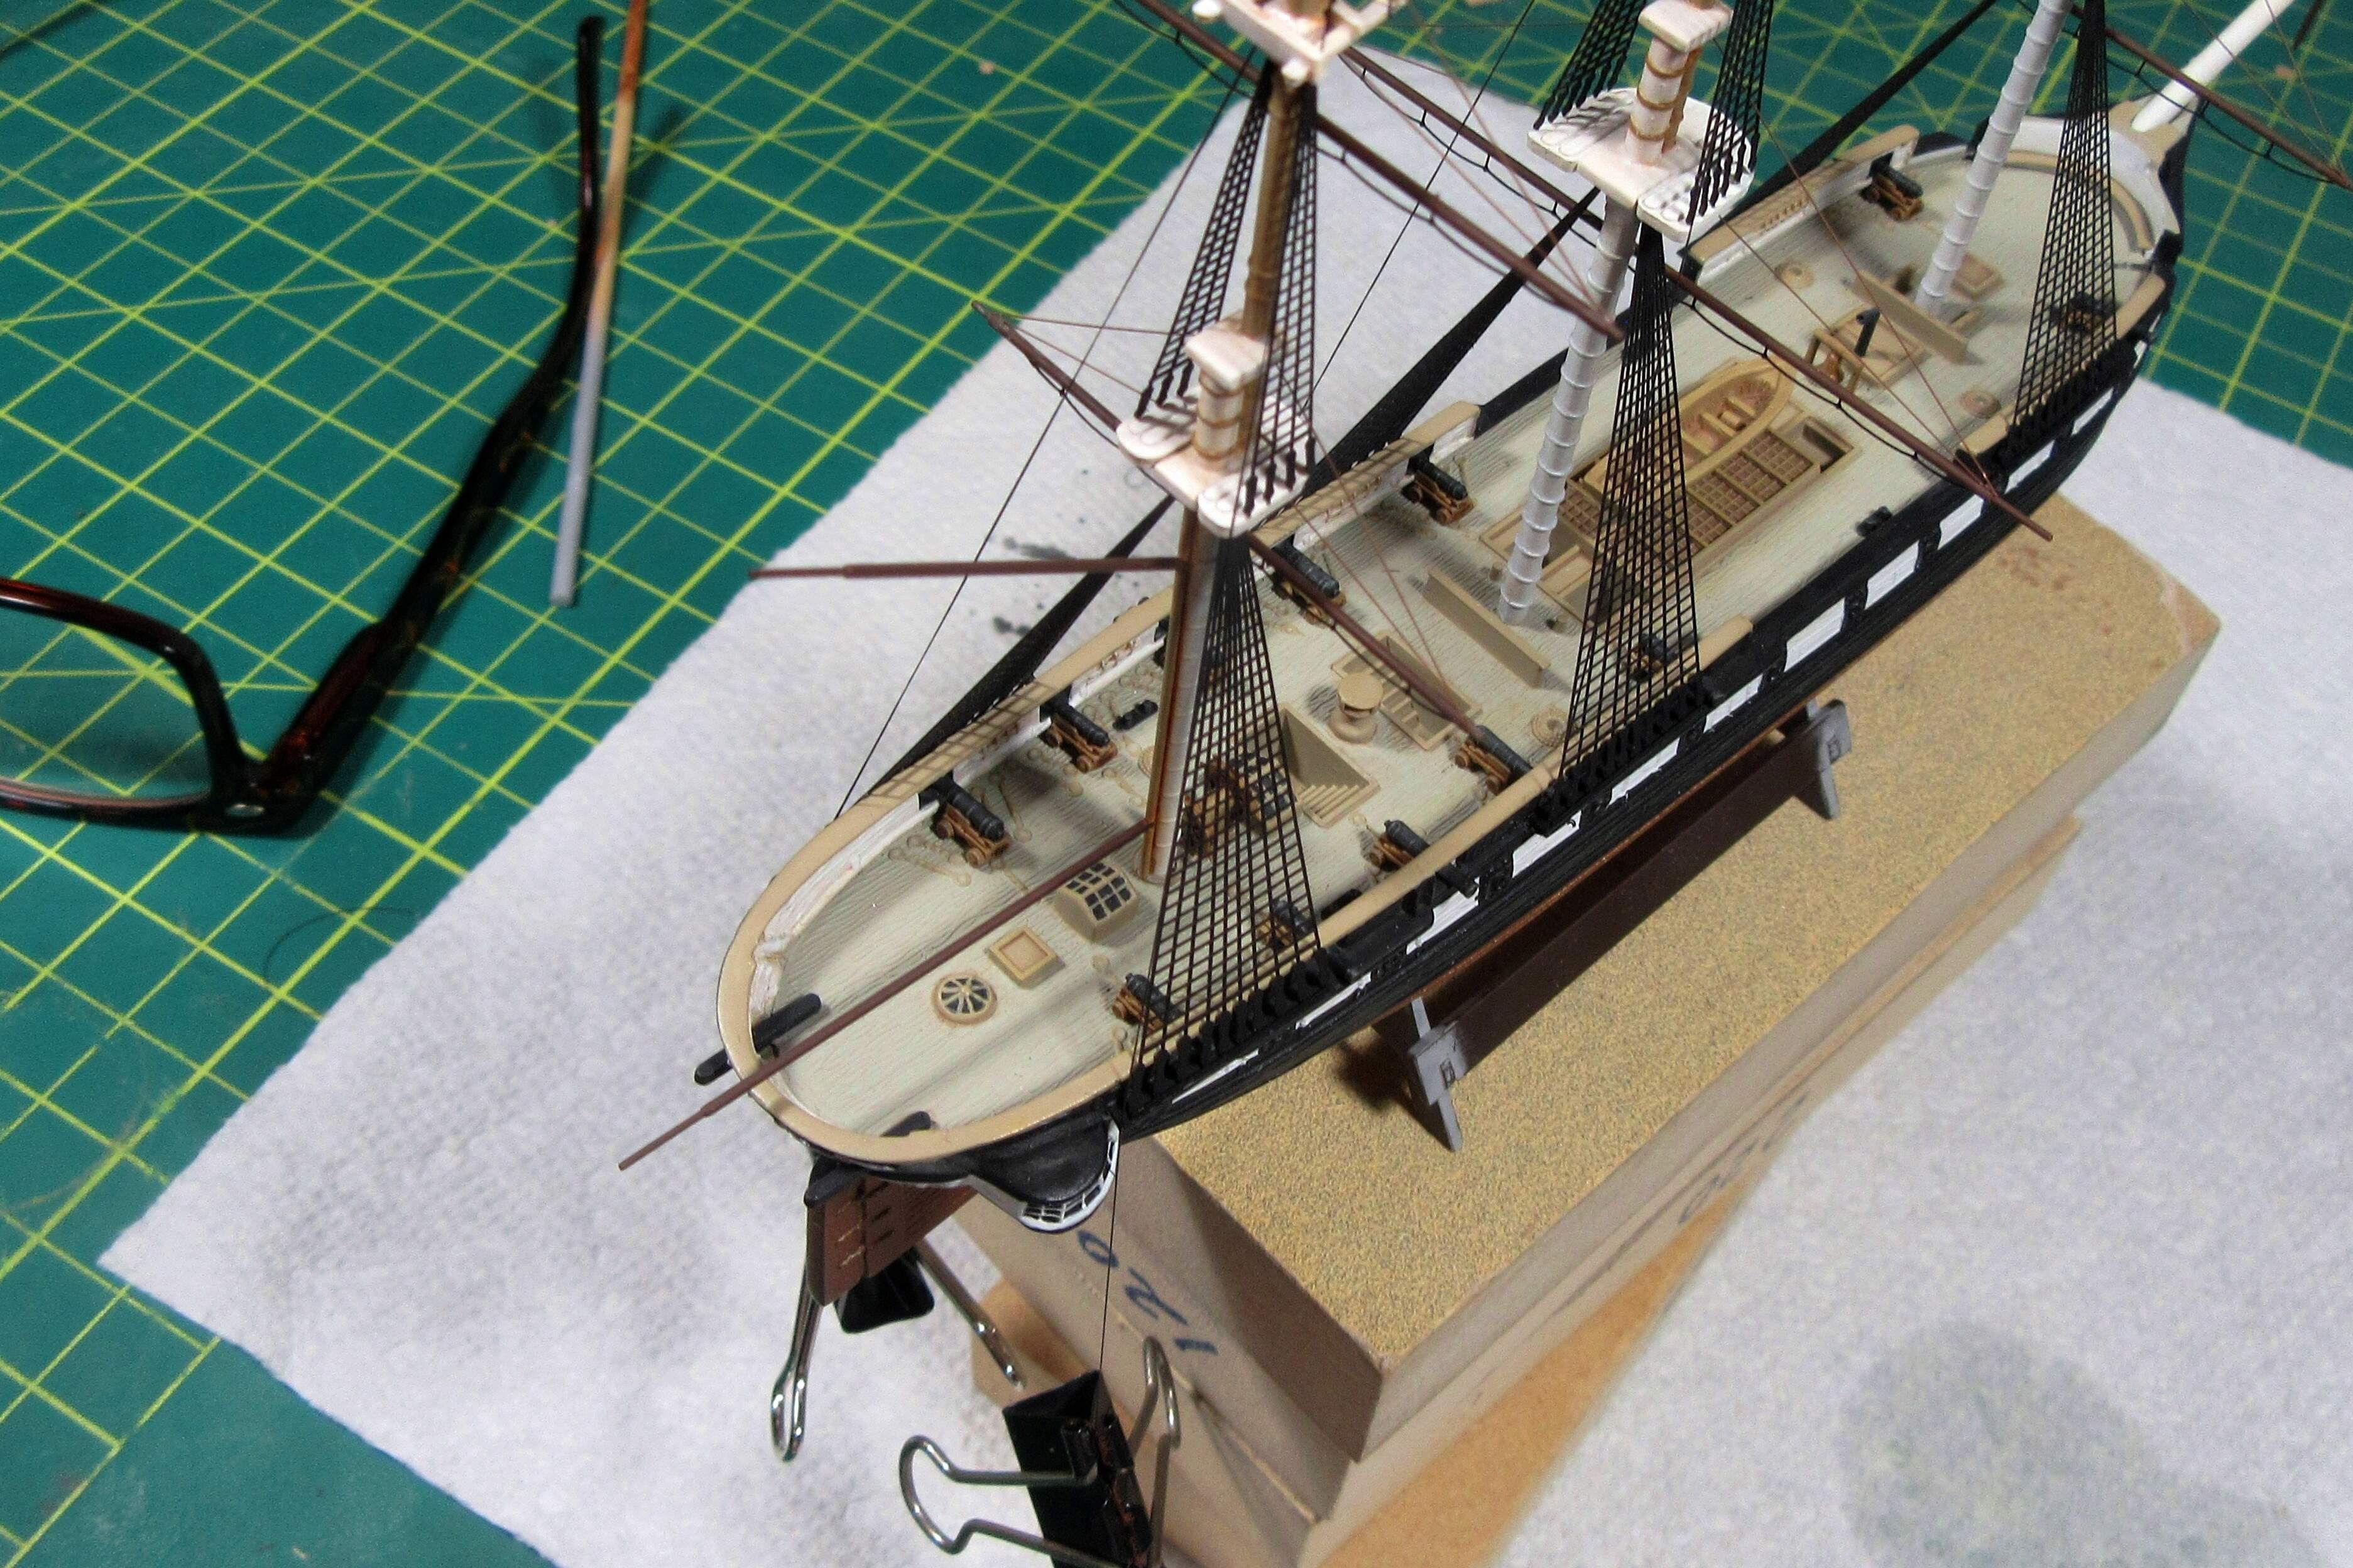
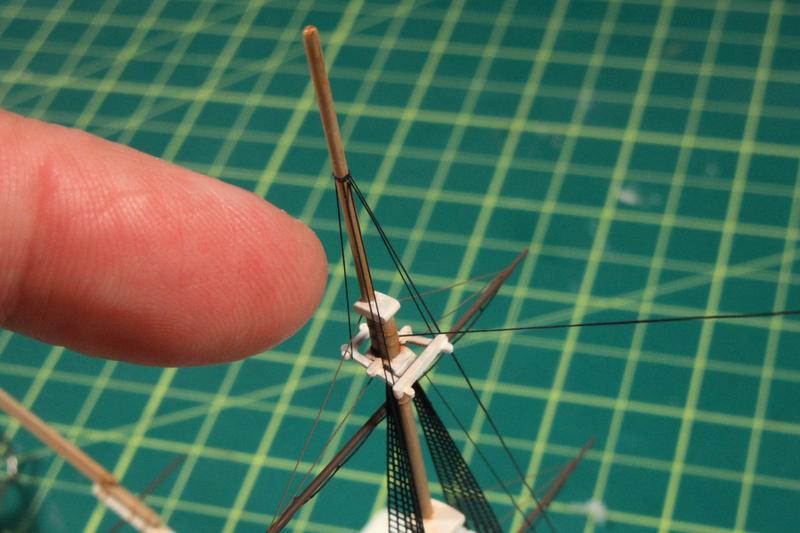
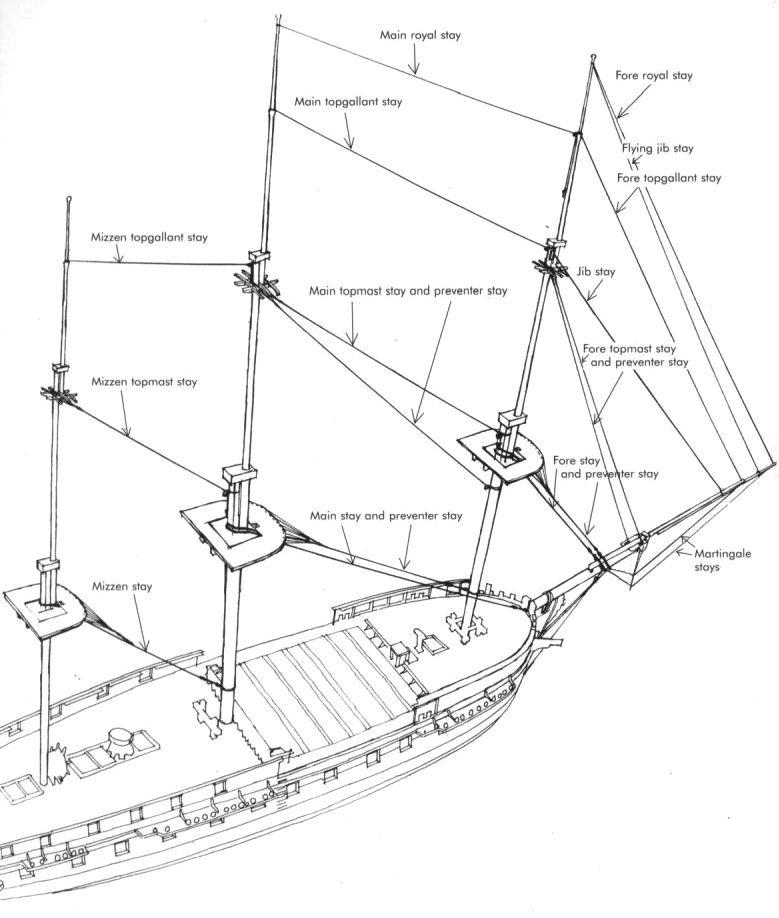
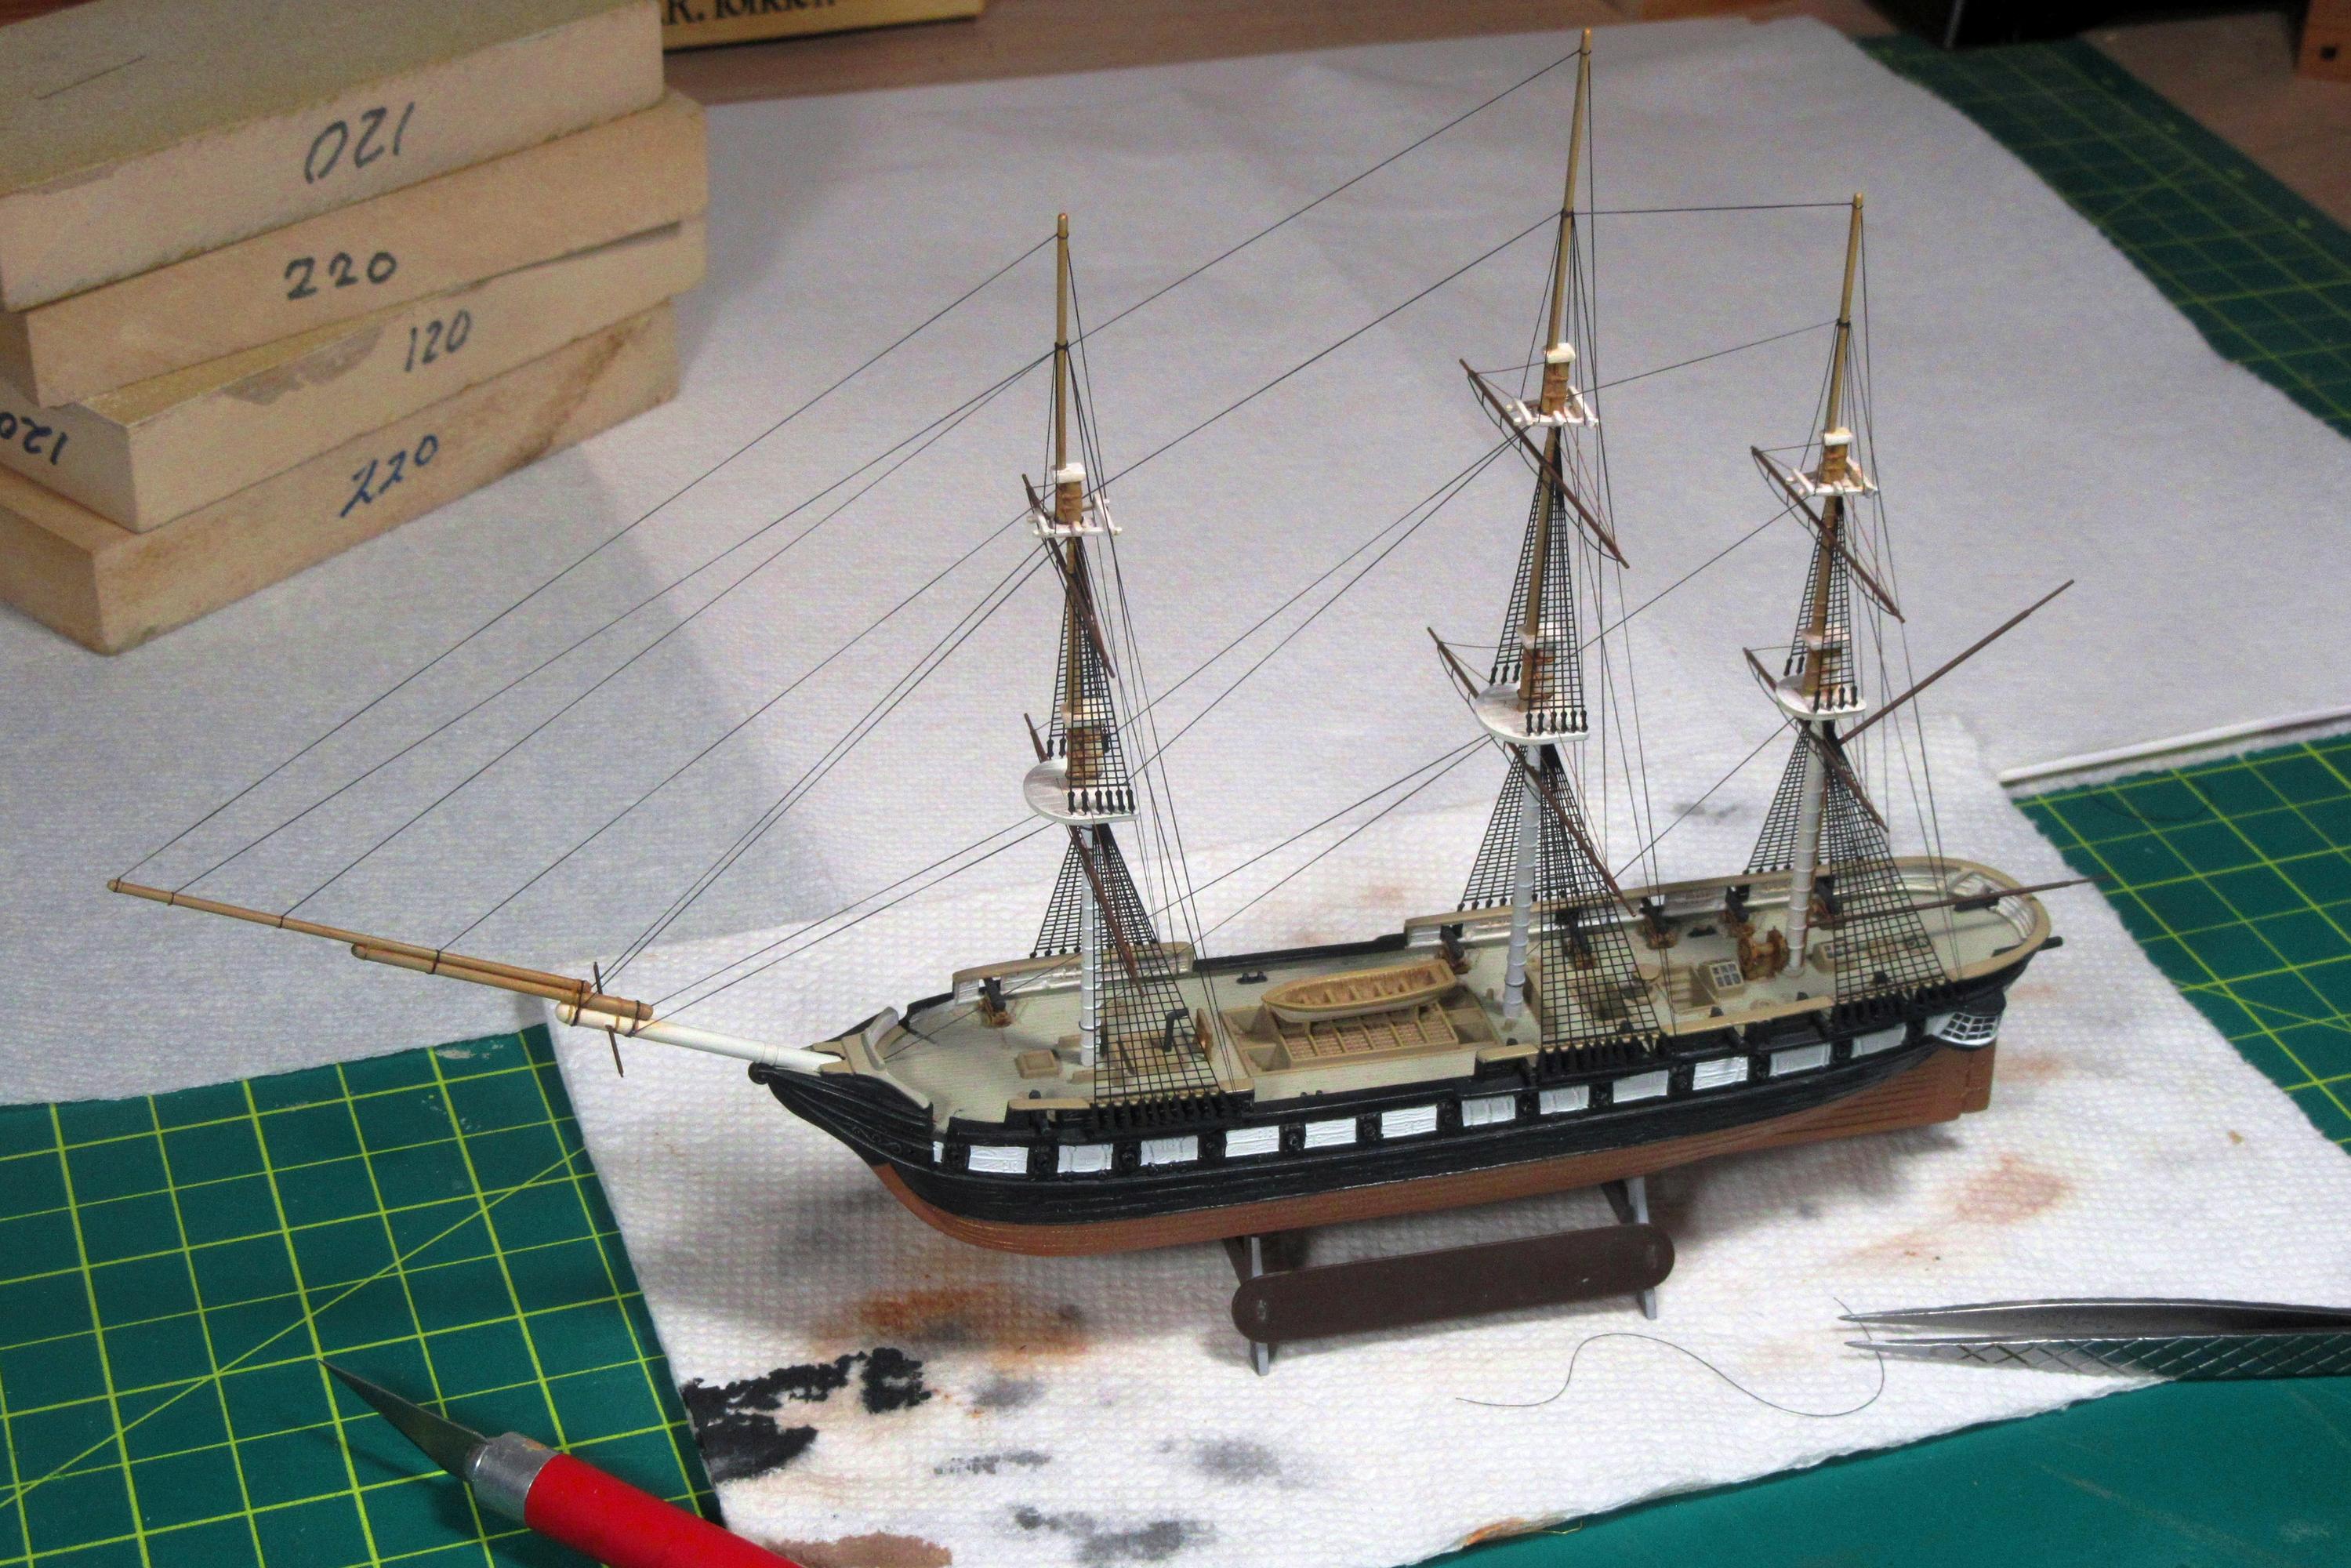
Although effective, all those fine wire lines require careful straightening, painting, and then fussy, tedious installation. They are also maddeningly subject to damage once installed… so for the numerous stays connecting the masts to each other and to the hull I am switching to EZ Line. I began with the back stays.
These standing (fixed) lines served to keep the masts from falling forward under the pressure of the sails, wind, and gravity. Backstays were fitted to each step of the masts and secured to the hull just aft of the shrouds/ratlines. To attach these, I first loop a length of EZ Line around the mast top and secure it with a dot of cyanoacrylate applied with the tip of a hobby knife. The ends are left suspended over the sides with small binder clips. The weight of the clips stretches the elastic lines just enough to pull them straight. They are then secured to the hull with cyanoacrylate and the ends trimmed.
The rat lines look great Tim 
Good to see EZ line being incorporated too: I love that stuff! So forgiving!
The rat lines look great Tim
Good to see EZ line being incorporated too: I love that stuff! So forgiving!
Russ, I have to agree about the EZ Line. It is SO much easier to use than wire, and the relatively thicker black strands look right for the heavier standing rigging which was protected with tar.
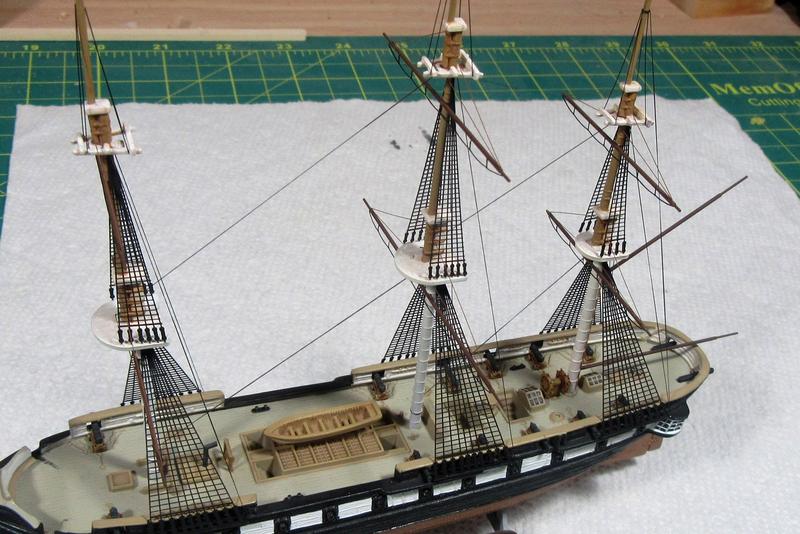
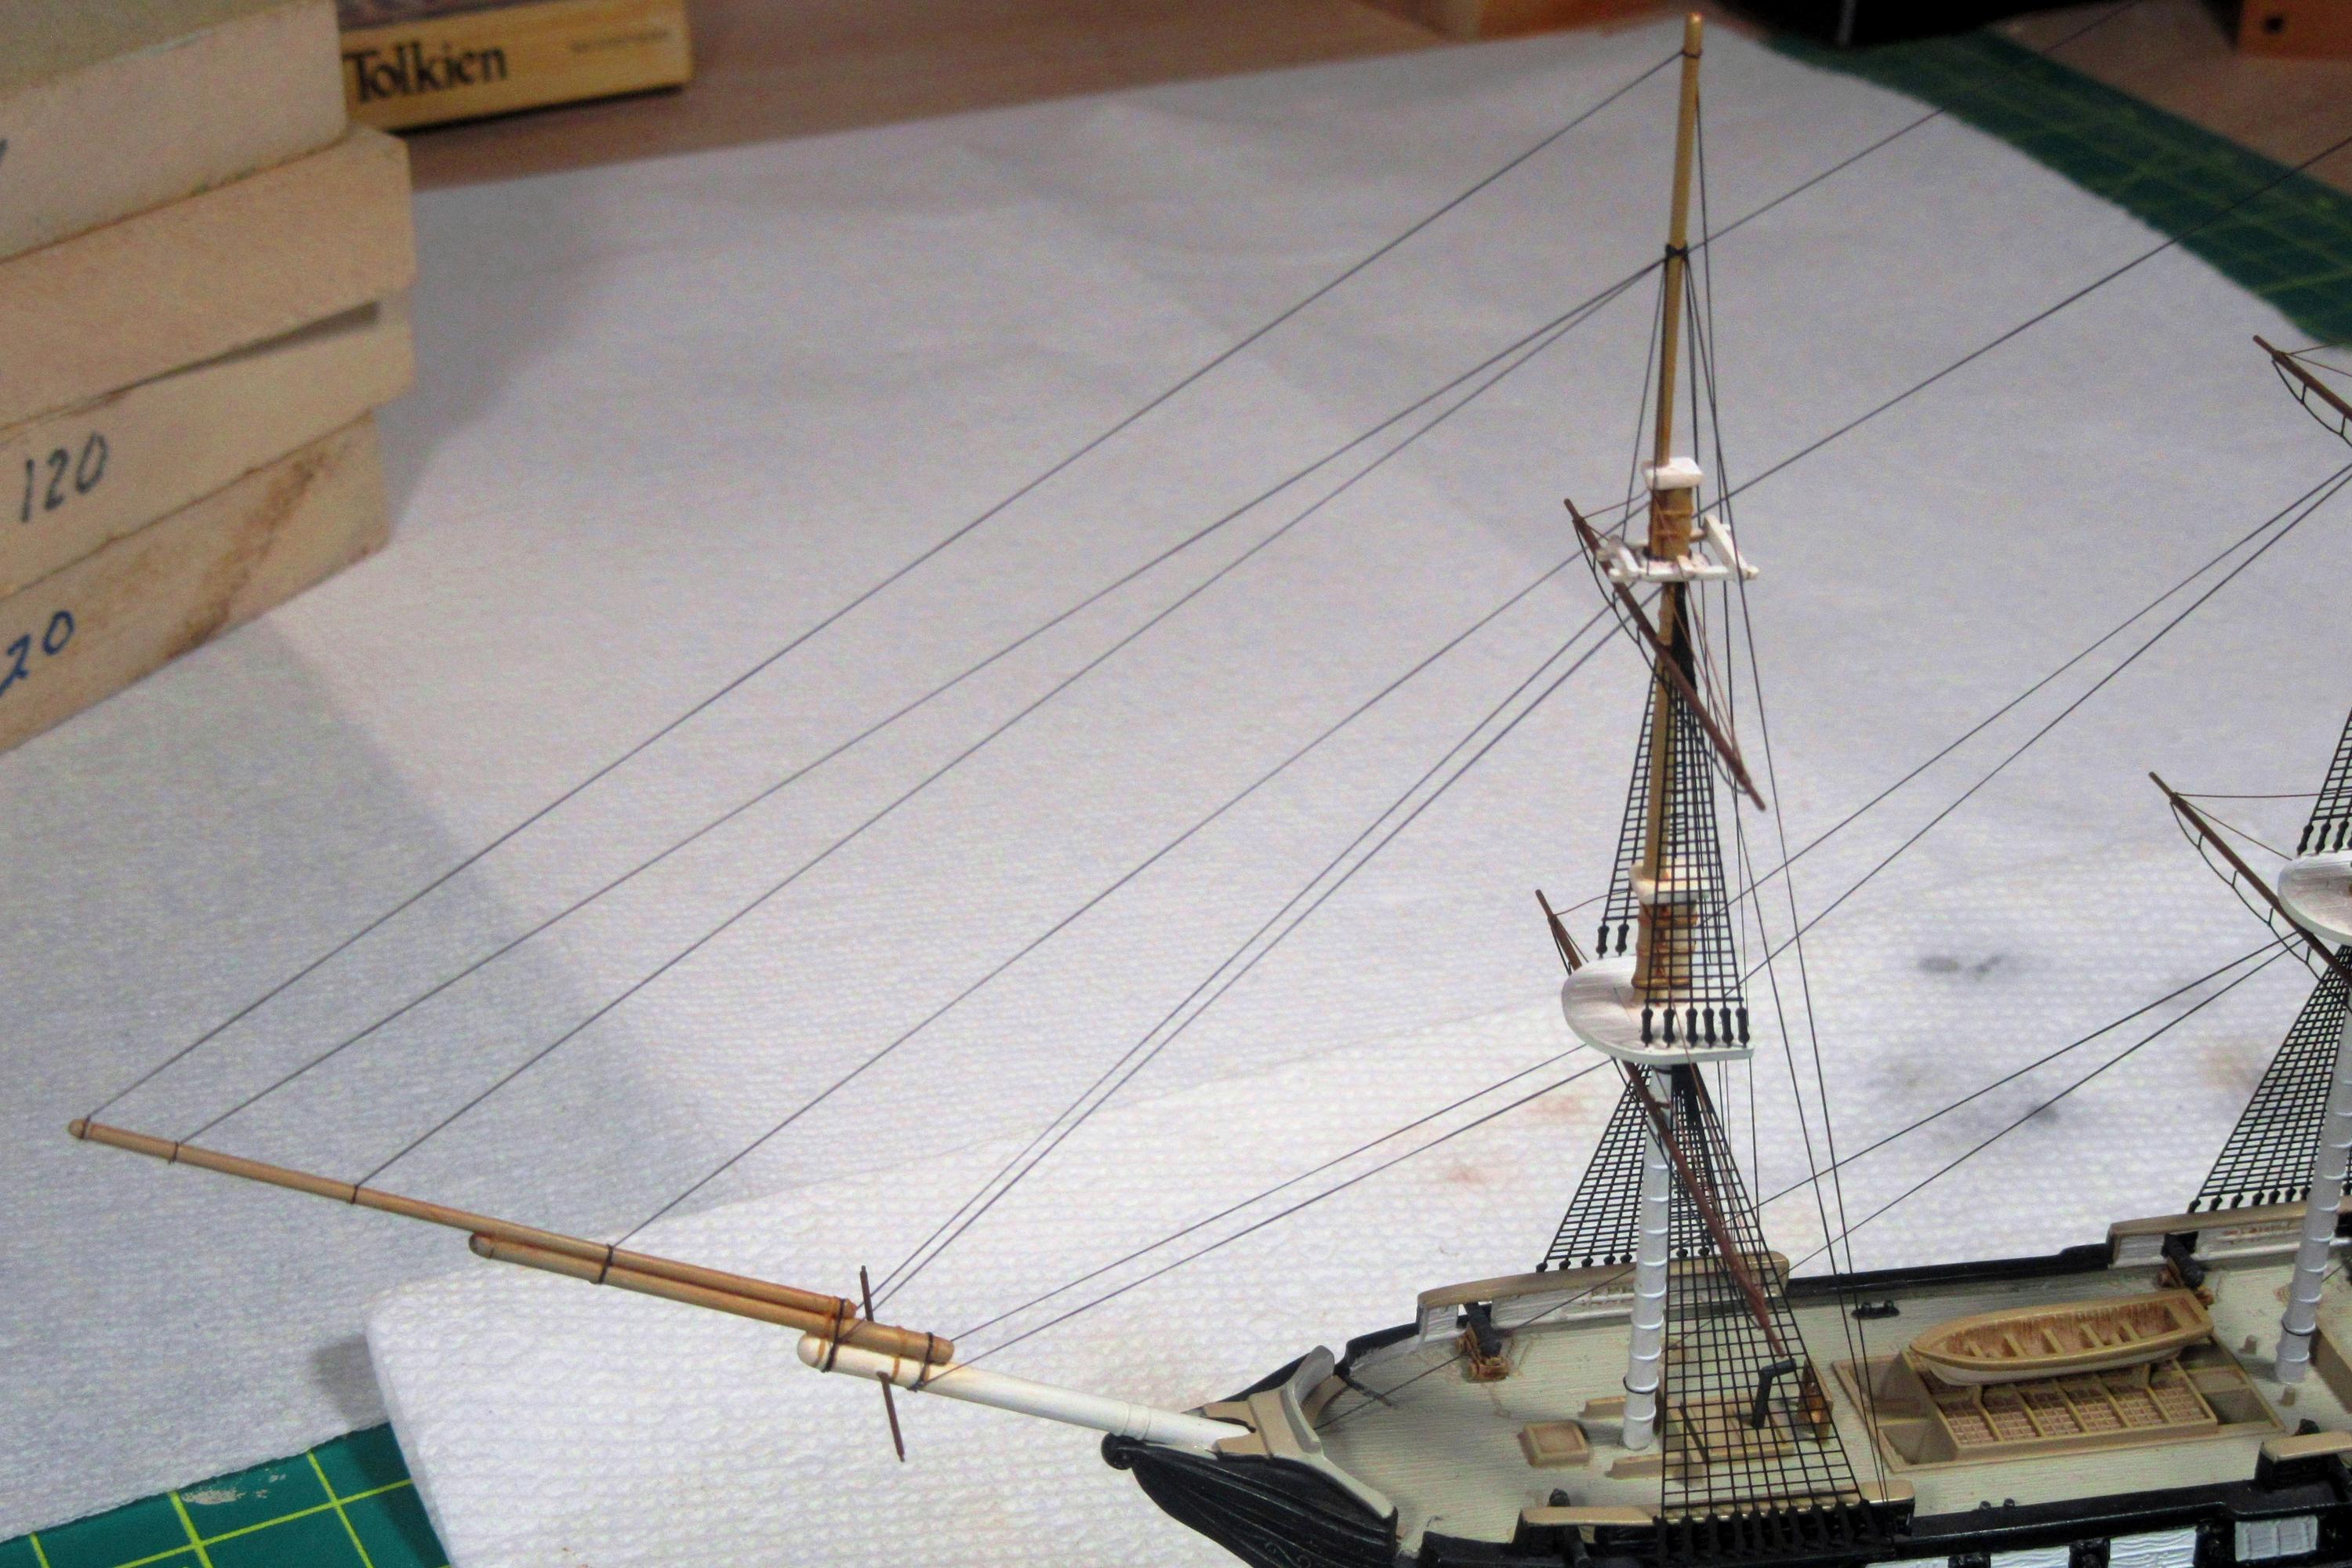
Here is the installation of the foremast topgallant backstays.
I also began adding forestays, which served the same purpose as the backstays but kept the masts from toppling backward.
Just beautiful, Tim!
You simply can’t build straight OOB, regardless how much you try - all of your builds are very special and with a lot of additions. Once again, you build that fine old kit into a real beauty! Rigging looks excellent!
Cheers
Jan
Just beautiful, Tim!
You simply can’t build straight OOB, regardless how much you try - all of your builds are very special and with a lot of additions. Once again, you build that fine old kit into a real beauty! Rigging looks excellent!
Cheers
Jan
Thank you Jan!
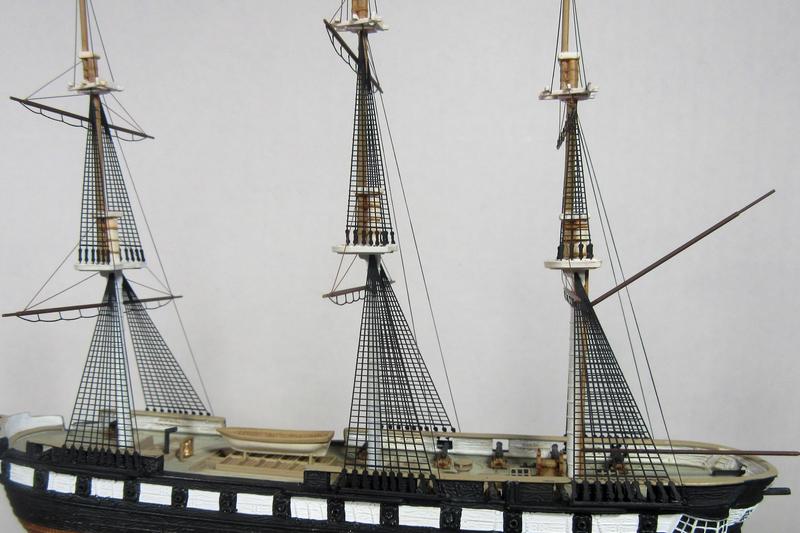
The rigging is complex and (at least to me) a bit intimidating, but The Neophyte Shipmodeller’s Jackstay was right; at its heart rigging is basically simple, the progressive addition of a number of details, each logical and uncomplicated.
Following plans, I have been building up the rigging step by step. In the interests of my continuing sanity, I don’t intend to include every single line in this small scale. Rather, I’m going for a “representational” rig that will achieve its effect by highlighting the most prominent lines.
More stays added; this time they are the bowsprit, jib boom, and flying jib stays leading up to the foremast. The EZ Line has turned out to be perfect for this. The elasticity of the superfine material makes for a tight, straight rig, but the diameters of all these lines are so small that they don’t place much strain on the masts which remain unbent.
I tend to agree Tim: rigging only needs to be representational; it’s a lot like looking at power lines from a distance, you know they’re there, but the naked eye cannot count and distinguish each and everyone 
EZ line is of course the perfect choice 
Once you add the braces, with the sails furled the rest are not that visible: Sheets leading aft and tacks forward from the lower yards, The clews and bunts are mostly a maze of lines along the masts from yards to deck and could be omitted without guilt.
Hey Tim R.,
I was wondering about your use of PVA glue to attach your yardarms & shrouds to the masts. You said that PVA is a white glue - my experience with white glues are either Elmer’s or woodworker’s glue. Is PVA a super-glue type stuff? I mean, you’re gluing brass to plastic; I would have thought that some super glue would be the adhesive to use.
Your Constellation is looking fine; painting over that molded chocolate brown color really helps to make things “pop”!
Thanks Russ and Danie, I feel a bit more grounded now that I know there’s no need to depict EVERYTHING on the rigging! The running rig will probably be not much more than the lifts and braces.
Hey Tim R.,
I was wondering about your use of PVA glue to attach your yardarms & shrouds to the masts. You said that PVA is a white glue - my experience with white glues are either Elmer’s or woodworker’s glue. Is PVA a super-glue type stuff? I mean, you’re gluing brass to plastic; I would have thought that some super glue would be the adhesive to use.
Your Constellation is looking fine; painting over that molded chocolate brown color really helps to make things “pop”!
timmyp, thanks! Next to your AWESOME HMS Victory my little Constellation is a modest effort indeed!
As for PVA - polyvinyl acetate - it is Elmer’s that I’m using. It creates a relatively weak bond with metal and plastic, but I used it to attach the shrouds and the lifts because of the extreme delicacy of the etched brass and copper wire. You are right, though - no way would it have been strong enough to attach the brass tube yards to the plastic masts. For that I used cyanoacrylate (super glue).
![]()
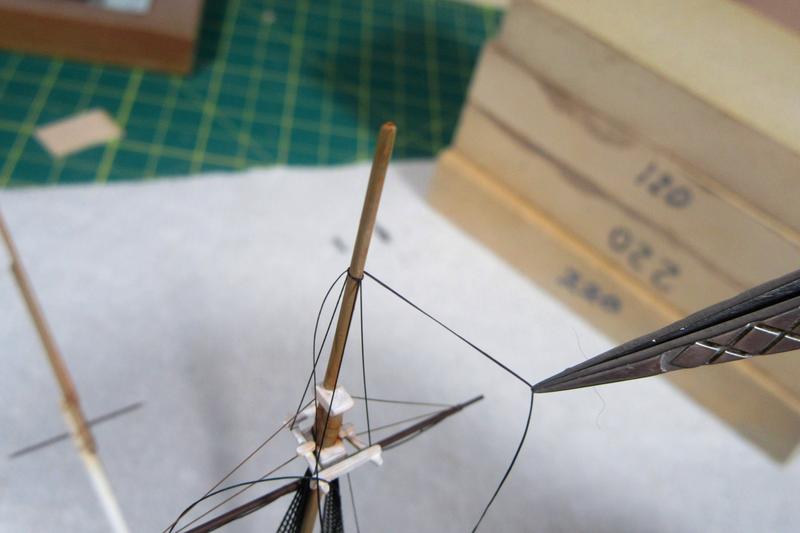
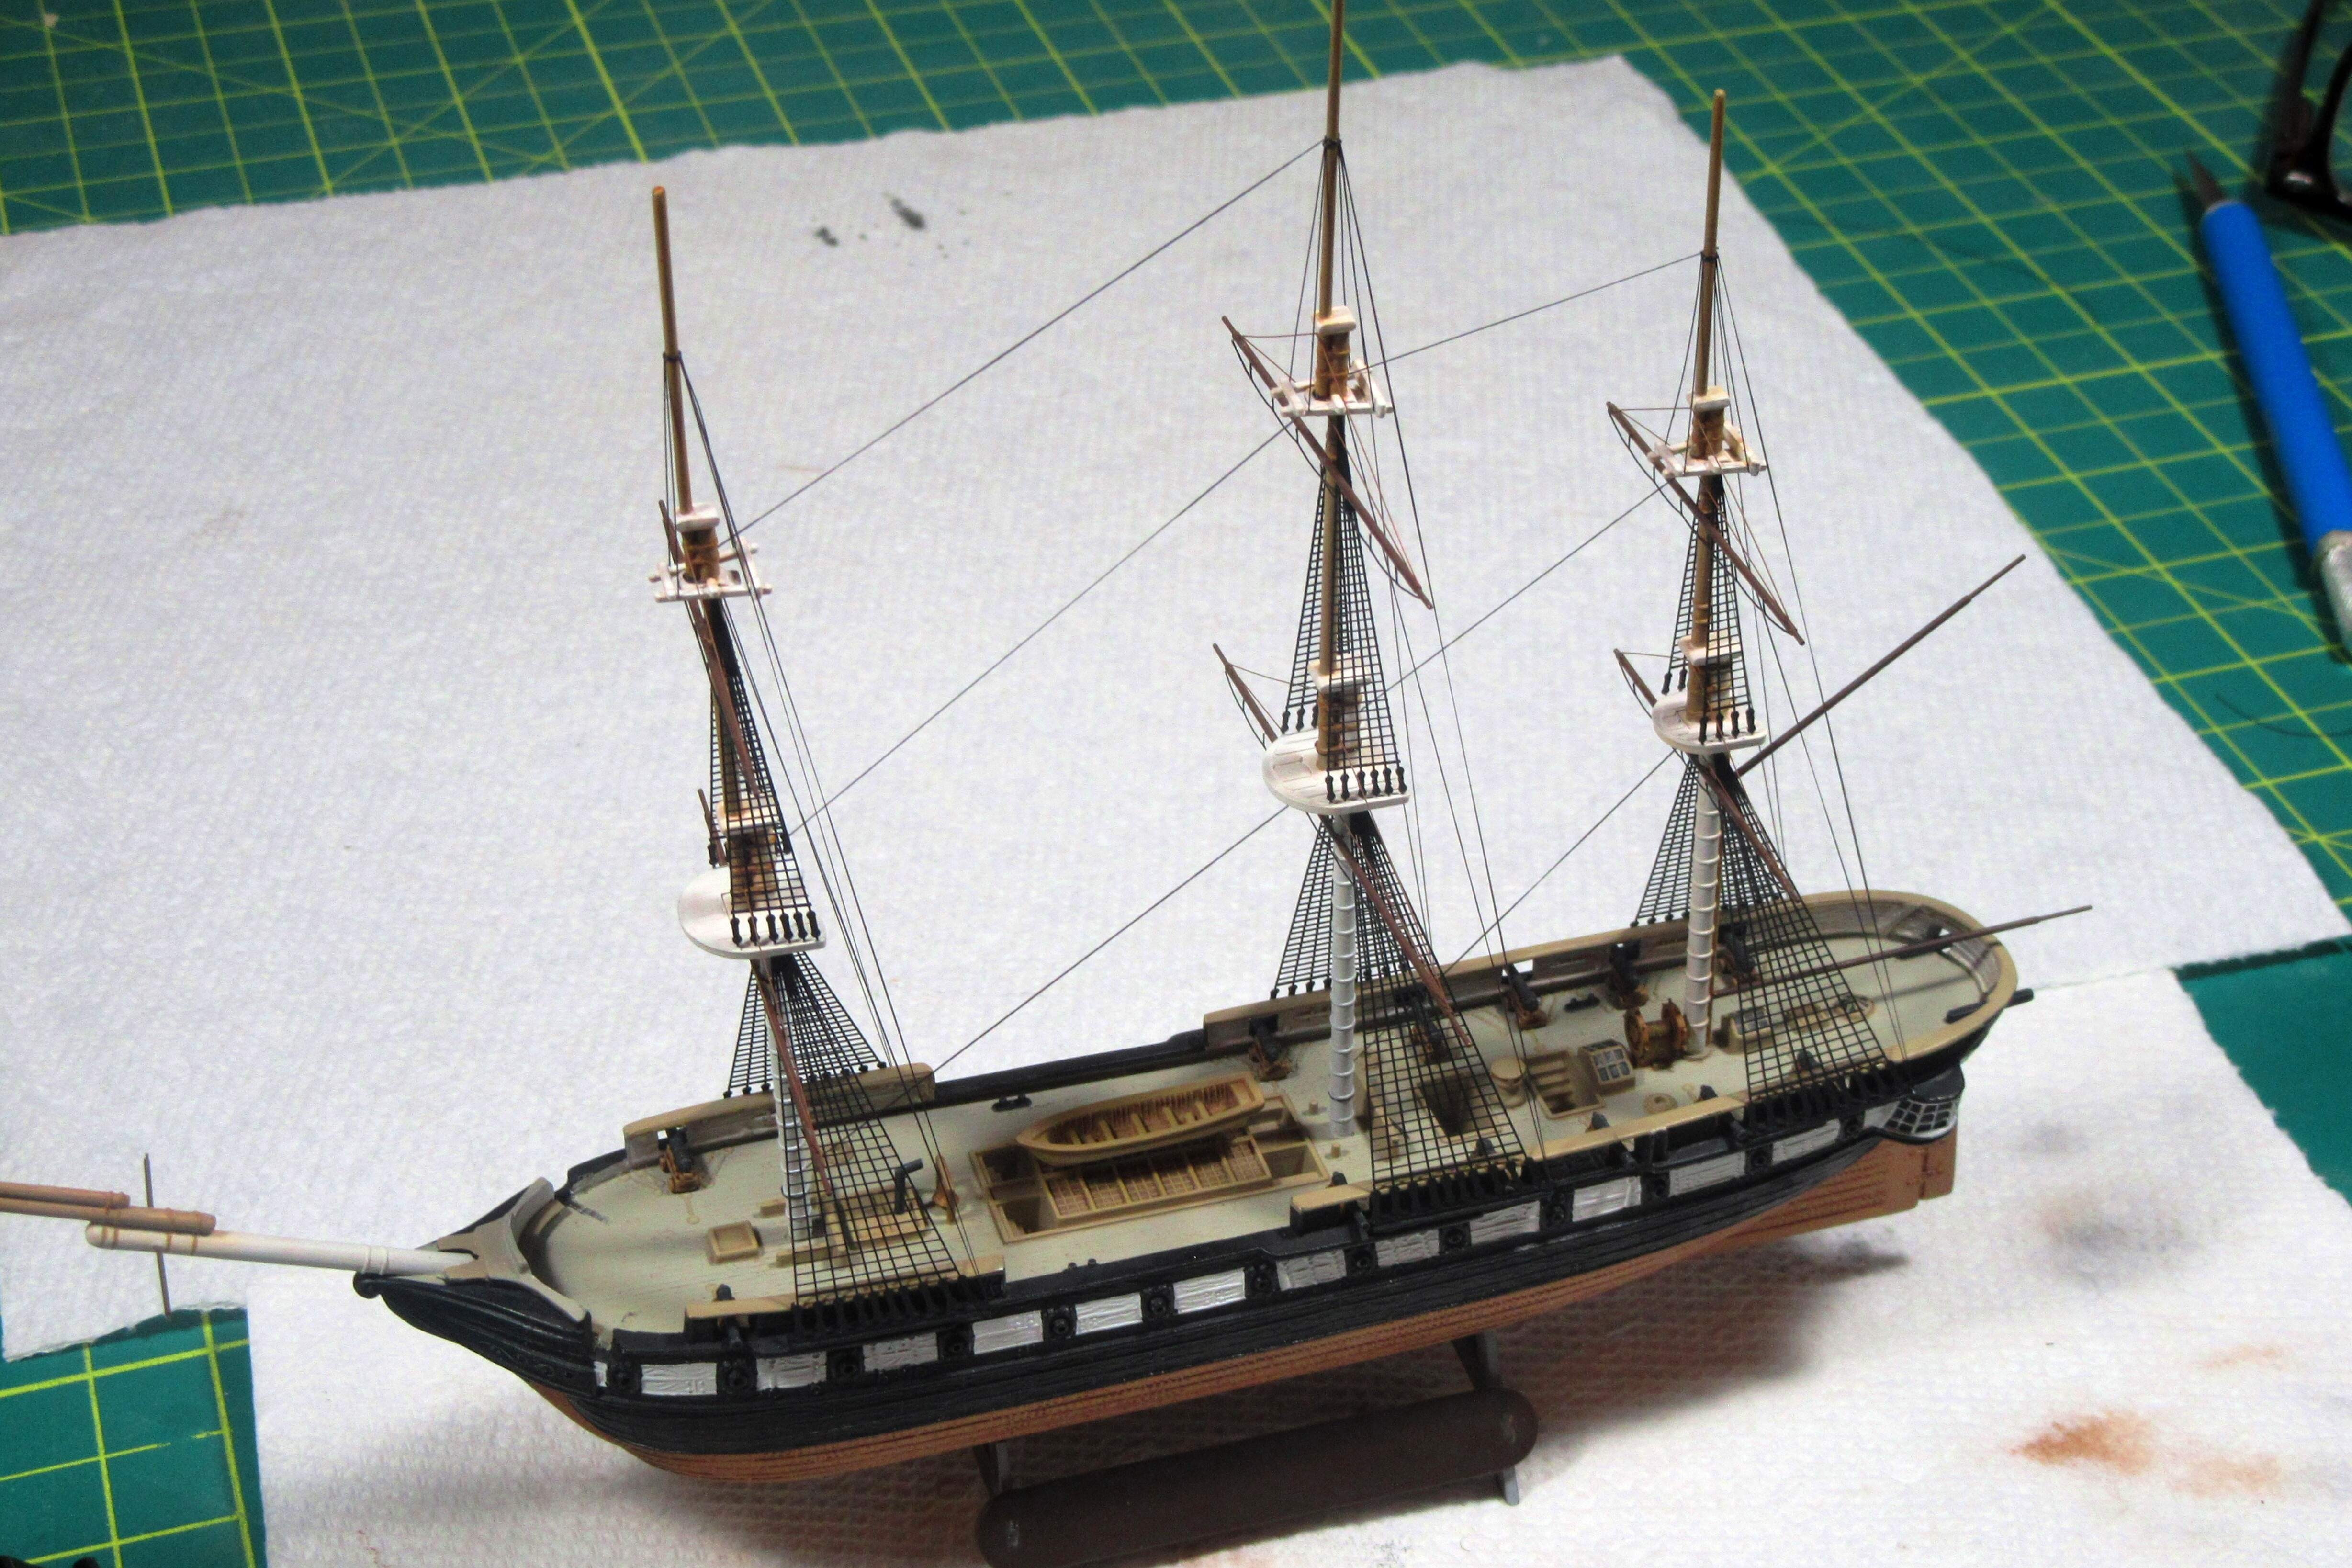
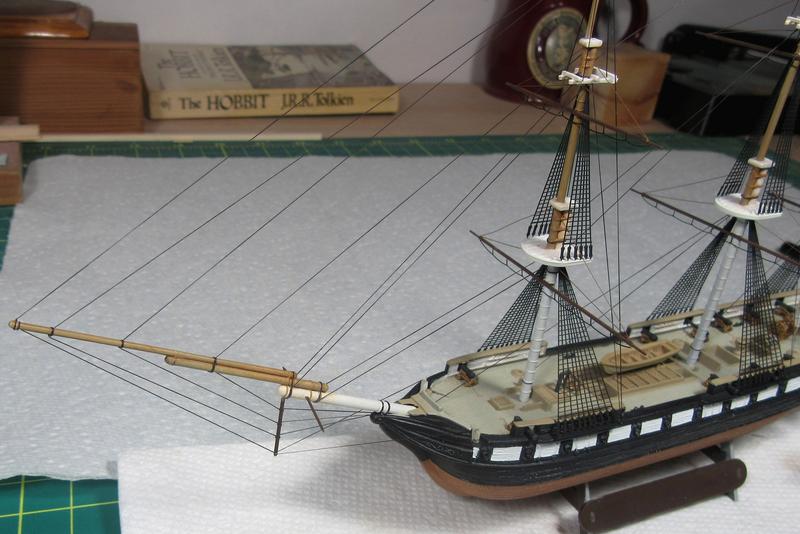
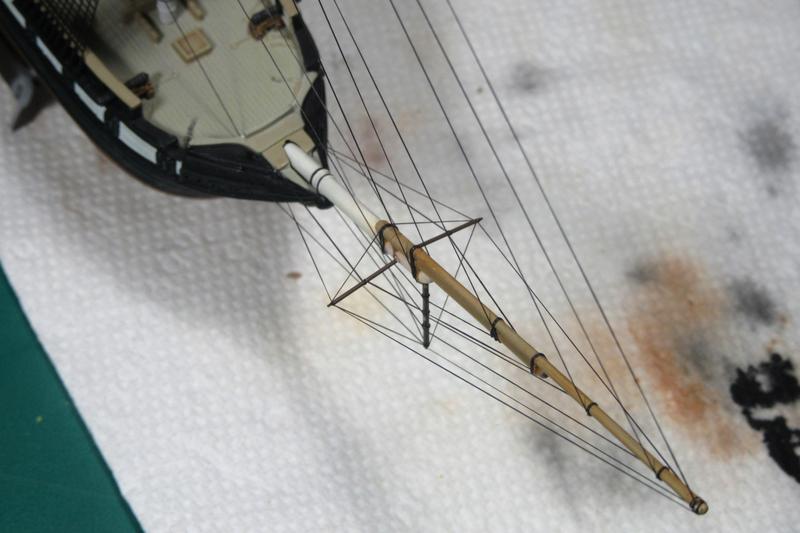
Having finished the forestays, I finished up the standing rigging with the martingales.
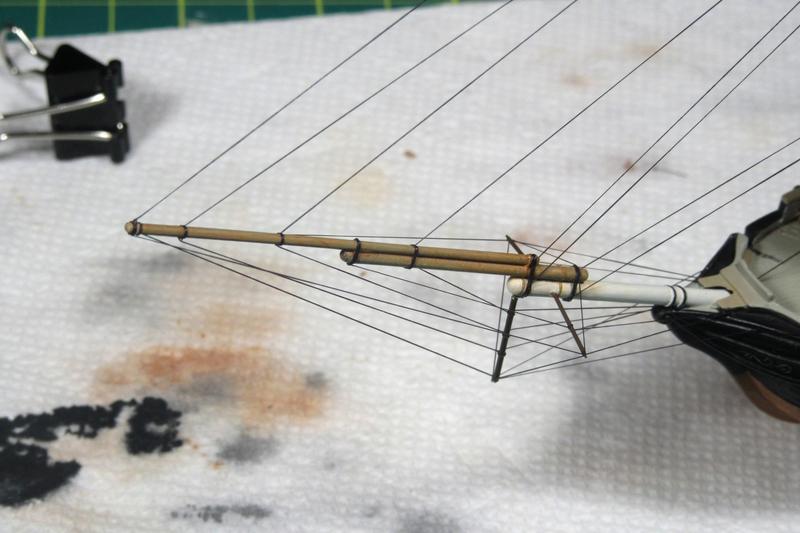
Martingale stays below the bowsprit counterbalanced the bowsprit, jib boom, and flying jib stays above to keep the bowsprit assembly from being pulled up toward the foremast. The small spar below the bowsprit to which they were attached was called the “dolphin striker” – an awful name!
The standing rigging was finished off with additional lines added to the whisker booms, those spars protruding from the sides of the bowsprit.
Tim,
great work on the rig. I fully agree that the representational rig is absolutely sufficient in this scale - I’d think to try to build every single line would look ‘overdone’ for such a small model. And your ‘representational rigging’ goes really into some depth already - looking really spot on and awesome as you have it now!
Cheers
Jan
For an even stronger bond on masts where it’s not possible to solder the joint, I often will use a 2 part epoxy glue, which, is stronger than CA but not as quick drying, so you do need to clamp it until cured 
Thanks Jan! Rigging something this complex is a new experience for me…
Russ, you are right about the epoxy, which might have been a better idea than the cyano - I’ve already knocked one of the yards loose while doing the rigging!
Thanks for the reply Tim. I’m just really surprised that PVA can make a lasting bond.
I just read one of your posts after this one - yes, it is a total danger when putting the rigging in, NOT to knock off one of the yardarms that was already installed. Such is the hazard of our hobby!
And thanks for your kind words about HMS Victory.
Tim