Tim,
Just found this post. I was following your build previously. So glad you picked back up on this build. Boy, what a difference. Awesome work, as usual. Starting to get bruises from my jaw continuously dropping to the floor. Excellence in action!
John
1 Like
Ezra and John, thanks! You do me too much credit, though - this really is a mostly out of the box build.
The model has become so delicate with all that fragile rigging that I decided it would be a good idea to put it in a case before giving it to my dad.
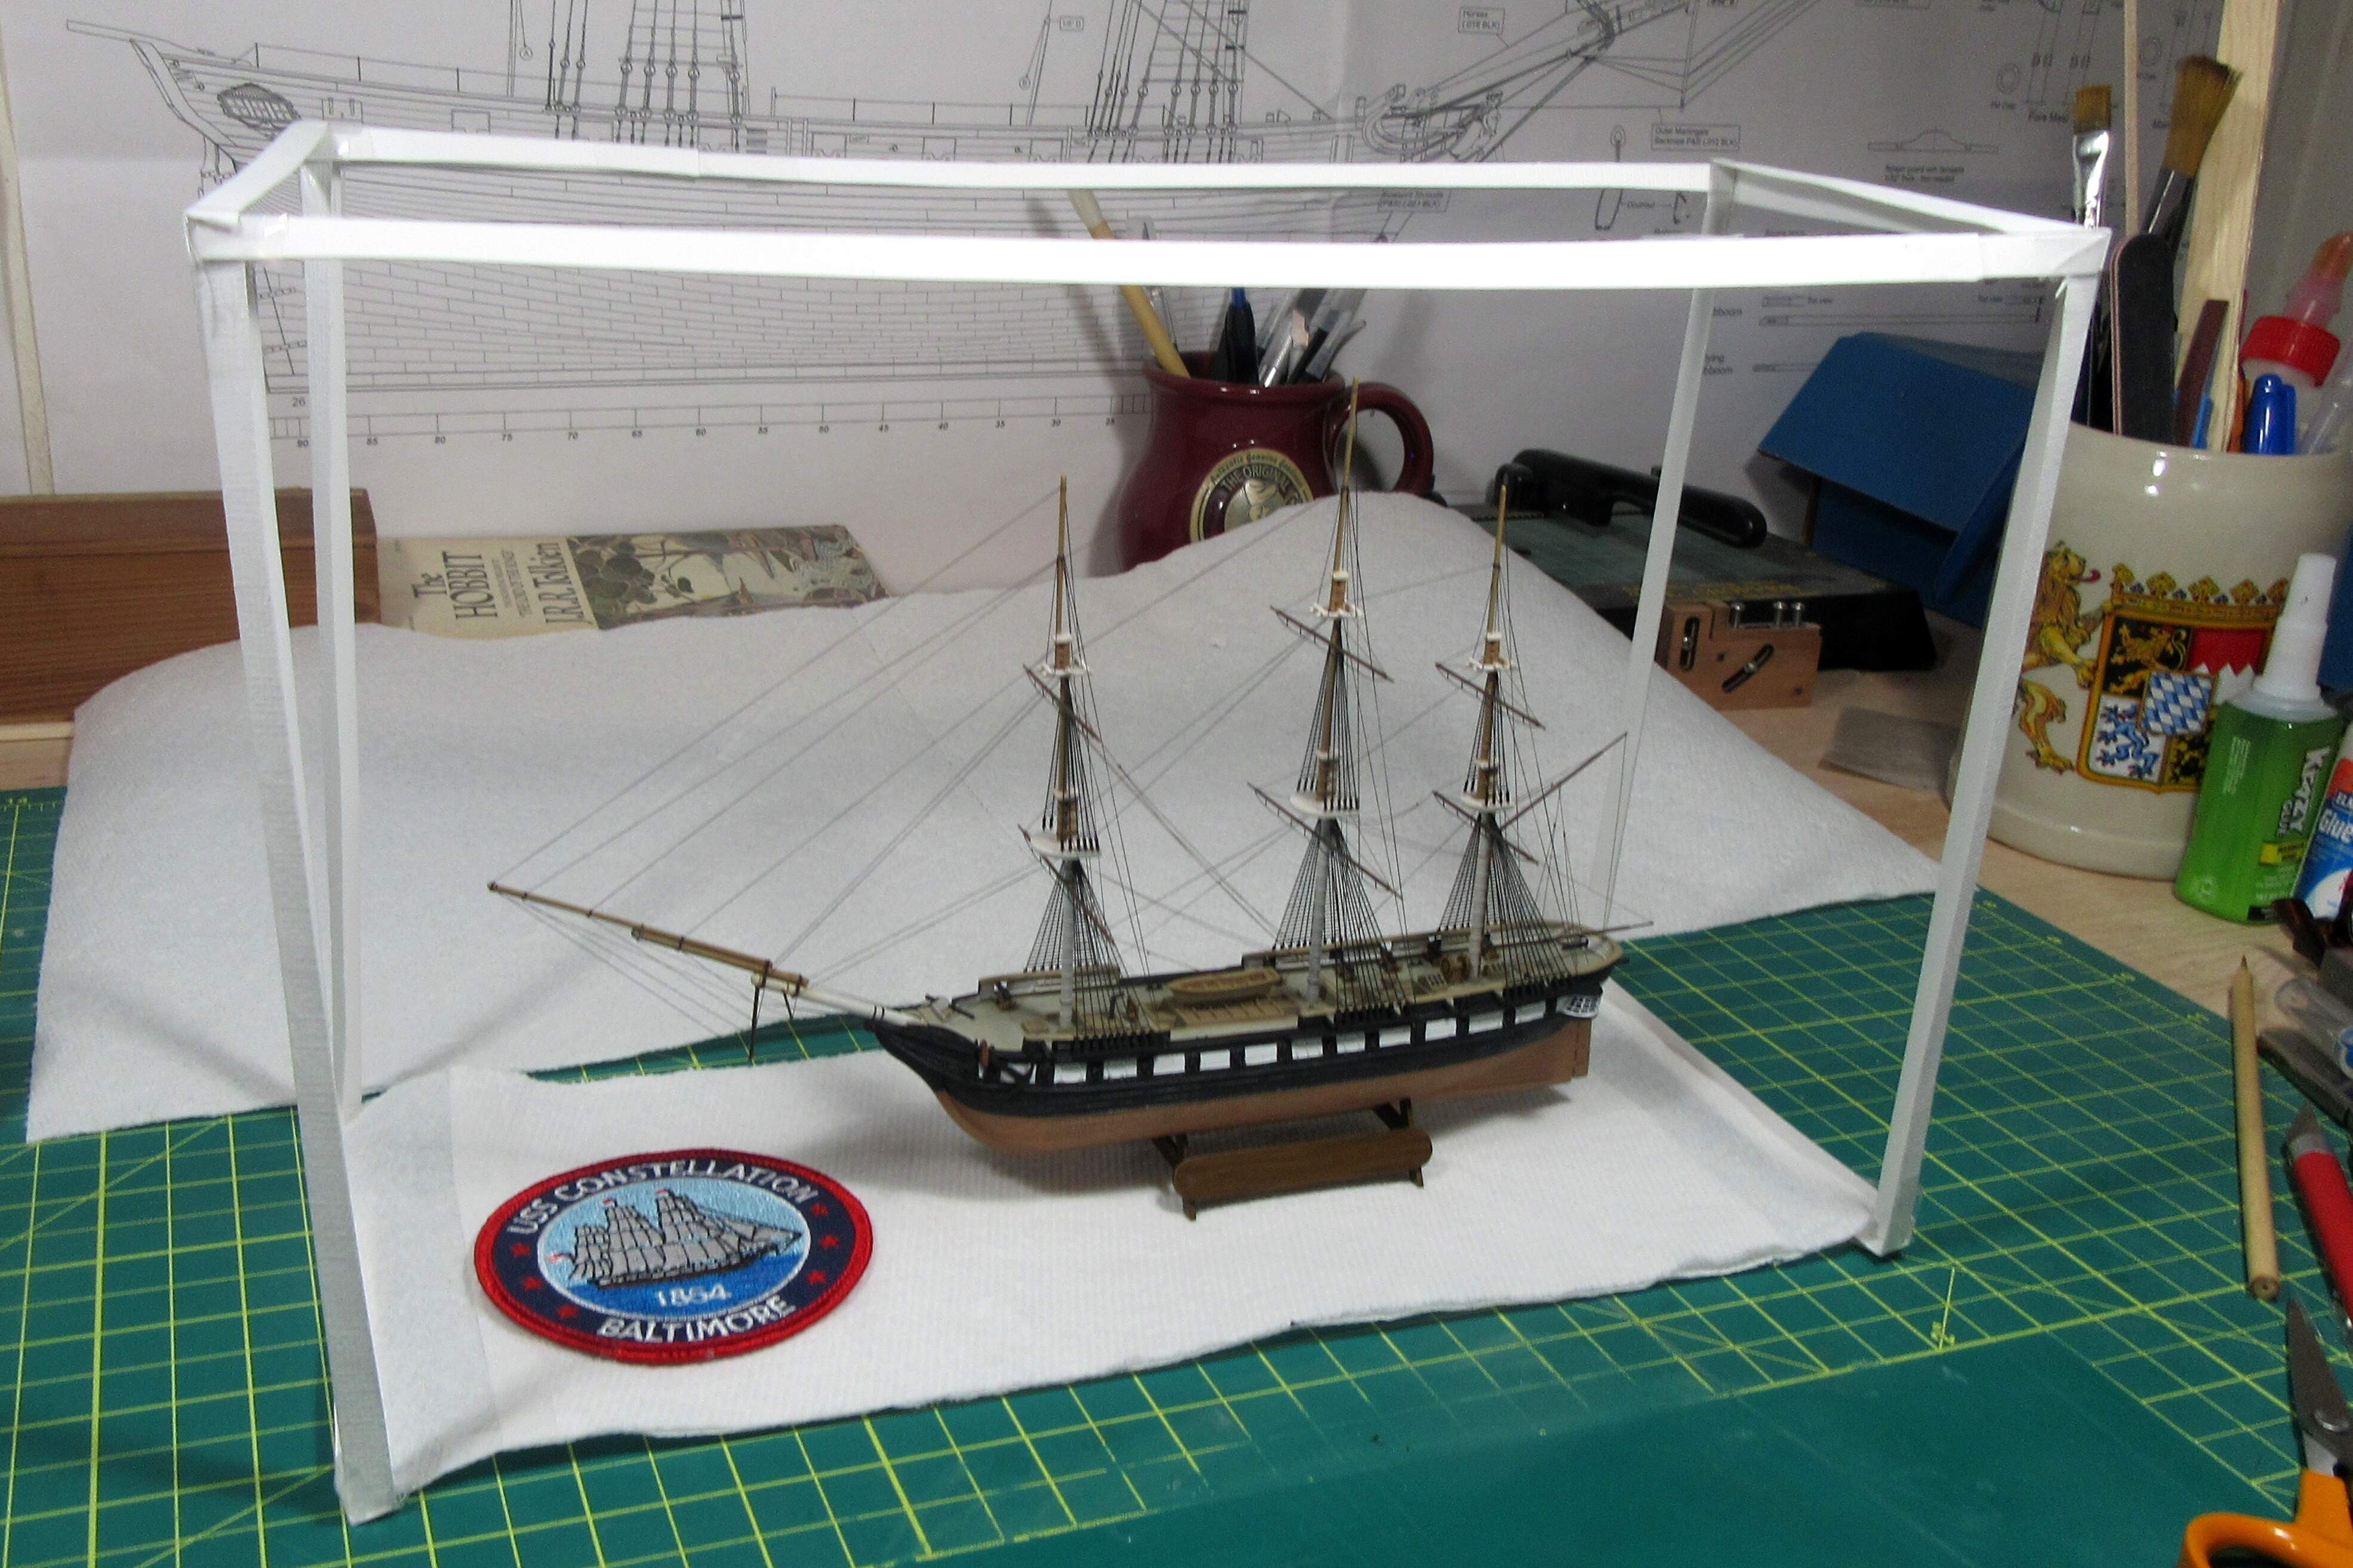
I built up a crude mockup around the model with paper strips to get a sense of what the dimensions of the clear cover should be. It may seem silly, but I find that mockups like this really do make it easier to visualize how things will look. (By the way, I’m using Ron Baluch of Grandpa’s Cabinets https://www.grandpascabinets.com/ who makes first-rate cases. I highly recommend him – I just hope he can get the case to me by Christmas!)
5 Likes
You might want to check a diagram or good photo: usually the braces run more or less horizontally to the mast aft (or forward for the mizzen) then around a block and down to a pinrail inboard of the shrouds. Running straight to the deck kills the leverage needed to haul the yards around when under sail.
The lines running from the upper mast to the rail behind the shrouds are backstays, part of the standing rigging.
1 Like
Thanks Danie,
I appreciate your “insider” perspective - and you are probably right!
In rigging my little model I’ve been following this diagram from A. Richard Mansir’s 1979 How to Build Ship Models - A Beginner’s Guide showing a typical running rigging plan for a square rigger:
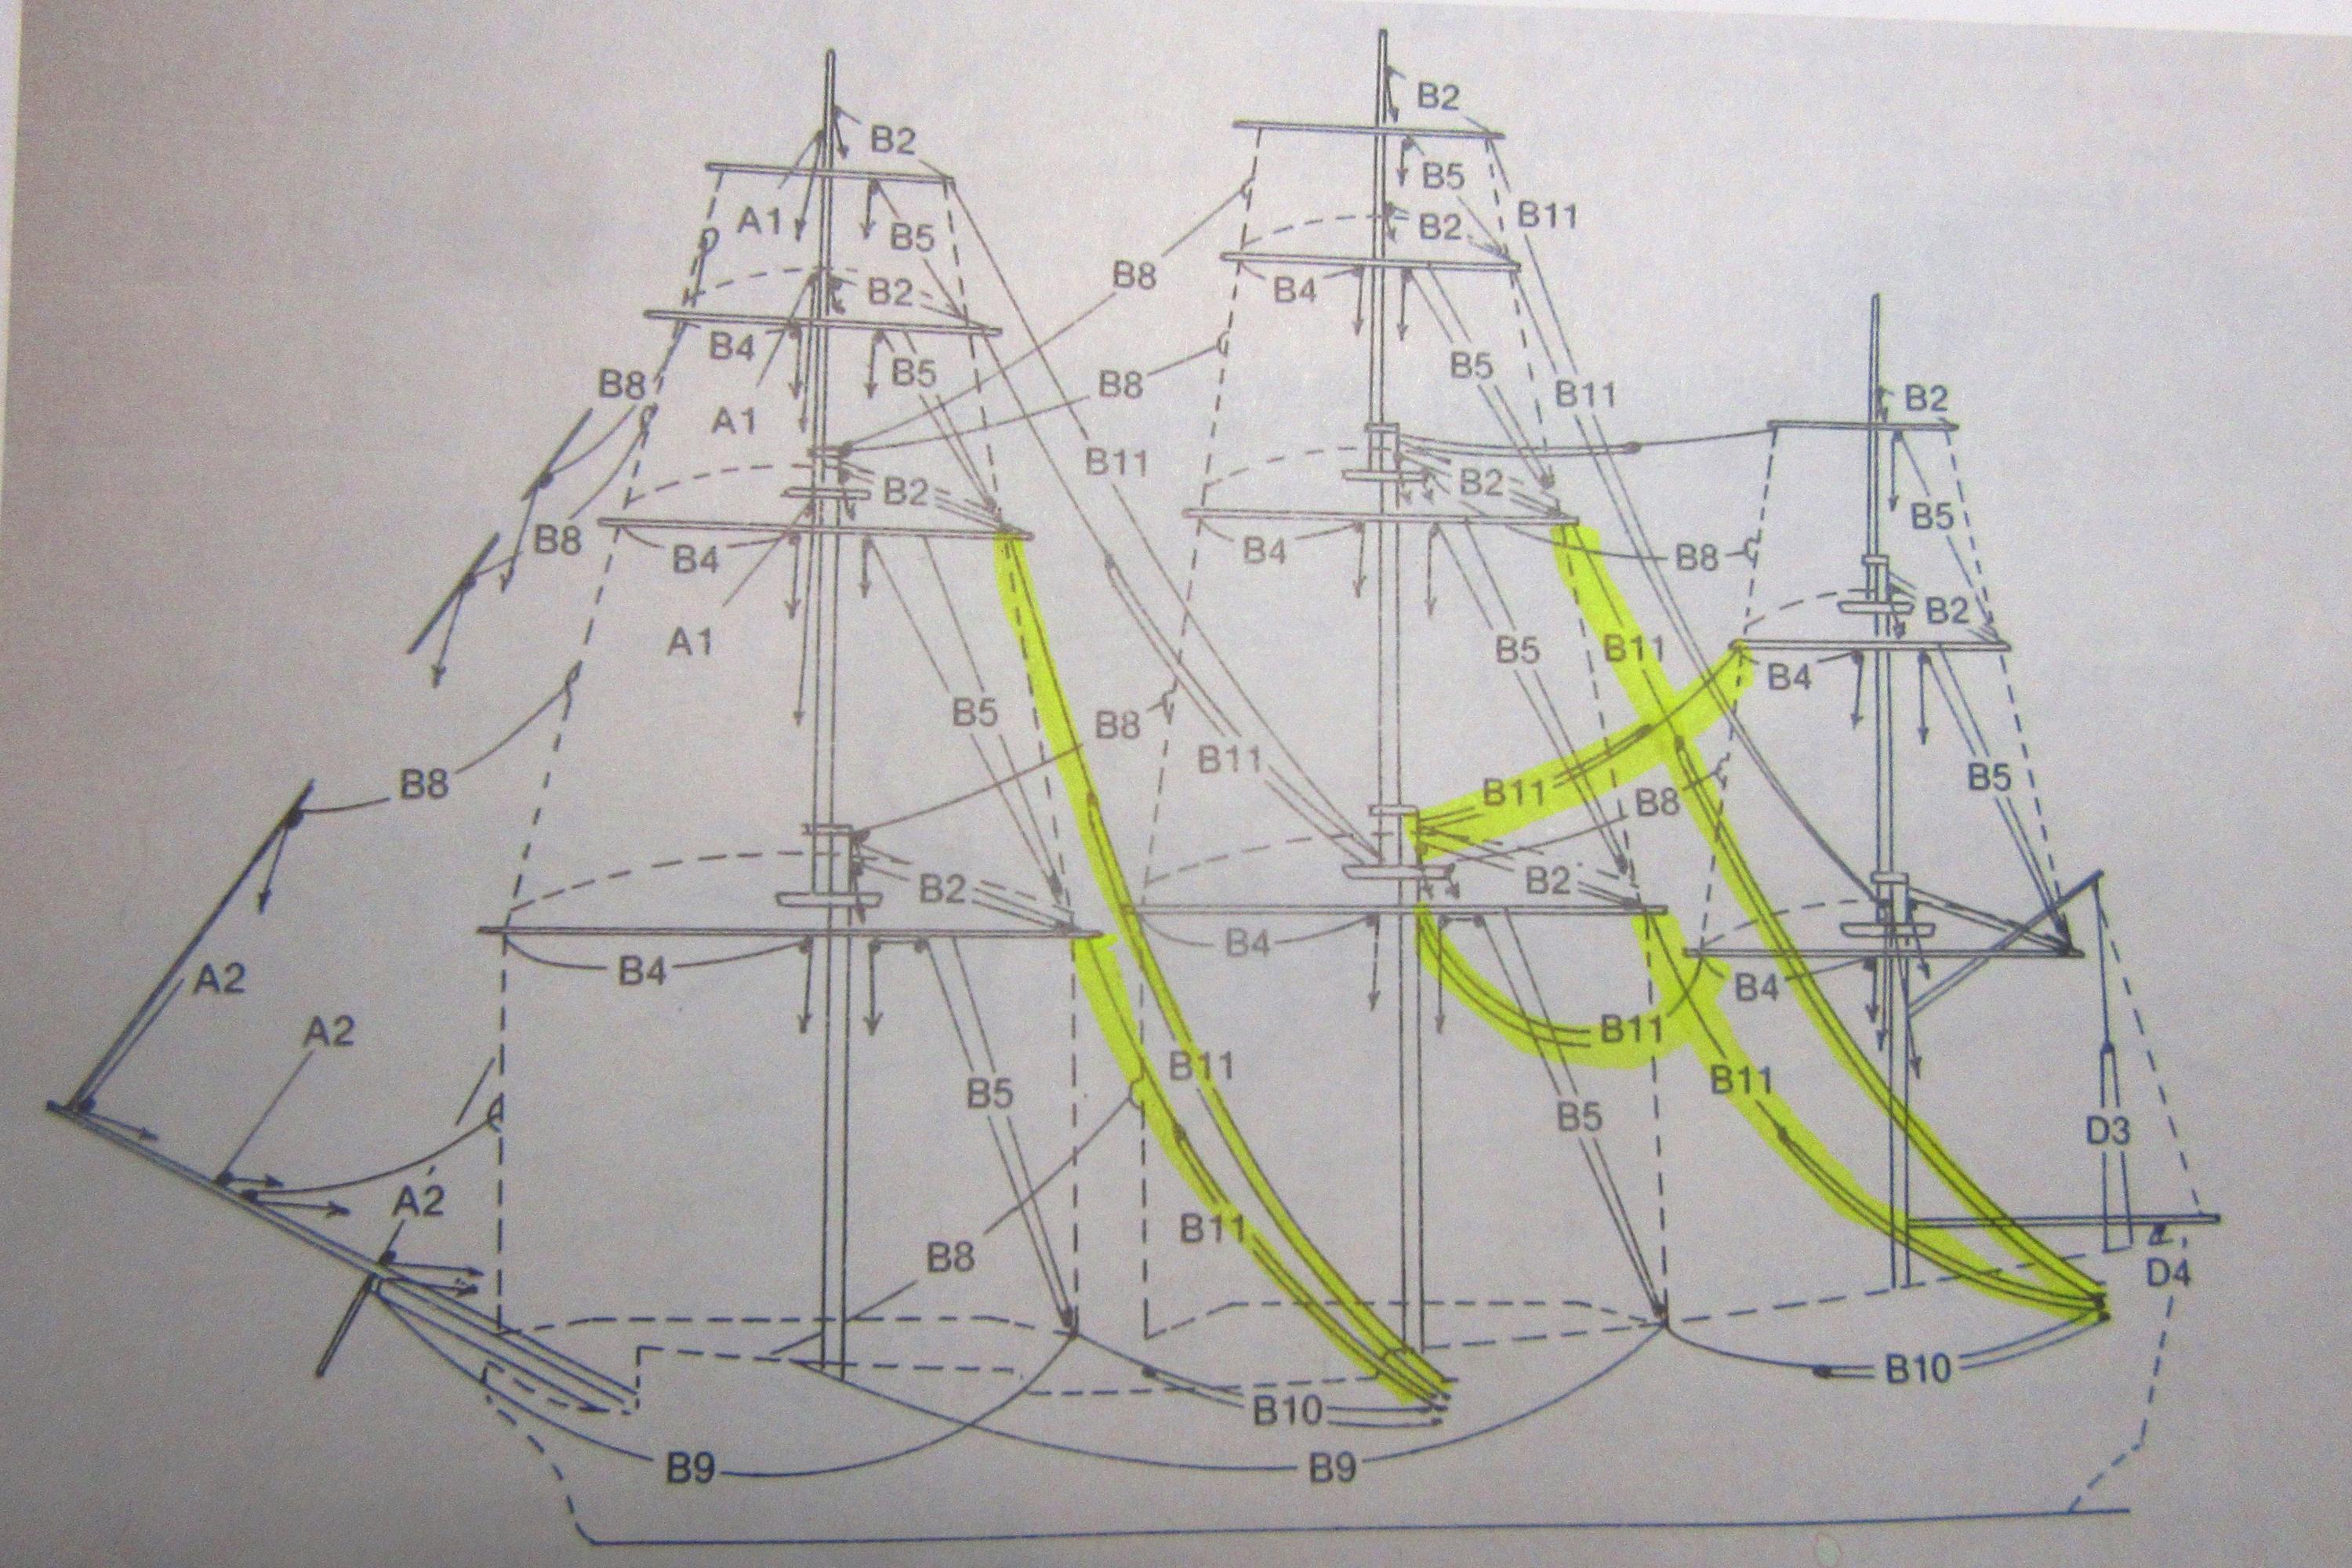
The braces are the “B11” lines highlighted in yellow. I also looked at photos I took of the USS Constellation museum ship when I was there a few years ago, and the braces matched Mansir’s plan pretty closely.

Now I can’t vouch for the ships rig today; it is a museum display after all, and they may have fitted lines focused more on simplicity or display appeal than functional accuracy. Anyway, I am building this as a (mostly) replica of the ship dad and I visited, so even if inaccurate for the working 1854 vessel, I hope the rig will still be a reasonable depiction of the museum ship as she appeared when we saw it.

3 Likes
You have it right. That’s just weird. I can’t imagine wrestling with that in a stiff wind.
1 Like
You have it right. That’s just weird. I can’t imagine wrestling with that in a stiff wind.
Good point, Danie!
![]()
1 Like
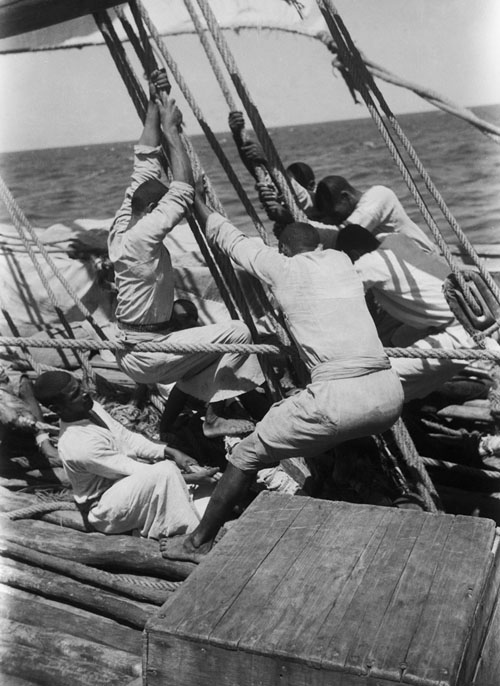
That’s how it works. The hand at the bottom left is “Tailing” the line, taking in slack and using the friction of the belaying pin to keep it from running back out. The others thrown their weight on the line, pulling it in. As they stand up for the next pull the tailer pulls in the slack they gained. The cycle continues until the rig is where they want it.
The four braces on the aftermost mast yards were next.
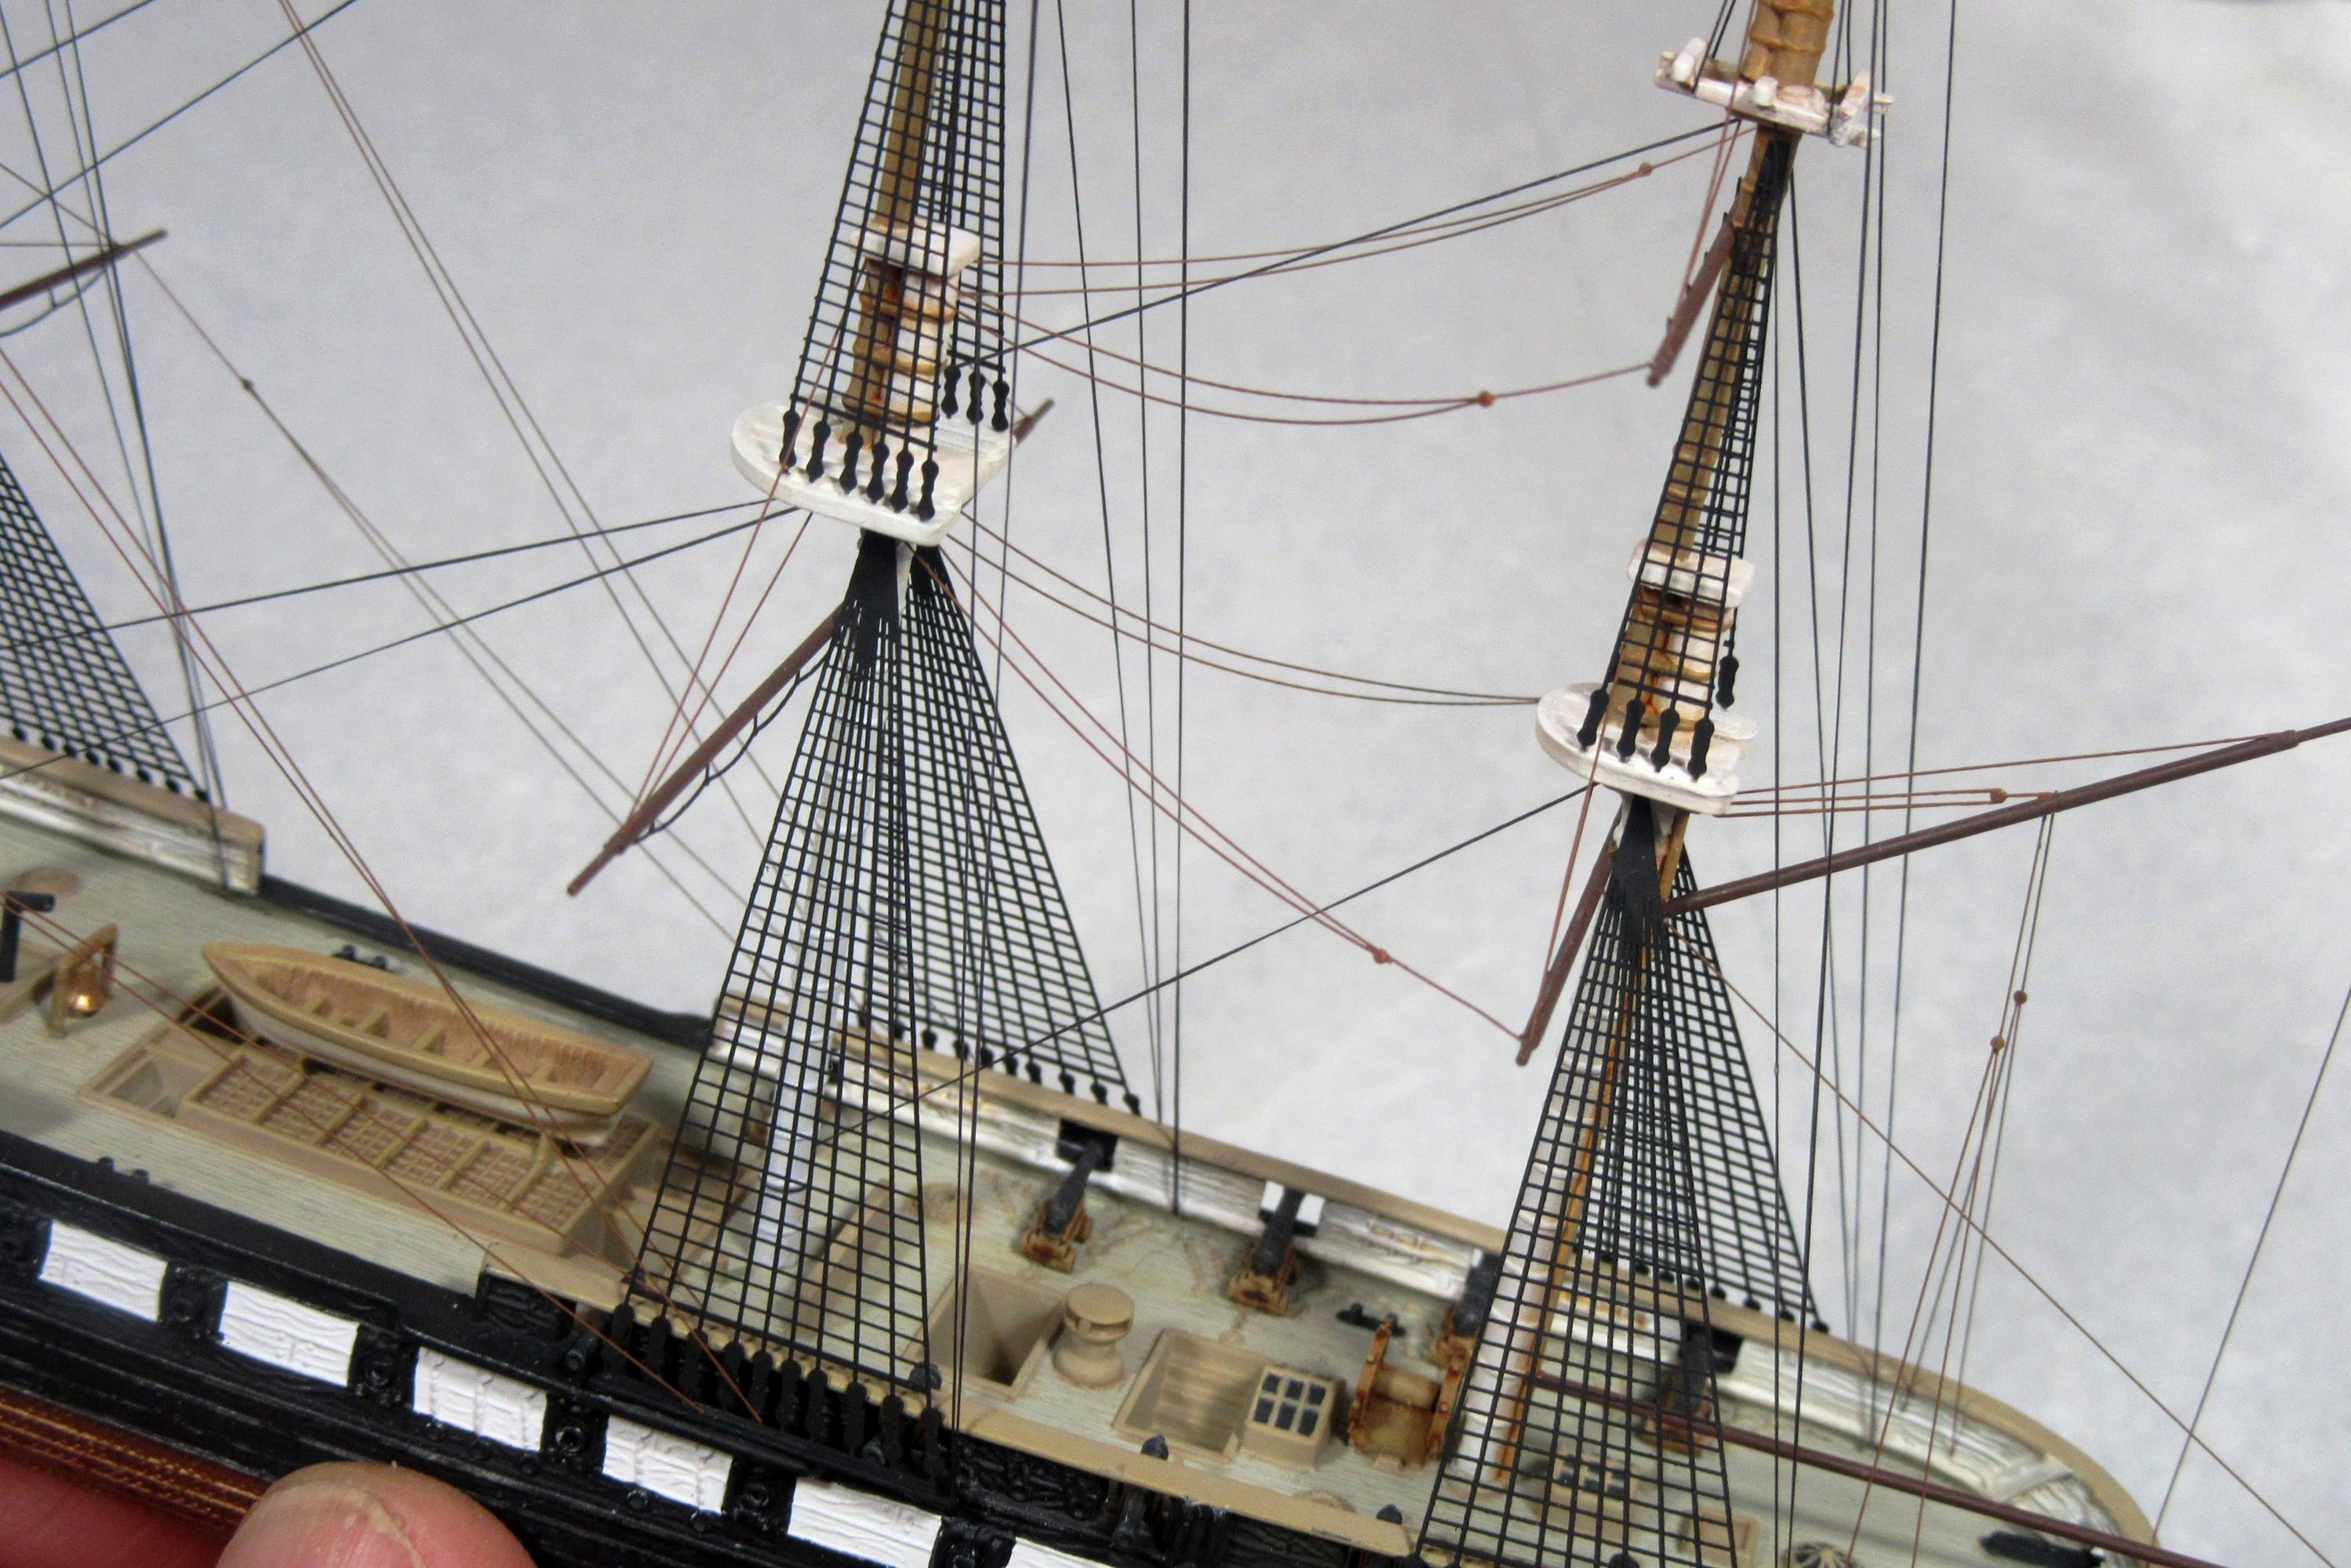
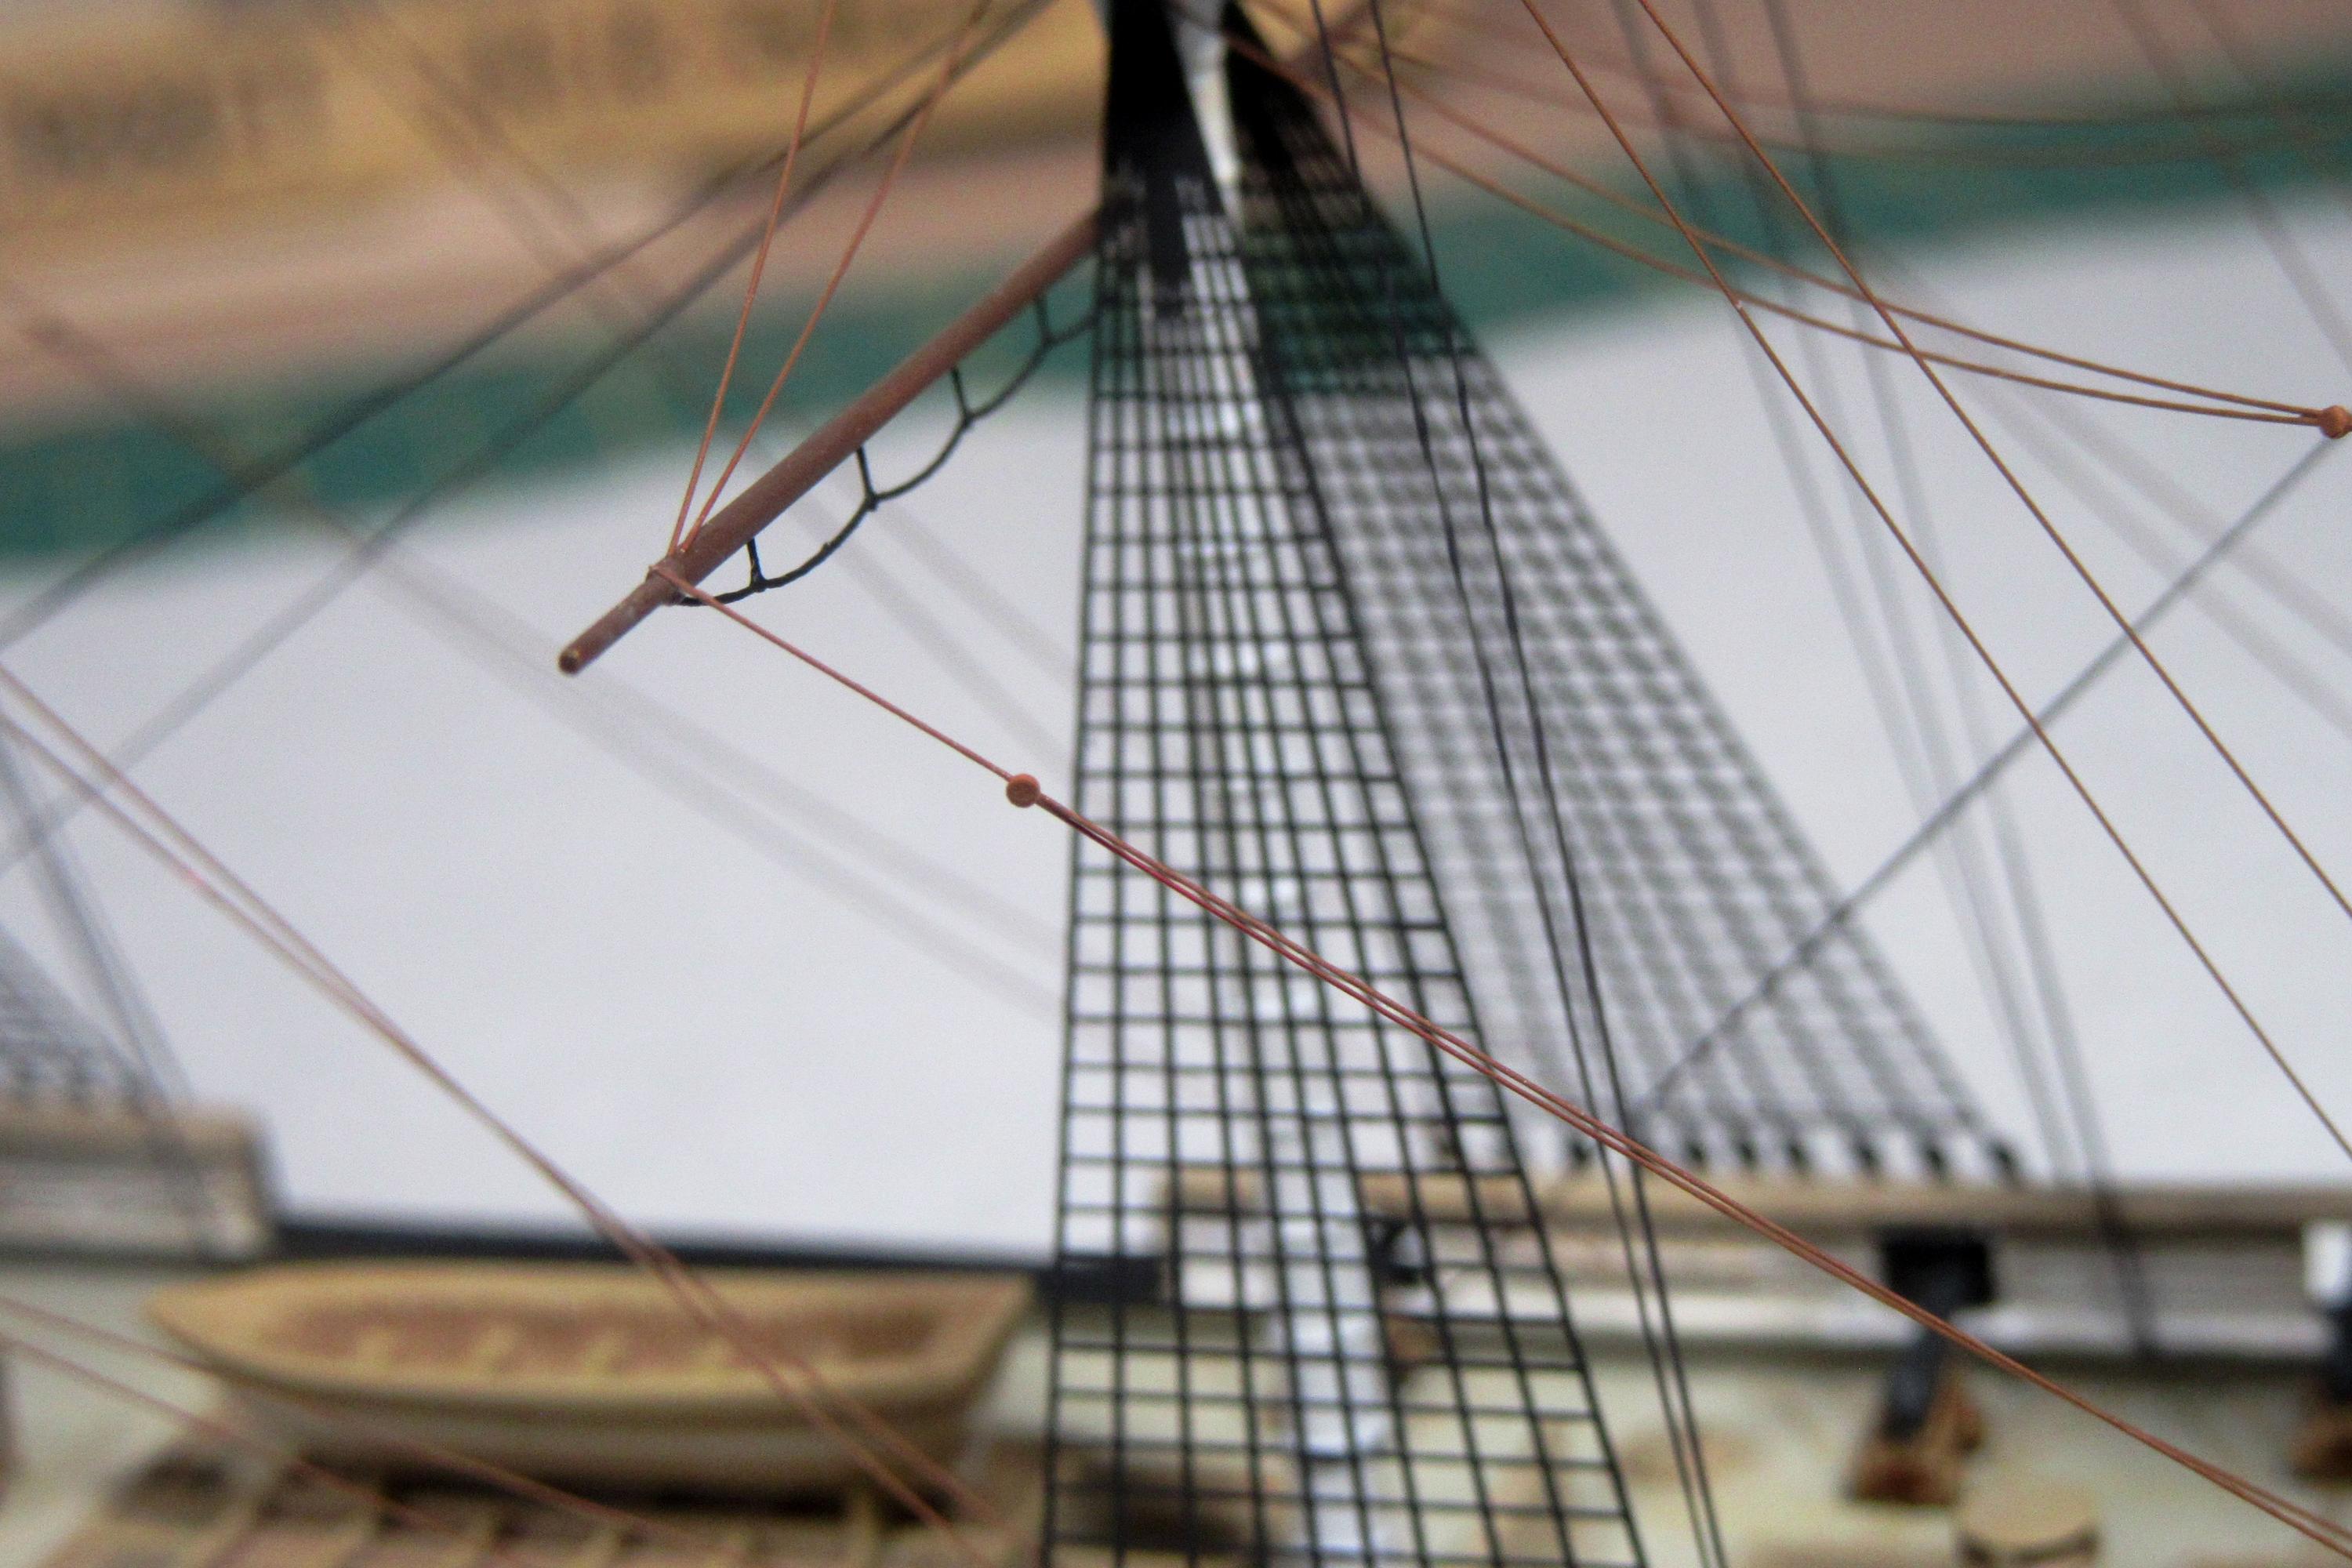
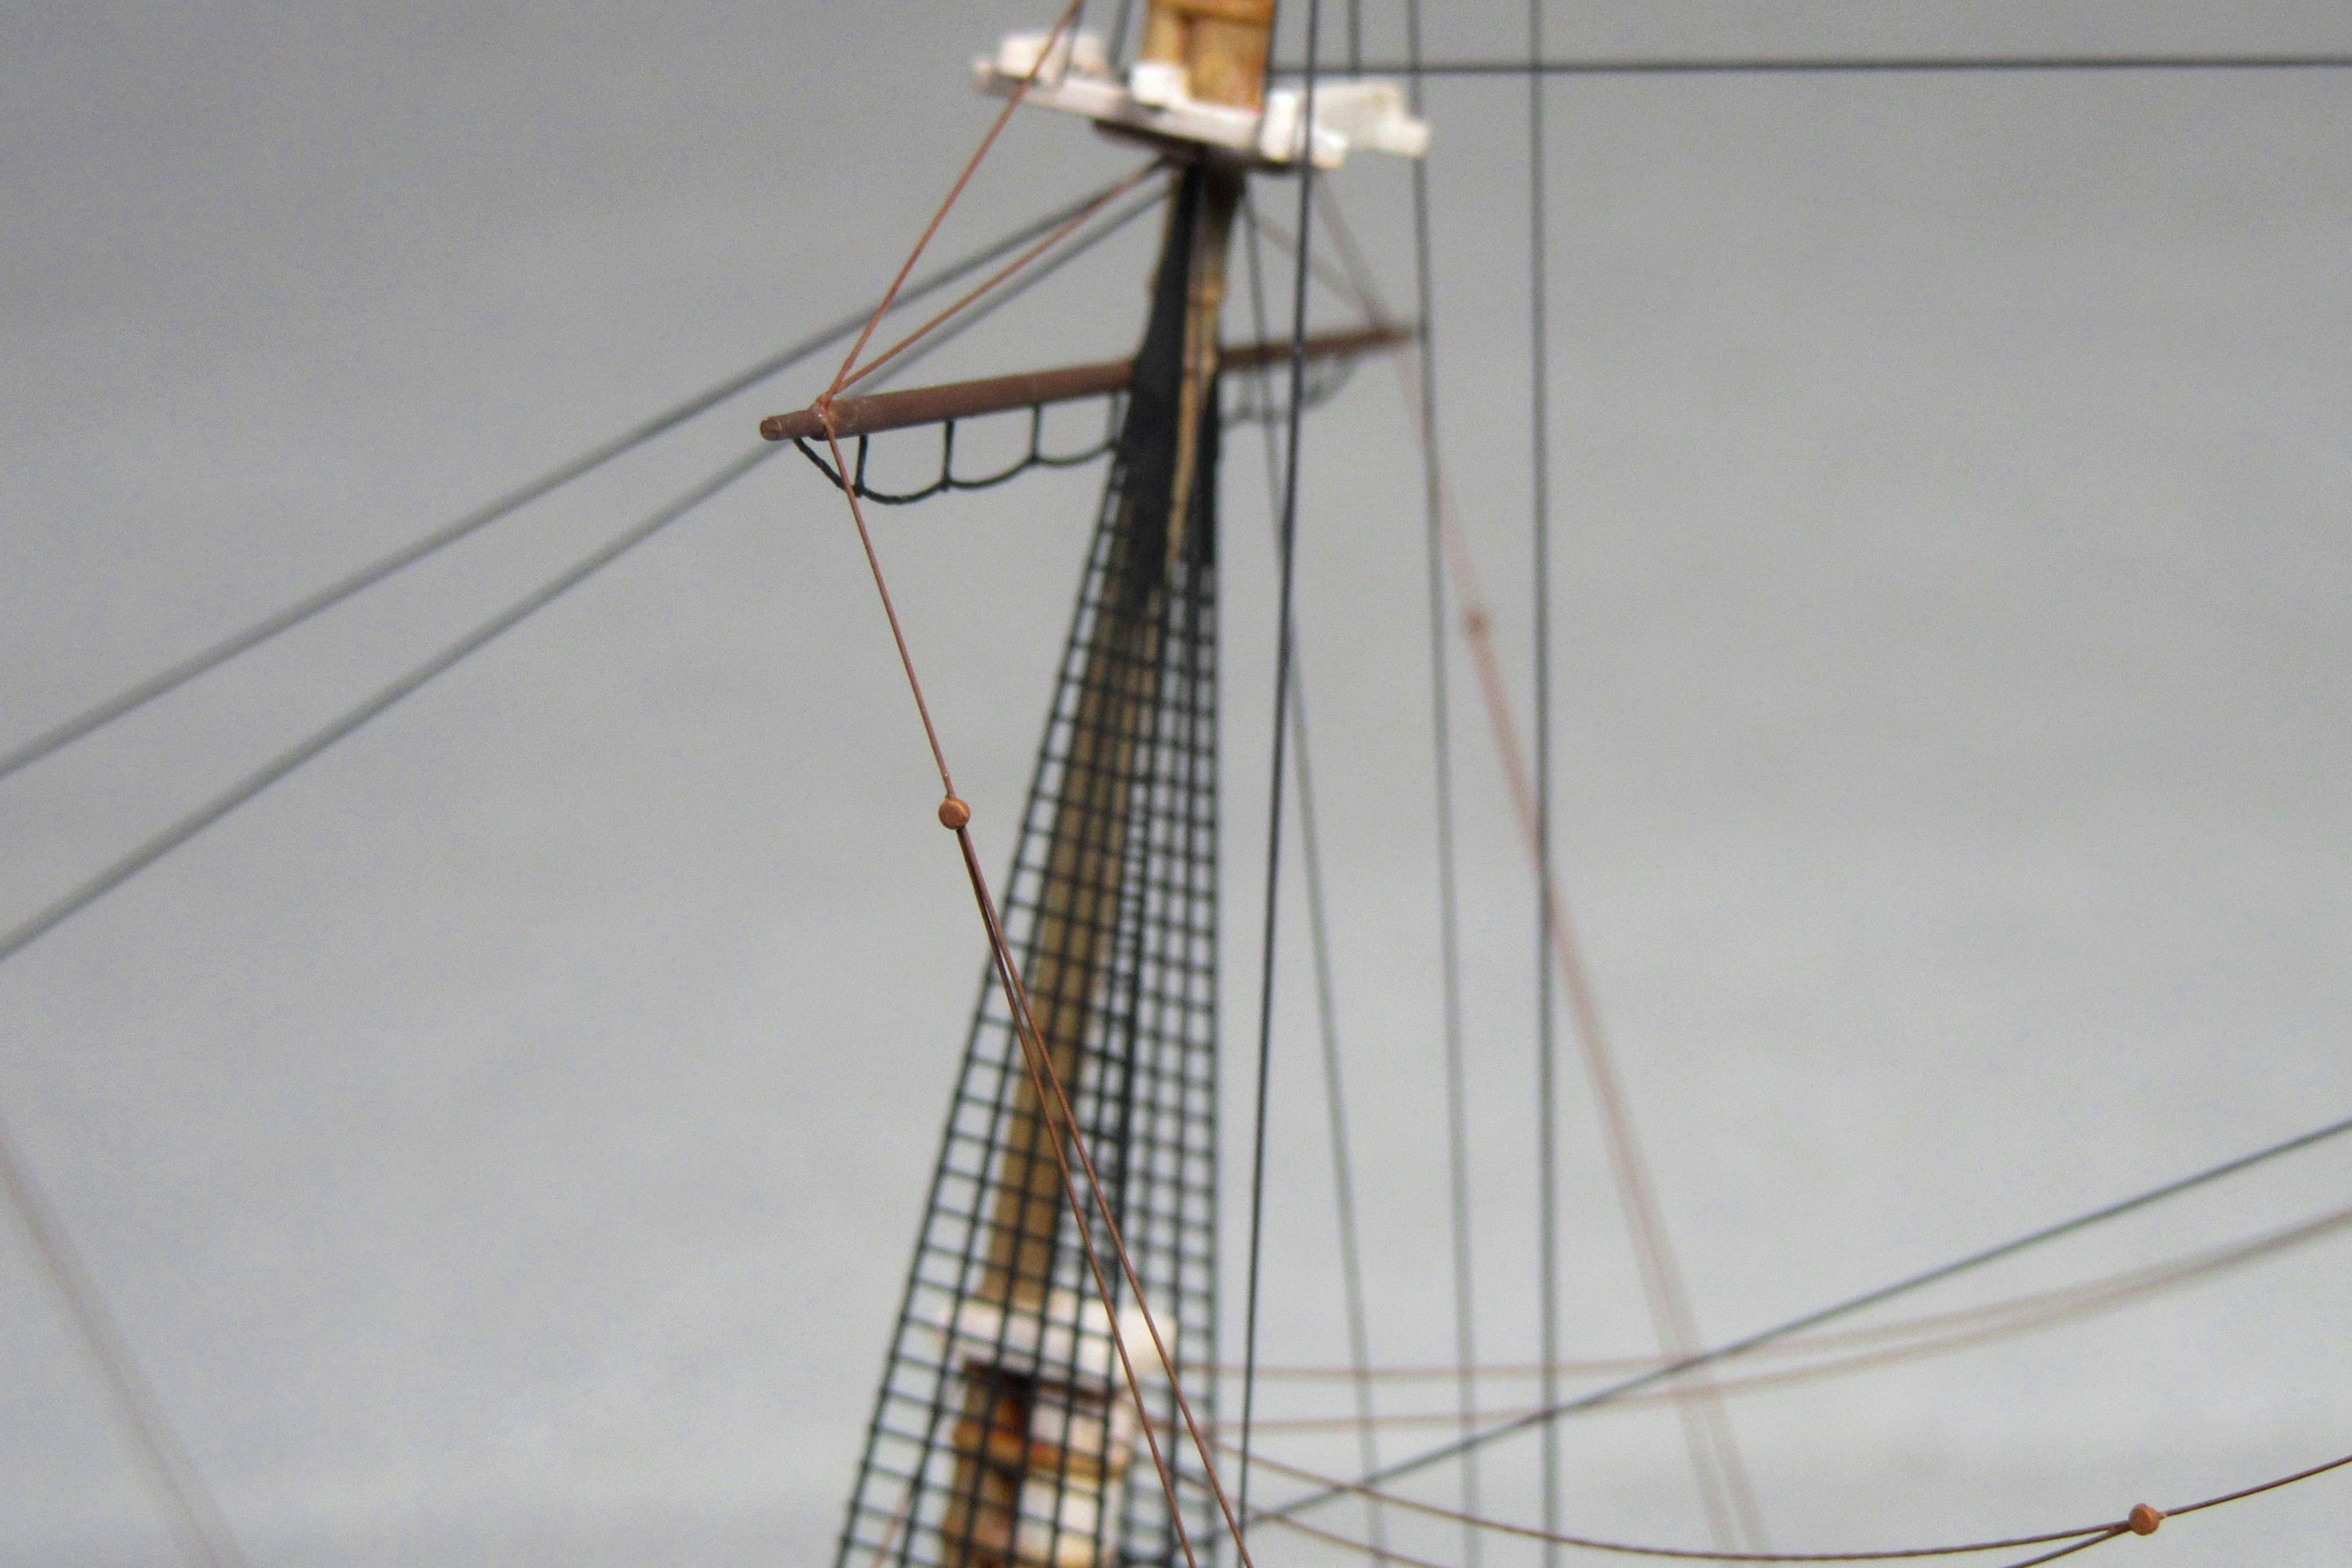
These proved a bit tricky as the proper “sag” had to be formed into each of the stiff little copper lines prior to installation. Also, fitting them in that confined space between the masts without kinking the wires or damaging the surrounding yards and lines has required extraordinarily careful attention – and more repairs, as I still managed to bend and knock some of the previously installed lines loose!

6 Likes
Well Tim,
All I can say is… ABSOLUTELY IMPRESSIVE !
Cheers,
2 Likes
I’ve been following this build since you started the thread, Tim, but have refrained from commenting just to add yet another “like” to the well deserved list props.
However, after your sagging braces, I can’t resist any longer… Beautiful and impressive work! I, for one, really appreciate you taking the time and effort to document and share it with us!
Still hooked and looking forward to seeing the final results!
1 Like
Tim,
just as was said so often before, but still - simply great and awesome work. The way you got the sag into the braces, amazing. She’s looking awesome!
Cheers
Jan
1 Like
Looking great Tim.
I think it definitely deserves a nice display to protect all your work. It will make a great gift for your Dad.
I ordered myself those etch ratlines for my Mary Rose and they arrived earlier in the week. I’ll make a start on that in the new year. Never done a sailing ship so quite excited to make a start.
1 Like
Joe, Michael, Jan, and Stephen - thank you! She’s in the home stretch now, just a bit more rigging to finish (braces on the main mast yards) and still waiting for the acrylic case… but nearly done!
1 Like
I’ve been following this build since you started the thread, Tim, … I, for one, really appreciate you taking the time and effort to document and share it with us!
…
Thanks Michael. I’m glad you find the build process interesting. I sometimes wonder if I’m overdocumenting things, so your comment is most appreciated!
1 Like
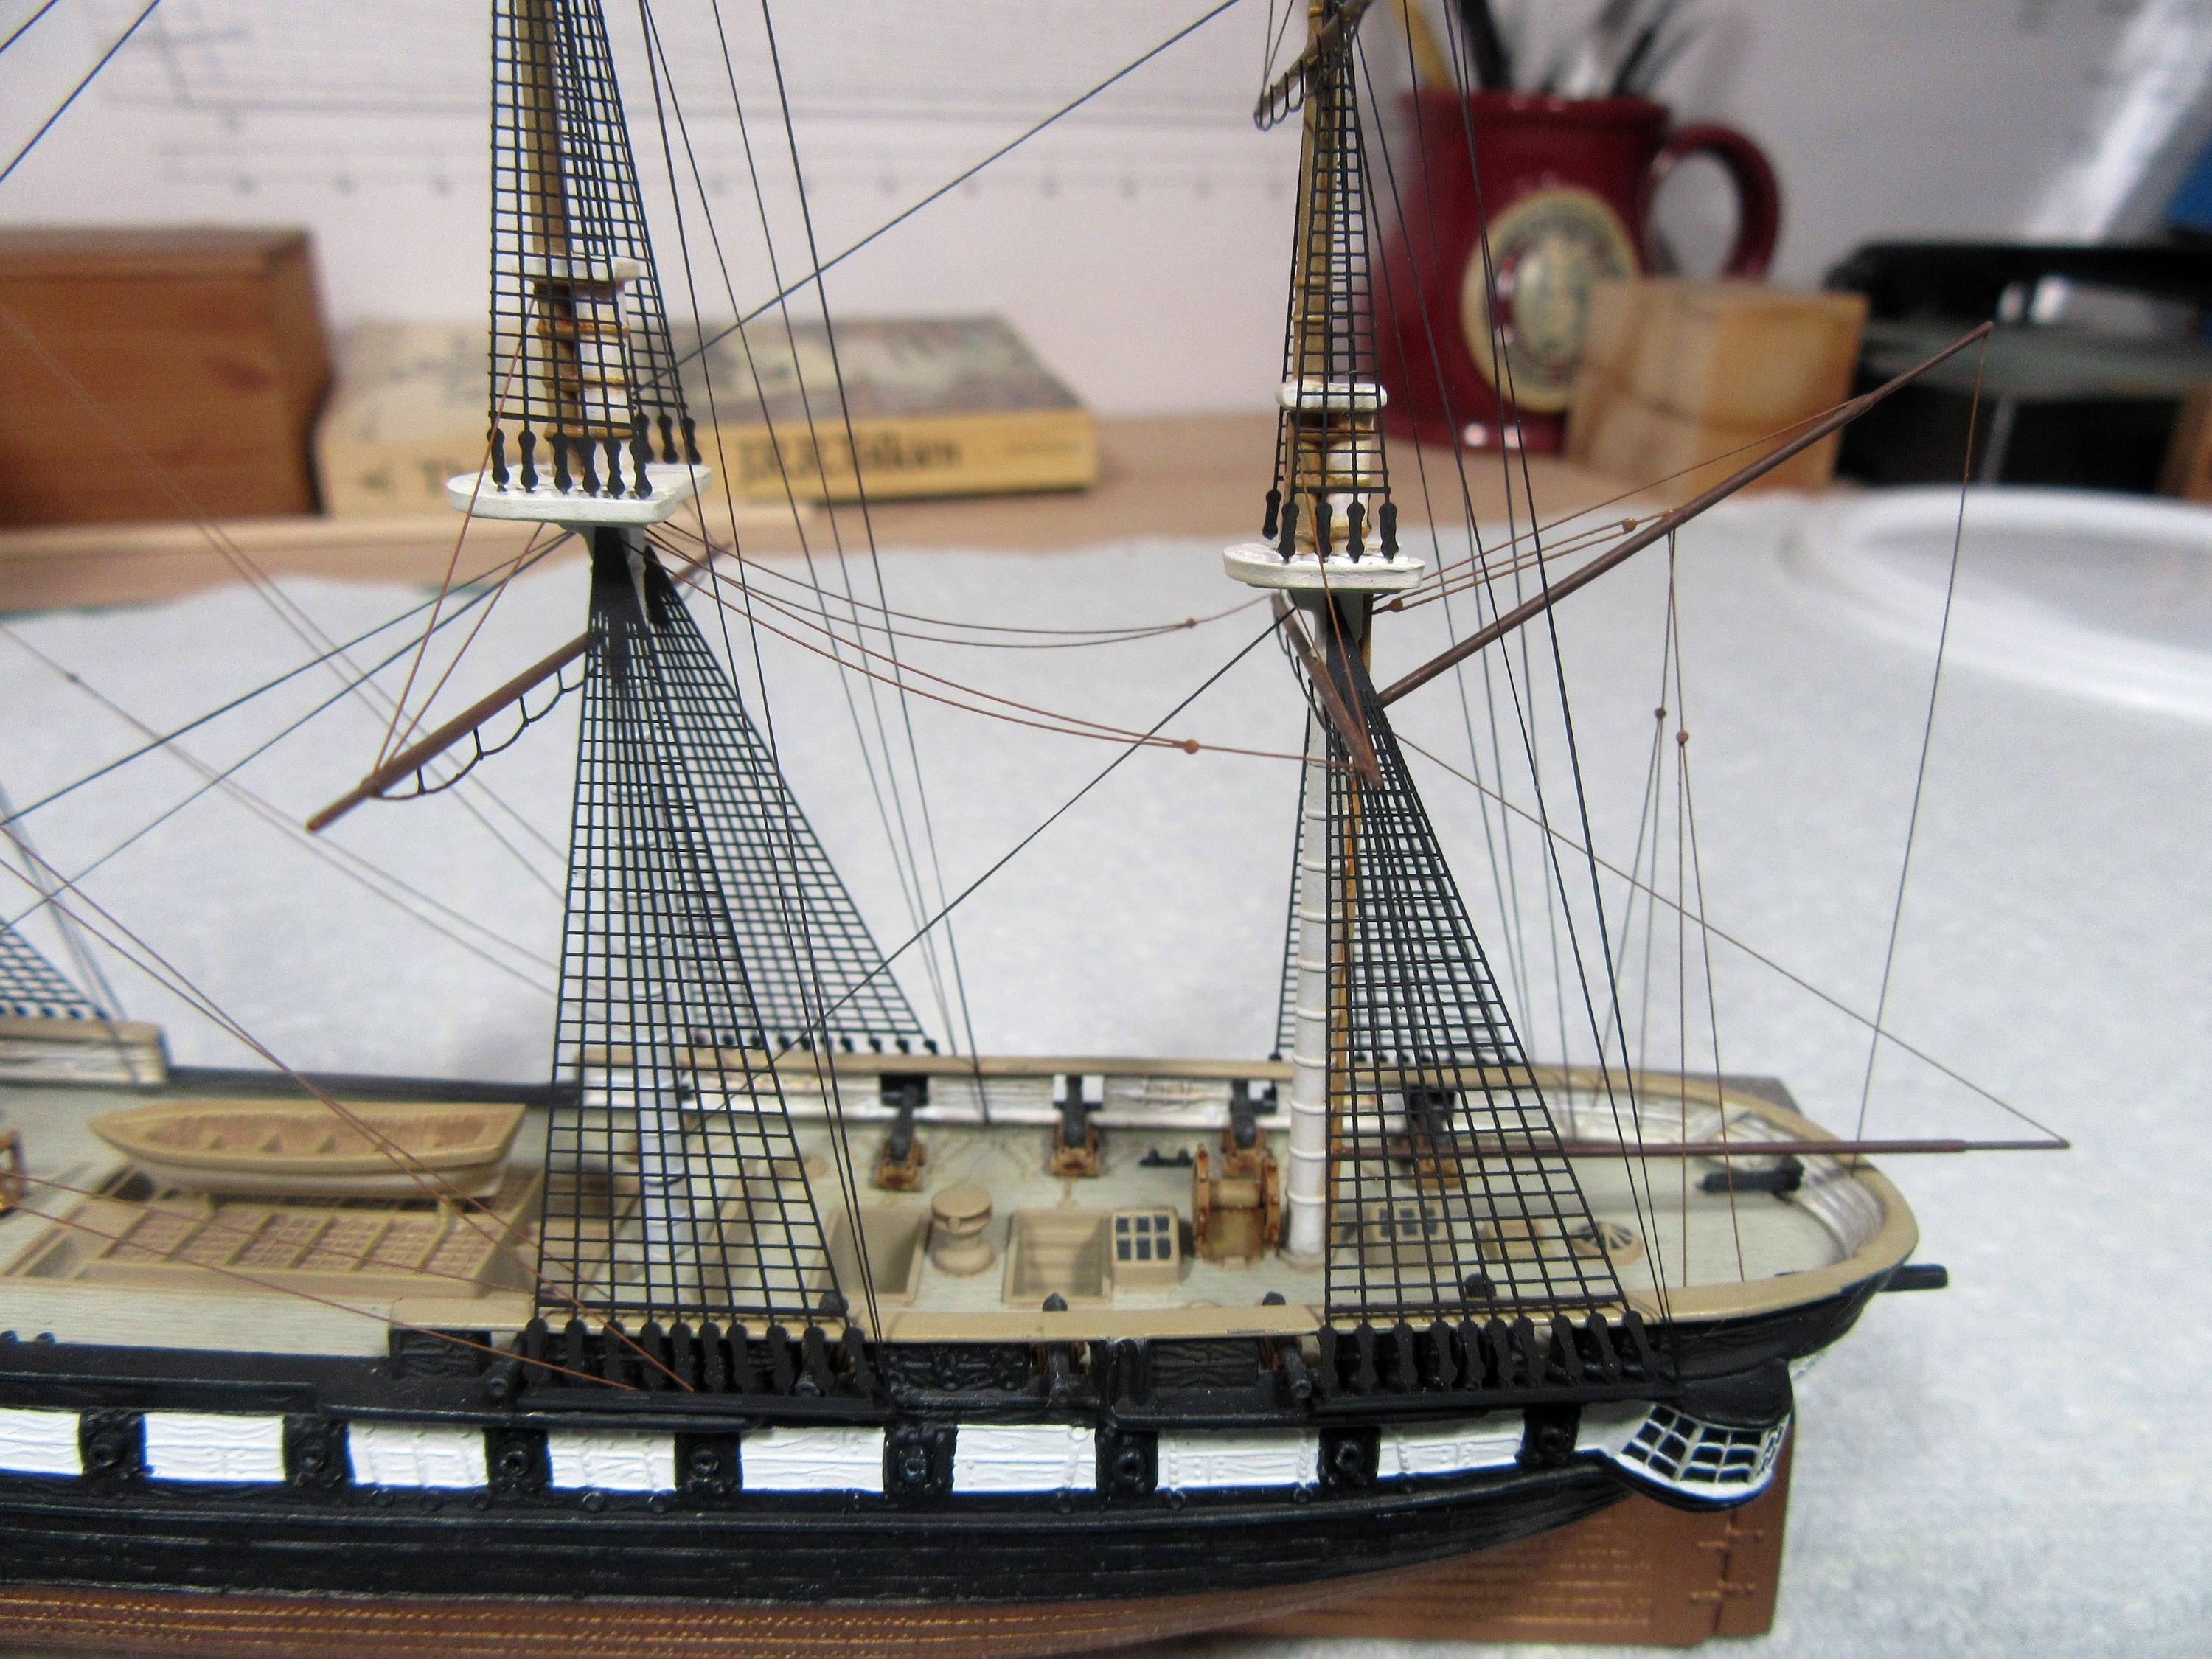
The last of the rigging to be installed were the braces on the main mast. Here is one on the lower mainmast yard…
…and the upper main mast yard:
The rigging is pretty accurate as far as it goes, but seen as a whole, the various stays, lifts, vangs, and braces create (at least for me) an almost indecipherable tangle of lines –
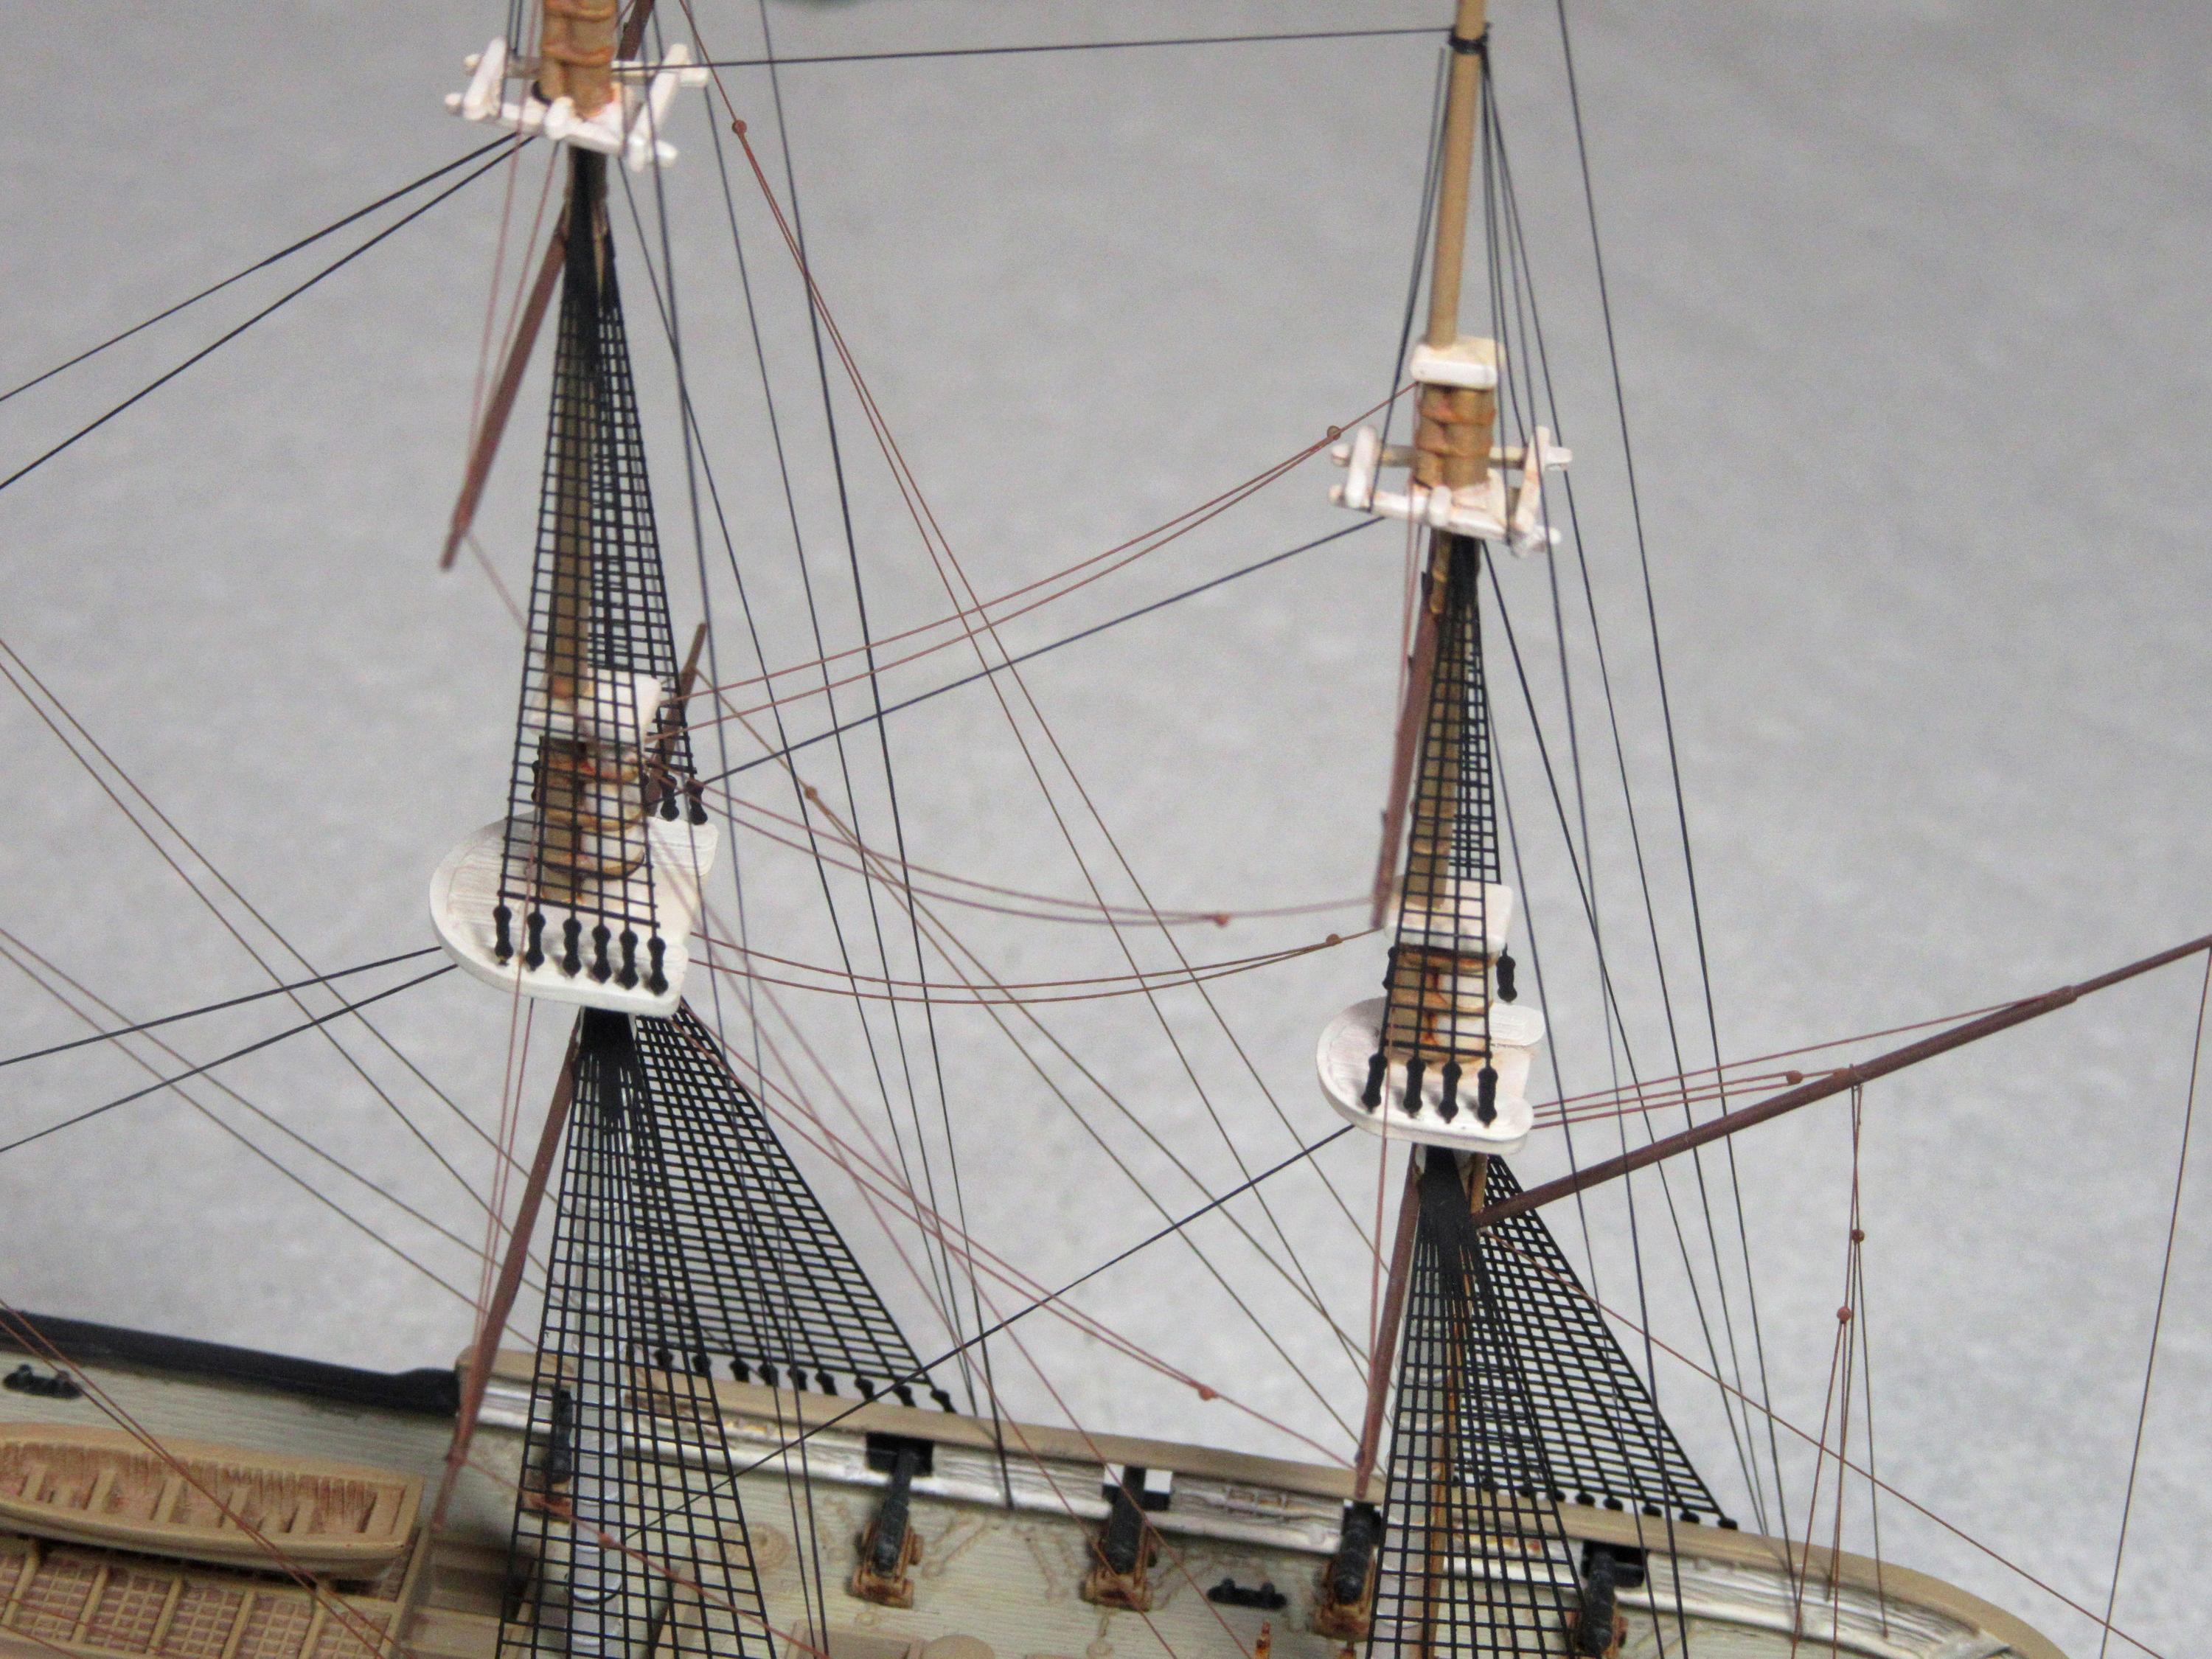
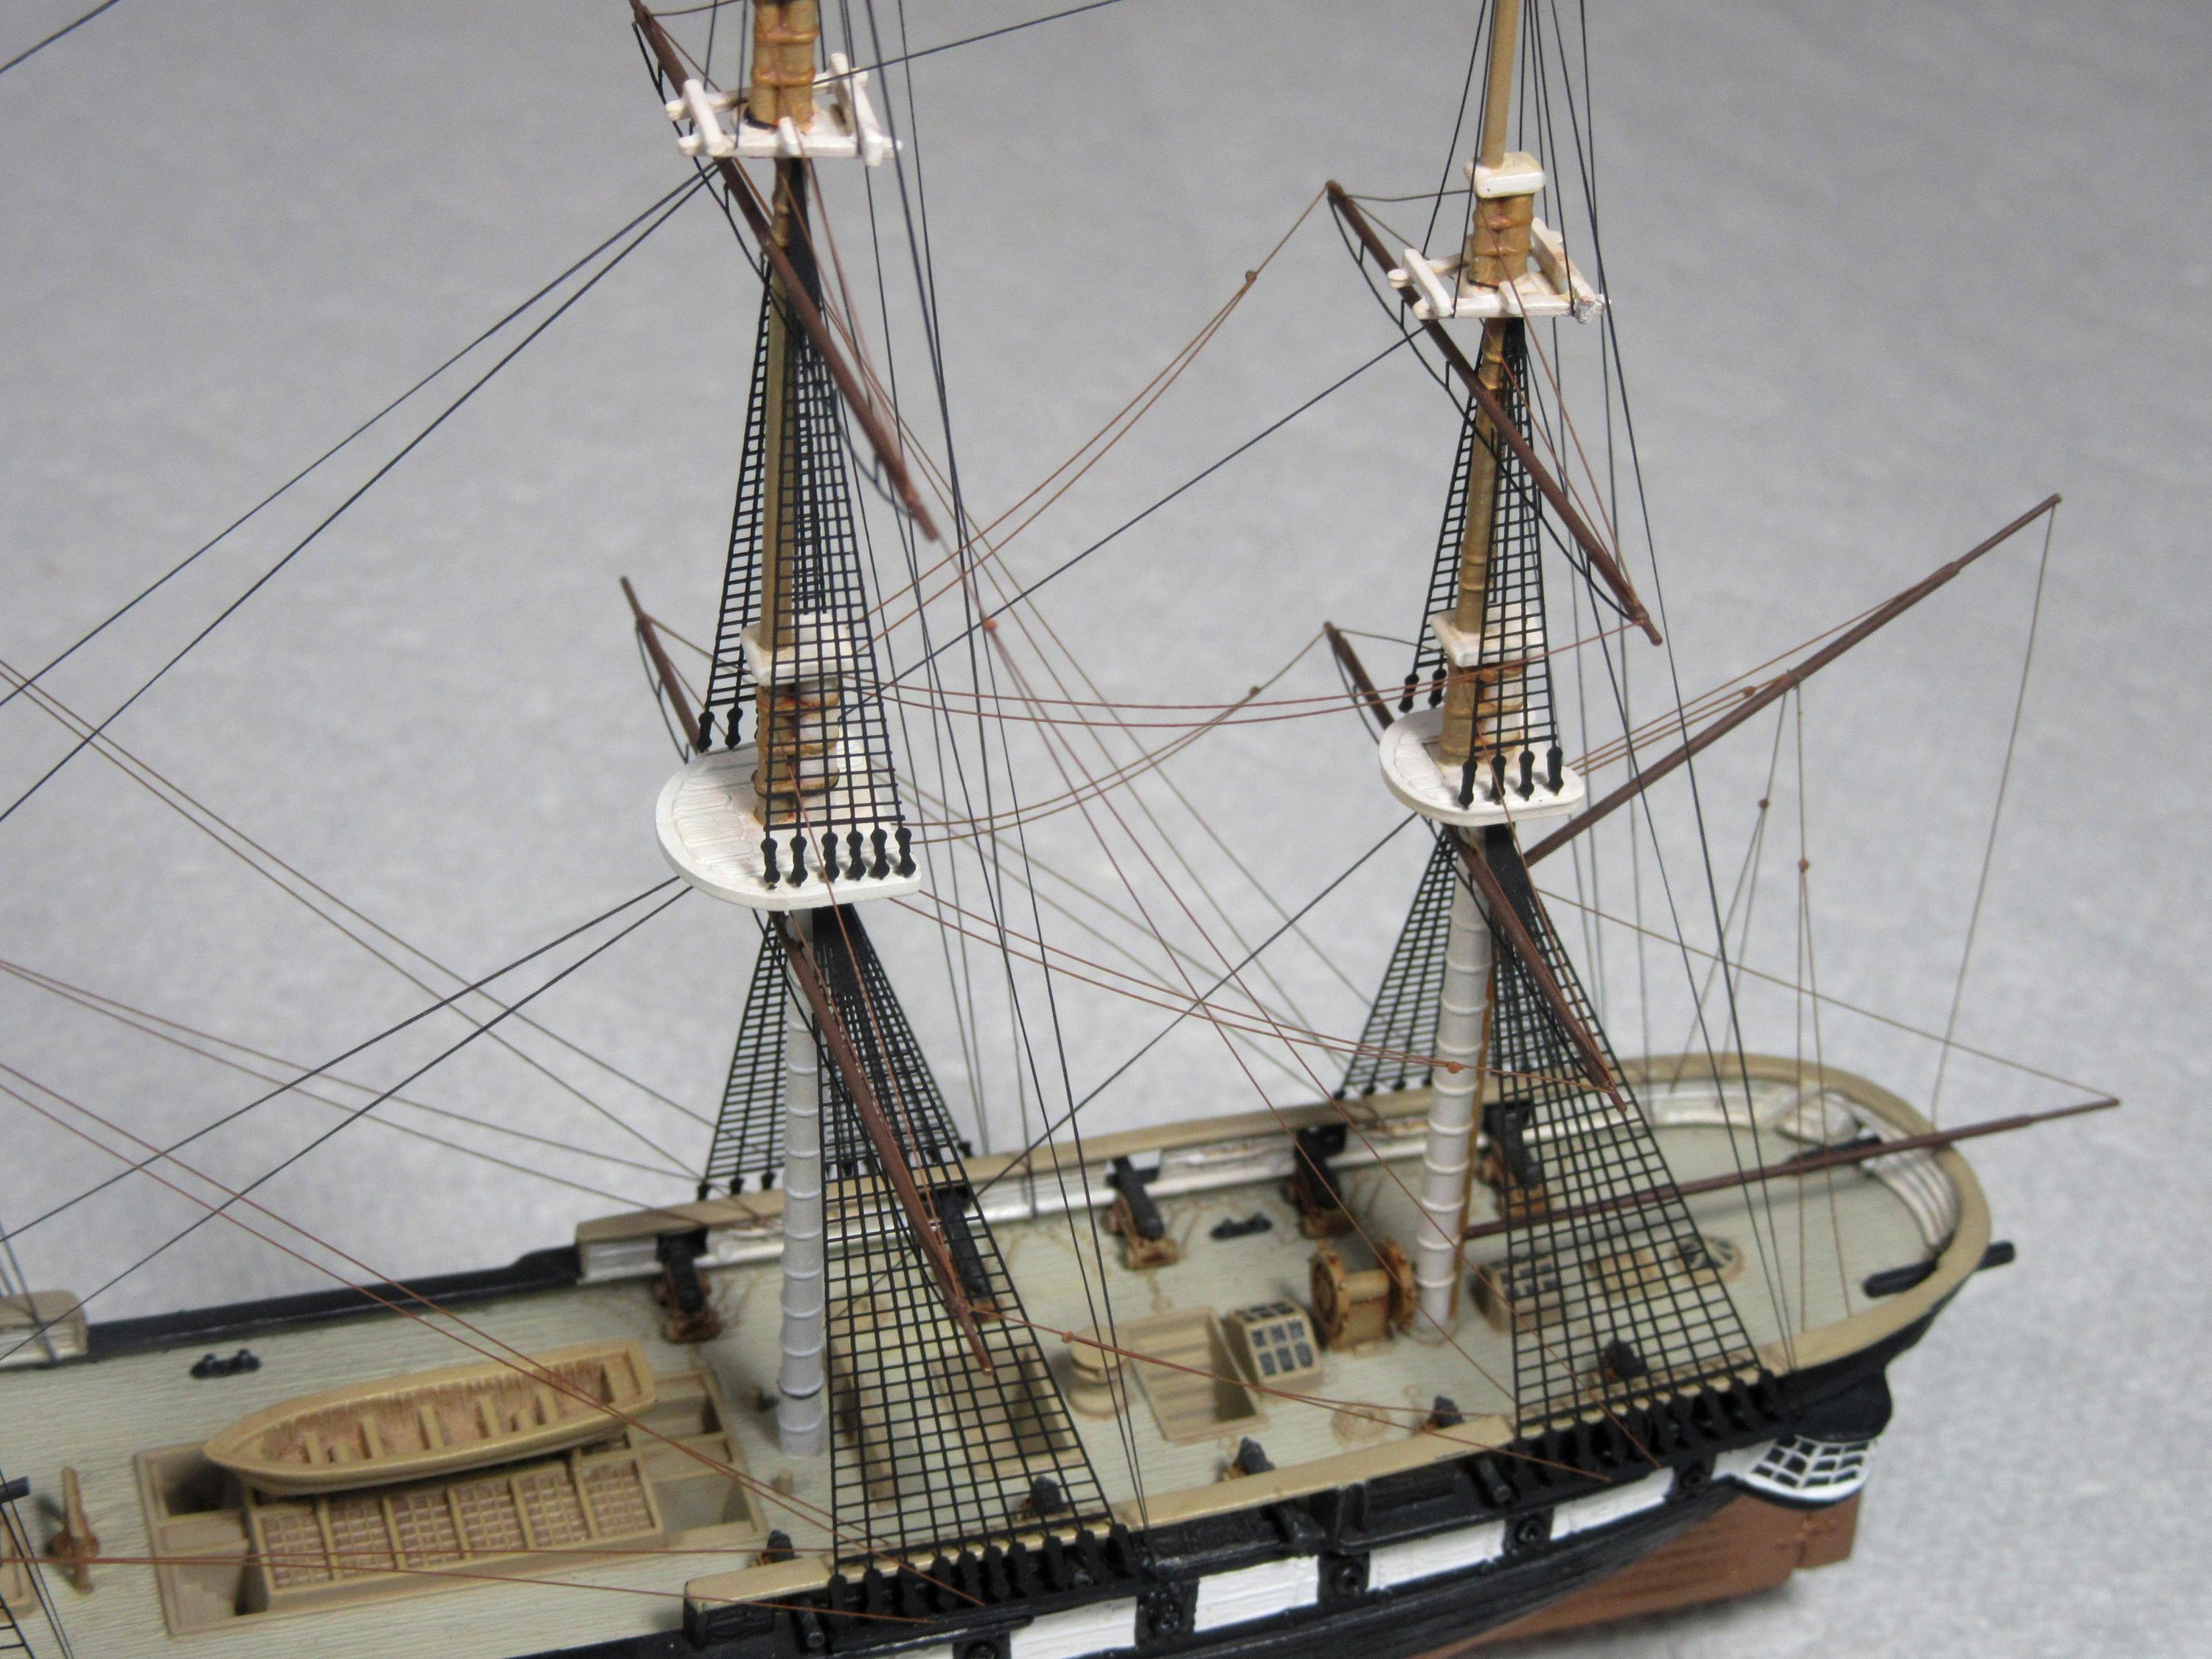
– and yet, this is just an abbreviated version of what the real ship carried!
8 Likes
A last detail to be added to the rigging was the flag. I used decals from Microscale’s US 50 Star Flags (MC-4202) intended for HO scale trains.

A 50-star U.S. flag might not seem altogether appropriate for an 1854 vessel, but hey, it is a museum ship now, right?

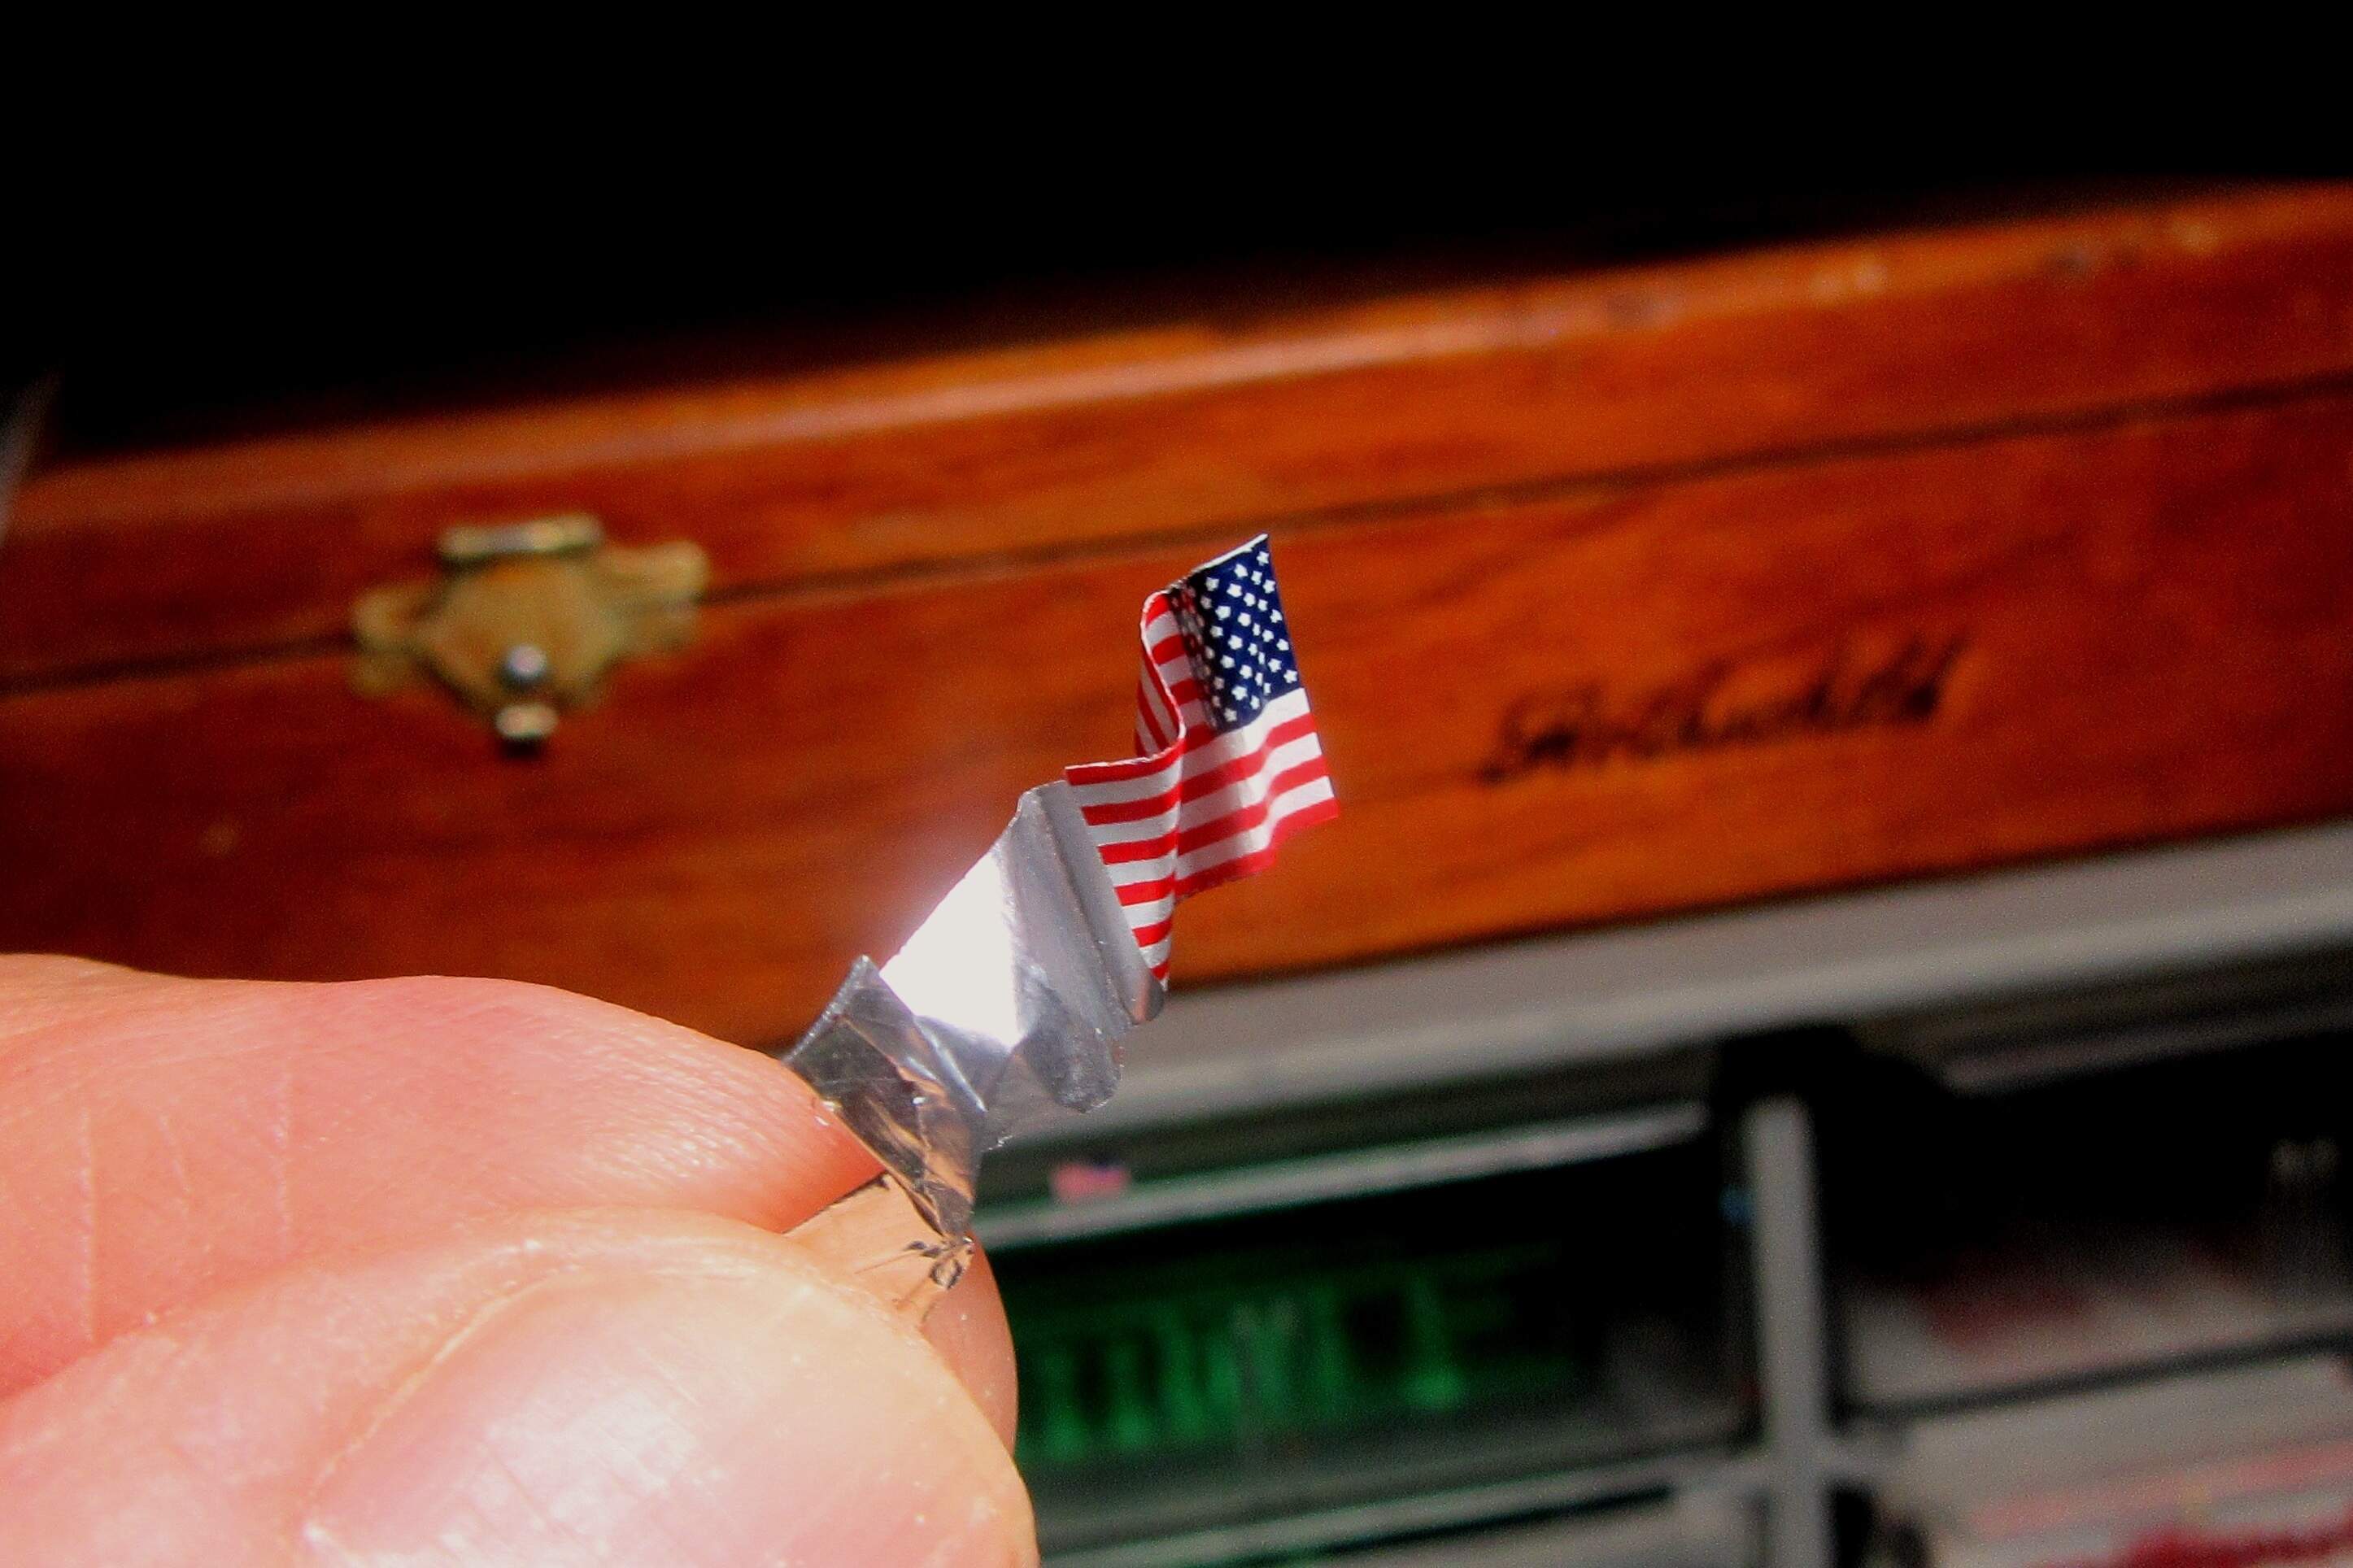
To enable a “waving in the breeze” presentation of the flag, I first applied the decals to both sides of a piece of heavy duty household aluminum foil. Then, after trimming off the excess foil around the flag (except for a bit left on one end to serve as a handle), I gently formed undulations with a toothpick. This may sound simple, but the foil and decal films were both so delicate that I managed to mangle four different flags before getting a single useable one!
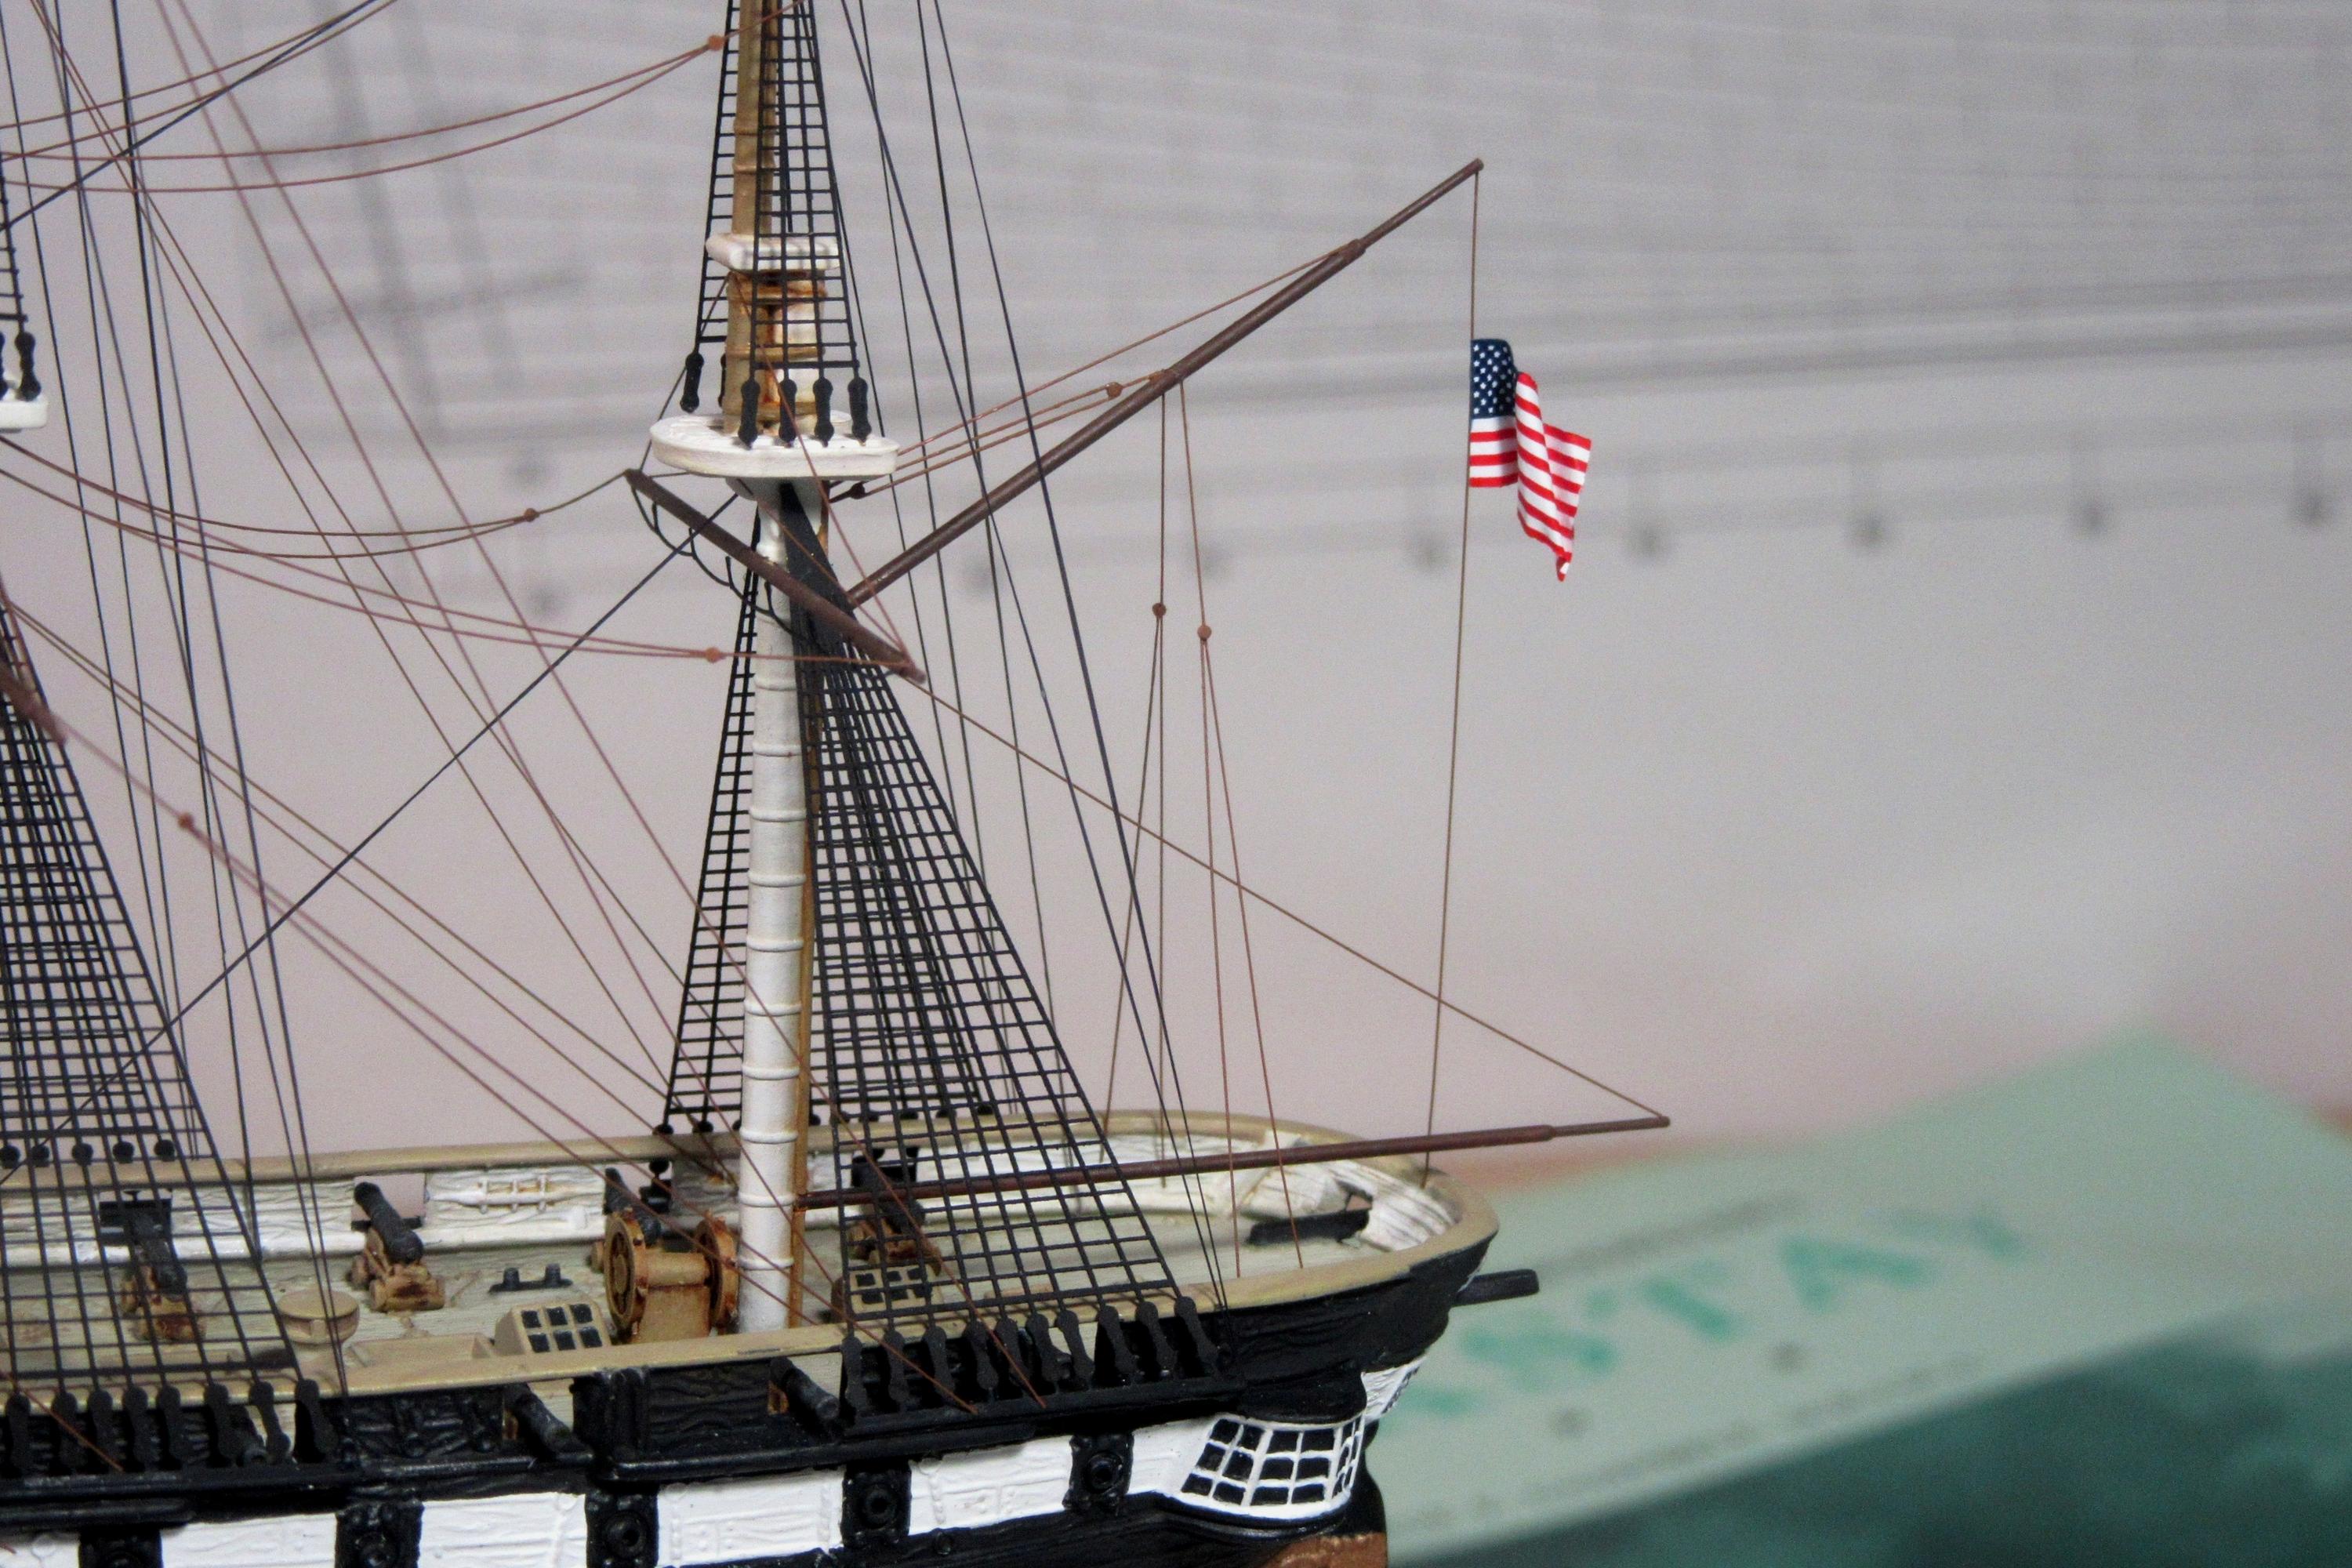
Anyway… with the shape established, I cut off the excess foil, touched up the edges with blue and red enamels, and attached the ensign to its halliard.
10 Likes
This is just an awesome model you’ve built Tim 
The rigging is perfect. And like we discussed before a fully rigged model isn’t necessary in order to create the illusion of a full rig 
Your dad will be super chuffed I’m sure 
2 Likes
Tim,
Totally love the rigging and the flag sets it all off. Excellent work my friend.
John
2 Likes
Tim,
I just can echo Russ’ and John’s words - simply awesome! Another shining jewel from an ancient kit, the base you started from makes your result even more remarkable!
Cheers
Jan
2 Likes
I really like the beer mug in the right-hand background, with the Bavarian coat of arms on it. Makes me wish I was back in Oberbayern!
Your flag looks great, and thanks for the explanation. I’m going to use the same technique on HMS Victory’s ensigns. One reason I bought the Victory, was because I wanted to have a ship with a humongous Union Jack flying from its stern; apparently the RN (at least back then) didn’t use a Union Jack on their ships. Bummer!
Your comment about how all the rigging looks like a bunch of wire going every which way is true, but you know, in real life, each line had a purpose.
Tim
2 Likes