One thing I have been experimenting with to attach some parts is UV cured resin. Holds pretty much like CA, but it will only cure with a UV light – or a while in the sun – So, a couple seconds with a UV flashlight and you can move on to the next part.
One thing I have been experimenting with to attach some parts is UV cured resin. Holds pretty much like CA, but it will only cure with a UV light – or a while in the sun – So, a couple seconds with a UV flashlight and you can move on to the next part.
Bob
Bob, that is an interesting idea - I look forward to giving it a try some time!
I really only use white glue (PVA) on non load bearing joins, where strength is more important than hardness and instant curing.
This means pretty much my use is limited to railings: I tack them in place, with CA then at various strategic points I’ll apply thin beads of PVA; this gives the railing both strength and hardness to resist temperature changes that would otherwise cause the CA to fail along the longer spans… Other than that it’s CA or 2 part epoxy everywhere else…
I stole the idea from a Japanese site to be honest. One of my favorite videos is a fish tank… DIY Miniature Aquarium Fish Tank ミニチュアアクアリウム水槽作り - YouTube … He uses a rubber like substance to make molds at about 15:10 which is what I got the resin to try… works great on flat stuff, such as hinges for tank decks. Also, you might be interested in the vacuformer he made… Handmade Vacuum Former 手作りバキュームフォーマー作り - YouTube … looks like it works better than the old Mattel one I had years ago.
Funny how much I have learned from ship modelers and doll house modelers. One reason I keep watching…
The standing (i.e., mast support) rigging now completed, the running rigging (the working lines used to set and adjust the sails) is next. According to Charles C. Davis’ 1926 The Ship Model Builder’s Assistant,
“When a ship reaches a harbor, the sails are unbent if she is to stay any length of time… When the sails were taken off, the running gear, such as buntlines and leechlines, would be unrove and put away. So it is perfectly proper and shipshape to show a model without this gear.”
This is ideal for the “laid up” condition of the Constellation museum ship – and definitely gives me latitude to omit quite a few of those complicated lines!
These running rigging lines, since they had to move through blocks, were plain rope, and often showed slack – something EZ Line doesn’t reproduce well – so for these I’ll return to the dreaded copper wire.
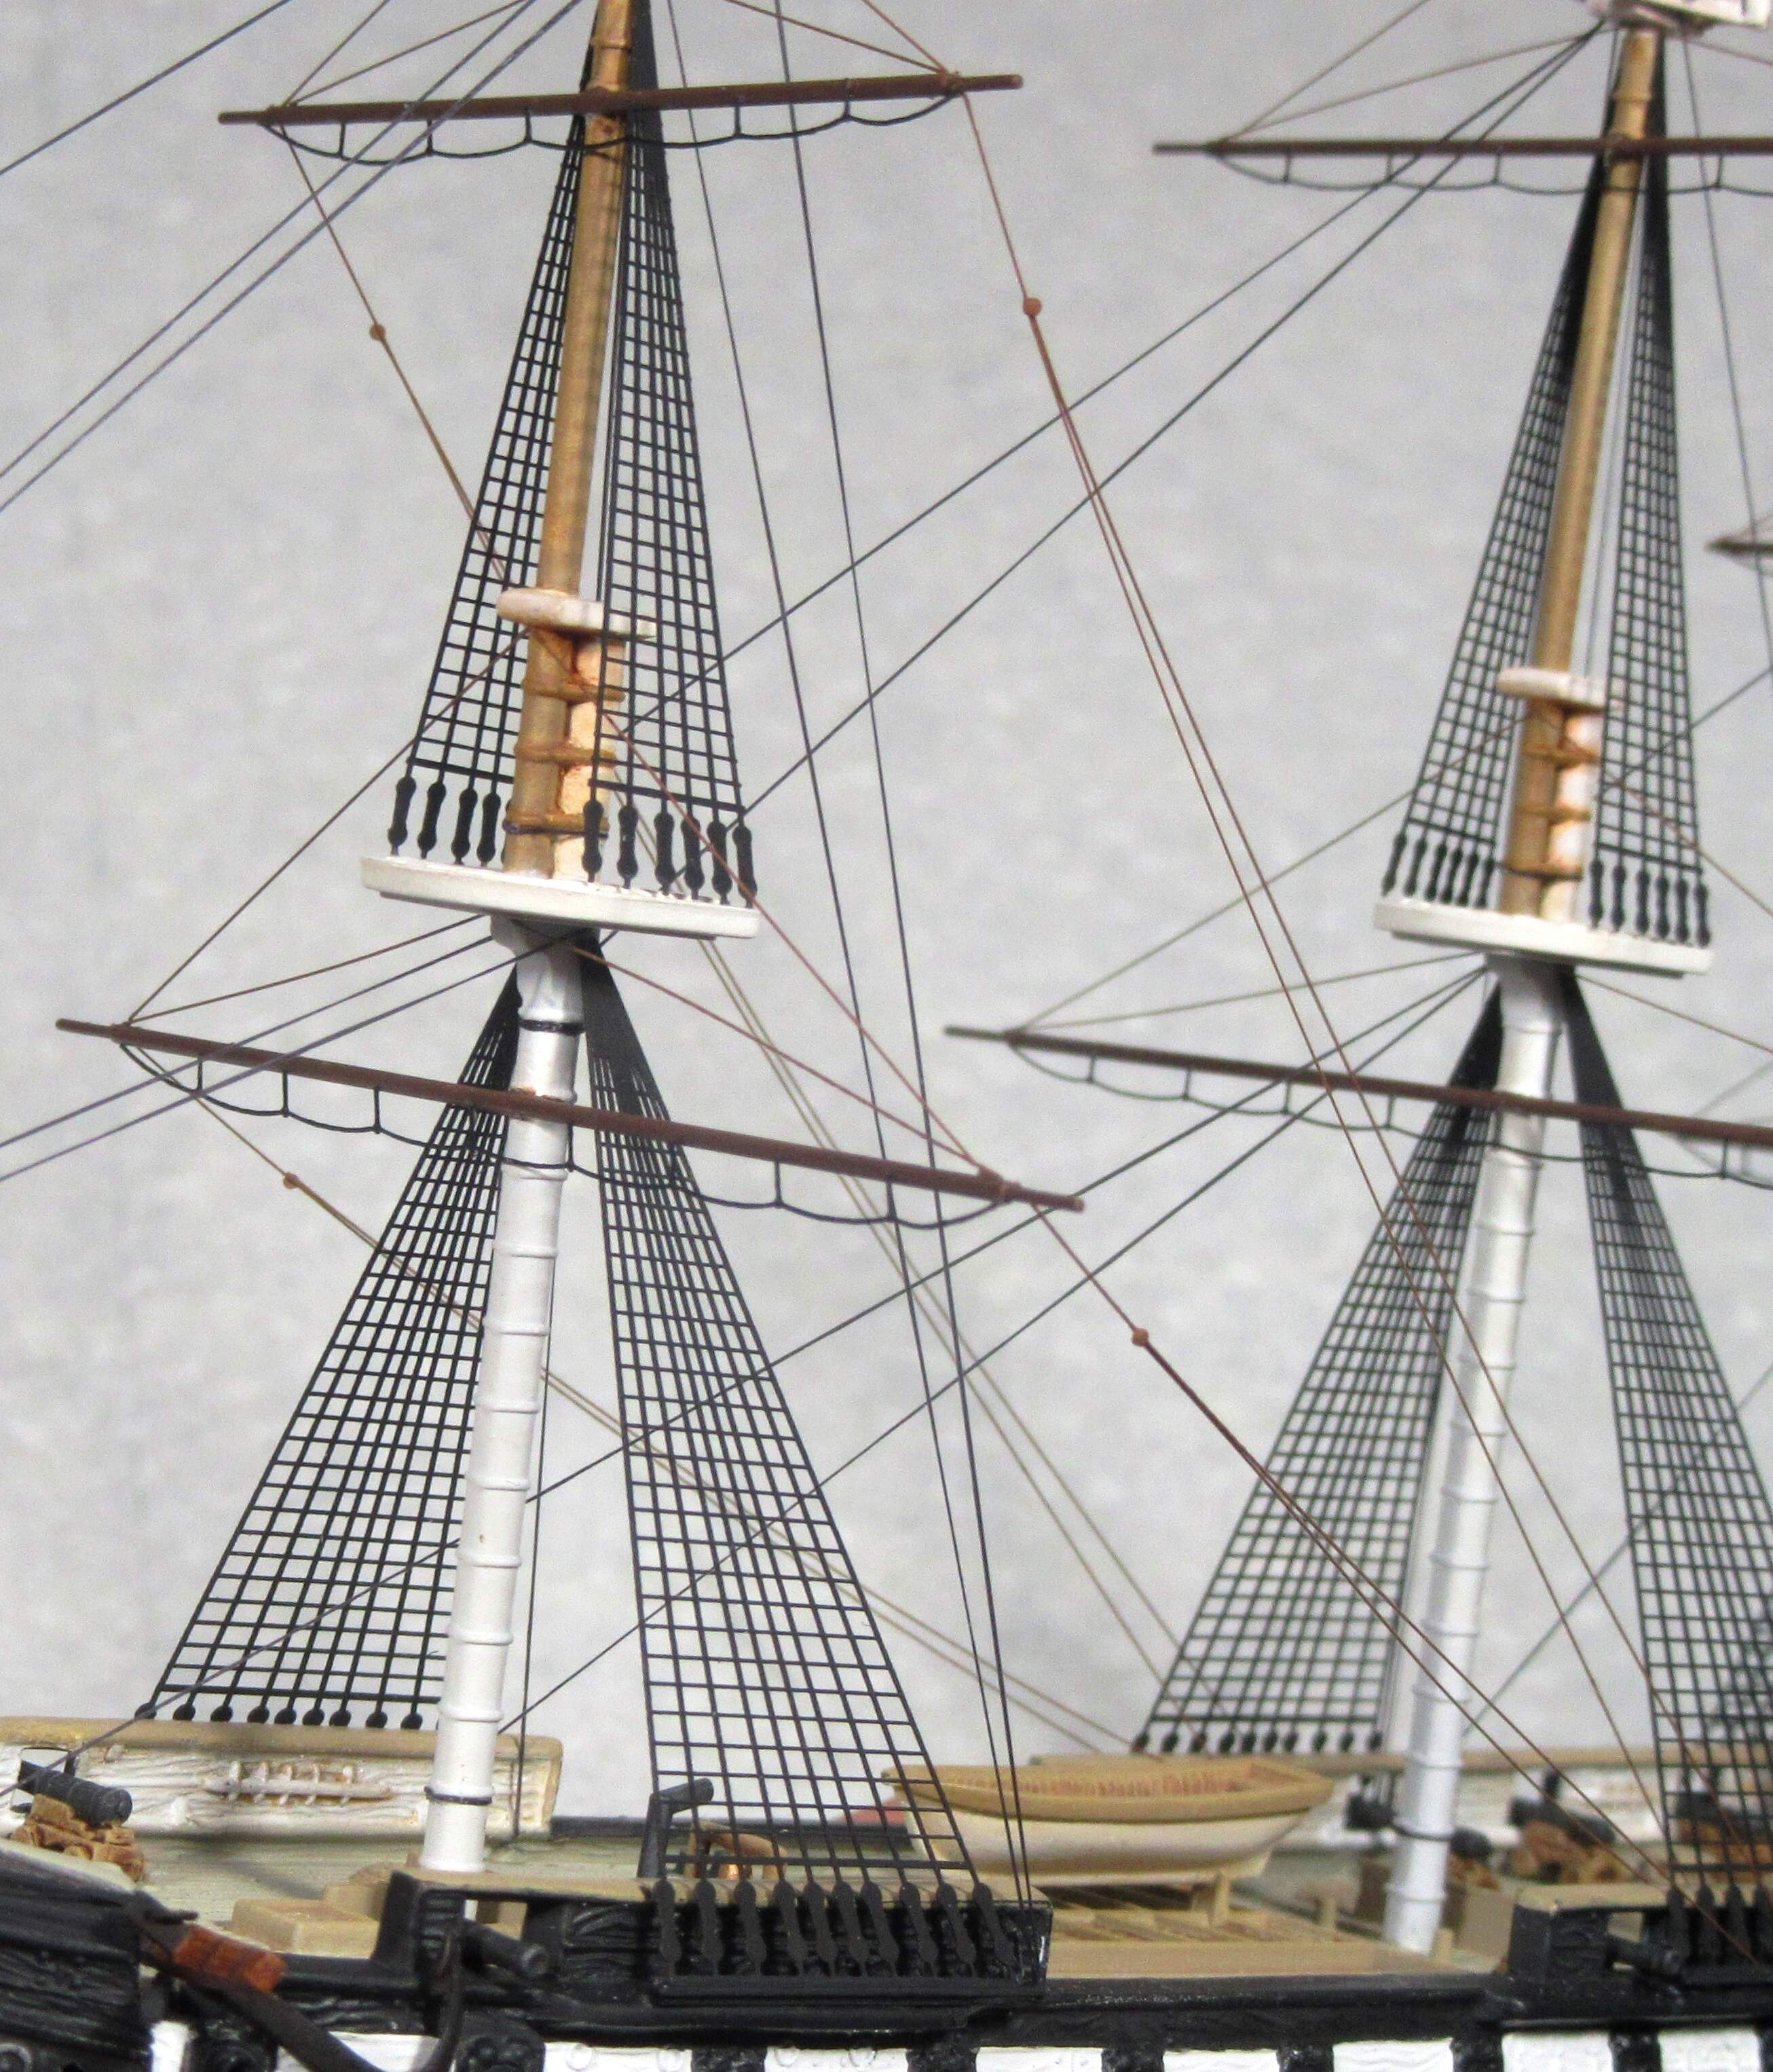
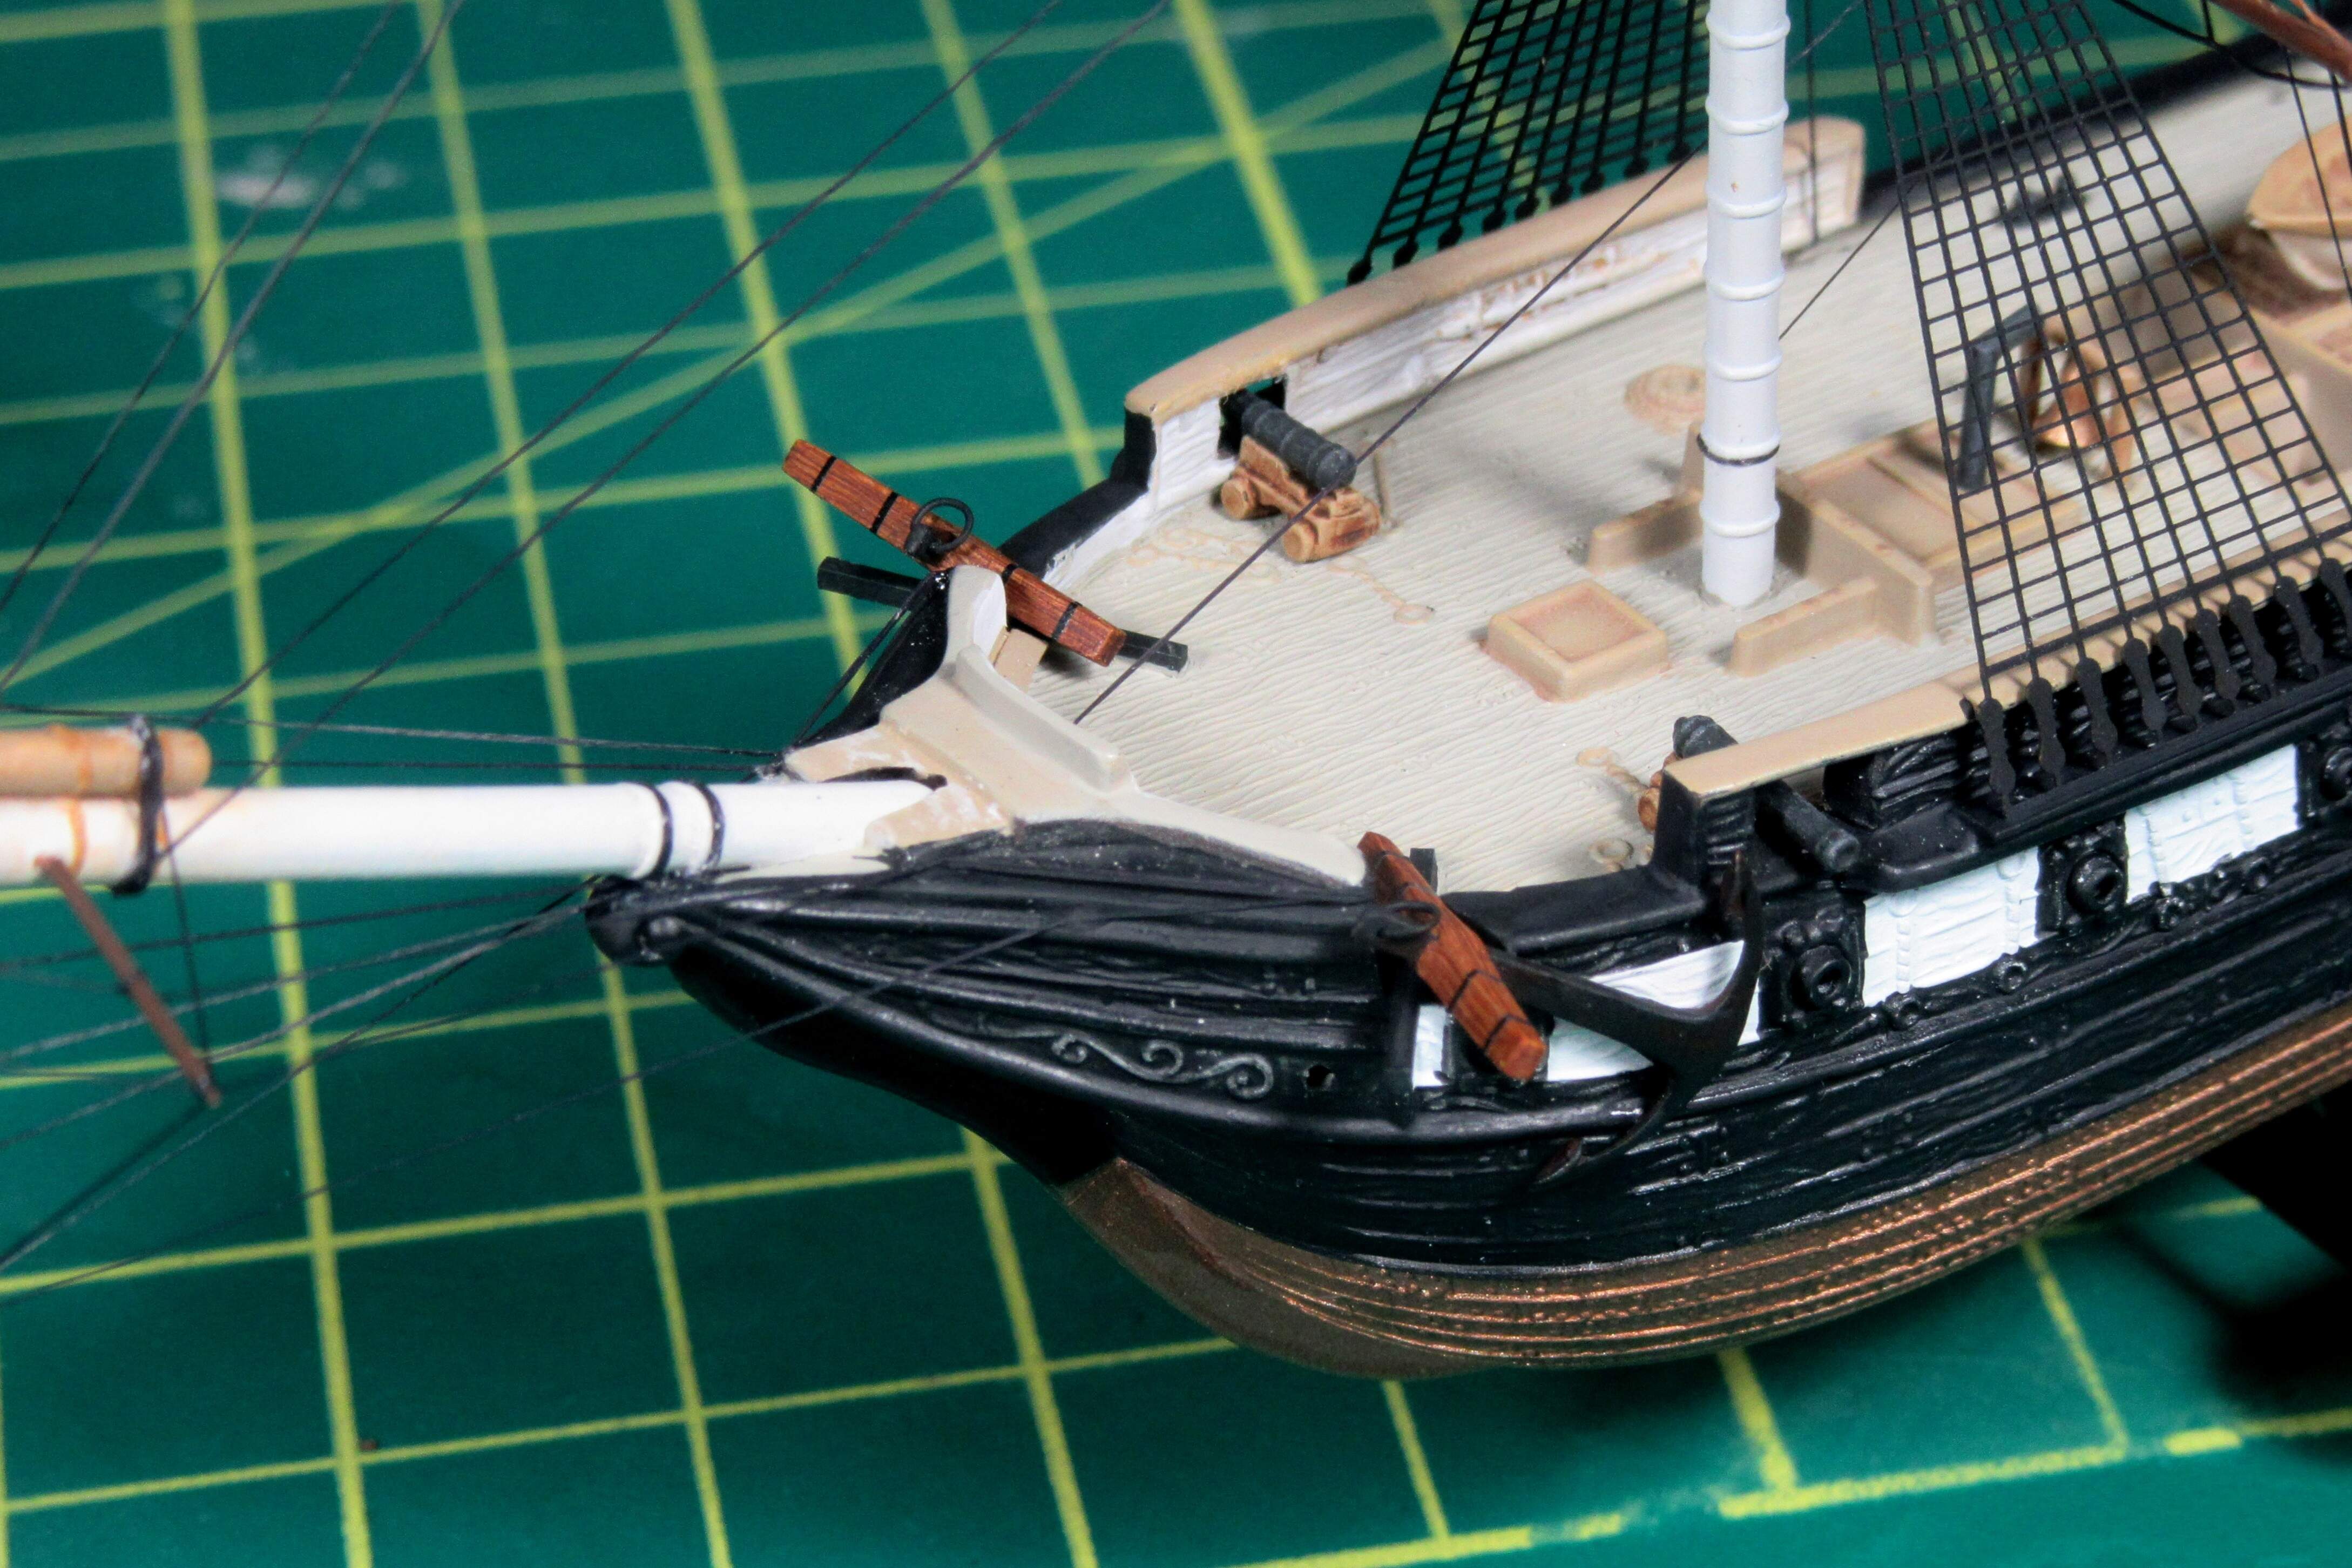
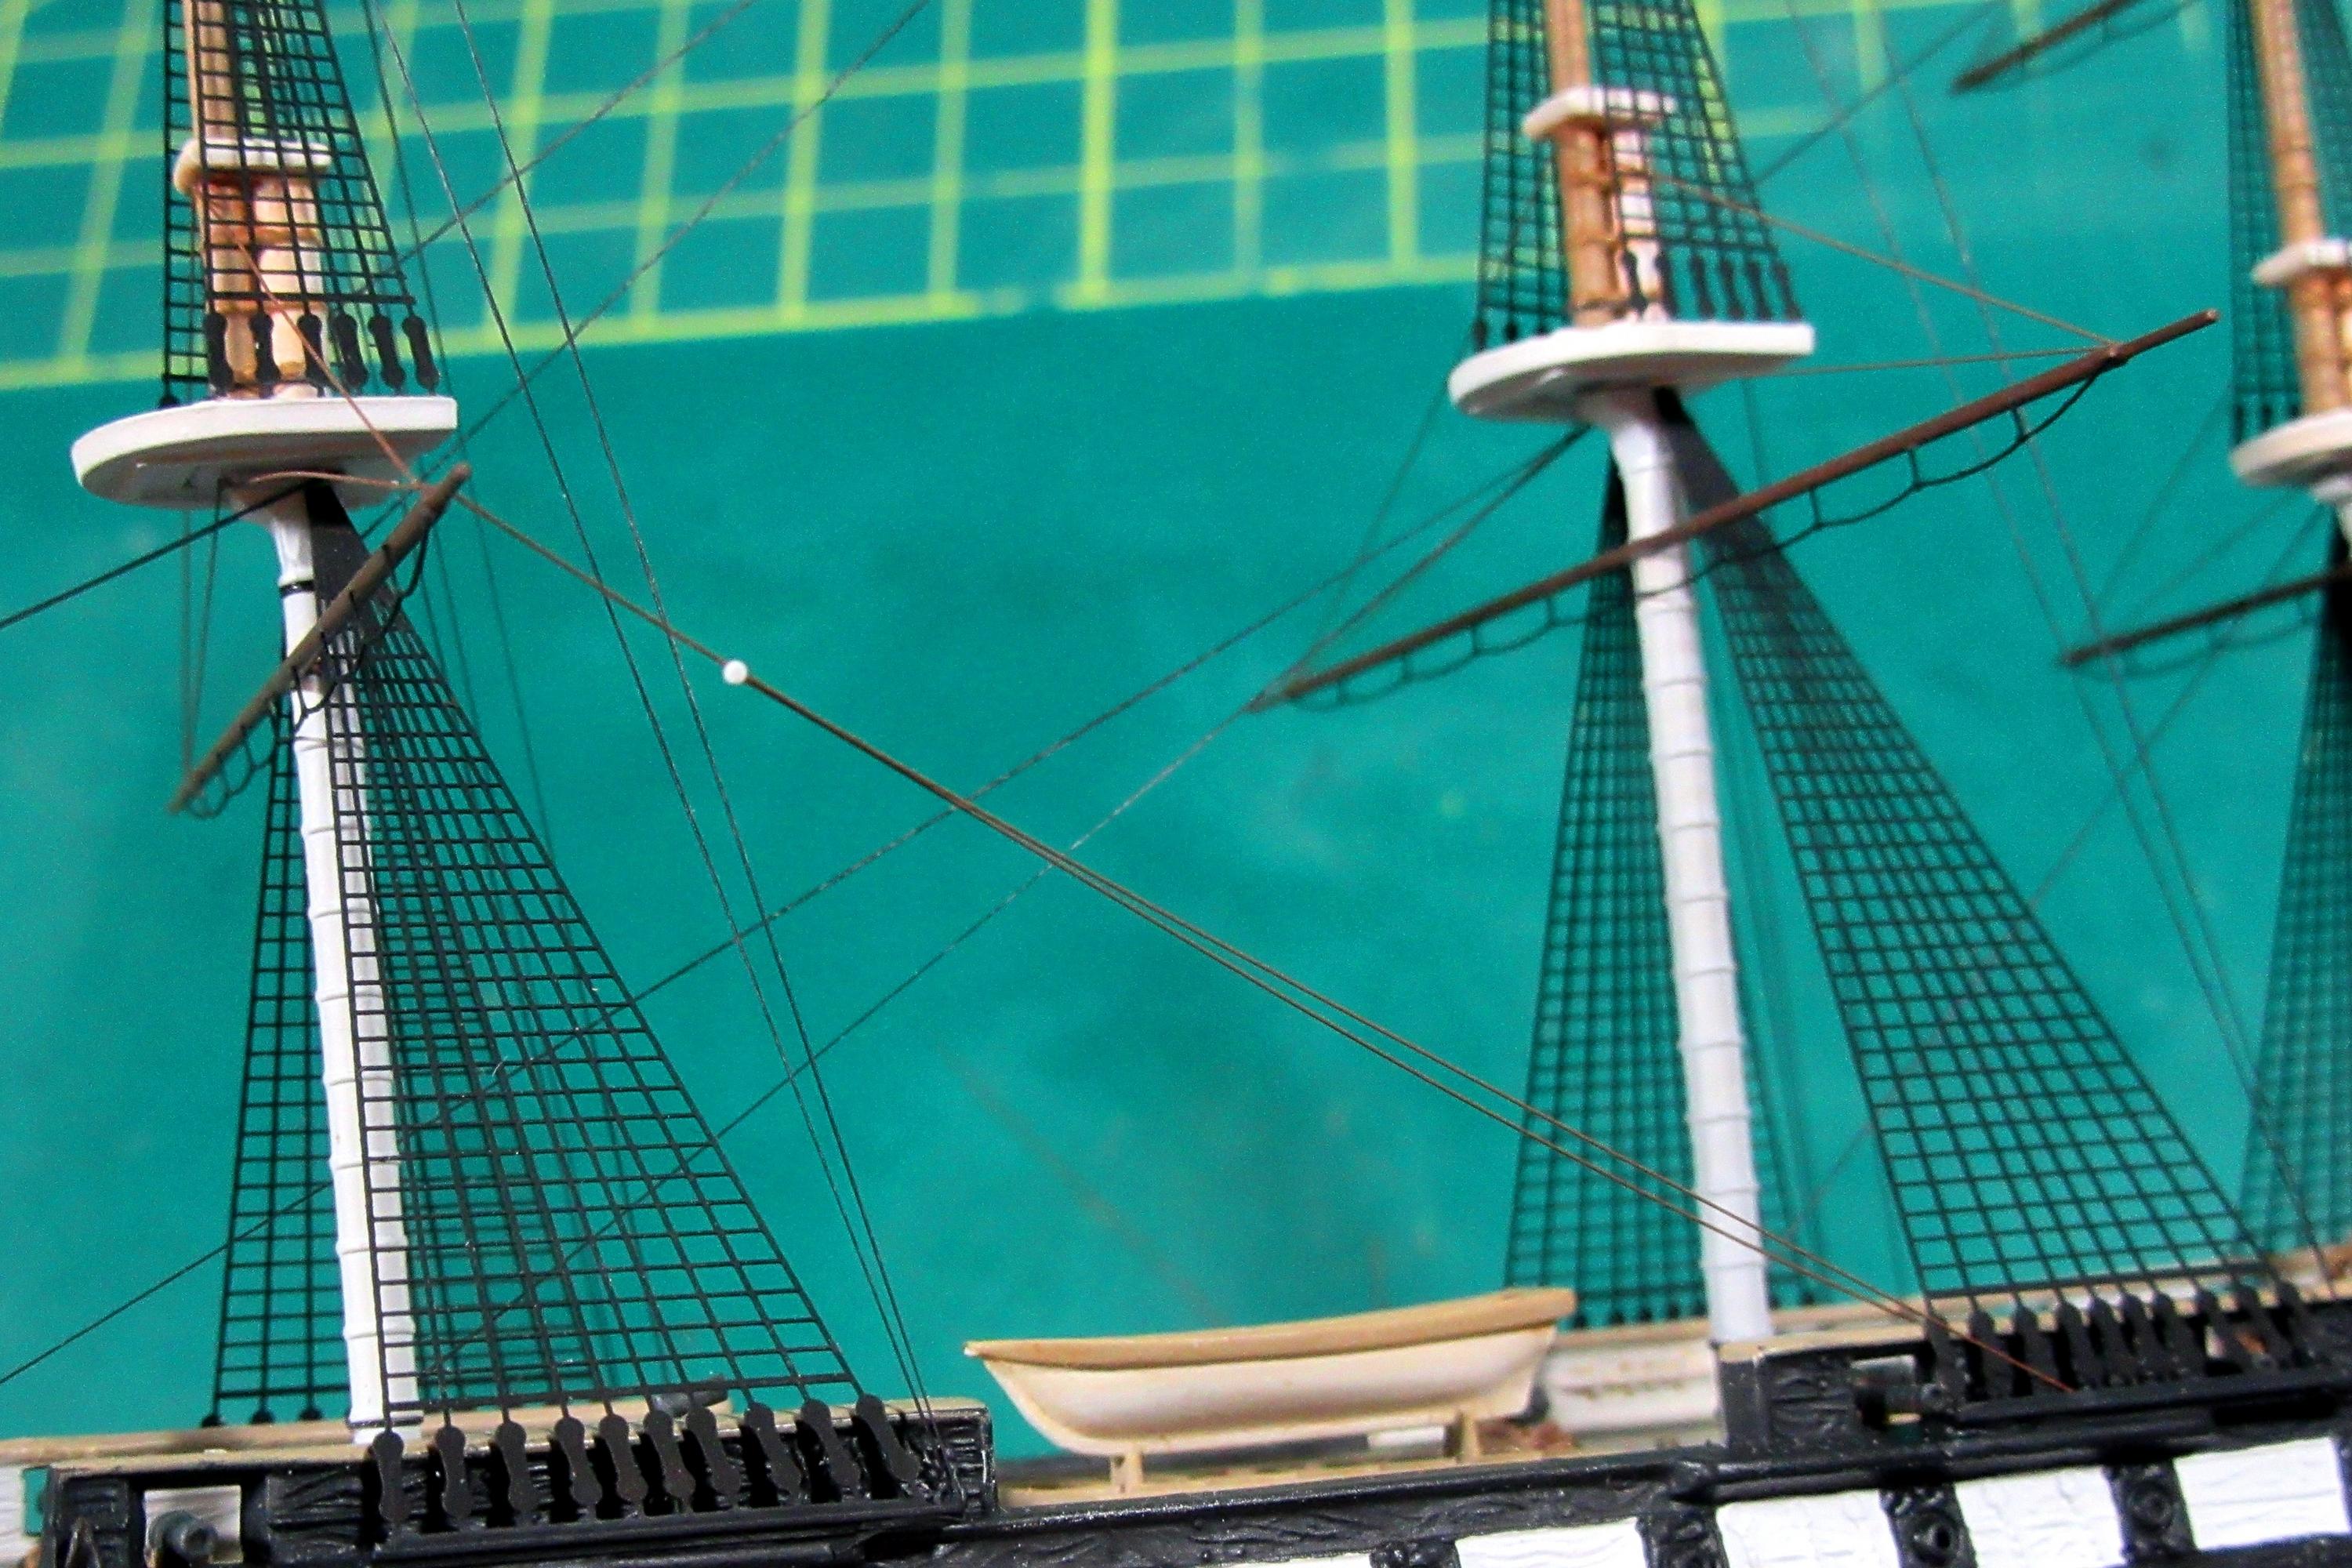
Before that, though, I found use for another etched brass part from the Toms Modelworks Olympia set; a small pulley which makes a great peak halliard for the mizzen gaff.
Then, using the copper wire, I also added another peak halliard, a topping lift for the mizzen boom, and vangs. The tiny blocks (pulleys) on the vangs are .023 inch discs punched from .010 inch plastic stock.
The brown-painted copper wire remains challenging to work with, but I do like that it is a little thinner, and the lighter color makes it stand out from the EZ Line used for the standing rigging.
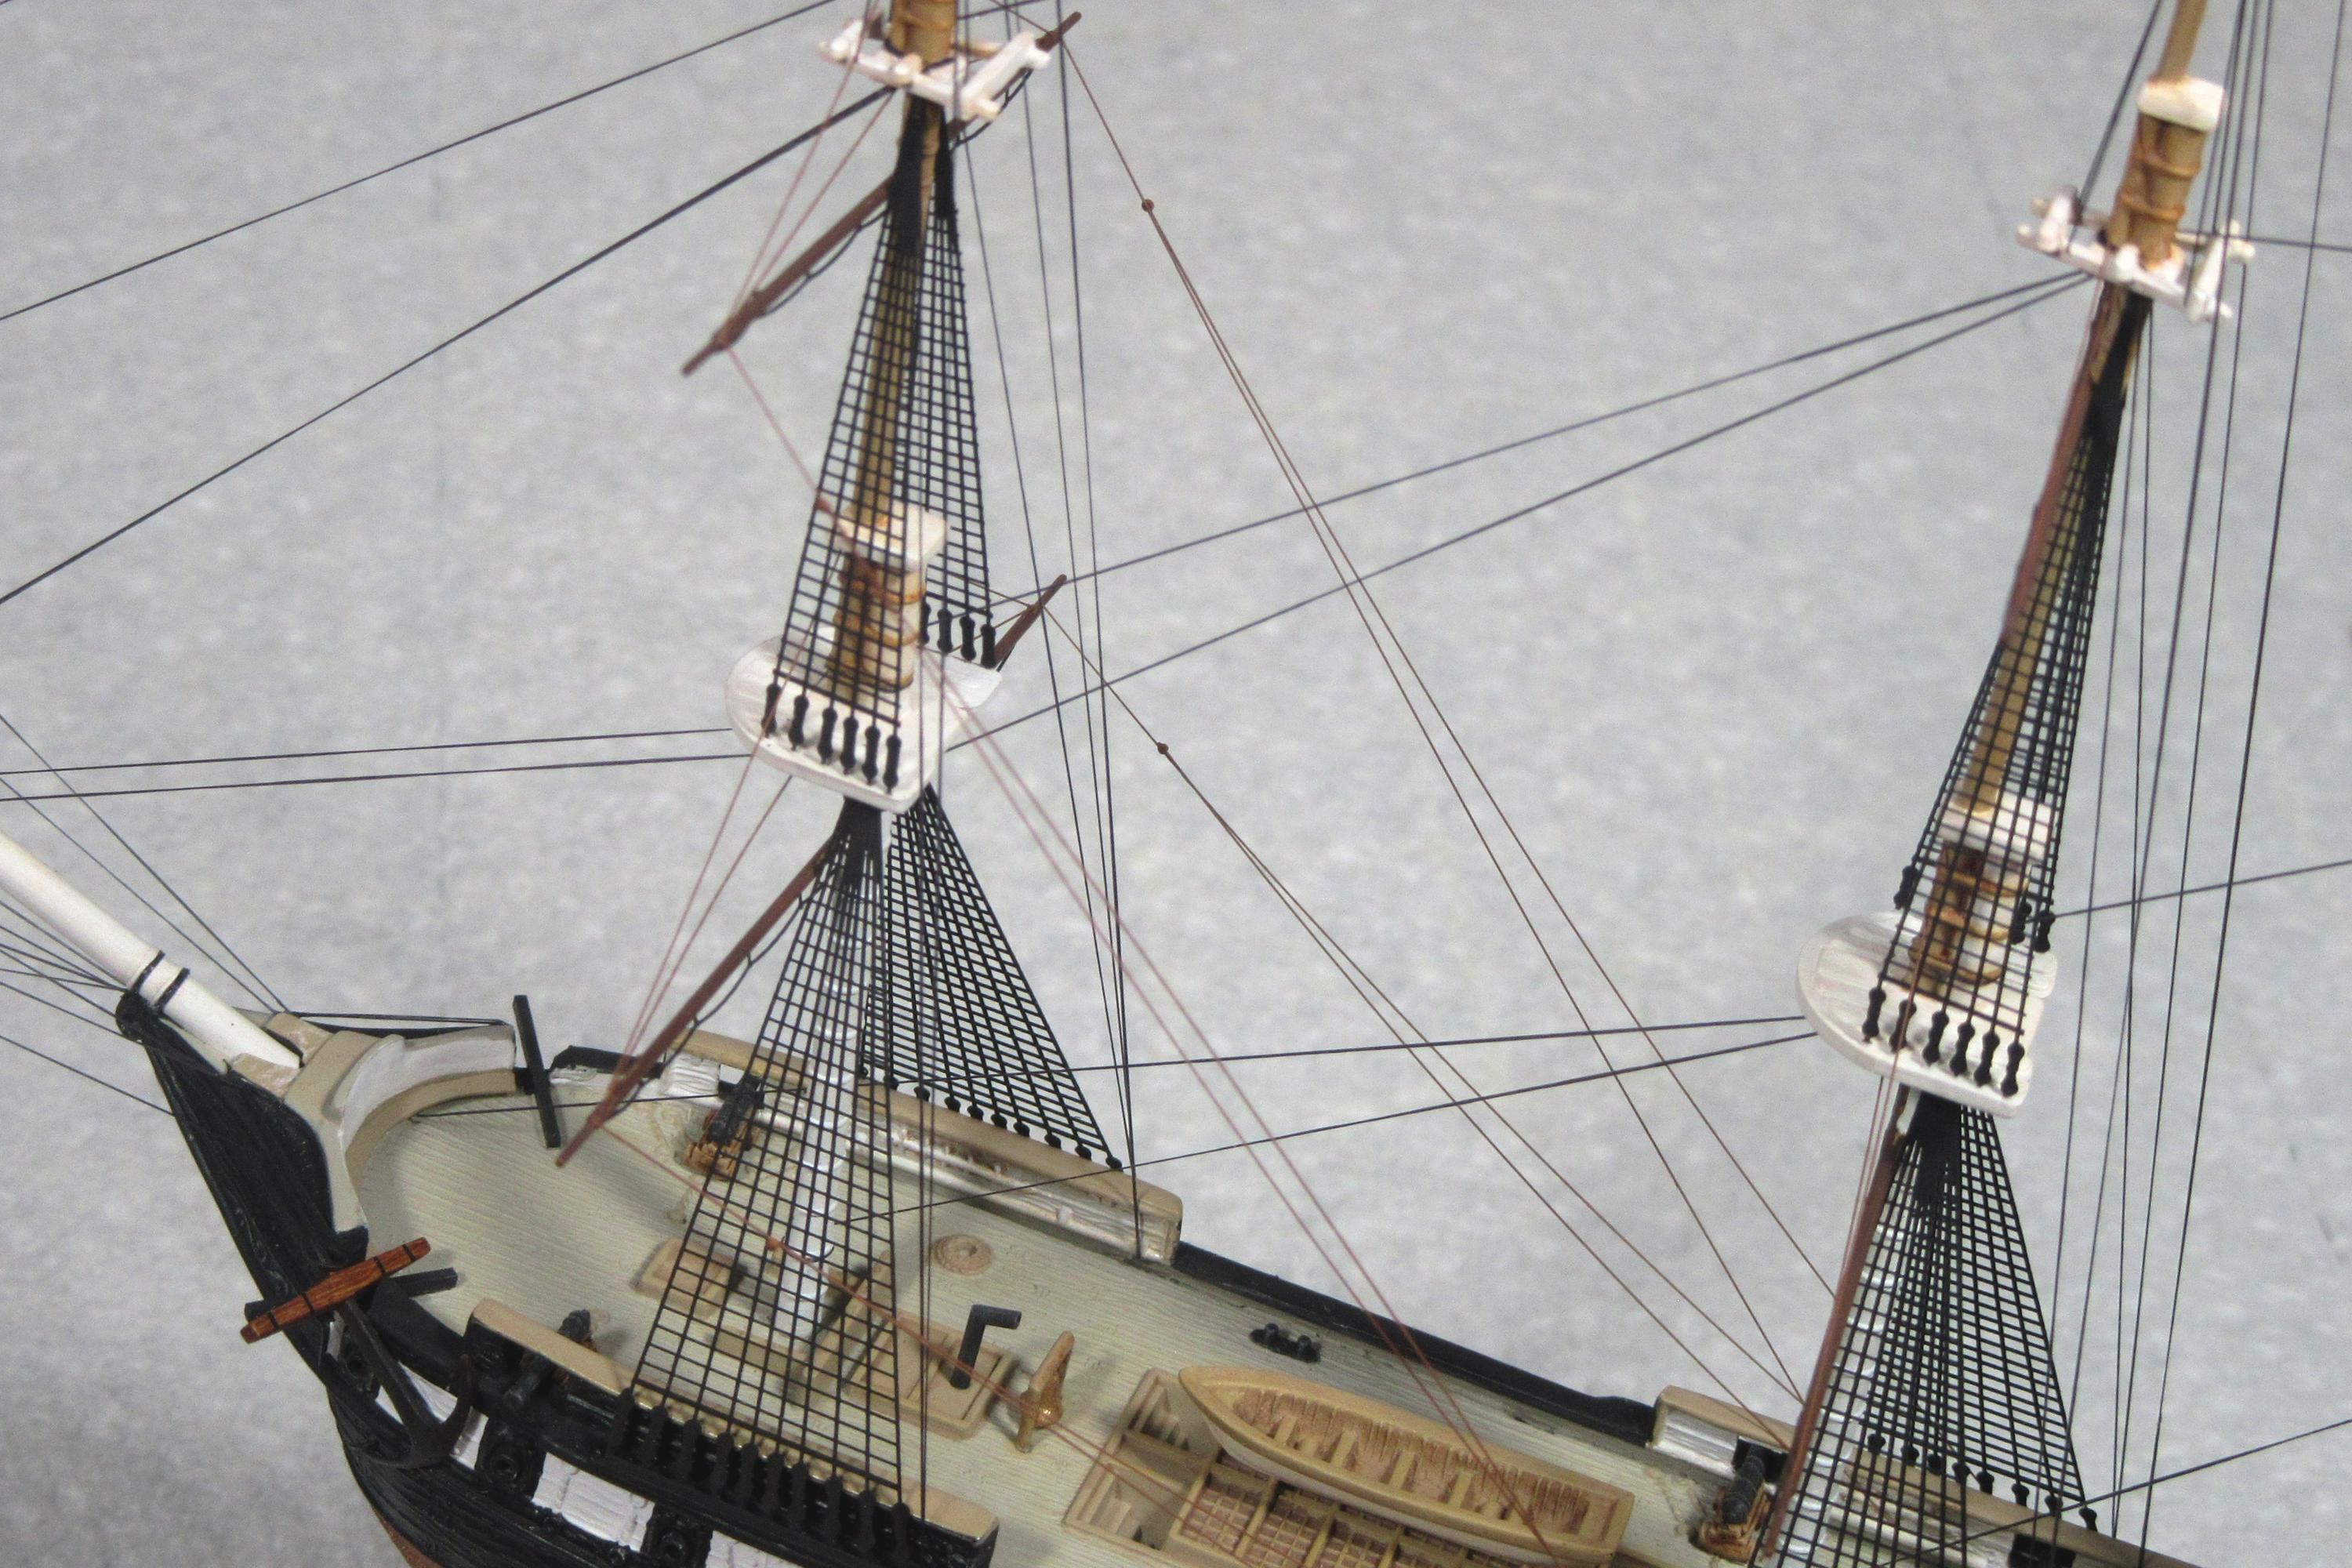
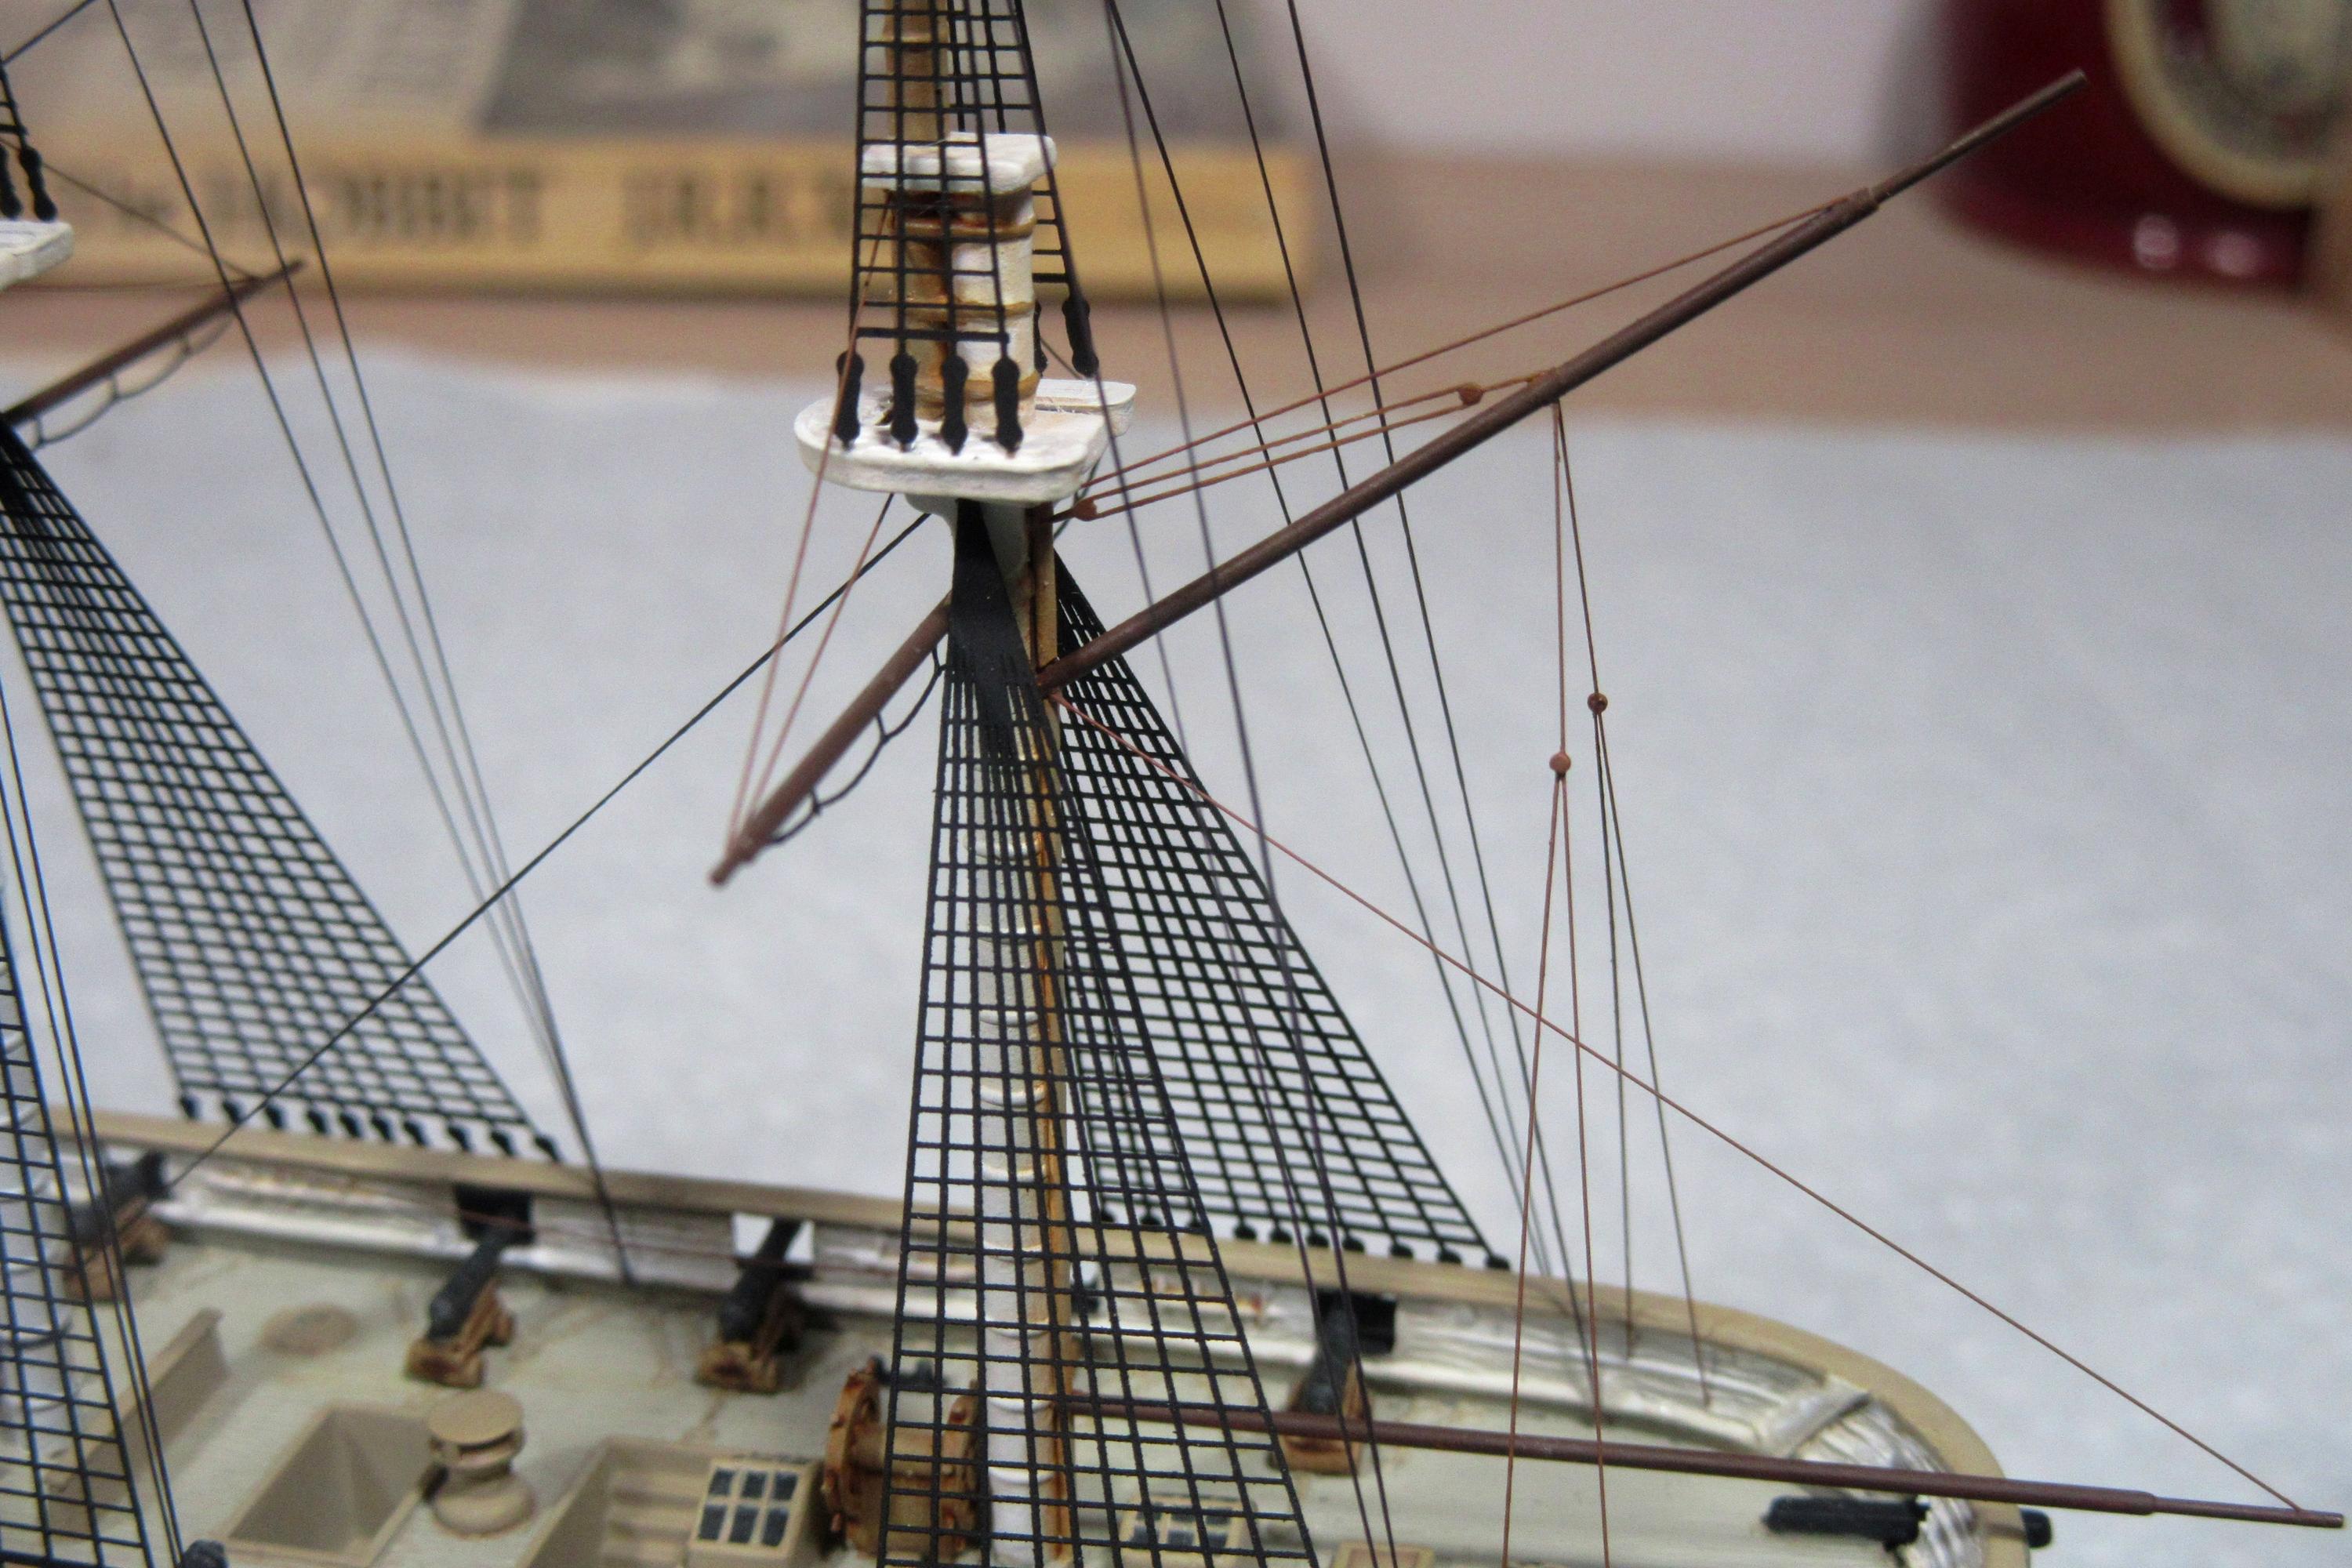
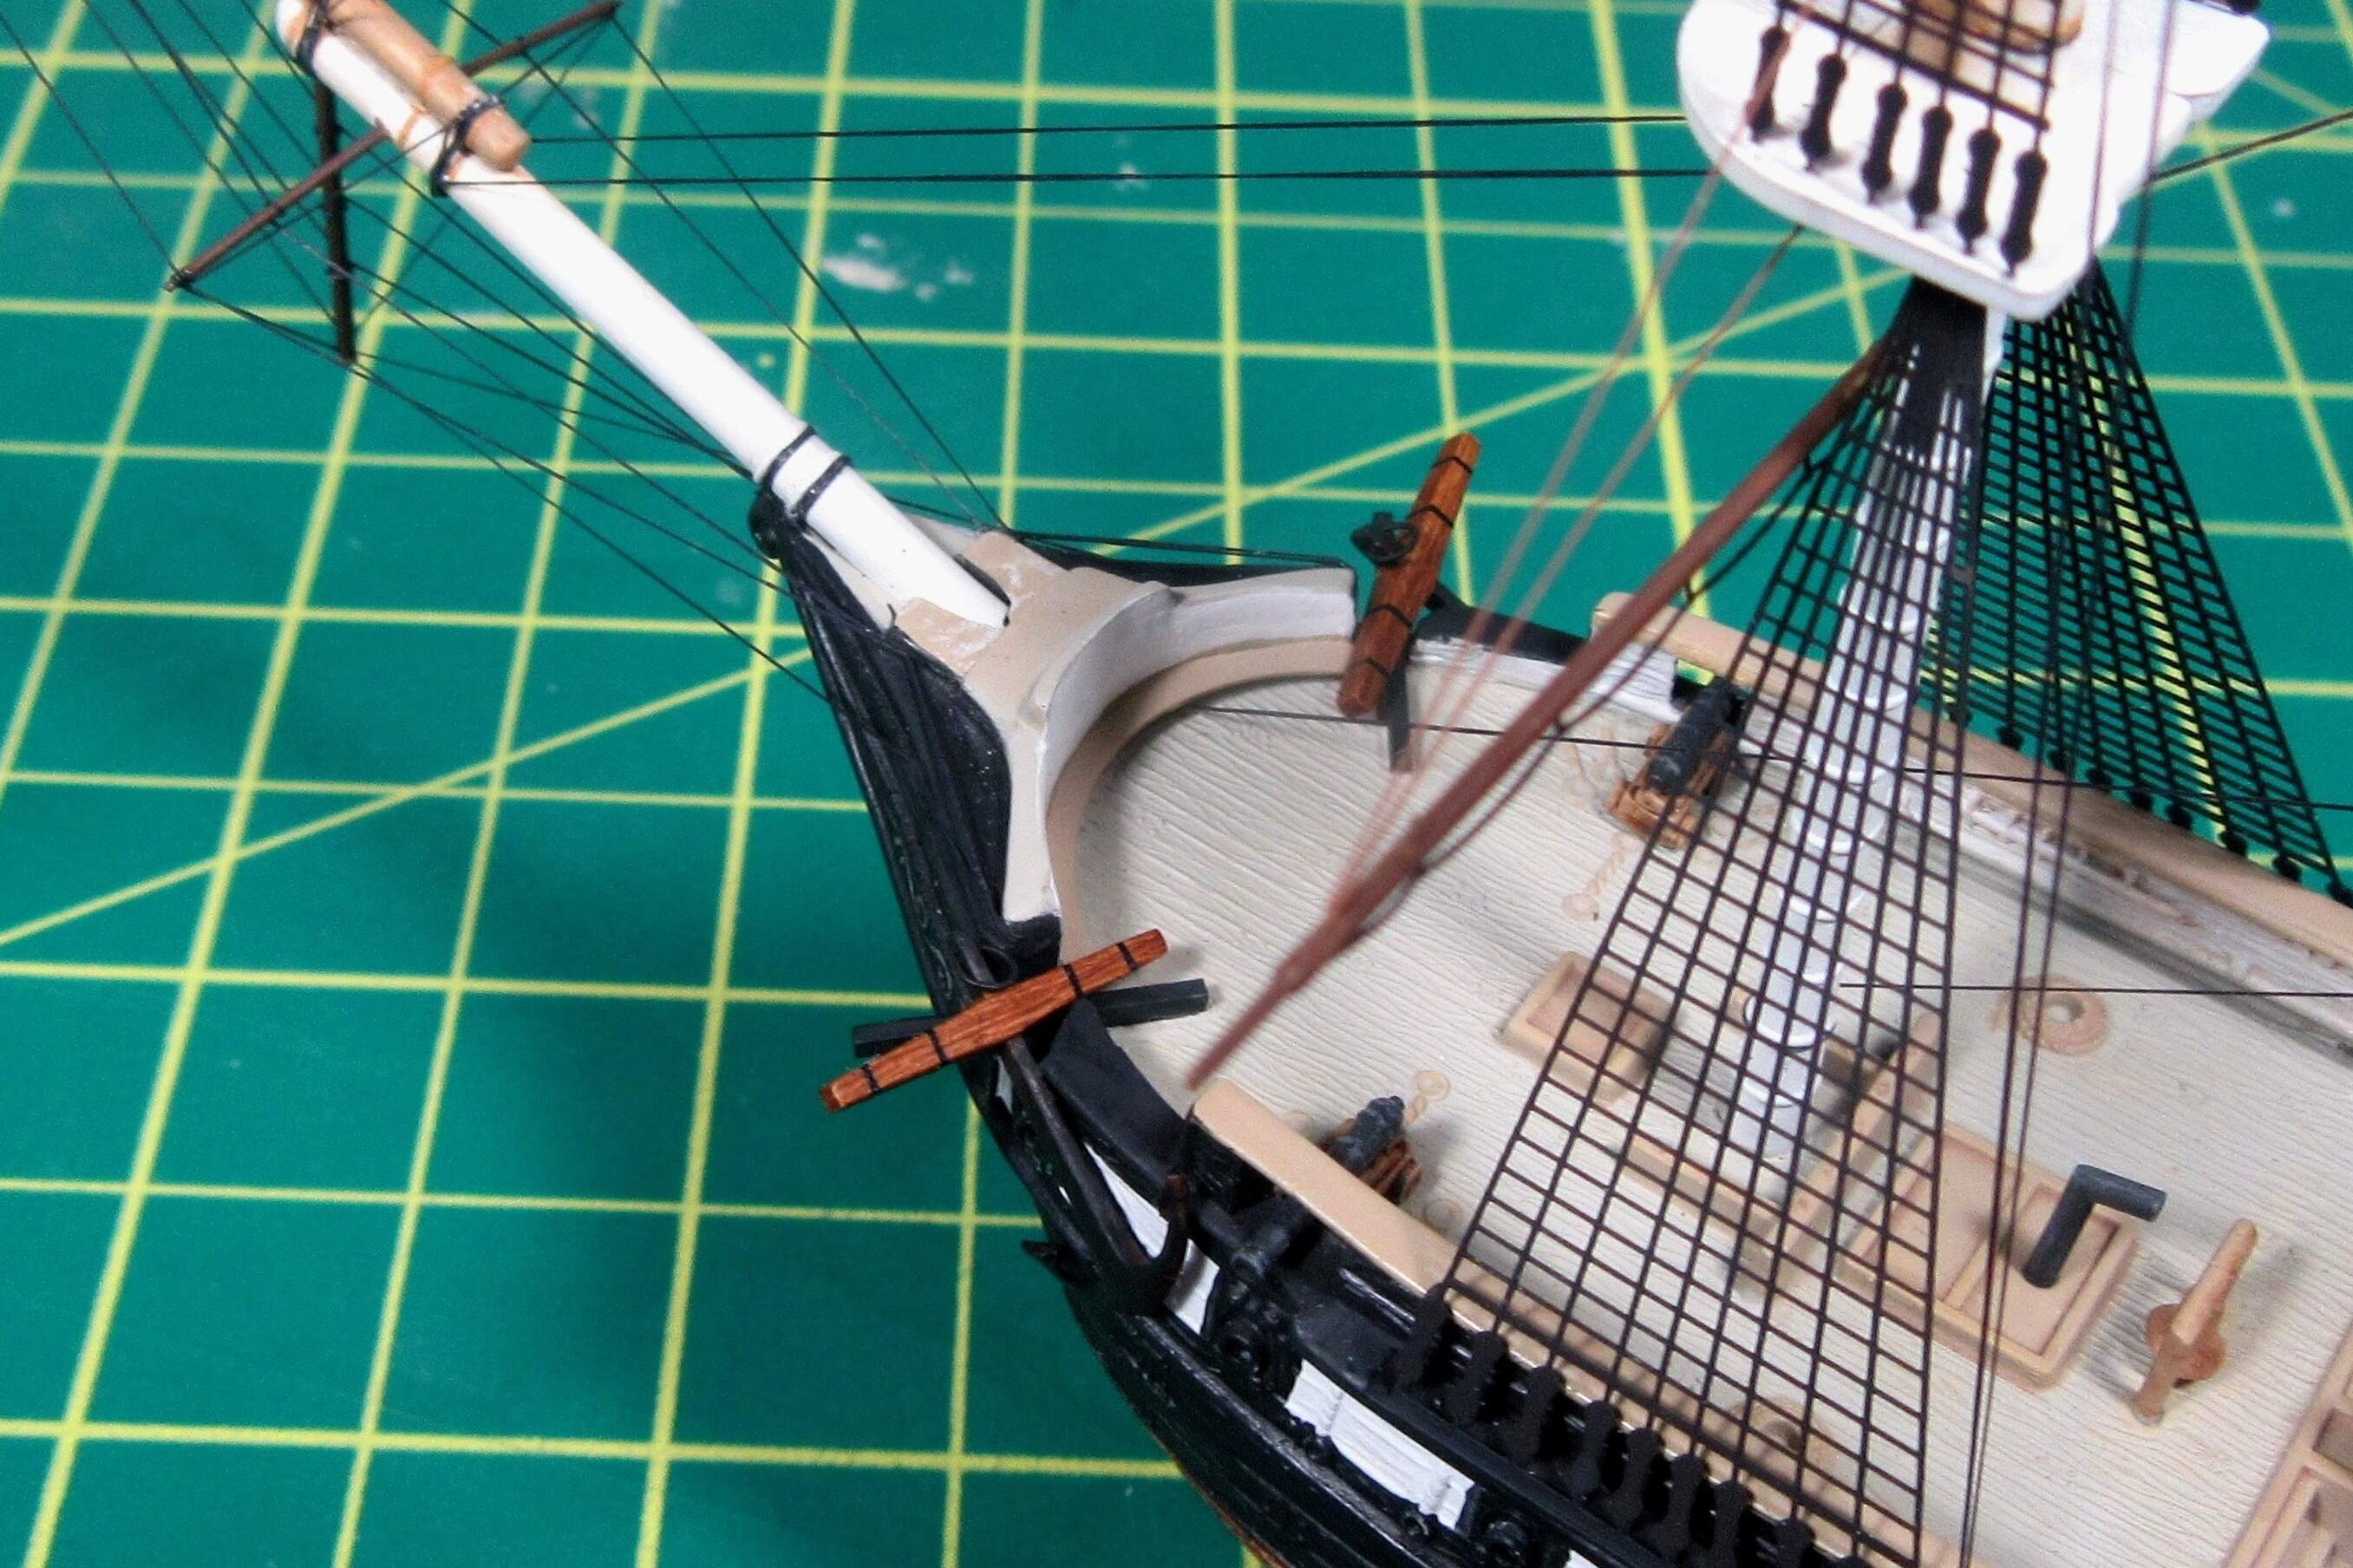
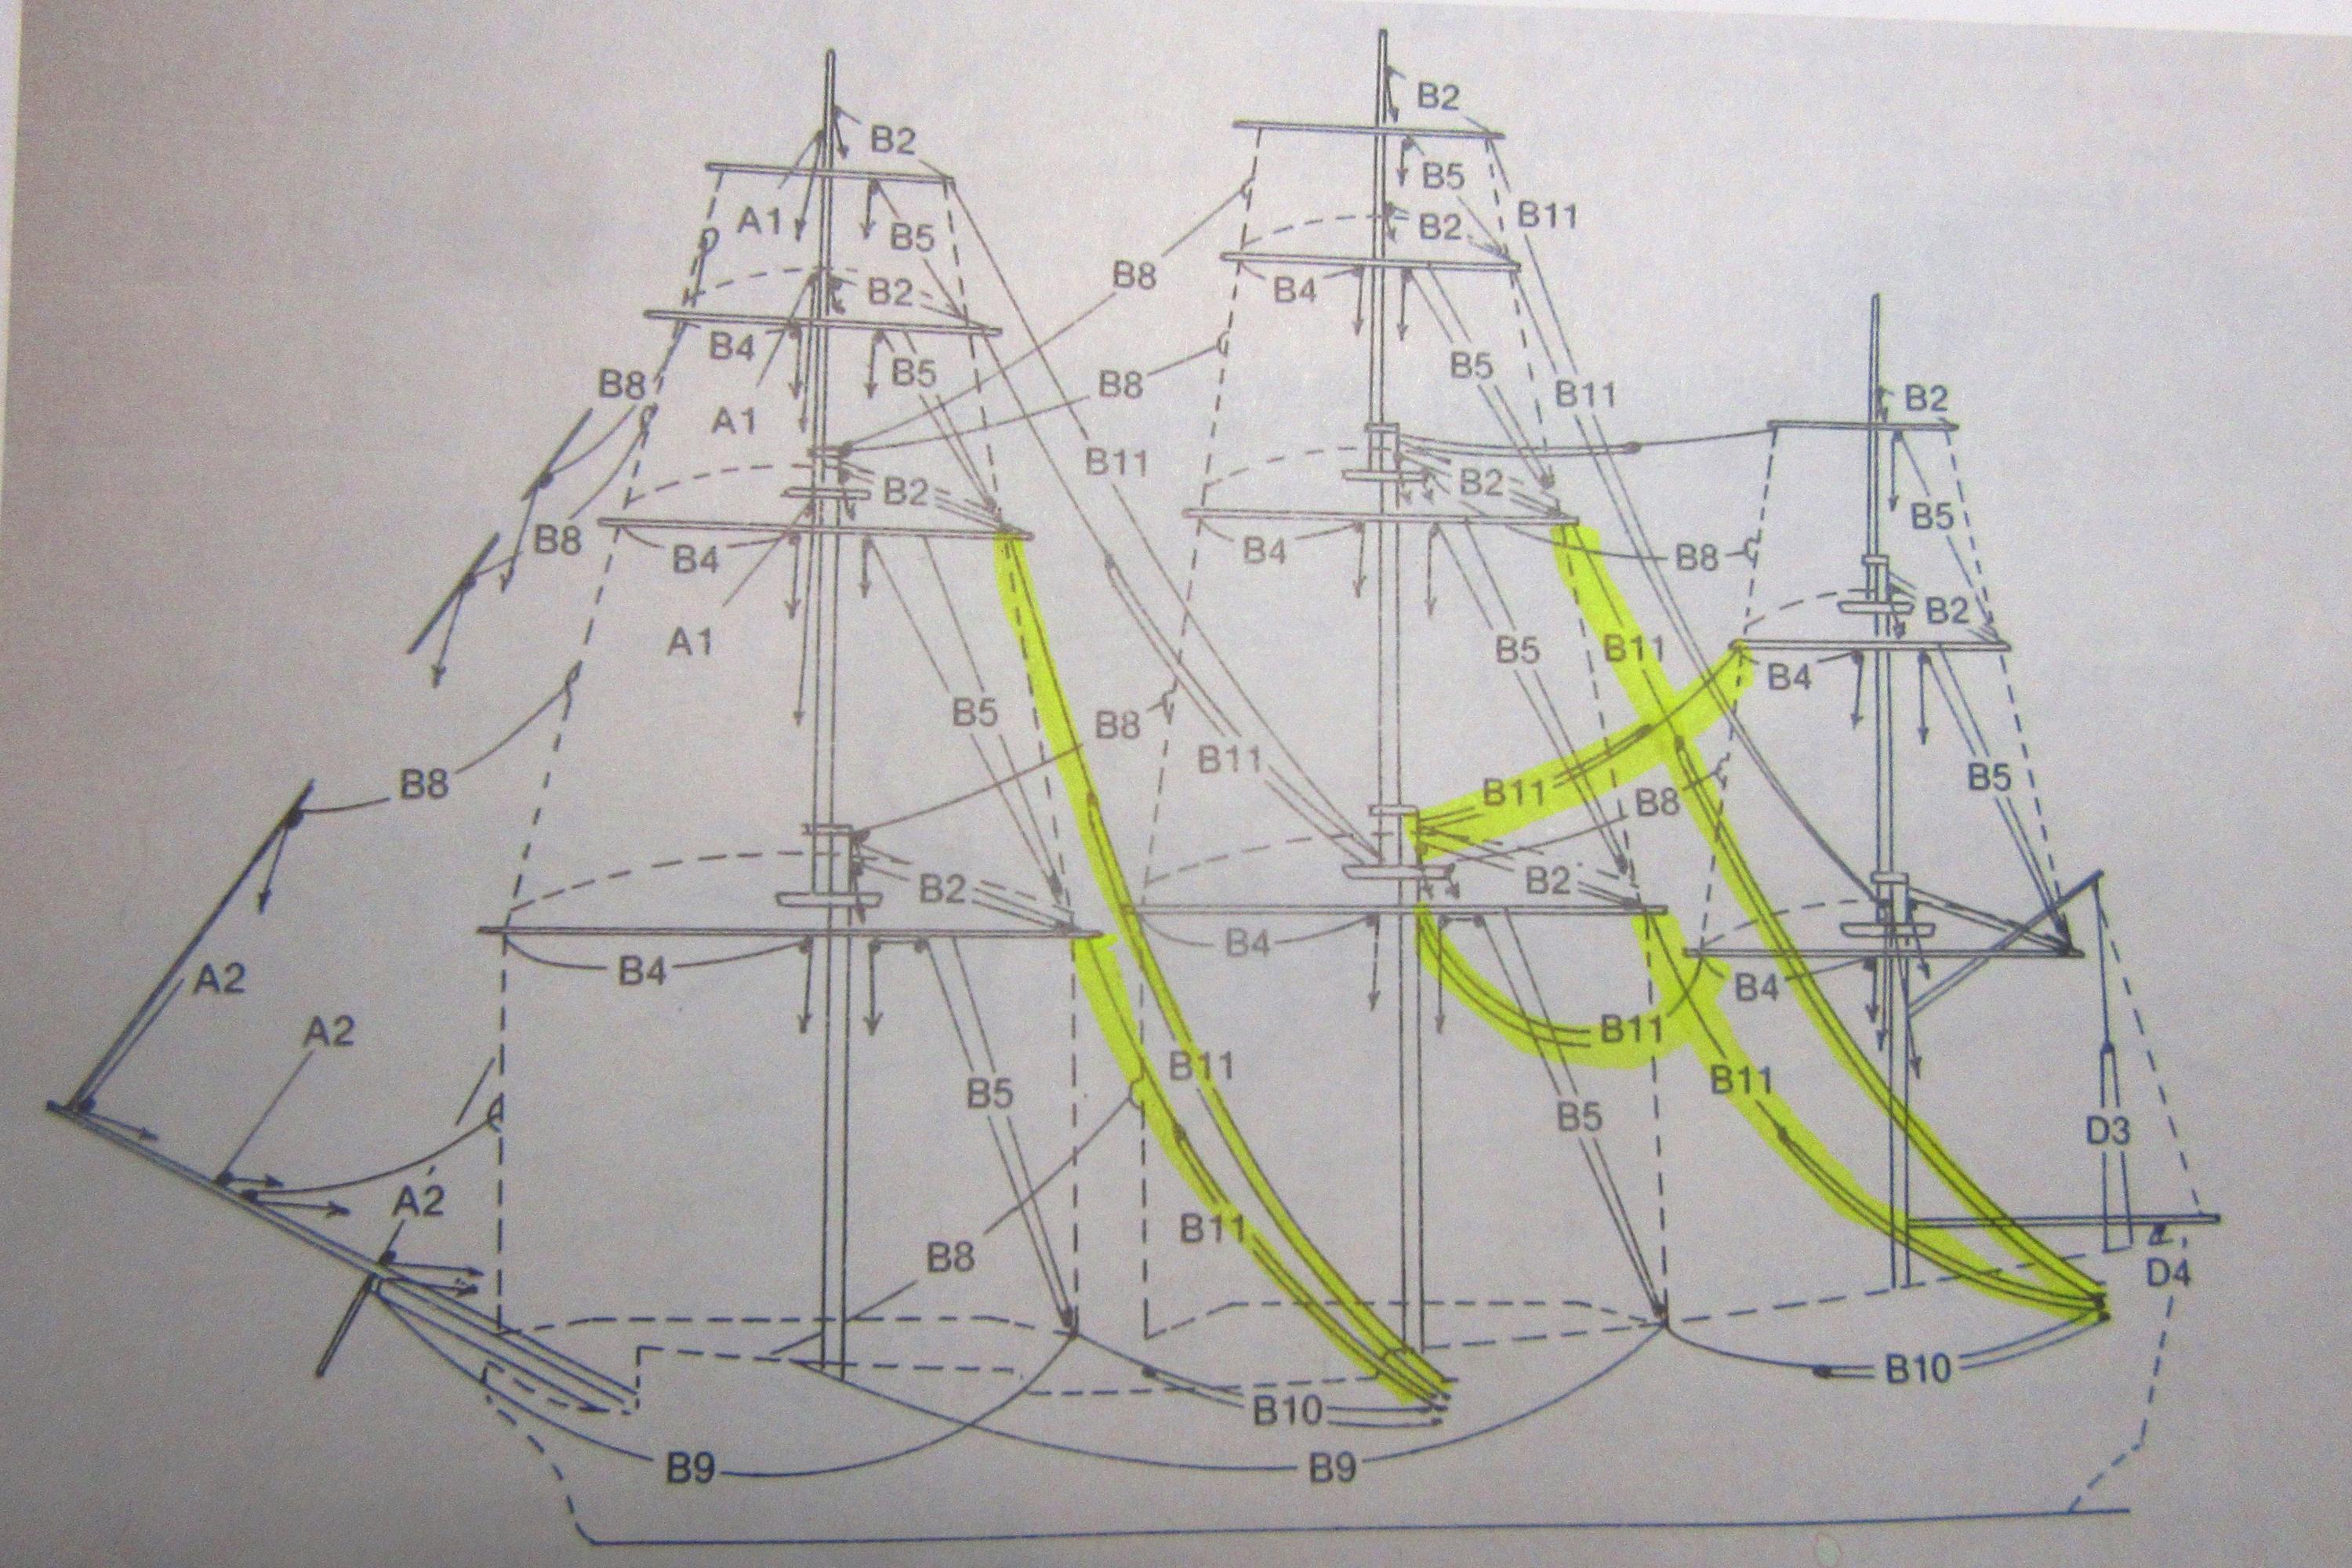
For a ship in laid up condition (i.e., in port for more than a short period of time) the sails and most of the running rigging would not be present, but the Constellation museum display has many of these lines permanently in place. I’ll add the braces, highlighted in yellow, for interest. Braces on square-rigged ships were the lines used to rotate a yard around the mast to allow the ship to sail at different angles to the wind.
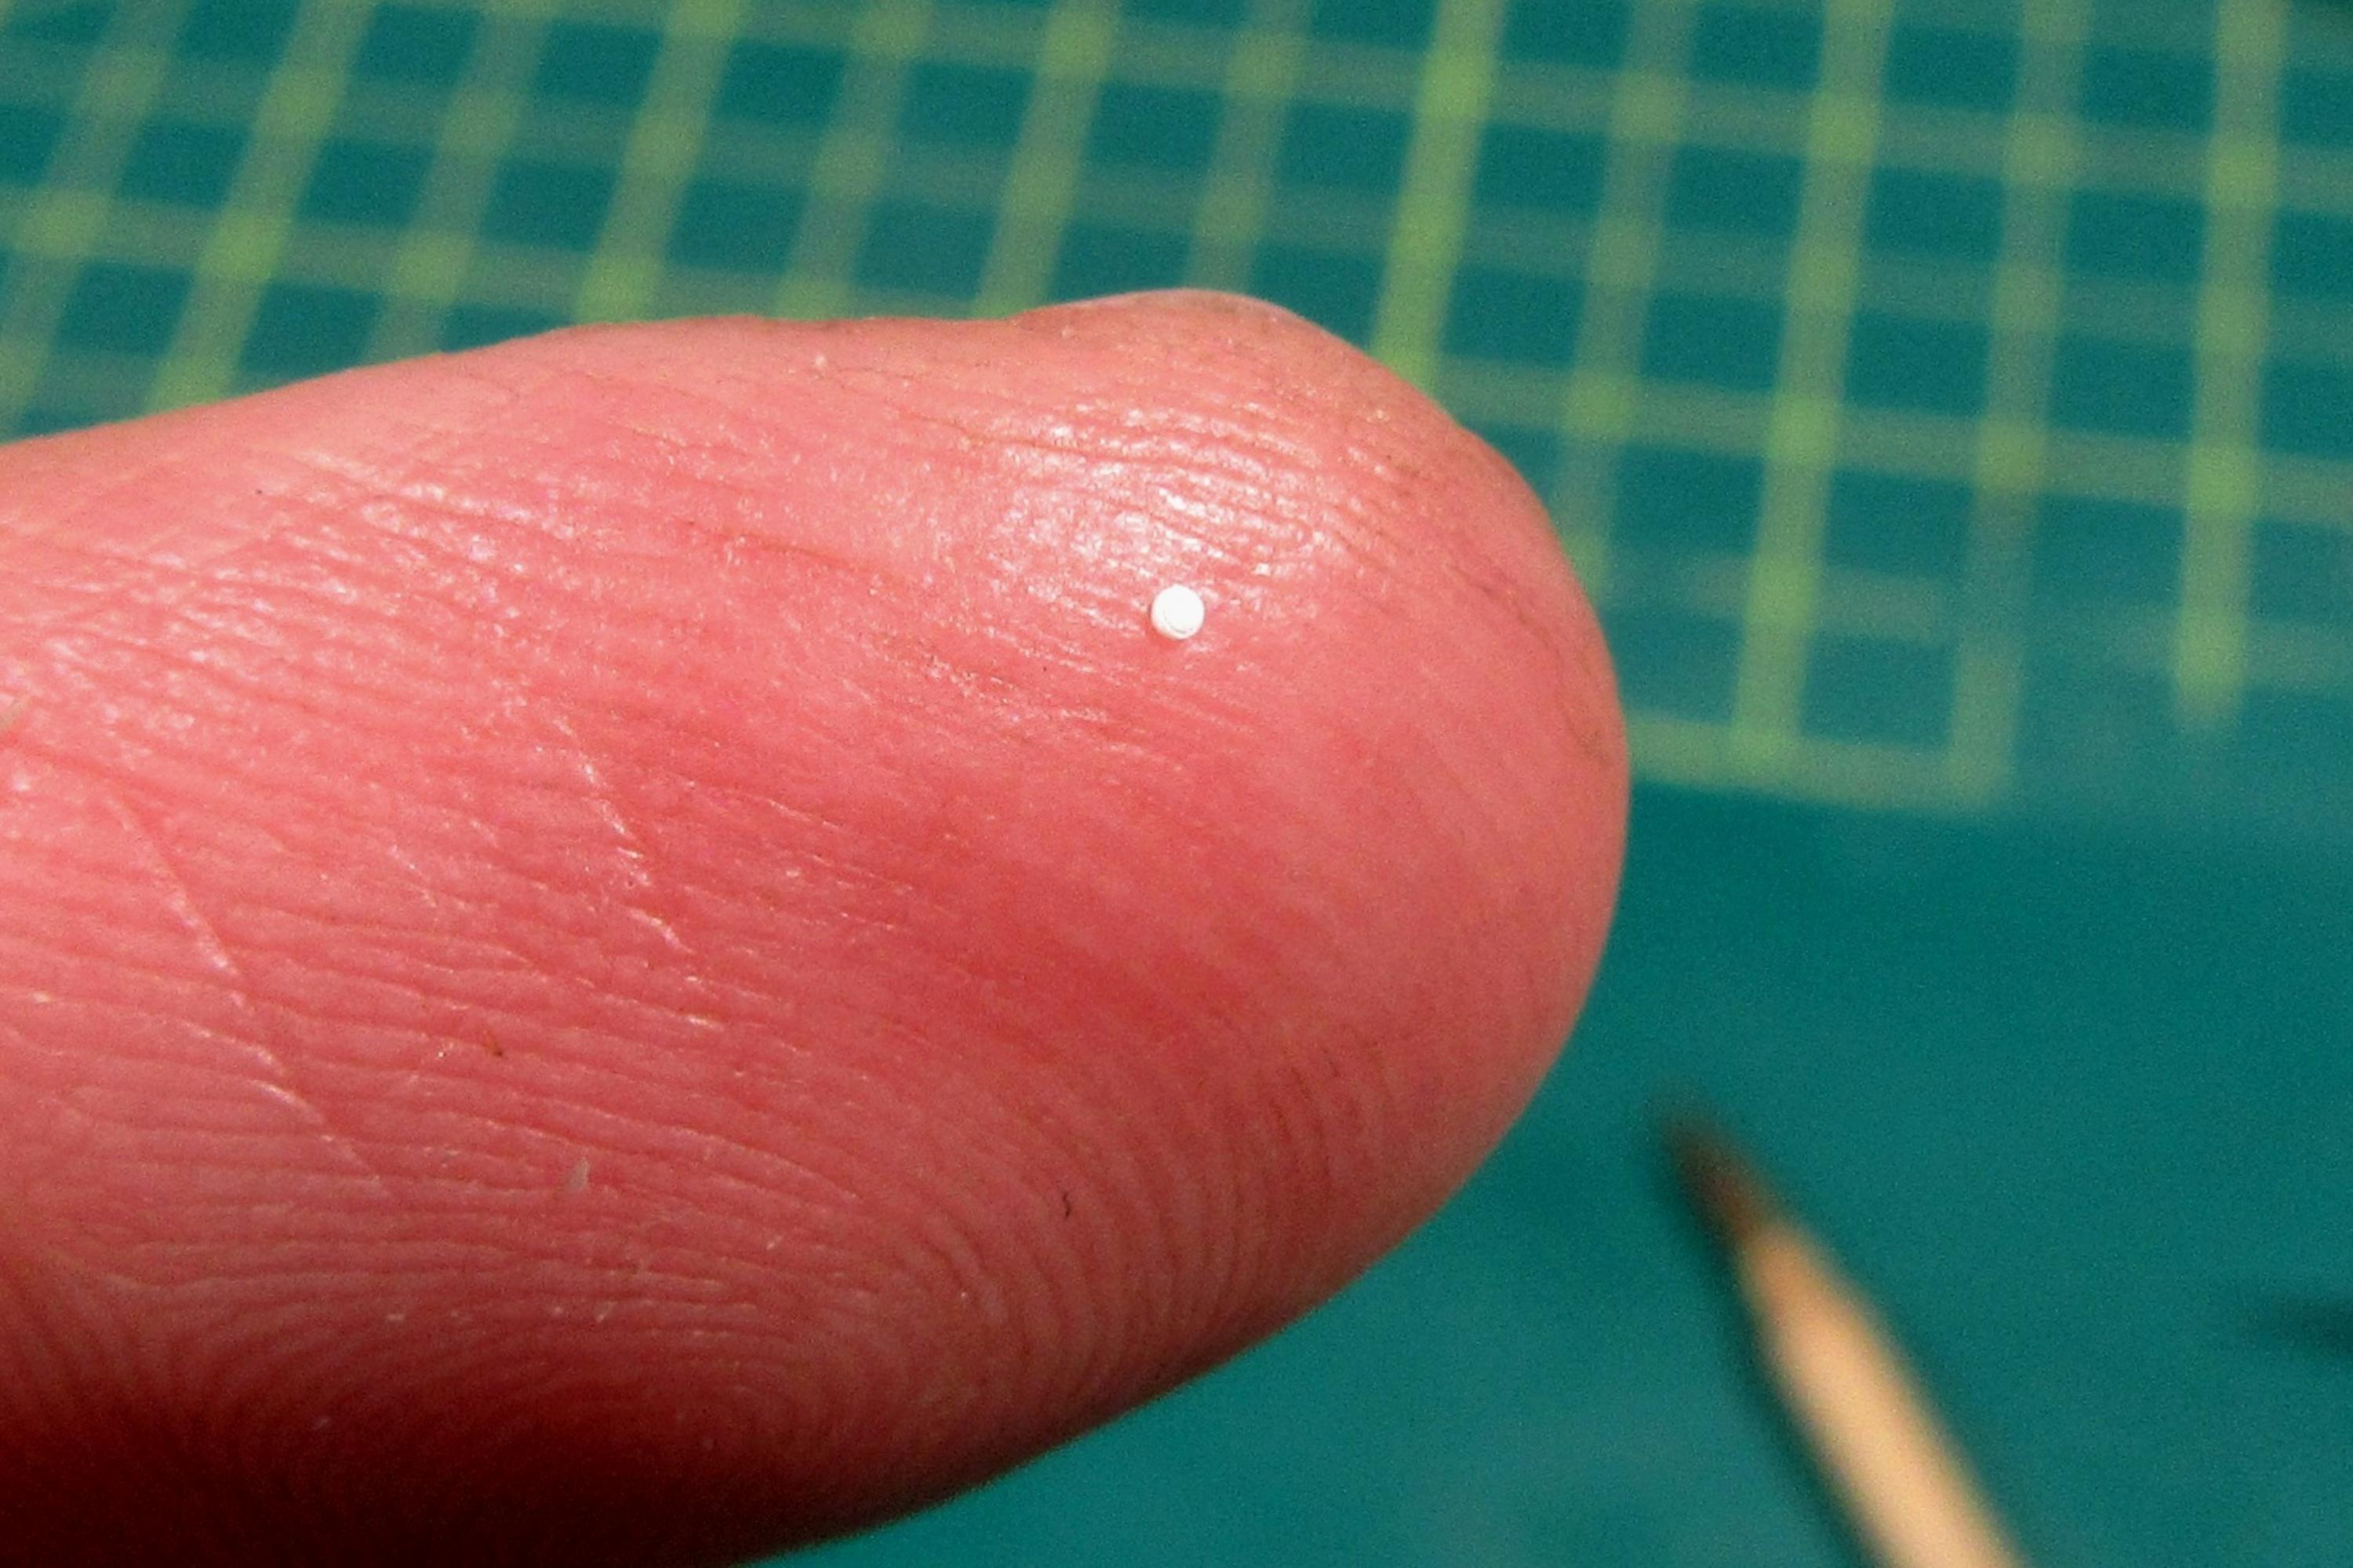
The real braces consisted of a line passing back through a block (pulley) connected to a “pennant” line attached to the yard. To recreate this I connected a single line from the yard to the hull, and then added a shorter second line from the hull to the place on the first line where the block would have been. The connecting point of the lines was then covered with a plastic disk to represent the block.
I made the tiny block from a .023 inch disc punched from .010 inch thick plastic stock. The white plastic “wooden” block will be painted brown when I touch up the pre-painted lines.
Well,Tim, you almost had me motivated to take a looks at building one of the sailing ships in the stash. But it passed, the 1/450 Revell Spanish Galleon was missing the stern, so that’s not gonna work. OK, check out the 1/196 Revell USS Constitution. Hmm parts still in bags, two sheets of vacuformed sails, somemonster rat lines, two bobbins of threads for rigging, even some silver thread (anchor chains?). Assembly instructions, rigging instructions all there. No painting instructions. Well, got over that impulse.
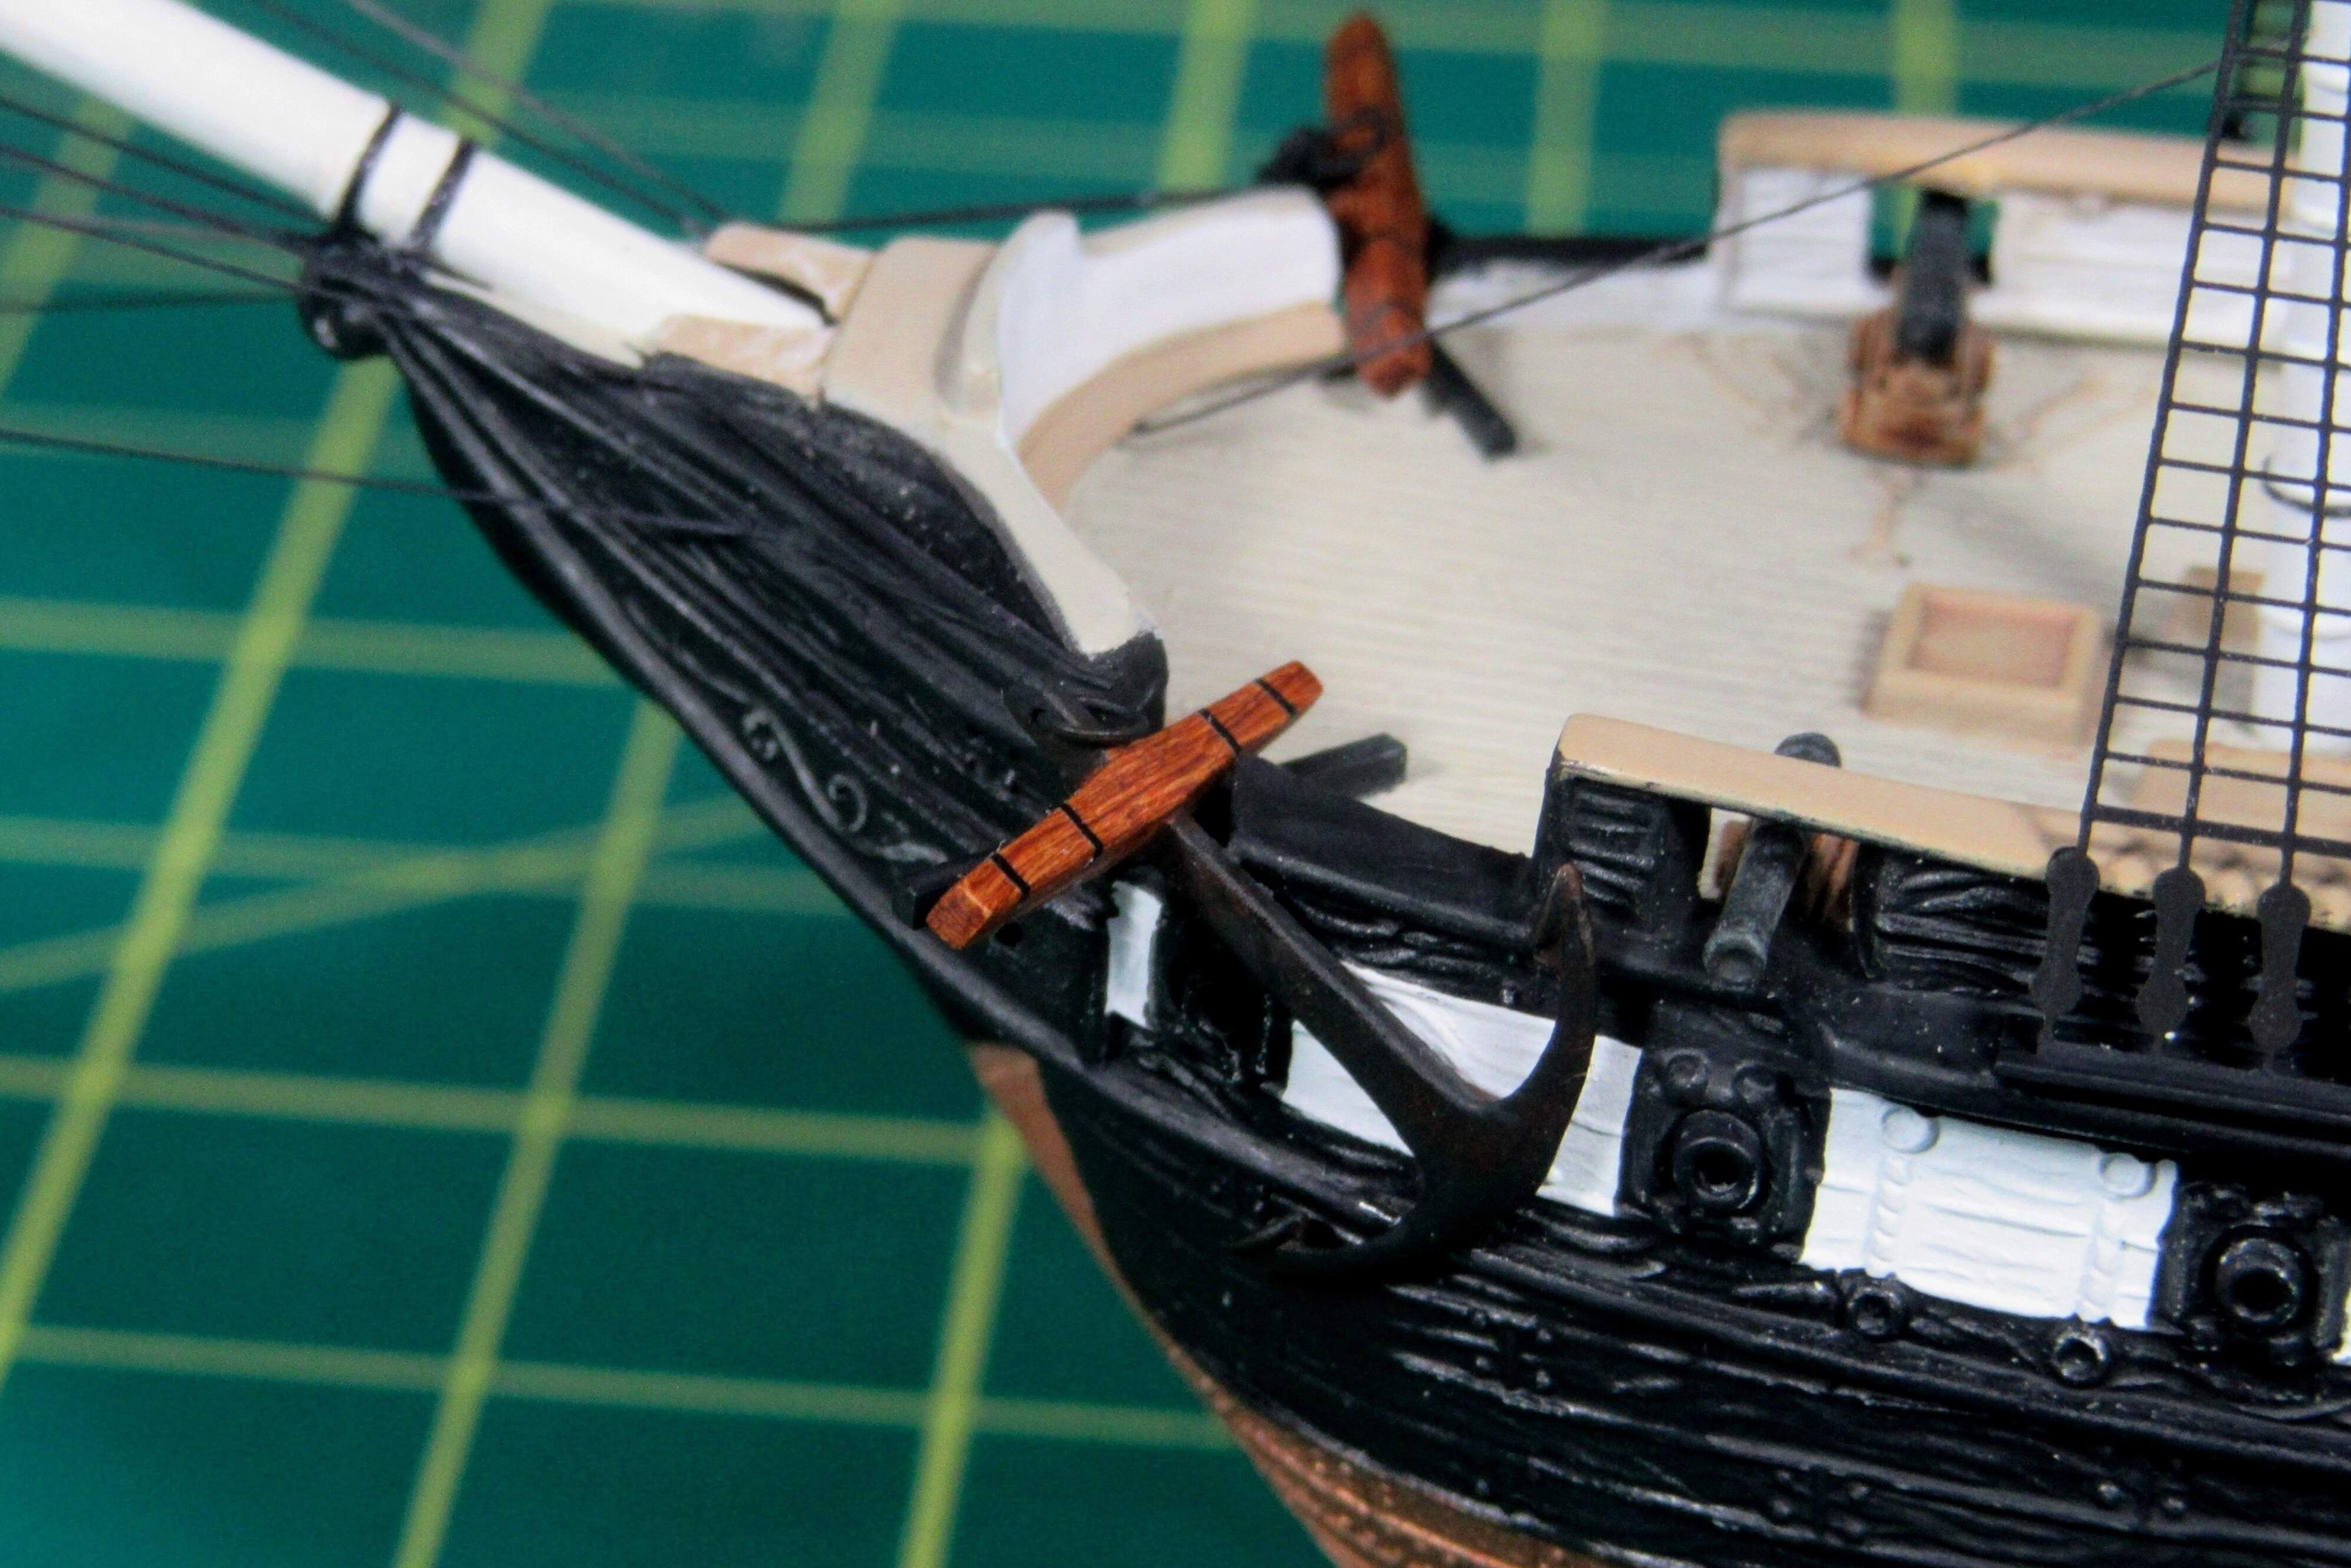
Russ, these lines are almost at my limit to work with. That simple fore brace above took me almost a half hour to get fitted… I feel like I’m all giant thumbs!
Well,Tim, you almost had me motivated to take a looks at building one of the sailing ships in the stash. … OK, check out the 1/196 Revell USS Constitution. Hmm parts still in bags, two sheets of vacuformed sails, somemonster rat lines, two bobbins of threads for rigging, even some silver thread (anchor chains?). Assembly instructions, rigging instructions all there. No painting instructions. Well, got over that impulse.
Mark,
Don’t give up on that 1/196 Constitution - it is a pretty good kit.
Thanks Tim, my last sailing ship ended up destroyed in a childhood fight nearly 60 years ago. The older brother of my nextdoor neighbor was doing a lot of the work for me, when his little brother took a disliking to me and bashed the incomplete model to bits. Now,that you’ve demonstrated the way, the next flavor might end up a victim of AMS, what with PE ratlines and add on supports.
Compared to the dot/block you’re adding, we’re all giant thumbs
Thanks Russ. Fortunately, making all those tiny plastic blocks was a simple task with the Waldron punch and die set. Now getting them to stay where I want them to go, that is another matter…!
A diagram from Charles C. Davis’ The Ship Model Builder’s Assistant shows the braces attached to the ends of the foremast yards:
In the pictures it is hard to see, but the brown-painted wire running rigging being added now is a little finer than the previously installed black EZ Line standing rig.
I am grateful for the flexibility of the EZ Line since it just bounces back whenever I touch it as I’m installing the wire lines. The wire, on the other hand, has a nasty habit of kinking unrealistically whenever bumped and has to be replaced each time my big fingers stray even a little. I’m going through a lot of wire, but learning as I go!


 Thanks, didn’t know if it was nautical language or a faulty keyboard.


 The older brother of my nextdoor neighbor was doing a lot of the work for me, when his little brother took a disliking to me and bashed the incomplete model to bits.