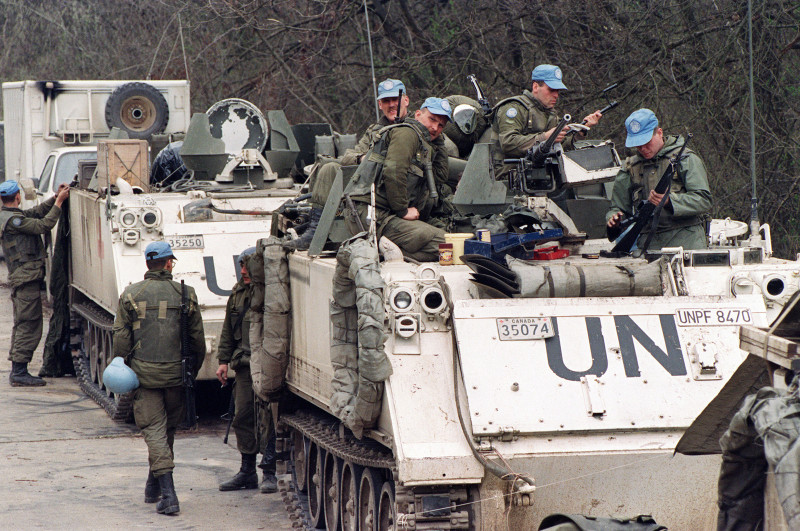
Now there is “some” work needed on this oldy, apart from the fact that most of Canada’s M113A1’s were upgraded to A2’s, but you can still see A1’s in the pictures of said era.
Also the kit is not entirely up to scratch.
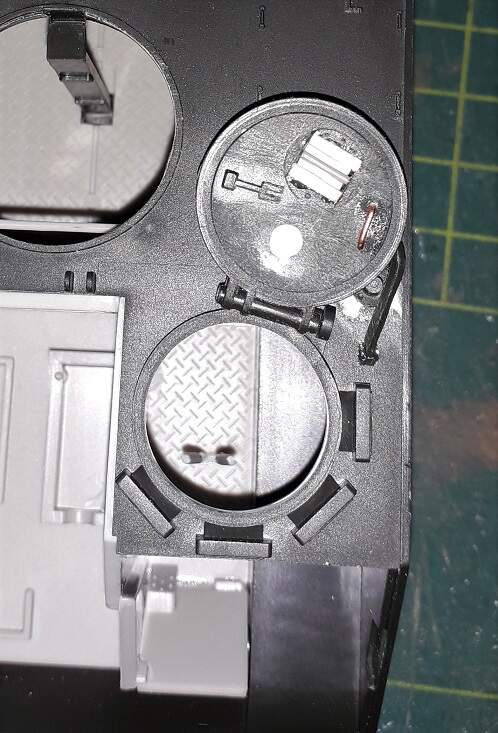
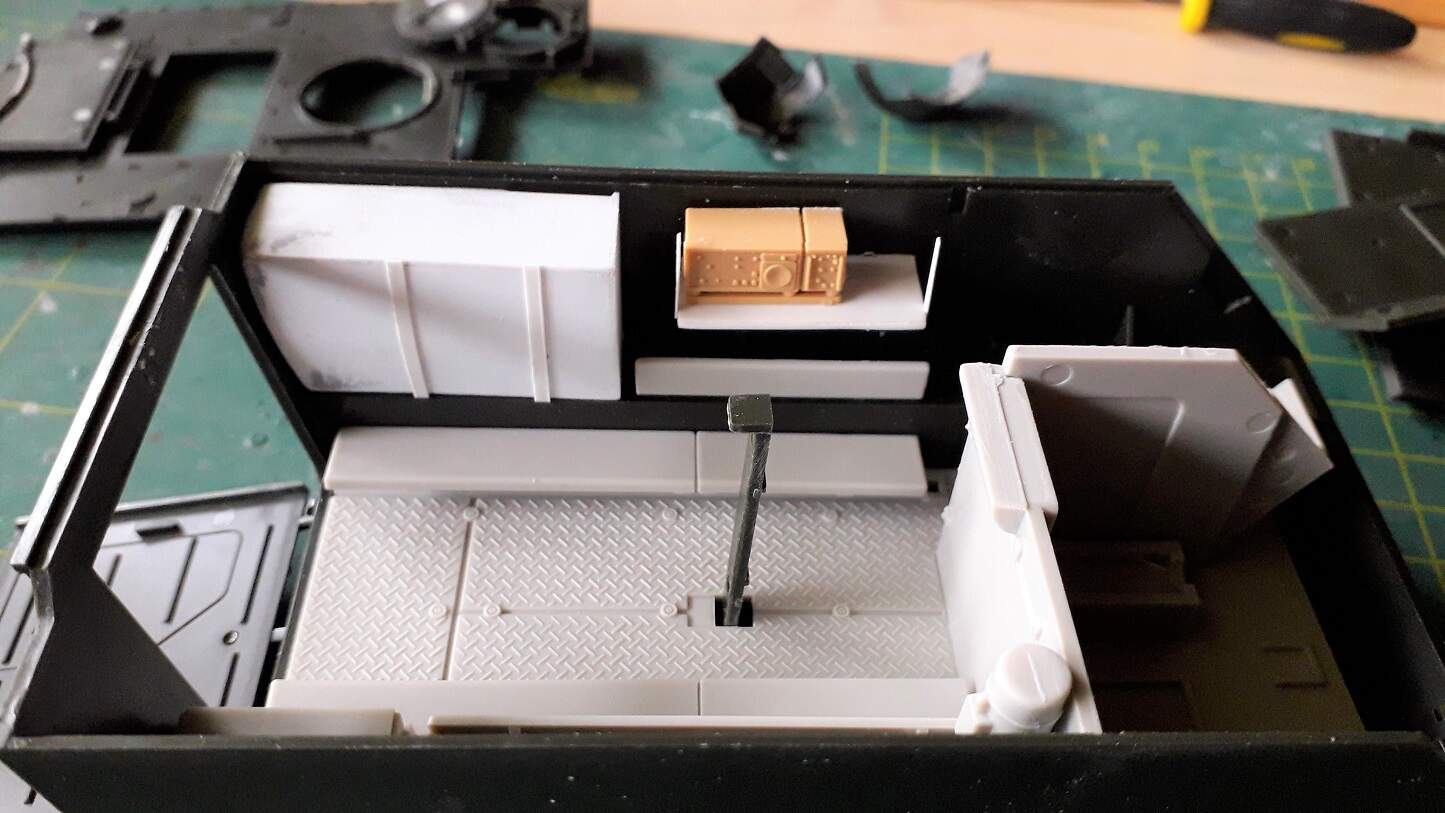
The driver’s hatch has a gaping hole in it, the rear hatch has the release mechanism on the wrong side of the hatch and the interior is rudimentary. Not that my additions will do much, since little is visible through the hatches. Unless I leave the ramp open, but am not sure about that yet.
I will use what I have at hand here; no AM or PE. The only extra will be the ordered Canadian markings, which I ordered through https://www.autoloaderdecals.ca/, run by Dennis @DennisatAutoloader
I actually wondered whether I would continue, but the lack of an available or affordable alternative in the form of an Academy A2 or A3, made that it went on. Tamiya’s “new” A3 is just the same old kit with some added extras!
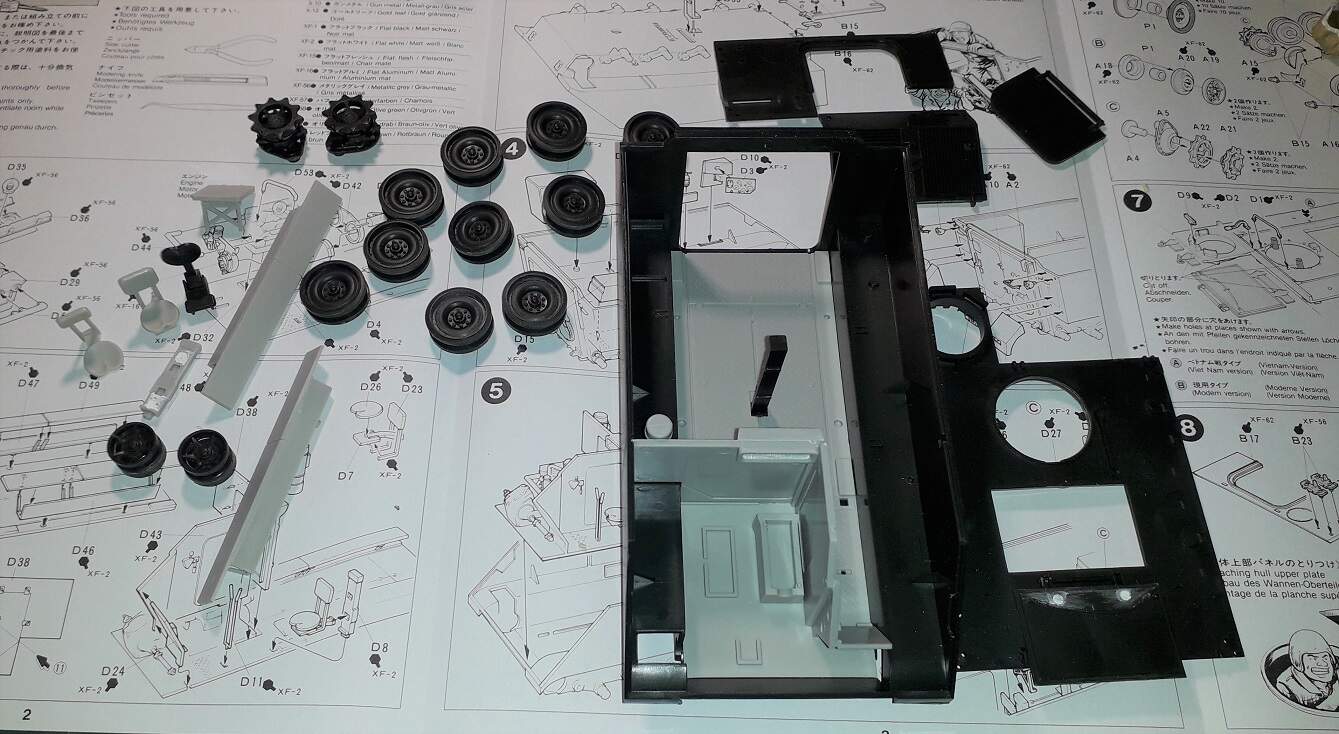
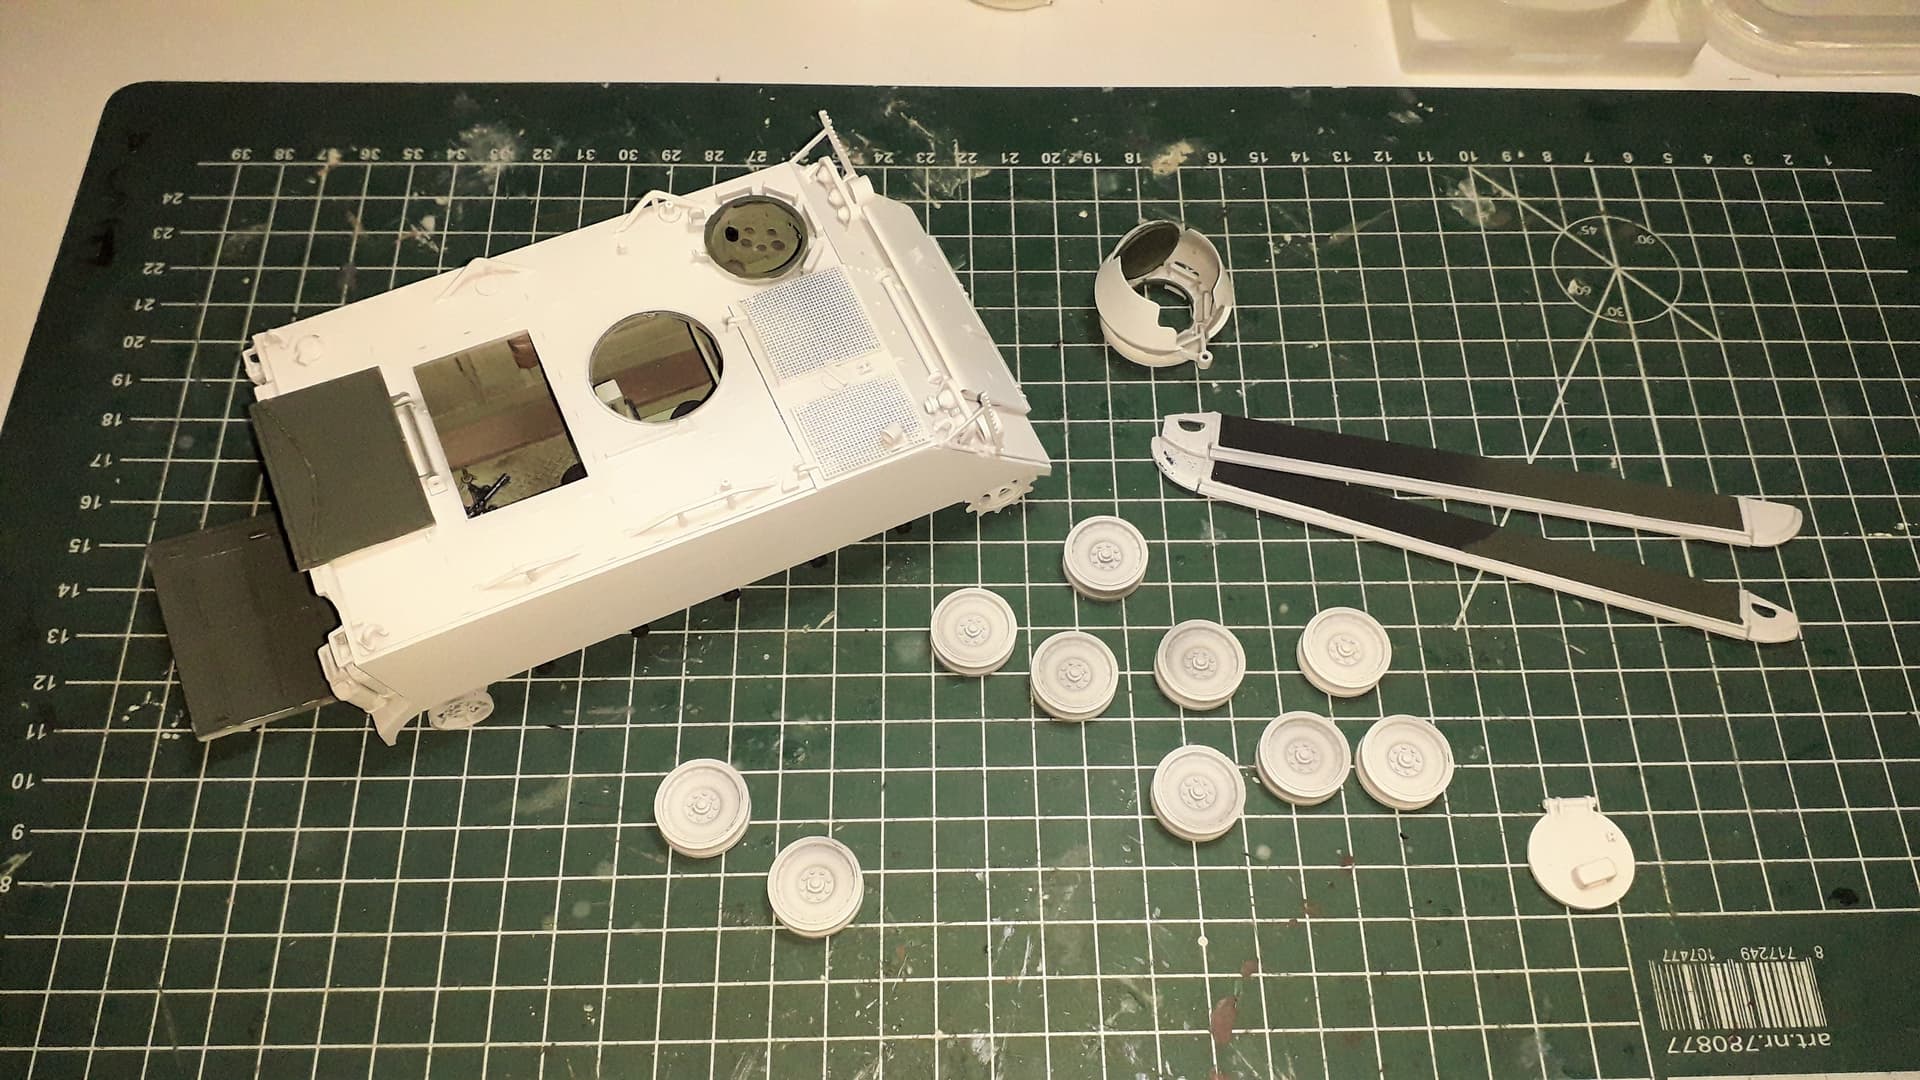
So time to bring out the knife, ruler, filler and glue.
The old kit has some serious and visible flaws, most noteably (so far) the driver’s hatch and the rear hatch. The first has a glaring hole in it and the other has the release mechanism on the wrong end!
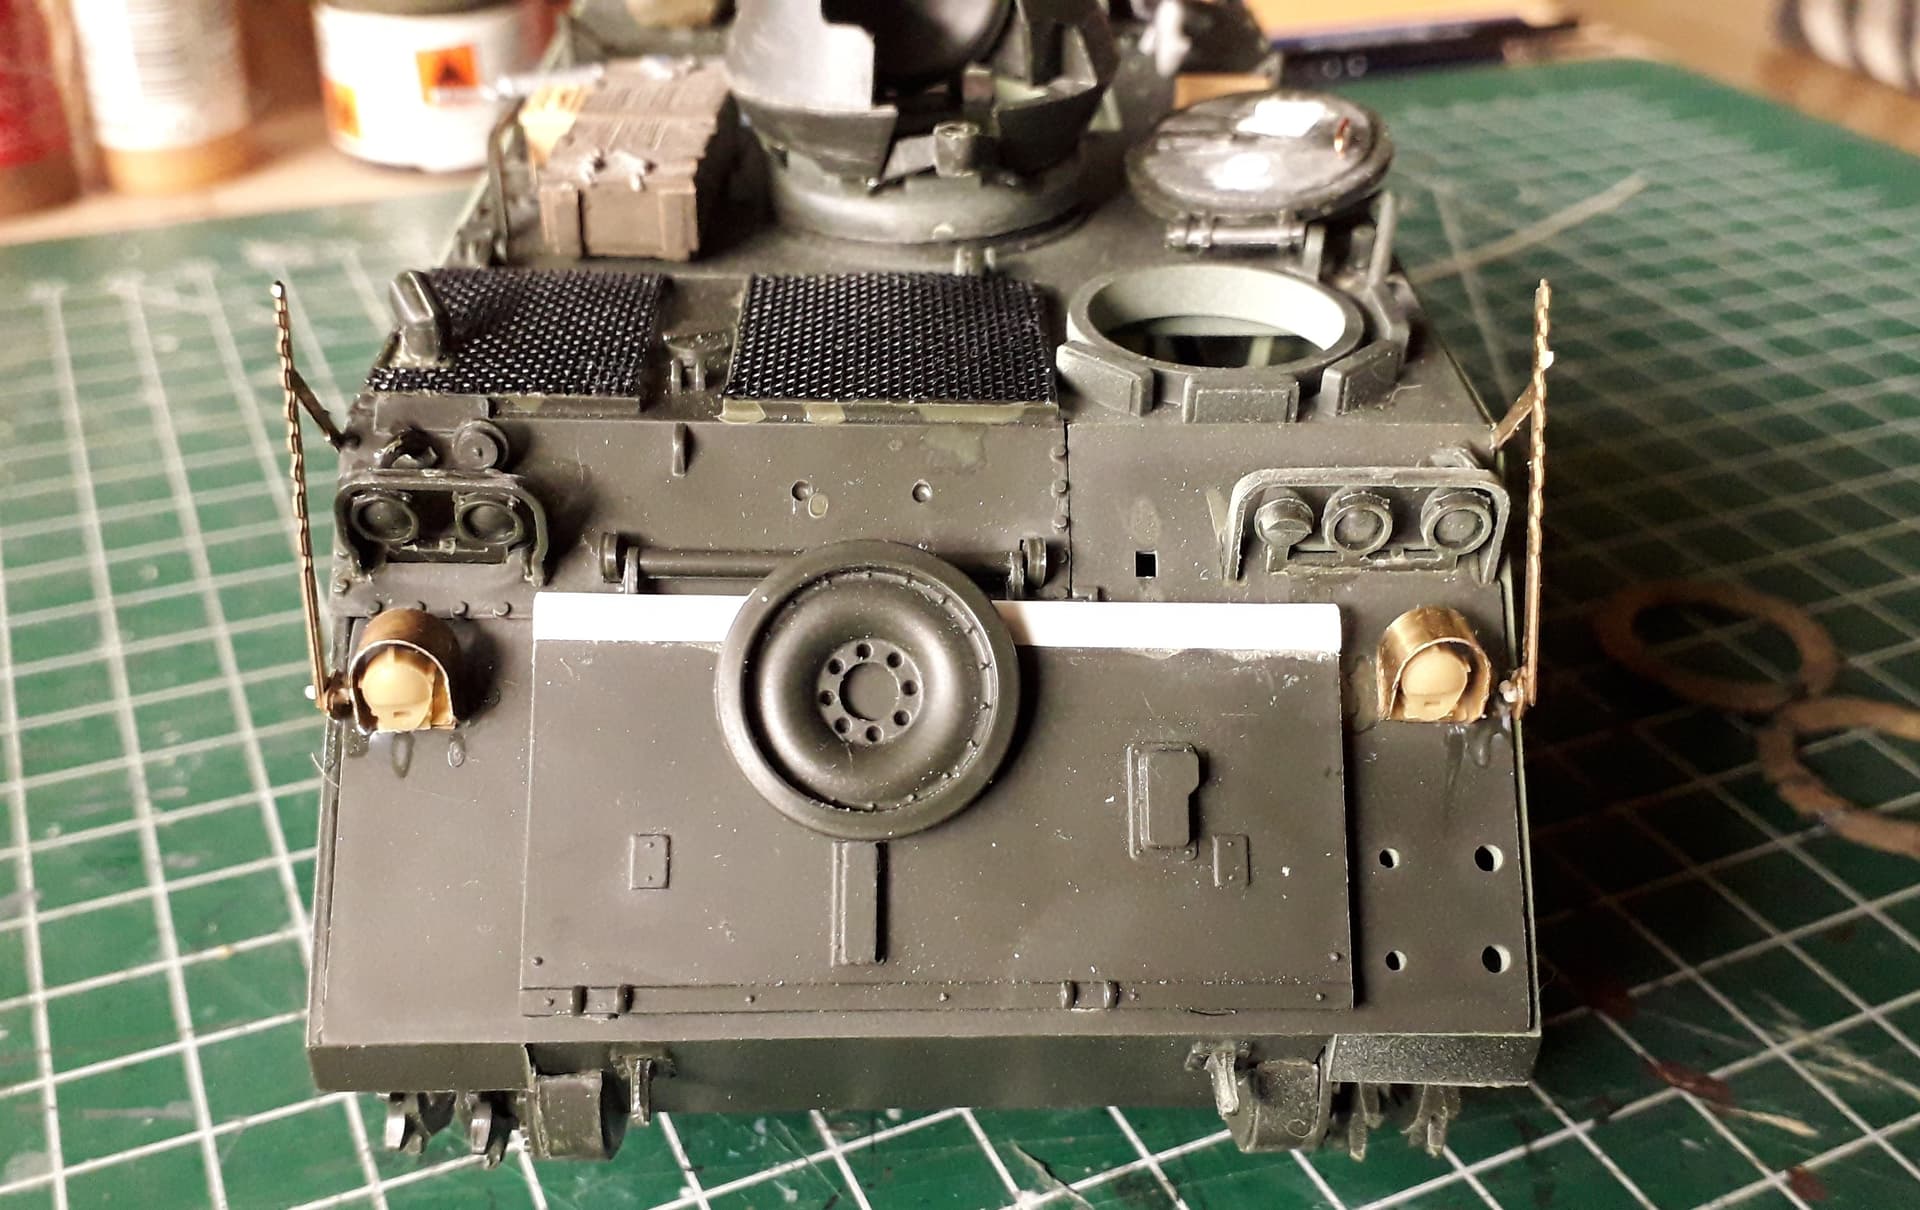
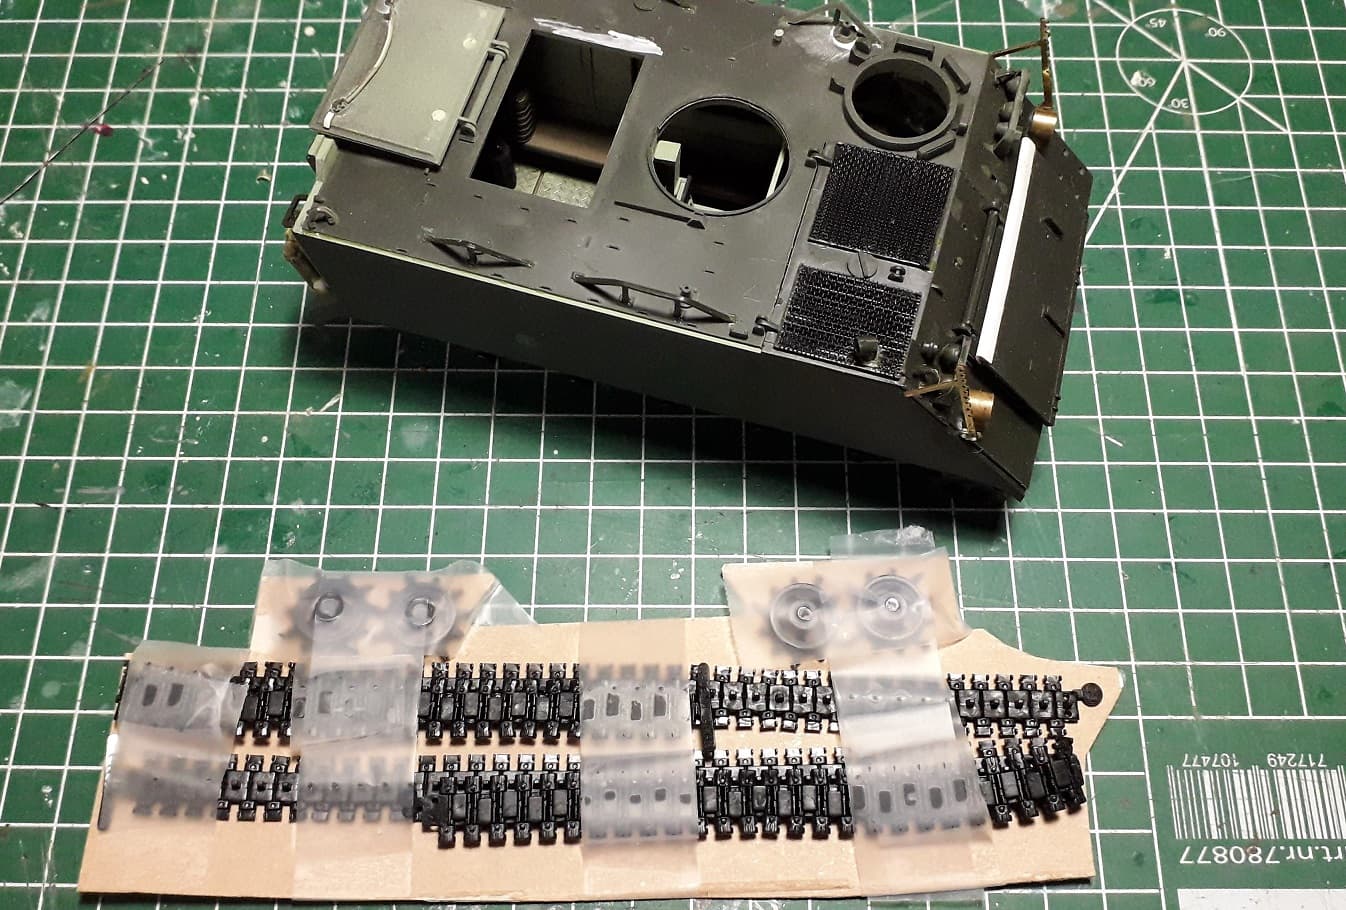
I also needed to relocate the frontleft antennabase more to the edge of the side, needed to add mesh to the intakes and had to add an extra bit to make the bowplate just a bit higher.
The interior needed a new and larger tank, for which I used the old one, extended it and gave it the characteristic rounded shape. It turned out a bit too big though. It also needed a radio and the only thing available was a leftover from Tamiya’s M151 kits. No matter, will be hardly visible anyway.
It is time I updated this thread!!
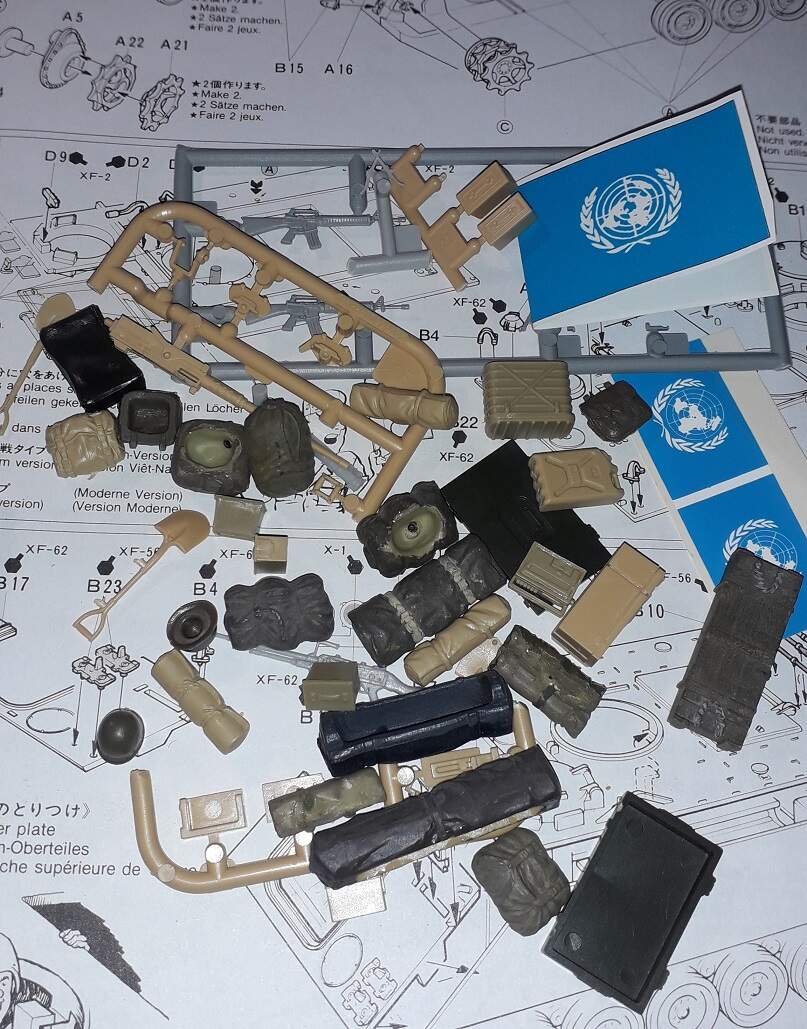
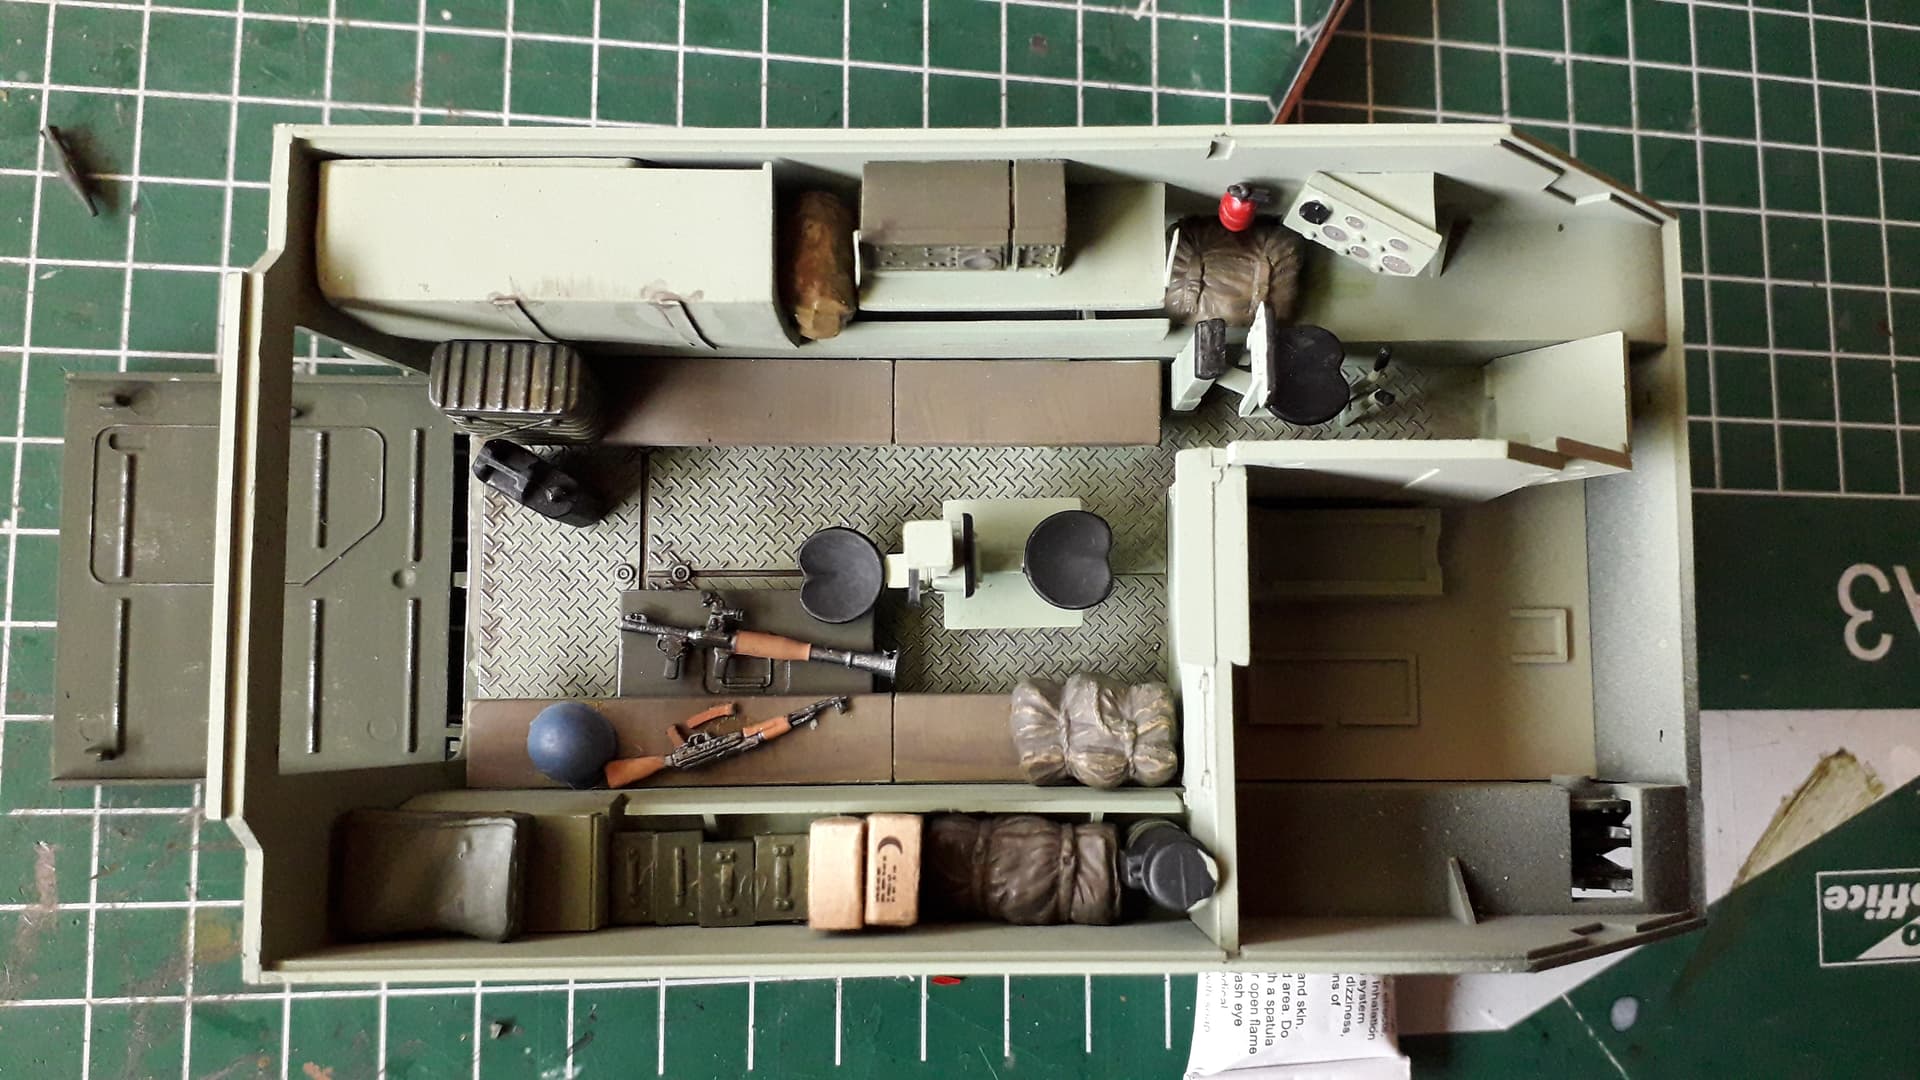
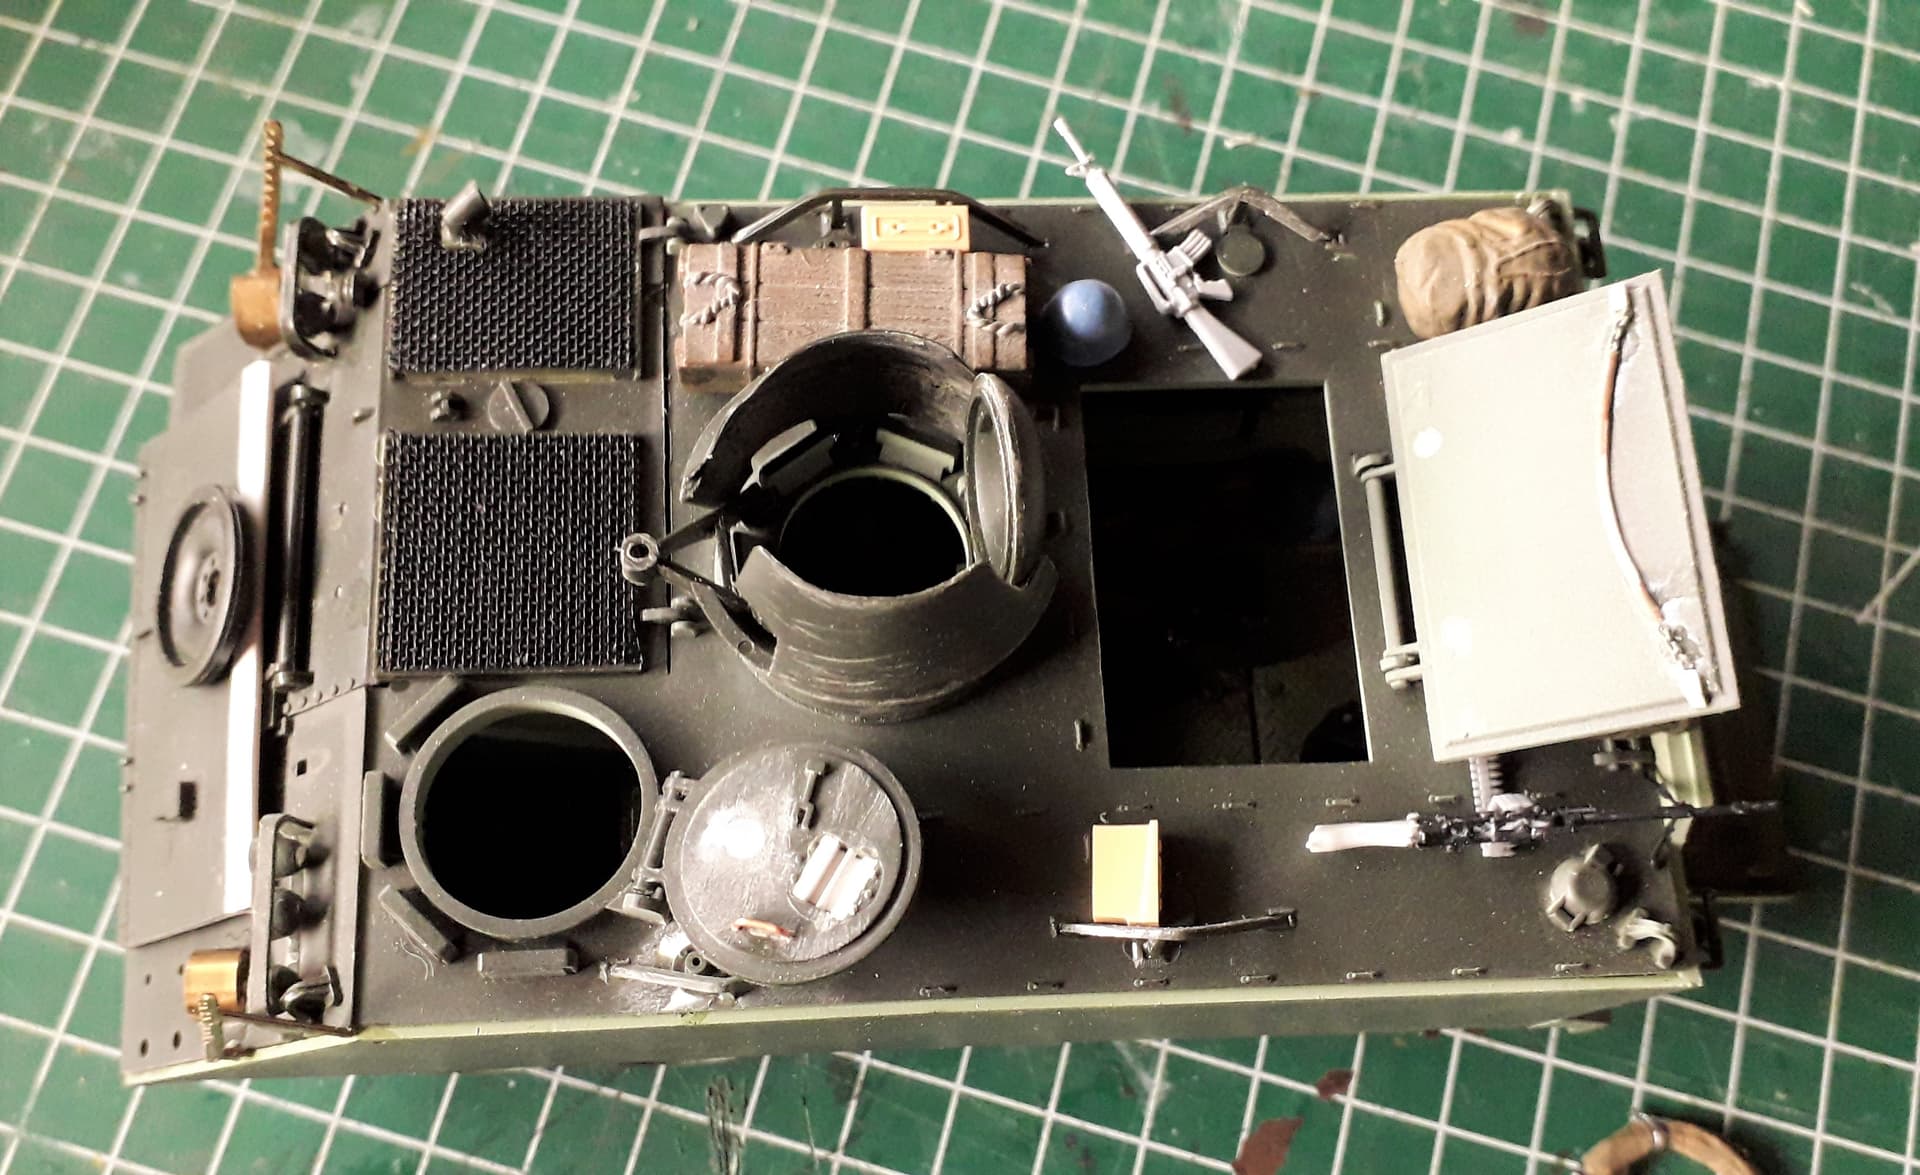
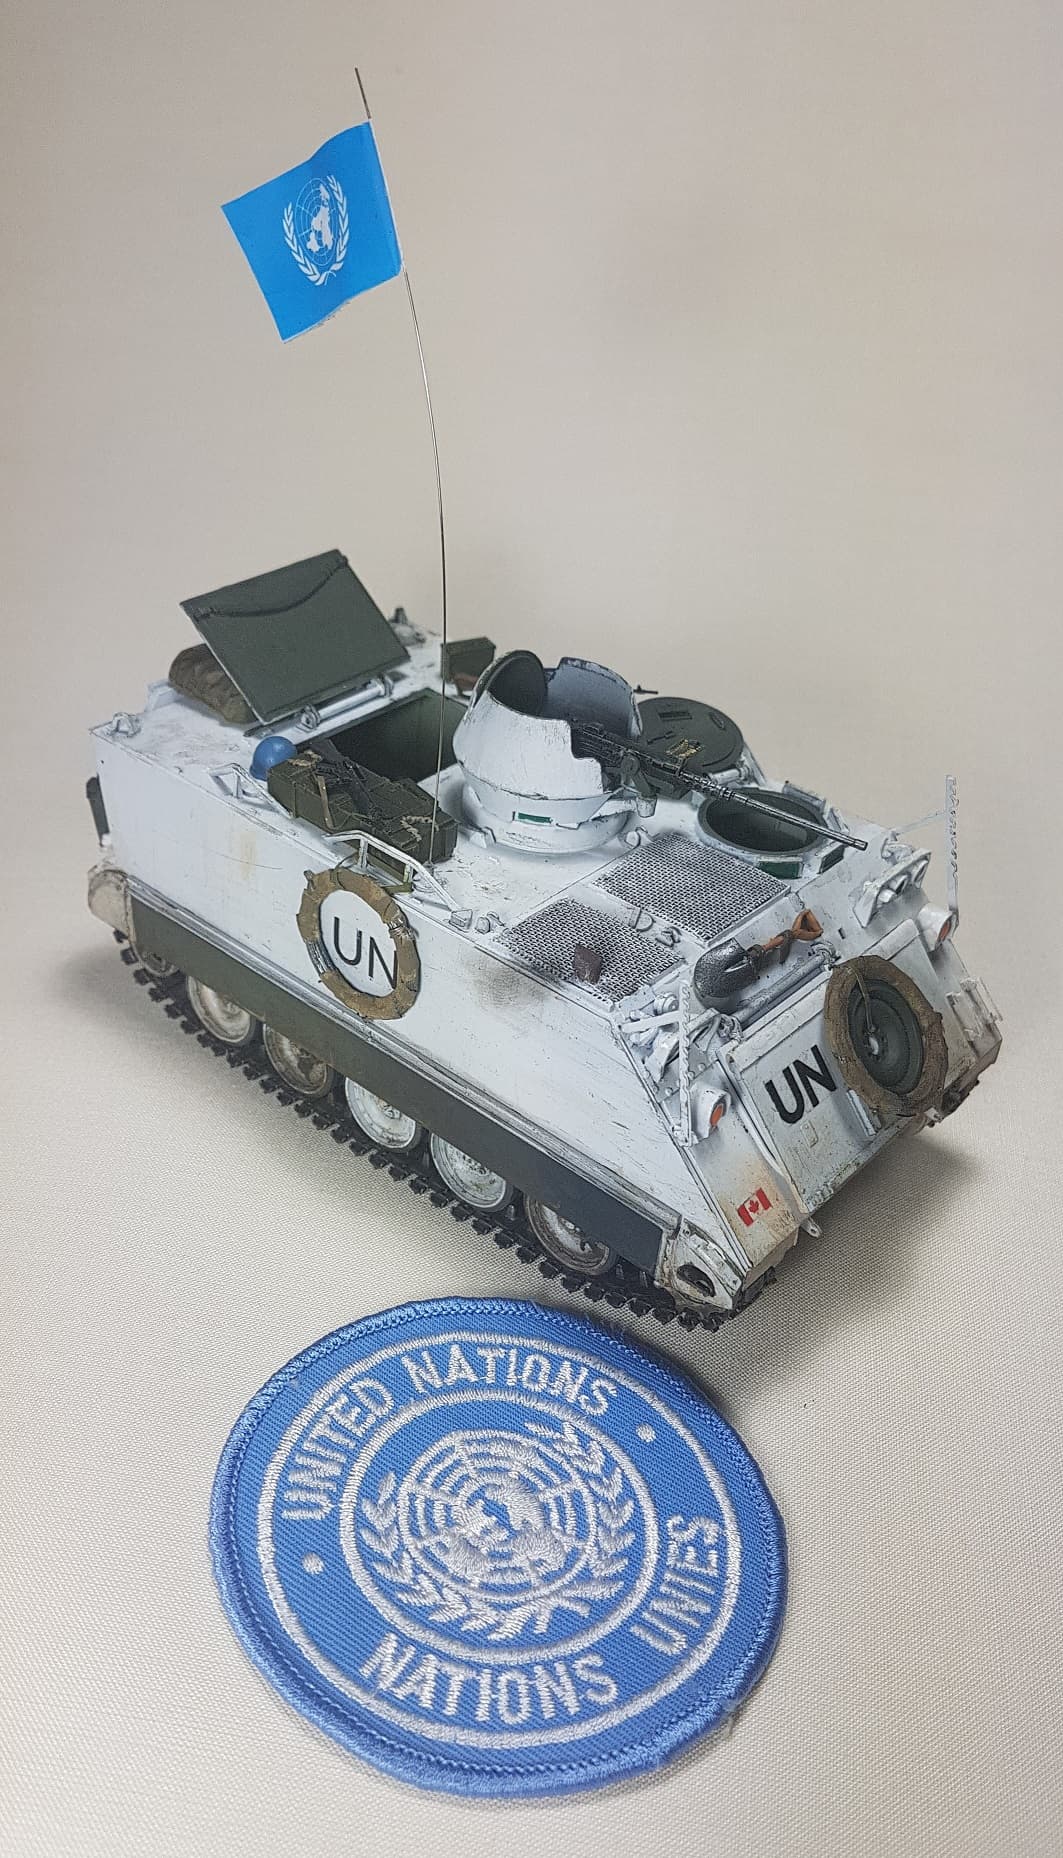
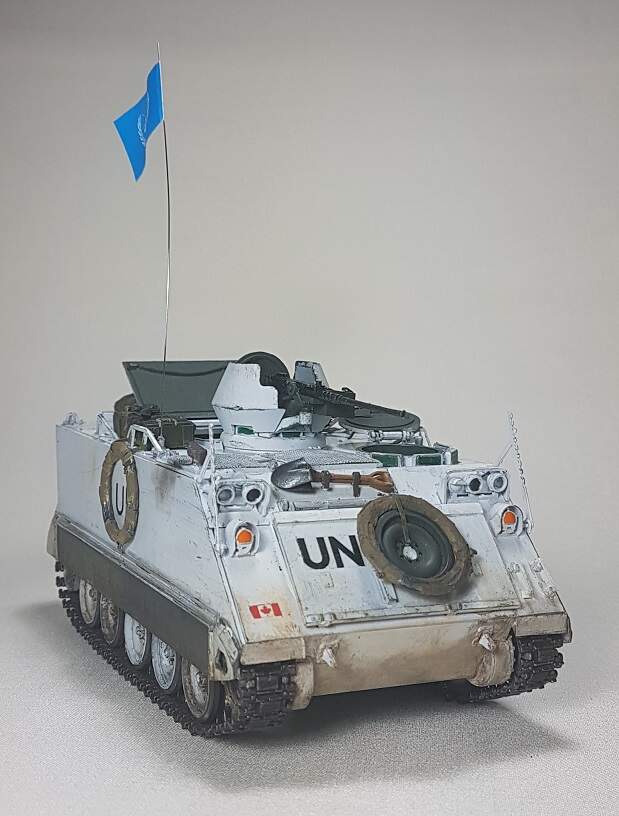
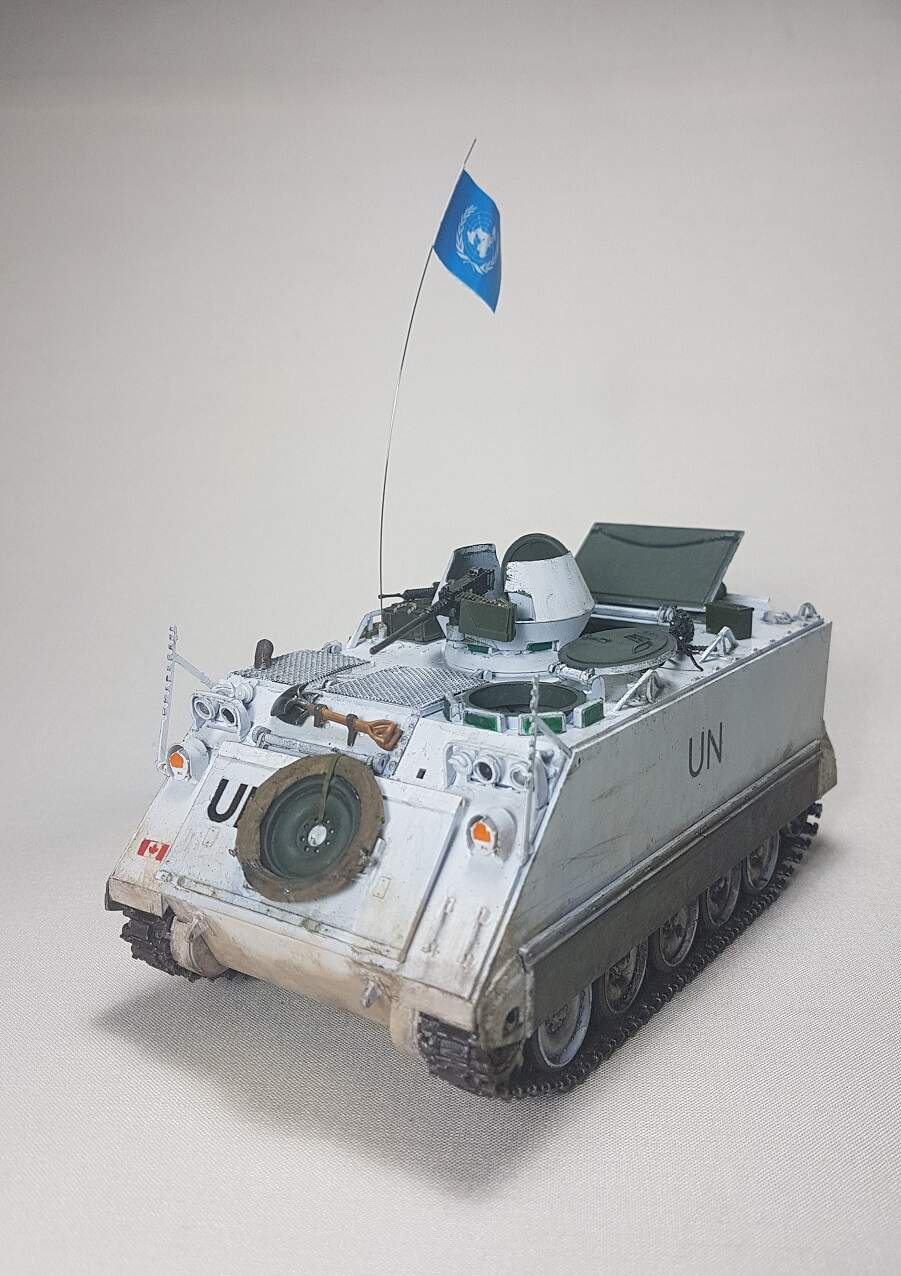
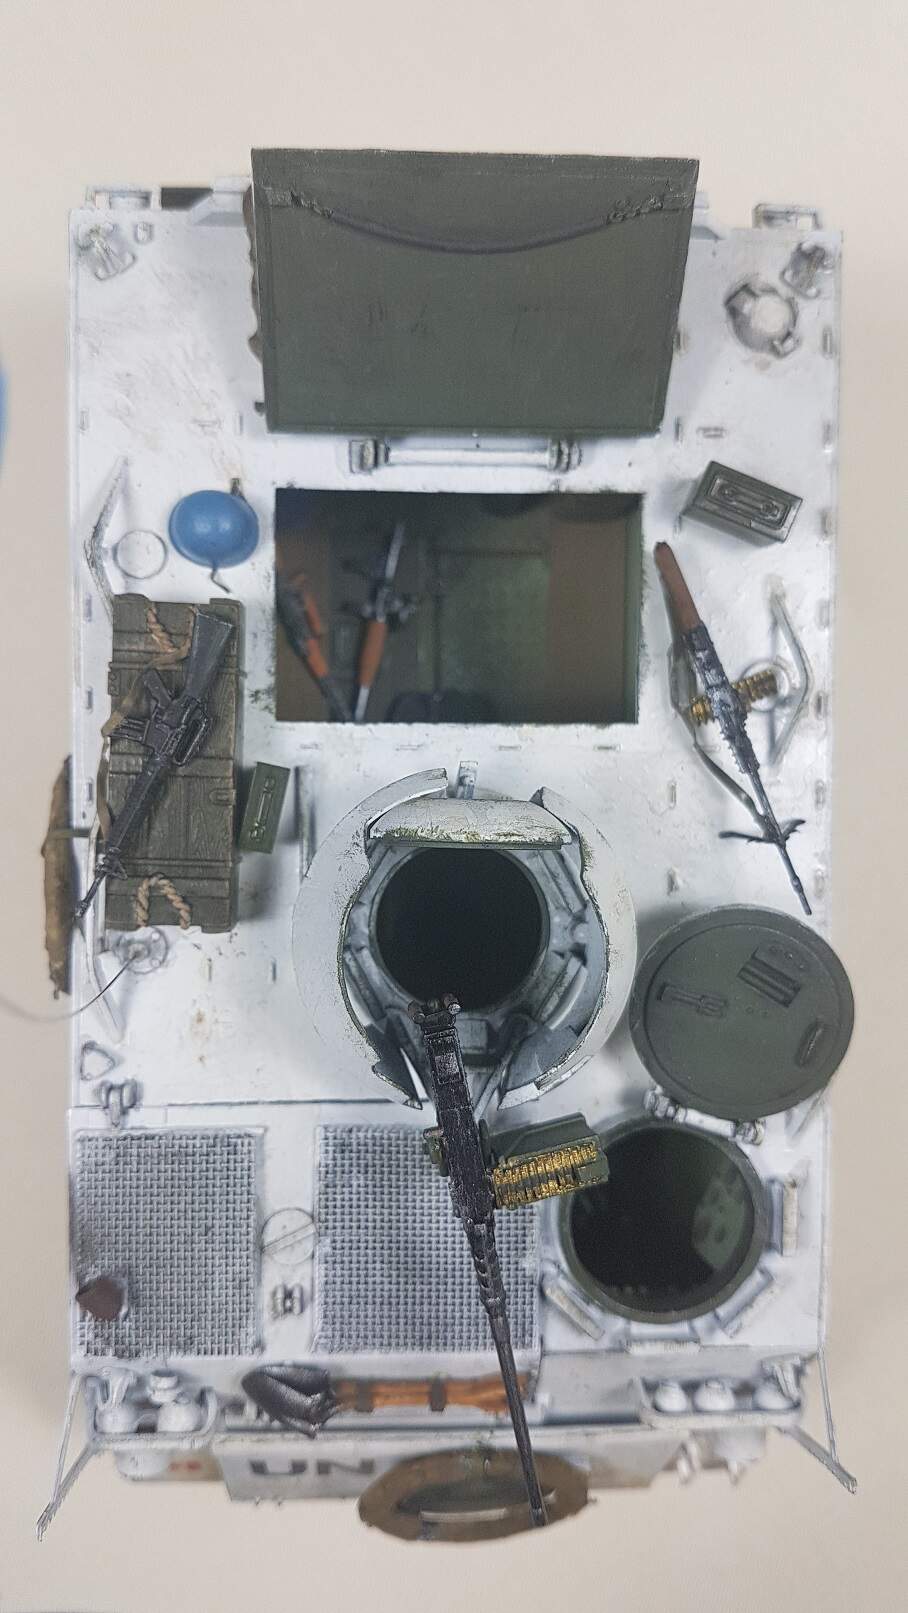
I have been working on it some more and the interior is concidered done. The colour turned out too dark, so I kept weathering light. Added some gear to it as well as some confiscated weapons for variation. Most of it will not be really visible, once the “lid” goes on. I was unable to find the appropriate decals for the front firewall, unfortunately.
Canadian gear is as rare as hen’s teeth, hence the sparse “clutter”.
Looking real nice Ron. I agree about the gun shields.
Tell me about it. At least for the mid to late Cold War period. There’s some nice modern stuff coming out now.
US ALICE packs aren’t too far off of the shape of the CF 64 or 82 pattern ruck (though I’d say closer to the 82) and both of them would be period correct. The frames are different but it’s the best I’ve found. Works best if they’re mixed in with other bits rather than right out on display. Same goes for the US sleeping bag valise.
Tiny update… Since I recently started studying and landed a parttime job as a substitute teacher time (and energy) became rather scarce…
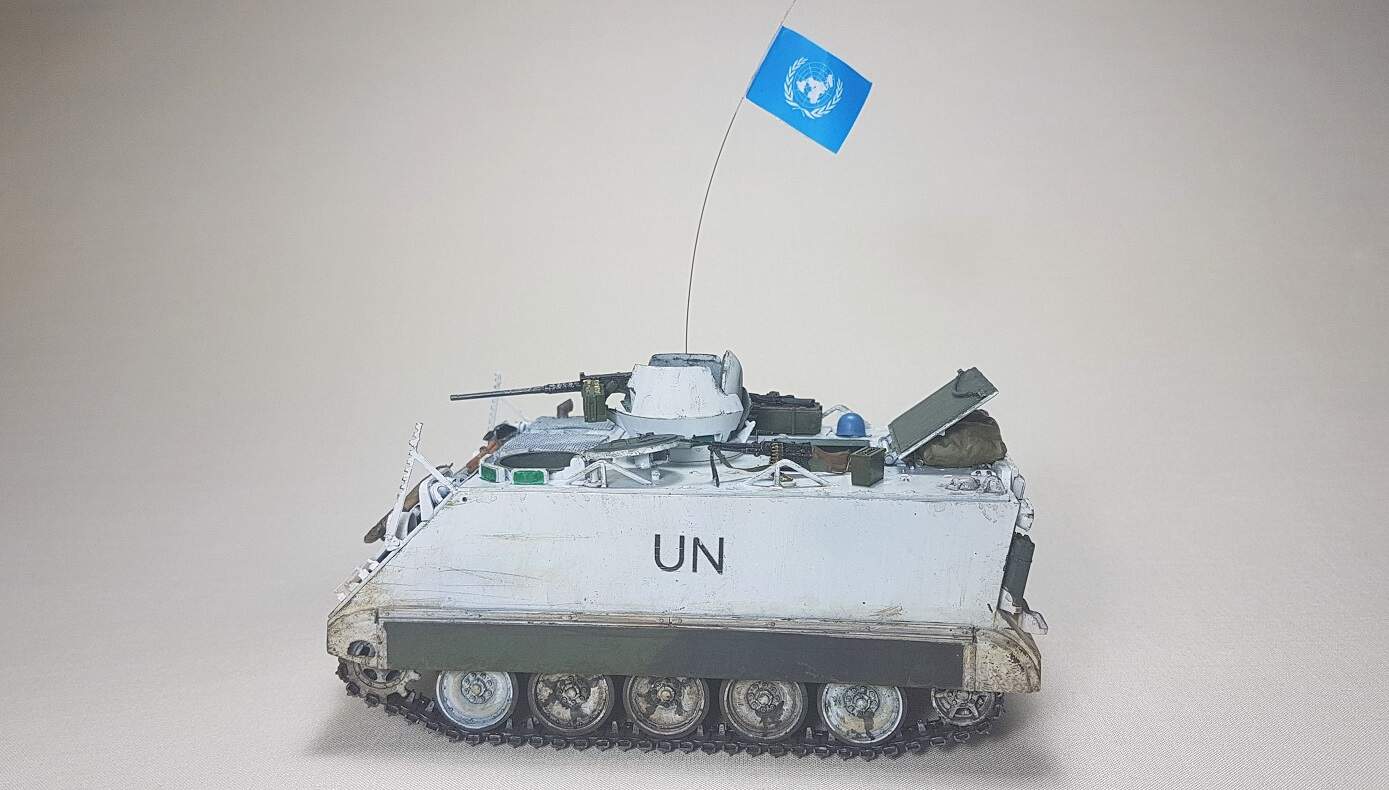
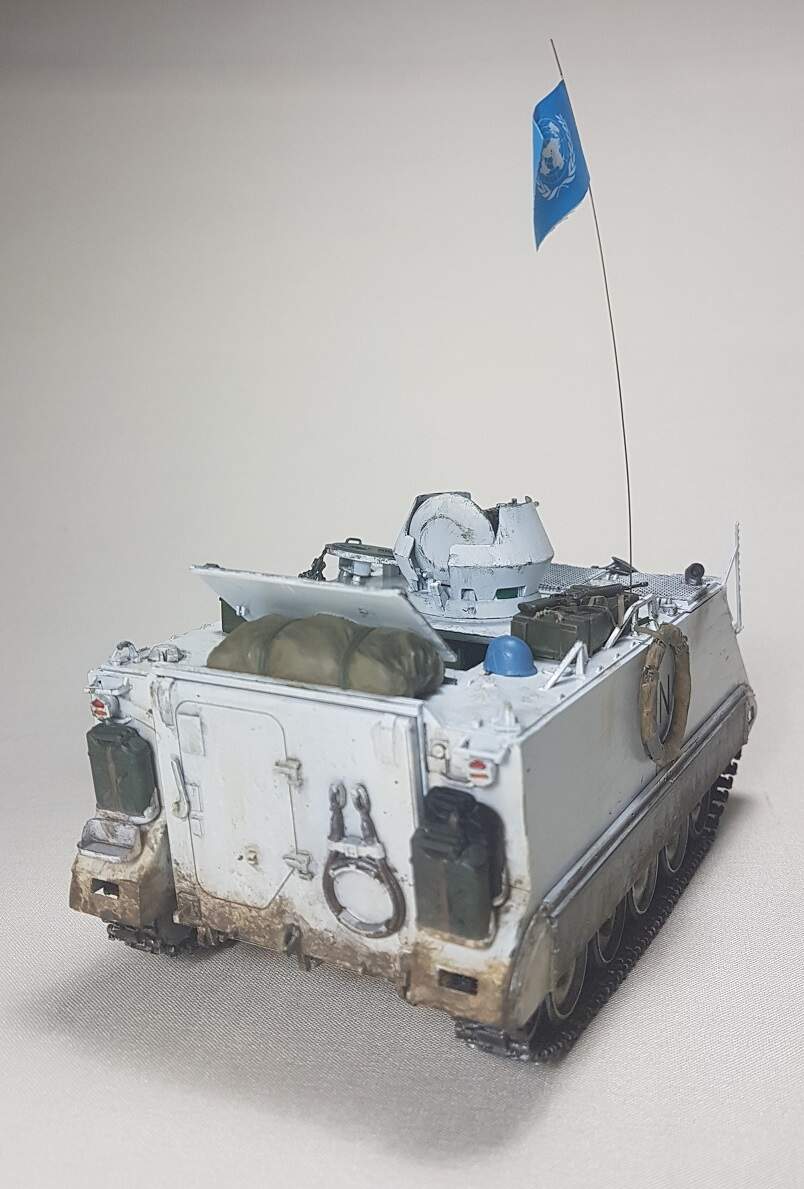
The artificial light makes the white looks funny. I also had to touch up one of the sideskirts, since the maskingtape tore off the paint when being removed.
Looks great! You really nailed the look and weathering!
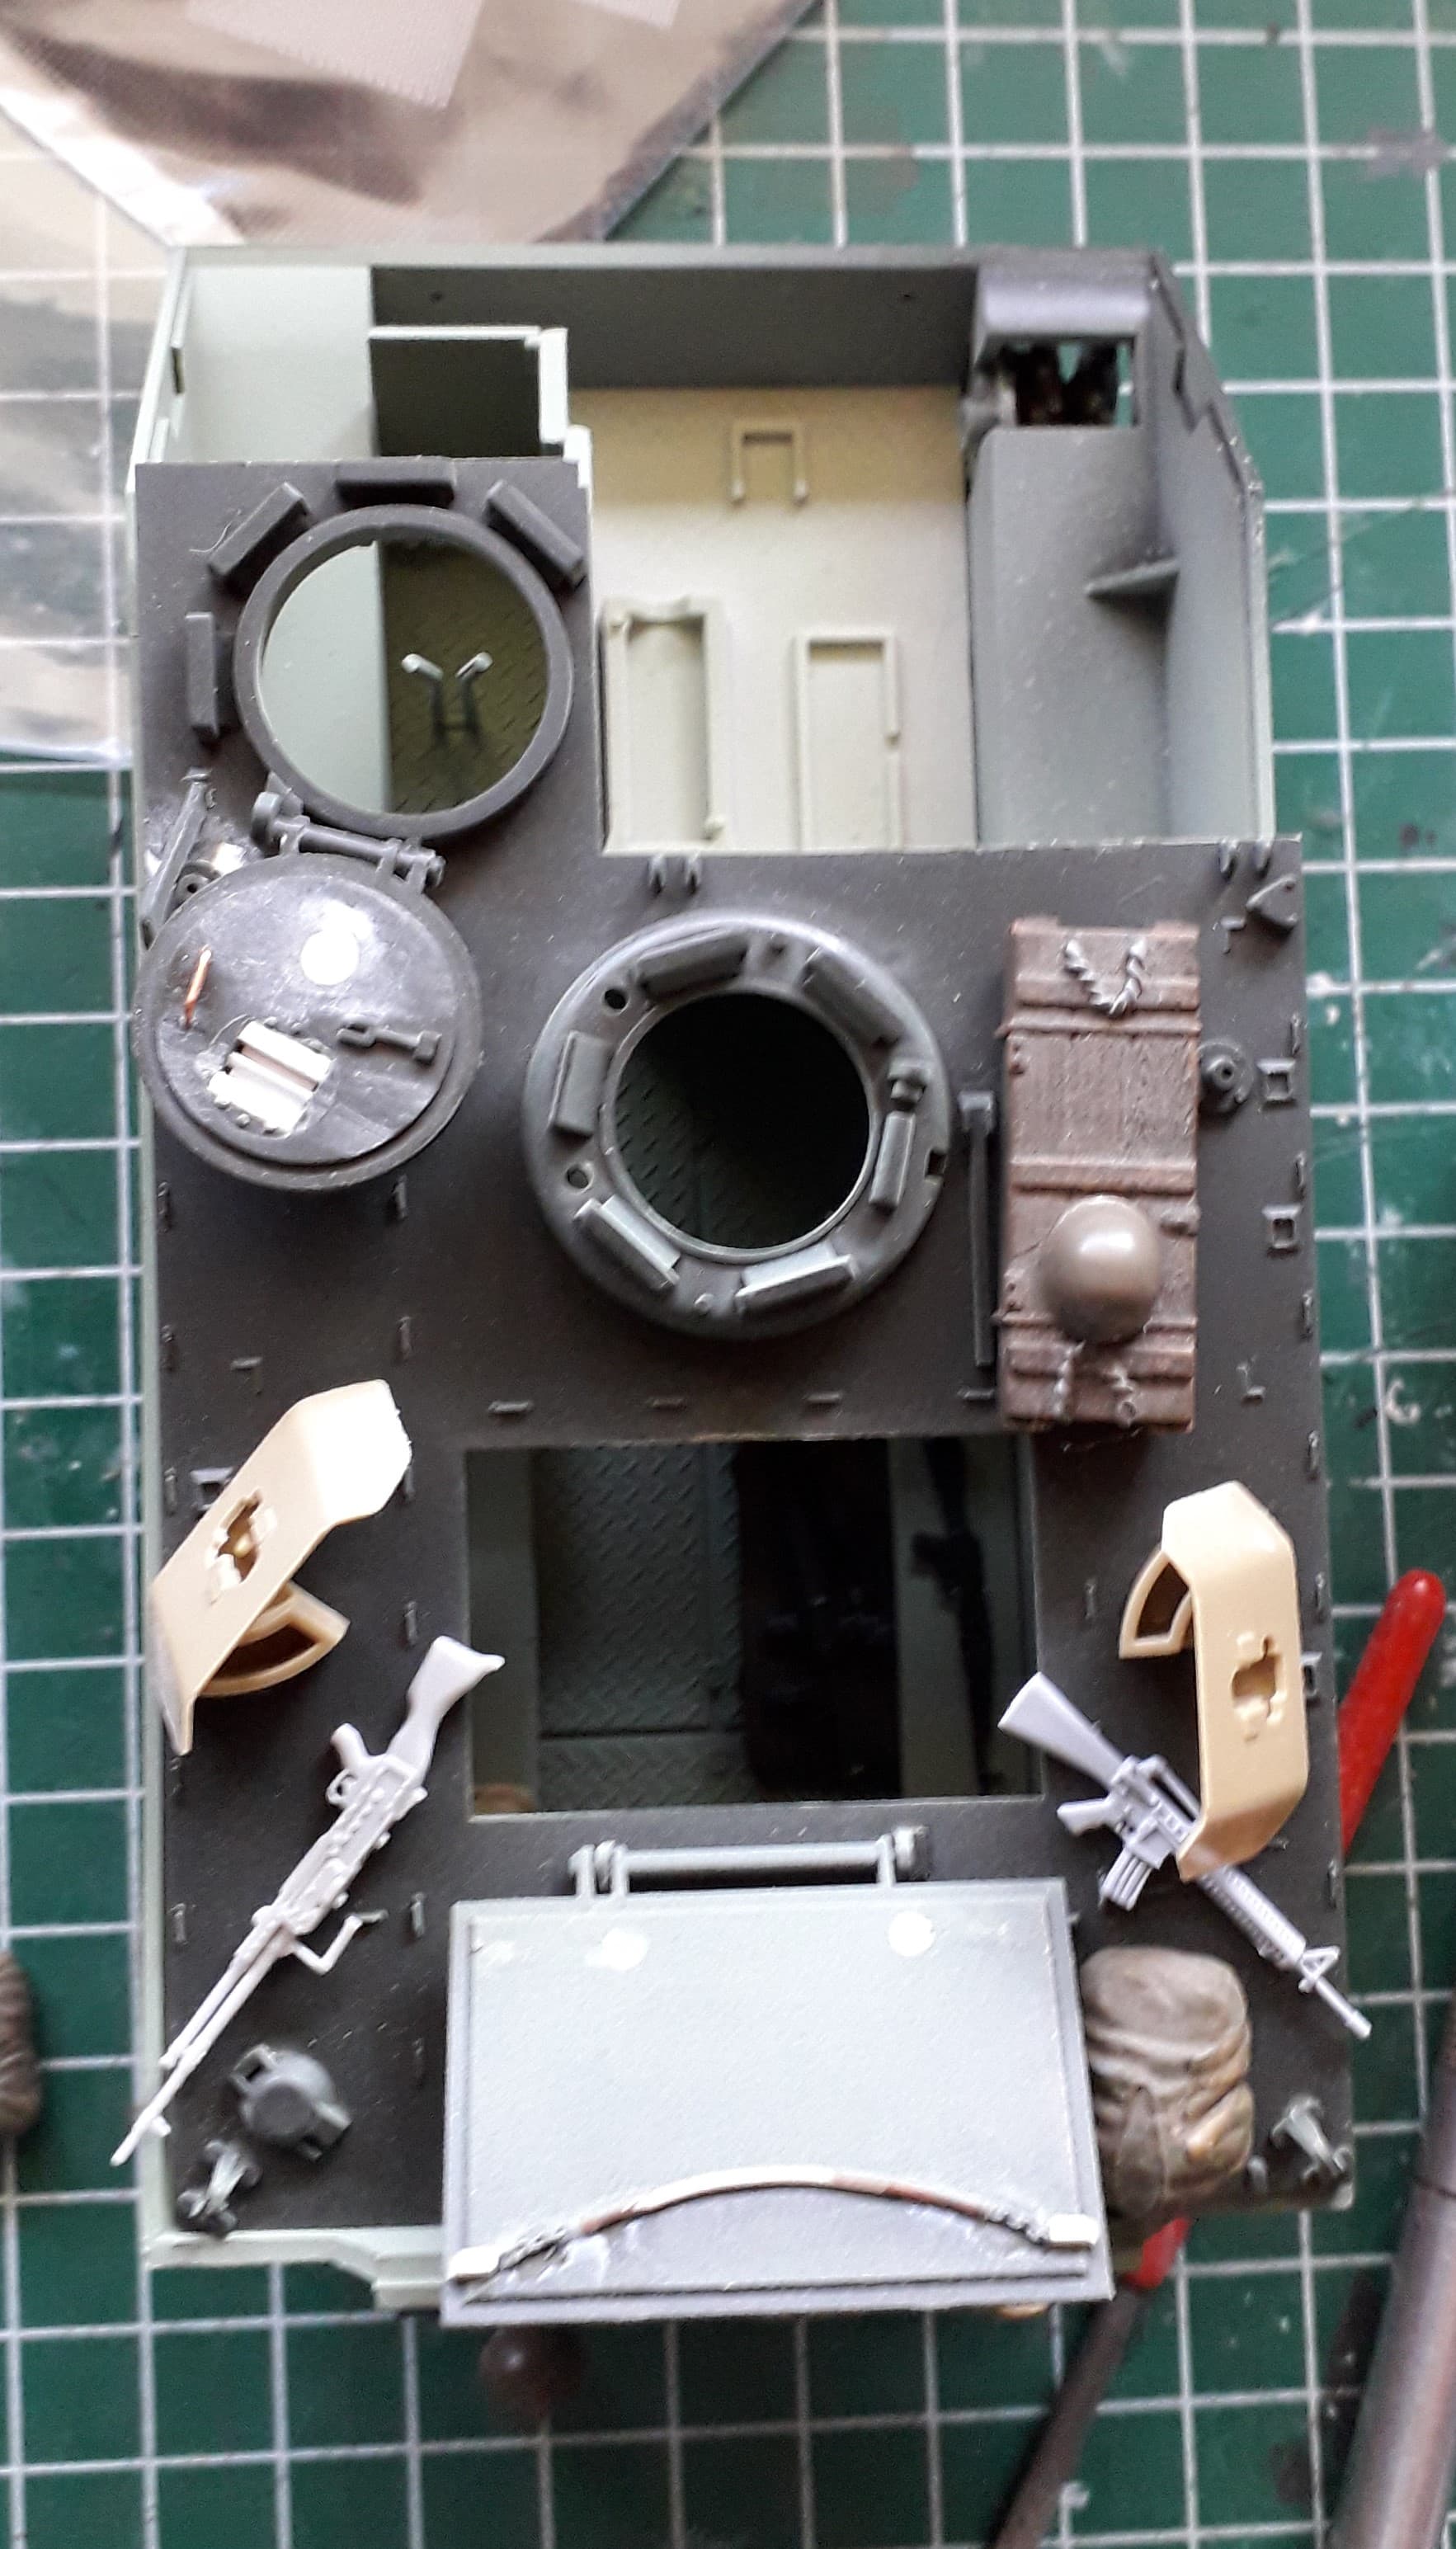
Although I would suggest moving the camo net bag from under the open cargo hatch, as the hatch can’t be locked open like that and would slam down on any troops standing in that opening.
I like how it turned out on you and the approach you gave it. I deployed in the year 93 in the valley of the neretva and coincided on some occasion with the Canadian troops.