CANVAS - Using Washes, Paints & Soft Oil Pastels on Plastic
Just my personal technique shared here:
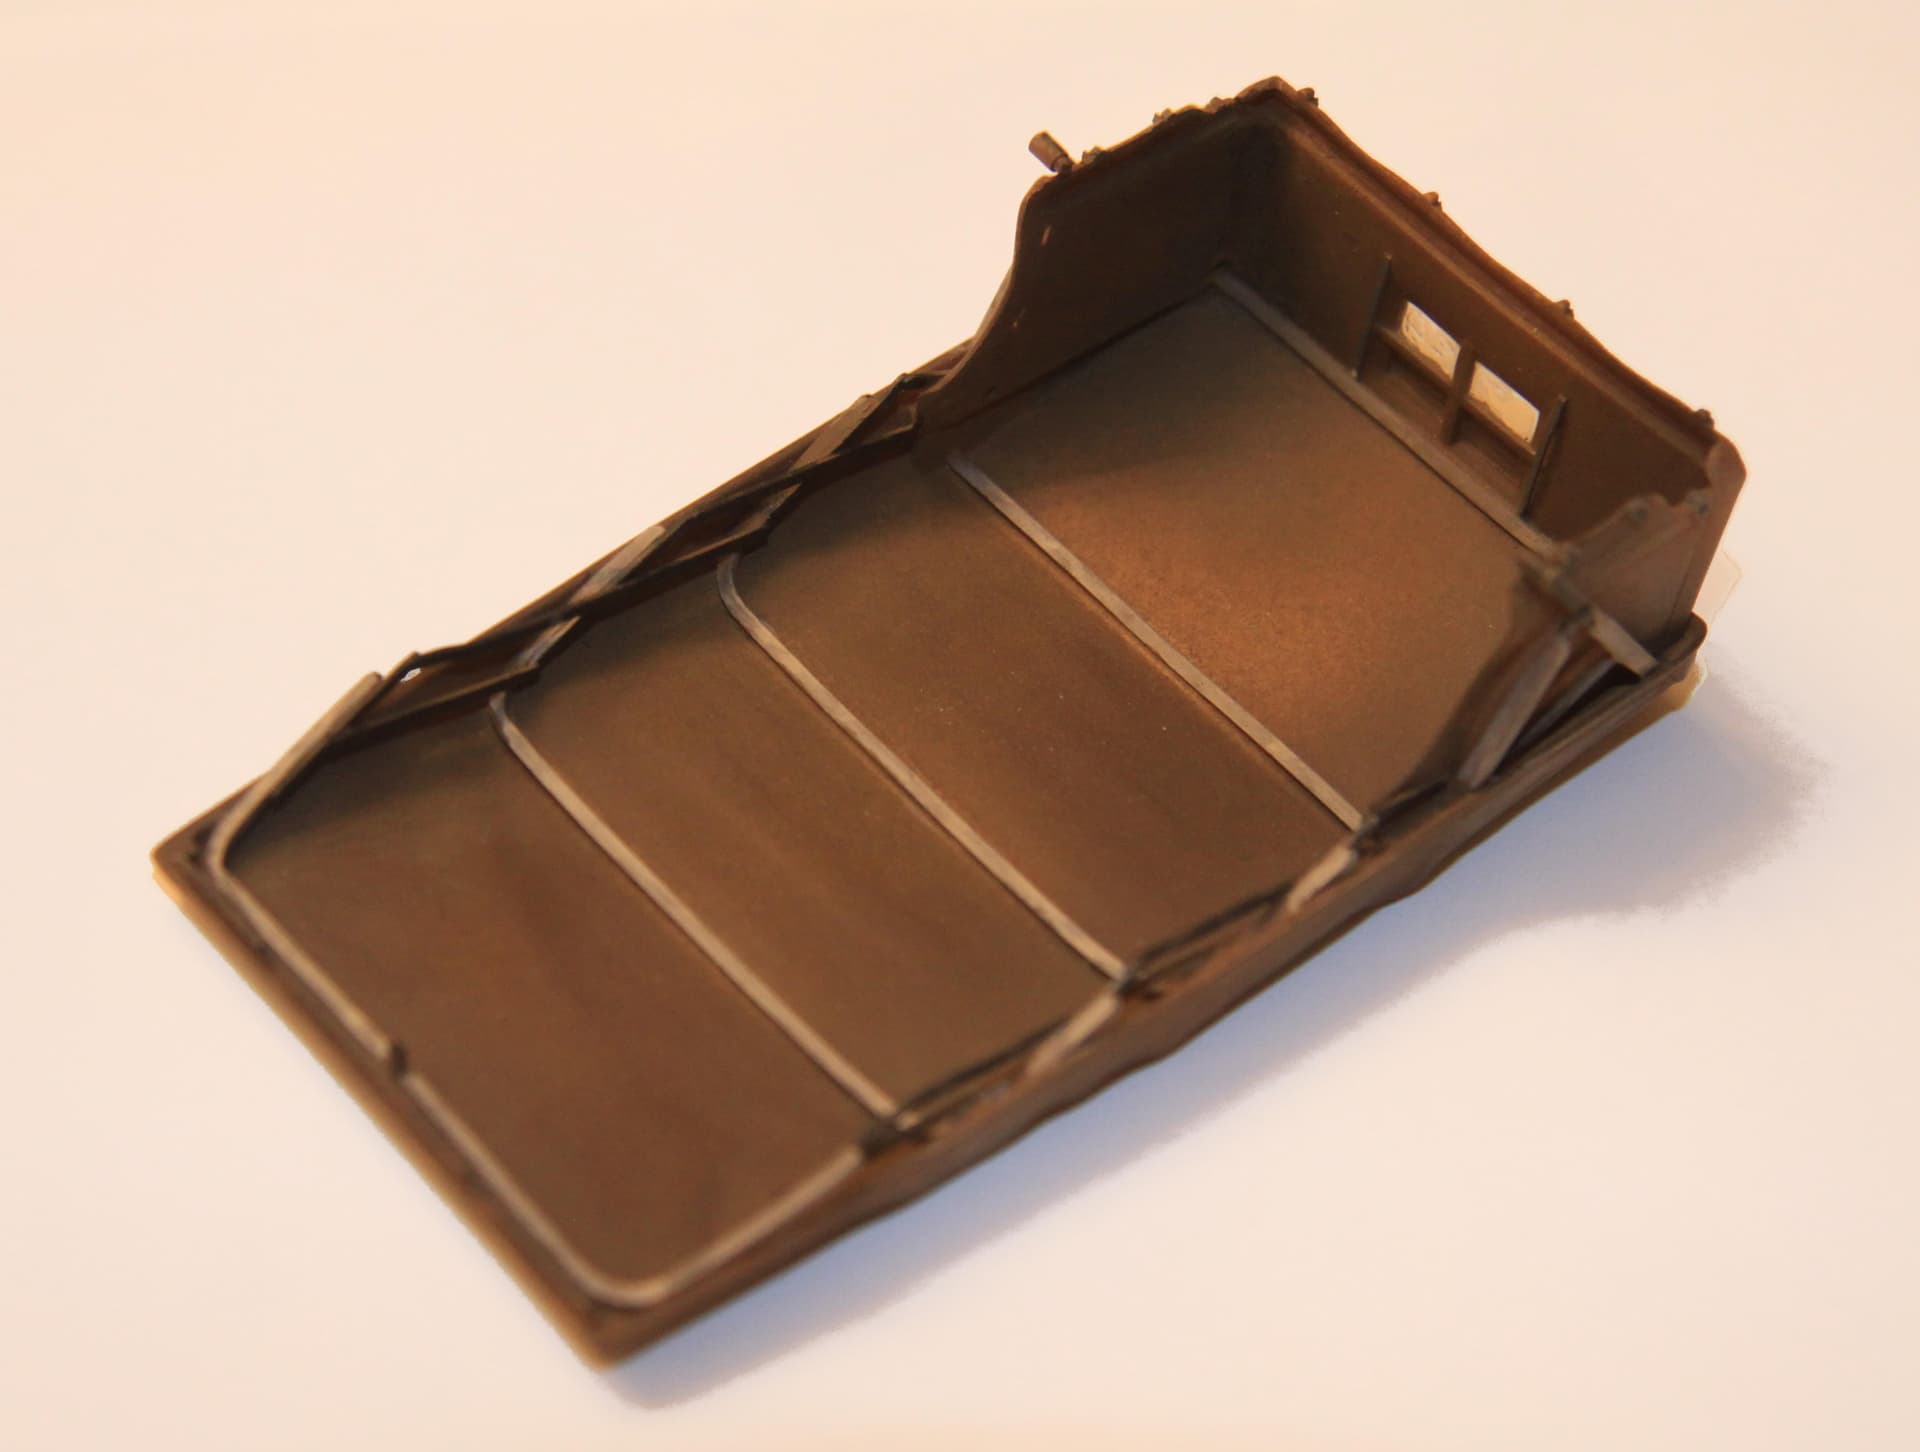
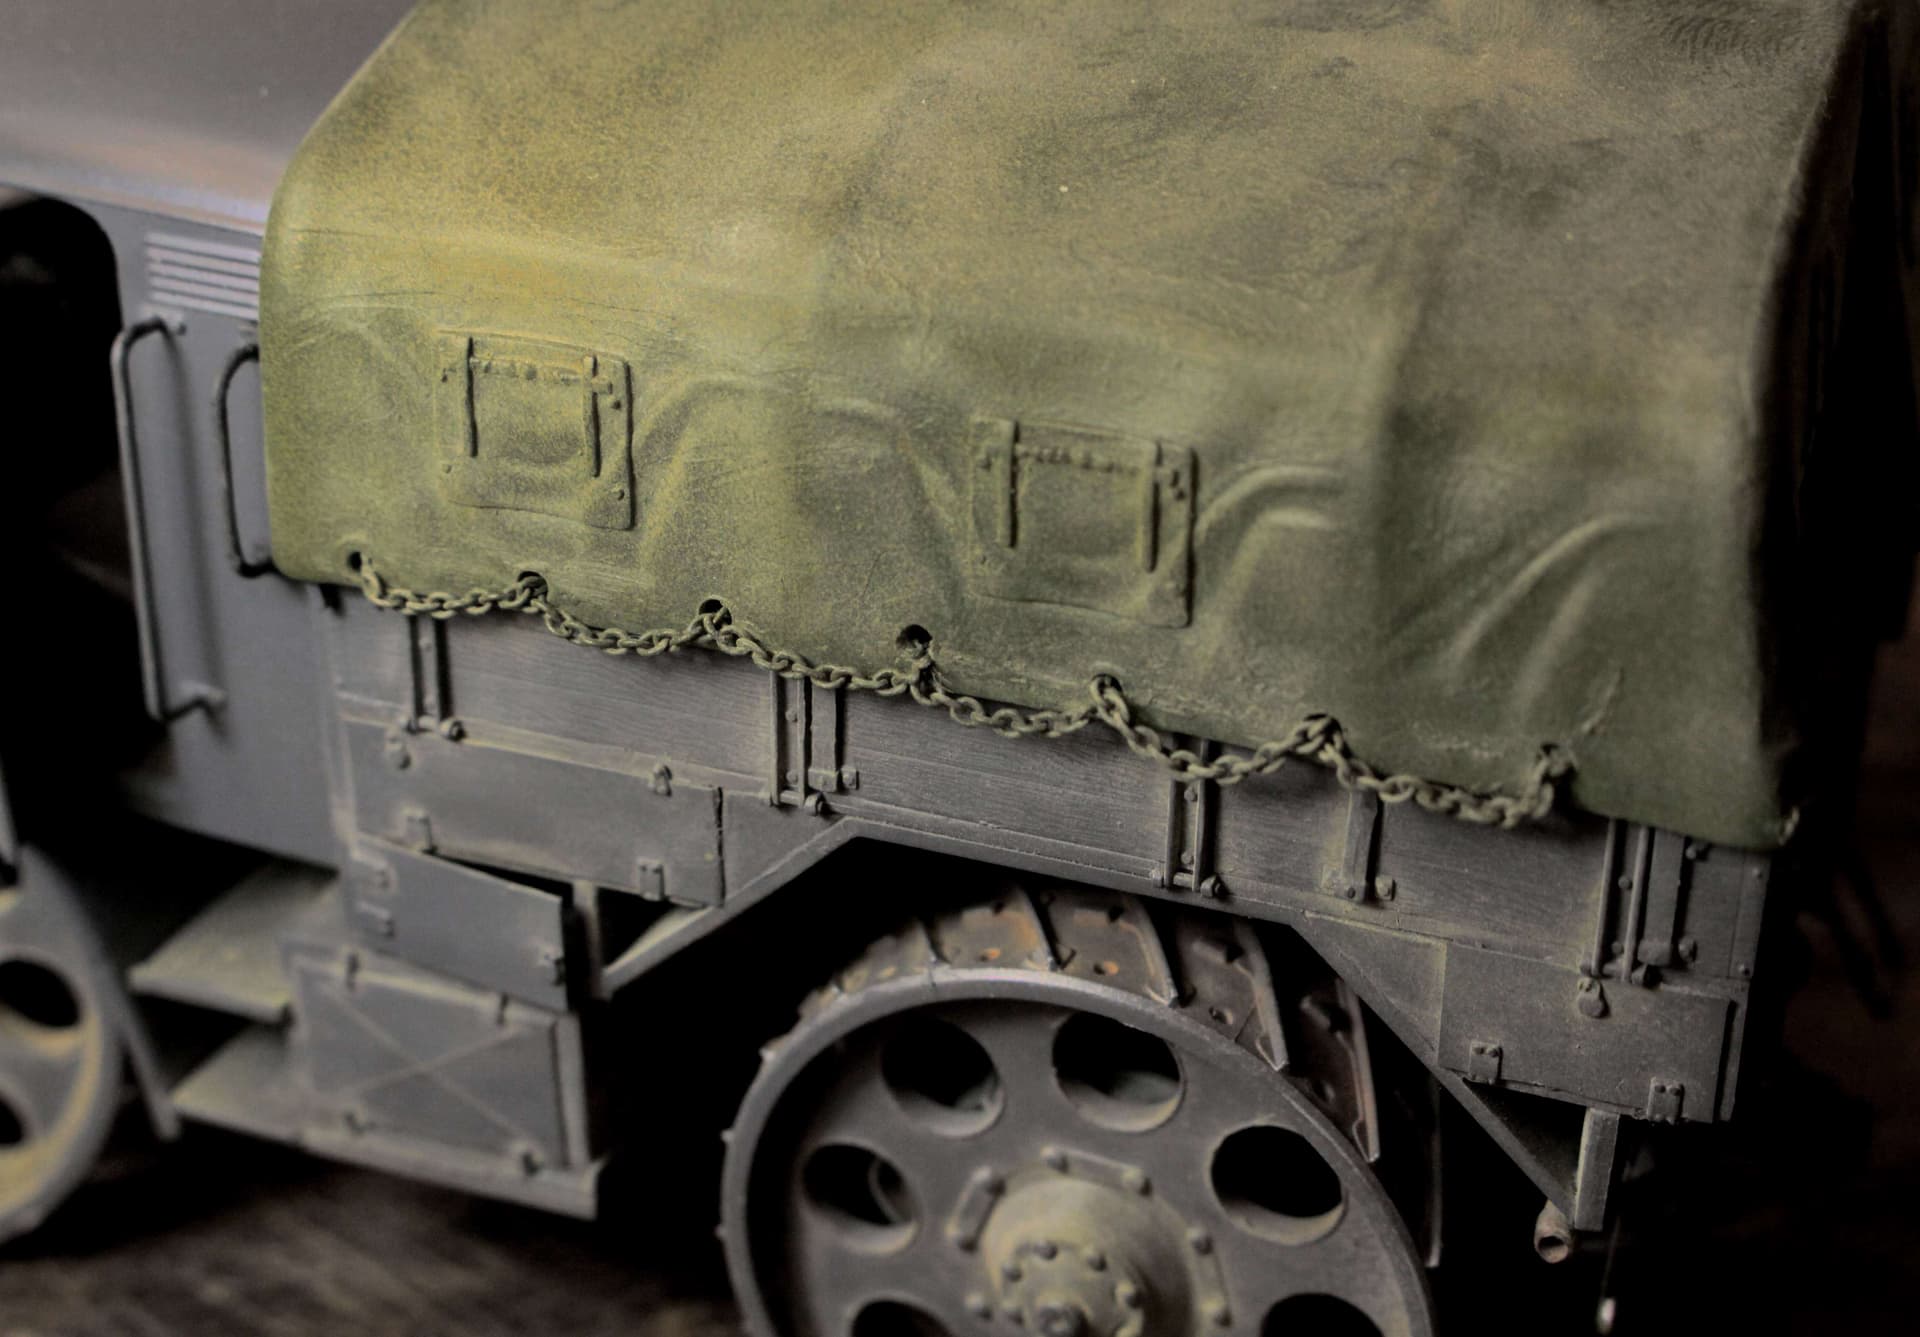
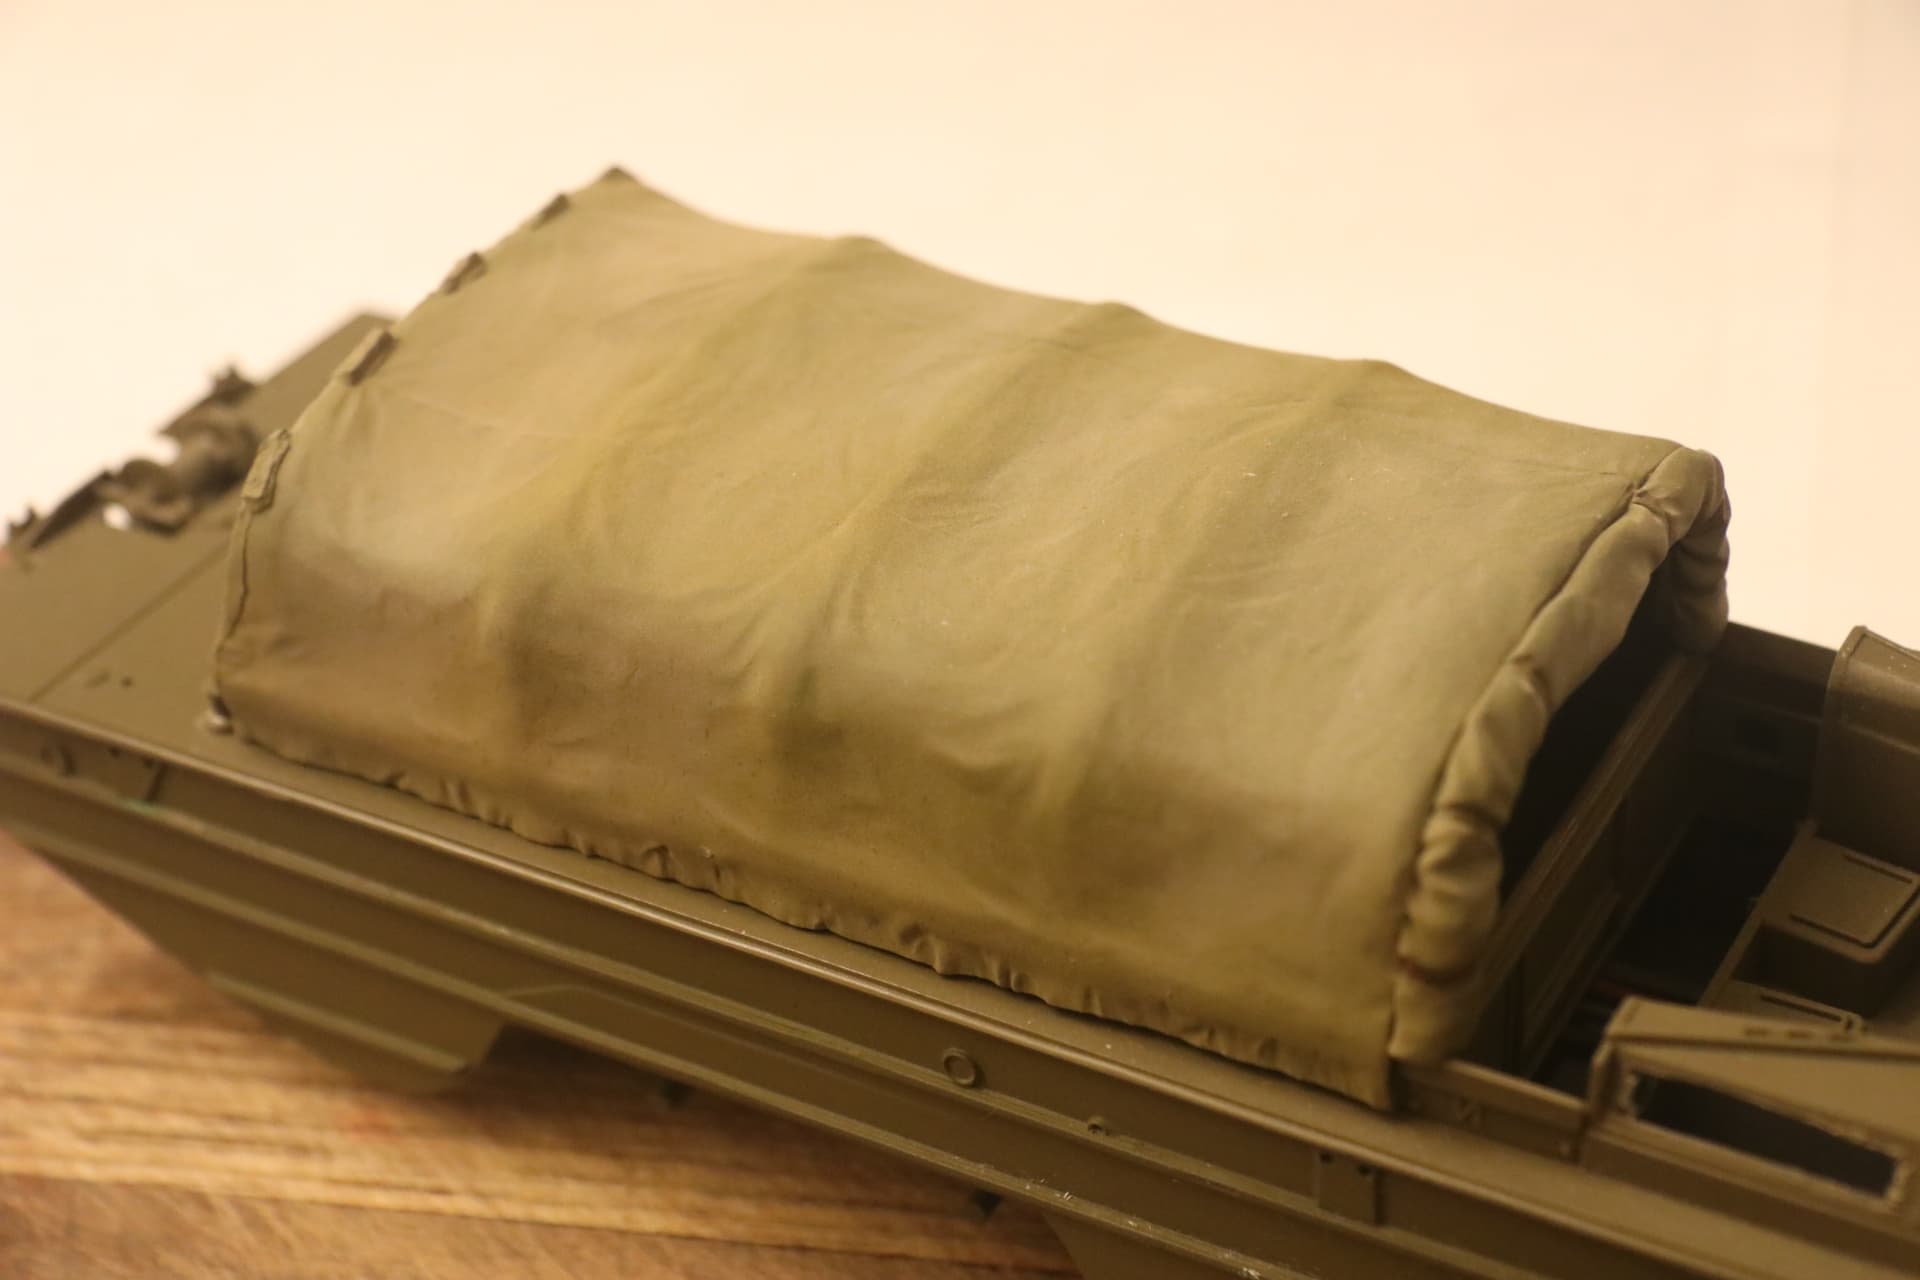
Pick your desired flat (matte) base color to start. Mine will usually be German Dark Yellow, Sand or Buff. Then give the canvas surface an overcoat of Matte Clear sprayed on very dry. (Hold can well away from the model piece so the paint falls almost dry onto the model surface.) This both gives a “toothed” rough surface for the Soft Oil Pastels (Pigments) to adhere to but also creates a minute “canvas texture” that will add to the “look” of you finished model cloth work.
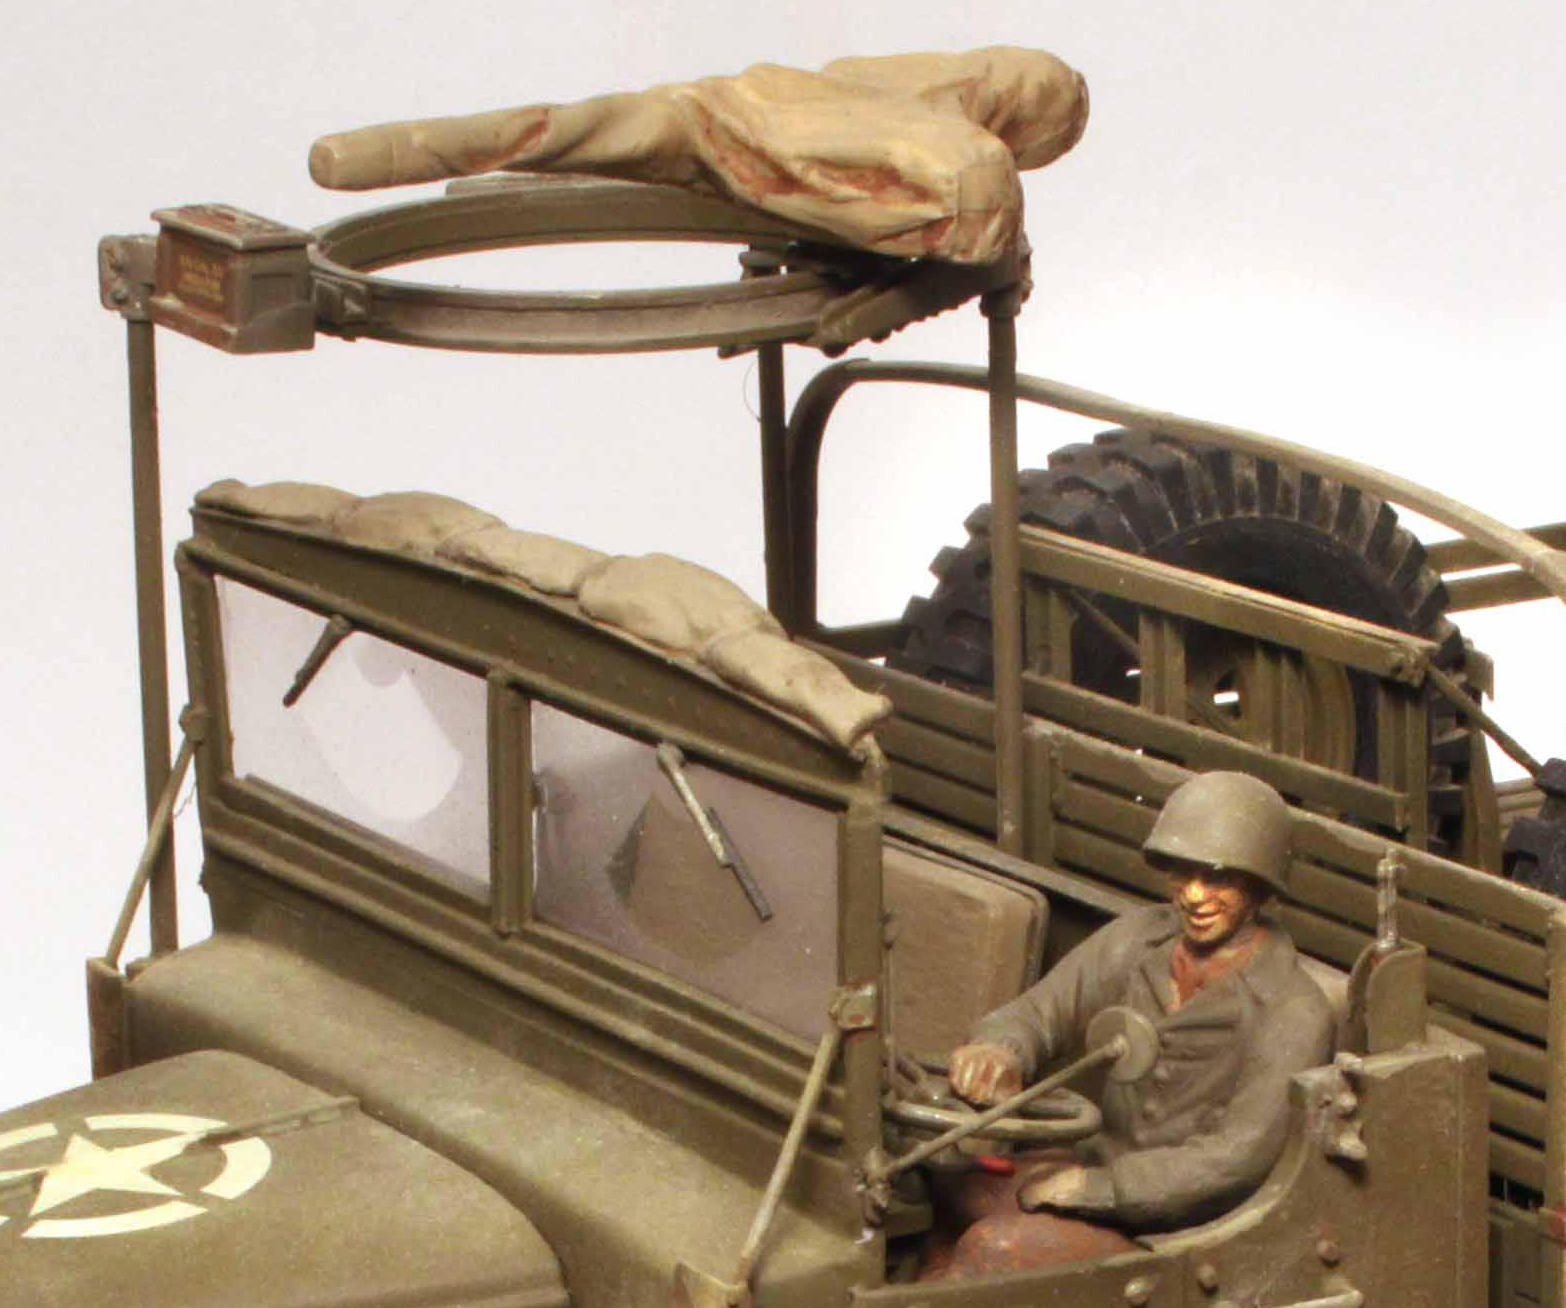
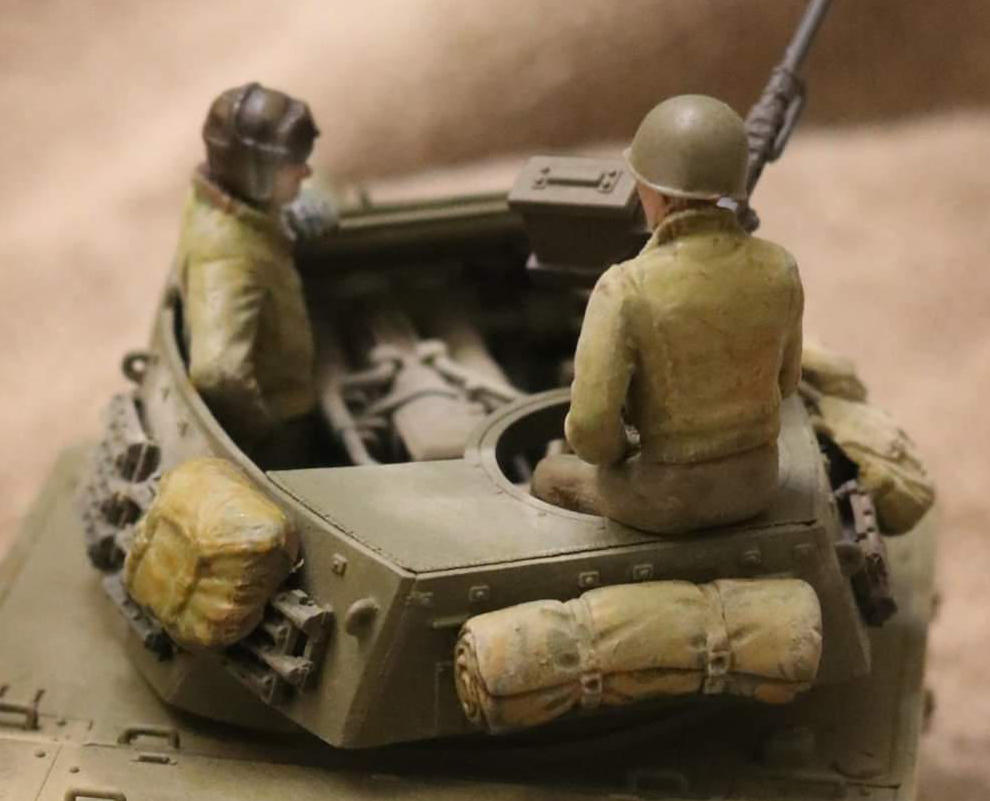
I also alternate light and darker Pastels to highlight ridges, seams and supporting ribs below the canvas.
NOTE:
I cannot stress strongly enough that the very dry coating of matte clear over the matte base color is absolutely necessary to this technique! The rough surface “tooth” laid down by the matte clear will give the pastel pigments something to grab on to, making the pigments ALMOST permanent with no further need for additional clear coats.
Also when using water based washes such as the Citadel products over the oil based paints the wash may tend to pool unrealistically on top of the oil unless this dry matte surface is created first!
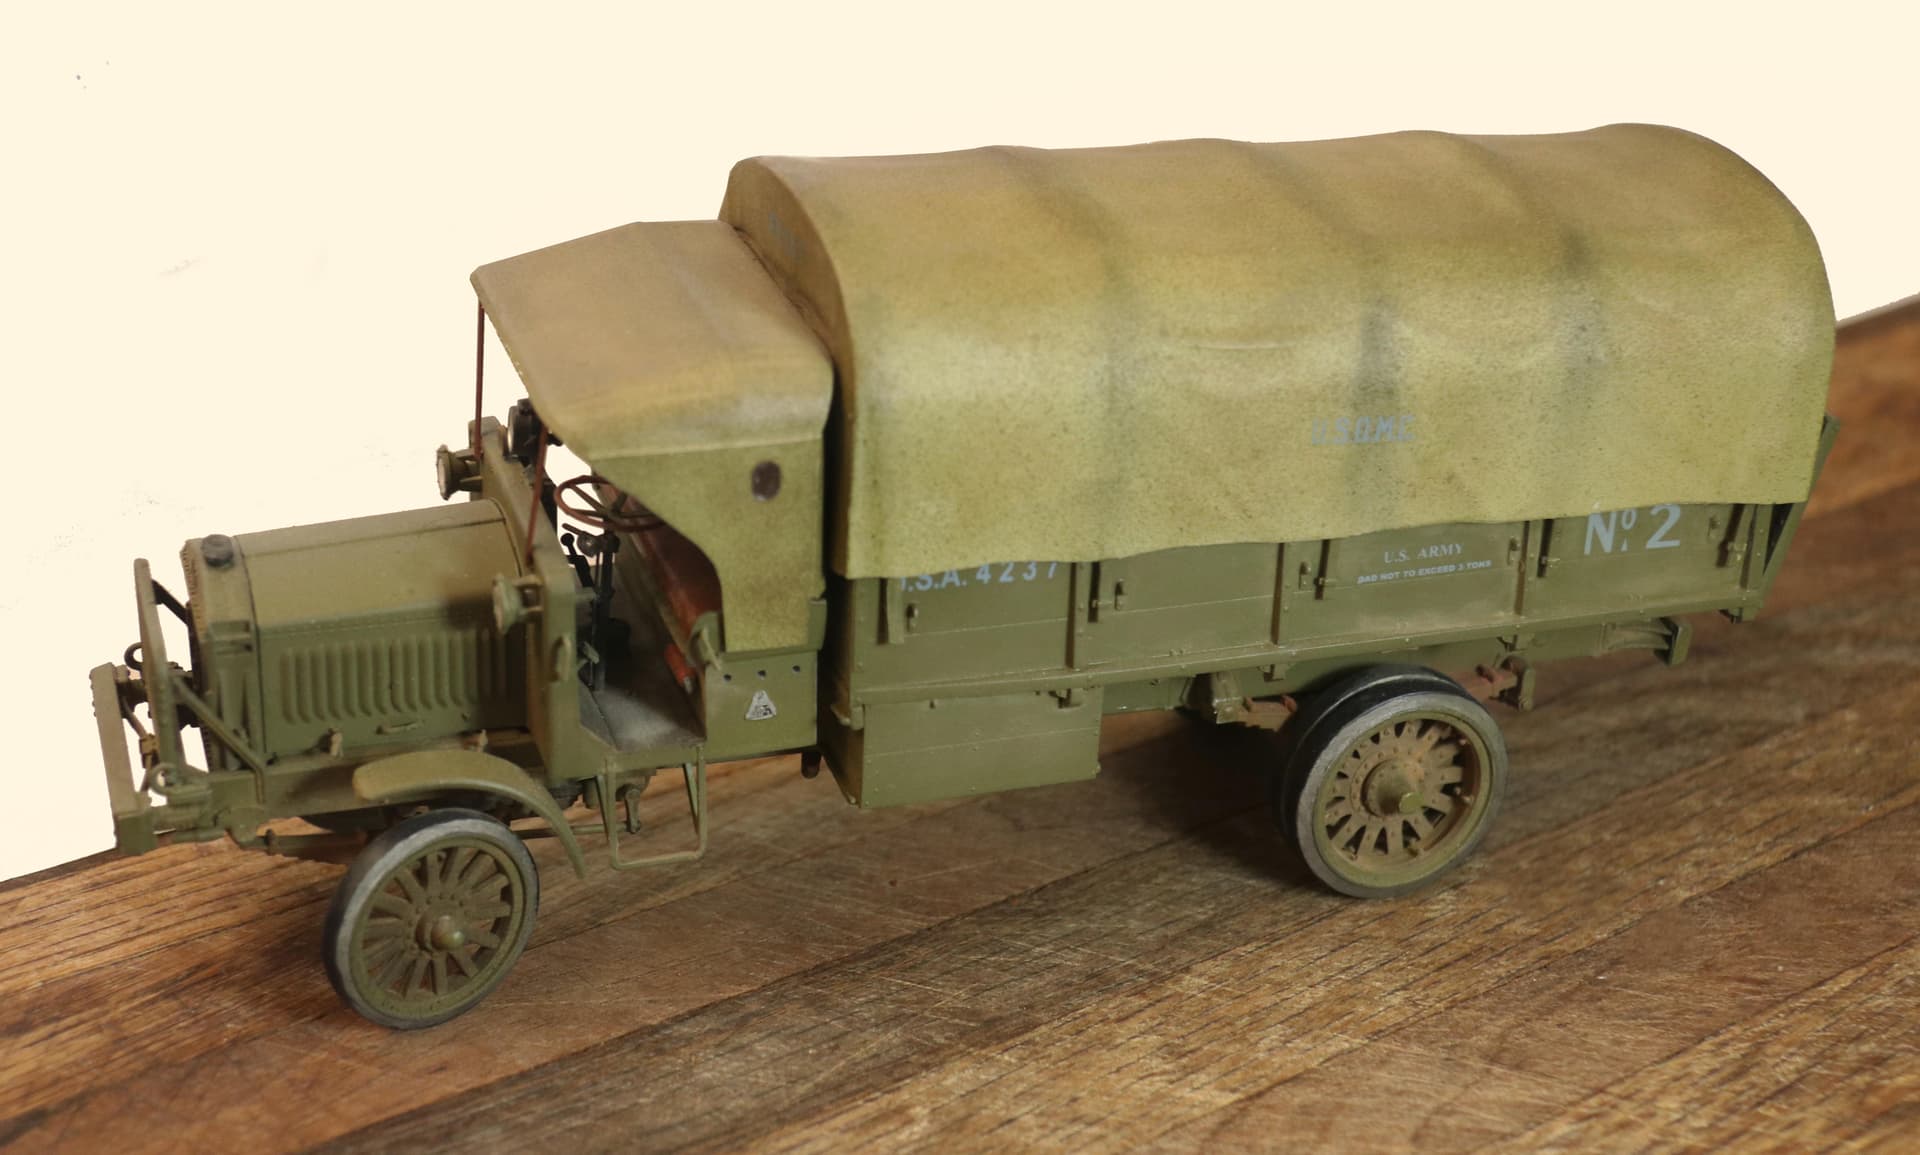
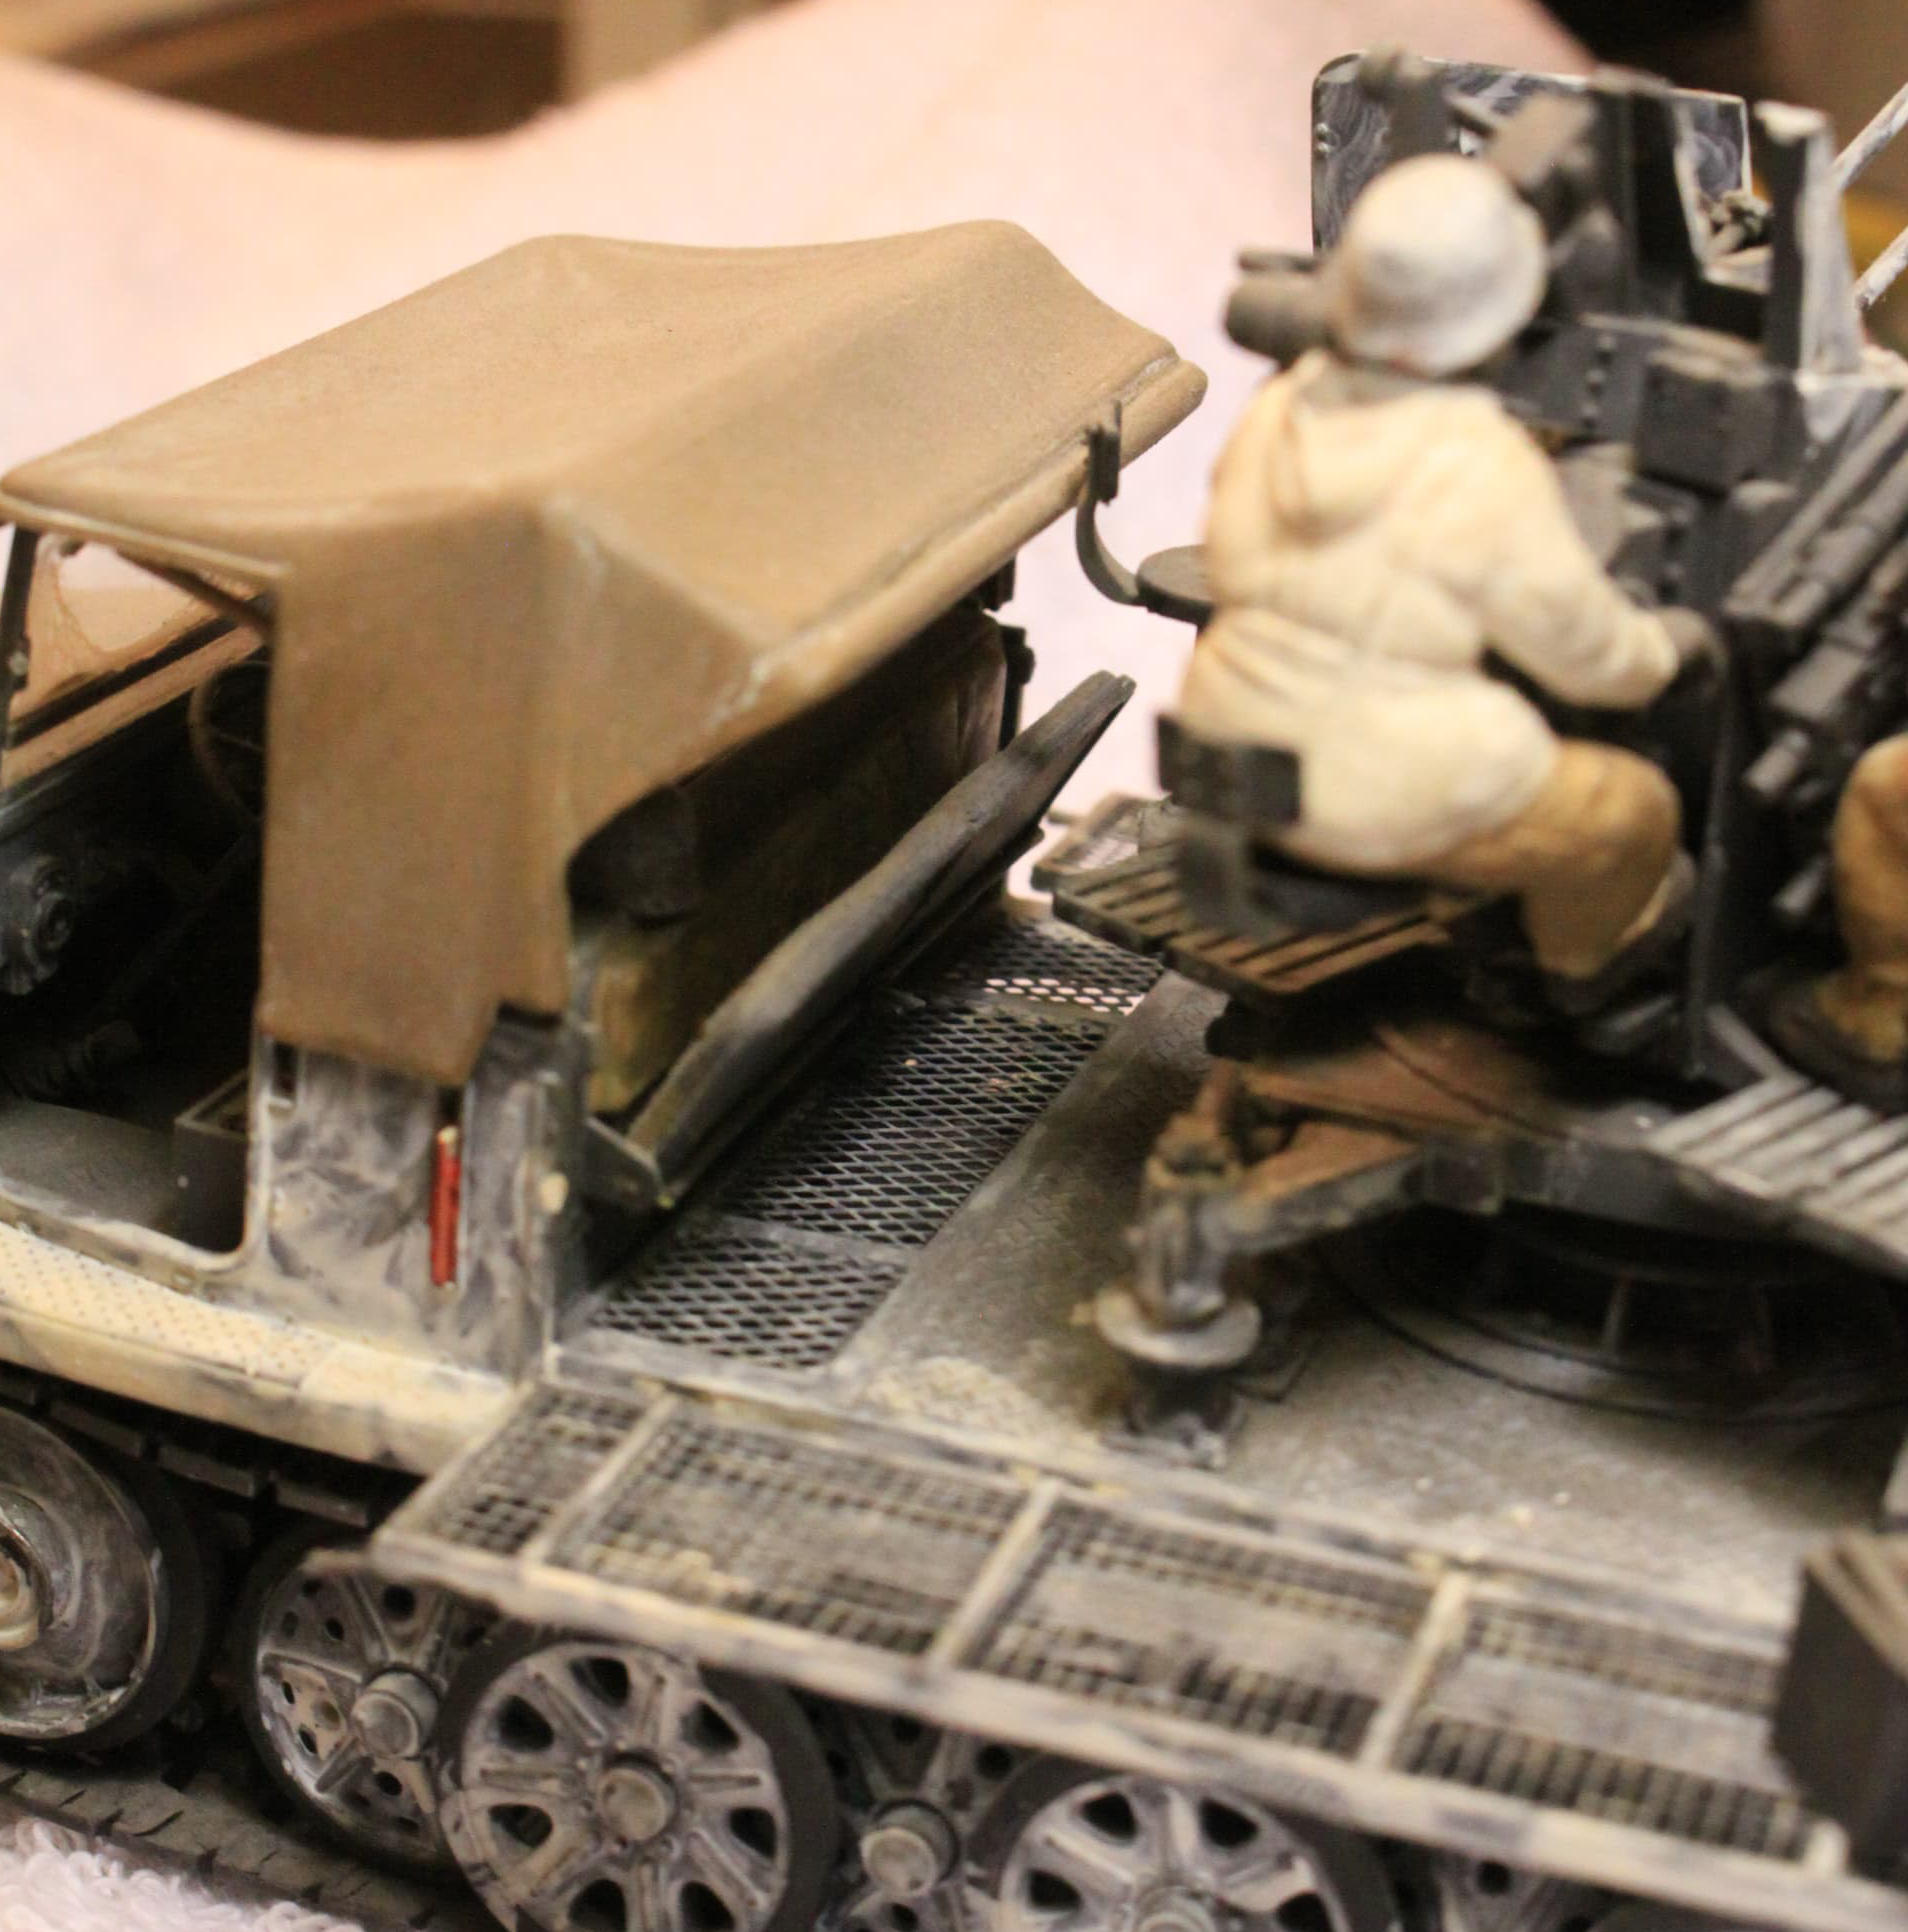
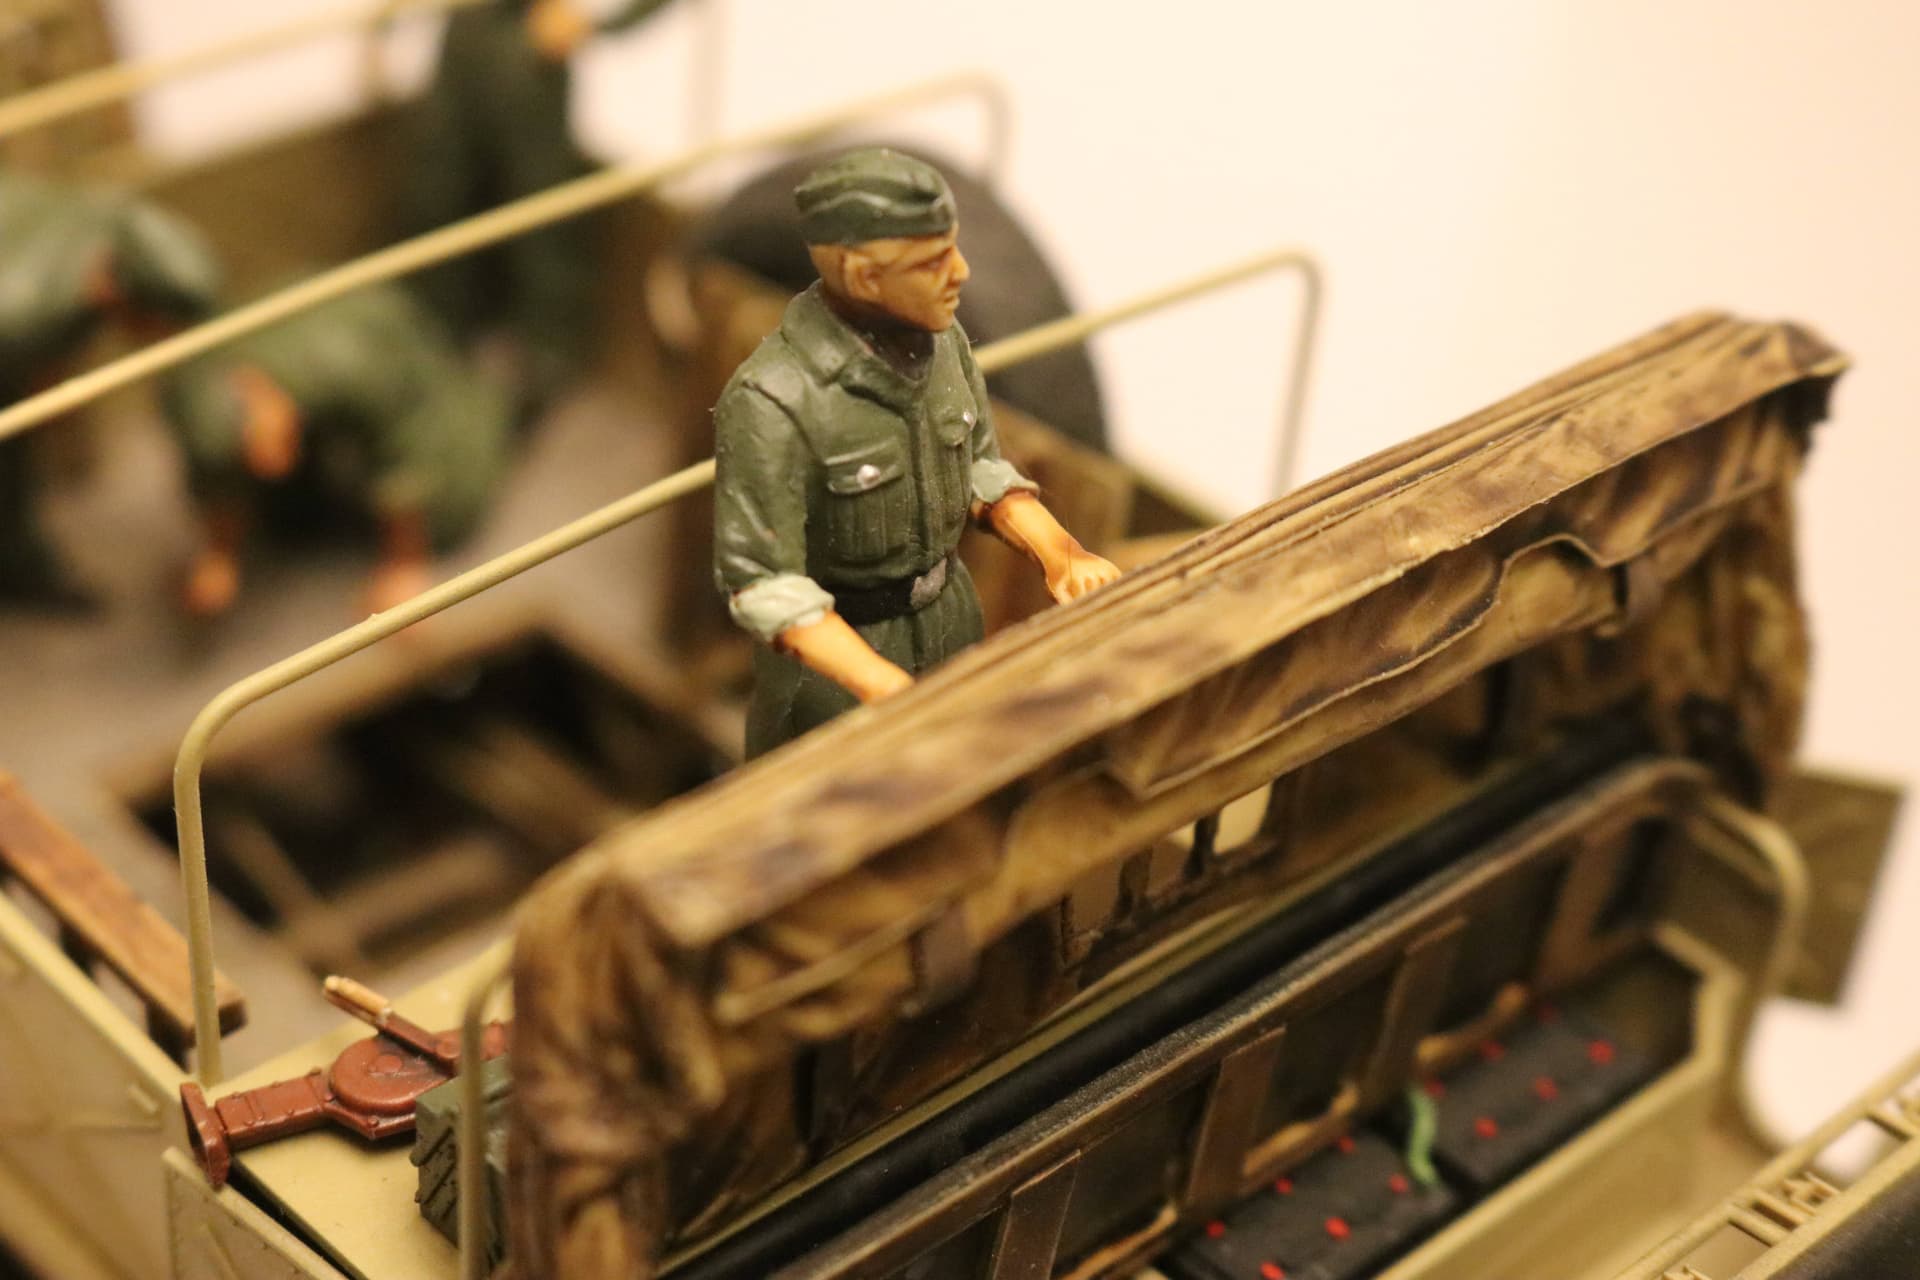
End flats are often an easy addition using thin plastic sheet.
(Tamiya “Plastic Paper” only 0.2mm thick)

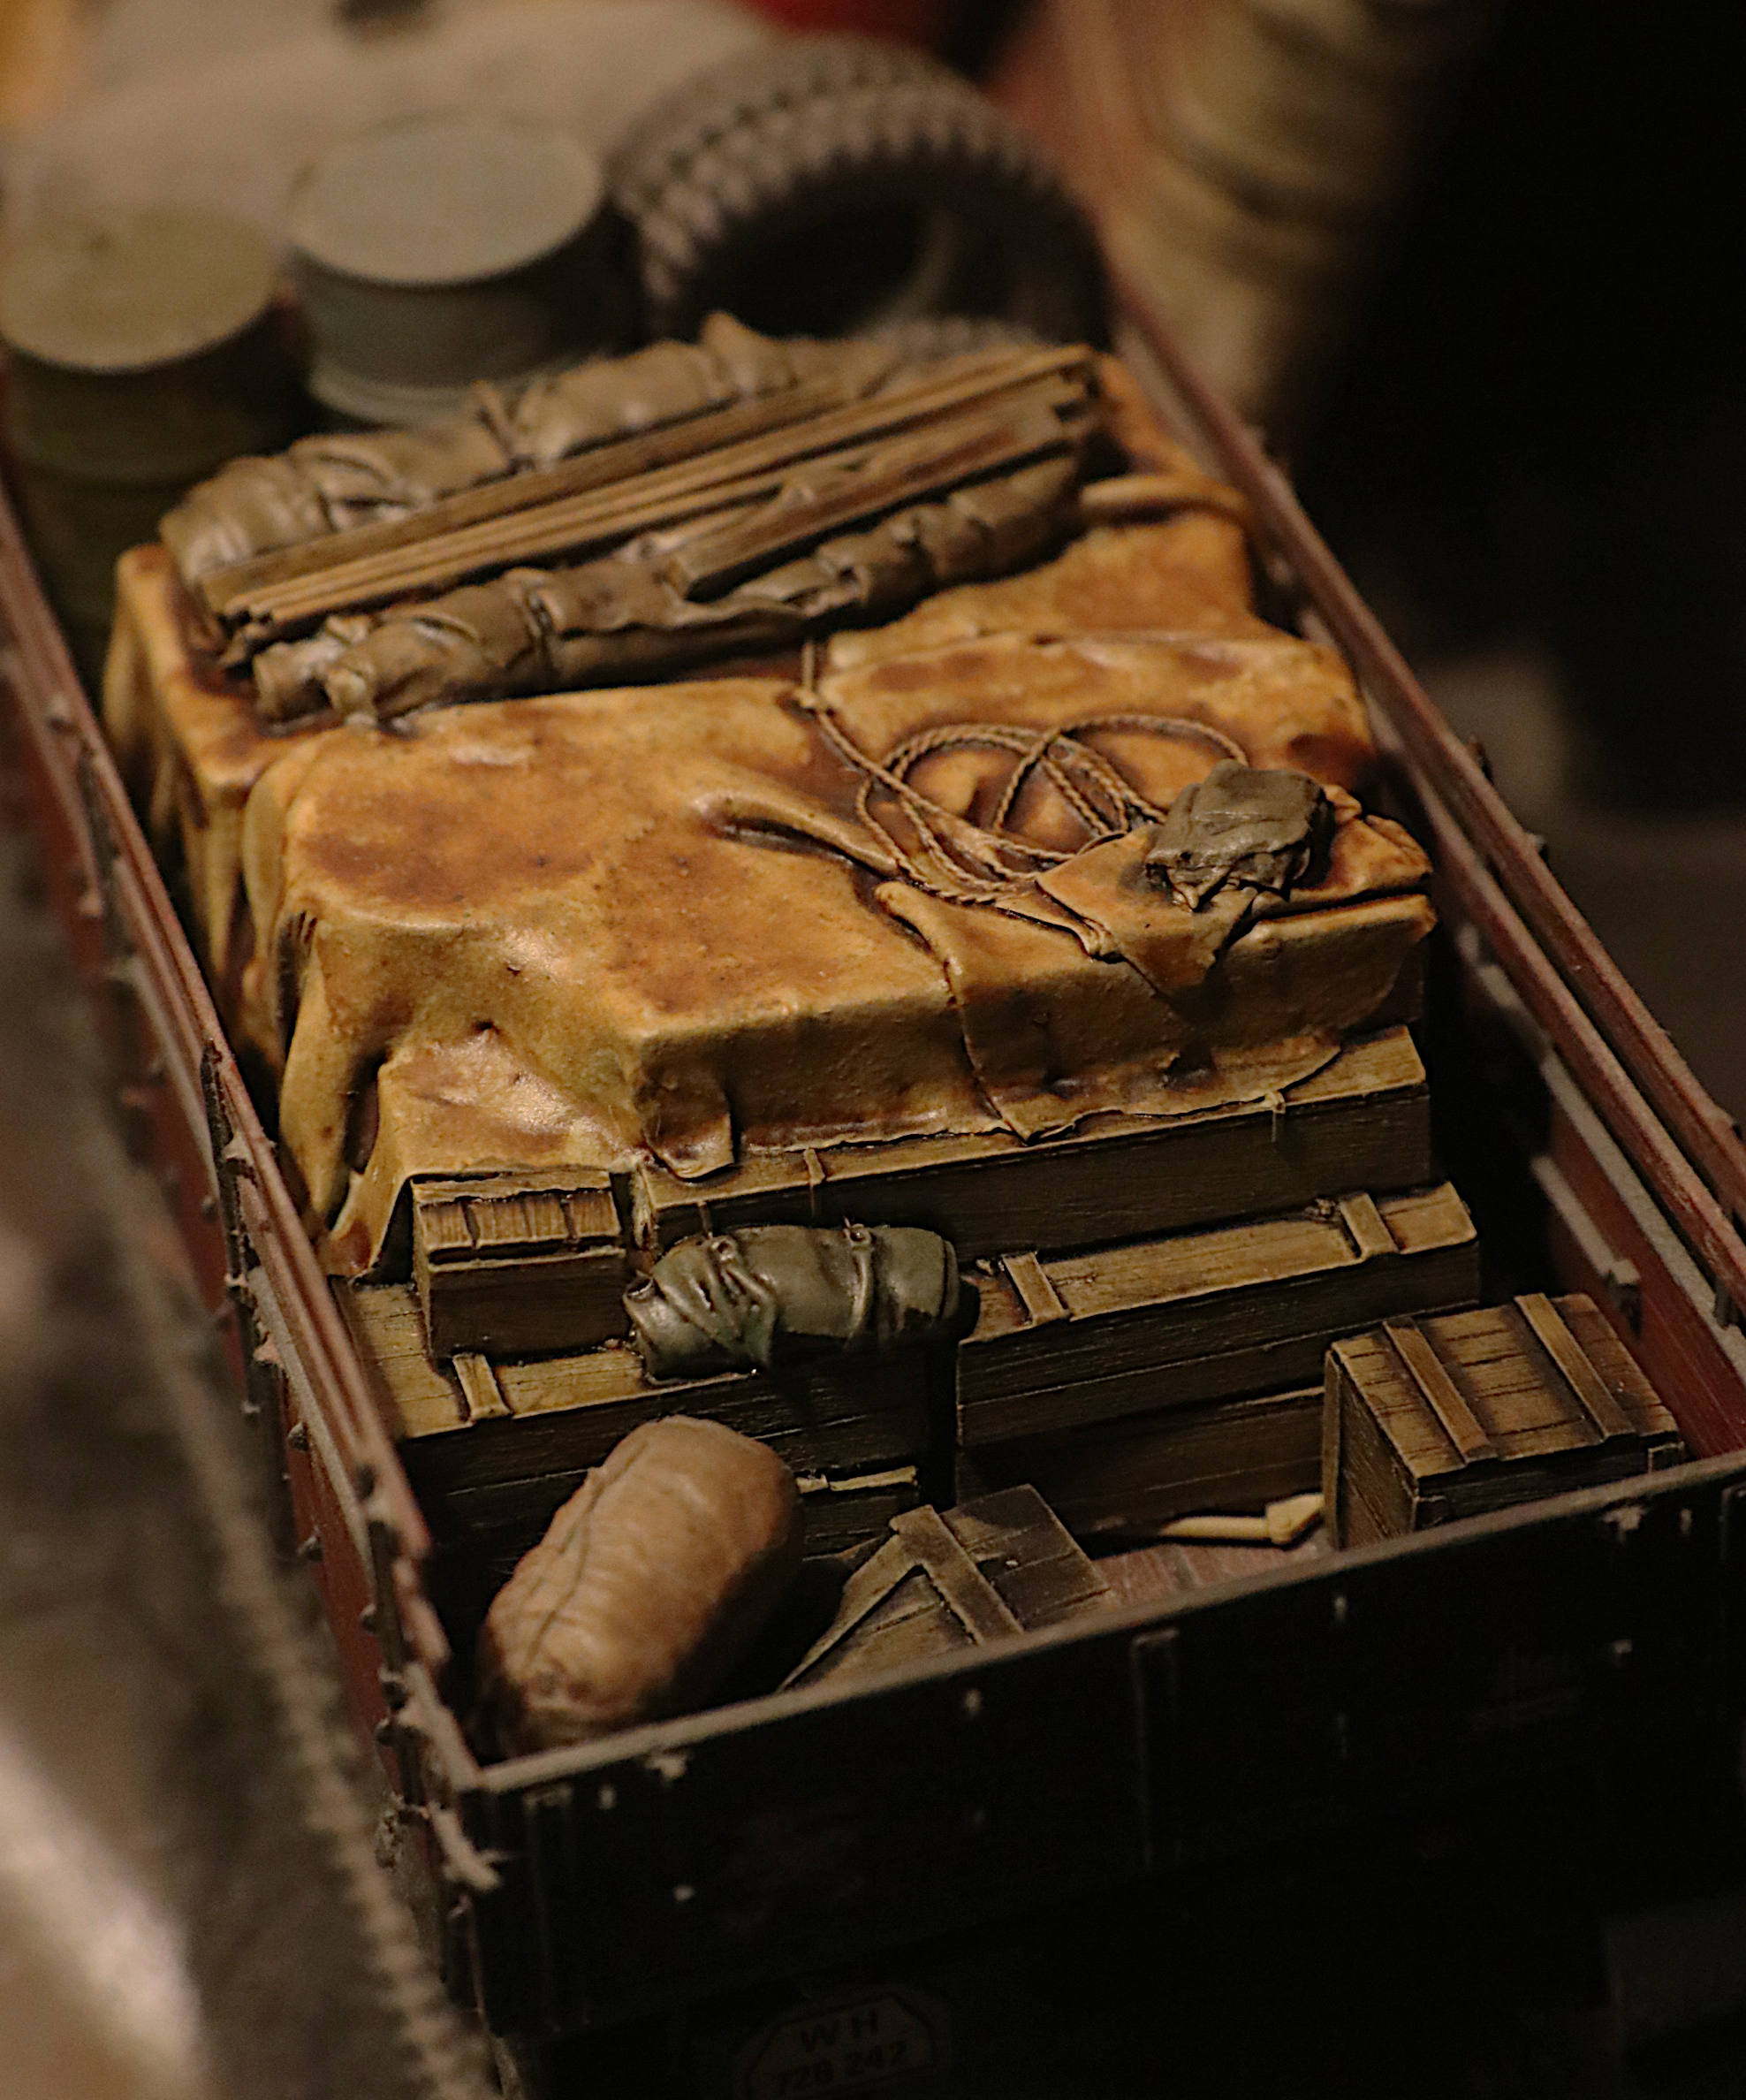
Always nice to research additional details to be added to your “canvas.”
.
.

Again, adding additional details to you canvas is a somewhat easy task.
.
.
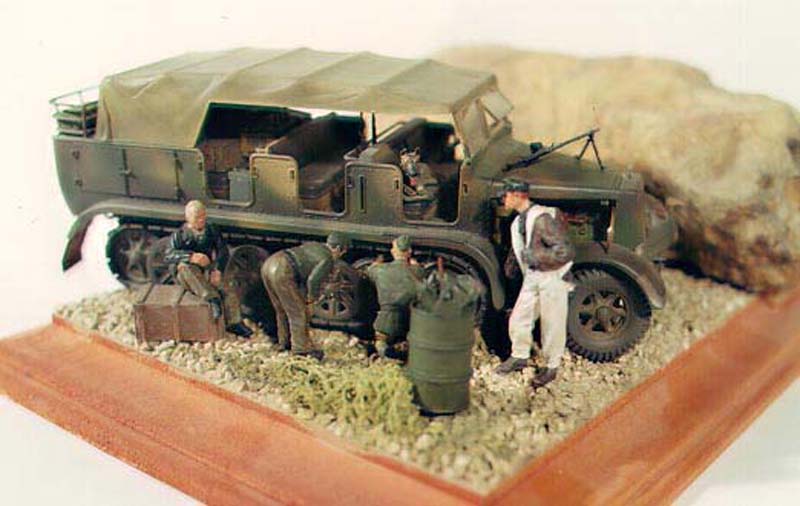
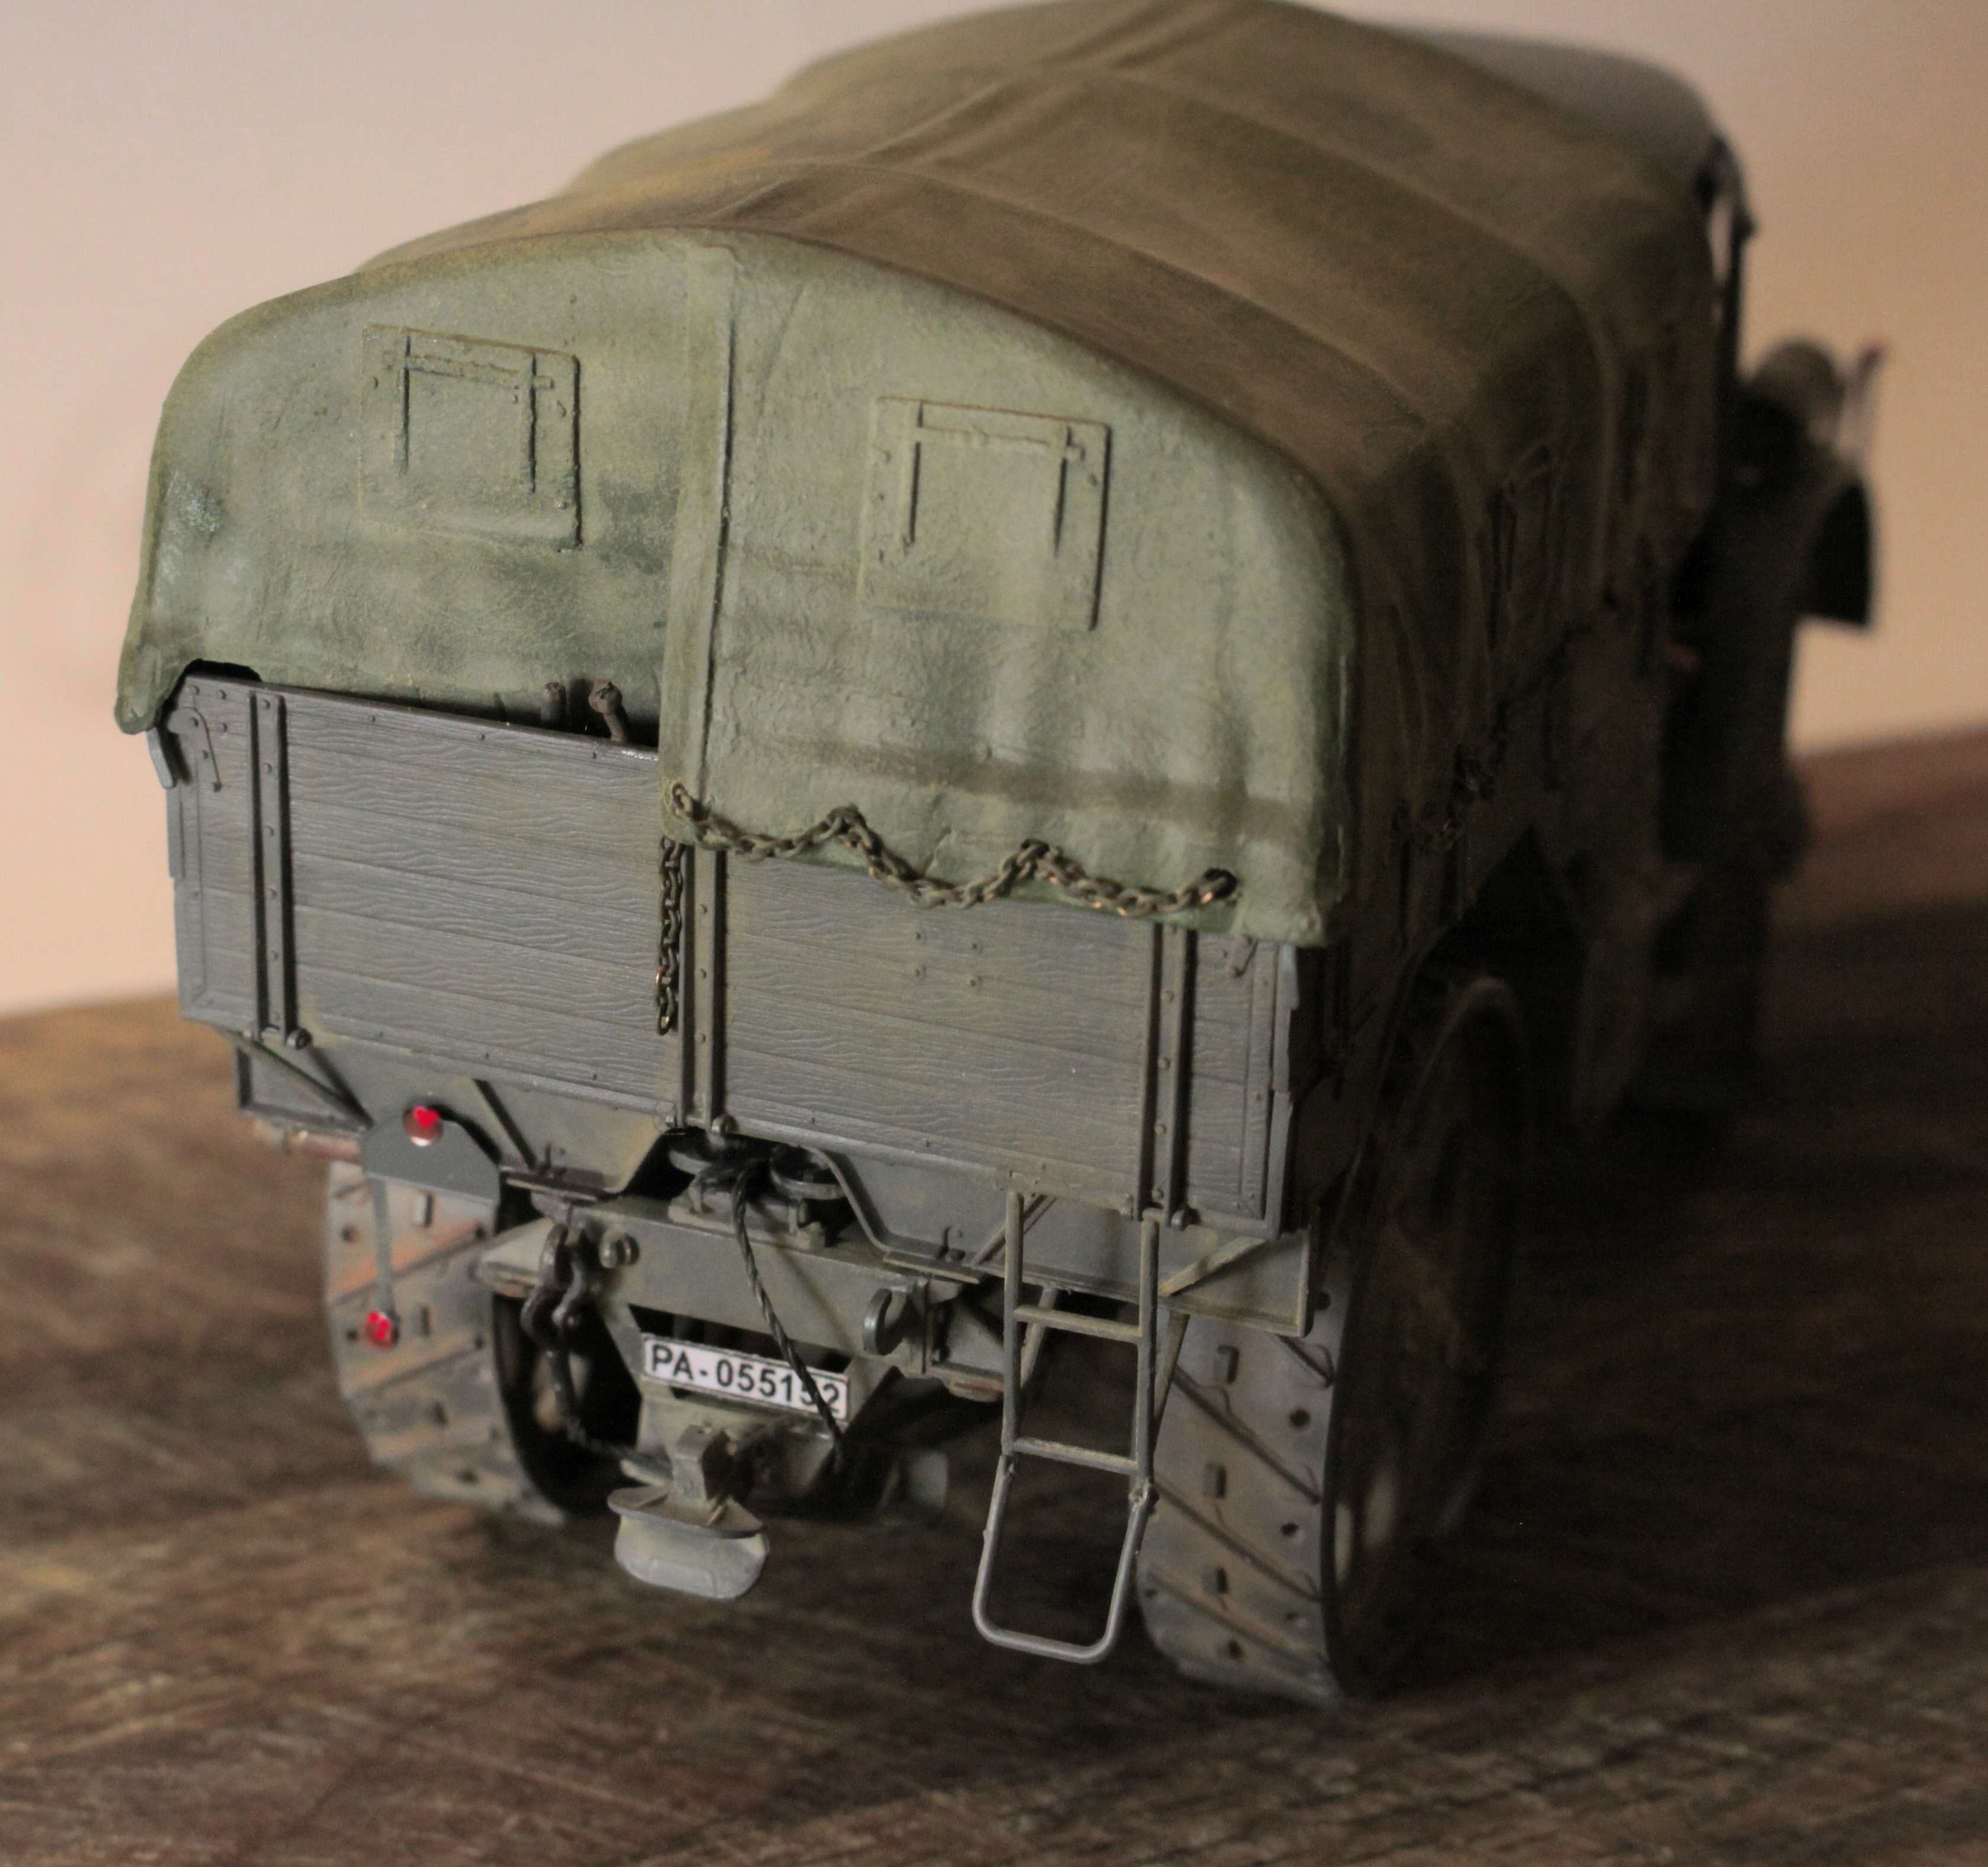
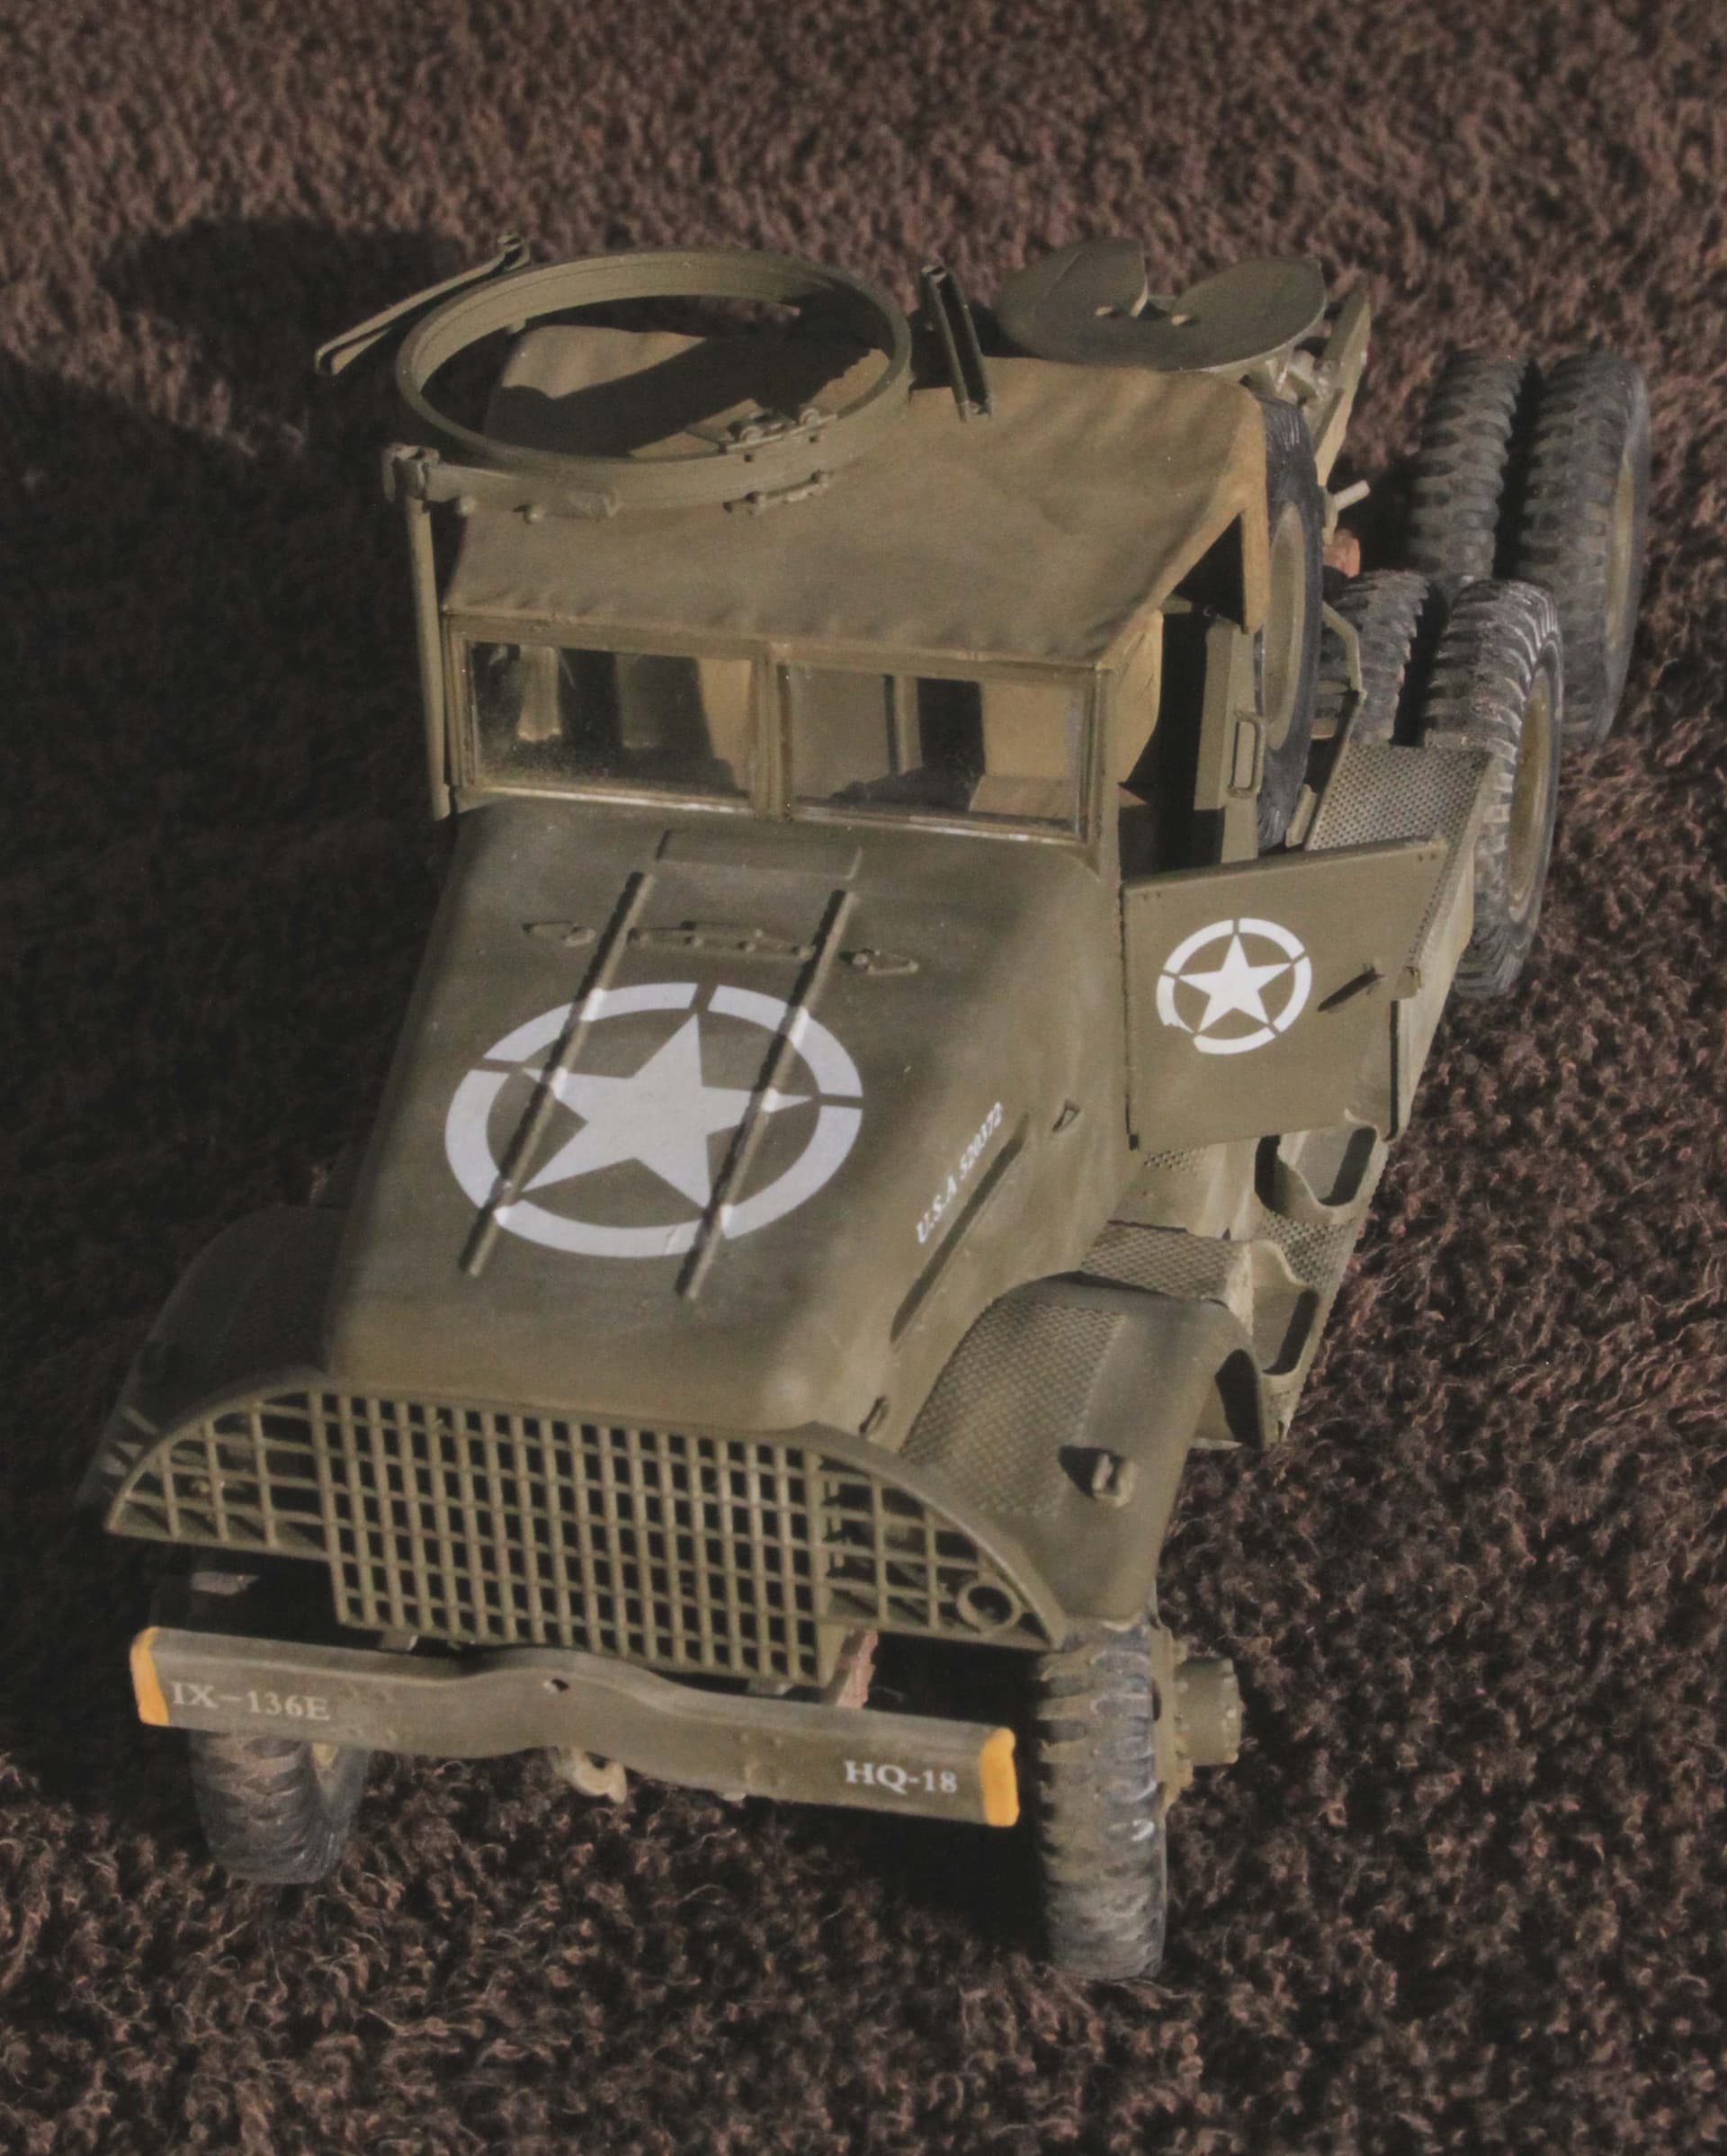
At one model competition they had a “Best Half-track” category. The Judge said I won the Class on the canvas alone.
And still with the added detailing
.
.
Details, details, details . . . . .
.
.
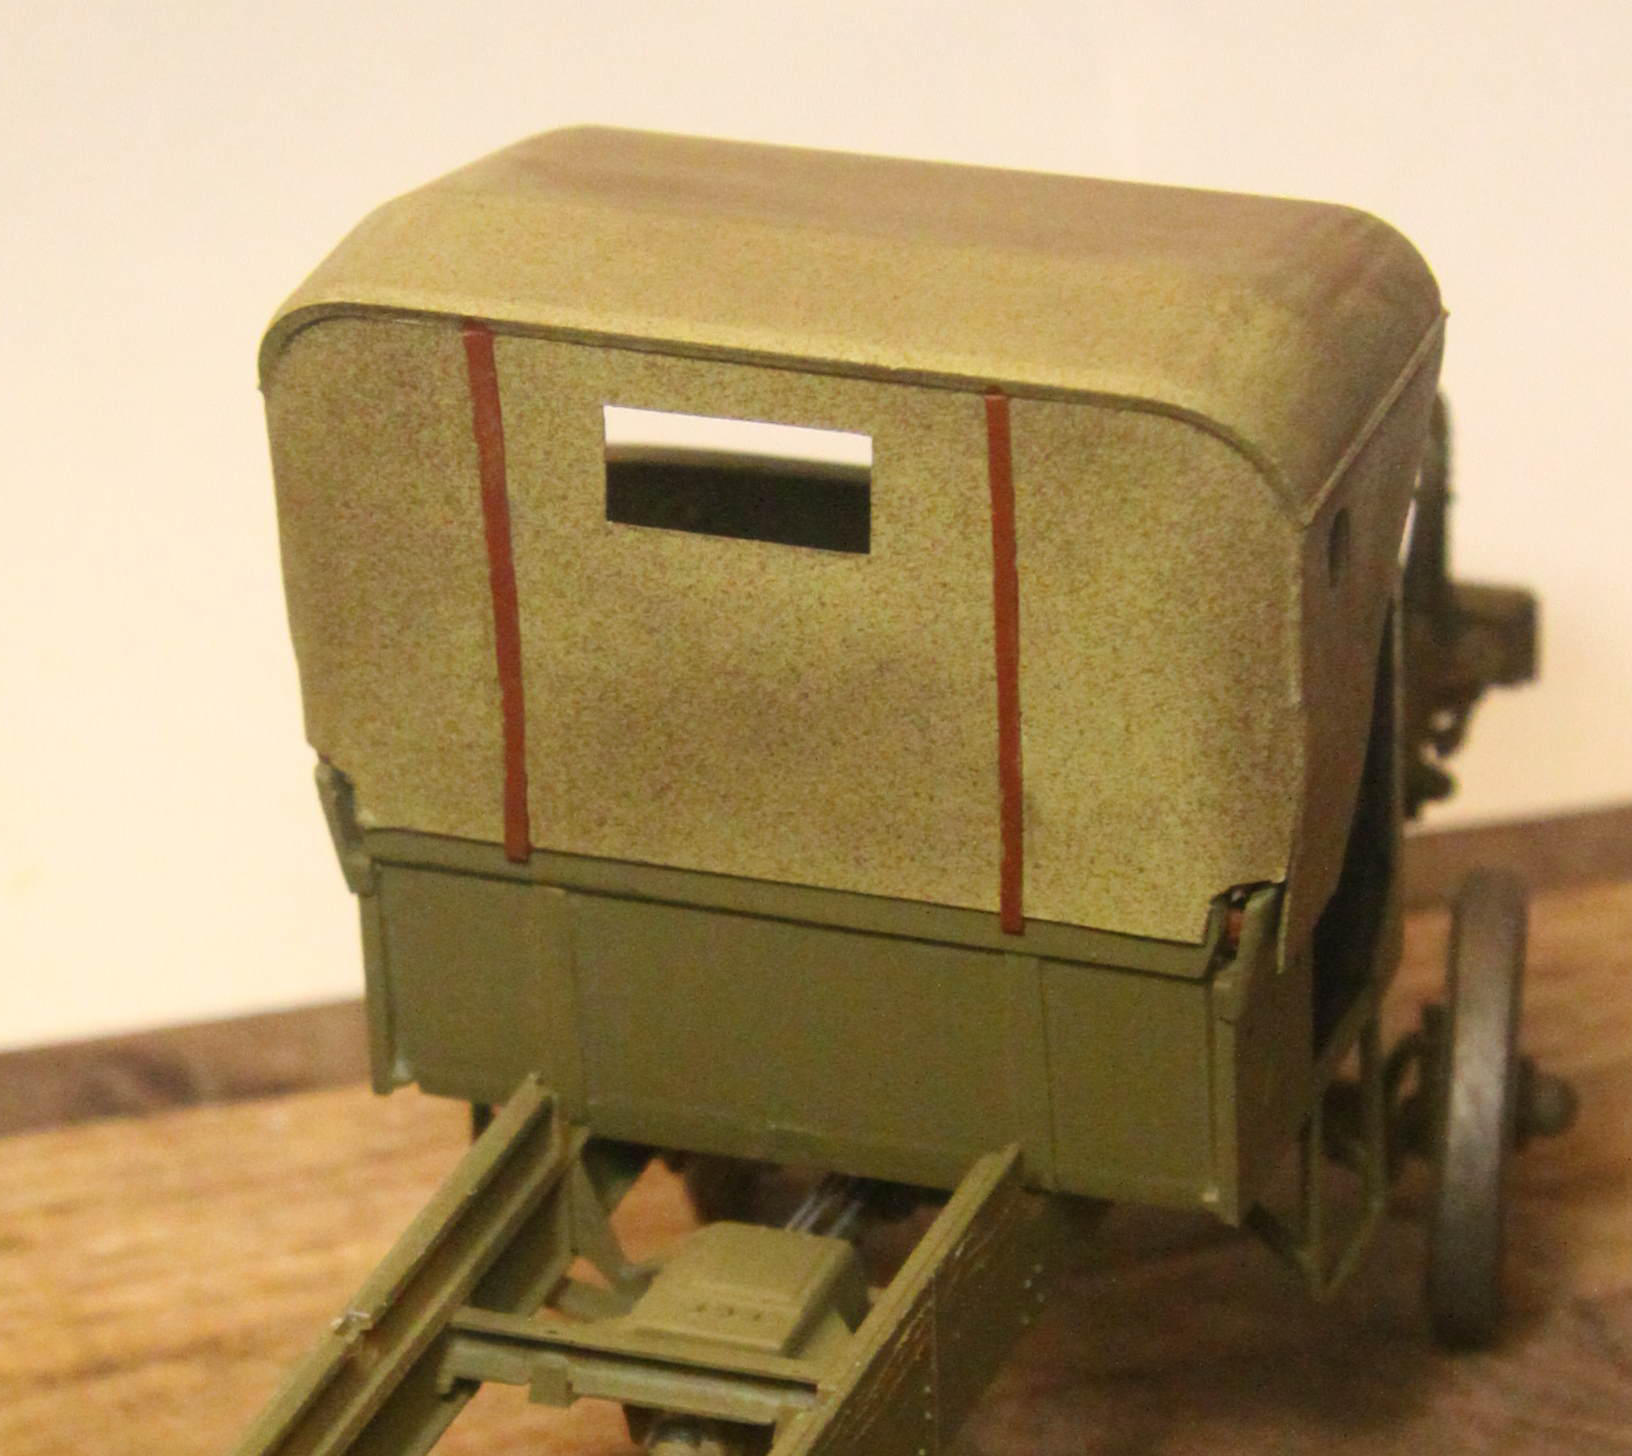
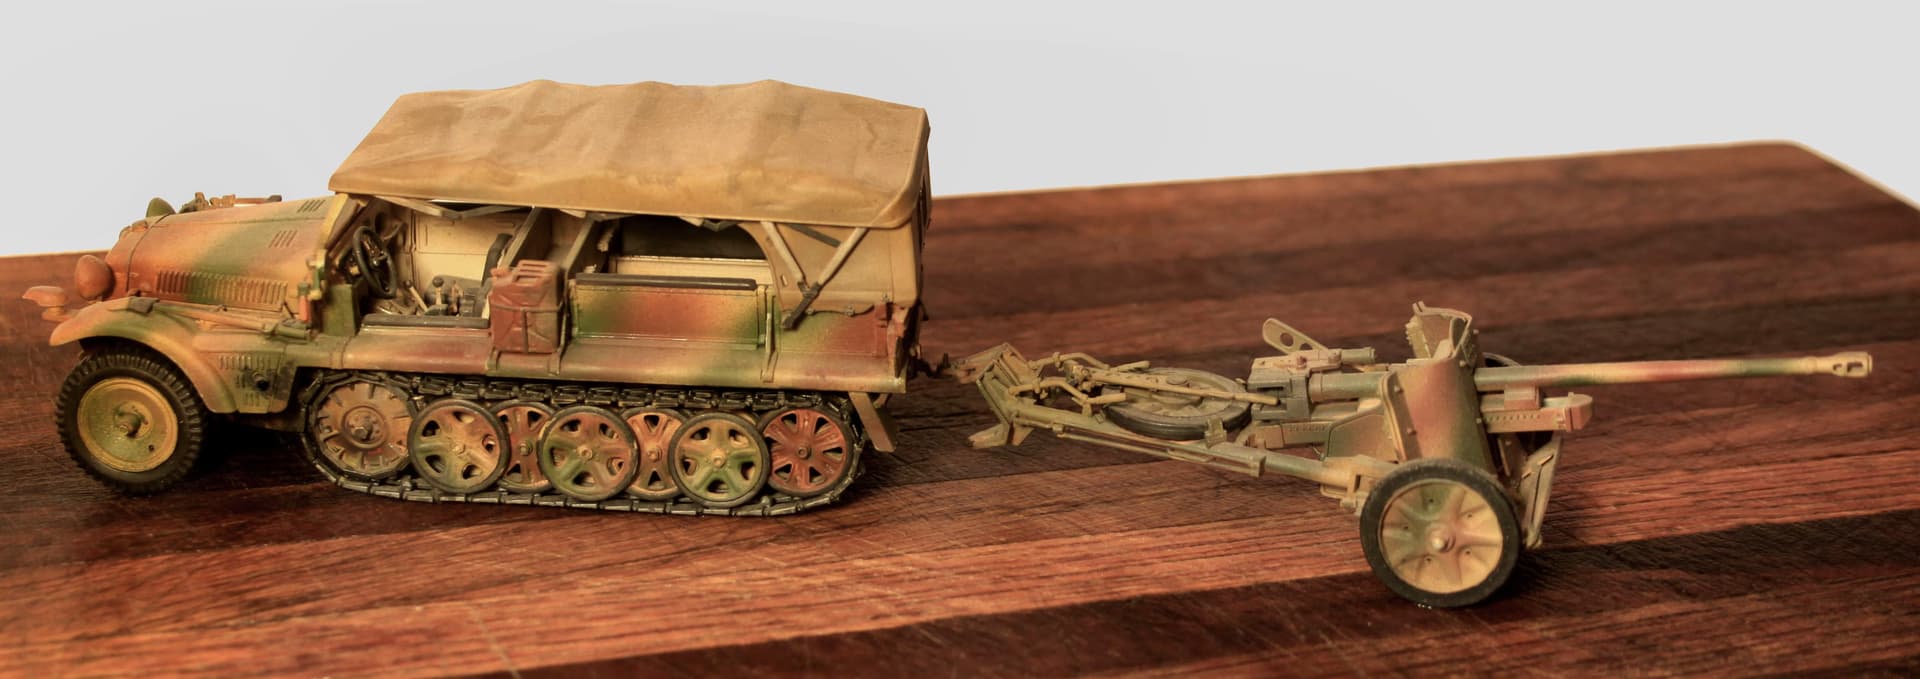
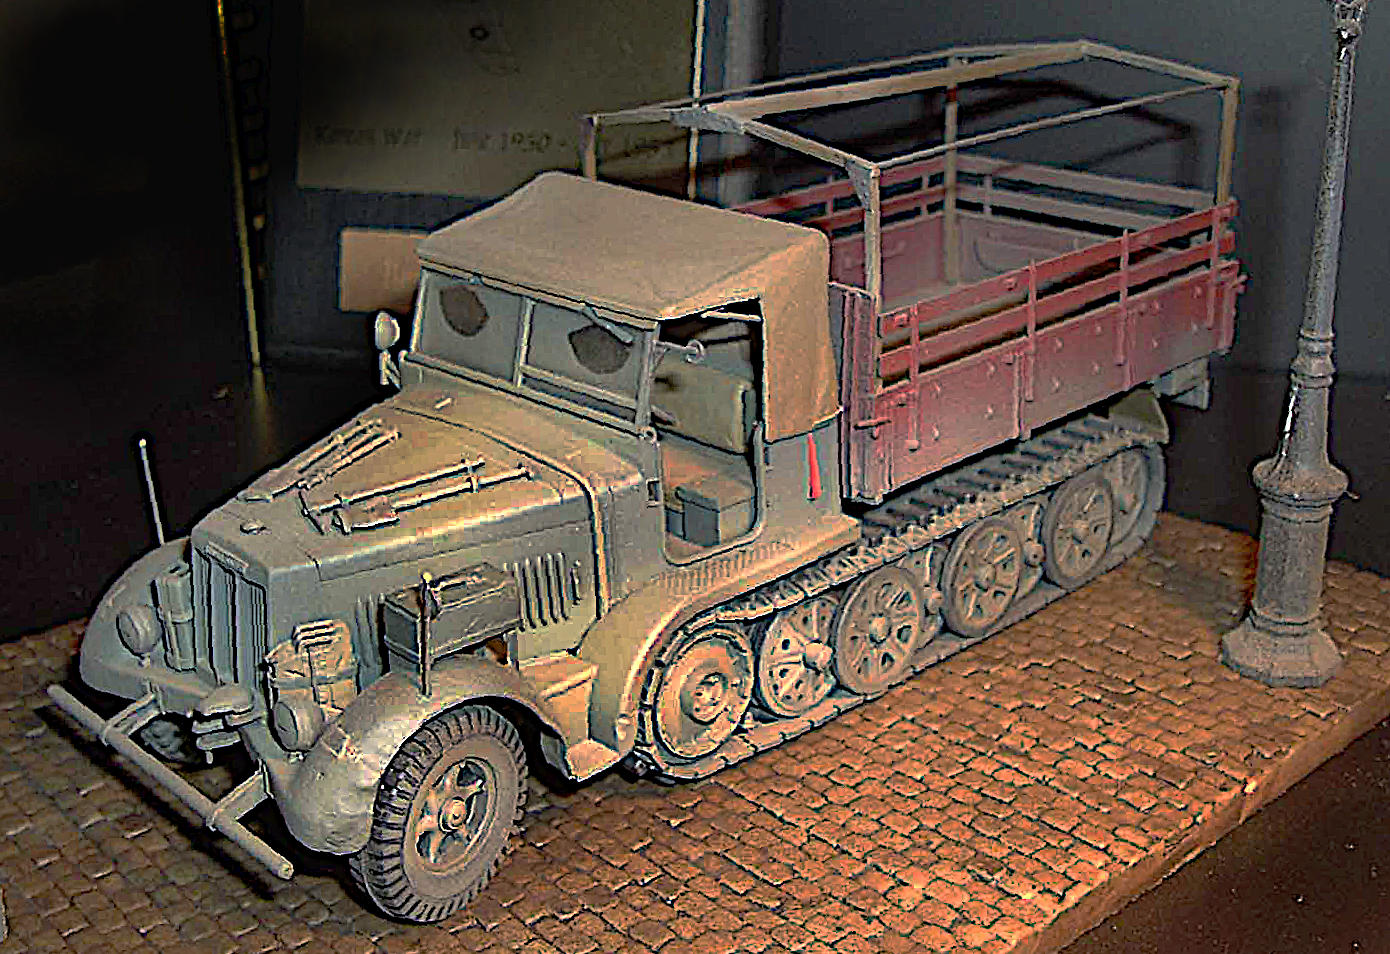
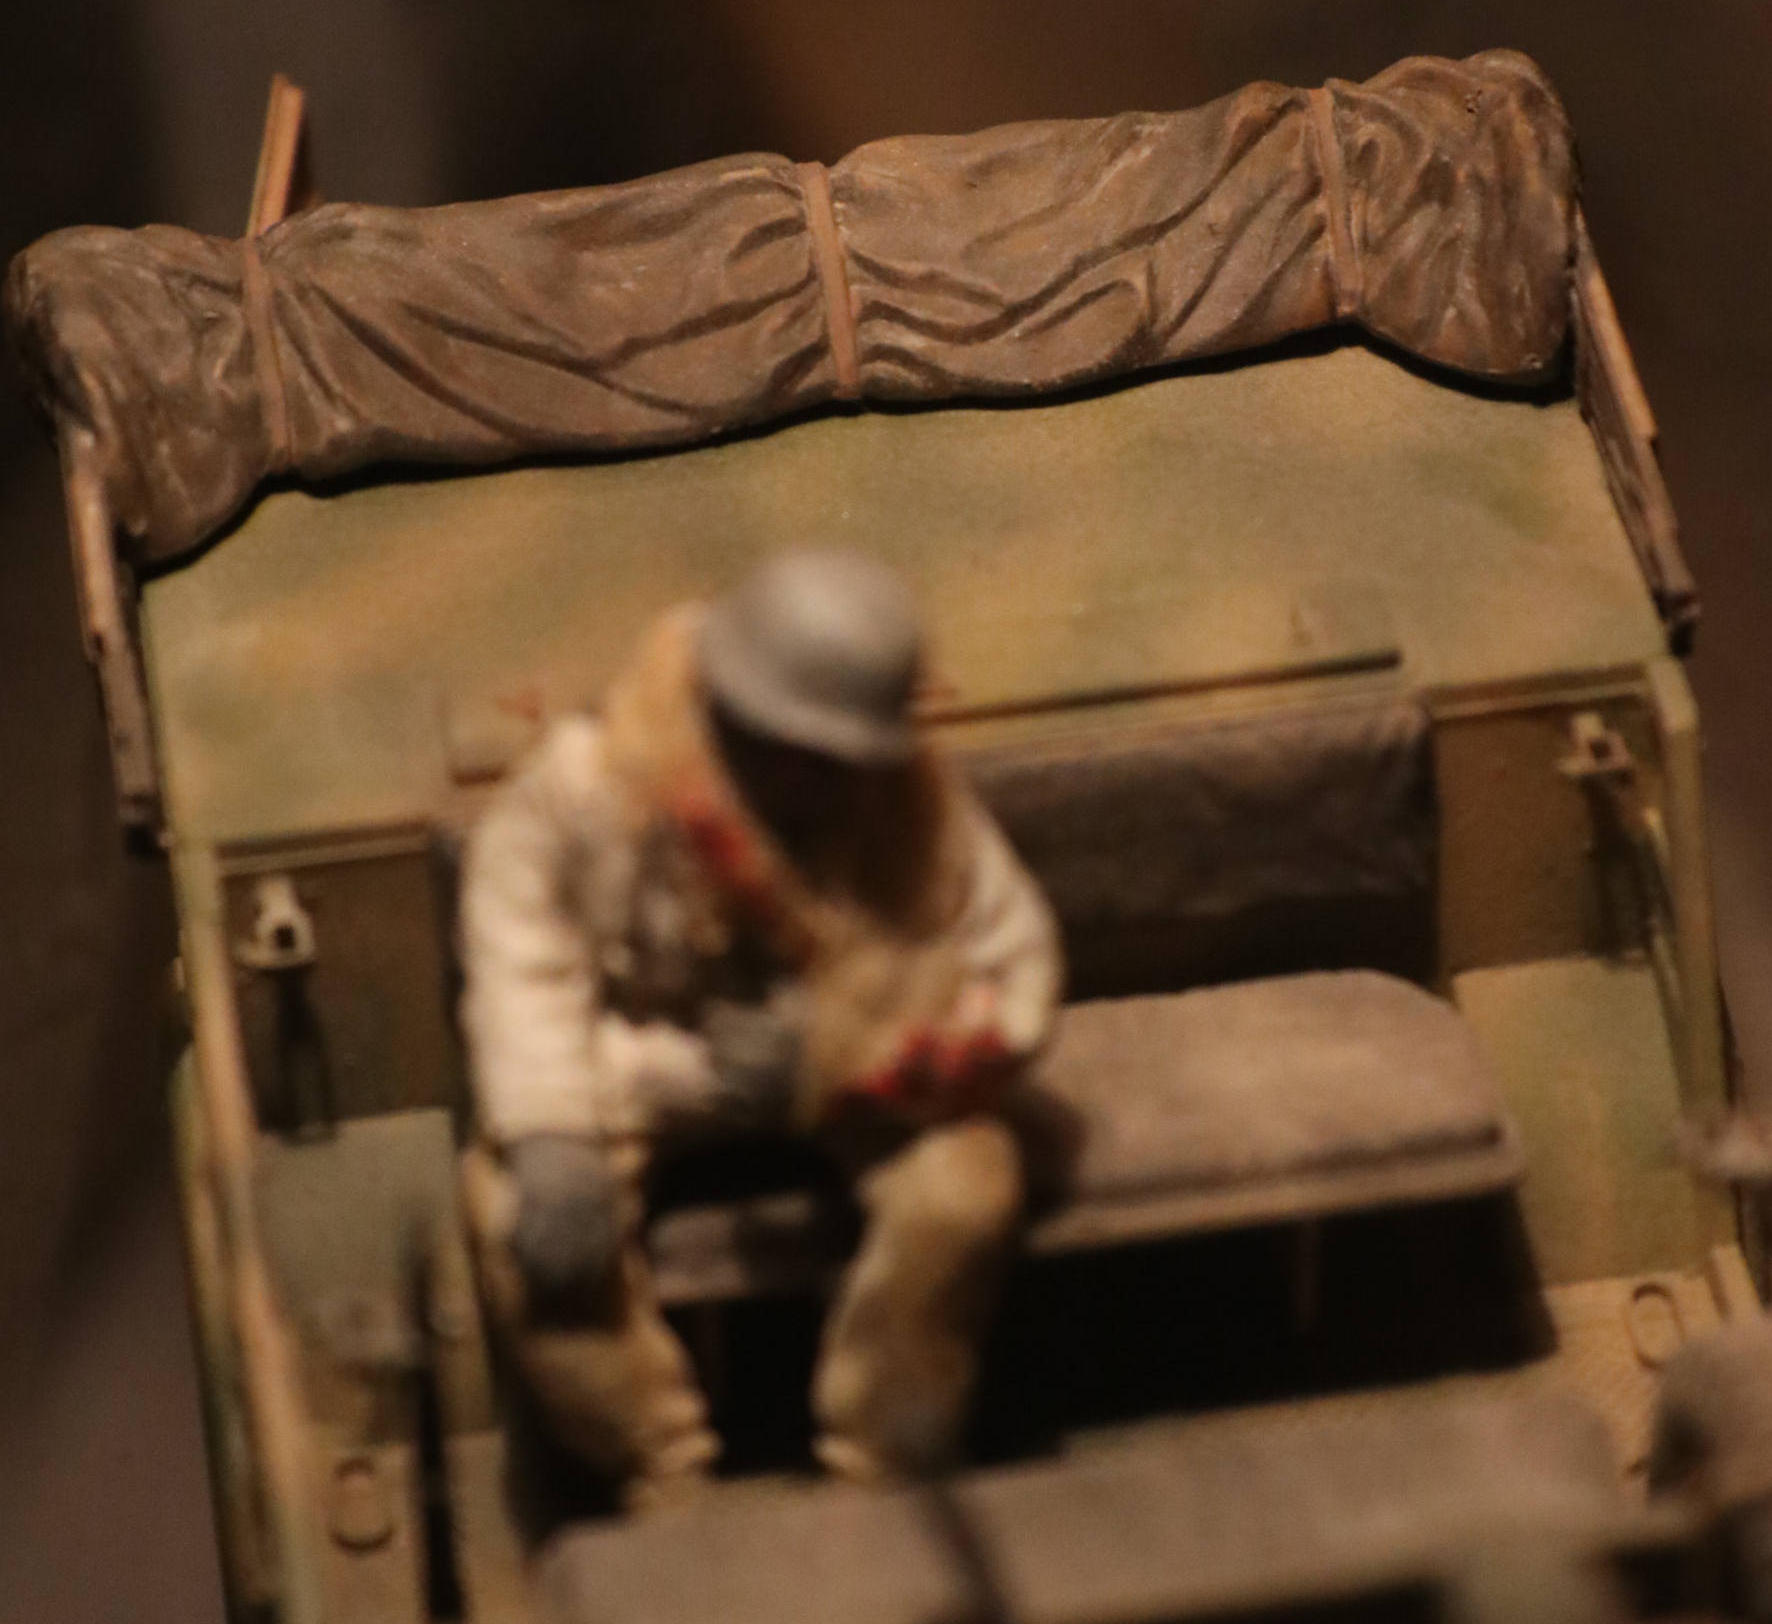
Tan and Yellow Pastels over a light gray base coat.
Again, I split the rear curtain for some added detailing interest.
1 Like
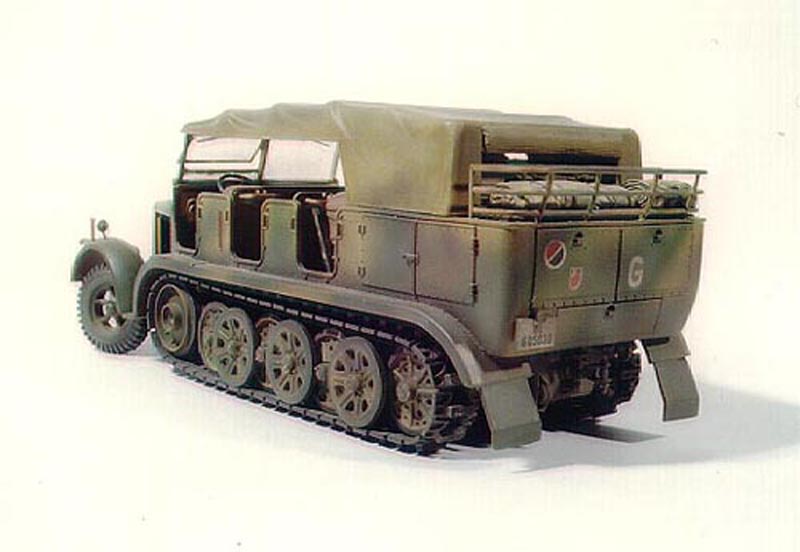
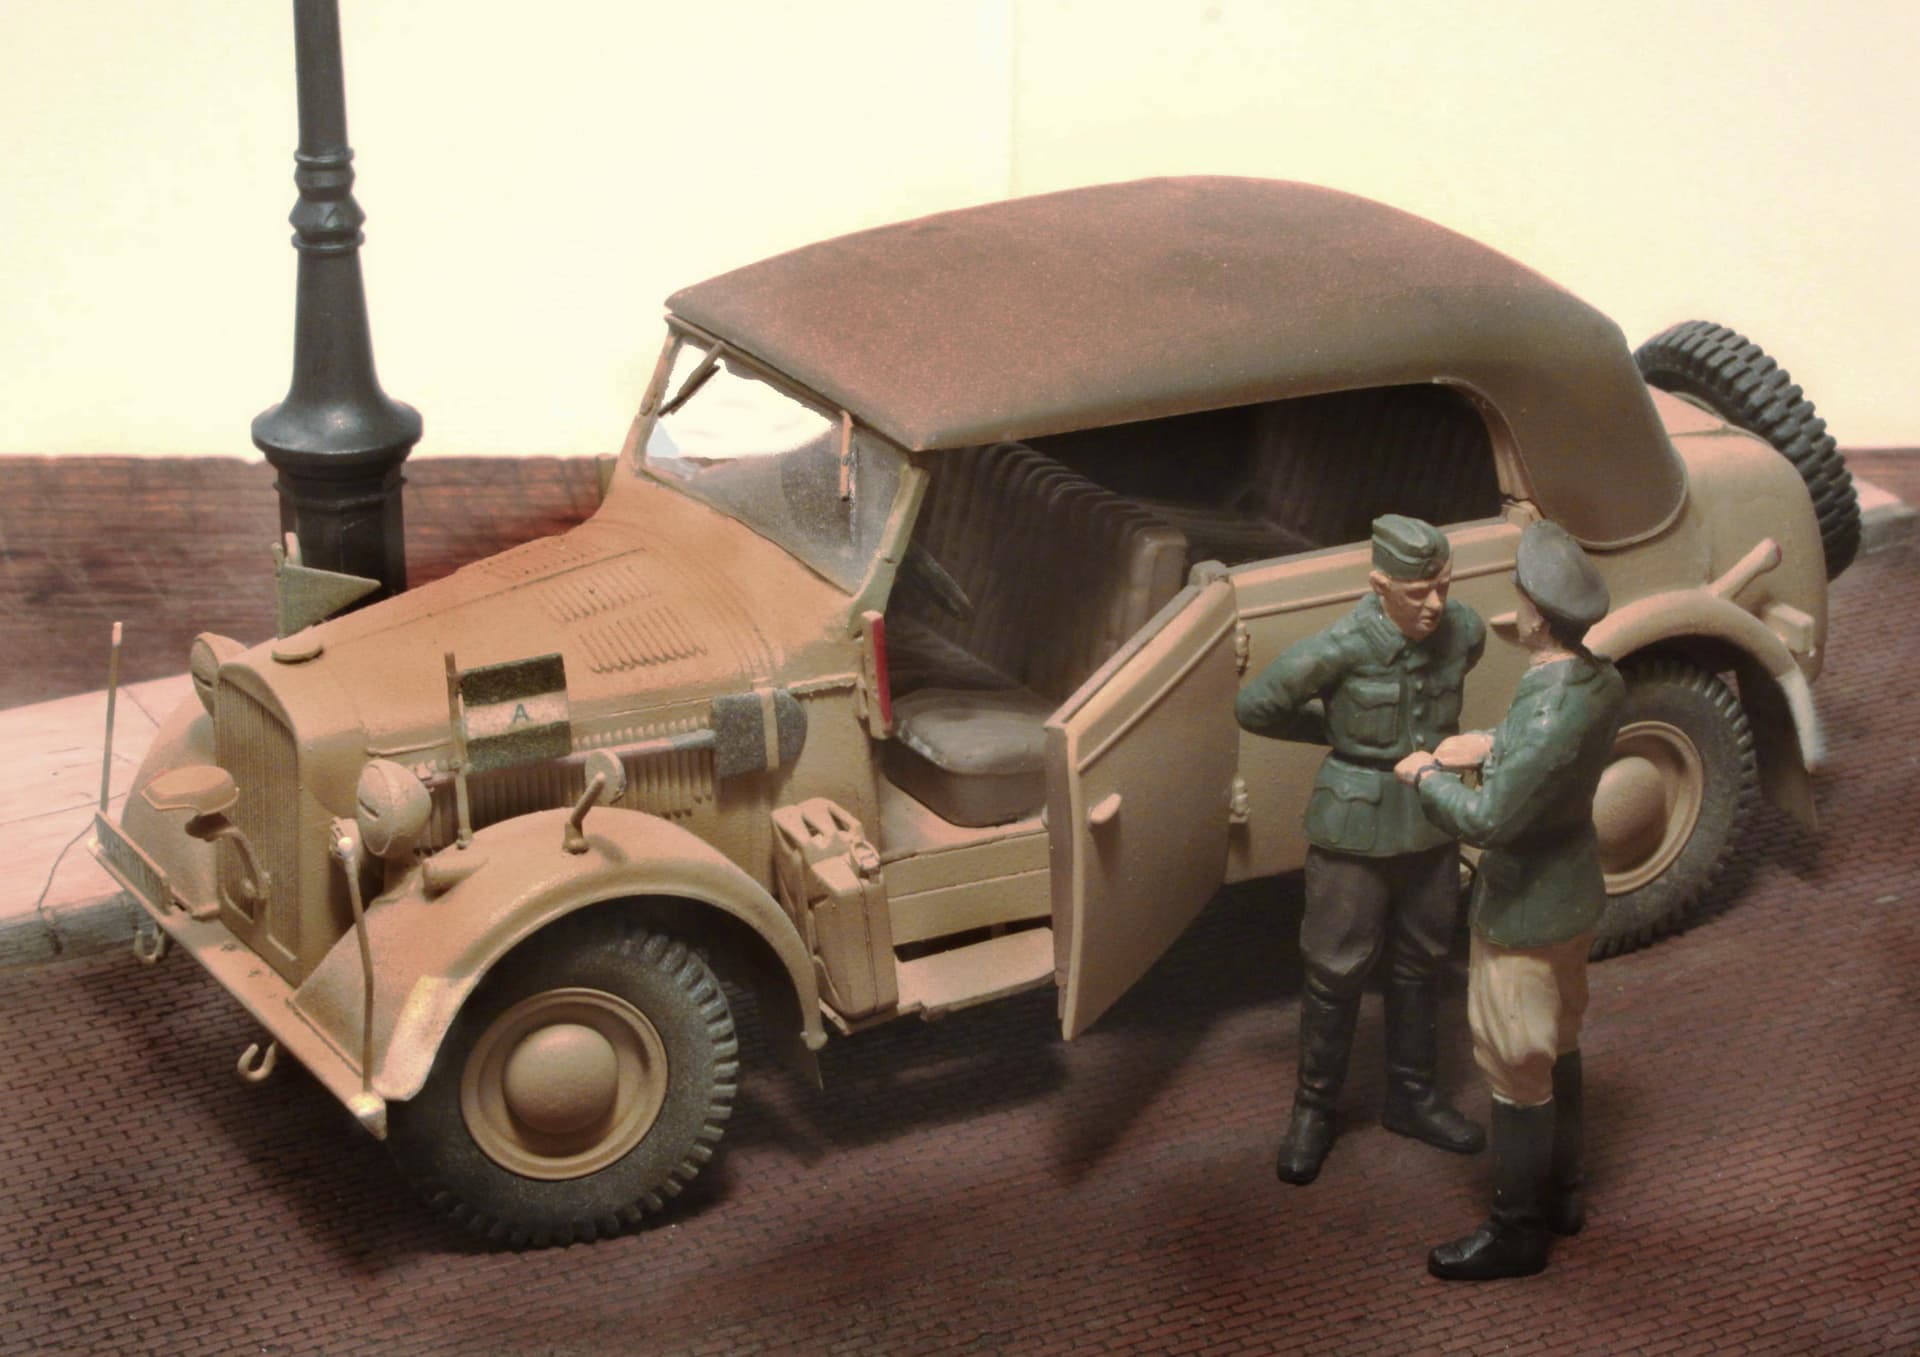
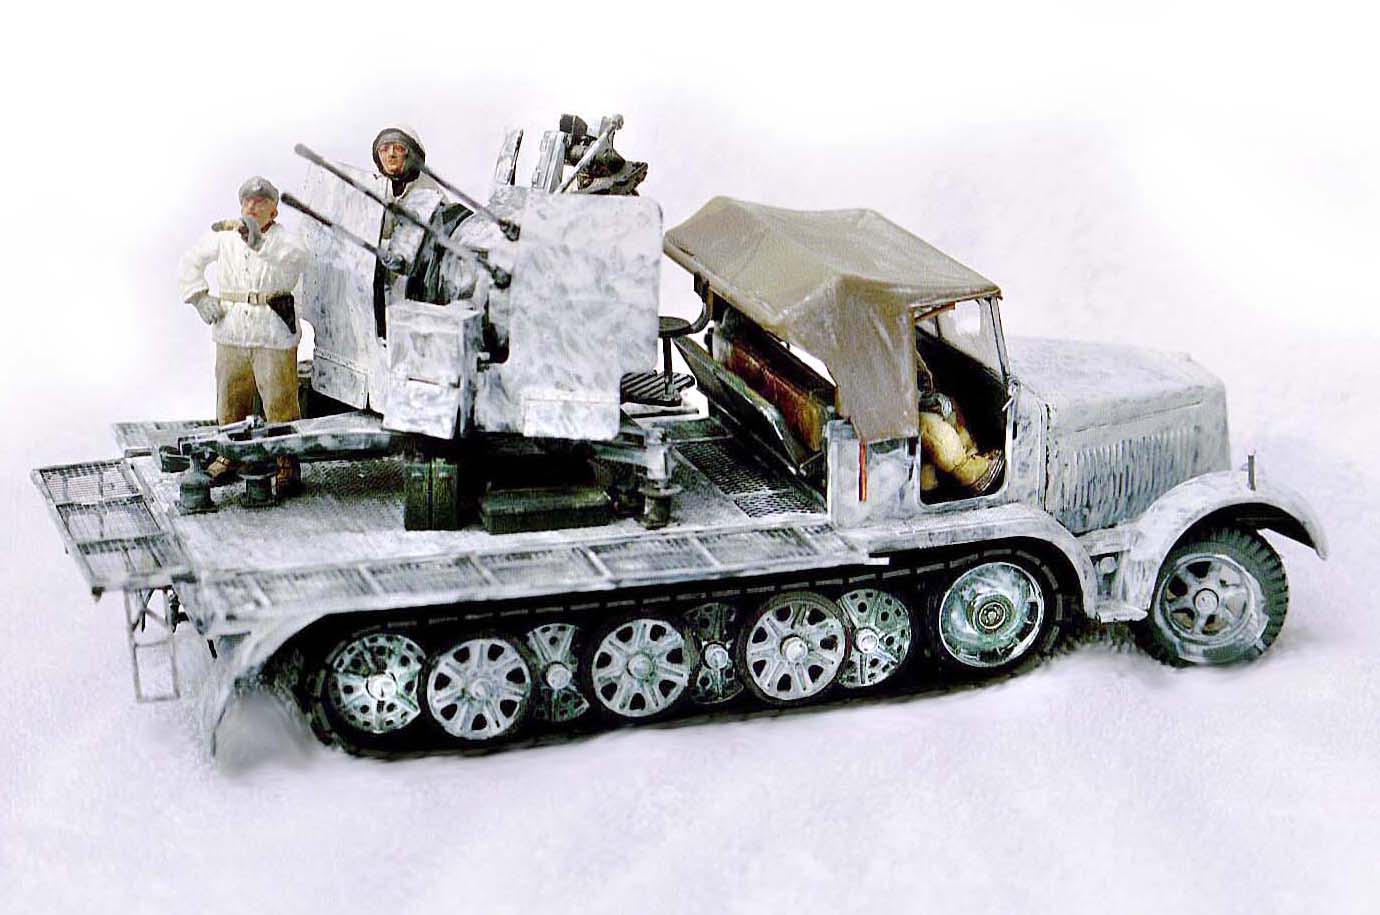
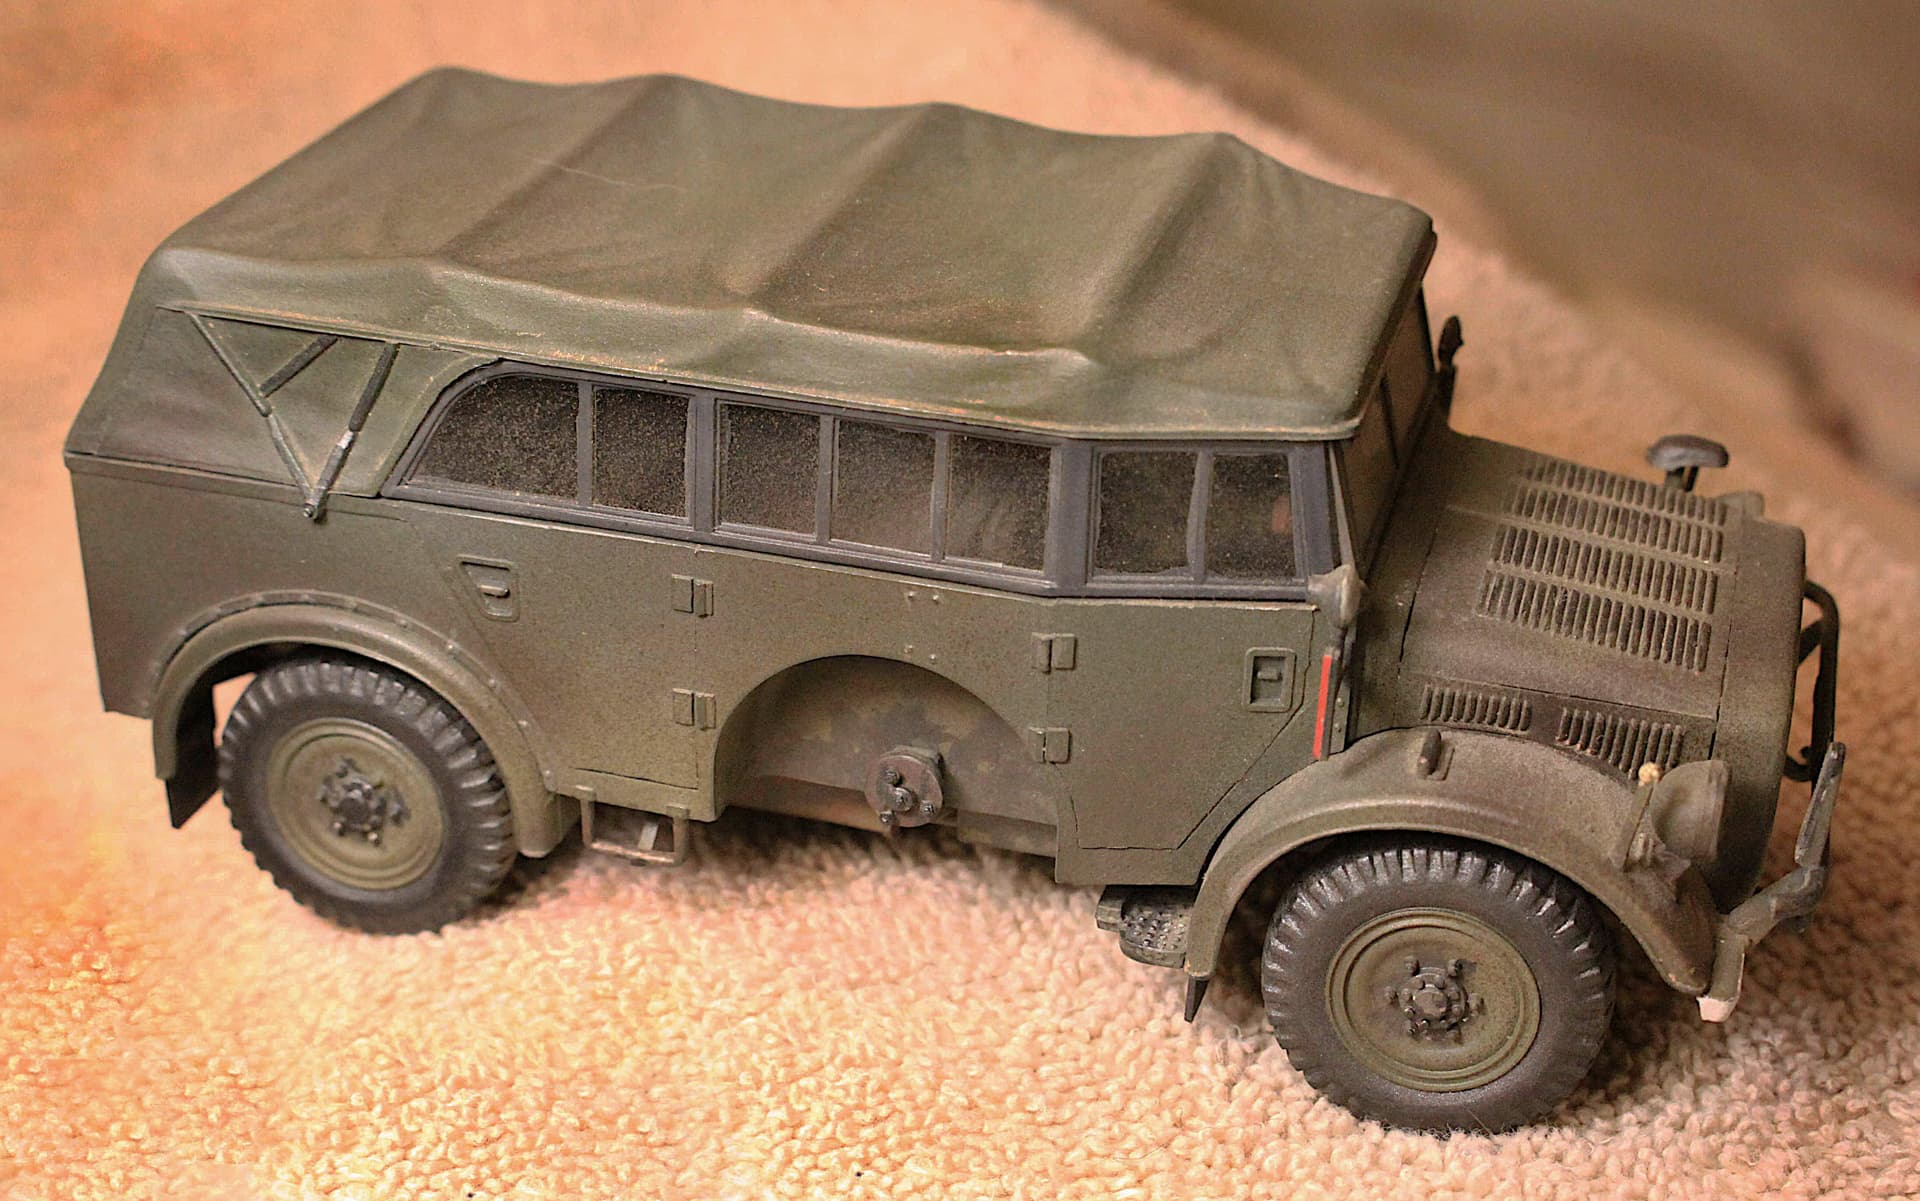
Some other miscellaneous models showing canvas.
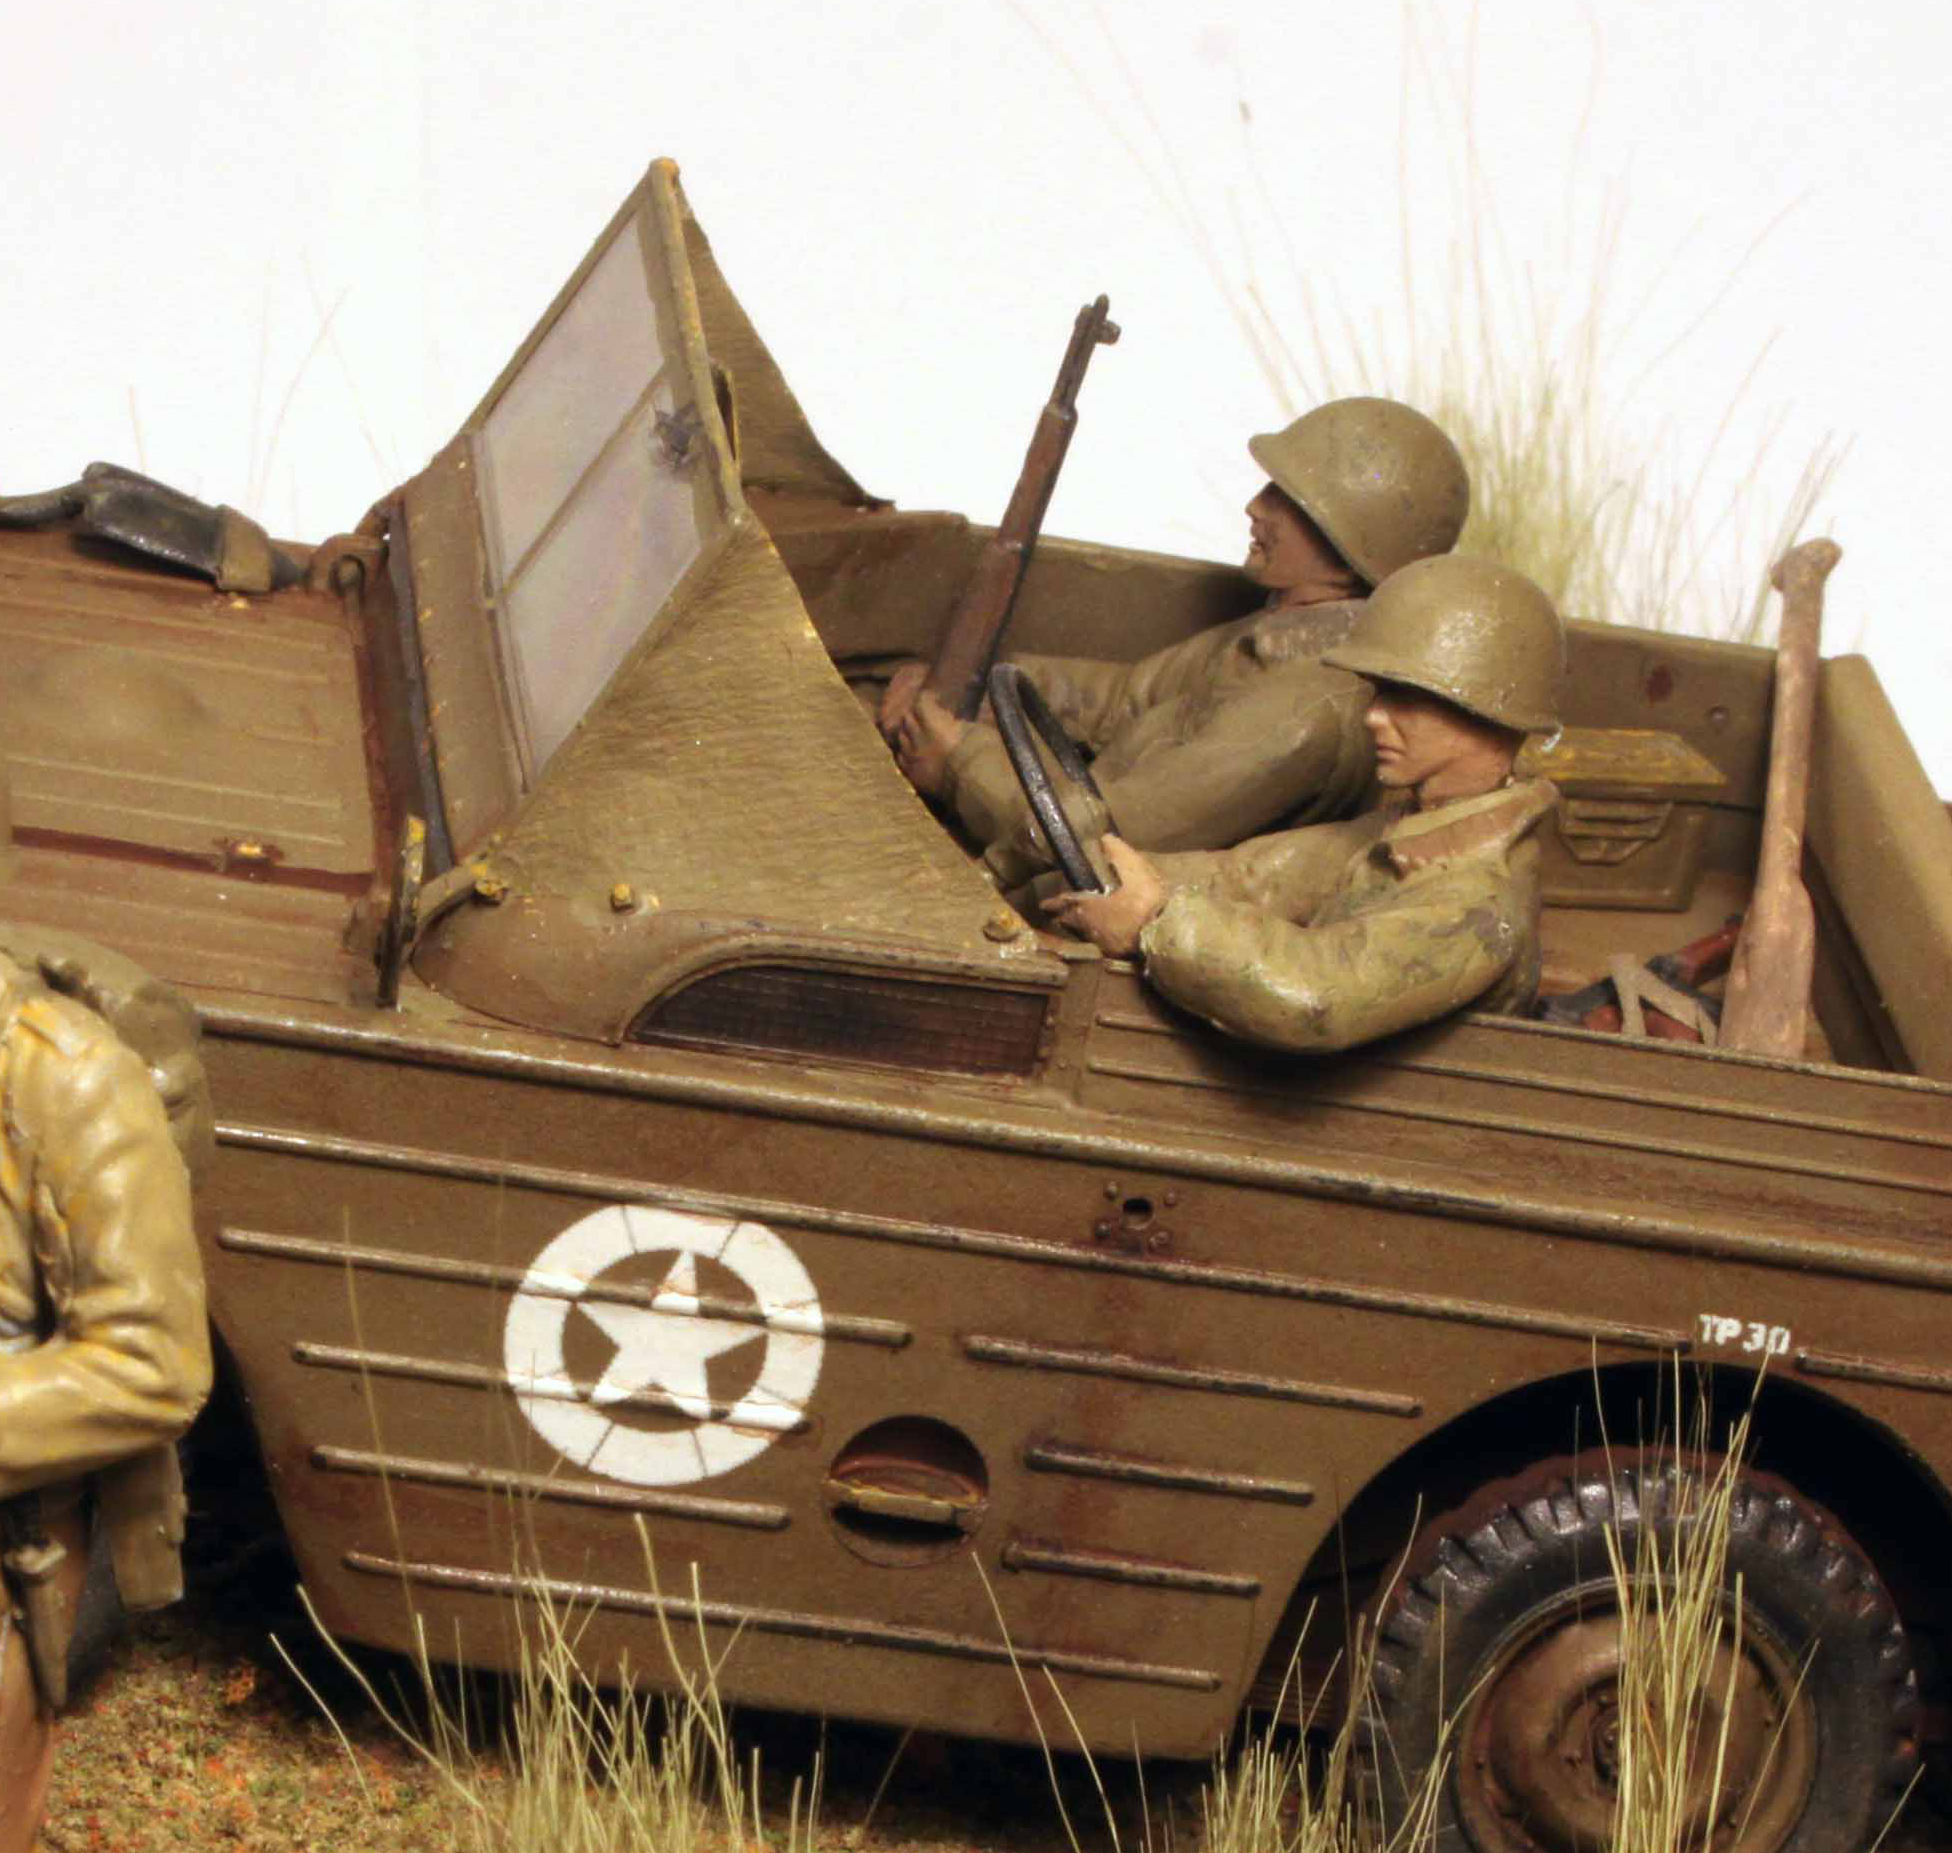
Only the more sophisticated and well finished cloth tops are going to be smooth and stretched tight when raised such as seen on this Horch Kommandeurwagon above.
2 Likes
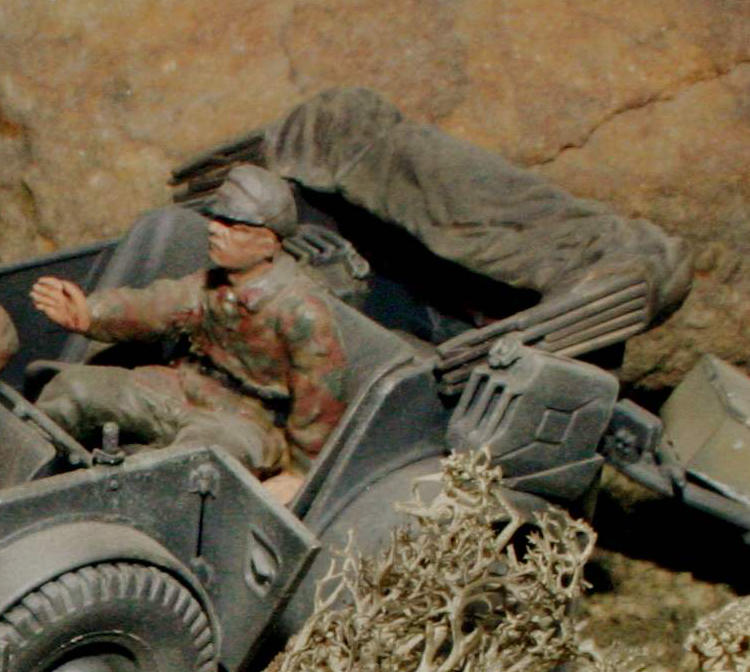
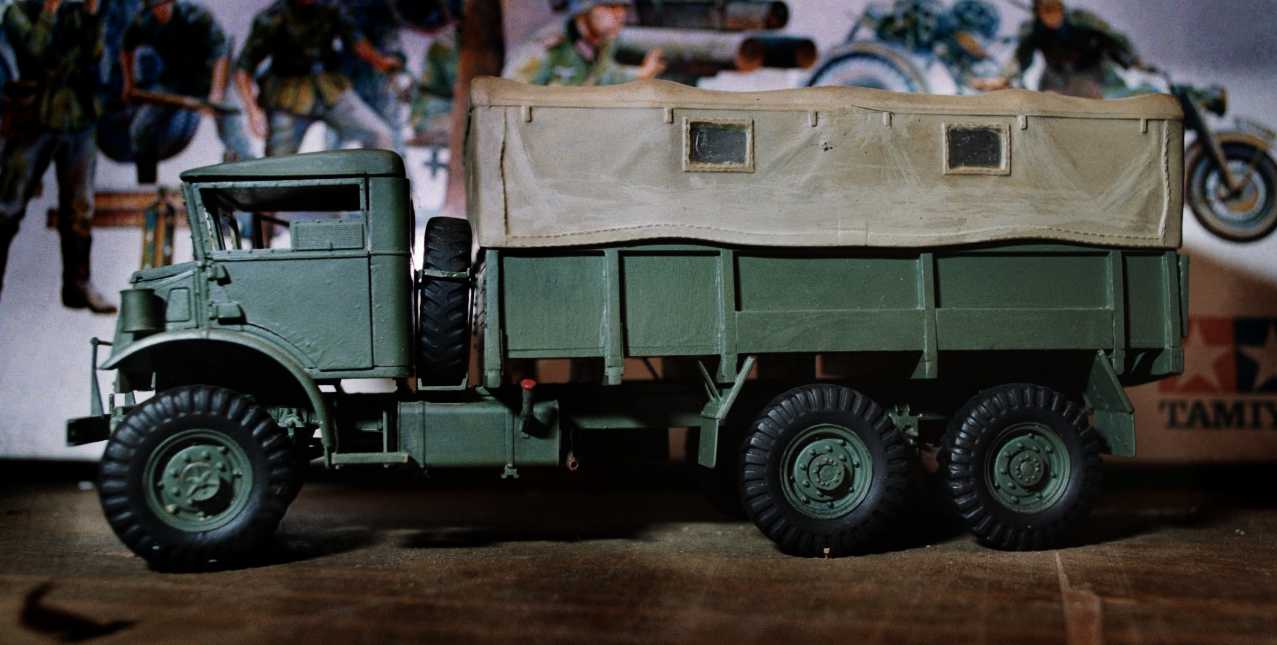
No pastels here. This was all done with a sprayed on (rattle can) base coat of dark yellow and then sepia red/brown and black washes over the canvas. The only other color in the entire scene is the dark green of the bedroll.
Above another sepia red/brown wash over a base coat of German dark yellow.
Again back to soft oil pastels over a tan base coat.
1 Like
And yet once again:
I cannot stress strongly enough that the very dry coating of matte clear over the matte base color is absolutely necessary to this technique! The rough surface “tooth” laid down by the matte clear will give the pastel pigments something to grab on to, making the pigments ALMOST permanent with no further need for additional clear coats.
Also when using water based washes such as the Citadel products over the oil based paints the wash may tend to pool unrealistically on top of the oil unless this dry rough matte surface* is created first!
*(Tamiya TS-80 rattle can is my quick and easy matte clear go-to. - Keep you distance and let the clear fall almost dry onto the model surface for the “flatest” matte surface ever! No muss, no fuss and no AB clean-up!)
1 Like
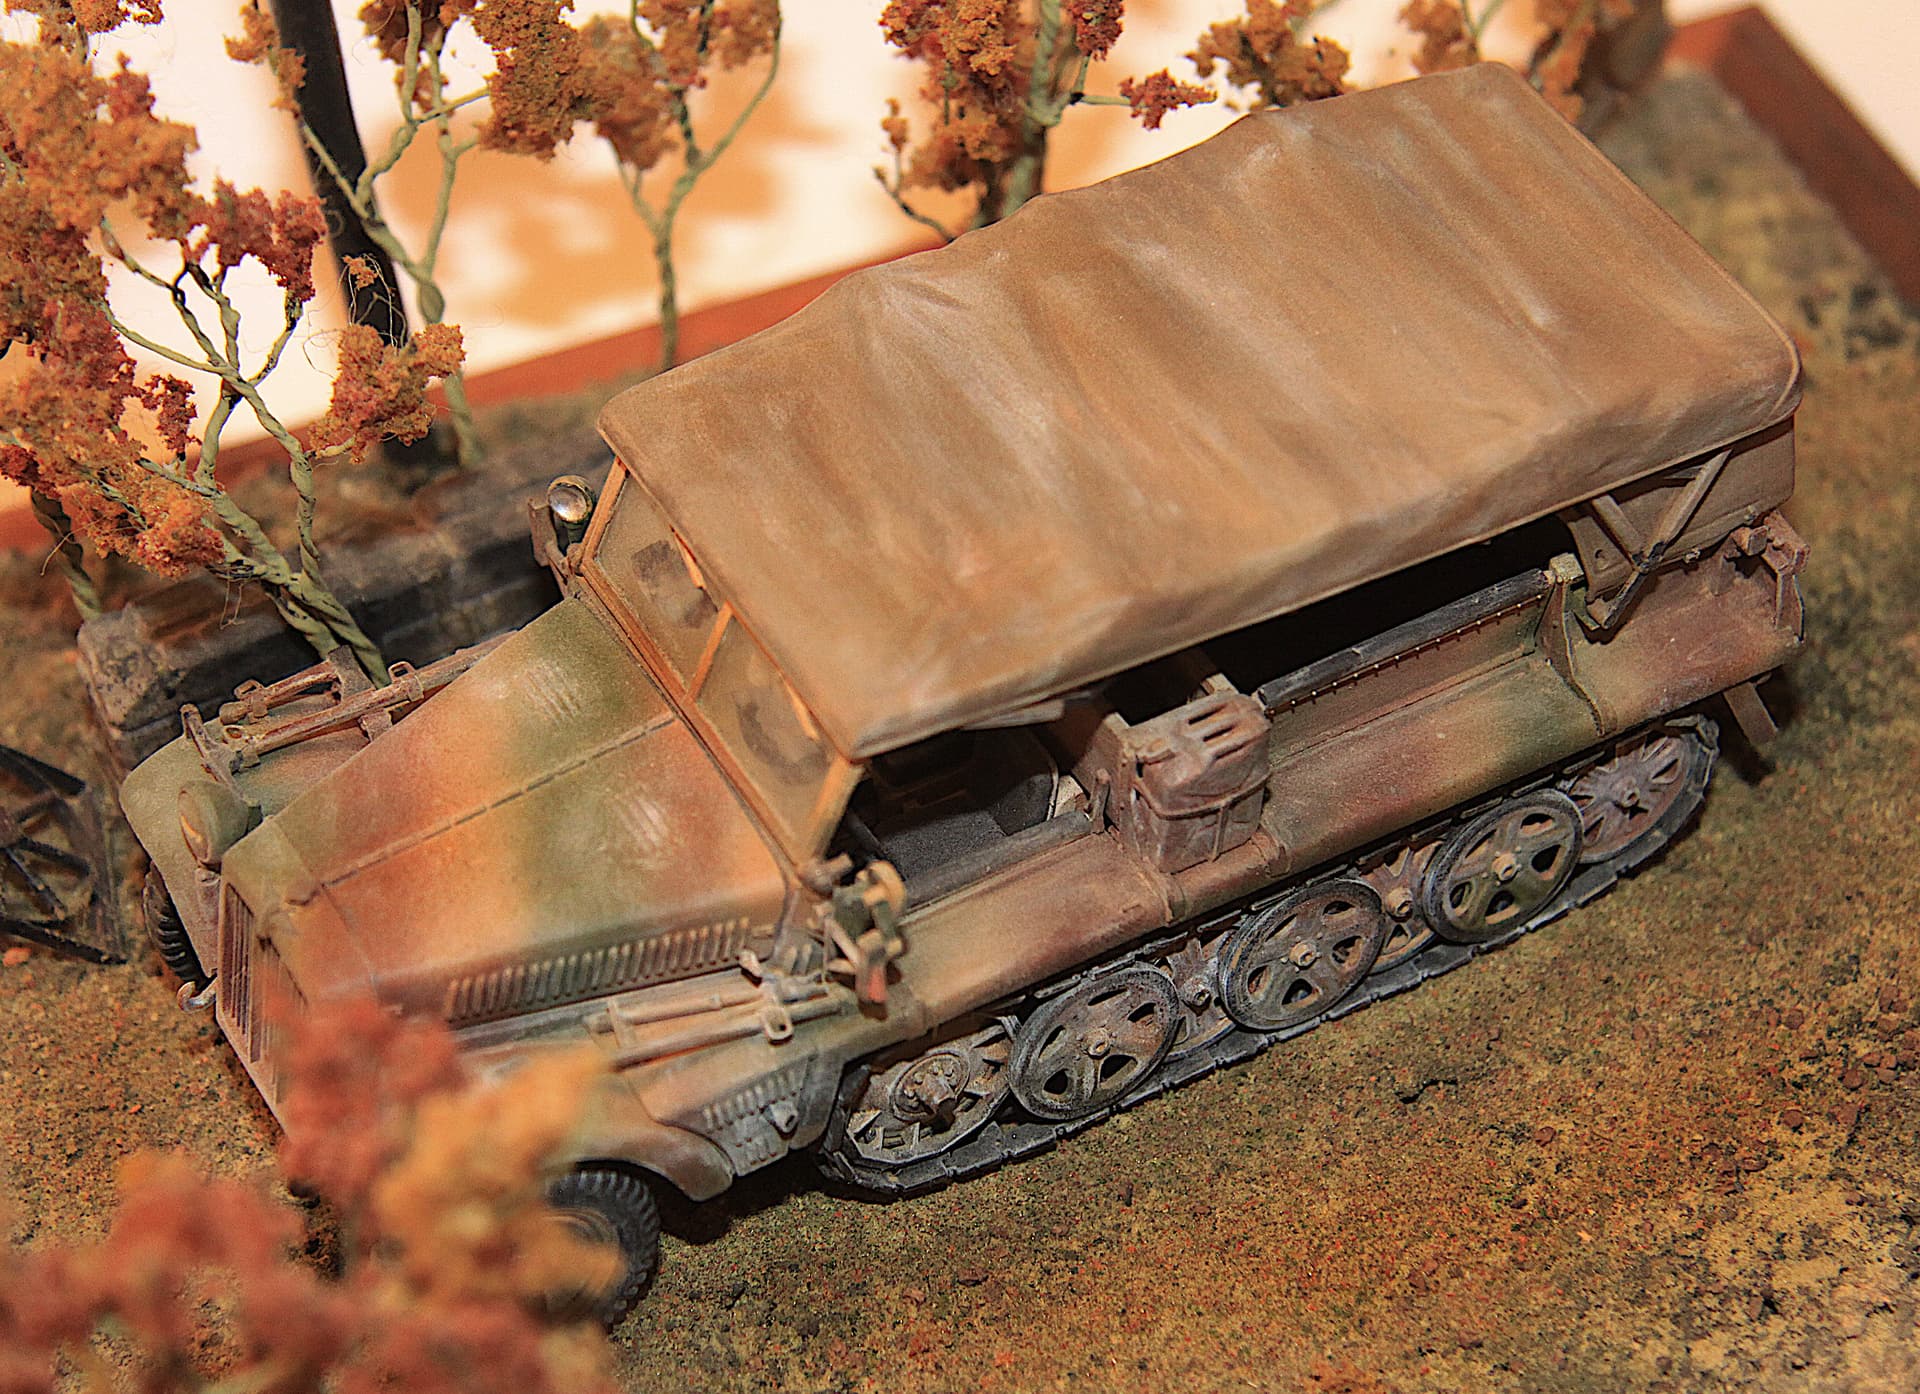
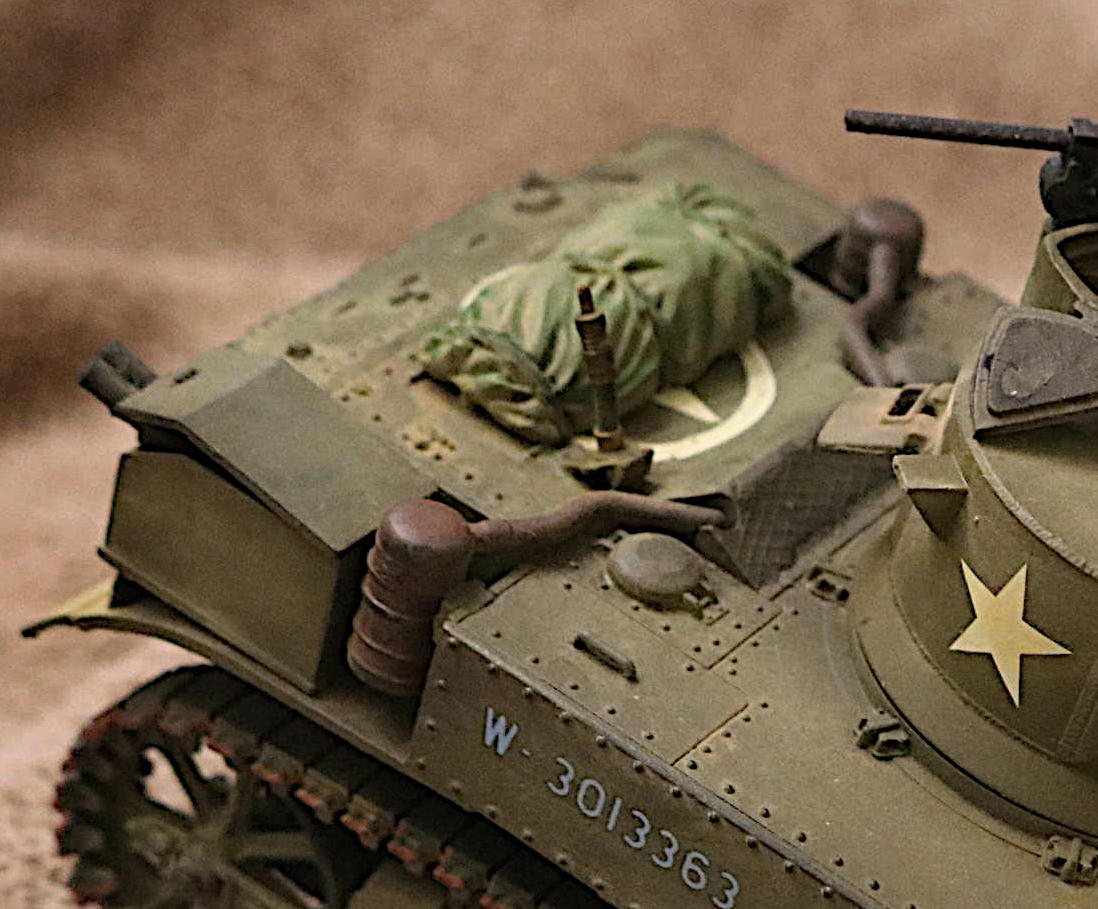
Color Shifting/Shading with Pastels:
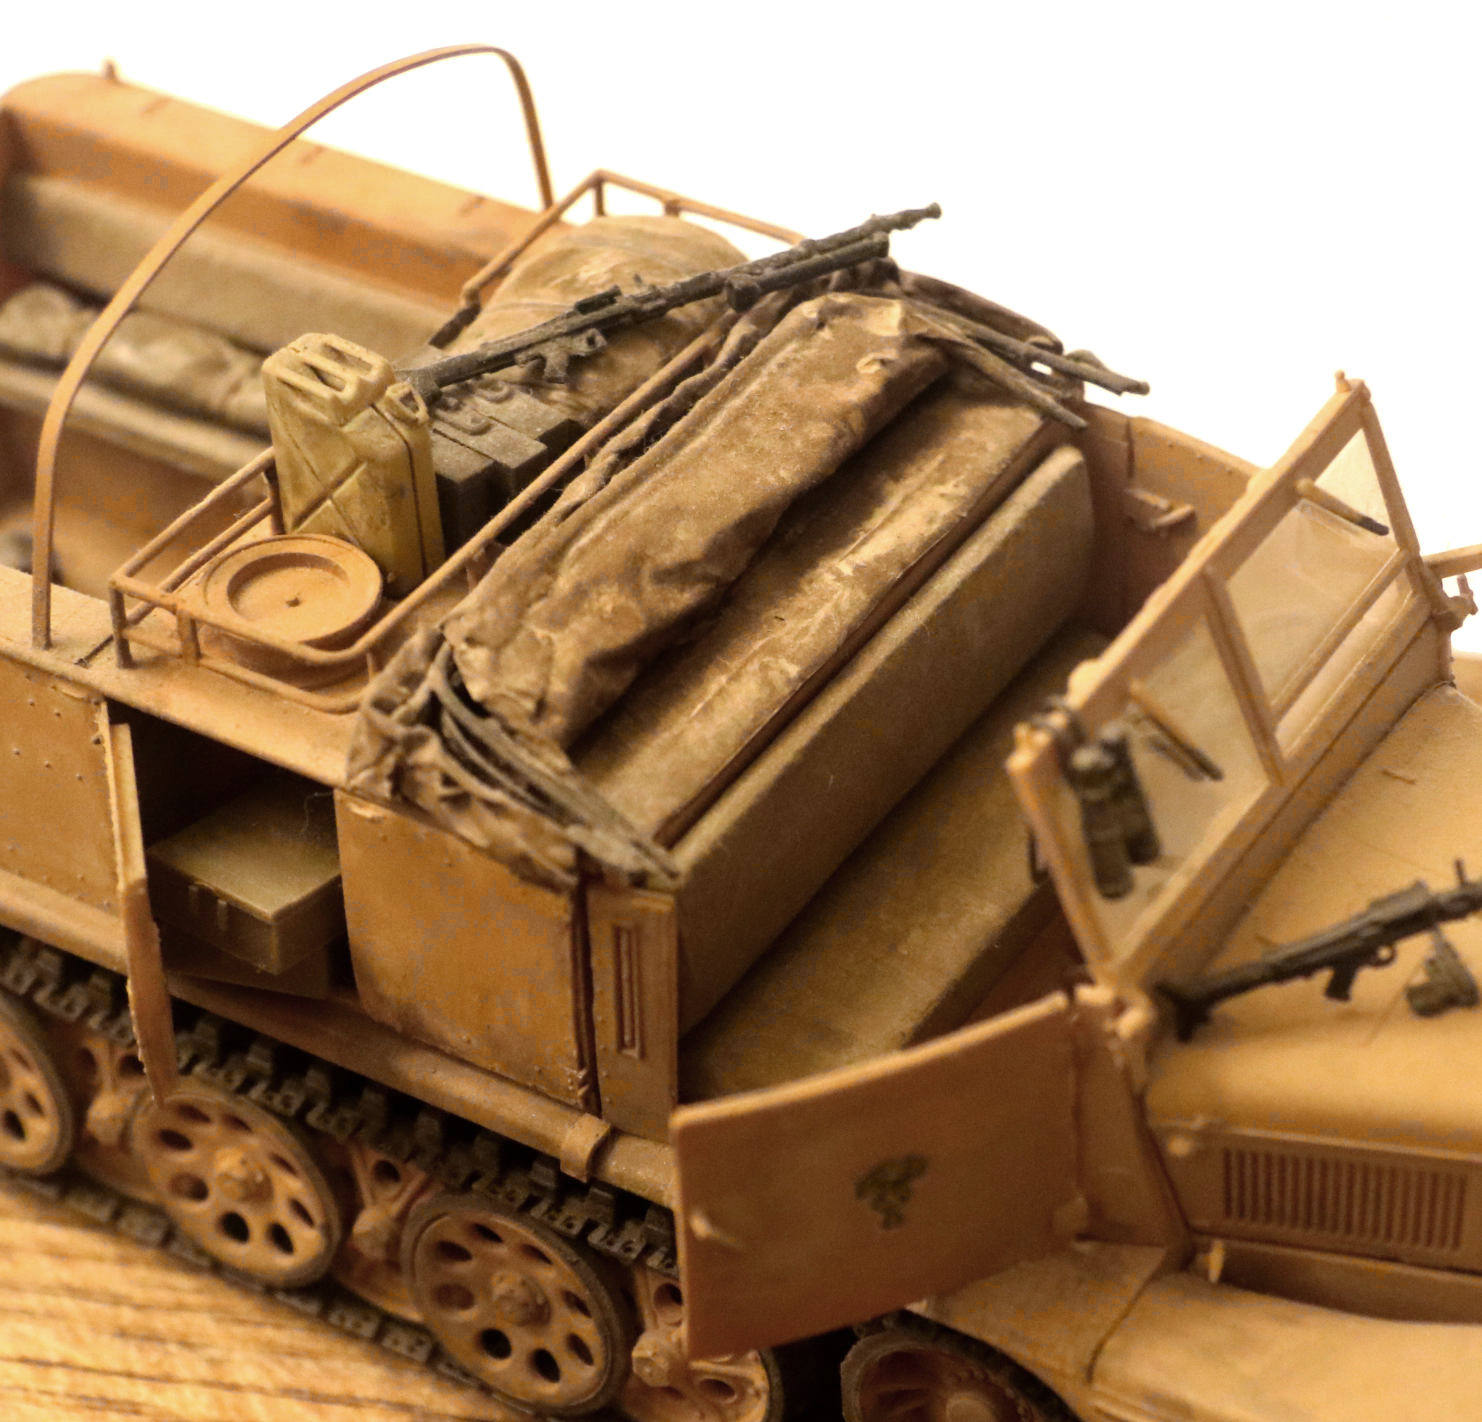
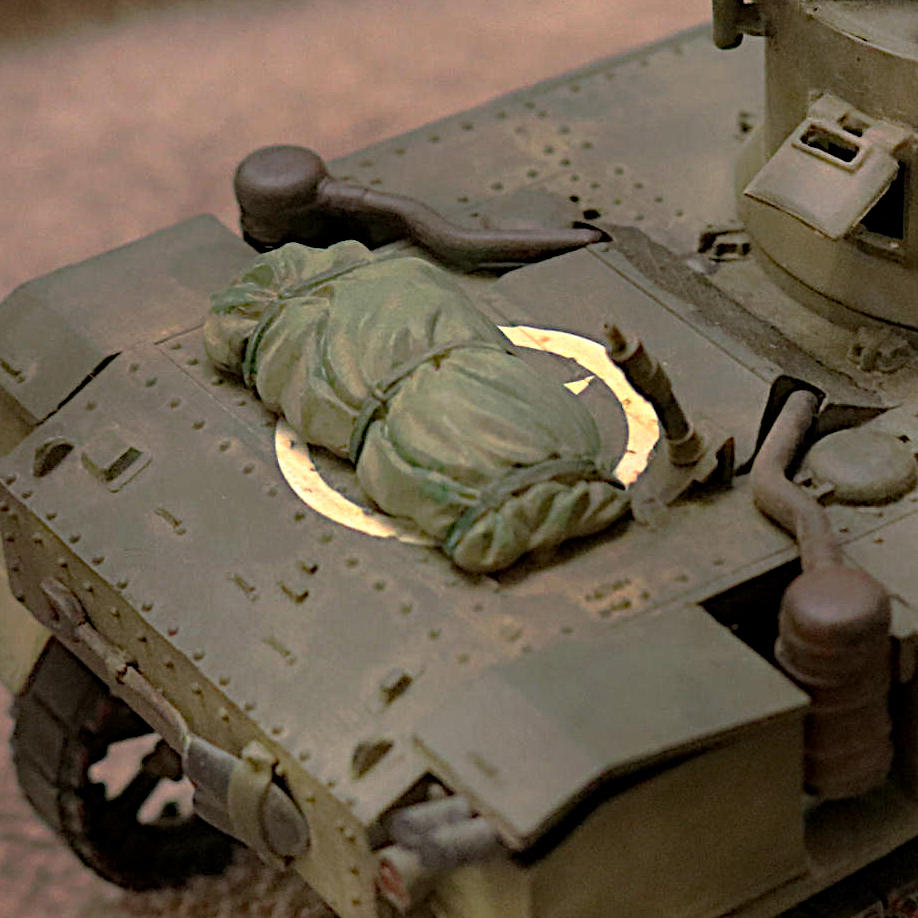
The base color paint on the tarp seen here was the exact same shade of OD as the tank. However I wanted to differentiate the cloth tarp from the steel tank so applications of both green and tan pastels shifted the color to what you see here.
p.s. Yes, I know the air filter canisters should be OD and not rust. I don’t know what I was thinking!
When considering a new model purchase I always check to see how well the canvas (if any) has been sculpted as a starting point for my detailing.
One recent new model offering (won’t name names) modeled the rear tilt on a British Lorrie so smooth and tight with zero sculpting, that it looked like smooth sheet metal rather than canvas. So that one immediately fell off my “wanted” list!
Any canvas stretched THAT tightly would be impossible for the crew to ever install over the bows!
Also:
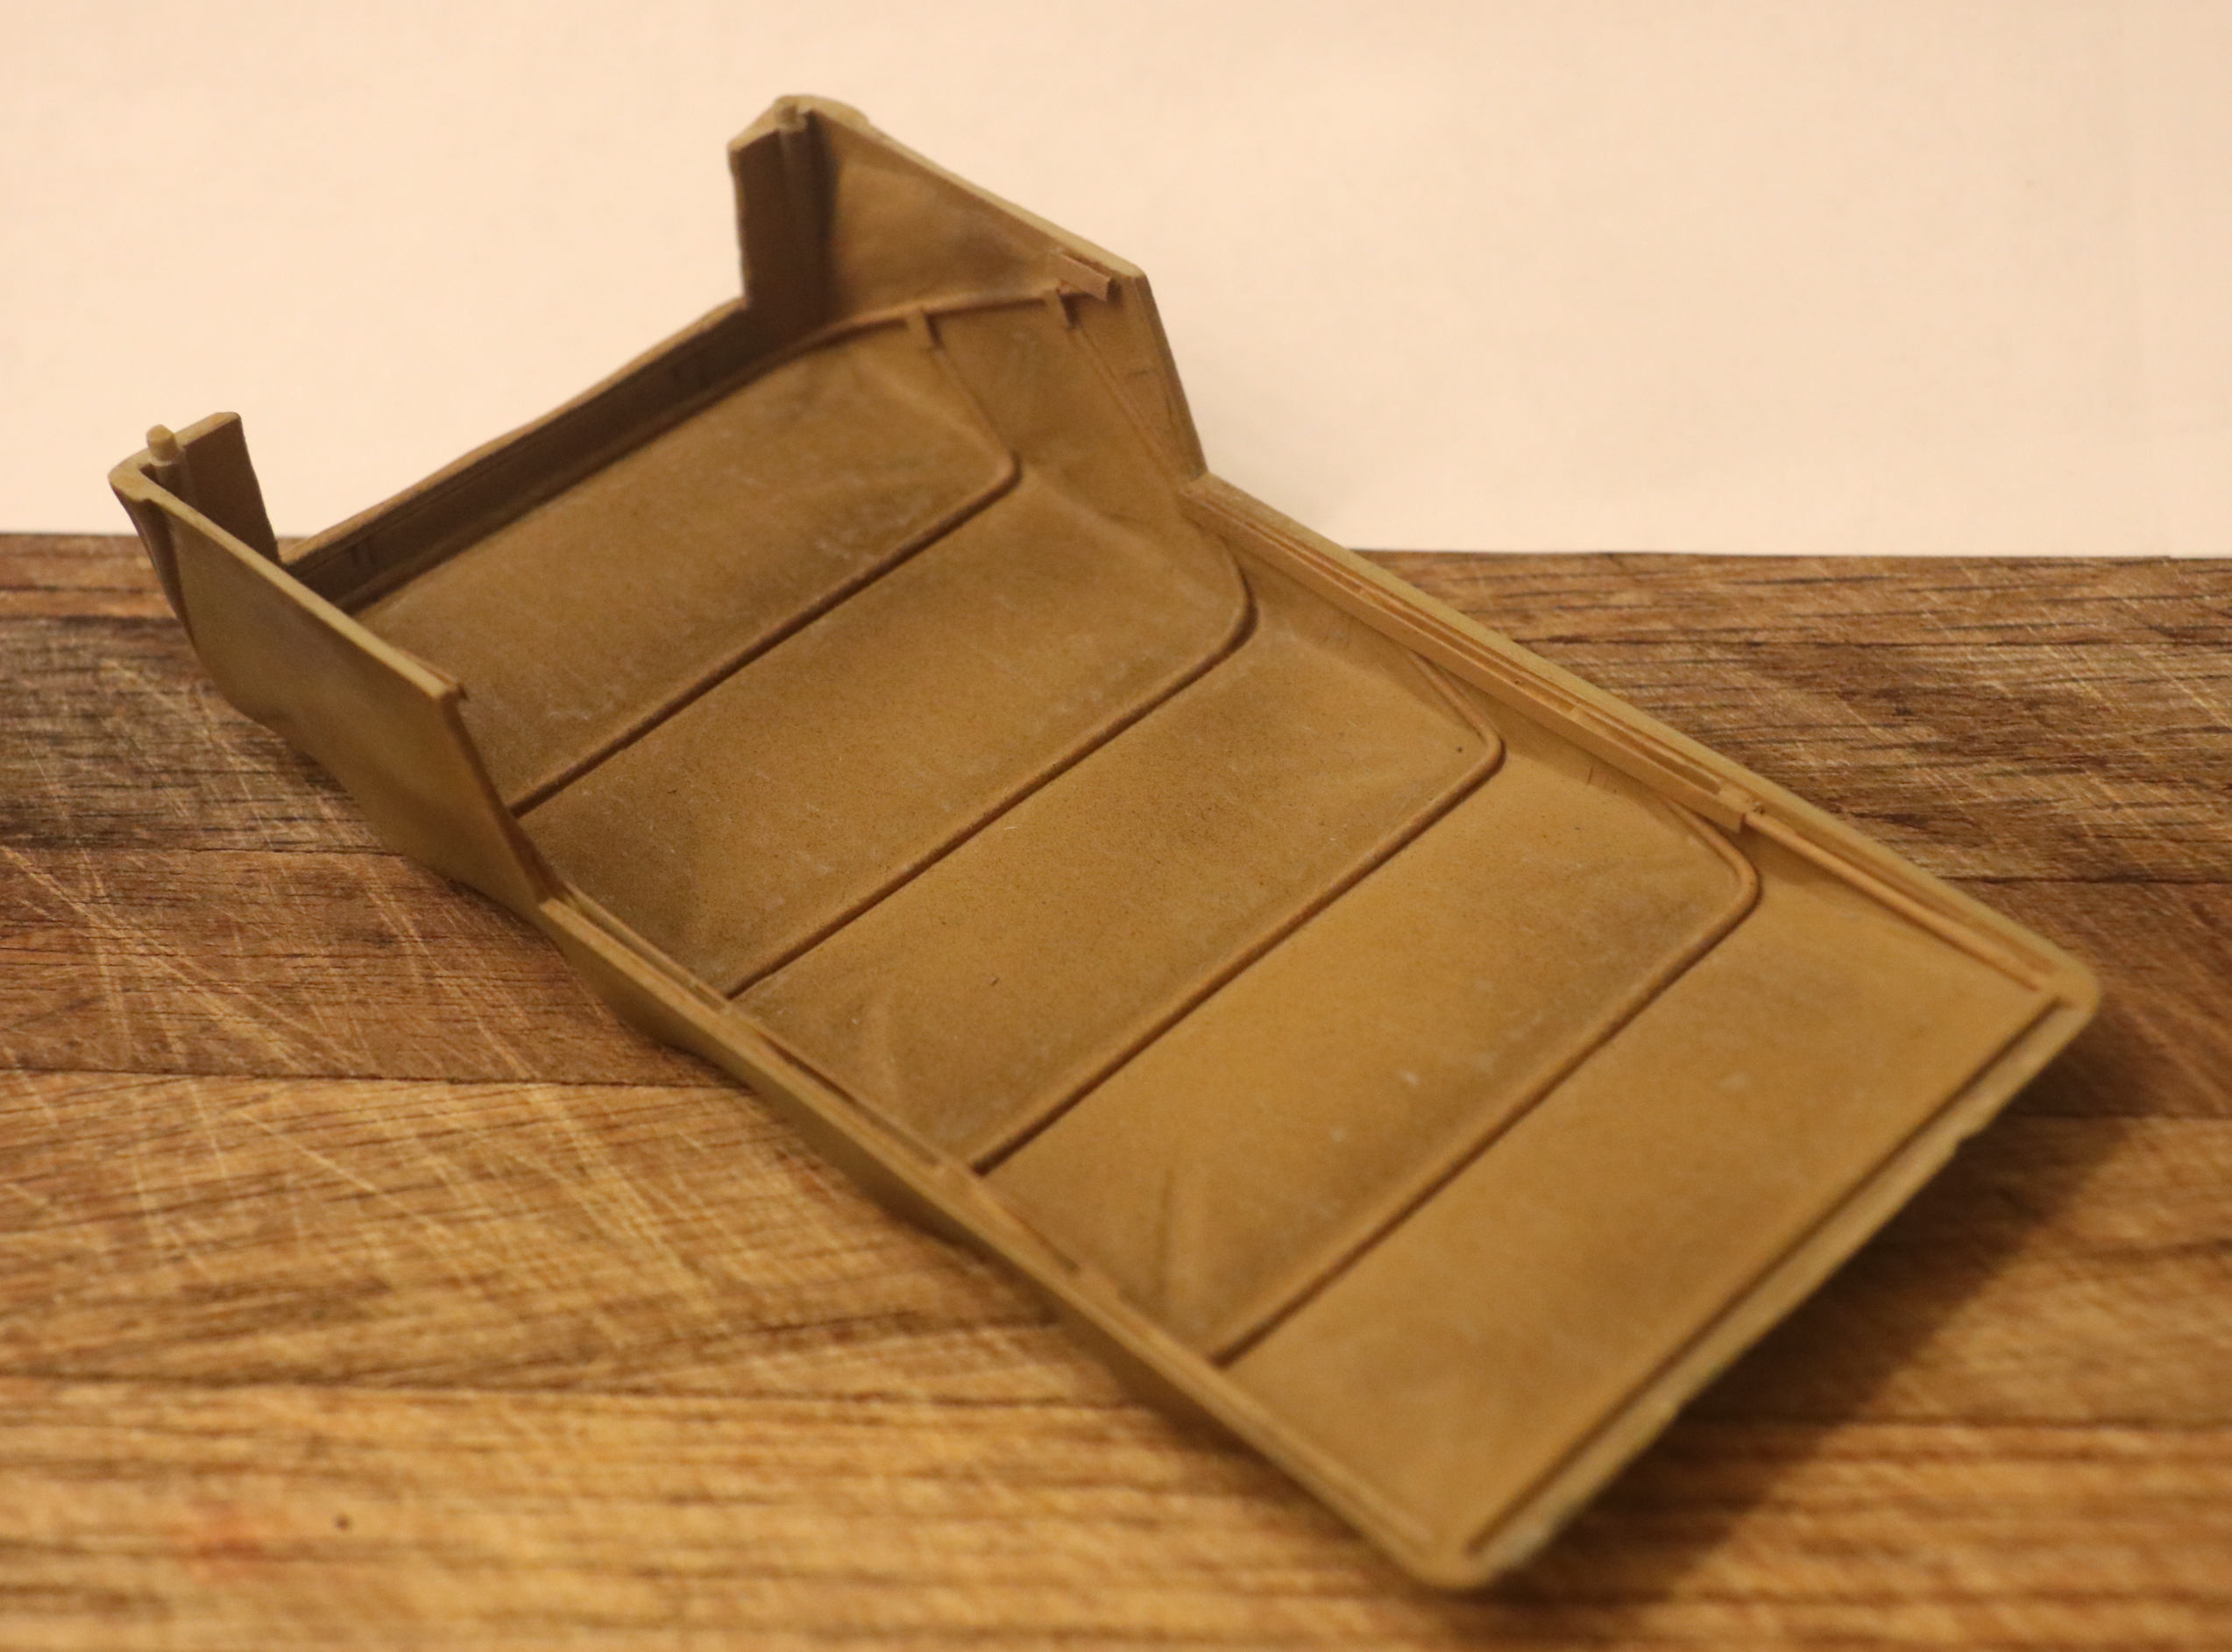
I almost never use the folded down top that is all neatly tucked into its’ smooth, tight fitting boot cover. That would be for a parade ready vehicle only. for a combat vehicle the crew would never waste the time it would take to neatly tuck the folded top into its’ tight fitting boot.
The old Tamiya Sd. Kfz. 7 offered such a folded top. That part immediately went into the spares bin!
Car Show / Parade Ready; It might take a single person a good half-hour to 45 minutes to get this boot on all neat and tidy. I don’t think it is going to happen in combat!
(Perhaps a married person could do it a bit faster! ~ Ba-Da-Bump!)
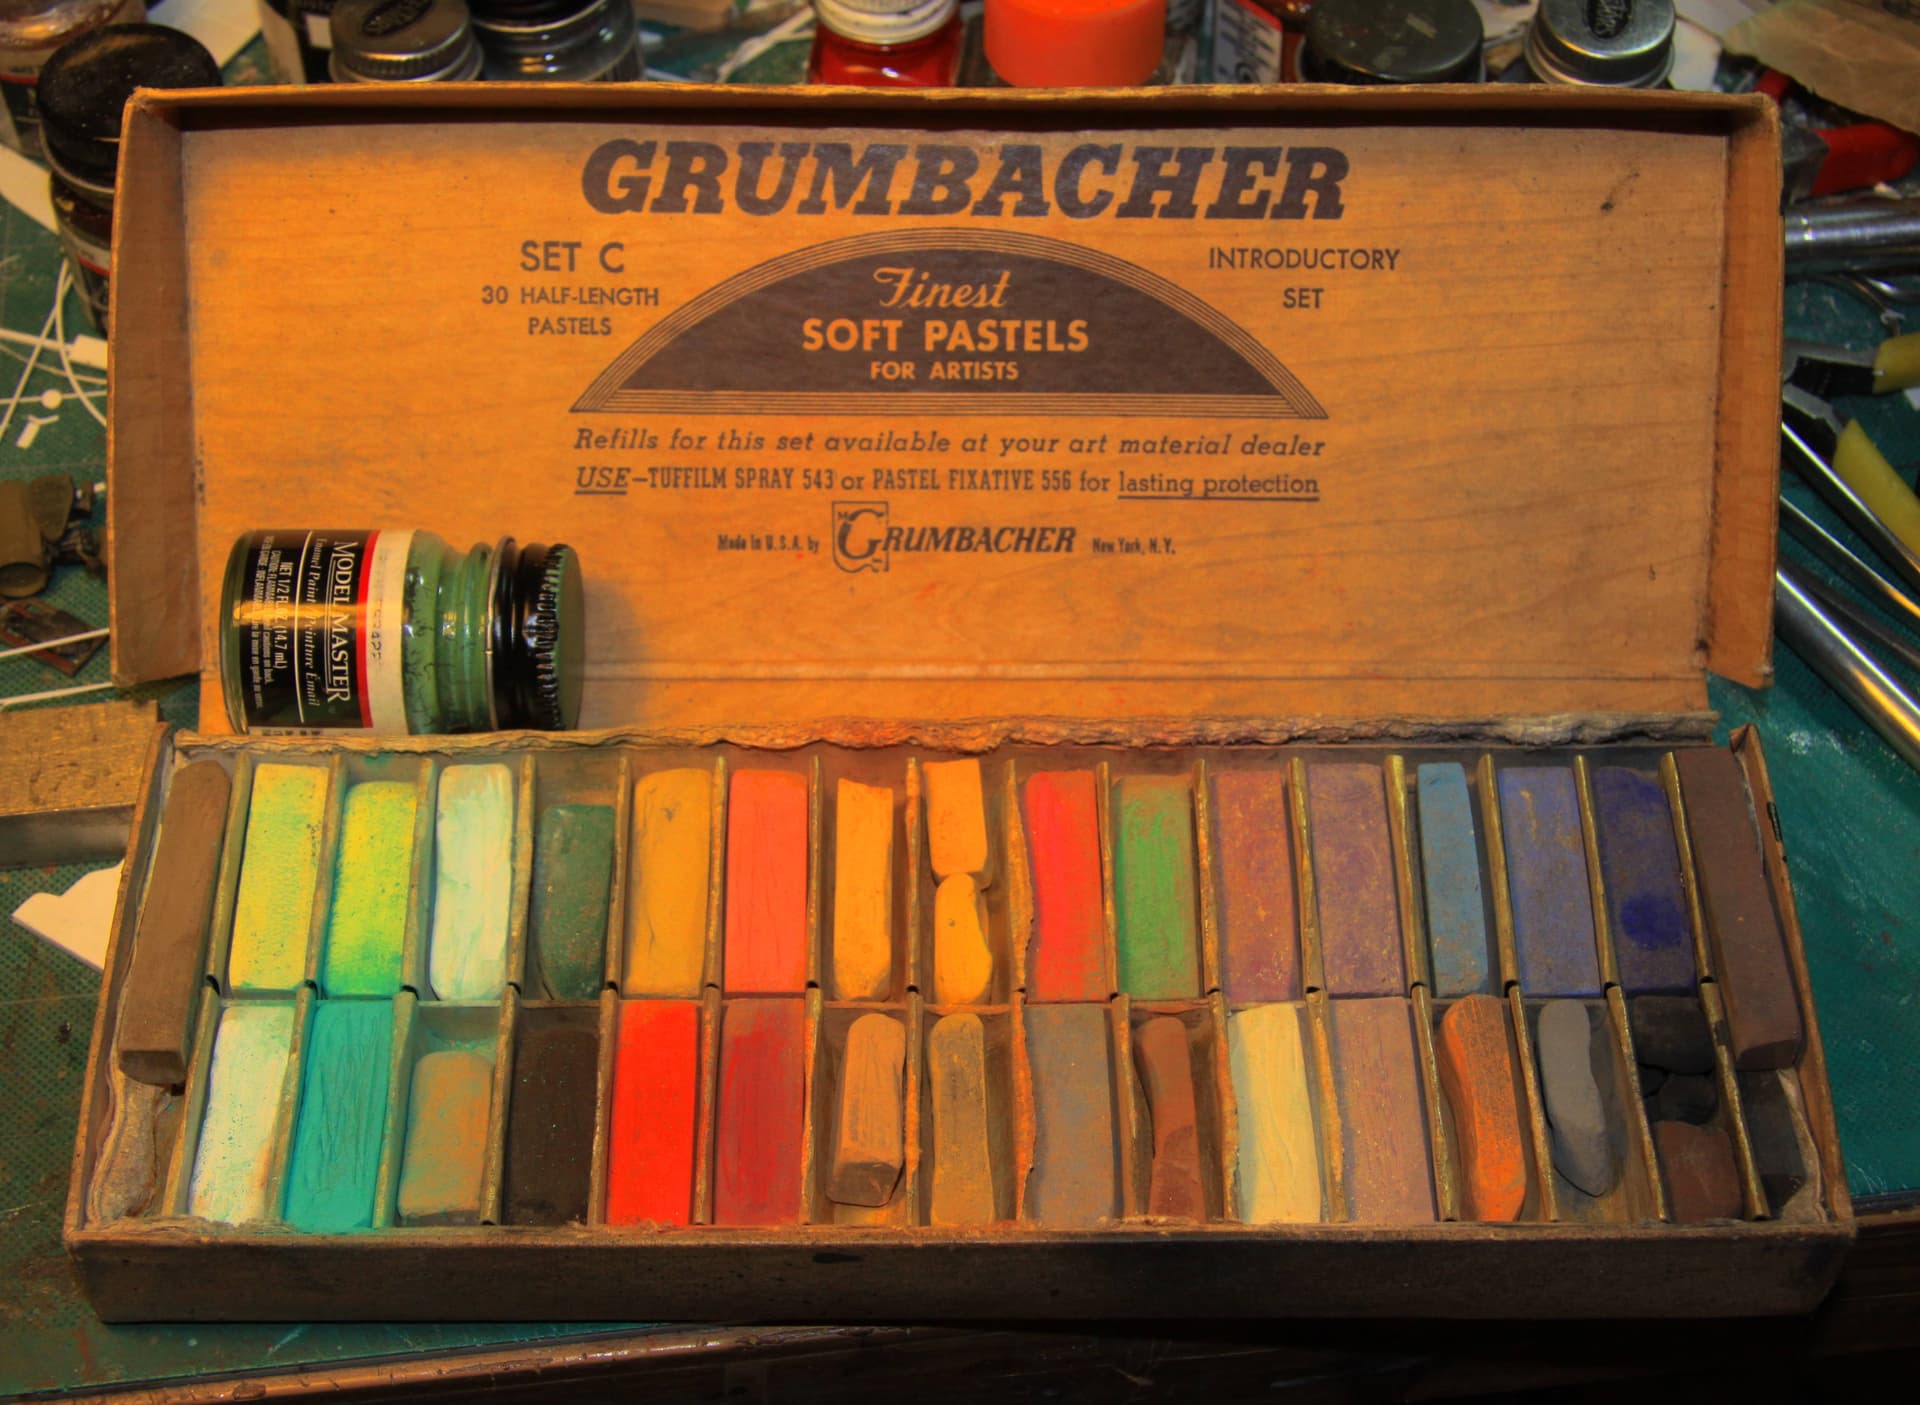
My original set of soft oil pastels (NOT chalks) purchased in the 70’s and used only for model weathering. Still going strong!