Hi All,
Sorry for the barrage of questions I’m posting here all of a sudden, but I want to get back into tanks after doing nothing but airplanes of late… Does anyone know what the real life color is for the lower hull and road wheels for the Challenger 2 in the Berlin camouflage (the patchwork white, gray and brown camo pattern)? The RFM instructions specify black for the lower hull and wheels, but I recall seeing somewhere the actual paint was the overall dark green of the Challenger 2, which may have been obscured due to dirt and mud in photos of the real tank, thus perhaps appearing as though those areas were painted black. Does anyone know for certain what color the hull and wheels were/are actually painted?
If I am not mistaken @Johnnych01 posted information on the hull color a while back.
You, sir, are exactly correct. It turns out that I even posted in that thread, way back in March, and had forgotten about it completely! In that thread, iwatajim did a GREAT job on the Berlin camo, and he painted the road wheels and lower hull green, and then weathered them to look almost exactly like the photos and videos of the real thing, where they look greyish and darker. My version is going to be harder to do, though, since I put anti-slip on my Chally 2, and masking all those different colored panels with the rougher texture may not result in precisely masked edges. That’s why iwata jim didn’t do anti-slip on his model. We will see how mine turns out. Thanks for the pointer to my own post, though!!
3 Likes
Hi!
At the very beginning, and from the pictures taken just after the paintjob and well before any exercise, these wheels were black (pictures taken from internet during the last years, here for discussion only). After being tested/on exercise etc, the vehicles became quite worn and I learned that they had been fully repainted at some time. Also, I guess one or another roadwheel had been replaced. So, colour might have been changed later to green from the supplies. Actually no idea if the lower hull was black also. It is always in a shadow and covered by the side skirts mostly. My guess from the middle picture is black for the lower hullsides.
Andreas
@AKirchhoff: Thank you, sir! Those photos leave zero doubt about the wheel color, as a semi-gloss black! You can’t get more definitive than that, I don’t think. As you wrote, there may have been later circumstances where the wheels were painted green, perhaps on a piece by piece basis, or all together, but these pictures are crystal clear that the wheels were, at one point, pure black. I think that pretty much seals it for me. The wheels on my tank, and the lower hull sides, are gonna be painted black.
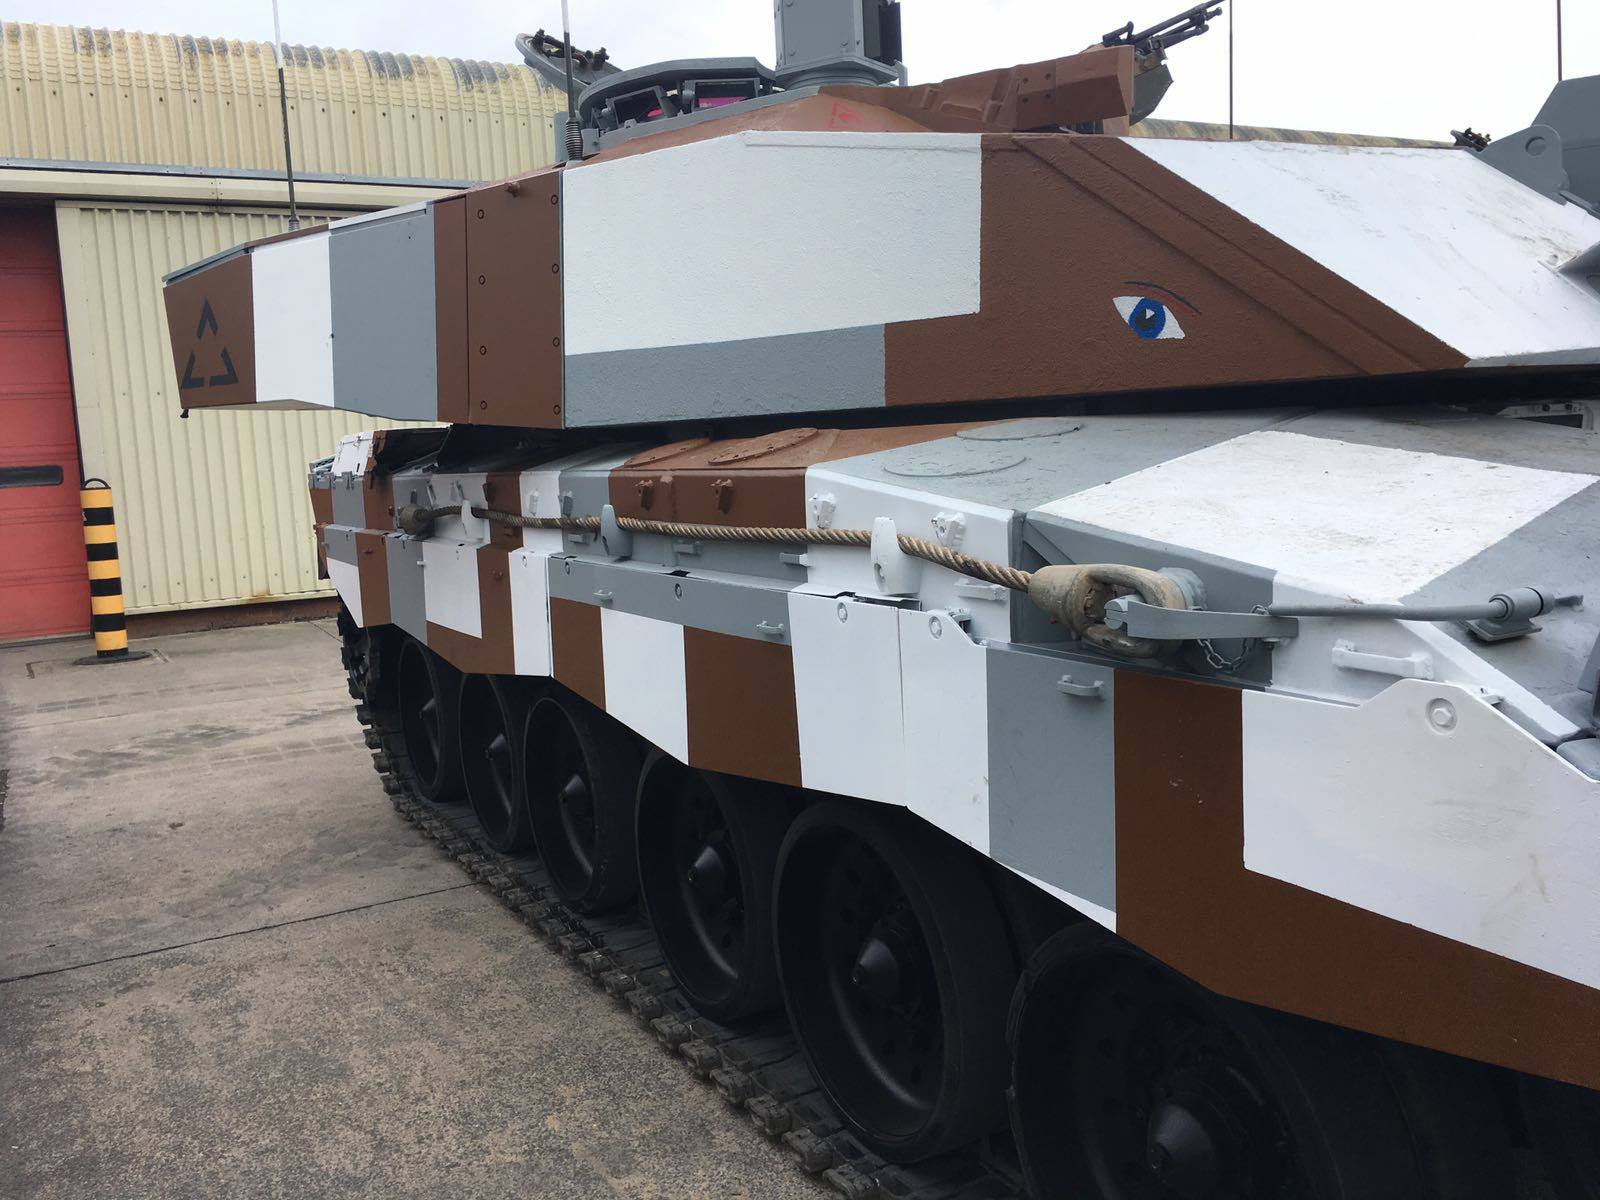
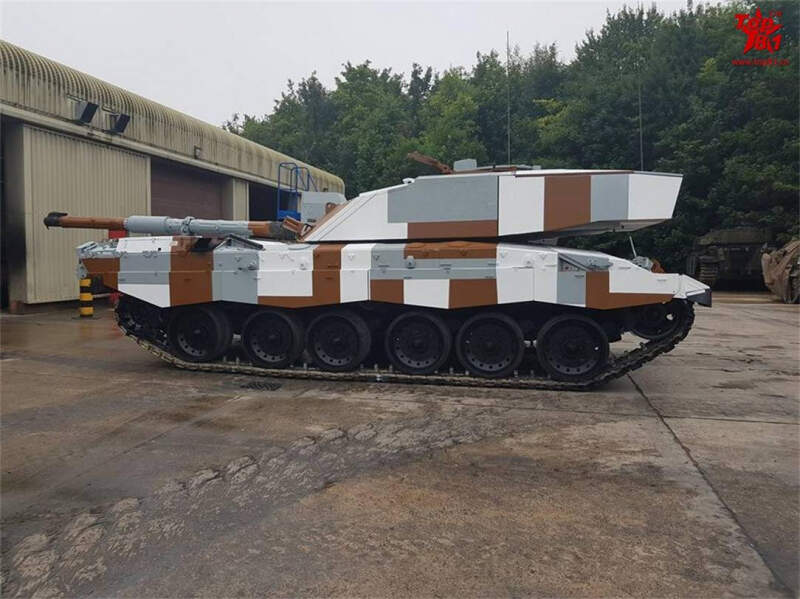
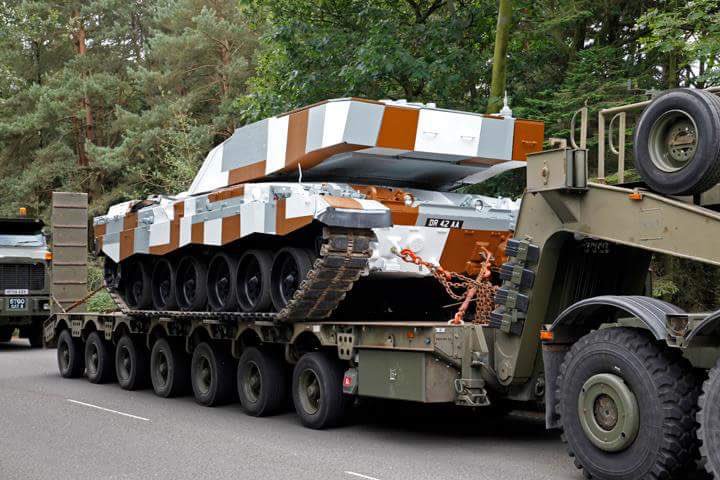
I have continued to look for more photos of the Challenger 2 in Berlin camouflage, and I’ve noted that it seems like the camouflage is not identical on these tanks. It is unfortunate that the RFM instructions, while apparently incorrect in some fashion, didn’t include both sides of the tank for the Berlin camo (not necessary for the green and sand color tanks), nor did they provide a top view. Additionally, photos of the real tanks show that the camo patterns differ from tank to tank. I am planning to put a dozer blade on my tank, and I have the Accurate Armour blade. Some pictures I’ve seen show the blade with the same white/grey/brown camo as the rest of the tank, though there is one photo that shows the face of the blade in plain overall green. One would think that for such a small cadre of tanks to which this camo scheme was being applied, the camo pattern would be the same for all. However, apparently this is not the case. And while I realize that I just need to pick one color pattern for the road wheels (and idler and drive sprocket), which I am going to do in semi-gloss black, one photo of the right side of the tank shows what appears to be a mud coating on the idler, wheels and sprocket so consistent that it looks like they were painted in that tan/sand color. Also, the pattern is not the same on the right side versus the left side of the tank, apparently, regardless of which camo pattern is/was used. I’ll try to create my own diagrams of the patterns I’ll use on the right, left, front, back and top of the tank to try to make them all consistent between each other. It will be interesting to see if I can do it!
Curt when I did mine I had the the tankograd book which shows a few tanks with all around views. It’s a great reference if you can get it. Probably my all time favorite camo pattern.
Thanks, metal! I will definitely look it up!
Now…I’ve just completed the road wheels, sprockets and idlers. I painted them all Mr. Color semi-gloss black, and painted the tires on the wheels Tamiya Rubber Black, and then made sure the ‘rubber’ was matte finish with a layer of matte varnish on the tire parts. They look great. I also have completed the kit tracks, which, though they did look a bit intimidating when starting, actually went pretty quickly. I was done with them in 2 days or so of bench time.
Now, though, I have a question for those of you with more experience with the plastic movable tracks. How have you painted them, in order to ensure that the movable aspect of them doesn’t get all messed with the paint? I’m planning to airbrush the tracks, but thinking hard about not priming them, in order to minimize the amount of paint that might get into the spaces that allow the individual track cleats to move. I think I’ve only done one other plastic articulating track (I’ve always used metal tracks like Fruil). The one time I did it before, painting really did get into the gaps and the tracks were kind of ruined. I’m not planning to have an ongoing need for the tracks to be flexible, just enough to go around the idlers and sprockets when I finally put them on the tank. Any thoughts on how best to accomplish this? I’m sure that someone will suggest waiting them after they are on the model, but that’s not an option. I’ve done too much work on the wheels, and will have too much effort in painting the lower hull to try that. So…any other ideas would be appreciated!
If you skip the primer and just go with the track color you should be OK. You can also try reducing the pressure to your airbrush so that the paint is not forced into the moving parts of the tracks.
Ken
That’s an obvious, but very good, idea. Thank you! I hadn’t figured there were any magical ideas out there, but a reduced pressure certainly should help prevent getting too much paint into the spots where things move.
Hey Curt, glad to hear you have made a start on the build. I did paint the road wheels black, but did the lower hull in green, none of which can be seen for the subsequent weathering! As for the tracks, I painted them black, not worrying about the paint filling the pivots and they were still very workable after, less so after the pigment/varnish mix I used for weathering but still easy to manipulate onto the model, it made the tracks ever so slightly shorter, a build up of the pigment slurry in the joins I think. I struggled with shots from above too but think I got pretty close.
Looking forward to more progress reports…
Hi Jim, thanks for checking in! I’m very happy with the way the road wheels turned out, as well as the thus far unpainted tracks. I’ve done a preliminary prime of the underside and the lower hull sides with black Stynylrez, but I somehow let the finish get a bit granular, and I had to sand some of the primer away. Still pondering the color for the hull, but I’m leaning toward black, but as you say, what is actually seen is pretty limited once everything is put together and weathered. I’m on hold with the build for the moment, as I placed an order with HobbyEasy for a hard to find Voyager PE set for this tank, and I want to wait until that gets here to continue on with the build. I did, however, do the upper hull and turret with anti-slip, and while it’s not a very good job, it’s there. I’m anxious to see how well I’ll be able to mask the Berlin camo and get good straight edges for the ‘color blocks’. I’m hoping it will be okay, but we’ll see. I’ll take some photos once the Voyager set arrives and I restart the build!
Frankly, though, Jim, I can’t imagine my tank coming out even close to as good as yours!
1 Like
Thank you for the reminder, Andreas! I just downloaded the photos now…greatly appreciated!