I used a piece of 1/4" thick foamcore with the paper backing stripped off one side. Then I selected a handy tool (in this case, the rounded end of a paint brush handle - the handle is about 1/2" diameter. The larger the diameter = larger wave patten, and vice versa). I pressed the end of the handle into the foam surface continuously until the surface was thoroughly craterized, but it looked like a flat golf ball so I made more impressions overlapping the previous. When I was satisfied, I airbrushed everything Tamiya Sea Blue, then just the wave tops with Tamiya Clear Blue. White for the ship’s wake, and disturbed water. Then a liberal coating of clear acrylic varnish - several times because the foam tended to soak up the varnish. I also stippled clear acrylic modelling paste to form the bow wave and disturbed water along the hull sides.
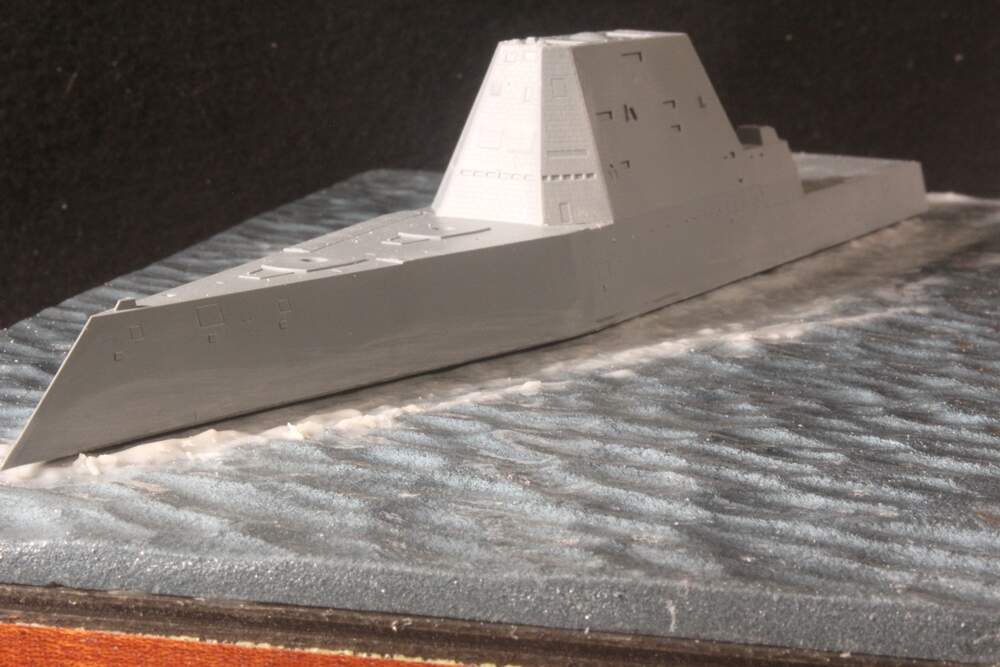
Admittedly I’ve seen better (but more expensive, and labor intensive) representations, but I did say this is “cheap and easy” - great for lazy modelers, like me, who want a quick base for their model that doesn’t look too bad. This base was made for my Flyhawk Zumwalt. The model has yet to be finished, and the base tweaked here and there, and some bow spray added.
Sooo…not bad, or piece of crap? Comments on improvements?
I think it’s bordering on genius, even I could manage that! Not sure the photos do the colours justice & I’d probably veer more towards (sea) greens. I wonder what a thick coat of PVA on top would do, keeping to the principle of low cost? Anyway, brilliant & thanks for the inspiration
That is brilliant. I’d recommend some trim around the edge to hide the raw foam. As for going for sea green on the color, it really depends on what environment you want to depict. When you get out on the open ocean, the water becomes the deepest blue imaginable–not a hint of green. You only get the green when you get in closer to land.
The color rendition definitely looks grey-ish, but the original pics tend more towards the blue. Anyway, the sea can appear different colors in different parts of the world, as well as depending on atmospheric conditions, ie; the North Atlantic usually appears grey, or greyish-green because of overcast skies; blue water is usually because of clear skies, and, as Namabiiru said, green closer to land areas.
Thanks for the - encouragement to refine and develop my technique.
On viewing the close-up shots there is quite a bit of specular-ization (?) - unintended little dark spots all over the surface. I believe these are due to the inherent texture of the foam. Apparently, several coats of varnish didn’t make them go away. Next time I’ll have to remember to seal the foam BEFORE painting - maybe with a coat of left-over latex house paint.
Definitely good as is for a calm sea, or I guess a river or lake. I have had a small river scene developing in my mind as a next project for some time, so will bear this in mind. Perhaps PVA would seal the foam prior to painting? Maybe some air dry clay to add wave tops?
Hmmm…PVA sounds like a good idea, and I’ve got a few bottles of cheap PVA lying around. With all this brain-storming going on something really good could result!
Styrofoam is fairly forgetful, and after being crushed, or pressed into a shape doesn’t return to original. That’s why many scratch-builders like to use this stuff - it’s light-weight, easy to cut, and you can texture it.
Yes i understand there is foam and there is foam. Im was just pointing out the fact that not all foams are created equal. I recently purchased some green foam sheet used for insulation. A hammer mark would be gone in the morning.
I don’t know if it’s generally available but there’s a potentially handy & likely dirt cheap fine-grained foam used in flower arranging, typically green. Reasonably strong yet very light, to poke flower stems into. The colour’s not important but it keeps its memory when dented. I’ve only seen it in small-ish blocks, this thread reminds me I’ve never got around to asking florists if they cut it down from much bigger blocks. If you don’t know what I’m talking about I’ll post a photo
It carves easily, is waterproof, and as you said, is reasonably strong.
I coated this piece with Celluclay to make the explosion plume for my 1/1200 Enterprise diorama. This one started as a small piece, but I’ve seen larger sheets of it at craft stores.
I’ve used that florists’ foam and there’s a reason why florist’s use it - it’s extremely porous. It would take considerable amounts of sealer before being able to paint. Anybody ever use “balsa foam”? It is more dense than florists’ foam, and just as easy to cut, but soaks up paint, etc. like a sponge!
I believe the florist foam is sold as “oasis” foam. You can get it at craft stores. One big caution though. It can be very powdery. Is that a word? Anyway the foam can fall to pieces and get into everything. Me? I would avoid it. Caveat - there are different types so rub it and if it turns to powder don’t use it.
Yep fair points from Leo & Bruce, I guess other-Tim must have found the better stuff. I suspect “fresh” holds together better and loses integrity with use/age…somewhat like myself. The porosity might be prevented with a thickish coat of PVA after sculpting before painting