That’s the Tamiya GPMG.
And the Accurate Armour one.
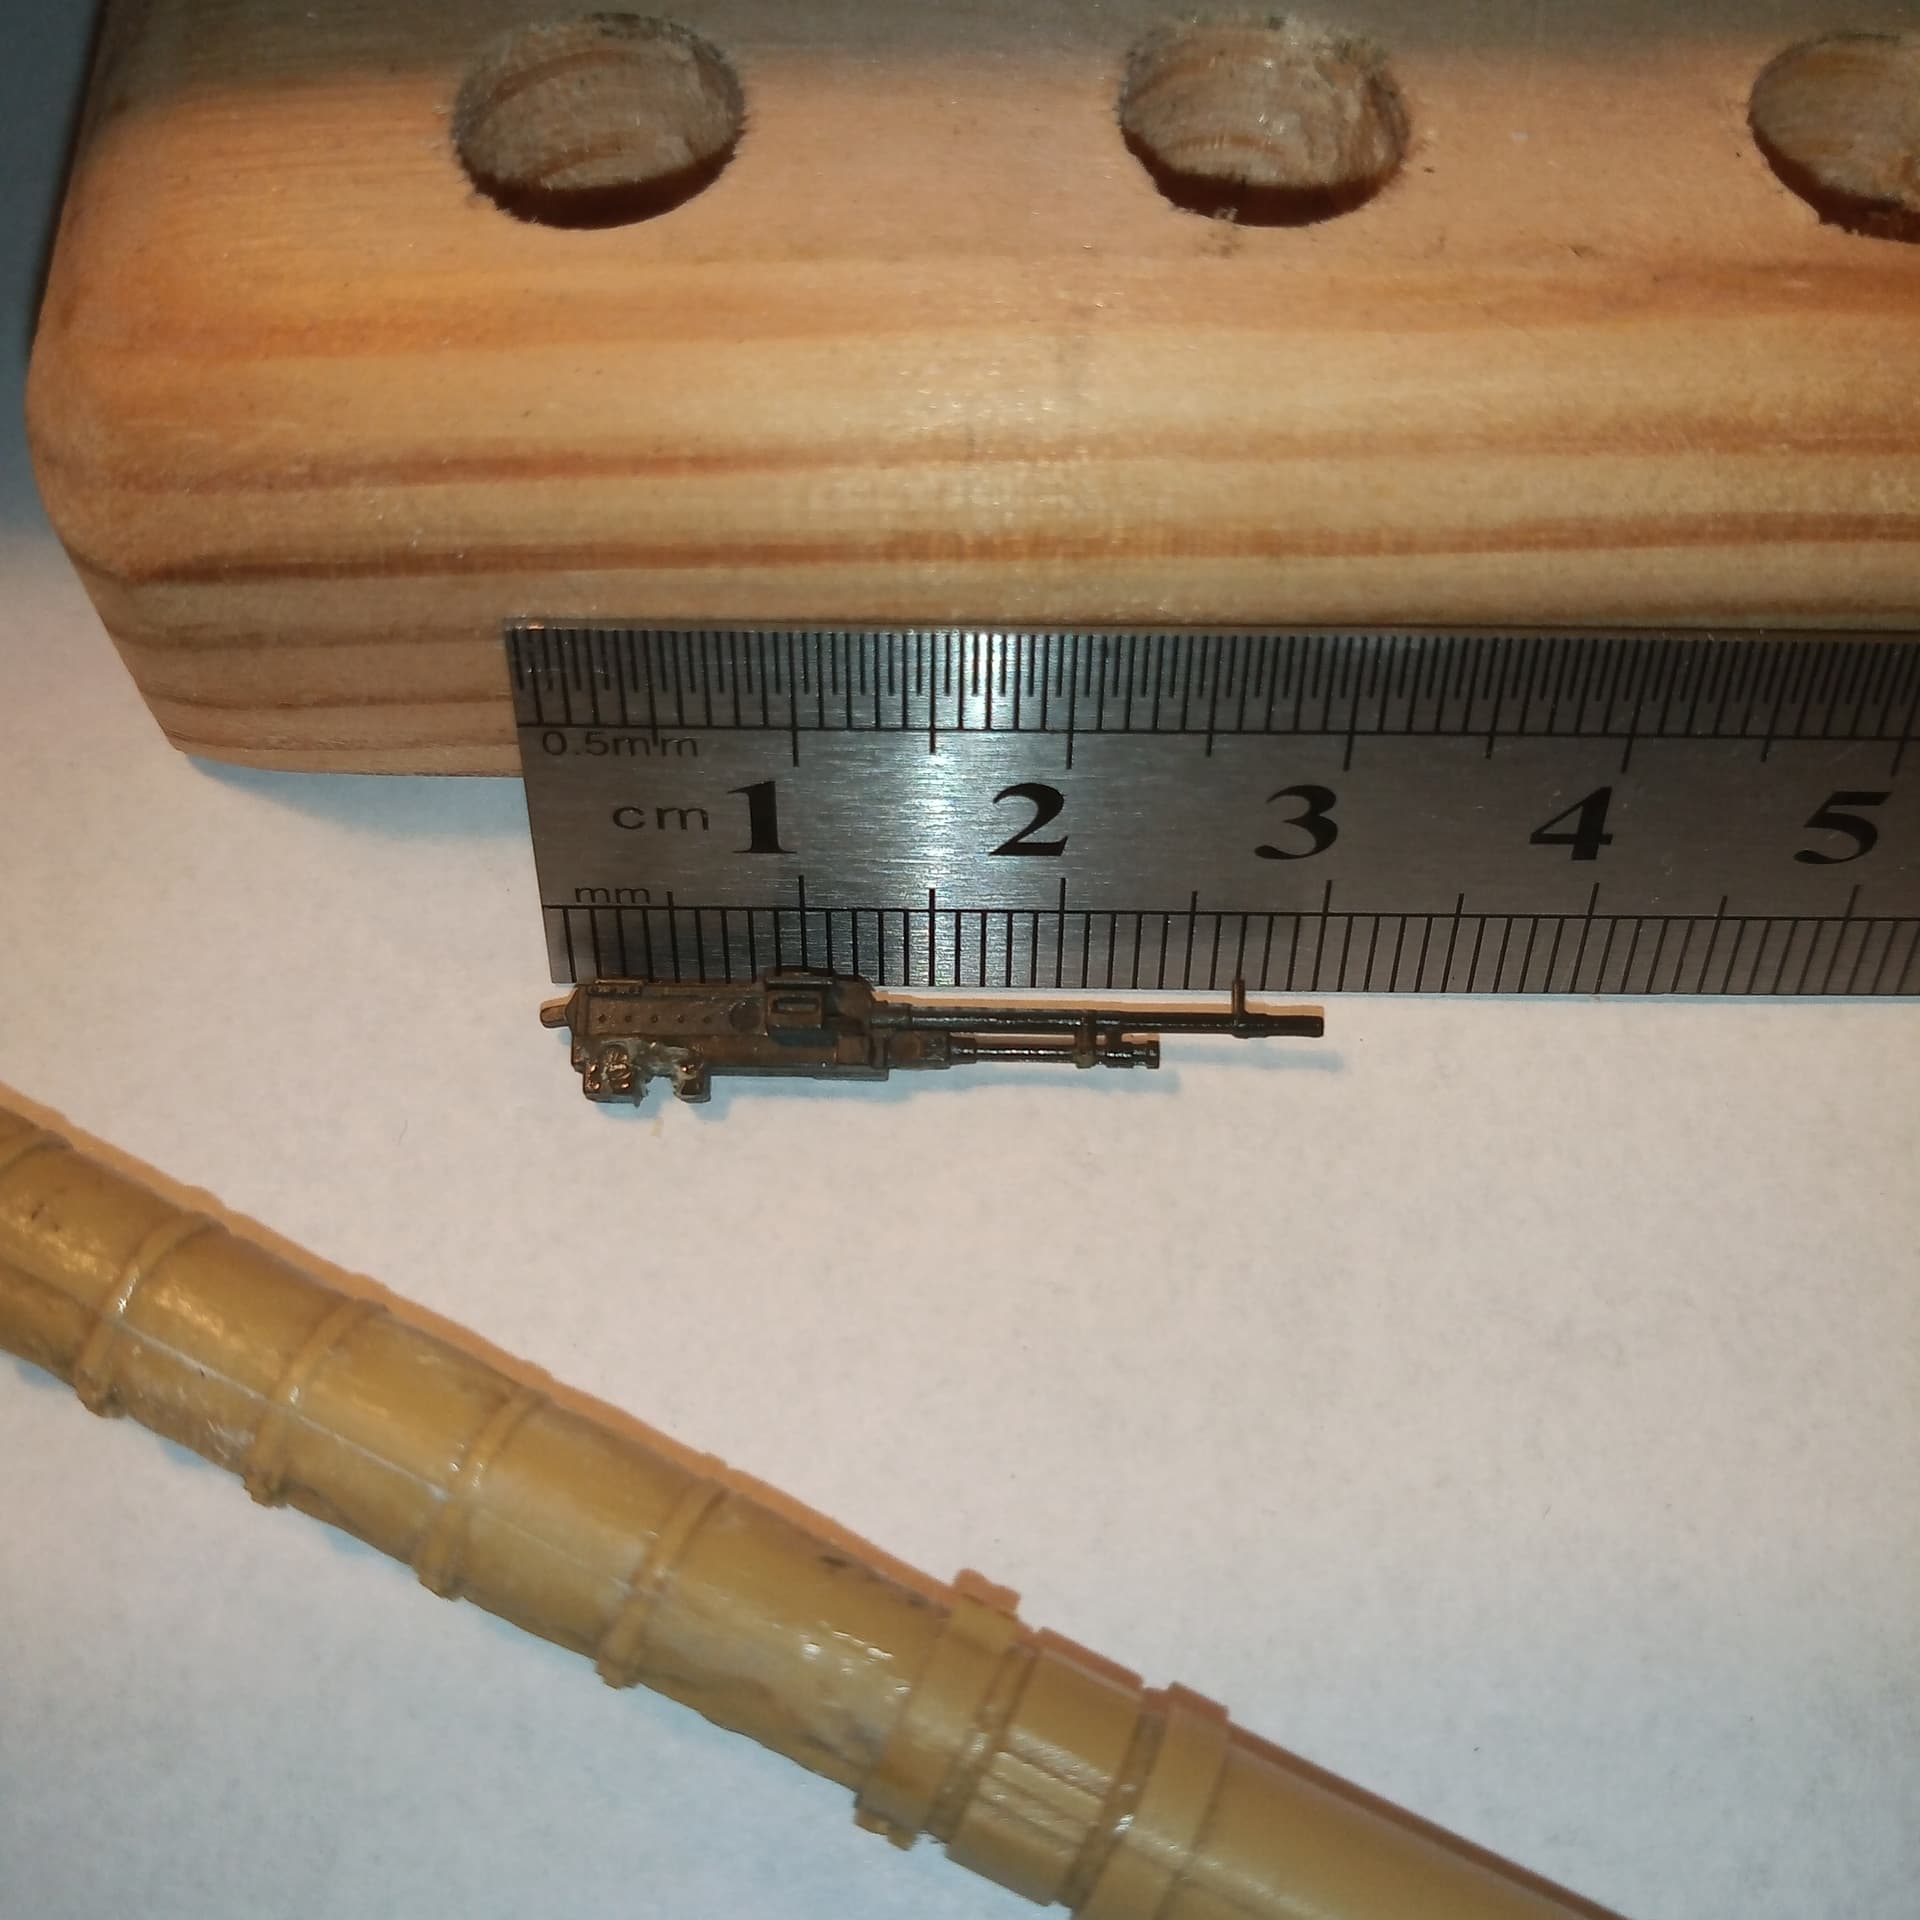
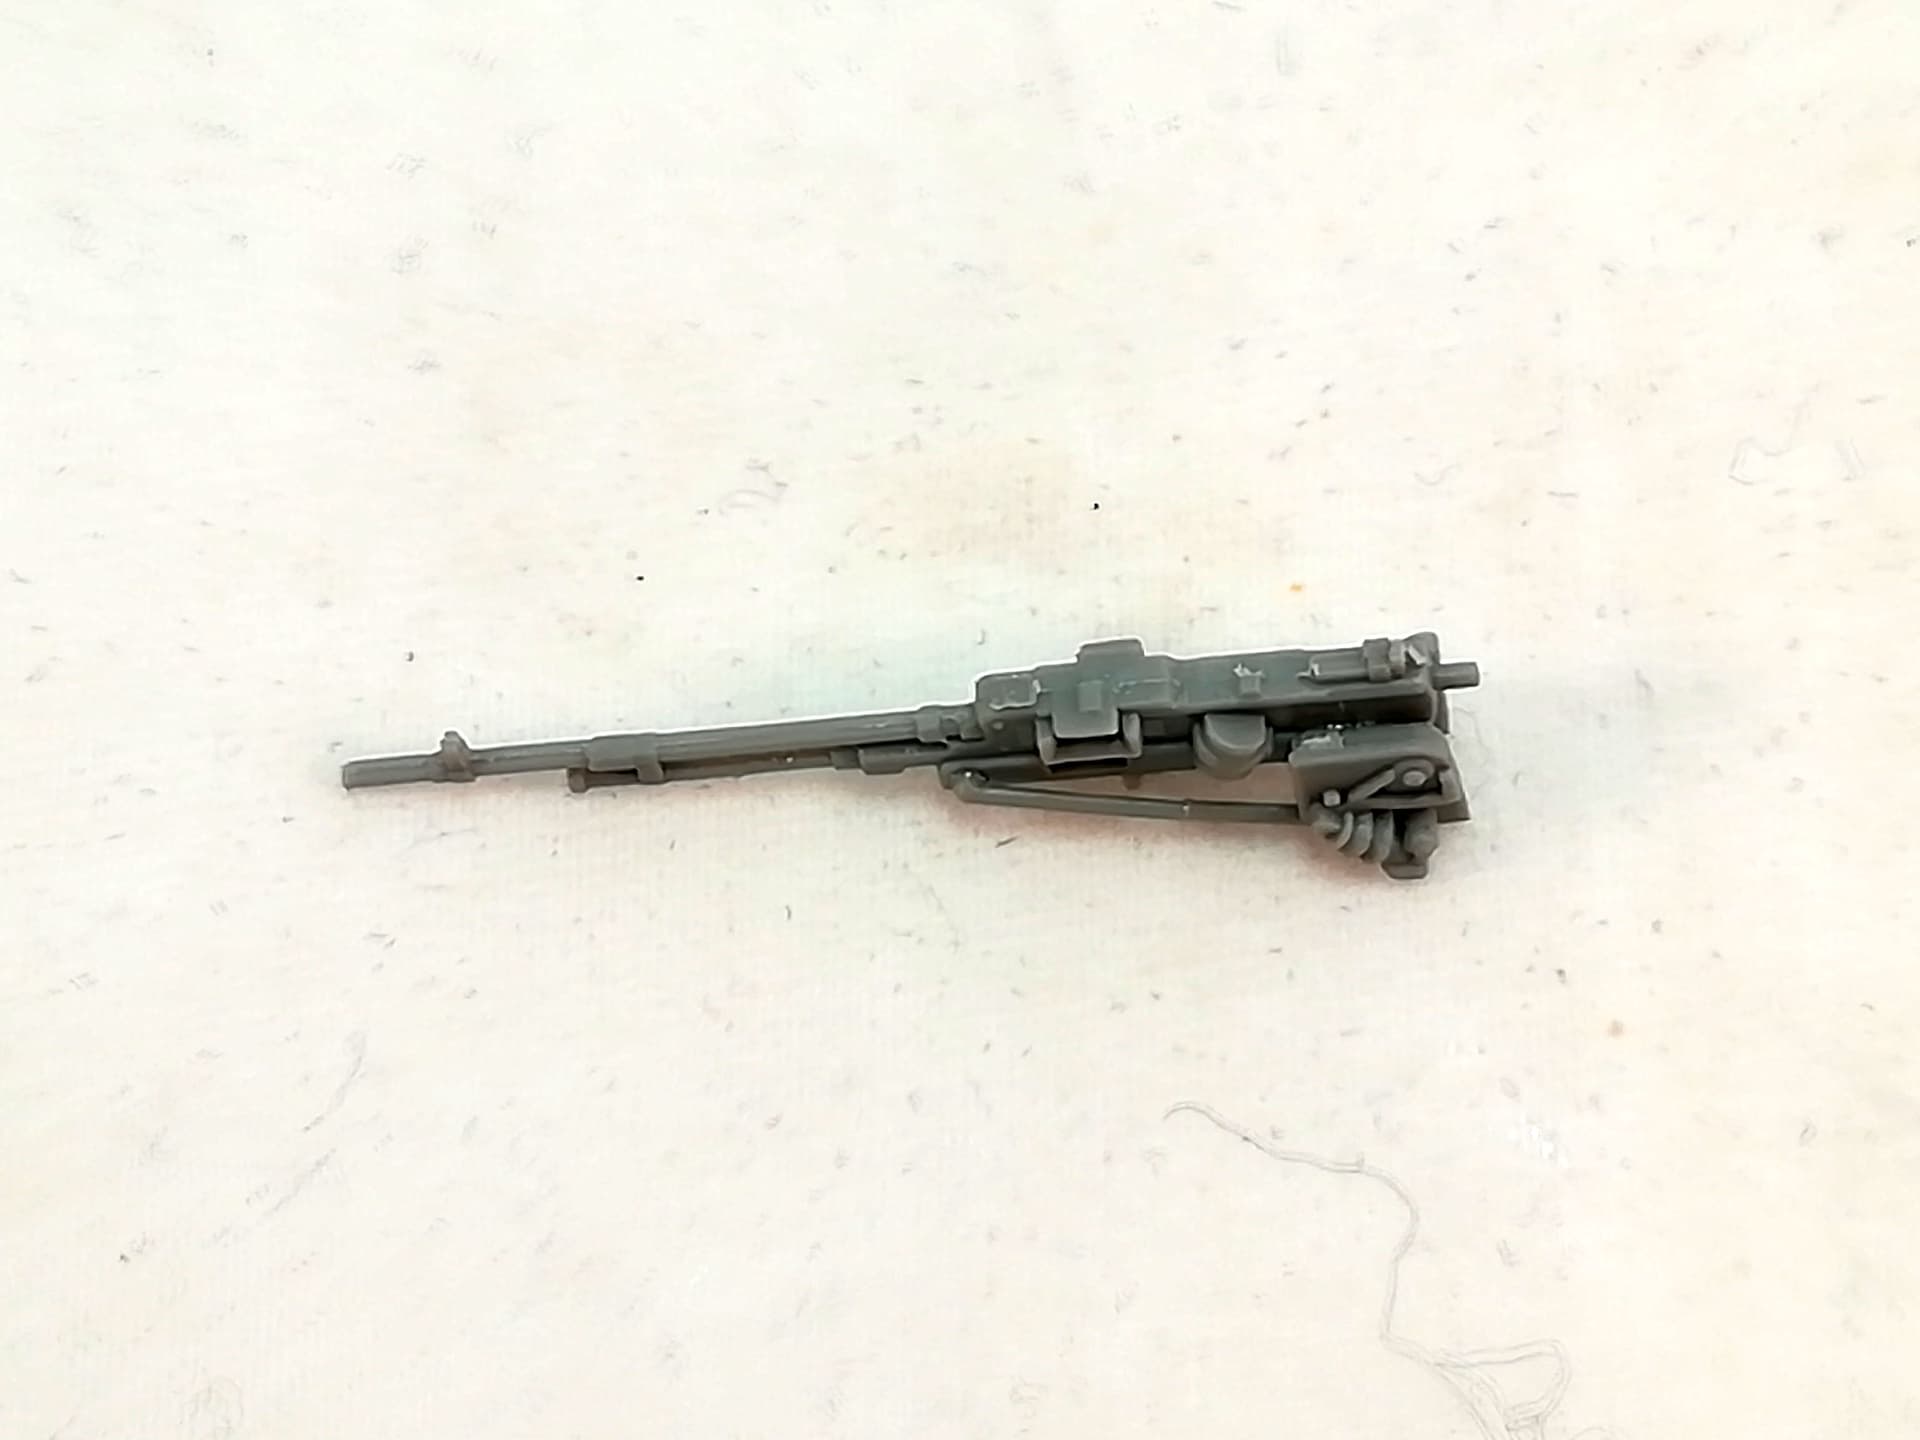
The AA GPMGs do lack a fair amount of detail and this one is probably 3mm to long as well as not having a very well detailed barrel. I am now debating whether to cut the barrel off as it joins the body and replace it with the Tamiya one
2 Likes
Takom GPMG is 3 cm long too.
Olivier
1 Like
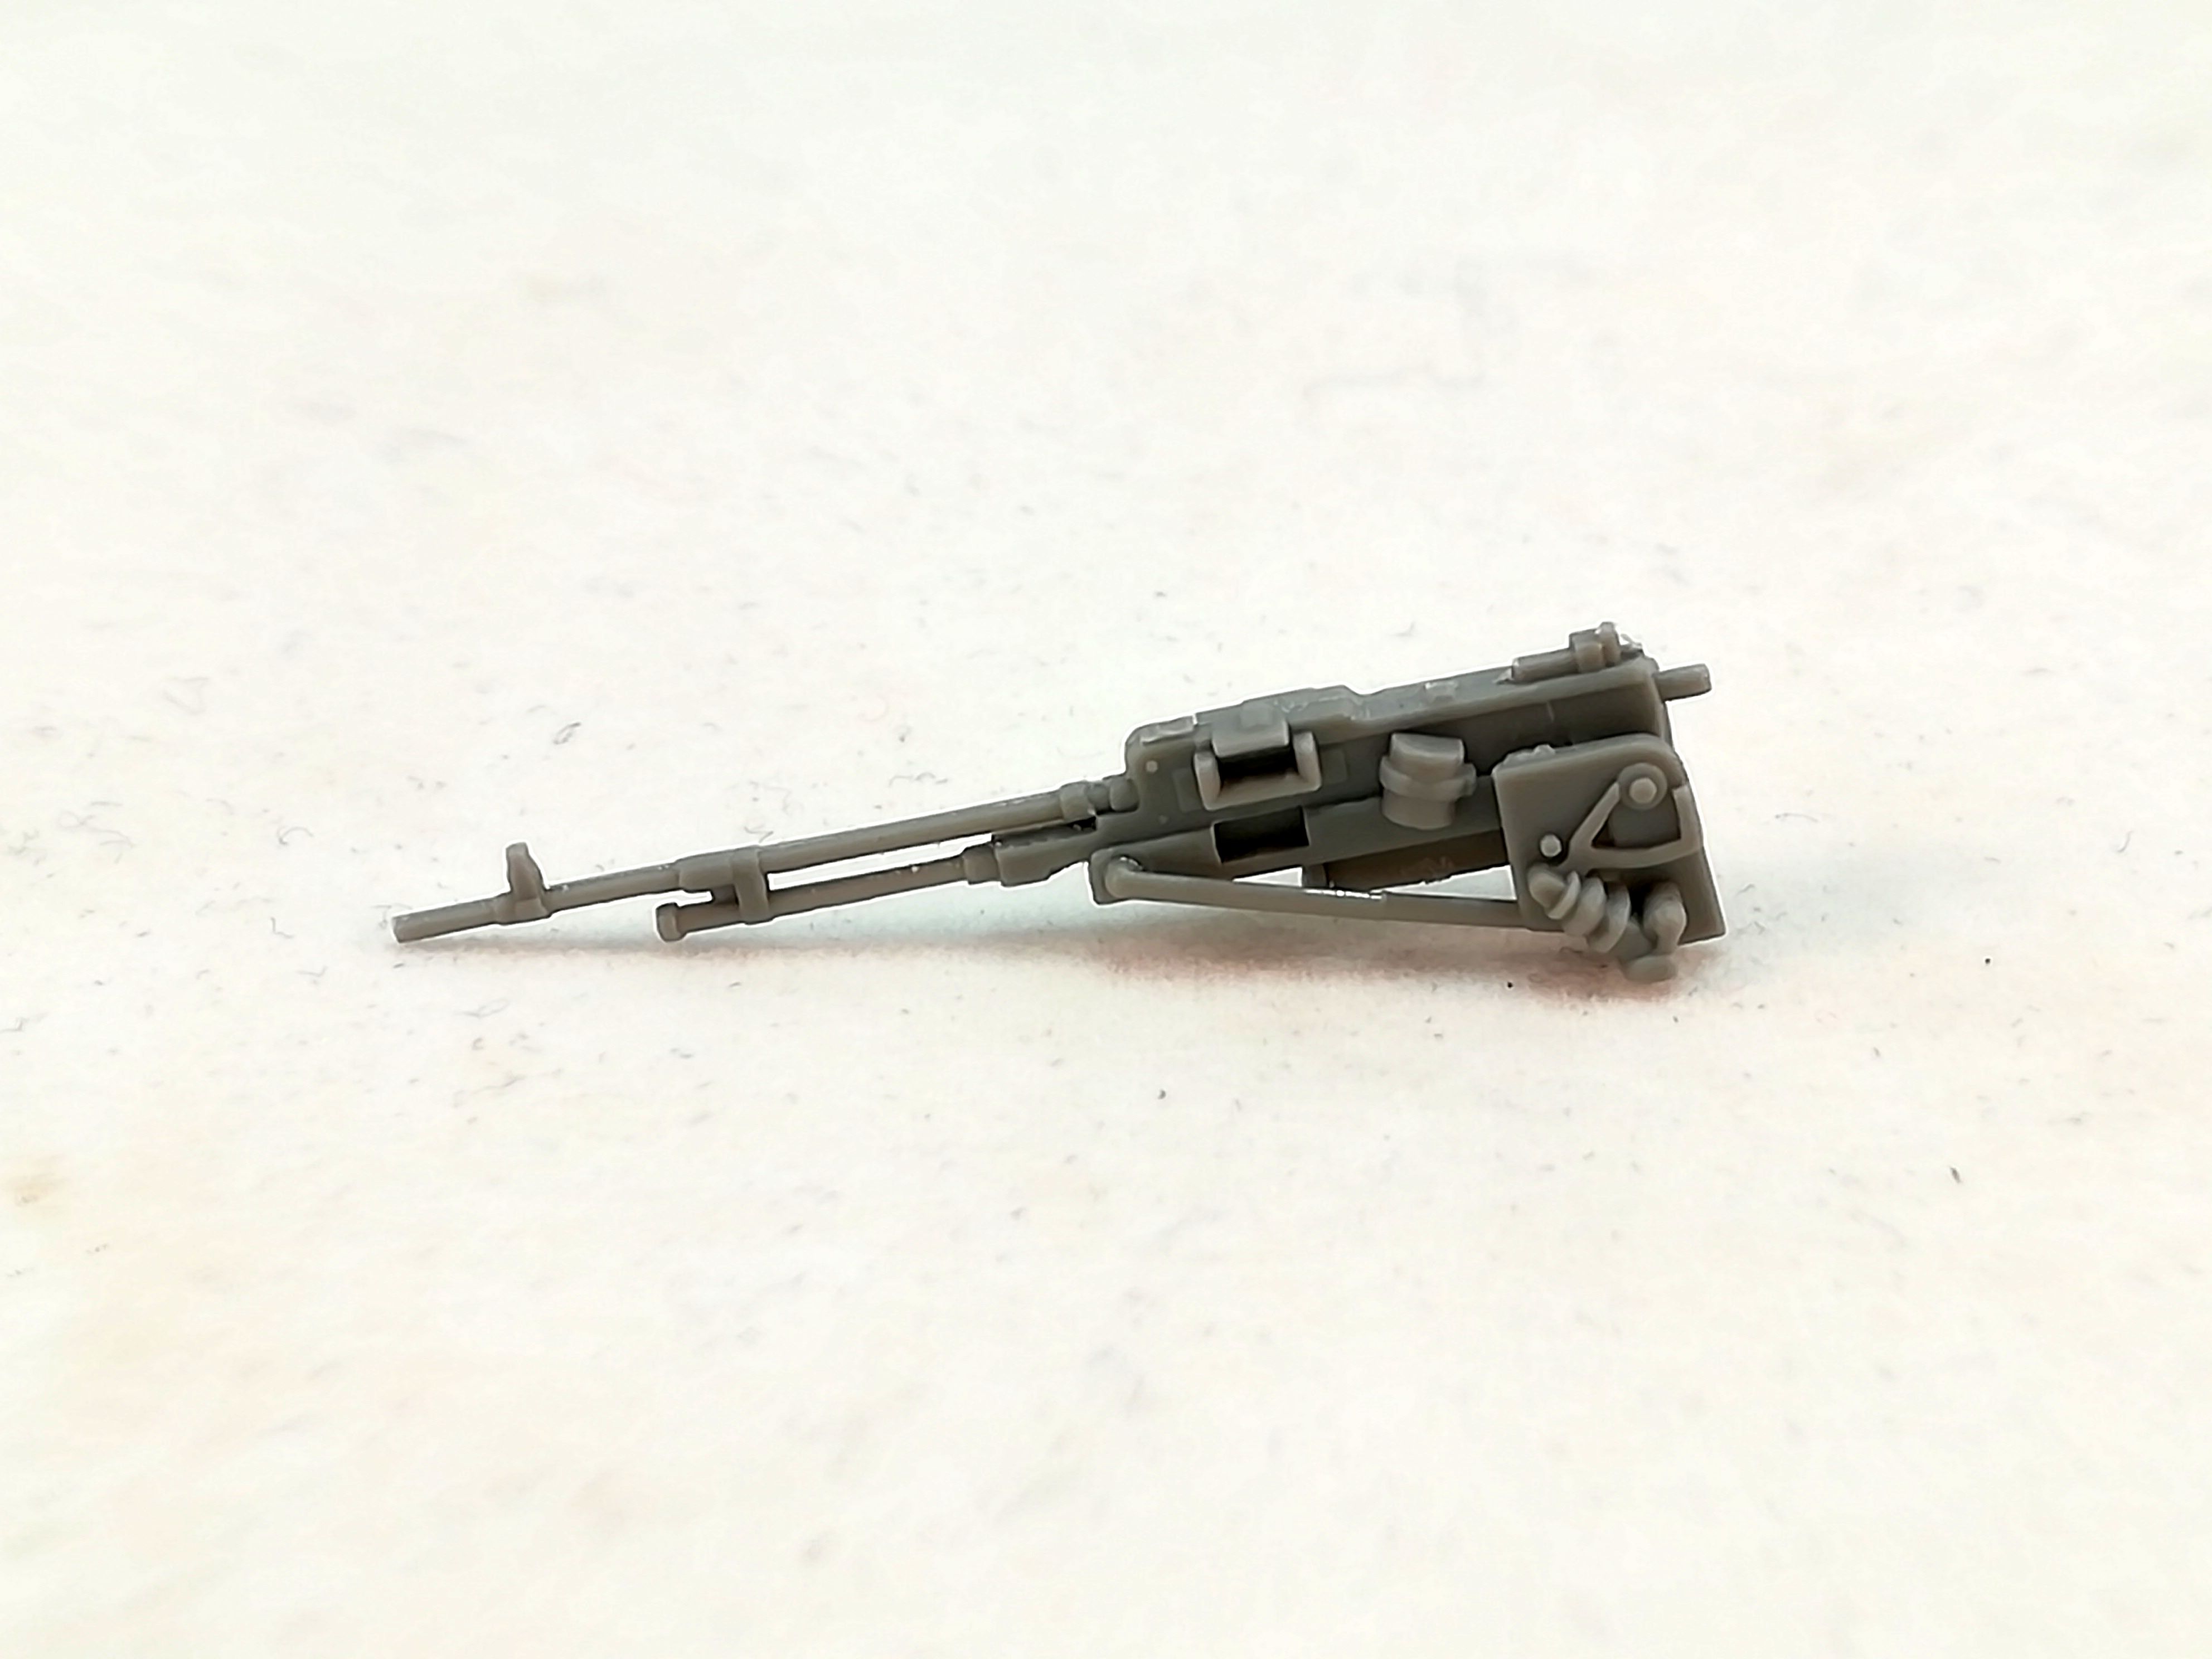
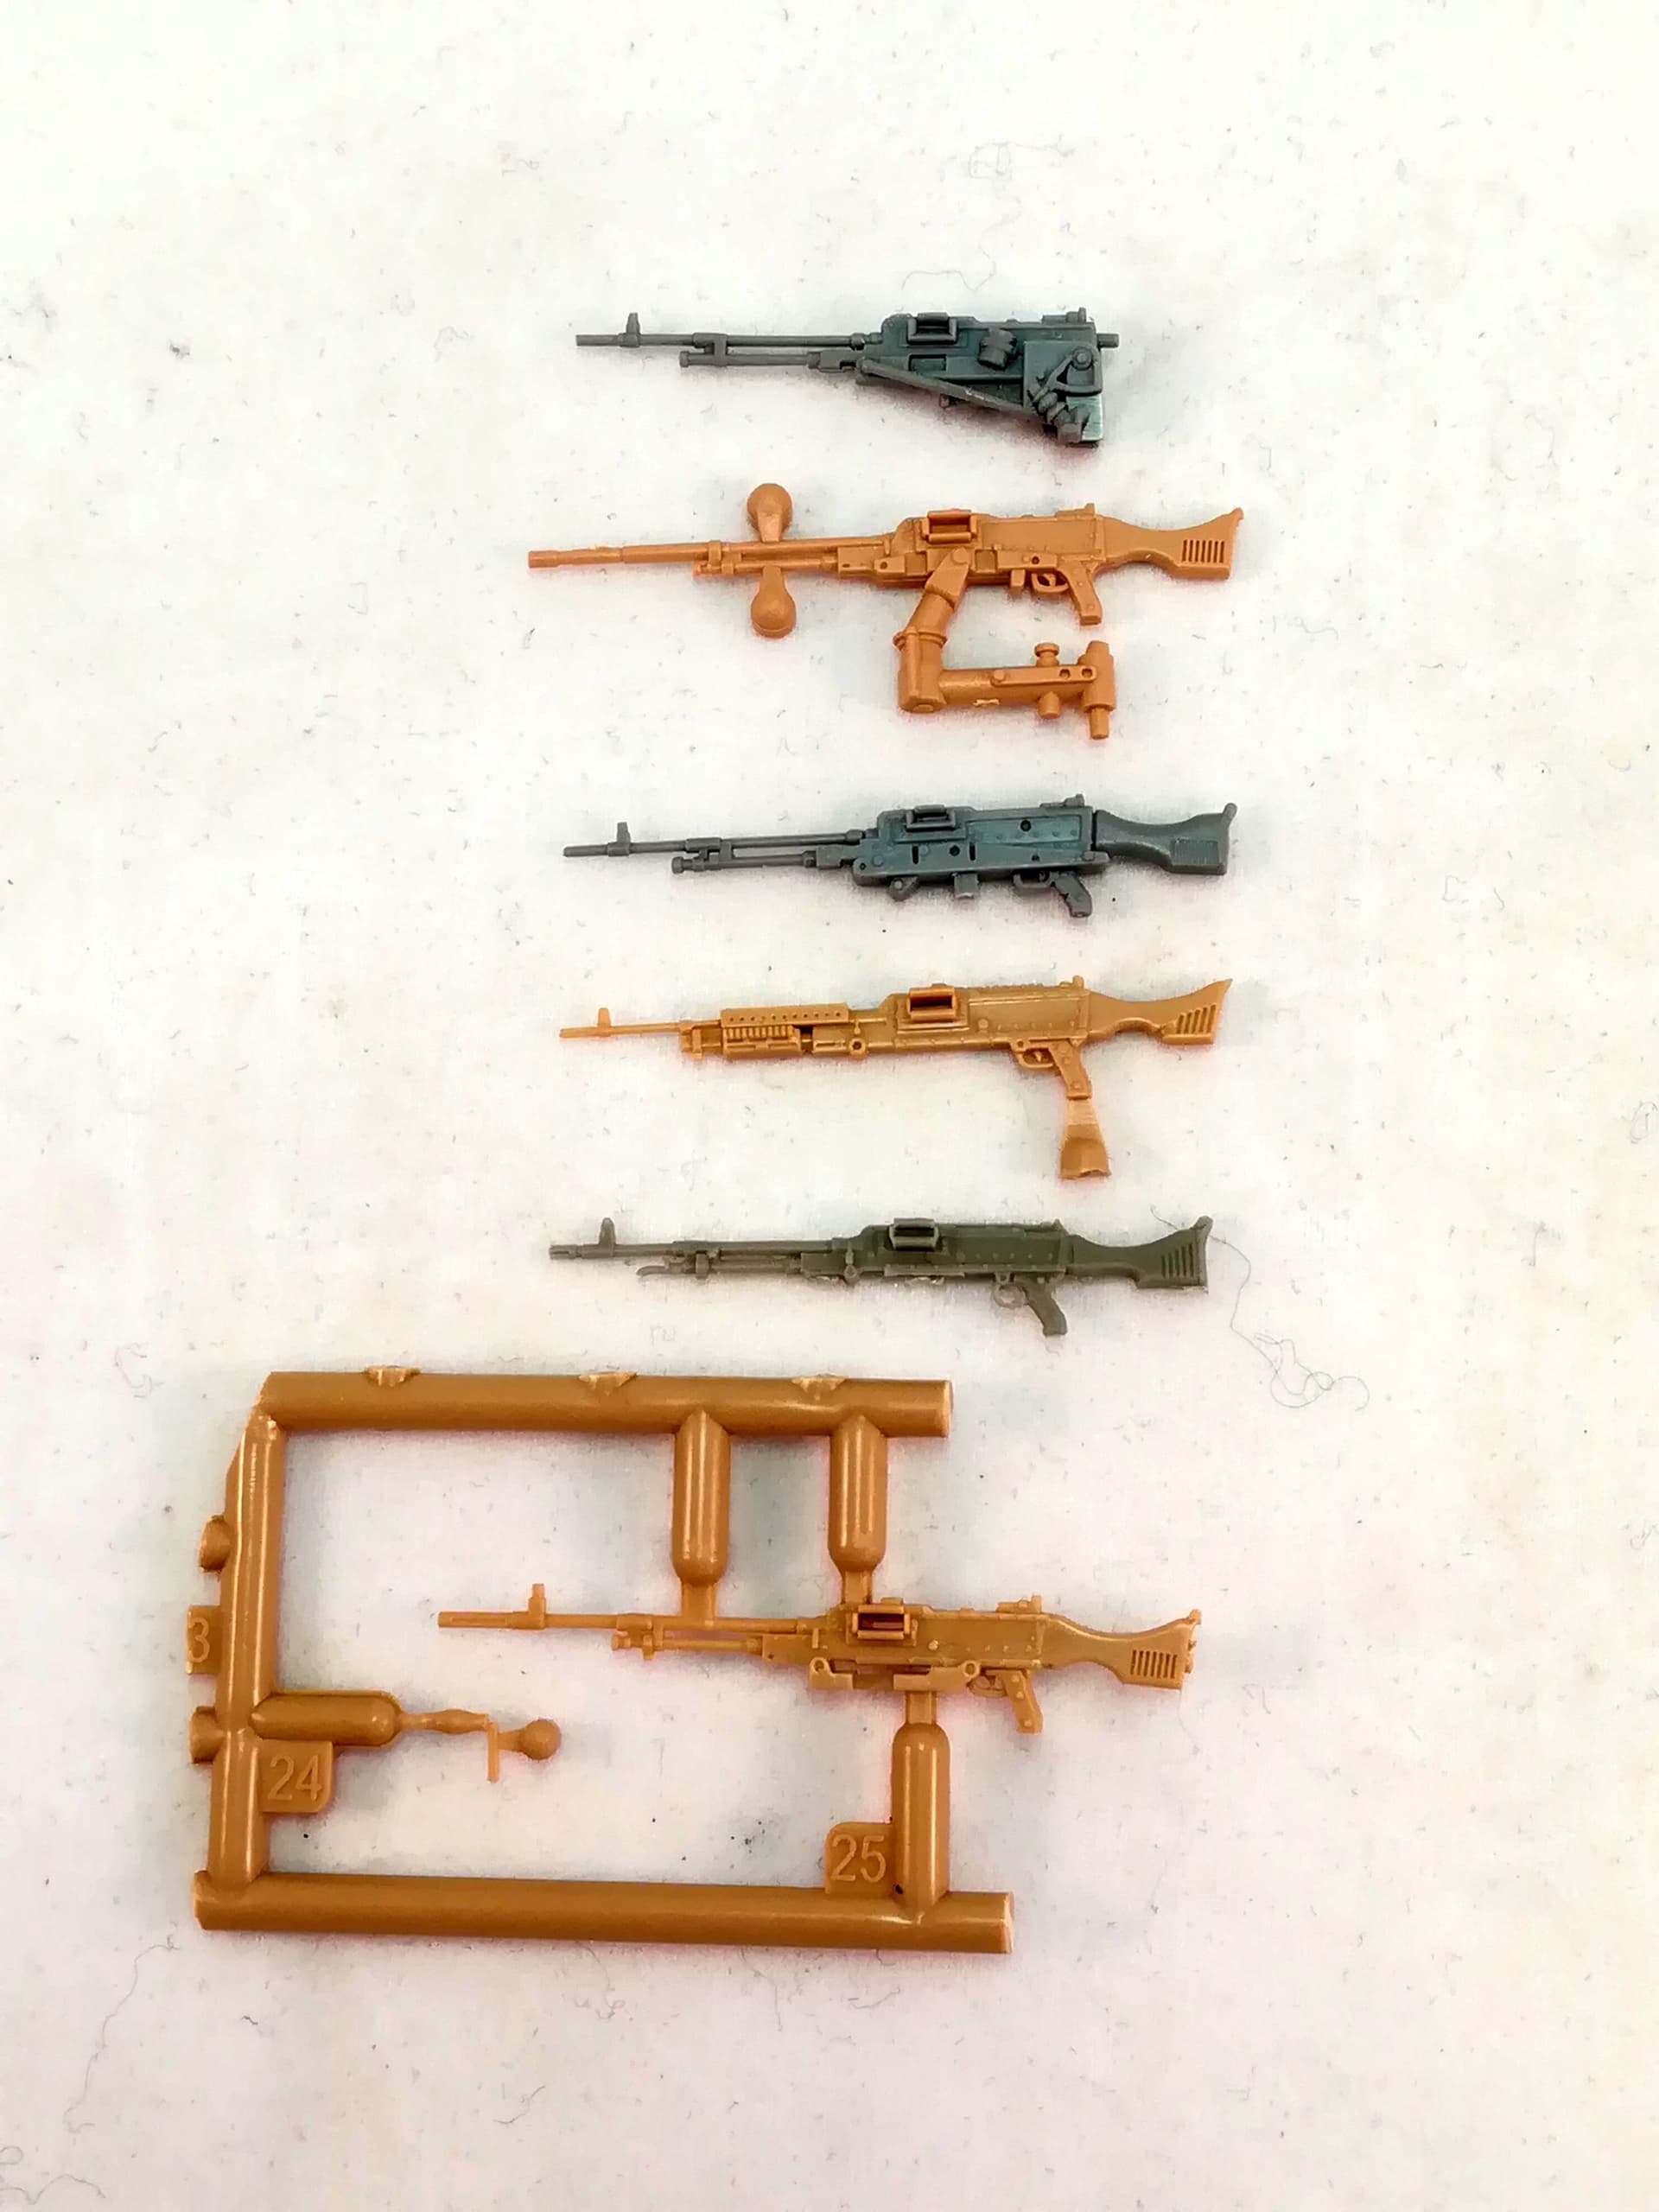
Here is a picture of the various GPMG/MAG/M240 I have in the stash.
From top to bottom
Takom GPMG Chieftain
Tiger Model MAG Nagmachon
manufacturer unknown (Takom?) IDF MAG
manufacturer unknown US M240
Live Resin M240
Meng MAG PZH2000
missing AFV Club IDF MAG Shot which is close to the third from top
Olivier
4 Likes
Thanks for showing us those Olivier.
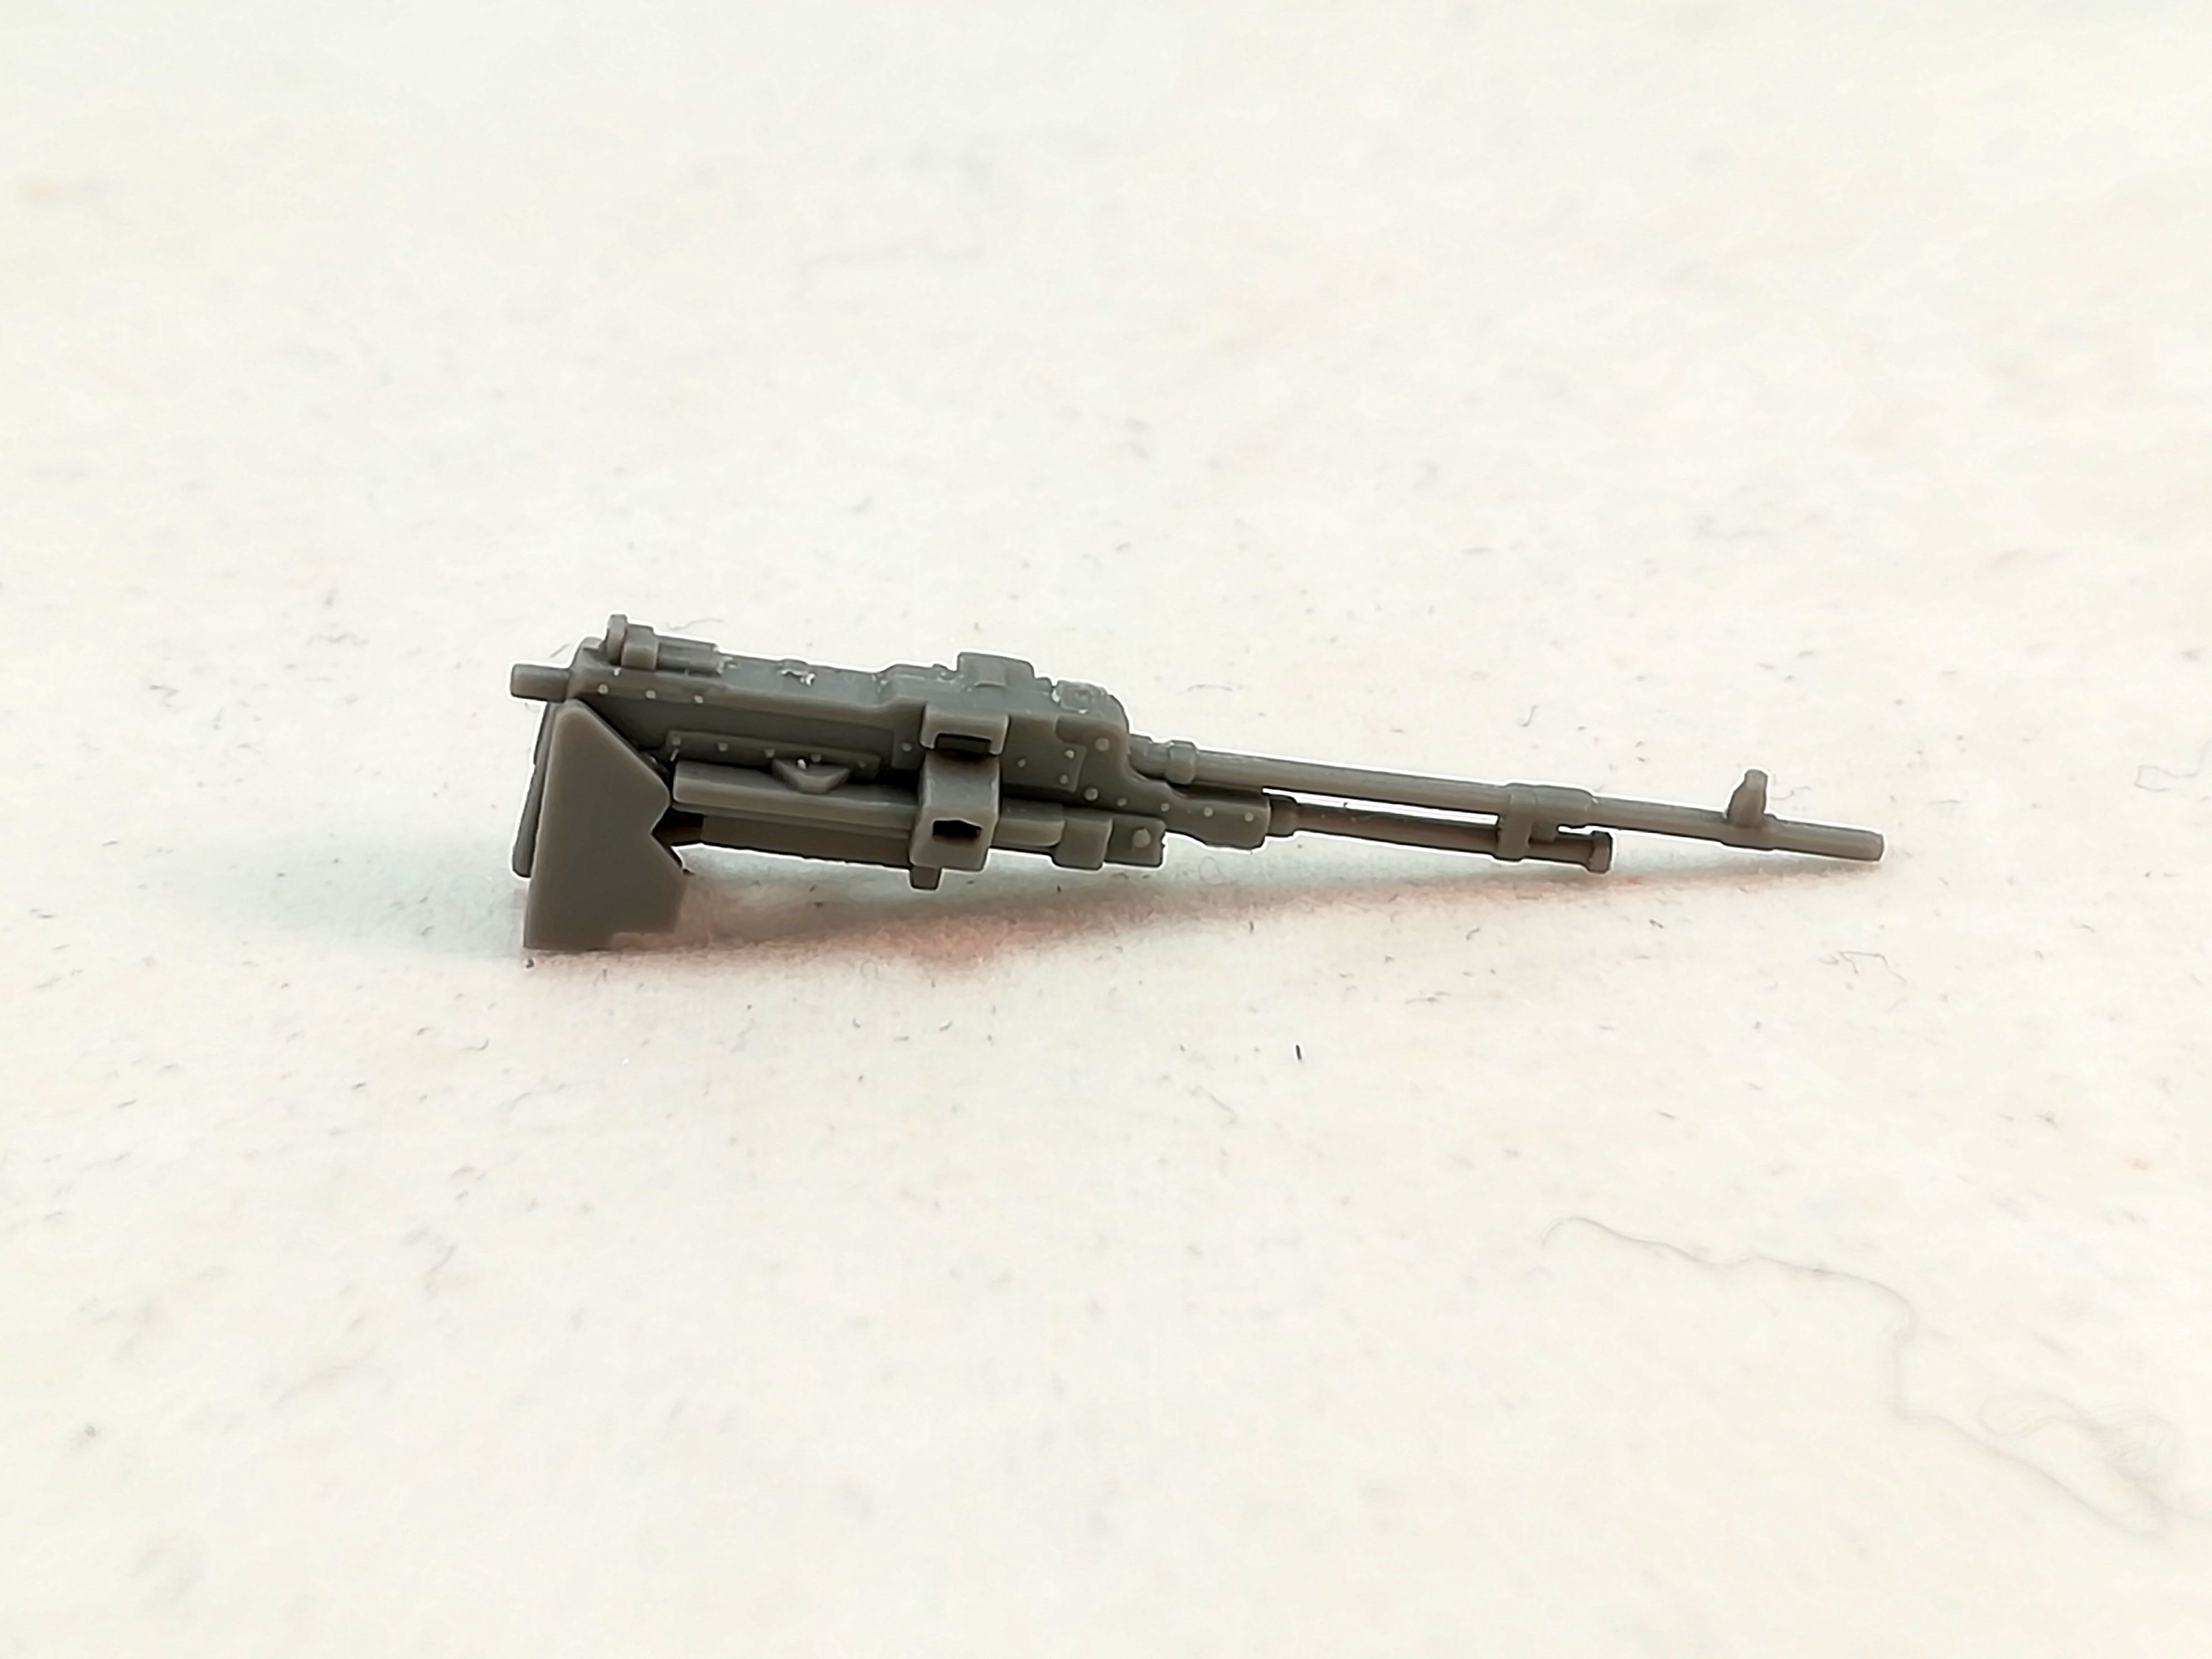
I wish the Accurate Armour GPMG was the same as your Takom one. It looks very nicely detailed.
To my eye the Takom one looks pretty much spot on to the real thing.
The third one down (unknown) IDF Mag also looks pretty much the same. So possibly both by Takom ?
They both have what I would call the L8 (With a foresight) barrel and both their barrel and gas plug details look the best.
On the Takom L37 one, don’t forget there is no Butt fitted and it only has a Butt plate so to the eye it looks short anyway which may give you a false perception.

And the live resin has the nicest pistol grip 
2 Likes
The 2nd (Tiger Model) and last (Meng) look overscale in the barrel department to me in that they look too long.
1 Like
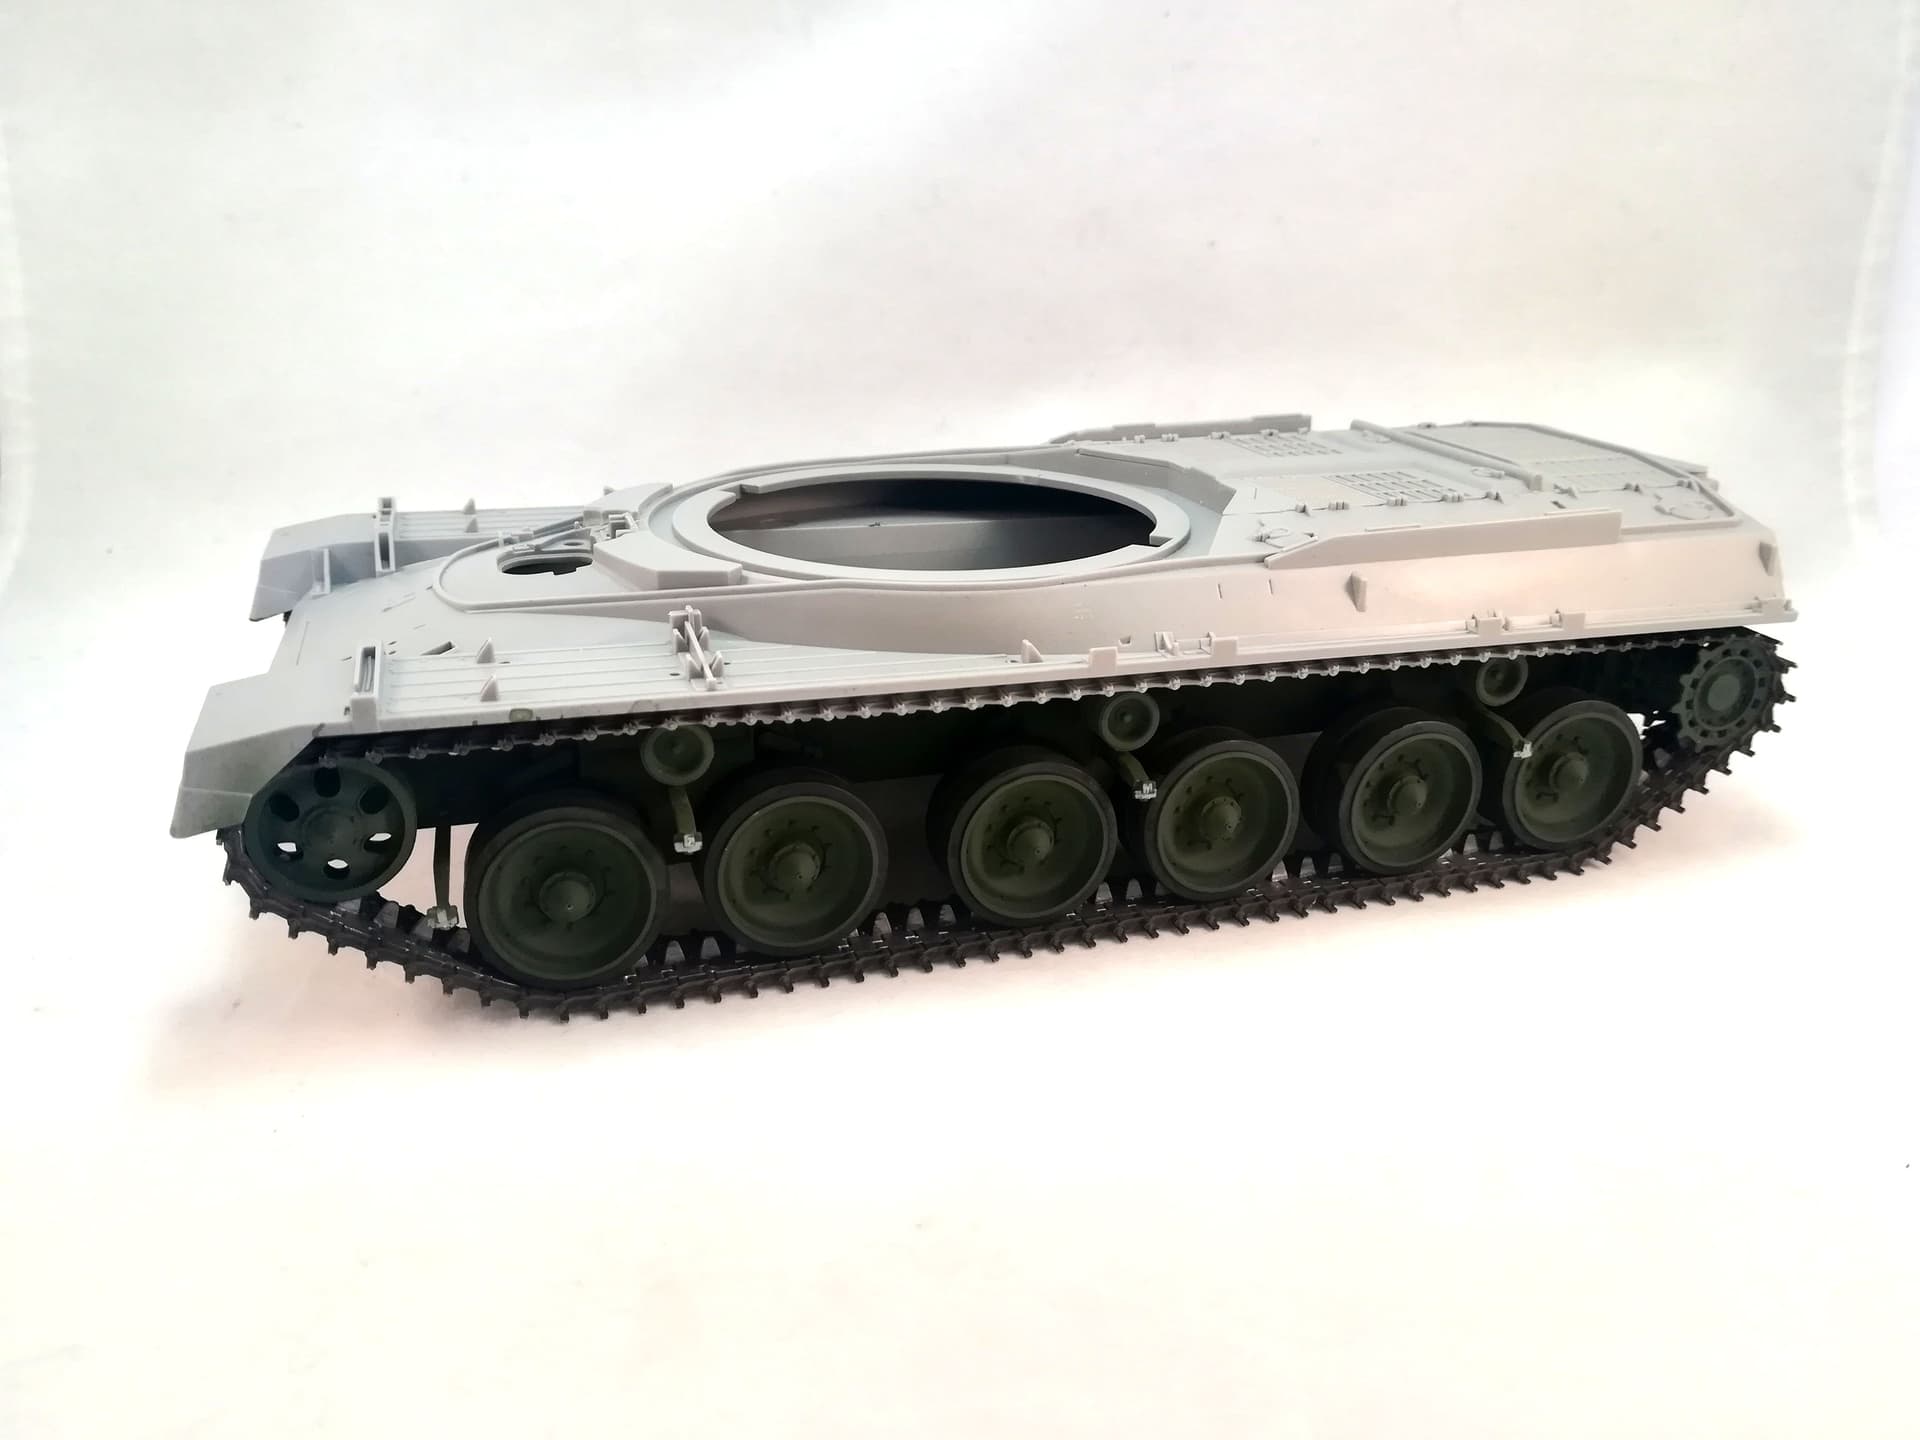
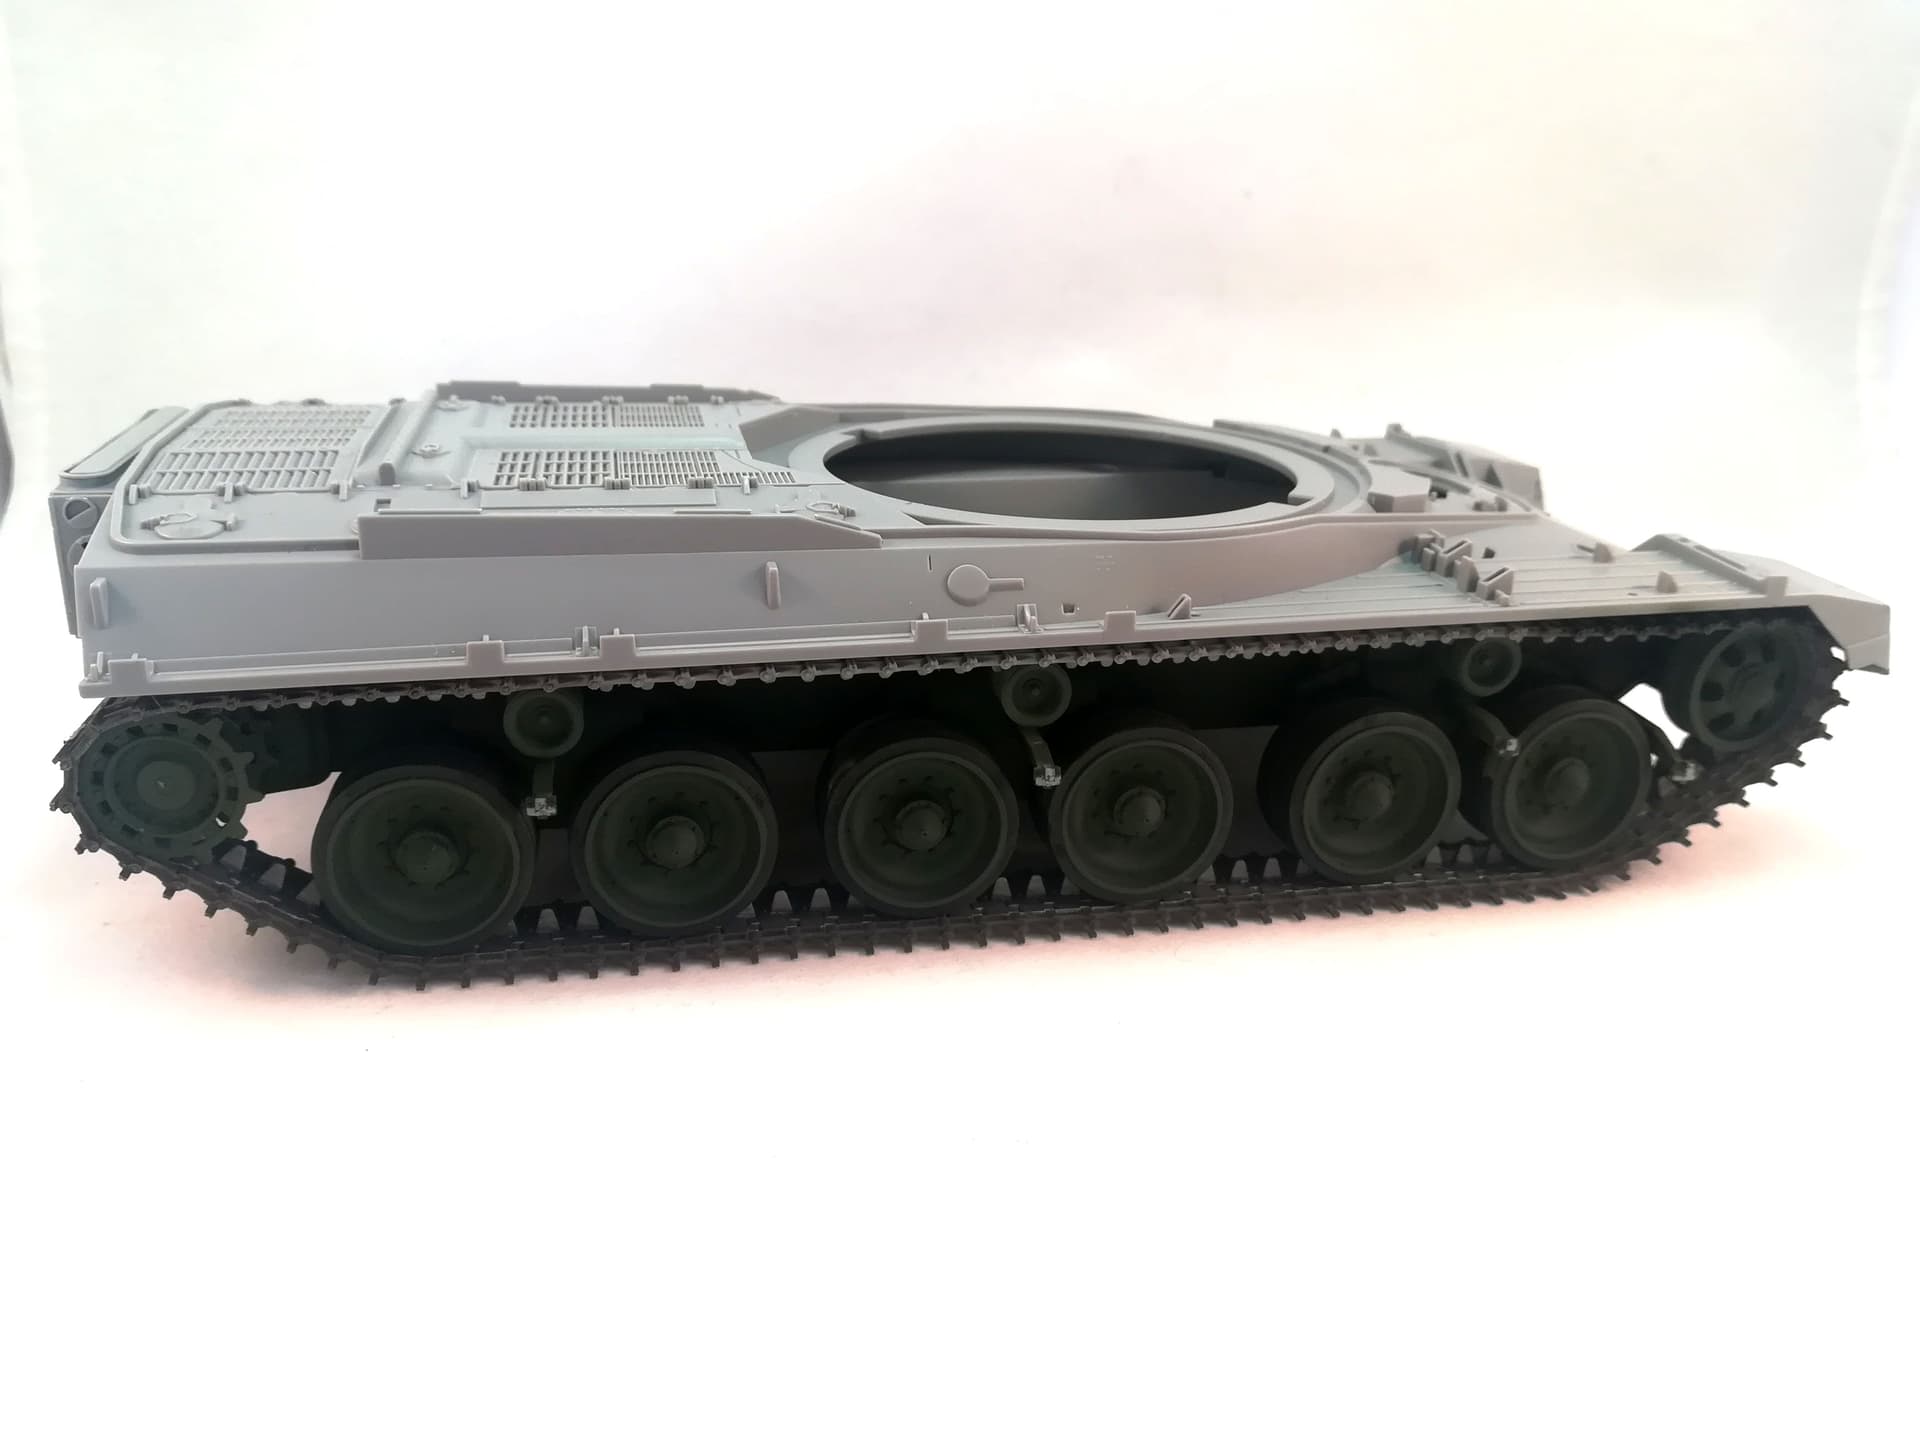
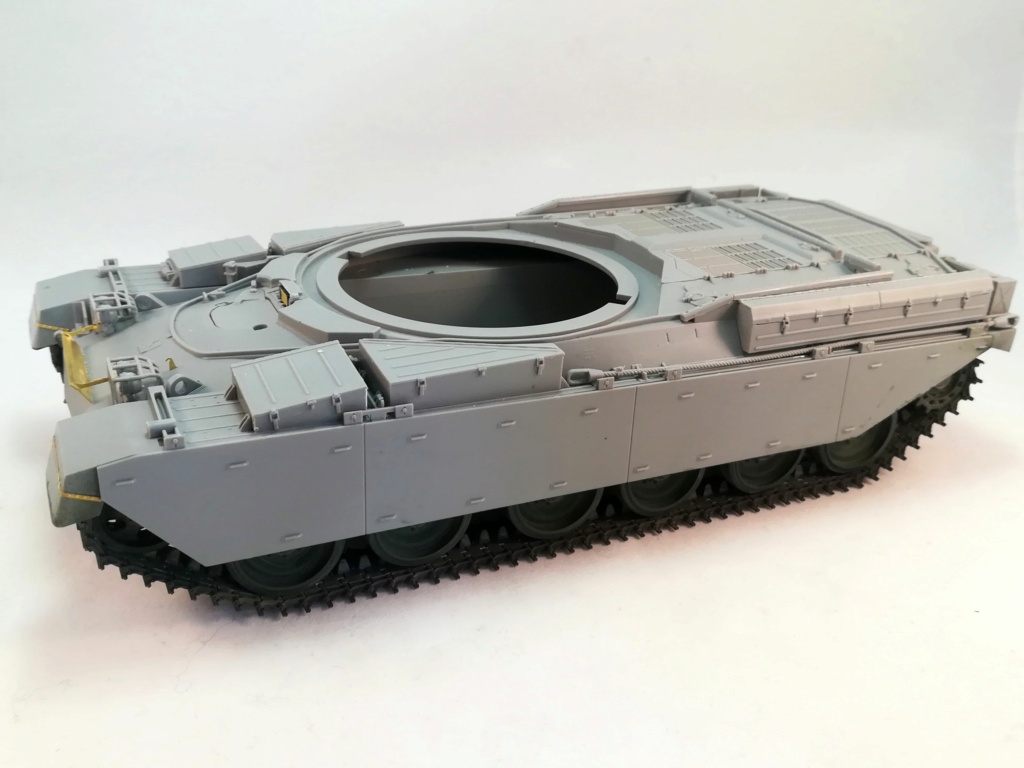
I made some progress on this beast. The running gear has been basically painted so I can fit the upper hull and add the various details on it.
The side skirts or boz plates according to those in the know  will be added when the running gear is weathered.
Olivier
6 Likes
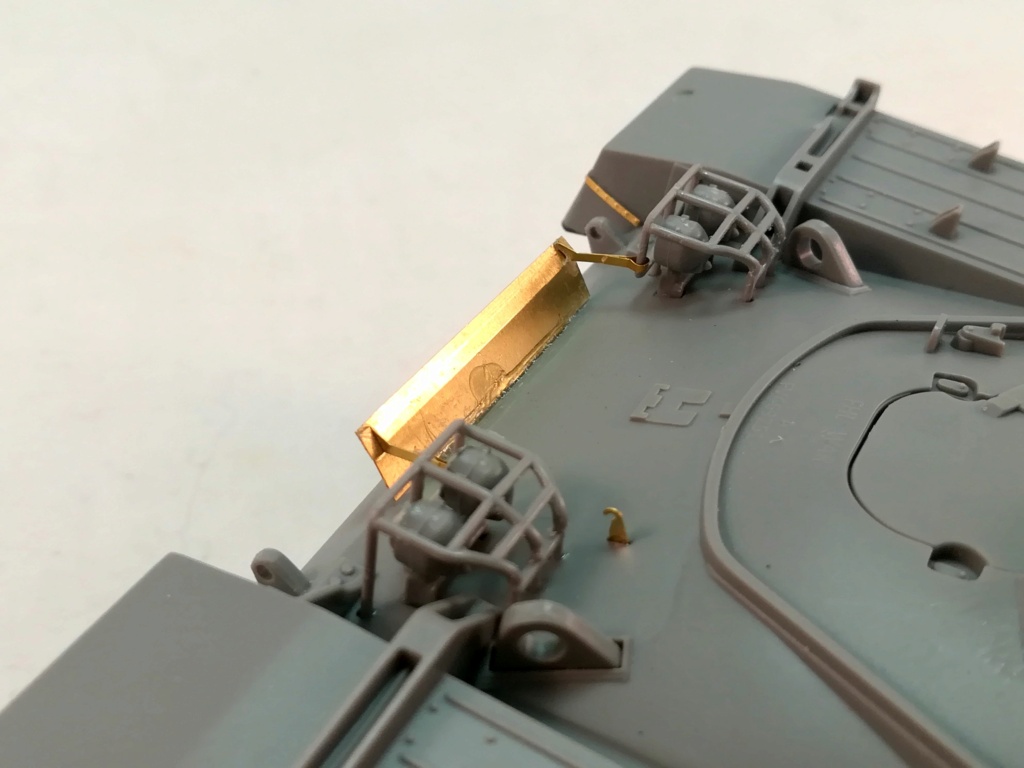
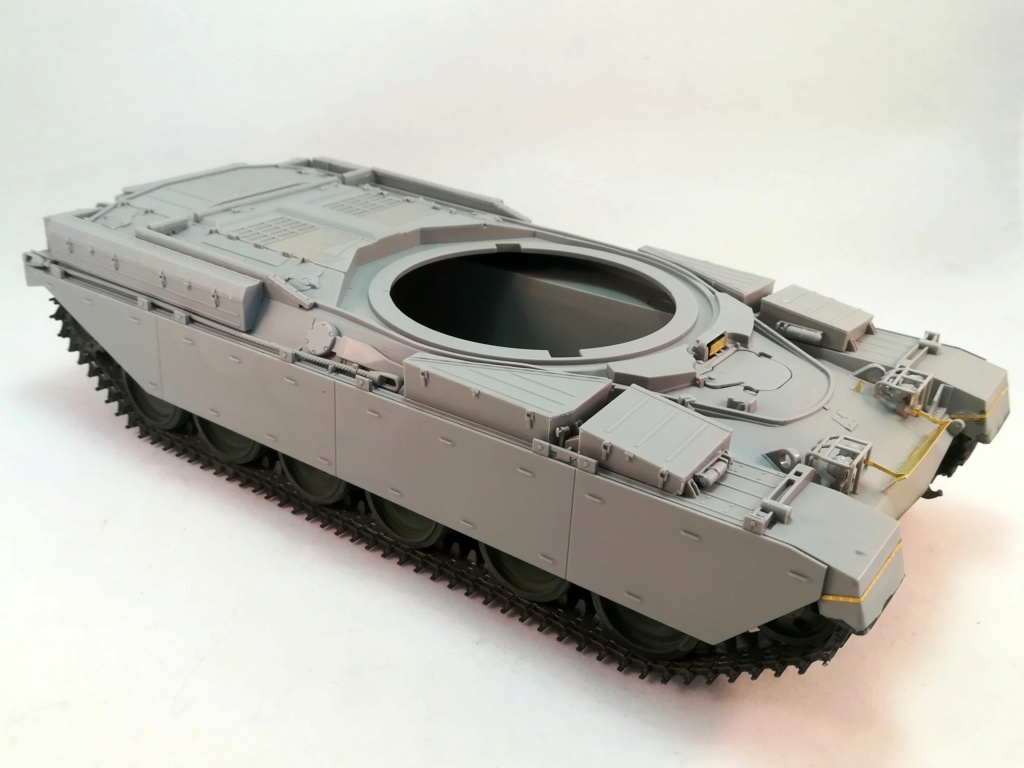
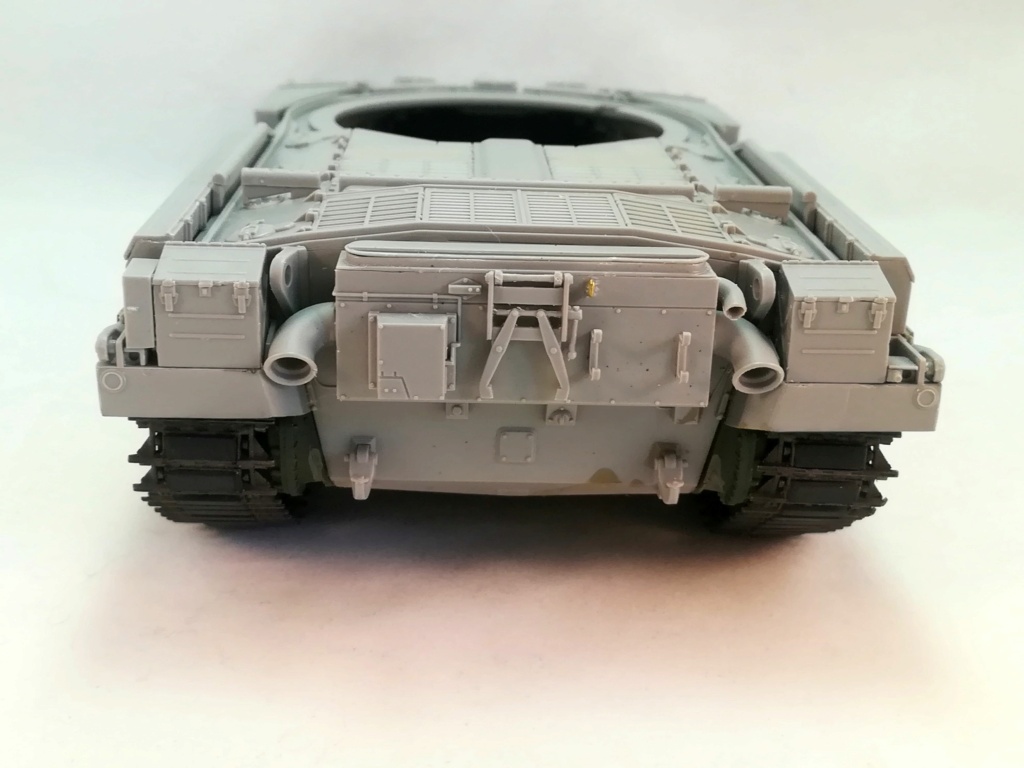
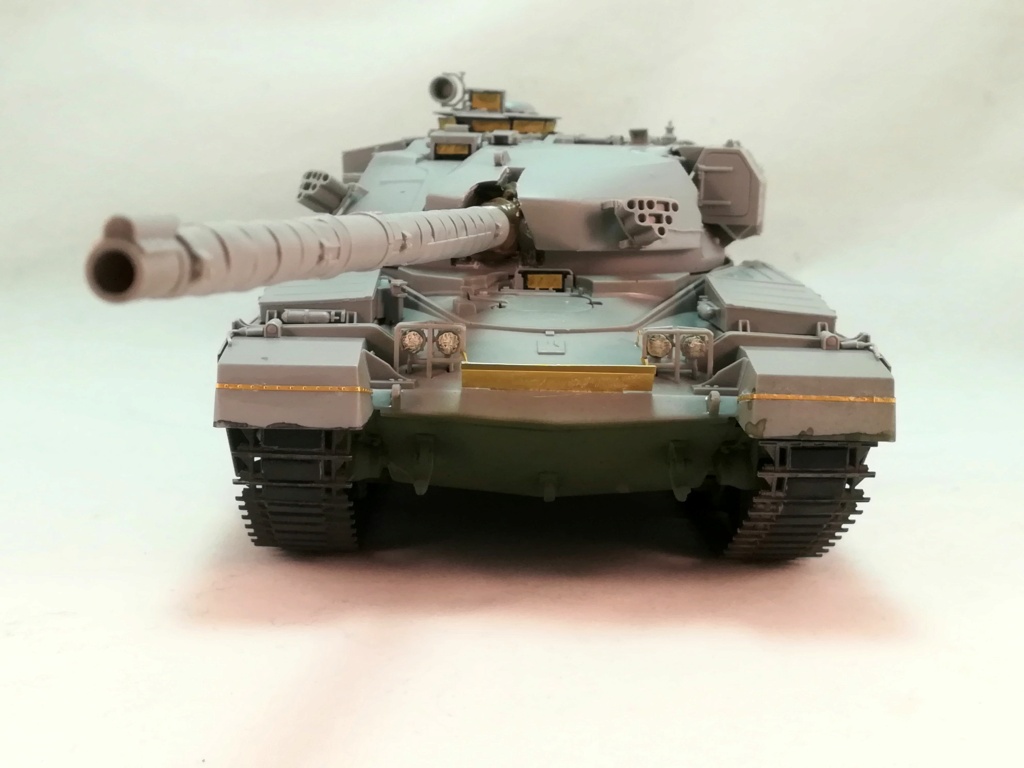
Slow progress on the front of the tank. The splash board “brackets” were as tedious to assemble as the instructions let guess. But I’m done with them.
The rear end is complete except for the mudguards which will be added after the tracks are fitted with the rubber pads and are weathered.
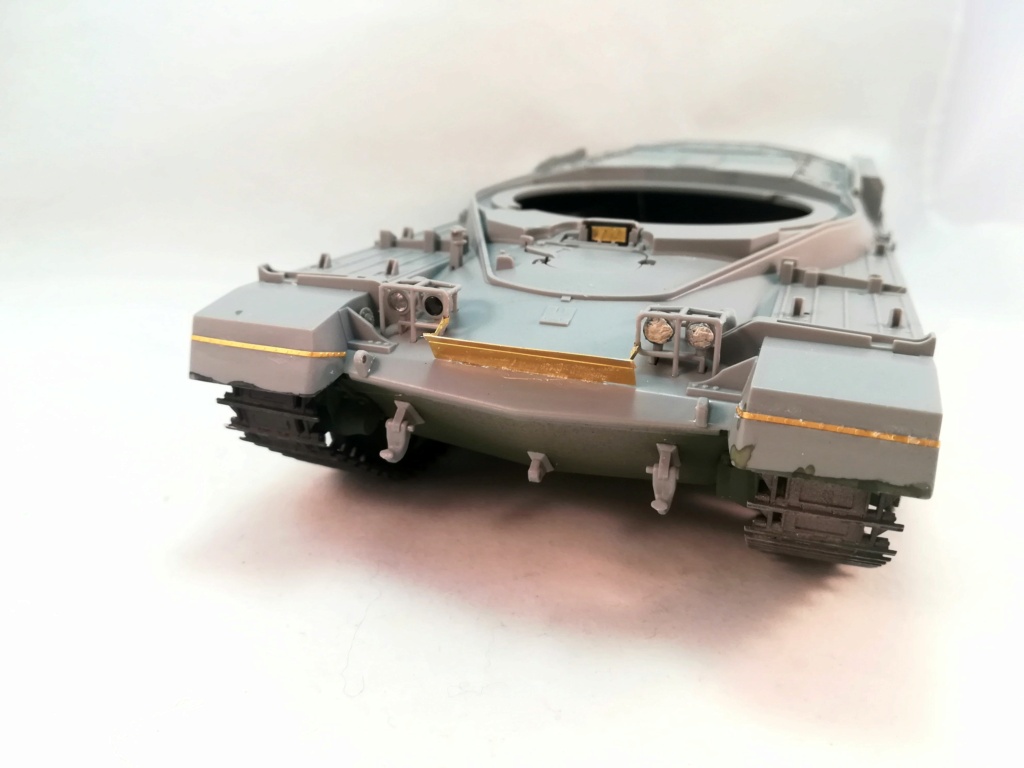

Olivier
6 Likes
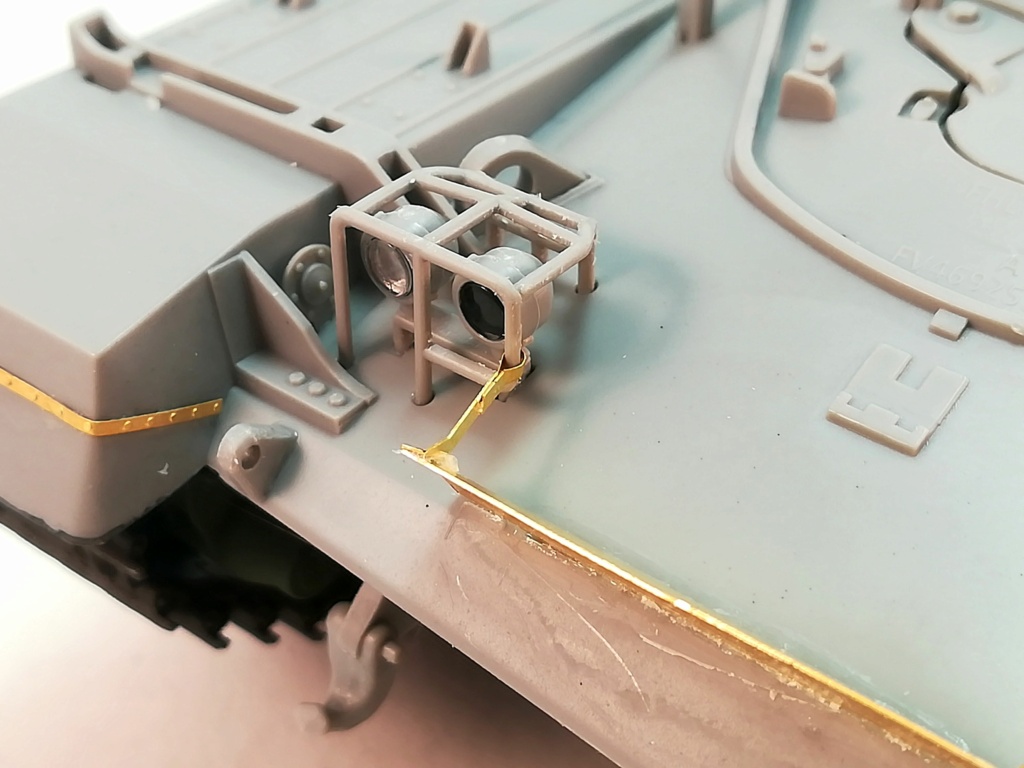
Coming along very nicely Olivier. Is that etch in the kit or an extra you bought ? And does it come with engine deck and TX grills ?
Thank you Johnny
Takom gives a nice PE plate with those parts and the engine grilles. The various handles are provided too. I think I’ll replace them with some brass rod as being flat they don’t look OK.
Olivier
1 Like
Hi Olivier
Looking pretty good. I don’t know if this is on every Chieftain, but it adds a little something
Mal
2 Likes
@Bison126 Oliver, very interesting build to follow and it looks like you’re doing fantastic building the Takom kit. Looking forward to more updates! A++
1 Like
@Bison126 Olivier, you are doing wonderful work on this kit. Very clean and sharp. I have couple off these Takom Chieftain tanks in my collection so, your work is a great guide on How to. 
Keep up the good work
1 Like
Thanks for the kind comments.
The hull is nearly complete. I still need to add the engine grilles and the handles. I also intend to display the rear view mirrors folded. Any picture of such a configuration would be appreciated.
Olivier
4 Likes
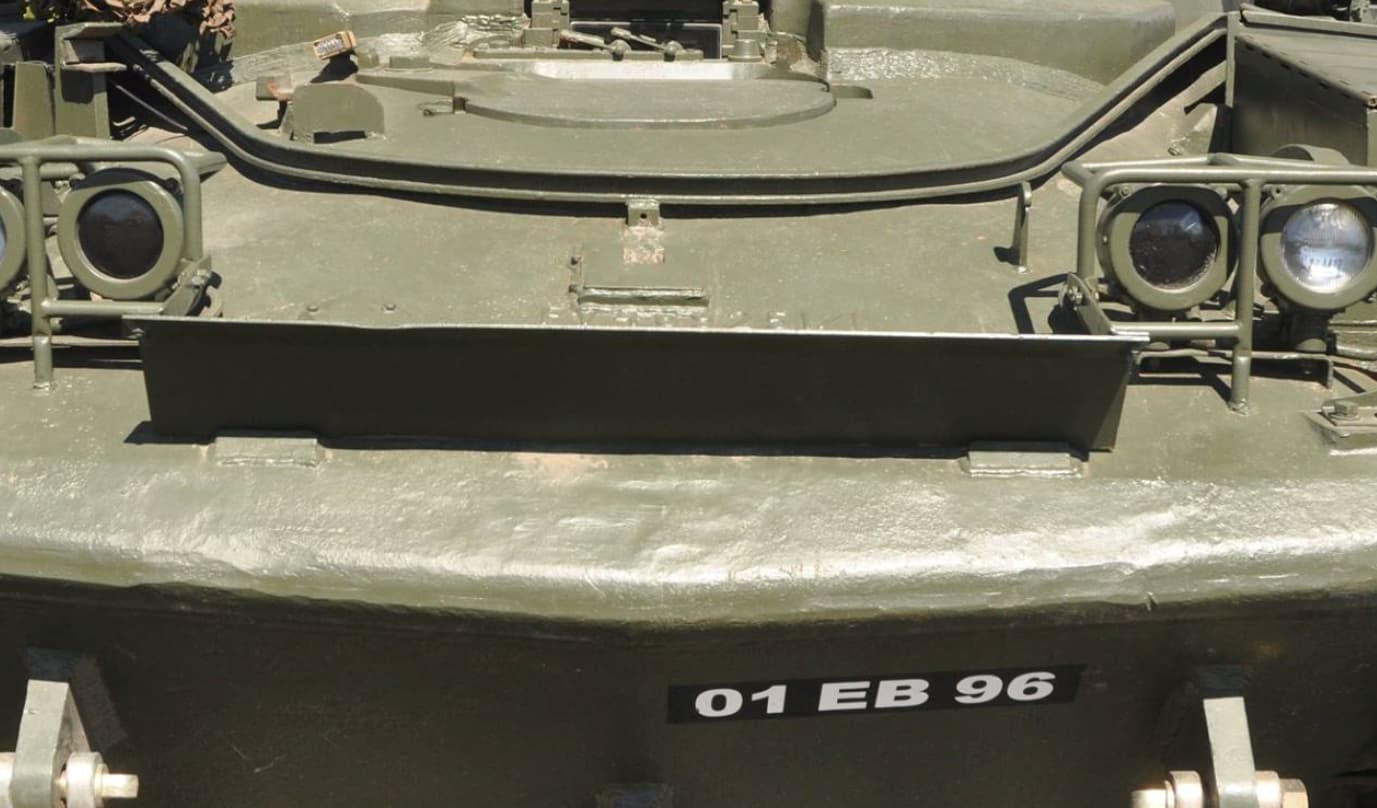
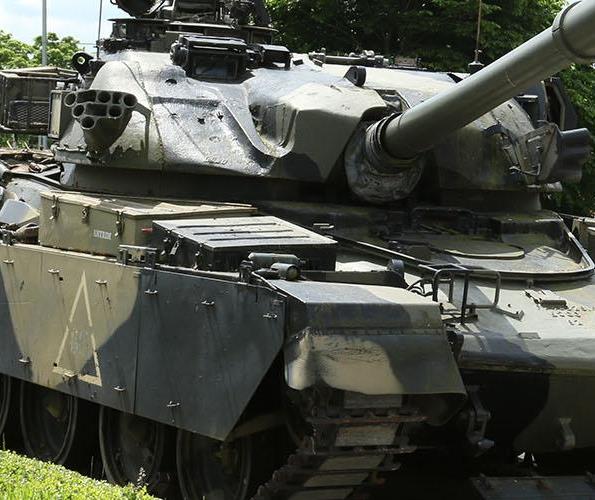
This isn’t a brilliant picture but you can see how the mirror arm folds forward when not in use, it’s visible just to the left of the front right side light. I say not in use when really it should be all the time. In 7 years of crewing Chieftains I never saw wing mirrors fitted once. Typically when you see them fitted it’s in a museum setting.
2 Likes
The back of that looks great Olivier, the rear bins and mudguards are exactly how they should be dimension and placement wise… My Stillbrew will not be looking like that lol
1 Like
With Max on this one, we never had them fitted, due the fact they were a complete waste of time… All ours were in the troop cages … The only time a mirror saw an exercise was when we took a spare out to use as a crew shaving mirror and even then it was kept in the ration bin on the front left hand side …
Genuinely Olivier, don’t bother fitting them,just the arms and position them down flat…
Also, on a lot of images of later 10s and 11s, the mirror arms have been removed completely.
3 Likes
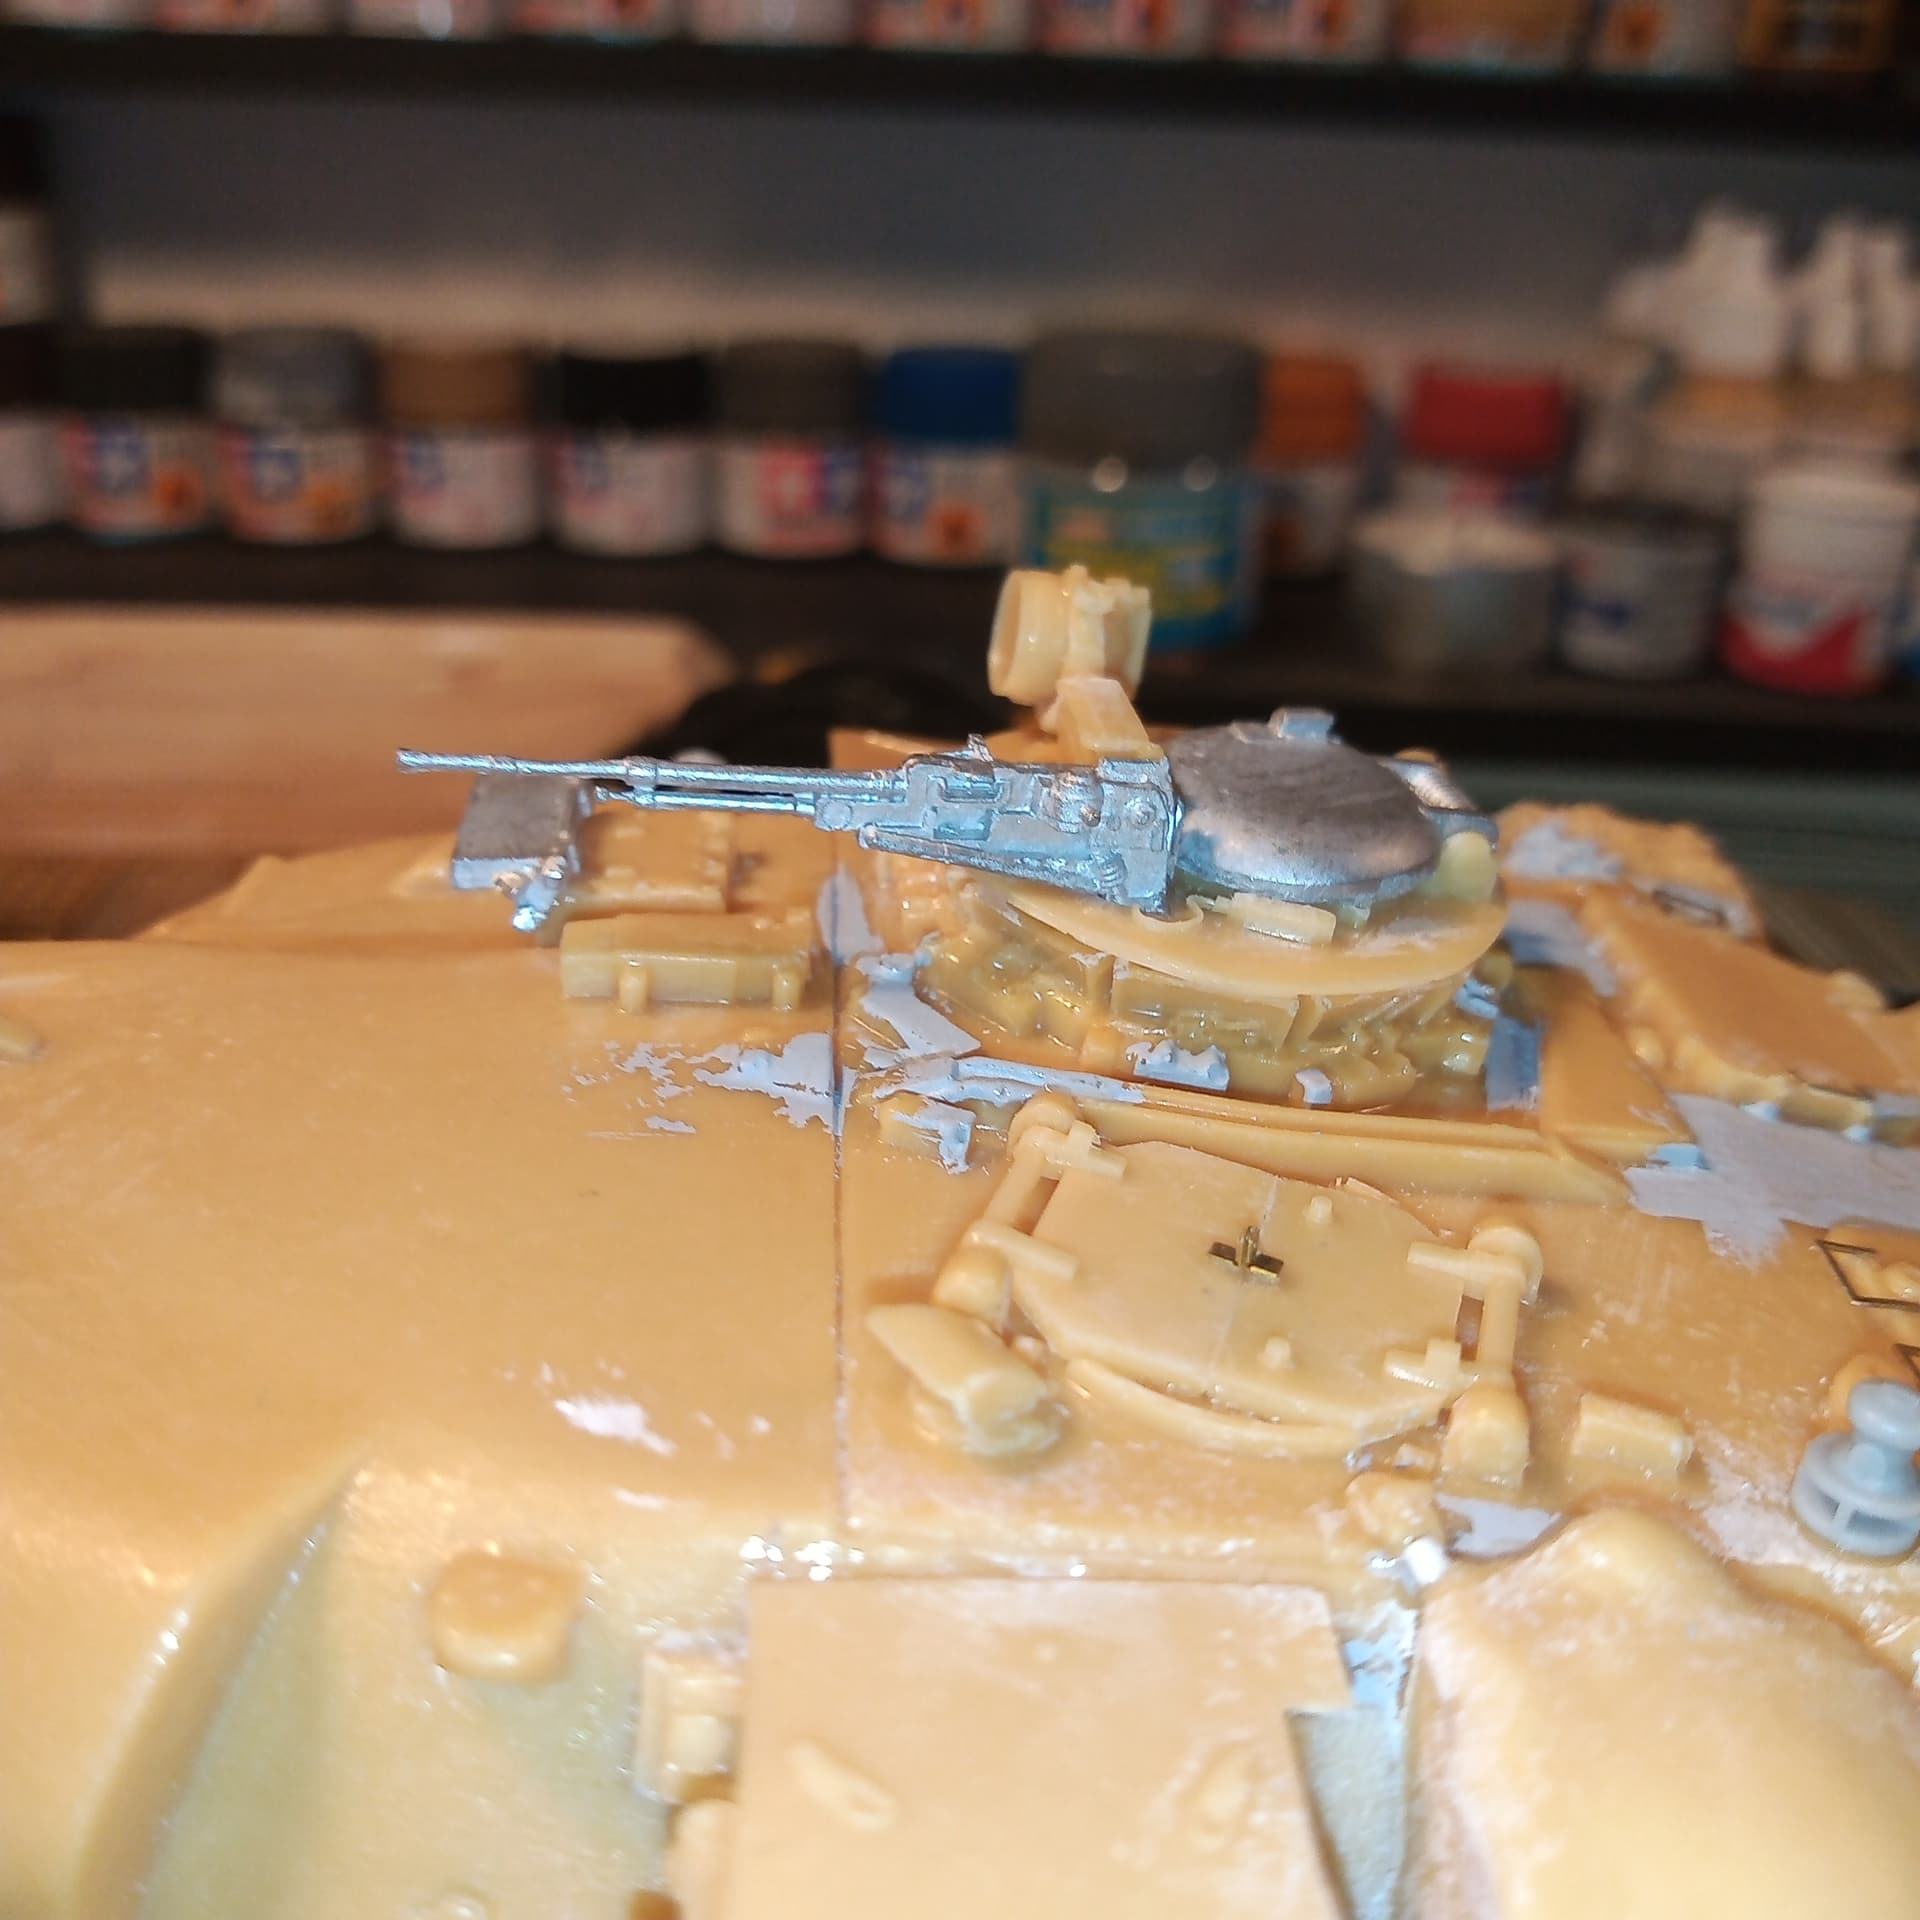
The build is complete. The only missing part is the commander cupola MG which will be added after the painting.
According to your advice the supports for the rear view mirrors have been modified to be folded down.
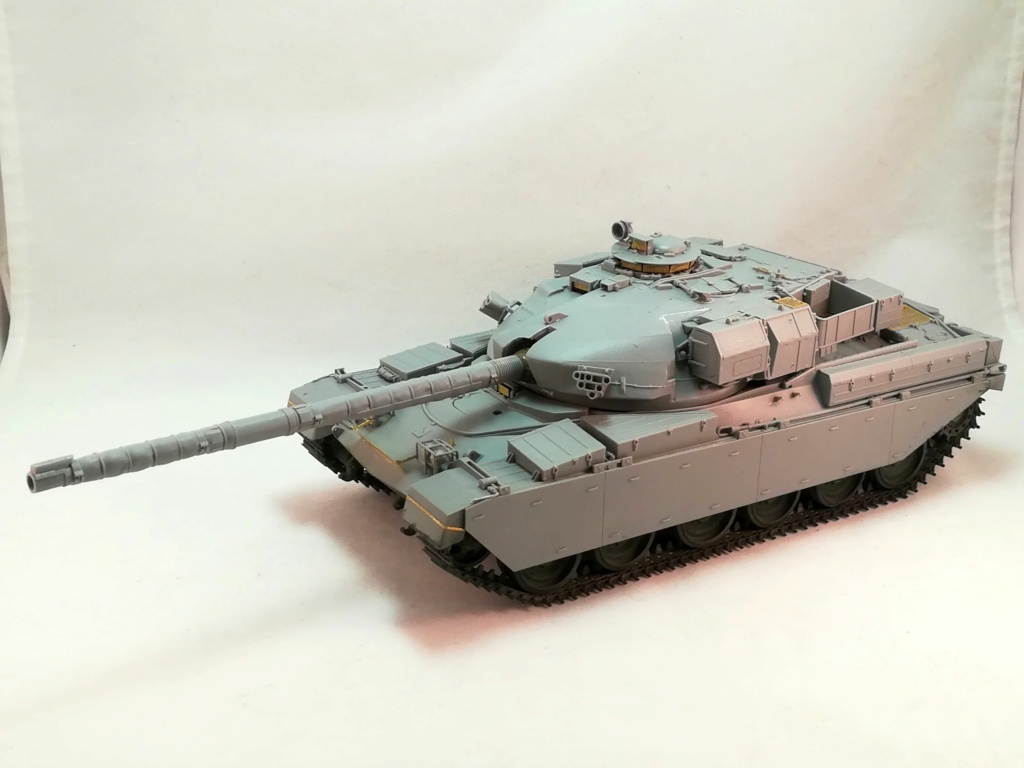
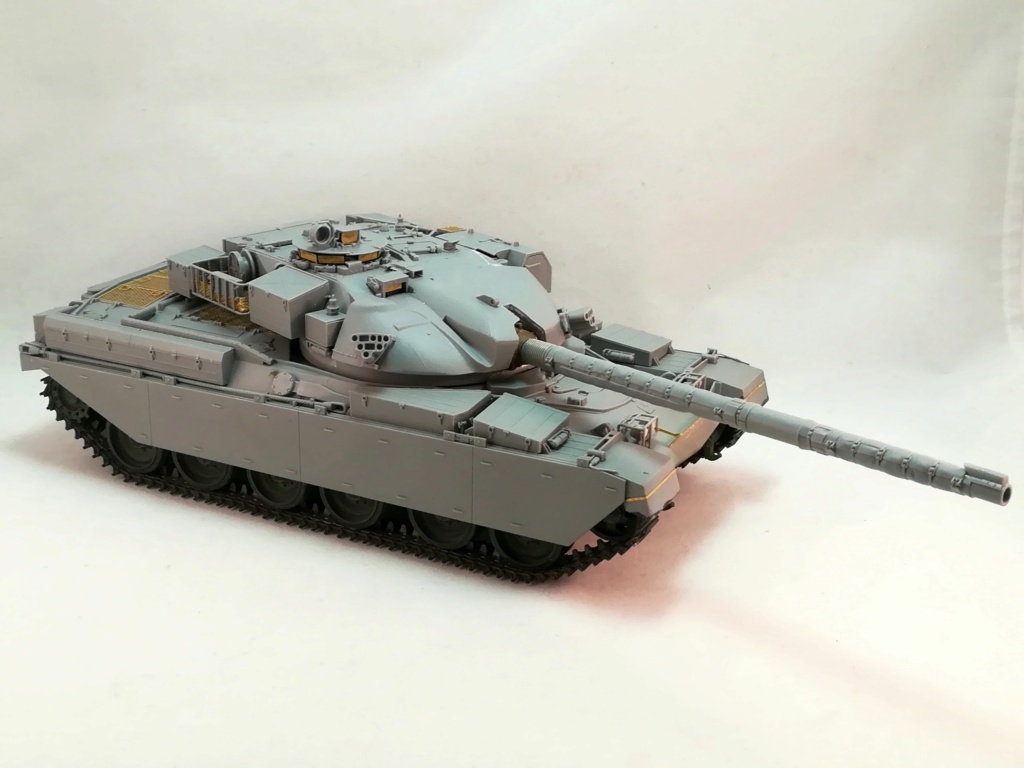

Olivier
14 Likes
Looks terrific Olivier. You’ve done a great job on the OOB build… Can’t get any better than that
1 Like
Nice work indeed !
Time to slap some camo on
Any figures in mind ?
Cheers
Christopher 
Thanks Christopher.
No figure I fear. But if I manage to find the old Accurate Armour crew I have somewhere I could add them in the turret. The driver hatch is already locked.
The green is sprayed. I have a question about the black stripes or patches. From a lot of pictures I’ve seen I have the feeling that the camo was a hard edge type just like if the black areas were hand painted, maybe by the crews themselves. Would the crew have bothered painting the rear faces of the boxes or the inside of the turret baskets?
It also seems that there is no true standard pattern.
Olivier
1 Like