Yeah, really diggin the realism you’re achieving with this. I thought most of those shots of your model were 1:1 ref shots!
1 Like
Great job !
1 Like
Unique and interesting build. Just goes to show that with some creativity and modeling skill vintage kits can still hold their own. 
1 Like
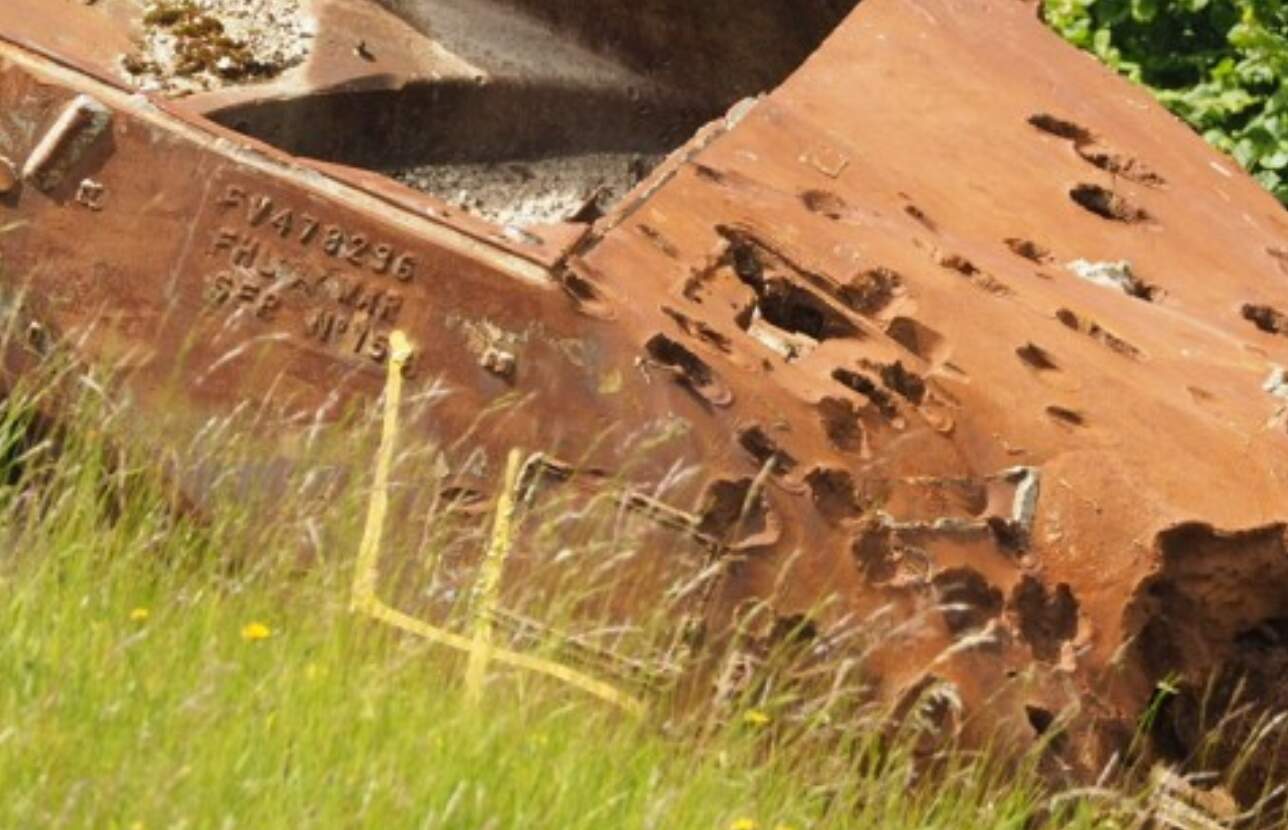
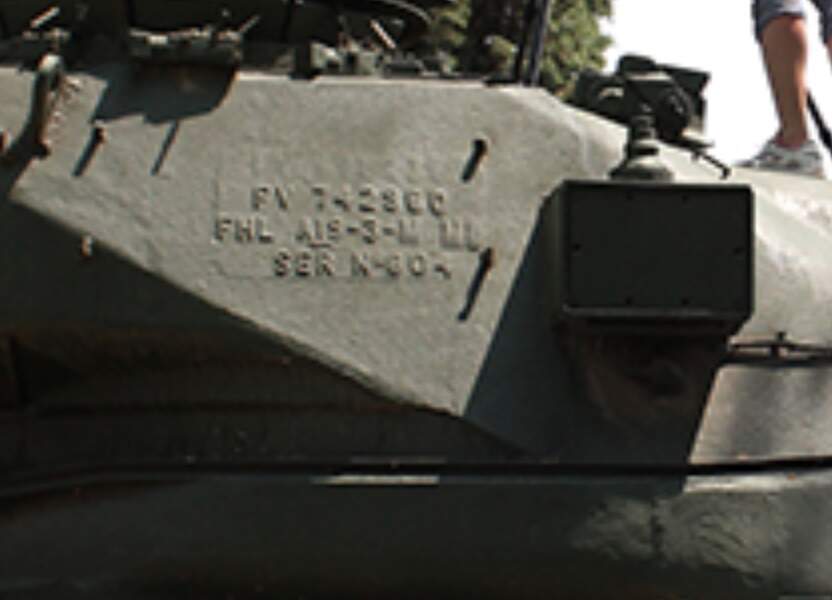
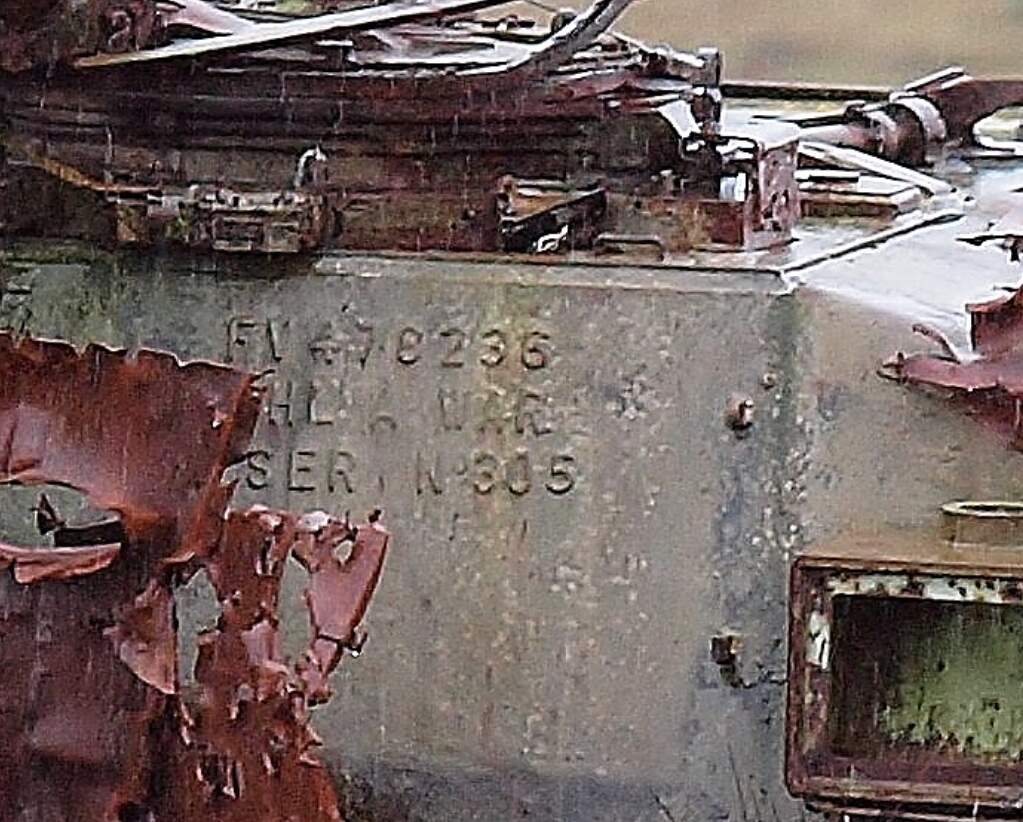
Very nice. Will you be putting casting marks on the vehicle? Where you’ve removed the Commanders stowage box - RHS beside the cupola - is the place where FHL (FH Lloyd) cast turrets were marked. They have the most extensive markings of the 3 companies involved in casting Chieftain. KL ( K & L Steelfounders) have the least & only seem to mark the LHS turret near the MBSGD (Multi Barrel Smoke Grenade Discharger) power lead. ESC or ESCC (English Steel Castings (Company) only seem to mark the top of the turret centre.
This is my 1st posting on the new forum, so no photo as yet.
Mal
2 Likes
Hi Mal, thanks for the comment, really impressed with your knowledge, those marks would really add some detail, are they available as add on parts do you know? Maybe a bit late for this one, but I doubt it’ll be my last Chieftain build.
It is a nie idea for a diorama, it is just always a strange thought to buy a kit with the intention to ruin the model )
1 Like
I understand your point of view, but of course being a tank target hulk is really part of the Chieftain story, all be it, a sad end.
Quote @Grouser
“I understand your point of view, but of course being a tank target hulk is really part of the Chieftain story, all be it, a sad end.”
Especially the picture showing the Stillbrew TOGS wagon … a sad end indeed 
1 Like
Cheer armorsmith, an old kit can provide a particular challenge, either that or I’m a Masochist.
Hi Grouser
I did a crash course on Chieftain when I got a HAYA UK 1/16th RC Chieftain - basically a number of books & a lot of scouring the web for Chieftain pics. I noticed there doesn’t seem to be much on the casting marks, as compared to Sherman for instance, though that is what makes a generic model unique. I started to notice on the photos that certain casting marks only appear in certain positions depending on the manufacturer, so I developed a theory, which the photos seem to confirm.
Along those lines, the Still Brew armour is of note, the armour panels are marked from left to right A, B, D & E - (C would be the centre panel but I’ve not seen the marking at all) with serial number following. The serial numbers do not seem to follow in sequence, I guess it could happen, but have not seen a case of that yet. The B marking is hidden behind the left side MBSGD.
Is there a detail set for the castings marks - not that I know of. On mine I’ve used both Plastruct & Slaters letters & numerals, both 2mm & 3mm - but that’s for 1/16th scale.
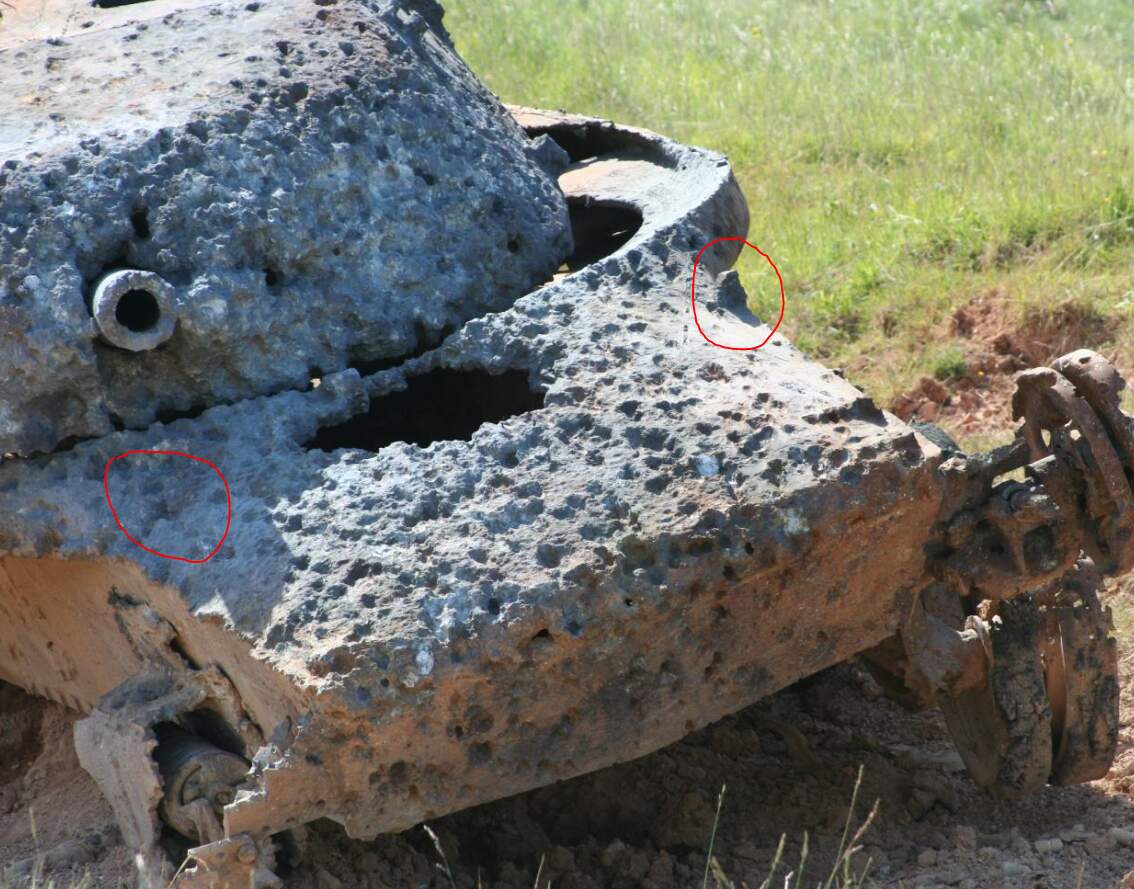
Something I’ve noticed is missing from your build is the fwd fender supports either side of the front hull. They’re part of the casting, so stay in place even when the vehicle is shot to sh_t. The Exterior Fire extinguisher pulls pass over them before going into the hull.
Mal
1 Like
Excellent work, I’m definitely going to use this thread as a reference for making damage effects in the future.
1 Like
A couple of photos - The fender backstops either side -
And how they look when shot up

Some FHL turrets -
Mal
3 Likes
Great idea Grouser, excellent result with some seriously superb corrosion FX 
1 Like
someone’s pride and joy reduced to a jumbled junk pile, amazing isn’t it, how quickly a neat and orderly world can become so Chaotic. But at least they are part of helping future tank crews become professional, a far better end than facing the scrap merchants cutting torch.
some excellent images there Mal, thanks for sharing them with us, that hulk in the third picture down, some serious damage there, 30mm do you think?
I was thinking multiple machinegun strikes, but the size of the divots suggests something bigger, so 30mm could well be it.
Yes, a good looking vehicle being turned into razor blades isn’t a comforting thought.
Mal
1 Like
Don’t forget, Some UK ranges are open to Fast Jet runs like Warminster, Brecon/sennybridge, warcop, Otterburn so depending what range they are on they could of been hit by aircraft cannon/ attack helicopters.
1 Like
That’s gorgeous. Well done.
1 Like
Re your query about the casting marks - have recently seen that Accurate Armour have PE sets of Letters & numbers in both 1mm & 1.5mm, as well as 2mm that should work in 1/35th scale.
Have ordered some for the light source box markings for my chieftain.
Mal
1 Like
Grouser,
I know this was eons ago, but the Forum has your builds cropping up in my recommended feed.
Can you explain a little more what your technique is for these impact holes? Are you drilling with a smaller bit first and then reaming out the top part with a larger bit? Is that putty around the holes? They look very good and I would like to try and shamelessly replicate them.
1 Like