So I want to get my paint scheme and decals properly lined up.
I am assuming the Mark 5 in Europe was all green or green and brown and not green and black.
What is the correct color of paint so I can make Scalehobbiest happy.
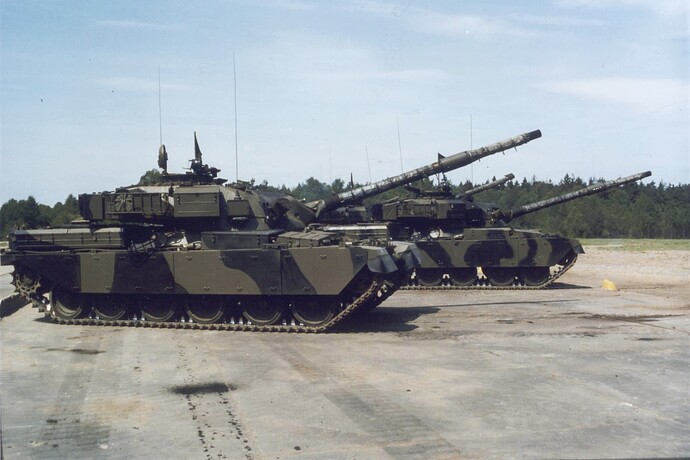
Whoa Greg! Green and Brown? Never. Green and Black - yes. The scheme came into general use in 1971; there is some evidence that some units in the UK used it a little earlier, and the British Army of the Rhine was always trying out innovative schemes.
In 1:35 I would recommend a Tamiya paint for the base colour Field Grey XF-65 with the black stripes/patches in as dark a grey as you can get; I use an enamel for this Revell Anthracite Enamel 9. I’m sure there’s a Tamiya equivalent.
Ratio should be 2/3rds green, 1/3rd black.
With Tamiya, I mix Black and NATO Black 50:50 to get a dark-enough black. I find NATO Black on its own is just too grey for my tastes.
Brian is of course on this one (as ever) on the ball. Green and black, for any post all over green.
I said green/brown due to some examples
And most of the green and black looked like later marks.
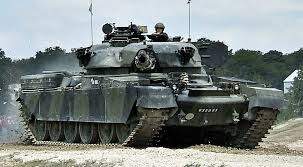
The camouflage pattern looked like it varied from picture to picture that I have.
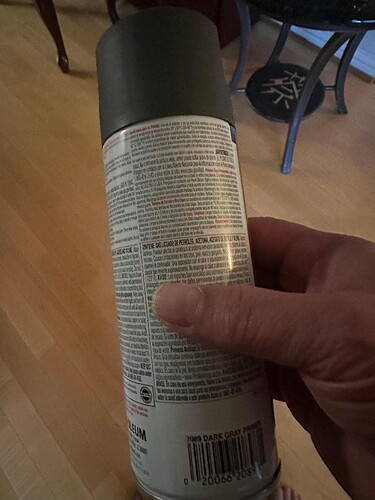
I agree with those choices and have used those exact paints many times. The Anthracite is also good for NATO three tone. However, as I loathe cleaning my airbrush I’ve taken to using this dark gray primer for black. It’s quick, easy, and looks perfect. I generally don’t like using aerosols, but this stuff is just too good. Actually works as a primer too!
Aren’t those tan tanks part of the BATUS fleet, where the UK trained in Canada?
So, Takom supplies Iranian, BATUS decals and the fictious Mark 5 Berlin paint scheme. Where is a good source for the European stationed Chieftan’s?
Second is the camo scheme standardized or not?
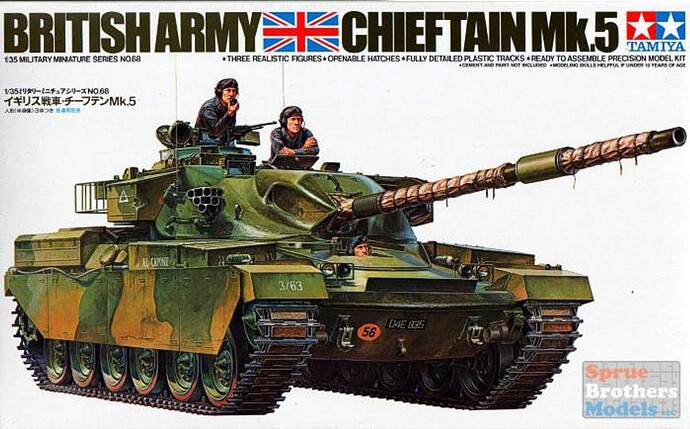
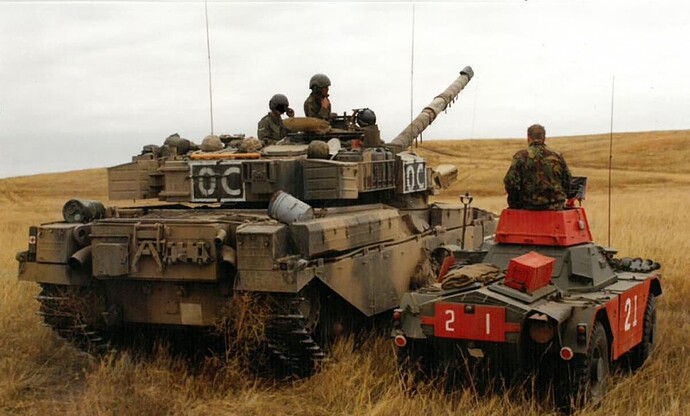
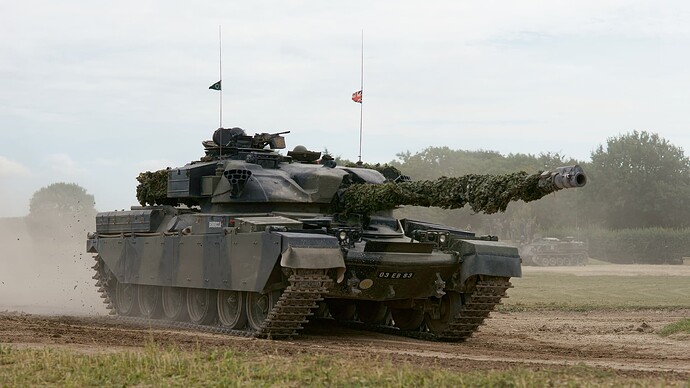
Tamiya box art for once lets itself down; not green/brown ever. The pic alongside the Ferret scout car is taken at the British Army Training Unit Suffield (BATUS) in Canada. The scheme is actually green and sand.
As for the model, I really can’t comment.
There was no set scheme; the ratio was as described earlier but it was left to regiments to interpret/apply this as they saw fit, which led to some interesting variations.
Sorry, reference my last: meant for Greg.
What are you referring to ref the above Greg ?
Ref colours and the other bits, as per what Brian already said. UK and Europe - Green and black 2/3 to 1/3 and pattern was decided usually at the unit when repainting, but even from a base workshop overhaul the pattern would be a random applied one.
Sorry, it appears thinking and typing require different skills. I was talking about where to get a good set of decals for the Mark 5 in Europe.
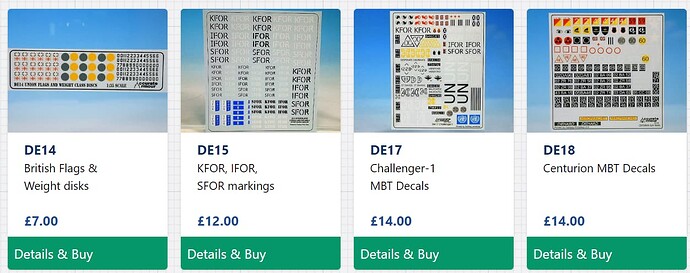
I’d probably get all of these sets while they’re still available. You can mix them up to get what you need.
This picture shows a tank assigned to BATUS in Alberta, Canada. Those had a sand-over-green camouflage scheme, probably due to the colour of the grass visible in the photo.
Although Robs suggestion above is a good idea for some generic decals, the only real one of value for a Chieftain would be the UK flags and Bridge classification sheet — IFOR one for a Mk 5 is wrong time frame, and the other 2 are very specific for Cr1 and Cent’s. Even with cutting them up and mashing them together you wont get any decent ones for anything chieftain like VRNs etc.
If it was me I would use the decals in the kit for the VRN from the BATUS wagon and then you only need to worry about TAC signs/ Vehicle call signs which for that time frame were usually white or yellow.
Let me have a look in my decal sheets and I will see what I have that I can send you for a generic Mk5 that would work for you. (if you want)
John is all over this - as he should be in a way - having crewed them(!)
For what it’s worth though my views:
Bridge plate; I think this changed shortly after the green and black scheme came in, or indeed, may have been part of the original stricture on the new scheme; yellow was clearly too stark (as originally applied) so a medium grey was selected. Sometimes this actually bore the weight details, often just left blank.
Union Flag. Only applied to vehicles serving in BAOR (which is applicable here), and those vehicles allocated to specific NATO roles viz the ACE Mobile Force and the UK Mobile Force. I think the then Airborne Brigade also sported the flag due to its out-of-area mission (it did not, of course have Chieftains).
Vehicle Registration Number (VRN); these days it’s possible to track down (no pun intended), practically an actual vehicle, though I feel that often leads to more research and modelling pain. I tend not to bother but that’s because I’m a somewhat lazy modeller.
Convoy Distance Markings. On the rear plate - black and white vertical stripes. This was an aid to tactical driving at night; there was a small light shining down above it. I think the Tamiya kit comes with this amongst the decals. For info on soft-skinned vehicles the rear differential was painted white (Land Rovers) and 4T trucks (and others) had a white circular plate fitted to achieve the same.
Unit Identification Number (UIN). These were applied to the front mudguard (and the rear) and can be a 'mare to decipher or even devise. They were originally painted in white and consisted of a number representing the parent formation (ie Brigade or Div), followed by a slash (oblique stroke) then the number allocated to the unit which was based on a previous identity numbering system from the 1960s. Later, these numbers were painted on in either green or black, depending where they fell on the overall paint scheme.
This system really demands a fairly comprehensive knowledge of the organisation of the BAOR; in modelling terms, they are, however, quite small, and mud may be your friend here.
Radio Call Signs. These too are quite complicated, and I’ll leave it to John to assist here(!) I always found it very complicated but then I never used radios at Unit level. They don’t always seem to have been applied, especially in the early days of Chieftain; if not painted on to the vehicle itself, they were often painted on to wooden boards (which often came from the lids to military packing cases) and affixed to the vehicle.
Sub-unit signs. Depending on the Unit, these were sometimes painted on to the turret sides, and consisted of geometric shapes representing the squadron (company) concerned).
Regimental Insignia. Sometimes affixed, and were normally full colour representations of the regimental badge. Applied according to Unit whim. Again, quite small in 1:35.
That’s about all I know; 'happy to be challenged and put right though. John, over to you…(!)
Aaaargh! An amendment: “UIN” should read as “Unit Identification Signs” - UINs being something totally different.
My apologies.
The IFOR at was wedged in there with the others. I only wanted to take one Snip so it made its way in for that reason. Still, anyone with an interest in modern British armor, now is the time to get anything you think you might need in the next ten years.
And “mashing” numbers together has unfortunately been necessary since I first started building IDF armor. We really need black backgrounds and separate numbers or two and three digit combinations.
Got ya ![]()
Accurate A did do a nice generic yellow Tac sign sheet for UK wagons but it looks like that isnt made anymore – the black one is still there. But also totally agree with you about anyone with an interest in UK cold war to modern armour/vehicles on stocking up on some of the very unique offerings AA produce before they go for good.
Back to Greg … Brian hit most of the nails on the head really. The main point being a lot of the ways Veh were marked up was down to Unit, Sqn and even Troop mind set.
On the image above, you can see that a lot of the time, the Veh C/S was incorporated into the Tac sign, so here we have 0B (Zero Bravo) with the circular Tac sign for C Sqn. The rear turret C/S- Tac sign would usually be on a metal plate that could be removed if a veh broke down and the Commander had to shift onto another wagon - he would simply grab his gear, and the call sign plate, hop onto another wagon and fix the C/S plate in place and that wagon then becomes him … Also worth noting the lack of any C/S or Tac signs on the Veh sides … again some did, some didnt. When I first got to Germany we did, then we stopped and went with just the rear ID on the turret, then went back with side markings for a while on Cr1 before we stopped again …
You can see the remains of where the rear VRN was on the RH mudguard and on the far side you can see the remains of the first aid box square sticker.
On the very bottom yo can see the white square ( convoy plate) this time a solid white square with no black lines, but again the veh C/S - worth noting that not all units did this on the convoy plate, many were just left white or with just a Tac sign on the white square etc and again, many just left it black and white stripes.
Union flags, again, should of been fitted, but in many cases were not fitted - usually on one of the front mudguards (sometimes both) and on the rear, either of the 2 rear bins, or just somewhere prominent.
Regimental badges - again hit and miss - some did, many didnt bother - Only ones who always have it fitted is the RTR and the chinese eye on the turret cheeks usually.
I have found a decent amount of unused decals in my spares if you do need some, e.g on the Mk 11 I am building at the moment, I am only going to need one set of the VRNs so theres 2 or 3 spares just on that sheet you can have- I also have spare Tac signs and numbers in various configurations and the union flags etc.
If I were you I’d get back on that horse (you know you want to) and plan a mtorcycle trip to their location, assuming they allow onsite purchases. The money you save on shipping would surely pay for a few pints.
