Cleaning up micro-nubs from sprue attachment pointss

All,

I’m looking for suggestions on how to clean-up/smooth the micro-nubs that are left on really delicate thin pieces after the sprue attachments are cut off with nippers. I’ve tried to carefully clean them up with a sharp blade, but sometime they are so delicate that the part breaks. I have also tried some liquid cement to smooth out the are with mixed results. Any suggestions are welcome…

Thanks,
Lou

1 Like

Needle files and whetstones have worked well for me.

:beer:

Don’t cut too close with the nippers, leave half a millimeter (1/50th of an inch, 0.02 inch).
Use a needle file or fine sandpaper to file the nub smooth.
Cutting too close can result in torn plastic and leave a hole when the nub has been filed down.

1 Like

I have found that using a very new blade x-acto for these works better than a file. When I use a file I tend to break fragile parts. Putting my finger behind the nub with a gentle scraping with a brand new blade works better for me. YMMV.

Uncle H’s advice about not cutting too close to begin with is essential advice.

1 Like

I would use a micro saw to remove, you might still have the nub but a little sanding stick can clean it up.

Carefully shaving with a very sharp #11 or gently with a medium sanding stick works for me,cant recall many mishaps.

1 Like

Thanks guys. Sharp blade and sanding stick have been my approach too. Figured I would ask just in case there was some trick I was missing!

2 Likes

Try holding the fine part into a pad of neoprene material. It’s soft and cradles the part during sanding.

2 Likes

2 Likes

The size of the tool needs to be adapted to the size/fragility of the part :smile:
Some manufacturers have injection gates that are larger than the part
(very small parts, not huge gates). The nippers may also be the wrong tool
in those cases, a micro saw could be better.
There is also a difference between small files. Small fine cut files are not
the same as the average needle file.
These are somewhat large:

Small parts will be tedious to clean, working with a 200 grit sanding stick
takes time …

Good suggestions - I’ll have to try a micro-saw next time and leave a little bit to sand. I have a piece of neoprene material to try as well.

1 Like

Use quality magnification. Easier to finesse your work that way.

My approach to cleaning up the mold seams and sprue attachment nubs from small and or delicate parts is to use a sequenced removal of the part from the sprue, using the sprue to hold the part (and often serve as a handle).

So, I’ll “rough cut” the sprue apart from the larger “tree” with the part still attached to it. While still held and supported by the sprue, I’ll scrape and sand the mold seams all the way around the parts (except for the attachment points, of course).

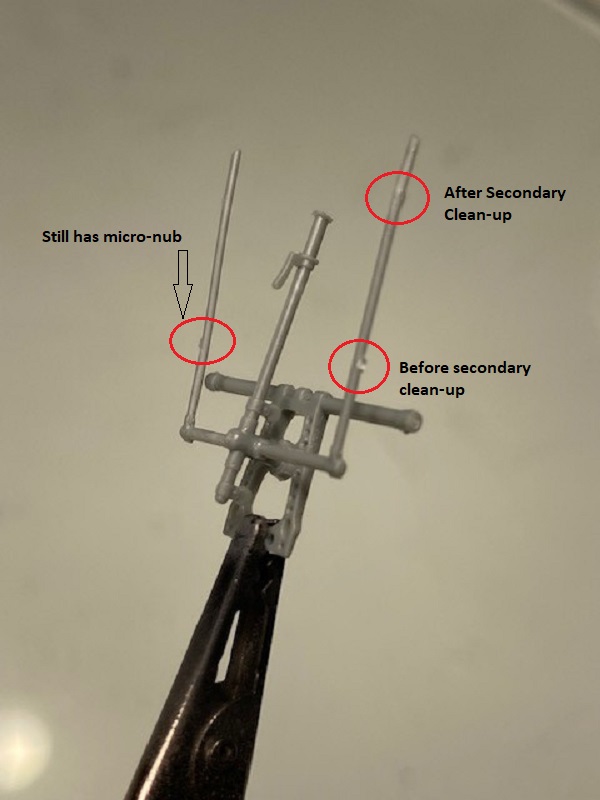
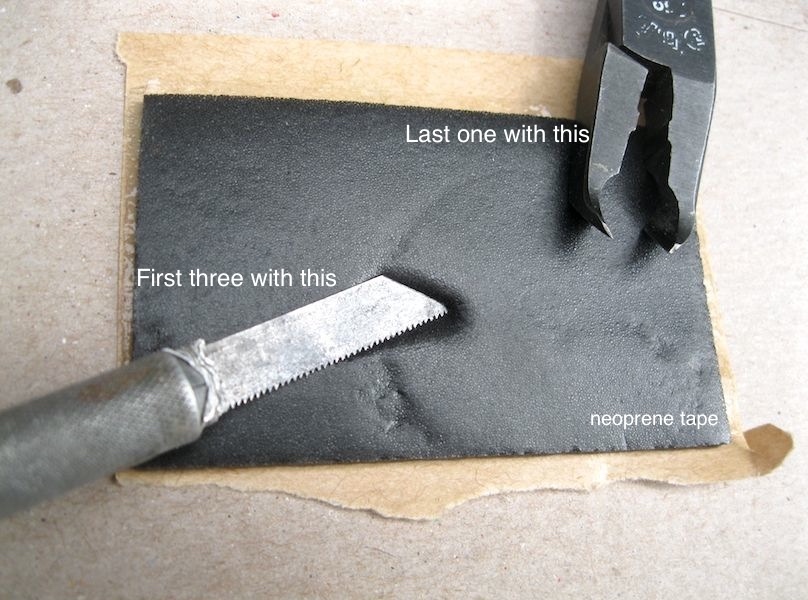
Then, starting away from the area of the part that has the largest cross-section (that, is, starting with the SMALLEST most delicate cross-section, if there is one), I’ll start cutting the part from the sprue (often sawing it rather than using nippers to mitigate force on the part). I’ll do this progressively, one sprue attachment point at a time, cleaning each one up before moving onto the next one.

I use the sprue to support the part and to give me something to hold onto (especially for very small parts). For the very last attachment point, I’ll use a sharp X-acto knife and trim the nub until the last bit of sprue falls off. This usually leaves only a very small “bump” for final clean up from the most robust area of the part possible.

A lot of time, for very thin, long and delicate parts, the main sprue tree, itself, needs relief cuts made to allow the part to flex easily away from the (especially) first attachment point planned for cutting. If this is not done, there’s often a risk that the part will not be able to flex between the attachment points without breaking.

So, my advice is to use the sprue and sprue trees as supporting and holding fixtures and to never hesitate to just cut the whole big sprue up to mitigate unwanted stress on the parts are they, themselves are cut away from it.

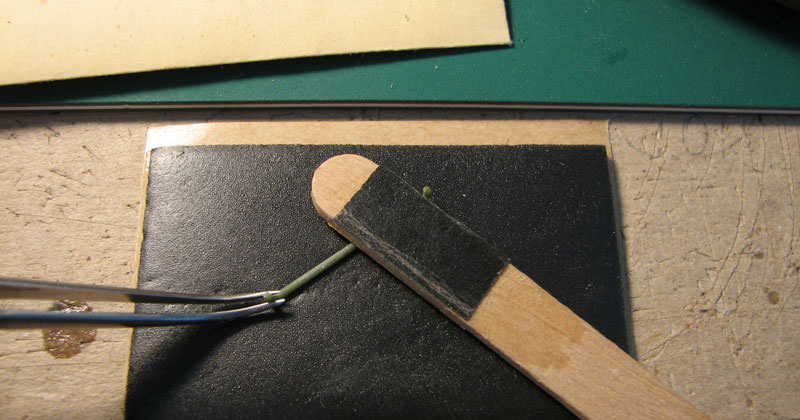
I hunted around through my build photo folders to see if I had a good picture of what I tried to describe, above, but the best that I could come up with was this one:

This picture shows some work I did to modify the Tamiya’s M13/40 kit road wheels. Here I left the wheels attached to the sprue while I routed / thinned their reverse sides and drilled the lightening holes all the way through them. The sprue served as a convenient handle to hold the small wheels for the work. I also cleaned up the mold seams before I cut them away from the sprues leaving only the nubs to clean up.

I handle most small and delicate parts like this (even though these wheels wouldn’t be considered particularly delicate). The kit sprue can serve more purpose than just holding the parts in the box or providing scraps for heating and stretching.

4 Likes

Sometimes the sprue attachment point is too inbricated to the part and I break the partby trying to cut it.

For those very hard to reach and cut sprue gates:

and when it gets really tricky:

Could be caused by a too coarse file (been there, done that …)
Use fine grit sandpaper glued to wooden sticks or sections of sprue.
The general rule is that a tool should be comparable in “size” to the object
being worked on. The same goes for tool holders (small holders for small drills …)

2 Likes

Thank you for the reply. I made up some small sanding sticks with various grits, we’ll see how that works.