Clerget 9B Rotary - Hasegawa 1/8 kit

Hi folks.
In my quest to cull the WIP list (scary as it is) this year, I dragged out this kit that I started back in 2017.
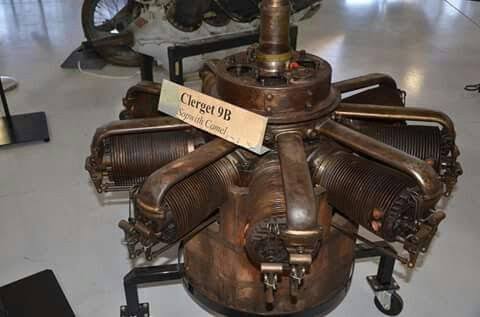
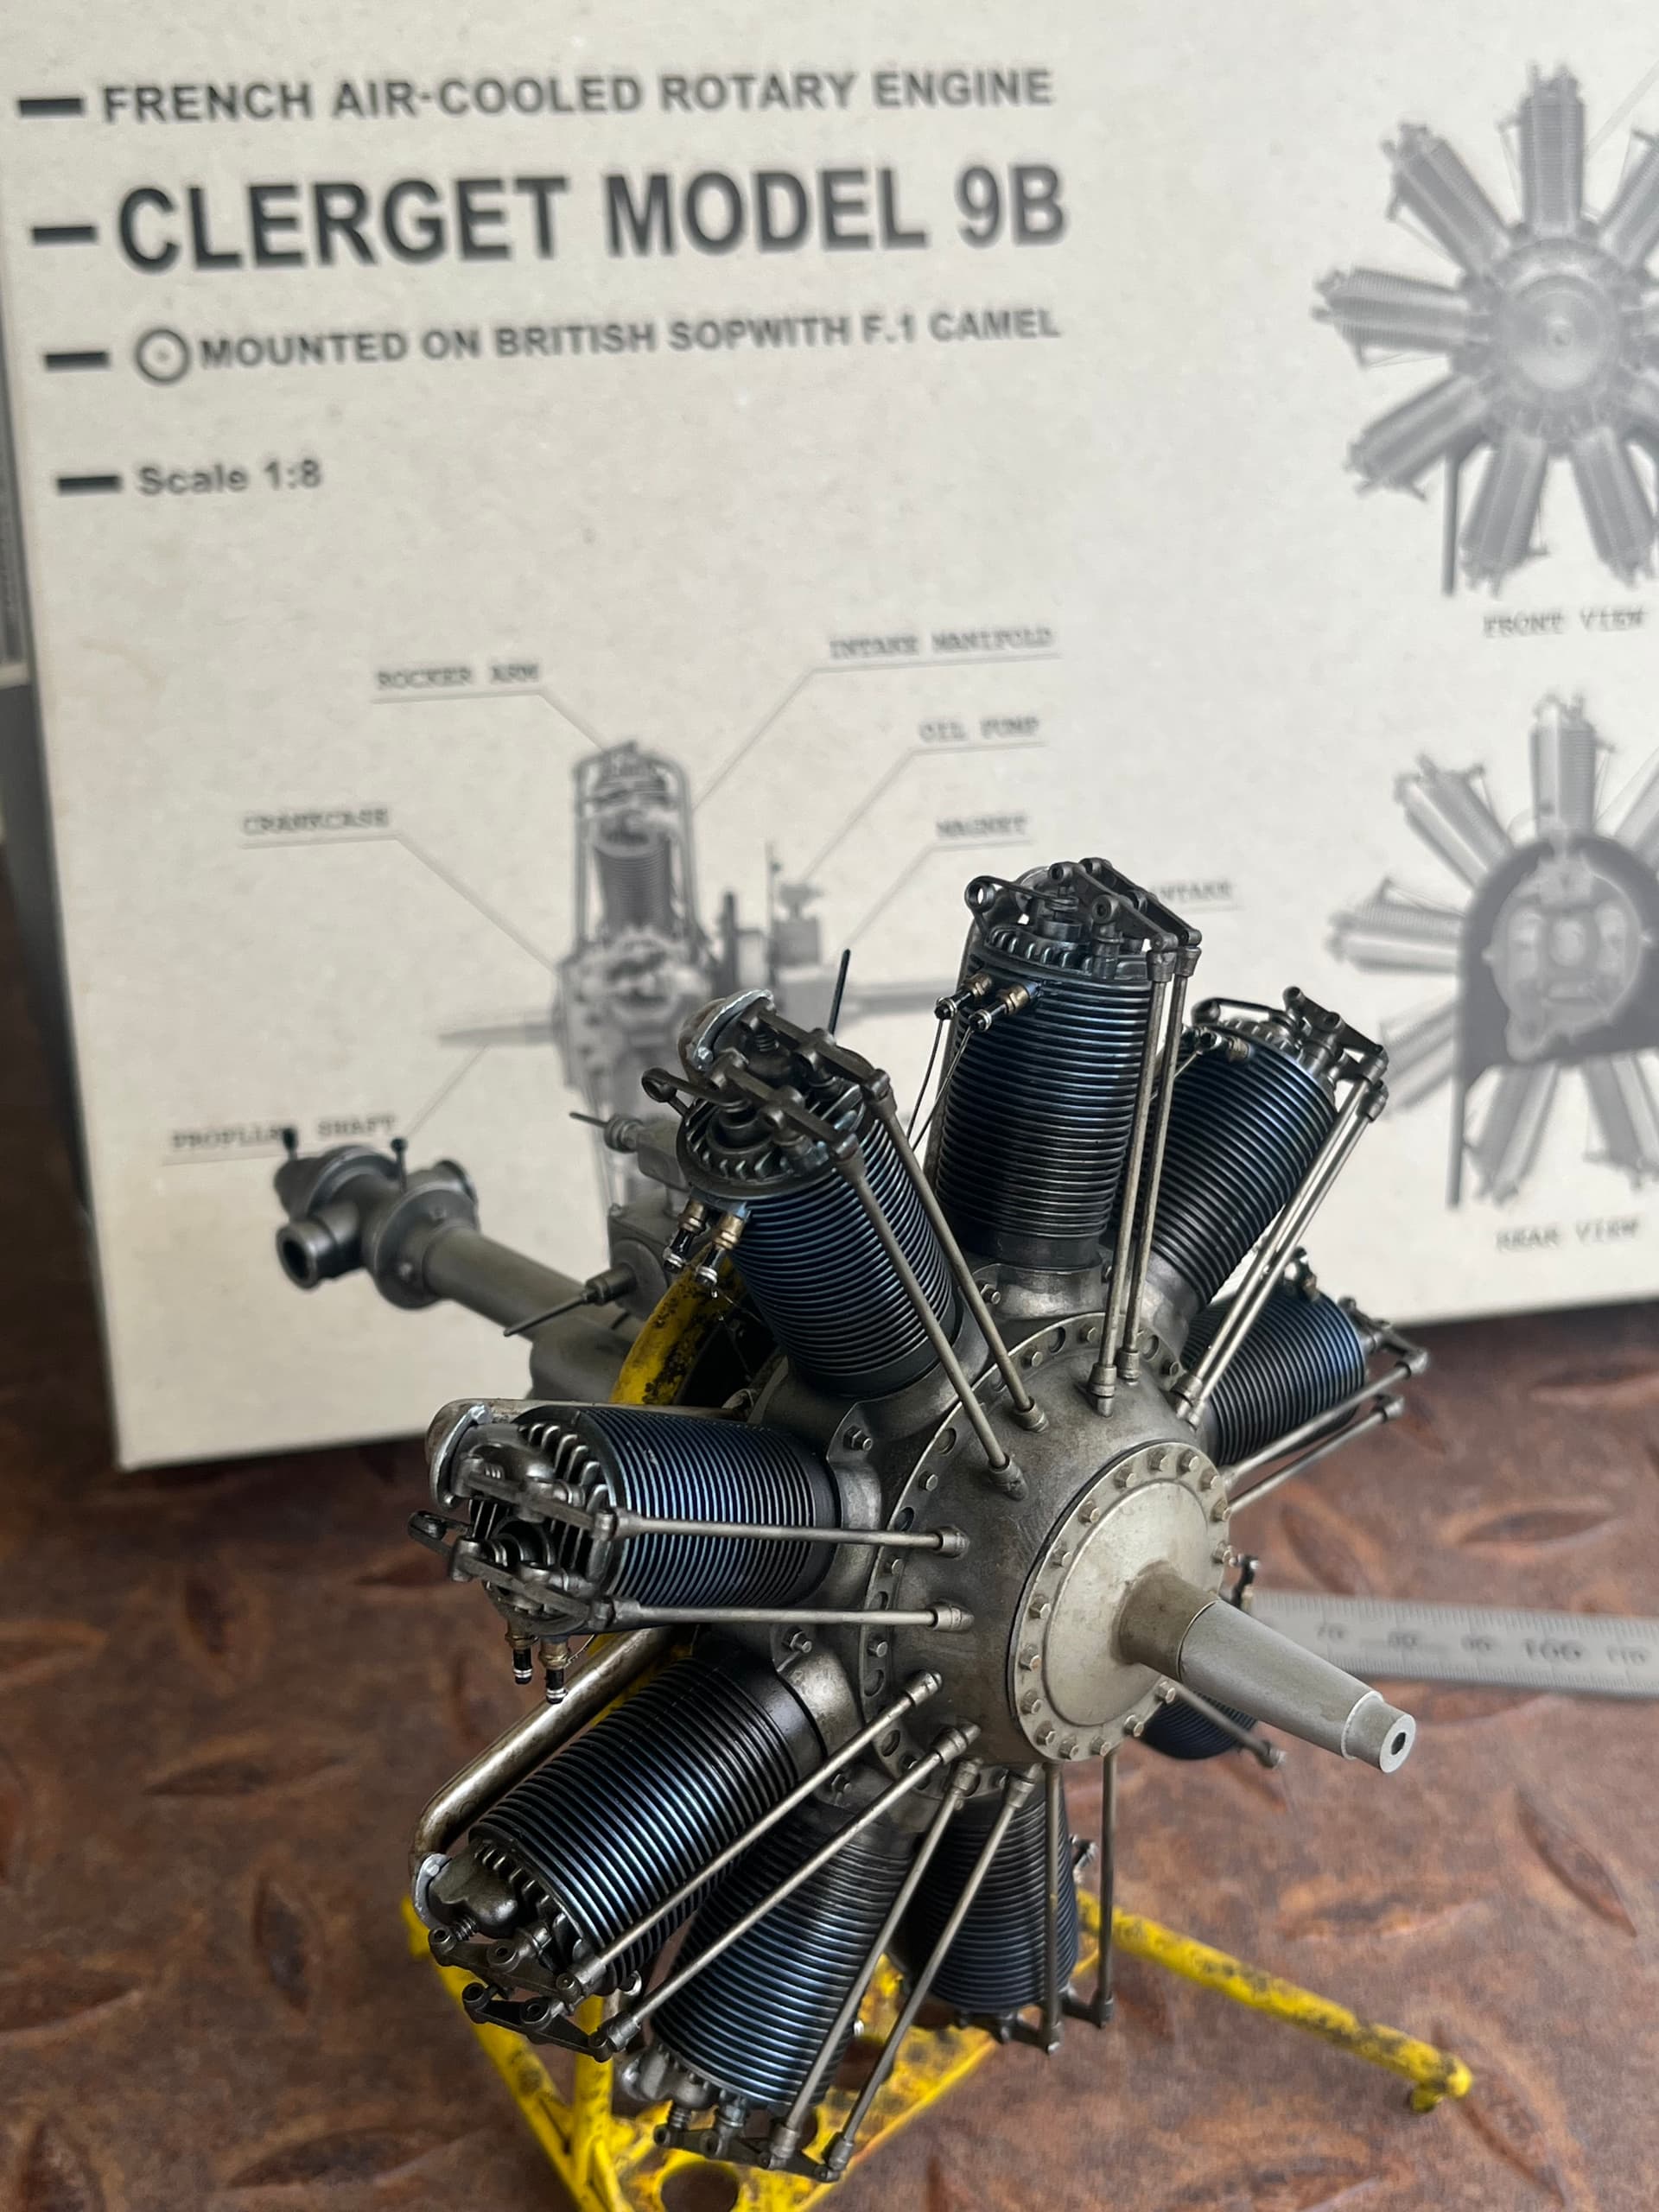
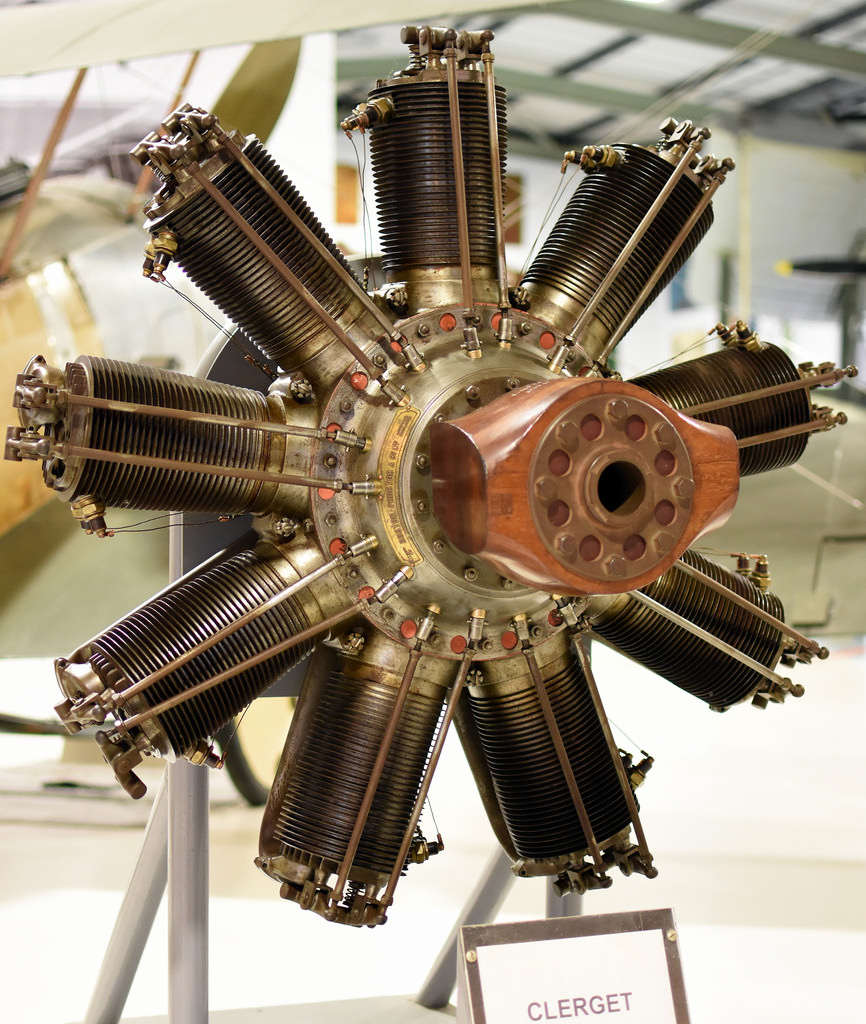
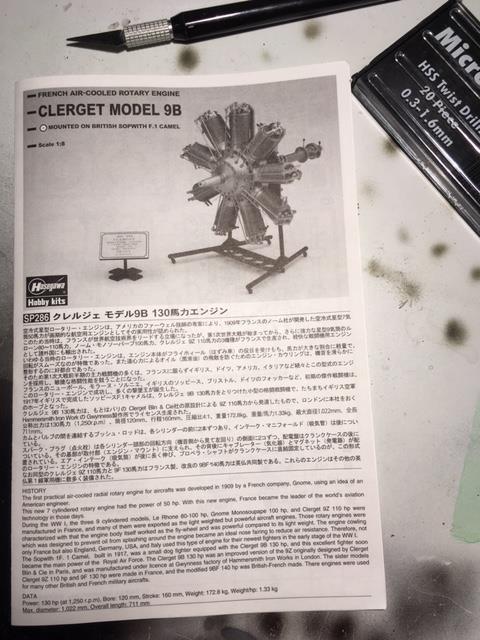
There was a build thread started on the old Aeroscale site AeroScale :: Sopwith Camel Clerget Project, and this kit was also the subject of my first review on Aeroscale AeroScale :: Hasegawa Models 1:8 Clerget 9B Rotary Engine Review.

I have made some progress over the past couple of weeks, but I thought I would summarize the original thread here to get things rolling.

Saturday November 4, 2017
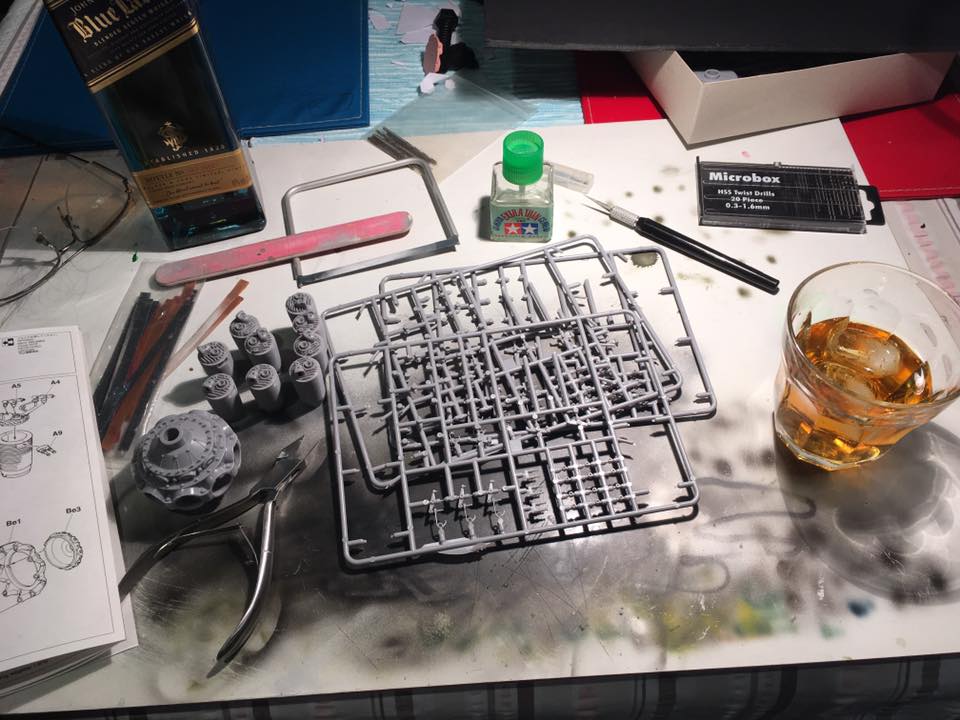
Step 1, open bottle of Johnny Walker Blue Label and pour over ice.

Step 2, reacquaint myself with tool kit.

Step 3, read instructions and fondle sprues.

Step 4, get amongst the styrene!

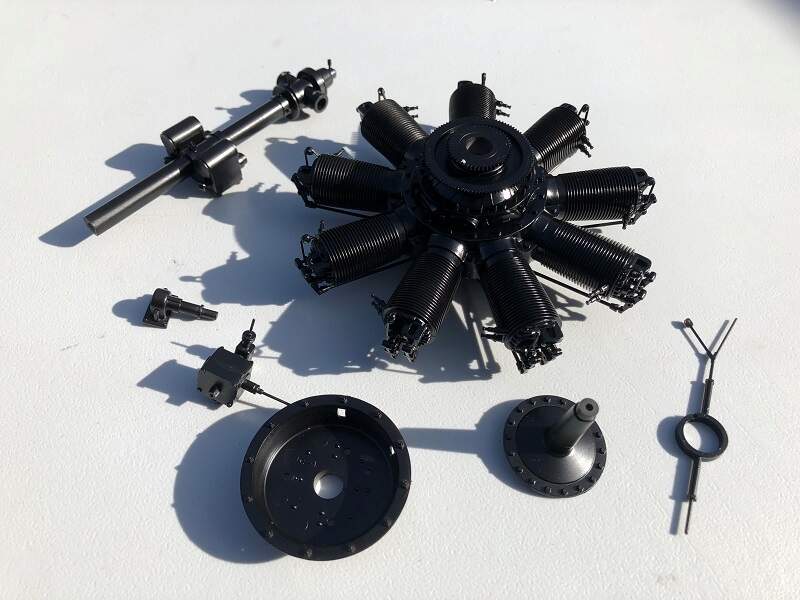
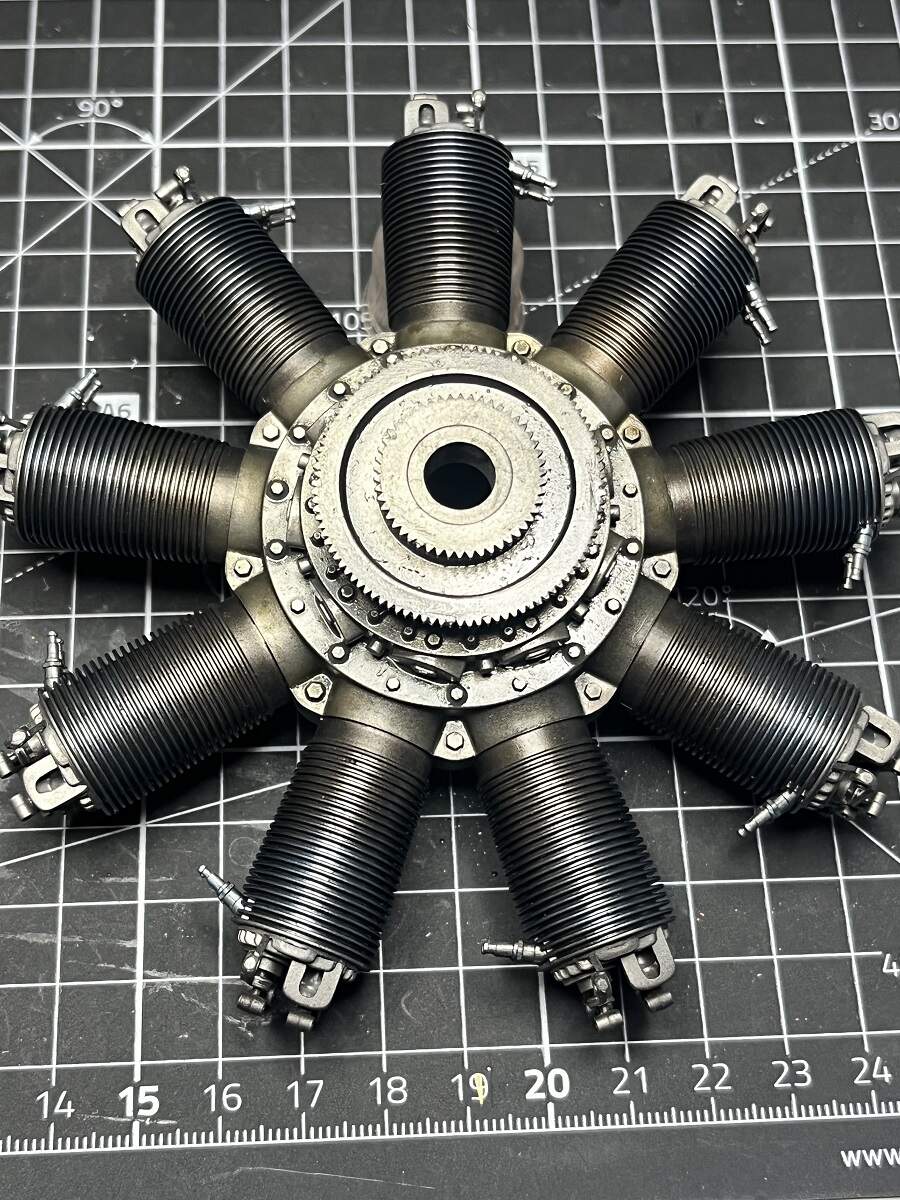
Stages 1 and 2 completed:

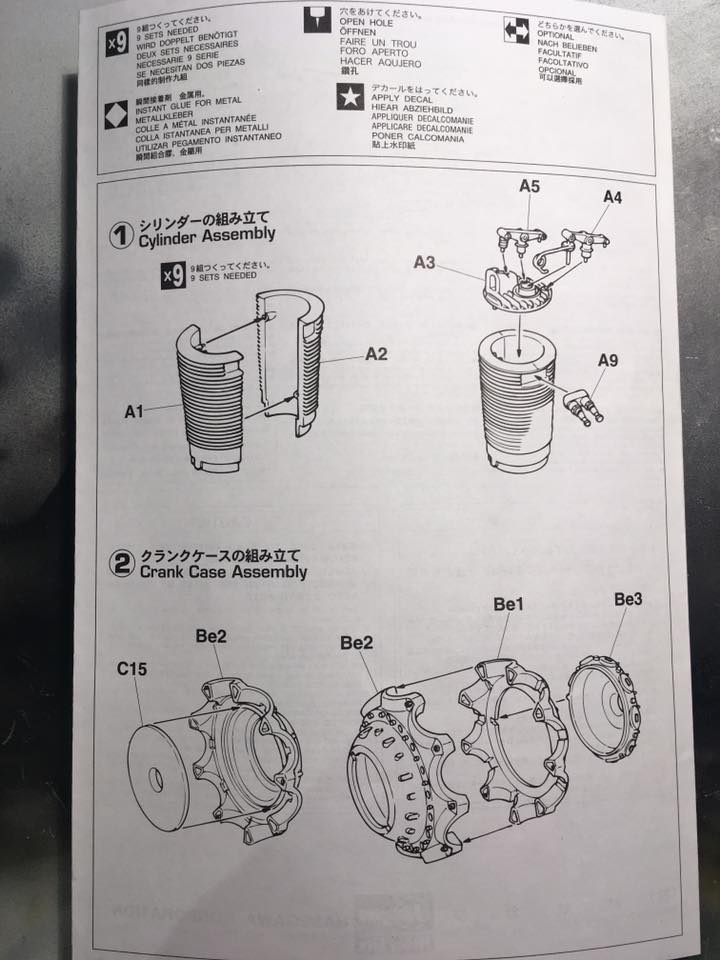
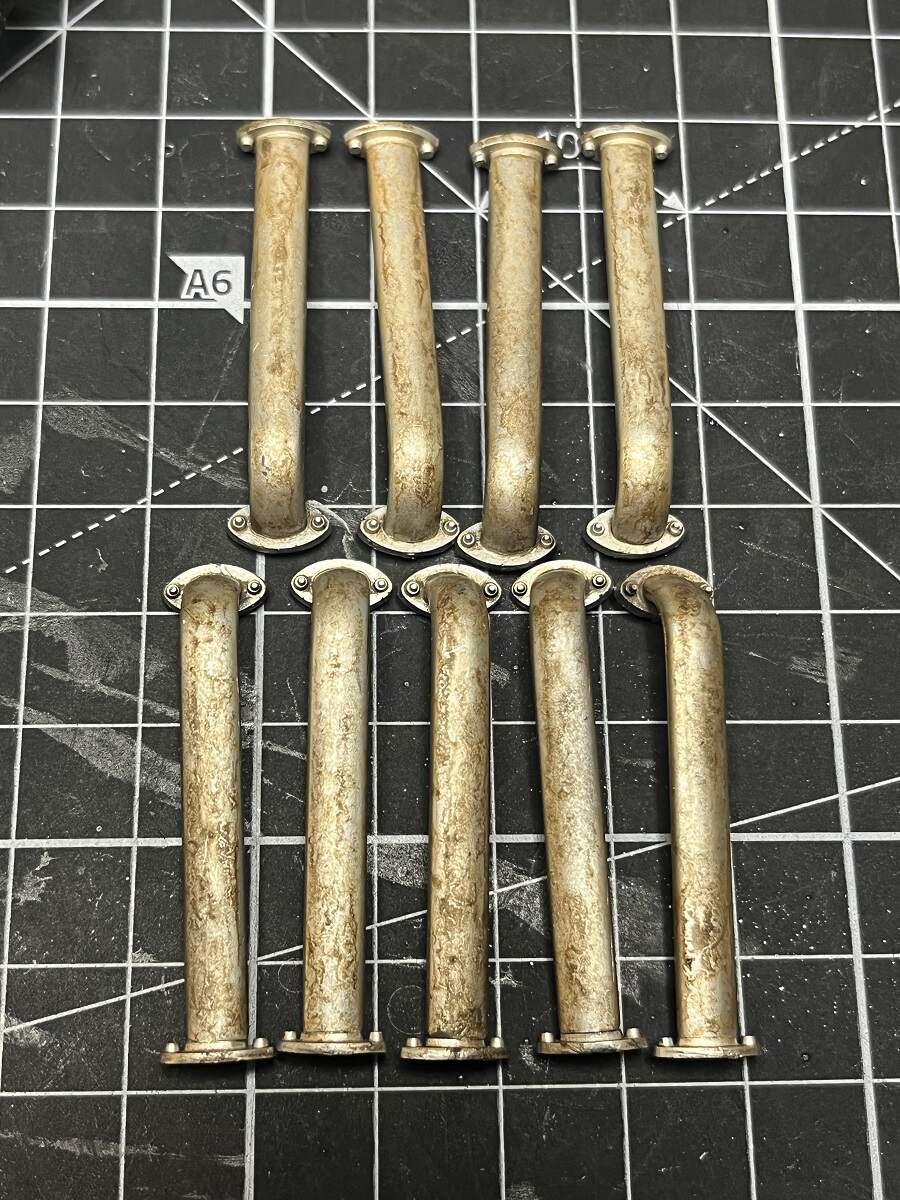
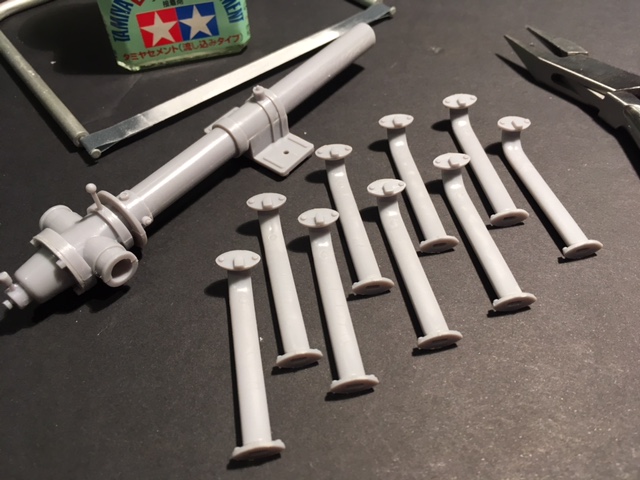
Part number A4 is very fragile. I managed to break 3 of the 9 pieces while removing them from the sprues, but the fix was quite easy.


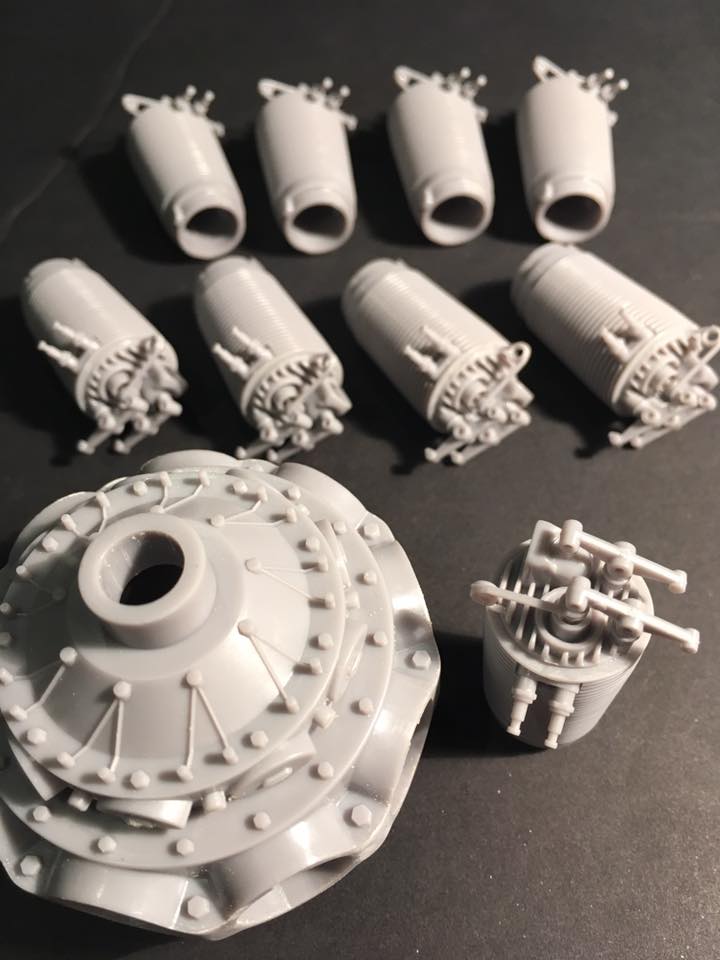
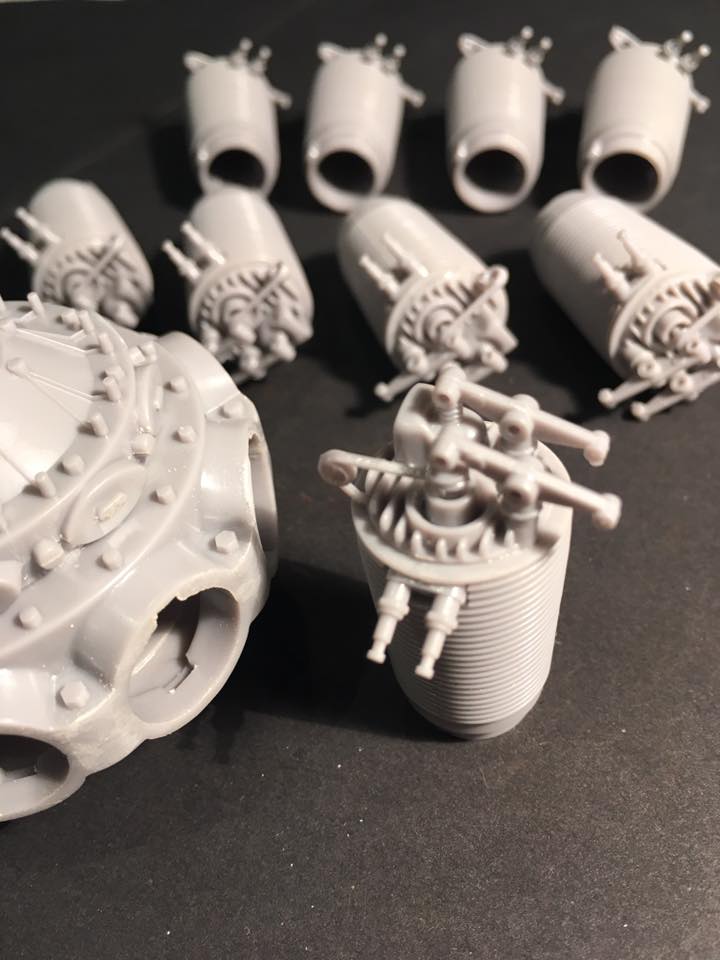
The detail is very crisp, virtually no flash, and the fit is excellent. Very little cleanup or sanding so far.

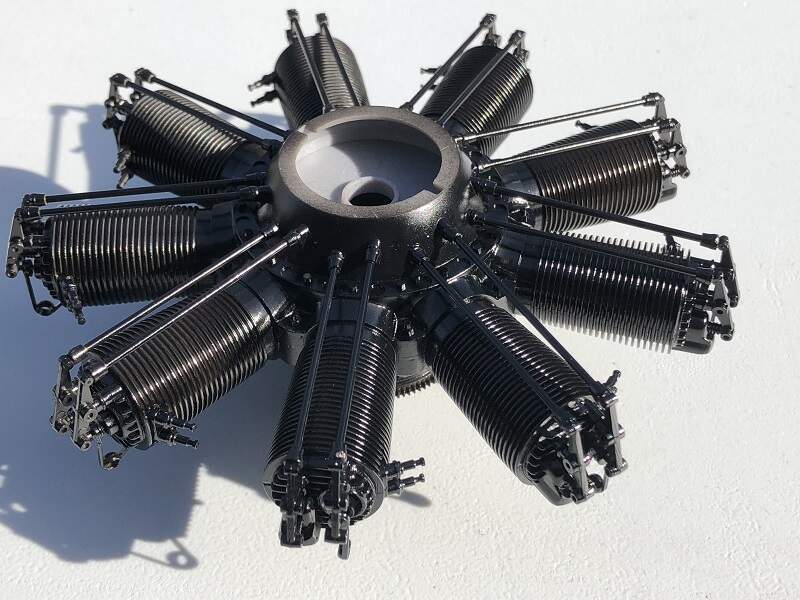
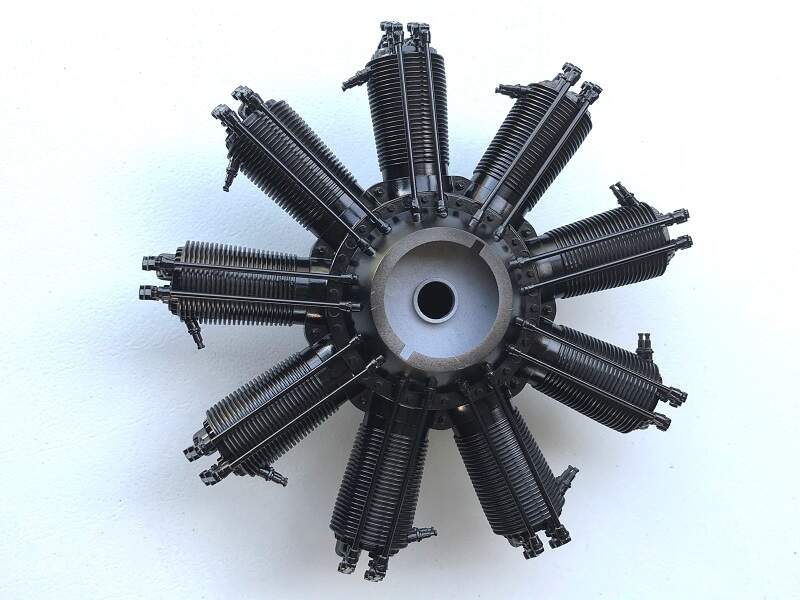
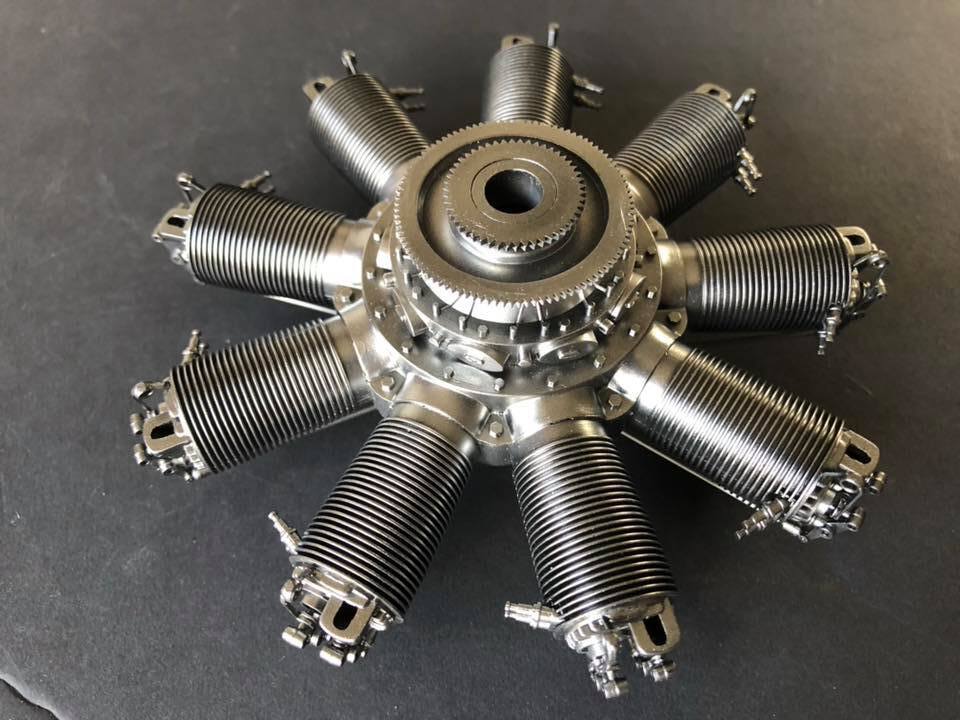
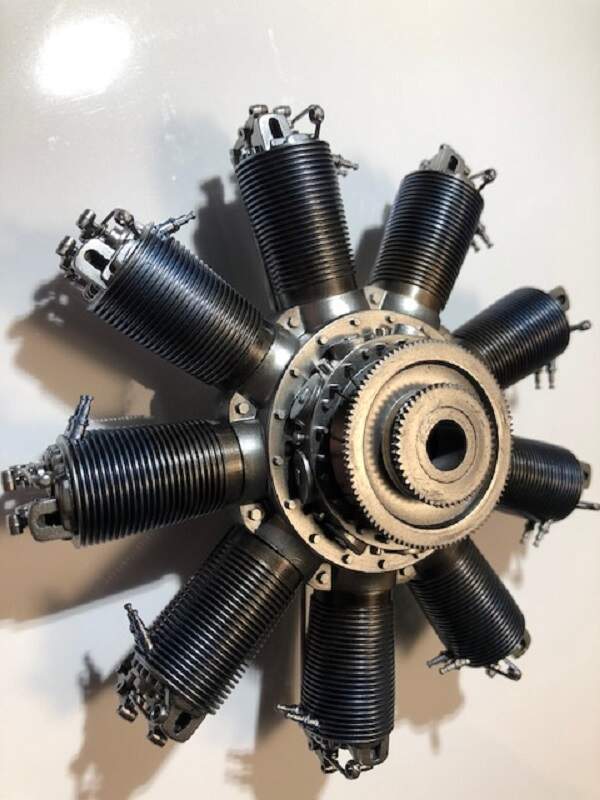
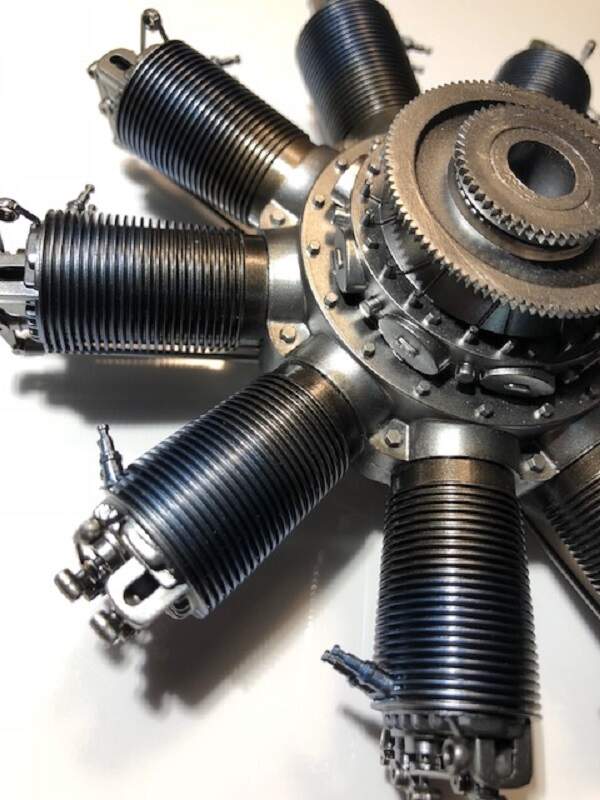
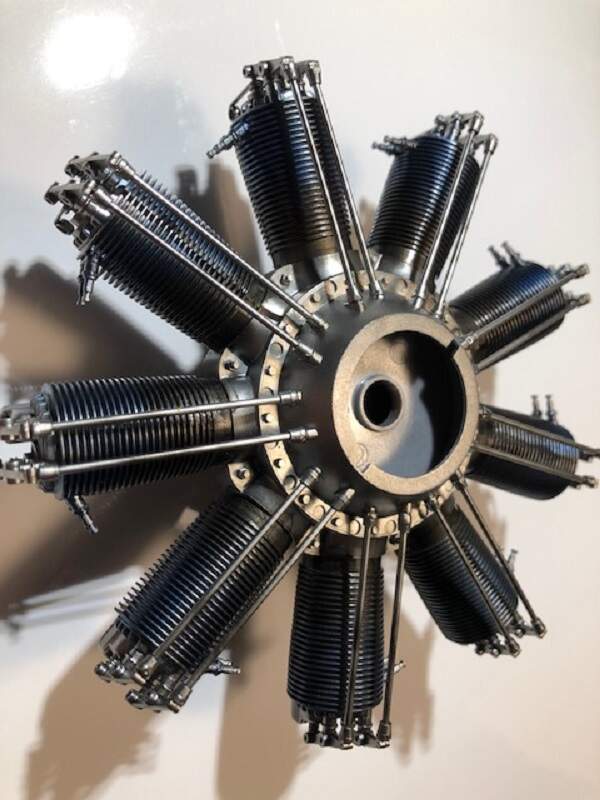
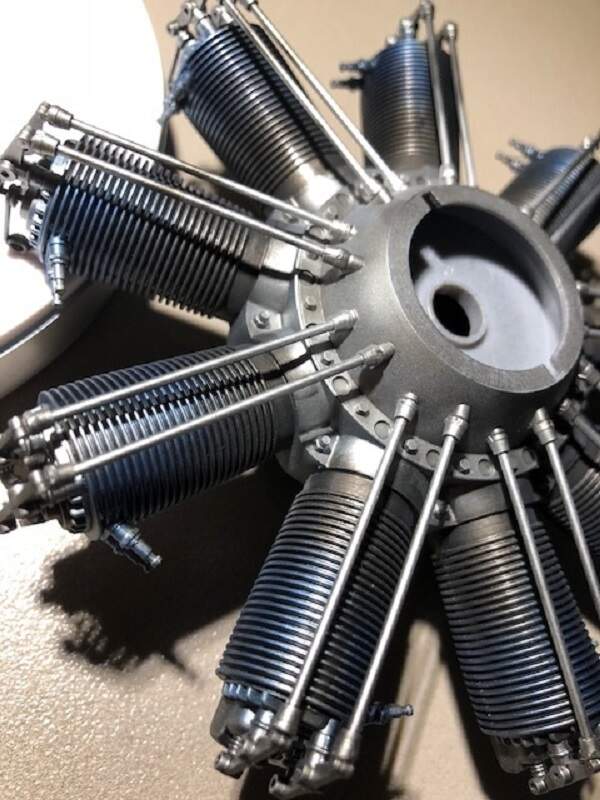
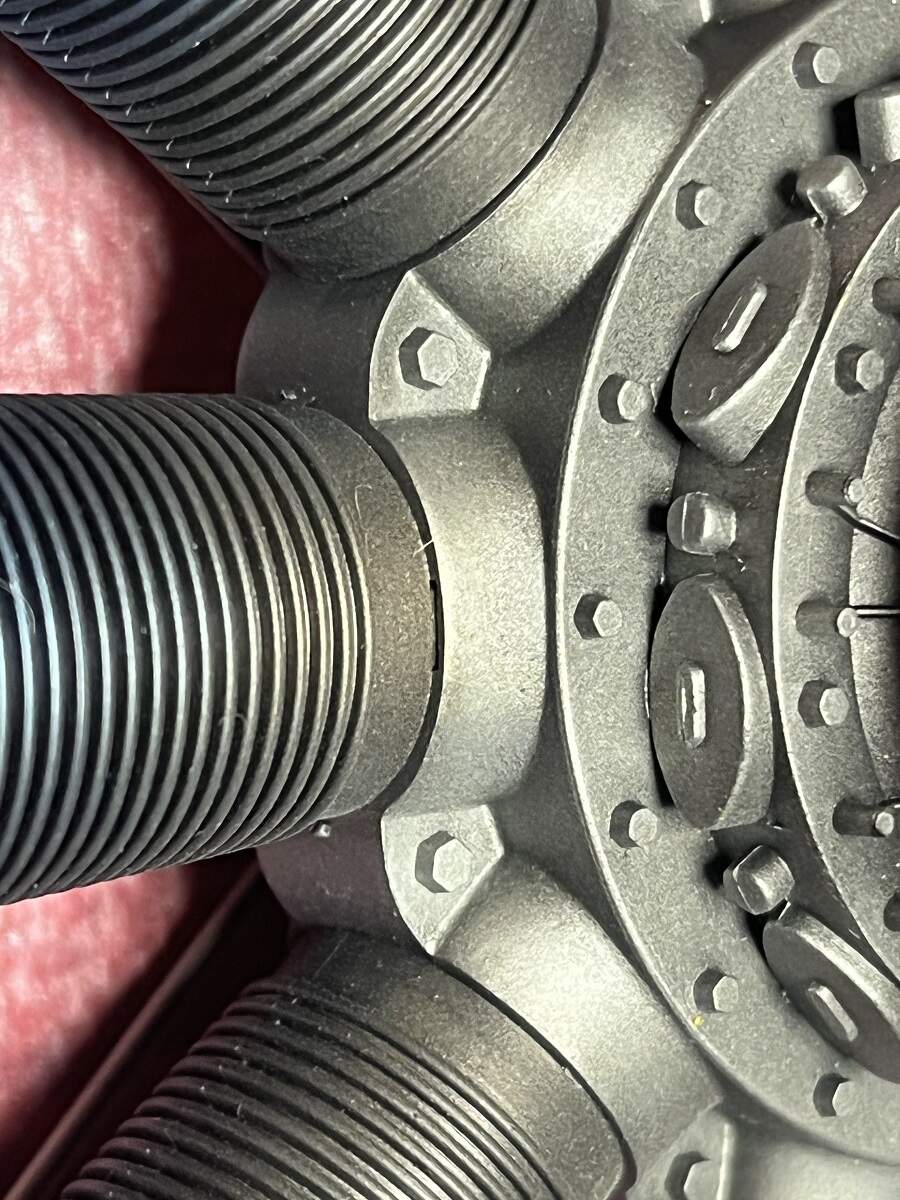
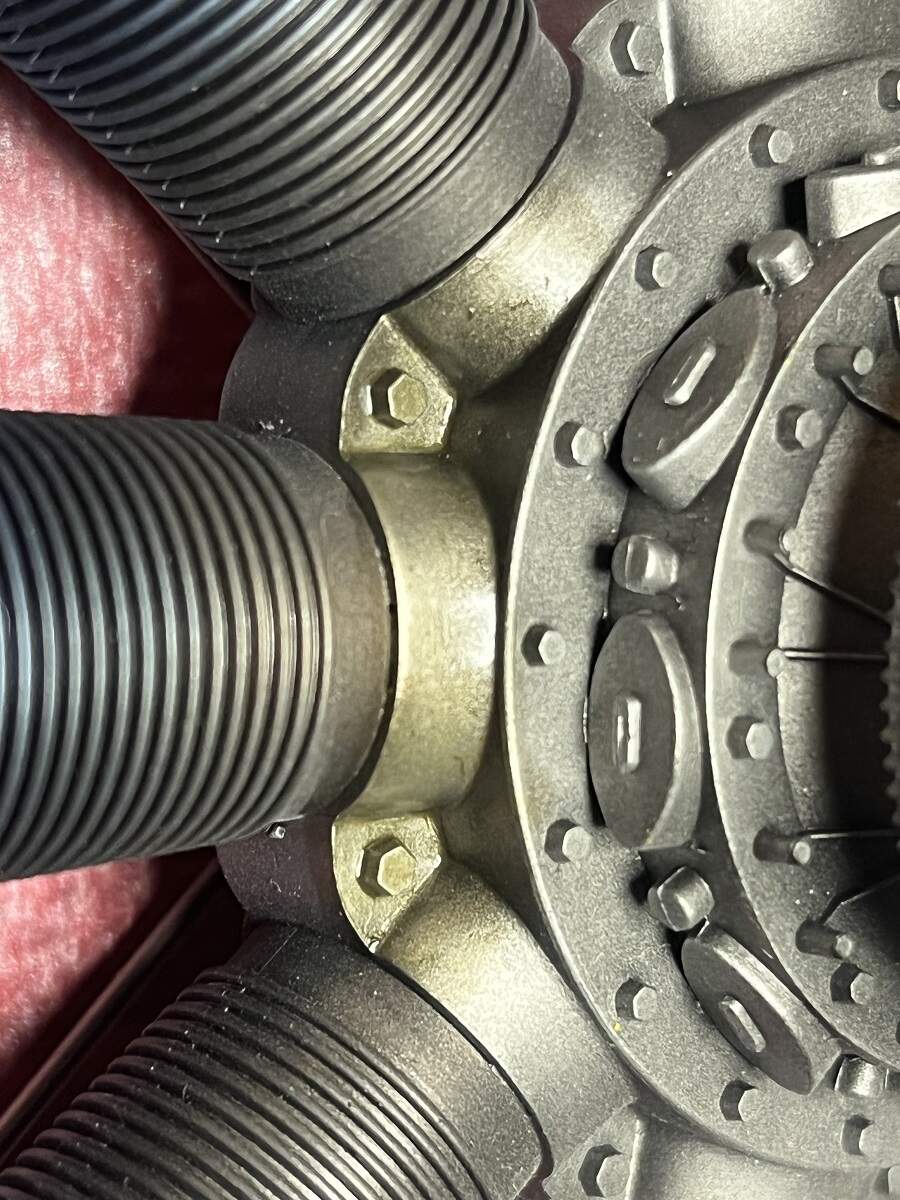
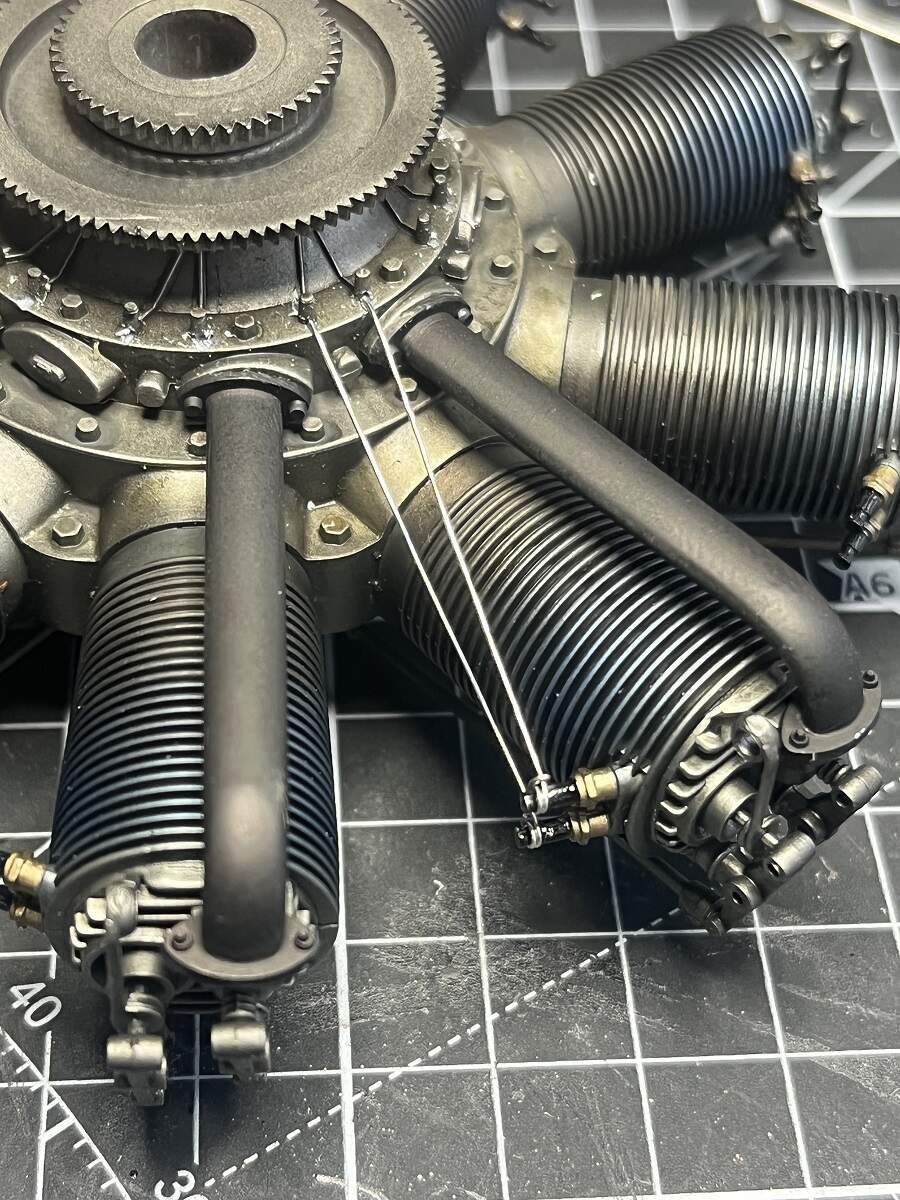
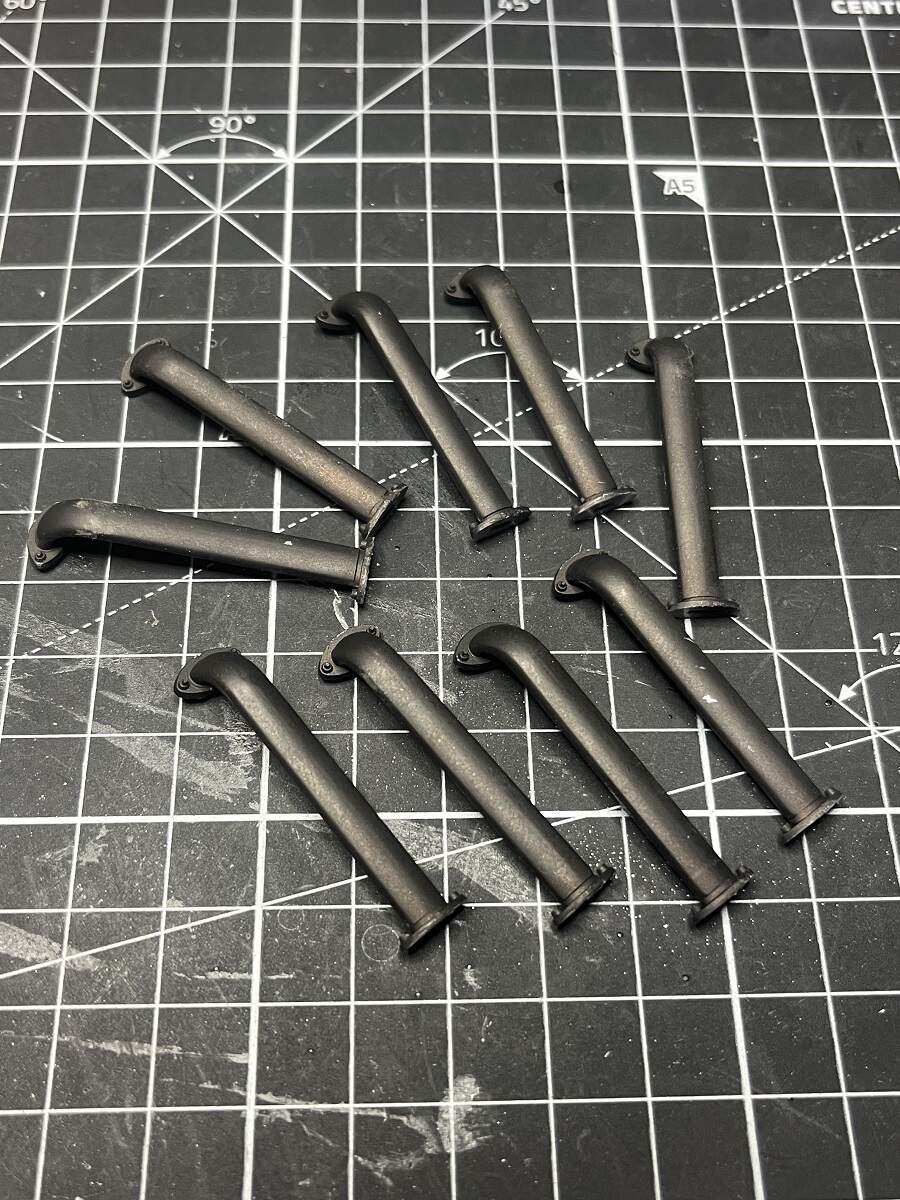
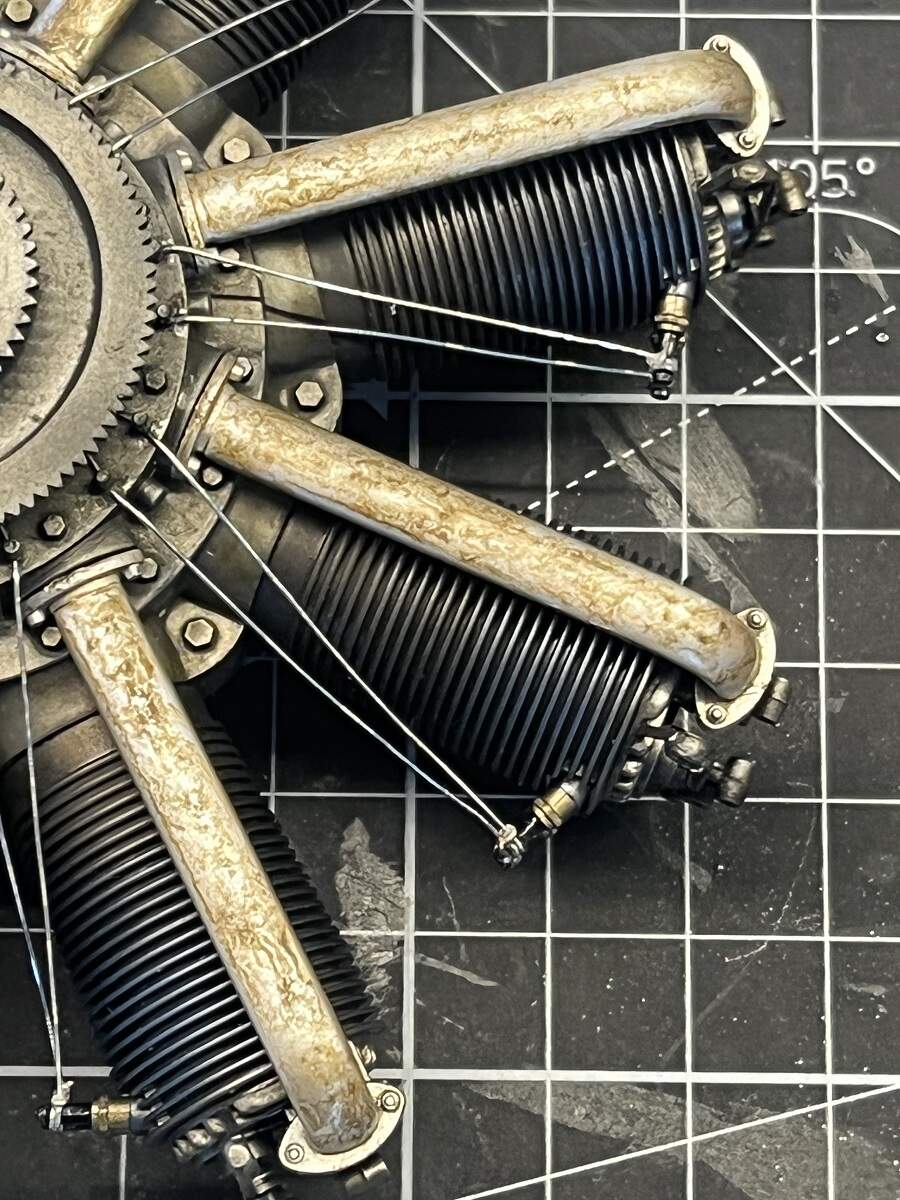
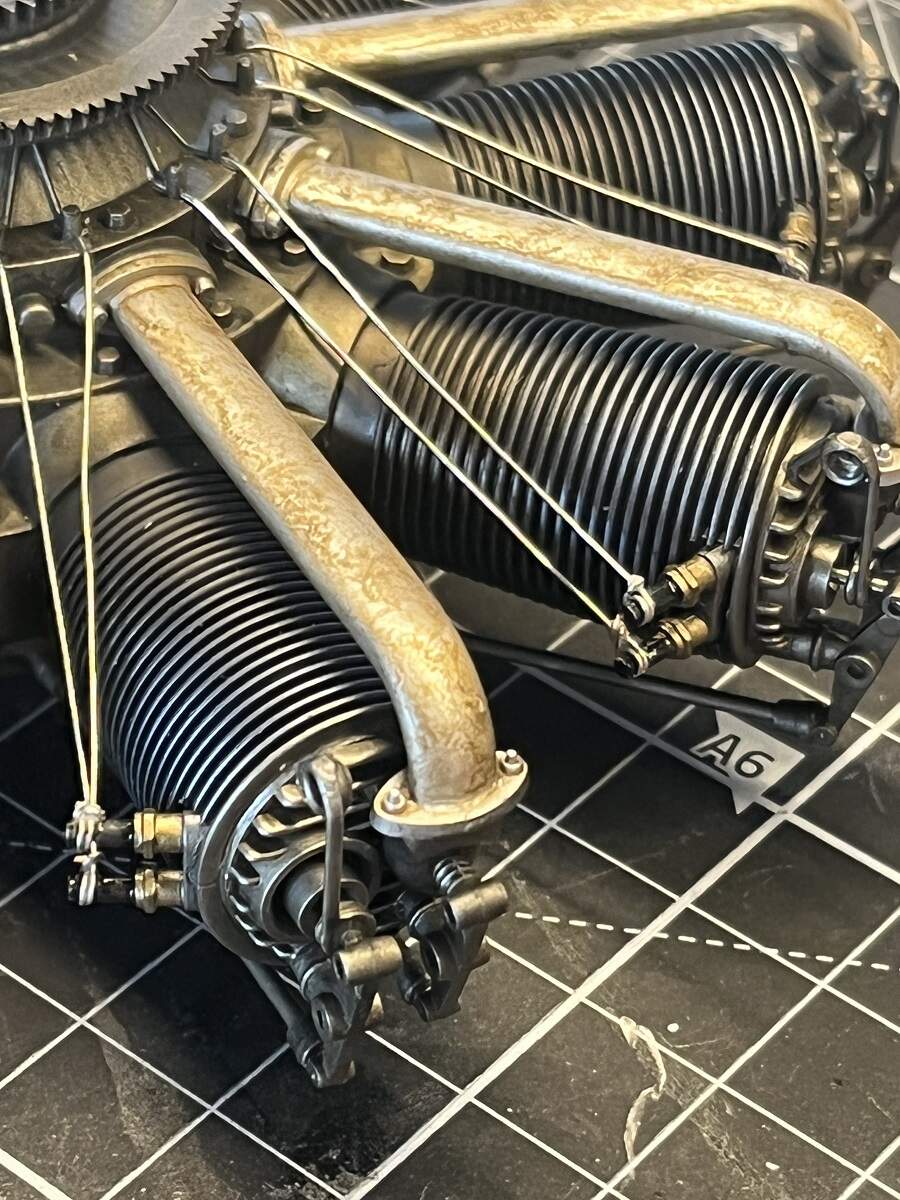
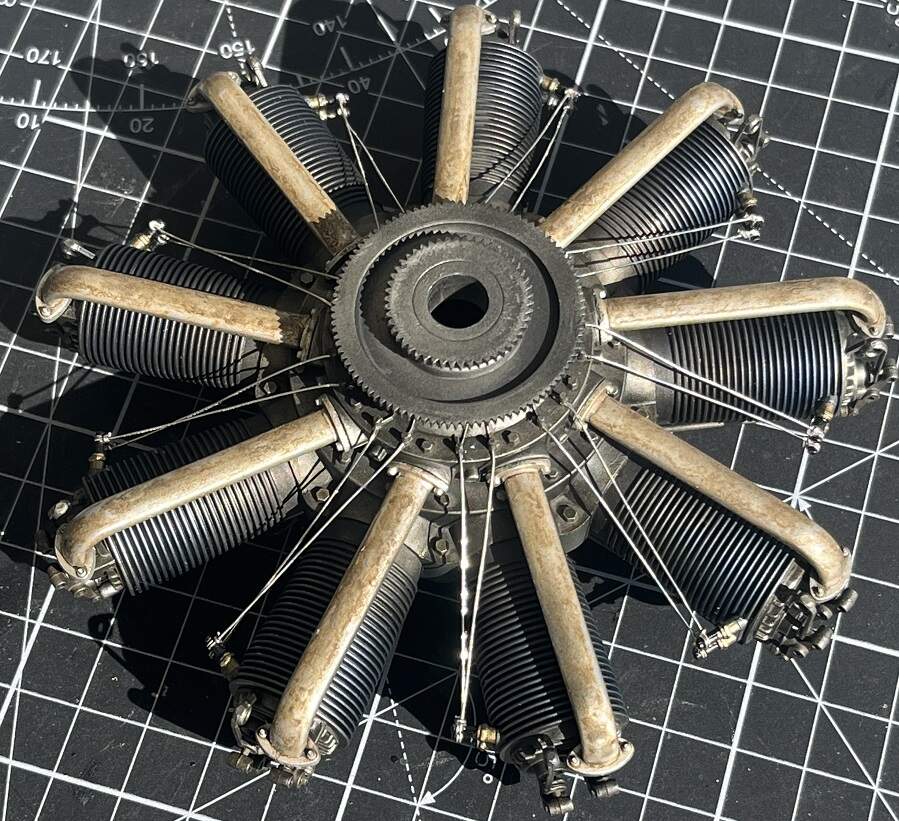
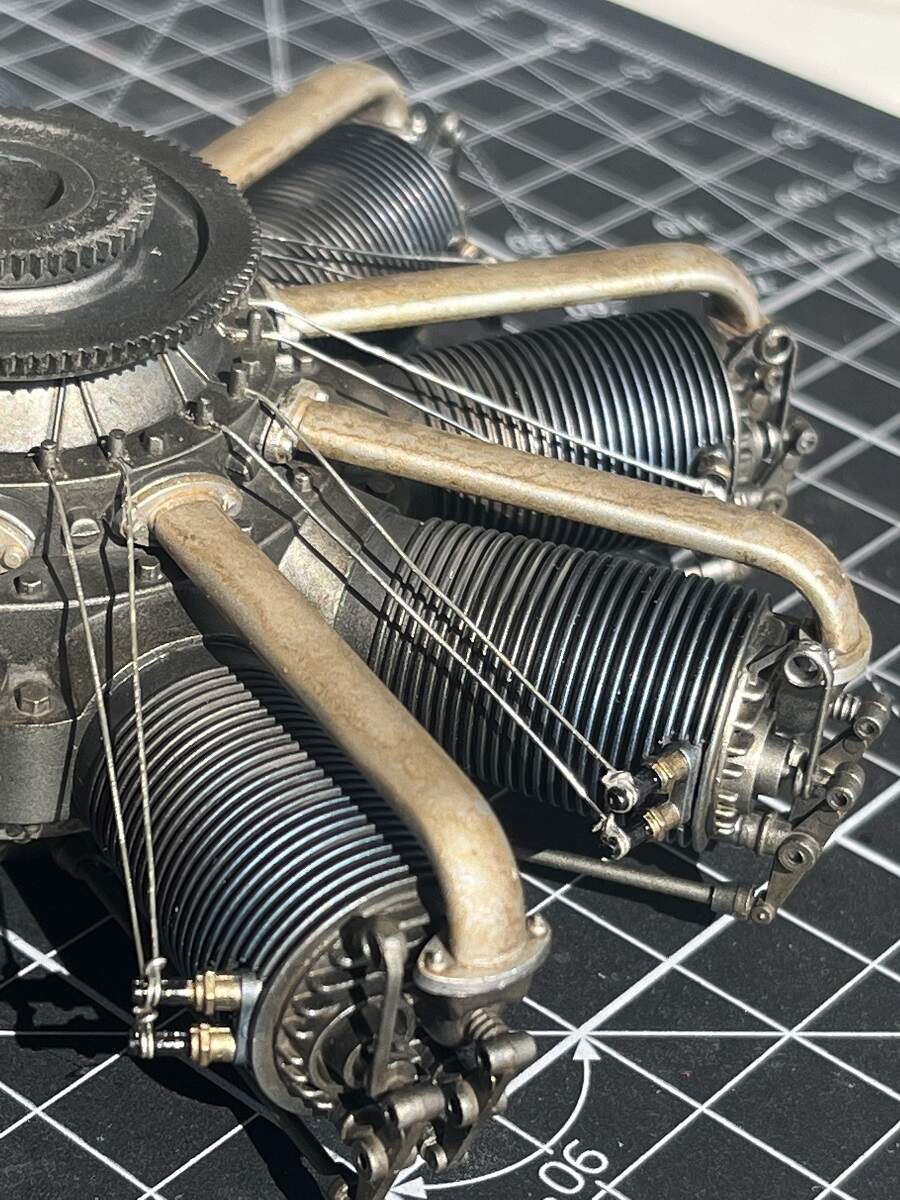
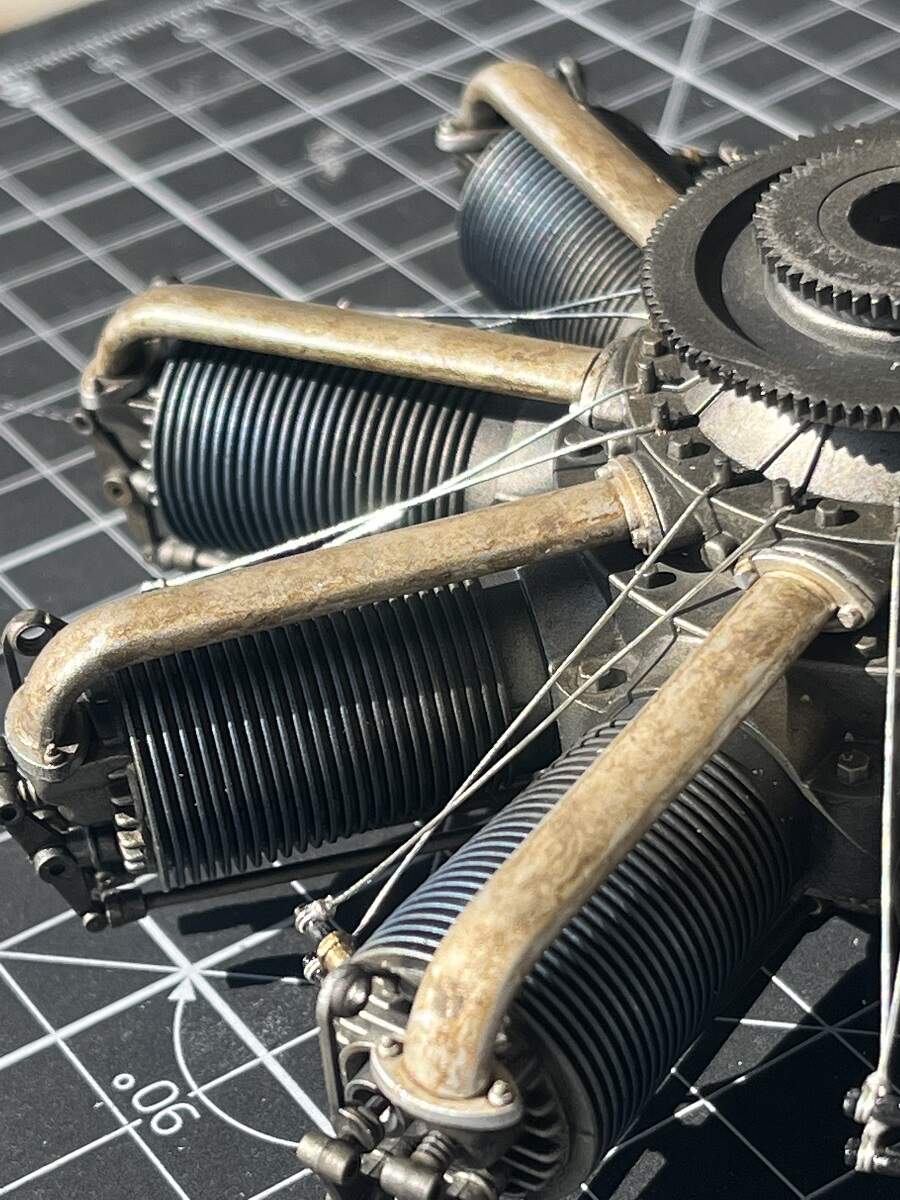
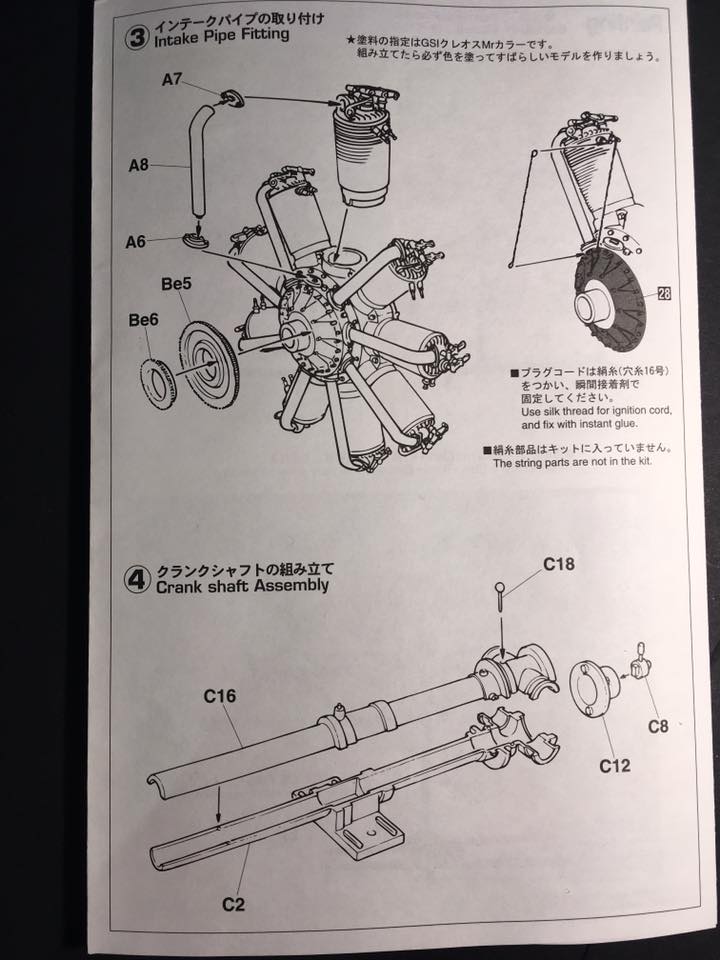
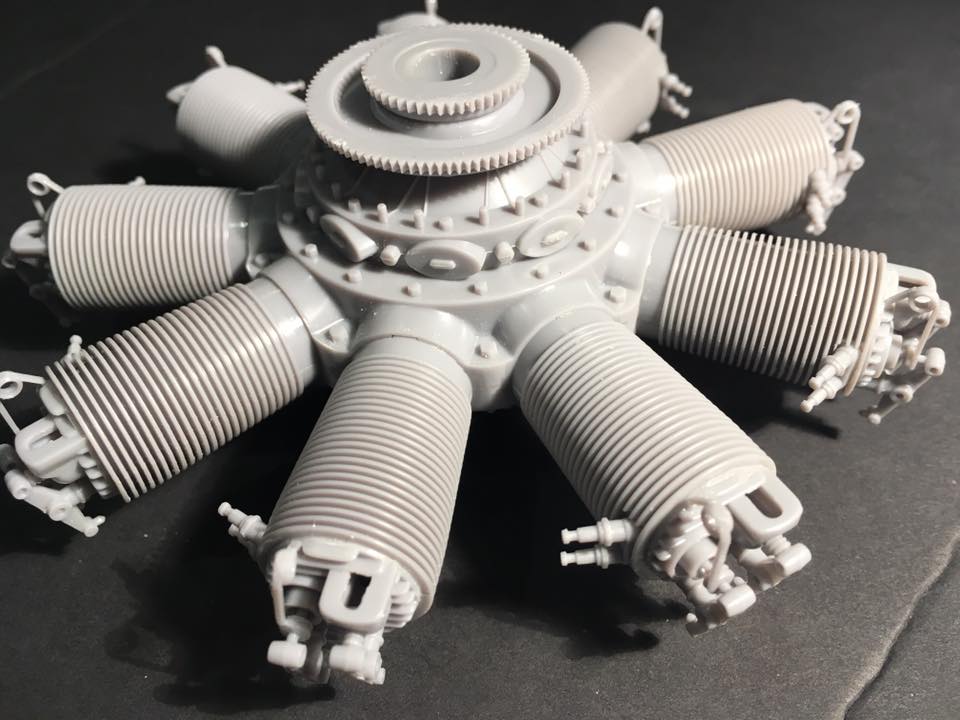
First part of Stage 3 completed, Cylinders assembled to Crank Case. I will paint this stage before I attach the Intake Pipes (to be pre-painted separately).

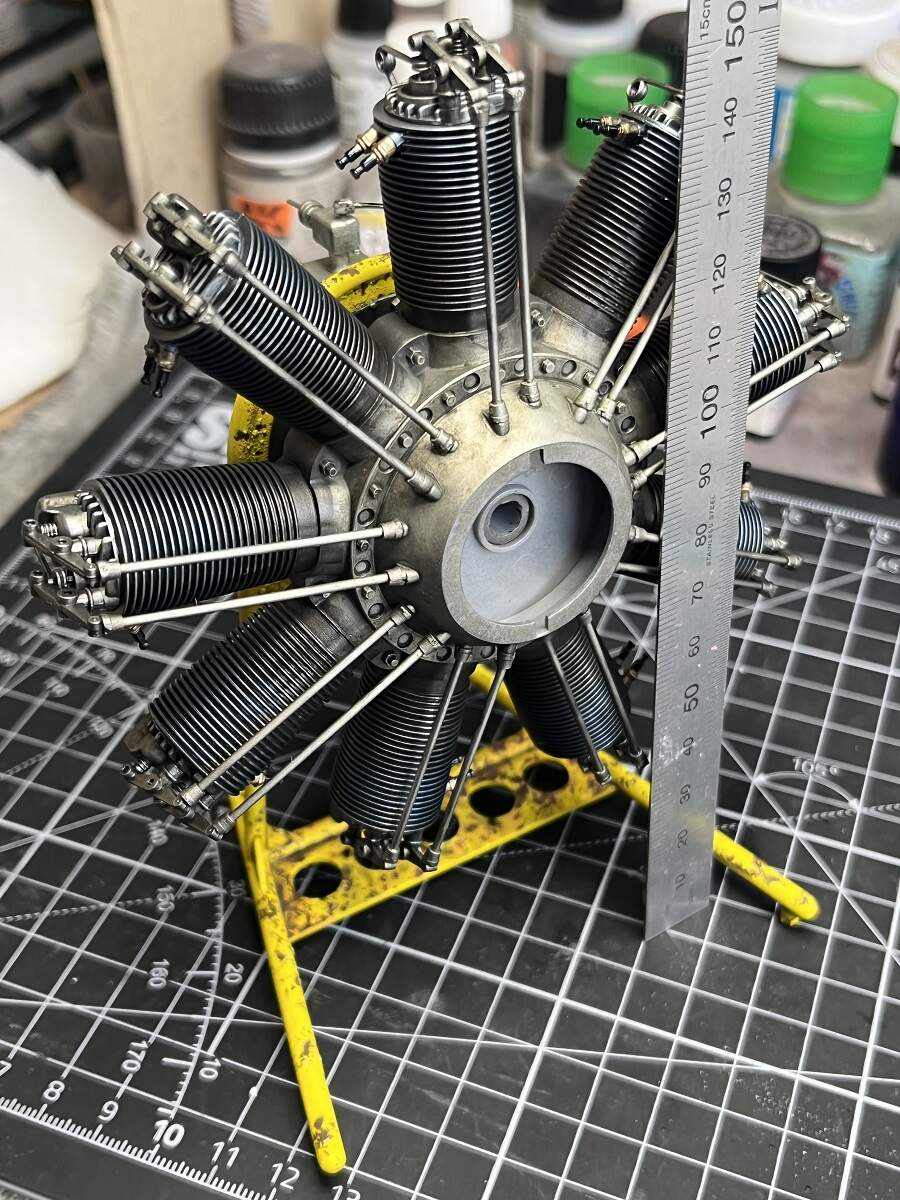
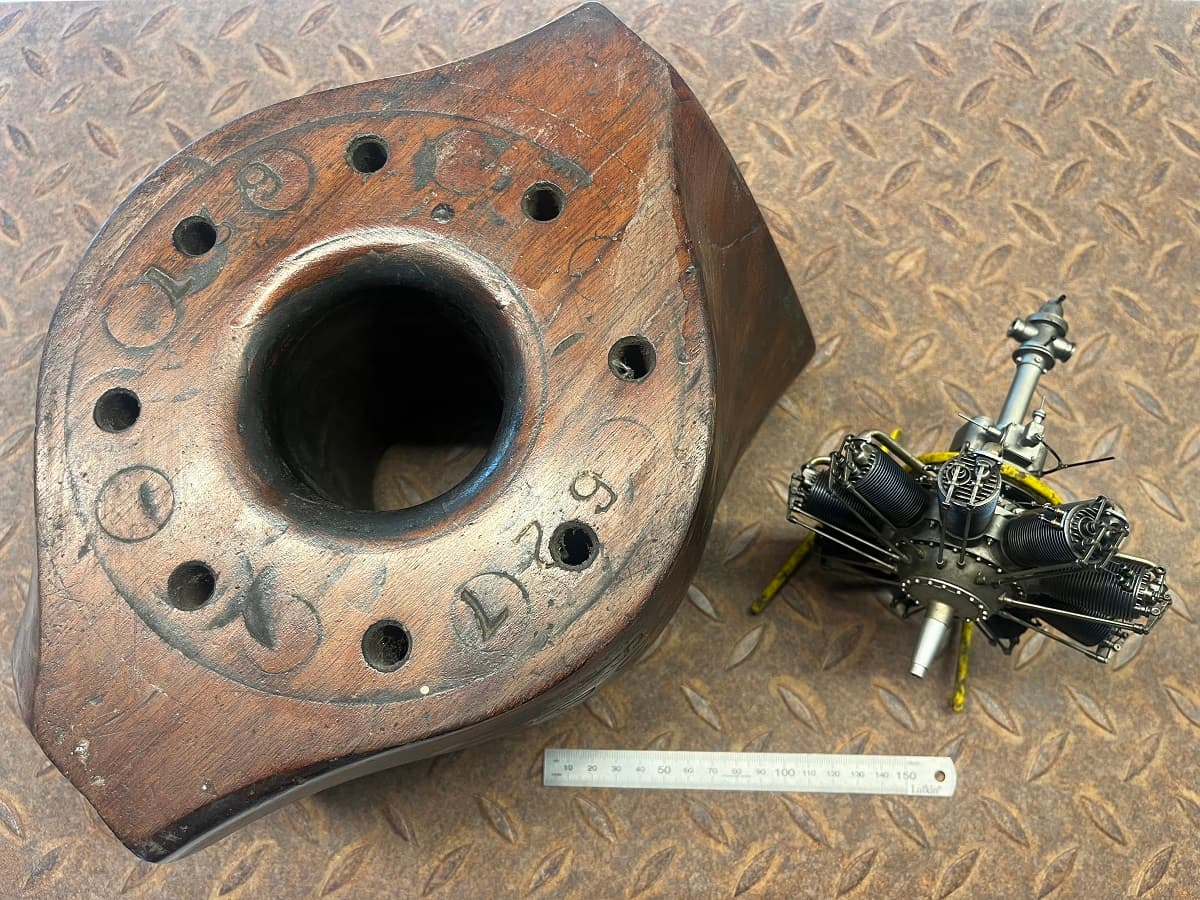
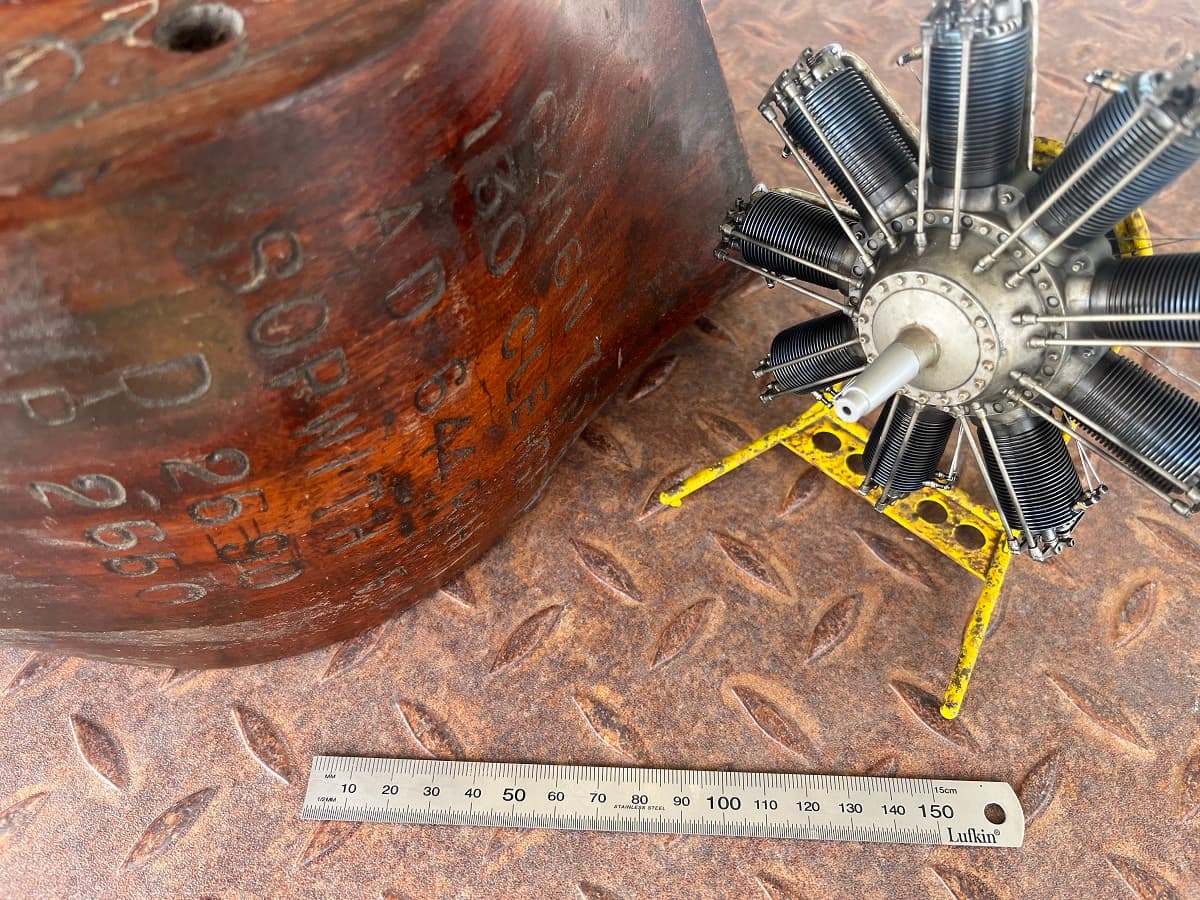
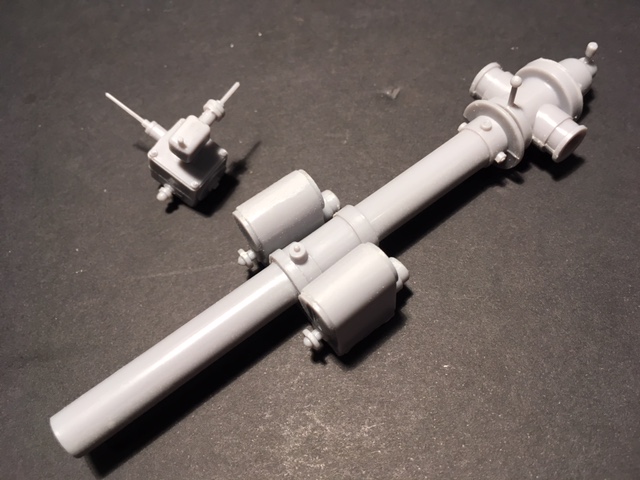
And for a sense of scale:

Friday November 10, 2017

A little more progress tonight. Some filling and sanding to do once the cement sets up properly, but no major issues.


Clerget21
Clerget22

Saturday November 18, 2017

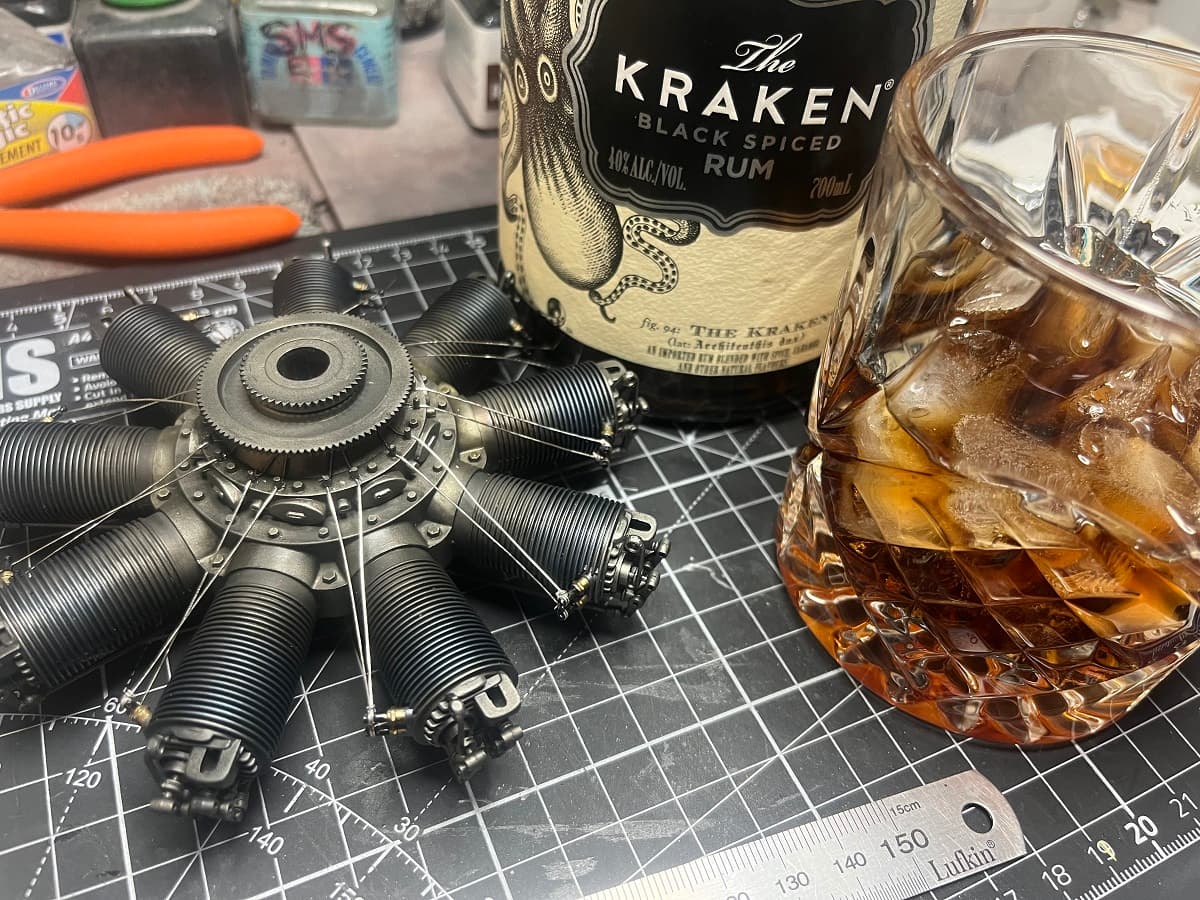
Hi folks. Some progress tonight, approaching paint stage now!

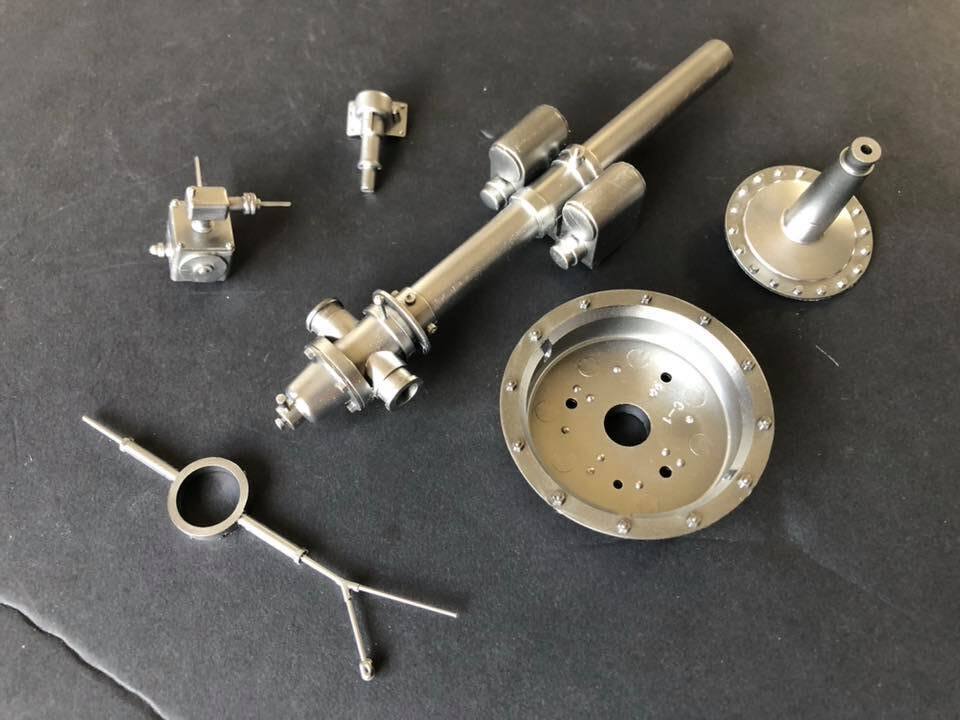
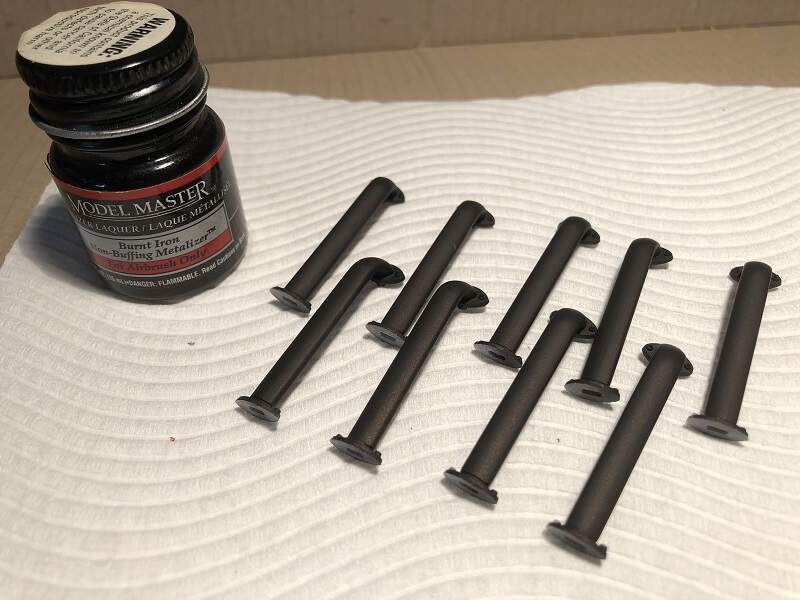
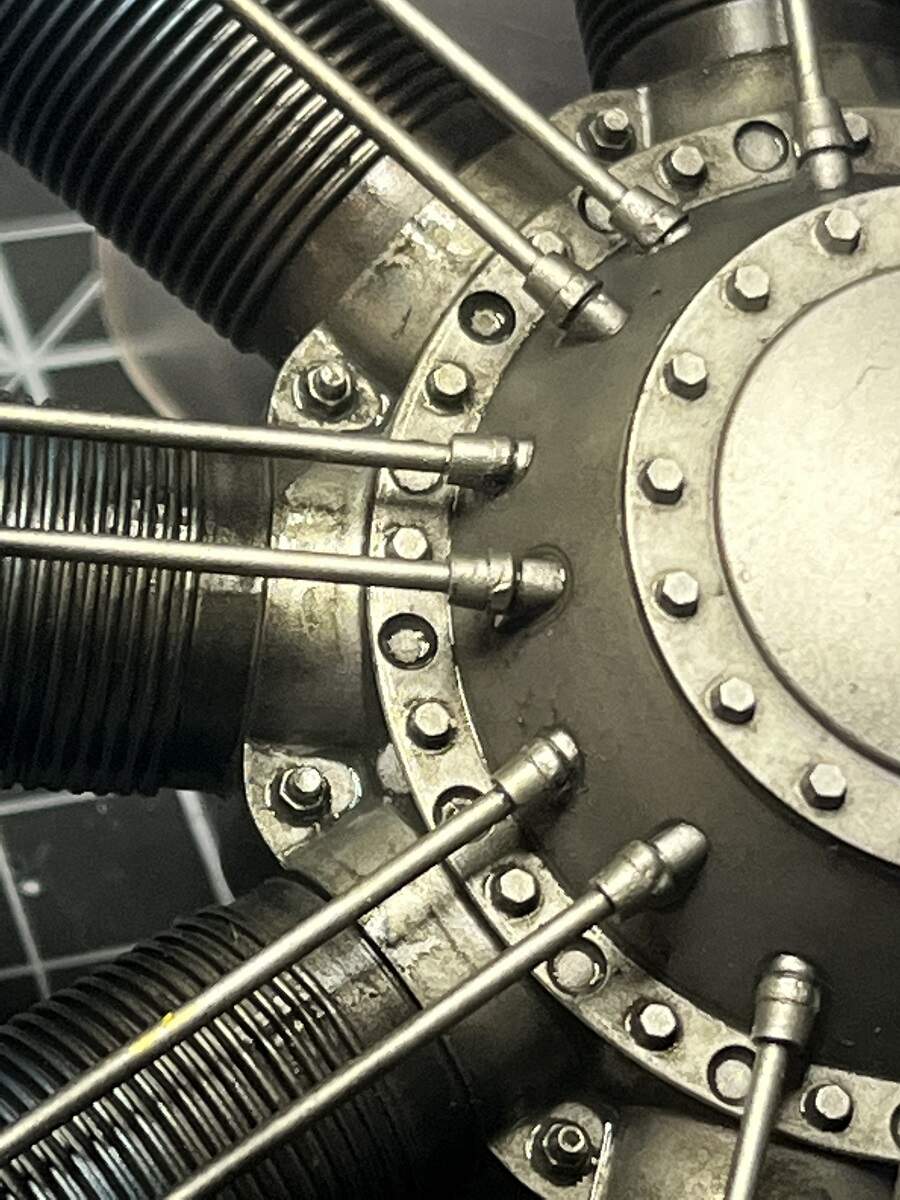
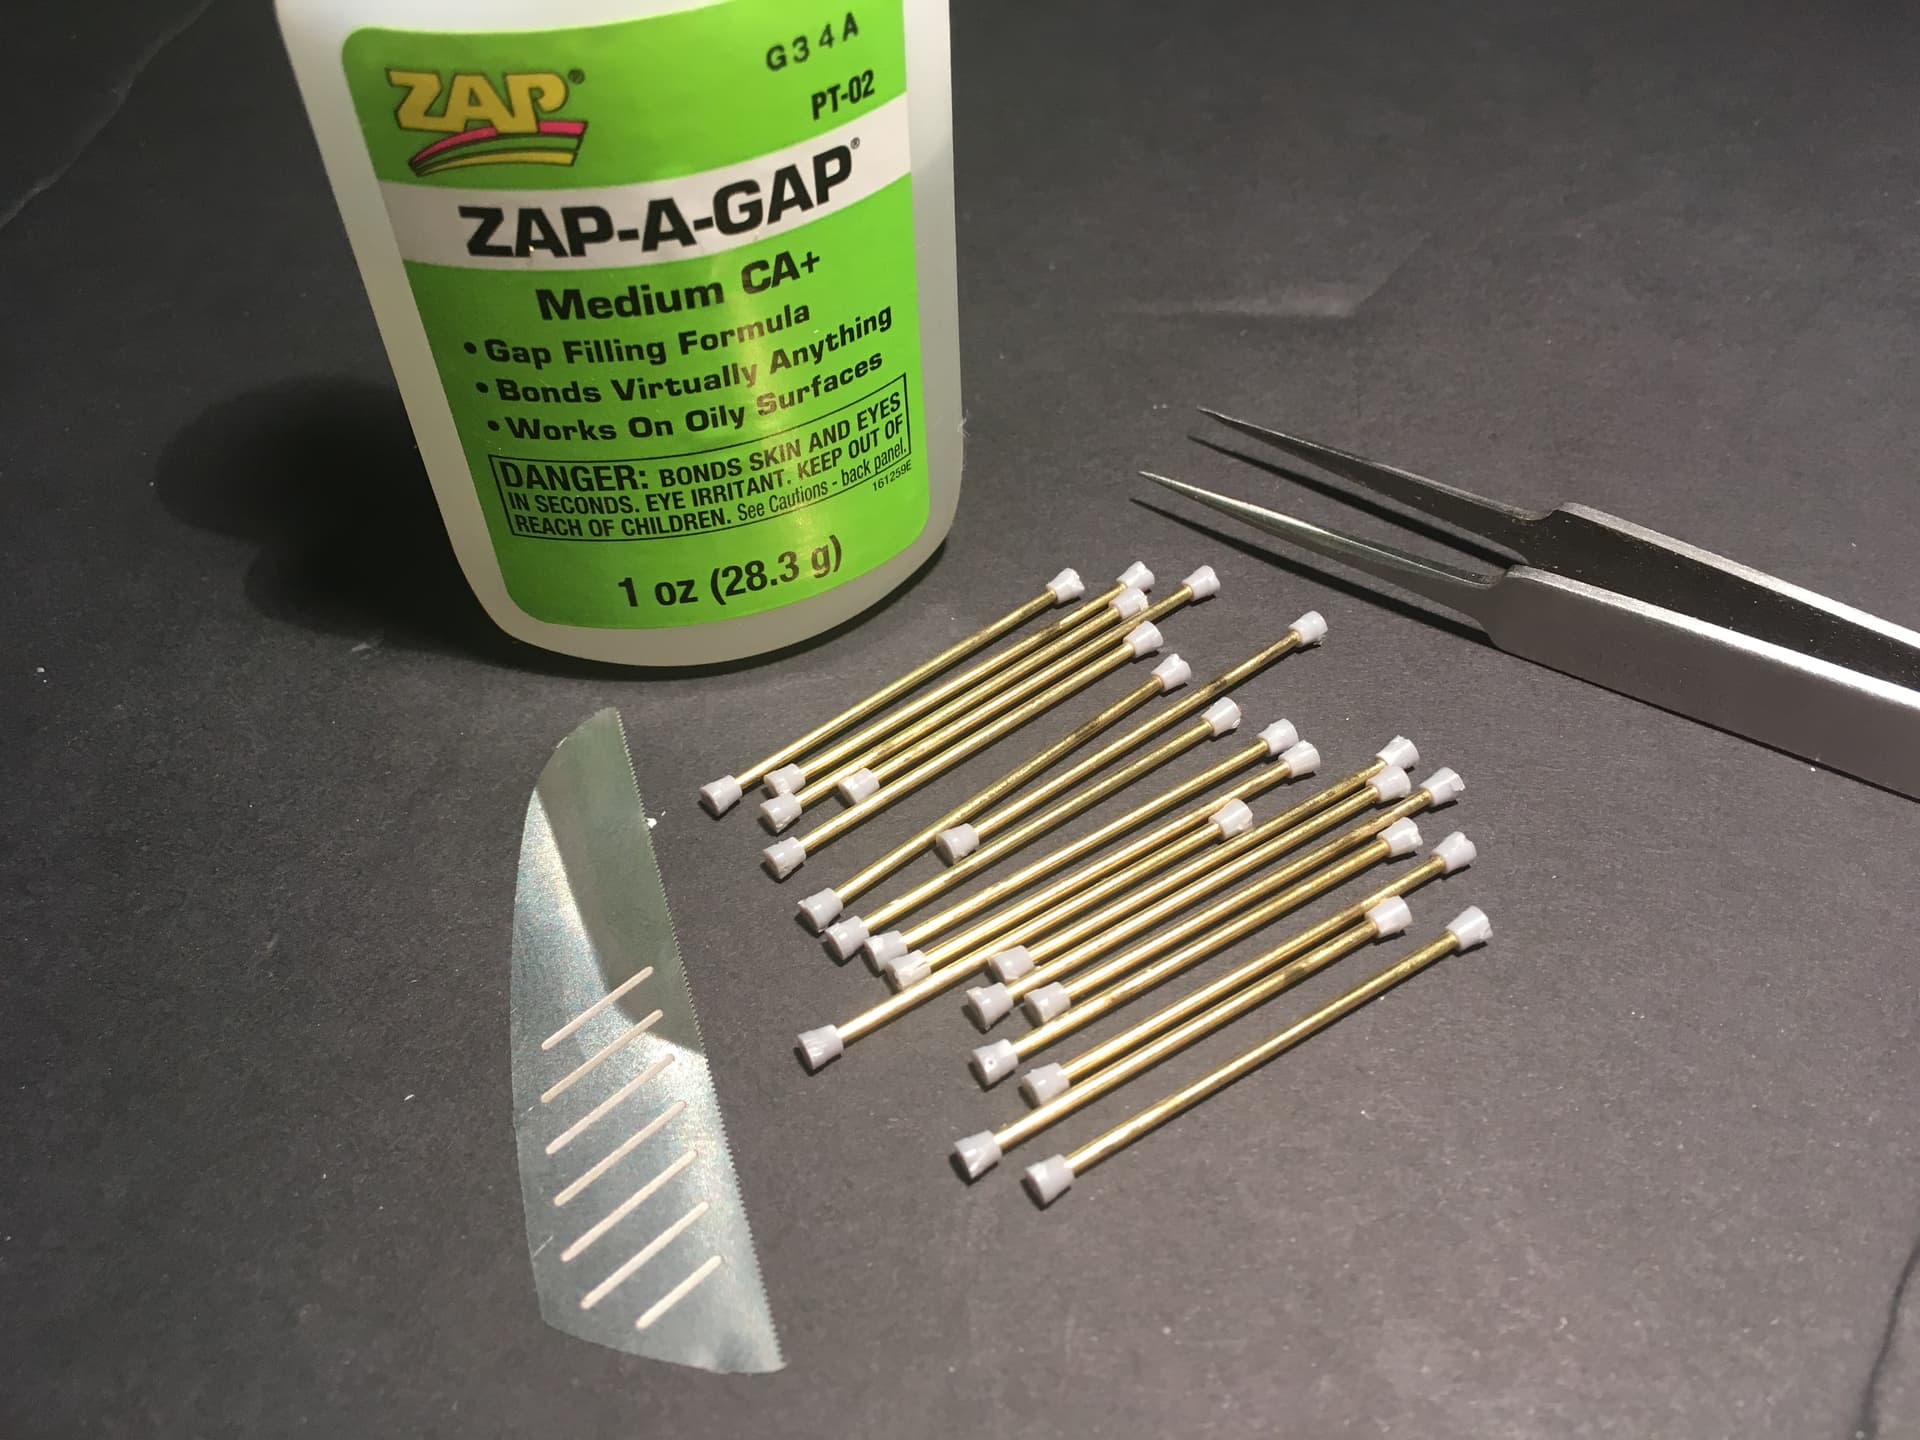
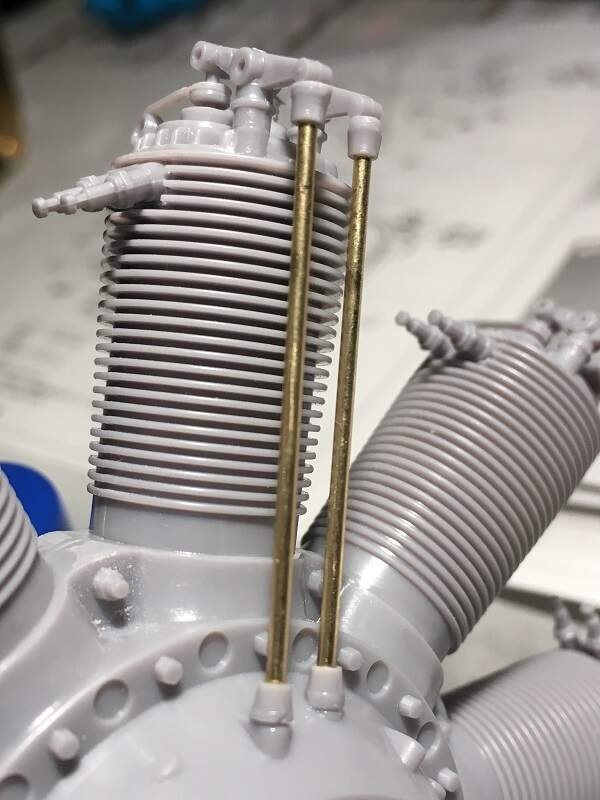
18 brass rods and 36 collars

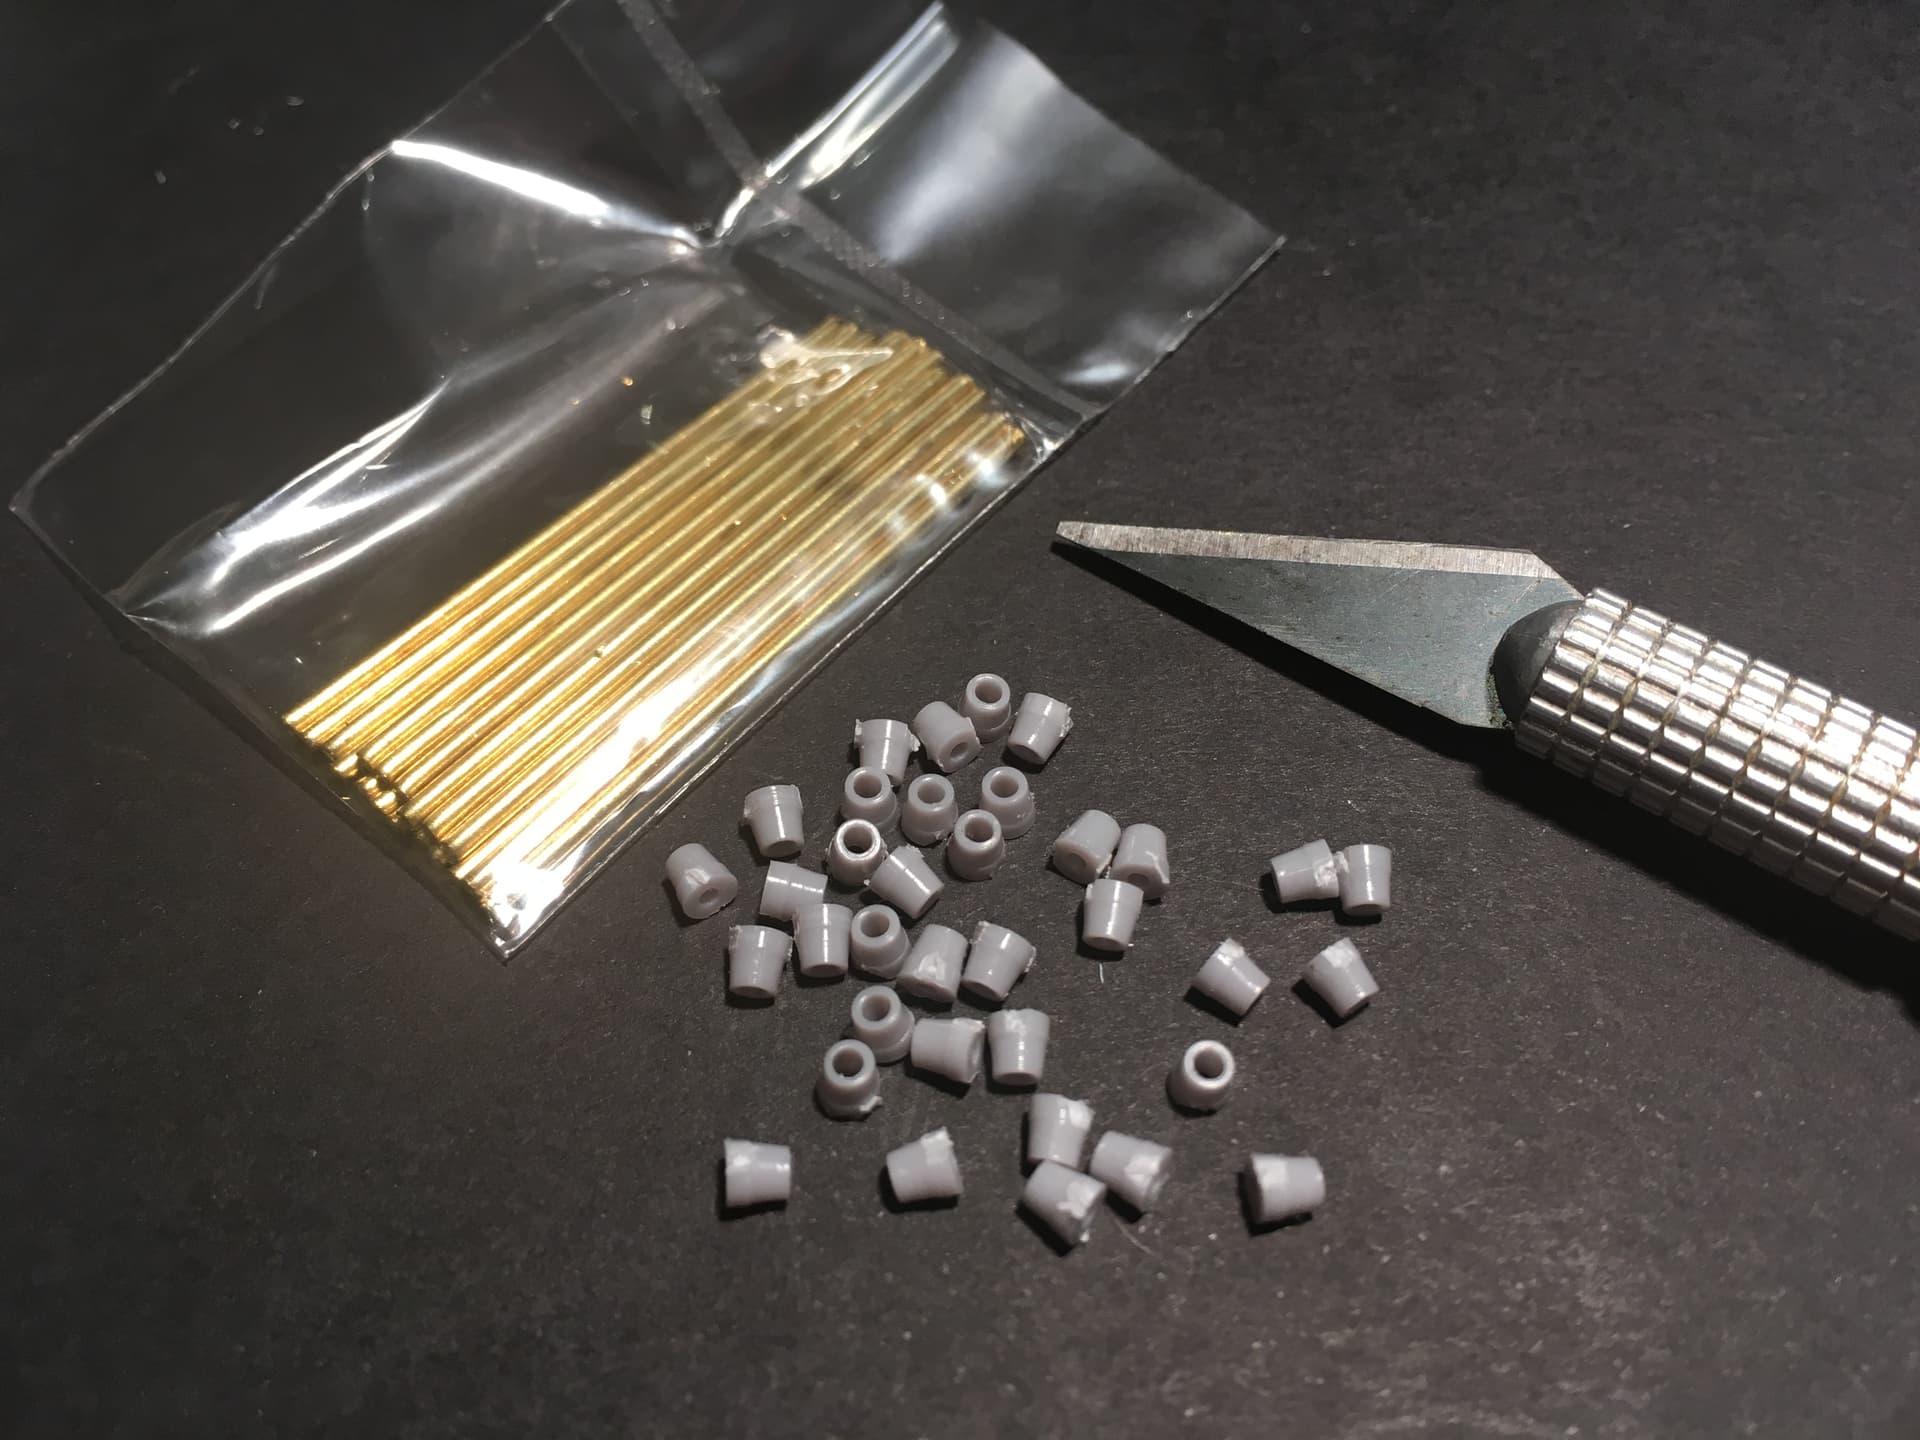
Add some CA and we have 18 push rods. Collars will be cleaned up once the CA is cured fully.

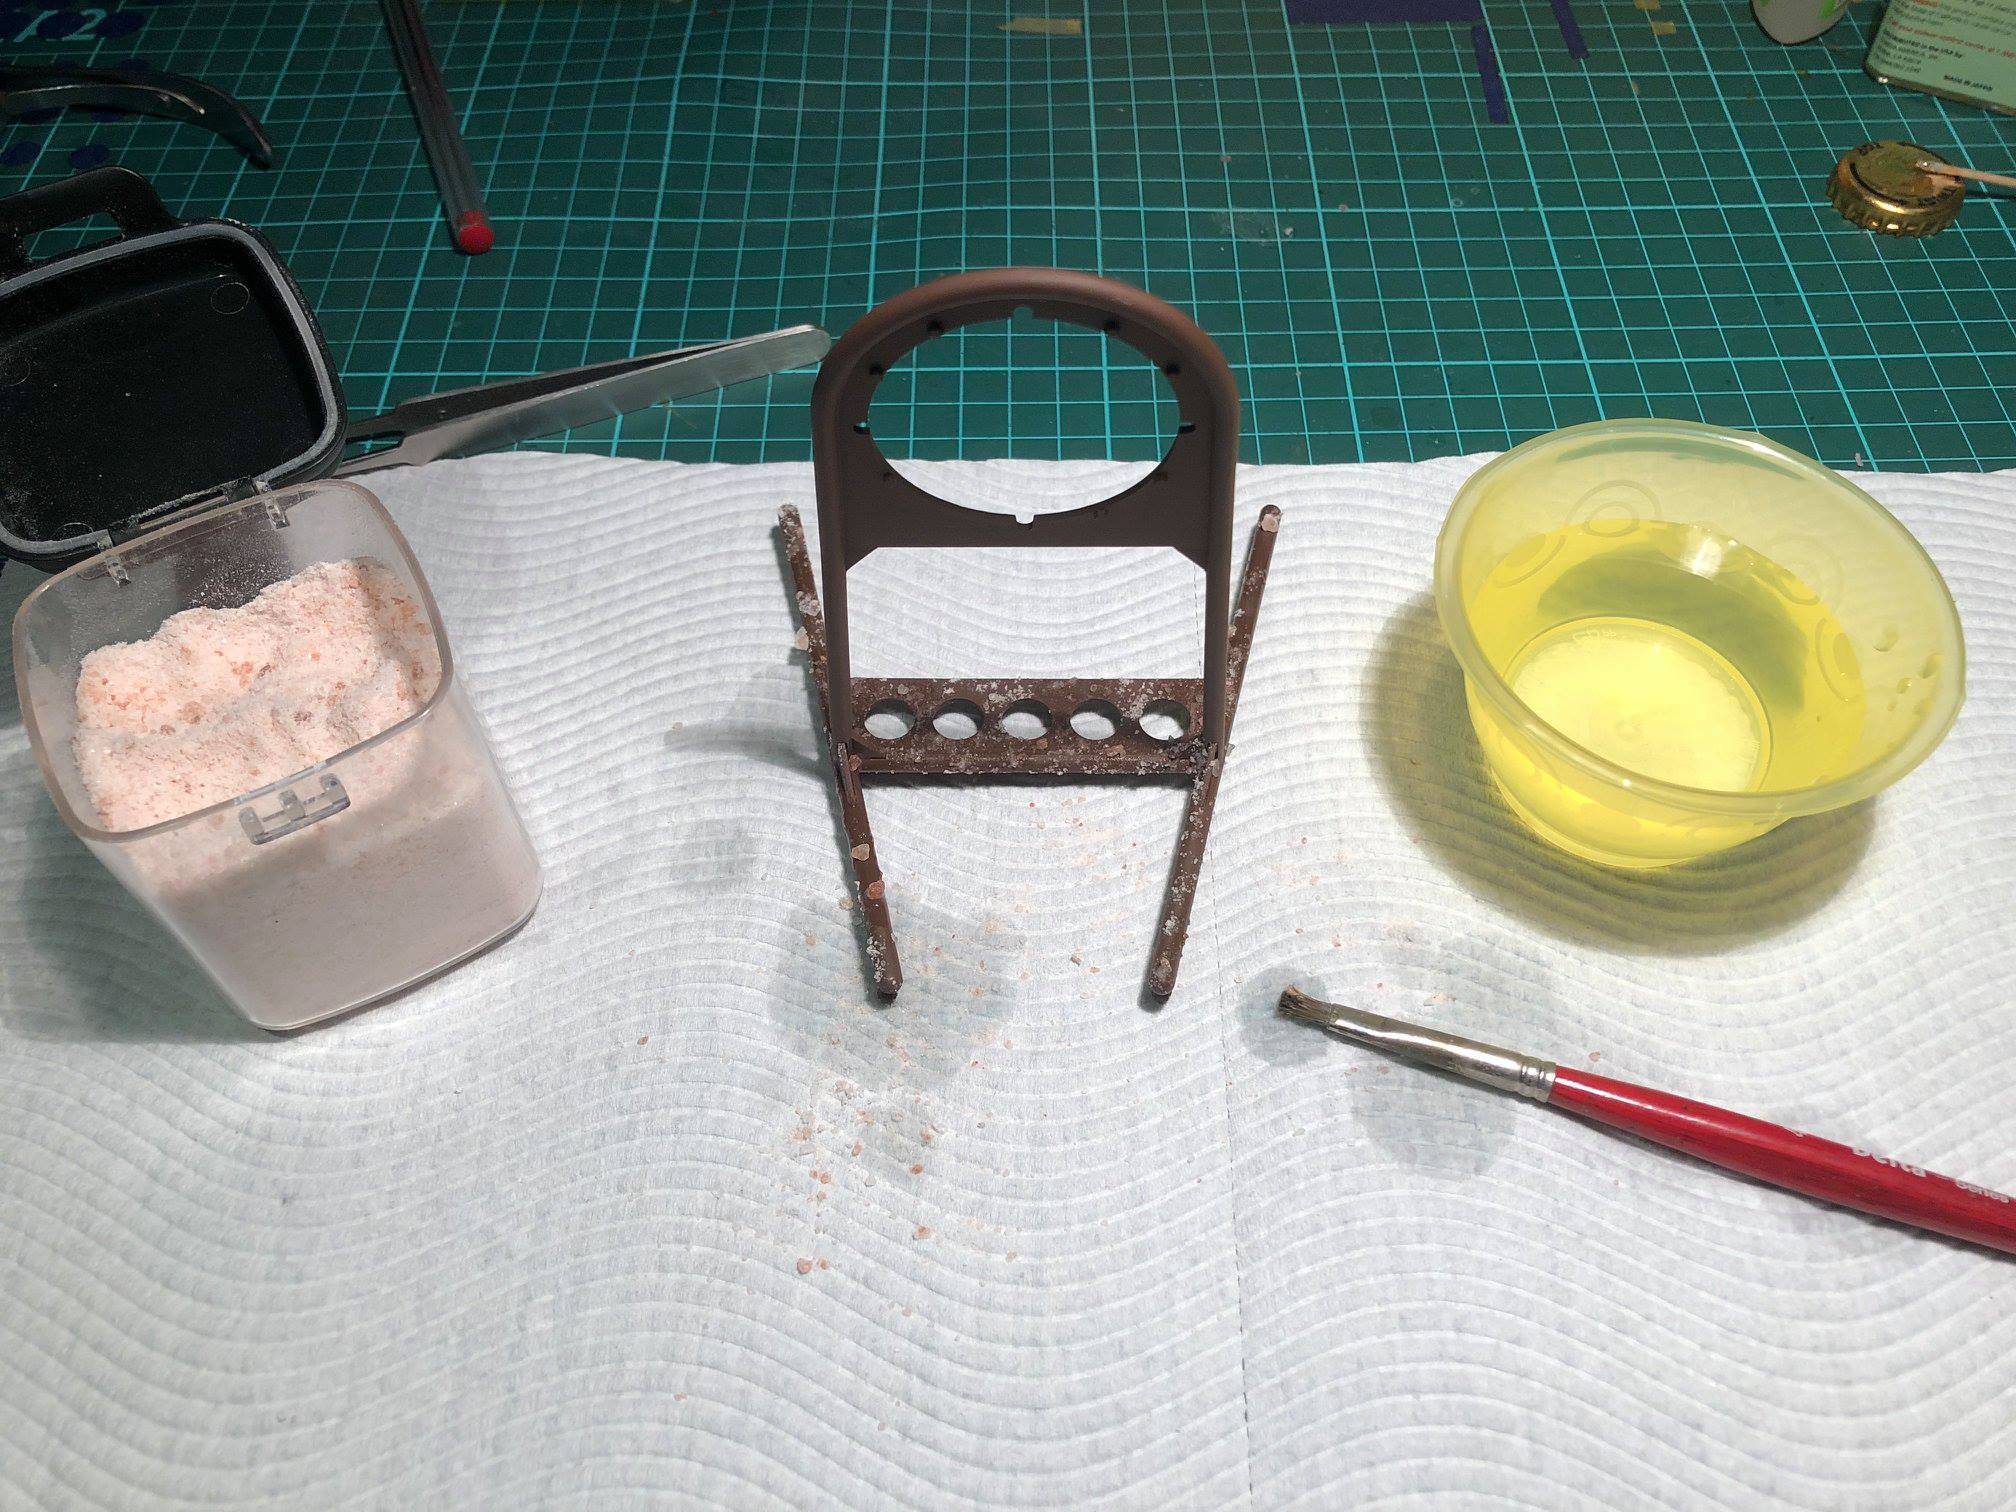
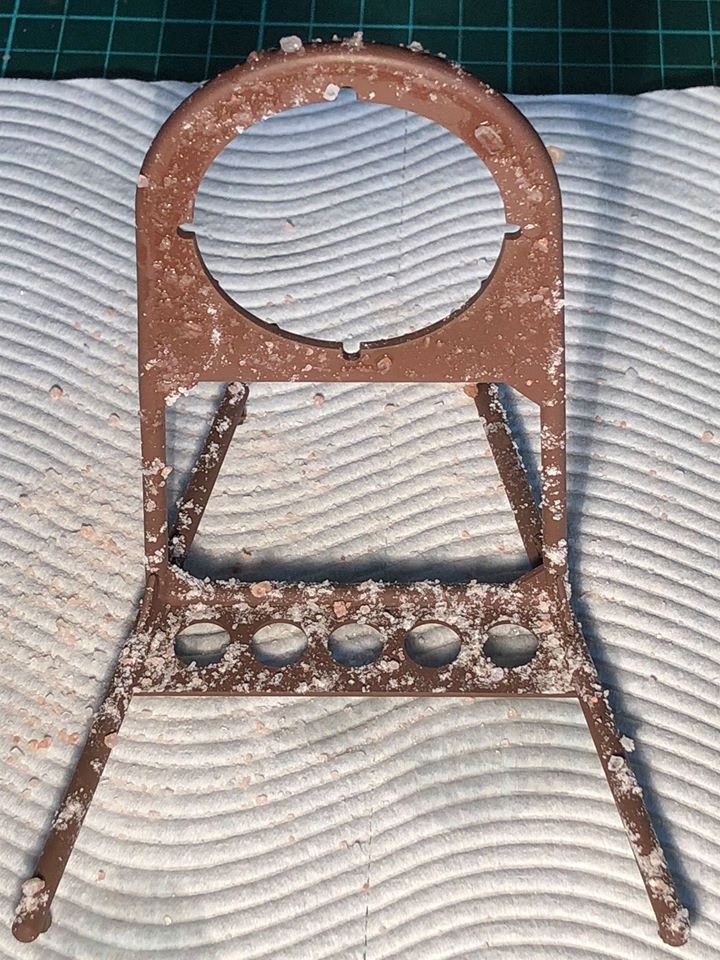
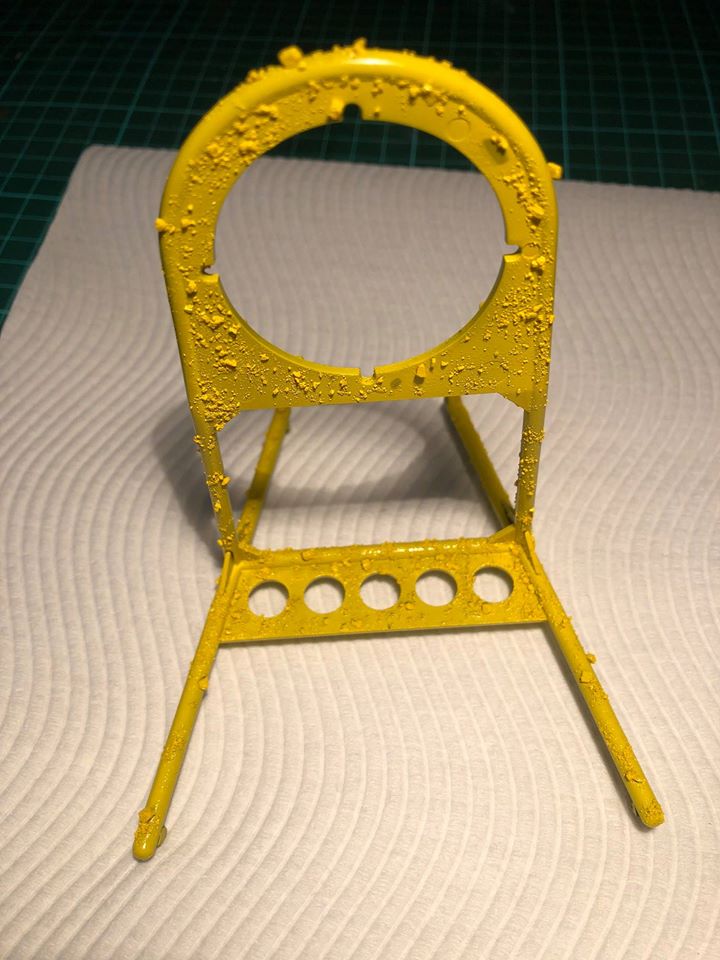
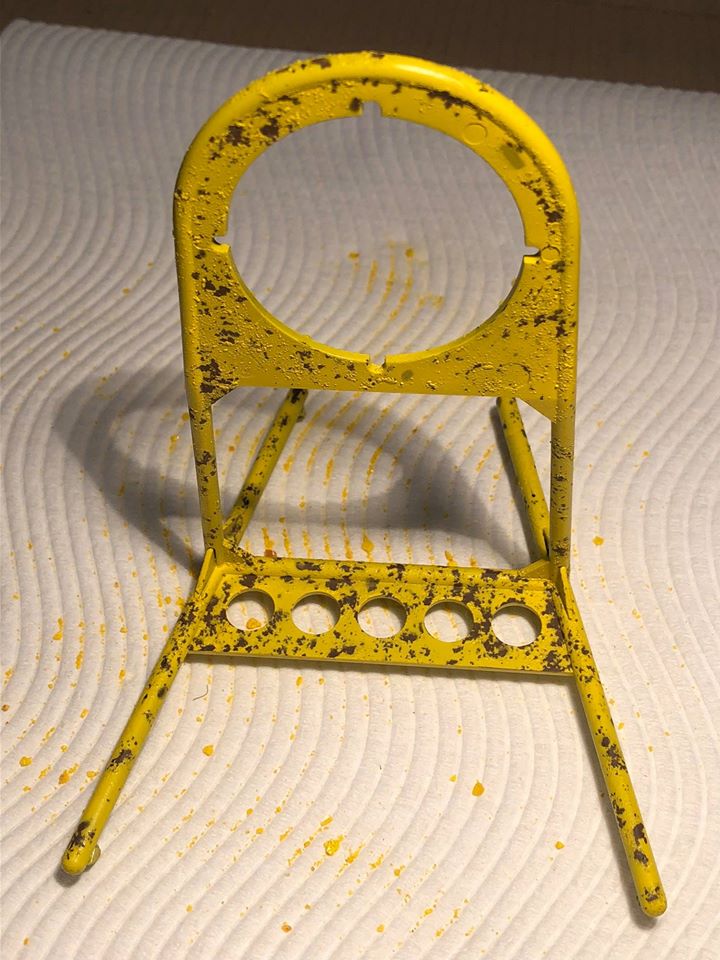
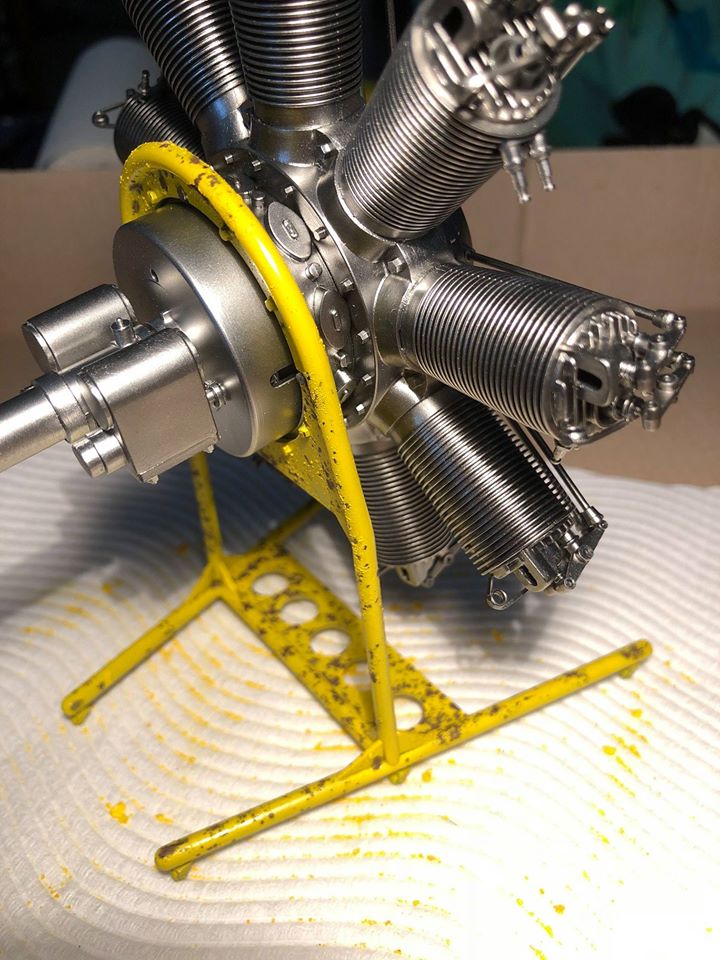
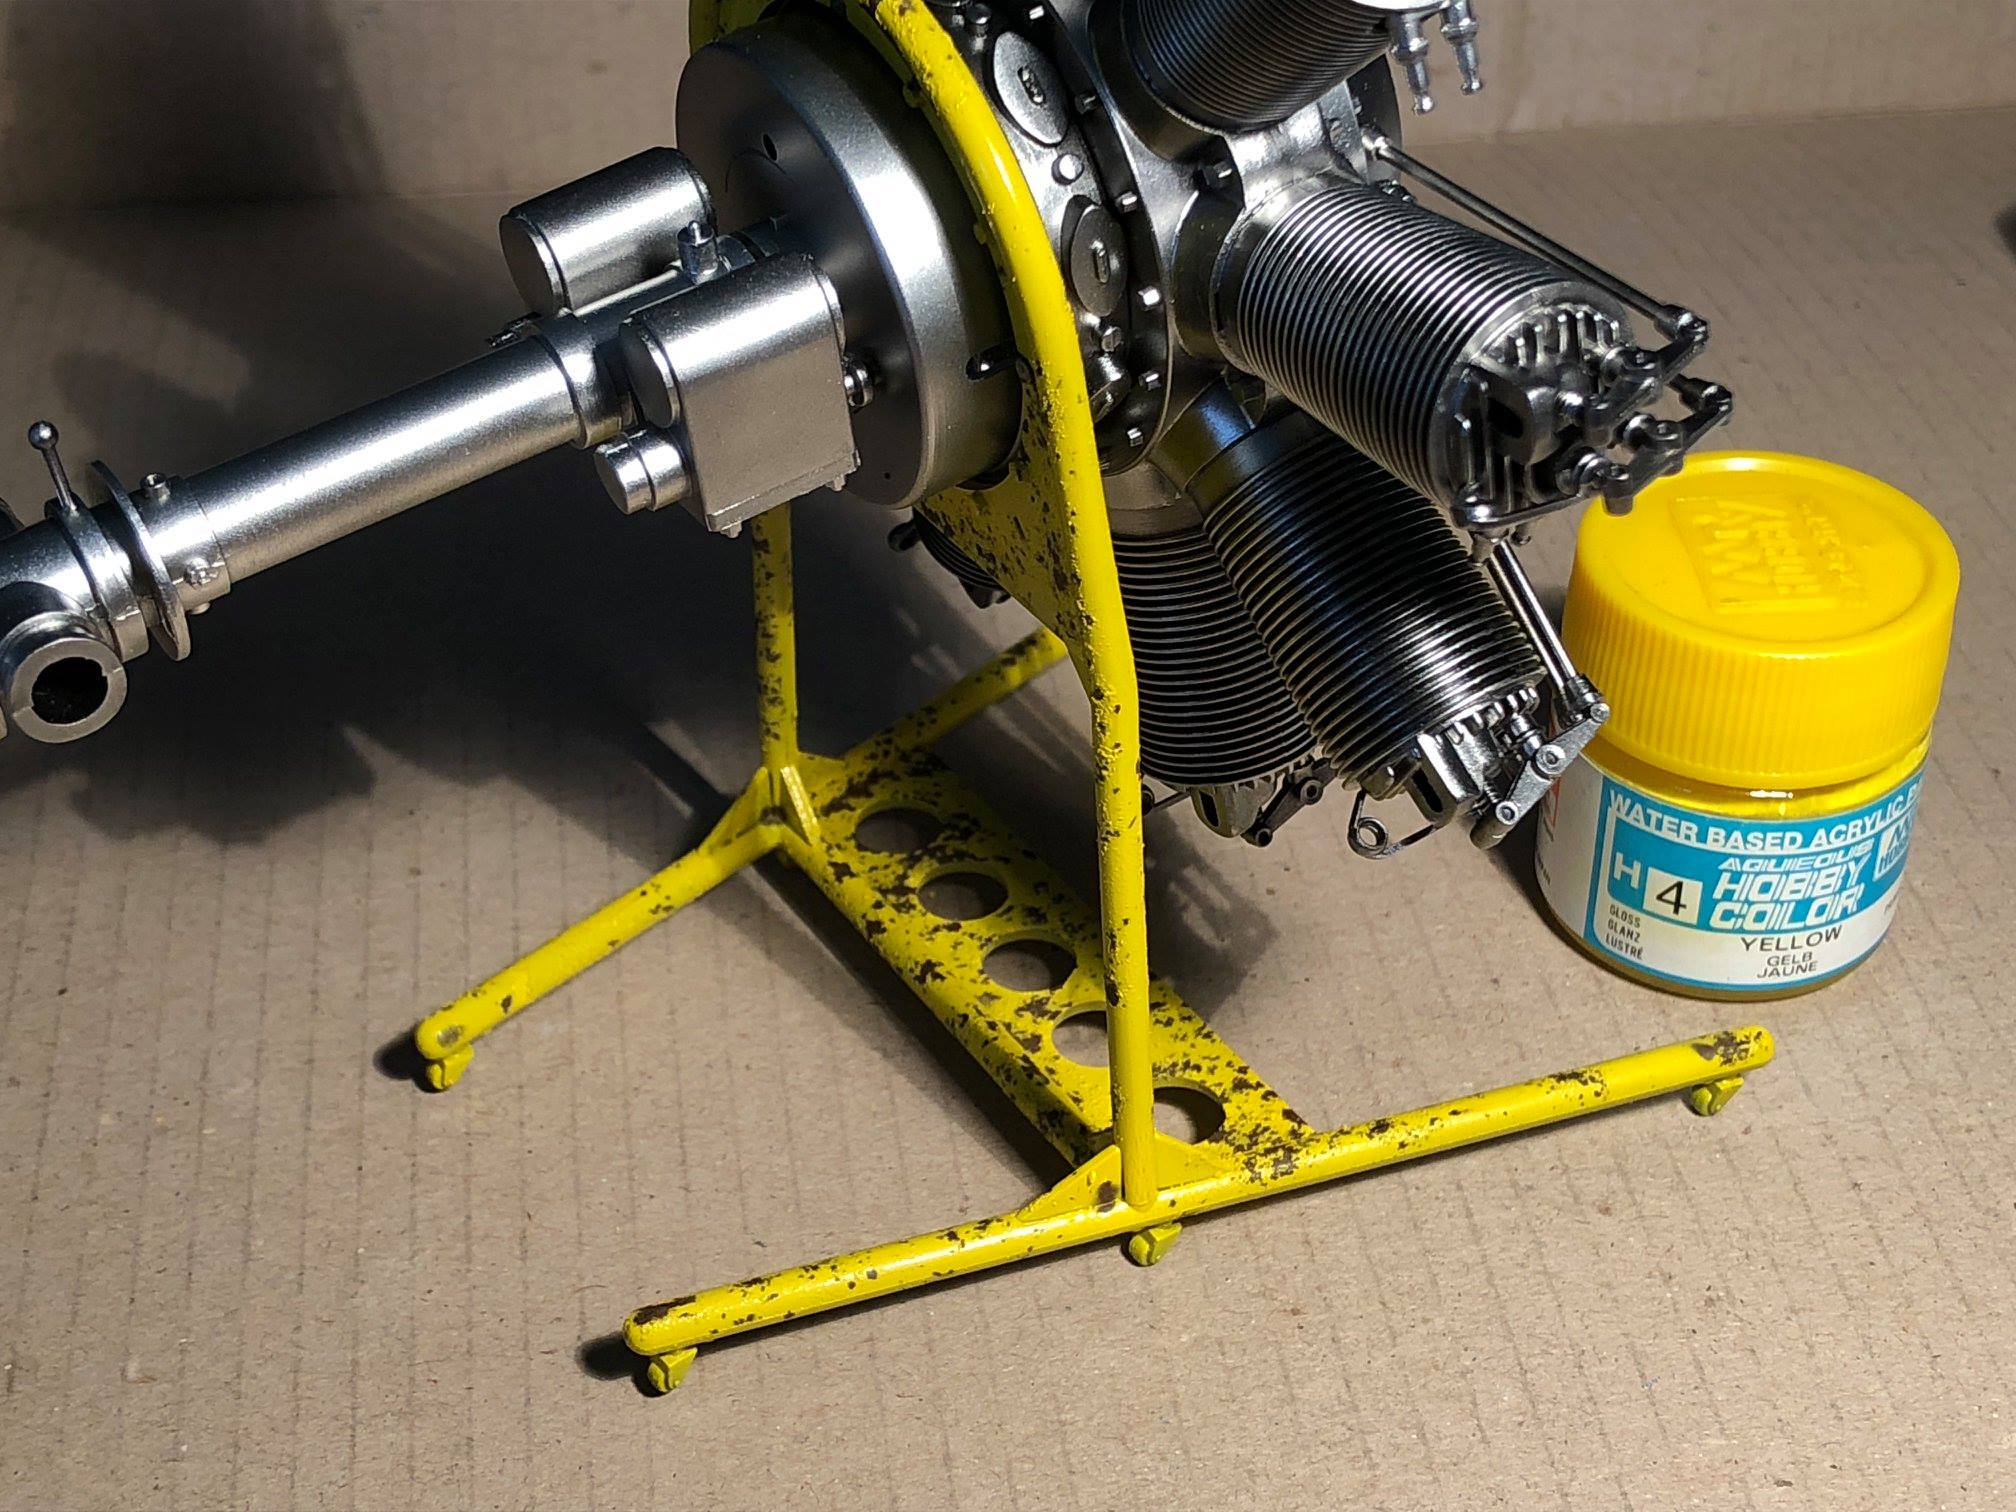
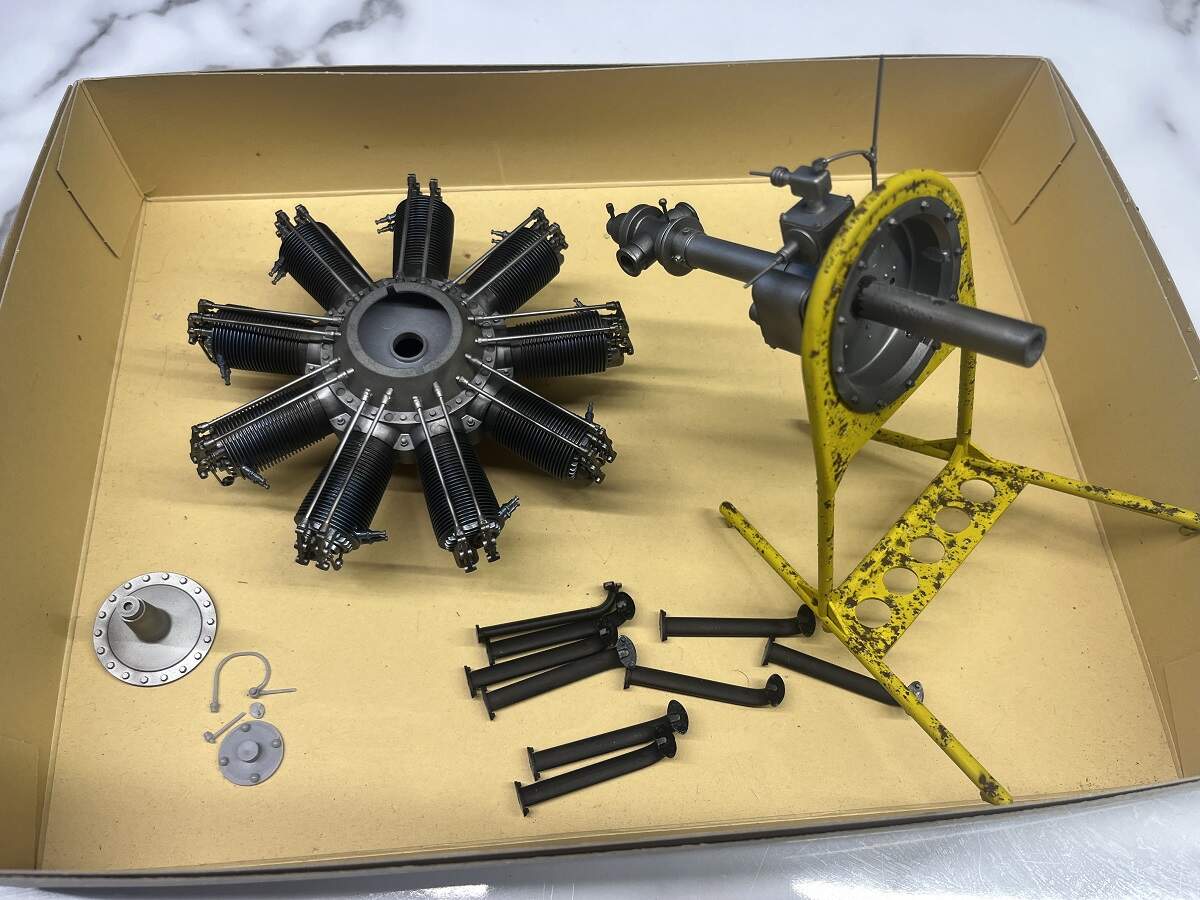
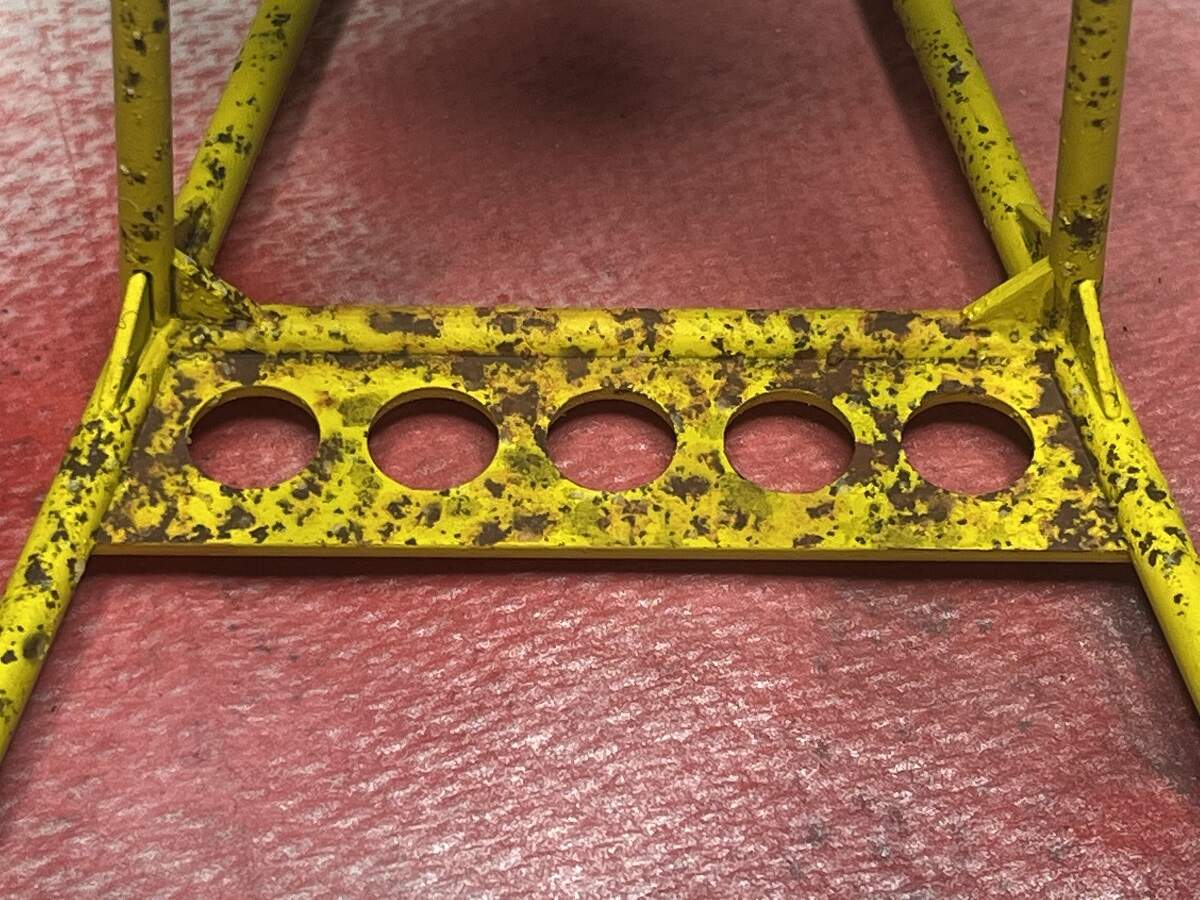
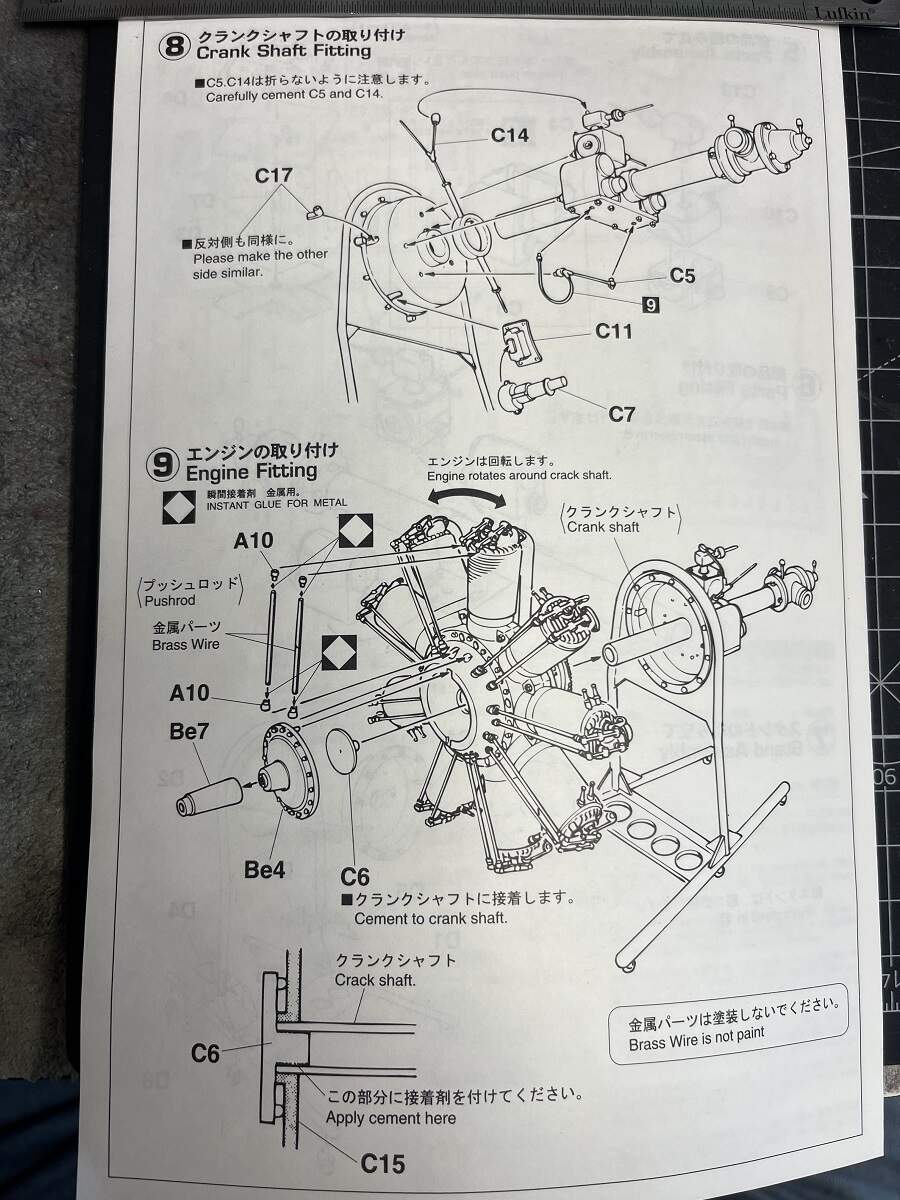
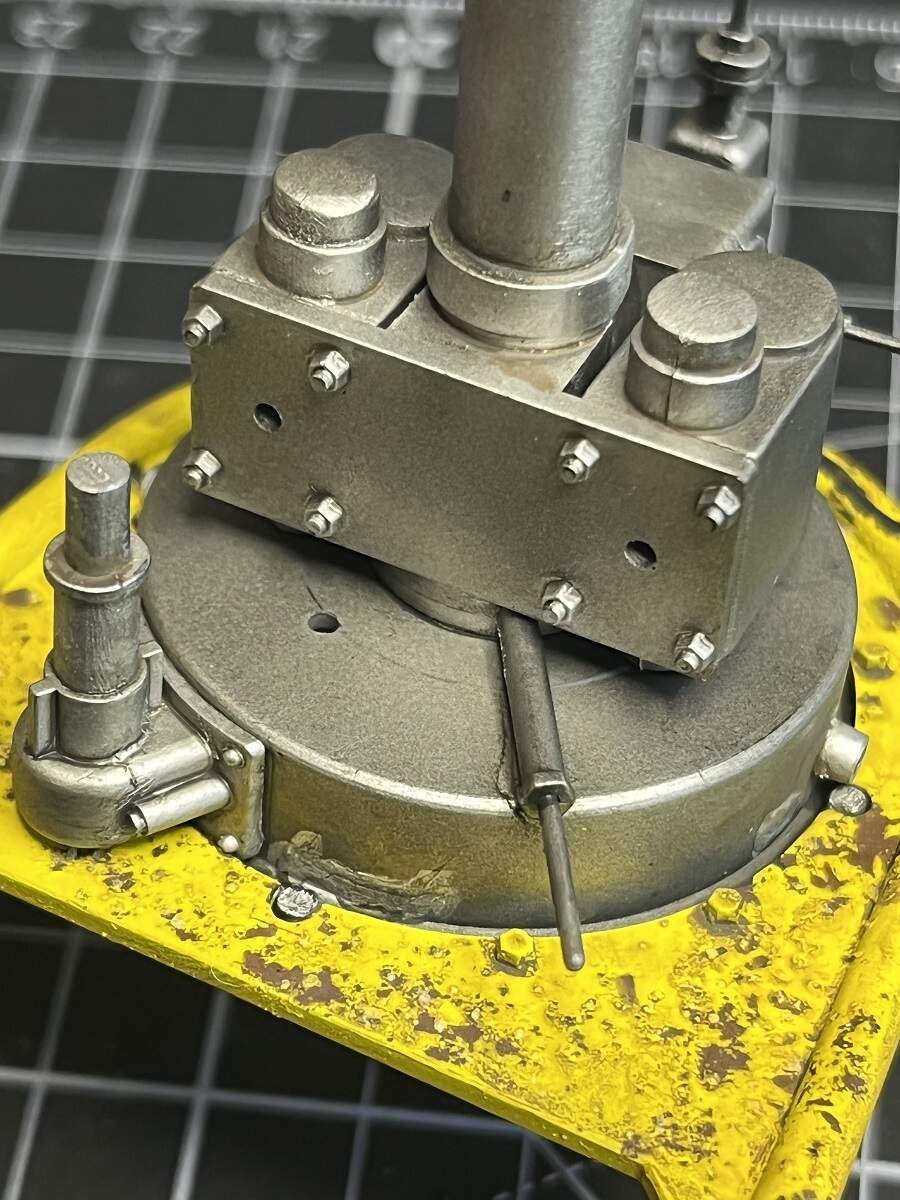
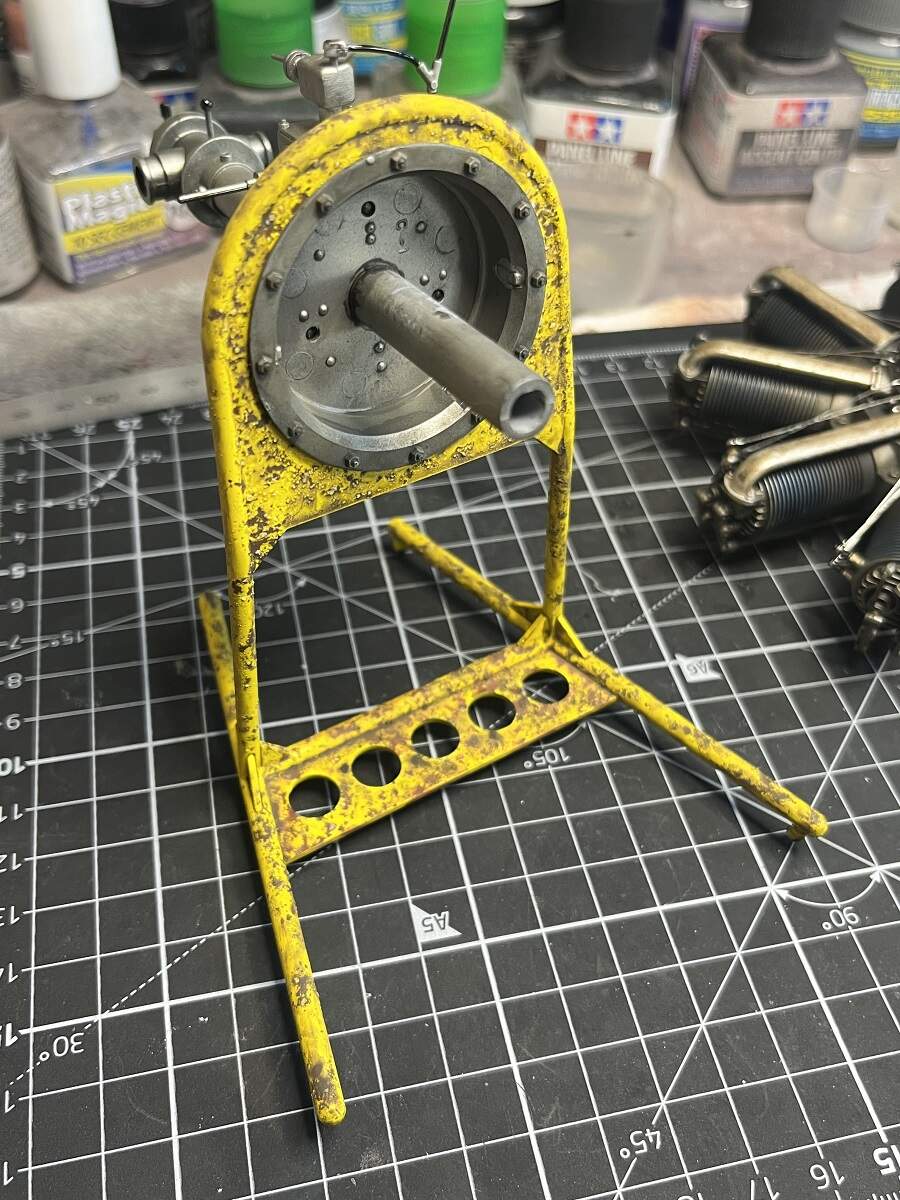
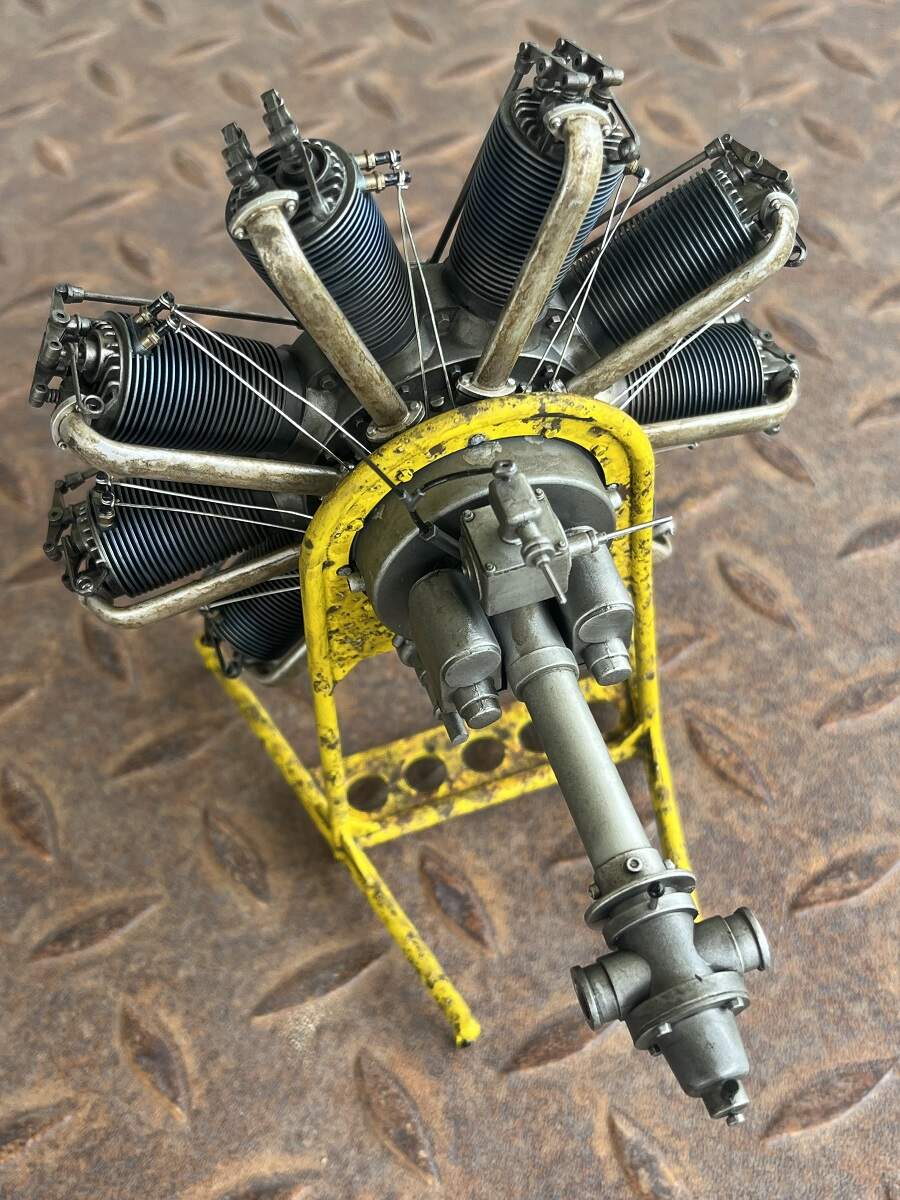
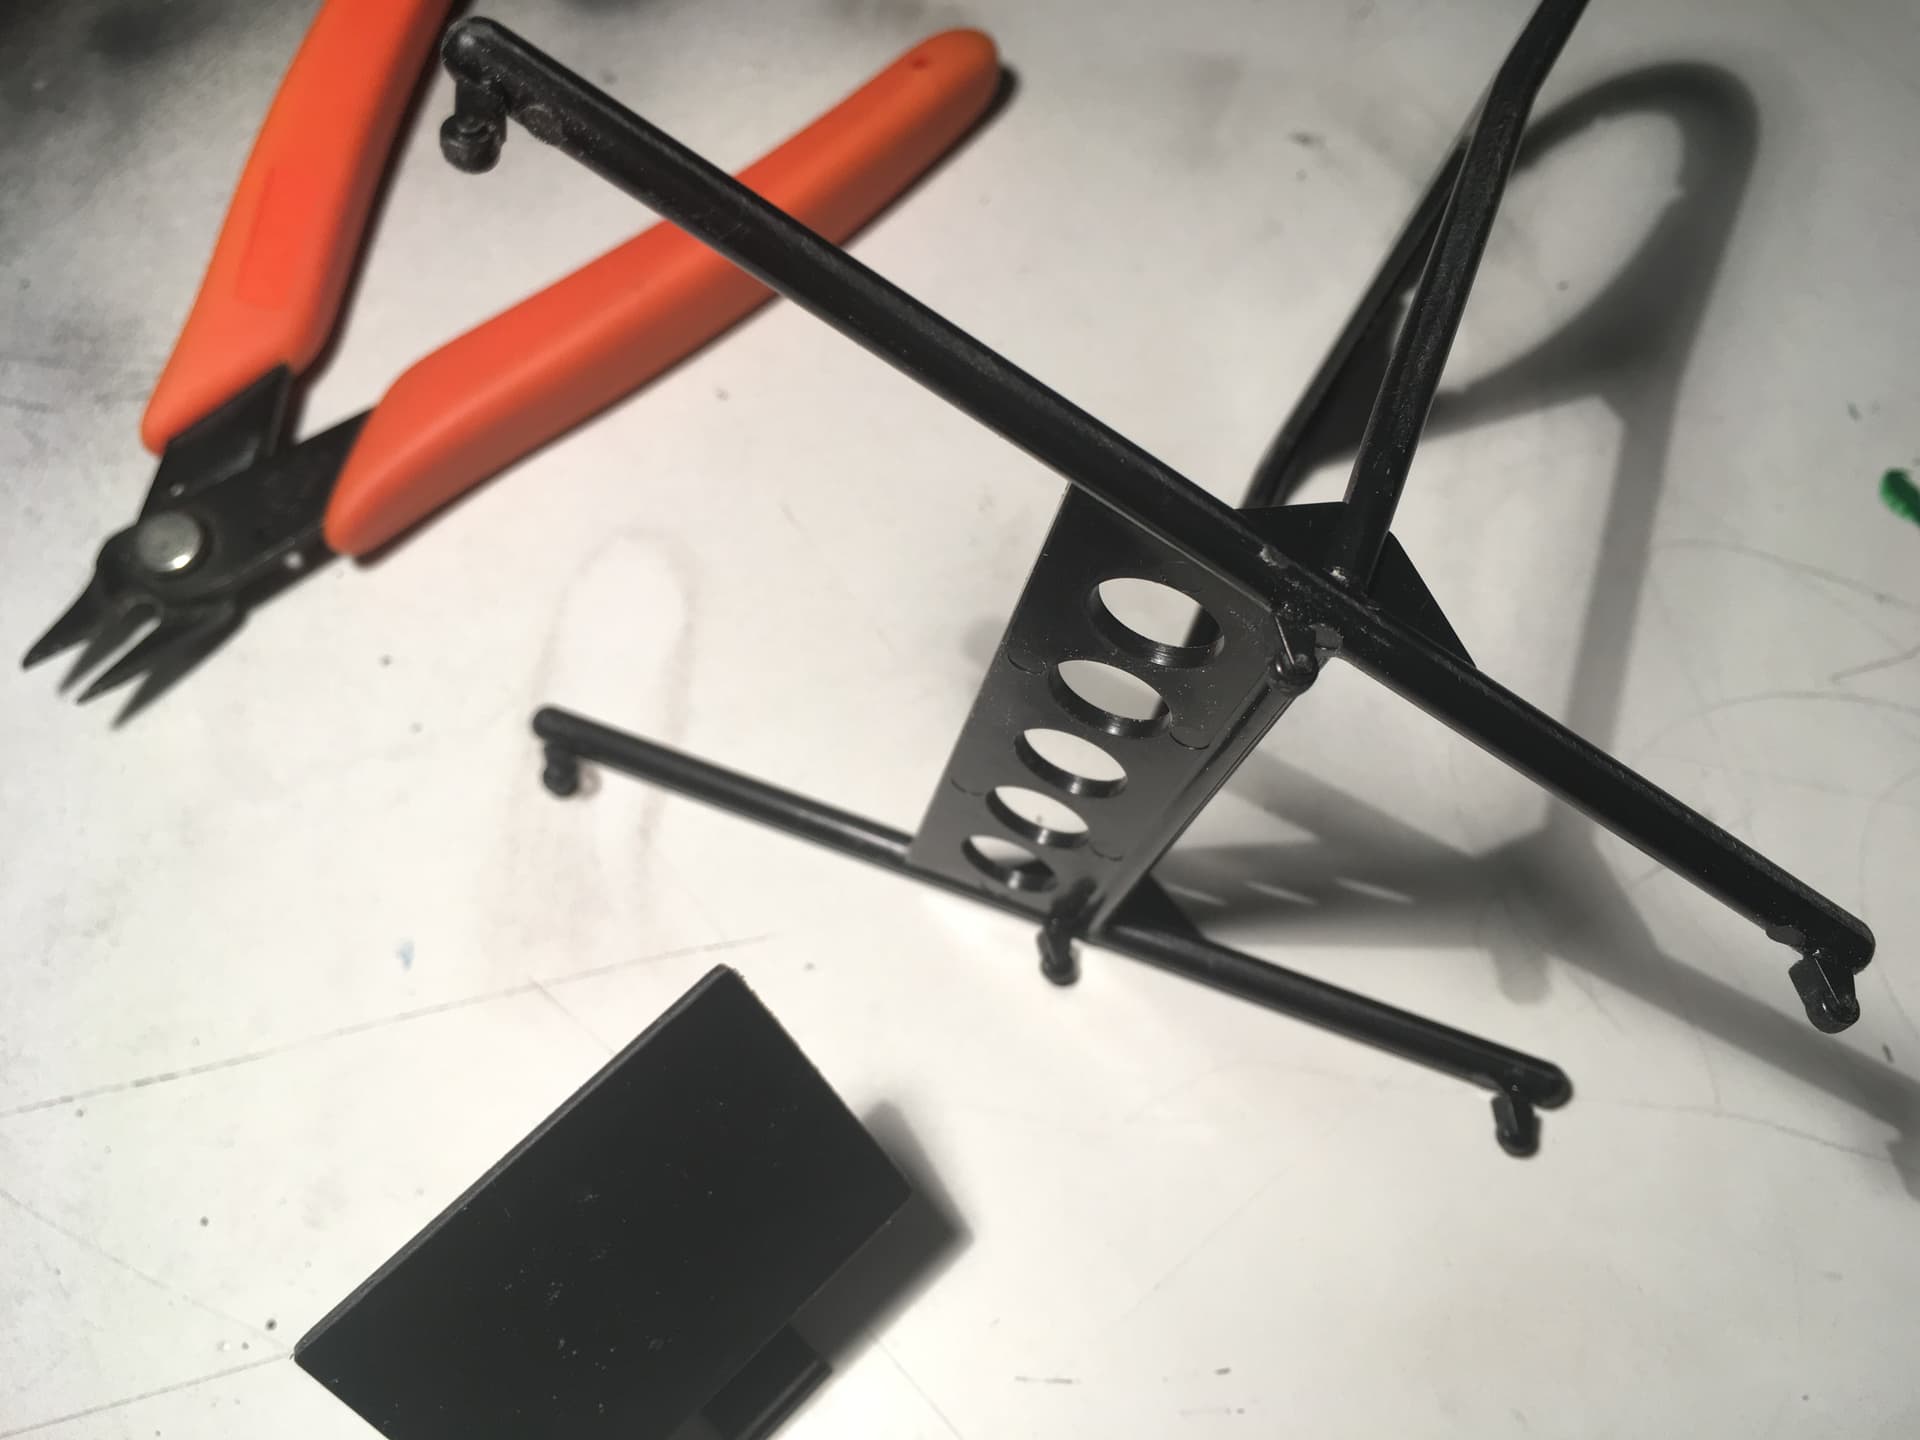
Engine and Label stands assembled.

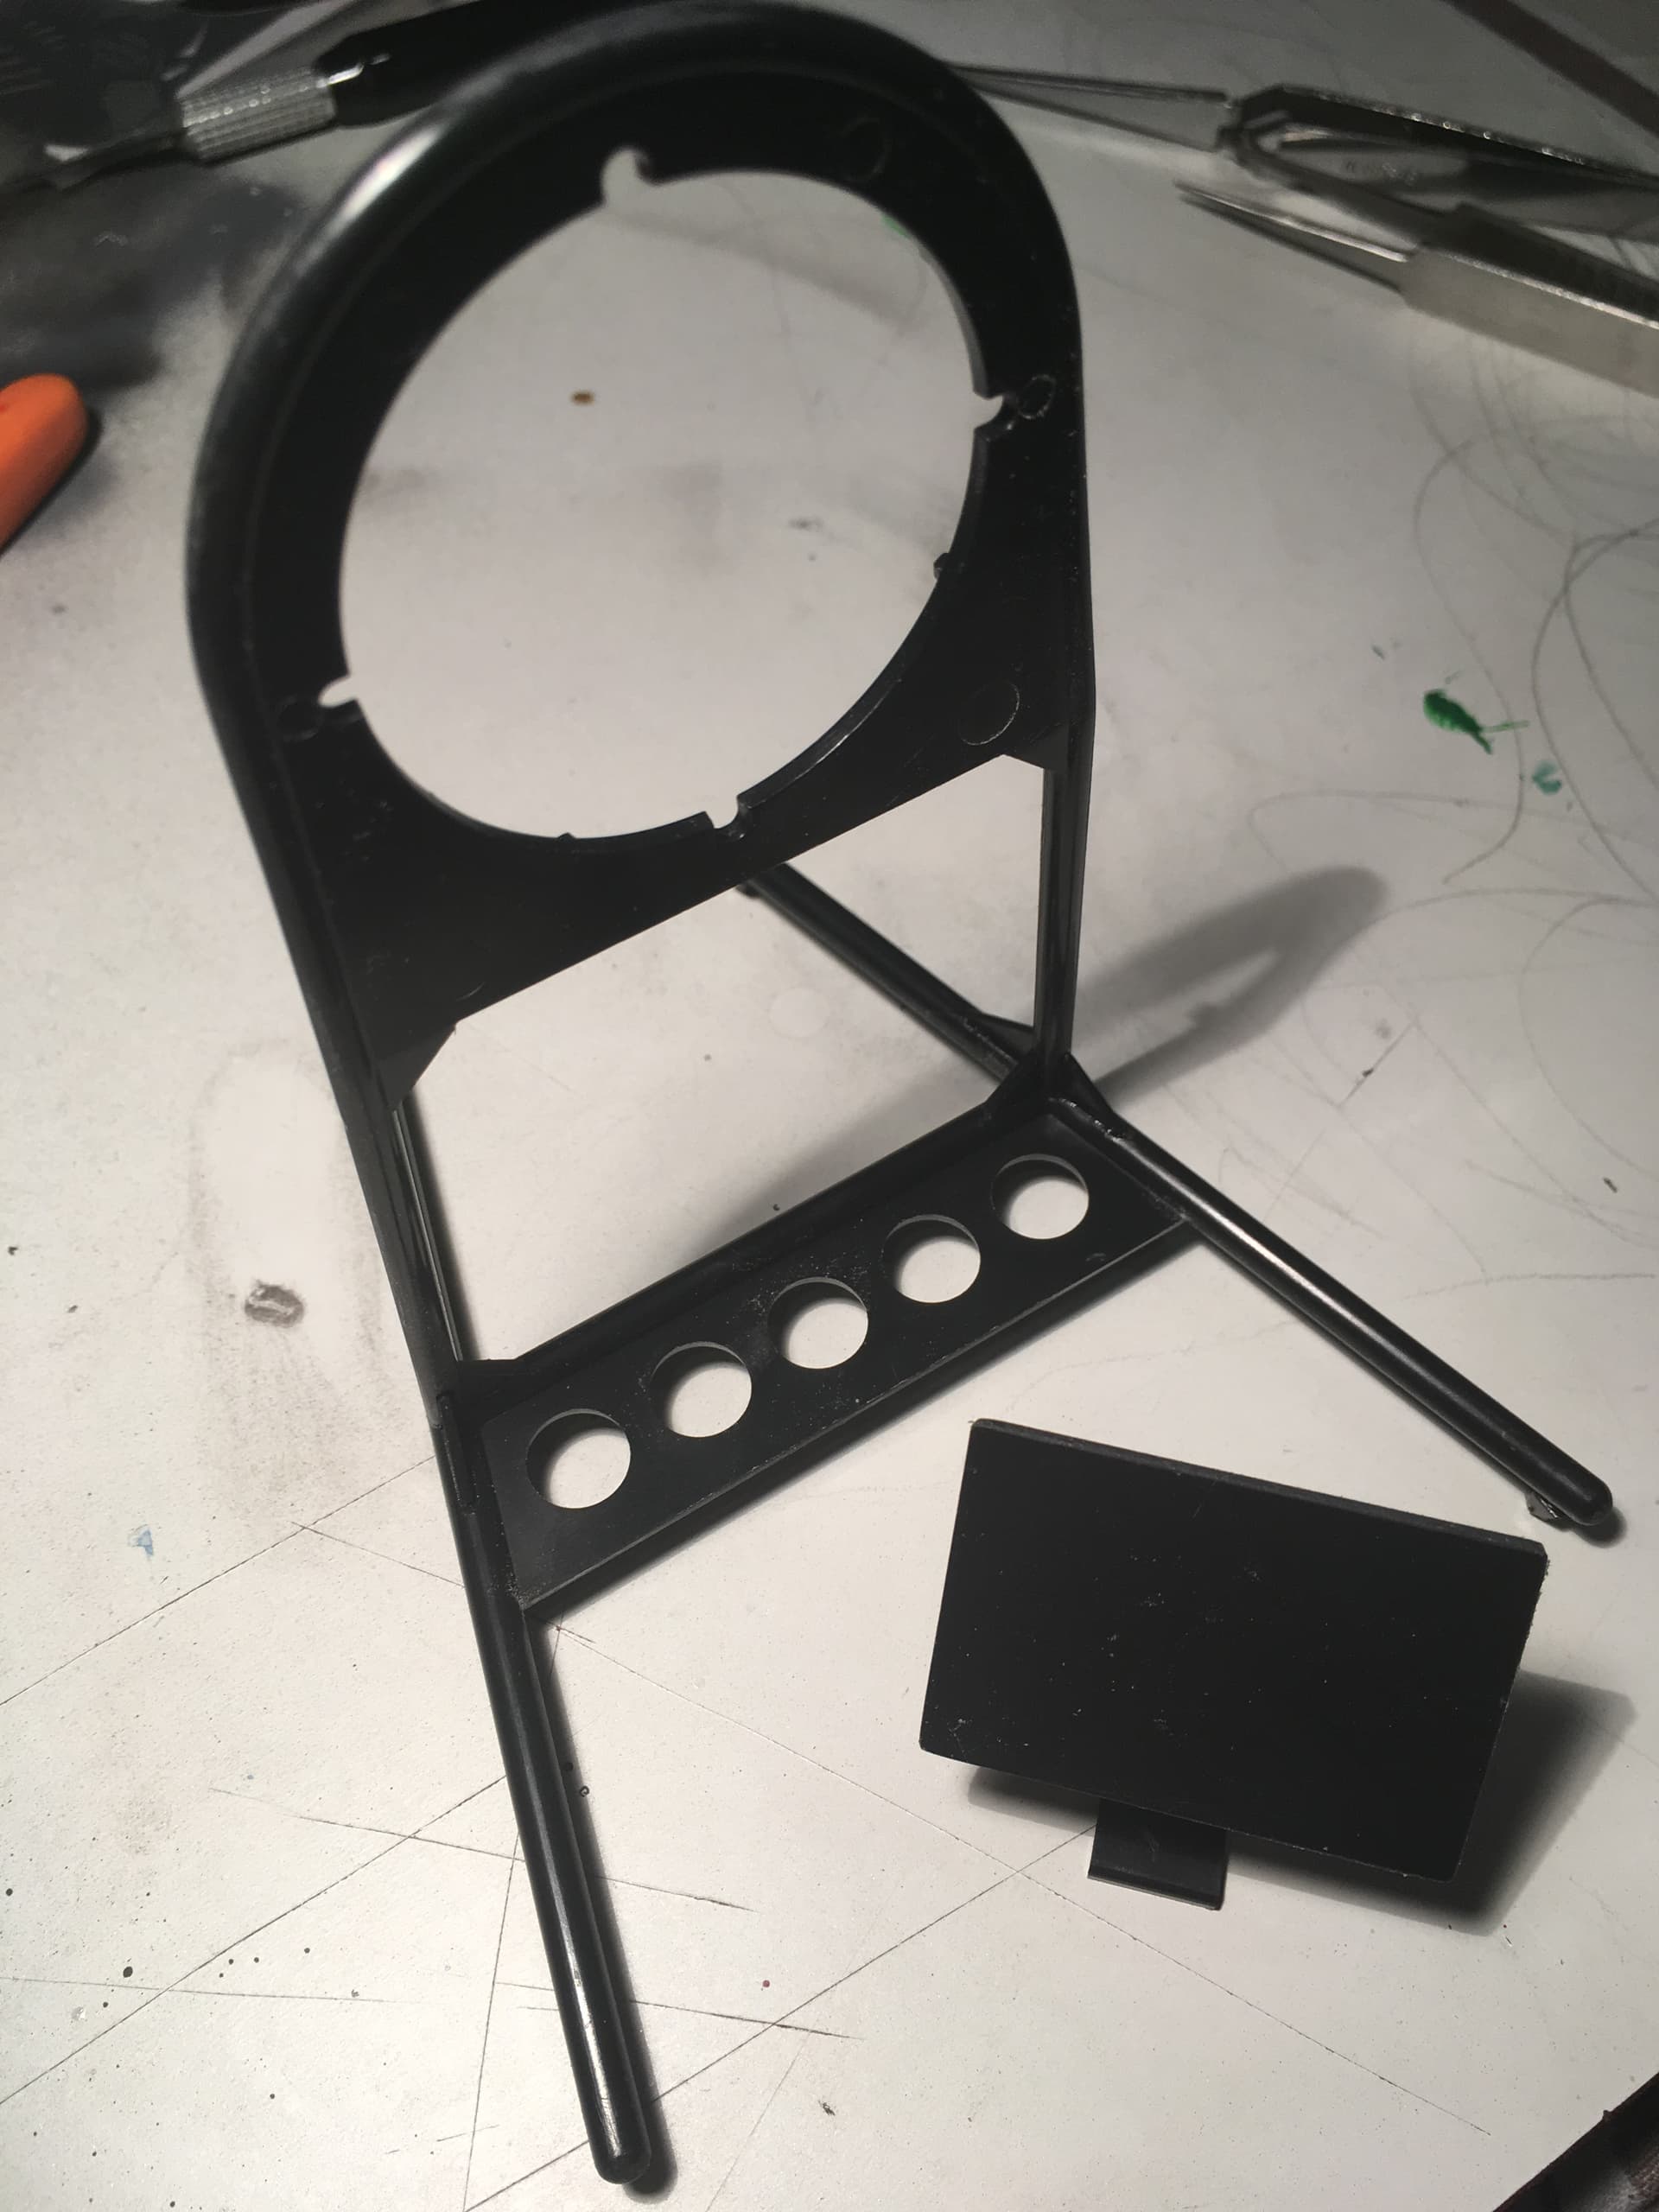
Detail on the engine stand right down to the casters is great!

Found a small error in the instructions, in step 7 parts D4 and D5 need to be reversed, they are slightly different sizes and the channel in the frame base is a very neat fit specific to the correct part.

Tuesday November 21, 2017

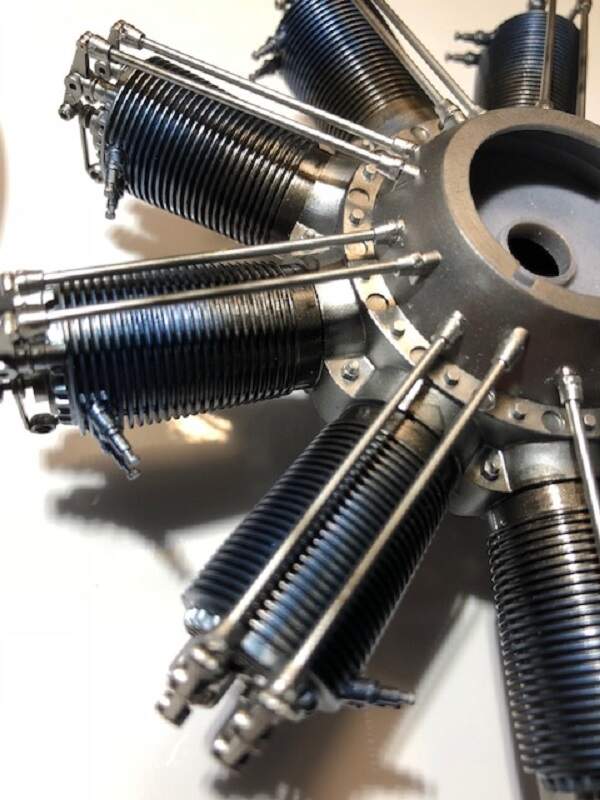
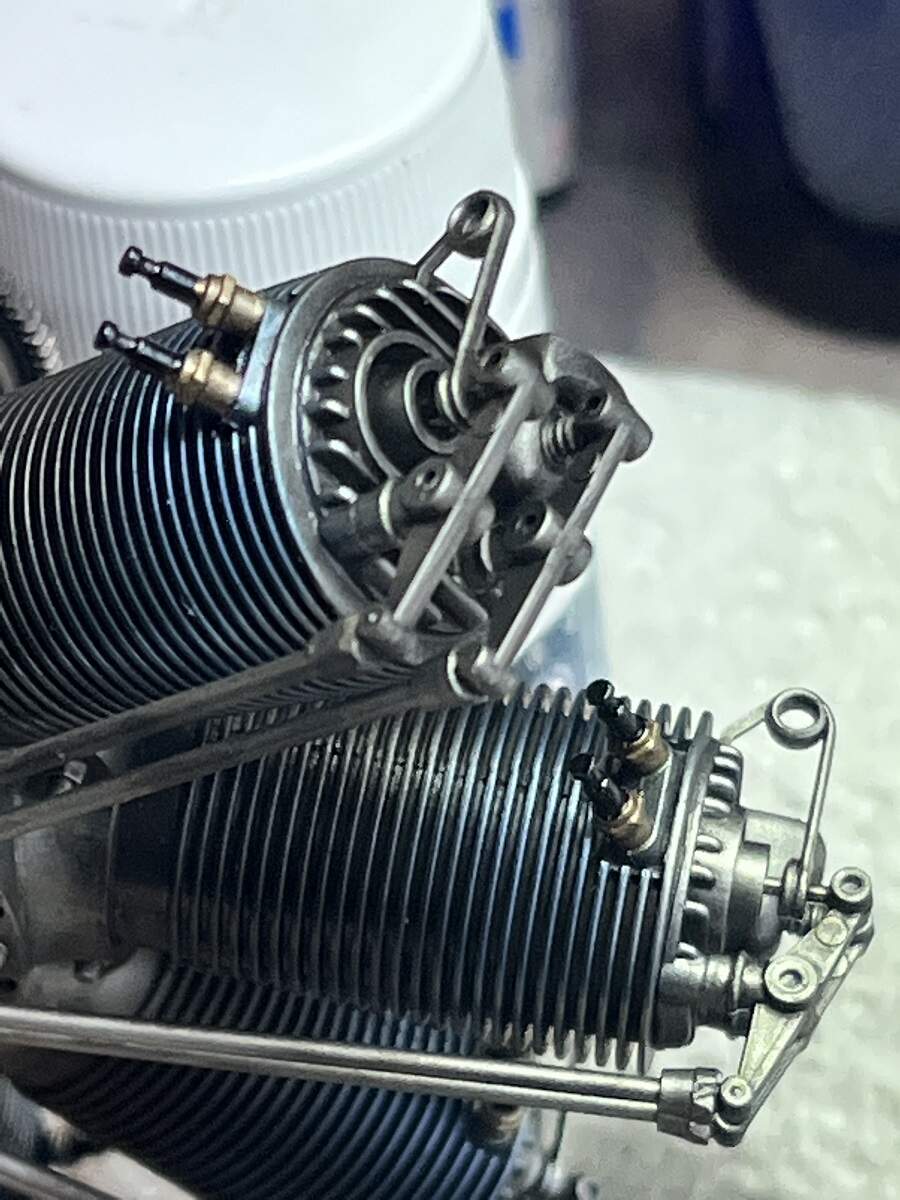
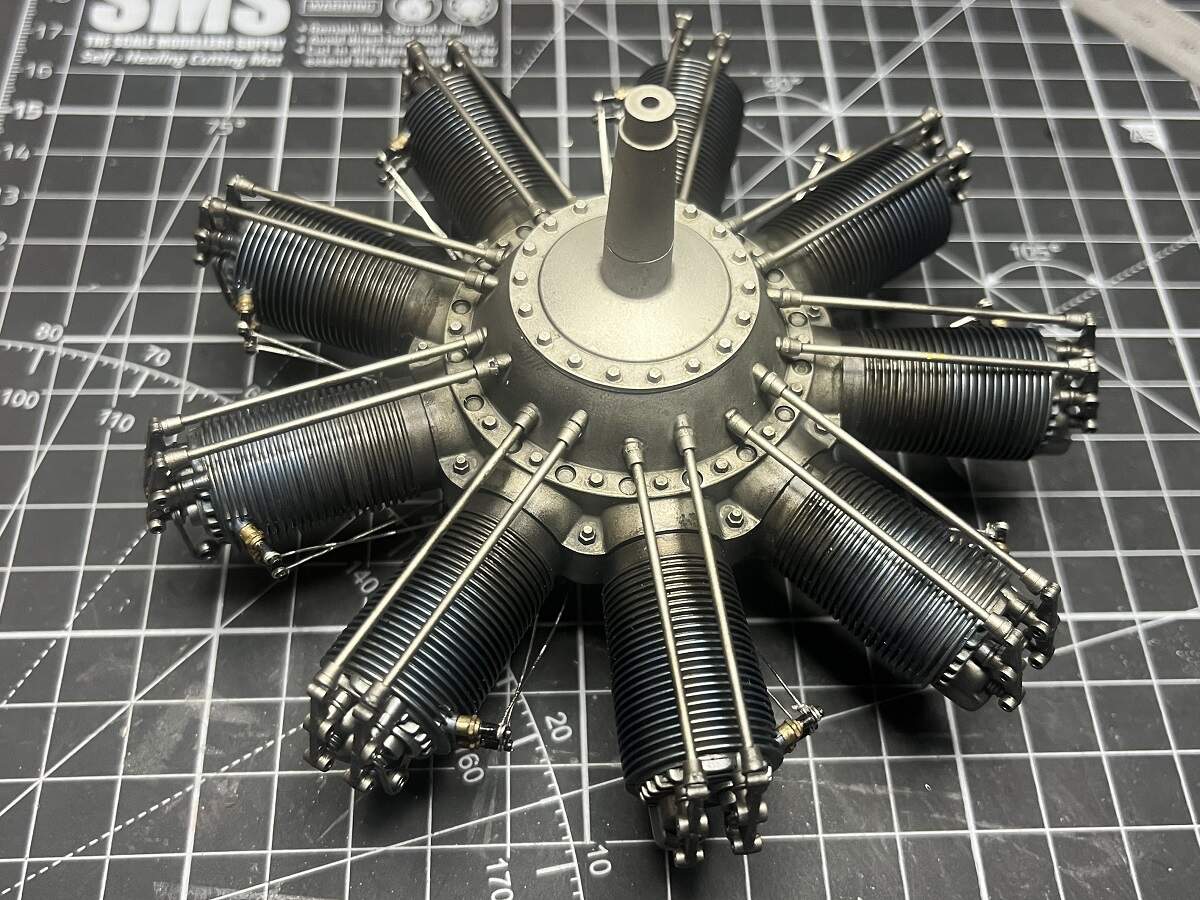
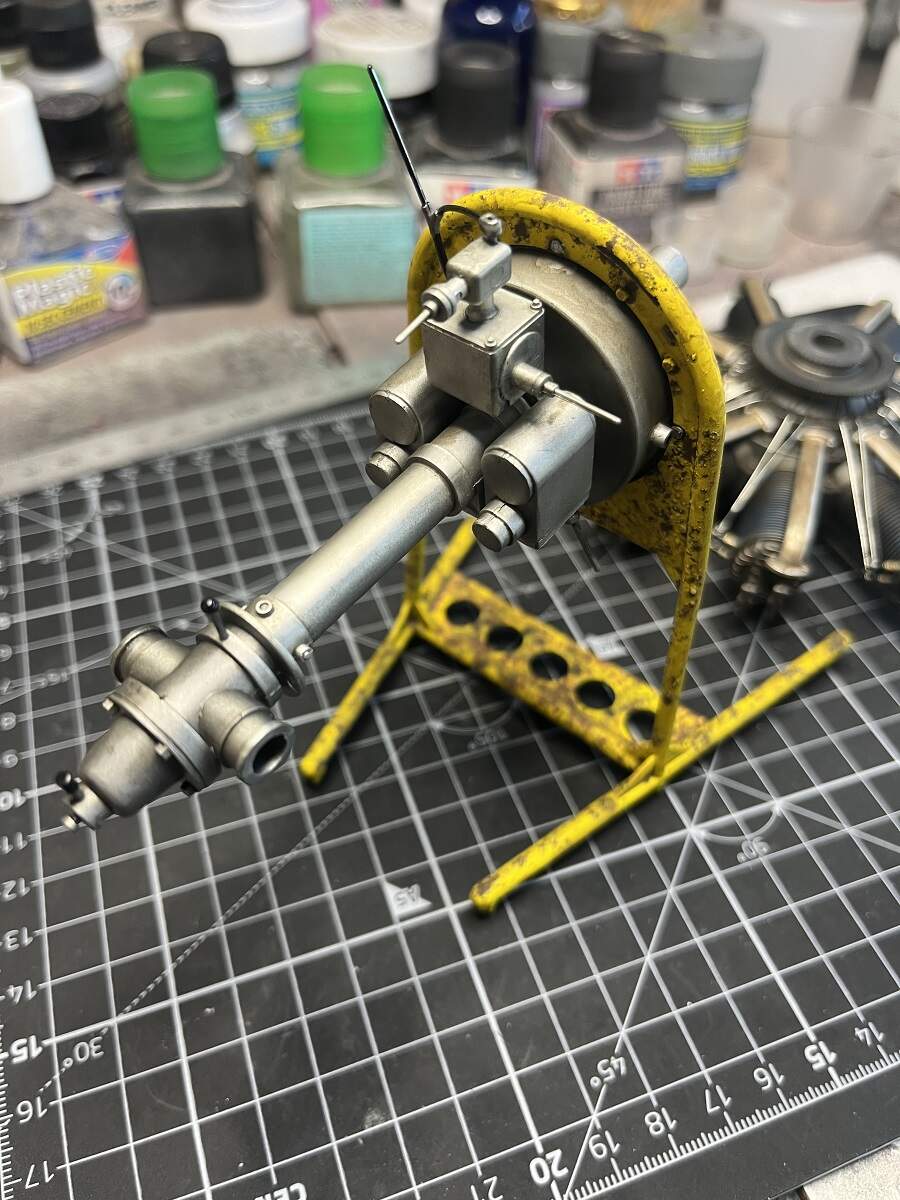
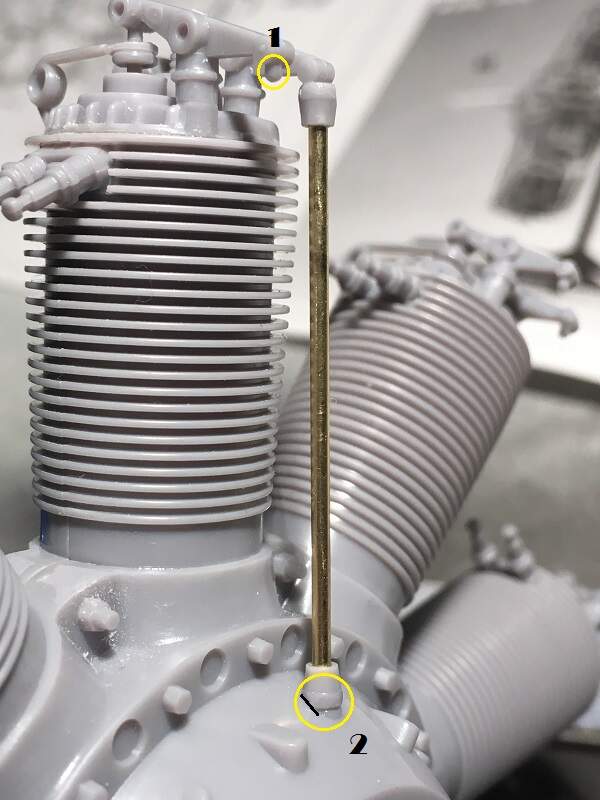
Time to fit the push rods. Some points to note, a bit of trimming work is required here.
As the brass rod pushes most of the way through the collar, I found it necessary to cut off half of the length of the locating pins on the rocker arms (circled 1), I used my sprue cutters.
Each cylinder has an inner and an outer push rod, and in order to get a neat fit of the bottom collar on the inner push rod I had to chamfer the bottom of the collar (circled 2).
In most cases the push rod is slightly too long so I trimmed the length by sanding the ends to prevent too much stress on the rocker arms.


Friday November 24, 2017

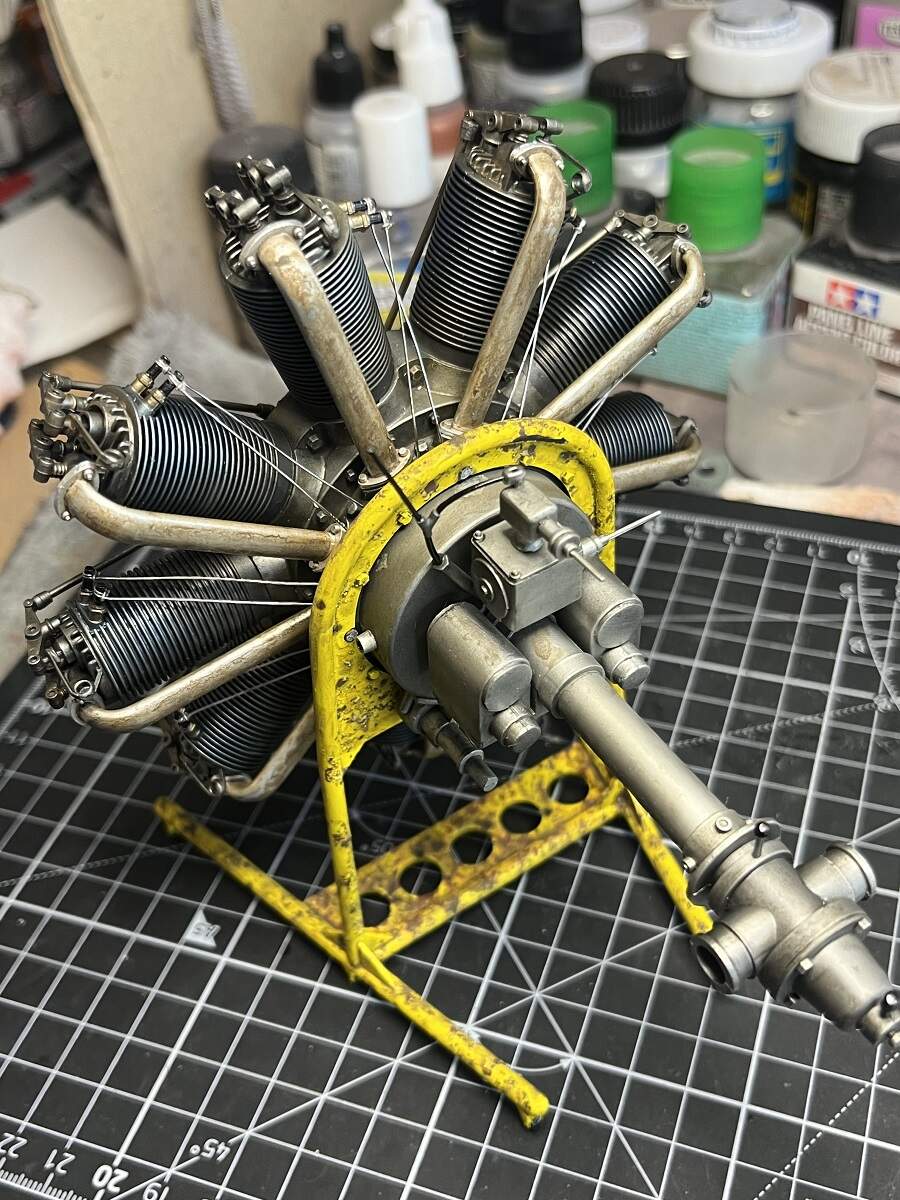
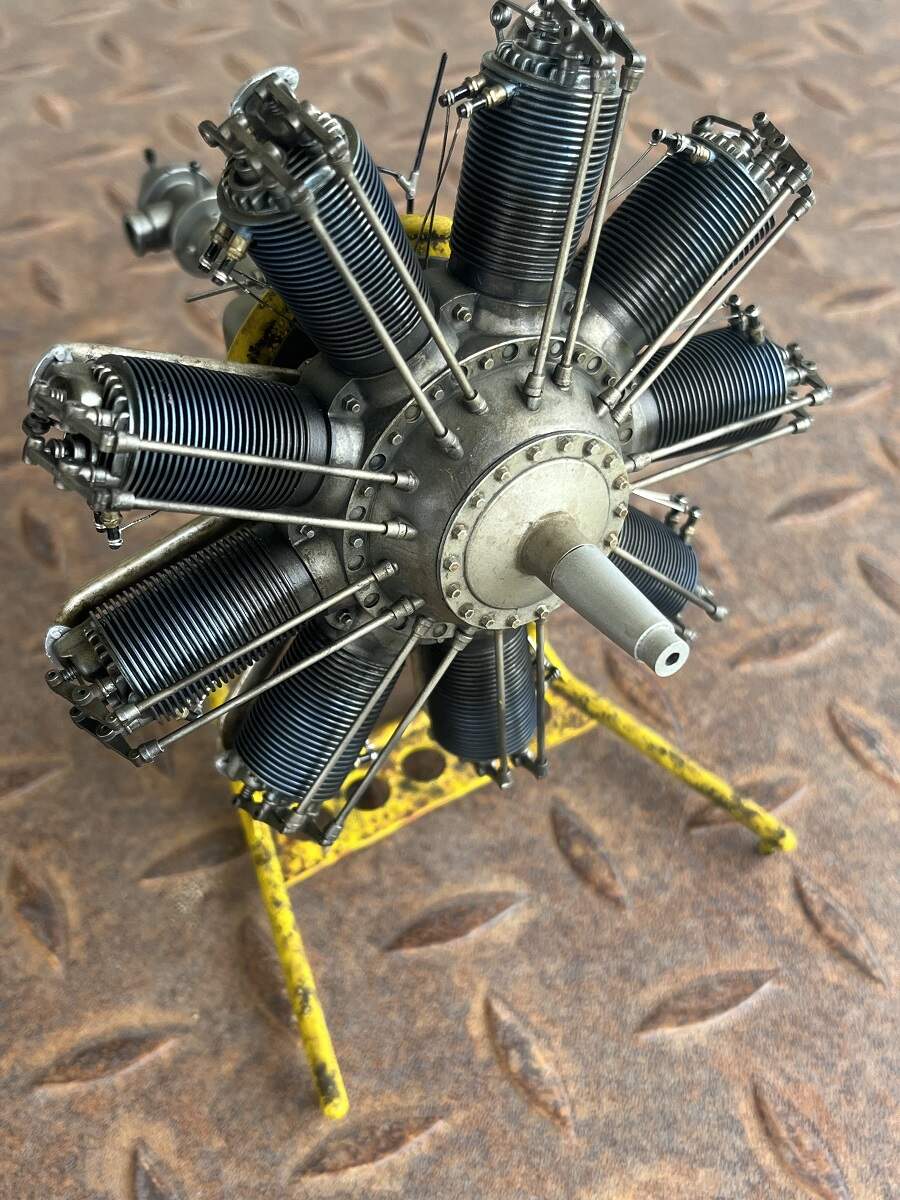
Push rods all fitted last night.

Time to get the rat-tail files out and do some clean up of mould lines and seams, then time for paint.

Cheers, D

4 Likes

This looks really interesting Damian. Will be following :smile:

1 Like

I remember this one D - nice to see it spring back to life.

1 Like

Sunday February 18, 2018

Tidying up of seams and sprue points completed, I gave the components a coat of Tamiya Semi-Gloss Black acrylic, thinned about 50:50 with Mr Levelling Thinner. First time I’ve used this thinner, must say I’m very impressed. Very smooth finish, absolutely no tip clogging on my old Paasche H, easy cleanup after.


Alclad next for the main NMF, then some weathering to try to achieve a used look, something like this-

Clerget_9B_RAFM

Friday February 23, 2018

Alclad Airframe Aluminium thrown on, letting it cure today and might give it a final coat tonight, then some weathering.


Tamiya Red Brown acrylic on the mounting frame as a rust base ready for clear coat, salt for chipping, then a yellow top coat.

All done with my trusty old Paasche H, light coats built up slowly. I paint very slowly compared to some, but I enjoy the process and find it very satisfying to watch the colours develop and be able to stop when I think I’ve reached where I want to be. Easier to add a little more than to try to take it away.

Sunday March 11, 2018

A first time having a try at a new technique is always daunting, but I’ve been trawling threads and YouTube researching the salt-chipping method and decided to jump in last night. The frame will have a couple of days to dry out properly then on with the yellow top coat.


The way I look at it, the base will be heavily knocked around from tools and parts being dropped and left on it, and being pushed against other objects in the workshop. The upper frame not so much. Once it is cured fully I will have another look at it and possibly knock some of the salt off before it gets its top coat.

Friday March 16, 2018

Yellow paint applied, a couple of mist coats to stop the salt from being blown off, then a couple of heavier coats.

After a couple of days to settle, I took to it with a flat paint brush with the bristles cut very short. I usually use it for dry-brushing, but it worked really well for this. I went over it and knocked off the larger, easier crystals first, then had to go back and attack it much more aggressively to get the finer crystals to dislodge.

There are some really fine crystals still under the paint, but they look like rough surface or rust bubbles, so I’m going to leave them there for some textural variation.

Next up for the frame is some detail paint on the wheels and some washes and stains.

Test fitted the engine on the frame, because it feels like progress!


Finally, blew some Burnt Metal onto the exhausts. These will get some pale pastels to add variation and texture.

Cheers, D

7 Likes

Friday April 20, 2018

Apologies for the lack of progress here, I’ve got myself hung up on the weathering and heat staining effects and been playing around with some options.
Reposting the reference image that I am using here:

Clerget_9B_RAFM

To replicate the red/brown and the faint blue I have chosen to use these (another first for me on this build). I played around with some home-brewed mixtures of clears and reds and greys but nothing gave me the effect I was happy with.

Hopefully I will get a couple of hours tonight to give this a try.

Wednesday September 26, 2018

Hi folks.

As always for me it’s been a while between drinks, but a sneaky little airbrush session got some heat staining on the cylinders


And, much as I hated the thought of dulling down that finish, I needed to Dullcote it to protect it for oil paint rendering and washes

Cheers, D

4 Likes

Very nice!

If not too late, I might suggest that you reconsider the colors and finish on what you have identified as the “exhausts.” Those are actually the fuel-air intake pipes / manifold (the crankcase itself functions as the manifold and the fuel-air is drawn through these pipes to each cylinder head). The carburetor was located at the end of the large center tube (poorly represented on the kit, but it’s that “ringy-thingy” with the handle and knob just forward of the cross tubes (which were the fresh air intakes). The fuel-air mixture was drawn into the crankcase (lubricating oil was also injected into the mixture) and from there through the individual intake tubes to each cylinder.

Most of these intake tubes were made from copper or brass, and they were only subject to tarnishing, but not to rusting.

The exhaust was ported directly into the air from each exhaust valve.

I have a pretty long thread posted up here on the KM Forums from a year or so ago on building this same kit. If you’re interested, it should be easy to find.

2 Likes

@litespeed @RDT1953 , Tim and Richard, great to have you on board for this revival build!

Please don’t hesitate to offer any constructive critique or advice, as always I’m here to learn!

Jump forward to Sunday August 7, 2022

Dragged this one down from the shelf of doom, hoping that my skills have raised to somewhat line up with my ambitions over the last few years :rofl:

First up, it needs to get a good coat of filth from the castor oil that spewed out all over the show!

Test shot on a small area. Before, first coat and second coat of oils, I’m using highly thinned ABT502 in a 50/50 mix of Starship Filth and Industrial Earth.


Happy with the way it settled over the Dullcote, I gave it a good couple of coats all over. I will add more in strategic areas as things progress.


Some more work on the engine stand, adding more rust tones and oil stains. very much a WIP here.


Tuesday August 16, 2022
A steady hand and a tiny brush to detail paint the spark plugs. My eyes hurt :nerd_face:


test fit on the stand to see how the overall picture looks.

Thursday August 18, 2022

Ignition wires started, 26 gauge jewellery wire. My eyes still hurt :disappointed:

Cheers, D

5 Likes

Hi Michael.

Perfect timing, this was going to be my next post! I’ve just learned exactly what you have explained here and have repainted the intake tubes in steel, to be flat coated and filthed up as per this reference image!

IMG_1350

Many thanks for checking in, very much appreciated! I’m here to learn, and always welcome the input from those more knowledgeable on these subjects.

Cheers, D

3 Likes

Bringing the build log up to date, tonight I finished the ignition wires and repainted the intake pipes.


Next up, more filth. From what I understand, these things sprayed Castor Oil all over the place!

Cheers, D

5 Likes

Testament to how bullet proof SMS metallics are, here are the intake tubes (dry fitted in place) with an initial oil paint treatment directly over the SMS Silver. I basically wet coated them with AK odourless white spirits and while they were still wet I randomly slopped on a thinned mix of ABT502 oils and rolled them around to get a random pattern. Absolutely no sign of the SMS moving under all of that.


I think I will give them another shot of oils and then fix them in place.

Cheers, D

5 Likes

I gave the intake tubes another shot of the grimy oil paint mix and after a couple of days curing I’ve fixed them in place now. Time for a couple of pics in sunlight to check the effect!


Not much left to do here now on the engine itself. There are some small detail parts to add on the rear section that is mounted on the frame already, but I need to rework them as the fit required them to be bent and twisted into place. The plastic was just too brittle and the fine sections broke. If you look at Part # C5 in the instructions here, it is moulded as a very fine flat piece, but look at the image below and you will see the 3 locating holes are on separate planes of the base by quite a large degree.


I have trimmed off the fine sections of the broken parts, and drilled the connection points on the larger sections so that I can glue them in place on the body and run some lead wire.

That’s the plan anyway :thinking:

Ok, time for some test fit shots.


Cheers, D

9 Likes

Wow D very impressive. Love the salt treatment, could have used those pointer on my first try. :wave:

1 Like

Well folks this build has moved off the bench and into the display cabinet, completion #10 for 2022 (after 5 years of tinkering!).


And with part of the real deal!


Next step for this project is to scratch build the propeller mounting frame, and after that I want to have a go at laminating and carving a 1/8 prop to go with it.


I also have the old 1/28 Revell Camel kit plus the WNW Clerget Camel kit to play with.

Thanks for joining me on my journey here, hopefully more to come soon.

Cheers, D

9 Likes

Great work D. Love to see the prop and the final display. :wave:

1 Like

Thanks Mark, much appreciated! It’s been a journey for sure, but I’m really happy with the result.

I’ve stored the name plate parts away in a safe place at some stage, absolutely no clue where though :roll_eyes::thinking::weary:

Cheers, D

3 Likes

Nice work D - glad you wrapped it up . Nice heirloom piece to go with your heirloom hub .
I am anxious to see your prop when you carve it .
Is there photo etch available for the prop hub ?
IIRC this engine kit is a spin-off from Hasegawa’s 1/8 multi media complete Camel kit - I think they also made an injection molded plastic one in 1/16 with complete structure, yes ? Maybe you should add those to your stash, along with Eduard’s new 1/48 offering - LOL

1 Like

It’s so safe that no one will ever find it there. :wave:

1 Like

Hey, I do that, too! Car keys, wallet…patience…pants…

1 Like

Damien, beautiful work. Love the rust bubbles of the stand.

1 Like