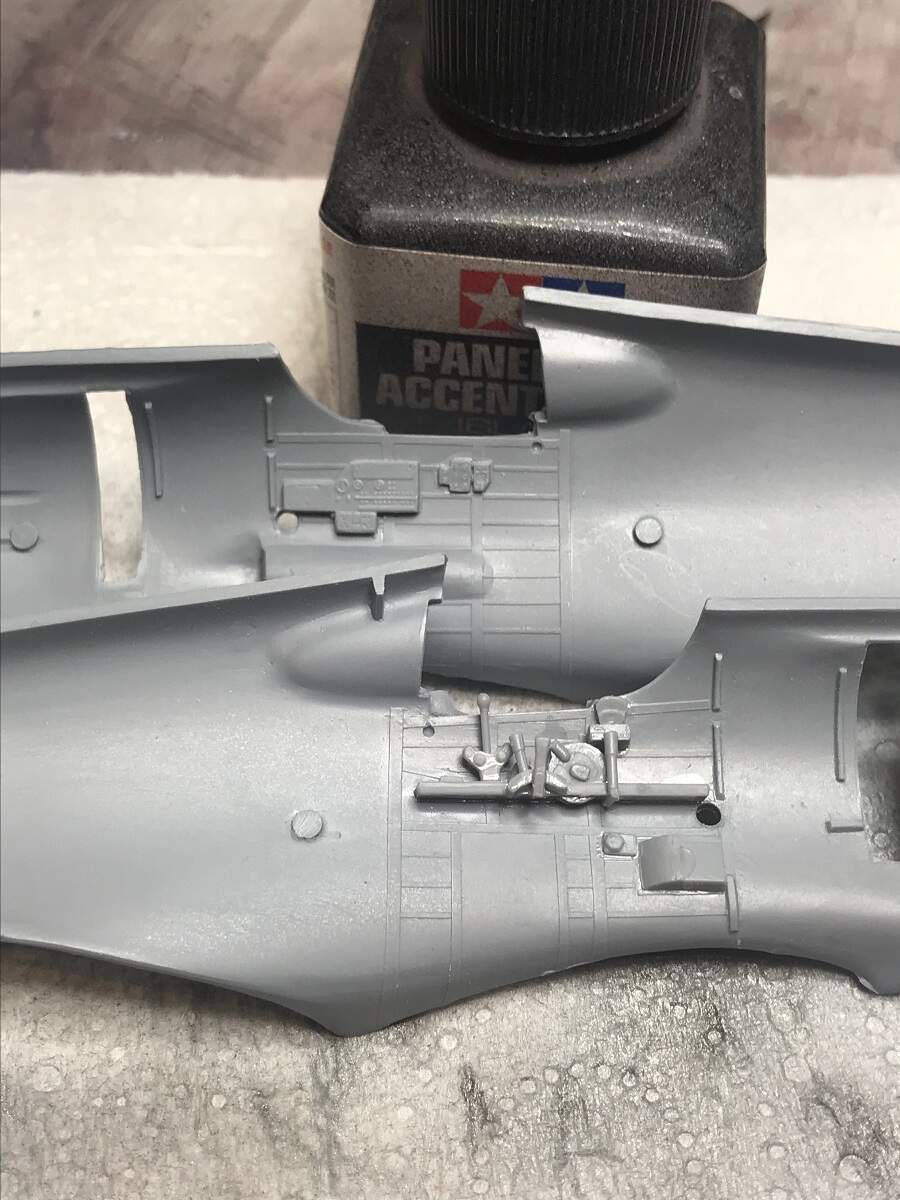
Giving the engine a rest while I work out what to use for the push rods, moved back to the office space. I fitted off the controls to the port side wall and gave the fuselage halves, wheel wells and cockpit assembly a shot of primer.
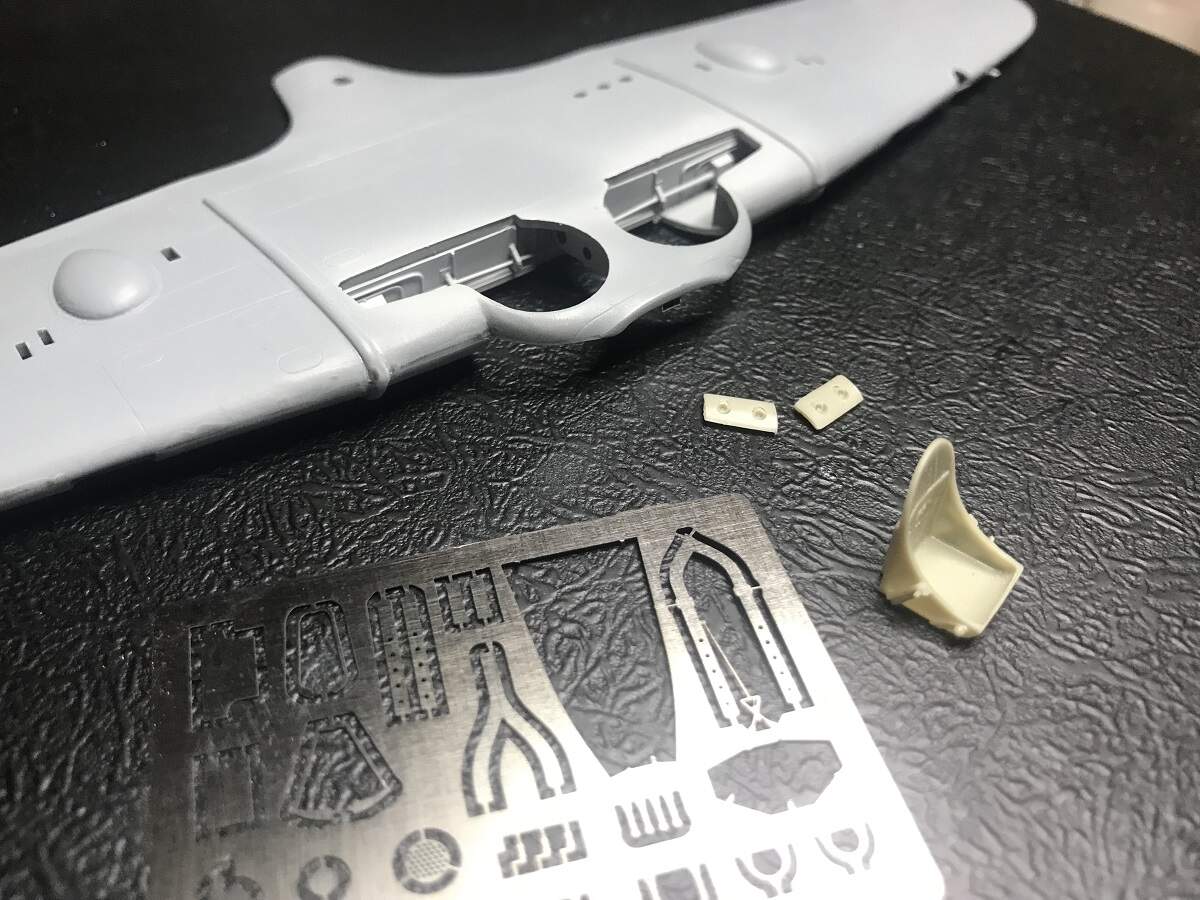
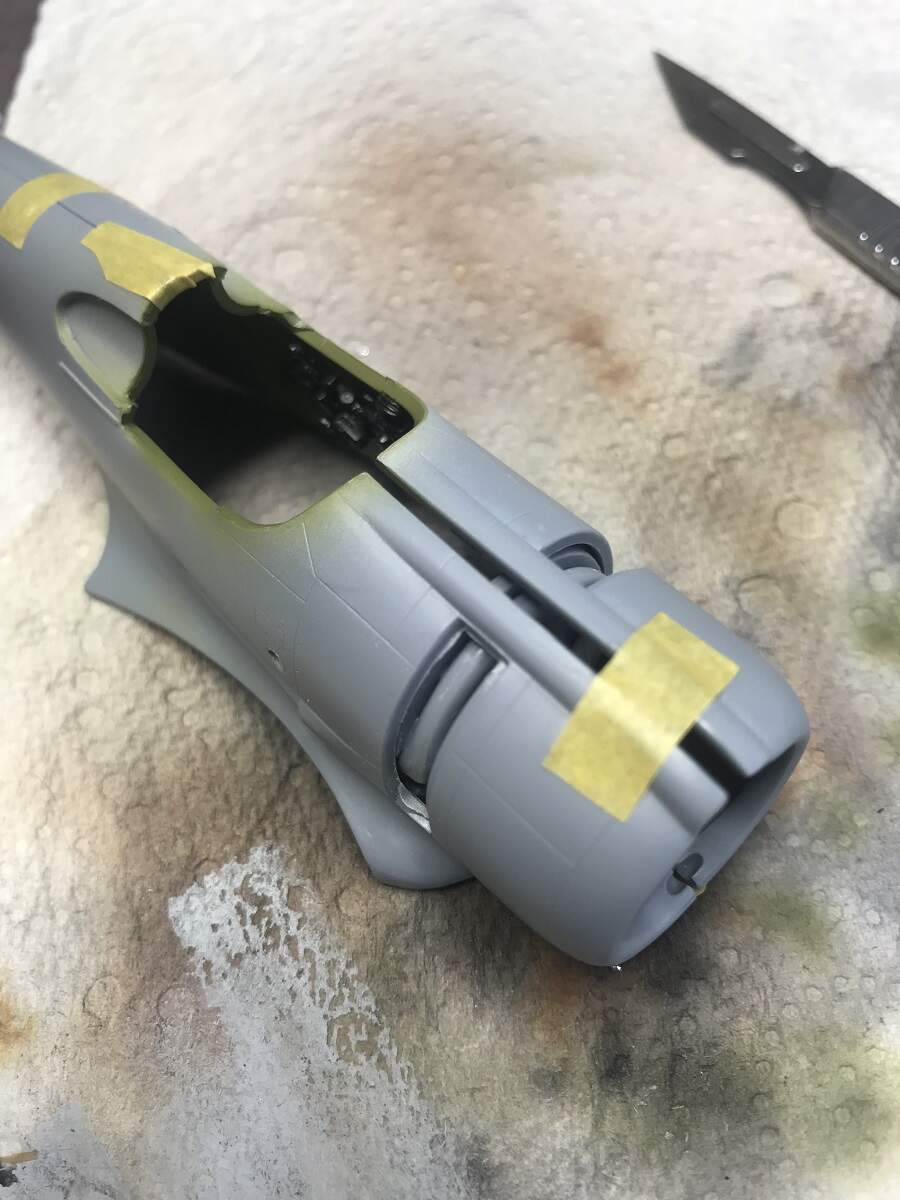
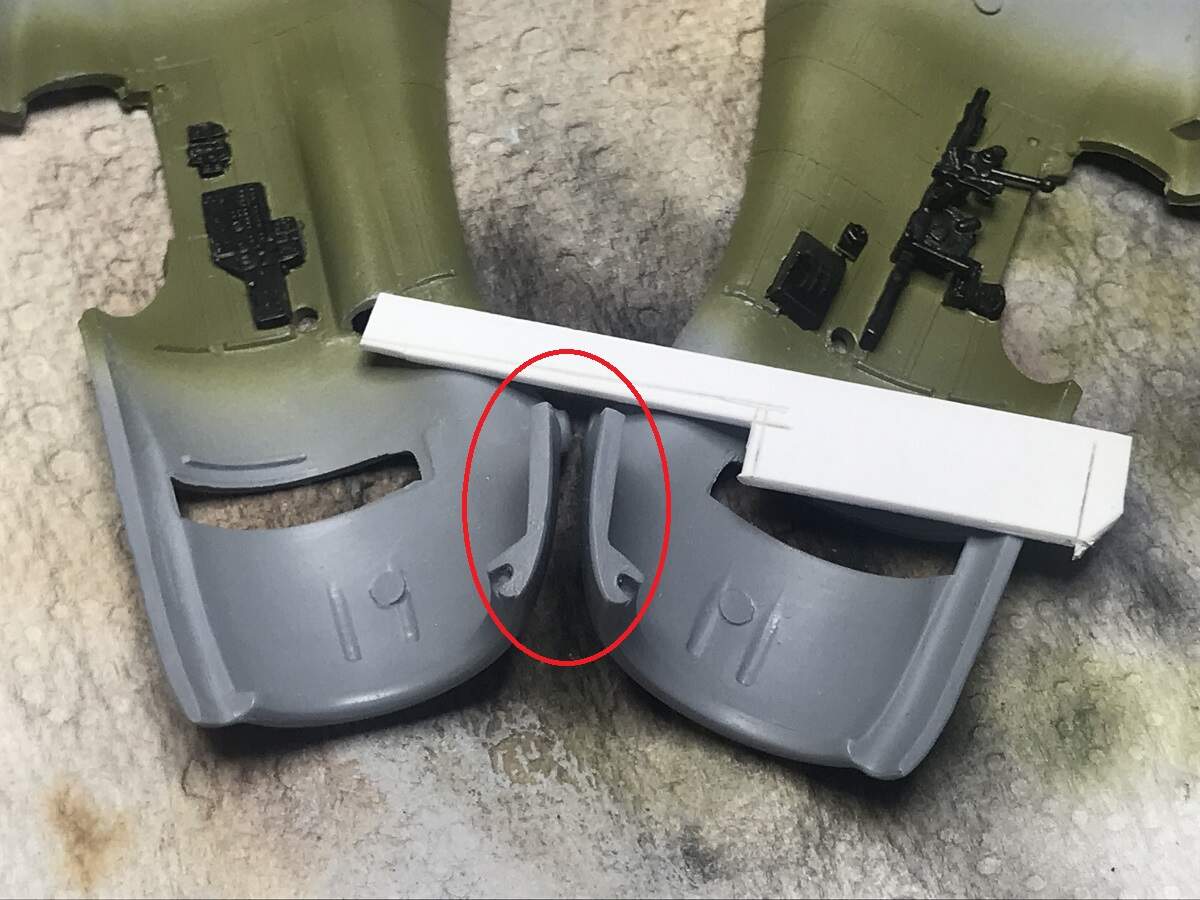
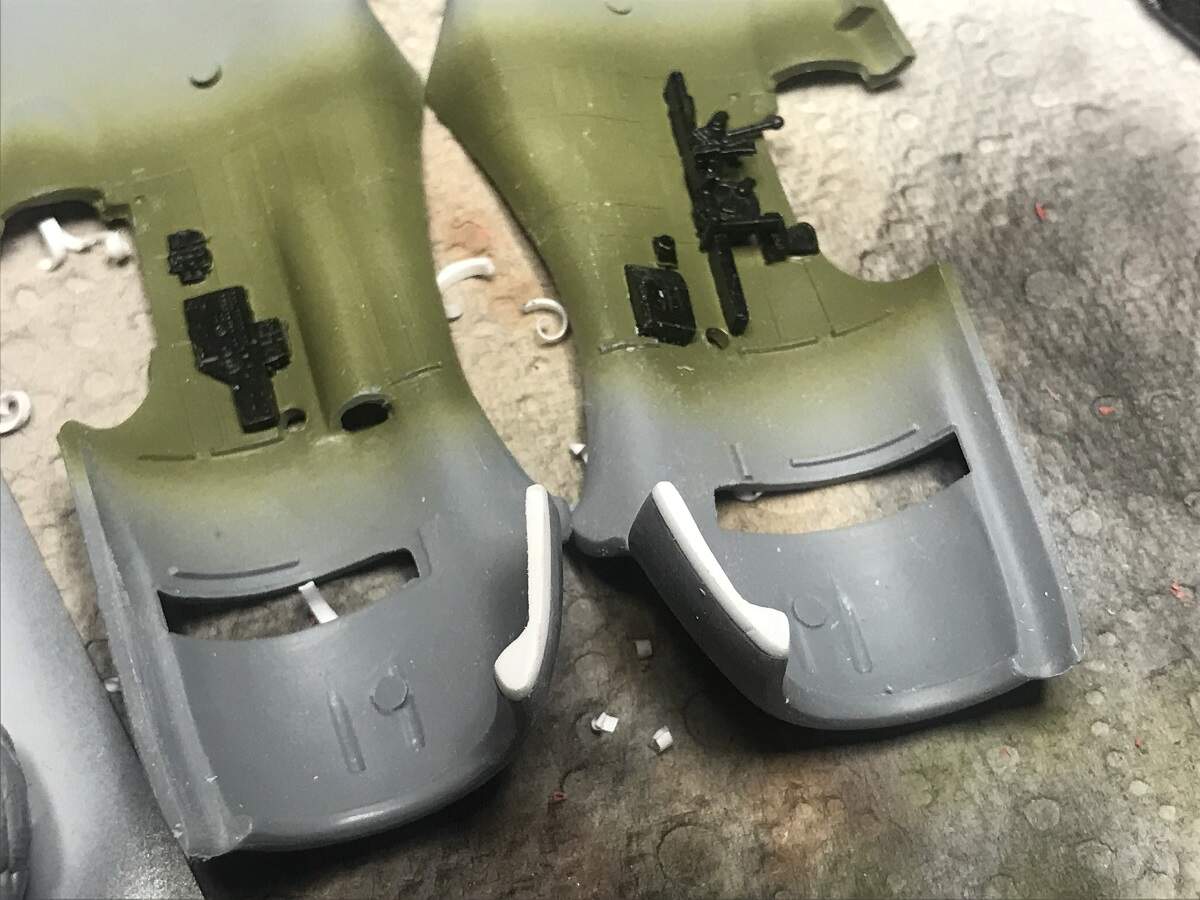
While that was curing I worked on some more fiddly stuff, the resin gun port inserts and PE seat belts.
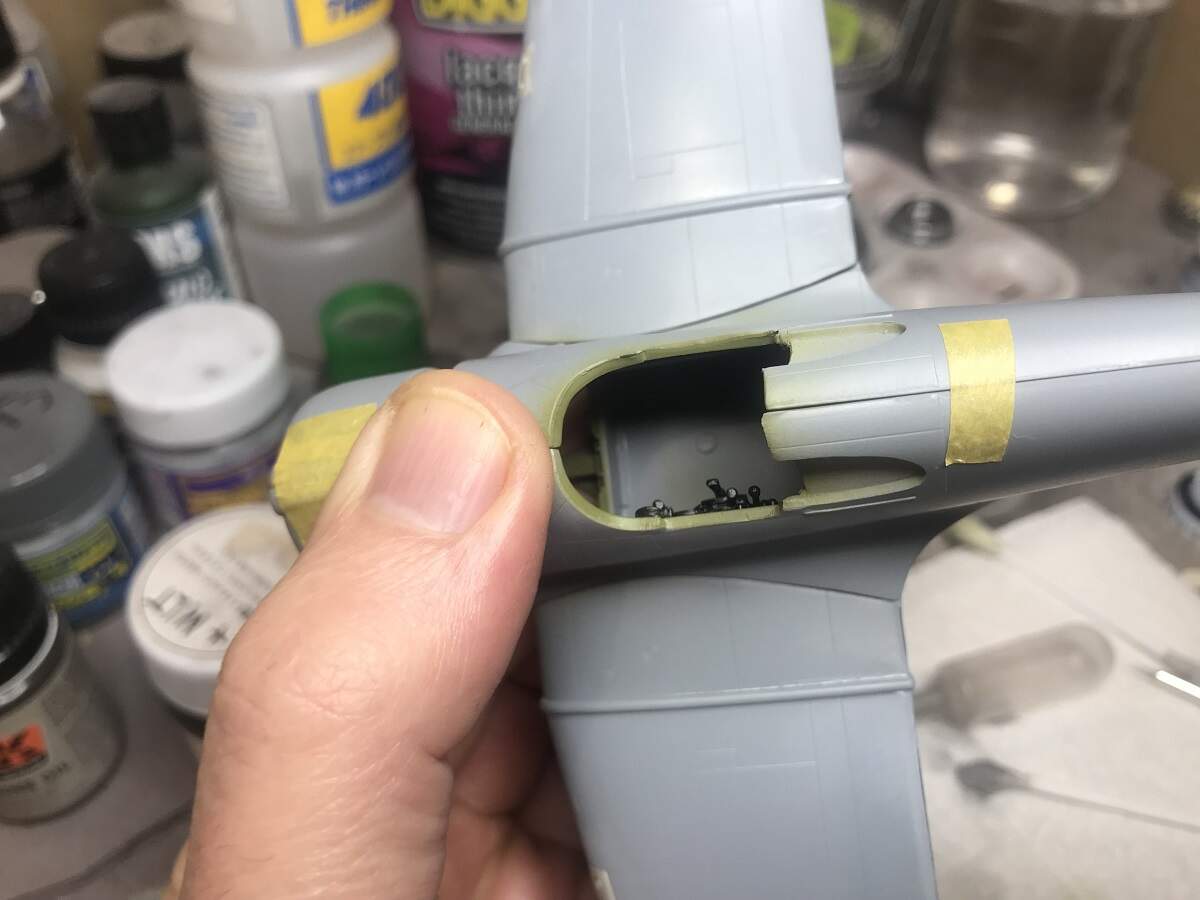
After a quick test fit I decided to glue a small styrene tab into the recess for the gun ports to give them some support and strength, the contact points are a bit slim.
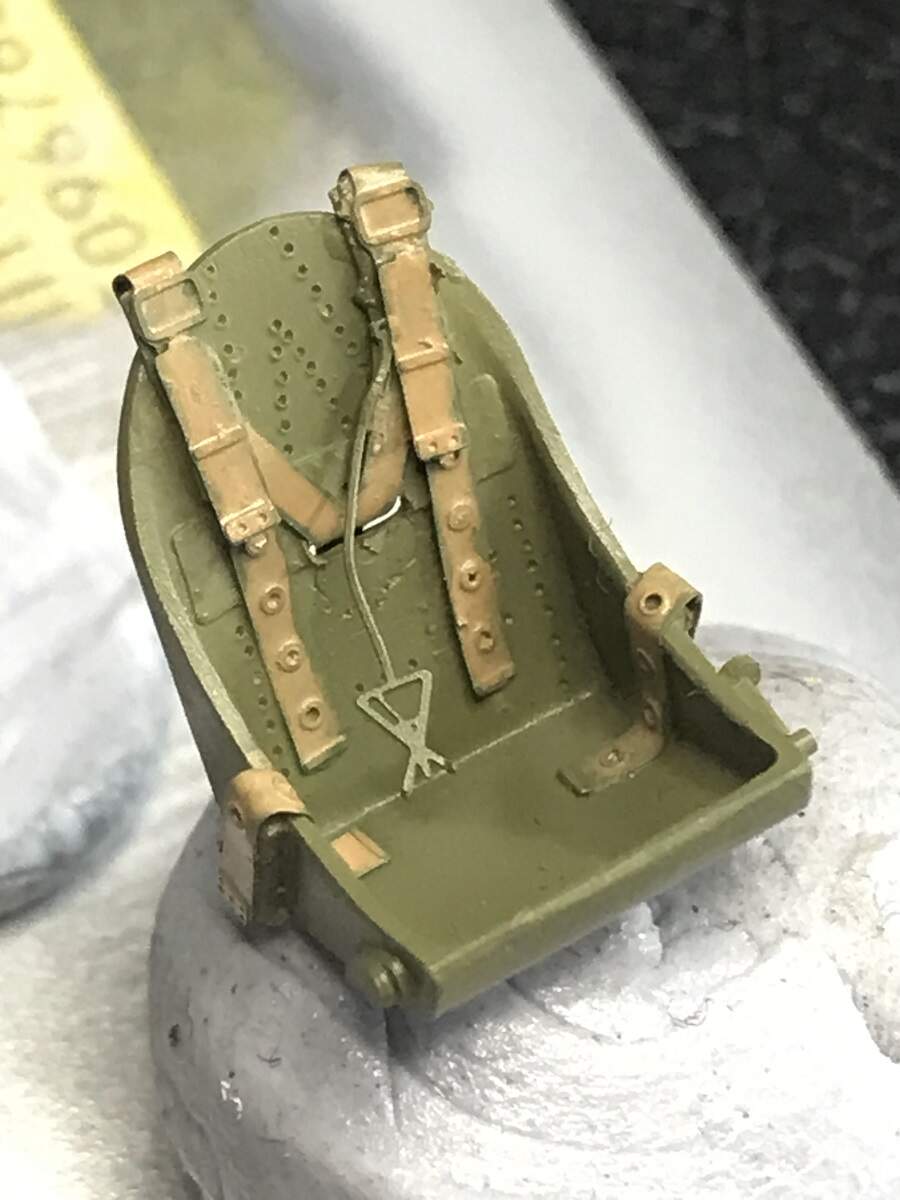
Only a small amount of trimming and sanding was required to get a fairly neat fit, and the profile of the inserts matches the wing quite well. The PE belts went together with no issues.
I ran some CA into the fine gaps around the inserts, to fill and strengthen. They should clean up nicely.
Cheers, D
3 Likes
And a little bit of colour!
Cheers, D
6 Likes
All that beautiful work is really coming together
Looking good D - nice to know I’m breathing resin dust at the same time as someone halfway around the world 
1 Like
Don’t you wear a mask, Richard? FFP2 masks is the magical word. I don’t work with resin, but whenever I 'm working with my airbrush I wear that mask. You can’t buy health …
Thanks for your concern Torsten - I don’t wear a mask generally for light stuff like hand sanding , painting on model work as the dust doesn’t really get to my nose . I now wear masks for my trade ( carpentry) when generating large amounts of dust but I fear it may be too little, too late . I have been a woodworker since my pre - teens ( I will be 68 next month) and my nose / sinuses have been assaulted for years - three cauterizations of my nose for chronic nose bleeding in my teenage years. I have entirely lost any sense of smell and consequently can’t taste much either . Still a happy guy though !
( Don’t mean to de rail your blog D )
Cheers - Richard
No problems. Discussions about health and safety are always good. I don’t use resin much at all, but I make sure I either wear a dust mask or wet sand, or both, when I do.
Cheers, D
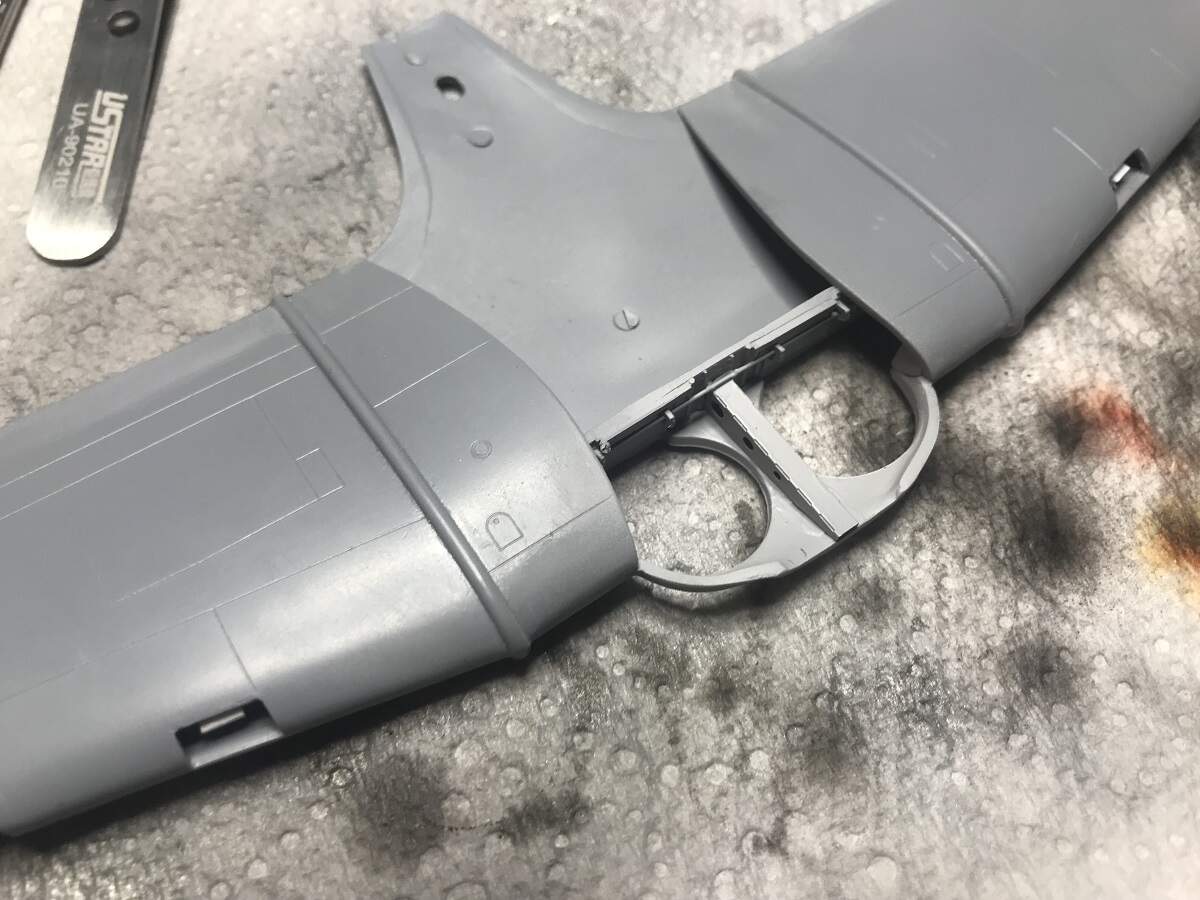
Forewarned is forearmed! Reading some reviews of this kit a while back I took note that the engine bulkhead was oversized and needed to be “adjusted” for a neat fit. I will let the pictures tell the story!
“Adjusted” is putting it mildly, I’m glad I checked at this point before I painted and mounted the engine! Off to the bench now to get out the carving set 
Cheers, D
3 Likes
Ok, after a little bit of carvery, I’ve got the upper wing roots to match up reasonably well with fuselage flare. with the cowling top taped together, I can get the wing roots to meet up neatly.
This leaves a gap of approximately 2mm width on the lower cowl.
Also, flaring the fuselage out at the upper wing join results in a tapered gap on the underside from the rear wing join to the tailwheel.
What I get from this is that I still need to resize the engine bulkhead, although not as much as I originally calculated, I need to shim the lower cowl join by 2mm, and I have some shimming work to do on the rear fuselage underside as well.
Checking against the bulkhead, the engine seems to be a slightly smaller diameter, so hopefully I won’t need to start chopping the cylinder heads up.
At least I can take some comfort in the fact that these shenanigans aren’t self-inflicted, apart from the fact that after reading reviews, after taking notes, after being warned, I purchased the kit and put it on the bench. Ok, maybe I did this to myself 
Cheers, D
6 Likes
The joy of fixing exceeds the joy of not having to fix … it’s a zen thing … 
3 Likes
I hunted through the scrap bin and found a small piece of 1mm Evergreen sheet and roughly cut and glued some to the lower cowl joint faces.
A couple of days to fully cure then I will set about carving and sanding them to shape.
Cheers, D
4 Likes
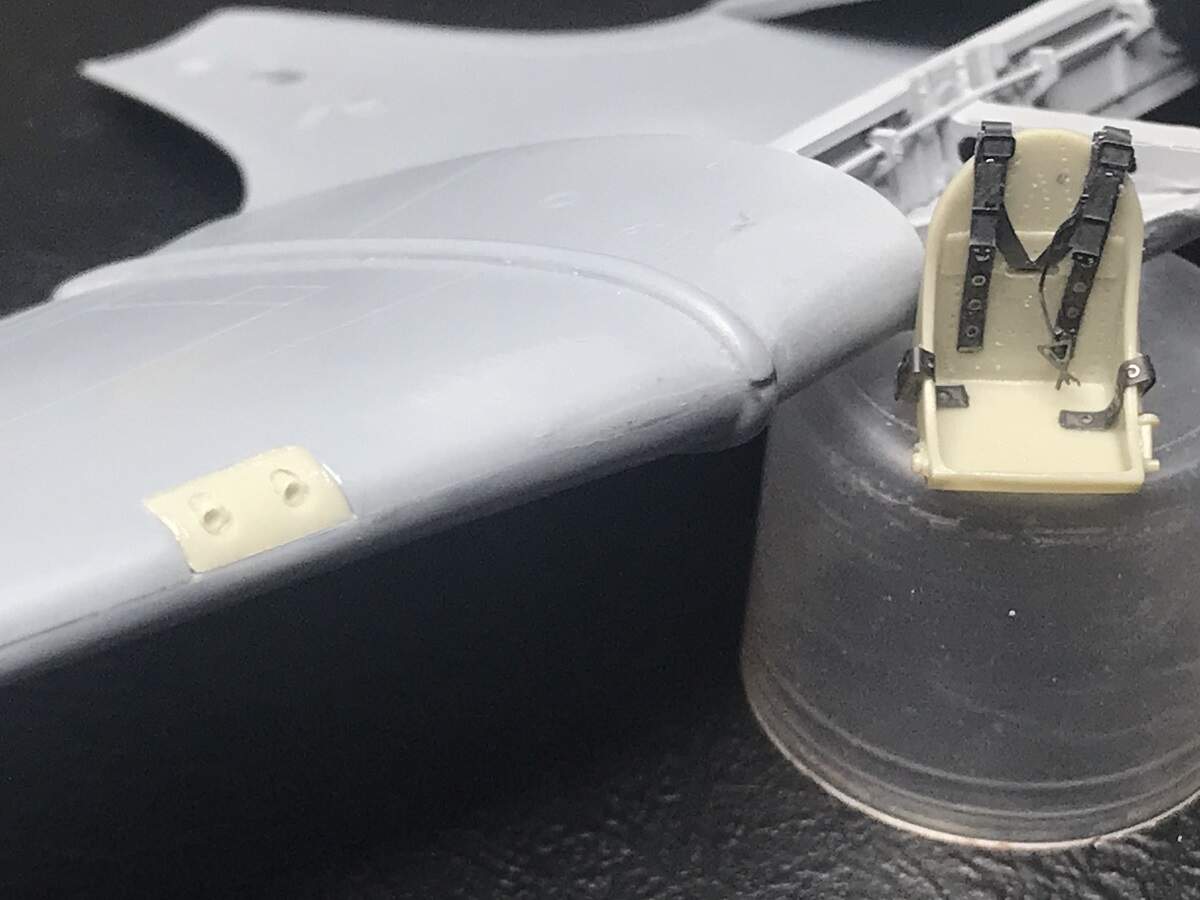
Carving and sanding tools came out for a run!
Also made a start on detail painting the seat.
Cheers, D
9 Likes
Great method to shim the gap, D 
1 Like
Great looking seat too…
tim 
Happy New Year folks!
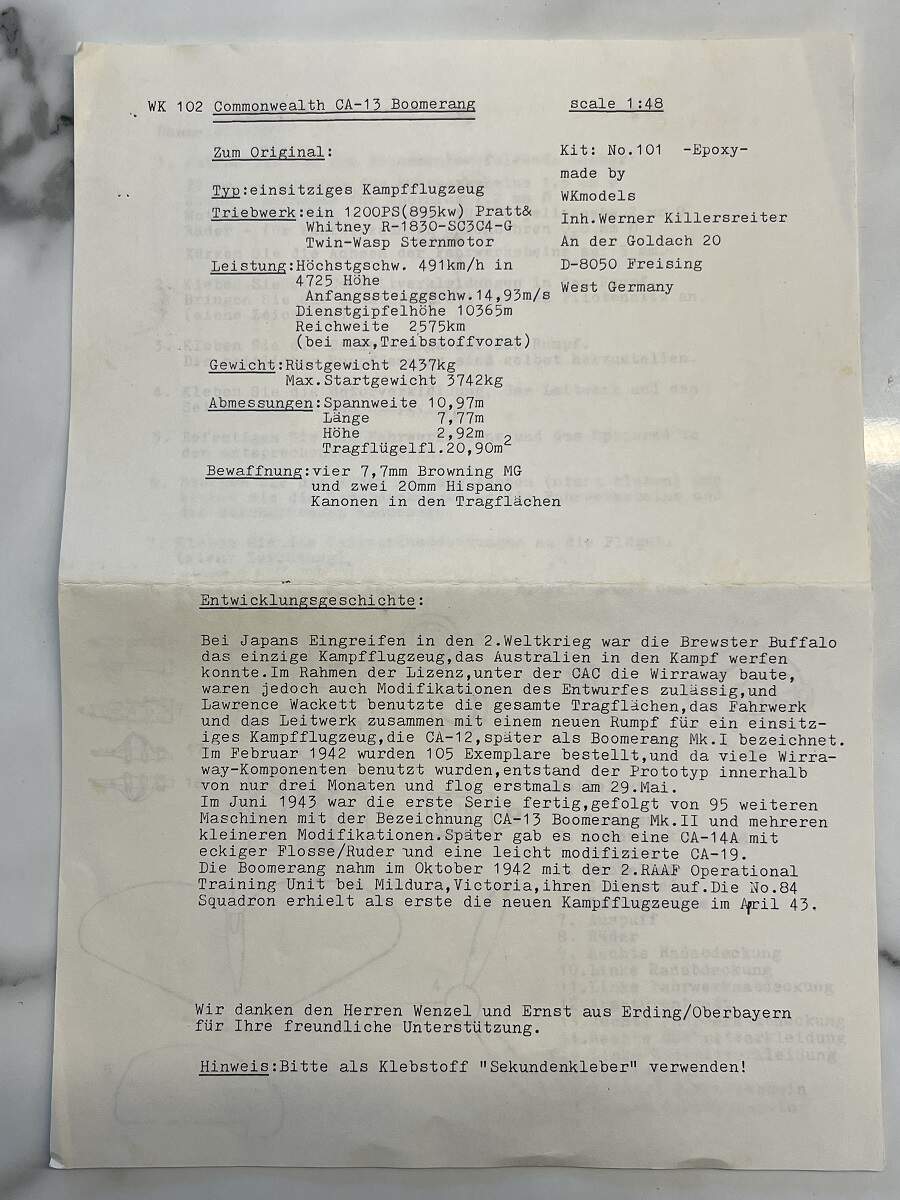
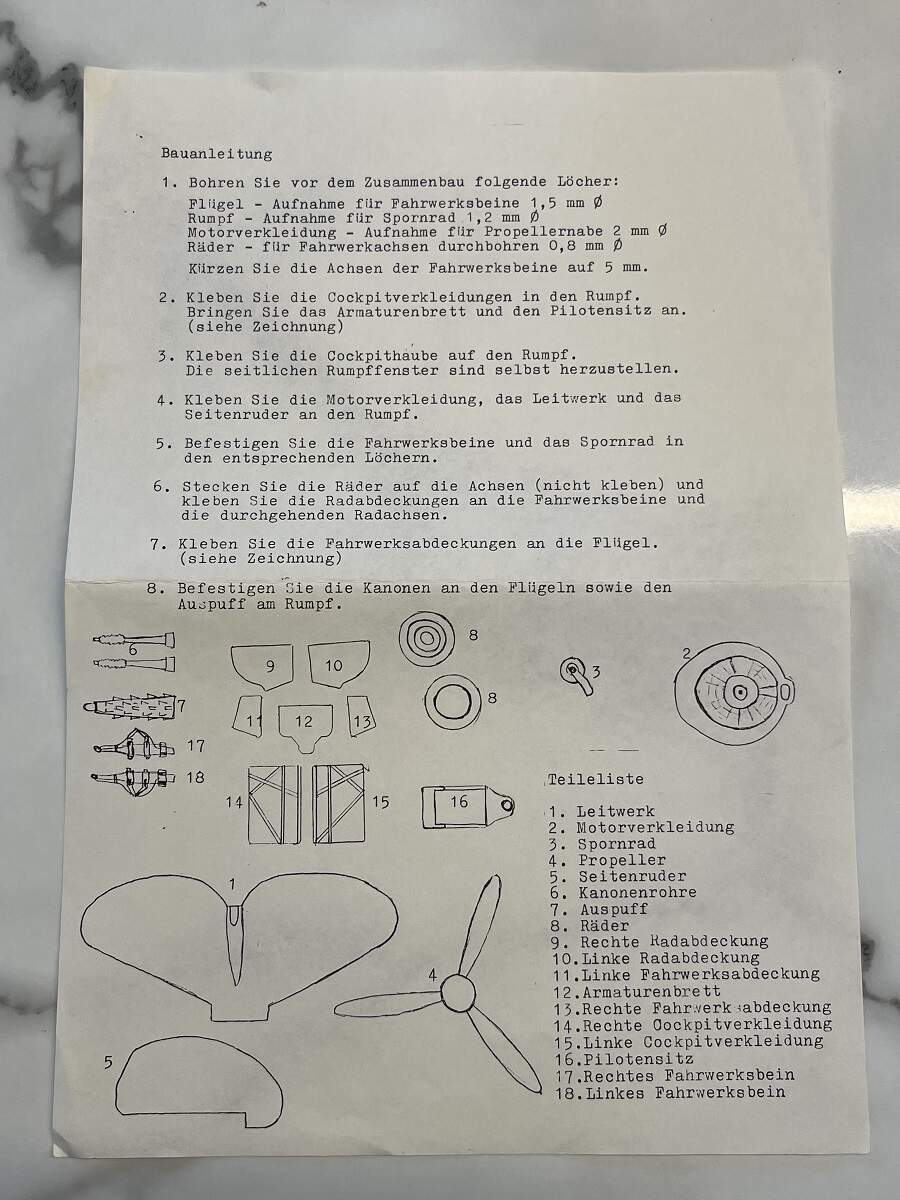
No updates on the Special Hobby build unfortunately, but browsing through a local Facebook BSS page I found this kit . . . . . . .
I’ve never seen it before, or even heard of the manufacturer, it’s not listed on Scalemates (although some other WKModels kits are), but at the price I just had to snap it up. From some brief Google searches it appears that the company does both resin and styrene kits. I will post some images here of the contents once it arrives.
Cheers, D
4 Likes
Should be interesting Damian, looking forward to seeing the Boomerang project progress in the future 
1 Like
Neat find D - good to see you back here and there.
1 Like
Well now this does look like a bucket-o-fun! 

Cheers, D
4 Likes
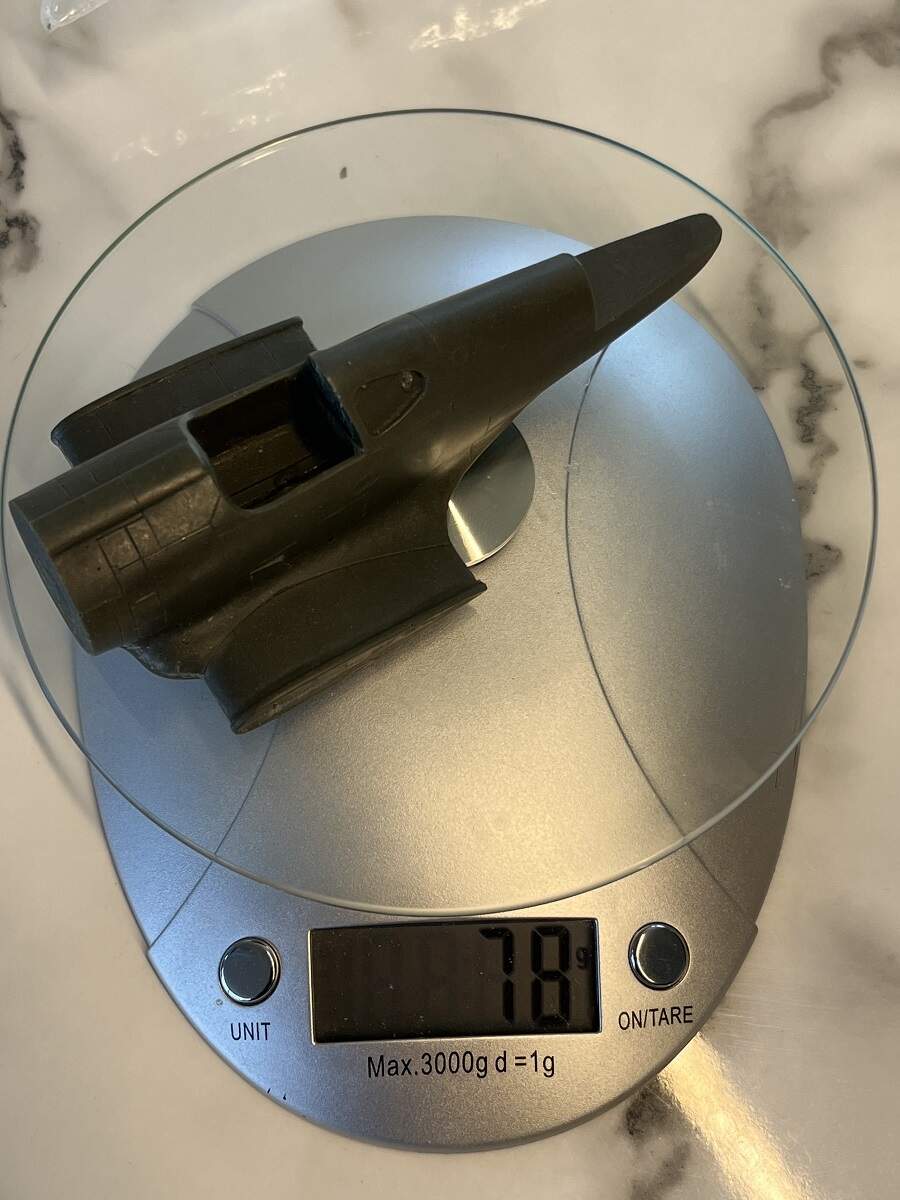
Wow thats a weighty resin fuselage section. Will look good when done. Interesting fuselage shape though. The real thing makes an impressive noise when in flight