Auto Modeler :: Boomerang Multiple Build Log (kitmaker.net)
Where were you in late July 2014? I was sorting though my stash trying to find the various quarter-scale Boomerangs that I had accumulated, and browsing the Google machine to see what other kits were out there!
I’m not going to copy the old thread posts across, I’m going to start where I left off in September 2014 with my first build in this project, the Special Hobby CA-13 initial release. I have since picked up the re-release of the CA-13 which has a few nice new goodies, but I will get to that later.
This thread is likely to roll on for millennia to come, so please feel free to join in with reference photos, your own Boomerang build photos, or just good old conversation.
There are sprue shots of a few of the kits in the thread on the old forums, so I won’t re-post them here. I will pick up where I started posting in the “Mud Movers” Campaign thread back in December 2020.
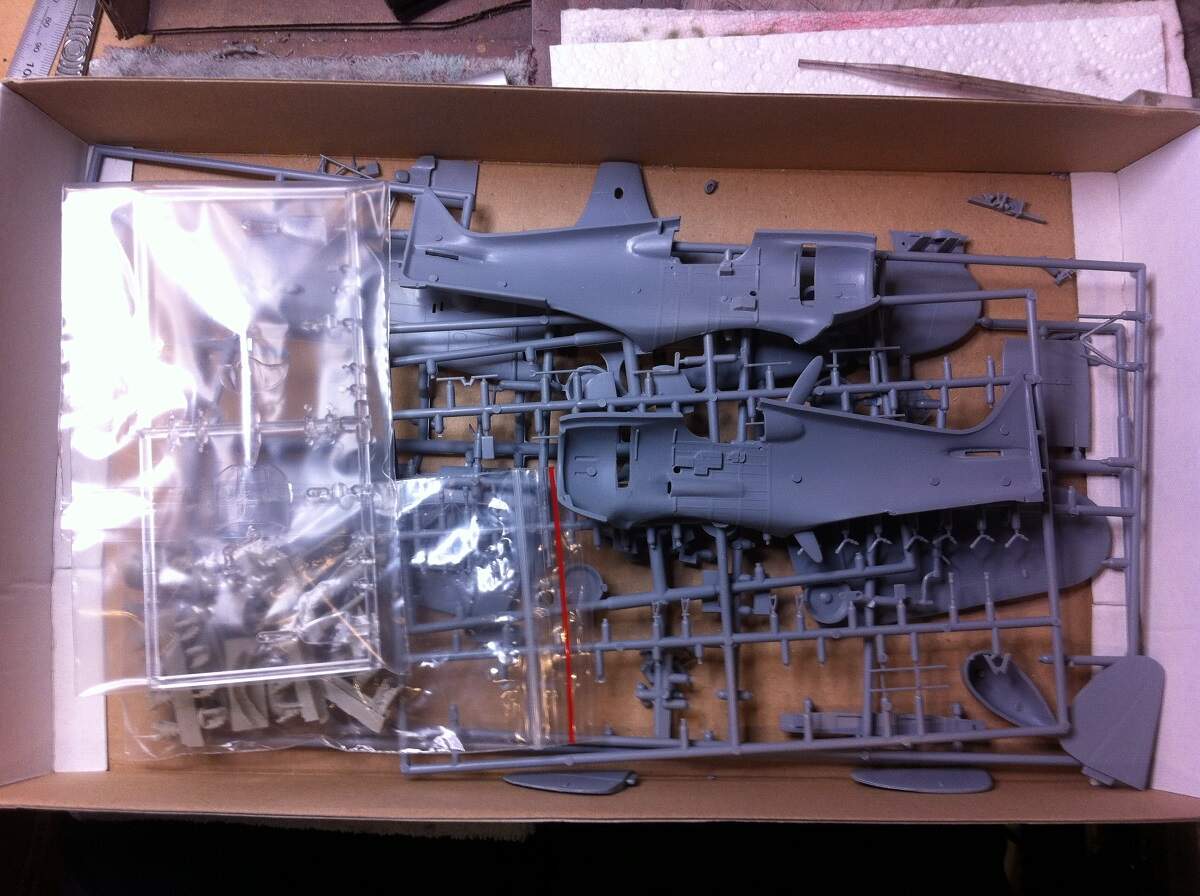
Opening the box after just over 6 years, a few sub assemblies done and some other parts cleaned up.
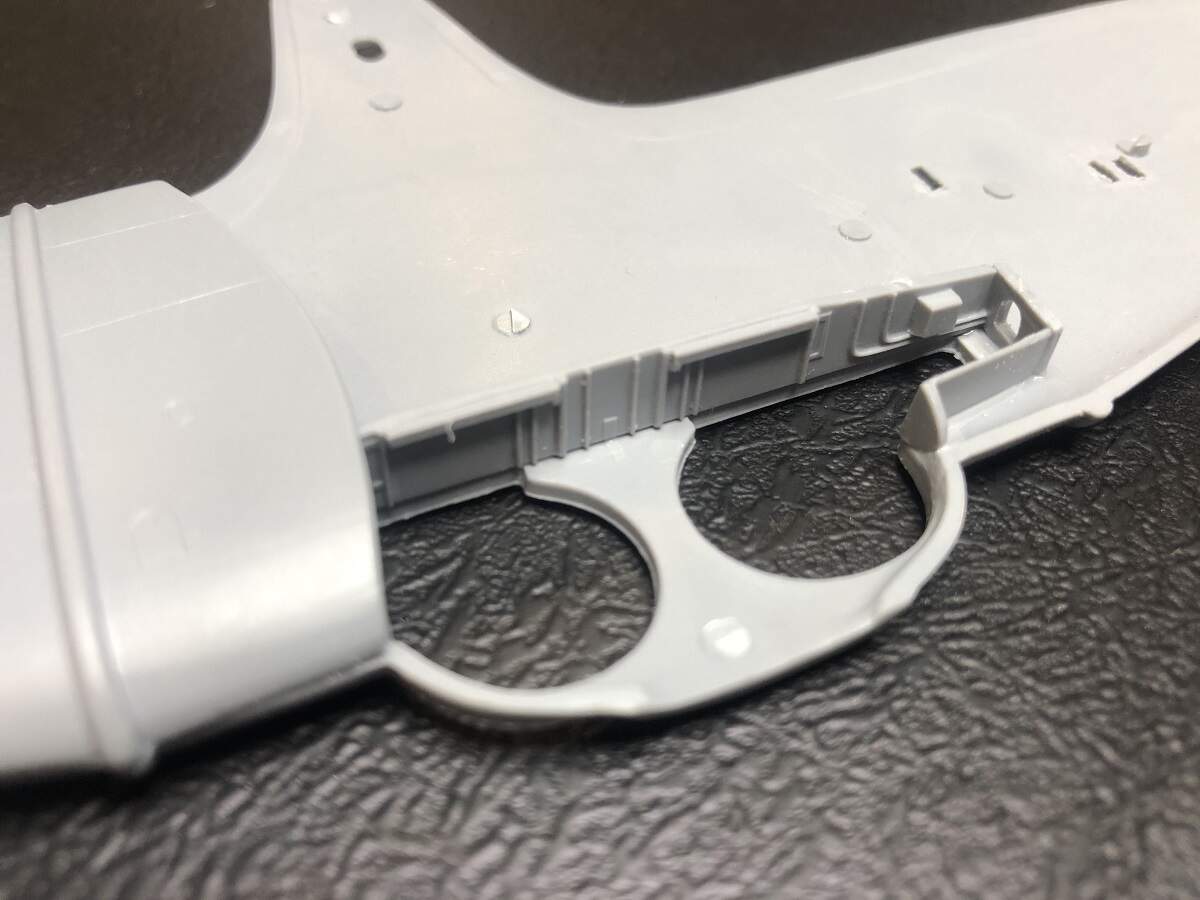
Making a start on the main wheel wells and main wing assembly.
Typical short-run kit, flat mating surfaces that aren’t flat and don’t mate. This looks like a job for . . . . . SPRUE GOO!
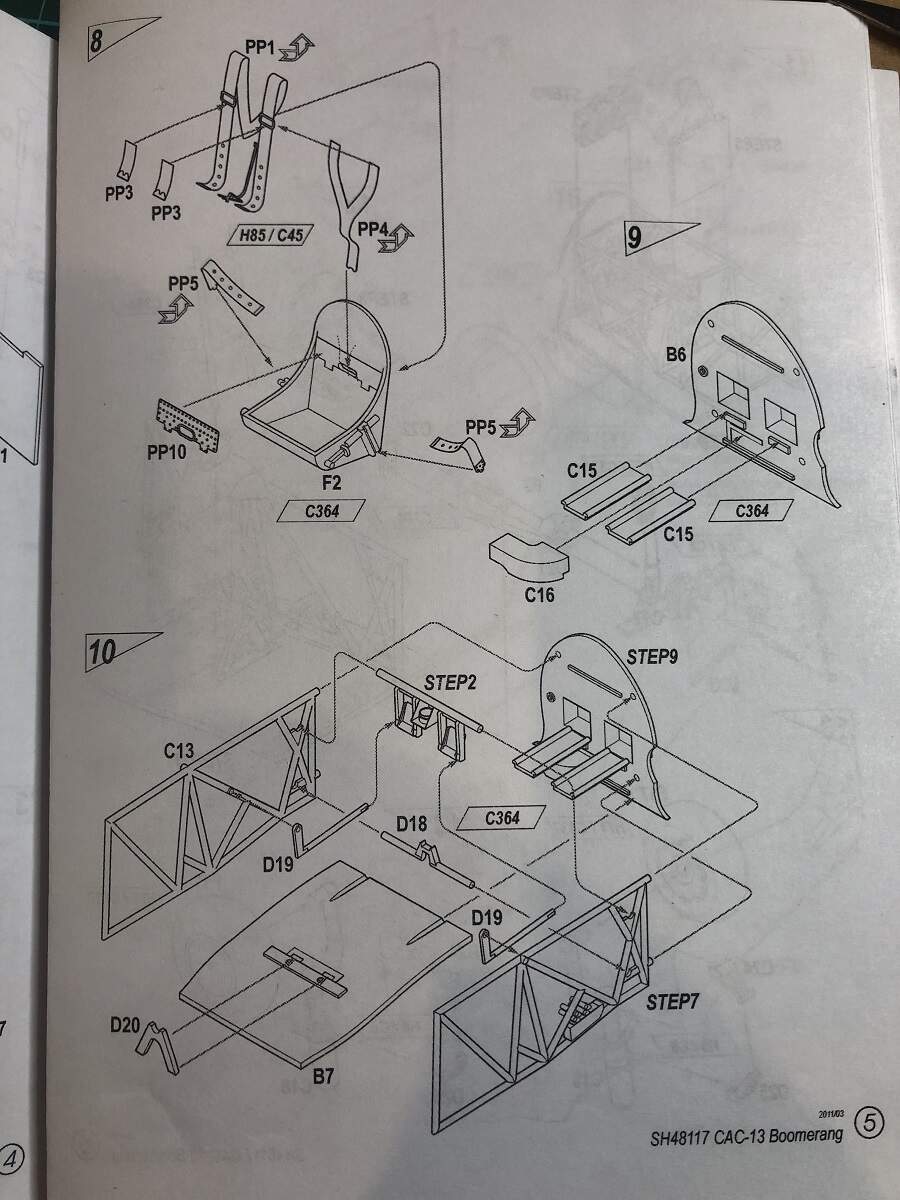
My mission for tonight, step 10. Assembling the firewall and office framework.
Note the short-shots on one of the main tube frame parts (C-13) and one of the T-handles on the throttle quadrant. Also, one of the D-19 parts was broken in two, but easily repaired and not noticeable.
The plastic is quite hard and brittle, so I am taking extra care on the clean-up of the small parts.
Cheers, D
5 Likes
Good to see these ones back D 
Following with interest
Will be watching your build.
Only Boomerang I have is the ye olde Airfix kit.
Well D , you should have known it would come back - it is a Boomerang after all - yuk yuk !
Nice to see you back to wing things .
Cheers Richard
1 Like
And just in case there was any doubt, multiple means multiple !!
The CA-13 kit here is the updated release with resin interior parts, corrected markings and full-colour instructions. The current build is the original CA-13 release from 2012.
I also have several AM decal sets to add to the task at hand.
Cheers, D
6 Likes
A little progress to report.
Cockpit framework, firewall and floor assembled. Not much in the way of locating tabs or pins, but a relatively painless operation!
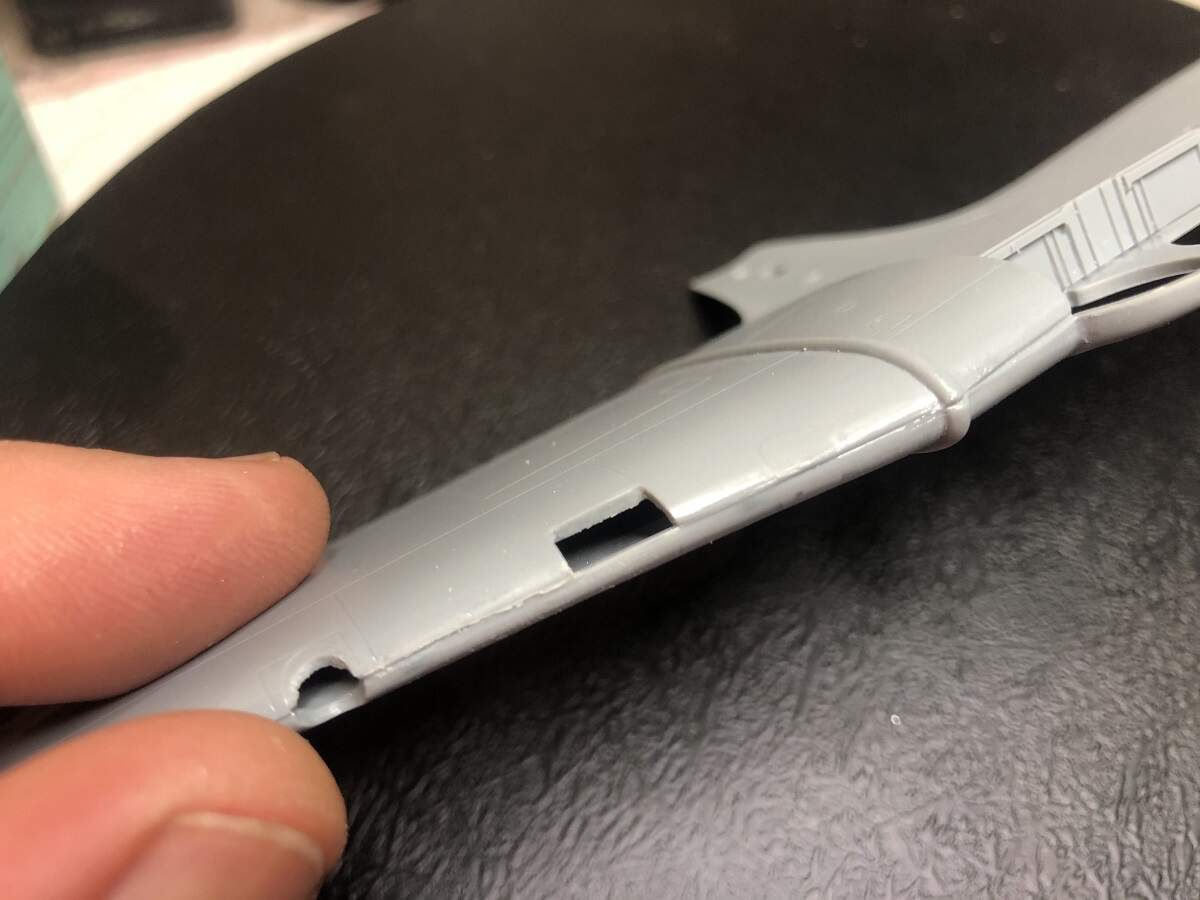
Wing leading edges cleaned up.
Some more work to do to get the trailing edges to where I’m happy, but I’m happy with the results so far.
Cheers, D
3 Likes
Very nice D. Have been thinking of adding SH’s 1/72 version of the Boomer to the stash of late…
1 Like
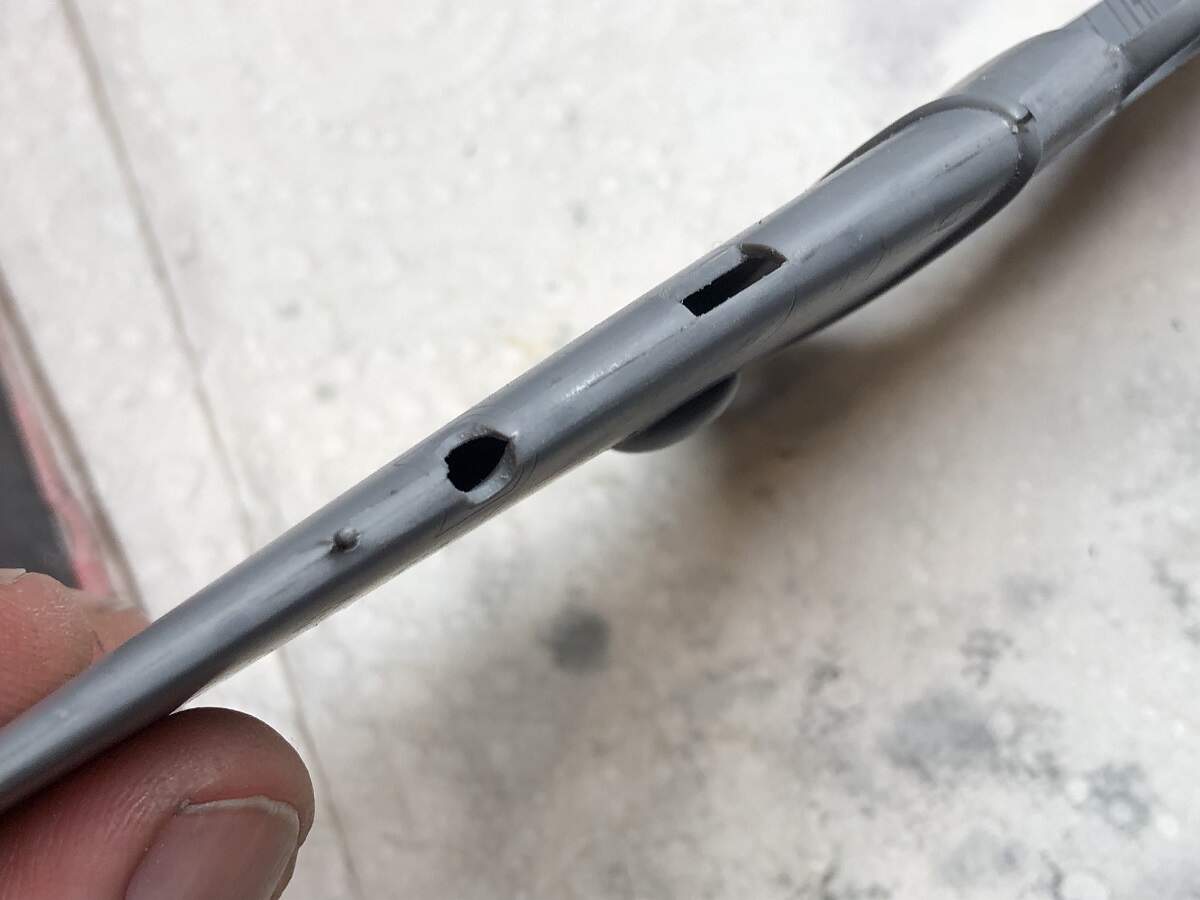
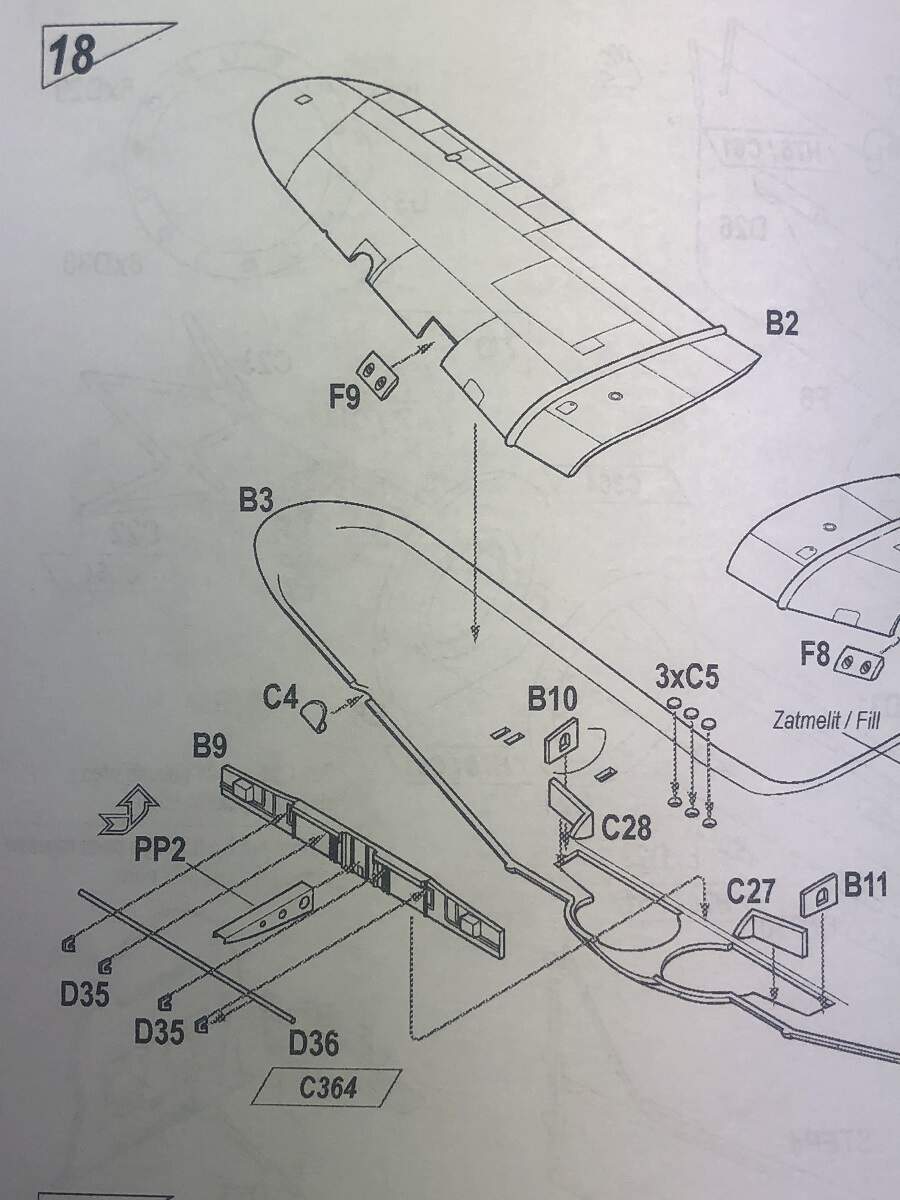
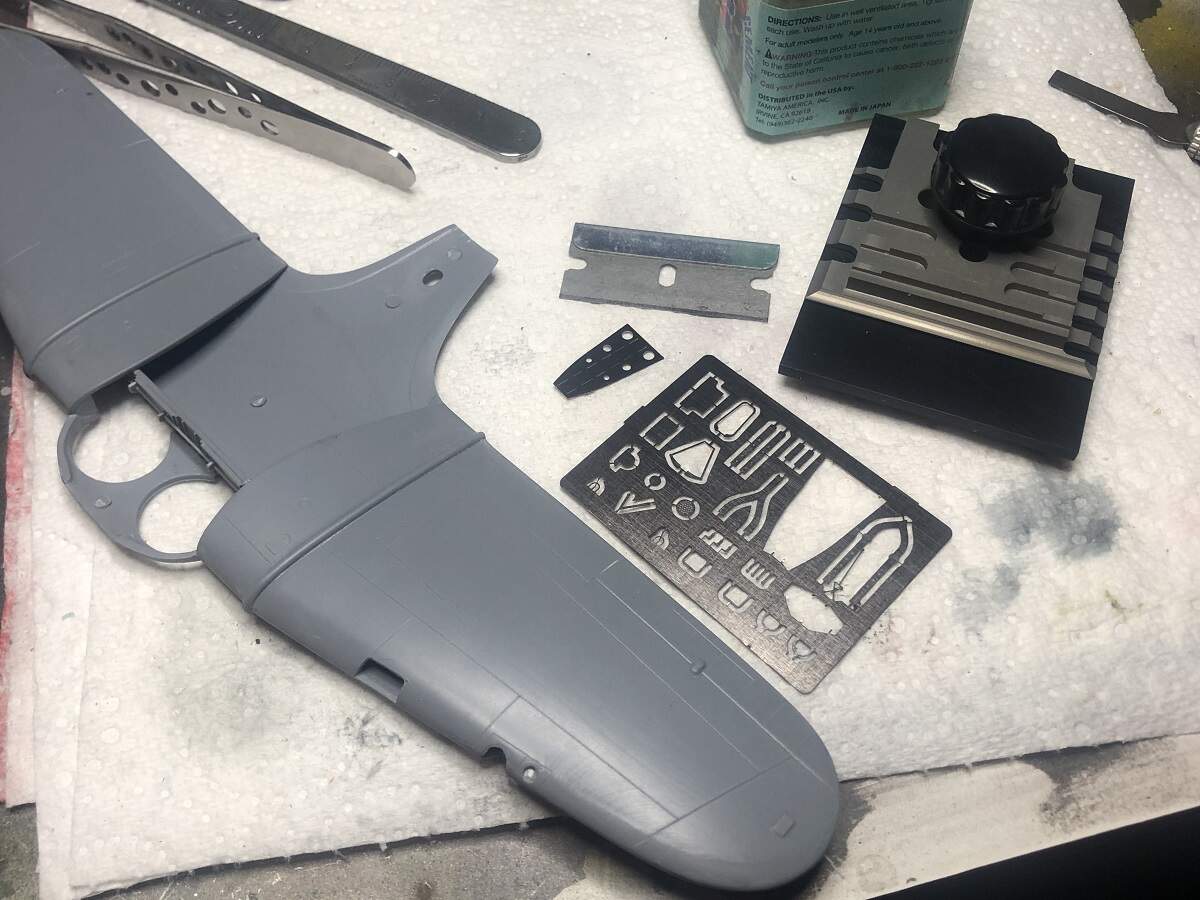
Finishing off the main gear wheel wells, we look at Step 18 of the instruction sheet.
I go to the Sprue, and find half of part D36 is missing. It’s a fragile long part, and it doesn’t seem to be short-shot. It looks like part of it has broken off and flown away. The plastic is quite brittle on this kit so I’m not entirely surprised.
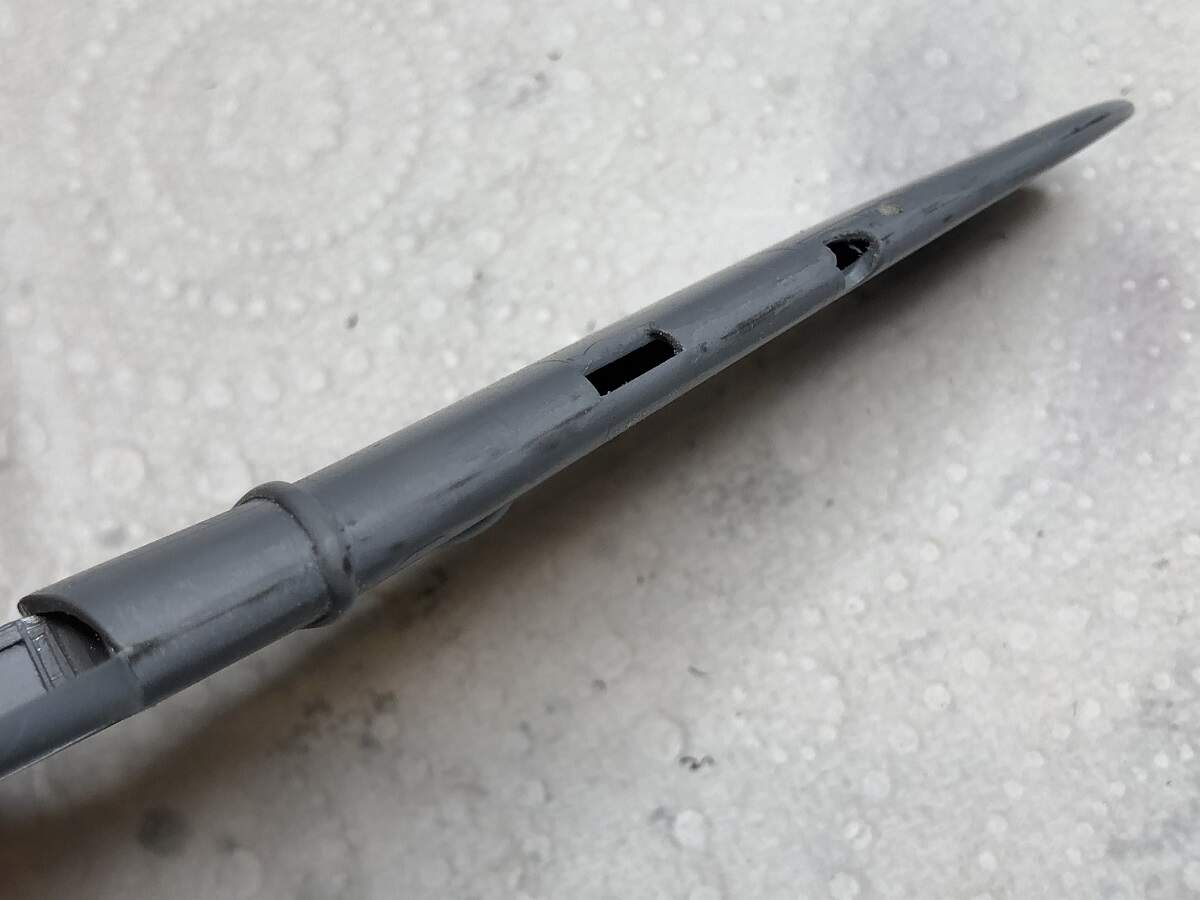
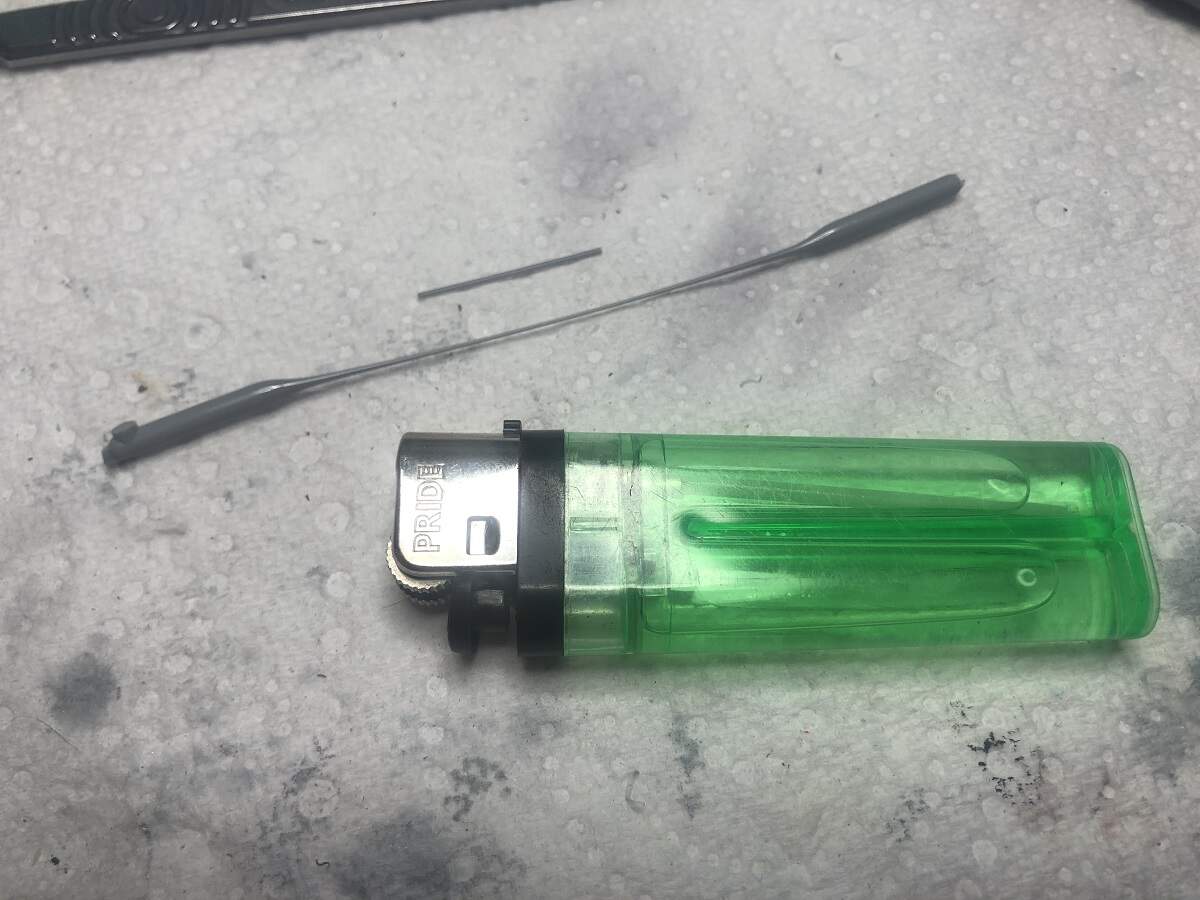
Anyway, out with some old Dragon grey sprue and a lighter, stretchy-time! A couple of tries and I’ve hit something close to the right diameter.
And set in place with the retainers.
The last part required for the wheel well is PP2, so out with the “Bug Hold’n’Fold” for a rare appearance.
And here we are a day later with the white glue (Ammo Ultra Glue) cured and ready for primer.
Cheers, D
5 Likes
Facebook
For anybody who’s interested, a short video with some great footage.
1 Like
Just when you thought you had a handle of all the known WWII era aircraft. Nice clean-up work and added detail!!!
1 Like
Well I have recently cleared one of my Auto builds off the bench, so it’s time to get back to this project and do some more work on the SH kit!
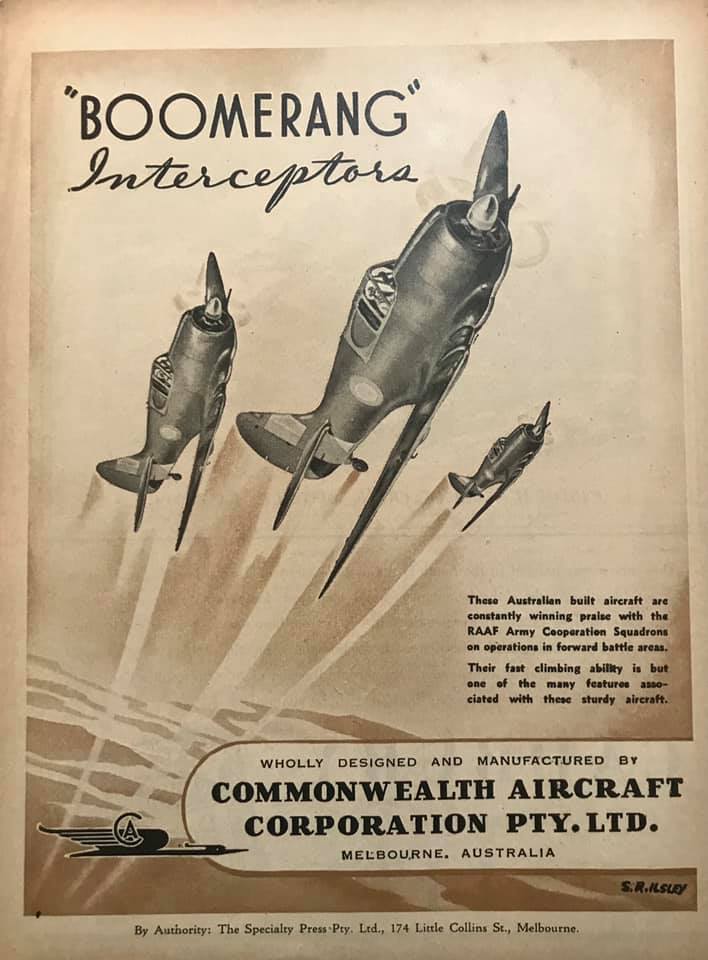
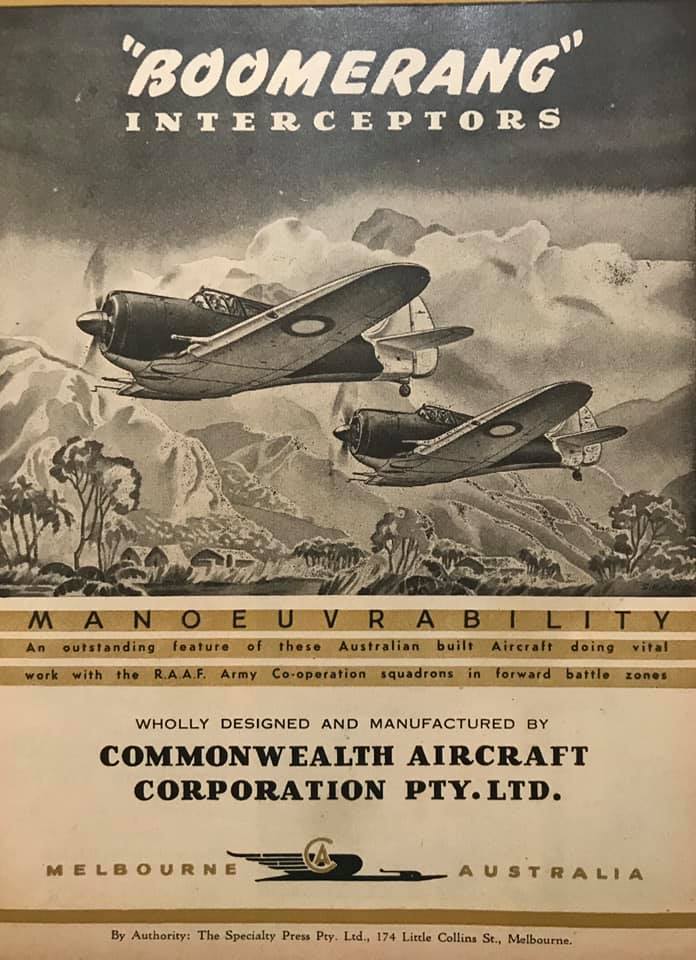
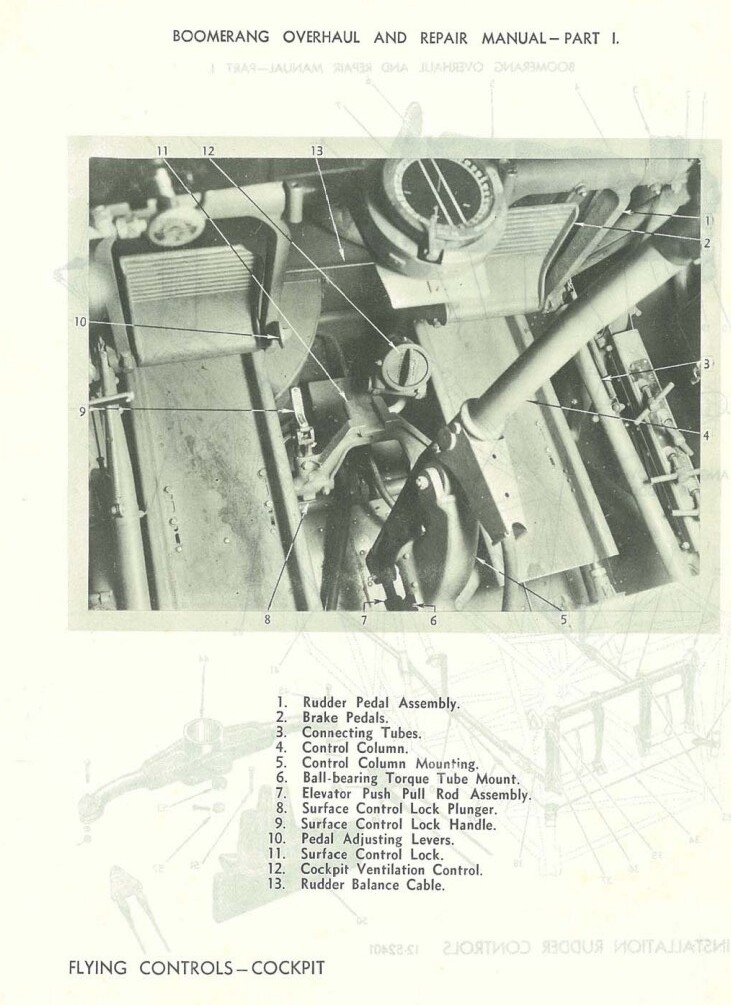
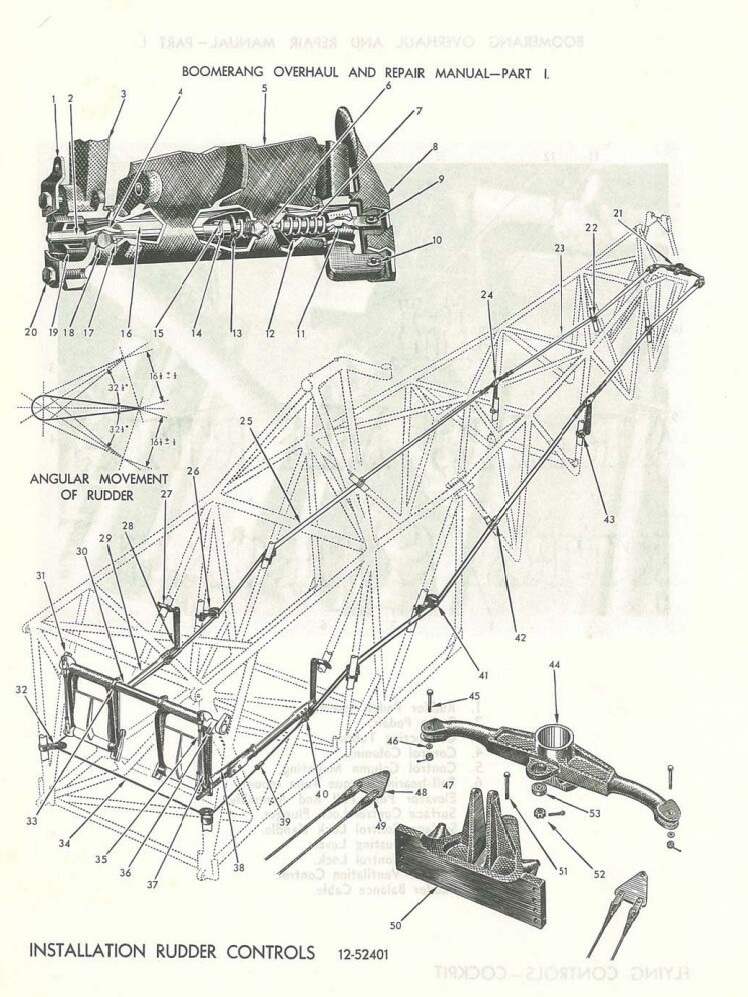
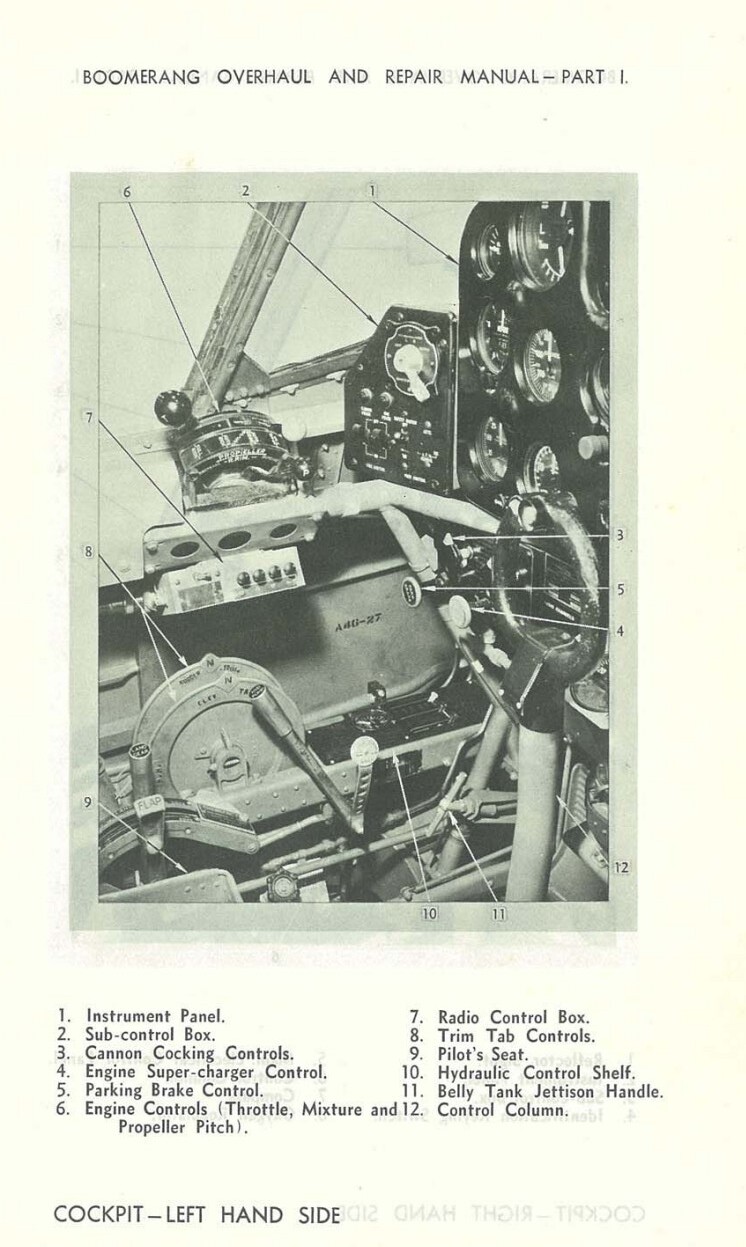
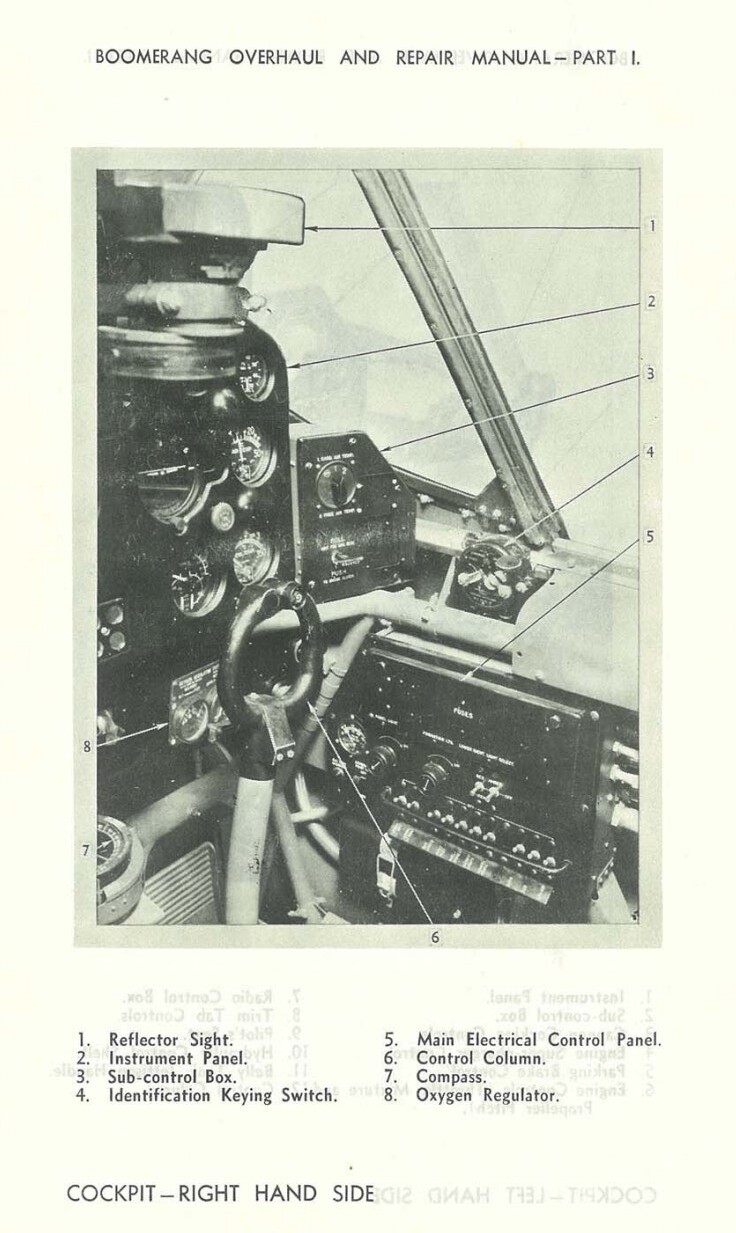
For inspiration, I found these images of original CAC promotional literature
For reference, I downloaded the full scanned PDF of this gem
Some examples of the great contents:
Hopefully some progress to report soon 
Cheers, D
5 Likes
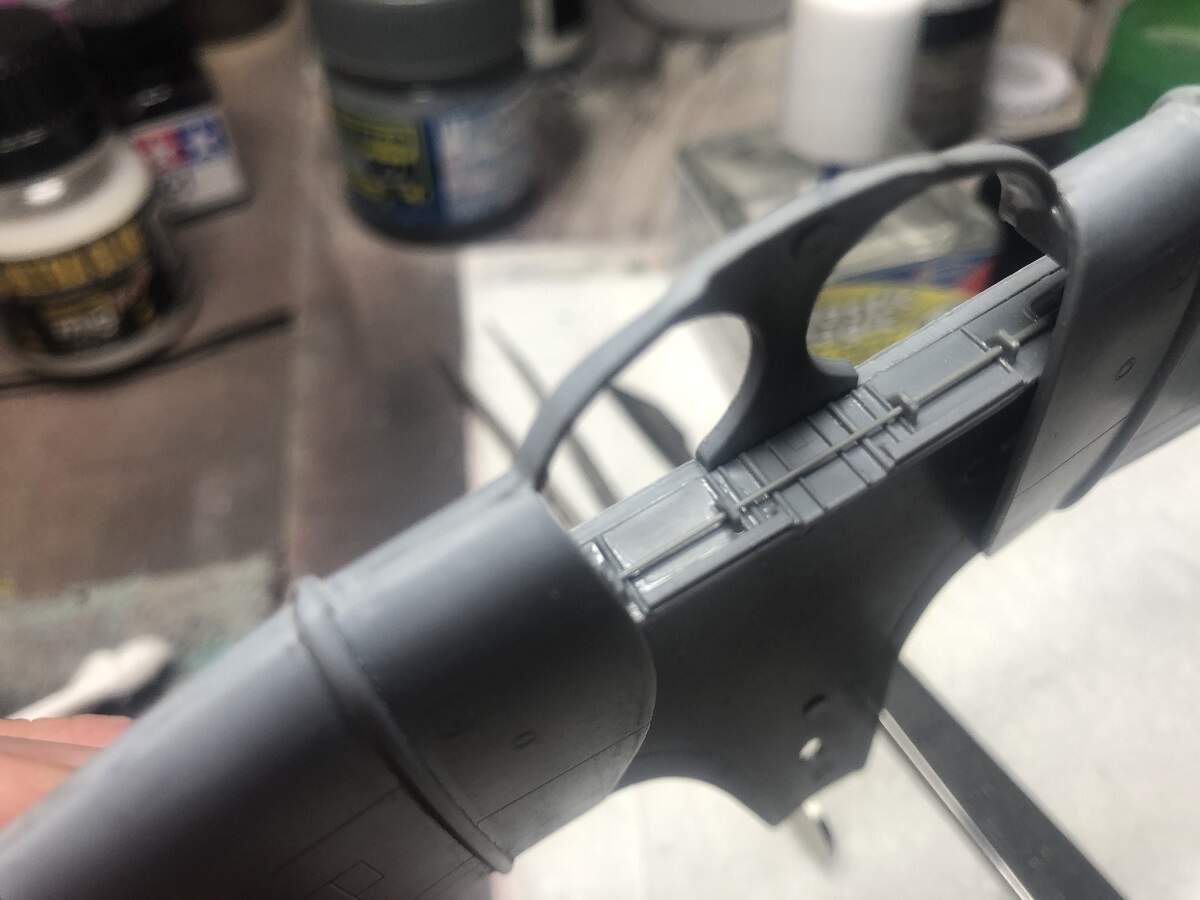
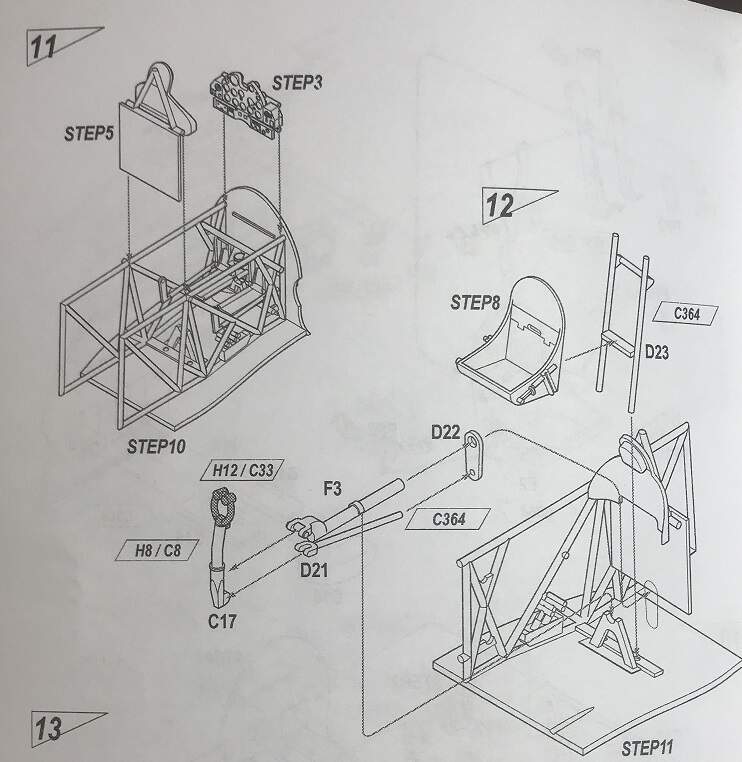
Back to the office we go, this looks like an exercise in precision tweezering and patience!
Lots of dry-fits and testing here, there are no positive location points except for the ridge in the middle of part F3 where it mounts to the bracket on the cockpit floor. So, that might need to be my starting point for getting Step 12 together!
First problem encountered, Part #F3 is resin and brittle, and part of the yoke broke off (visible in the above image). Part #D21 attaches to a lug at the bottom of the control stick, then passes beneath the floor mount bracket. Parts F3 and D21 then both fit (hopefully) into Part #D22 which also appears to attach to the bottom of the rear wall, but once again no locating point. Speaking of which, the whole rear wall assembly has no positive locating points, so I’m going round in circles trying to decide which part to install first.
Time for a nice hot cuppa, it’s 3 degrees C outside! Stop dithering, make a decision and move on it!
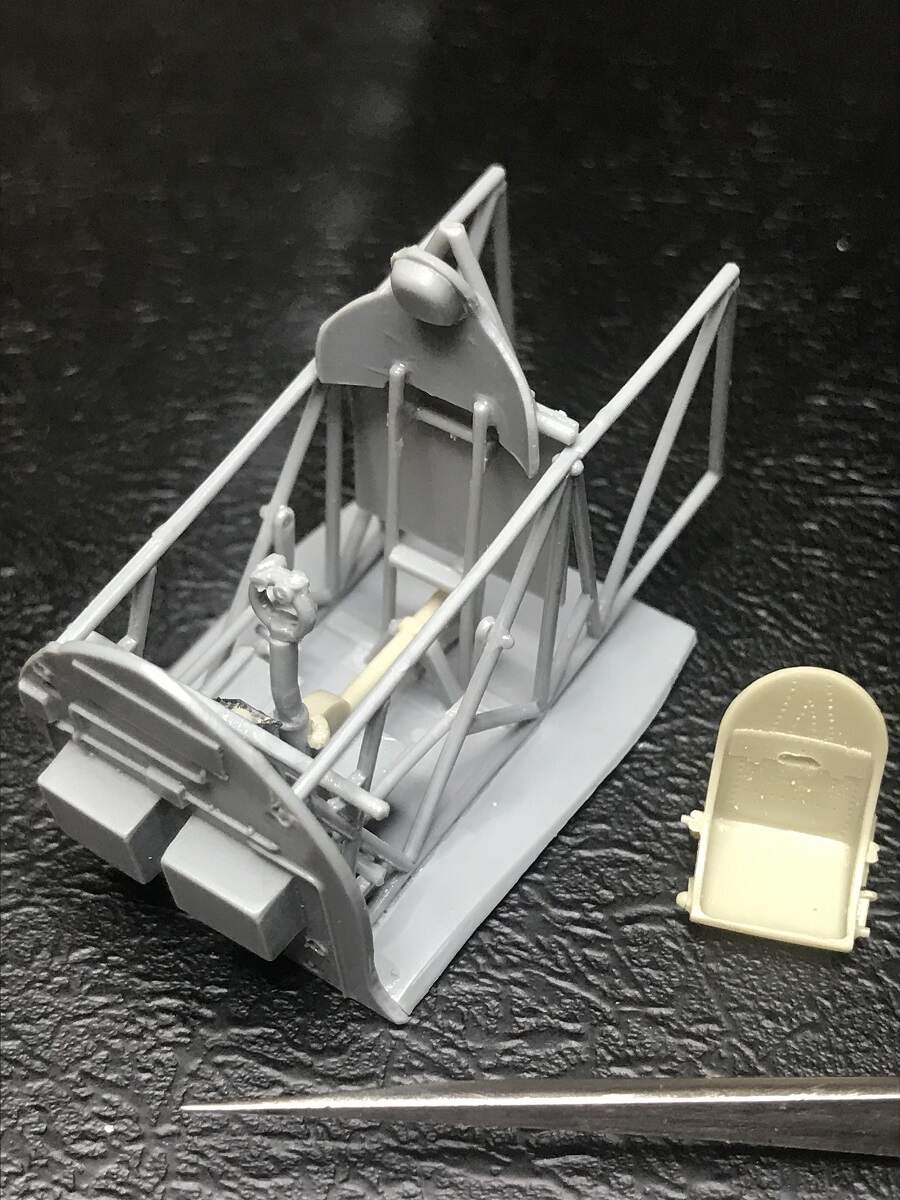
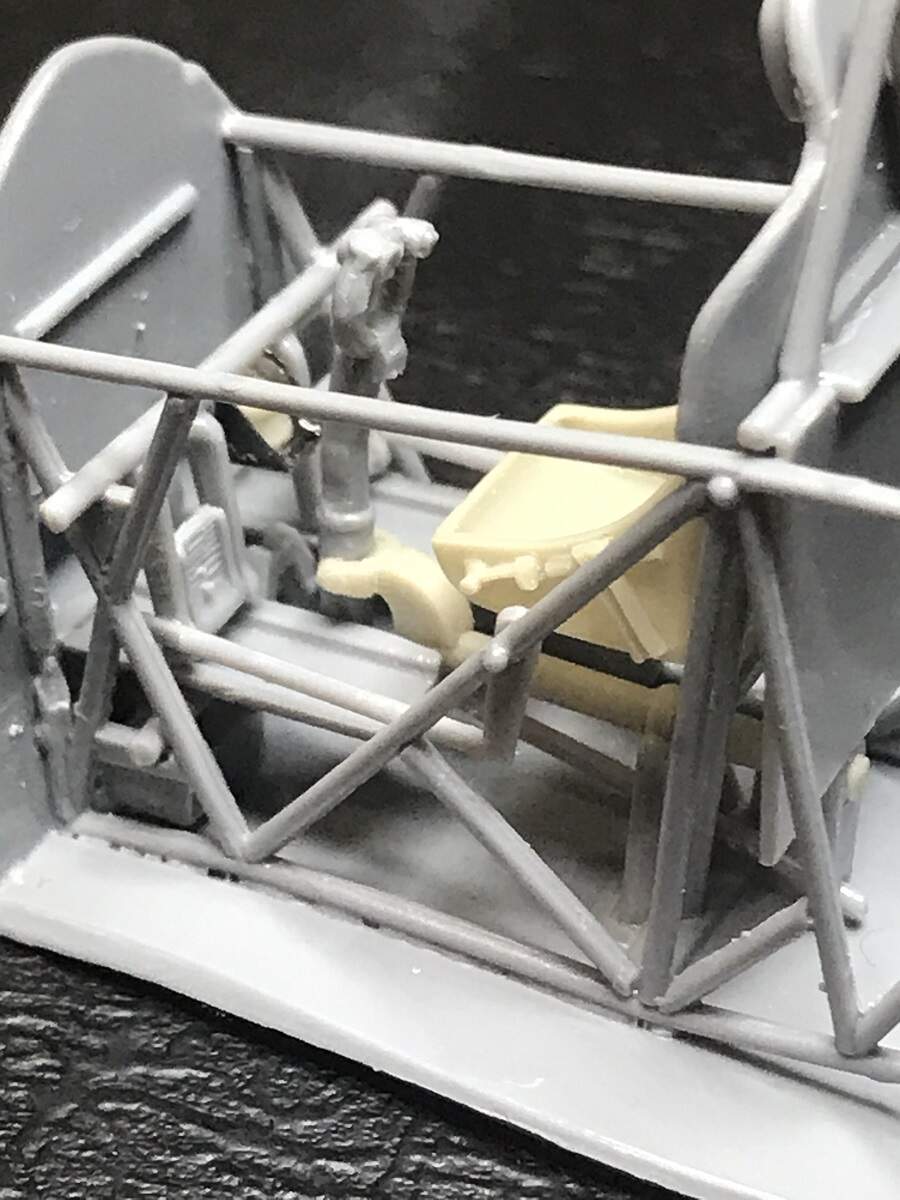
Part #F3 was CA’d onto the control stick (C17) and the broken piece glued back in place (so that I could sleep tonight!). This assembly was then CA’d down onto the floor mount bracket, then D21 was tweezered in beneath the bracket (with a drop of Extra Thin in the contact point) and onto the lug at the bottom of the control stick. Part #D22 was then set into place with Extra Thin onto D21 and CA onto F3, and I sat back admiring my success!
The rear cockpit wall really is a “best guess” scenario with very small contact points to provide any sort of fixing. I settled it in to where I thought it should go, then capillaried some Extra Thin around the contact points at the top, and onto D22 at the bottom where there was a small contact point as well.
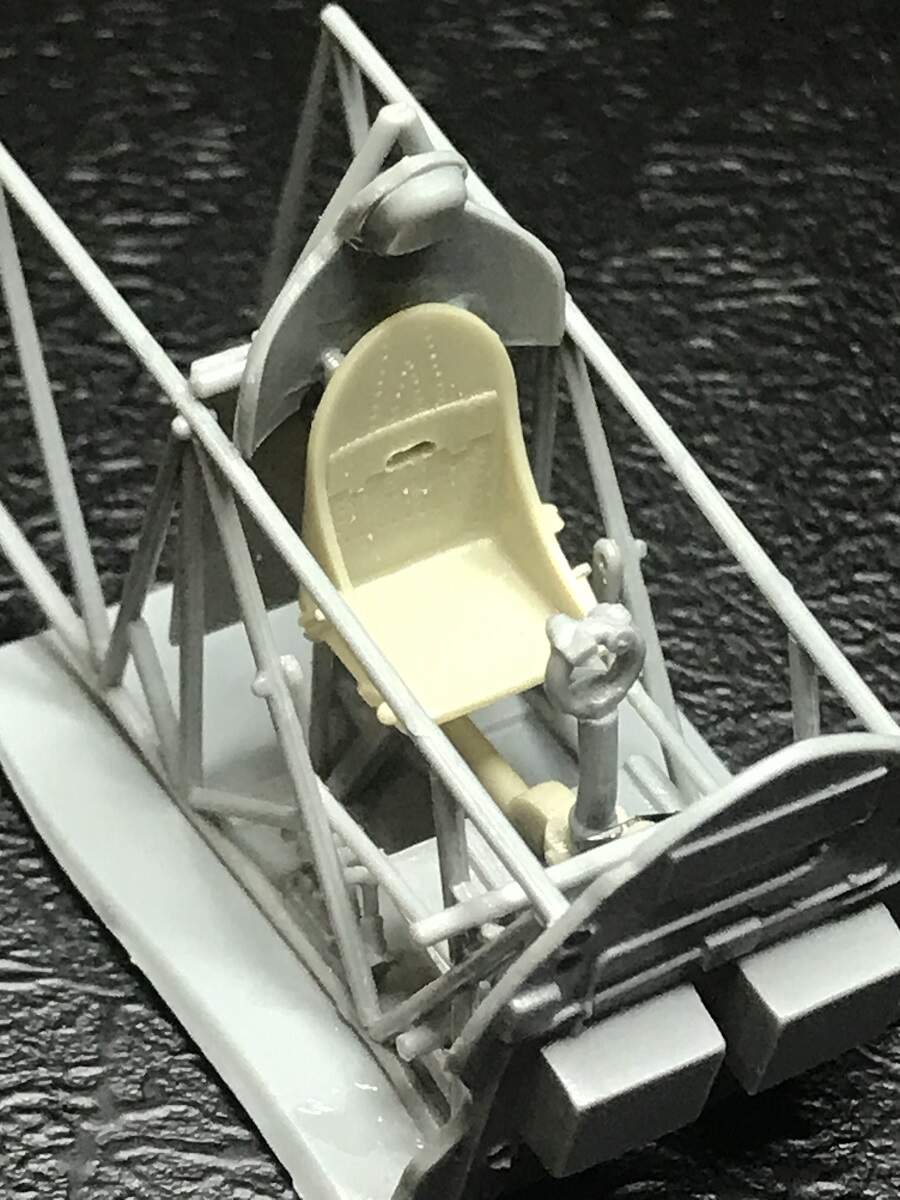
So far so good! Finally part #D23 (seat support frame) was installed (finally locating points and clear access!).
The seat still needs to have 7 PE parts added to make up the harness assembly, then painted and weathered prior to installation, but I just needed to dry test fit it to see how it looks.
The real brain-melt in all of this is the fact that once the assembly is installed and the fuselage closed up, pretty much none of this will be visible 


Cheers, D (off for another cuppa)
4 Likes
Nice to see this one back on the workbench for some love, D!
Recently have become enamored with special hobby kits (Bf109 in 1/72, in particular) and been watching Rowan’s spectacular 1/32 whirlwind build
1 Like
Thanks for checking in Russ. I agree, that big Whirlwind is looking great. Another kit on the want list!
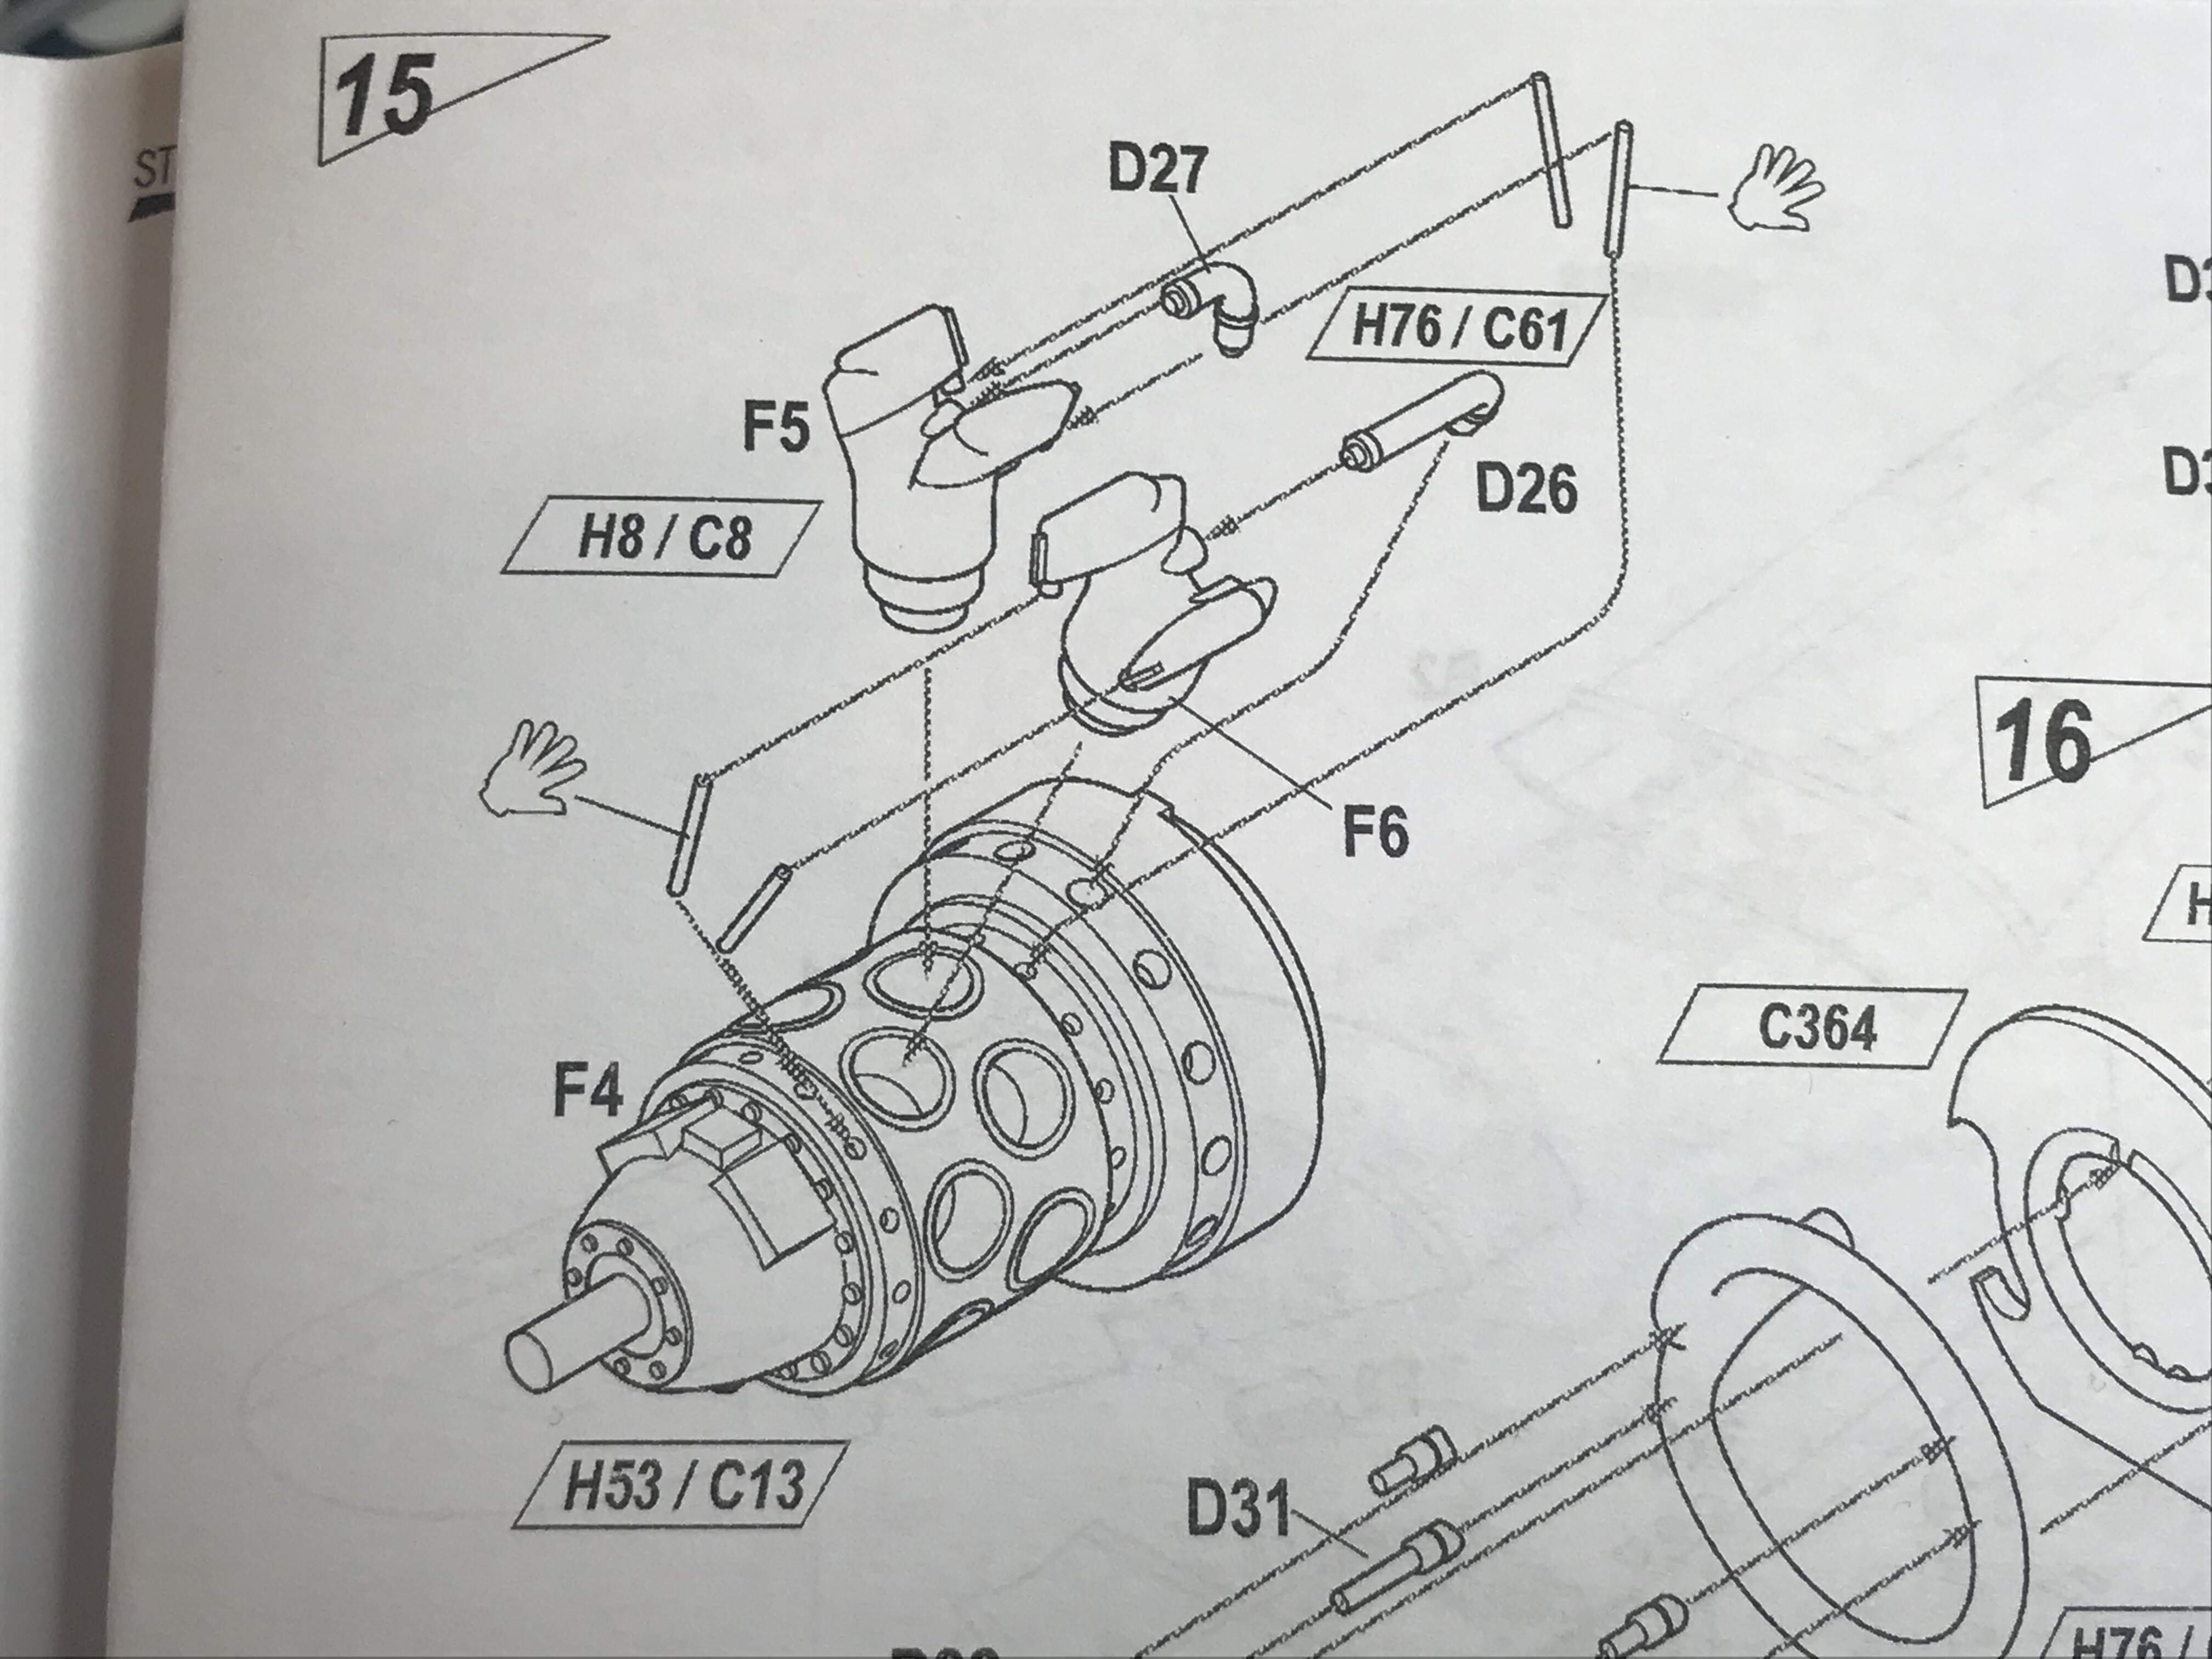
Mission for tonight? Well, this looks like a bunch of fun!
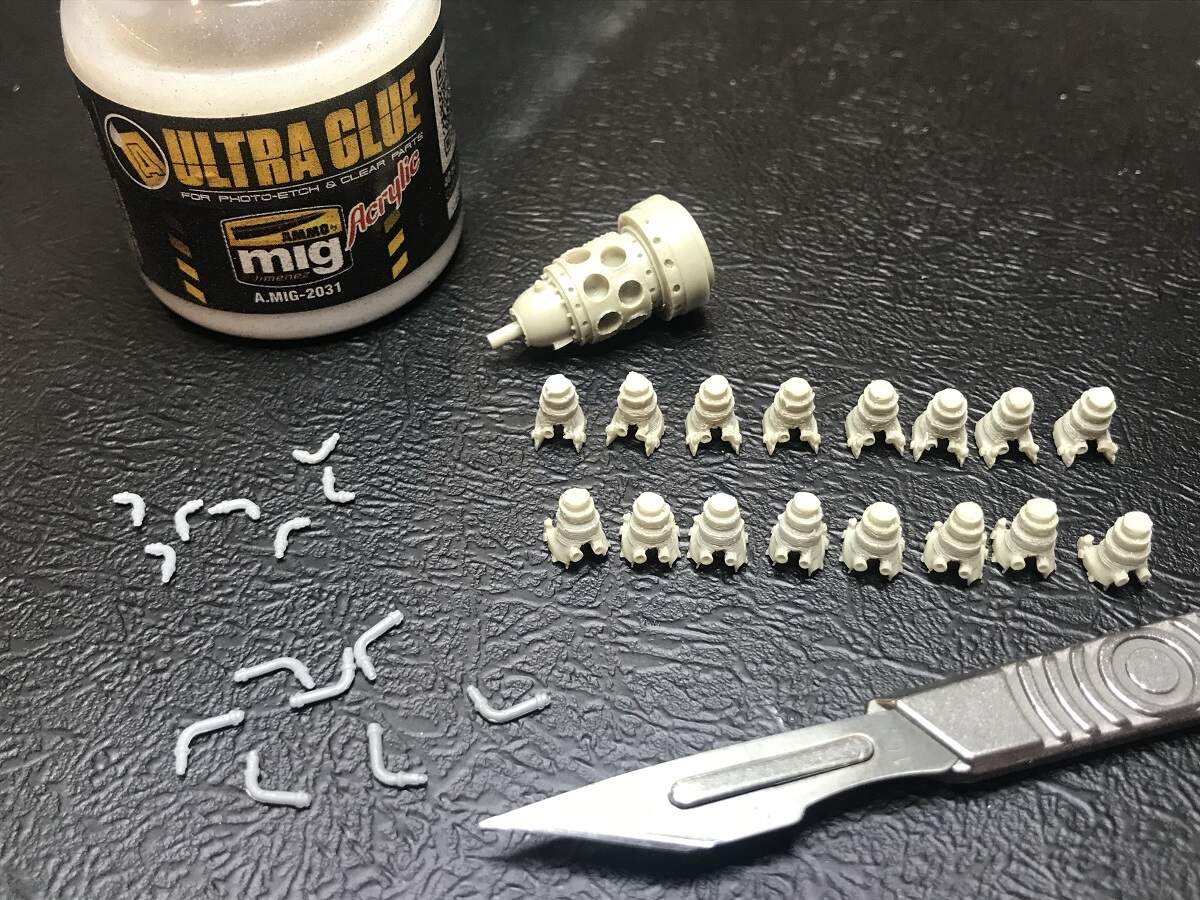
Parts F4, F5 (x8) and F6 (x8) are resin. Parts D26 (x6) and D27 (x6) are styrene. The pushrods are to be scratch-built, so I need to see what fine rod I have in styrene, otherwise maybe some heavy guitar string wire.
I’m going to use MIG Ultra Glue for this to give me some working time to align the cylinders properly. I’ve been using it quite a bit lately and find it dries quite quickly and very strong.
Cheers, D
2 Likes
Good to see you back to this D . Wrestling with many of the same issues on the Lysander build - no locations , pins etc but all in all fit is pretty good.
Thanks for the heads up on the MiG acrylic glue .
I am nearing the point of assembling the resin engine/ cowl from SBS model and I think I may give it a try.
Cheers - Richard
1 Like
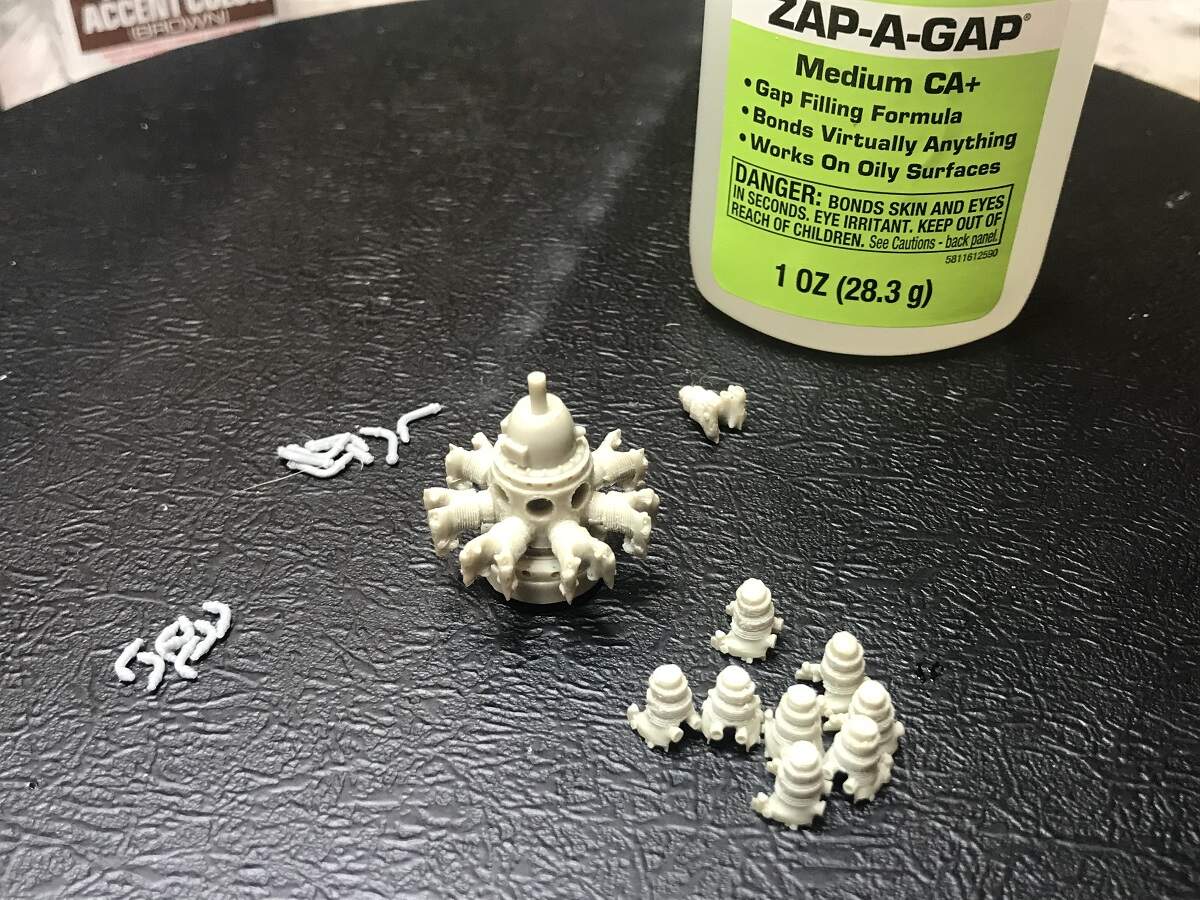
Well, it was worth a try! The Ultra Glue didn’t take too well to the resin. It might have been residue on the parts, or just the “sloppy” fit of the cylinder lugs in the locating holes, but it just didn’t even begin to cure over the time I normally leave it for.
Back to Plan A, old faithful Zap Medium CA, and 10 minutes later one bank of cylinders is in place.
Oh well, we live and learn. I spent the time waiting for the Ultra Glue to cure cleaning up a few more of the kit parts, so all is well.
Cheers, D
1 Like
Ha - went on line to order some and everyone is out of stock - I guess that’s a good thing ! I’ll stick with the CA as well then …
It’s still well worth chasing some down to have at the bench Richard, I use it a lot on clear parts and other spots where CA isn’t the best choice.
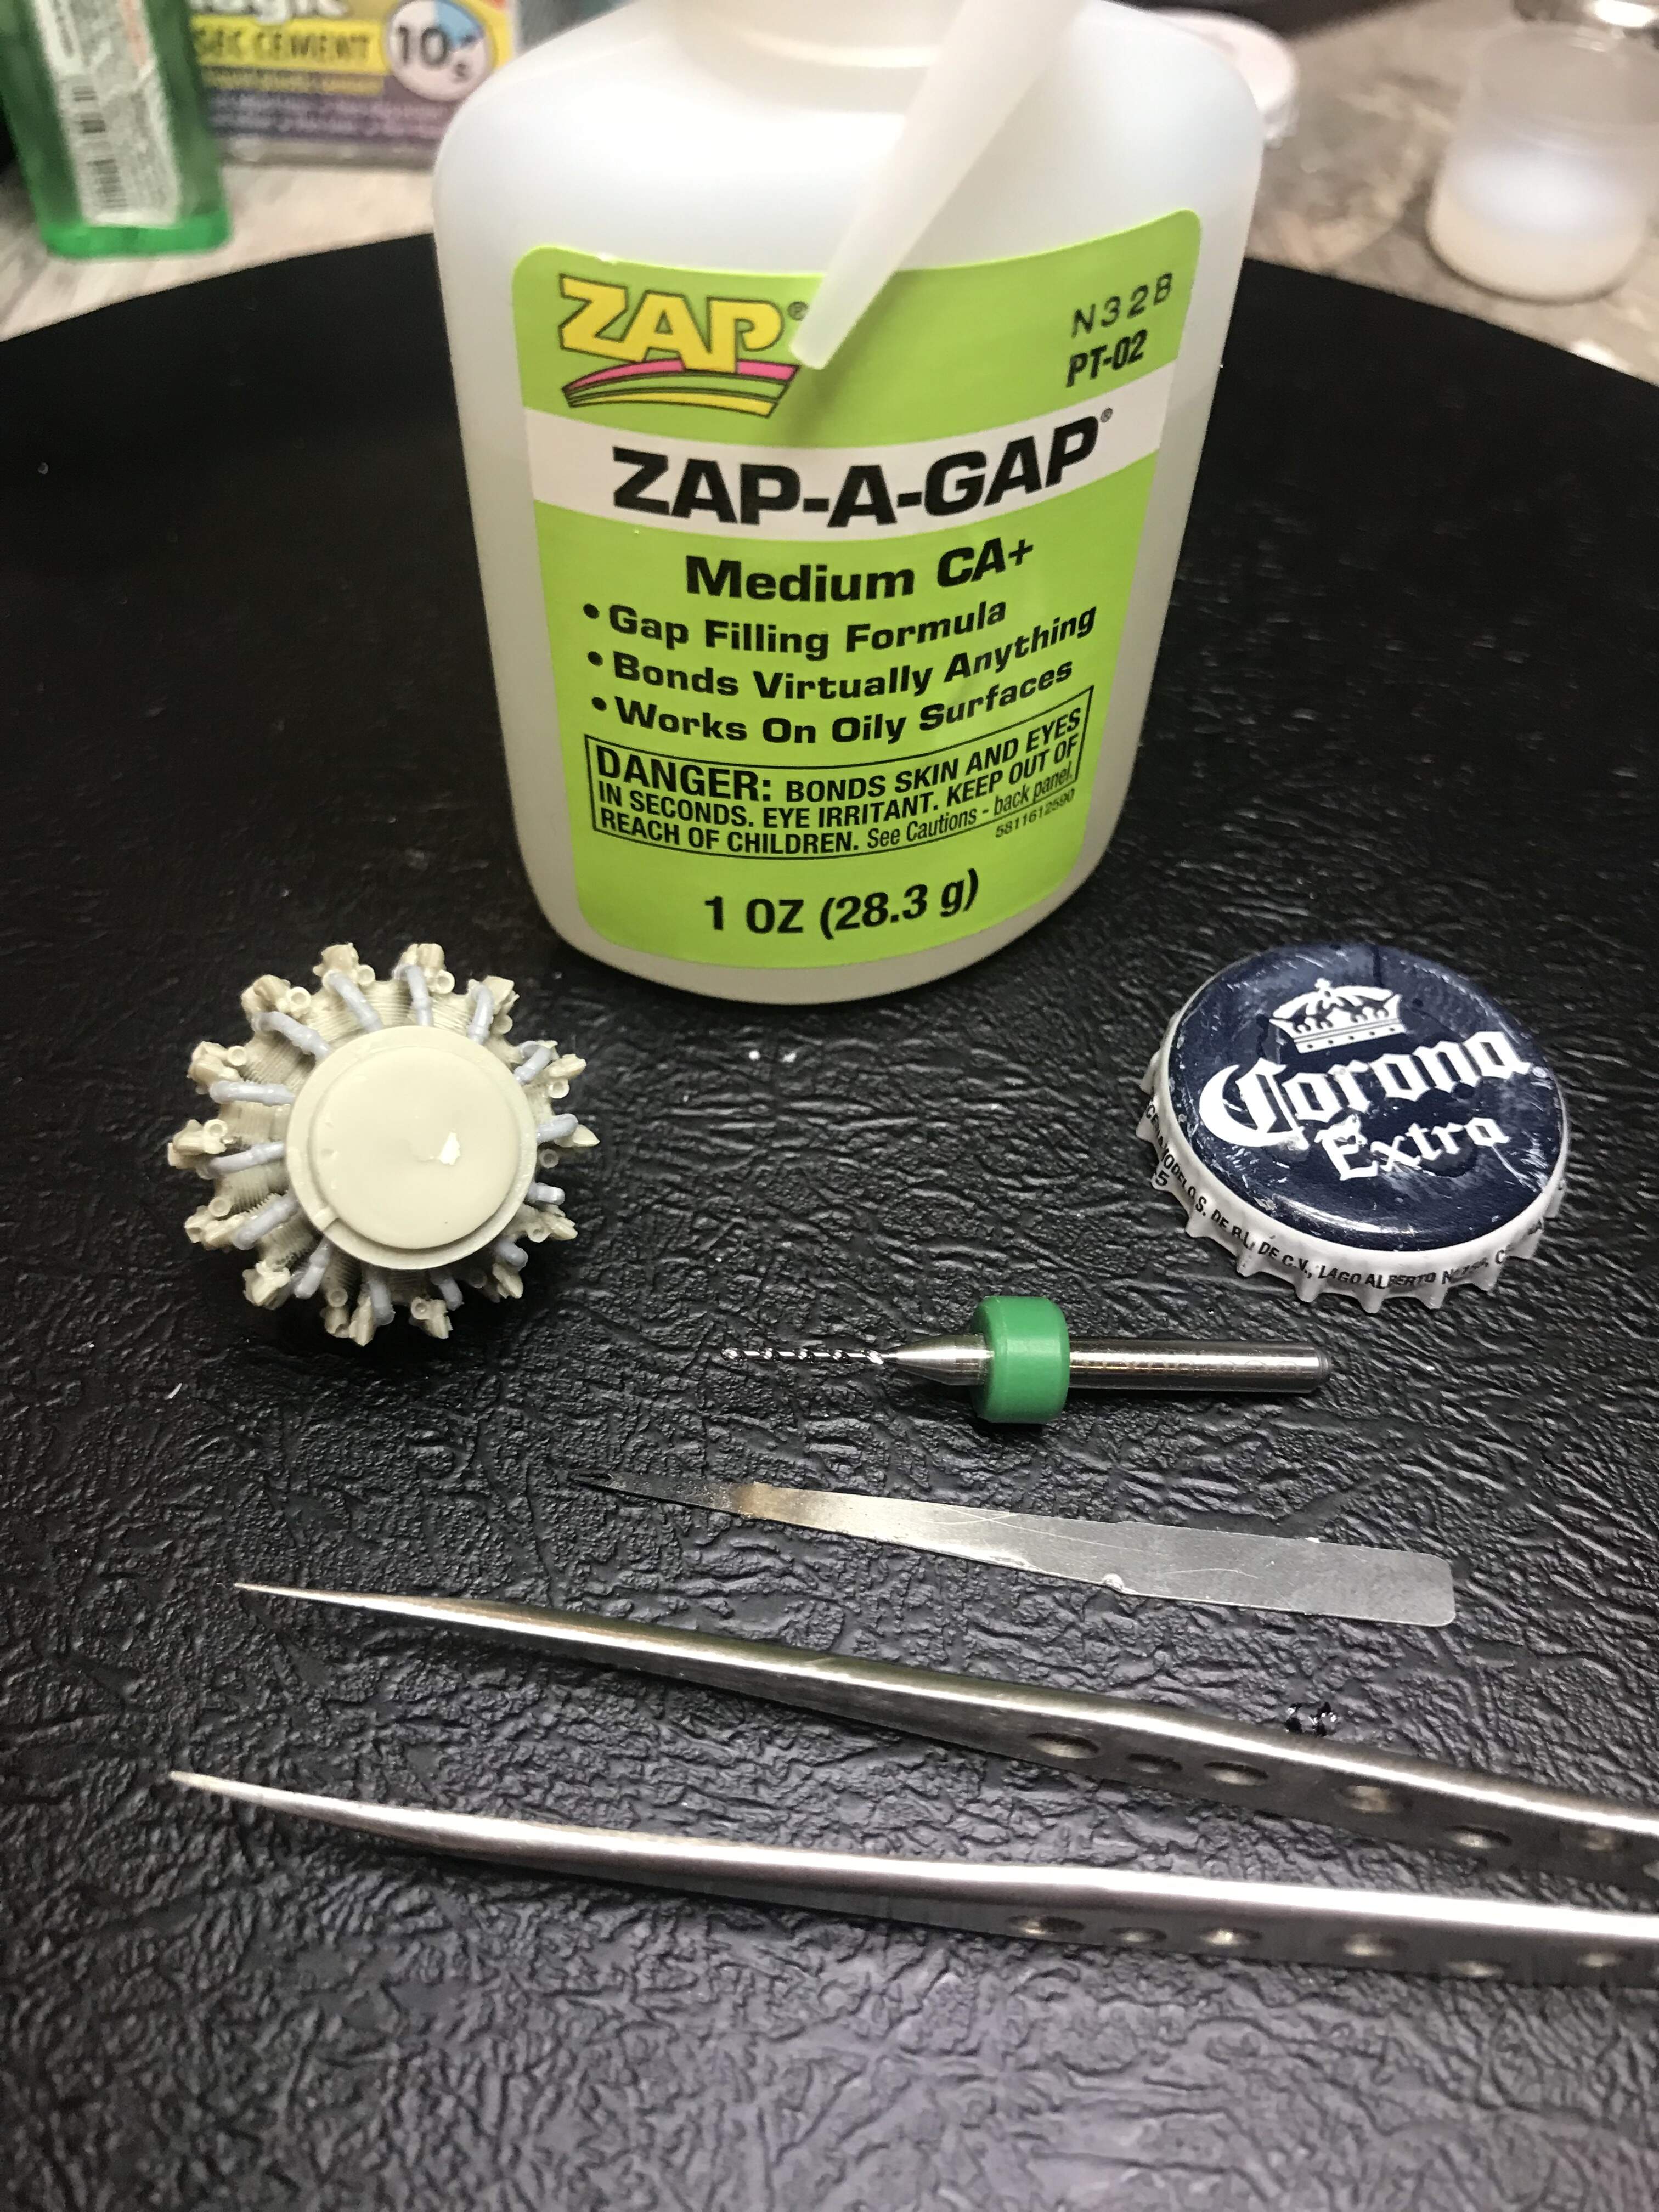
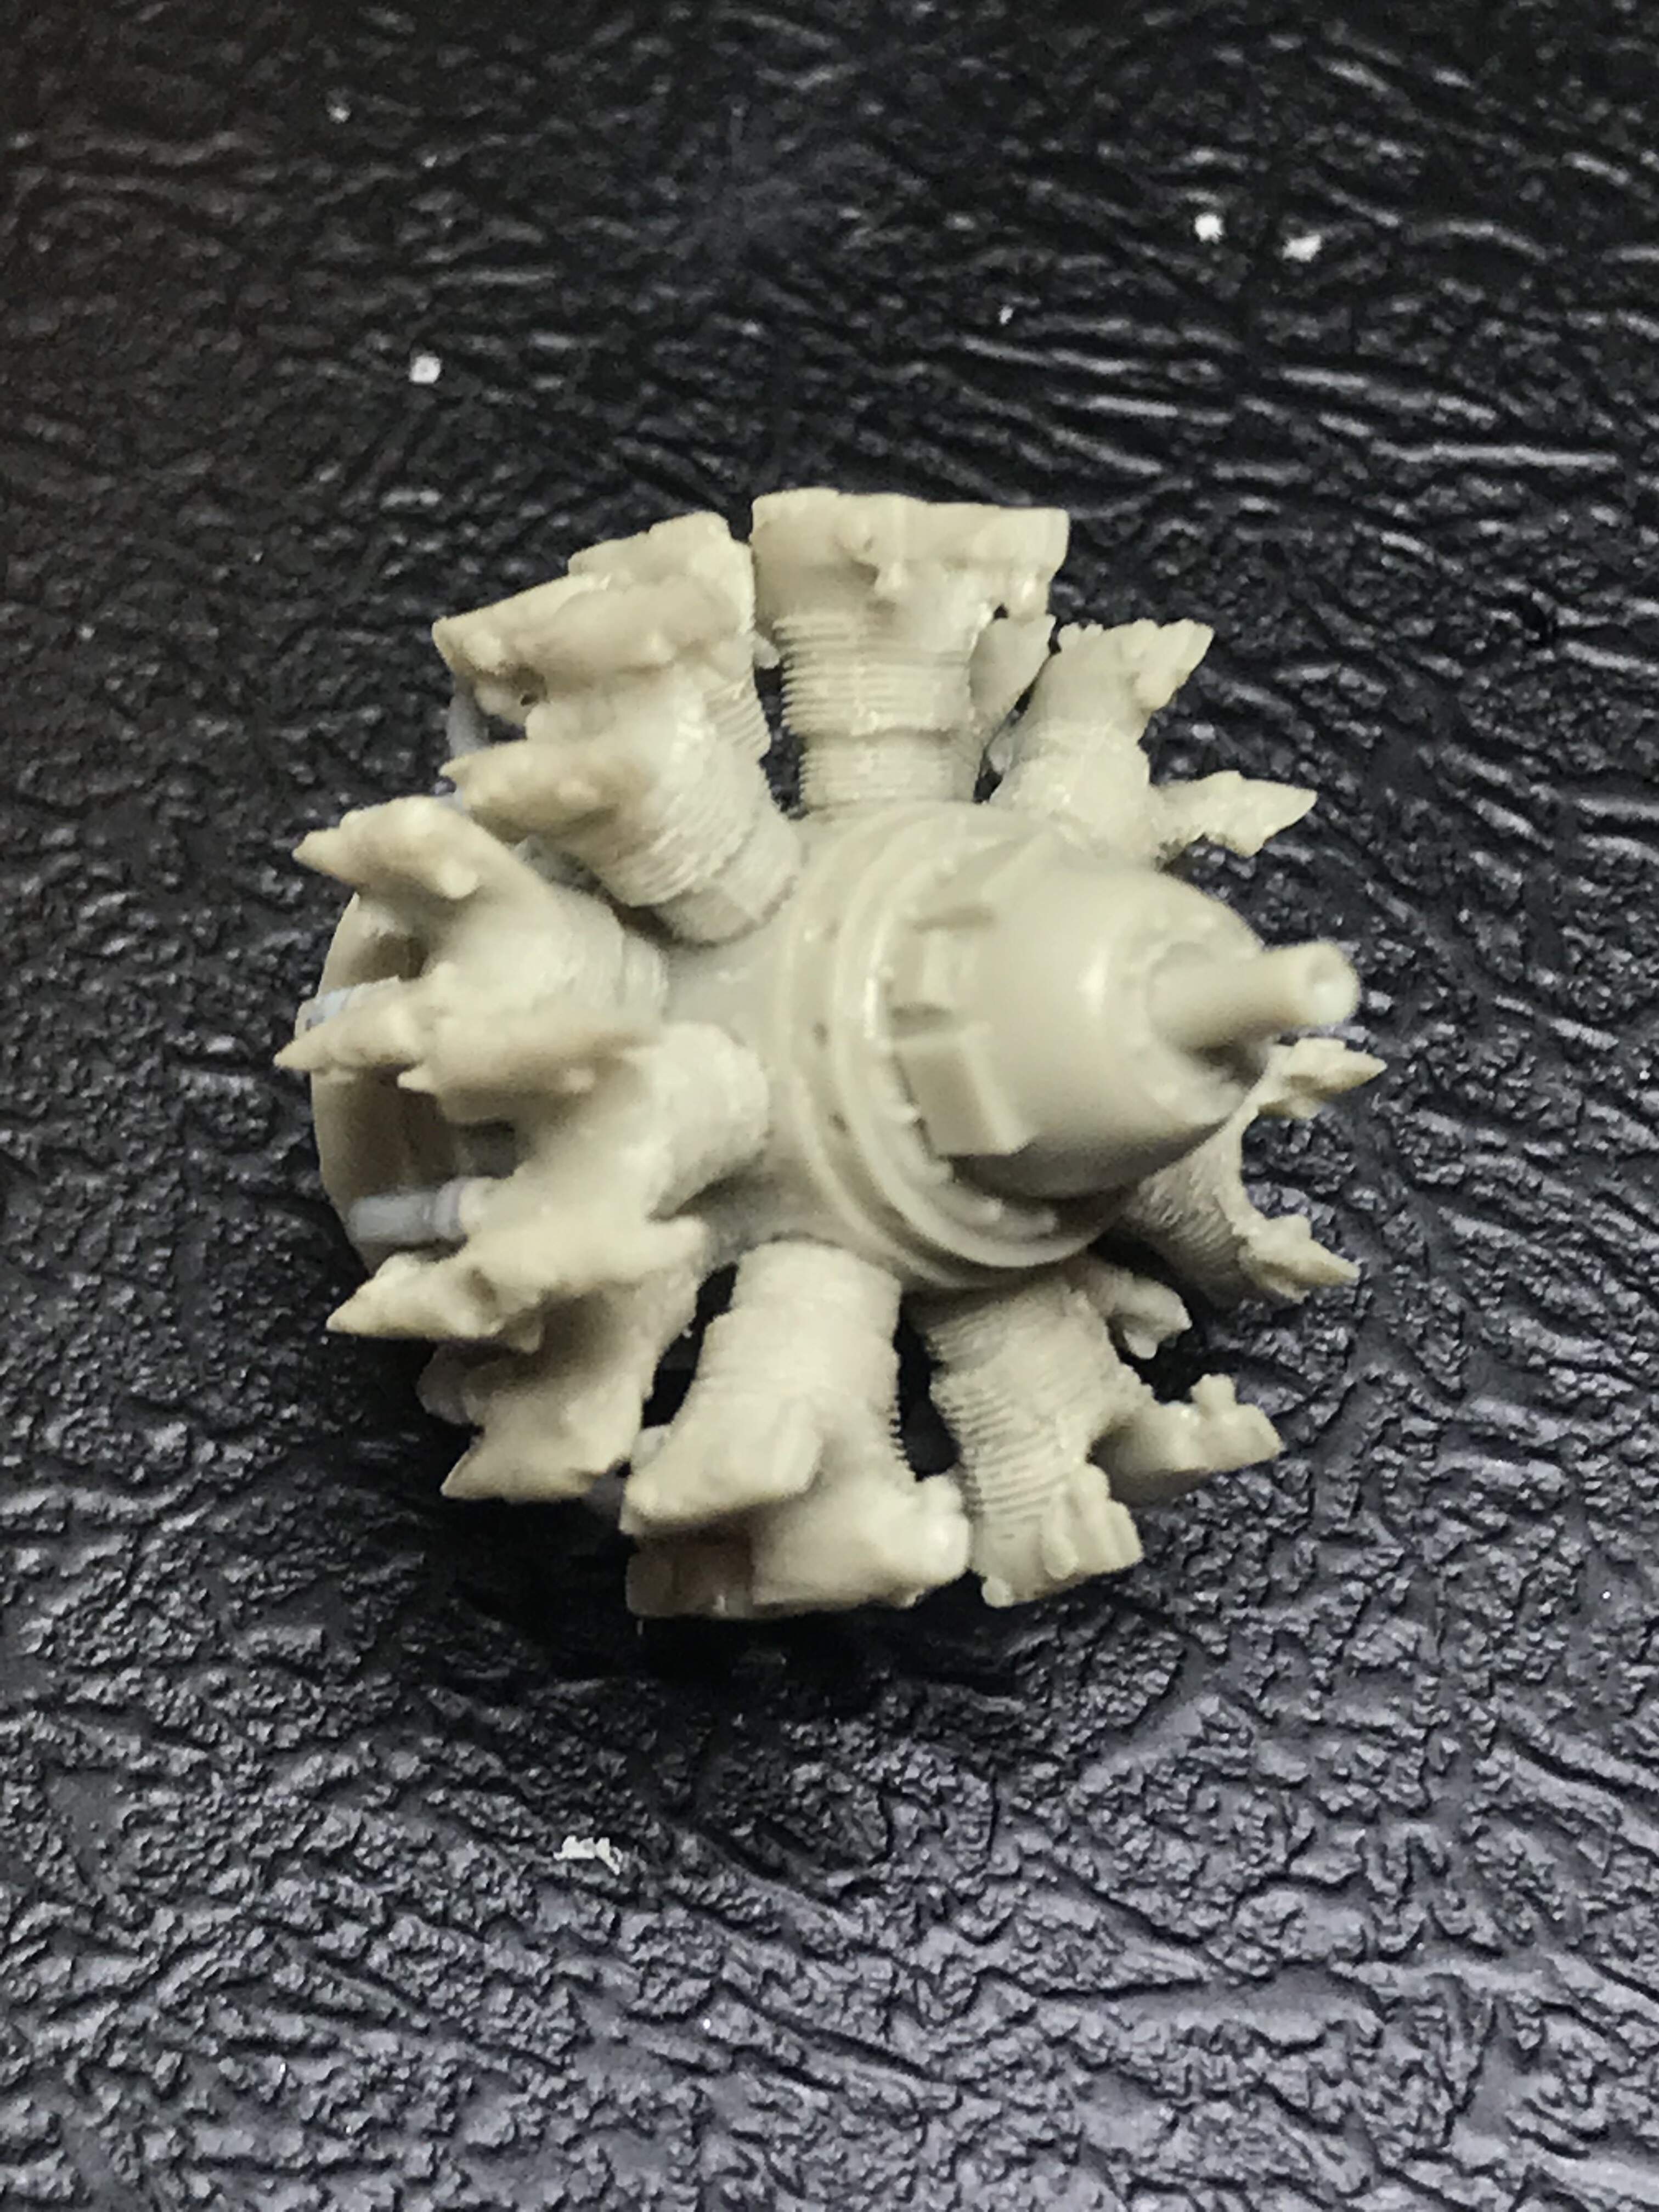
Mission for tonight accomplished, cylinders and air intake tubes all fitted off. I have never really worked with resin much, so I was feeling my way tonight having to drill out some locating holes and clean up some parts. It’s very different to the styrene, much more brittle and unforgiving, but I have a few kits in the stash now with resin parts so I will get the hang of it.
I use the top of a beer bottle (because for some reason there are a few around my bench  ) slightly pushed in to hold a couple of drops of CA, and a little stainless steel CA applicator to place the small drops where I want them. The 0.9mm PCB drill bit was used to open up or clean out a few of the locating holes, but on some of them the expose sides blew out, so I touched a drop of CA on the side once the tube was in place to build it back up.
The tubes are all at the back of the engine so they won’t be seen once the fuselage is buttoned up, and I’m thinking I might not add the push-rods to the rear of the engine for the same reason. Then again, I could use the back as a rehearsal for getting the front push-rods done better.
Cheers, D
5 Likes
Nice work with the CA D.
Actually been eyeing off the 1/72 version of this kit 
Yes, very nice work on the engine, D!  I hope it will fit in the fuselage.
My prefered CA glue is the jellylike type Uhu Mini (1 gram), though I have not used it for resin only for PE parts.
Torsten 
1 Like