Converting a Toyota BJ44 to an FJ45 rock crawler

Hello model builders,

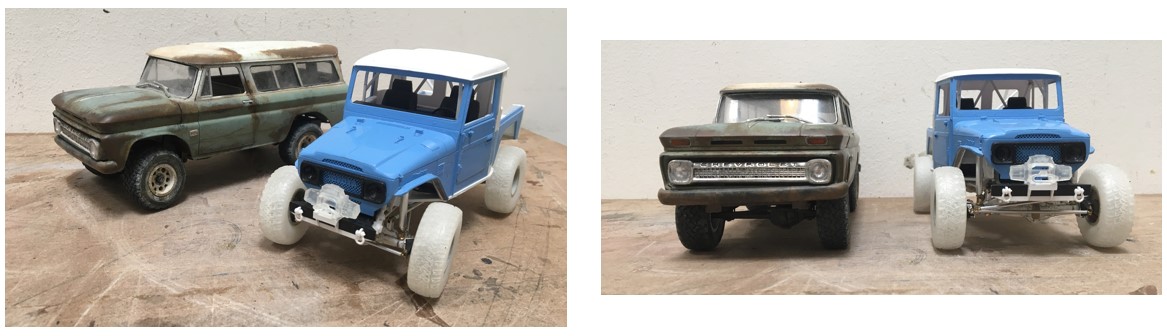
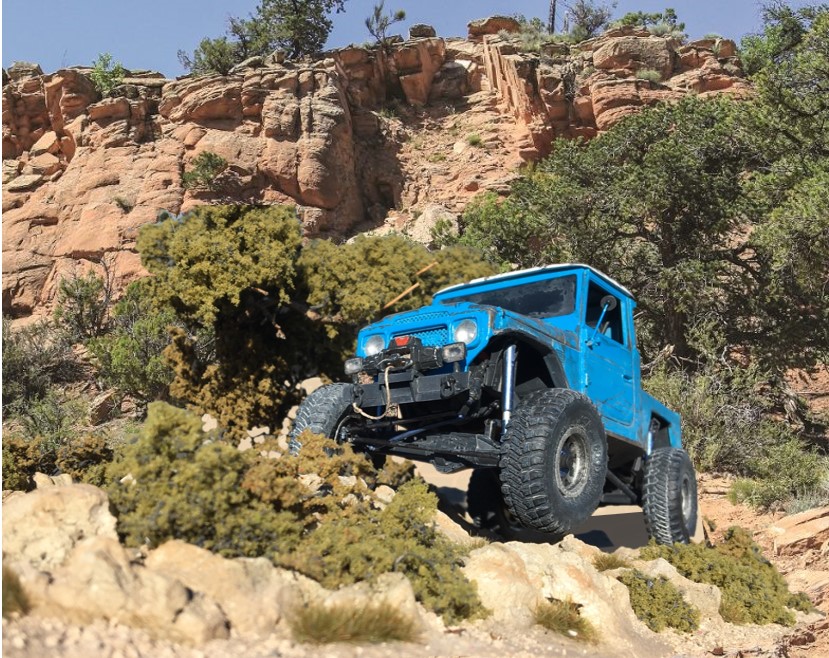
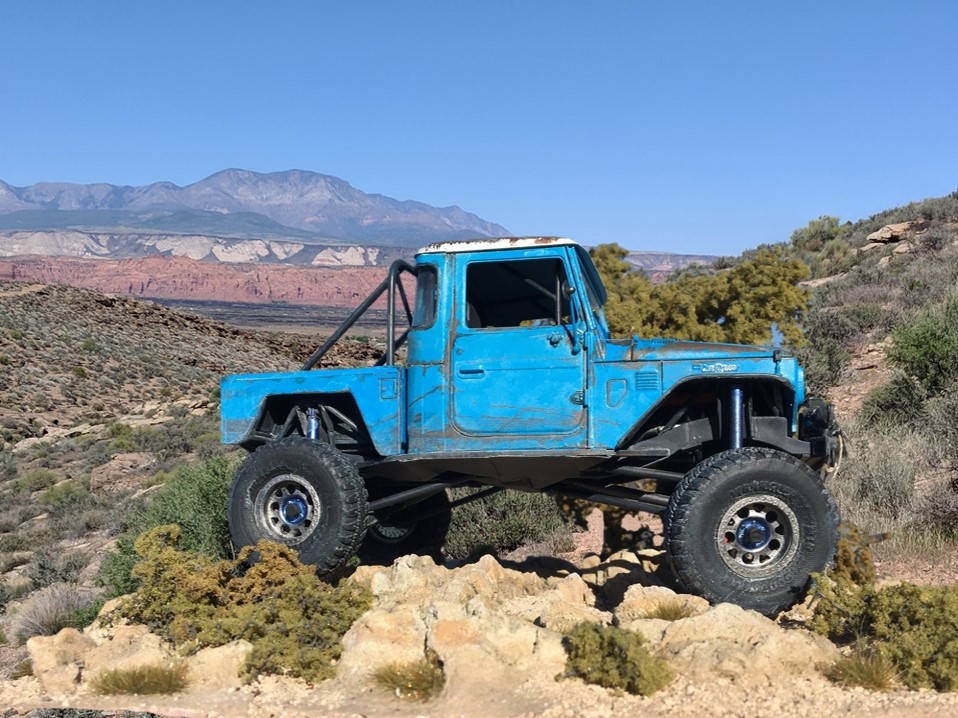
Just after I finished kitbashing a Chevrolet Canopy Express and then making it into a four wheel drive, I decided I had at least one more of these in me to build. This time though, basing the build on a truck built on a youtube channel called Fab Rats. I didn’t do this to begin with because I didn’t think there was a Toyota Land Cruiser available - well, there is - so below you’ll see the inspiration and the kit from Italeri:

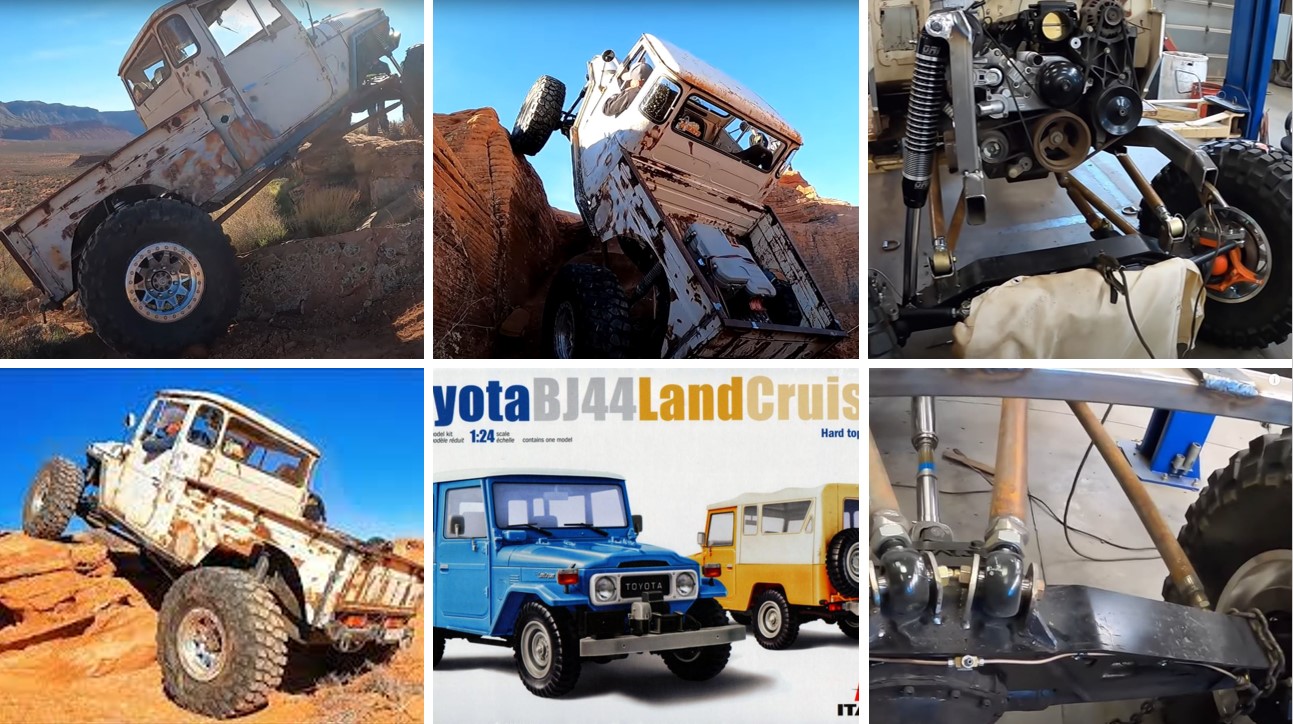
The guy on the channel built this FJ45 up using a dana axles, four link front and rear, NP tranfer case, doubler, and Chevy LS engine. After the last build, I opted out of the LS engine work. There is a really nice kit avail but it’s sort of expensive, and will never be seen.

Instead, I went with a junkbox Chevro_For_Dodge V8 - that is various parts assembled so that I could attach a transmission, scratch build a transfer case, and have visible headers.

I then stopped work on it for several months. Friday, I decided to get after it again, and here we are:

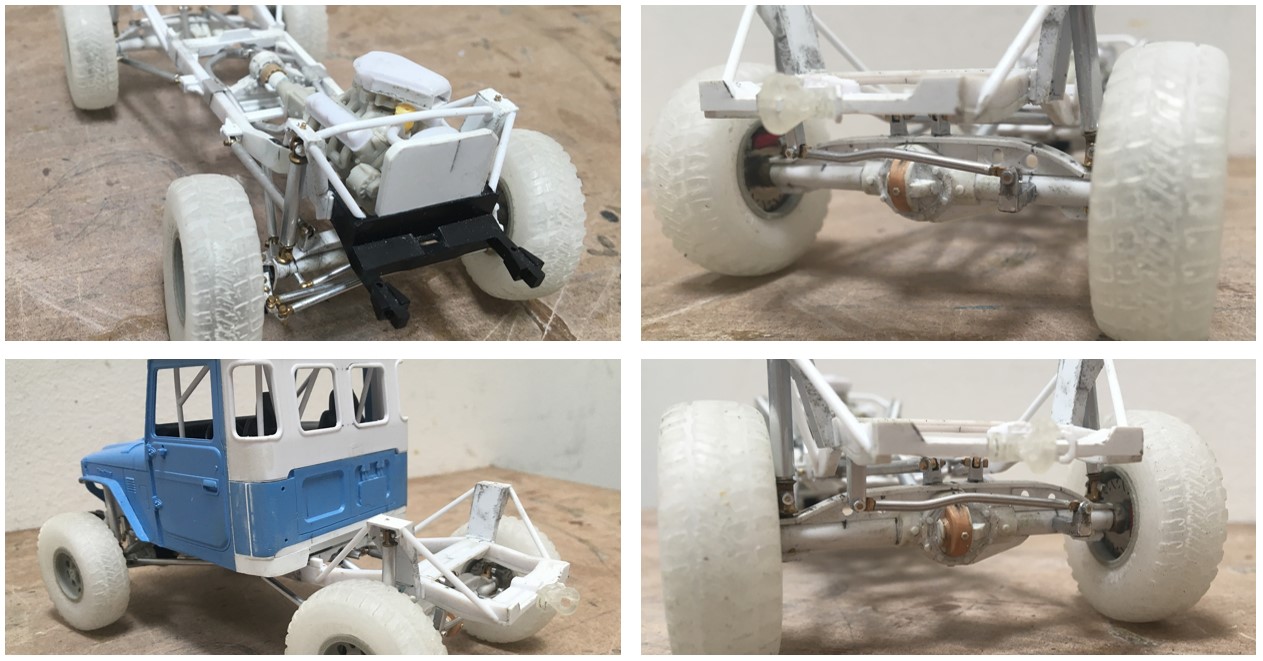
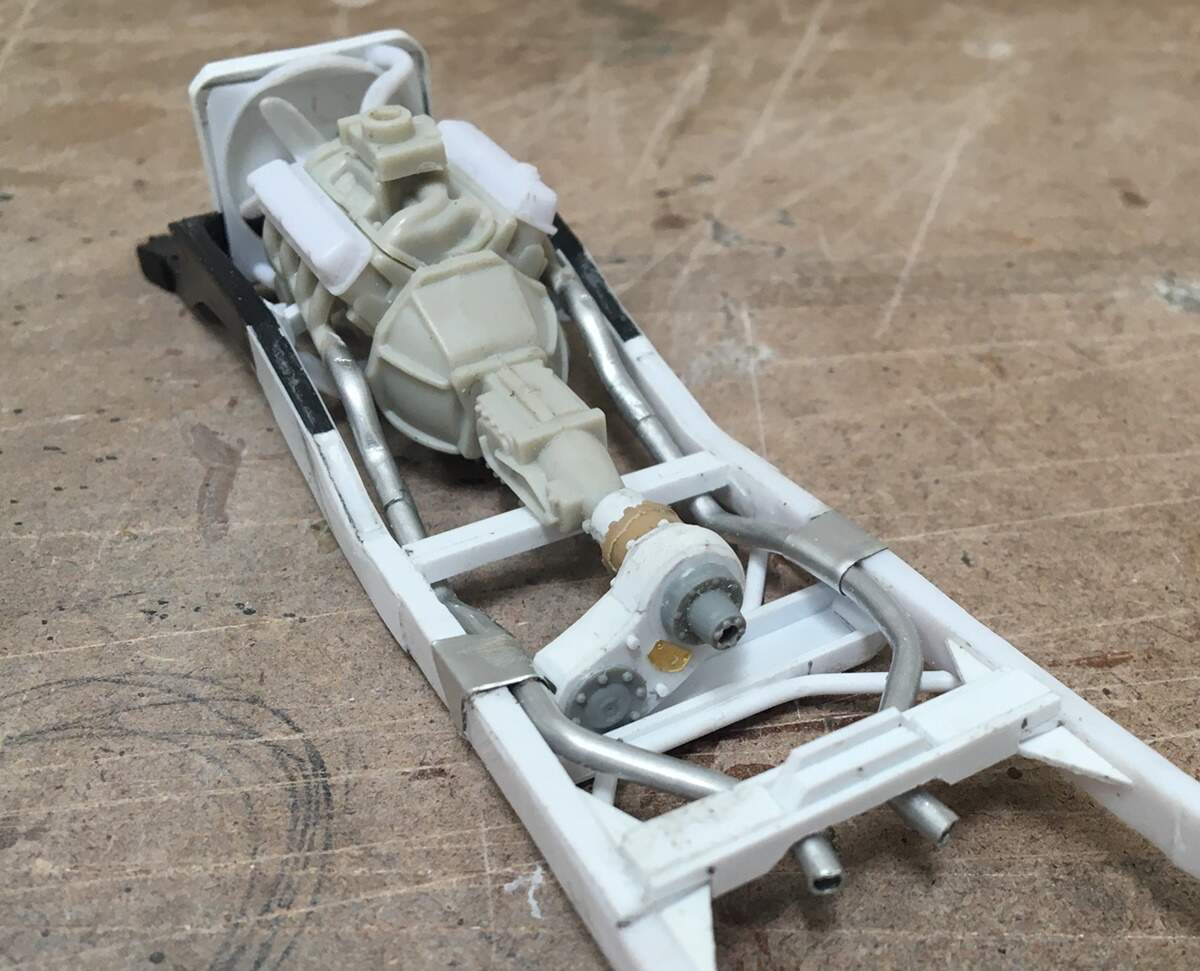
As you can see above the chassis (another mix and match, including the very front off the Toyota, scratch built/kitbashed Dana axles with trusses, and body work was about done.

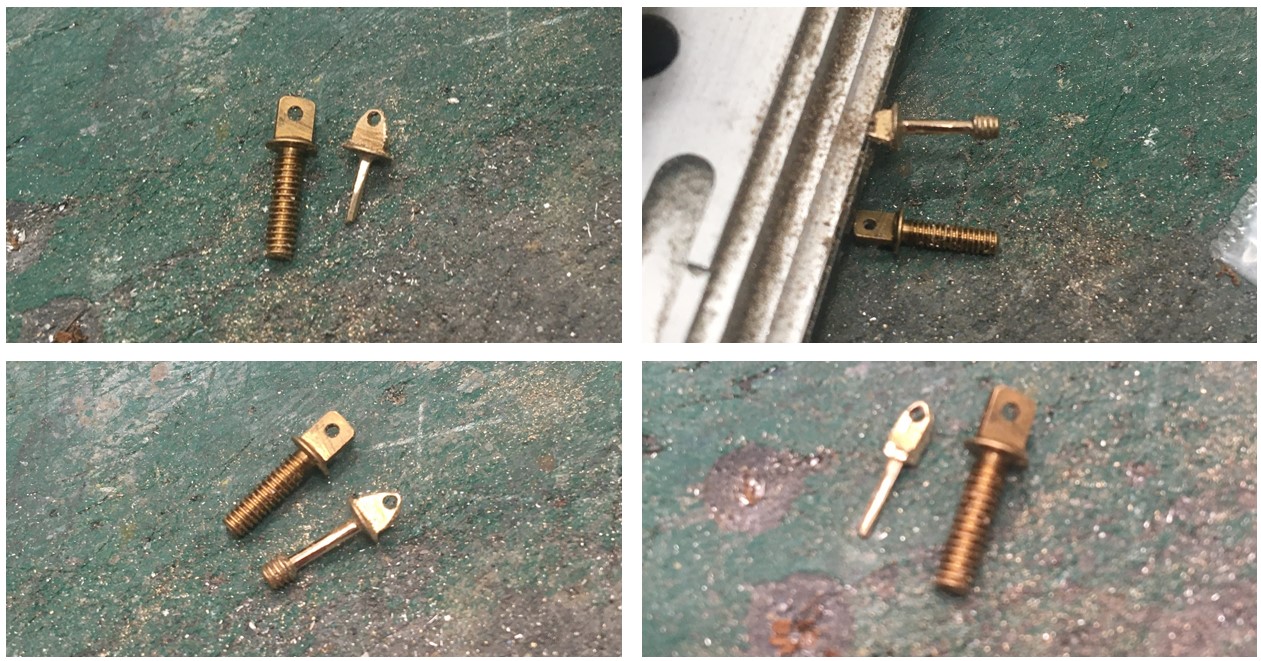
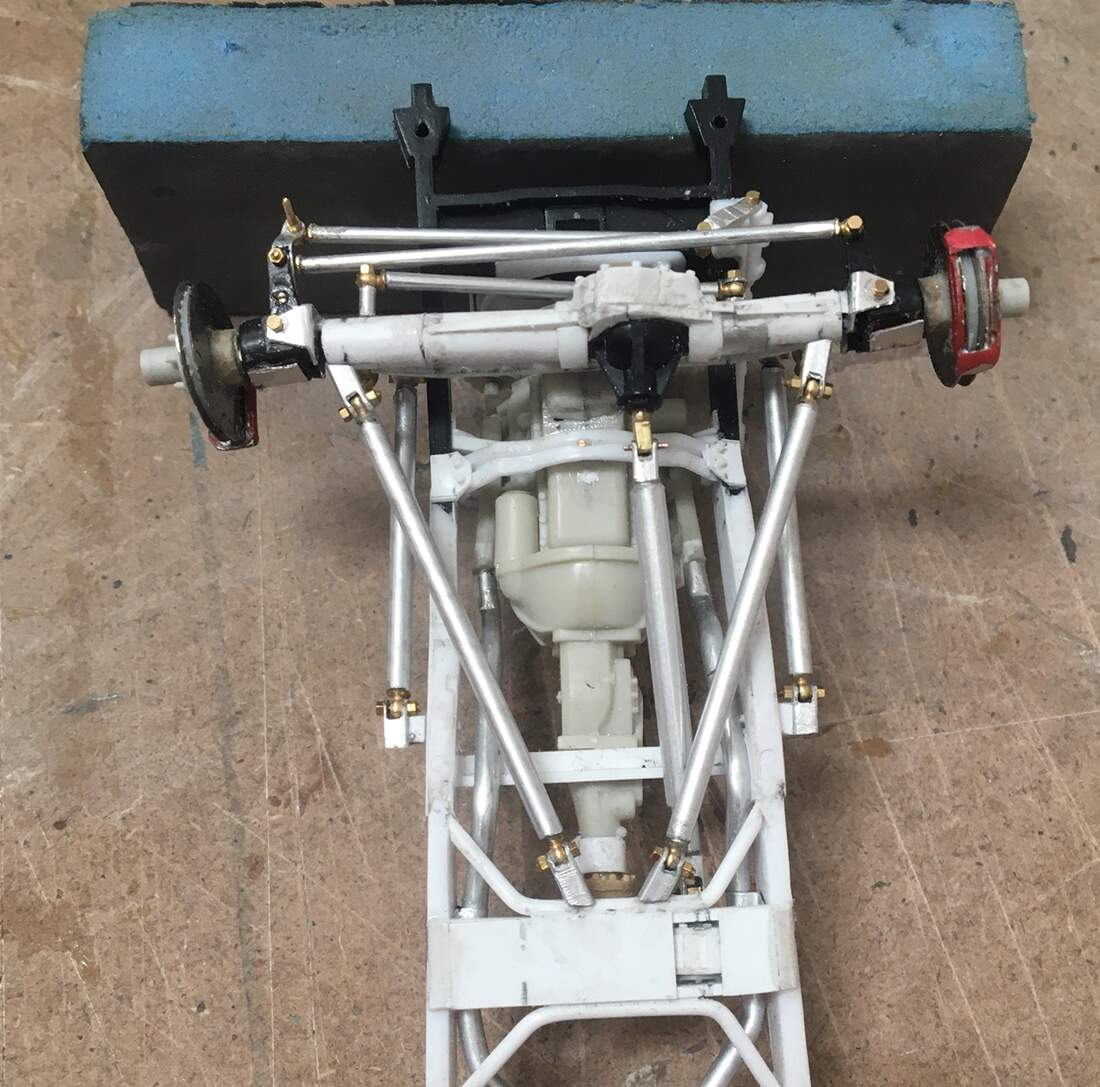
Over the last couple days I added the mounting hardware for the four link to the frame and rear axle. This includes the use of several segments of brass rod and square tube, aluminum square tube and lots of tiny hardware. The latter of which I ran out of, and while it is indeed some sassy hardware, it’s expensive and not always easy to find, so I went about scratch building connectors using brass rod and alu tubing - just as good and a lot less expensive - you can see this on the rear axle, where the single and double clevis’ are tied together for shock mounts.

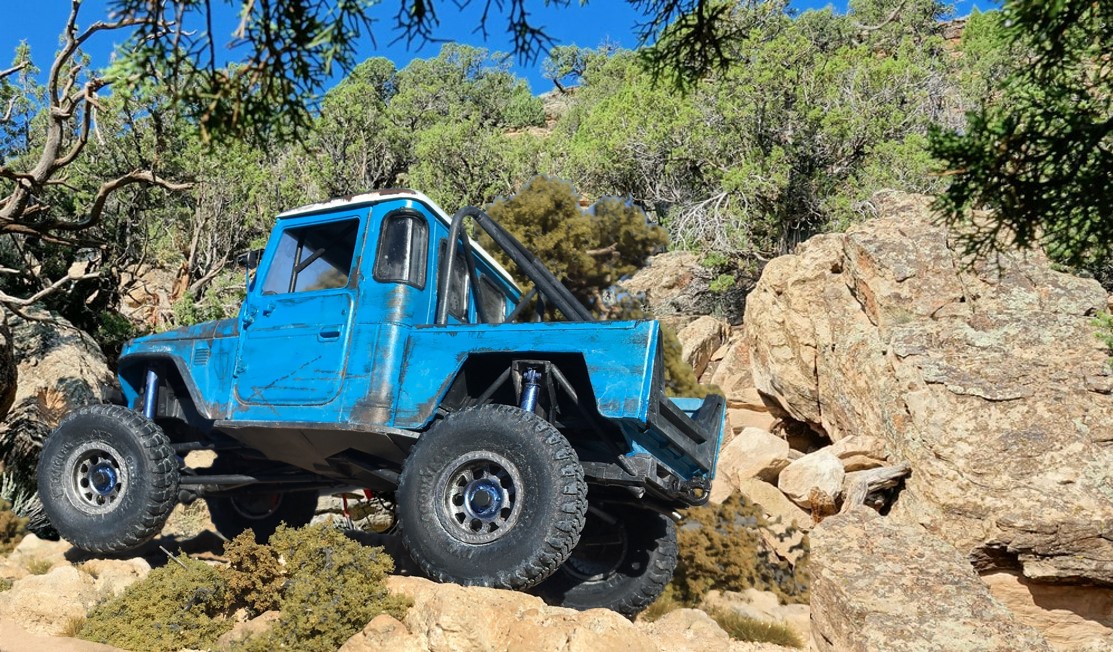
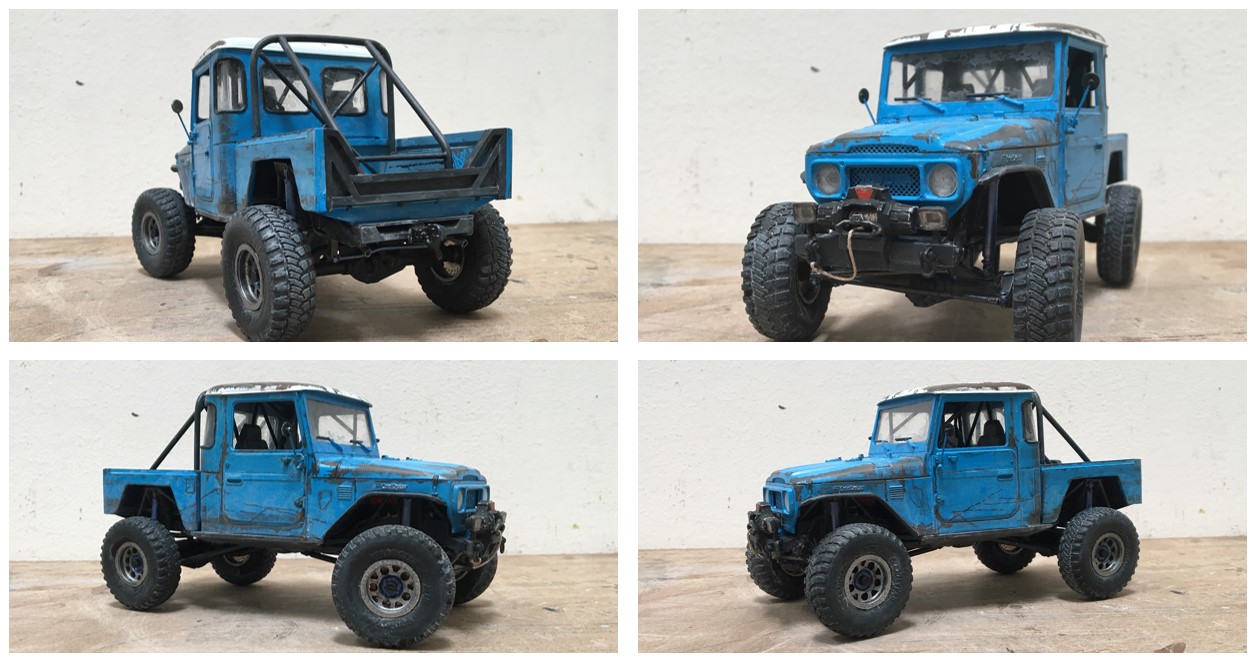
And below, what it looks like assembled:

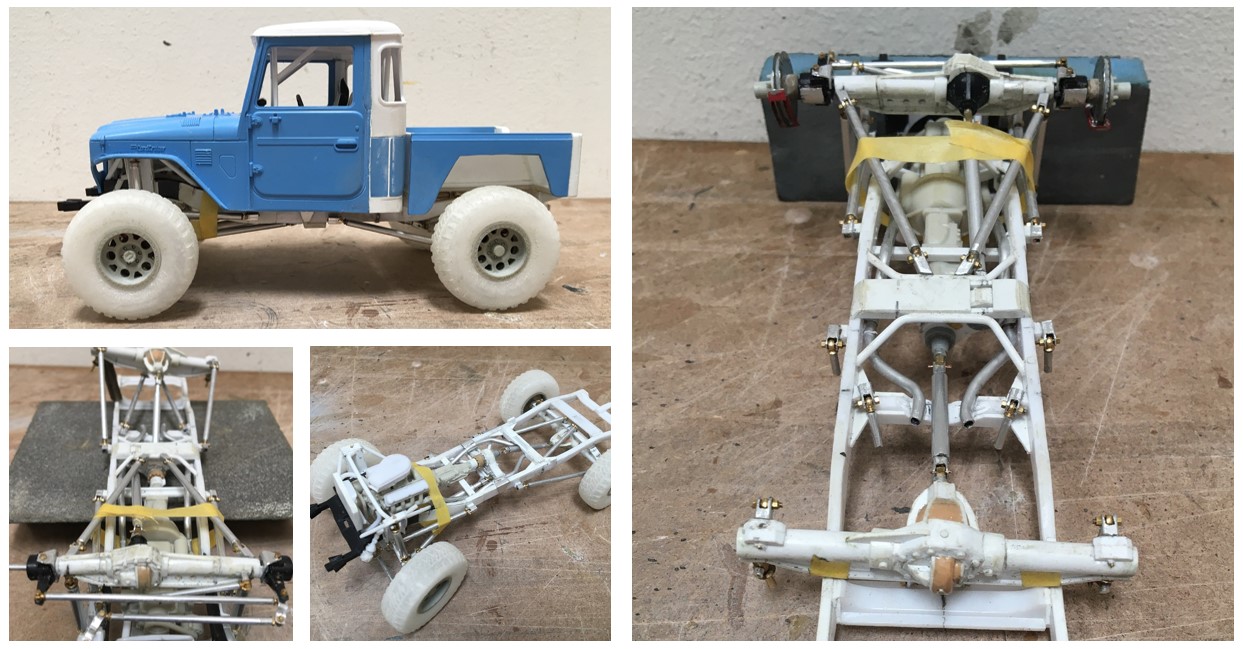
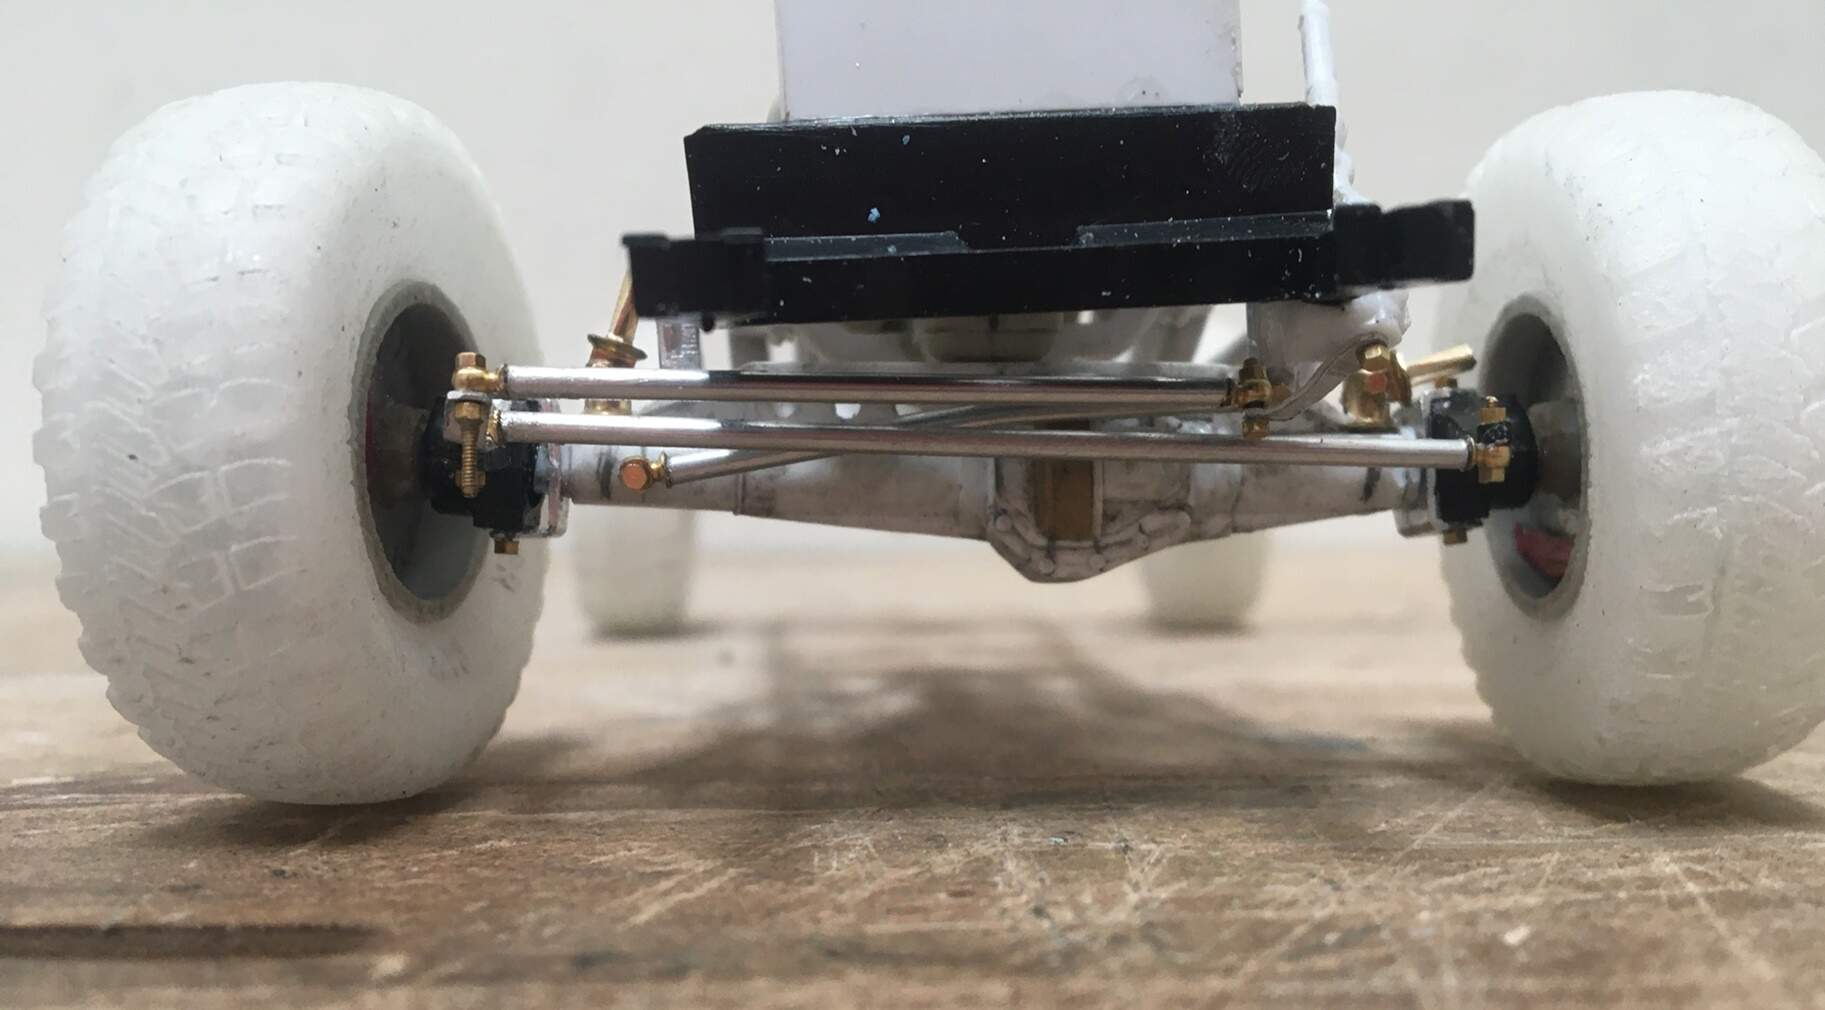
This works out to be a posable four link suspension front and rear. On one hand, the four link might look relatively simple - which it is in some ways, but, if the geometry is off, well, nothing will be aligned correctly - the clocking of the axle, centering of the axle, or the ability for the whole setup to flex as intended. There is a fair amount of experimenting to get this to work correctly

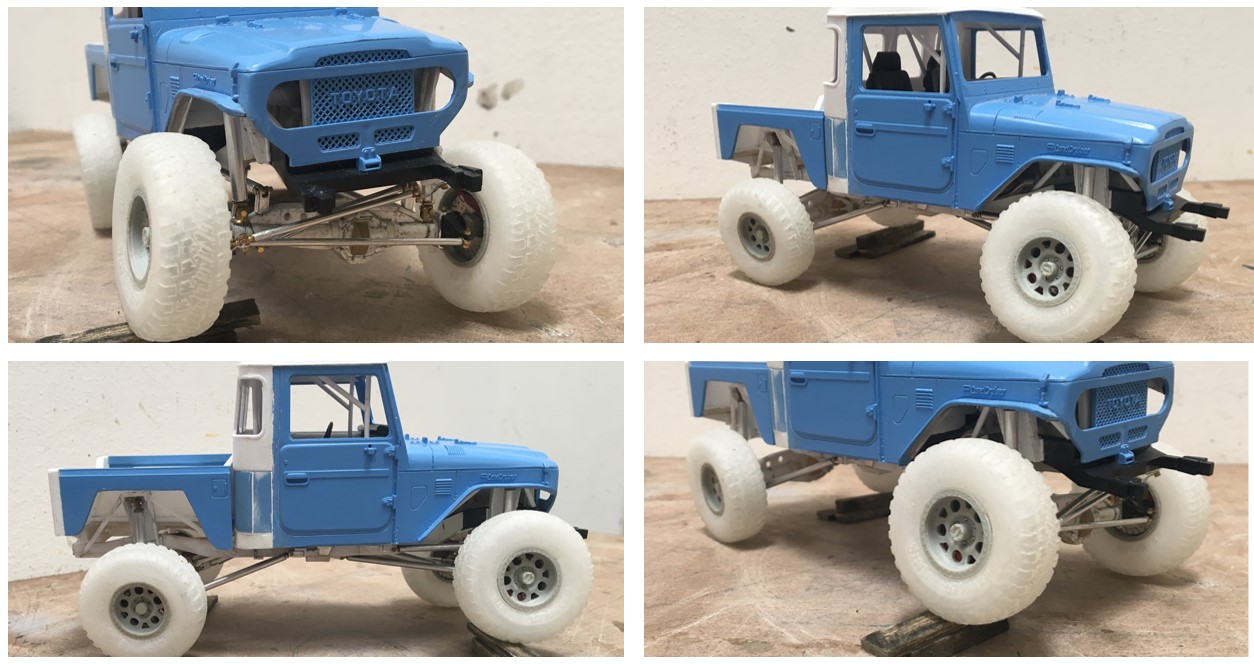
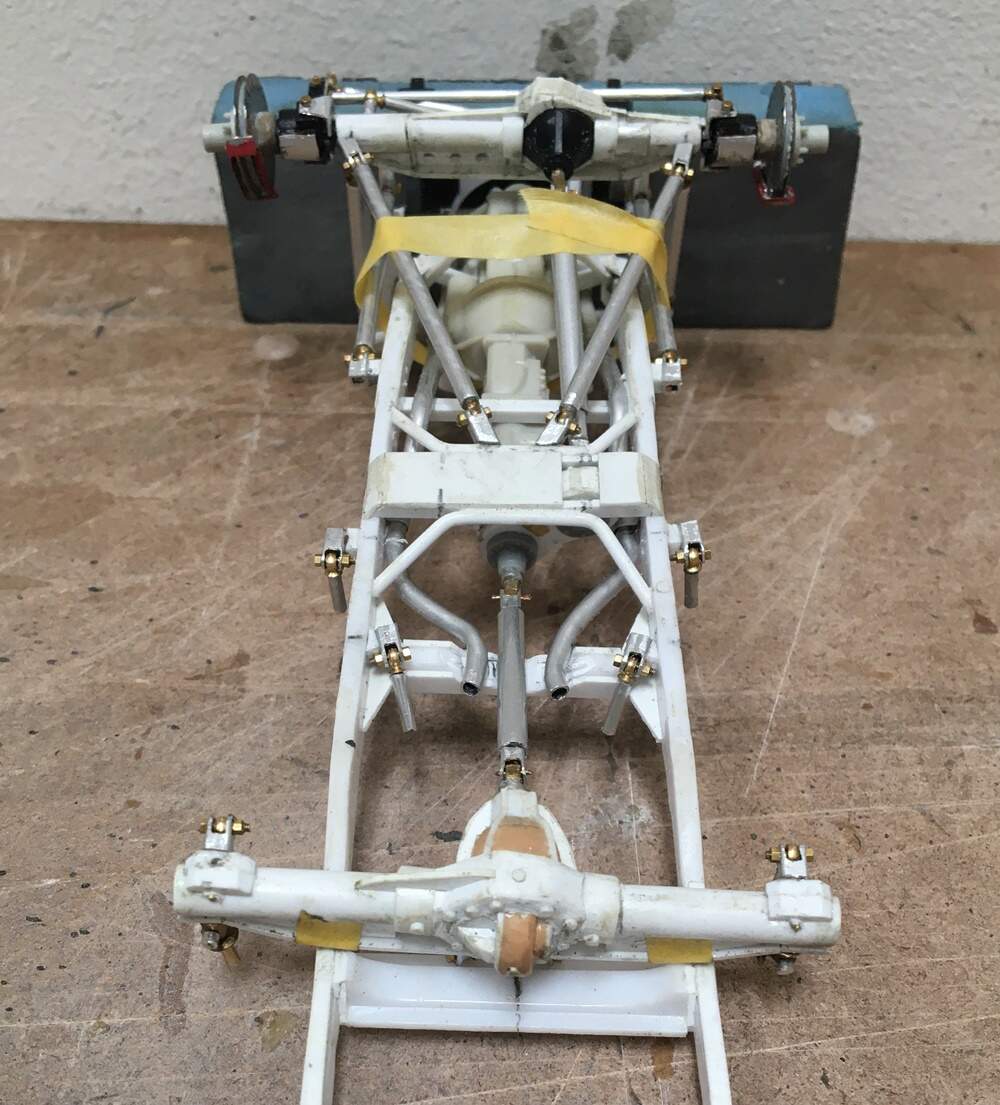
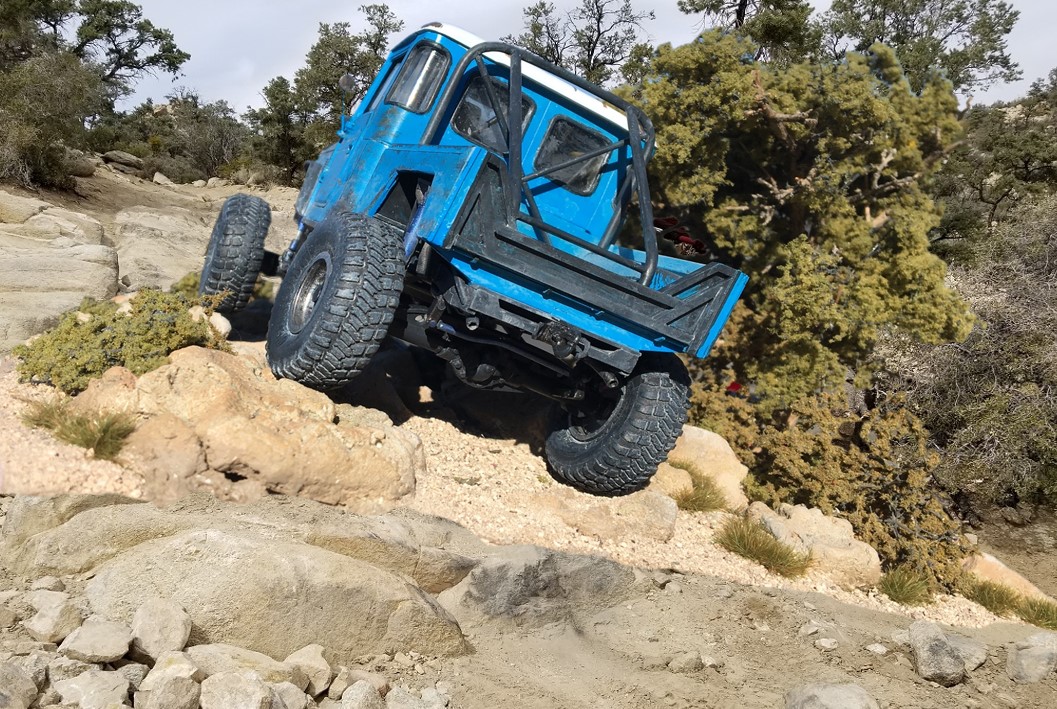
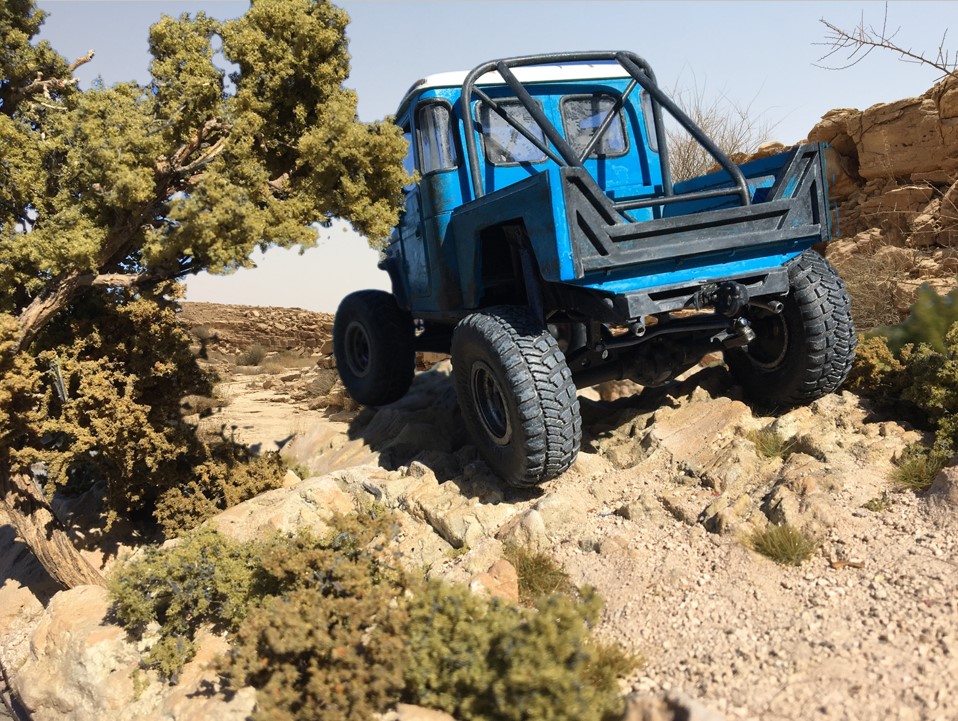
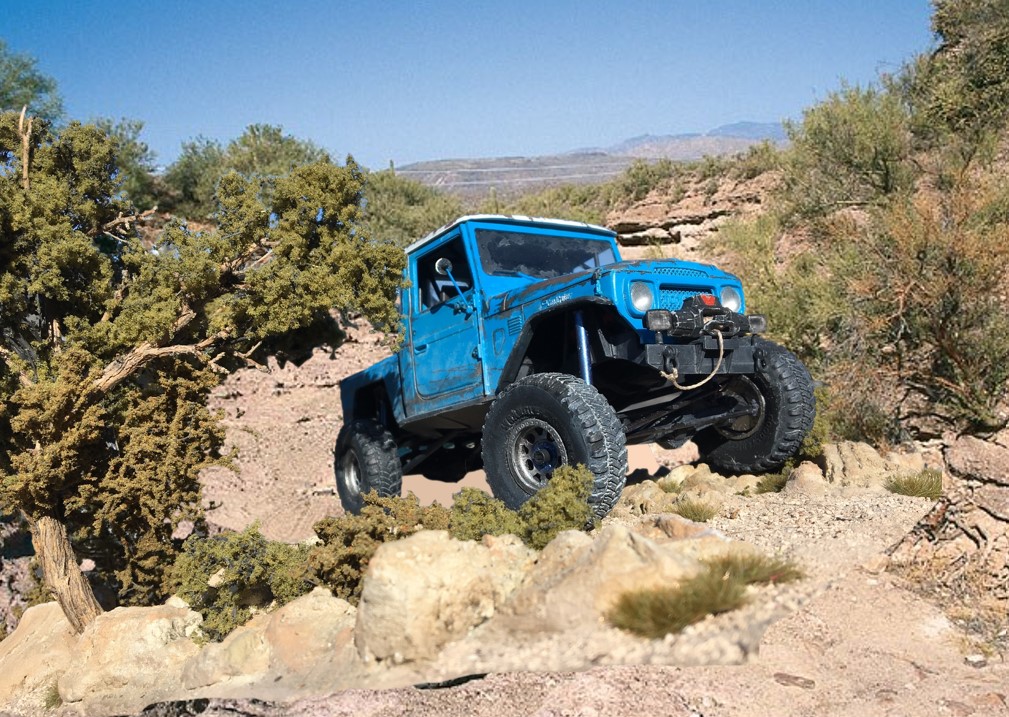
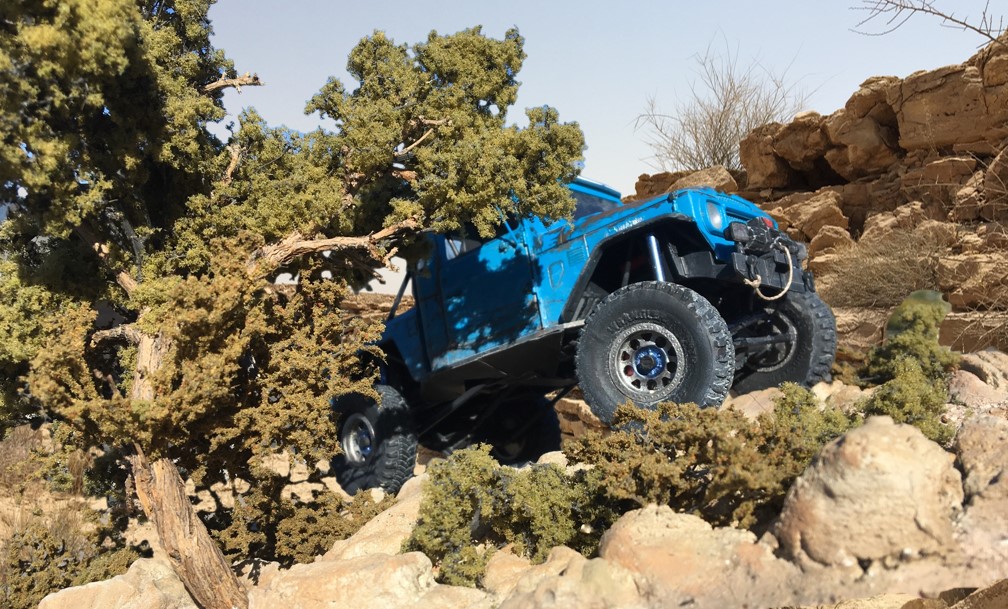
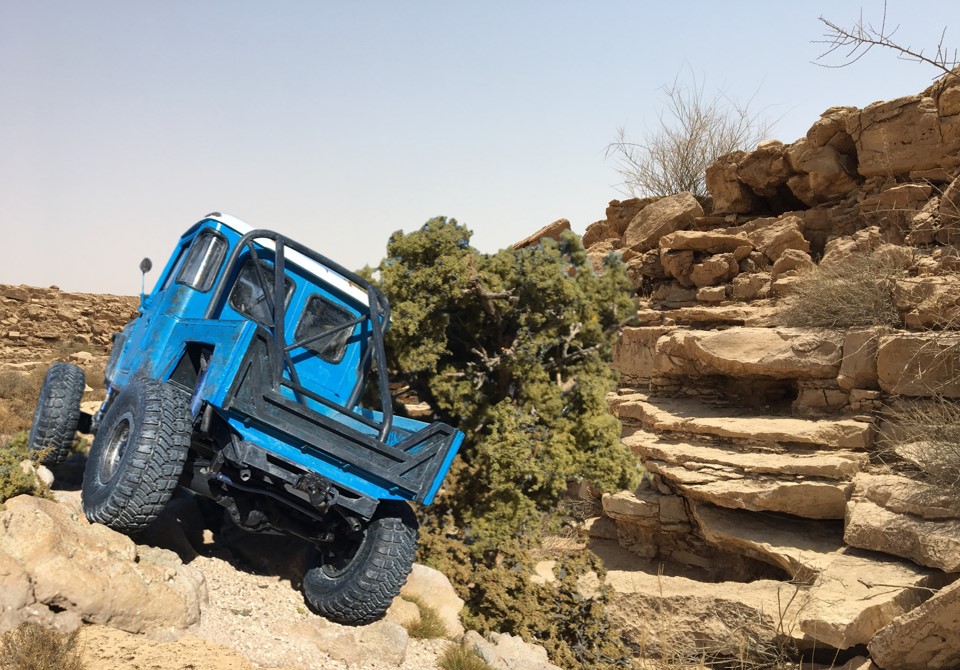
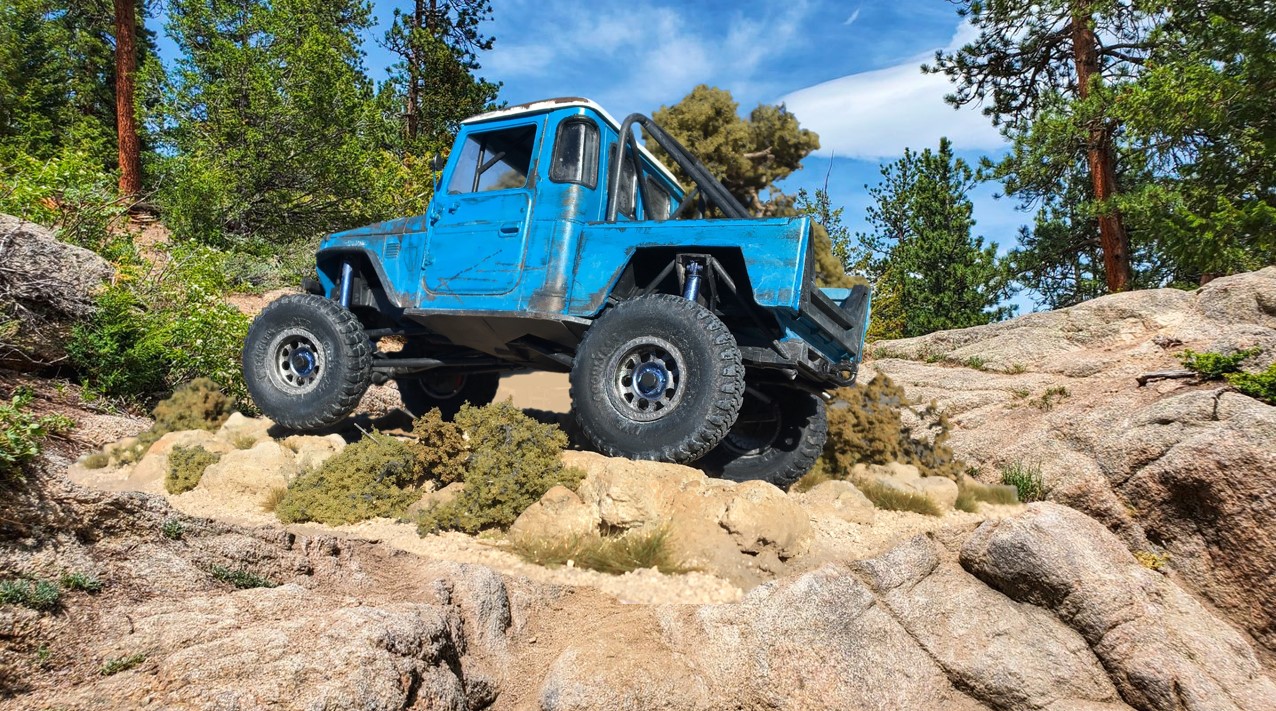
For a test, see below:

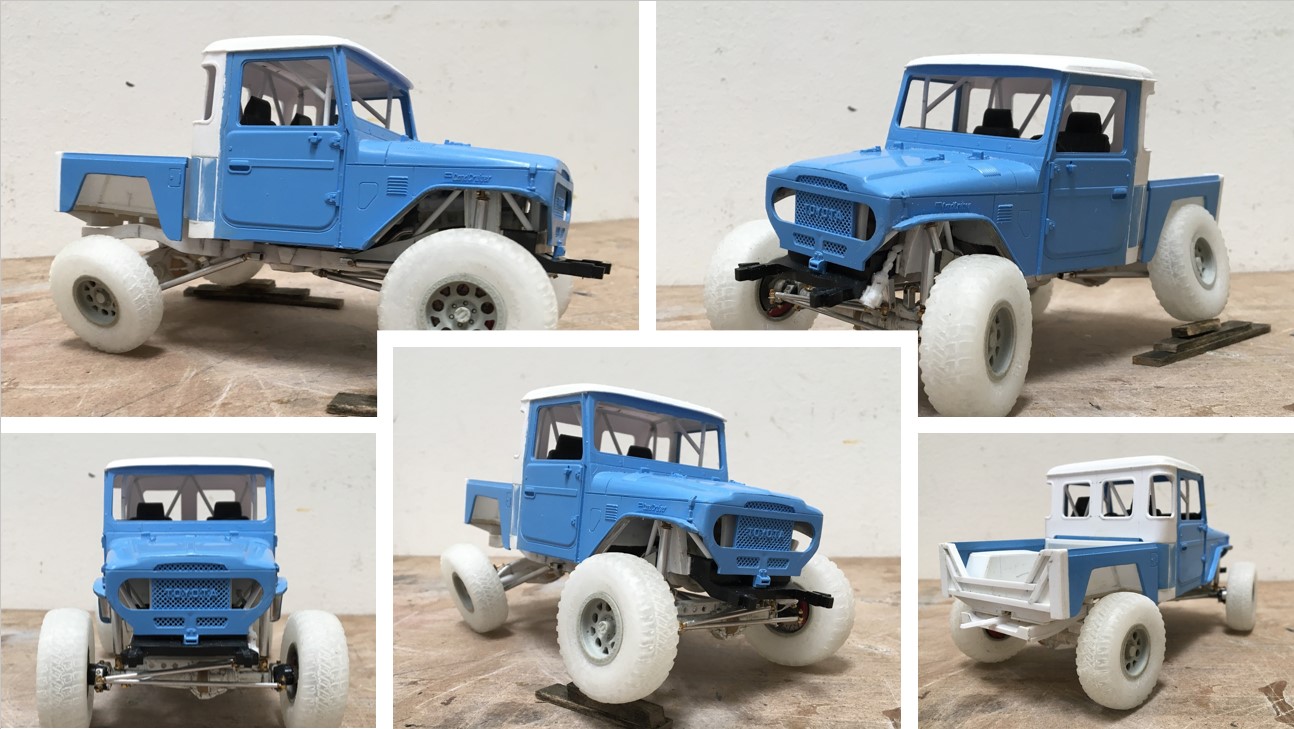
As you can see, albeit dryfit, and with no rear shocks and on and on, it works! The object of this type of suspension is to allow all four wheels to remain on the ground, despite what can be dramatically uneven surfaces.

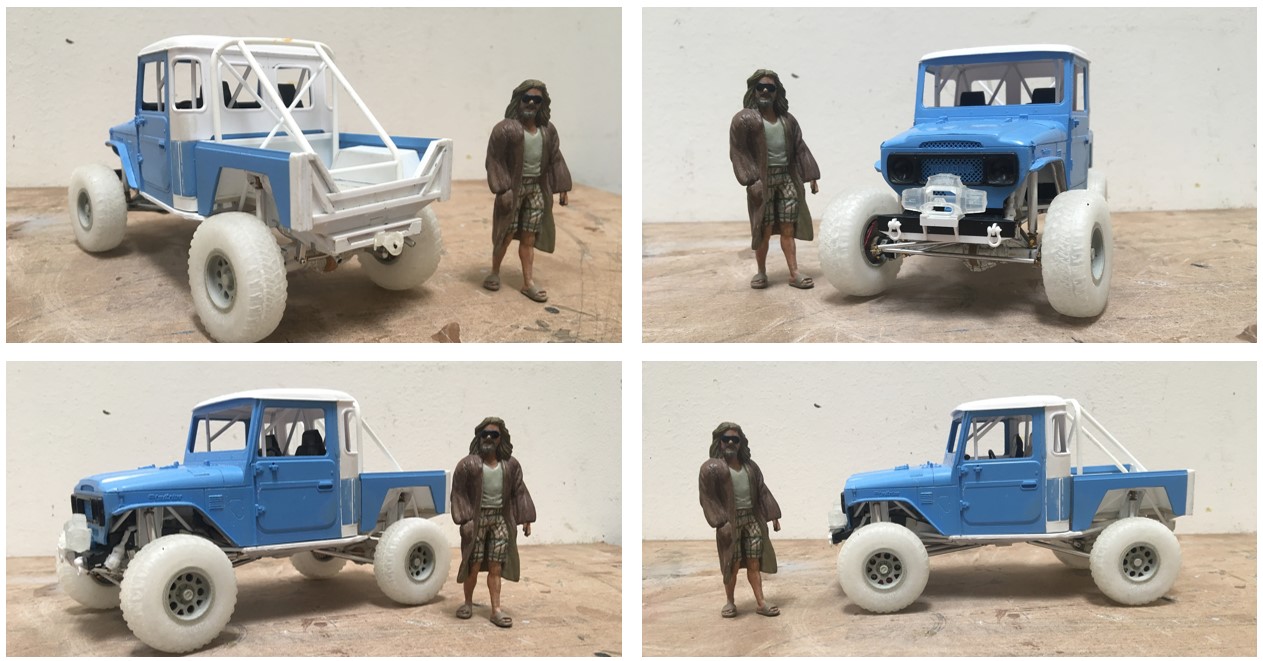
Next up will be to finish the rear end. I built a cage for this early on, and despite never being seen again, a stick shift, transfer case lever, doubler lever, steering column and highly modified transmission tunnel are in there -

Thanks for having a look

Cheers
Nick

10 Likes

Very cool. the scratch building, as always, is just amazing. Judging by the photos looks like it would be handy off-road.

cheers
Michael

Hi Michael, thanks for having a look at this build, and leaving some words of support. I suppose if I had some land and wealth, I’d enjoy building one of these in real life. I’ve watched a few of this fellow’s videos and the performance of the rig is remarkable - tho it should be! with the power, gearing, suspension, and engine - - lol -

I have a brief update today - I finished installing the rear axle parts and shock towers. To do this tho, I had to keep going with home machine shop work - a term I’m using very loosely:

Ahh - no machine shop at all - instead, using a PE bender as a vice, and a file, to convert some small clevis pins into smaller eyebolts. And in use:

If you look carefully under the rear end you can see a trailing arm has been installed, using those “custom” eyebolts and hardware. Same treatment for the rear shock towers. And below, some images of this working together:

This basically worked out as planned, though I would have preferred the rear end to sit a bit lower. At this point, that desire seems a bit irrelevant - it works and only I’m griping about it.

Next up will be a roll bar in the bed, some bumper work and a few odds and ends - then to paint.

Thanks for having a look

Nick

3 Likes

It turns out I’m on something of a mission to finish this build - so an update.

This task focused on getting the undercarriage protected for use on big rocks:

These trucks commonly use something called “rock sliders” which are steel tubes located just below the rocker panels - my prototype uses 2" x 4" x 1/4" steel tube, welded to the frame - with skid plates added to a reinforcing sub structure. These are not the same as the bolt in tube steps commonly seen, as they are integral to the structure of the chassis - and are strong!

Next, added some more parts to the body including roll bar in the bed (there’s already a roll cage in the cab), rear pintle hooks and front bumper, winch, and some hardware:

Added the Dude for some scale - I don’t like the rake - with the rear being a bit higher than the front. I managed to get the “right” ride height on the canopy express, but to do so took a lot of work - more than I want at this point - so, we will need to abide this as is!

Thinking about color, the prototype is a light beige/off-white, but I’m thinking about going with one of my favorite light blue/green colors like this:

The old Suburban is the Revell kit that I converted to 4x4 - and yes, with some signs of use!

Ok gents, thanks for having a look -

Nick

4 Likes

Awesome conversion work as always Nick, never fails to amaze me the way you can make these complex things come together seemingly without effort.

Great to see “The Dude” make an appearance, probably still upset that they peed on his rug.

Cheers, D

1 Like

Really nice work going on here. You sure have way with plastic and brass.

I only wish each photo was a single subject shot rather them combinations of 4 or 5 compiled into one. It make seeing your fine detail work but fuzzy as I try to zoom into it.

Btw, are those wheels and tires 3D printed? The translucent looks gives it a shapeway 3D printing item look.

Hello model builders,

@AussieReg, Hi D, and thanks - as far as this coming together apparently easily, I’ll draw the comparison to the finishes you achieve with paint - there are lots of steps, sanding, putty, priming, painting, stripping and repainting, more of the same with clearcoat, and in the end, your results look great. I think I can achieve some pretty nice paint work, but nowhere near the finishes you get.

It’s funny, I have the patience to cut, drill, file, toss, recut, bend, glue, reglue tear apart and so on - but not the same with paint :smile:

As for the The Dude - yes, I like throwing him in for scale now and then. I purchased him as a resin figure from BNA years ago - lol - he really ties the project together :smile:

@Stryker45 , thanks for stopping to leave a note. I have been grouping pictures for a while now, because they take up less room (storage space) on the remote site I post from. But, as you’re interested, please see the following:

I’ve long enjoyed building up suspensions, when about two years ago, I came across these really small brass parts. There are indeed, very nice, but are also pretty expensive, and as you can see, with a bit of time, and when used with K&S metals and some Evergreen, you can build some fairly convincing parts, which move.

Because the suspension flexes, the driveline needs to move too, so I made up little ujoints using brass and alu square tube, and wire with crimped ends. While not really all that close to a real ujoint, they work for this. I don’t have a milling machine or lathe etc, so I use what I can make with hand tools.

The brass bolts make some of this much easier to build - for example, attaching and readjusting the front knuckles, and attaching the pitman arm. But, they are not as essential for attaching eyebolts.

If you look carefully at the hardware on the rear axle, you’ll see some nuts and bolts, and some that are just metal rod with alu tubing glued in to function as nuts - which work fine. This is less expensive, and can be made with readily available materials.

As for the tires and wheels, the wheels are made by Fireball Modelworks, which come with some really nice, 35" tires, but for this, I wanted taller tires. Matt from the forums here, printed these 38" beauties up. While really nice, just like the brass parts, are pretty expensive. For another type of off-road build, I’d use the tires that come with the wheels.

Some time ago I built a Peterbilt 348 4x4 service truck with brass leaf springs and so on. I plan to build another, and for that I found some really small and inexpensive brass U-joints, which I think were supposed to be used for RC vehicles and I will try to use. For now though, want to get this wrapped up. I made the mistake of trying more than one build at once, and the result is this and couple of other projects are not done - I won’t do that again :smile:

Ok, on we go -

Cheers
Nick

2 Likes

@Stickframe Nick, appreciate you posting update with photos showing clear, clean, single subject view.

I understand know why you complying them together. I guess, I would do similar if I need to save space. I only commented as my eyes are changing and seeing find detail is becoming hard without the help of foreign forces :disguised_face: I tell ya, it’s crazy :upside_down_face:

1 Like

Another awesome project. Hah, The Dude abides

1 Like

Well guys, time to call this one done! Now that it is, I’m ready to start something new.

But, as today was a nice and sunny day, I took her out for a drive:

And there you have it - quite a fun project! Makes me wish I had one in real life!

And, a little grouping of the as-built - no sunlight:

Ok gents, thanks for having a look

Cheers
Nick

6 Likes

Looks awesome Nick. :+1:

What is the next project?

1 Like

@Tank_1812 , Hi, and thanks for leaving a note - glad you like it!

As for next, likely a Peterbilt 6 x 6 of some sort - I built a Peterbilt 348 4 x 4 a while ago, and really enjoyed the build -

thanks again, and cheers
Nick

1 Like

I would like to use the word awesome as well. The outdoors photos of the Toyota are incredible. Color and weathering really create the illusion this the real thing.

cheers
Michael

1 Like

Nice finish and the photos are ultra realism :beer:

1 Like

Hi @cosimodo , thanks Michael - I’m humbled, as your recent F1 is in my eyes awesome!

Hi @KoSprueone, KSO, thanks very much - appreciate it.

I’m glad the photo’s pass the “eye test”. I like taking outdoor pics of the build, and in this case placing them in real outdoor settings -

Cheers
Nick

Just beautiful work as always Nick, love it!

As the other guys said, the outdoor images really bring the build to life. Stunning!

What’s the plan for the 6x6 Pete? An XOS rock crawler? A mad recovery vehicle? Whatever it is, I’m looking forward to it.

Cheers, D

1 Like

@AussieReg , hi D, thanks very much - now if I could just do a body that isn’t rusted and grimy! :smile:

Yes, the next project will be a 6x6 conversion of some type. I really like the look of those trucks!

I have an old AMT Peterbilt 378 kit, that I will convert to some newer body style, but not sure which just yet. I’m considering three different body styles - I’d love to do one of the new models (356), but that might just be beyond my skills!

As I’m a bit of a suspension enthusiast, I’m going to go with a solid axle on leaf springs up front, but will try some sort of twin drive with a walking beam for the rear - and, for better or worse, my plan is to try and make one of the newer types that don’t have leaf springs or air bags. Instead, the have rubber bushings at a central pivot point, four links and shock absorbers. Piece of cake! :smile:

I’ll likely use the motor from the kit, but might use another resin version that’s a big CAT. Other than the shell of the cab, most of the rest will be kitbash and scratch work. I’m, looking forward to it! :hot_face: :face_with_spiral_eyes: :smiley:

I hope to get going on it in a few weeks, but I have to travel for real work next week and have a big deliverable on its way - when that’s done, let the scratching begin!

Cheers
Nick