HI Guys,
I’ve been keeping after the Scammell, and can show some progress:
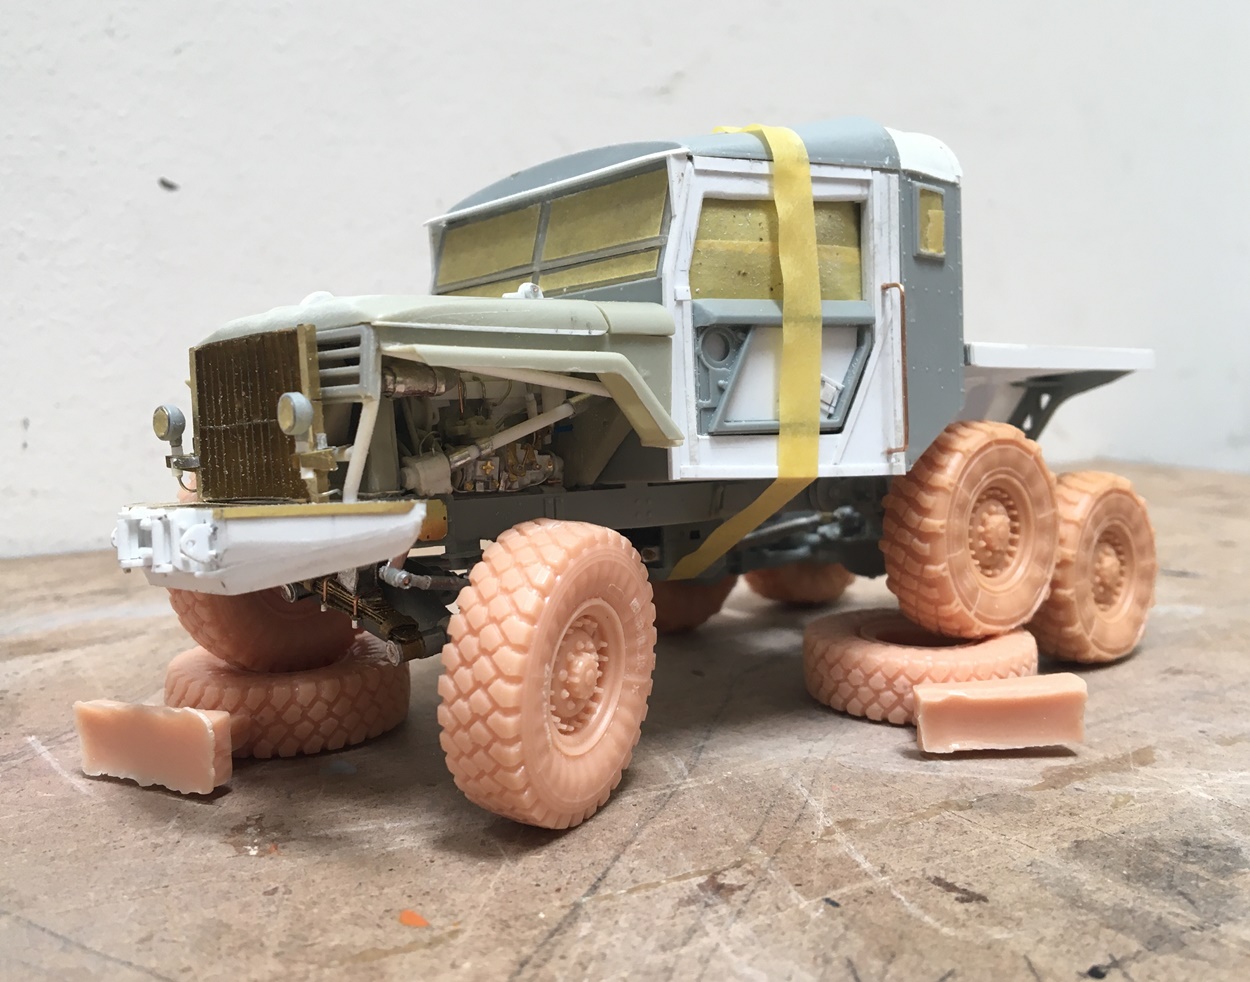
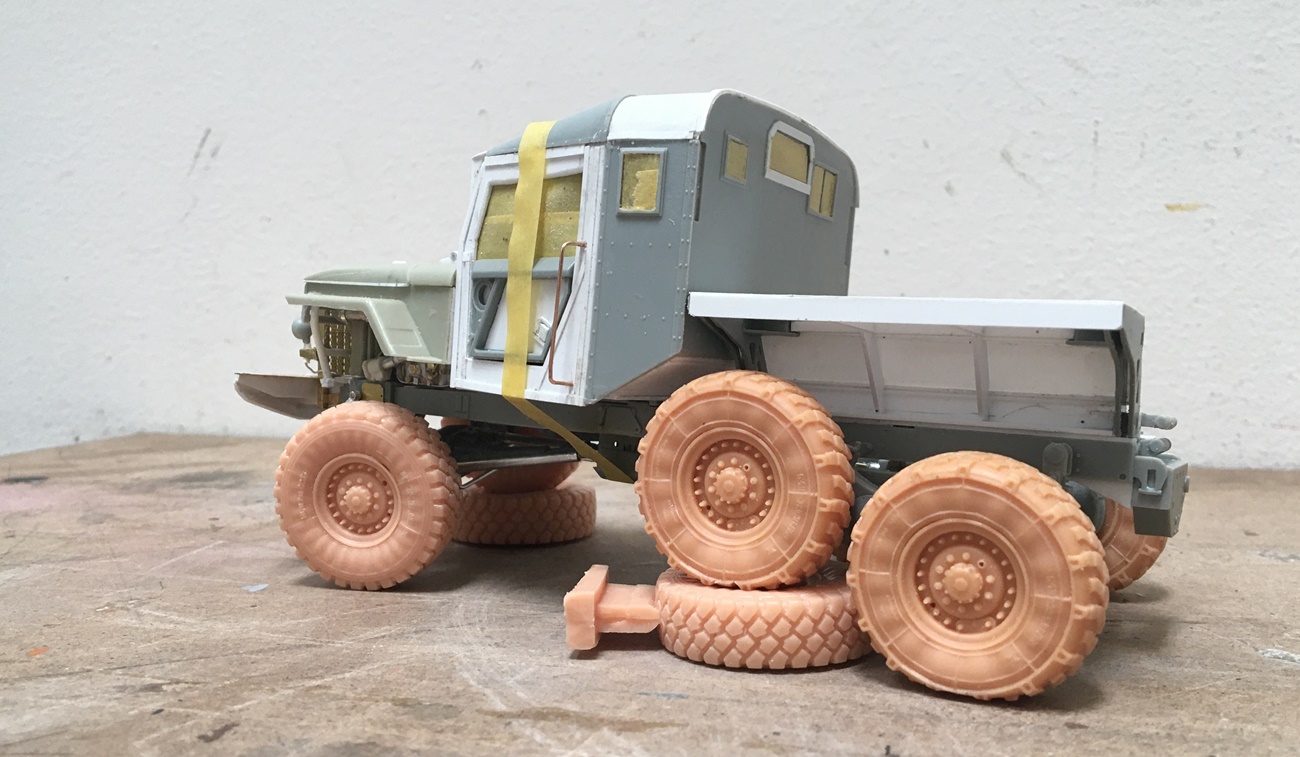
The suspension turned out OK - posable front and rear, the cab is extended a bit, the engine detailed, hood openable, and the bed, about halfway done - still a long way to go 
On we go -
Cheers
Nick
11 Likes
Hi folks! Great to see so much activity going on here, really cool builds all the way through!
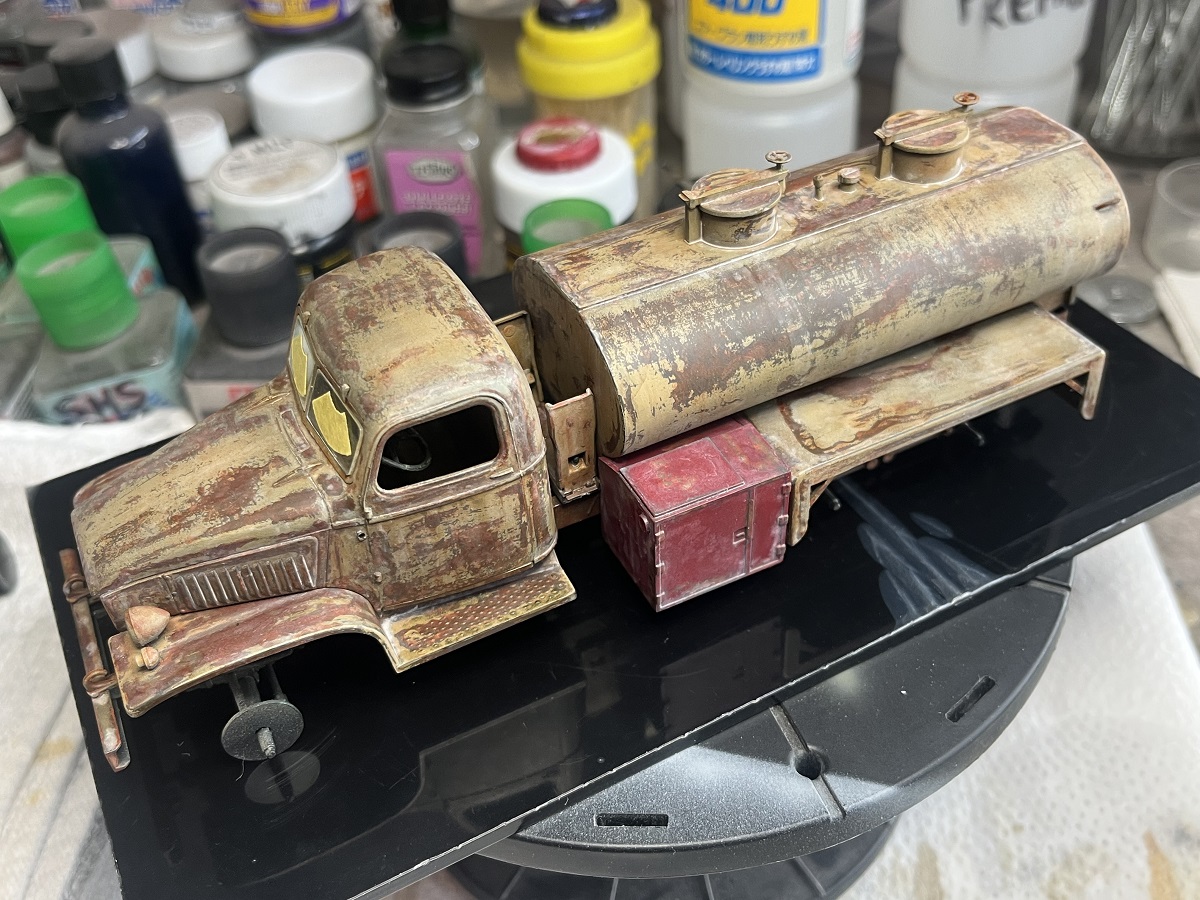
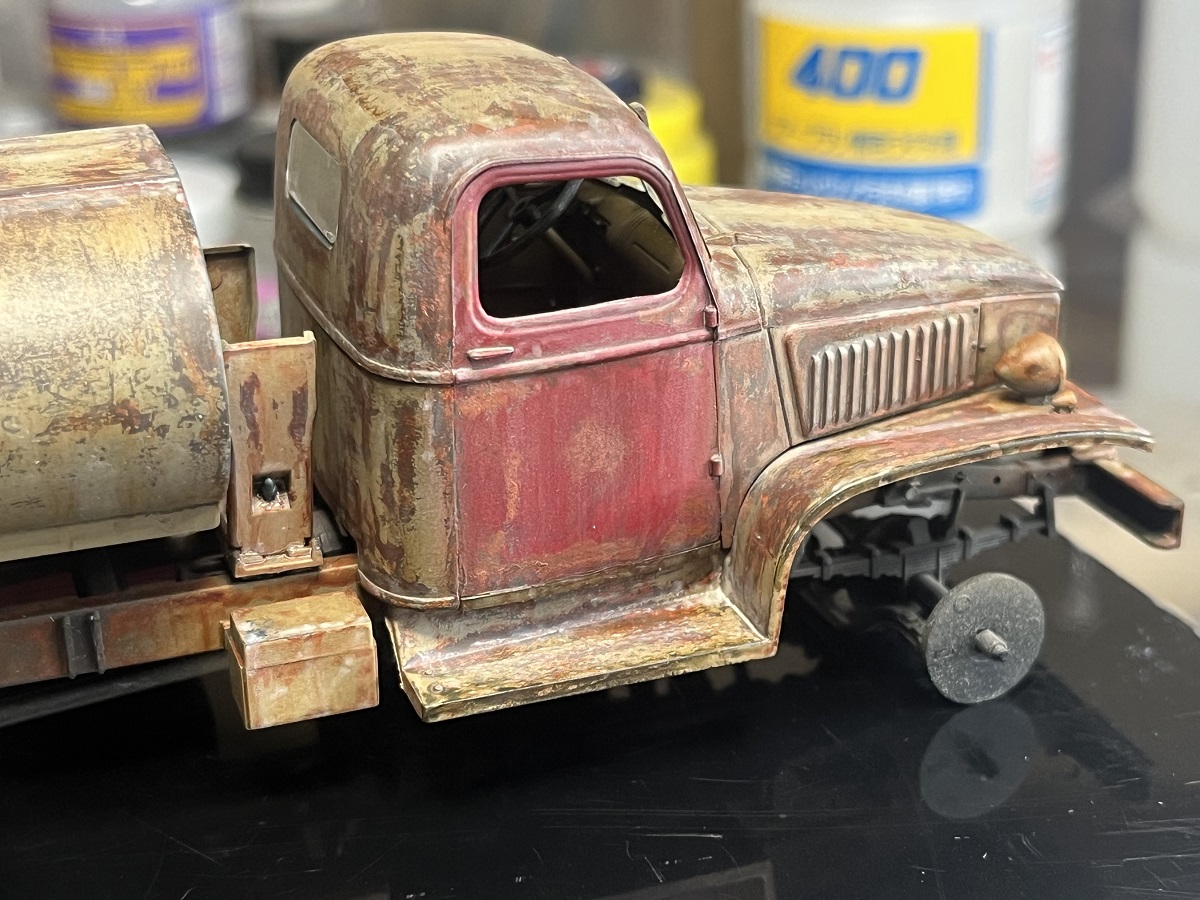
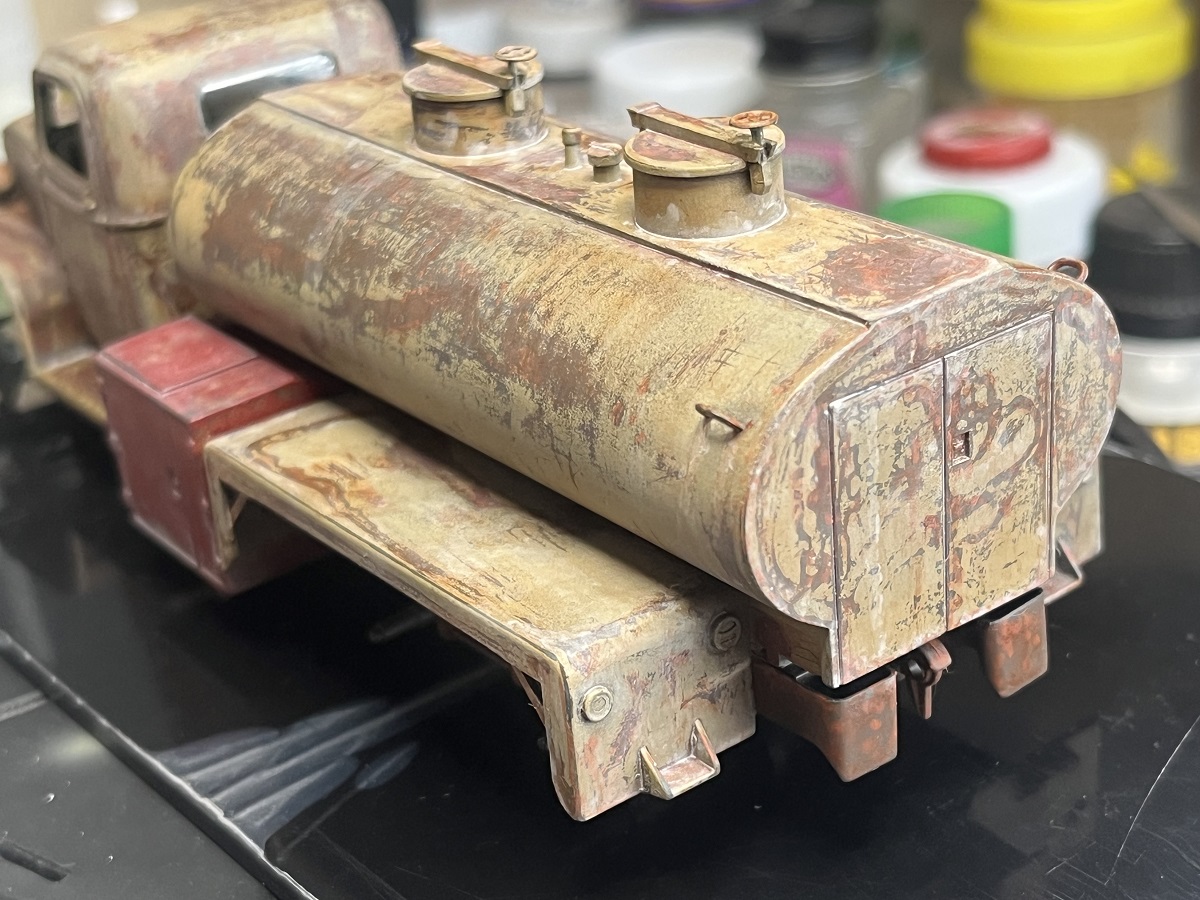
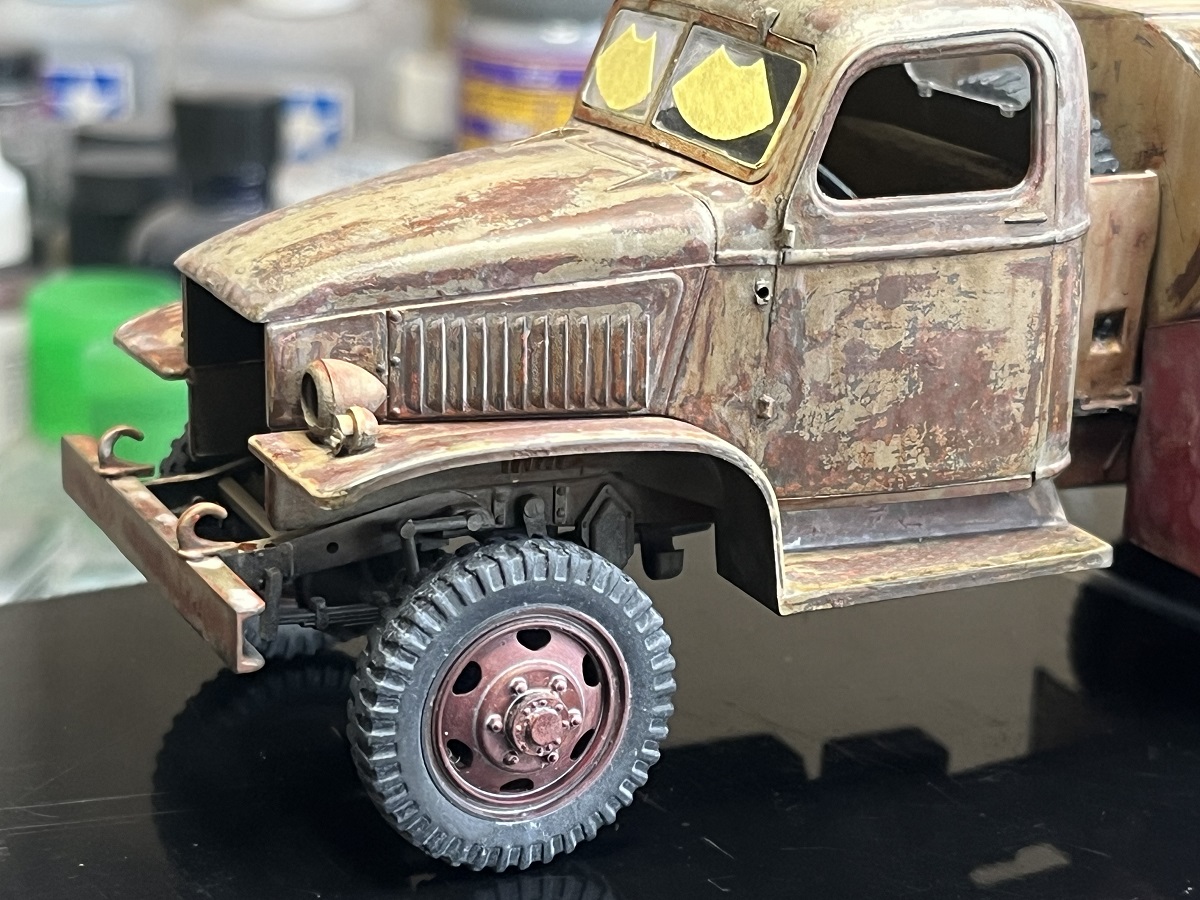
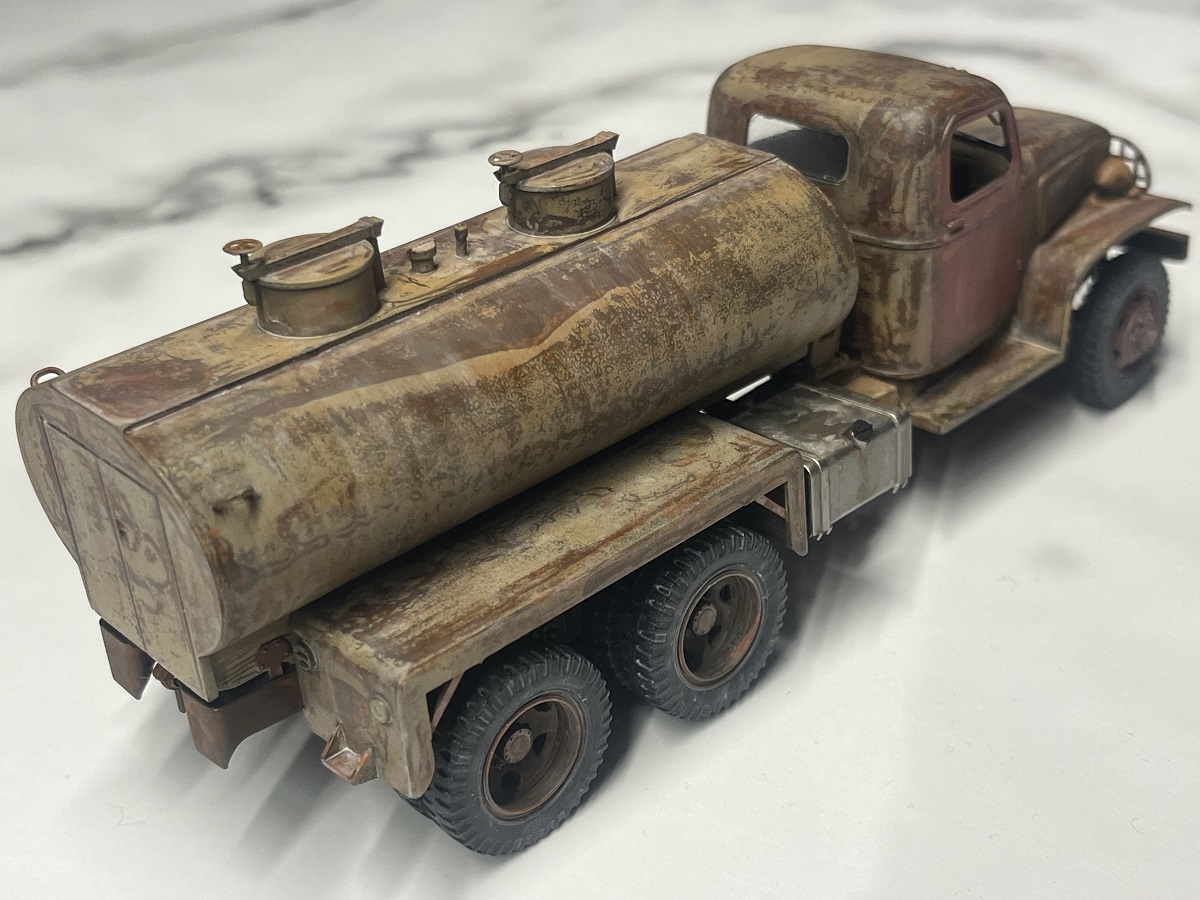
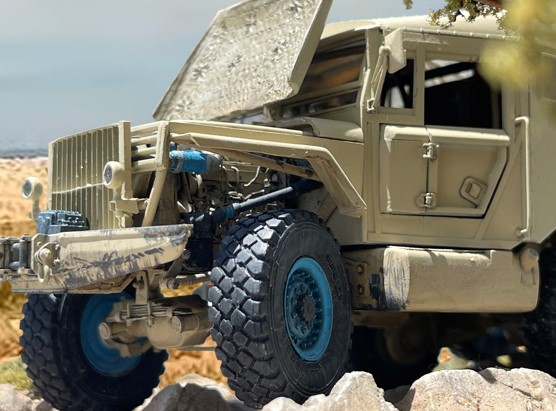
I’ve put a few more hours into the oils on the CCKW Water Tanker, working with Dust and Industrial Earth now to give some dirty streaks plus a light overall filter. I will let this cure and then work it a bit more before I lock it all in again with Dullcote.
Still lots to learn with oils, but really enjoying the process! After I’ve finished with the oils and locked them in, final assembly then I will have a play with pigments (for the first time) to build up some dirt and dust effects.
Cheers, D
9 Likes
That’s looking great John. You should be well pleased with that. I’ve had a M984A2 HEMTT Wrecker on my wish list for some time. Love that series of trucks!
1 Like
Cheers Terry, for the price of that gun truck it’s not a bad build and as I said before, if you don’t fancy a gun truck, you can easily just do it as a cargo bed.
Nick @Stickframe … Explorers looking great … Reminds me a bit of the Bedford Overland explorer wagons that use to travel down through Africa …
Damian @AussieReg … Love that water tanker … it keeps getting better … Seriously cool finish so far 
3 Likes
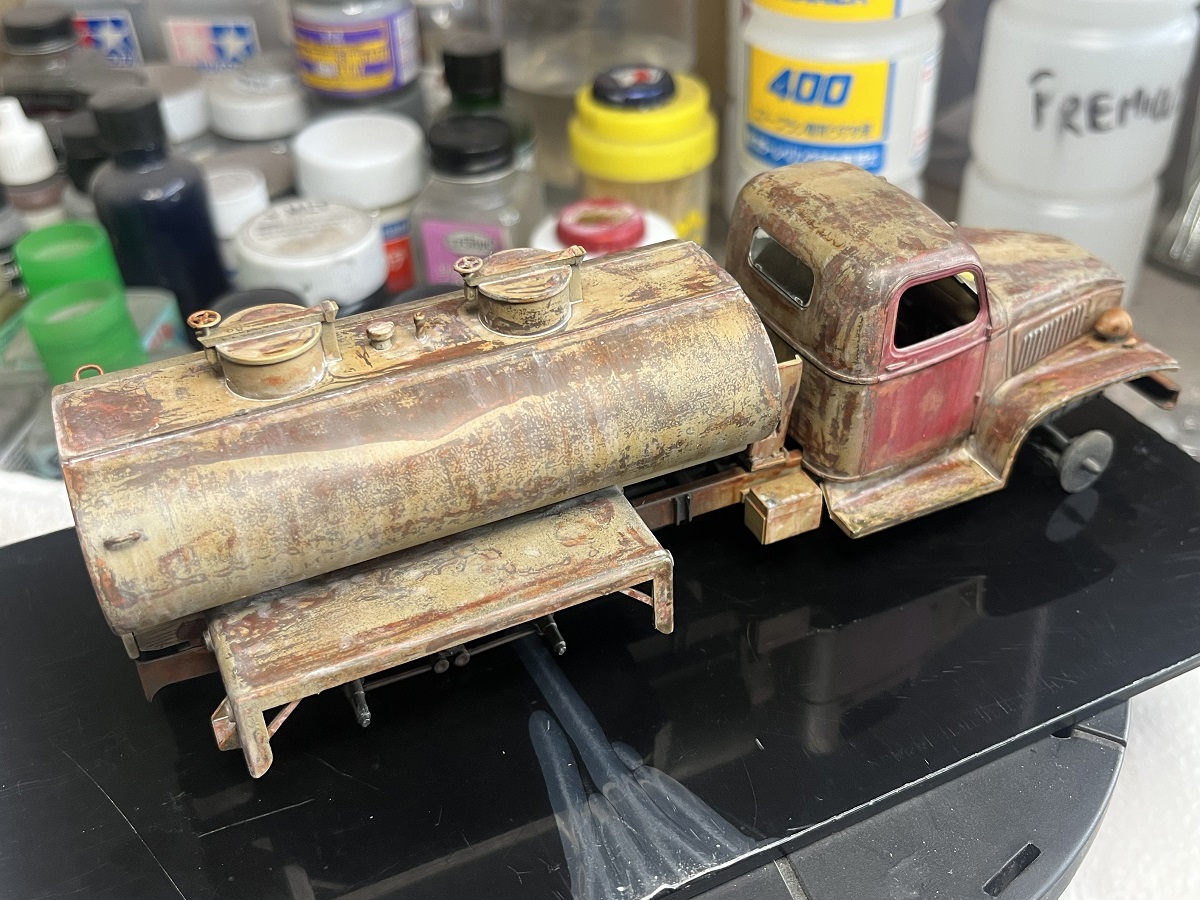
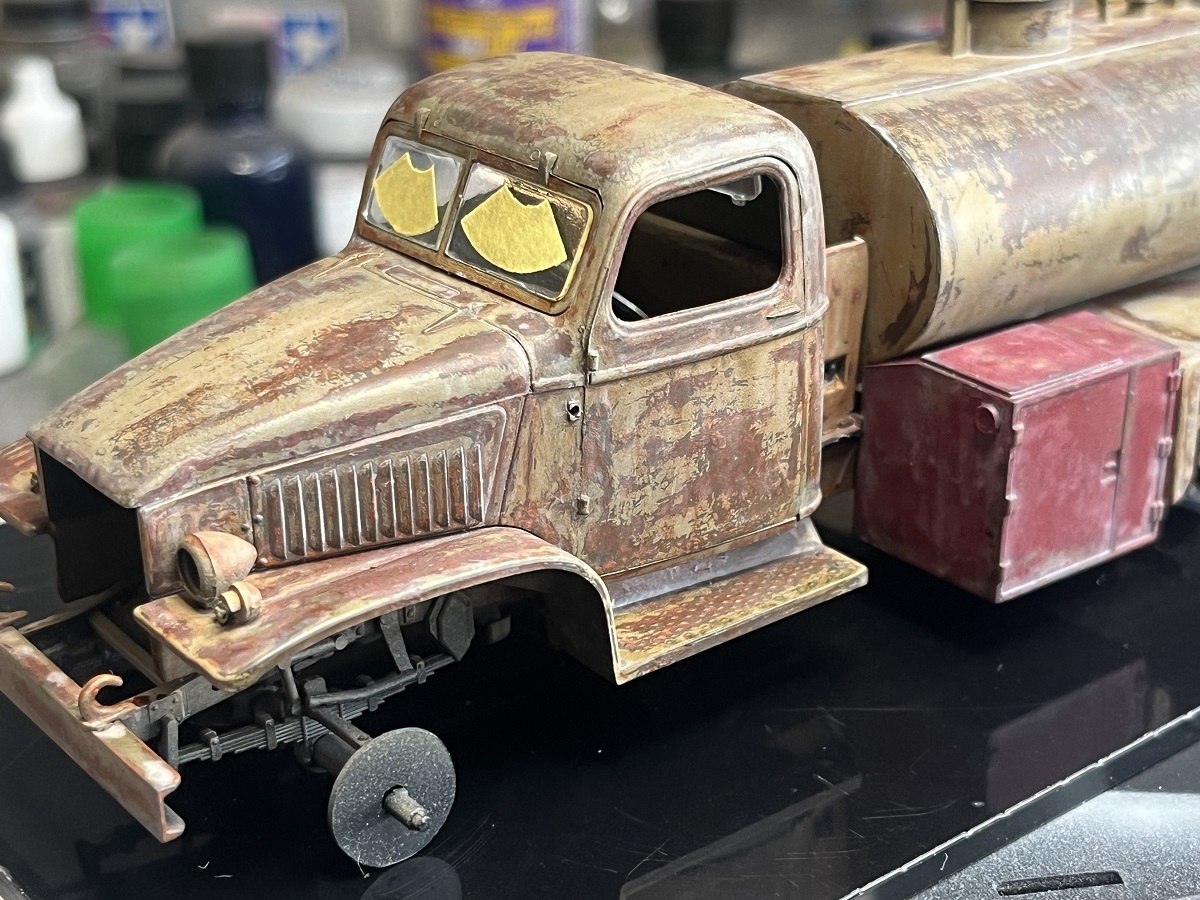
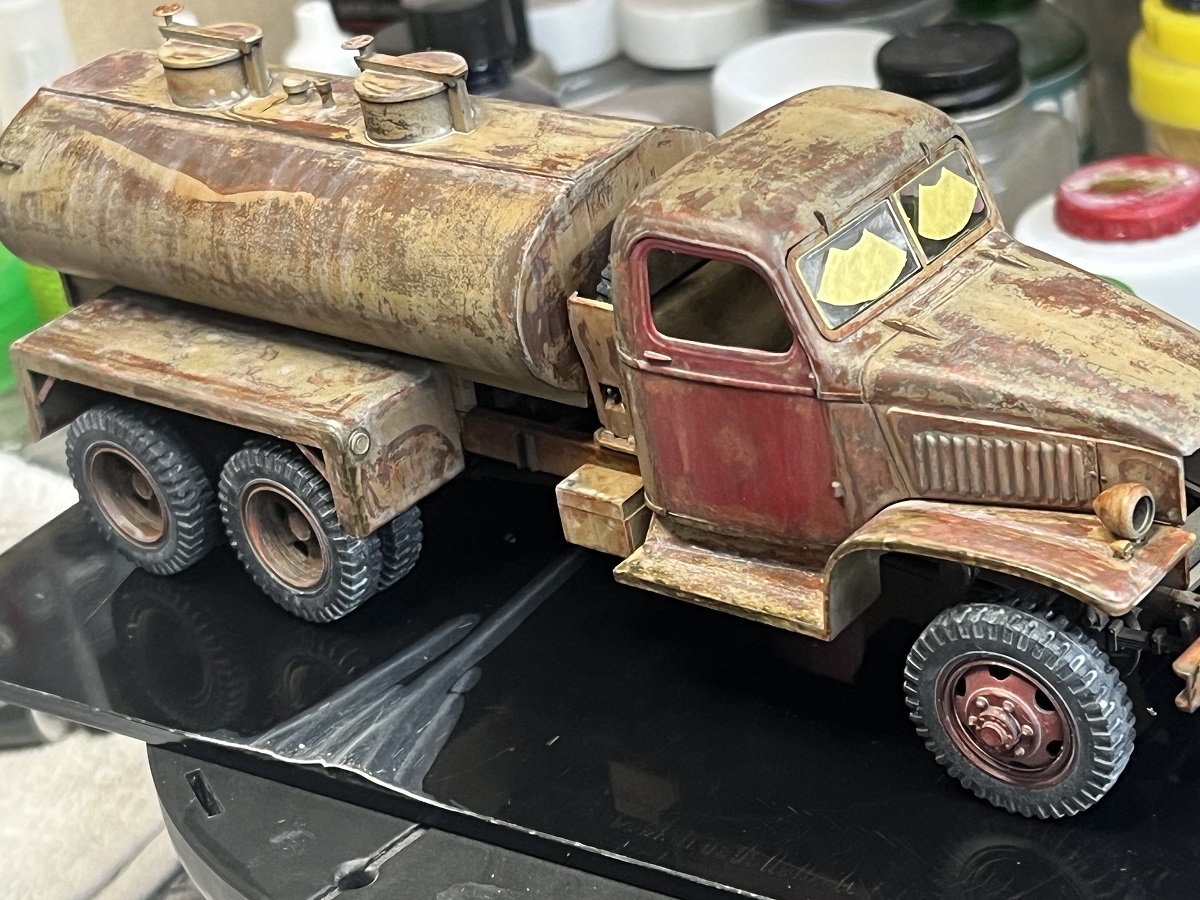
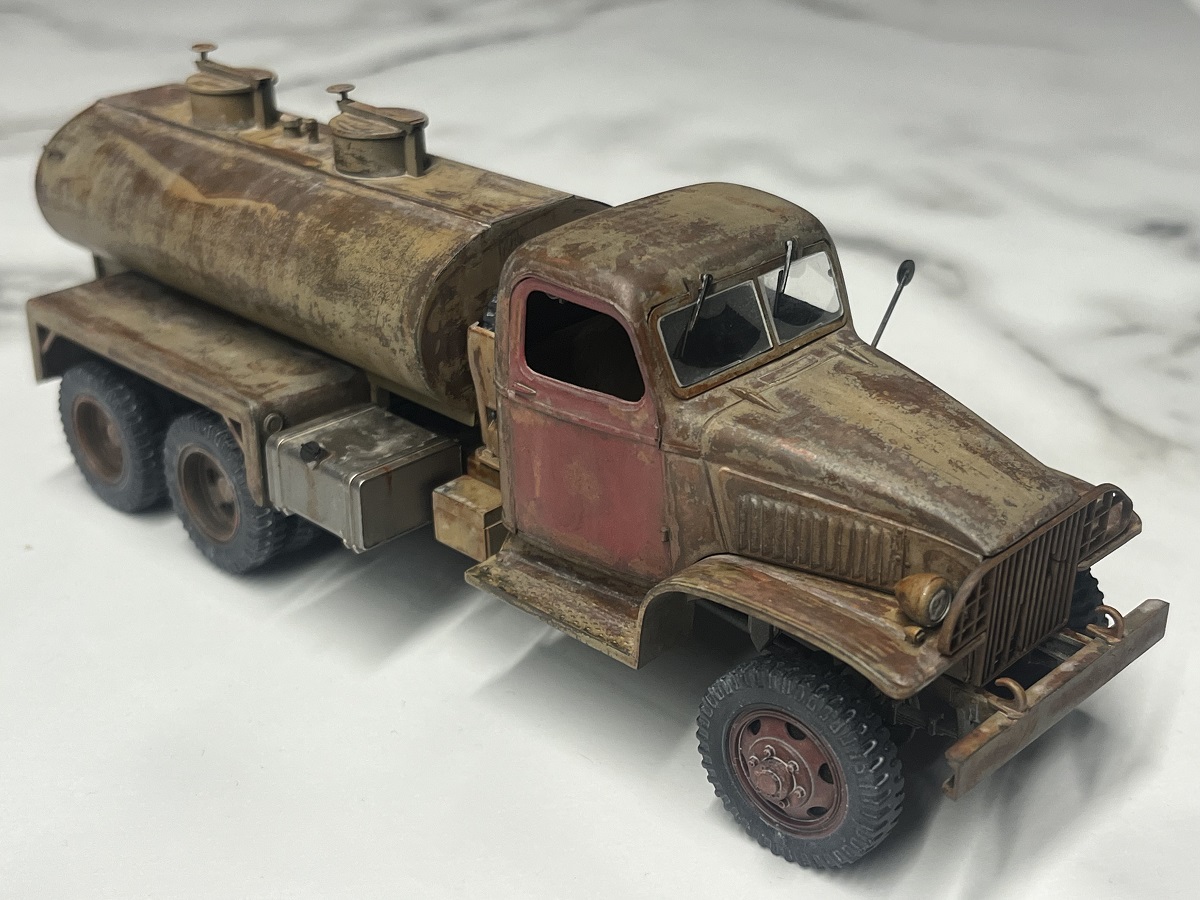
I’ve decided to call time on this build, it is complete in its own right and I will leave further weathering with pigments until I have a couple more builds complete that I want to put together with this one in a diorama. That way I can be sure to tie them in together properly.
The final additions are in place now, radiator and front grille, fuel tank, tool box bracket, wipers and mirror. I gave the front and rear glass a light shot of Buff highly thinned to give a dusty look then removed the masks for the wiper path.
I’m happy with the way it has turned out and I had a lot of fun playing with the oil weathering technique, still lots to learn there though. I also just realised that this is my first ever 1/35 scale kit completed.
Cheers, D
8 Likes
This is truly an accomplished build Damian. Not only was the build great to watch and the extras you did for it, but the icing on the cake was that paint finish and the weathering to get it looking like that.
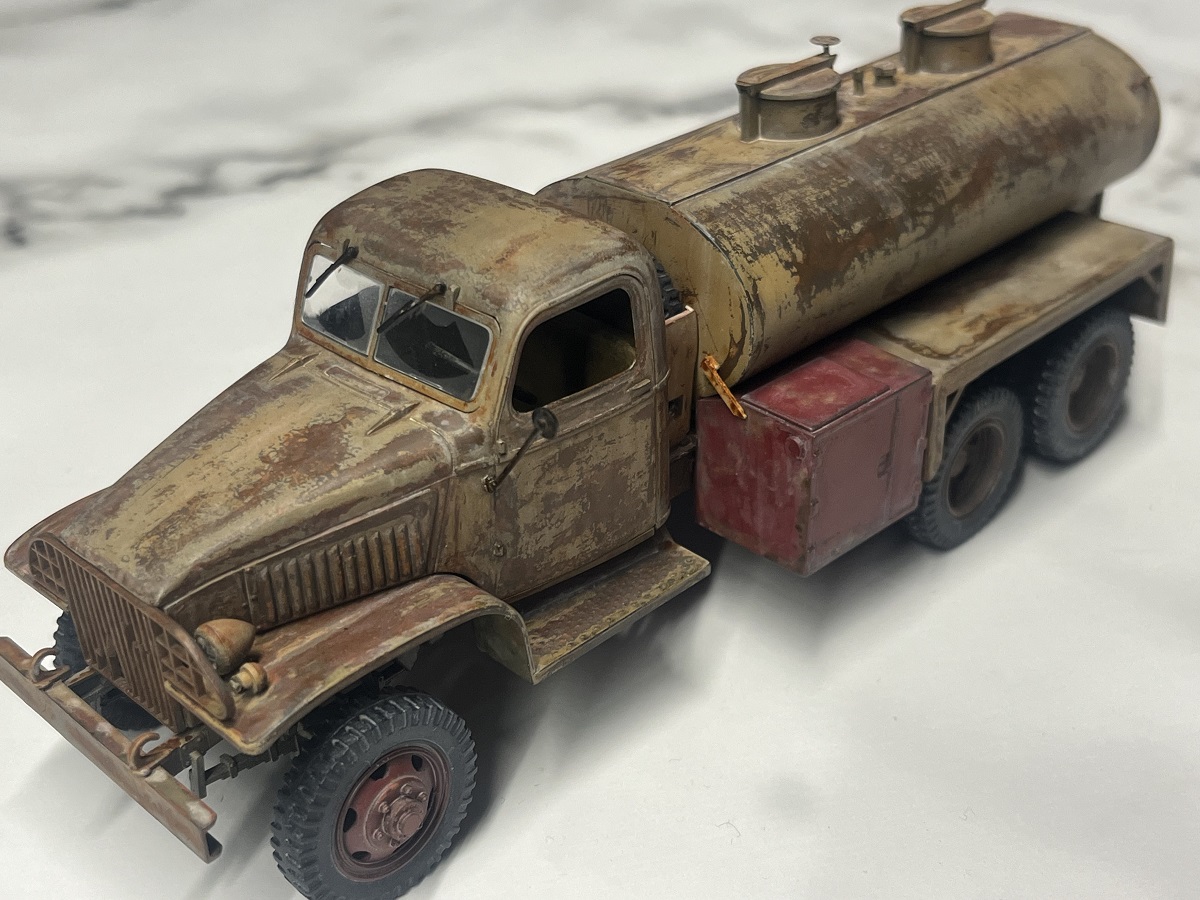
The additional red colour on the tool box and door, and the replacement fuel tank with that splash of silver give it a real used and maintained look to keep it on the road. Superb mate
2 Likes
Thanks John. I really appreciate the feedback, and especially the support along the way mate!
Cheers, D
1 Like
And looking forward to the planned Dio as well
1 Like
Excellent work on that tanker! Another “completed” tick for the spreadsheet…
2 Likes
Very impressive work Damian. This truck turned out beautiful, really fantastic work.
Looking forward to the diorama you’re going to put this into
3 Likes
Fantastic build Damian. I too have marvelled at this build as it progressed. Thanks for posting the in progress pics. They were very welcome.
2 Likes
Well guys,
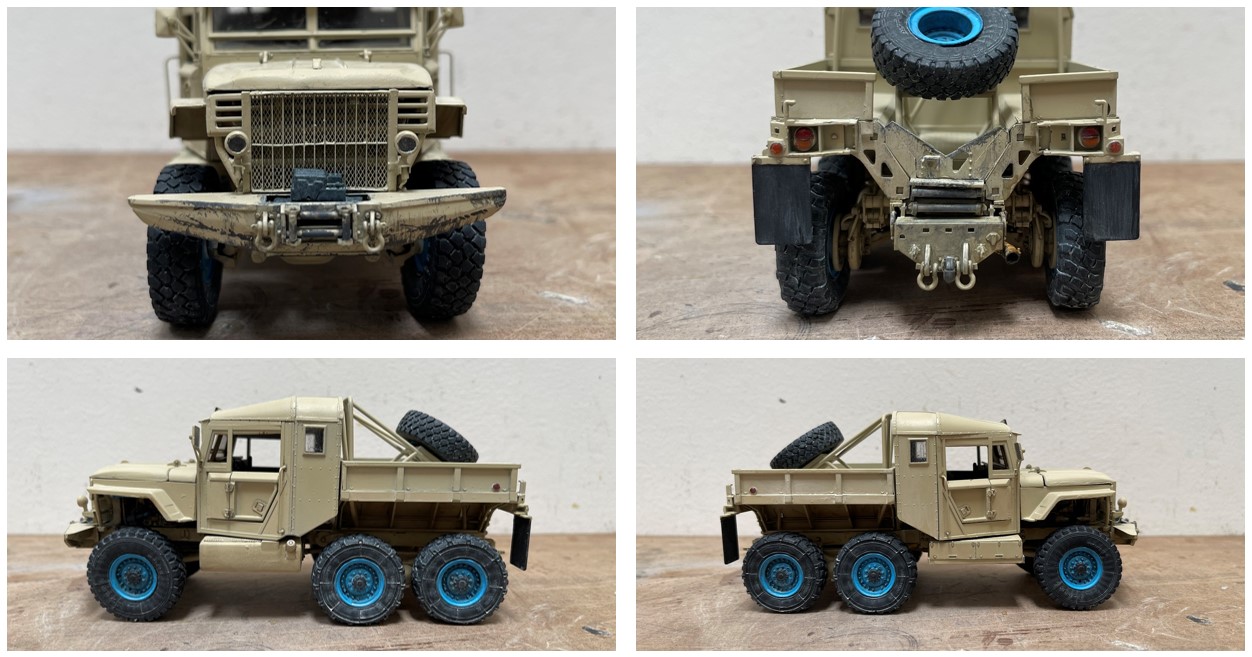
I’m calling the Scammell done!
As you can see, I went ahead with a bit of a retro-mod look 
This was an interesting project - figuring out how to make it into an all-wheel drive rig with a fully posable suspension, and then plenty of body work - but, it also left me wondering how else I might have changed it? For example, bigger tires? but, doing that would have been a lot more work. I’d also reconsider the location of the fuel tank and battery box - while relatively high, I think they sit too low - perfect
I will show a few more images in the build log, in the Automodeler Truck section.
So, on to something else! This will be another truck or two. I’m debating - either a pair of old Ford Marmon Harrington 4x4s, or, converting an M1070 into an oilfield bed truck. So, thanks for having a look, and enjoy what’s left of the weekend -
Cheers
Nick
13 Likes
How many times have I seen this very truck parked next to a corrugated tin building or one of those elevated tanks in an industrial yard, you’ve acheived something every modeler wants, to remind the viewer of a subject or time or place they’ve encountered or experiened. About the silver gas tank, something you might consider experimenting with, take a few drops of silver metallic enamel paint and dip the loaded brush into water then paint the intended subject ( bucket, can, tank, box) set that aside to dry, you should have a finish that very closely resembles galvanized metal.
Cajun 
1 Like
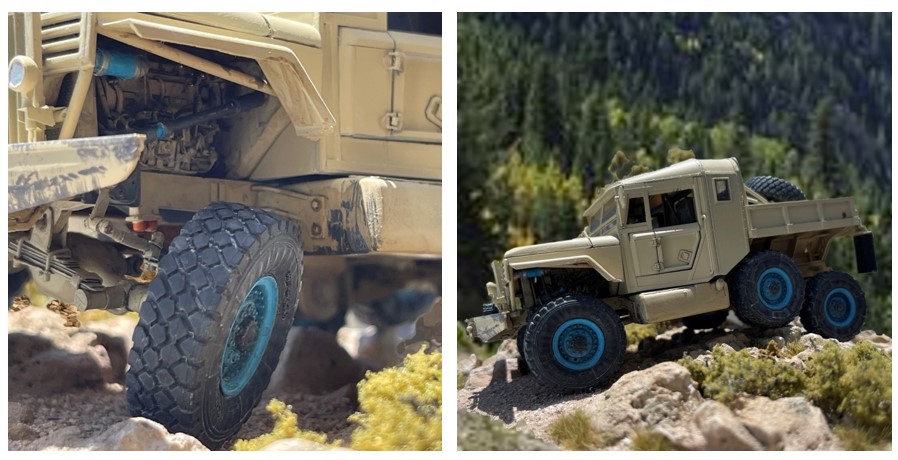
Man I love to see the “steering” wheels turned off center, and articulated axles are just too cool! Lovely finish on another impressive build. Nice.
Cajun
Also, forgot to mention in the other post that the articulating suspension and steering really show it off and give it such a cool look.
1 Like
In addition to the great build the photography is a standout. It really does look like it is out in the forest.
Paul
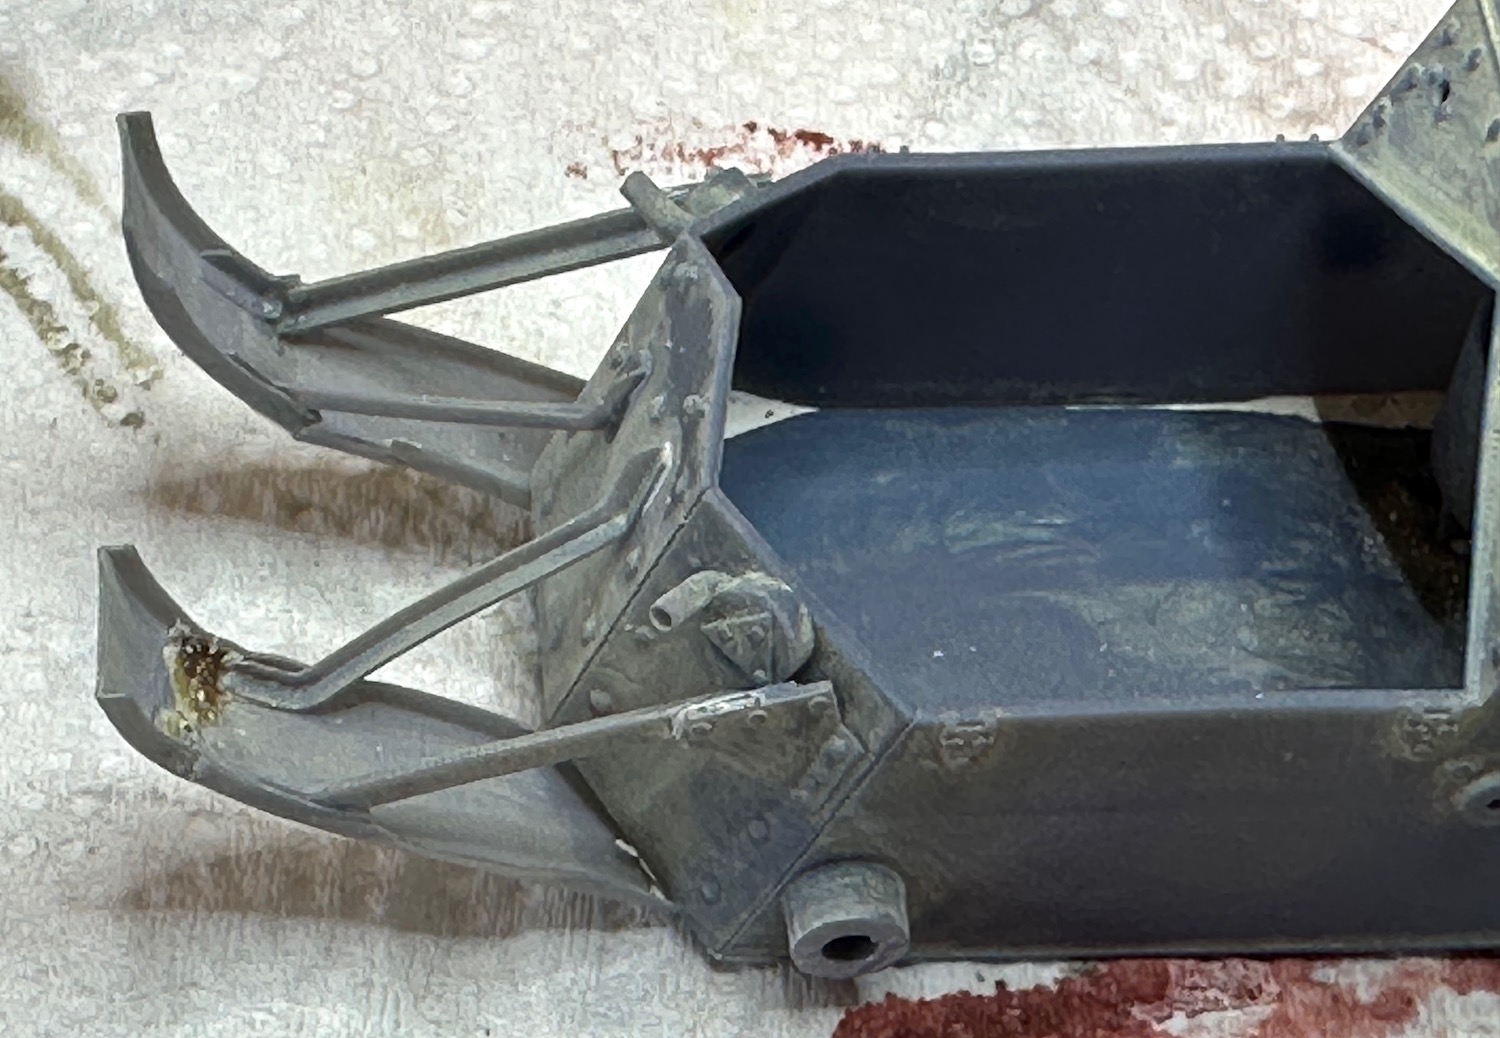
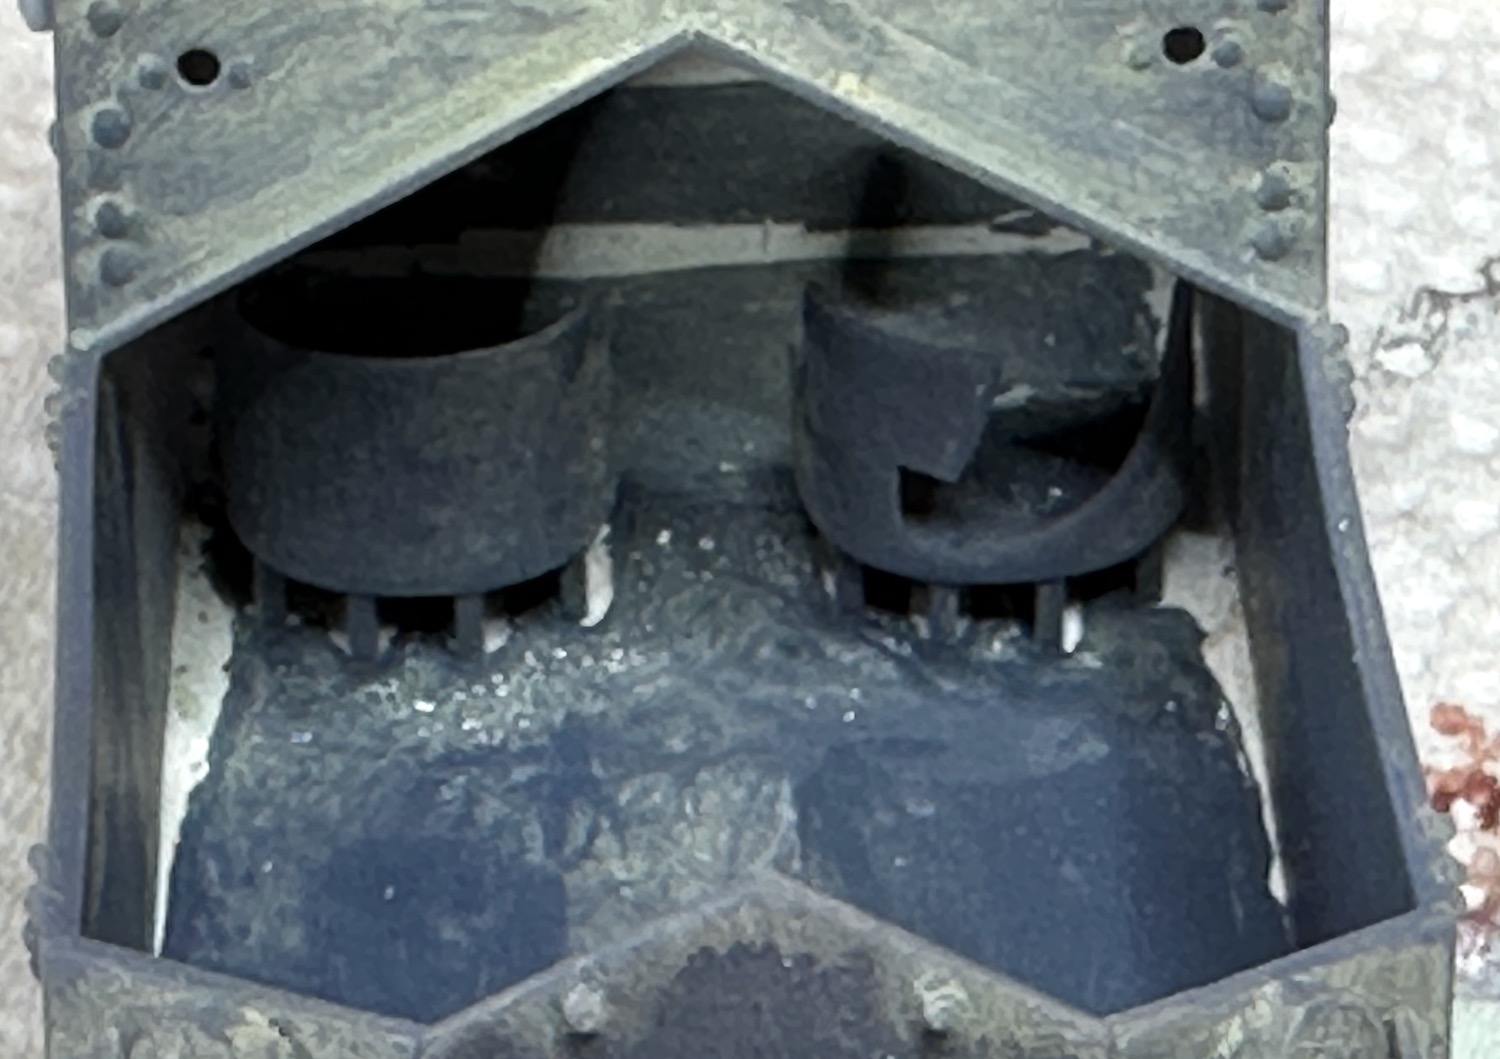
When I last posted about the Ford 3 Ton Tractor/Tank, the bad paint job needed to come off. The acetone bath does remove paint. I did the engine cover first scrubbing with an old toothbrush. I figured I was OK with the Evergreen sheet plastic if I kept the duration of the bath under 10 minutes. It really didn’t even need that much time.
Most of the parts were just the same but the main body was a problem. There were 11 coats of hand painted Model Master white on the interior and they did not want to come off completely so I kept it in the bath and kept scrubbing. Acetone DOES attack the 3D plastic just as it did the Evergreen sheet. It took me awhile to figure this out and when I did many of the very thin parts had distorted or even dissolved. While this was a PIA, it also had one good benefit, I was able to straighten one of the badly warped rear skids by placing a wood dowel on it and a heavy weight and allowing it to dry.
A part of the seat back on one of the seats broke off and completely dissolved. Also, part of the very thin gun shield started to disintegrate.
I had to give some thought to continuing on with this kit or just throwing in the towel & buying a new kit. The current project is the product of the best part of two kits with some scratch built replacement parts and I had no confidence that a new kit would be any better. I decided to take a swing at fixing this one.
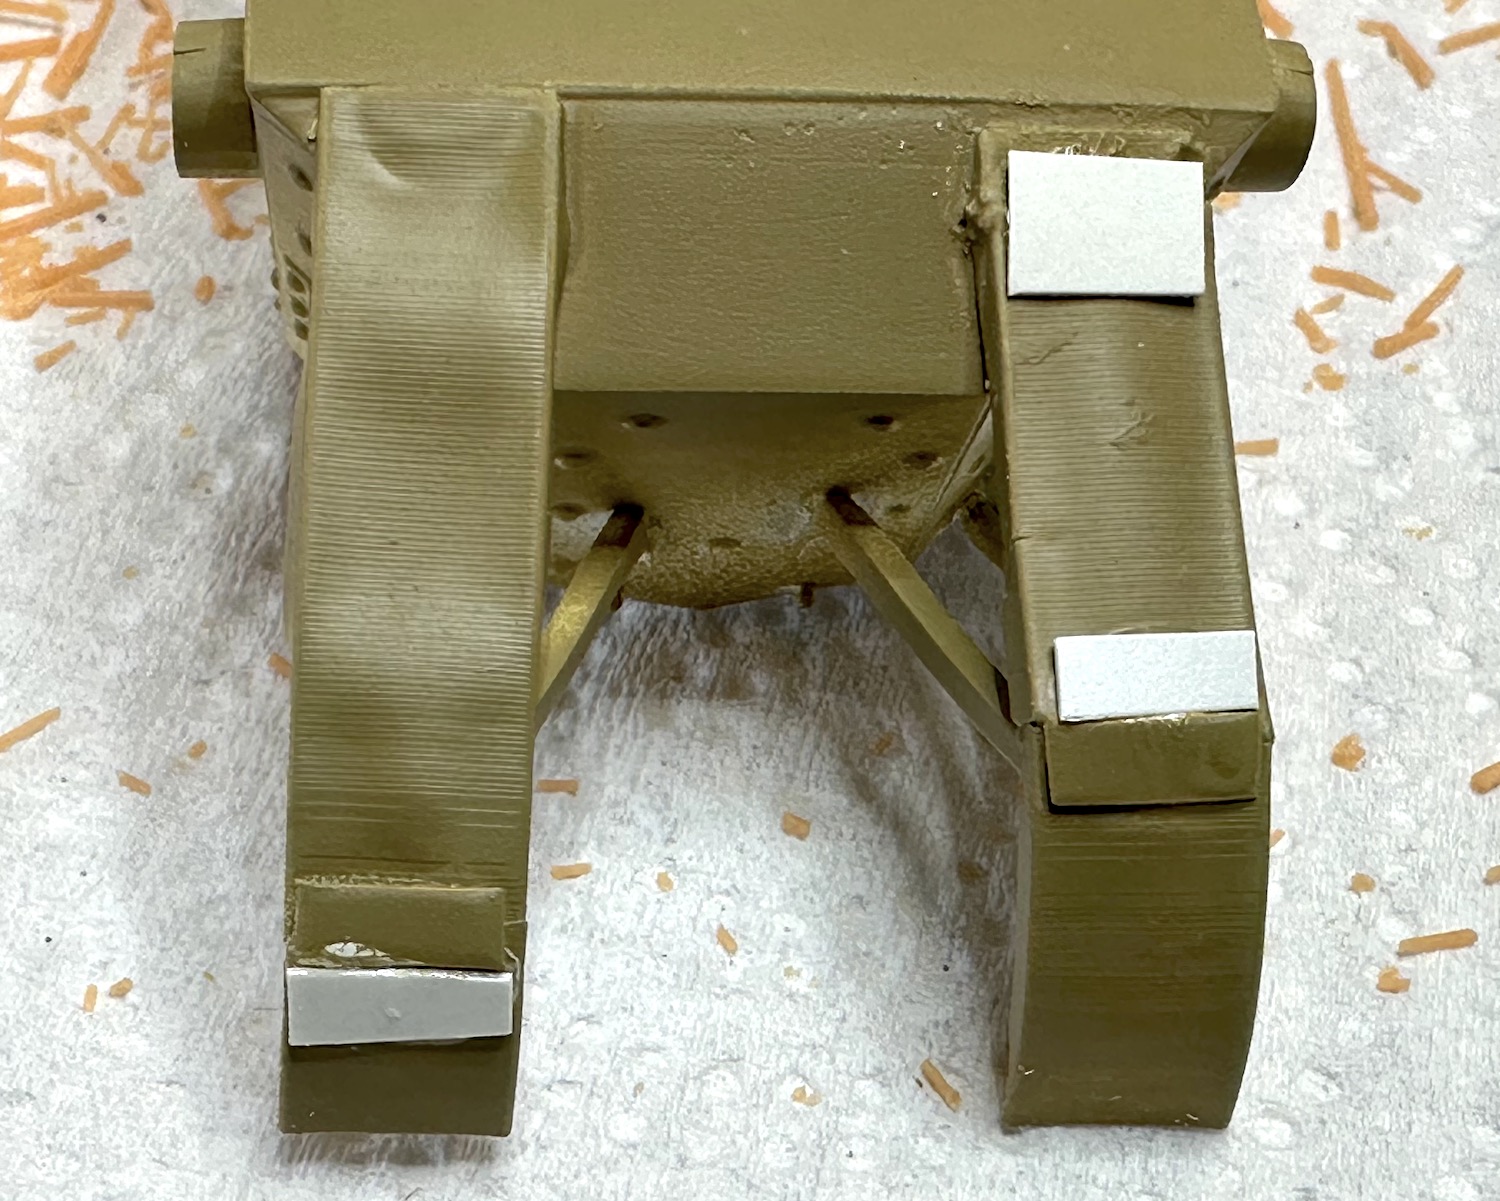
The wrecked skid was reattached and plastic scraps were added to reinforce the wrecked structure. The gun shield was repaired with a few layers of CA gel glue.
Paul
3 Likes
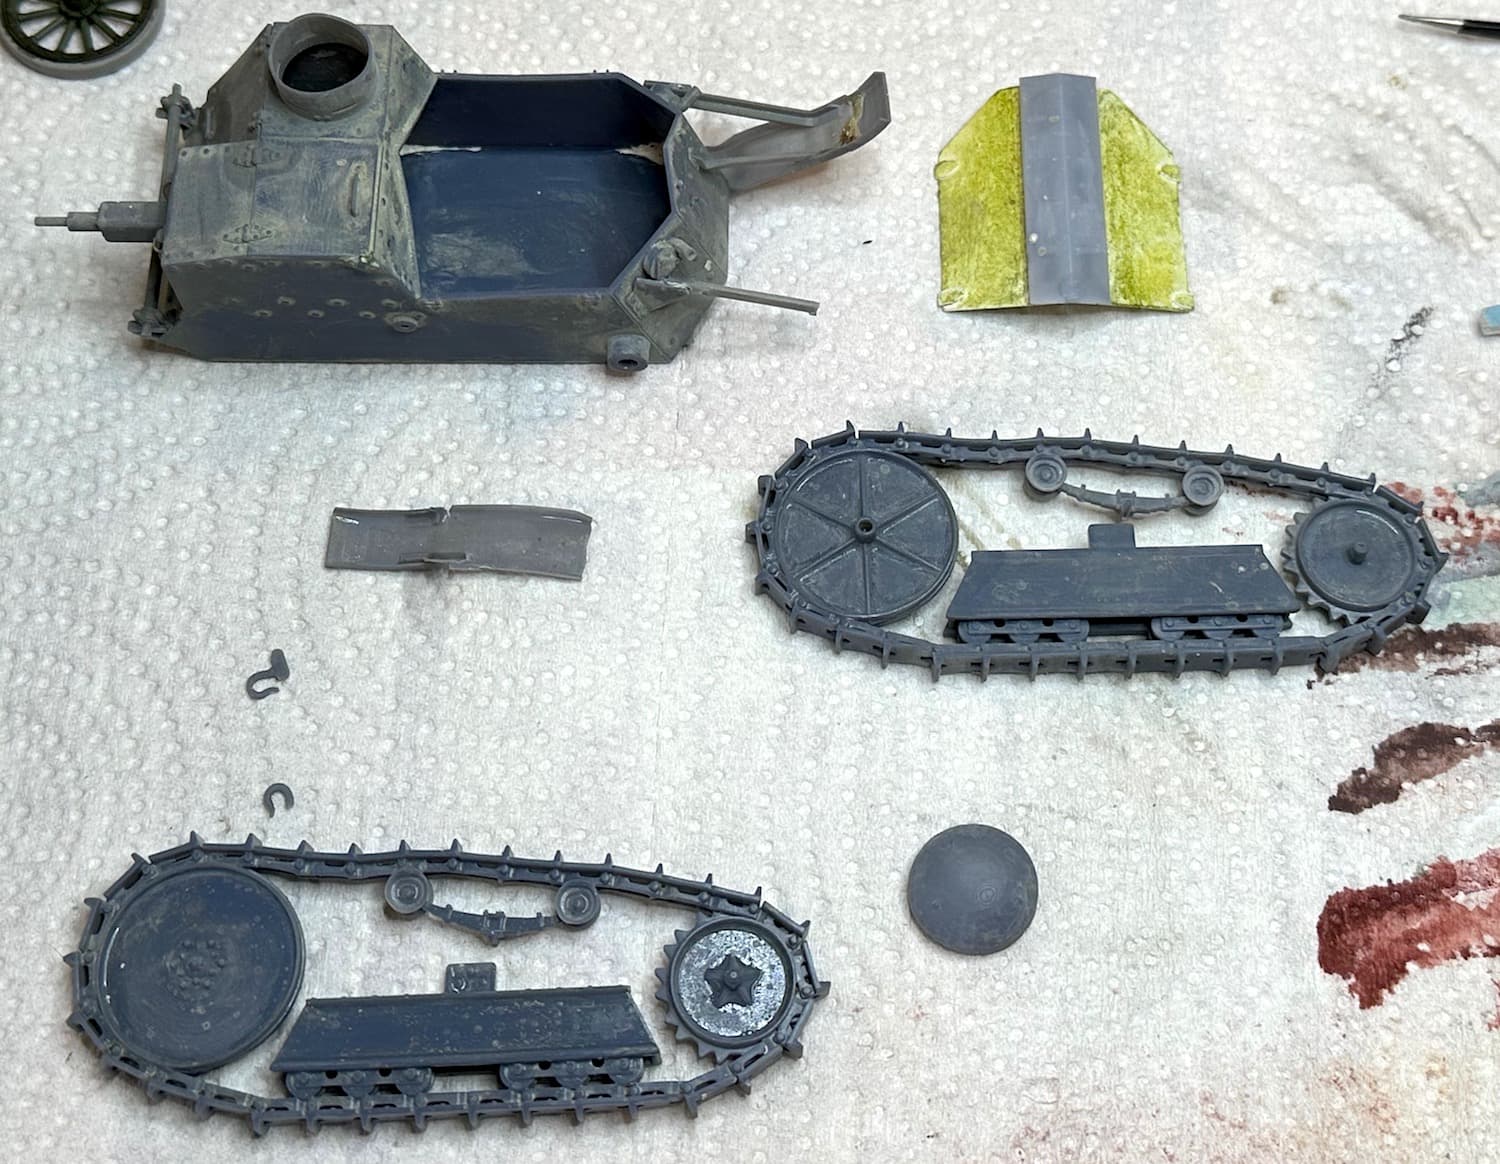
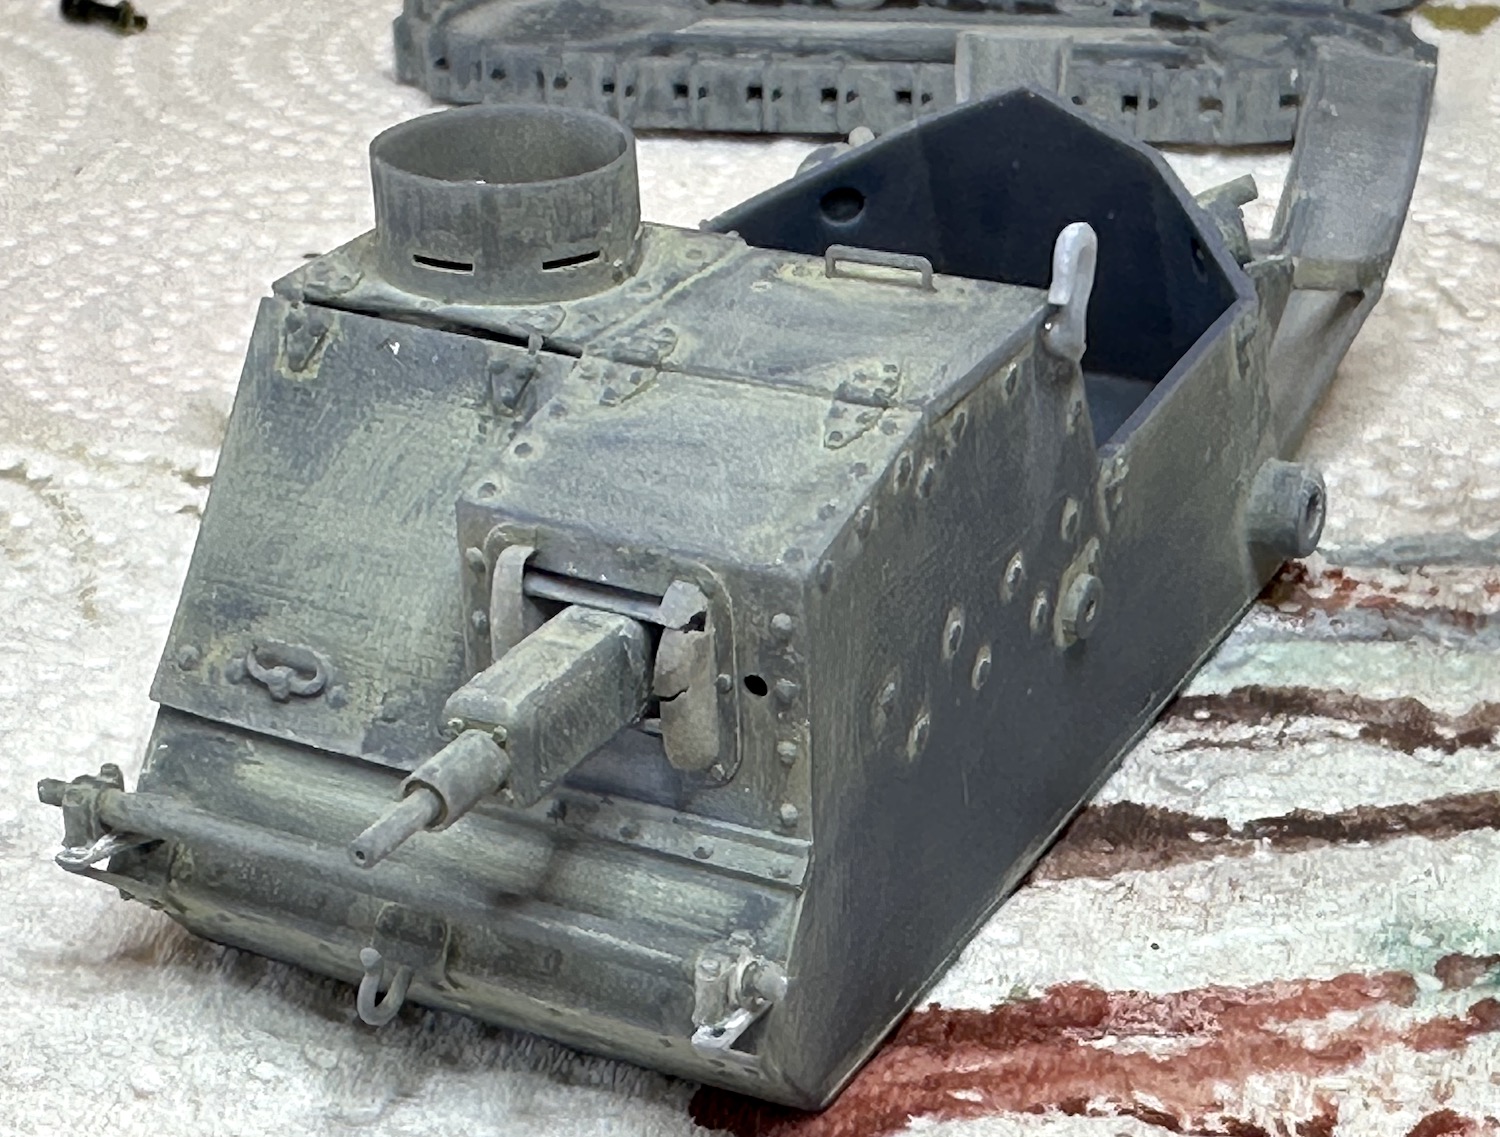
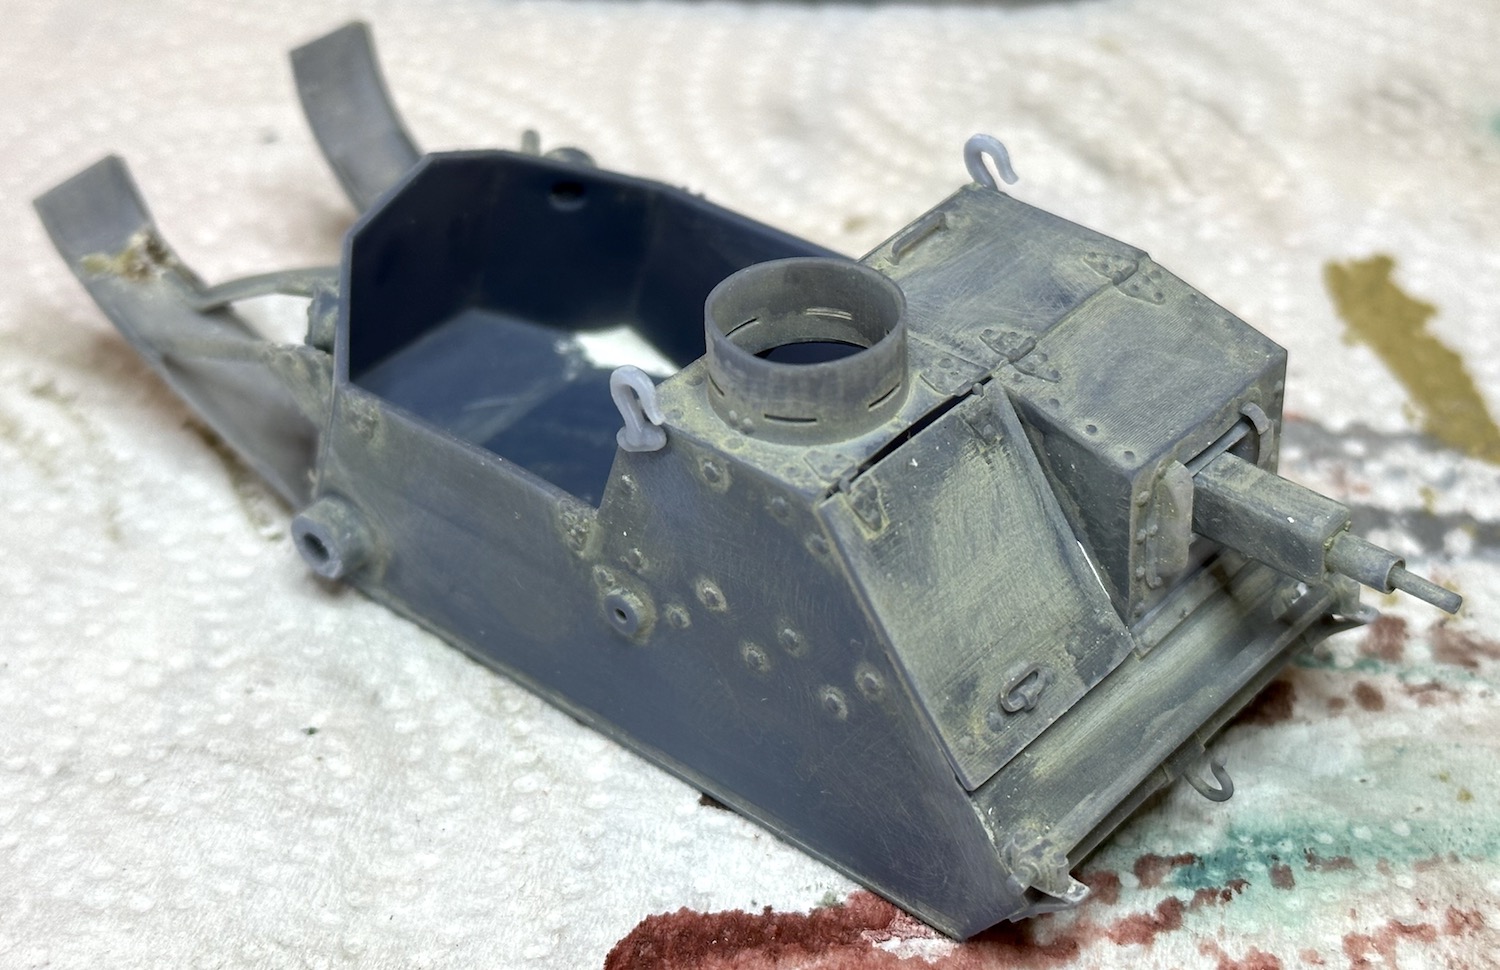
After repairing the damage as best as I could, I shot the model with Mr. Surfacer 1000 WHITE primer. I wanted the interior white to make it easier to brush paint and it worked. A single coat of Tru Color off white did the deed this time.
The body color was again the Tamiya dark yellow.
Somewhere along the road I decide that the skids were still too weak and added more patches. Now there were so many patches it would be hard to hide them. Why not feature them? These skids look very flimsy in the pictures as well as on the model. Had the ARMY put them to any real test I’ll bet they would have been damaged and needed repair probably by welding steel patch plates on in weak areas just as I had done with my plastic patches.
I will add CA glue welds and paint the patches rusty steel with scrapes along the skids.
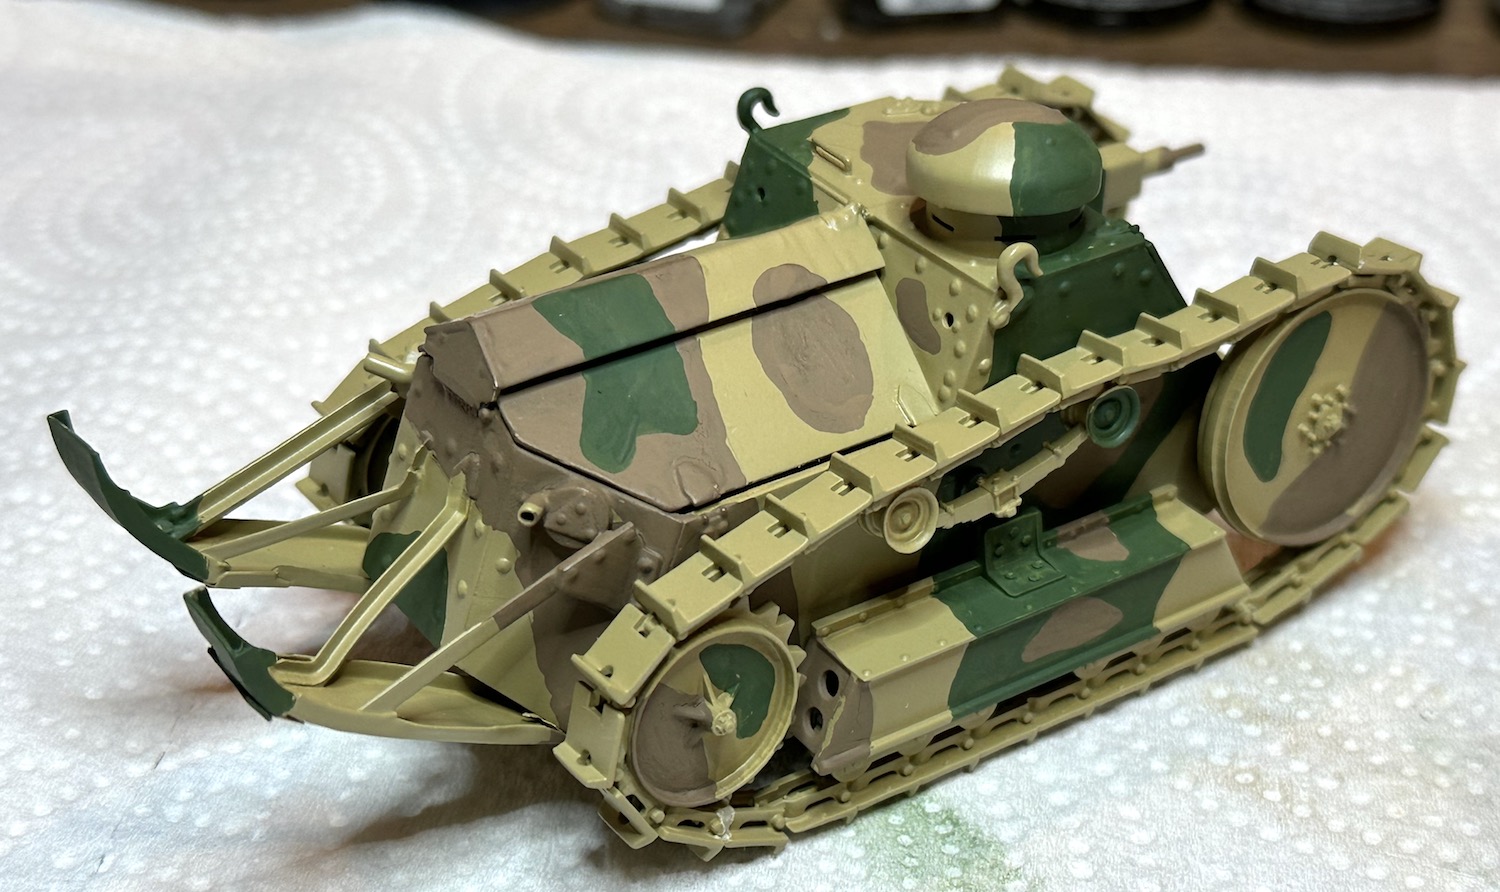
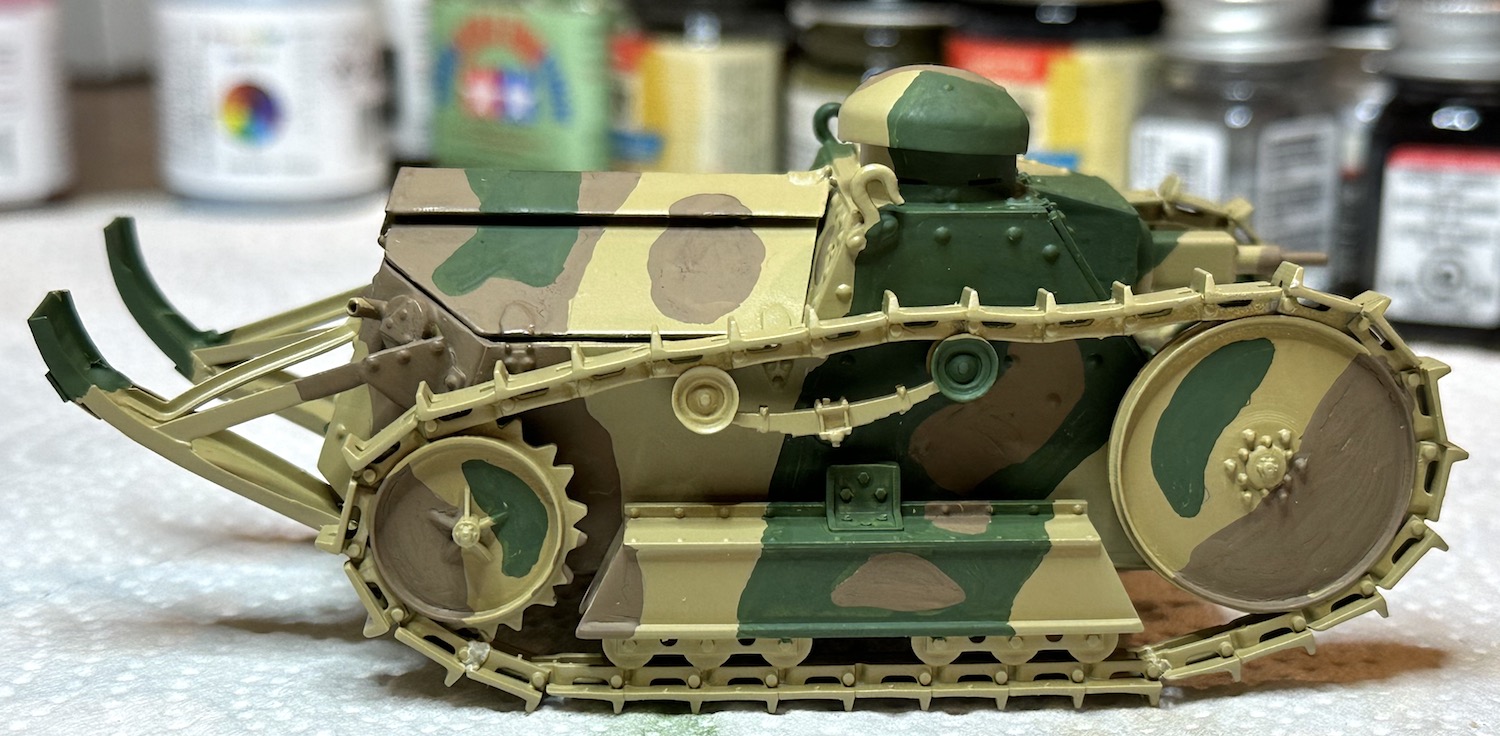
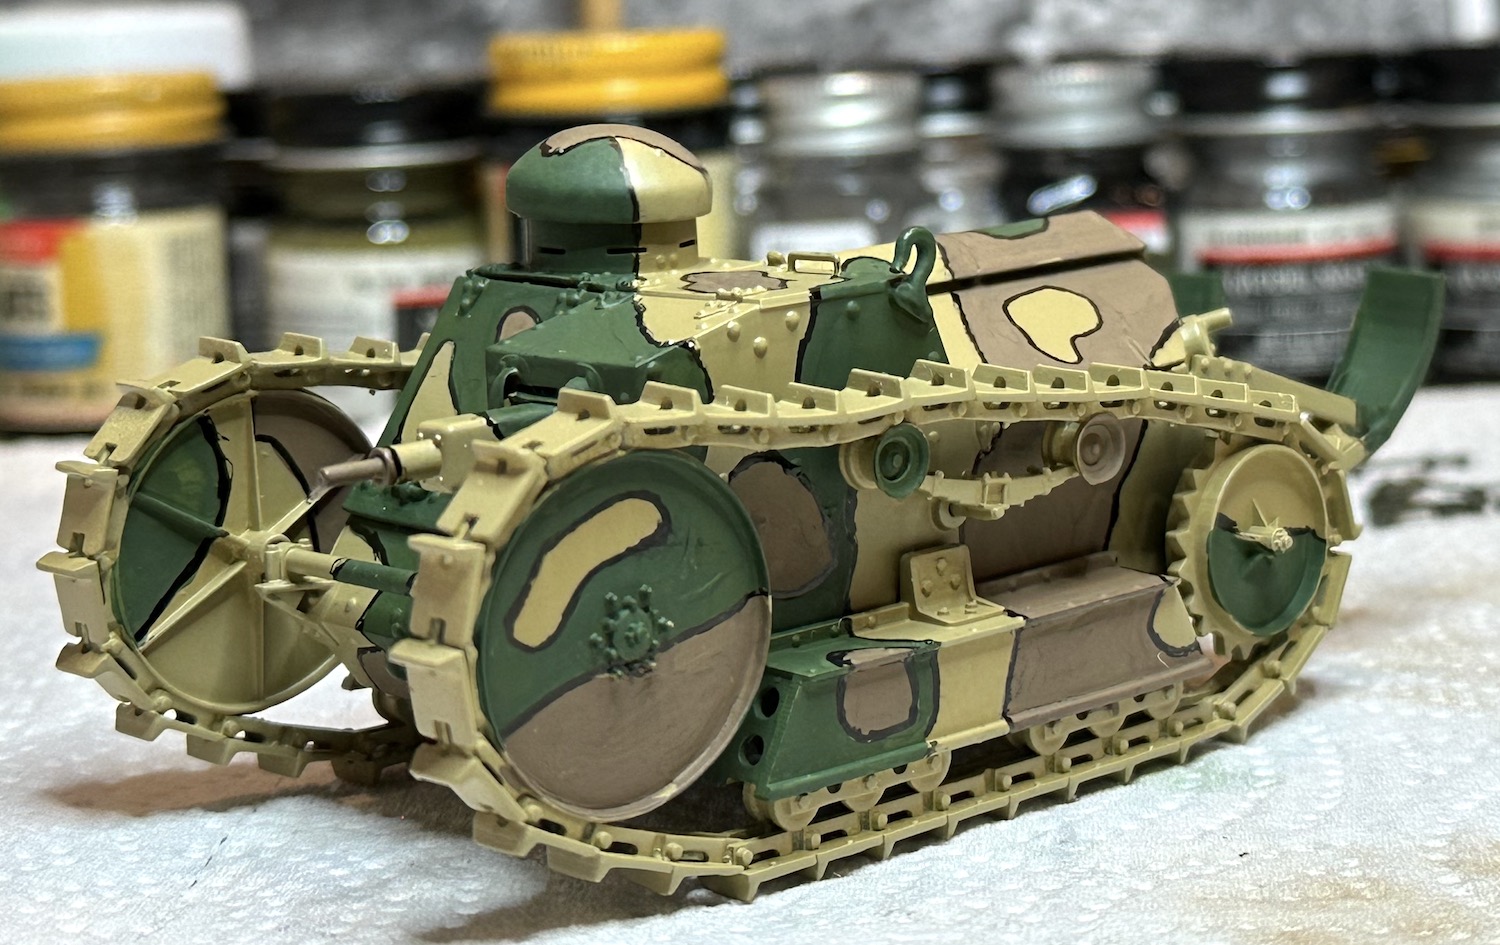
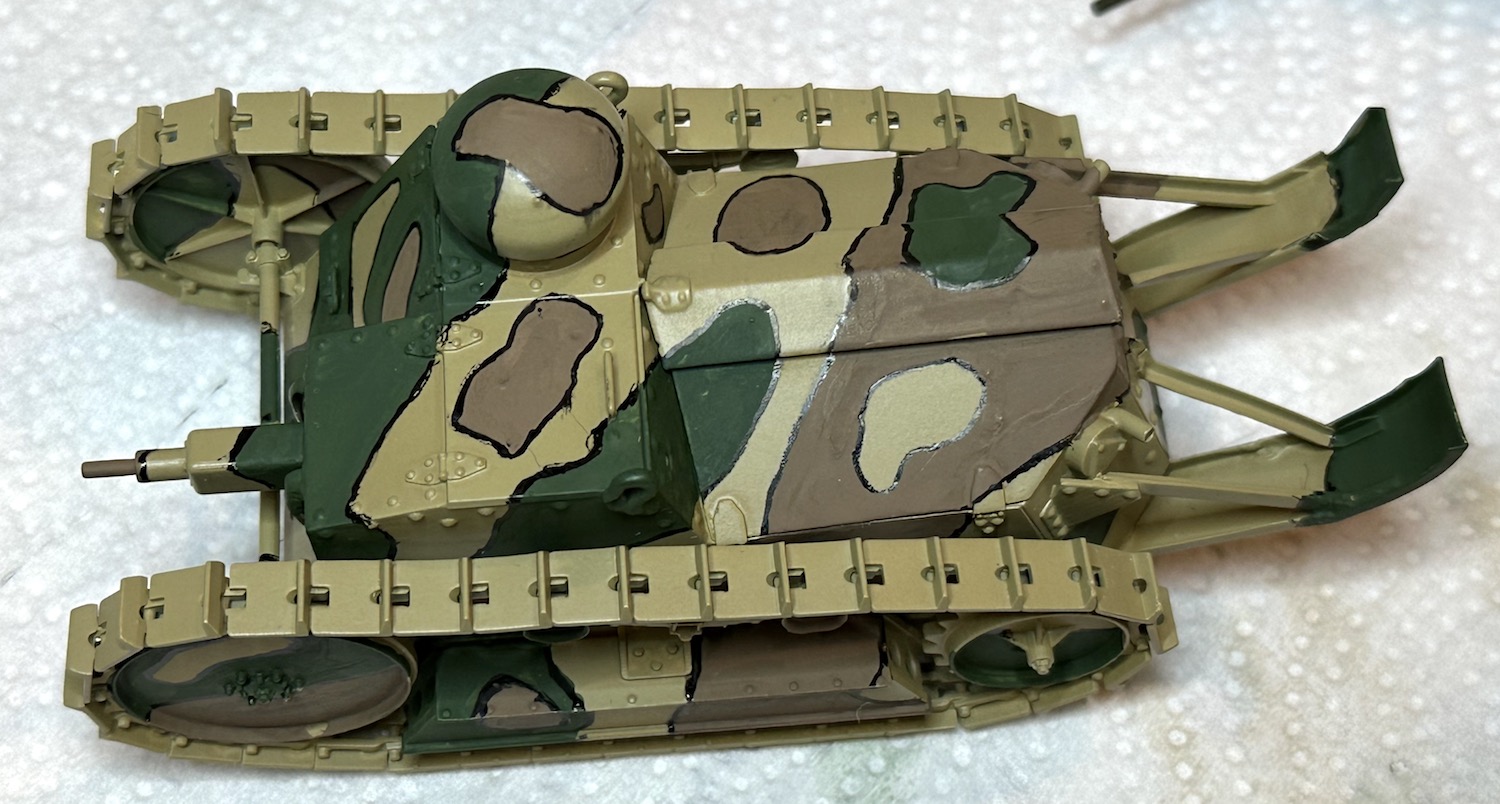
I decided to brush paint the camo this time and used a Tamiya dark green & a Humbrol brown. This was the fun part!
Paul
5 Likes
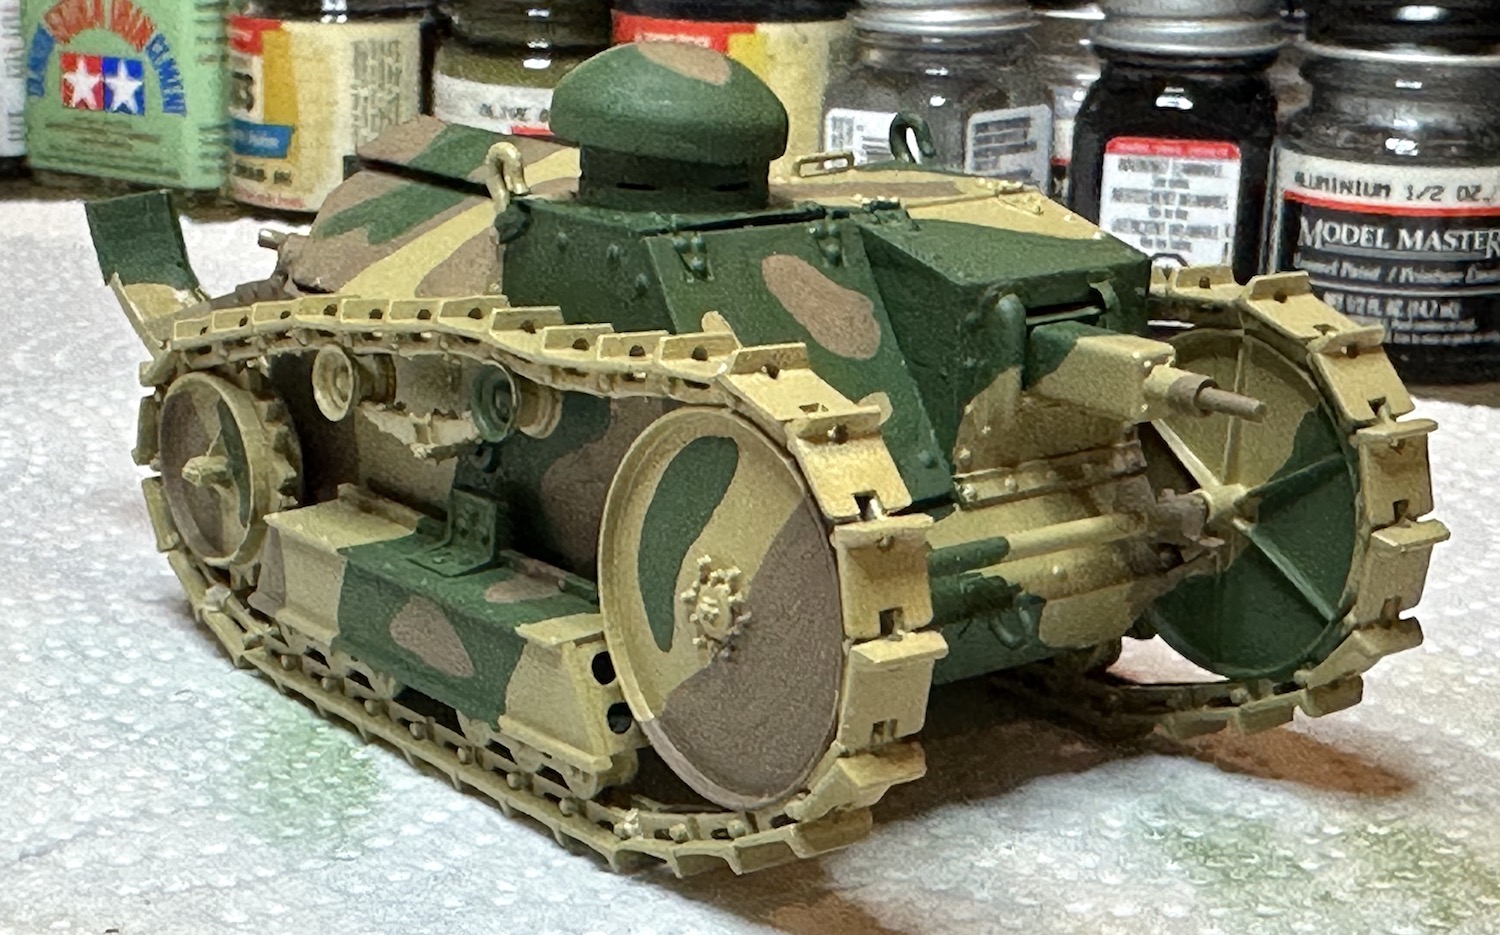
Another try with the black marker produced the black lines around the color areas. It will need some touch up. This is were the project is right now.
Paul
9 Likes
That’s a VERY impressive save!
1 Like