Damraska’s AFV Projects

Well, if you like the “Archbishop” concept for one of your future builds go for it; Bronco do both the “Bishop” and the “Pheasant” in 1:35th scale…

I wonder if the 54 inch turret ring of a Matilda could be increased to 69 inches, making it big enough to accommodate the turret of an American M4 medium tank.

Highly unlikely, I’d say, as there was some surprise at the fitting of the A24 turret which only had a 57 inch turret ring.

Cheers,

M

2 Likes

Thank you. I added both of those models to my want list but will leave the ‘Archbishop’ to you or BringupthePIAT. My 1/35 scale model collection is tiny. Before venturing into made up British vehicles, I really need to build some real British vehicles. :slightly_smiling_face: I ventured into made up vehicles based on the American M4 medium because, after building a half dozen M4s (15 years ago), my spares box was full of leftover Sherman parts. (Jagdsherman was started 15 years ago.)

4 Likes

Fair enough, I might get round to it…

Ah, now I get it; that’s the sort of problem that can afflict anyone but impacts particularly builders of 1960s-tooled 1:25th scale customising car kits and those building Games Workshop plastic wargaming items (with the latter it’s not uncommon to have more components left over than went into the completed item). I’m actually glancing over at a pile of half-full frames as I type and contemplating a Jet Bike for some reason…
Have you come across the Super Hellcat Tank Destroyer? One single test vehicle built which put a M36 Jackson Turret on a M18 Hellcat hull. Another interesting hybrid was developed by the Republic of China (Taiwan) who installed the turrets from about 50 worn-out M18s onto the hulls of M42 “Duster” 40 mm Self-Propelled Anti-Aircraft Guns. Why is this relevant? Because these swaps mean they must have used the 69 inch Sherman turret ring or something remarkably similar, so there is a lot of potential for “What If” swops that didn’t happen to use up your surplus stocks of Sherman bits… Sherman hull + Duster Turret? Hellcat hull with “Achilles” 17pdr turret? The list may not be endless but it might be rather long.

Cheers,

M

2 Likes

Stikpusher’s anti-grav racer in the Science Fiction campaign, along with Meng’s recent release of a Dune Ornithoper, inspired me to make drawings of some small, utility flyers. A few of us have discussed starting a second science fiction campaign focused on small vehicles. Would something like that interest you?

It seems vaguely familiar. I own 5 or 6 of Hunnicutt’s books on American tank history but have not read any of them in years.

My closet includes many M4 models. The 15 year old plan was to cross kit the lot, thus obtaining 4 or 5 specific vehicles. I cannot remember how that was supposed to work and my interests have changed.

I do not own an Achilles, M18, M10, M36, or M42. In the past, I avoided almost everything with an interior because such projects are very time consuming and my painting ability is not that great. As my skill improves, I am becoming less wary of such projects. The GAZ-AAA pictured earlier in this journal was my first 1/35 scale truck and it turned out okay.

2 Likes

Almost 4 months have passed since I last completed a model, mostly because summer heat makes painting in the garage very unpleasant. Rather than close down the assembly line for the summer, I am steadily building one model after another, taking each to the primer phase then moving on to the next.

About a week ago, I started a Hobby Boss Panzer I F. It is a surprisingly pleasant model to build but has some accuracy issues. When that reached the putty stage, I began an Academy Panzer 35(t). This is also a fairly pleasant model to build with only minor problems.

After completing construction of the previous two models I began assembling a Meng Jagdpanther G2. This was a Christmas present. The hull builds up from many flat plates, much like the real thing, but with some really strange design gimmicks thrown in. Keeping everything true is really difficult, making for a very unpleasant building experience. Something went wrong during assembly because mine is slightly borked. There is also a good bit of play when installing the suspension swing arms. It will be a minor miracle if this thing sits flat.

Painting is still happening in the background, just at a very slow pace. My next completed project will probably be the Firefly from a few months back.

5 Likes

Things are going okay in Jagdpather land.

Jagdpanther almost sits flat. Some judicious yanking on select road wheel arms may help matters. :face_with_raised_eyebrow:

Replacing polycaps with hard plastic bearings worked! :slightly_smiling_face: All suspension components are nice and tight.

Borked seams were filled with very diluted Testor’s Contour Putty. This nicely closed a number of hairline fissures at various weld lines. :slightly_smiling_face: The front plate now blends nicely with the fenders. The technique worked a bit too well on the engine deck. :flushed:

So, three successful long passes in a row. Kinda surprised.

Cleaning up and assembling the tracks comes next and will take a few days. Preliminary tests reveal they look quite nice and fit together very well.

5 Likes

The main gun of the Meng Jagdpanther G2 is quite lovely and would make an excellent stand alone model.

If this gun was fielded as a piece of towed artillery and a1/35 scale model exists, I need to purchase it.

The model includes two finishing options for vehicles from Heavy Tank Destroyer Battalion 654. In my opinion, having just browsed through a 600 page unit history for that formation, they are both wrong. Using decals from the leftovers folder, I can probably fix that.

There are two slightly more pressing issues. Jagdpanthers of 654 all carried a custom storage bin on the left rear of the fighting compartment. The model does not include the necessary bin. In addition, the gun cleaning tube was relocated to the very back of the engine deck. That one is an easy fix.

4 Likes

It does:

image

4 Likes

Yay! Thank you!

2 Likes

Another Jagdpanther is born.

The model comes with brass fenders. These were replaced with spare fenders from a Dragon Panther G. The front and side fenders do not line up, which is a bummer. Oh well.

So, after 4 days, I am back where I started with nothing to do and a bigger line at the paint station. What should I do? Ha! Start another model.

Found this one in a box while looking for fenders. Must of built it 15 years ago. The front and side fenders line up on this one. Into the paint queue it goes.

This was the fender donor. May as well build it. Pantherpalooza! It will be 2027 before all these dumb models are painted.

Edit: The steel wheel Panther G does not have any tracks. That means I built them and stuffed them in another box. Boys and girls, this is why you should finish what you start in a timely fashion.

The fender kink thing is really bothering me. Maybe I should trash the Meng Jagdpanther and put those tracks on the Dragon Panther G. I can build the Dragon Jagdpanther instead. :thinking:

Edit: I am adding two more pictures that better show what went wrong.

Here you can see where I added putty all around the engine deck to cover up small gaps.

Here you can see where I filled the join between the front fenders and body. The mismatch between the front and side fenders is also clearly evident. The former problem occurred because I did not understand how the model designer wanted me to assemble the hull. The latter problem occurred because I borked the hull assembly and then replaced thin brass parts with a thick plastic one from a different model.

Even though 15 years have passed, by brain is still trying to build a Dragon Panther. This Meng Jagdpanther does not compute.

5 Likes

If I am willing to trash a whole model, I may as well throw a Hail Mary and try to fix the problem.

The Dragon sourced fenders rode high because this Meng Jagdpanther has a shelf to attach and support brass fenders. That shelf needed to go, along with the upper portion of each apron plate attachment hook.

Cutting away the shelf and upper hook sections was quite harrowing. In essence, I traded one gigantic flaw for a bunch of little flaws. If I were to add cast texture to the hull, the little flaws would disappear.

The Dragon fenders were damaged beyond repair in the removal process. That is acceptable because the Dragon Jagdpanther G1 includes a second set of spare fenders in the correct configuration. (The model comes with three sets of fenders–one early and two late.)

The Dragon Jagdpather G1 also includes two different storage boxes unique to 654. The instructions make no mention of them. :flushed: I will use the bigger one as a template to scratch build storage boxes for both Jagdpanthers. That way, if I ever build another Jagdpanther, the original parts can serve as templates for more copies.

The only other thing I would like to take back is fitting the deep fording cover over the roof exhaust fan. That is what I get for not reading up on the vehicle before building a model of it. Never trust model instructions. Never.

3 Likes

In my quest to find something easy, quick, and fun to build, I engaged in another dalliance.

The diversion of the day is a Dragon Panzer II Ausf. F, originally released in approximately 2007. I was going to build it without the interior but curiosity got the better of me. Fit varies wildly from excellent to terrible. I had to chop three of 10 bogie trucks to make them fit. All interior wall pieces require shimming. Final drive covers are wonky. Upper hull exterior pieces fit very well. After working on this model for a few hours I realized it is a major project requiring significant effort and research. It went back into the box for another time.

With that short diversion out of the way, I am turning my attention back to the Sd.Kfz. 232 and T30. Can I overcome my aversion to painting and finish some stuff?

1 Like

Well Doug, you’re sure crankin’ on the builds, and nice tight builds they are. That Jagdpanther is worth saving for sure, it’s too complete and it’s a beautiful model. I suggest you invest in a jar of AK Easycast Texture Medium, AK897. If you want to add the armor texture to the hull to hide all those little mistakes, this is your stuff. Unlike Mr. Surfacer, this is a cream-like substance that can be applied and worked with subtle nuance, creating perfect cast texture that requires no sanding down afterward. I tried it on a Centurion turret to hide the parts lines and it worked beautifully.
Yeah, do finish that Meng Jagdpanther, it doesn’t need too much.

3 Likes

Oh, whoa. In the Making Water discussion, Leo (Biggles50) suggested using a very similar acrylic paste for water effects!

It turns out there are a huge number of acrylic pastes available for creating all sorts of textures. Marble dust is often a primary ingredient. All the ugly, zero skill paintings that hang in doctor’s and lawyer’s offices–acrylic paste and cheap paint.

This seems like an excellent opportunity to solve two problems with one product. Since I potentially need a lot of material for future diorama work, I will go with cheap acrylic paste marketed to artists and perform some experiments. Maybe I can sell the experiments to doctors and lawyers! That would be awesome.

On the subject of dioramas, I may have also solved my basing quandary! My brother has some left over cement board from a bathroom upgrade project. The stuff is rock hard, impermeable to water, and nearly indestructible. :slightly_smiling_face:

1 Like

And then there were two.

I decided to build the Dragon Jagdpather G1 (shown a couple says ago) and divert spare parts to the Meng Jagdpanther G2. As usual, this became very involved, very fast.

The Dragon model is significantly easier to build than the Meng Model. Just like the Meng model, fitting the Dragon hull parts together is difficult. After a bunch of sanding and scraping, I realized the upper hull is warped, like someone squashed the part while hot out of the mold, causing it to splay. I do not remember Dragon Panthers having this issue.

3 Likes

The patient survived the operation!

Ladies and gentlemen, you are looking at a Jagdpanther with new fenders that actually line up. Since I am impatient, Mr. Surfacer 1000 was used to make cast texture.

A 654 style stowage box is near completion. Track hangers are also fixed.

Gun and roof are now cemented in place. Parts of the model are primed. Construction is almost done.

Something really interesting happened with the Dragon Jagdpanther G1. In my previous entry, I wrote about distortion in the upper hull causing it to flatten. When attempting to insert the hull roof, I discovered it would not fit without a great deal of effort and tape. It turns out the hull is not flattened, top to bottom. It is skewed, front to back. Imagine someone held the very front of the hull and pulled right, while someone else held the back and pulled left. The model center line would skew from upper left to lower right. This causes the right rear quarter to flare out. The left rear quarter pulls in. The shoulder area with the front fenders tilts.

My original intention was to assemble the hull without the roof, allowing access to the inside of the model for adding braces. Gluing the roof in place first forces the entire upper hull back into alignment. That is the route I took. The upper and lower hull pieces now come together much better.

At this point I encountered a new problem. With the engine inserts in place inside the model, the upper hull rides too high to mate with the lower hull. I am also fairly certain the instructions have the engine inserts going in backward, front to back. I cut down the engine inserts and flipped them around.

In other news, the T30 is now fully painted and awaiting decals. The Sd.Kfz. 232 is at the painting stage.

The following 7 models are now in some stage of painting.

  1. Dragon IC Firefly
  2. ICM Studebaker US6 U4
  3. Hobby Boss VK16.01 Leopard (Chibi Panther)
  4. Takon T30 US Heavy Tank
  5. Tamiya Sd.Kfz. 232 Armored Radio Car
  6. Meng Jagdpanther G2
  7. Dragon Jagdpanther G1

Will I actually finish something this month? Maybe I should start a Pave Hawk or Stuka!

4 Likes

Doug excellent resolution to the Meng Jagdpanther problem. I am so glad you didn’t bin it. Instead, you are going to wind up with a spectacular model. Nice job on the armor texturing, too. Can’t go down to Hobby Lobby or Michael’s for the acrylic gel, eh?
Looking forward to seeing some of these in paint. Don’t breathe too many fumes. Throw some paint!

3 Likes

Doug, excellent save! Well worth & well done!

3 Likes

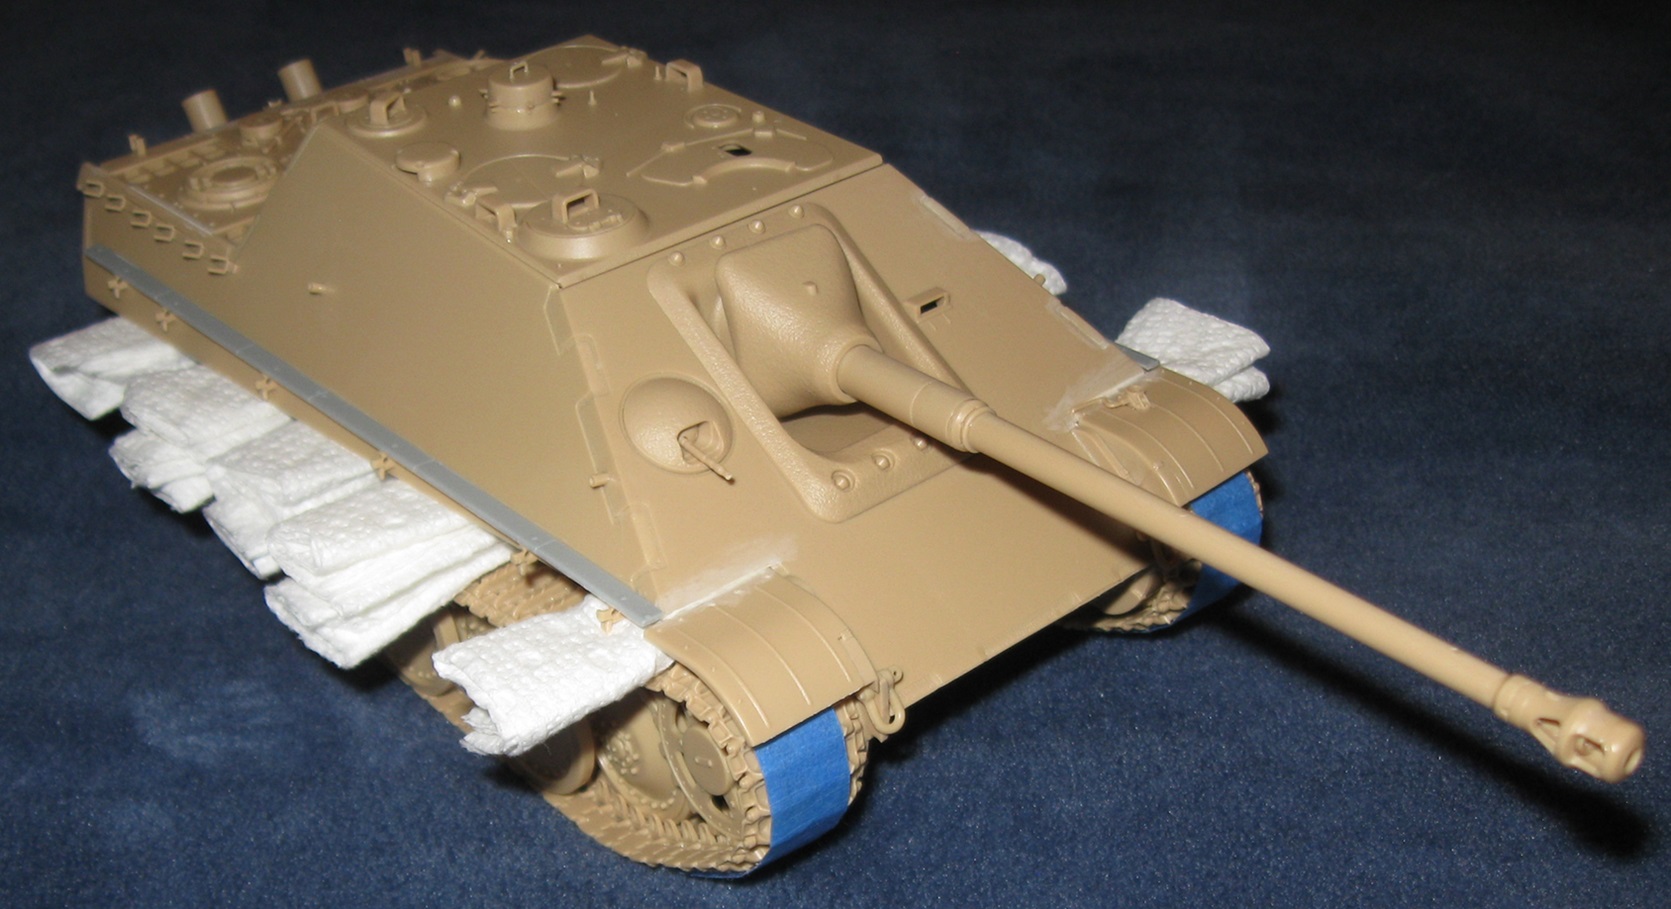
The Dragon Jagdpanther G1 is now on tracks.

As expected, connecting the upper and lower hull was harrowing. The front and left side fit fine. The rear is a fraction off but some tape brought the seam together. At this point in the gluing process, the right rear upper hull flares out about 2mm. Using a whole lot of glue and tape, starting at the front, I slowly closed the left side seam. Once the tape is removed, the seam will continue to experience a lot of burst stress. Will the glue hold? No clue.

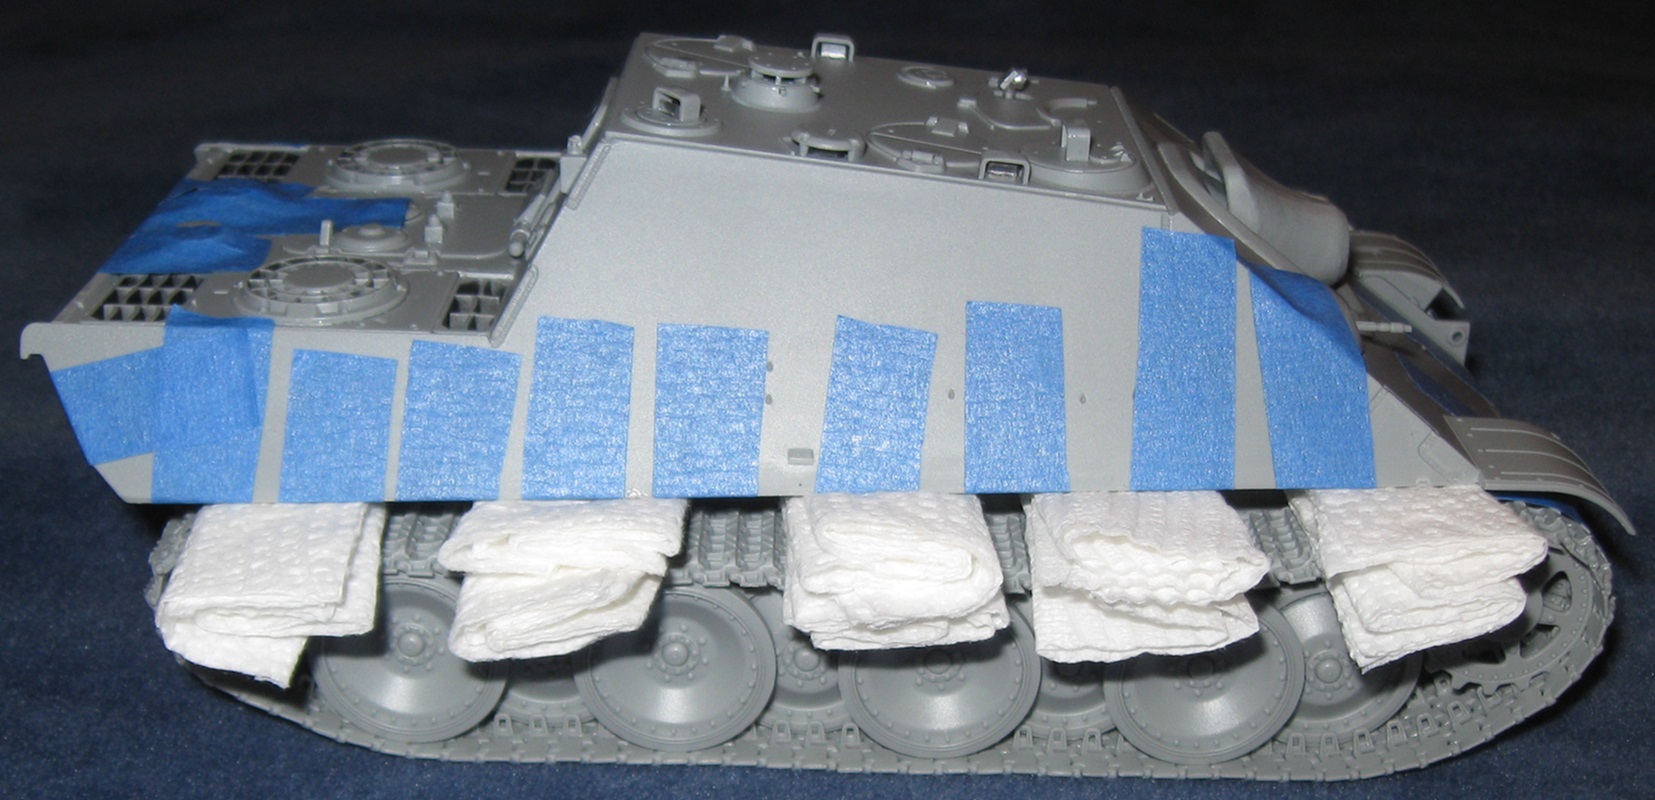
About 12 hours after joining the hull halves, I built up and installed the tracks. This goes rather quickly with Magic Tracks. There are 16 special track links, 8 for each sprocket. Nine or 10 per sprocket would produce a better result but I made 8 work. Instructions call for 81 Magic Tracks and 8 special links per run. My model uses 80 Magic Tracks per run. The exact distribution, starting on the sprocket, going backward, around the idler, and forward, back to the sprocket, is 5 special links, 80 Magic Tracks, and 3 special links. The join point is not glued.

While installing the tracks I made another rookie mistake. Earlier in the day, after joining the hull halves, I built up all 16 special tracks. That way, they would be dry when fitting the tracks much later.

Unfortunately, I did not glue together the 8 center line wheels at the same time. I only remembered to do this after assembling both track runs. As a result, some glue ended up in the axle hole of each center line wheel. There is now a very real danger that when I pull the suspension apart for painting, some of those wheels will stick. This could lead to broken axles, broken road wheel arms, broken tracks, and broken detail bits.

As primary references, I am using Panther Tank: The Quest for Combat Supremacy, and The Combat History of Schwere Panzerjager Abteilung 654: In Action in the East and West with the Ferdinand and the Jagdpanther. My goal is to build two ‘idealized’ 654 Jagdpanthers. The Dragon G1 will represent a vehicle from the first batch of 8. The Meng G2 will represent a replacement machine received much later in the year.

4 Likes

This following picture demonstrates my airbrush problems.

On the far left and far right the airbrush behaved well, producing a very nice, mottled texture. If I could maintain that result for 15 minutes at a time, I could lay down excellent camouflage. I was able to maintain a very fine line along the bottom of the card. The middle of the card is littered with paint barfs and sputtering. This is the typical result when trying to spray fine lines. For this experiment, air pressure was somewhere around 10 PSI.

Dry tip is a major problem with Vallejo acrylic paints. Temperature is currently 92 F. Humidity is hovering at 38%. Under these conditions, when spraying at very low pressure, Vallejo Flow Improver works for 30 seconds or less.

The tip of my airbrush is definitely bent. That happened in the last few days. I have no idea how.

Some Vallejo Model Air paints spray much better than others. German Africa colors are uncomfortably thin.

According to the weather forecast, temperature will drop below 60 F and humidity will reach 80% at 6am tomorrow morning. That seems typical. Maybe spraying in the early morning would help. I vaguely recall doing that last year and it helping.

2 Likes