I need some advice here. I have Flyhawks Battle of the Atlantic set in 1/700, which is essentially a small dio with a destroyer, a sub and an anti-sub aircraft. It comes with a base, but what if I wanted to actually have some sort of resin to make it more realistic? I can use transparent two-part epoxy (although if there is a non-toxic option I would choose that), but then what do you do about the waves on the top? How do you add them? (I have seen a couple of products to be used for waterline kits, but not sure they would work with a transparent base.) What would be my options? Also, talking about waterline models- what is the best and easiest way to make a wavy-water base for them? I am putting them into Trumpeter’s display cases, but they would look better with a patch of water around them. Thank you
For a flat base I’ve used thick tinfoil scrunched up and opened out and glued to the base. Has a nice uneven wavy texture. You can create deeper parallel crests with cocktail sticks glued under first. Make sure you cut out a section for the ship to sit in.
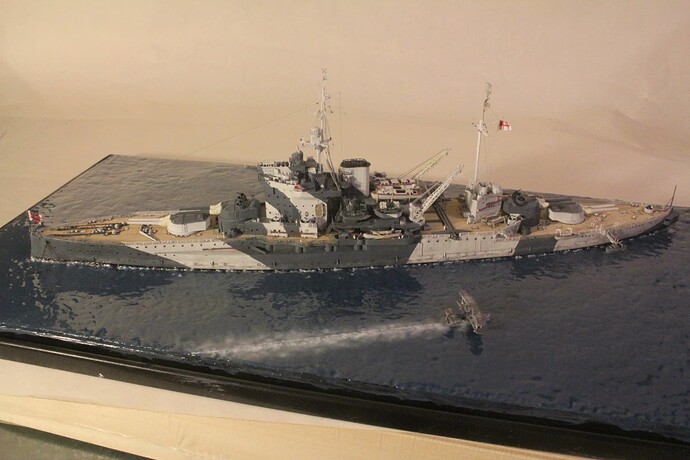
Painted in appropriate sea colours, dry brushed white for the crests and used thick white paint to create the wake. Plenty of clear gloss over.
I don’t have any photos on my current phone to show how it looked.
Good luck with it.
Hi Andras,
One simple alternative is spackling paste. It isn’t clear, but in 1/700 scale clear ocean water can sometimes look a little odd anyway. I like spackle since it is cheap and you can easily form waves with it and then paint to taste.

(1/700 Noah’s Ark)


(1/700 subchaser)
I saw a modeler on utube make a uboat (1/350) submerged in clear resin. His first attempt was a failure (but a learning experience), because of the exothermic reaction (the heat given off by the curing) actually melted and warped the uboat. I have the same kit and was a little disappointed that Flyhawk supplies PE for the uboat, and aircraft, but not for the destroyer! If you’re looking for J-class destroyer PE, look here: FLYHAWK FH710089 FOR FLYHAWK 1/700 ROYAL NAVY J-CLASS DESTROYER 2020 NEW | eBay Beats me why Flyhawk couldn’t include that too! Oddly, it’s cheaper to buy the J-Class (Jupitor) destroyer included in your Battle of Atlantic kit, than it is to buy the destroyer alone - and neither contain the PE! Go figure!
![]()
![]()
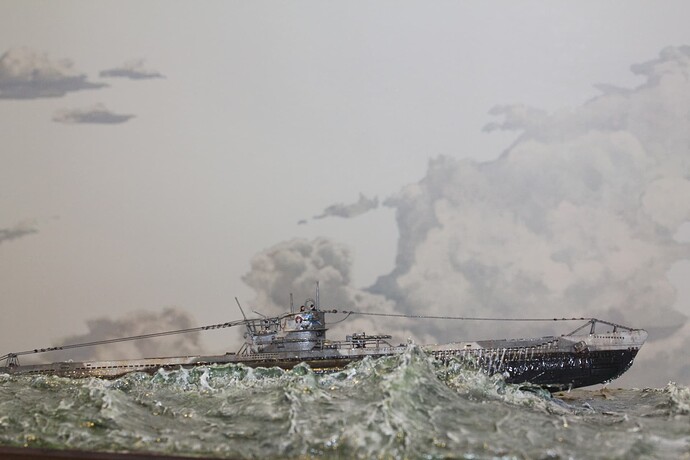
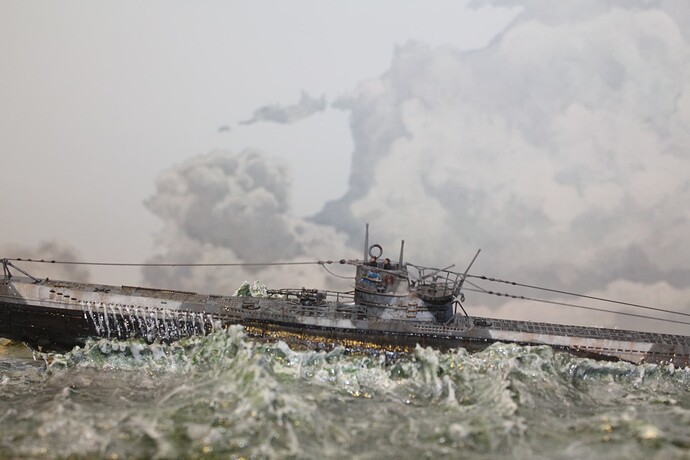
I made this 1/350 uboat (AFV) surfaced, in Celluclay and acrylic modelling paste. Inspired by “Das Boot”.
Lots of water-making tips here: The Ship Model Forum • View topic - Compendium of model-water making links
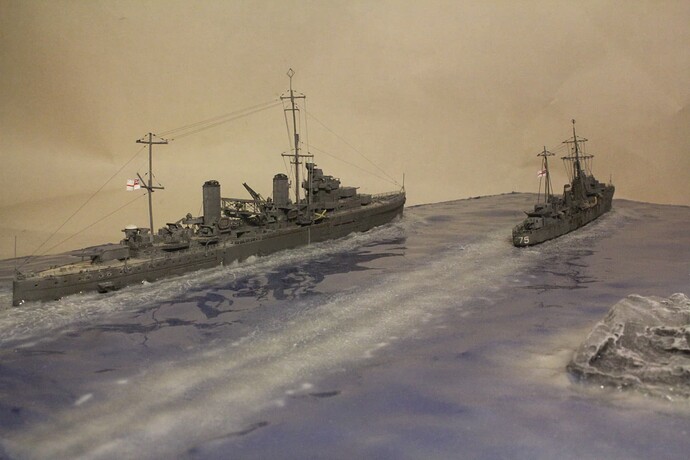
Then there’s this technique using aluminum foil and Tamiya clear coats:
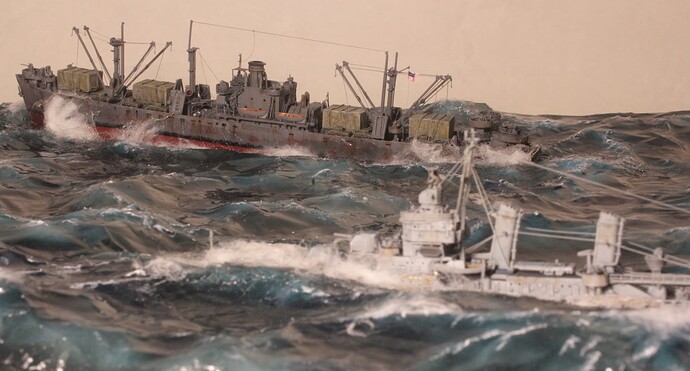
And again, Celluclay with several coats of clear acrylic varnish:
and:
and:
(Yes, I like my work!) ![]()
![]()
![]()
![]()
My son and I used clear acrylic sealant from DIY store to make the water on his D-Day landing craft diorama with the tops of the waves dry brushed with white acrylic paint.
It is gloopy to apply and kept it’s shape when moulded in wave and churned-up water shapes. It does however dry rubbery.
We applied it to a painted base but there’s no reason it couldn’t be put on top of a solid resin base.
As you should.
Many times it’s easier to critize our lesser endeavours, than it is to stand proud, with honest humility, and state, “Ya, that’s a good one”. Nice work.
Thanks. But I only showed some of my good stuff! ![]()
![]()
![]()
![]()
Thank you all for the replies.
So, Leo, you have the same flyhawk set… how do you plan placing the models onto the base? I feel it is meant to be used with waterline builds, but it is not made clear in the instructions…
Well…they’re the same models, but not the Deluxe kit with the included base such as you have. I always make my own base using the various methods I’ve illustrated above. I’ll probably split up the various models rather than use them all in the same dio - I wanted the Jupiter Class destroyer and it was actually cheaper to buy it in this combined set rather than it is as a single kit! Placing all 3 in a single dio would look crowded, or unrealistic. I could use the aircraft bombing, or depth-charging, the U-boat while surfaced, as one small dio. Or I could model the destroyer engaging the U-boat( or ramming it!) in a separate dio. Variously, I could combine the Sunderland flying boat with the “Seaplane Dockside Base” kit - that’s another kit I would discard the cardboard “water base” and design my own seaplane base.
Hope this helps, or gives you some ideas.
![]()
![]()
There’s also this method from an old posting: Cheap and easy water base
![]()
![]()
Your models and water bases are very impressive.
I would like to experiment with water and place a vehicle next to a lake or stream. Excluding materials that set to a rubbery consistency, what do you consider the easiest method for making a water base?
I will assume you are modeling in 1/35. The easiest method would be to model the water surface with Celluclay, then pour several coats of liquid clear gloss acrylic varnish: https://www.amazon.ca/Signature-Protects-Artworks-Archival-Finishing/dp/B0C2GMRHHZ/ref=asc_df_B0C2GMRHHZ/?tag=googleshopc0c-20&linkCode=df0&hvadid=579754181005&hvpos=&hvnetw=g&hvrand=8412188058212650924&hvpone=&hvptwo=&hvqmt=&hvdev=c&hvdvcmdl=&hvlocint=&hvlocphy=9000375&hvtargid=pla-2242884763167&psc=1&mcid=1aab00f834cd3c9b9be412d9dc3816a6
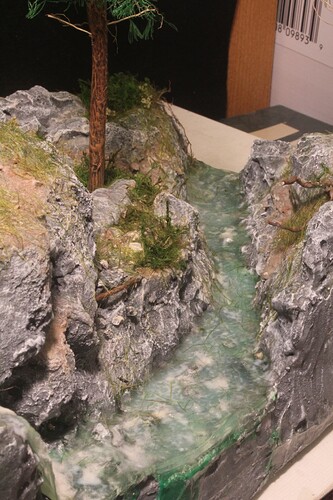
I use a similar product by a different brand. You can pour incremental layers of no more than a few millimeters each, with a day, or two, of drying time between layers. I made this rapidly running stream like that. Maximum depth is about 1/2 " - 3/4 ":
As you can see from close-ups of my above pic, it will be MUCH better to apply any static grass BEFORE pouring any liquid acrylic!
Haha! Got it. Make sure to build dams. Static grass before water.
That is a very nice terrain piece and exactly the sort of thing I want to make. In another discussion, someone made a ‘generic’ diorama base consisting of a road winding through a stretch of forest. I want to do the same thing but add a stream or lake to one side.
I am currently reading an Osprey book called Terrain Modeling but it was written over 20 years ago. The product recommendations are rather dated.
For me, the biggest problem is deciding on a base material for the diorama. As it is my nature to overthink everything, I have considered acrylic sheet, cement board, metal sheet, plywood, wire reinforced epoxy, wood planks, and wood plaques.
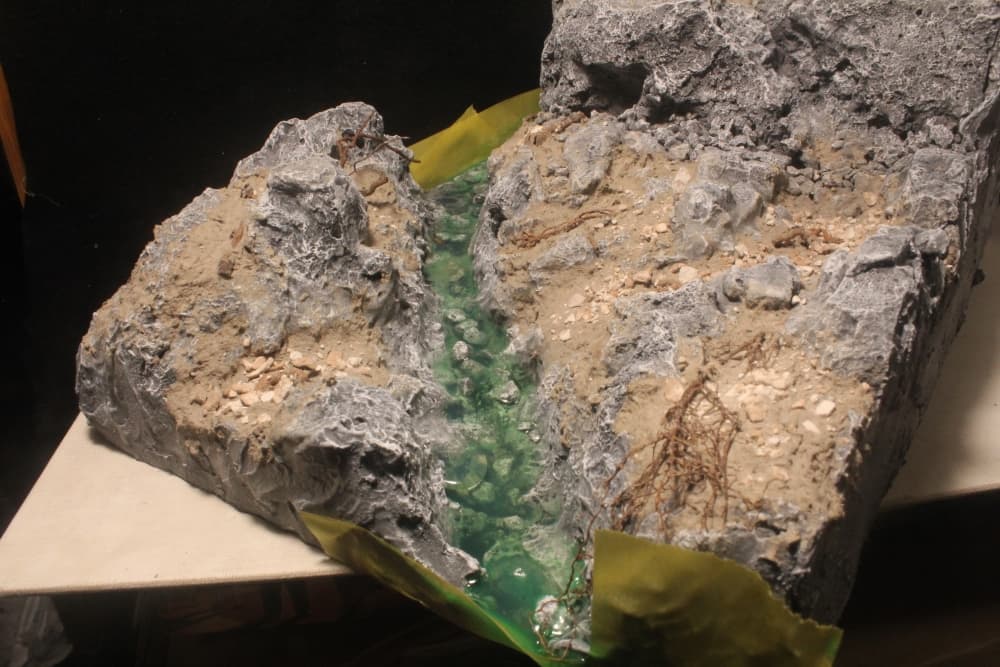
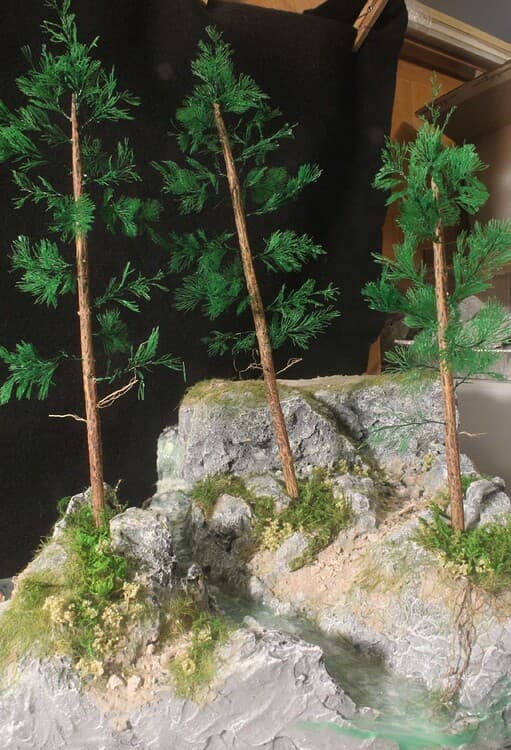
When I built the above terrain (which measures a little under 1.5 ’ x 1 ') I roughly carved it out from chunks of 2" insulation foam, glued together. I then coated it all with plaster, and applied plaster rock castings. When dry, everything held together quite solidly. I then used Celluclay in the gaps between the rock castings:
Before the stream bed had quite set up, I added small rocks, etc, as well as gravel along the path, and rubble at the base of the small cliff:
You can see where I used masking tape to dam off the open portions of the stream.
How it looks now:
The top elevation is kinda flat and I was considering adding more rock castings to make the cliff face higher.
But my point is, I only used insulation foam, plaster of Paris, plaster rock castings, and my favorite, Celluclay, (and various scenic supplies) to make the base.
Huh. No base at all? That is very unexpected.
Cleaning out my old office over the last week I found ballast, brick molds, celluclay, fake foliage, fake grass, fake tree armatures, gauze, plaster, rock molds, scenic cement, and some wood plaques.
Models recently purchased from China arrived wrapped in insulation foam. Totally weird. Totally worked. Kept all of it.
Maybe I have everything?
I really, really like what you did with that mountain scene.
I think the dio provided by Skyhawk is meant to be a “demonstration”. I am happy to build it this way - to display some of the main weapons of the Atlantic war. (And I am not that confident yet to build an ambitious water-based dio.)
I think I will leave the models in a waterline-configuration (this is the idea here, right?), and create some water effects on the plexiglass. I was thinking about using Vallejo’s Atlantic water texture gel. (Not sure how the white froth can be replicated yet, but I am reading on it.)
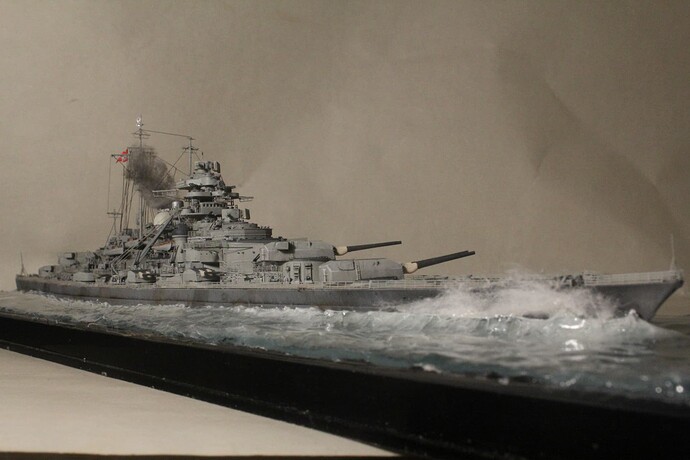
Vallejo water texture gel is nothing more than clear acrylic modeling paste, which is available in larger quantities, from various manufacturers (and cheaper prices) at most art supply stores, which is what I use. For the “white froth” you simply blob it on more thickly, where you want it, and tease it up with a brush. You can dry brush white paint onto the frothy bits after it has set up, or actually mix white acrylic paint into the acrylic gel. As usual, try out any new techniques on old models before the good ones. You can also experiment using teased-out cotton (like from cotton balls) for the ships’ bow wave, and spray, like what I did on Flyhawk’s Bismarck:
You can also make neat smoke! But you will need some sort of armature to support it, or as I did here, the ends of the smoke are supported by the mainmast and rigging.
Thanks!! There’s no base yet because I just didn’t mount it on one yet. And I didn’t want to mess up a base while I was pouring plaster, liquid acrylic, etc. Looks like you have everything you need at hand. Just add some imagination, and reference pics.
![]()
![]()
Thanks, Leo. Finished projects like yours are what keep me pushing forward and trying new things. I look forward to seeing your next watery wonder.
