Yeah spotting a cracked nozzle is tough with poor eyes. You have to use your fingernail to catch it.
I hope you meant Model air, not Model color.
In my limited experience, Model Color requires much thinning to try to airbrush.
You should still try the mechanical mixing.
Good luck.
Two thumbs up for Master Airbrush, has worked fine for me with getting smooth and fine results. Cheap enough that when I can’t fix it I can just toss it and buy another that’ll last me a year or so.
@Petro , that’s an interesting idea, I’ll have to try that with my paints.
Doug, it really does seem like the airbrush gods don’t like you very much. I hope the new nozzle/needle helps!
@Damraska, reading of your adventures with airbrushes seems to be a recurrent theme - with each of us at one time or another struggling with our trusted/hated/favorite tool!
I too only shoot acrylics, and mostly Vallejo Model Air through a couple of different Badger air brushes. I have experienced the situation you describe above, with paint being shot out of the brush at an angle, favoring one side or the other, that is, not a full and balanced distribution of paint on the target. This in turn leading to a complete clog, and no spray at all! It took me a lot of failed attempts to get this resolved.
I found that my problem stemmed from having a tiny amount of paint, maybe even a small dot’s worth, stuck to the inside of the final cone (no idea what the part is actually called, but the last piece of the airbrush that surrounds the pin). Like you I tried soaking etc and no luck.
I eventually resorted to using a very fine strand of hard wire to pick at the inside of that last cone, along with sacrificing an old small paint brush flooded (working like a pipe cleaner) with AB cleaner to thoroughly clean the part. To my surprise, I am usually able to eventually flick out a small chunk of whatever was gumming up the tip.
So now, I thoroughly wash the gun after each use, and make it a point to only use “fresh” paint. I use old paint for hand brushing. I still have to pick out the gunk from the tip now and then, but at least I now know why it usually gunks up.
I also make it a point to carefully consider which brush I am using for which tasks - one of my airbrushes has a fairly fine tip, which is great for small targets, but not at all great for spraying bigger surfaces for a longer period of time, which inevitably leads to a clog. I figured this obvious point out by being lazy, and not just switching brushes ![]() In some cases, I’ll use rattle cans to establish a base color, and then go over it again with the airbrush to change color tones and add details etc -
In some cases, I’ll use rattle cans to establish a base color, and then go over it again with the airbrush to change color tones and add details etc -
Good luck - I hope you get this resolved and back to building -
Cheers
Nick
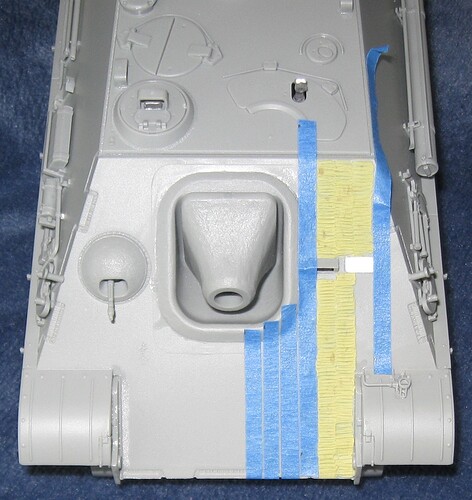
I started adding zimmerit to the Dragon Jagdpanther G1.
…
@Petro Over the last year or so, I have used Game Color, Model Air (new), Model Air (old), Model Color (new), Model Color (old), and Panzer Aces paints by Vallejo. They all have different requirements for airbrush use. It is really complicated.
@CKPlasticModels Thank you for your kind remark and offering more feedback on the alternate airbrush.
@Stickframe Thank you for your advice and kind remarks. If I purchase a second airbrush, I will dedicate one to painting and the other to priming.
Edit: I ordered that airbrush.
Wow! Awesome job on that zimmerit! That turned out great IMO.
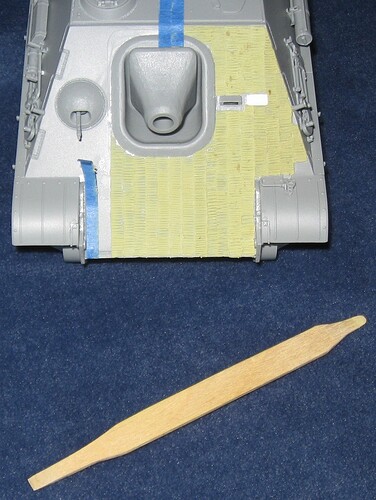
Are you using a roller or something else?
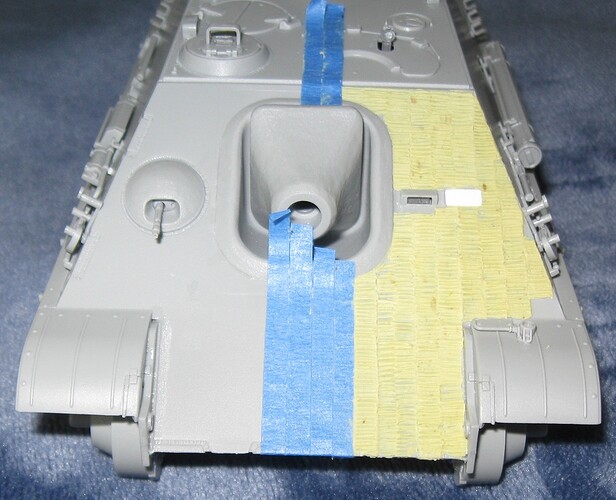
More zimmerit.
This is something like 9 hours of work.
…
@CKPlasticModels I use a popsicle stick. Super high tech.
Doug,
did you get the new AB? Any luck with these same paints?
I received the new airbrush a few days ago. The last part needed to fix the old airbrush arrives tomorrow.
I have not had much time to experiment but the new airbrush is definitely better in some ways. The ability to limit trigger travel is fantastic. It can spray a very fine line but I am still working on spray control like artists (not model builders) demonstrate in videos. Cleaning is weird. Clogs still happen but are significantly easier to trouble shoot. The gigantic paint cup interfering with line of sight down the barrel is a negative. Ability to cap the color cup is a positive. Paint really needs to be mixed in a second container which is a negative. Having fully mixed paint everywhere in the cup is a positive.
I am no longer watching model making videos to master this thing. I am now all in on videos by fine artists doing photo-realistic work.
Making zimmerit is laborious. Getting it under tools is challenging to the point of painful. I try to work on it an hour or two every other day.
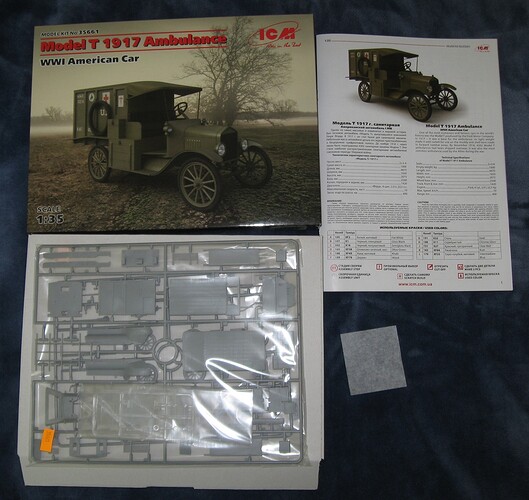
Just opened this one for the World War I campaign.
My bad luck streak with models continues. It did not come with any decals. Off to eBay it goes.
The fact that you are making your own is awesome! Most people just go with molded on or after market stuff. It might be easier to do the zimmerit before you put the tools on, but that can cause its own problems.
Keep at it, what you have is looking good so far!
Ken
The zimmerit is looking awesome! Much better than cookie cutter aftermarket sheets. The sweat equity is paying off!
The zimmeritt method is very interesting, it looks nearly a sort of adhesive tape. What material are you employing? Epoxy putty?
@tankerken Thanks! This is my fifth attempt at zimmerit. Fourth using Milliput.
In the specific case of Heavy Tank Destroyer Battalion 654, the maintenance company always moved the tools. Eventually. There are pictures of Jagdpanthers from 654 with tools in the expected places, with tools and hangers pulled off, and with tools moved and the zimmerit patched. Pictures with tools and hangers removed show big areas without zimmerit. Maybe the zimmerit was never there. Maybe it was scraped off when removing the tool hangers. Dunno.
@Armor_Buff Haha! Sweat equity.
@MassimoTessitori Thank you for stopping by. I am using standard grade, green-yellow Milliput. It is a two part epoxy putty. When making zimmerit, each batch is smaller than a pea and work time is about one hour.
Interesting. How do you work it to obtain that regular stripe? I suppose that you roll it on a flat surface, cut it by blade and move it on the model. How do you manage to remove it from the surface without breaking it?
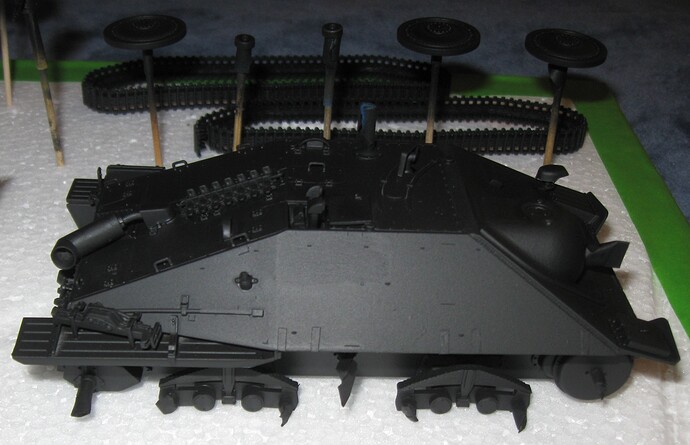
“Success is going from failure to failure without loss of enthusiasm”, is a quote often incorrectly attributed to Winston Churchill. Due to a rather severe loss of enthusiasm resulting from repeated failures, two months have passed since my last update to this journal. The first 4 weeks were spent avoiding all model projects. This next two weeks were spent sculpting and slowly building an Italeri M101 105mm Howitzer. After messing up and throwing away the howitzer, I started a Takom late production Jagdpanzer 38 for the Hot Out of the Molds 2024 campaign.
Constantly starting and stopping projects conceals my real issue–I suck at painting. While I understand that success at painting will only come with many repeated failures, maintaining enthusiasm through all those failures is difficult.
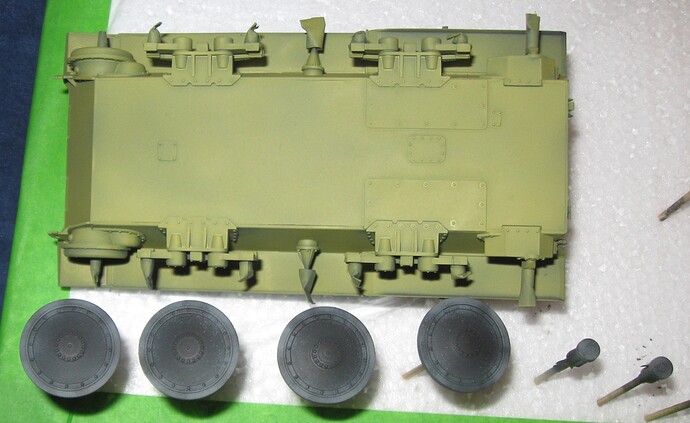
Three months back, I ordered a new needle and nozzle for my Iwata airbrush. This is the result. The airbrush once again shoots straight, but the spray pattern is very broad and prone to splattering. In addition, the trigger now has a tendency to stick open.
I also purchased a new, el cheapo, top feeding airbrush. It sprays a much tighter pattern than the Iwata. Unfortunately, it is so unlike the Iwata, so utterly alien, making a quick switch is impossible.
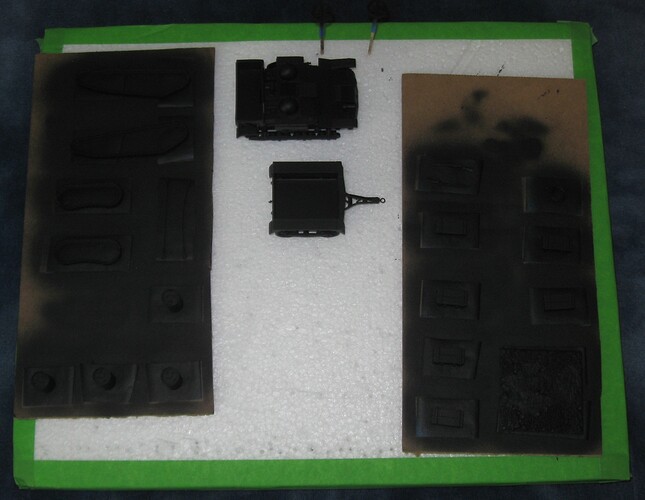
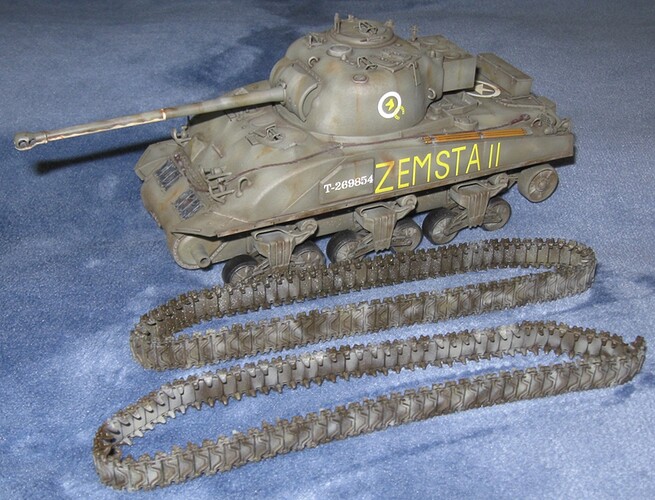
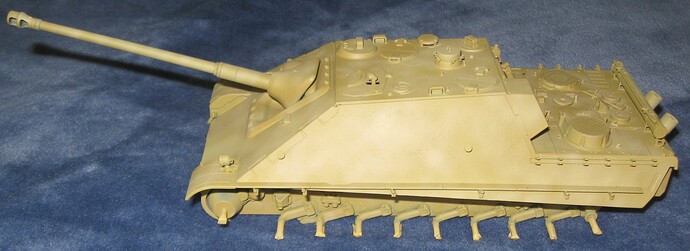
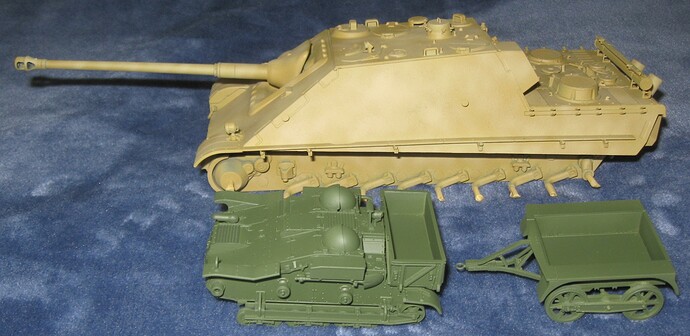
In the picture above, all wheels were sprayed with the Iwata, leaving heavy splatter. The Jadgpanzer 38 was sprayed with the el cheapo, resulting in all sorts operating errors. If I dirty up the model, all of this is completely recoverable and I know it.
Lessons Learned:
New parts did not completely fix the Iwata airbrush. I suspect the needle and nozzle are not a precise match. Trigger parts probably require lubrication. Everything seems clean.
A new airbrush of completely different design is not an instant remedy for painting issues. The new airbrush is heavy. The large color cup interferes with the trigger. The trigger back stop control must be carefully monitored. Paint must be thoroughly mixed in external cups. Air pressure tolerances are significantly different from the Iwata. Trigger pressure is significantly different from the Iwata.
Taking three month breaks from airbrush practice forces me to relearn difficult lessons. For example, painting on low humidity days must be avoided. The airbrush tip must be checked often and kept clean.
Starting and not finishing dozens of models is an organization nightmare. Poor results must be accepted for now. Paint dirty tanks and get good at it.
Will I actually finish something this year? ![]()
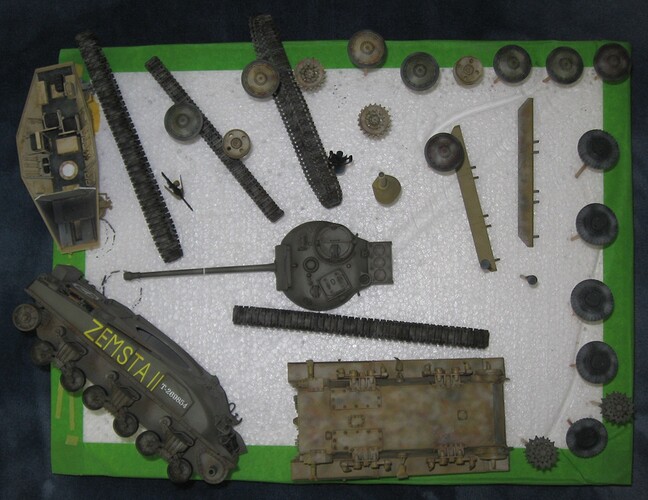
These are all really far along.
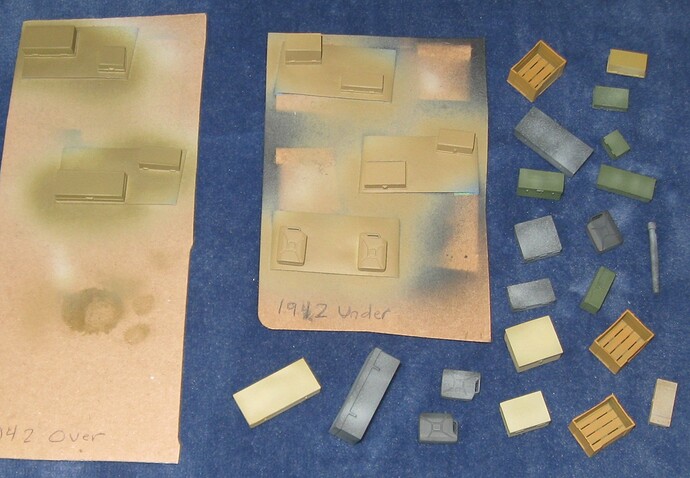
An experiment approaches completion. Can I build a model with some decent looking stowage? ![]()
Things are moving along so well, another old model returned to the stage. What could it possibly be? ![]()
Dragon Firefly IC
Oil painting is d o n e. Think this looks decent. Needs a small amount of touch up work and a clear coat before final assembly.
Kickin some model butt.
With the Firefly and Jagdpanzer 38 off in a corner to dry, I pulled out the Jagdpanther G2 from August and gave it a base coat using a new trick.
A few days ago, I tried to paint some boxes using a light color. This is very difficult over black primer. Back when I used enamel paints, I primed almost everything in Light Ghost Gray. Ah ha! The next day, I sprayed the boxes Vallejo Sky Gray, t h e n used the light color. Came out great.
Back in August, the Jagdpanther ran afoul of the light color over black primer problem. This time, I sprayed the whole model Sky Gray, then Dunkelgelb, then lightened Dunkelgelb. Worked great. In a few places, black and gray show through. That is fine. It will blend in with the camouflage and mud.
At this point, my airbrush had performed okay for about an hour so I attempted to paint camouflage. Wait. My airbrush likes to lull me into complacency, then barf. After cleaning it, I mixed some paint and tried some squiggles on a white card. Nope. Tried a few different pressure settings. Nope. Mixed a new batch of paint. Nope. Changed the pressure settings again. Nope. Tried changing the paint consistency again. Nope. Changed the pressure settings again. Nope. Decided to try again another day. It is really dry and that makes fine work super difficult.
In a worse case scenario, I could leave the model as is. Heavy Tank Destroyer Battalion 654 received many Jagdpanthers in Dunkelgelb. They conducted at least some training before adding camouflage to the vehicles. This solution is kinda lame. I would prefer to add some cool camouflage.
Same trick–Sky Gray then Green. Same result–looks pretty good.
At this point, I tried to post shade the UE but my airbrush was like, “Yeah. No. Nope. Nuh Uh.”
Sometimes, it is best to clean the airbrush and wait for a better day with more humidity.
Funny bonus picture. The UE is so tiny. DO NOT RUN OVER ME!!!
Hi Doug mate - a couple of things if I may.
1 - you do not suck at painting.
2 - your Iwata issue I suspect might be needle-related. It’s either bent or you have a too-large needle in. Iwata’s perform best (I find) with smaller needles in. What needle size do you have loaded in it? And what air pressure are you shooting at?
3 - the mottled, diffused effect on the Jagdpanther looks super, I really like how that’s come out. It’s so nice I think I would not bother with the camo on it and focus on using weathering etc to get to where you want to be.
4 - Like Nick says above, one of the things I find difficult is the build up of paint inside the petals of the needle guard. I use an old bent airbrush needle to scrape all the residue out every time I deep clean it and it does get gummed up very fast. I always notice a marked improvement in how it sprays once Ive cleaned the paint out from behind the petals. It may be that this is contributing to the problems you are encountering but I still think it sounds like it might be a needle issue.
5 - that Zimmerit is some of the best I’ve seen. Outstanding.
Well, I just put another model in the trash–this time it was the Dragon Firefly IC. ![]()
Installing the antennas went badly. Dragon does not provide antenna bases with holes to receive the rods. Drilling then out resulted in damage. Painting filled the holes. Drilling out the holes a second time caused more damage. The antennas themselves did not fit. In my experience, these problems are common to many models.
Installing the periscopes went more badly. They are not designed for assembly after painting. Trying to glue them into place resulted in smearing of paint and all sorts of mayhem. For whatever reason, primer ate into the silver. In my experience, these problems are also common to many models.
One drive sprocket broke. Trying to fix it ruined the part and the paint. The shaft for the sprocket is too long, making it very difficult to install. Eventually, I chopped it but by then, it was too late. In my experience, sprockets that are badly designed for final assembly are very common.
When trying to install the Bronco tracks, they shattered into many sections. They are the worst designed tracks I have personally encountered. Putting broken sections back together is impossible. Much of the running gear paint was damaged along the way.
I was really hopeful for this model. The paint job looked pretty good going into final assembly. However, I should know better than to let myself feel any hope when building a model. Final assembly is when many models fall apart. ![]()
I did manage to assemble the running gear of the Takom Jagdpanzer 38. The tracks, sprockets, idlers, and road wheels are well designed for final assembly–a very pleasant surprise. To balance that out, the return roller design is terrible and the side skirt plates pretty bad. ![]()
I am considering throwing away approximately twenty built but not painted models. Many of these are quite old. Given my current modeling and painting skills, they will probably end up in the trash. If I toss them now, I gain back many future hours of wasted effort and lots of work space. That time and space can go to projects with a higher chance of success.
Anyway, I am off to ruin something else… Ha!
