Doug, I’m sorry to hear the Dragon Firefly had the mishaps. The model’s paint work looked outstanding to me.
Two comments:
-
You’re a much more accomplished all around model builder than myself because I wouldn’t dare take on a Dragon Sherman kit. I had a couple over the years, studied the kit & instructions, and all of them went to the vending table. I admire your daring and perseverance. A+++
-
Shelf queens can be rewarding but they are the most difficult model work to me. Rediscovering long forgotten mistakes from 20+ years ago again has put many of my annoying queens back on the shelf for a few weeks more than once. Building a well designed 2020+ era kit and take a break for flusterating projects helps. It’s our hobby and it’s OK to do that when one likes. The break, building something else gives an opportunity to think of new solutions to old problems without being under duress.
3 Likes
@Armor_Buff You are waaaayyyy too kind. You are one of the skilled model makers I am chasing. 
That model is fine. I genuinely like Dragon M4 mediums and own a bunch of them, including 4 or 5 in display cases. This would have been one of the better ones. It was turning out pretty good until disaster struck.
…
(Two Hours Later) I just pulled it out the trash, removed the slice of cheese, and gave it a bath. Not the tracks. I never want to see those again. If I can fix a shattered Brummbar, I can fix this.
…
(Five Hours Later) There is a silver lining. While looking for replacement tracks, I discovered Gecko Models now sells T49 and T54E1 tracks. To my eyes, they look like MiniArt molds. MiniArt tracks for M4 mediums are pretty good so I ordered a set of each via eBay. The cool thing is, the T49s allow me to finally start a project originally planned 15 years ago.
(I edited this post a bunch of times over the last few hours as my initial displeasure ebbed.)
3 Likes
Phew! I was wondering how a skilled SciFi builder like yourself could abandoned so much plastic without trying the bright pink anti-gravity version. And in the real world the proper fording depth limit doesn’t count when the vehicle is over it’s tracks/wheels in mud or opaque dirty water…
Remember the Rules:
- Kit has no tracks: model is hull down (and well camouflaged?)
- Kit has no turret: “It’s a recovery vehicle”.
- Kit is grossly over-scale: “It’s a Panzer '46…”.
- Kit is under-scale: In a desert setting “It’s Italian”, in a tropical setting “It’s Japanese”.
- Kit is in two or more different scales: “It’s British/French”.
- Kit includes an alternative suspension: scratch-build approximate hull floor and display that as upside down in a flooded crater.
- Kit includes an alternative gun barrel: stick it in a roughly carved block of foam and cover it with camo nets (modern alternative, build “Turtle tank” shed from scraps and cover THAT with camo nets).
- Kit is annoying: display it in “round file”, drape it with a banana skin and sell it as modern art…
Cheers,
M
4 Likes
Thank you for that. It was a crummy evening and your suggestions genuinely made me laugh, mostly because they are true.
3 Likes
Now that I can paint again…here’s some painted stuff.
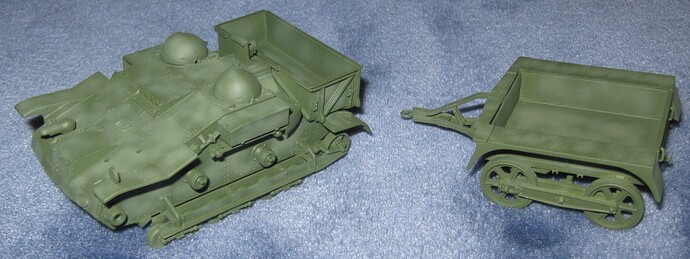
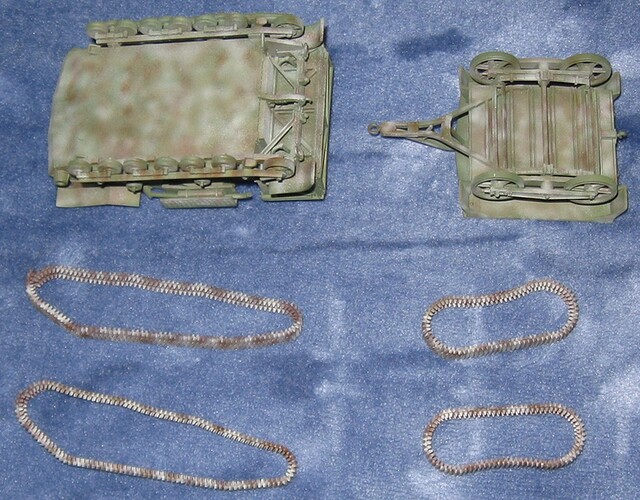
Tamiya French UE: The rear of the trailer was repainted, then the whole vehicle mottled with a lightened shade of green. This is something my evil airbrush can reliably do. To my eyes, this looks okay.
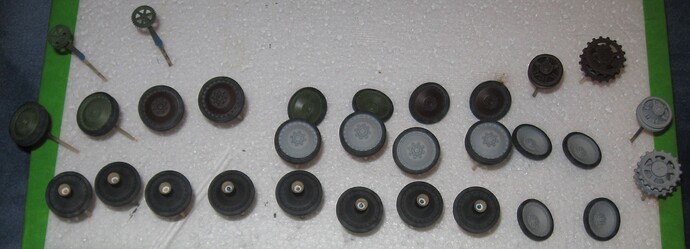
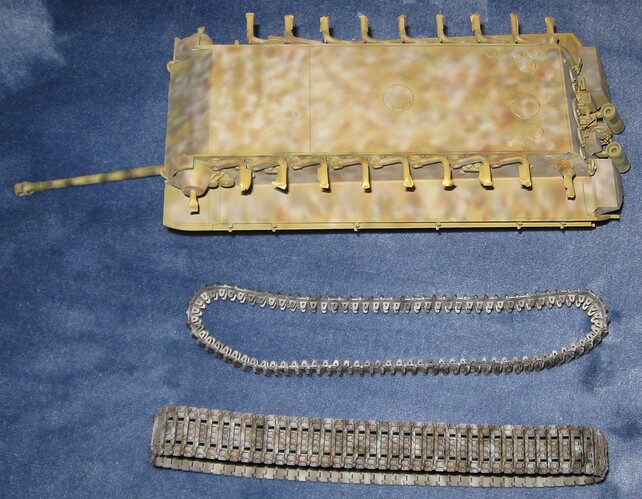
Meng Jagdpanther G2: Front faces of all wheels were painted Sky Gray, then over painted with Chocolate Brown and Olive Green. Using Sky Gray as a secondary primer over Black primer is a winning trick. Why not just use gray primer? Black primer has better adhesion and sanding properties.
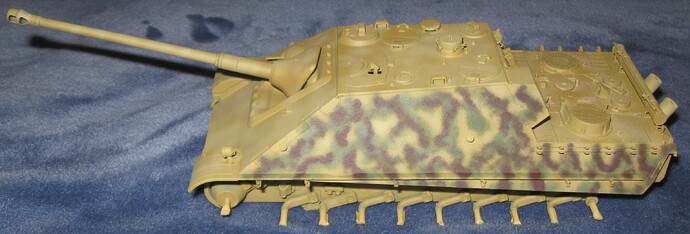
Meng Jagdpanther G2: Since my evil airbrush was mostly behaving when spraying Olive Green, I decided to spray some camouflage on the Jagdpanther. After about 60 seconds, it became clear this was a mistake so I decided to experiment and keep going.
The maintenance company of Heavy Tank Destryer Battalion 654 was responsible for configuring and painting new vehicles. According to the Battalion Log, it took 8 hours to reposition all Jagdpanther tools to the rear and apply camouflage. Painting was done with a large spray gun and really messy. When the painters were done, there was not much Panzer Yellow left showing. What you see above is my failed attempt to recreate the same effect. For my next experiment, I am going to spray another round of green over this and see what happens.
As an aside, rolled cast texture now looks pretty good. I am going to count that experiment as a success.
5 Likes
Dont paint over it! It is spot on, Doug! It is exactly as it is supposed to look!
5 Likes
That Jagdpanther camo looks outstanding Doug! Don’t overpaint it. Keep going just like that with the rest of the model and you’ll have a fantastic result. Great work.
4 Likes
Whaaaat?! Dude, I know you didn’t 86 your Sherman after getting that far into the build . . . for shame, for shame, for shame! NEVER scrap a built model, there’s too many options for battlefield damage, spare parts or something. Your models look too nice for the can man. Say it ain’t so. 
Cajun 
3 Likes
Yeah. It was a dumb move. I ended up pulling the Firefly out of the trash, minus the tracks. Those can go to Hell where they belong. The model is washed, dried, and ready for repairs. New tracks are on the way from China.
5 Likes
This makes my inner model nut happy  Keep at it Doug.
3 Likes
Doug, every model finished, no matter how “badly”, is a step toward excellence.
5 Likes
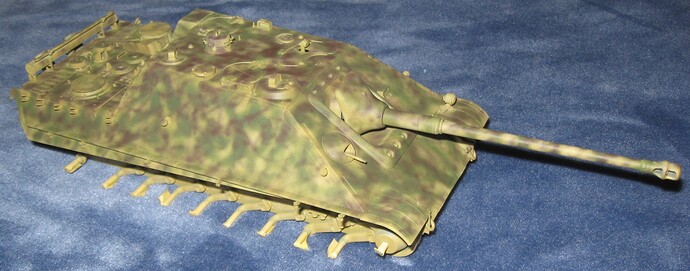
Meng Jagdpanther G2
Even though my airbrush was in full evil mode for much of the evening, I managed to camouflage the rest of the Jagdpanther G2. The right side is better than the left side but, with some effects painting to hide boo boos, I think this will work.
4 Likes
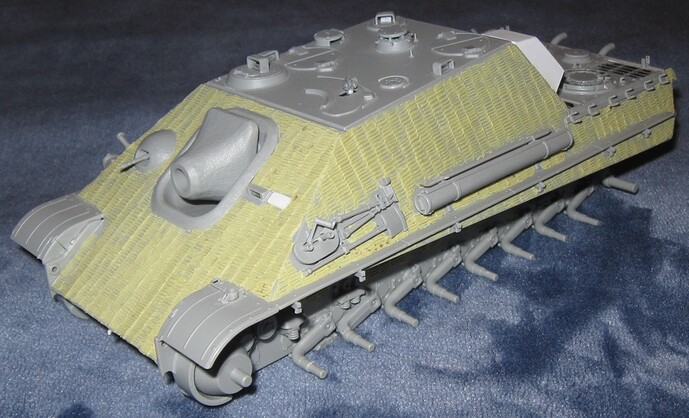
Dragon Jagdpanther G1
Zimmerit application required about 20 sculpting sessions over 3.5 months. It still needs sanding in a few spots. The zimmerit is probably not perfectly accurate because old photos are often hard to interpret or do not show a specific spot.
I will delay painting until the Meng Jagdpanther is assembled to avoid mixing parts.
5 Likes
I paint in the garage, with the side door open, and just completed a 4.5 hour session with the airbrush. It is currently 42 degrees Fahrenheit outside. 
Hoping to finish these 4 projects (plus one more) by Christmas.
Meng Jagdpanther G2: Kinda worried about this one. Track alignment is goofy.
Tamiya French UE: My favorite model of the year to built and paint.
5 Likes
Doug, airbrushing in your garage might be part of your airbrushing woes. When using acrylic paint for airbrushing, optimum conditions are 60 - 80 degrees Fahrenheit and 50 - 70% humidity. I realize not everybody can achieve these conditions, but 42 degrees is definitely too cold to shoot acrylics. Perhaps a space heater would make things better.
Also, with acrylics, take care of your paints! If you’ve left them in the garage below 35 degrees, they are shot. Acrylics do not tolerate extreme temperature differences.
6 Likes
Alas, the situation is what it is. Concern for the acrylic paints is what caused me to look up the temperature. Forty-two degrees is getting into, “Danger, Will Robinson!”, territory.
On the positive side, the wet season finally arrived and humidity is normally high.
All my acrylic paints are stored inside so freezing is not an issue. I am careful not to order paint and primer from the eastern or central United States during winter.
The 4 hour airbrush session last night was my longest since returning to model building. (It may have been my longest ever.) Normally, I need to tear down and clean my Iwata airbrush every 5 to 30 minutes. Last night, it ran okay for three solid hours before cleaning became unavoidable. That is a minor miracle. After cleaning, it was back to okay.
Many things have changed over the last few months. I still hate my Iwata airbrush but my know how is growing and stuff is getting painted. The French UE actually turned out pretty good.
3 Likes
I do my spray painting in the garage too. In the summer, door open. In winter, I use a spray booth with ducting to the outside.
Acrylics are good because you have less issues with fumes, depending on what thinner you use.
Before spraying, I use heaters to warm things up to around 60F. I like to do the spraying on the weekend, that’s when laundry gets done. The dryer is in the garage. I put a diverter on the outlet duct, so I can heat up the garage using the waste heat from the dryer. I live in the desert, so the humidity helps too.
Ken
4 Likes
Doug you are way to hard on yourself brother.
4 Likes
Meng Jagdpanther G2 and Tamiya French UE
Decals are down. Inexperience continues to get me into trouble. On the French UE, the ‘Odette’ decal rests over a rivet, causing it to curve, ruining the appearance. I should have cut the decal in half at the rivet, forcing a straight line. 
…
@BattleScaleCollectic My aspirations far exceed my skill.
3 Likes
