Damraska’s AFV Projects

Thank you again for the tip! I knew there is one degree of zoom, but I am not sure I knew there are two degrees. My procedure is to zoom in once, download the picture to the corresponding project folder, rename it, then zoom in using the picture viewer organic to the operating system.

At least two of the pictures you posted offer the best views of the Flakvierling stowed seat attachment points I have seen. The corners of the loader’s platforms where the seats attach, as pictured, seem to differ significantly from the Tamiya kit. I intend to look at some other models and photo etch update sets to see if and how they address that.

1 Like

Thank you, Wade, for the gracious and kind encouragement.

2 Likes

The weather cooled off so model building and painting have resumed!

Painting mud and stains continues to present a major challenge for me as shown in the photo above, which was taken without using a flash because fresh oil paints reflect back a lot of light. The bottom of the Sturmgeschutz IV was airbrushed with 4 different acrylic earth tone colors, then painted with three more oil earth tones. This requires a lot of time and effort! Unfortunately, while it certainly looks interesting, it does not look particularly realistic or photograph well.

It feels like my painting skills have reached a plateau because I have no idea what to try next. My pin washes continue to perform poorly and I am unsure how to simulate dried mud and stains in a realistic way. My attempts to use weathering techniques from tutorials and videos have mostly failed.

Last week I did learn one important lesson about paints in general. In order to fully cure, they need air flow. Painted assemblies placed in sealed containers will remain slightly tacky for an exceptionally long time. Last week, in yet another one of my experiments, I decided to leave some of my sealed drying boxes cracked to allow some air flow. After a few days, the items inside were no longer tacky to the touch. Over the next few weeks, I plan on opening up a number of sealed boxes so that the models inside can finally dry out over two or three weeks.

After finishing up with oil paints on the Sturmgeshutz IV, I immediately began using oil paints on the Panzer II. This very quickly became frustrating because I want to do something different but have no idea what the different should be, resulting in more of the same. For now, I continue to watch tutorials in hope of finding a painting methodology I like and can successfully emulate.

5 Likes

I think you are being a bit hard on yourself here Doug. It looks pretty good to me and also, well done for going the extra mile and bothering to paint the underside. I never bother if I am honest, well, I never bother weathering it apart from the inside of the first few and last dew road wheels and any visible suspension units that are visible from the front or rear.
If you wanted to add a bit more realism, then you should maybe add more scrapes running the whole length of the underside and also to include some heavy wear and tear with surface rust showing and possible oil leaks from any access points.

2 Likes

Keep at it Doug. Rome was not built in a day. It takes practice and trial and error before you start getting the type of result you want.

For pin washes try starting with a semi to glossy finish and moisten the area you are going to apply it before adding the wash. The glossy finish tends to stop the drawing out of paint like matt finishes do. The moistened area does a similar thing, it creates a surface that is already damp so it does not draw paint out like a dry surface does. This results in the pin wash staing in the crevices and around detail.

4 Likes

Doug, as the others say you’re being too hard on yourself.

The bottom of an AFV is excellent for practice, testing weathering ideas or as a "warm up’ area for painting and testing washes. Like Johnnych01 mentioned most of the underside is seldom visible.


My .02’s

  1. With oil paint washes, try Zippo lighter fluid. It evaporates faster than mineral spirits which also works OK. Definitely test first vs gloss coat to ensure it won’t react etc.

  2. I like mixing the wash on small aluminum foil covered palette like this one. Foil makes for easy clean up.

  1. A little Zippo in a clean empty spot on the palette makes a handy “moisturizer” to apply to the area before the wash. Work in small sections etc. Once wash is down, it needs coaxed into place and tidying.

  2. Tide marks can be removed with a little Zippo on a clean brush. A dried tide mark that won’t lift can be lightly drybrushed away.

4 Likes

Thank you once again for the comments and advice.

Two weeks back, I did some reading on pin wash techniques and began using the methods suggested in the thread Pin Wash Woes.

Up until two weeks ago, everything I have built over the last few months was sealed with Vallejo acrylic Satin Clear, then subjected to a pin wash of Mig or Winsor & Newton oil paints thinned with Mona Lisa Odorless Mineral Spirits. Vallejo acrylic clear coats lay down very nicely–I thin them significantly and airbrush multiple coats–but Vallejo paints are so toothy, surfaces usually feel very rough even after multiple clear coats. The oil paints I am using have a lot of fine pigment and flow very well.

My oil washes are fanning out on the toothy surfaces left by the satin clear coats. Capillary action pulls the washes into all the microscopic nooks and crannies remaining on the surface.

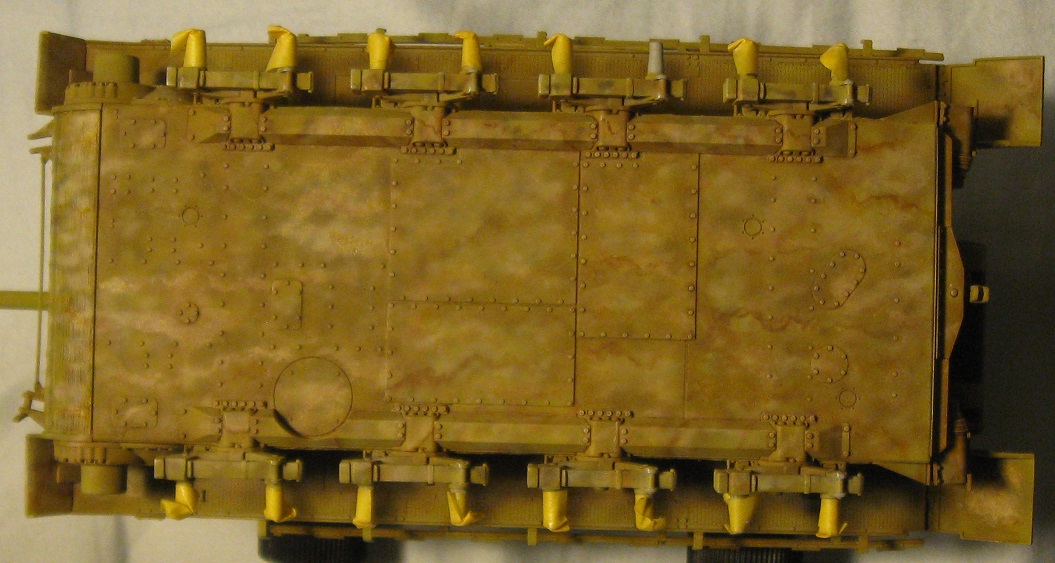
The Sturmgeshutz IV was given a satin clear coat leaving a rough surface as described above. After reading the post I linked, I began preparing each surface for a wash by flooding it with straight odorless mineral spirits. This worked only slightly better. The wash still gets pulled away from details by the toothy surface.

Weathering the toothy surface with straight oil paint first, then applying a pin wash, works somewhat better. Adjusting the ratio of paint to thinner in the wash also makes the situation better or worse.

While finishing a F-15E Strike Eagle, I discovered that lightly sanding a clear coated surface will remove the toothy texture. Unfortunately, armored vehicles are festooned with so many greebles, sanding out a toothy surface is not practical.

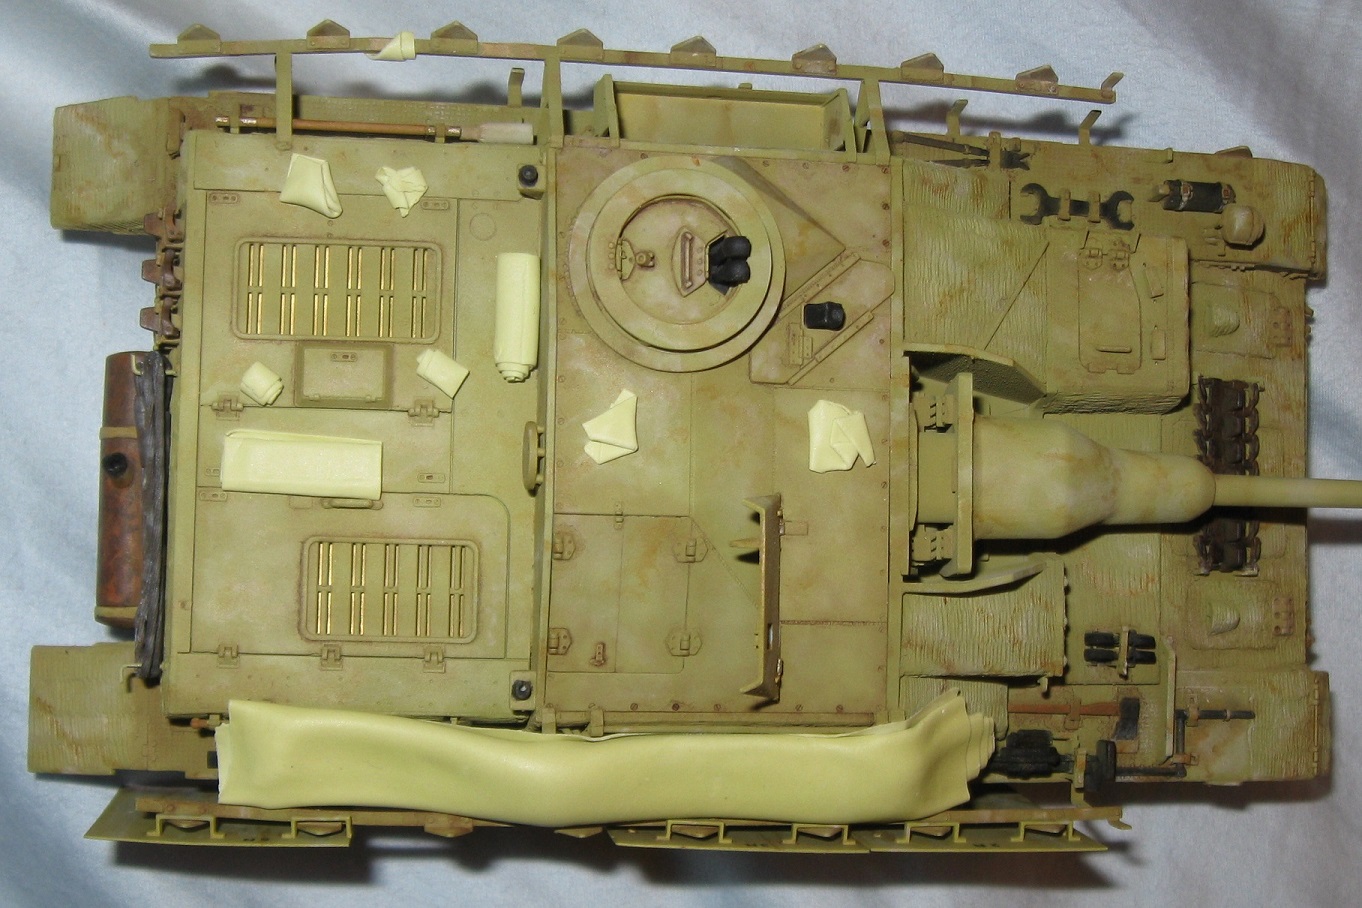
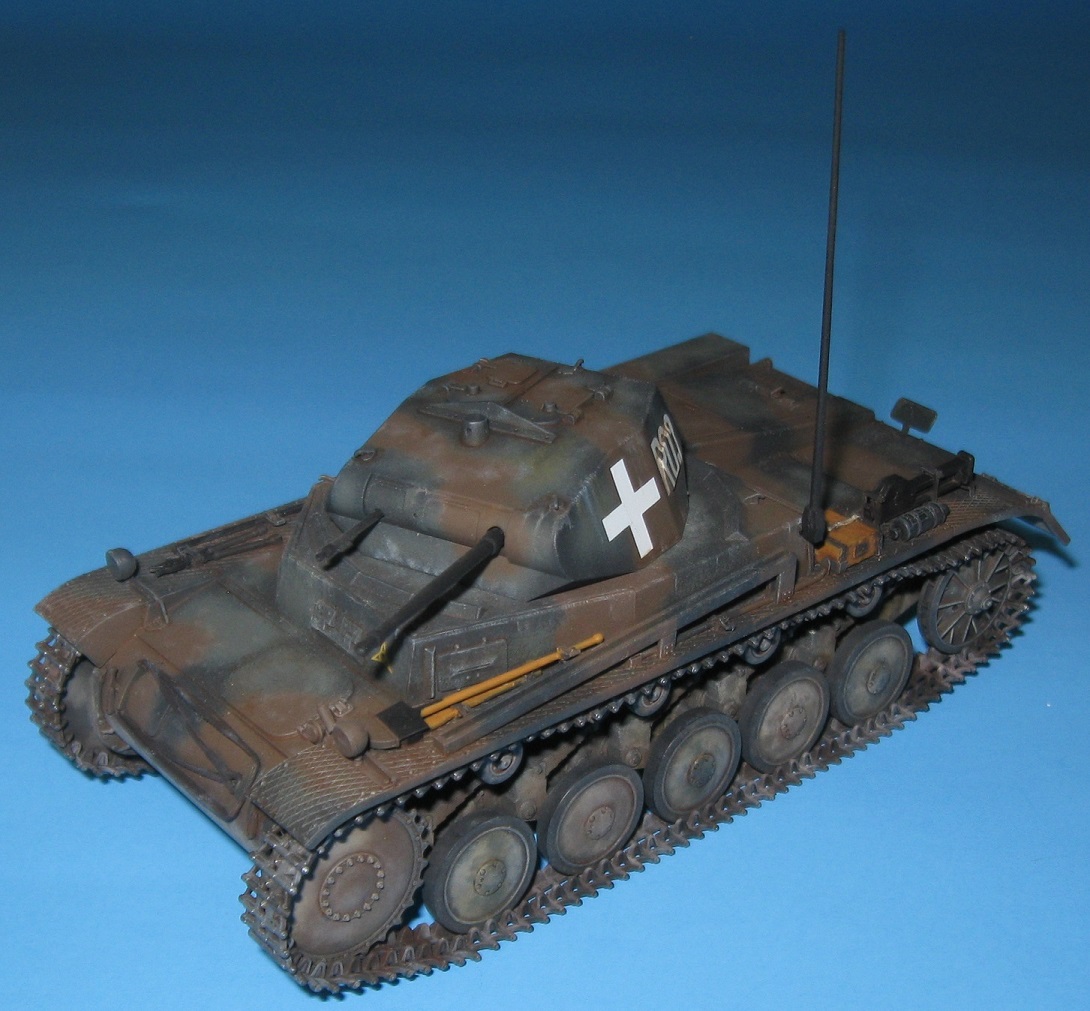
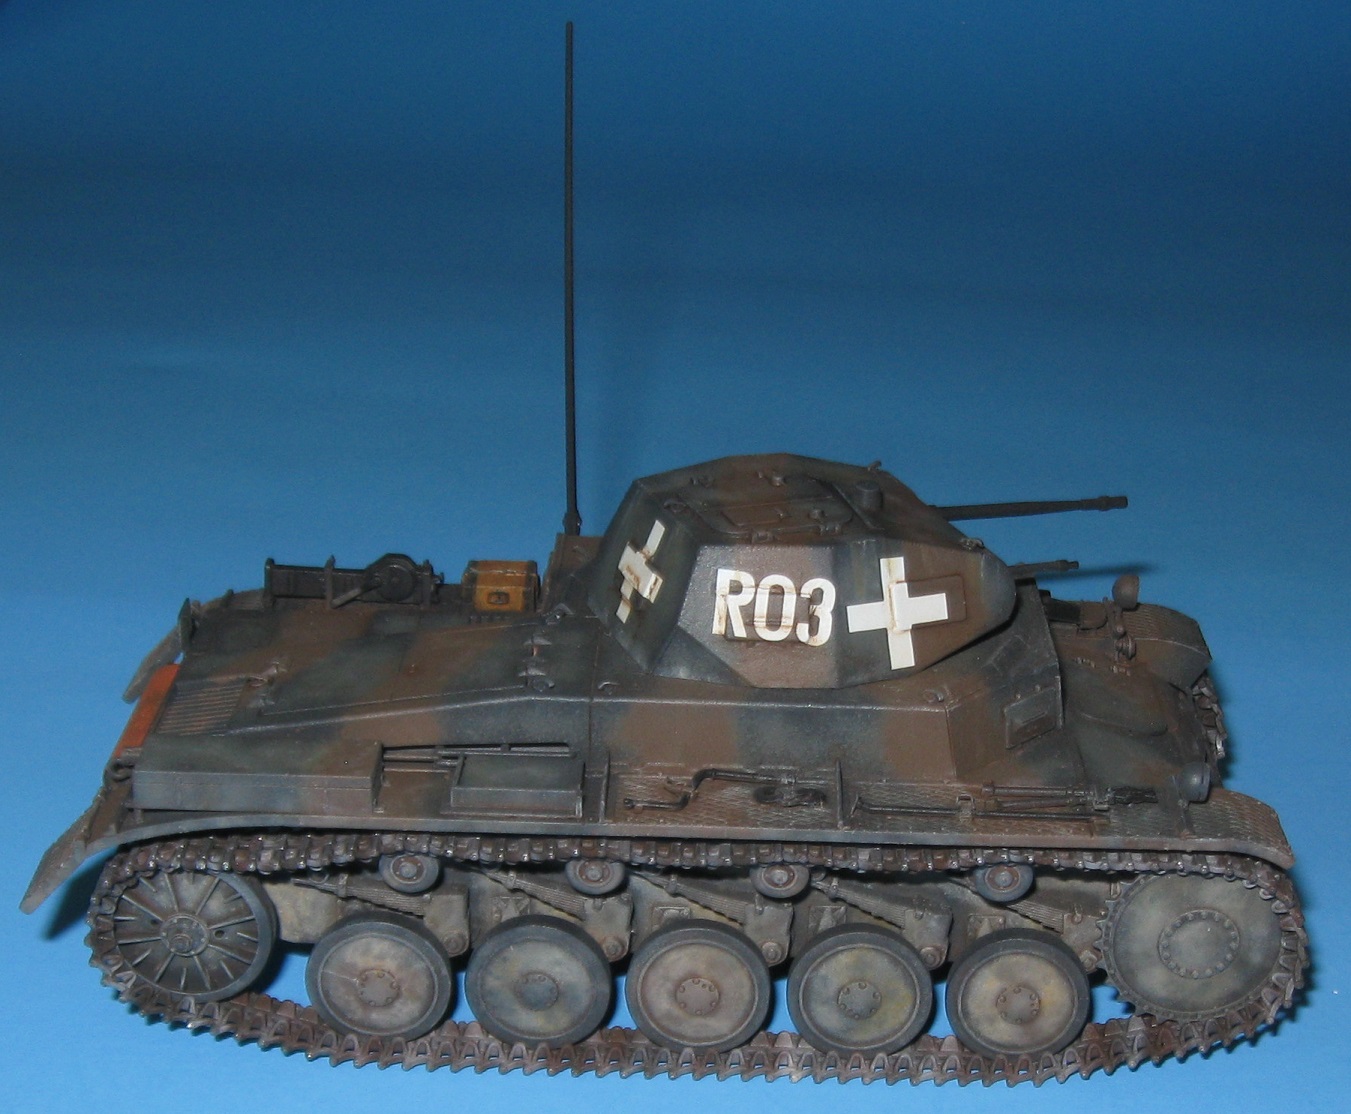
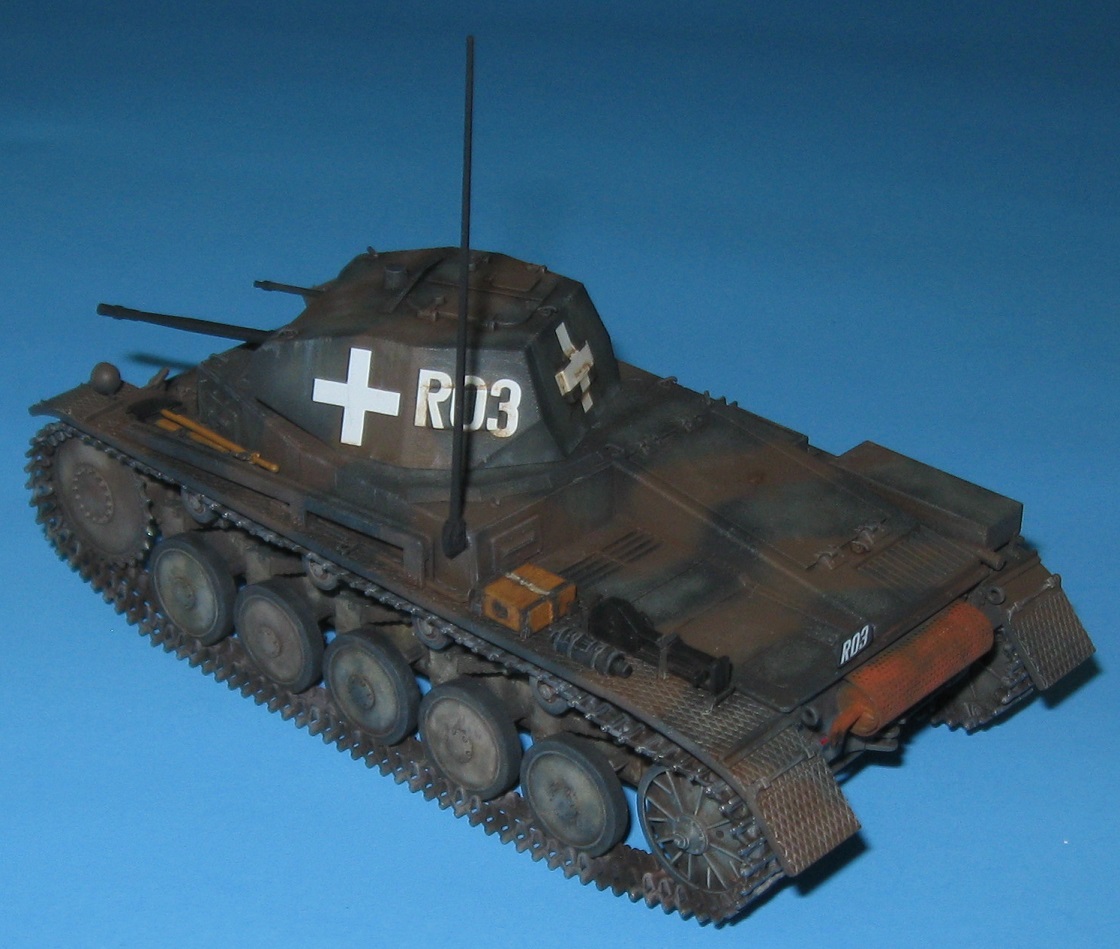
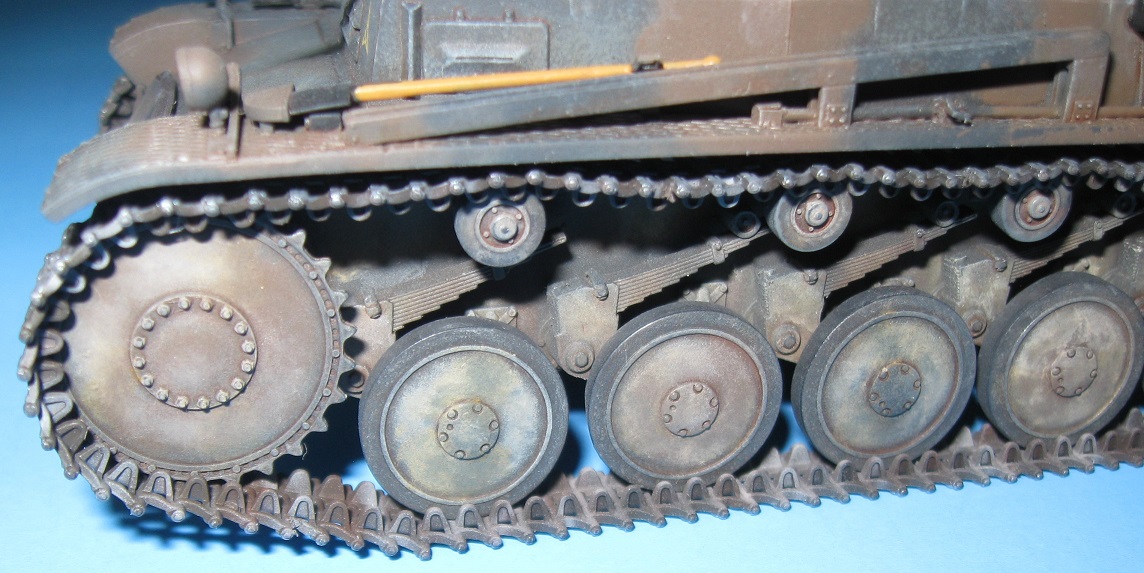
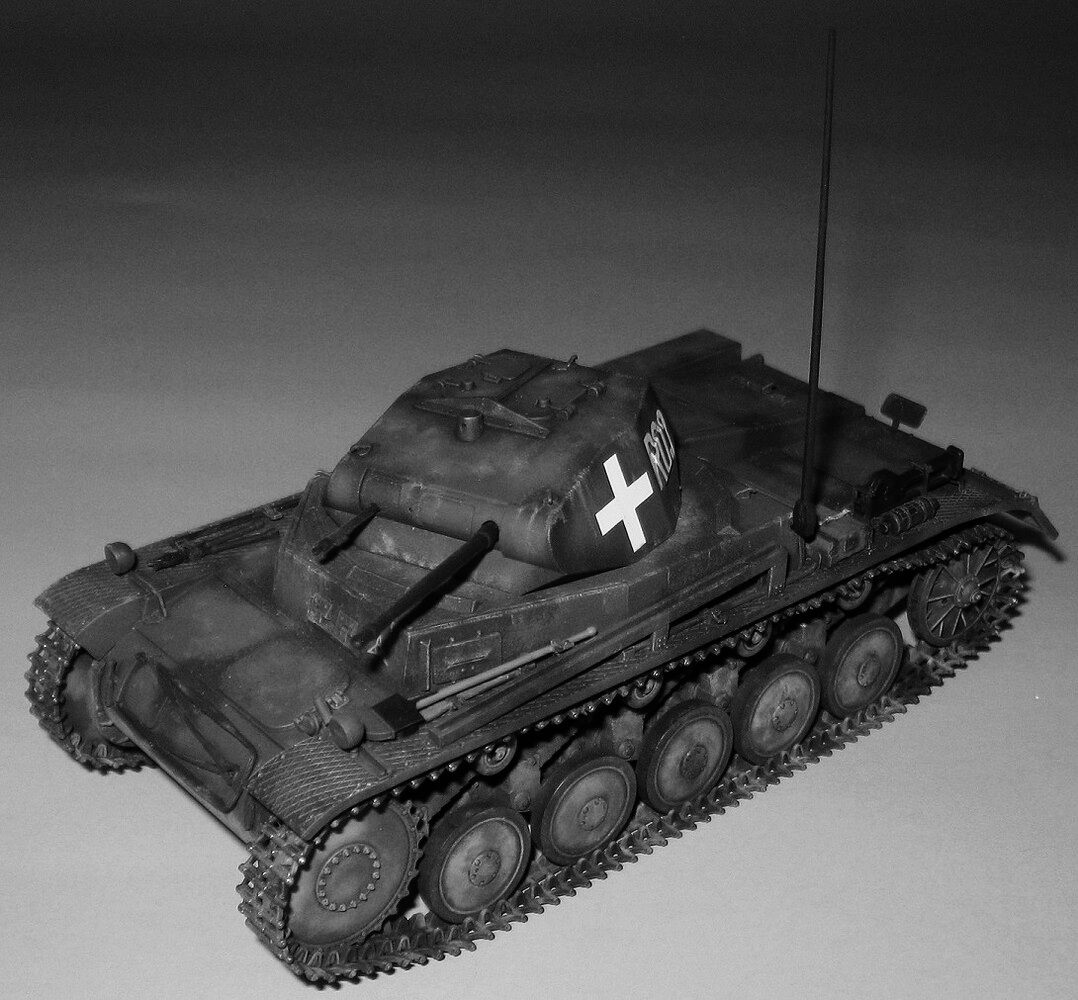
For the Panzer II, I used Vallejo acrylic Gloss Clear. This produces what I can only describe as a glossy toothy surface–it feels smooth and rough at the same time. After flooding the bottom of the Panzer II with odorless mineral spirits, I applied a pin wash. This worked somewhat better than the previous attemots but still suffered a lot of spread. After cleaning up the wash as best I could using a brush dampened with more mineral spirits, I began applying dirt stains with oil paint and…pretty much ended up with the bottom of the Sturmgeshutz. :face_exhaling:

I have watched many videos of modelers applying pin washes. Their washes cling very tightly to surface details without spreading.

Fifteen years ago, using Model Master enamel paints and Model Master acrylic clear coats, I had exactly the same problem but it was even worse.

Gloss clear coat works better than satin clear coat. Flooding the wash area with thinner helps. Using a higher pigment load in the wash helps with the caveat that it also requires more post wash clean up. Sanding clear coats to produce a smooth surface definitely helps but is mostly not possible.

With regards the weathering, in addition to everything else, I am having a Goldilocks Problem. I am not even sure what look I want to produce.

I will spend the rest of today applying pin washes and oil paints to the Panzer II. As I wrote earlier, it was given an acrylic gloss coat making things a little easier. However, I am still doing multiple things fundamentally wrong. Thus my vexation.

5 Likes

For today’s shenanigans, I decided to try my hand at making some tarps. I have only done this once before, about 14 years ago. so everything will surely go well.

My ground tarps for camping are about 12 by 12 feet. American vehicles in World War II came with a 12 by 12 foot tarp as standard issue because Americans love taking their armored fighting vehicles on camping vacations. Since I could not find any information on German tarps beyond the fact they existed, I decided 4 by 4 meters would make an excellent tarp size.

Yeah. Have you tried to roll out a 4 by 4 inch square of super thin Milliput? It’s really hard. My first attempt failed miserably so…on to attempt two. (If you are wondering, attempt one became a figure display stand.)

After much rolling and vexation, I was able to make a 3.5 by 3.5 inch tarp. Those dumb allies and their super dumb bombing raids were creating war shortages of tarp material, I guess. That left me with enough extra Milliput to roll out another 2 by 2 inch tarp. They were a little thick but…success! I cleaned up my work area–baby powder EXPLOSION!!!—and then went to work artfully draping my brand new tarps on my current yellow brick of doom.

Nope. Nope. This tarp is HUGE! Everything is okay. There is the second, much smaller tarp. With great care and the help of some plastic wrap, I draped my perfect little tarp over the gun mantlet. I folded it artfully. I folded it artfully some more. I was not really getting good results and then…it started to break apart. NOOOOOOooooooOOOOOOoooOOOOo!

Okay. That could have gone better. What should I do with the big tarp? I know! I’ll roll it up and drape it over the apron plate rails.

Love those brass screens showing through the engine grates. :disappointed:

Anyway, it appears the wacky boys of Stug 111 have decided to curry some favor and loot a roll of carpet for Def Fuhrer. :face_exhaling:

Using scissors, I cut the broken tarp into smaller pieces and made some wadded up handkerchiefs and stuff. Rags. They are rags.

Okay. So…this could have gone better. I have never seen a picture of a German vehicle carrying a roll of carpet, nor have I seen a vehicle covered in used snot rags. However, I did make a nice big tarp and now know to drape the thing before the putty starts to set up.

Model building: It’s not just a job. It’s an adventure!

6 Likes

In a pleasant turn of Fate, two of my experiments to achieve better pin washes actually worked.

The picture above shows various parts of the Panzer II from earlier in this thread. As I mentioned previously, this model received a gloss clear coat instead of a satin clear coat to facilitate a better pin wash. On the underside of the vehicle, this change did not seem to work. However, a pin wash applied to the upper surfaces performed significantly better. When I switched to a very pointy brush to deliver the wash, control went up even more dramatically. The turret clearly shows this. The top was painted with the fine tip brush. The sides were painted with the older, kinda gnarly brush.

As with the Sturmgeshutz, the underside of the Panzer II now looks like an abstract painting. If painting with blues, grays, and white on a canvas, this technique would produce a lovely cloud pattern. My brother suggested using paints with a slight texture to improve the effect further. That seems like an excellent idea.

On the Sturmgeshutz, the top was intentionally lightened and the lower portions intentionally darkened to create contrast and visual interest. The Panzer II uses the same technique in reverse–the upper surfaces were left dark and the lower elements significantly lightened. I have seen this effect on real vehicles but some texture would make it even more realistic.

For the last two months I have largely avoided dry brushing. To change things up, I am using a lot of dry brushing on the Panzer II.

I readily admit all of these painting experiments involve excessive weathering. My hope is that, once I get the techniques right, mix them all together, and tone things down, a much better finish will result.

The Sturmgeshutz and Panzer II are now painted and awaiting final assembly. I am intentionally letting the models cure for a few days before moving to the last steps, leaving them beneath dust covers that allow some air flow. Paint dries far more quickly and thoroughly using this system.

The next series of experiments will involve a German Sturmpanzer IV ‘Brummbar’, entered in the Unfinished Business campaign, and an American M41, entered in the Summer Nostalgia campaign. The Sturmpanzer uses a light over light painting technique instead of light over mottled dark painting. The M41 will make heavy use of panel shading underneath the light on light technique.

4 Likes

Finished: Tamiya 35299 Panzerkampfwagen II Ausf. C

Some photo etch parts from Eduard were used. The model was primed with Model Master Panzer Grey enamel then painted with Vallejo acrylics. Most weathering techniques utilized Mig and Winsor & Newton oil paints.

The first attempt to paint camouflage stripes by hand went horribly wrong. After stripping them away with alcohol, the the whole model was repainted using an airbrush.

The muffler was painted using various rust effect acrylic paints, then dusted with rust colored pigment. The result is rather…umm…vibrant! Producing convincing rust effects will require more practice.

The weakest element of the whole model is the jack block. This is amusing because the strongest element of the next model is also the jack block. In general, the tools look rather dull and uninteresting. This is a recurring problem.

The running gear was painted with all sorts of earth tones to create visual interest. These techniques almost worked!

This model was very easy to assemble and paint, making it an excellent practice project. The link and length tracks are far superior to the vinyl tracks found in Tamiya 35009 Panzer II Ausf. F/G. Even though the painting process started off badly, corrective measures successfully saved the model. It looks rather dull but some painting techniques show promise.

9 Likes

Looks good! Very nice camo with the Panzer Gray & Brown! The wheels and suspension look good too.

3 Likes

Thank you, Wade! If you have any suggestions for improving, I would appreciate the guidance.

The running gear was really close to being decent… It gets a Maxwell Smart, “Missed it by that much.” The color values are just a bit too dark.

Dark brown on dark gray is a really ugly color combination and hard to work with. Adding some stowage would help a lot.

The jack block and tools need help and the pigment on the muffler needs to come off. The gun barrels need some graphite.

Matte clear over gloss clear does not photograph well when using dark colors. Light from the flash reveals the depth of the clear coats. I have no clue how to fix that.

Even after pulling it back, the brown wash over the turret decals is too stark. A very light gray might look better.

2 Likes

Hi Doug - the pry bar seen under the aerial trough in the last pic - did you intend that it be shown as painted over?

If you want to add a bit more interest to the tools, the Bakelite handles on the wire cutters could be a slightly glossy Red-Brown:


image

5 Likes

HAHA! Nope! Didn’t know it was there. That is what happens when I paint a model three years after building it.

Thank you for those pictures! My memory failed me. I knew the handles were Bakelite but used the wrong shade of brown and made them way too dark. The Jagdpanzer IV, Panzer II, Sturgeschutz IV, and Sturmpanzer IV will all need that correction.

Earlier this morning I added graphite to the Panzer II gun barrels then repainted the jack block, muffler cover, and tools. I will try to make these new corrections later today or tomorrow.

Thank you very much, as always, for the advice and information. It really does help.

Edit: The crowbar and wire cutters were all repainted to the best of my ability given paints available.

3 Likes

I don’t know what kind of airbrush you’re using Doug but the subtle mottled look of your finish looks great . . . .

image

I can’t seem to get quite the same effect with my Iwata. I’ll second the idea that you’re being too harsh on your results, all the work you’ve shared looks pretty darn good to me, but, those high expectations is what gives a nice looking presentation. Well done!

Cajun :crocodile:

3 Likes

I think gray & brown are a challenging color combo to work with and you’ve done very well. Shifting one of the above pictures to black & white says to me your in the ballpark.

Maybe a very light touch of dust or light earth colored pastels or pigment on the markings to tone down the white markings. Gently blending into the white with a soft brush.

2 Likes

Thank you very much for the kind words! I do realize my models already look halfway decent and continue to improve. However, as I explore new paints and painting techniques, I try to be honest with myself with regards what worked and what did not. This sets up opportunities for new experiments and further improvement. I do not think I am doing bad. I just want to do even better.

With regards the underside of the Sturmgeschutz IV, it was painted Panzer Yellow, then mottled with Dark Brown (Umber), Red Brown (Sienna), and Sand Brown, in that order, using an Iwata Eclipse side loading airbrush with a .35 needle. (I believe a top loading airbrush with a smaller needle would produces better results but cannot currently test that hypothesis.) Upon completion, Panzer Yellow remains the dominant color, followed by Sand Brown.

Once that dried, a satin clear coat was applied. (More recent experiments indicate a gloss coat works better for pin washes.) Again after that dried, the bottom was hand painted with Raw Umber, Mud Brown, Raw Sienna, and Buff oil paints. Mud Brown was also used as the pin wash color. This step uses tiny amounts of paint and takes a very long time to apply. Probably 50% of all oil paints used are later pulled off the model. Landscape artists use the exact same system to paint rough seas and turbulent clouds.

I have seen real vehicles with this effect. The patterns can be really dramatic and pretty. However, most vehicles end up with a more uniform covering of dried mud. Unfortunately, the technique described above does not reproduce the texture of mud in scale. More skilled model builders use pigments and texture paints for that sort of thing. My experiments have not gone that far.

3 Likes

Oh whoa. That…actually looks surprisingly good. Well, except for the gigantic, “AIM HERE”, markings. HAHA!

Thank you very much for the suggestion, Wade. I have the necessary pigments and will give it a try. That may also solve the problem of the overly visible pin wash on those markings.

3 Likes

Much the same as yourself I’m always trying new or different techniques in my model building and painting, some come out good some not so good. We’re using the same Airbrush but everything I paint is solid OD, I’ll have to spend more time trying different finishes.

Cajun :crocodile:

1 Like

My Flakvierling, Jagdpanzer IV, and upcoming Sturmgeschutz IV were all experiments in trying to make a single color scheme look more interesting. I recommend building up some cheap, easy to build models and experimenting on those. Jeeps would work and they make great dressing for dioramas.

In my opinion, Olive Drab is significantly easier to play with than Panzer Yellow. Later this year and into next year, assuming life does not throw another monkey wrench at me, this thread will make a major foray into the world of Olive Drab. My photo collection now includes some great color pictures of World War II American vehicles, some colorized, some from better films, and some period. Life Magazine, in particular, published some fantastic period photos. That will make it much easier to get things right.

3 Likes