Damraska’s AFV Projects

With the Jagdpanzer IV and Borgward finally finished, I am circling back to complete more models started in the winter of 2022.

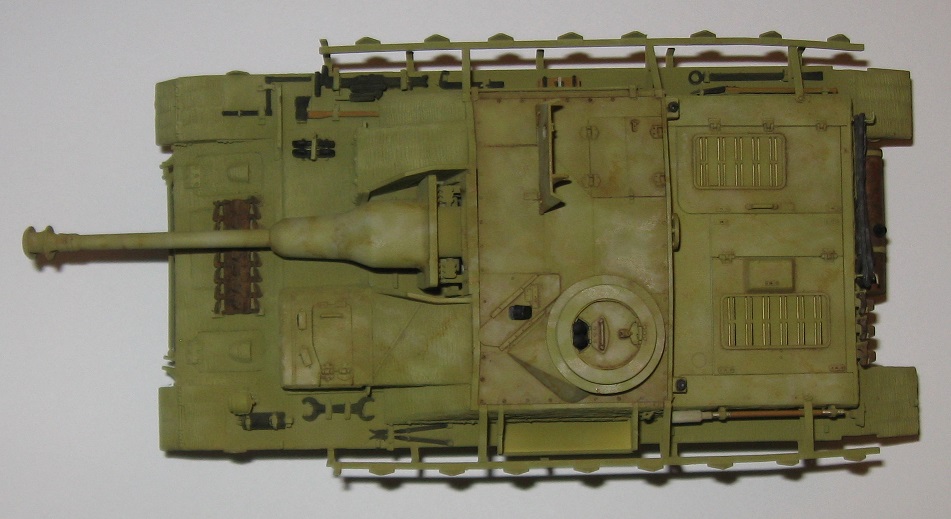
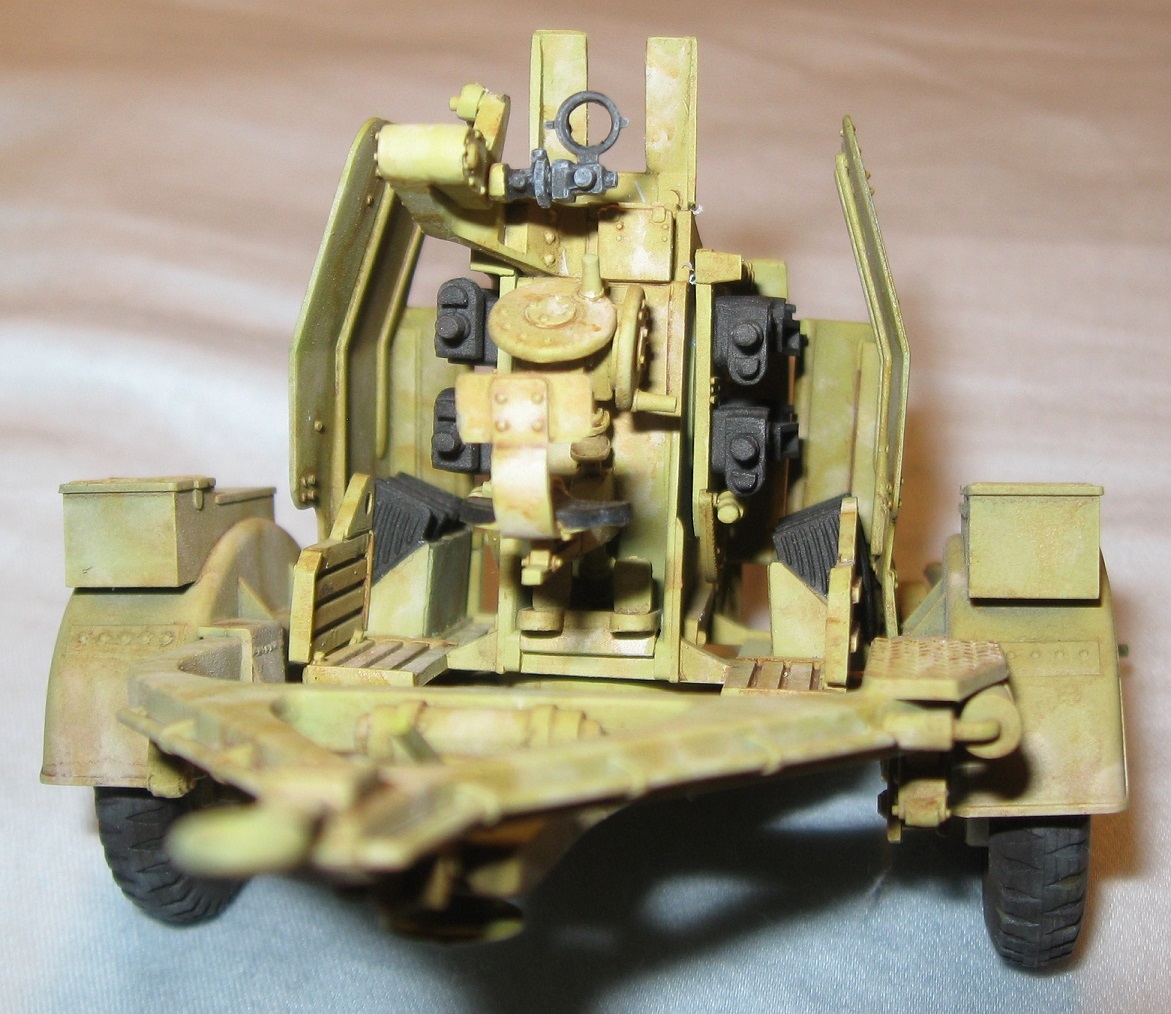
Since the Jagdpanzer IV ended up too dark, I am trying to exercise much greater control when using oil paints on the Sturmgeschutz IV. In the picture above, the engine deck, gun, and roof were weathered with oil paints. The rest of the model awaits such treatment. My hope is that by applying oil paints in short sessions spread over many days, I will not get tired and sloppy. This should result in a more vibrant model.

For the last few models I applied a satin clear coat before using oil paints. Satin coats are not glossy enough to prevent oil washes from spreading. Therefore, I intend to use a gloss clear coat on the next model and see if that works better.

The picture above reveals one unfortunate error–paint did not reach the brass pieces under the engine deck grills. In the future, I will prepare stuff like that with black primer. The areas beneath the periscopes were so prepared and look much better.

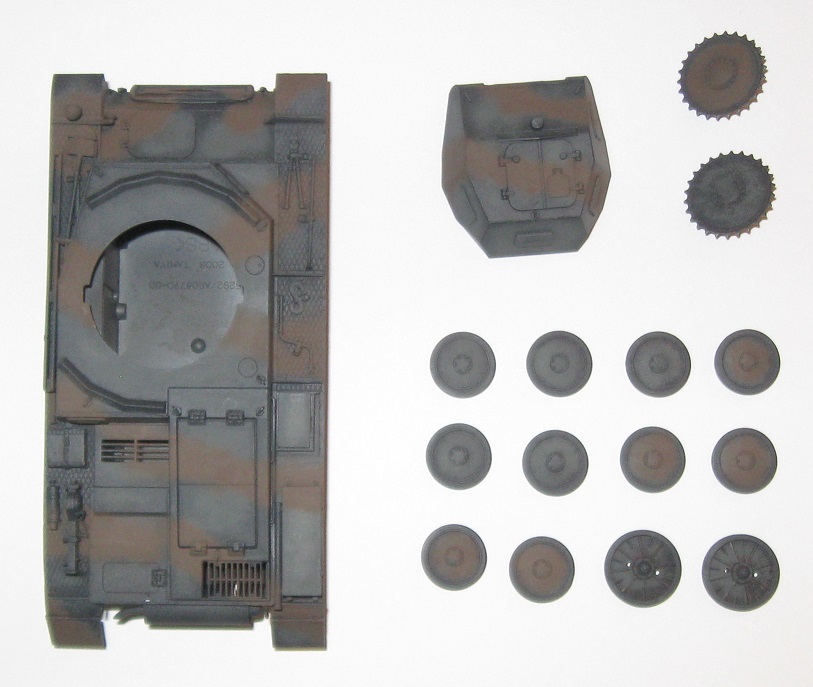
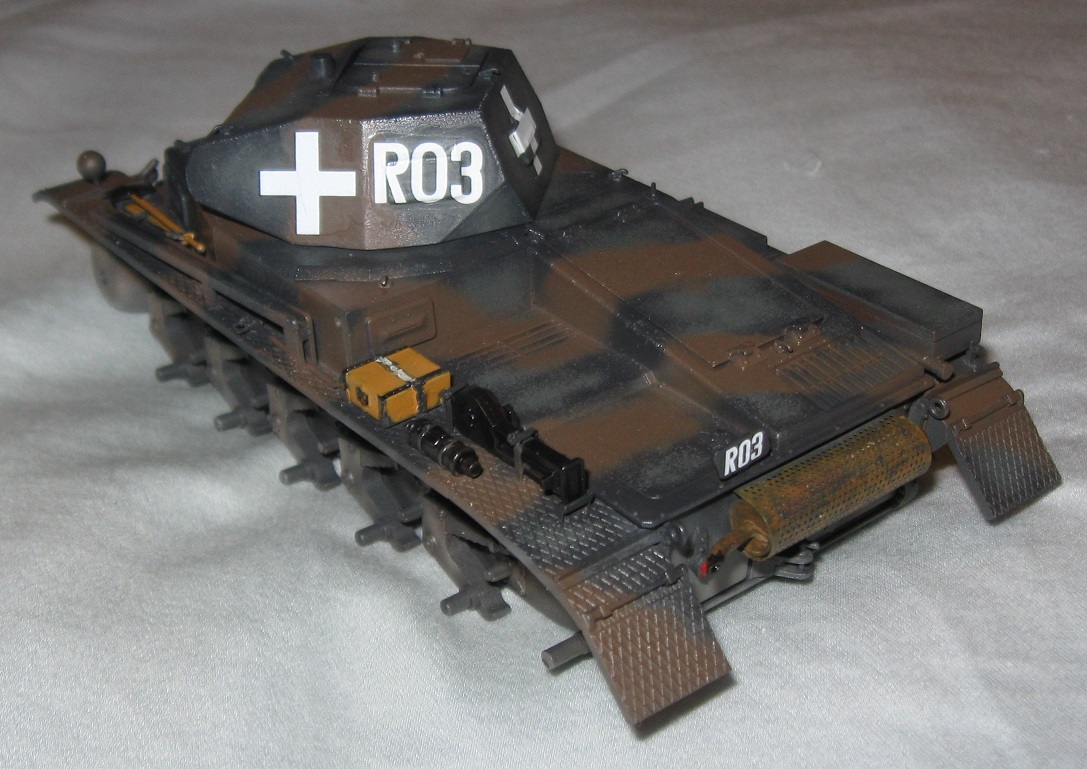
The Tamiya Panzer II from March 2022 also makes a return. After sanding out the horrible, hand painted camouflage, the model received a new base coat of Panzer Gray. That was also sanded before applying light gray mottling and chocolate brown stripes.

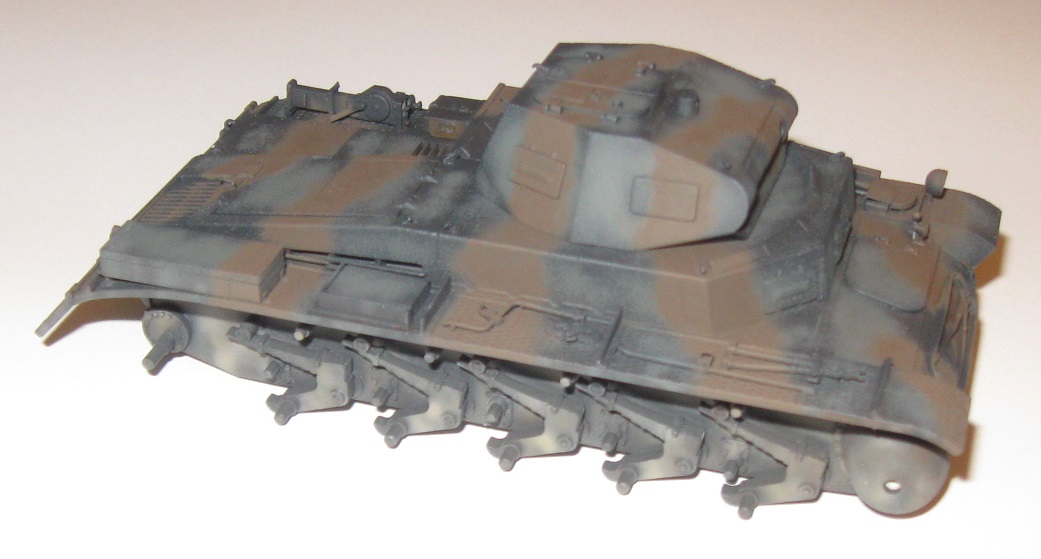
The updated camouflage looks significantly better. The hue was intentionally brought up so that when oil paints knock it down, the net result will amount to zero. The underside of the vehicle also received preliminary weathering with an airbrush.

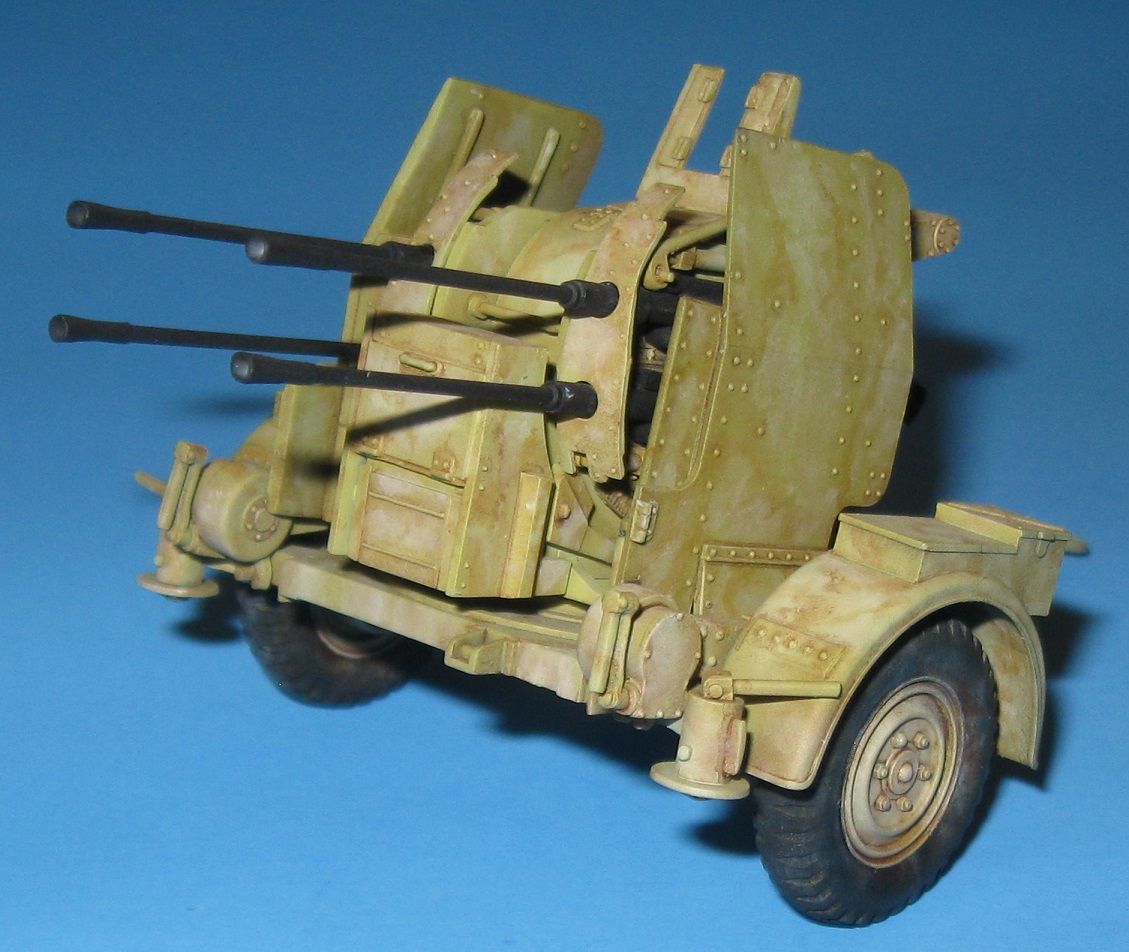
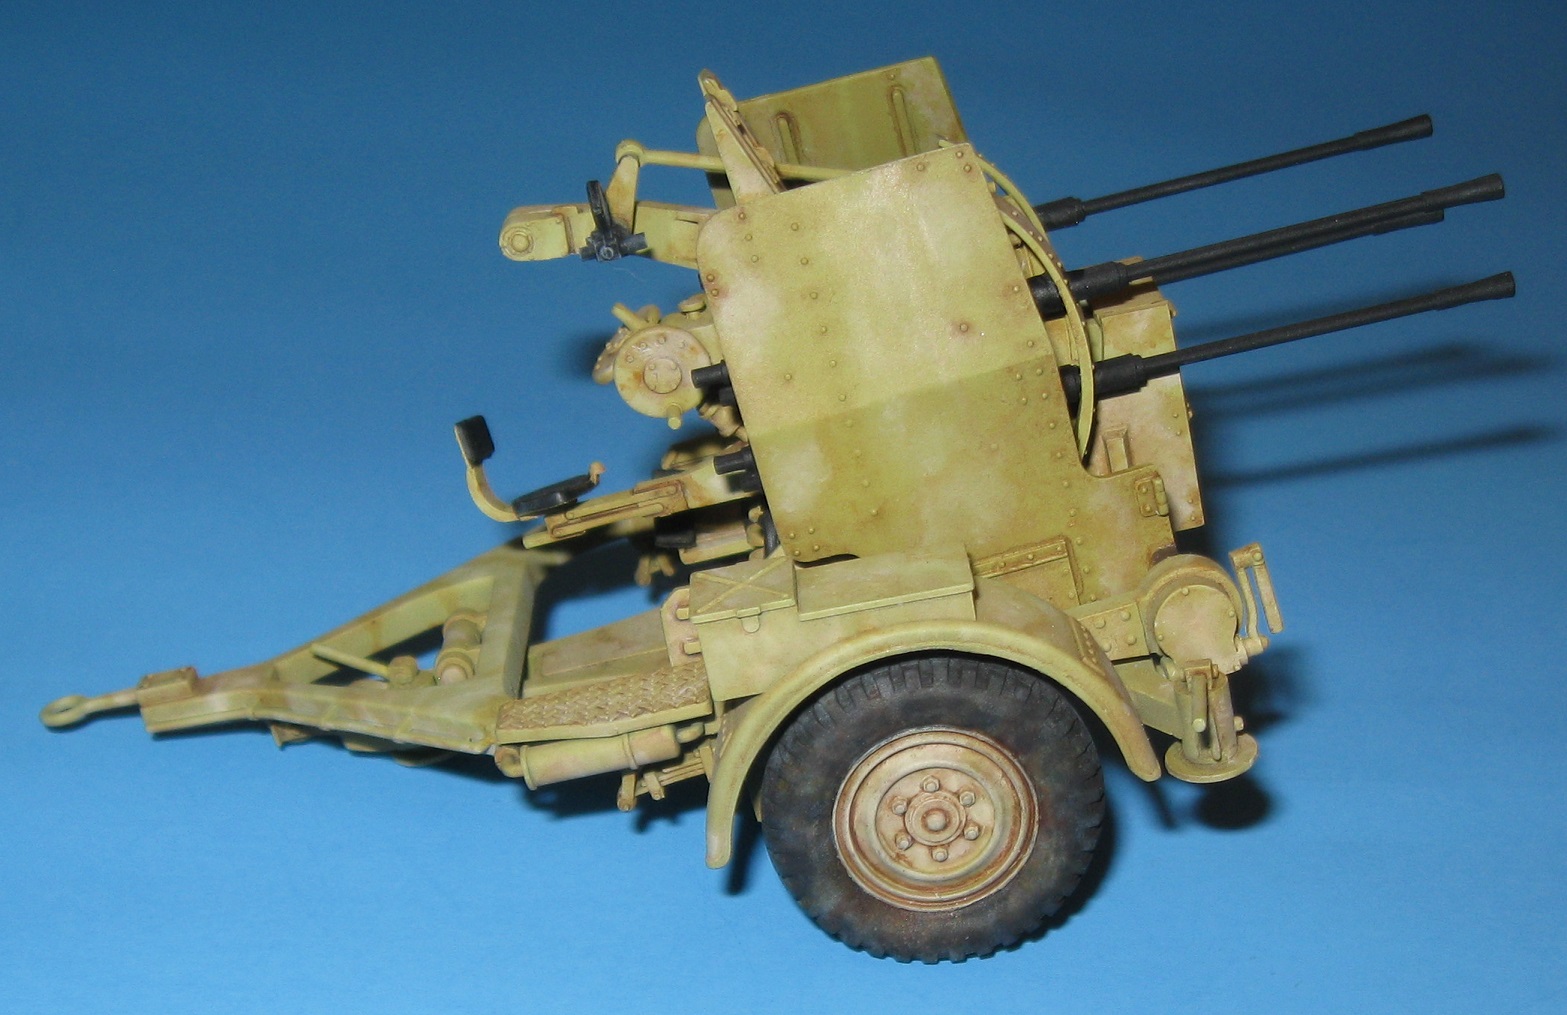
This model illustrates something that keeps coming up. Vallejo Game Color and Model Air paints often do not play well together, resulting in wonky spray characteristics. To achieve more consistent results, I am considering duplicating select Game Color paints with Model Air equivalents.

4 Likes

A very inspiring topic you have placed.
It looks to me like you’re very organized and structured in your model building hobby, I like that.
Also setting goals for yourself is very good if you ask me.
It might inspire me to do this with my own things in life.
Thank you for posting and I must say it is interesting to read from you.

2 Likes

Thank you! I love your Avatar.

My sincere hope is that my experiments, foolishness, and musings will help less experienced model builders avoid some pitfalls and more easily achieve model building success. (Vallejo Primer sucks about as badly as something can possibly suck.) This thread also serves as a historical record to supplement my memory and as an invitation for more experienced model builders to critique my work. Many people ask for critiques but really want praise. I am kinda the opposite. “Pour your misery down on me.” If I messed something up I actually do want to know, even if a correction is no longer possible.

A short time ago I went through my closet and identified 25 old, stalled model projects in need to completion. More await in the downstairs office. Most date from 2008 to 2010. They ended up in that state because I enjoy building far more than painting. I am now resolved to switch to acrylics (Done!), figure out a new model painting paradigm (~75%), learn to airbrush with acrylics at a professional level (Making progress!), and finally bring all those models across the finish line.

Now, back to painting…

2 Likes

The situation you are describing, of unfinished models laying in closets in your house and I imagine just about everywhere else. Is just the kind of situation I want to prevent. Because it makes me restless personally.

Finally I’ve recently made the switch to acrylics. And I’m wanting to first try as much of AK Interactive products as I can. But MIG is also a brand I heavily want to try. I had to donate just about all of my old Revell enamel paint and Tamiya acrylic paints to the action of Modelbouwenzo. But boy, did it bring a feeling of relieve. Finally being able to make a fresh, clean start with paint and products. And finally, I’ve opened up the road to make further progress. And try out new tehniques. Which were way to difficult and complicated when having so many different products.
Since I don’ 't have knowledge of chemistry or so, this was a big problem, which I finally solved.

Yes, health reasons are also one of the reasons why I’ve switched to acrylics. But haven’t had any chance so far to work with them and have since. Since time is so scarce here. That I’m happy with moments like these that I’m able to hang out on here. Or study. And since it’s summer and the weather is to bad to do any model making work. I’ 'm stuck with doing with things like this. And no, I don’t have airconditioning, I wish I had.

Anyway, it is nice to chat with you like this. Very inspiring to.

Finished: Tamiya 35047 7.5 cm Anti-tank Gun Pak 40/L46

This was built for the NOT a Tank Destroyer Campaign. More pictures of the build and final model appear in that thread.

This model was completed using both both acrylic pirmer (Badger Sytlenze) and paint (Vallejo), a first for me. The results are somewhat messy but there is hope.

6 Likes

Finished: Bronco Canadian T17E1 Staghound Mk. I (Late Production) equipped with 60 lb Rockets

This model was completed for the Unfinished Business 2023 campaign. More pictures of the painting process and finished model appear in that thread.

Painting was completed using Vallejo acrylic primer, Vallejo acrylic paints, and Mig oil paints. Vallejo primer is terrible, causing many problems that would never occur with a good primer. Once again, the final result looks rather messy because I continue to explore many unfamiliar products and painting techniques.

11 Likes

That looks excellent Doug.

1 Like

I’m wondering now, did you type this post first in a Word or other text editor program and then copy and paste it here on the forum? Because it looks to me that the post took a long time to make. And that it possibly involved a few days of work if not more or less.

I must say though that, even though I think that I have read your post once before. I’m still getting inspired from it by reading it a second time. Not only with model making, but with other things in my life as well. So I’m happy you’ve posted it here.

Good day to you, Roland.

All my posts are composed using the native Armorama text editor. They are not prepared in advance but I often edit posts multiple times for grammar and spelling. When I want to take good pictures, I use a rolled sheet of 24" x 36" (2/3m x 1m) blue poster board as a backdrop. It only takes a minute or two to set up. If I need some extra light, I use a desk lamp.

Thank you for the kind words and I am very happy you find these experiences and experiments helpful. Model building can be very demanding and touches on many disciplines, both artistic and technical. There is a lot to learn and there will be failures, but that is the path to success for most things worth doing.

1 Like

I am simultaneously working on too many projects again. It is a very hard habit to break.

My humble Flakvierling continues to serve as an excellent learning project. A few weeks back, a Blu-Tac painting experiment on the gun shields resulted in a truly hideous camouflage pattern. After some consideration, I decided to try another experiment–completely stripping the parts of paint and starting over.

As it turns out, stripping Badger Stylenze primer, Vallejo paint, and Vallejo primer with rubbing alcohol is a simple matter that takes minutes. Alcohol easily eats away acrylic paint and primer without even slightly damaging styrene plastic. This was not anticipated! With all the bad coats of paint stripped away, I primed and painted the gun shields anew with excellent results.

With everything finally fixed and a base coat applied, many parts were assembled and oil paints applied. The gun sight is the last part in need of detail painting.

About a week ago, I also took another stab at fixing the Sturmgeshutz IV apron plates. This time, touch up painting went very well and the model should finish up this week. The blue bucket will serve as some extra stowage.

Finally, the Panzer II from a few posts back received decals, detail painting, and repairs. Unlike some of you, I cannot detail paint with great precision and must rely on oil paints to cover up mistakes.

The Panzer II is about to serve as yet another experiment. On all previous models to this point, oil paints were applied over a matte or satin clear coat. That led to unwanted wash bleeding–oil washes spreading over large areas rather than clinging to nooks and crannies. The Panzer II received an overall gloss coat.

If things go to plan, I will finish these three projects in the next week or so, then circle back to pick up the Panzer III from a few weeks ago. In July, I hope to resume work on the M3 Scout Car and M24 from last year.

It is hard to believe that only two months have passed since returning to these forums and starting the transition to acrylic paints. I have learned so much. My primer problem was finally solved by Badger Stylenze. Oil painting feels natural again. My air brush now works well the majority of the time. After 17 years, I finally completed two Armorama campaigns. I even have a decent little work area established. Heady stuff.

In the next two months, my goals will expand to include the exploration of pigments, texture products, and stowage. I may even take a swing for the fence.

5 Likes

Finished: Tamiya 35091 20mm Flakvierling 38 mit Sd.An. 52

This model was painted with Vallejo acrylics over Badger and Vallejo primers. Weathering was done with Mig and Windsor & Newton oil paints. Clear coats were Vallejo acrylics. Pigments were Mig (for the wheels) and pencil lead (for the guns).

In the process of taking these pictures I knocked over the gunner’s seat. Woops!

The goal was to paint a model in solid Dunklegelb, then add visual interest through various weathering techniques. Unfortunately, this was not very successful and the finished project looks like a dirty yellow brick.

Early on, I decided to build the weapon in towed configuration. At the very end, when connecting the gun to the mount, I encountered some troublesome fit problems. In addition, closing up the gun shields hides much of the interesting detail. My next Tamiya Flanvierling will be in the deployed configuration.

Curiously, the oil paints still show some shine after 5 days of drying followed by a matte clear coat. The box I use for drying models probably needs more air flow.

I am not very happy with the guns. Flat black dusted with ground pencil lead does not really resemble gunmetal. In addition, bare plastic can be seen inside the gun muzzles. That I can correct.

The wheels turned out better than those on the Staghound. I may go back and put some black pigment on the Staghound wheels to tone them down.

In the end, this practice model proved very useful, both for what worked and what did not work, and that made it worth the journey.

5 Likes

Flat black is too stark for scale. You may find it better to use a dark grey, with a very dark grey (almost black) wash and very light dry brushing with a medium slate grey instead of the pencil graphite will give something more to your liking.

The real deals - note how the guns are upside down on one side:


3 Likes

Some other things of note for your next build. The gun sight in the kit is the Schwebekreisvisier 38 and is actually an open circular frame with a wire centre section:


The loader’s seats are actually attached to the side of the flip up floor plate as per pic above, and these ones I took myself:


3 Likes

To add Vallejo has a few gun metal colors that can help. It should also eliminate the graphite step or make it optional at that point.

3 Likes

Oh crud burgers. I also put the smaller gun shields on upside down!

Peter, thank you very much, once again, for the feedback and pictures. I sincerely appreciate the help.

So, two hours later…

I broke off the smaller gun shields and flipped them around. This damaged and scratched up some stuff including one of the smaller gun shields because they would not longer fit. I jammed them in there, repainted the boo boos, and covered the crack with a rust streak. Actually, that rust streak is probably the most interesting thing about the whole model.

I drilled out the gun sight using a drill bit as close to the reticle diameter as possible. That made me a little sad because the blue gun sight glass gave the model a tiny amount of color. Oh well. I tried to add a little cross member inside the reticle to make it look more interesting. I really tried. Unfortunately, it was just too small to place and secure.

The seats were the easiest thing to fix because…I had not secured them! I was unable to find a good picture showing how they attach to the gun platform so I left them loose. I did find one museum picture with them stuffed in exactly how they appear in my earlier pictures so I went with that. I have not decided how to attach them so for now, I left them off.

With regards gunmetal…yeah. I keep trying different ways to get there without much success. One of my storage boxes includes a built up quad .50 so I will try the method you suggest on that.

I also painted black inside the gun muzzles to tone them down.

Thank you again for the great pictures and advice. Hopefully, I can make a better go of it next time and avoid the backwards bits. :upside_down_face:

3 Likes

Thank you for the advice, Ryan. In the past, I skipped Vallejo Metallic Gunmetal because it looks way too light to me. However, it might work with some black added or a black wash over the top. I will order a bottle and give it a try.

2 Likes

I liked the blue sight as well. Nice artist license. I think that 20 Quad turned out nice. It took me three attempts get one that was semi decent built.

Gunmetal? I can never find anything in a bottle I really liked.

FWIW - I like to mixing paints like Floquil Chain Mail (dark blueish black metallic) with a Floquil Silver on a alumfoil covered palette. It’s amazing the range of metal tones two colors like that can make. Should work with most paints if one wants to vary the gunmetal tones.

2 Likes

Thank you, Wade. I aspire to build models as perfect and clean as yours. My detail painting and weathering often looks messy. Yous always looks much more controlled. I will continue to build and torture cheap Tamiya kits until painting improves.

With regards gunmetal, I ordered some Vallejo metallic colors and will use them for some experiments as you, Peter, and Ryan describe. In fact, I already tried some of that on an F-15E with surprisingly good results. Acrylic paints are extremely easy to mix in an air brush cup or on a wet palette. Figure and landscape painters, whom I often watch on YouTube, often mix up a series of colors for blending, producing excellent results. While difficult to execute well, that is yet another technique I hope to learn in the coming months.

3 Likes

Doug, I’m very confident you’ll quickly exceed my skill level. You’ve got the right mind set on how to improve, motivation and an open mind when folks share suggestions and tips. That’s the key ingredients to model building satisfaction my friend.

2 Likes

By the way Doug. I’m not sure if you know this, but the site scales pictures posted for the thread, but if you click on them they enlarge a bit up to the height or width of the screen pane. However, depending on the size of the pic uploaded, you can often click again and this time they open full size. Do that to the ones I did above and see the detail in IMAX (almost) !!

3 Likes