I would suggest if you are having airbrush issues that you should check out the Model Paint Solutions website and reach out to the gentleman who runs the sit the man is a genius and a wizard if he can’t fix then no one can.
Thank you for the suggestion! I have visited that website on a number of occasions and just reread all the articles on airbrush use.
I did a one-on-one phone call with the owner (I have a problem remembering people’s names) and he is a great teacher. Another resource is go to the Plastic Model Mojo Podcast he ha done several episodes with them, and they are worth a listen.
Doug, has the air brush been checked for damaged parts?
I’ve had hooked needle or split cone cause all sorts of random chaos.
The airbrush has hit the concrete on multiple occasions. After the last impact, the airbrush needle no longer slides in smoothly from the back. The needle was replaced maybe two months ago. Both needles–original and replacement–and all other parts look fine to my eyes. It sprays pretty much the same as the day it was purchased–very erratically.
The person who runs that website is obviously very experienced. He went through various paint systems, settled on LifeColor and Vallejo, and found a reliable painting algorithm. He is many years ahead of me. I am still experimenting with acrylics, air pressure, individual paints, paint systems, thinning ratios, and the airbrush itself. Weather affects everything. He seems to use multiple gravity feed airbrushes. I use a single side loader. He uses solvent based products for cleaning. I refuse to do that. He uses LifeColor and Vallejo. I continue to experiment with 4 lines of Vallejo paint–Game Color, Model Air, Model Color, Panzer Aces–all with different characteristics. What I do varies from session to session, hour to hour, and even minute to minute. It is not like, “Golly, if I could fix this one thing, my airbrush would be super swell!” It is impossible to have an intelligent conversation on the subject because there are so many variables in play.
I need to continue the experimentation process or take up woodworking instead. ![]()
No physical damage, good deal. Two more questions if that’s OK.
-
Moisture trap?
-
Any air leaks in the brush?
My precision made Harder-Steenbeck leaks where its threaded just as bad as my Paasche VL. Both brushes greatly benefit from a little tiny dab of beeswax or chap-stick on the threaded parts.
One cc or so of Tamiya extra thin or similar shot through an airbrush after cleaning can also help keep the barnacles cleared out if a dedicated solvent isn’t acceptable. Tamiya Extra Thin is basically Tamiya airbrush cleaner. Testor’s Liquid Cement works too
There is an Iwata moisture trap attached to the compressor. It seems to work quite well.
There is a very small air leak where the airbrush attaches to the flexible hose.
The airbrush is approaching 20 years old so I will pick up some wax (for the seals) and a new paint cup and see what happens.
With 2024 come projects both old and new.
My goal for 2023 was to complete 24 models and 24 figures. While that did not happen, I did finish 9 models including 7 old projects, make progress on a dozen additional models, sculpt 30 or 40 terrain pieces, and achieve moderate success with a whole new kind of paint. Having stepped away from serious model building for 12 years, it was a decent effort.
The new year brings a rather different goal–to improve painting skill while finishing campaign models and unfinished projects. I am not putting a number to it. By the end of the year, I hope to understand paints well enough to smoothly complete a model project without suffering any major delays or issues.
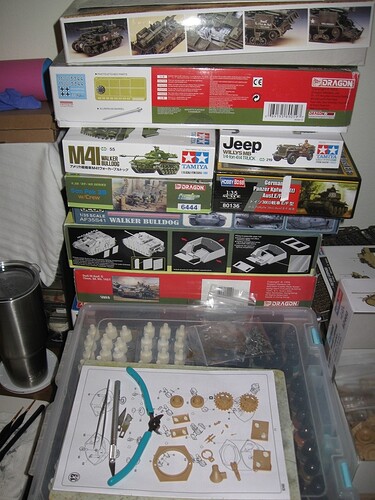
Back in May of 2023, my active project stack contained two models. By the end of the year, it included close to a dozen boxes. These are my cannon fodder for 2024. ![]()
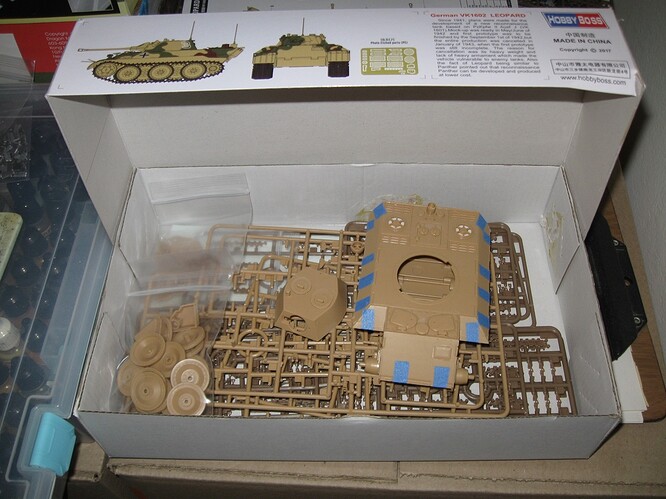
Over the holidays, I was suffering from failure fatigue and did not have much time to work on models. However, I did put in some time on a chibi panther left under the Christmas tree. I am not sure what model will occupy my desk next week but this week…chibi panther.
Chibi Panther is coming along nicely.
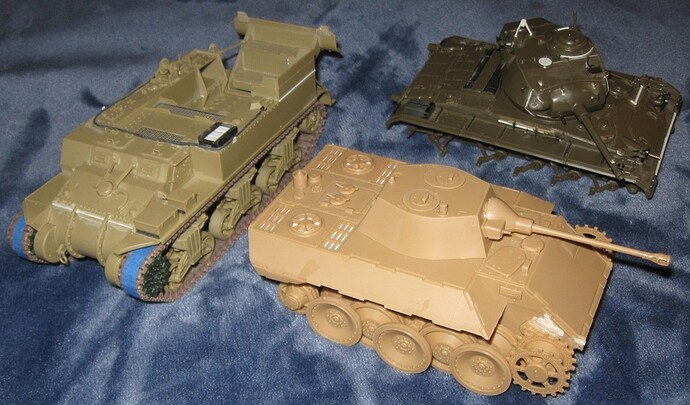
As shown in the picture, it is about the same size as an M24 (chibi M26) but smaller than an M12 GMC.
Detail is pretty good, especially in the running gear and at weld seams, but soft in some places. In my opinion, the final drive covers look too small for a machine of this size. The engine deck is particularly weak and lacks lifting hooks. A couple spots need some putty but overall, fit is rather good.
The smoke dischargers that come with the kit are kinda awful so I tossed 'em. They will be replaced with spares from a Dragon Panther.
The model does not include anything that would show through the engine grates. Since Wade will shine a pen light in there, I blanked off all the engine compartment openings with some sheet stock.
The idler wheels and sprockets are hollow. They do not include channels for the axles to slot into. To prevent them from flopping around, I added some channels with tube stock. This worked really well.
This vehicle only made it to the mock up stage and the model reflects this. It does not include any tools or spare track hangers. Dragon once again came to the rescue, providing a bunch of spare tools, track hangers, and tow cables. Parts sourced from Dragon are significantly more refined than those provided by Hobby Boss.
In addition to tools, I plan on adding zimmerit, storage boxes, foliage loops, lifting hooks, and maybe an infra-red rig. German recon vehicles often carried a lot of junk so maybe it will also get some external stowage. Dunno.
I should mention, this is my favorite vehicle in World of Tanks. Every time I circle strafe and blow up some big tank with this thing, leading to a lot of cursing by the other guy, I achieve a profound state of inner happiness.
With regards gunmetal - slightly off-kilter here but I absolutely love the little Humbrol enamel tins for this sort of thing. They do an absolutely beautiful gunmetal which goes down quite dark and dries slightly lighter. You can use a dry brush with nothing on it or even a bit of cloth to buff it up, it polishes up nicely in exactly the same way the real thing does. Takes an enamel wash beautifully as well. I very rarely use enamels these days but this is one case where it makes sense to.
The reference pics above show a rust-coloured patina to parts of the breech mechanism on those 20s and buffed up Humbrol gunmetal would take a lovely brown wash on parts as a shader of sorts. Apply liberally on the flat parts not letting it get into the recesses, let it dry and then remove most of it with a tissue. You’re just after a hint, a slight modulation of the gunmetal tones. I reckon it would look great.
Thank you very much for those suggestions!
Years ago, I used Humbrol enamels regularly and liked them a lot. Perhaps I can achieve the same result with acrylics and high pigment oils.
Until recently, I had no real knowledge of the many variations of gunmetal. Perhaps three weeks ago, I stumbled upon the C&Rsenal YouTube channel and began learning about the history of hand guns and rifles used during World War I. After three weeks of looking at old firearms displayed on a lightbox, I have a much better idea of how gunmetal looks and ages.
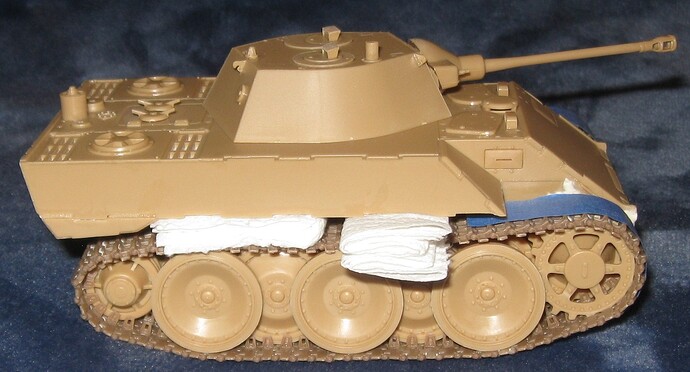
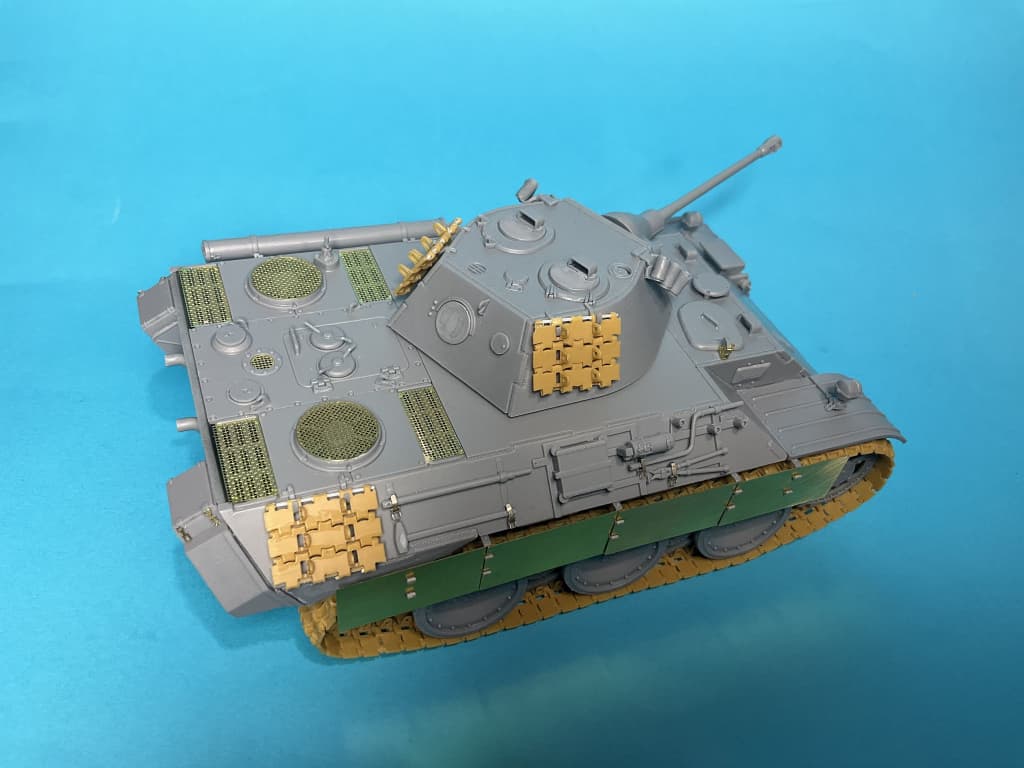
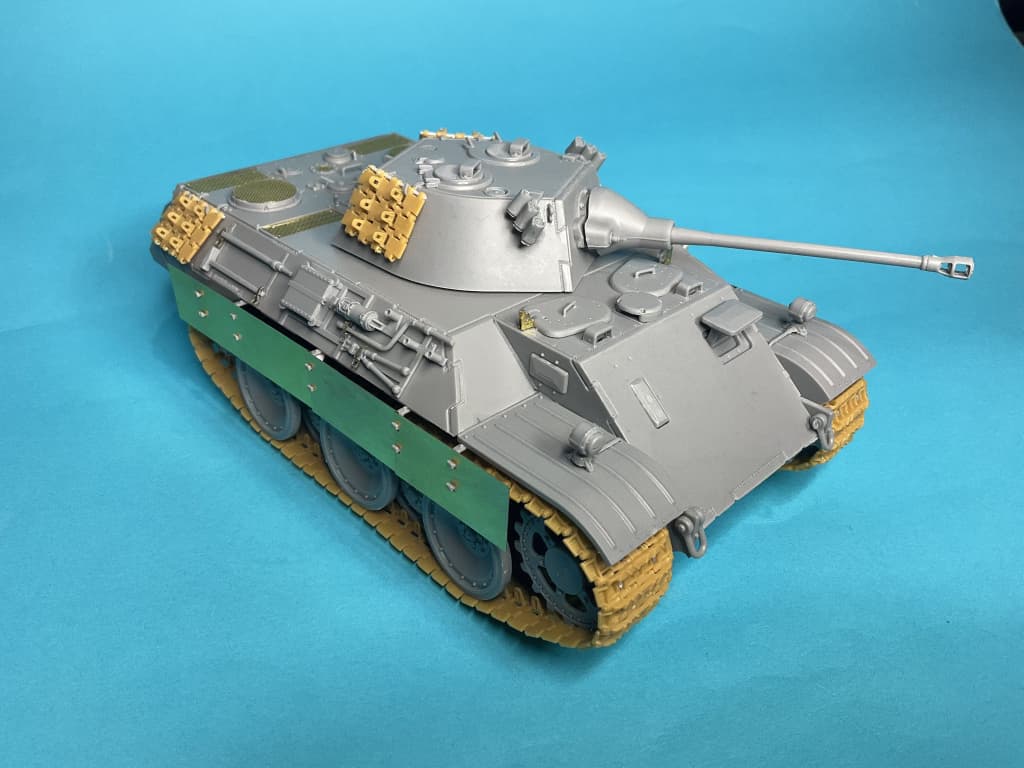
Chibi Panther is now wearing tracks.
Panther drive sprockets have 17 teeth. One review notes that the drive sprockets on this model have 18 instead of 17 teeth. That observation is correct. To compensate for the extra tooth, individual track links that come with this kit are slightly shorter than normal Panther tracks. They fit the 18 tooth sprockets just fine.
Plastic used for the main model is rather hard. Thankfully, plastic used for the tracks is much softer. As a result, despite four attachment points per link, they clean up rather quickly. There is a knock out pin mark in the center of every inner face, mostly raised or very shallow. Guide horns have correct cutouts and fit the tracks quite well. Guide horns also have different texture on each side so make sure to position the smooth faces inward.
Instructions call for 66 links per run. My model required 67 links per run and even then, they are tight. Idler wheel arms offer no play by design so this may come back to bite me after painting everything. Using 67 links per run left me with 10 spare links.
The plastic barrel is okay. I tried not to sand any flat spots or divots into it. The muzzle break is also okay.
The model comes with brass screens for the engine deck which is great. What you see now is very close to the finished product. While the tracks dry over the next day or two, I will pull off the turret and jazz it up.
The model includes enough parts to build the suspension in two configurations with different road wheel arrangements. My model features the Outie-Innie-Outie-Innie-Outie configuration with the smaller idler wheel. The alternative is an Innie-Outie-Innie-Outie-Innie configiration with a larger idler wheel. The VK16.02 pictured on the box top uses the latter configuration. The VK16.02 in World of Tanks also uses the latter configuration. Given these two options, there is a good reason to build this model a second time and I probably will because chibi Panther is just that awesome.
Unfortunately, my small reference library does not include any information on VK16.02 so I cannot offer any comments on model accuracy. According to the Wikipedia article on VK16.02, two versions were contemplated, a light version and a heavy version. Hitler favored the latter but the Heer wanted the former. Both versions were dropped after introduction of the Panther. Panzer Tracts 20-2 covers the vehicle.
Oh. I did not know Amusing Hobby made a much better model of the same vehicle. Well crud. That really is disappointing. I guess mine can go in the trash. It probably would have ended up there anyway. ![]()
That was not my point Doug. It was interesting to see the different approach by two companies. This hull was never produced so who knows what it would have ended up like in production.
Your build looks great and the kit itself looks quite good. I think you only have to give it a good paint job and it will be fantastic.
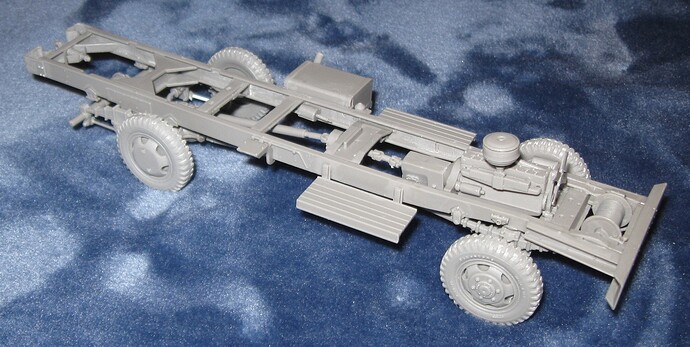
For the last two days, I worked on an ICM Studebaker U56 U6 for the Winter Wonderland campaign.
Assembly is very complicated. Fit is hit and miss. Plastic is very soft. Painting will be difficult. Very worried major assemblies will not mate up correctly. Confidence in ability to complete is low.
Doug, what’s built looks good! I hope the rest of the build goes well.
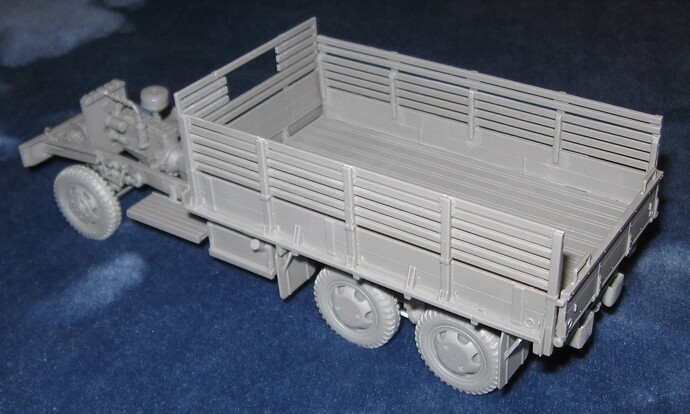
This is two more days of work on an ICM Studebaker U56 U6 for the Winter Wonderland campaign.
The front of the vehicle is out of focus because the camera was too close.
To my pleasant surprise, fit between bed and frame is very good. The bed ends up stiffening the rather fragile frame.
One of the rear wheels floats because my building skill was not up to the challenge.
Fit between bed and bed walls is somewhat wonky. The seam inside the bed where those two parts meet is clearly imperfect. Some very thin putty fed into the joint may fix that.
Plastic used for this model is soft and fragile. To date, half a dozen parts have broken or shattered during clean up.
Having no experience with this kind of model, the current plan is to paint wheels, frame, bed, cab front, cab back, seats, and hood as separate parts, then mate them up.
Plastic used for this model turns to mush when flooded with glue. It is best to position a few parts true to one another, glue them, then leave them to dry. When trying to go fast, whole assemblies will fall apart.
ICM Studebaker U56 U4
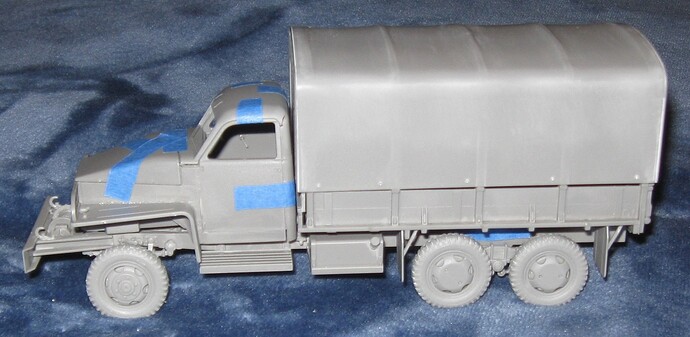
Many fit problems plague the covered top and associated hoops. Once assembled, the covered top does not align with the bed. I am not sure how to fix this.
Fit of cab parts is hit and miss. Assembled cab does not mate to the frame. I am not sure what went wrong or how to fix it.
The mold release agent used for this model is very persistent. Two baths using Dawn dish washing liquid failed to remove all of it. In some cases, a tooth brush would not remove the stuff. It had to be scraped away with a knife.
This model requires a lot of patience and very careful assembly. Three major problems remain unresolved.
Hobby Boss VK1602 Leopard (Chibi Panther):
I decided to continue with Chibi Panther. Over the last week, the model received various upgrades including smoke candle launchers and spare tracks. It is currently in another soap bath to remove mold release and sanding residue.
ICM Studebaker U56 U4:
Construction is done. All the fit problems are resolved. It just received a final soap bath.
Dragon Sherman IC Firefly:
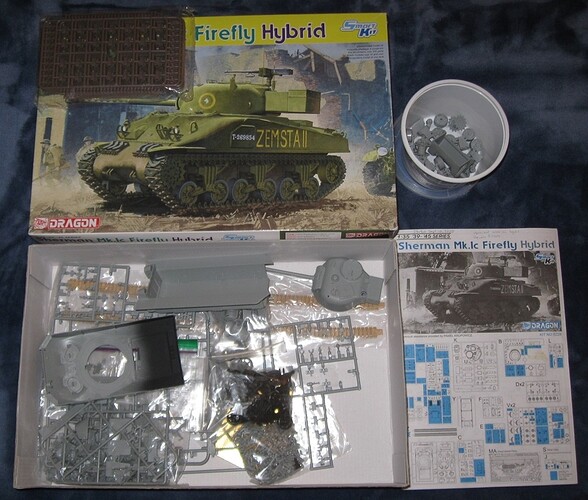
My desk currently looks like a tank factory assembly line and this will be the next project. According to my notes, this Sherman IC Firefly was started in September of 2020, making it one of many aborted attempts to return to model building. While doing research on Sherman VC Fireflies for the D-Day campaign, I remembered this model and pulled it out of storage.
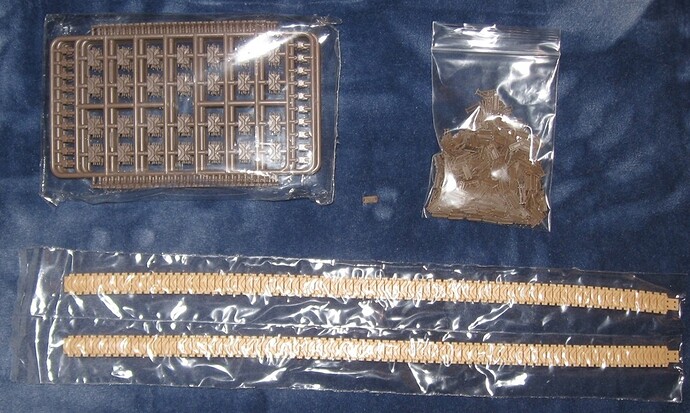
The model comes with Dragon Styrene soft vinyl tracks. At some point, replacement tracks were purchased, shown on the upper left. Three years later, a second set of replacement tracks were purchased, appearing on the upper right.
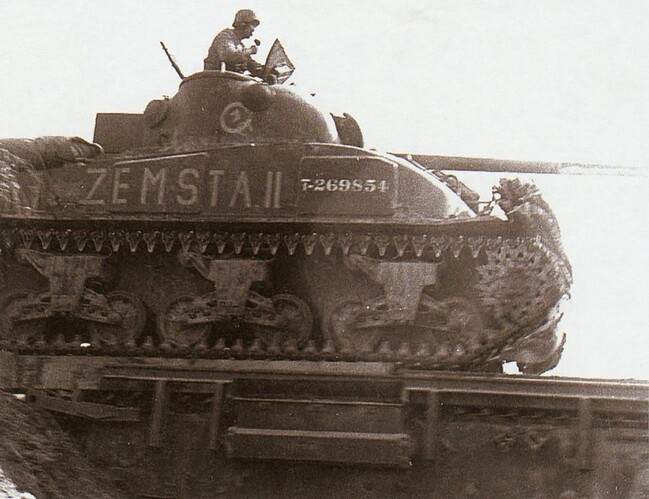
To my knowledge, this is the only extant picture of ZEMSTA II. “Zemsta” means “Revenge” in Polish. The photo was taken at an angle making it difficult to determine the track type. Another Sherman IC Firefly in the same unit, “Zyrafa” or “Giraffe”, clearly wears metal cleat tracks resembling the ones on the upper right of the track photo.
Anyway, with a Sturmpanzer IV, Chibi Panther, and Studebaker all heading into paint at the same time, a supreme act of self torture, I need something to fiddle with in the evenings when it is too cold to paint.
In truth, I am just avoiding painting because I suck at it.
