Damraska's Fictional Projects

Hey, hey.

Last year, upon returning to model building after a decade long hiatus, I made a thread in the Armorama forums to write about my military figure and vehicle projects. The format works well for me because I tend to divide my time between many projects. Instead of focusing on a specific model, I can focus on experiments and techniques.

I also enjoy alien creature sculpting, card models, fantasy figure painting, and hard science fiction. Having recently revived some old projects in those areas, and since such things are not appropriate for a military models forum, I decided to discuss them here. In this thread I will write about my journey to become a better figure painter, science fiction model designer, and sculptor of living things. :slightly_smiling_face:

One of my core traits is a strong desire to see, try, and understand many things. Two unfortunate consequences of such broad interest is a tendency to start many projects without completing previous ones and never mastering anything. My closet is full of old, half completed figures, models, and sculptures. :upside_down_face: My attempts to learn are too scattered. Therefore, my very first goal for this thread is to complete old projects. A few days ago, I went through my storage boxes and identified 5 fictional figure projects in need of completion. The journey will start with them.

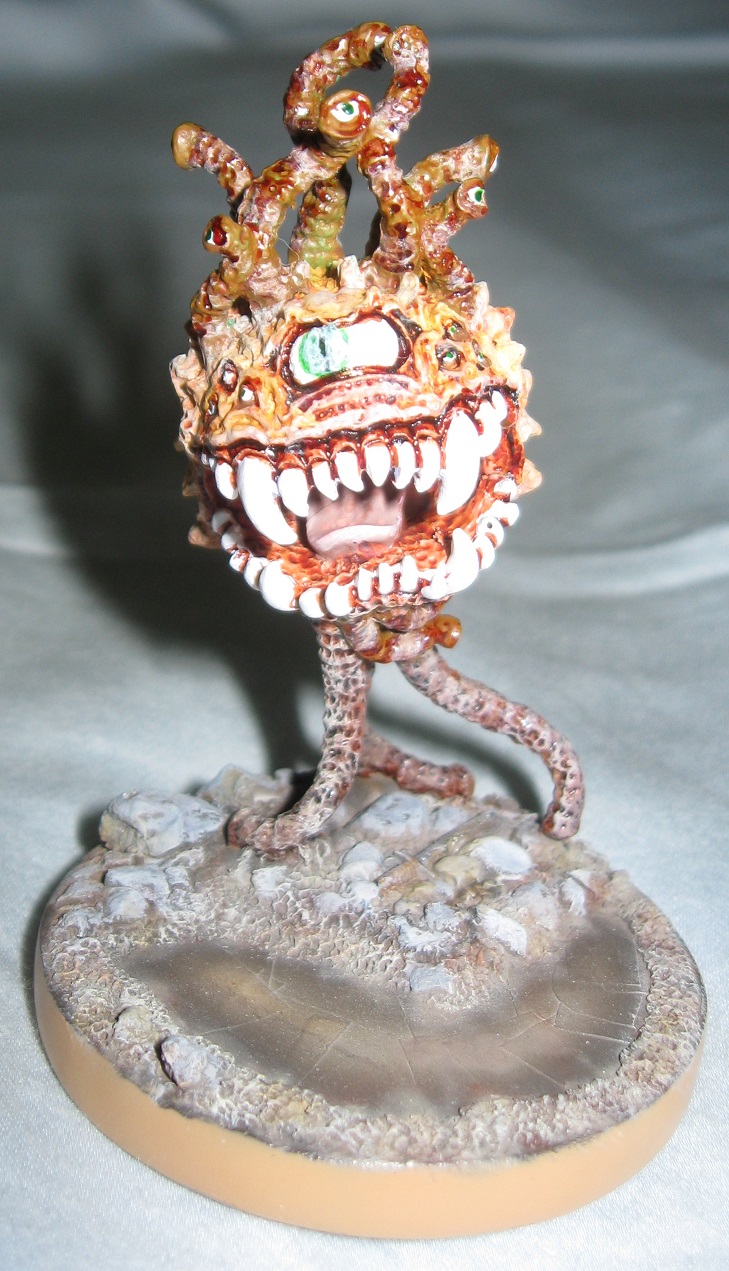
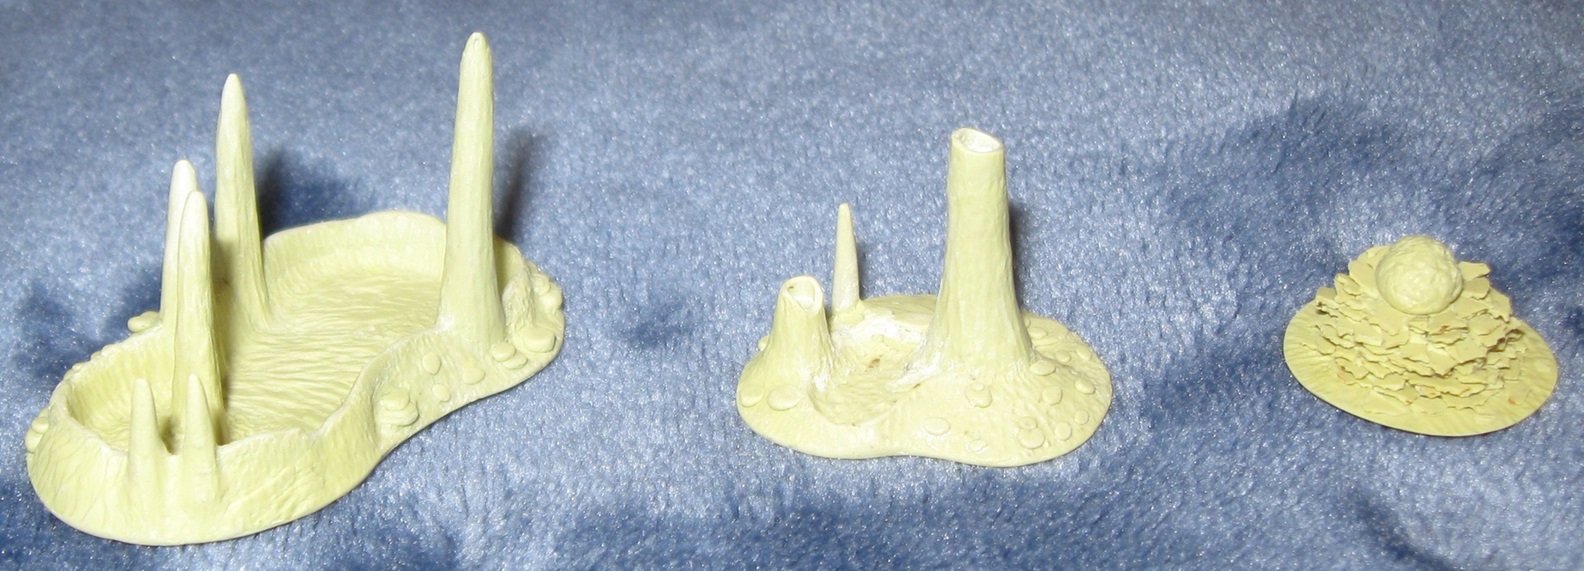
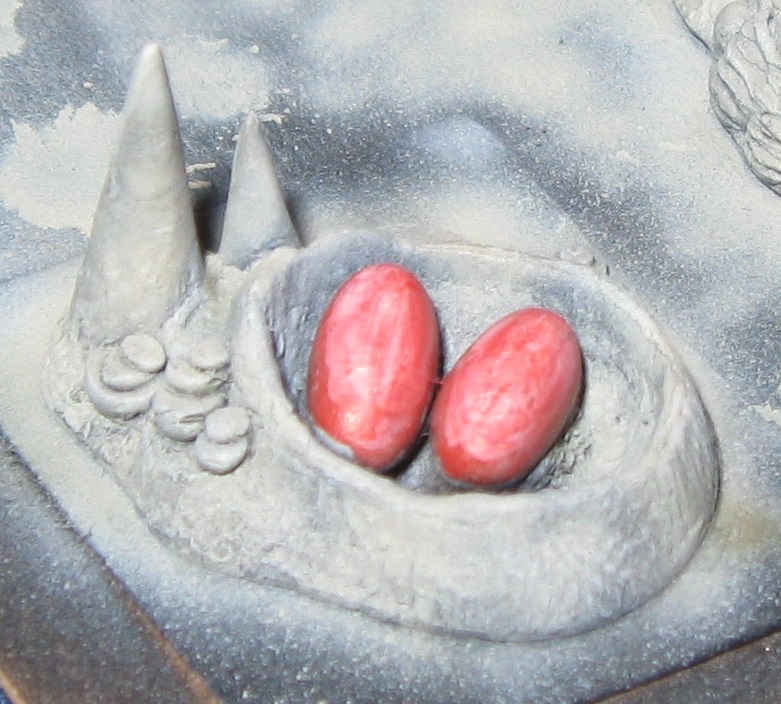
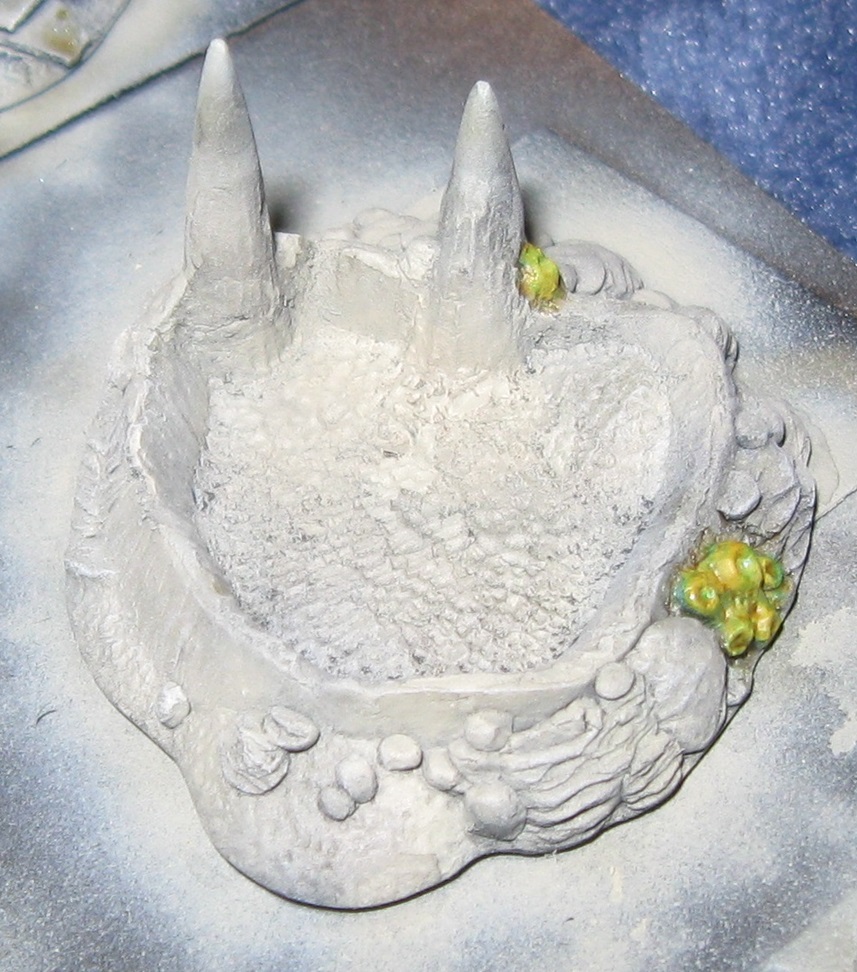
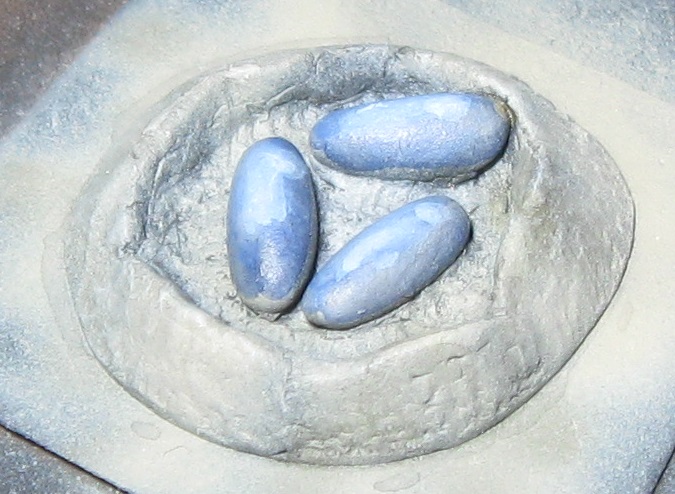
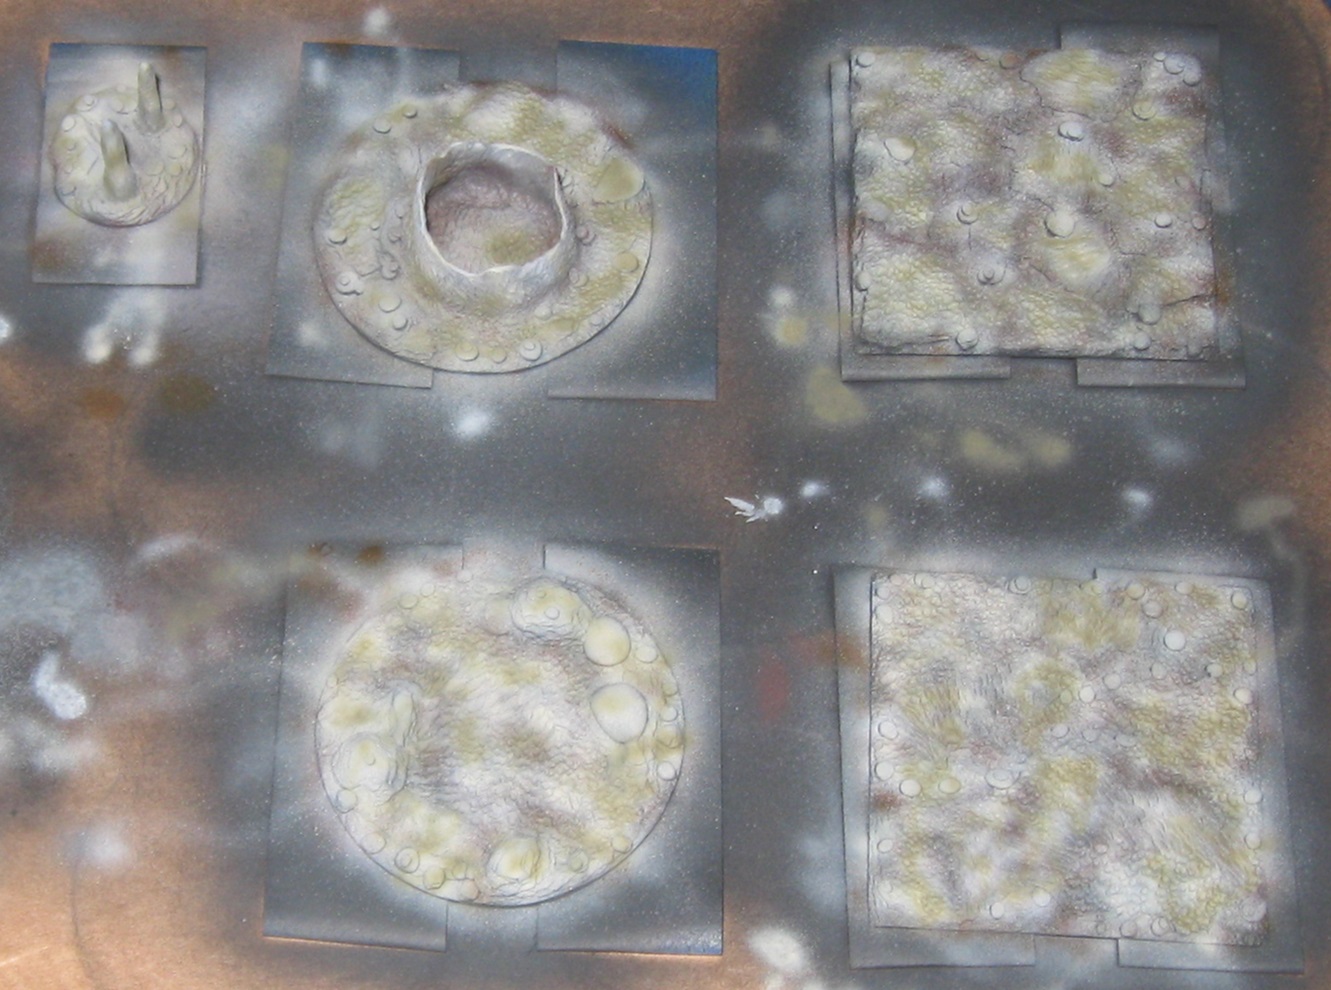
This figure, a Reaper Miniatures Eye Beast, was started and based around 13 years ago. Some very preliminary painting was done using Reaper acrylics. About 6 weeks ago, after watching a number of figure painting videos, I pulled it out of storage and used it to experiment with Vallejo acrylic paints. The results are encouraging!

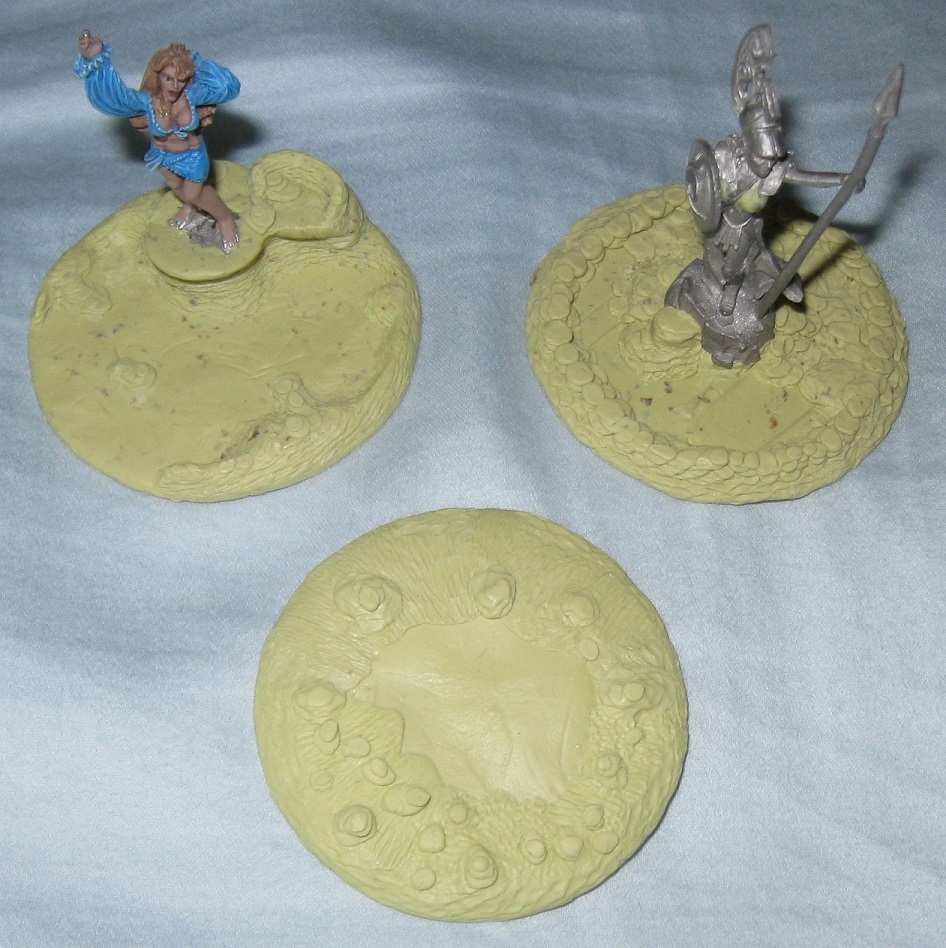
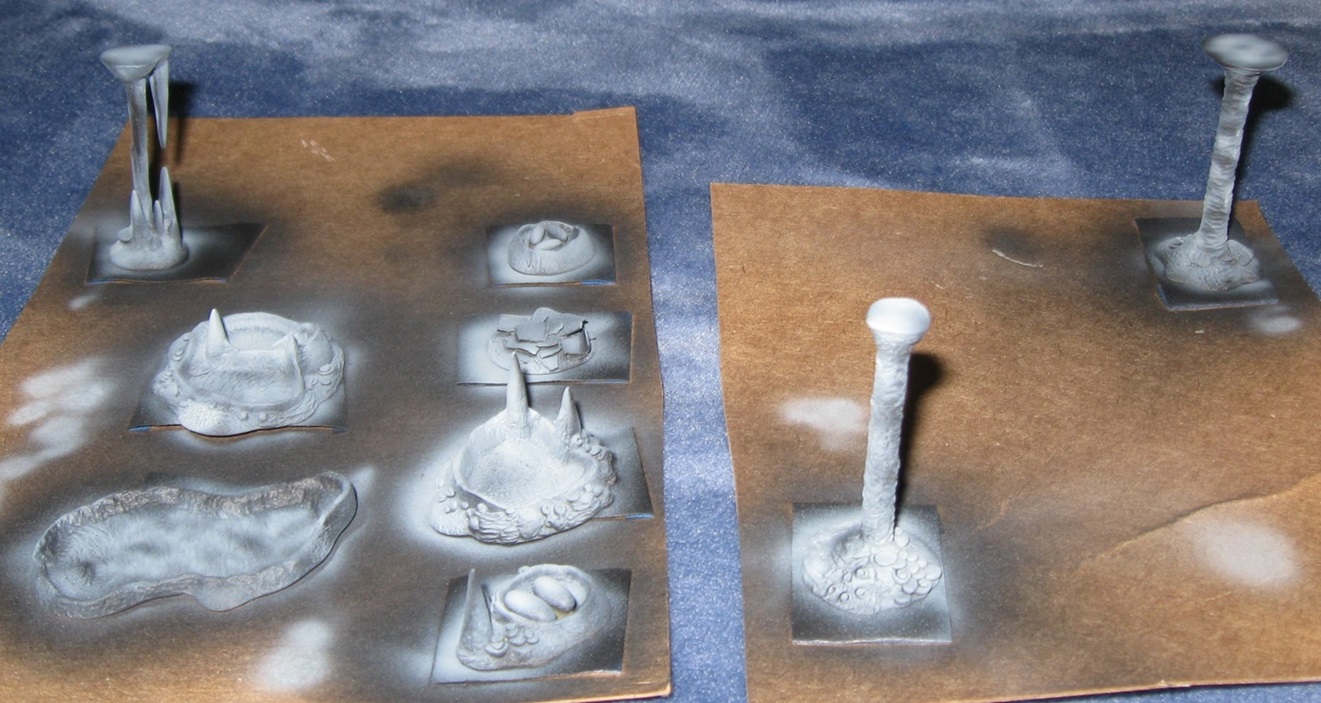
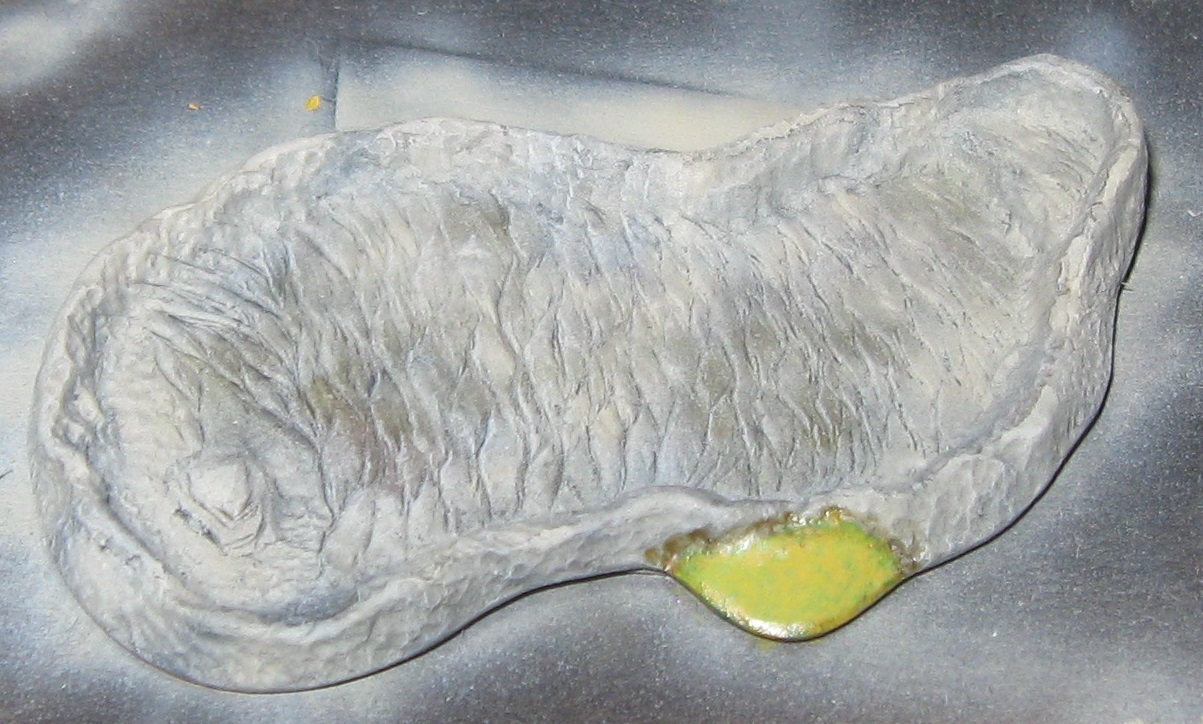
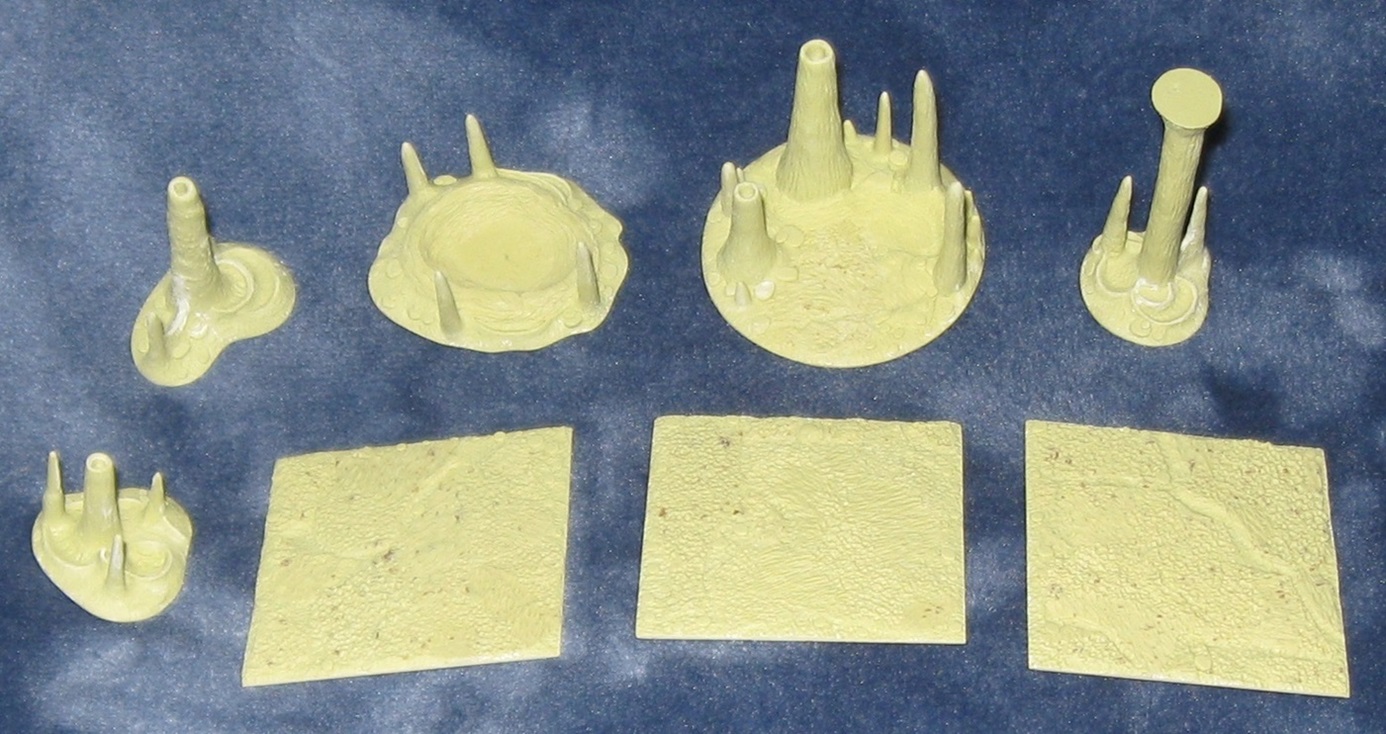
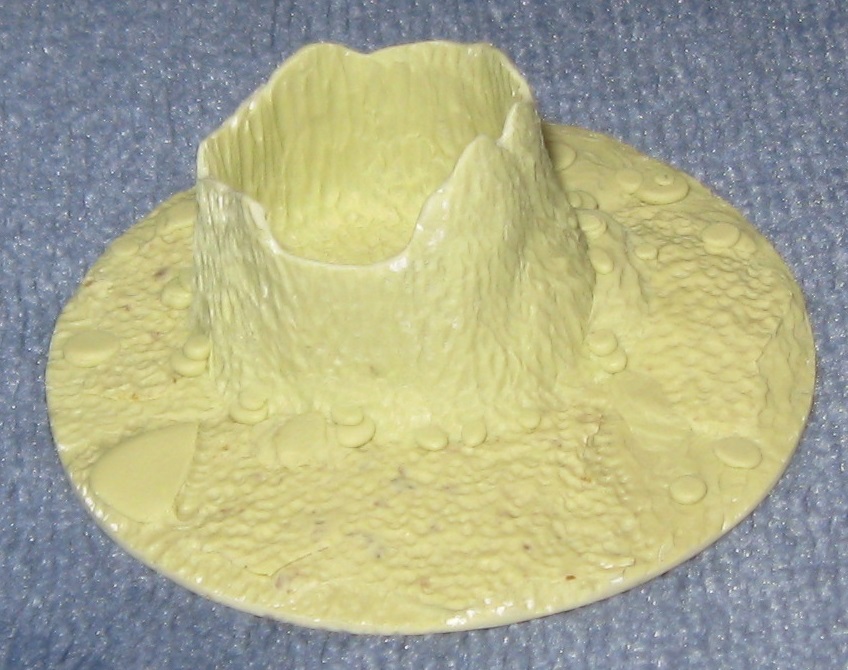
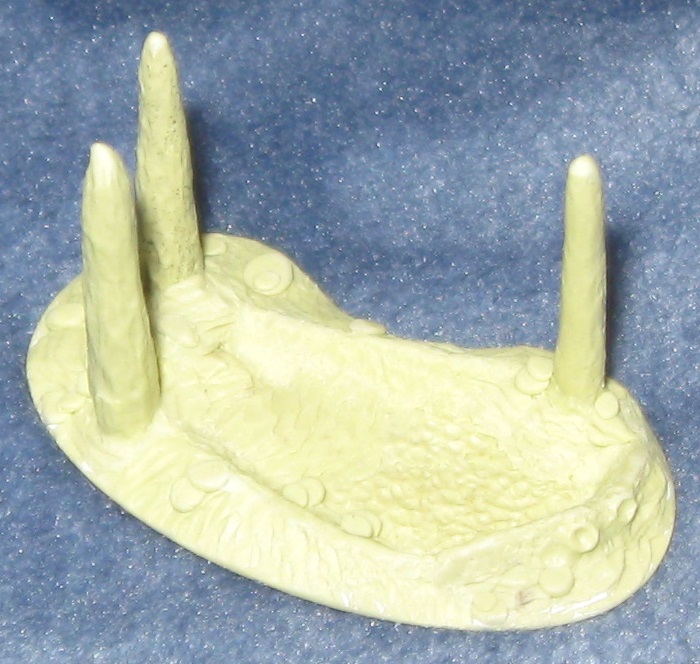
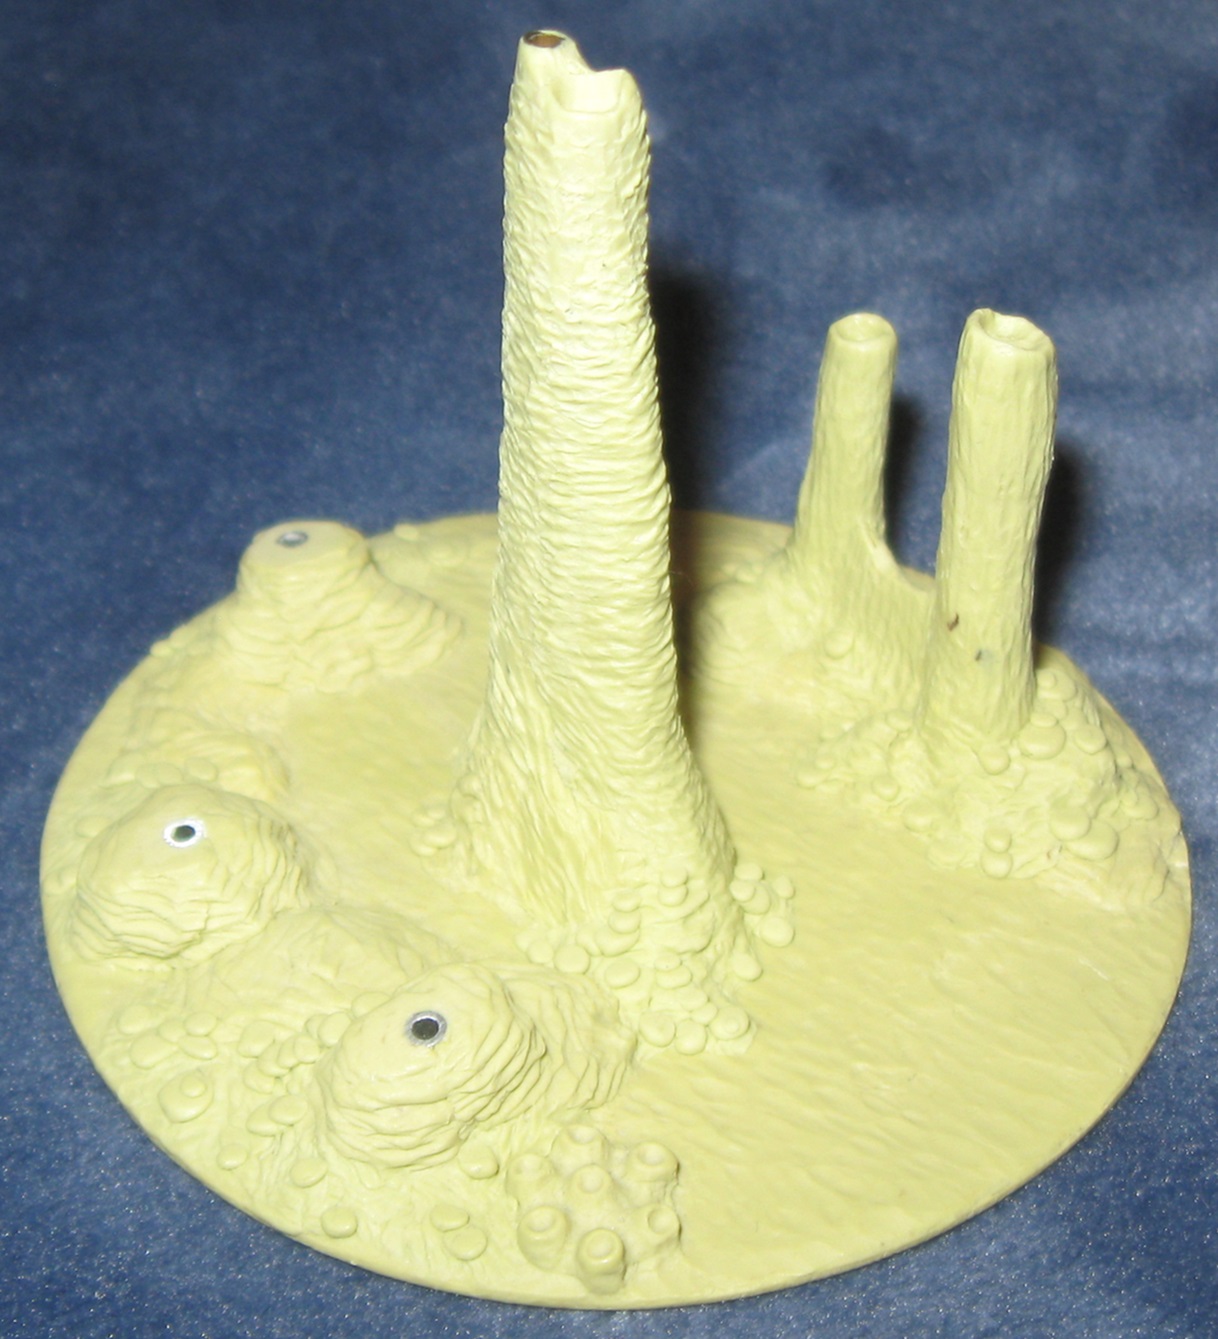
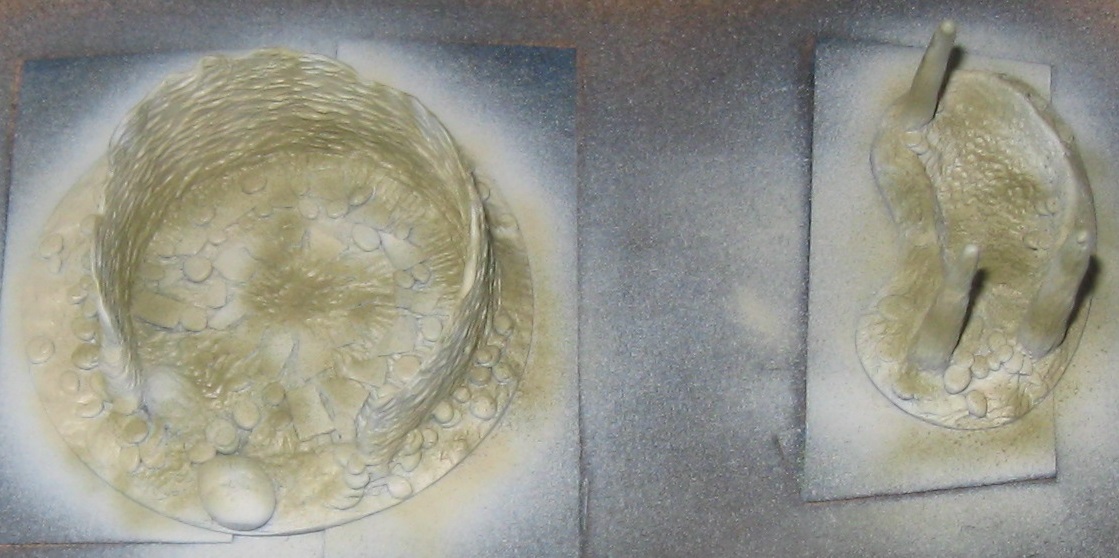
The base consists of a two inch diameter circle of clear acrylic. Part of the top surface was masked with Tamiya Tape. The miniature was then attached to the disk using Milliput. More Milliput was used to add a ring around the outer edge and sculpt terrain around the masked pool surface. The next step involves painting the bottom of the acrylic disk to resemble the bottom of a cave pool.

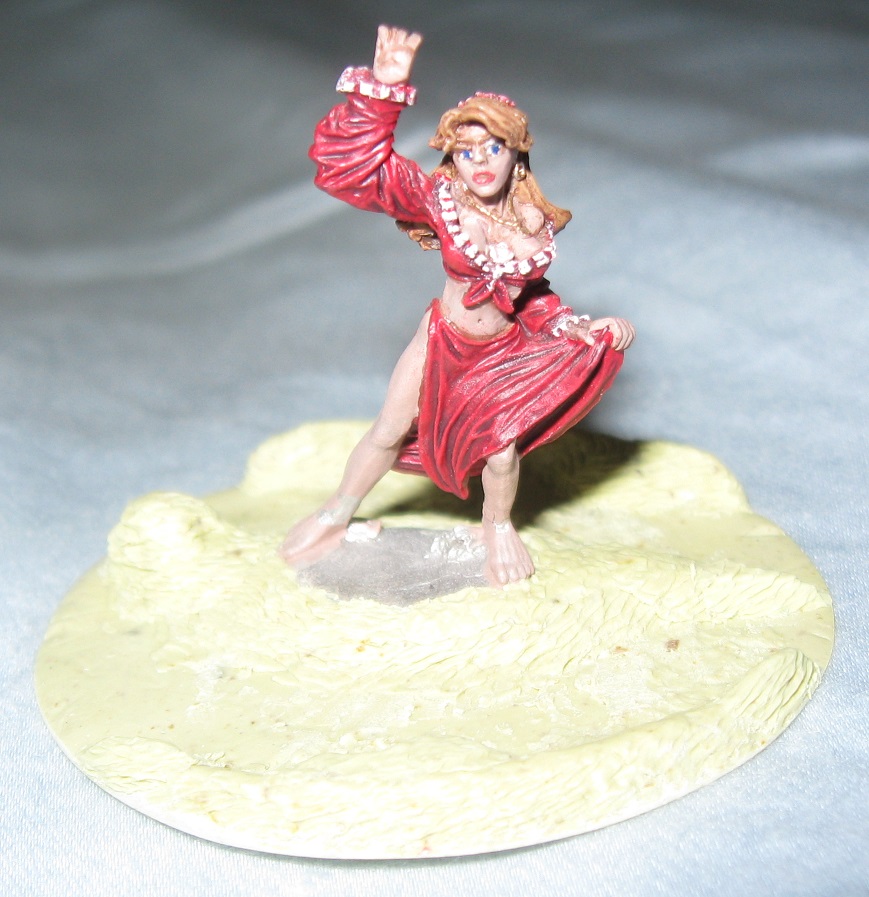
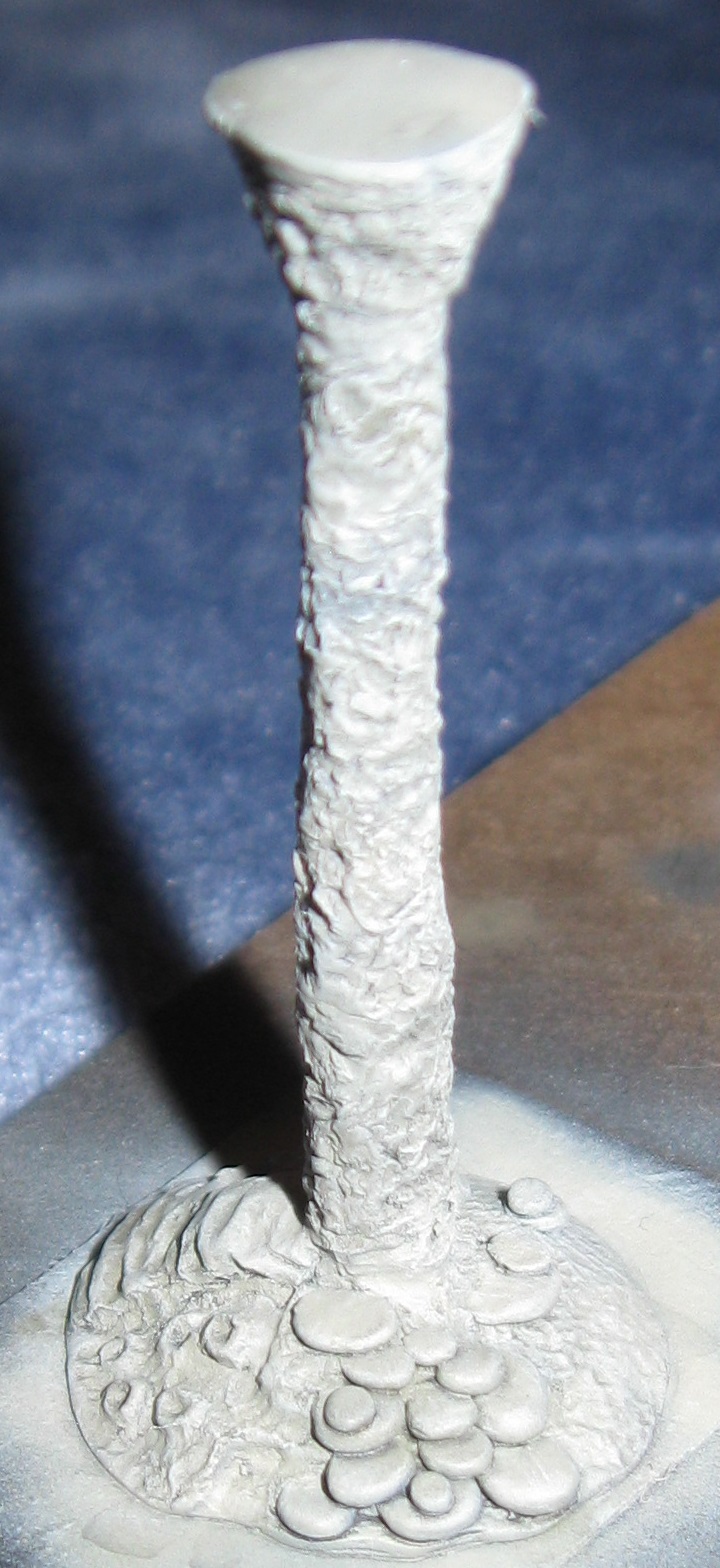
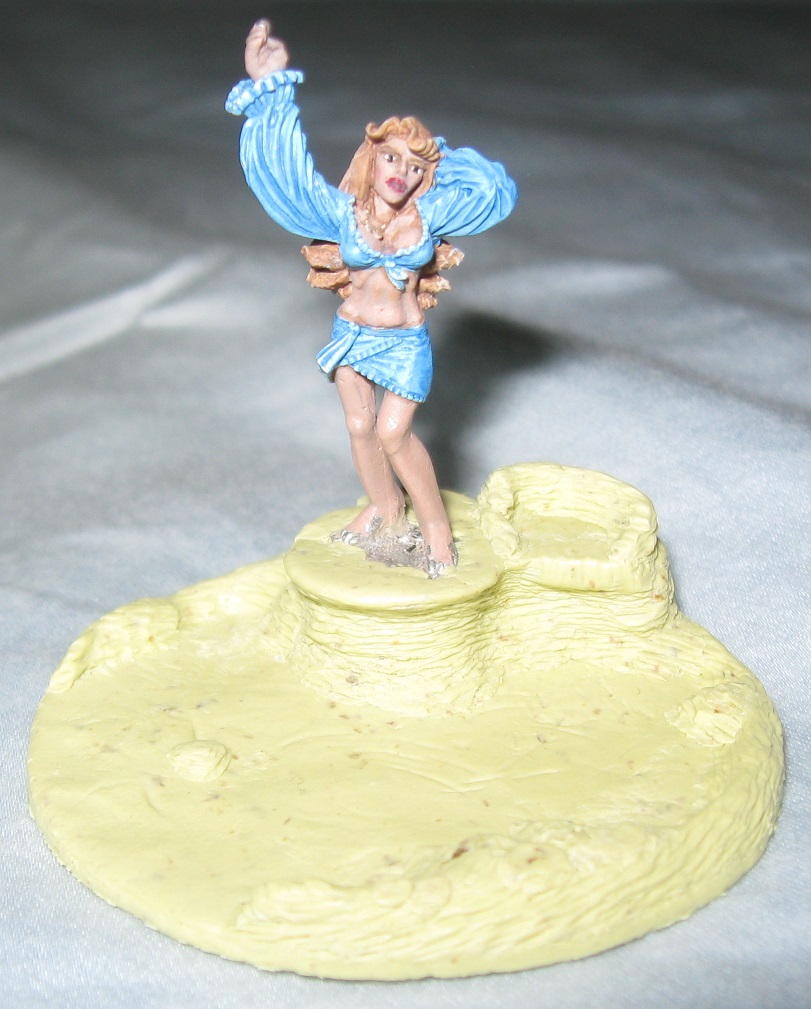
This figure was painted to the current state about 13 years ago, probably with Reaper acrylics. My hope is to significantly improve her.

A few days ago, I decided to base all future figures using two inch disks of Milliput with this figure as my first experiment. Creating a perfect two inch diameter disk of Milliput proved difficult. Eventually, I cut a two inch diameter disk of plastic from the top of a cottage cheese container and used that as the basis for the Milliput. After the Milliput dries, the plastic slice peels off easily, leaving a perfect, two inch disk. I was quite pleased with myself for figuring out that little trick.

After making the disk, the figure was attached using more Milliput. A few weeks ago, another modeler produced a wonderful diorama of a beached Vietnam patrol boat. I decided to use this figure to try the same sort of thing on a much smaller scale. The area around the woman was sculpted to represent a shore upon which she is dancing. About an hour later, I decided she is actually dancing on a little island in a small stream. Later still, I decided the woman is a Rhein maid, a personification of the Rhein River from ancient Germanic religion.

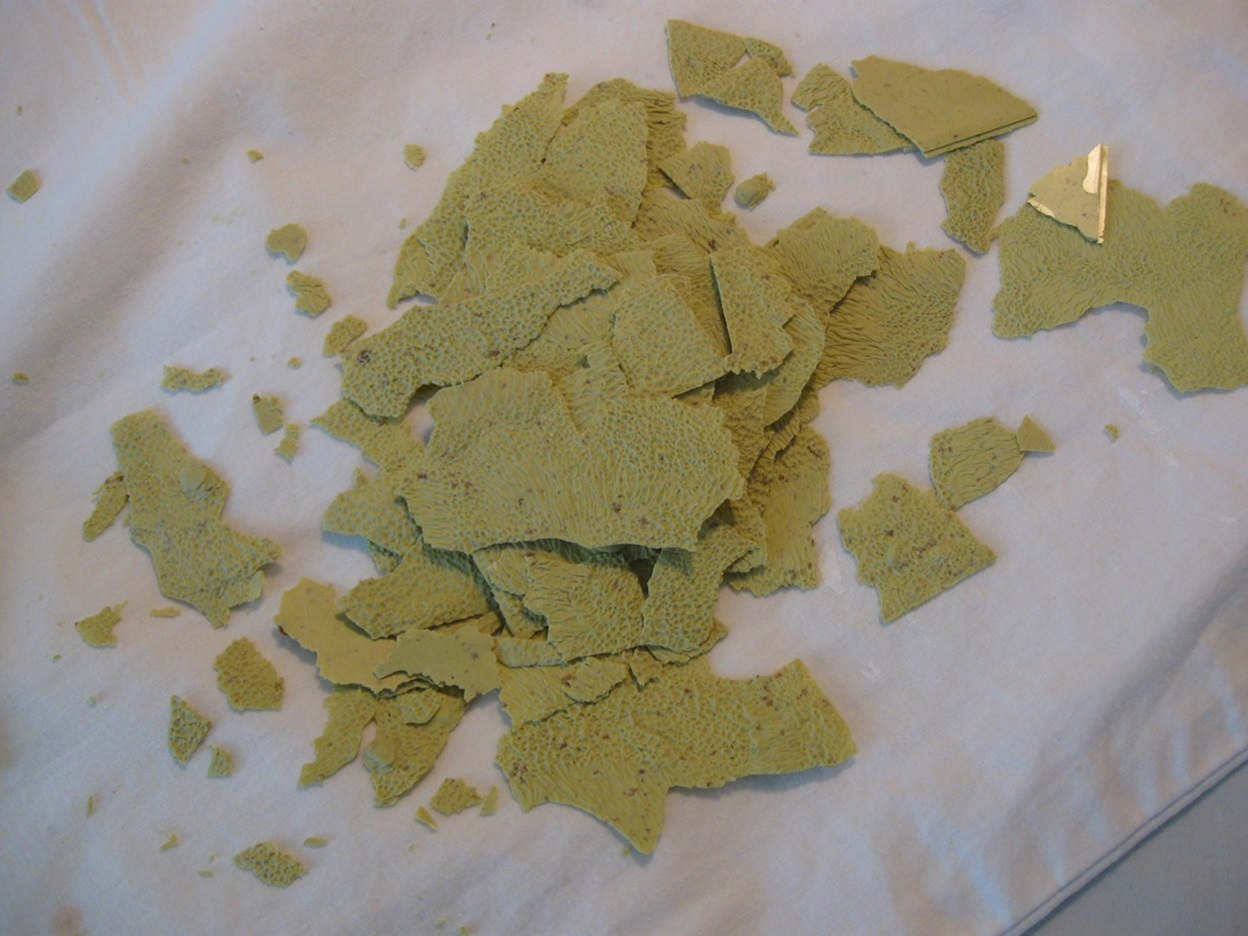
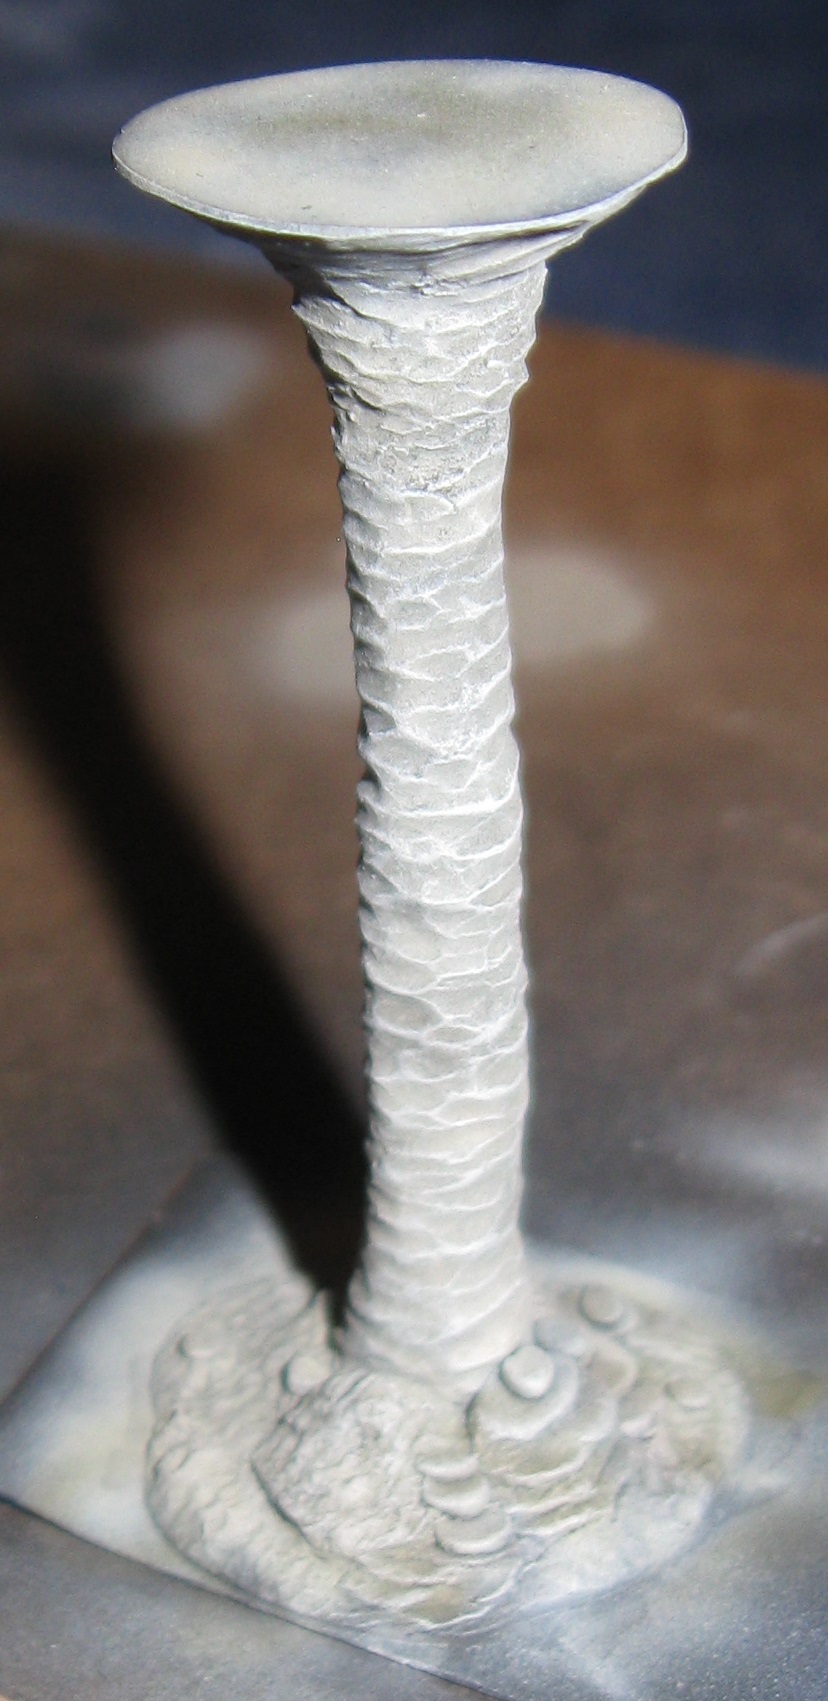
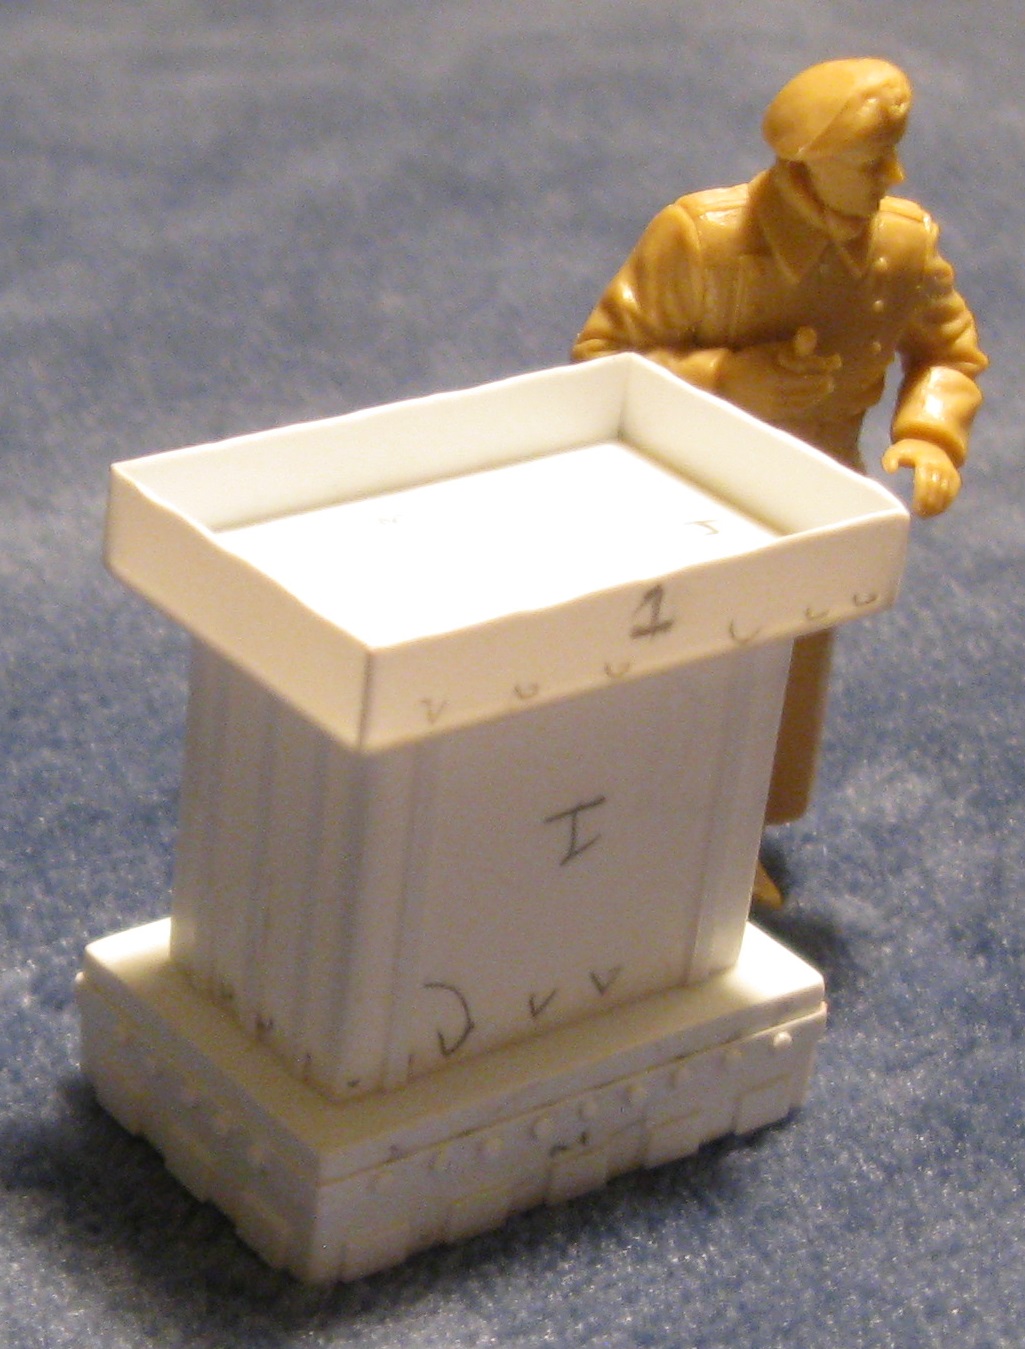
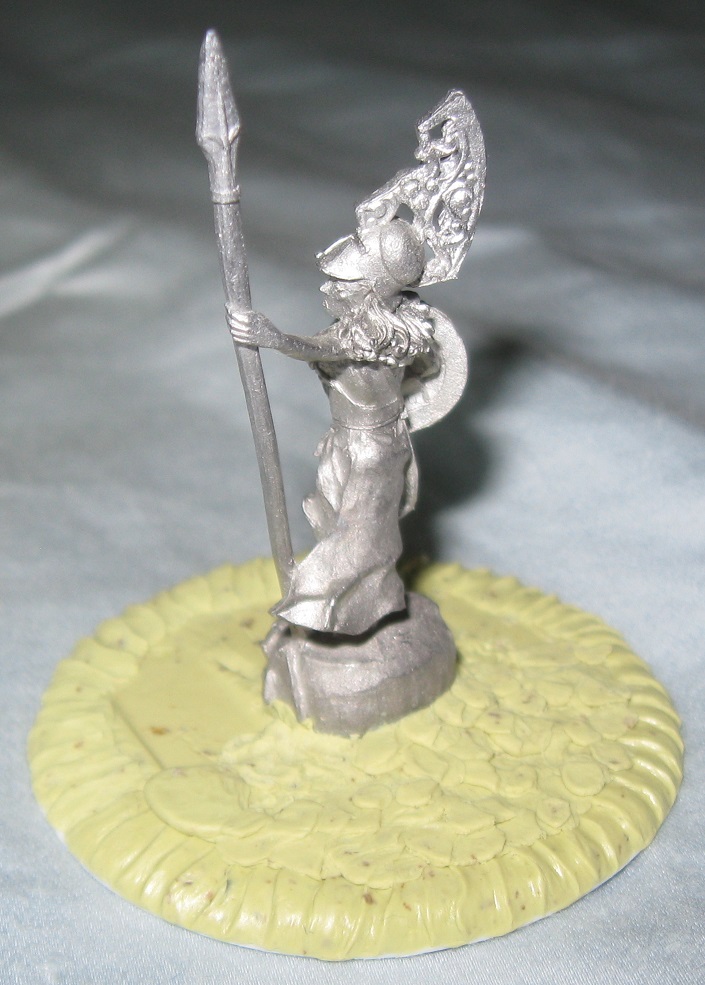
This figure was also painted and based about 13 years ago. The base, a standard, cheap, ugly square decorated with white putty and sand, was peeled and cut away. It then occurred to me to cut away most of the metal base as well.

With the figure free of the ugly square, now standing on a little platform of metal, I secured her to another two inch disk of Milliput. This Rhein maid is standing on a rock outcropping over looking the river. A small spring to her left feeds water into the river, forming a small water fall. This base still needs some work. My hope is to significantly improve the painting quality of this figure and perhaps give her a much longer skirt.

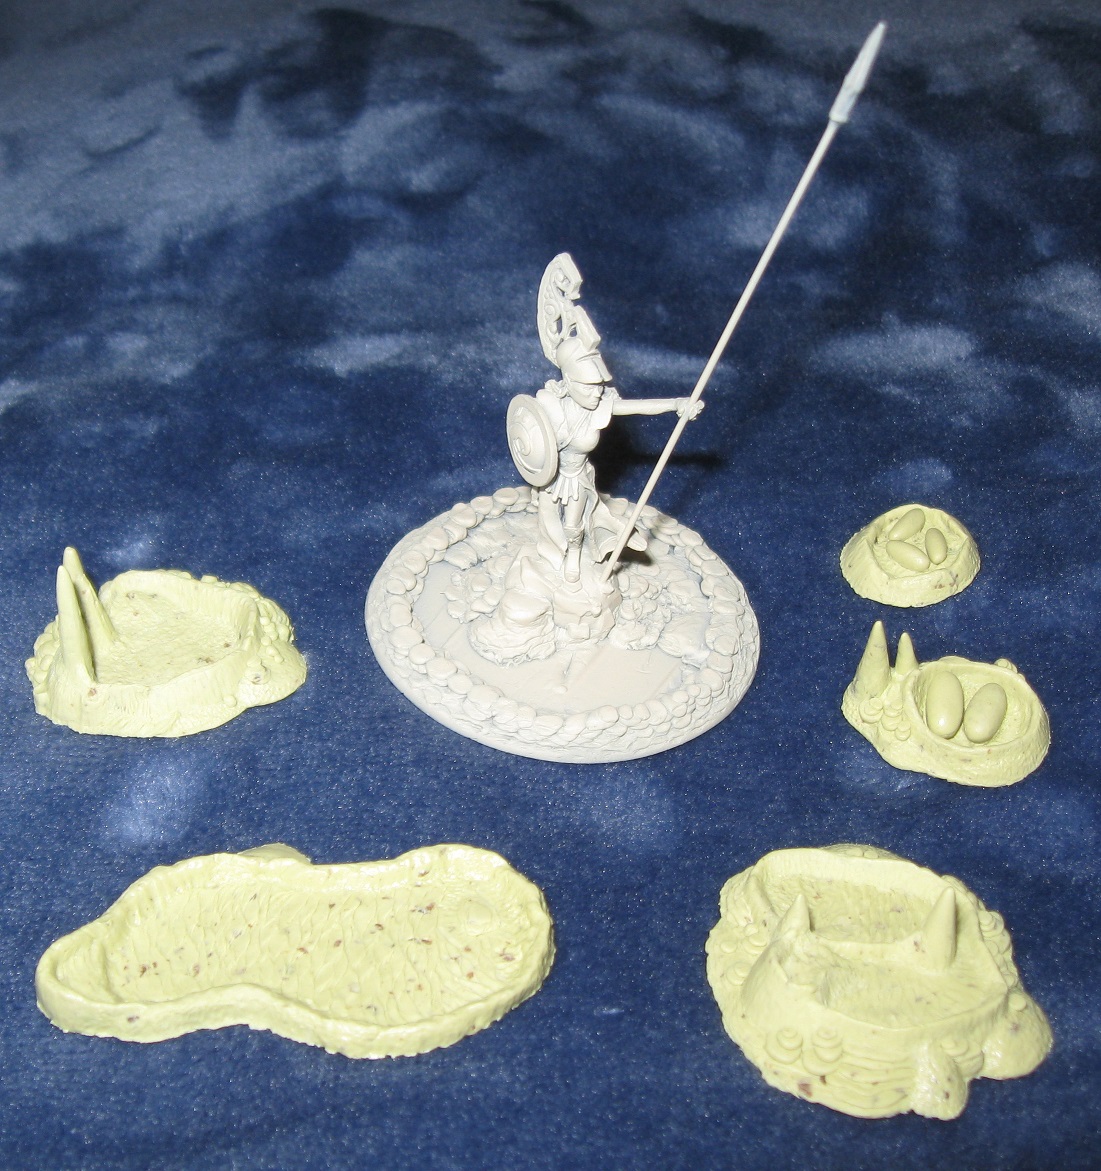
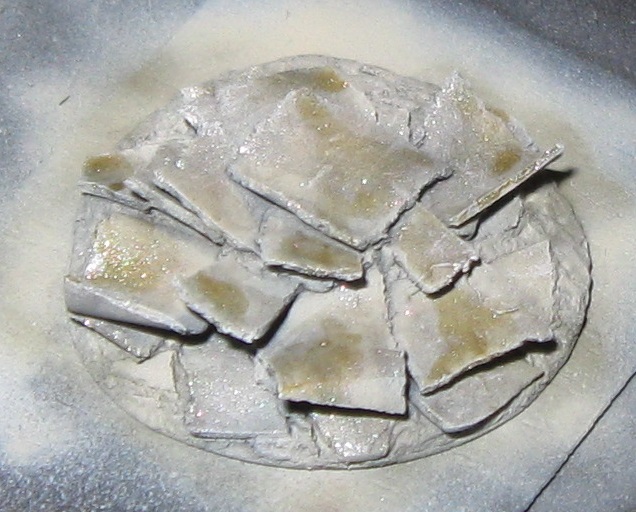
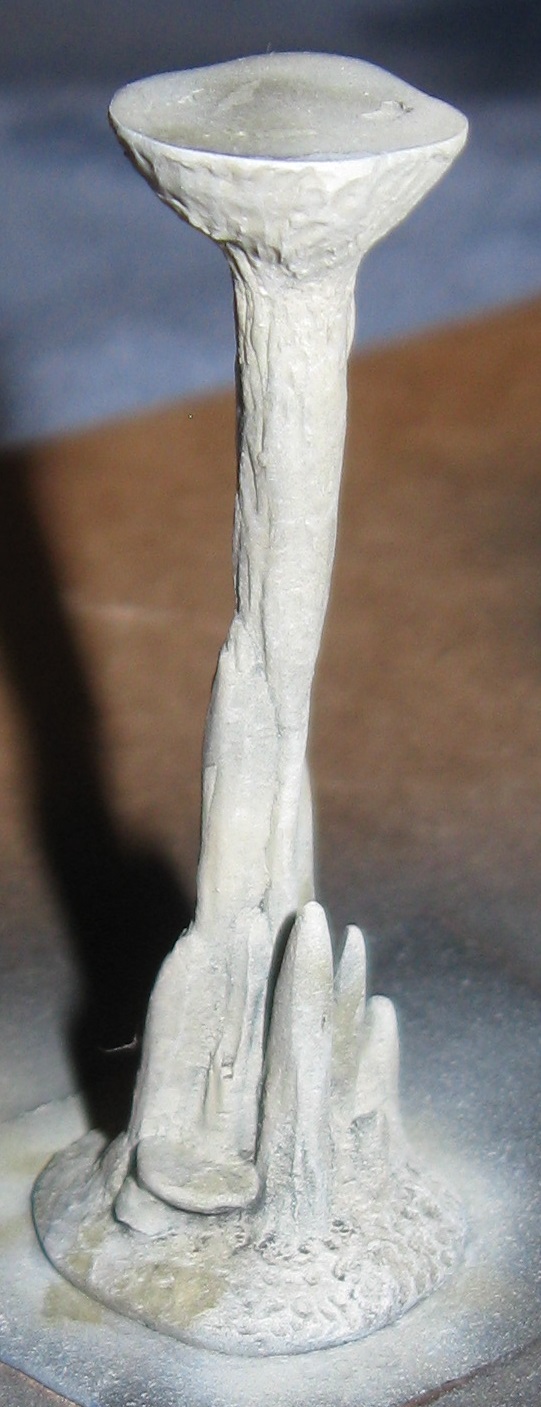
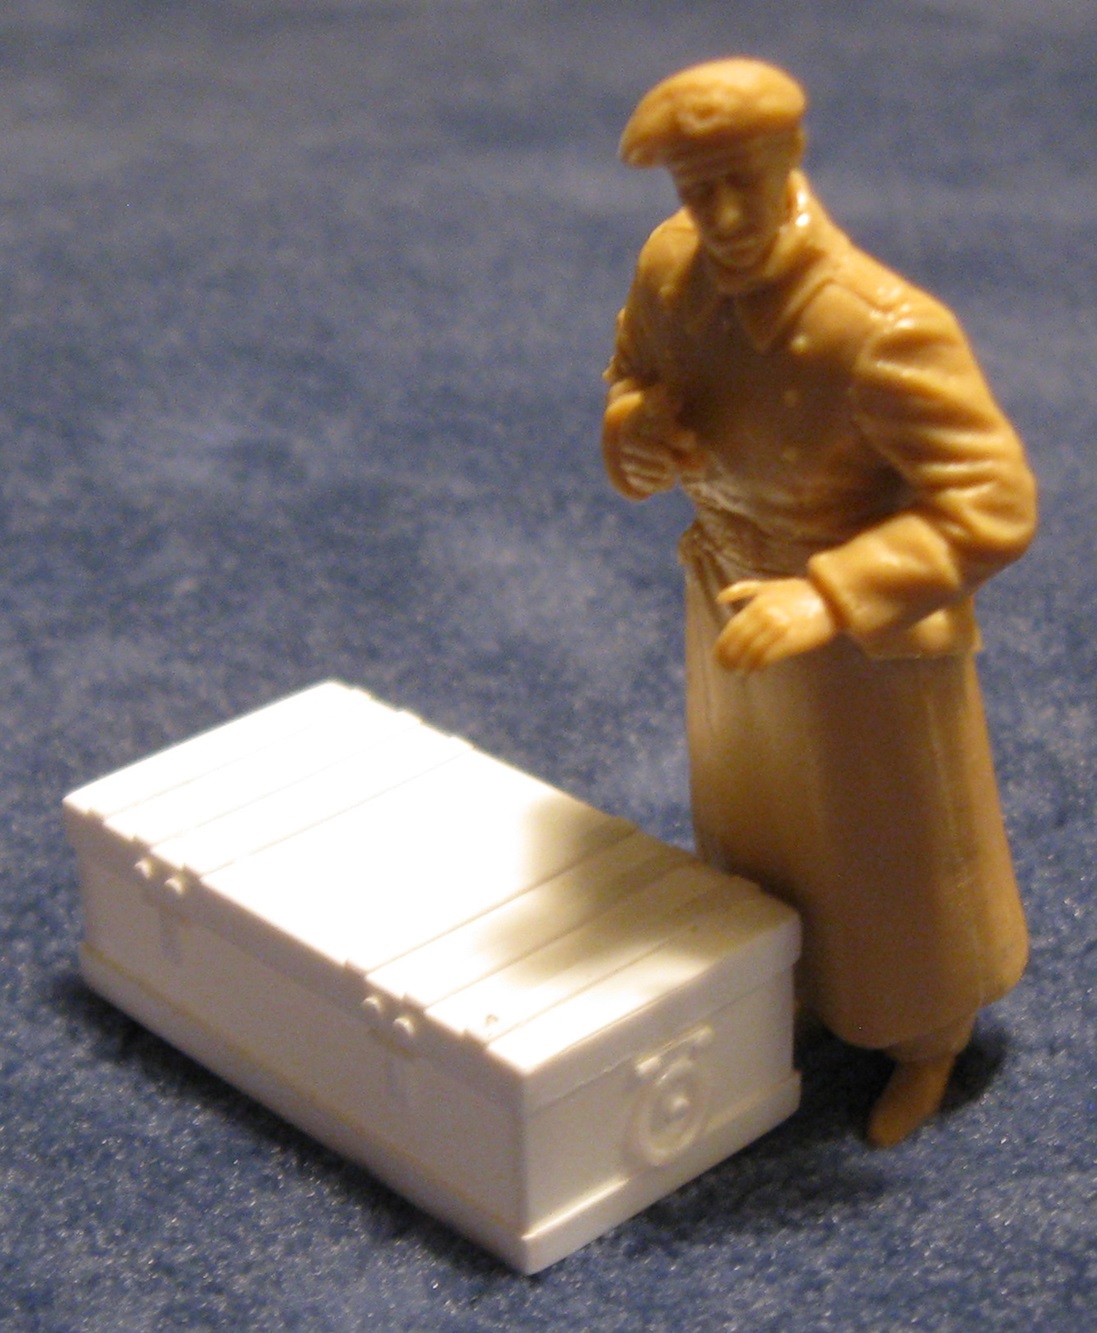
This figure was cleaned up a very long time ago, then stuck in a drawer.

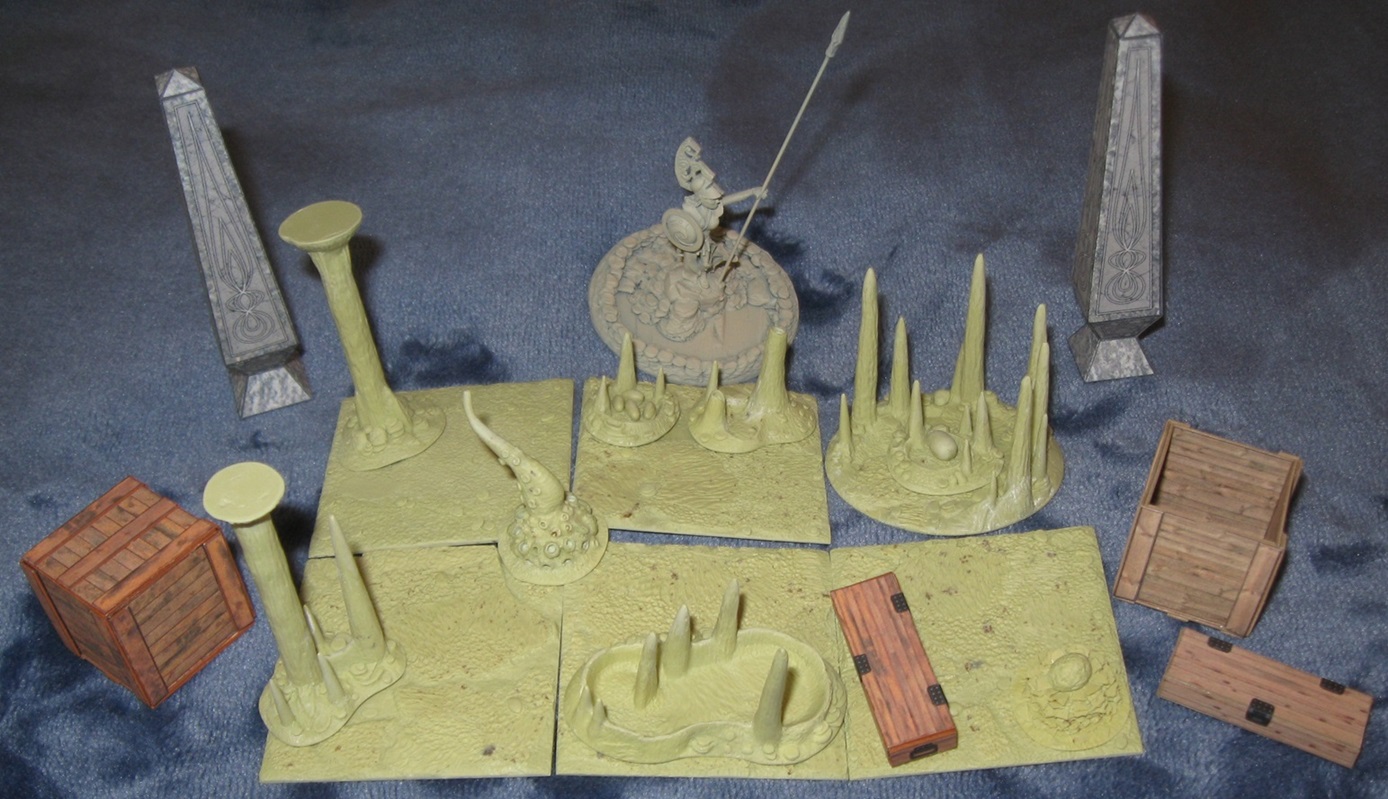
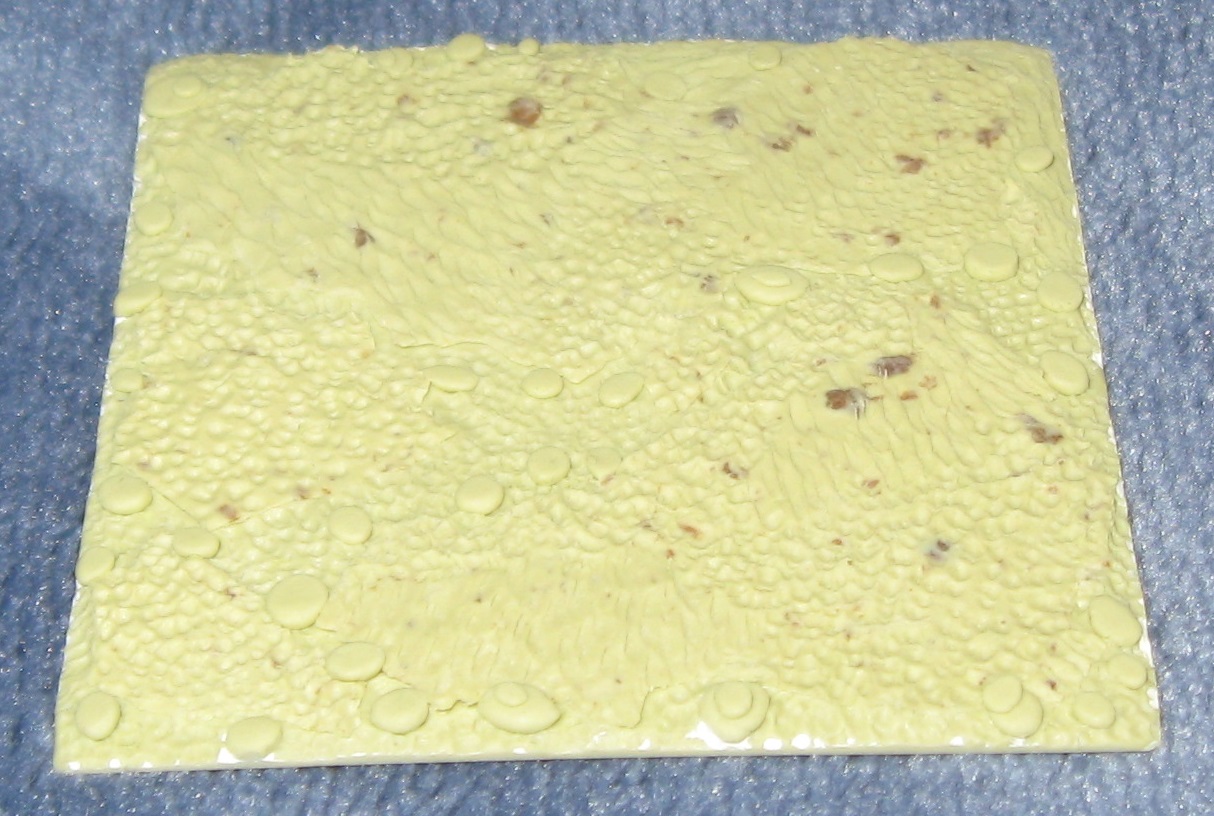
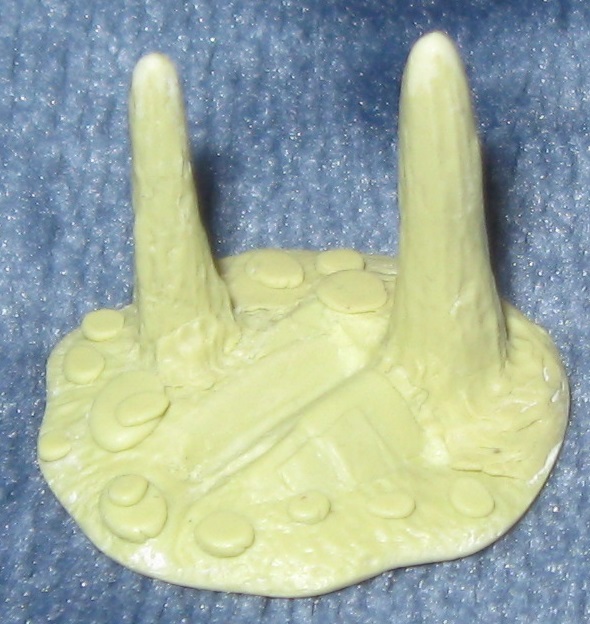
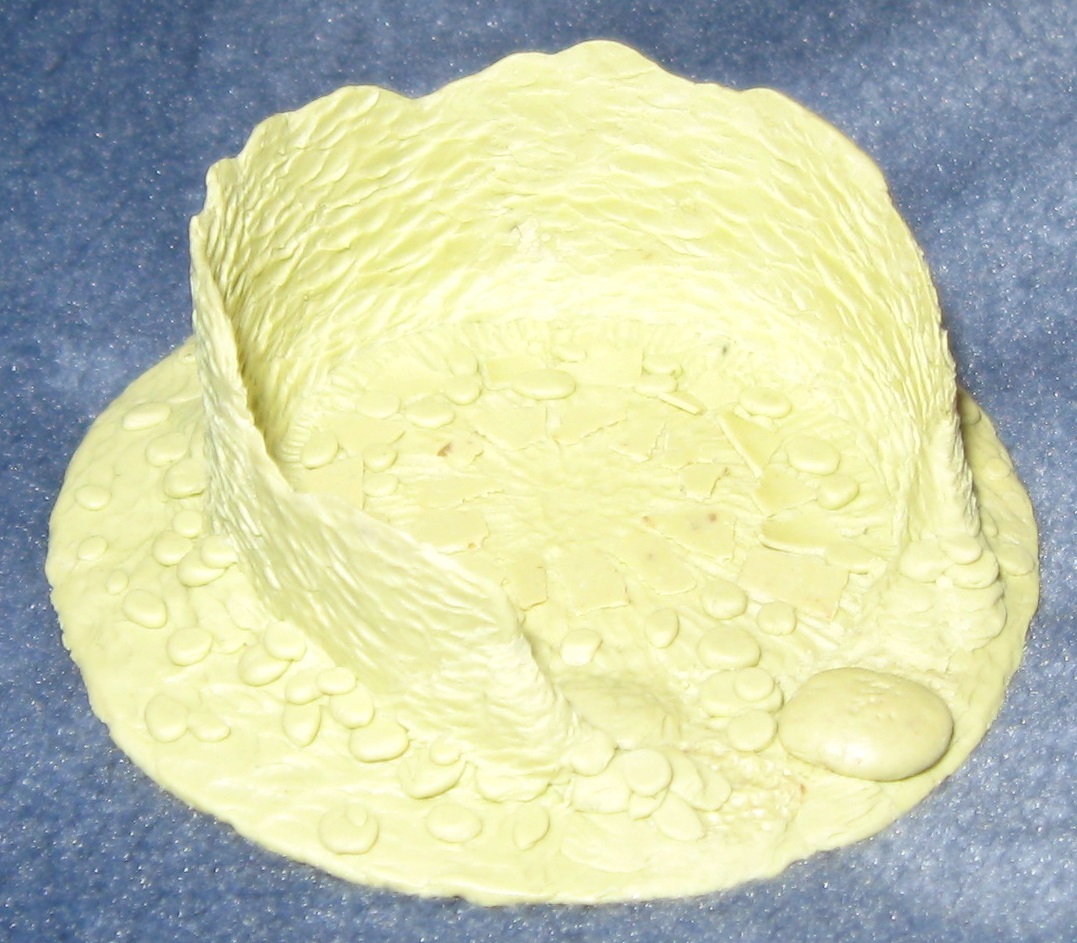
Once again, the figure was attached to a two inch disk of Milliput. A scale-like pattern was added to the edge of the disk, then broken shale sculpted to fill the interior. After a couple hours of work, I changed my original plan and decided to incorporate another pool of water. It will require a few more hours of sculpting to finish this base. Her spear also needs replacement.

Two challenges now await–mastery of face painting and the wet blending painting technique. The Eye Beast was a decent first attempt but much practice lies between me and my goal. :slightly_smiling_face:

6 Likes

I was never that good, even 13 years ago!

Her name is Rio?
:dancer:t2: :smile:
Cheers,

M

2 Likes

HAHA! That is excellent! My brother loves Duran Duran. I will give him the completed figure.

…

I try to sculpt for an hour or two every day.

The base of the Blue Rhein Maid is now complete. More rock outcroppings were added to increase visual interest.

The base of the Shield Maid is also complete. Amusingly, this base turned into a little Koi Pond!

The third base came into being after a failed attempt to make some tarps for armored vehicles. Rather than waste the putty, it was smeared into a disk and given some texture. The center was left open for a miniature and additional sculpting.

For the Eye Beast, I plan to cut a two inch disk of plastic, paint one side as a pool bottom, glue it to the underside of the base, and then seal everything in a thin layer of Milliput. If things go to plan, all 4 pending miniatures will go to priming and painting starting tomorrow. :slightly_smiling_face:

To create flowing water around the three maids, I plan on using Vallejo water effects products. My hope is that they will dry hard, last a very long time, apply without much mess, and be significantly less toxic than epoxy resin.

5 Likes

This sounds like the technique I has some success with many years ago. I are used a clear material for a base (the thicker the better), made sure the top was really shiny and then painted the shades in reverse order on the bottom. That is to say, I started with the darkest colour at the deepest point and blended the shades out towards the shallows. It helped with the illusion of depth, I used the technique to create sections of river for use as terrain on a wargame table. I had to thickly coat the underside in a neutral grey-green as the shaded layer was applied lightly and was pretty much transparent so the colour of the surface it was laid on would have affected the appearance plus the delicate shade painting needed protecting against the wear-and-tear of repeated use.

Regards,

M

3 Likes

Goodness, how time flies.

After a few months of really bad luck with various model projects, I am once again working on fantasy figures and terrain.

My return to the fiction side of the house started with a failed terrain square experiment. The goal was to create a piece of modular terrain for a 1/35 scale diorama. Unfortunately, I forgot to place the square on a perfectly flat surface to dry and…it bowed. :disappointed:

Seeking a solution to my diorama tile dilemma, I embarked on a meandering journey through the internet to explore diorama construction and terrain making.

Instead of fixing the problem, I ended up using Milliput to make a bunch of dungeon scatter terrain. :upside_down_face: The new plan is to break up the borked diorama tile and repurpose the pieces as yet more dungeon scatter terrain. By making the pieces scale ambiguous, they can ultimately end up in a 1/35 military vehicle diorama, 1/35 science fiction vehicle diorama, or 1/60 fantasy game layout.

4 Likes

Yesterday’s batch of sculpted diorama/dungeon dressing pieces includes three columns and a rubble pile.

These still need sanding, mostly to clean up the bases and make the stalactites and stalagmites more pointy.

Piece one represents a drip formed cave pillar with some stalactites and stalagmites. A wire core adds strength to the central pillar and the single stalactite. In my opinion, this is the best of the lot.

Piece two is a rocky pillar, made by rolling a ball of crumpled aluminum foil over wet putty. In all my years of hiking and spelunking, I have never seen a natural rock formation of similar appearance. Instead, it resembles a life encrusted salt water pier piling, such as found in Monterey and Santa Cruz. Perhaps this pillar was once submerged in salt water.

Piece three somewhat resembles a coconut tree trunk. It is not perfectly straight. Perhaps it was formed by an alien life form.

Piece 4 is a rubble pile, made using leftover pieces of putty from a tarp making experiment. Paper, pieces of metal plate, and scrolls can be made using the same technique.

Back to sculpting. :slightly_smiling_face:

4 Likes

The first set of 9 diorama pieces is now in paint.

As it turns out, separating dried Milliput from styrene is rather easy.

It behaves like peanut brittle. These pieces will become more diorama and dungeon scatter terrain.

3 Likes

Sculpting diorama pieces is a very relaxing way to pass an evening.

The latest column is sculpted on a two inch wood screw. The screw adds a lot of bulk, saving putty, and ensures a perfectly straight piece. In my opinion, this column is a bit too bulky and course. That is easily fixed by using a nail or screw with a smaller diameter.

All my failed sculptures go into a drawer for future repurposing. The underlying structure of this piece, a fictional sessile organism that lives in deep caves, was created 6 years ago. The only things showing from the original sculpture are the large diameter holes spaced around the base. The top tentacle was made from a second leftover piece.

The two nests on the upper right turned out particularly well. Each egg was rolled from a small blob of putty, allowed to dry, and then attached to the base. This results in very good definition.

The terrain square on the left consists of 4 layers–putty, wire rebar, putty, (allow to dry), top coat. This construction method produces a thin, tough tile and uses surprisingly little putty.

The terrain square on the right consists of 5 layers–putty, wire, putty, (allow to dry), putty, peanut brittle (salvaged material shown in the previous post). This construction method results in a very interesting texture.

All of these pieces require sanding before going to the paint shop.

3 Likes

Here is the latest round of cave terrain pieces. They are somewhat more detailed than previous pieces and took longer to sculpt. All require sanding.

I am calling the circular piece on the upper left a mini-lair because it is large enough for a single figure to stand in the middle. Once sanded to make the stalagmites more pointy, it should look okay.

The natural column on the upper right was sculpted on a long wood screw. In my opinion, it is the best natural column so far. The small stalagmite bent while drying but will straighten out with some careful sanding.

Both tiles were made in 5 lairs–putty, rebar, putty, (let dry), putty, peanut brittle. They have a lot of character but require sanding to restore a square footprint. Having made 6 such squares, I have concluded by time is better spent making scatter terrain.

I know these pieces are not terribly interesting but they are fun to sculpt.

2 Likes

Here is today’s batch of new sculpted pieces.

The piece on the far left is a small cave pool with lots of stalagmites. Real stalagmites are more rounded on top and tend to have lots of tiny flaws around the barrel. These look more like something from a fantasy game and are far easier to sculpt.

The center piece includes two steam vent cones. Mineral rich salt seeps sometimes produce similar structures. They are very common in fantasy games, usually belching forth puffs of steam.

Cairns are man made piles of rocks used to mark something such as a grave, historic site, property boundary, or trail. Humans have built such markers since the dawn of time and they were common before the modern age. This first attempt at a small cairn was made using small pieces of peanut brittle to represent individual stones. The next one needs to be much larger and use bigger stones. Sometimes my sculptures are too petite, even for 1/60 scale miniatures.

In combination, pieces designed and sculpted over the last few weeks can already form a simple cave scene diorama. The boxes and obelisks are simple card models designed in Inkscape and printed at 1/35 scale but they will also work at 1/60 scale. These are all sanded and ready for paint.

4 Likes

Plodding away with more terrain pieces…

The column on the upper lefts is sculpted on a two inch wood screw.

The mini-lair on the upper right is sculpted on two smaller wood screws and various pieces of wire. The central base is a piece of peanut brittle. This piece was sculpted after looking at many real cave pictures which refreshed my memory and resulted in more realism.

The piece on the lower left is wire tree experiment number three. Tree experiment number one was made many years using Testor’s Contour Putty as bark and failed. Tree experiment number two was made last year using stretched sprue and also failed. Tree number three is pretty good. Many old power cords are now scheduled for demolition and wire recovery.

The steam cone on the lower right, sculpted on a smaller wood screw, has a lot of character.

All these pieces require sanding.

These pieces were sculpted one or two years ago during my first foray into terrain sculpting. They represent elements of an alien seascape. The 75mm disc on the lower right can serve as the base for a small diorama and includes mounting holes for creature miniatures. Since my sculpting skill has improved, some of these pieces will return to the shop for refit.

2 Likes

Mmmm…sources of inspiration! :thinking: :hugs:
:smiley: :canada:

The pictures below show the first batch of terrain pieces after airbrushing and hand painting.

This one uses two special Vallejo texture paints–fuel stains and lichen.

A zoomed in photo reveals some problems on this one.

To the naked eye, these pieces are all very dark. To the camera, they are super bright.

This one uses very small amounts of fuel stain and metallic paints.

Dressing 2023_1114 06

After watching countless tutorials on blending acrylic paints they still refuse to blend.

This is my favorite sculpture of this batch, photographed at the worst possible angle. Oops.

This sculpture has some nice texture.

The texture on this sculpture was created using a crushed ball of aluminum foil.

These paint jobs all kinda suck but improvement comes with practice. Each piece was airbrushed with approximately 6 colors, given a wash of black, detail painted, and finished off with some dry brushing. This algorithm obviously did not work. Photography always reveals dozens of issues. My understanding of colors and paints is still flat out awful. I will try again in a few days after the latest bitter pill of disappointment wears off.

3 Likes

Another batch of pieces is sanded and ready for paint.