I’m glad you liked the pics
We also had the B17 G the Bristol Beau fighter that seems to go in acknowledged lots ![]() f interesting aircraft over the years. And our Air Force museum has only a few of what they had. Only part of the B17 is the top turret the Bristol Beau fighter part of a wing that was recovered on a beach where it crashed
f interesting aircraft over the years. And our Air Force museum has only a few of what they had. Only part of the B17 is the top turret the Bristol Beau fighter part of a wing that was recovered on a beach where it crashed
3 Likes
The bright YELLOW one does stand out proud
3 Likes
I’ve never heard this but it makes much more sense then my previous comment. I’ve always wondered why would they need to know what is armor and what isn’t. This certainly explains it!
2 Likes
Glad to have given you a possible further explanation but, as I repeat, we are always in the realm of hypotheses, given that, according to my current knowledge, the topic has not yet found a univocal explanation
1 Like
Looking great. Love the figure and the cockpit paintwork!
1 Like
Thank you John!
1 Like
Amazing… ![]()
Watto.
2 Likes
Hi guys,
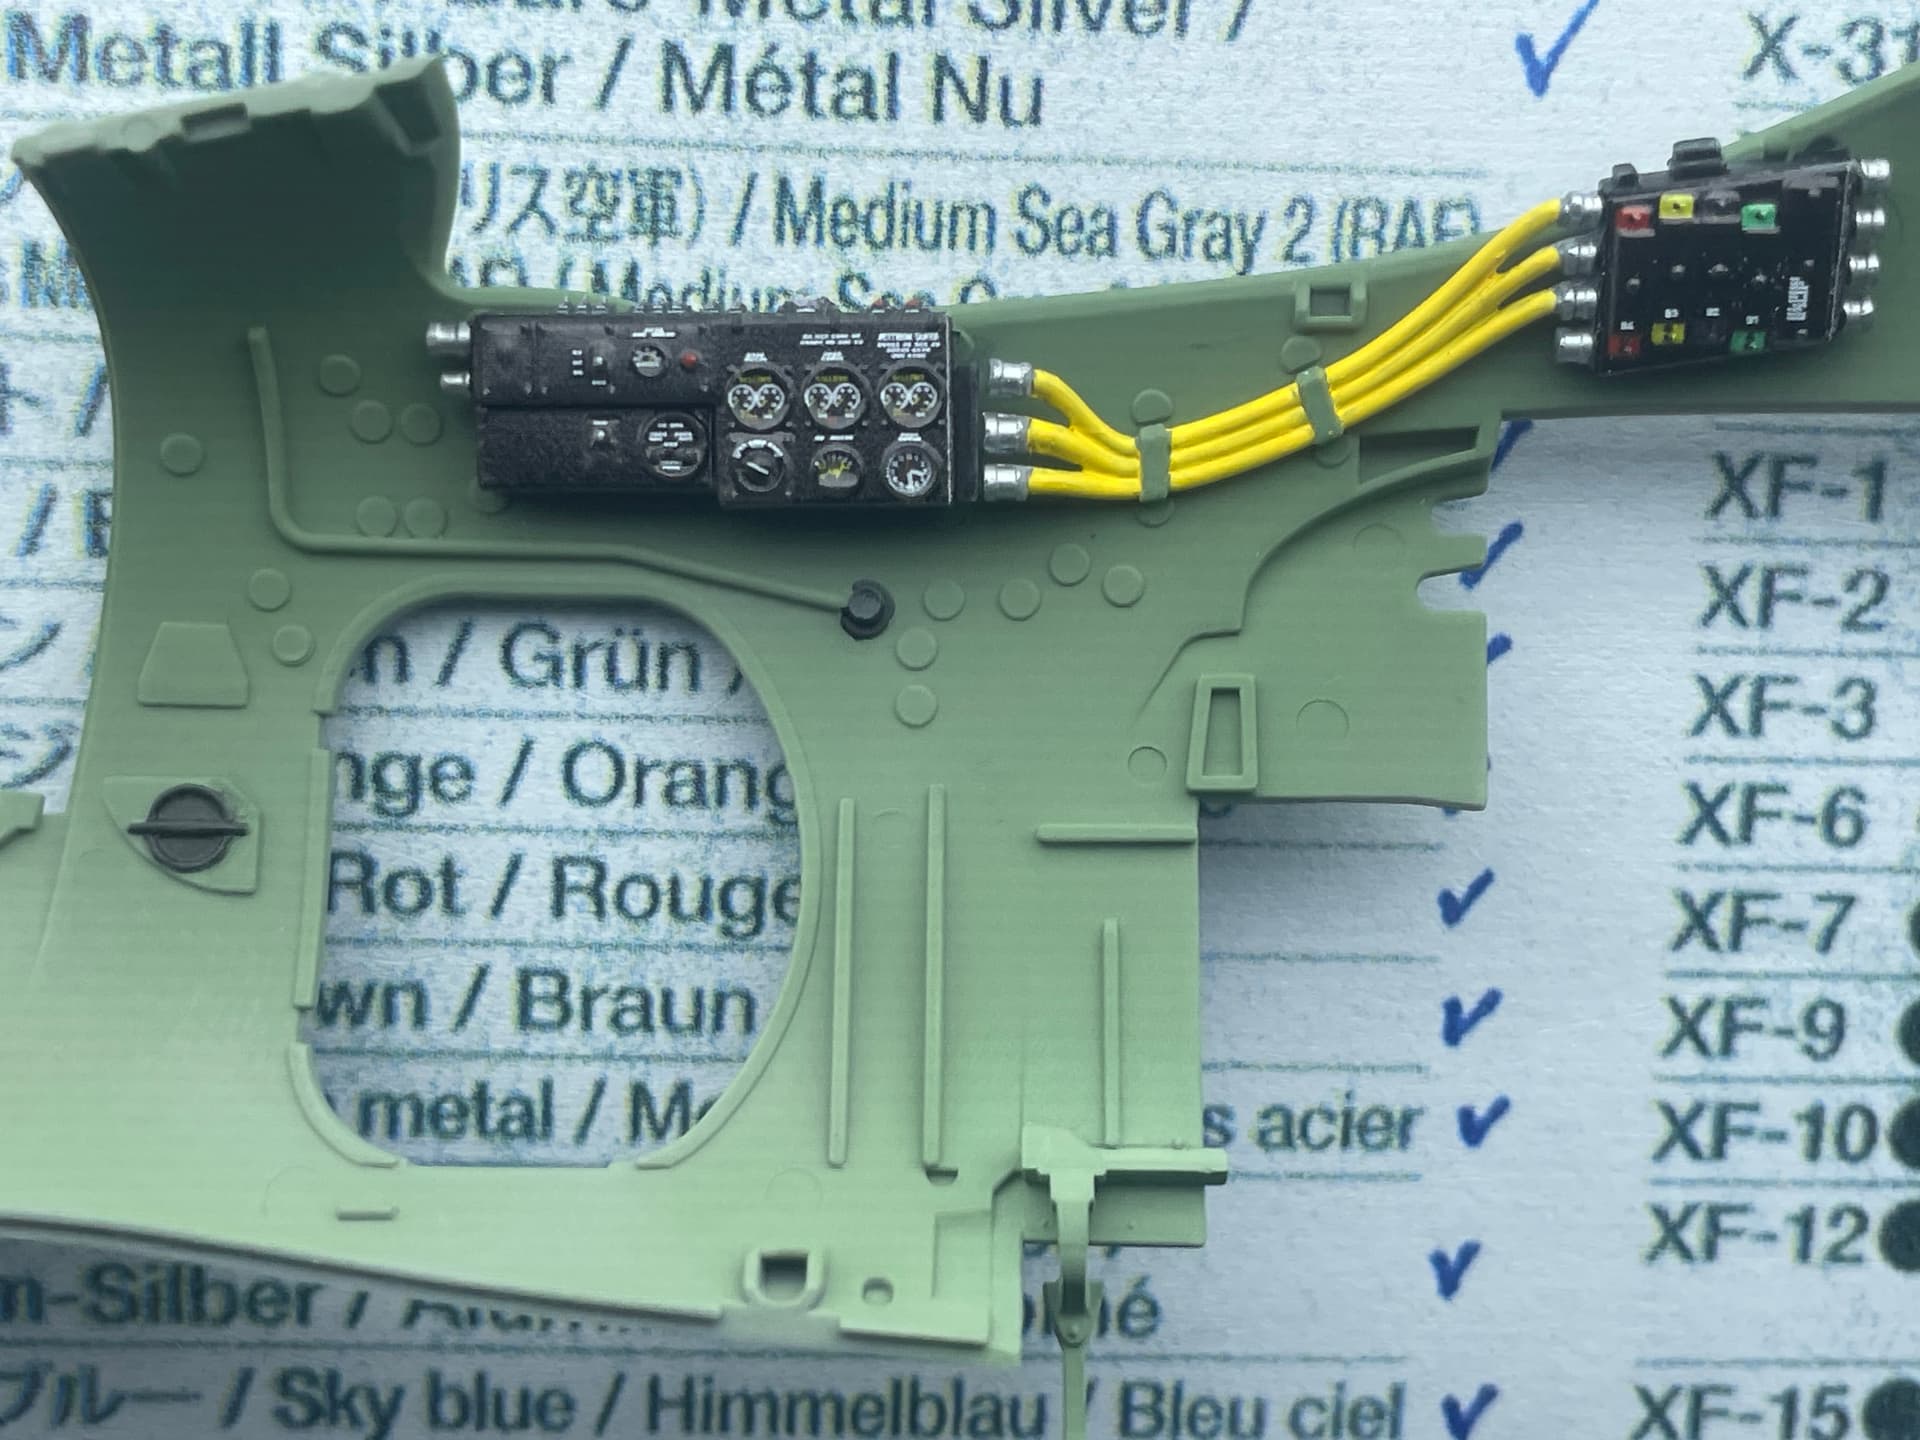
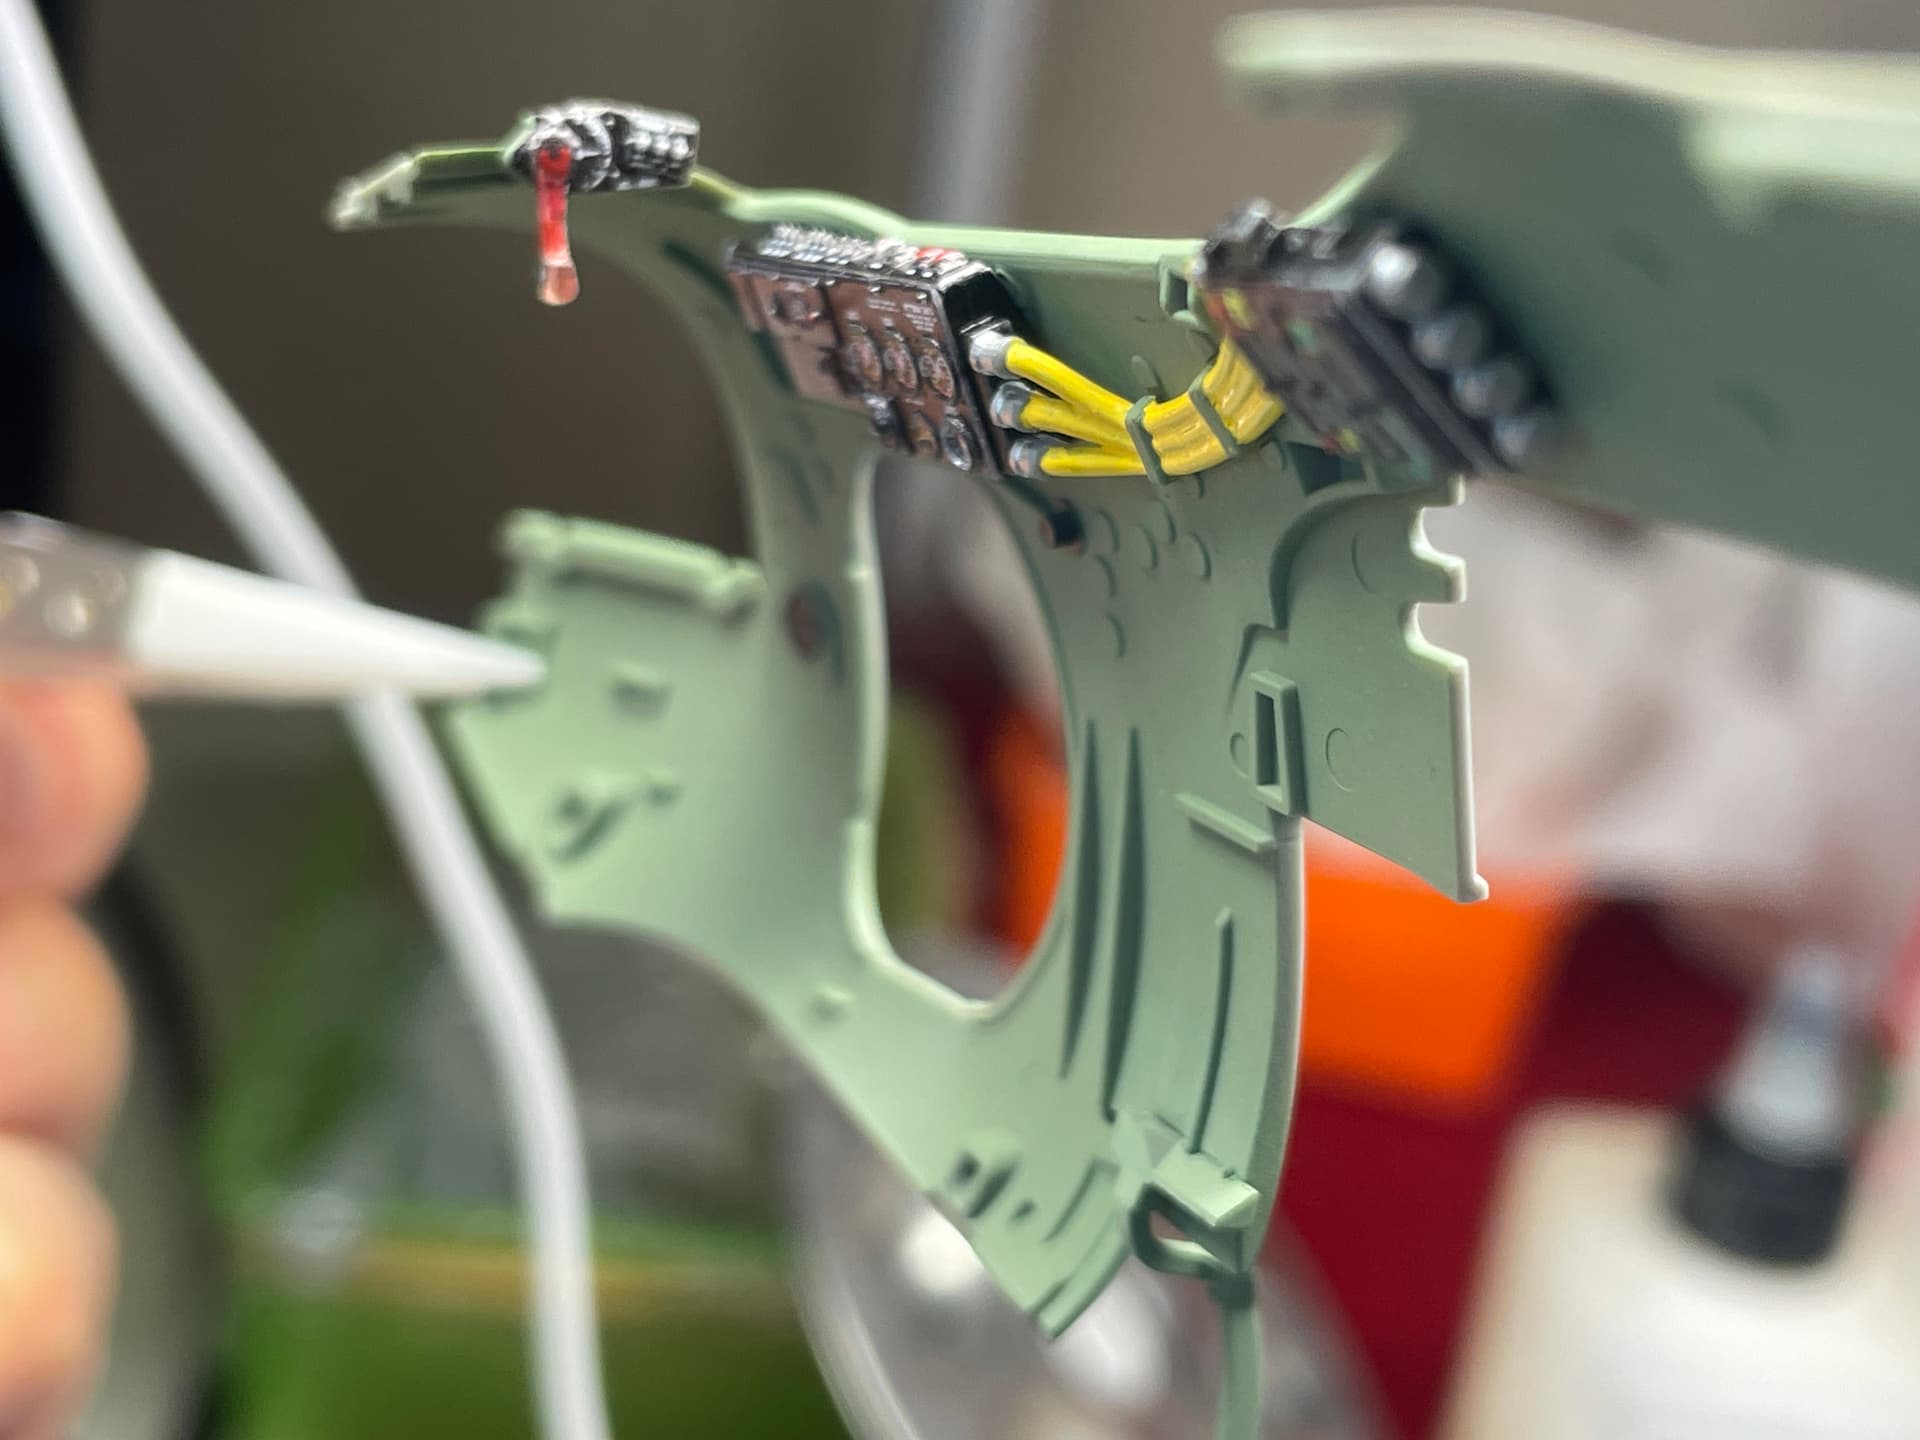
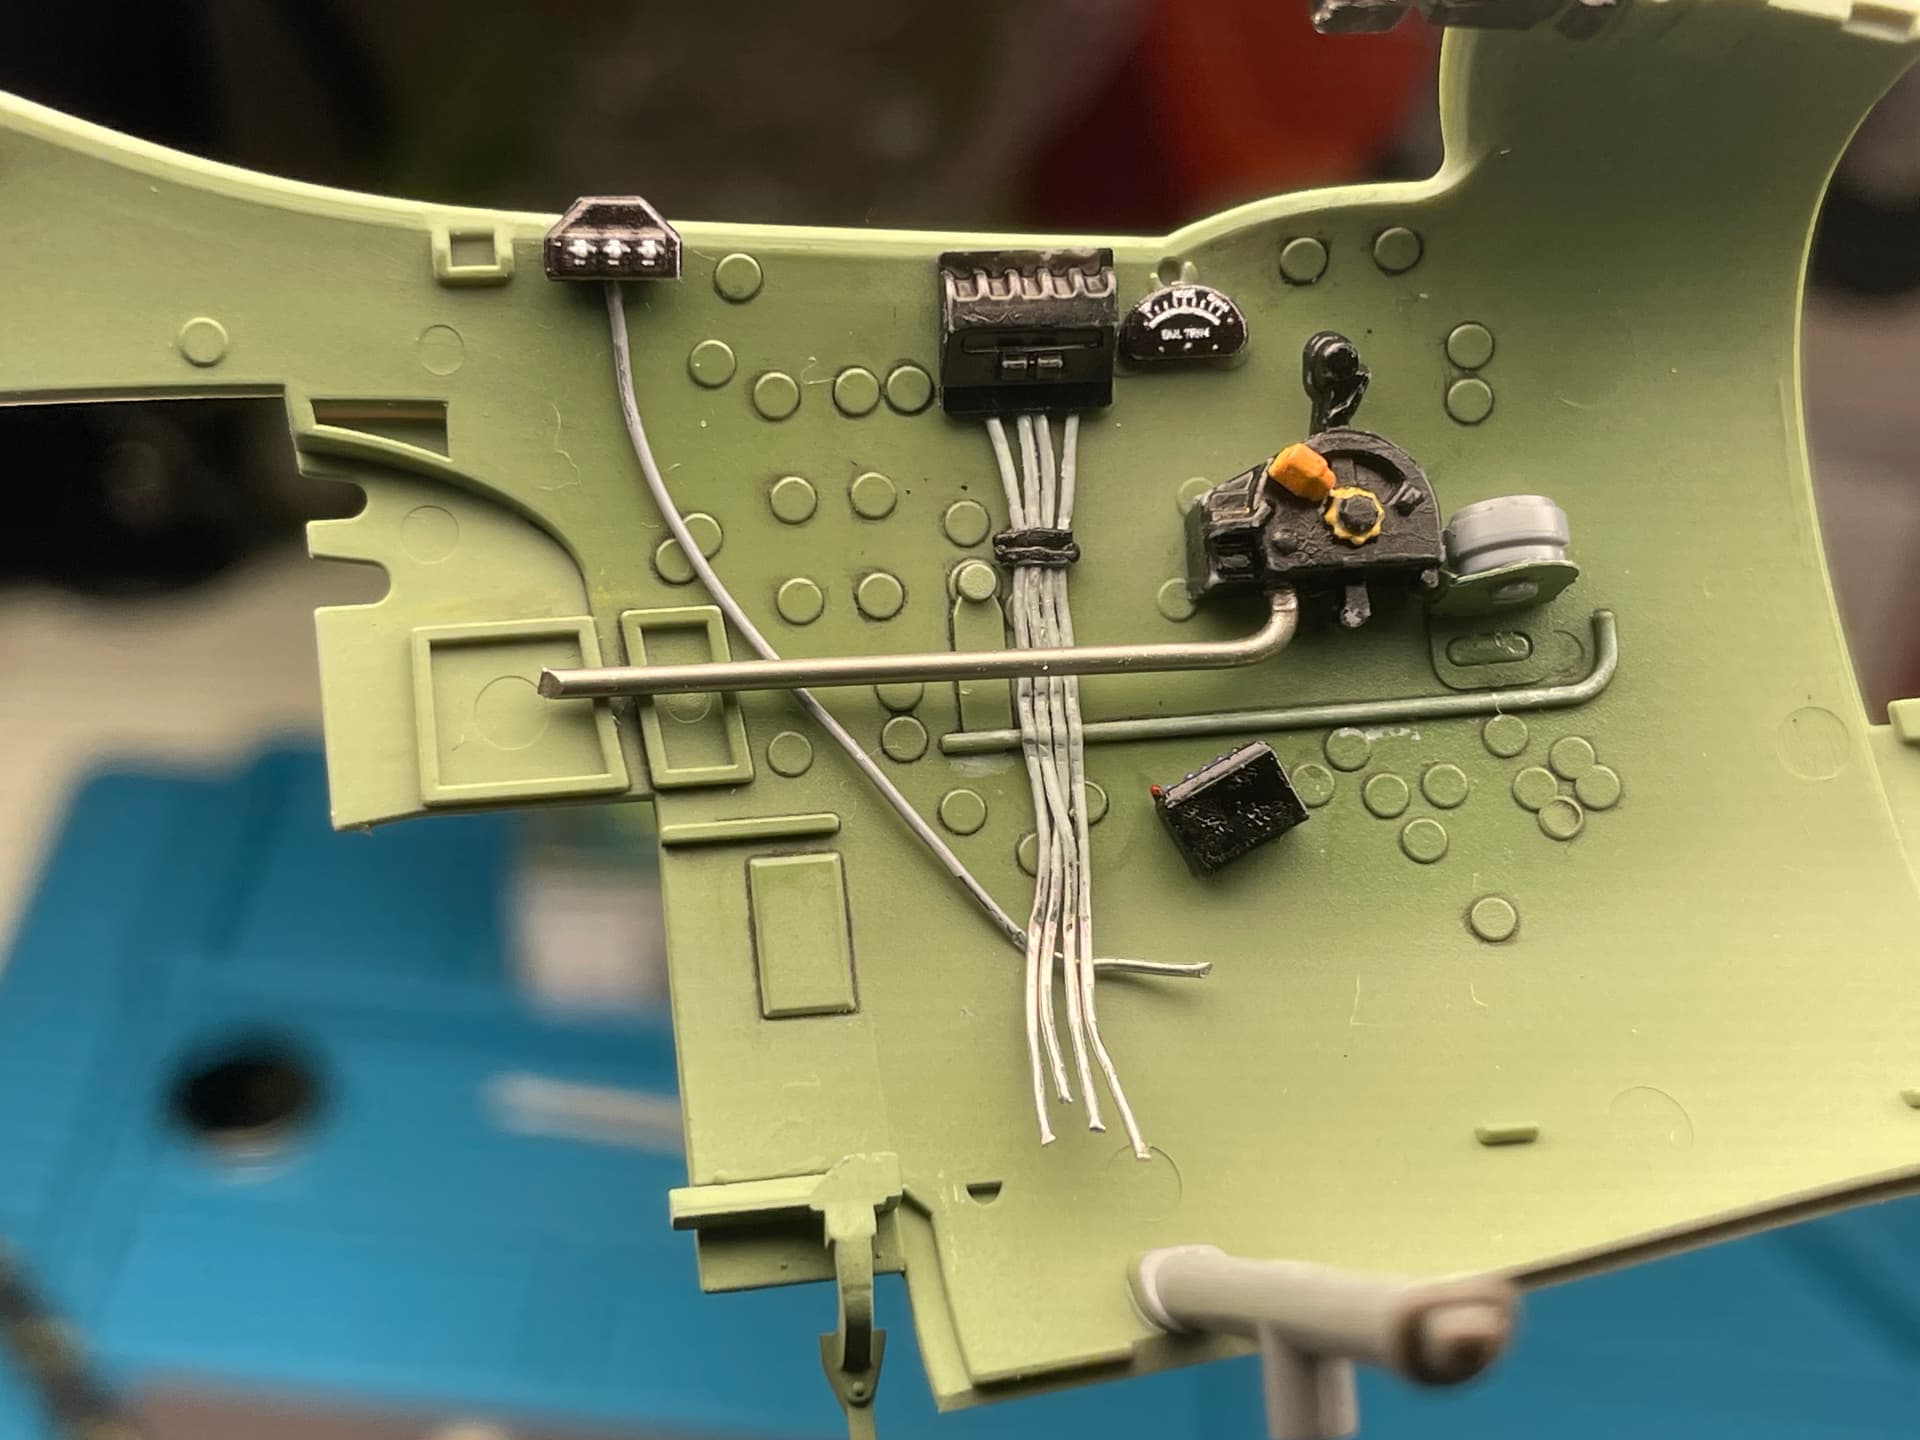
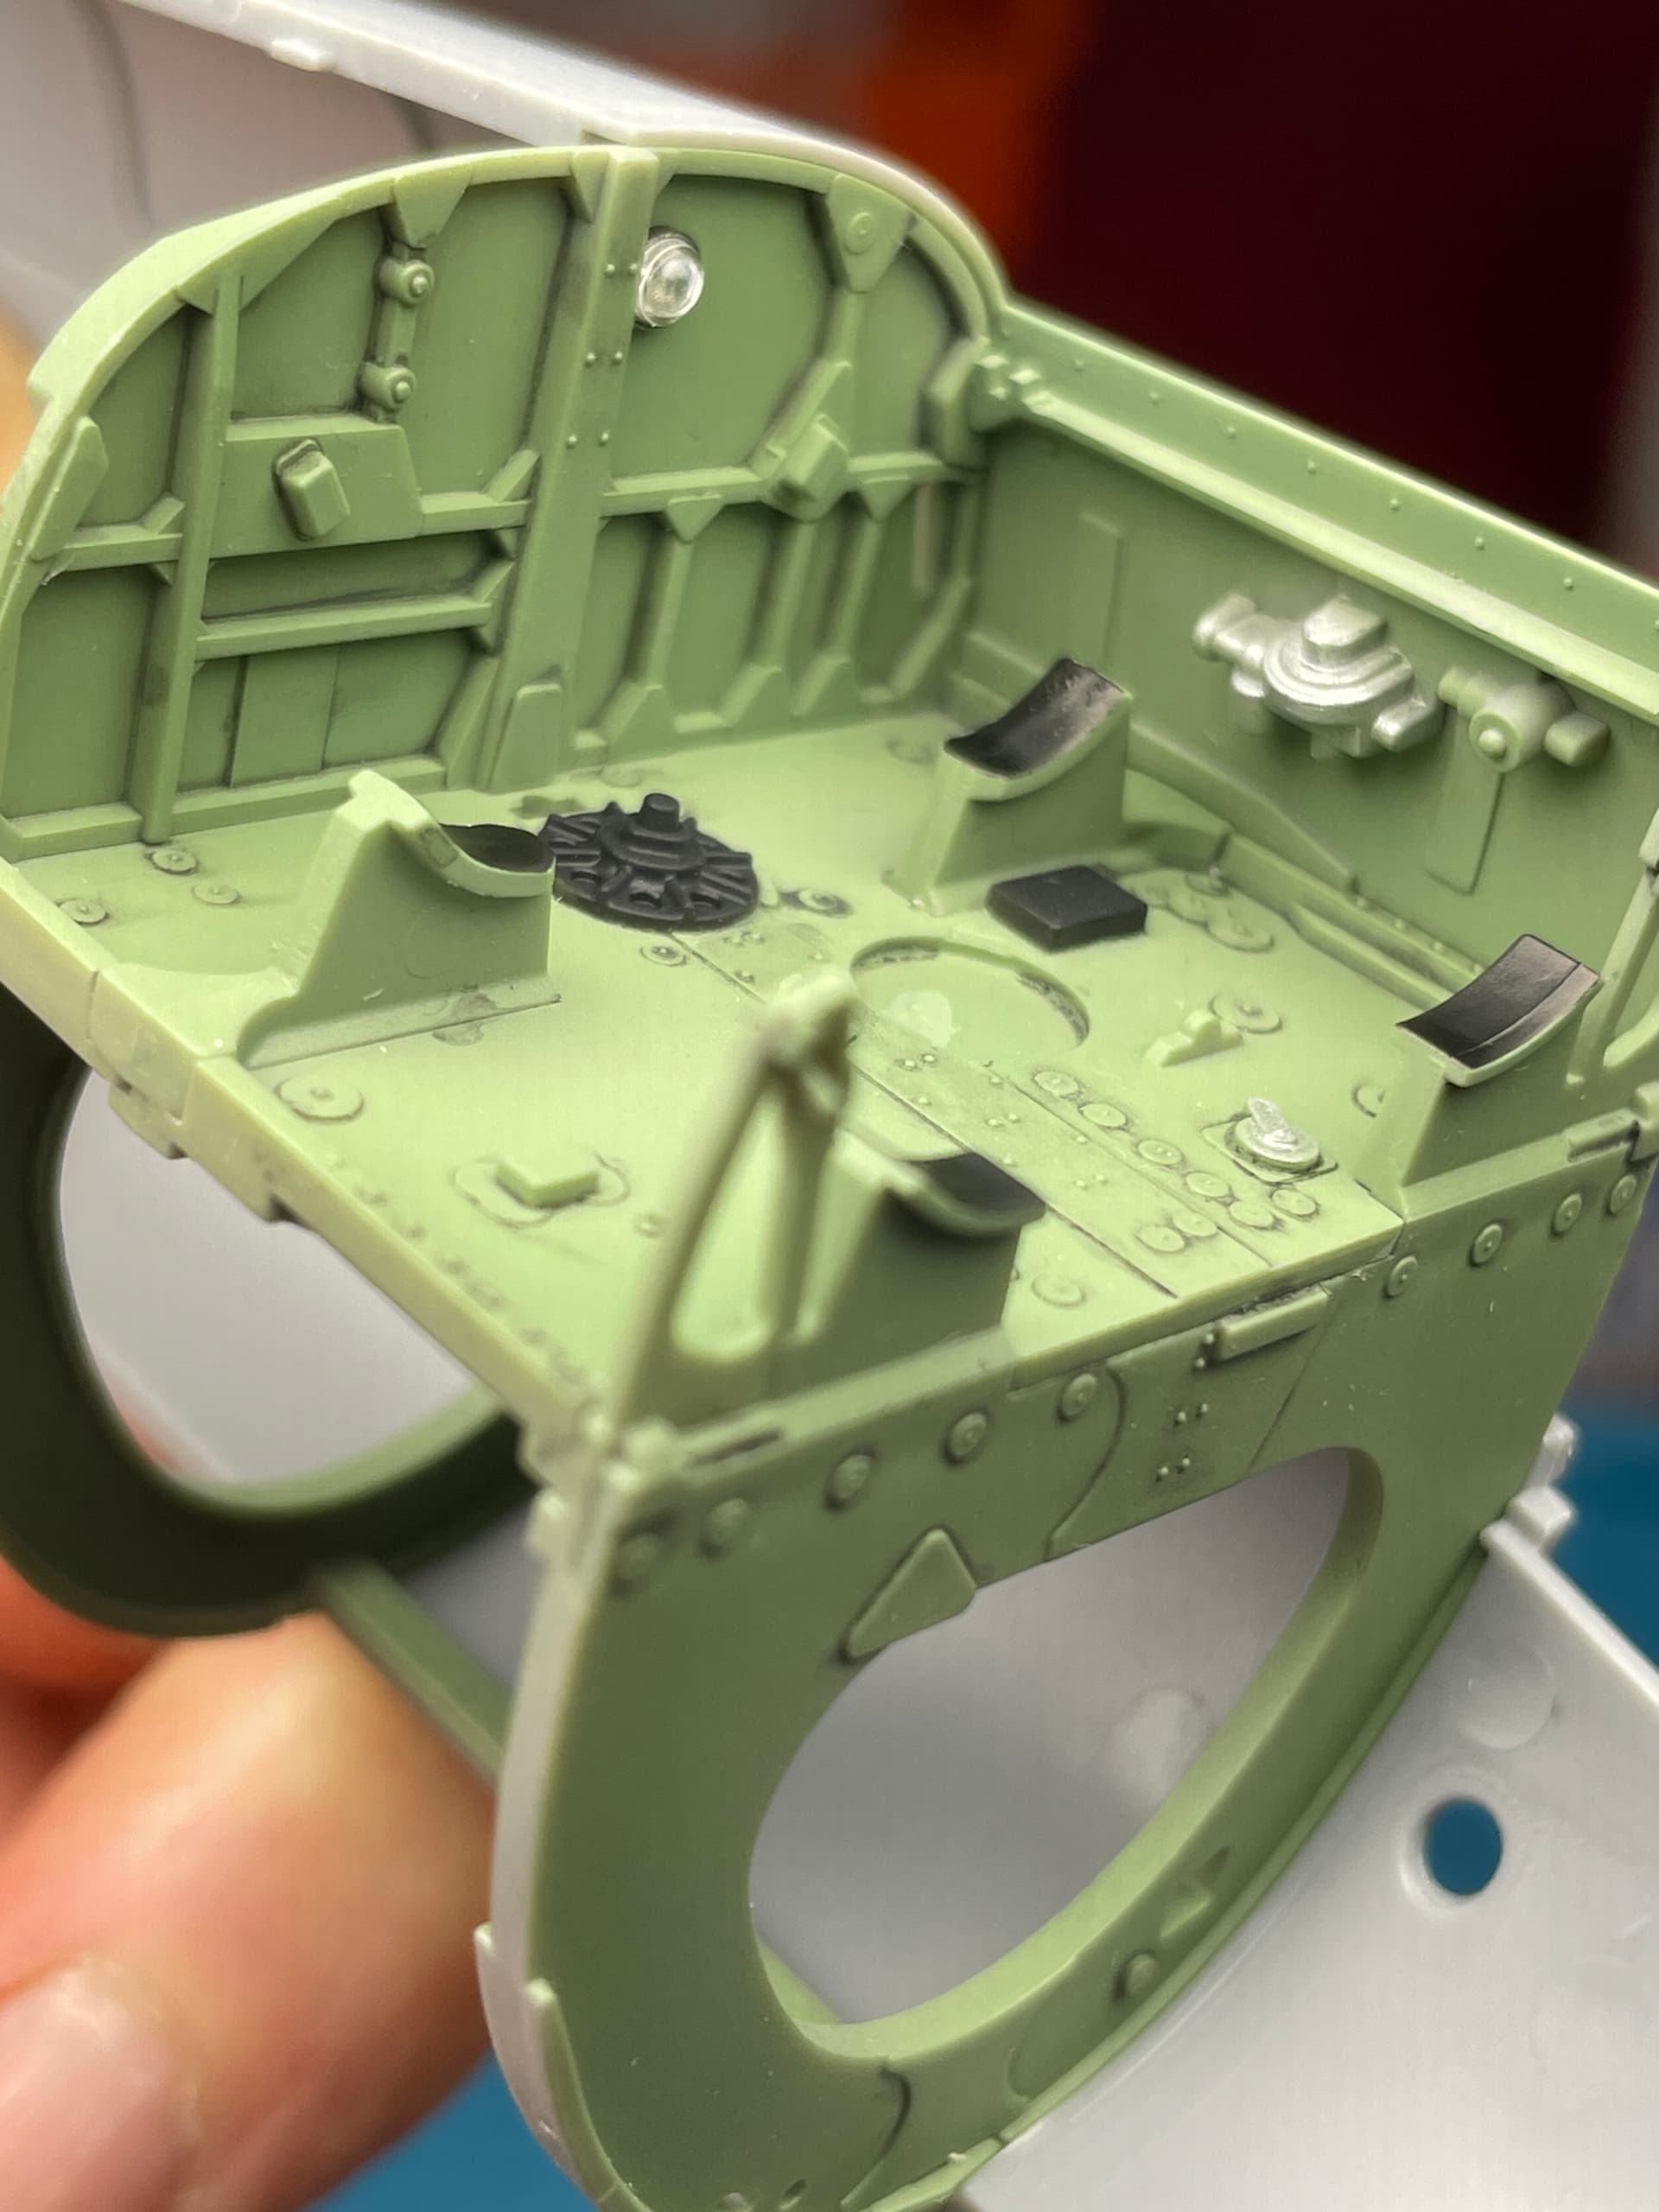
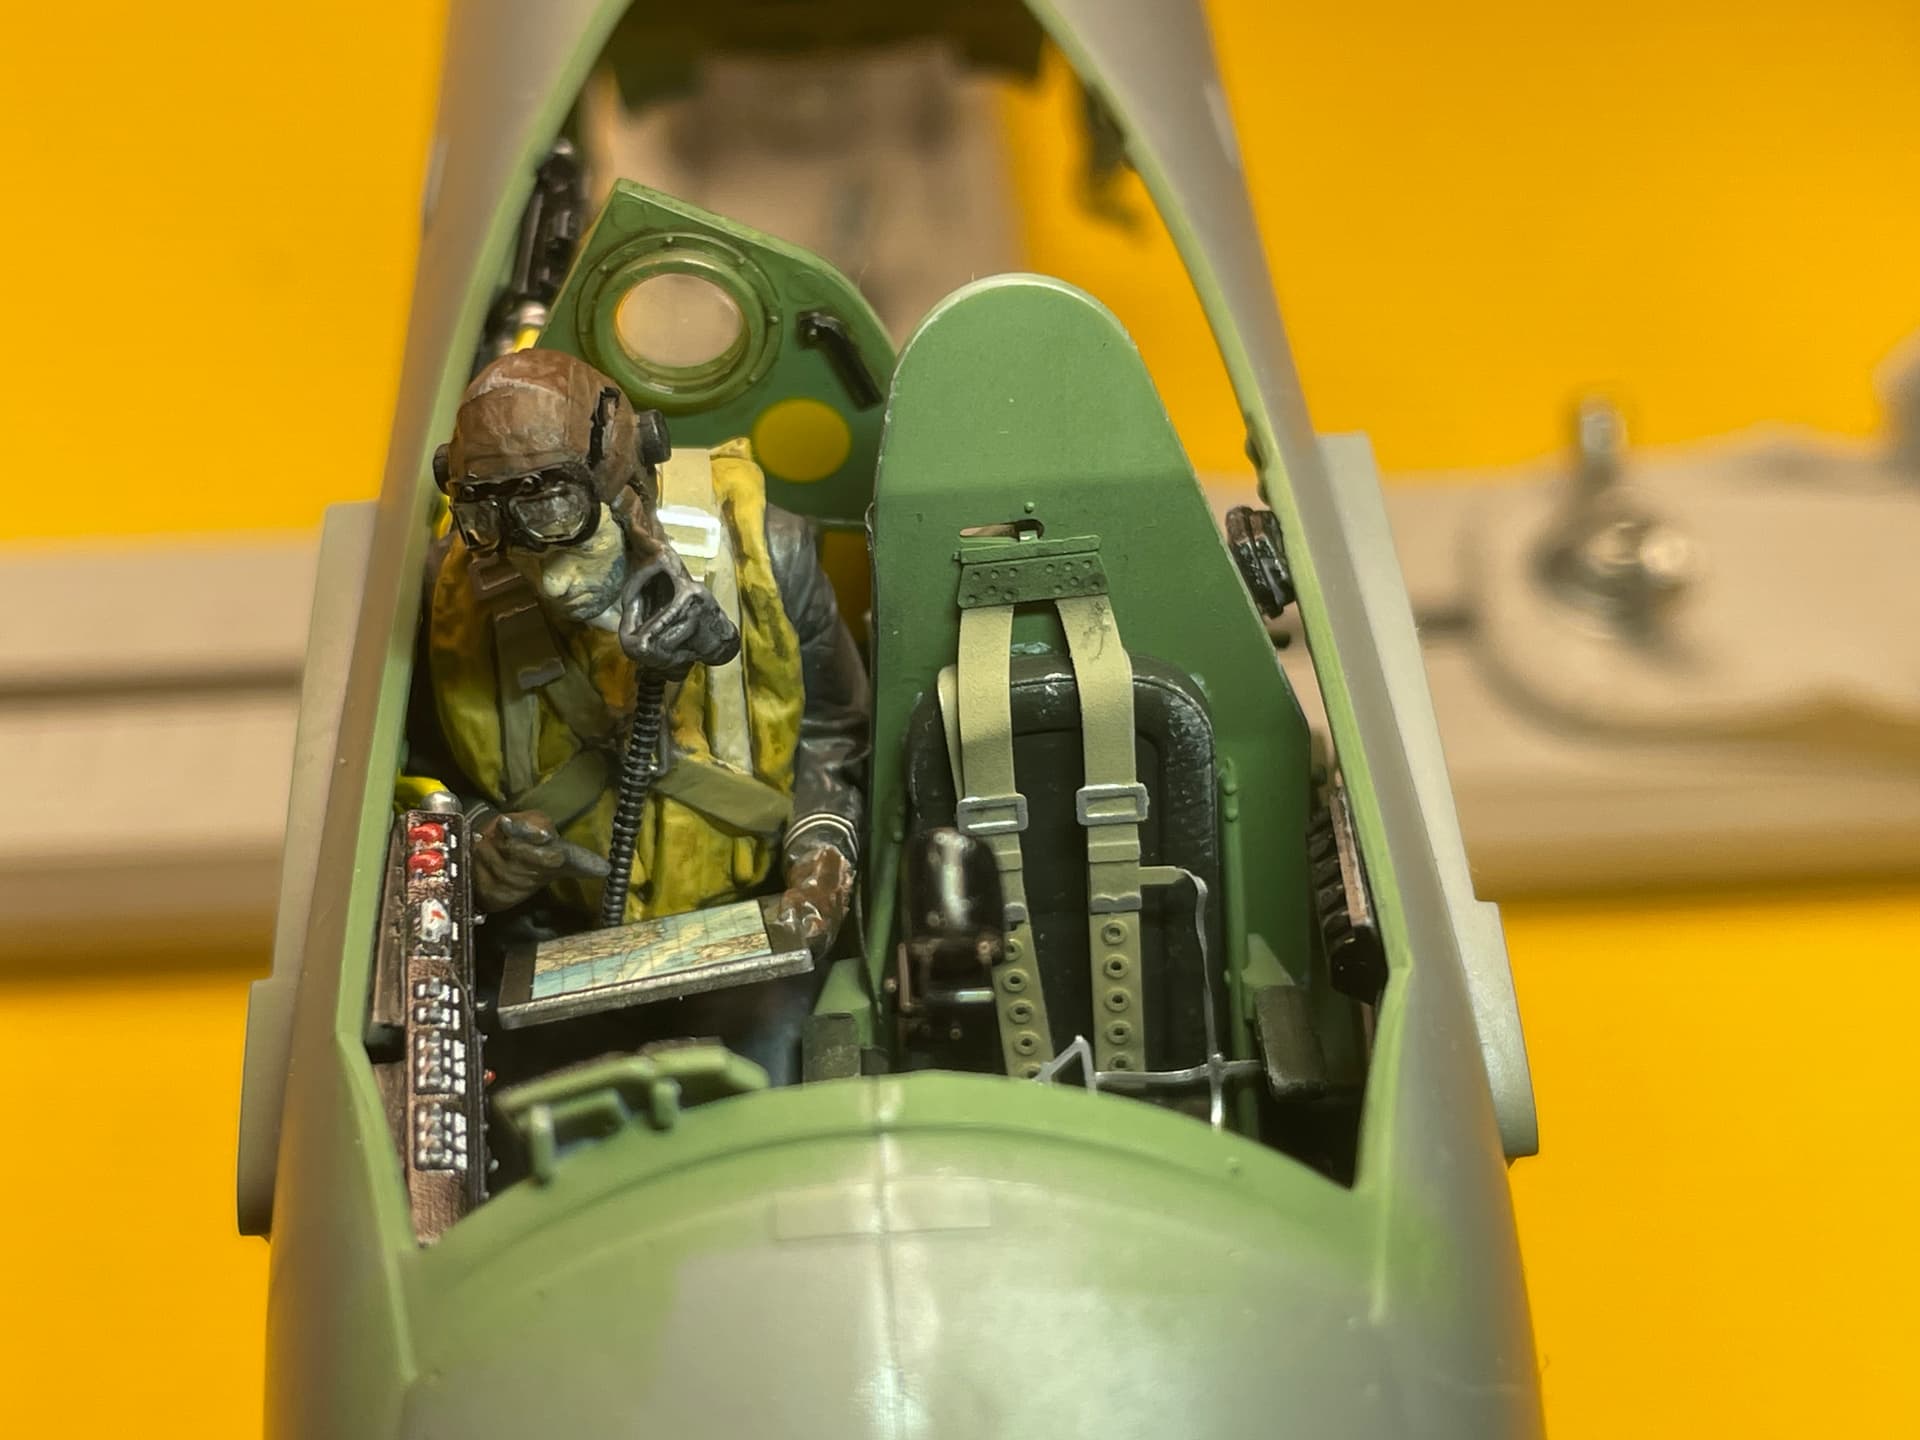
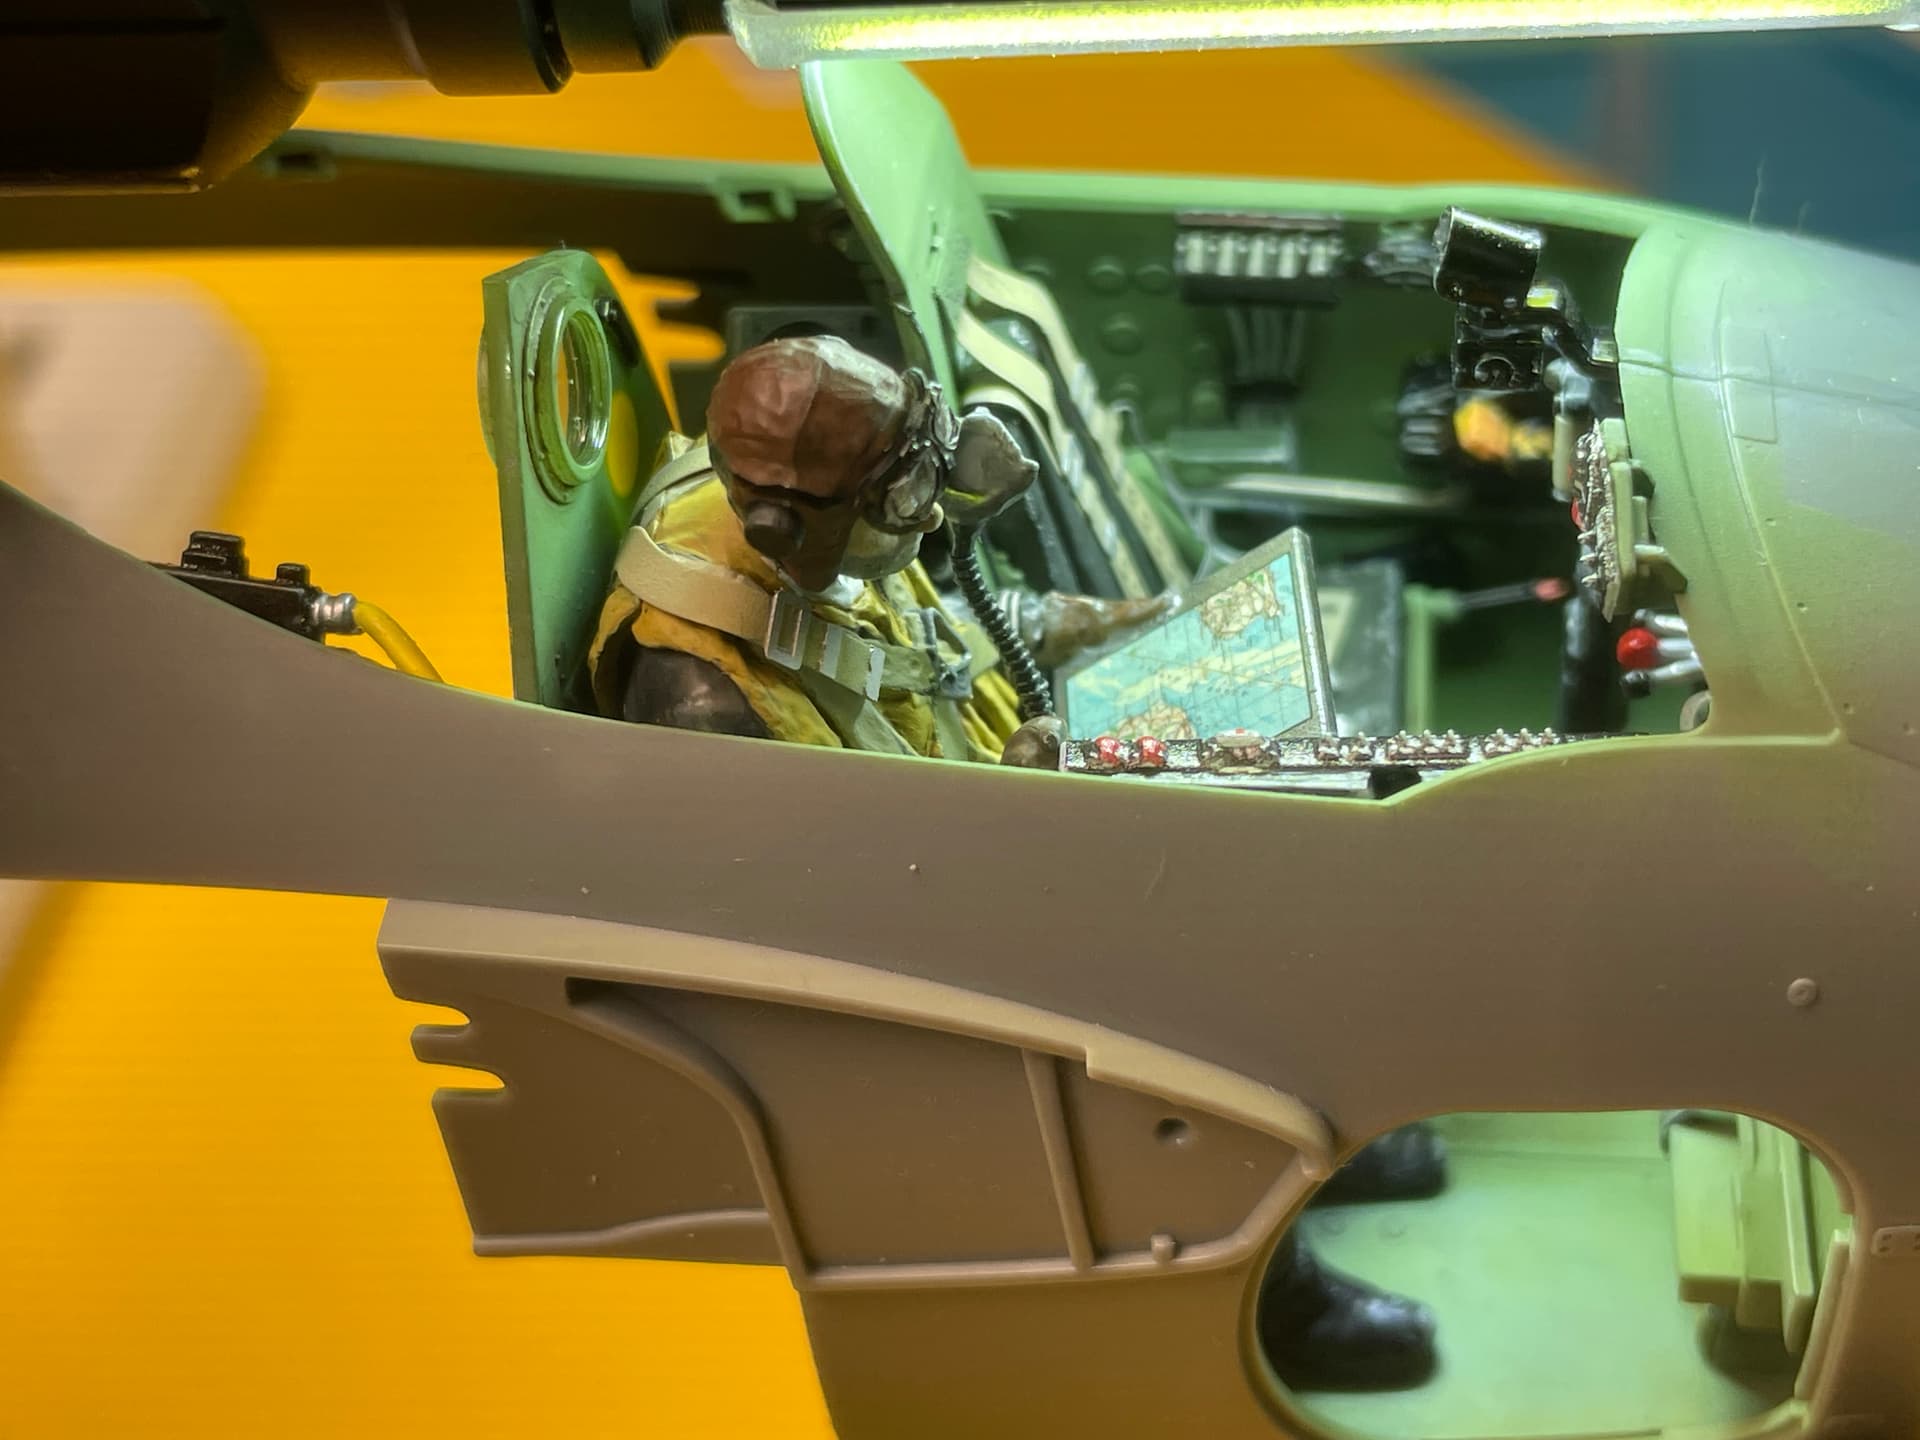
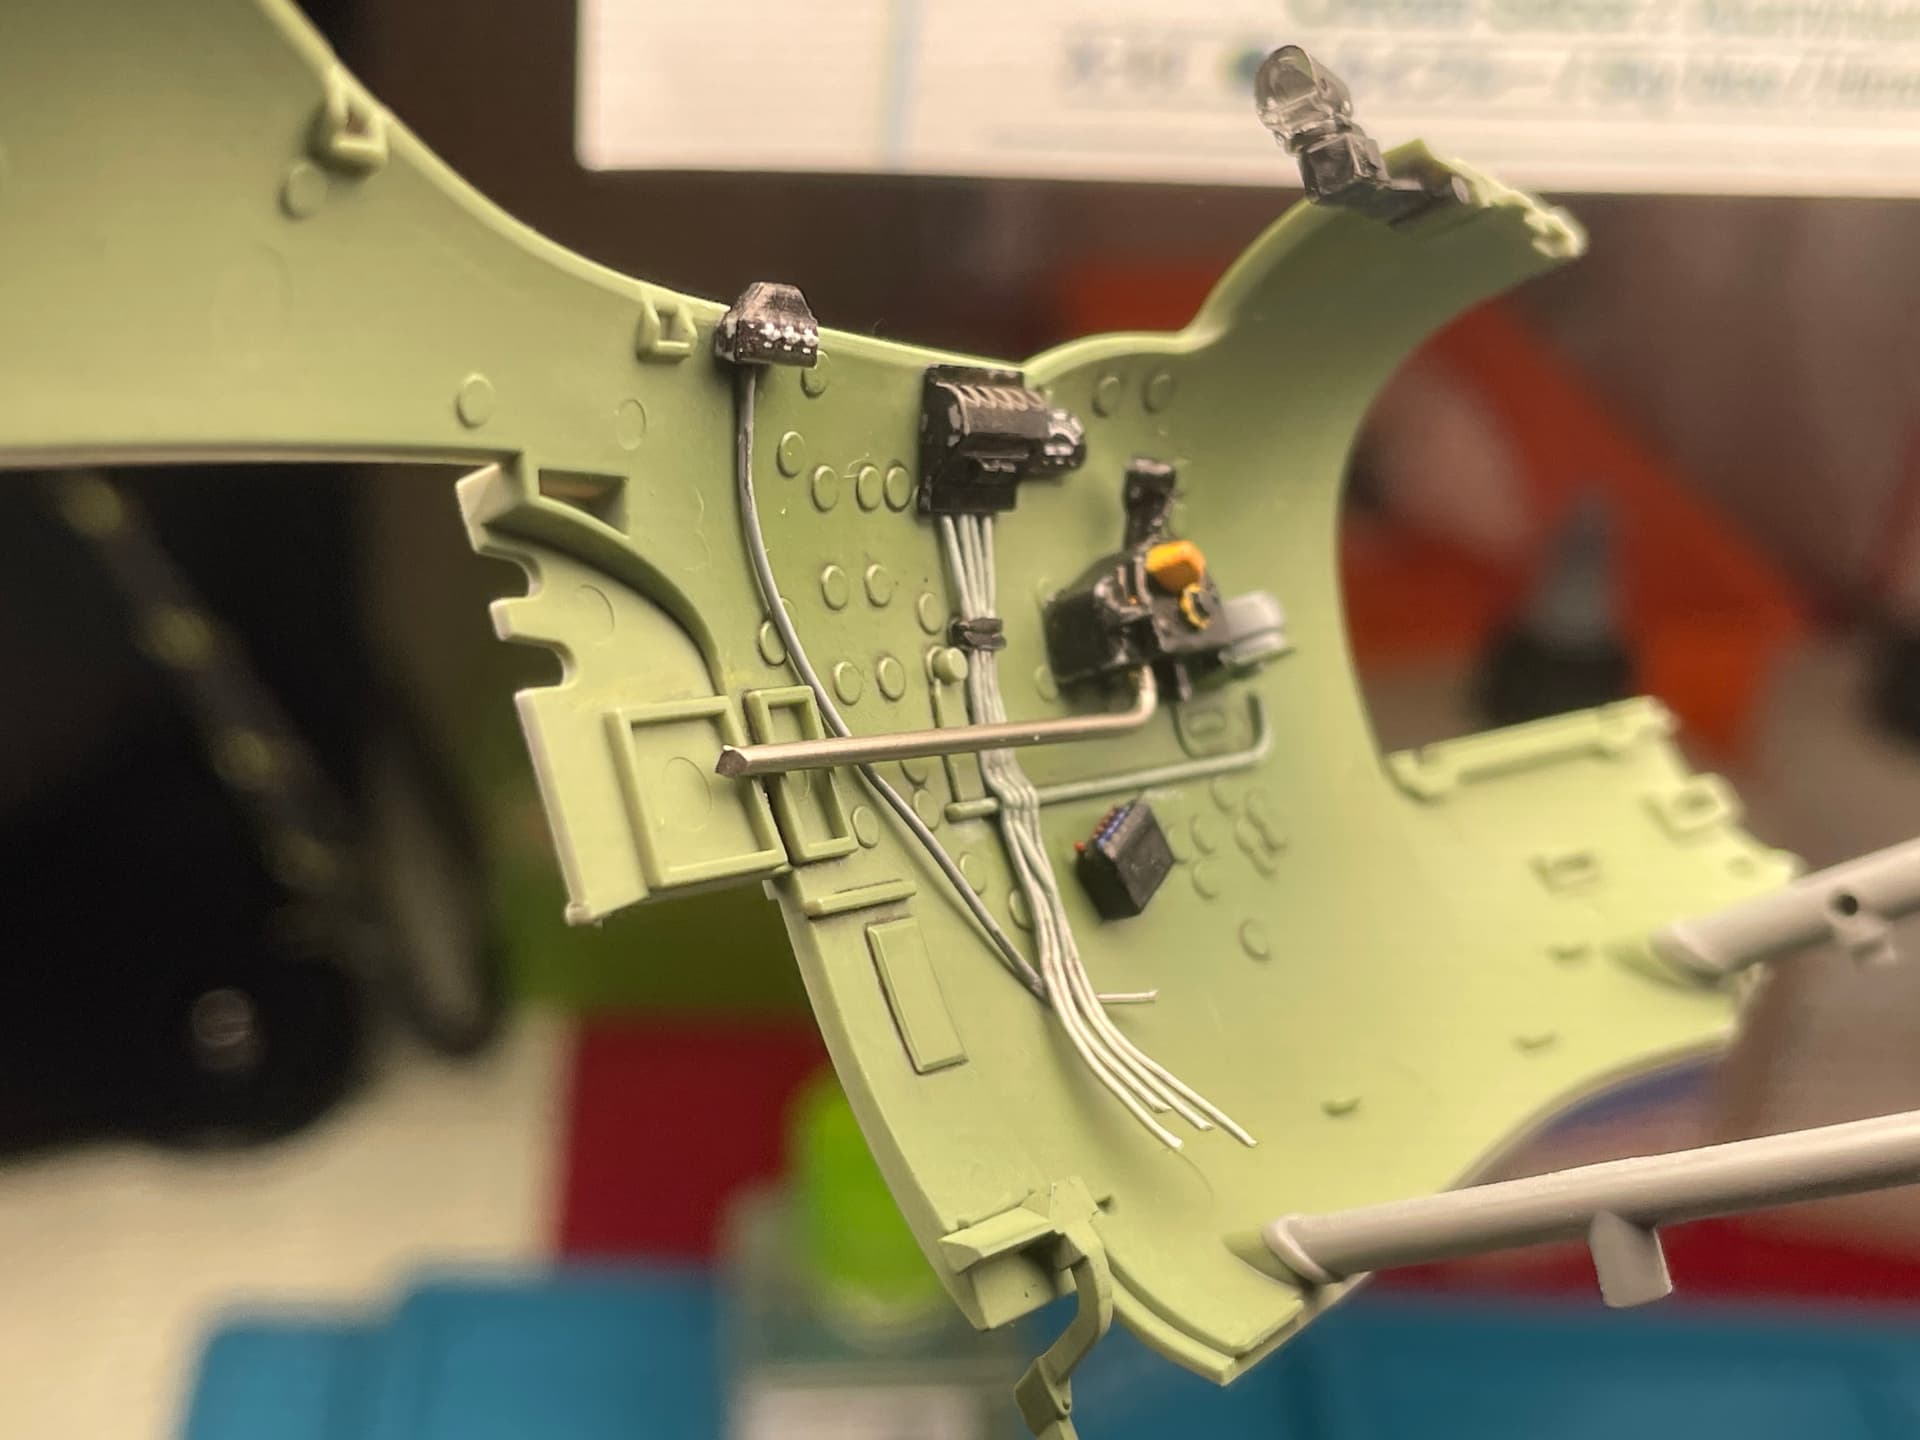
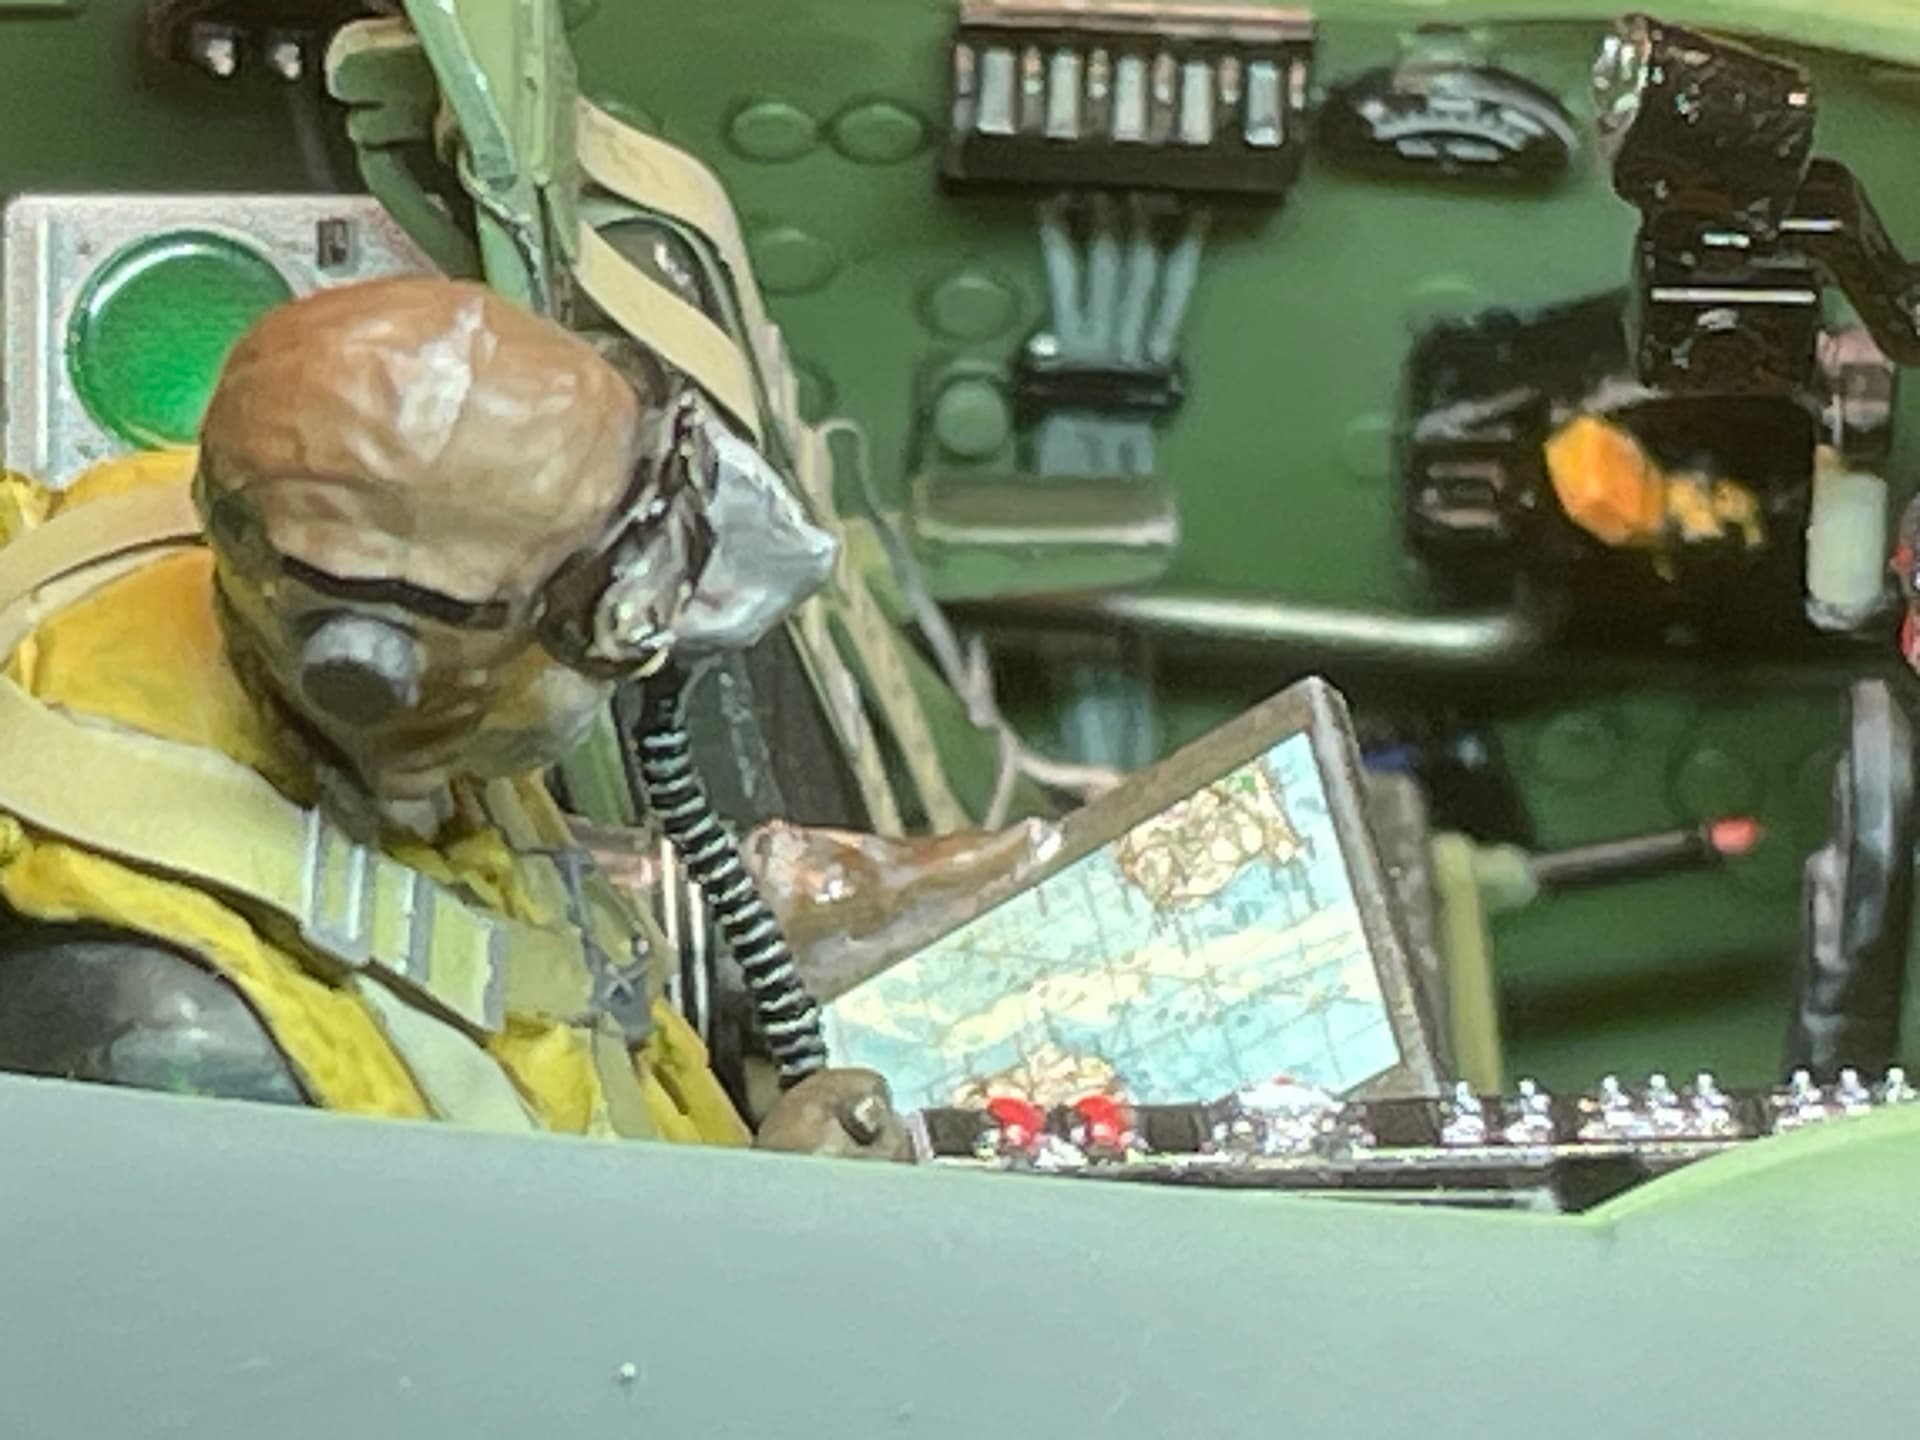
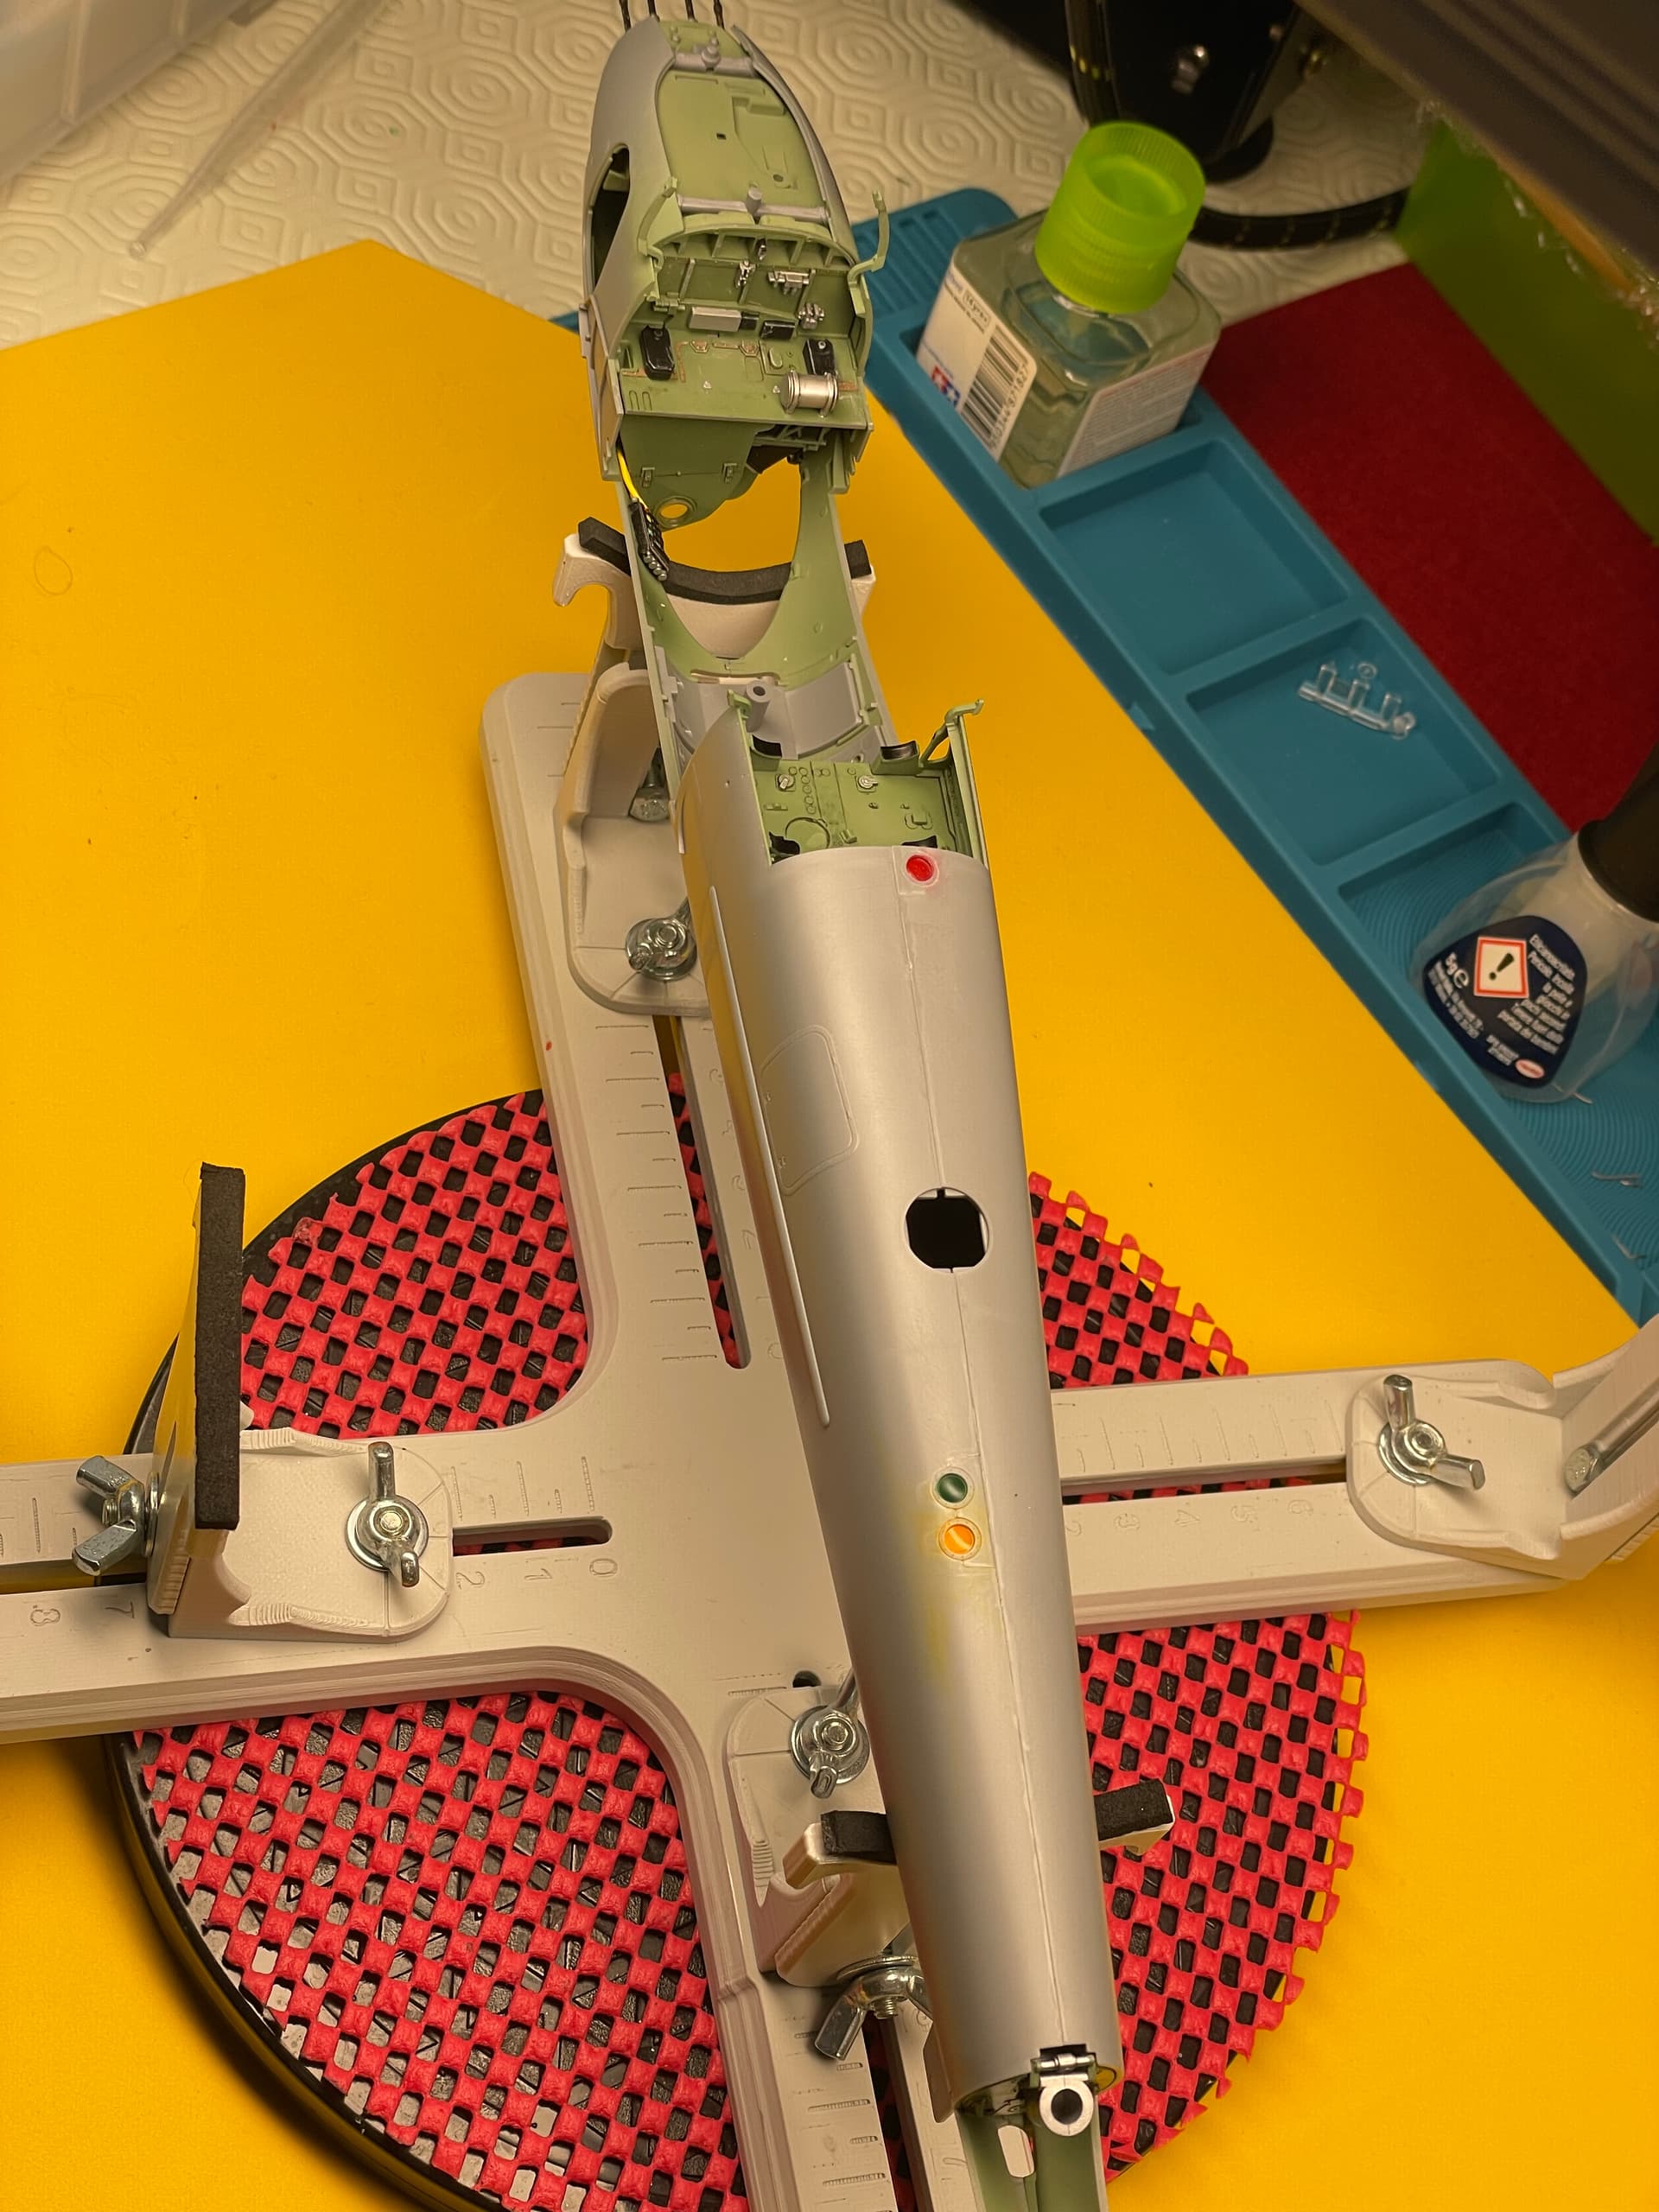
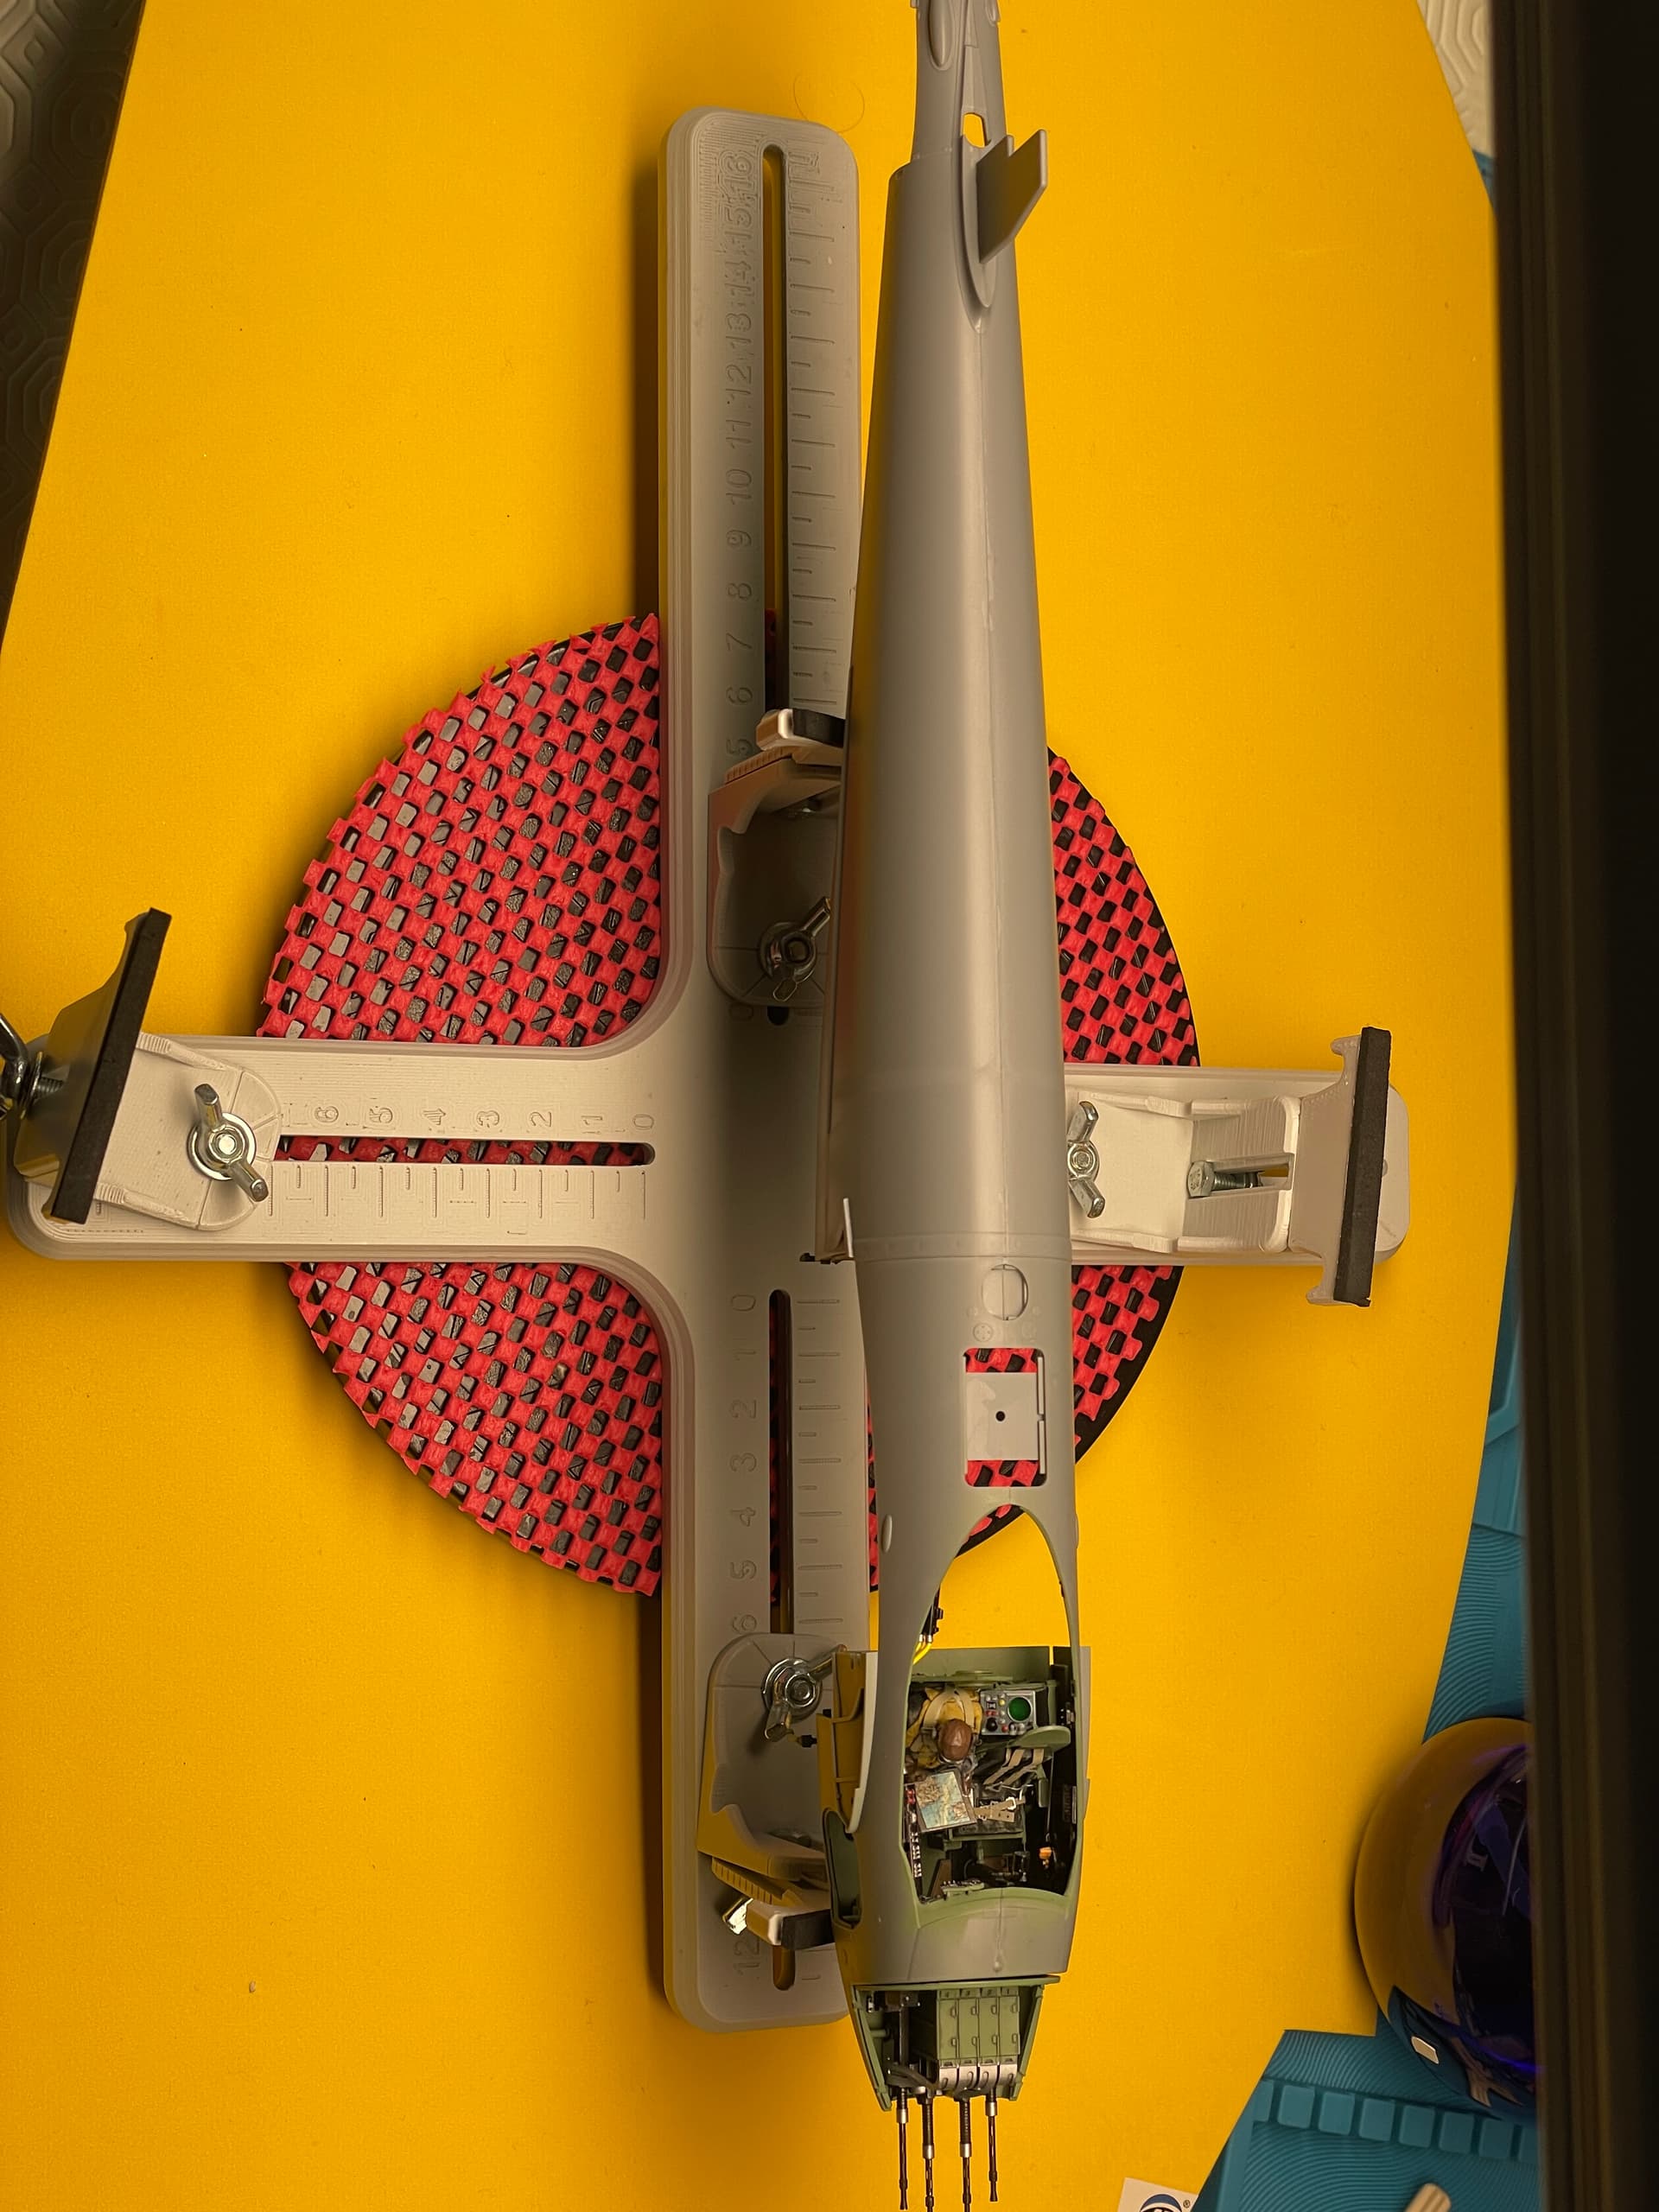
Here’s a little update on the growth of Wooden Wonder. I completed the cockpit side walls with all the pieces in the box and also added some wires on the left side to make it more realistic (in the photos of the pieces not yet closed, the wires are still to be shortened so as not to hinder the assembly of the various parts). The whole thing is a bit difficult to see once the fuselage is closed. But I’m quite happy with the final result.
Next step: joining the “four” half fuselages. Yes, four, as you can see in the photos. Tamiya uses a clever system to join the two port half fuselages and the two starboard half fuselages. This solution allows for perfect alignment that makes it easy to mate the two “long” half fuselages. Fantastic! (You will hear me repeat many times in this thread that Tamiya’s engineering in this kit is exceptional, sorry for that… ![]() ).
).
Here some photos:


To the next episode. ![]()
Dan
15 Likes
That kit has some exceptional detailing and your painting of it only adds to the quality. Navigator looks very good as well. It also shows how cramped the cockpit was for both of them.
3 Likes
Once again Thank you John
2 Likes
I’m at a loss for words…
3 Likes
Ah Ah ![]() Thank you so much! But you’re exaggerating…
Thank you so much! But you’re exaggerating…
2 Likes
Hello everyone
Today a little update just to show the progress of the work. The holidays are approaching and family commitments take over…


Let’s talk about the joint between the two half-fuselages. I will dedicate my attention to the one above at a later time. In the lower part the joint was quite good but not good enough in my eyes.
See the arrows in the photo.
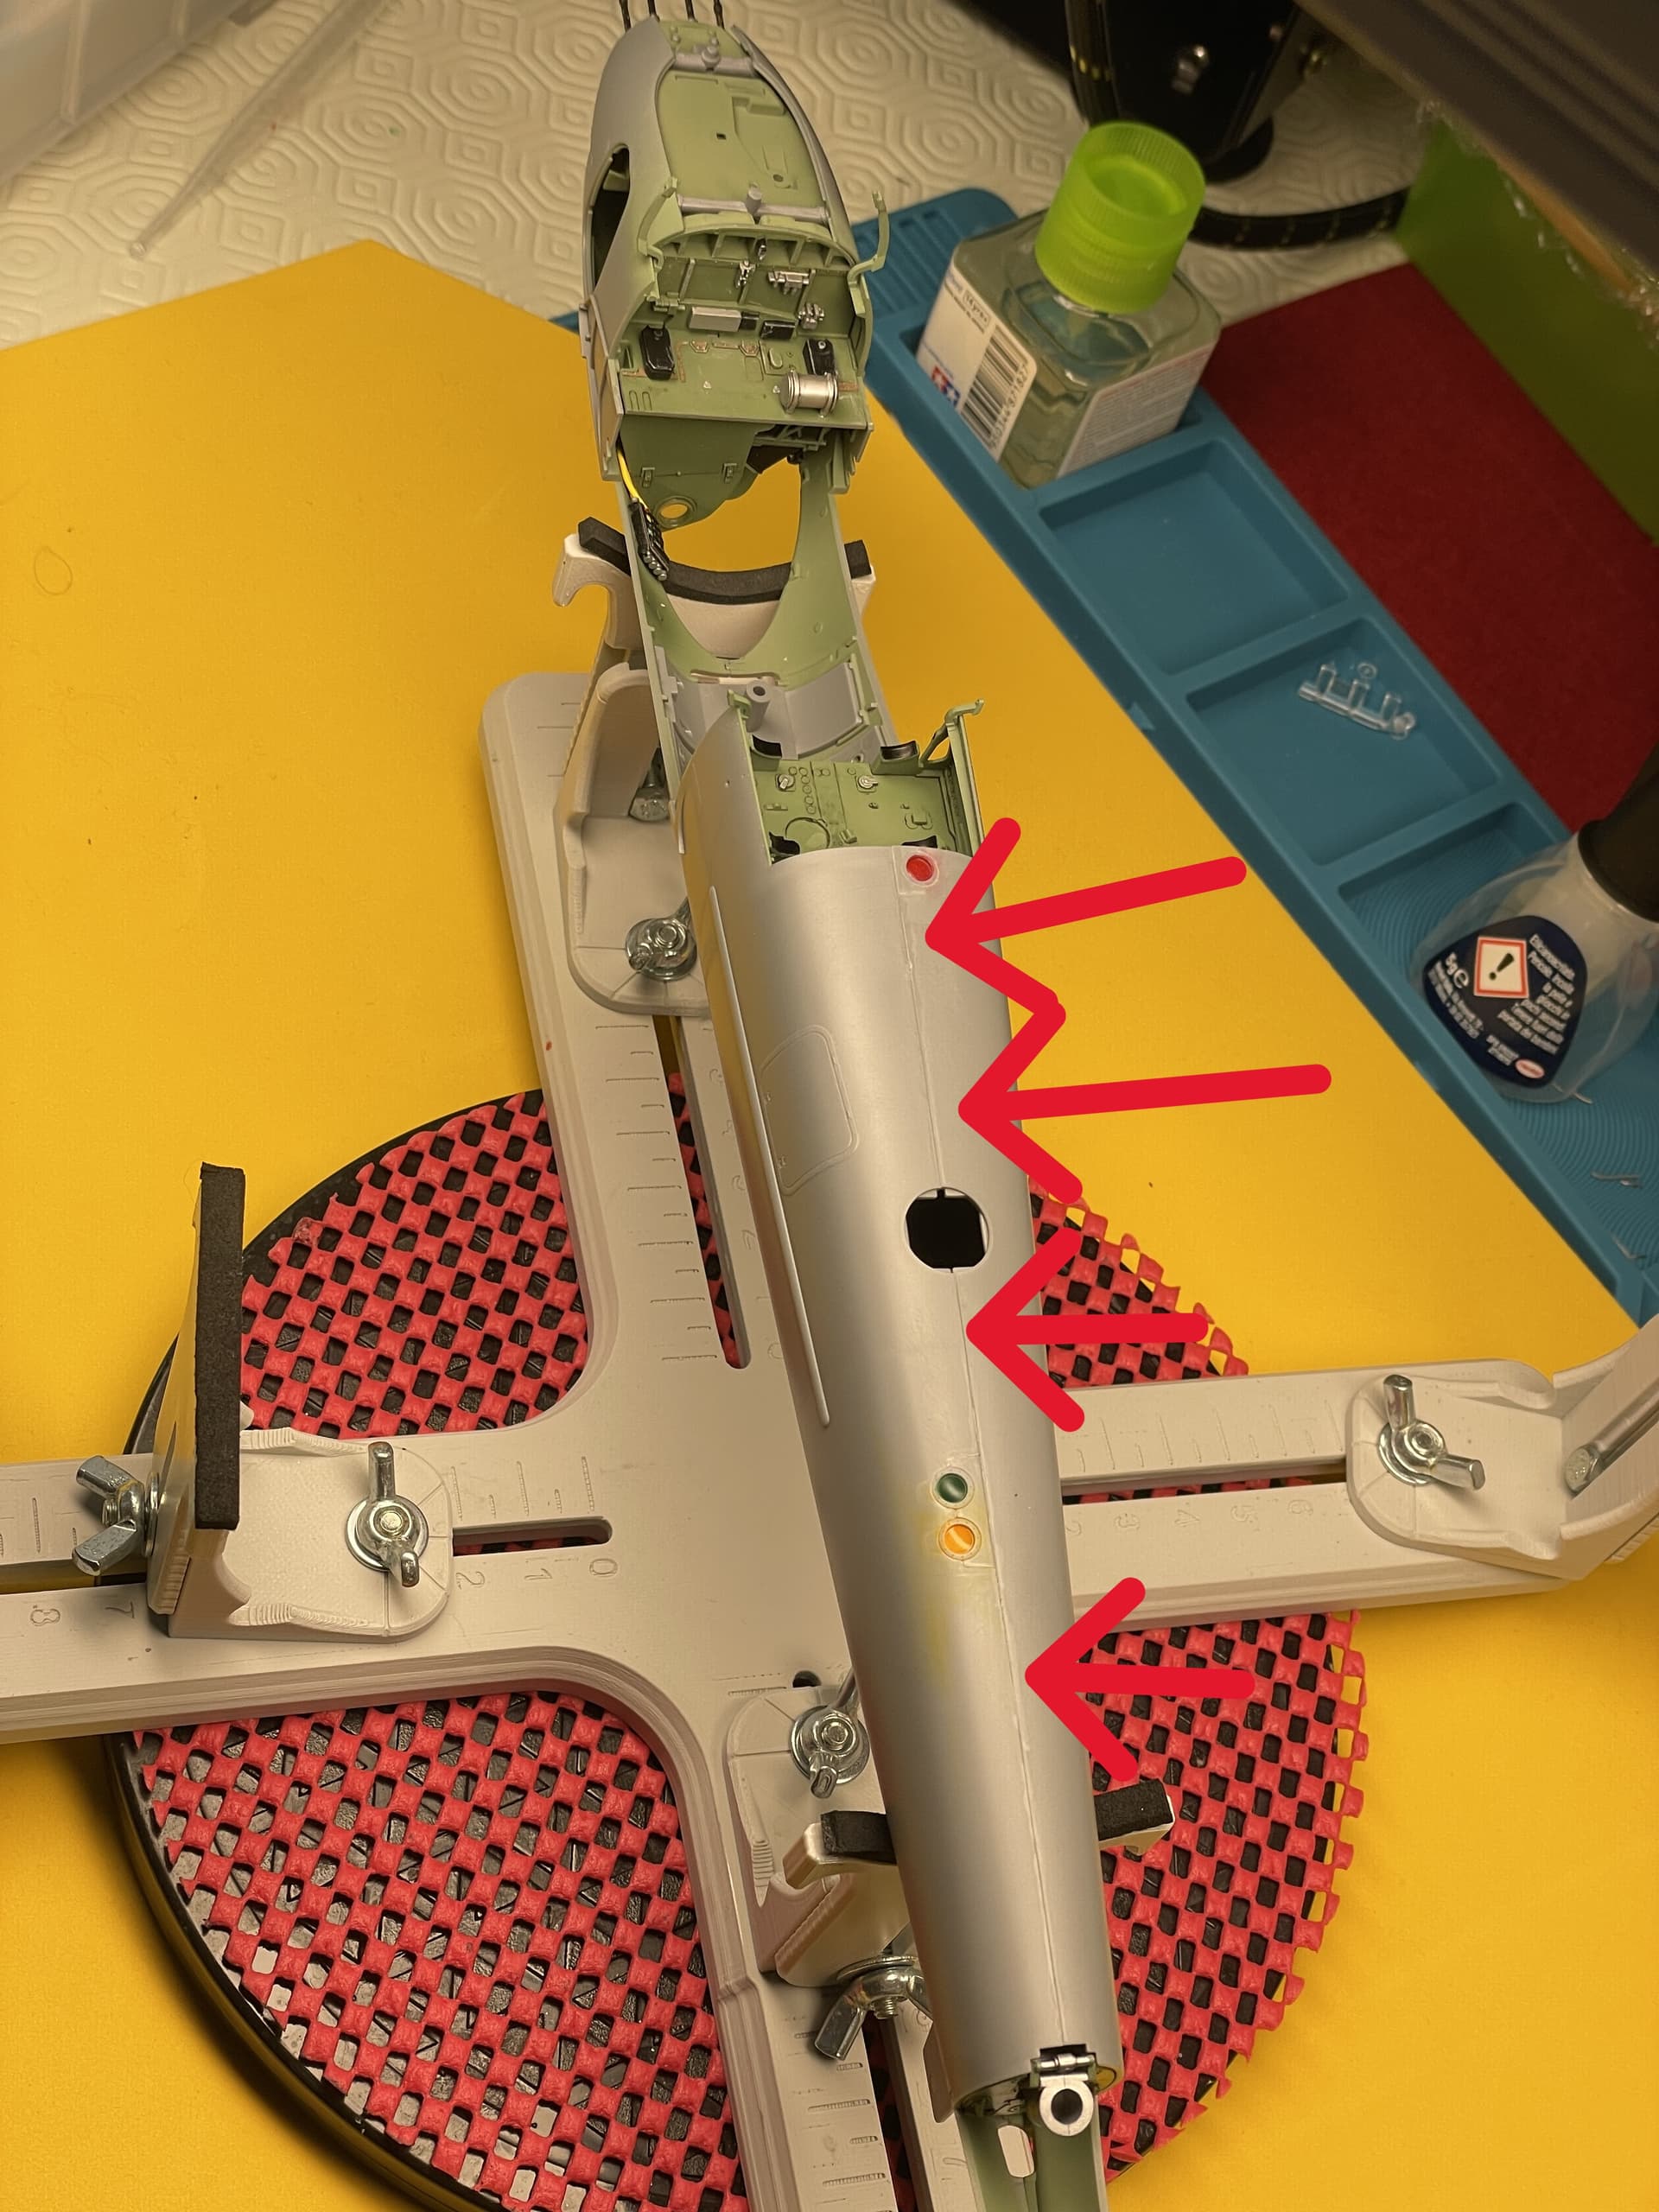
Then I tried with some sprue goo but once again I was not satisfied. So the final solution, a line of CA glue and, after only a few minutes (to not polymerize the CA glue to the maximum) the use of my multi-layer nail file - yes a women’s nail file - (seven grits from the coarsest to the one that actually shines). Now to the touch everything is smooth and uniform, we will see when the camouflage (or primer) is applied if my feeling is true.
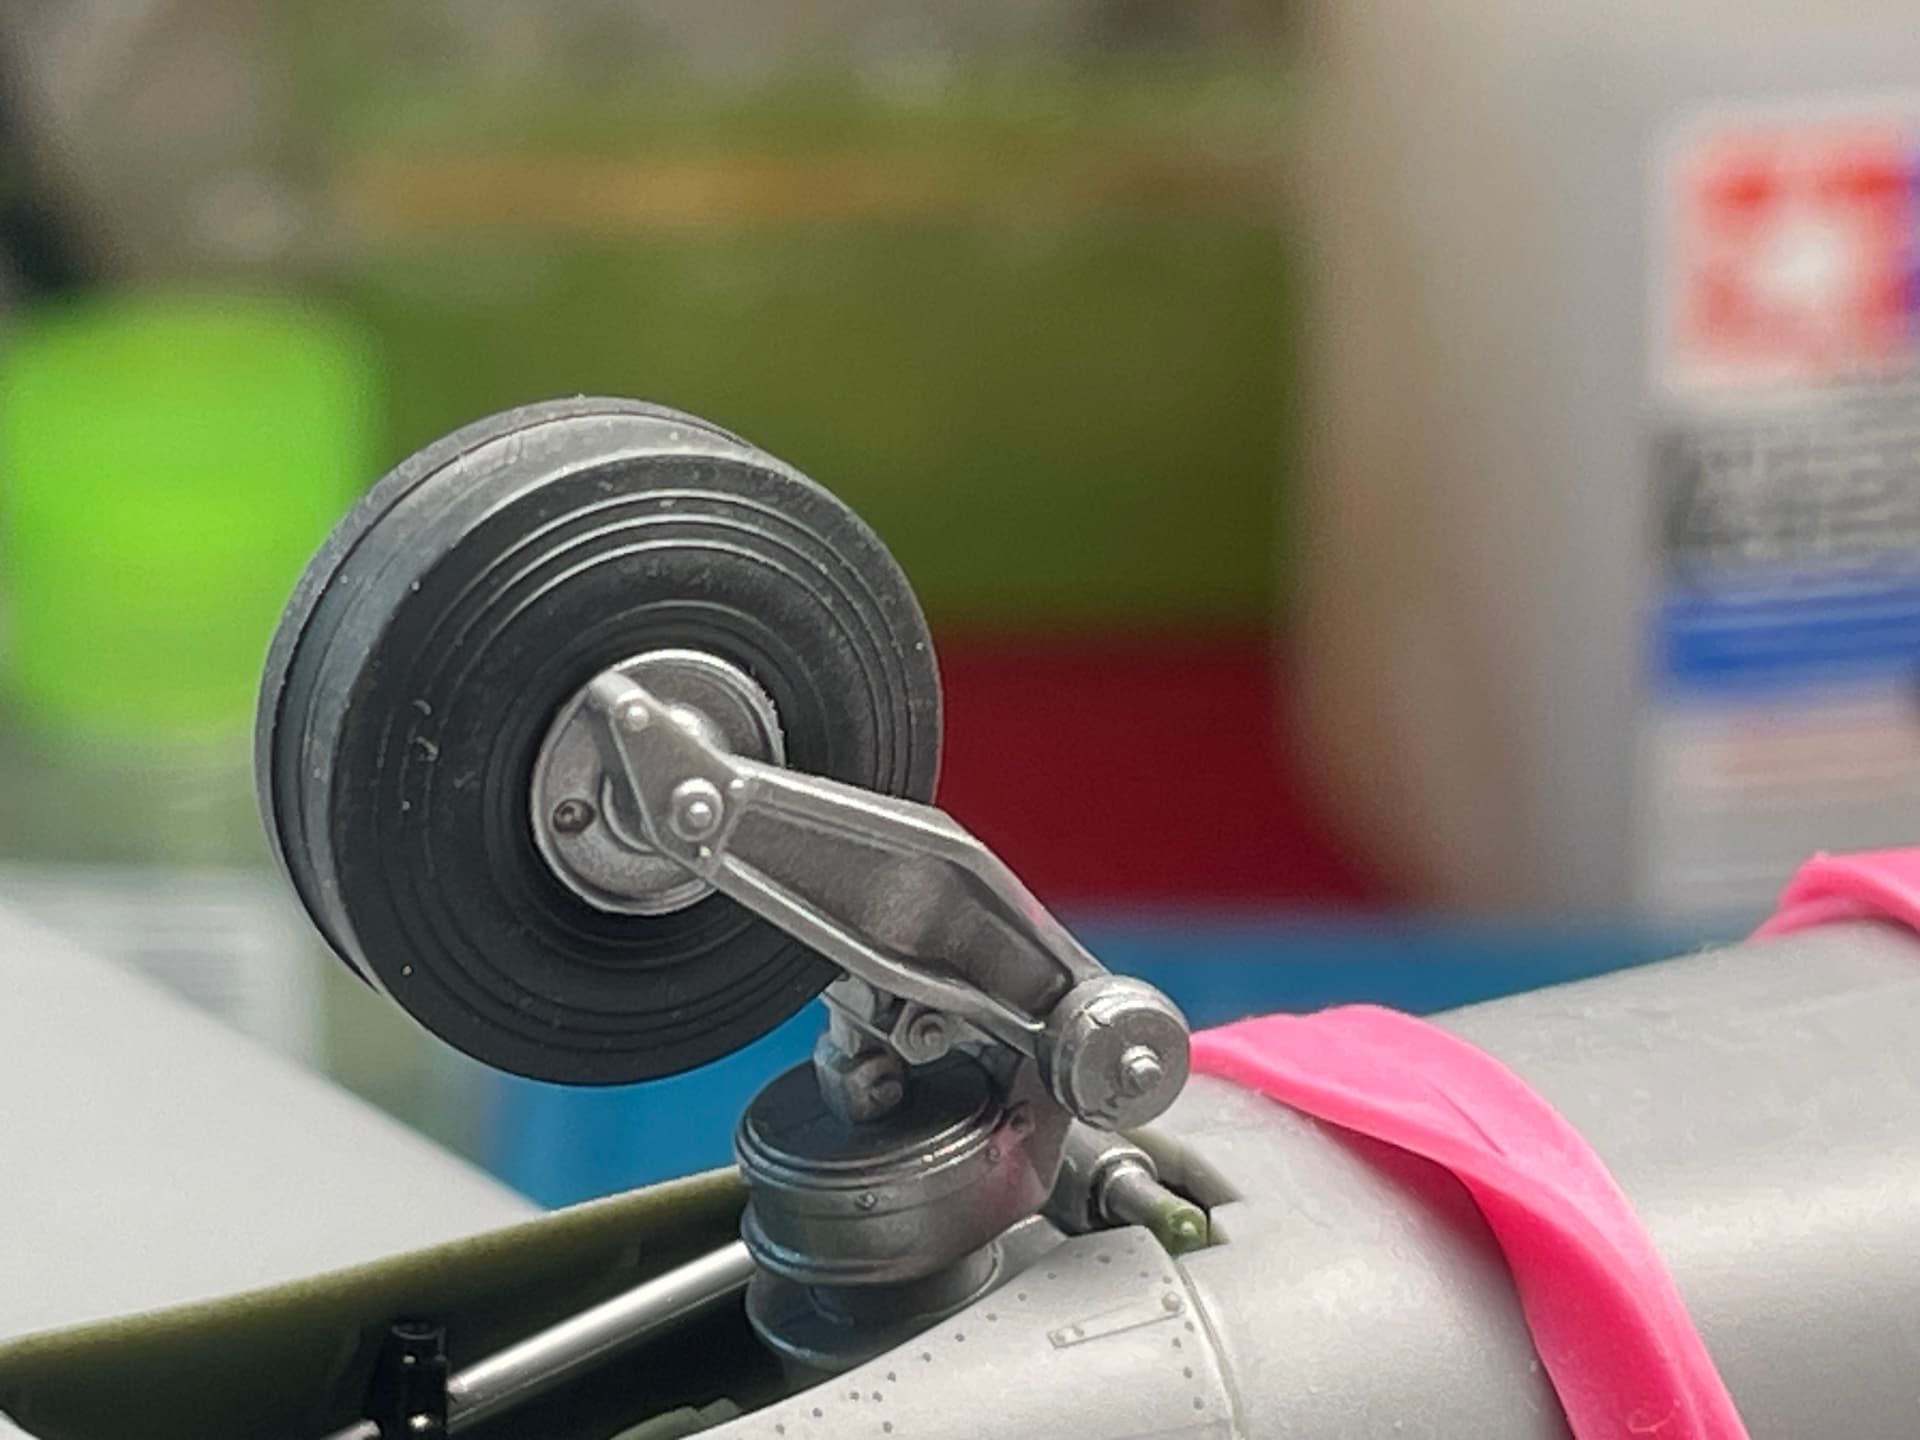
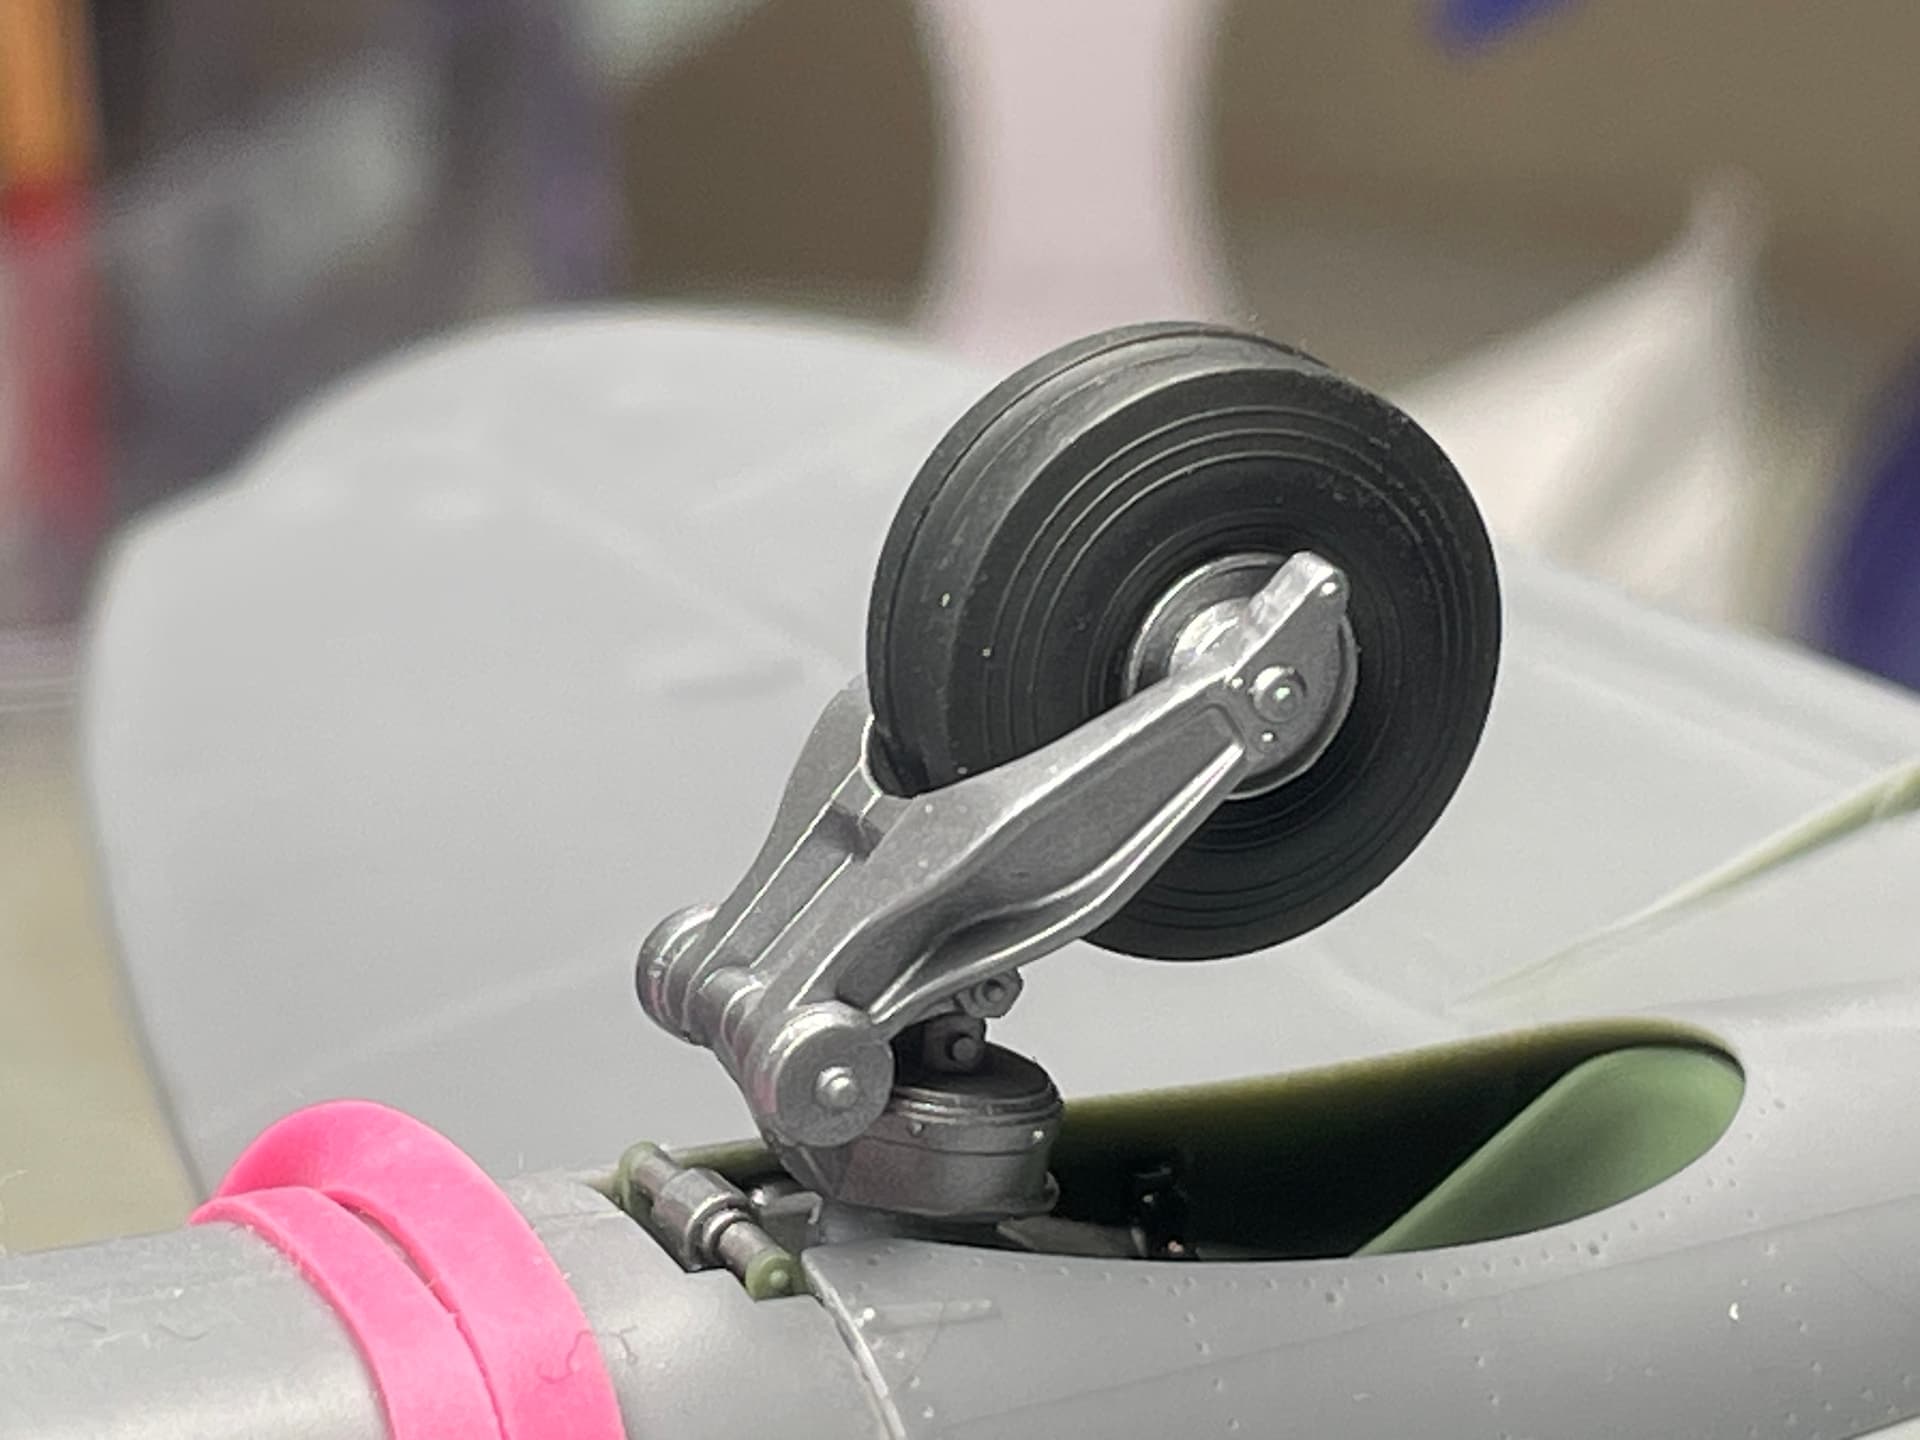
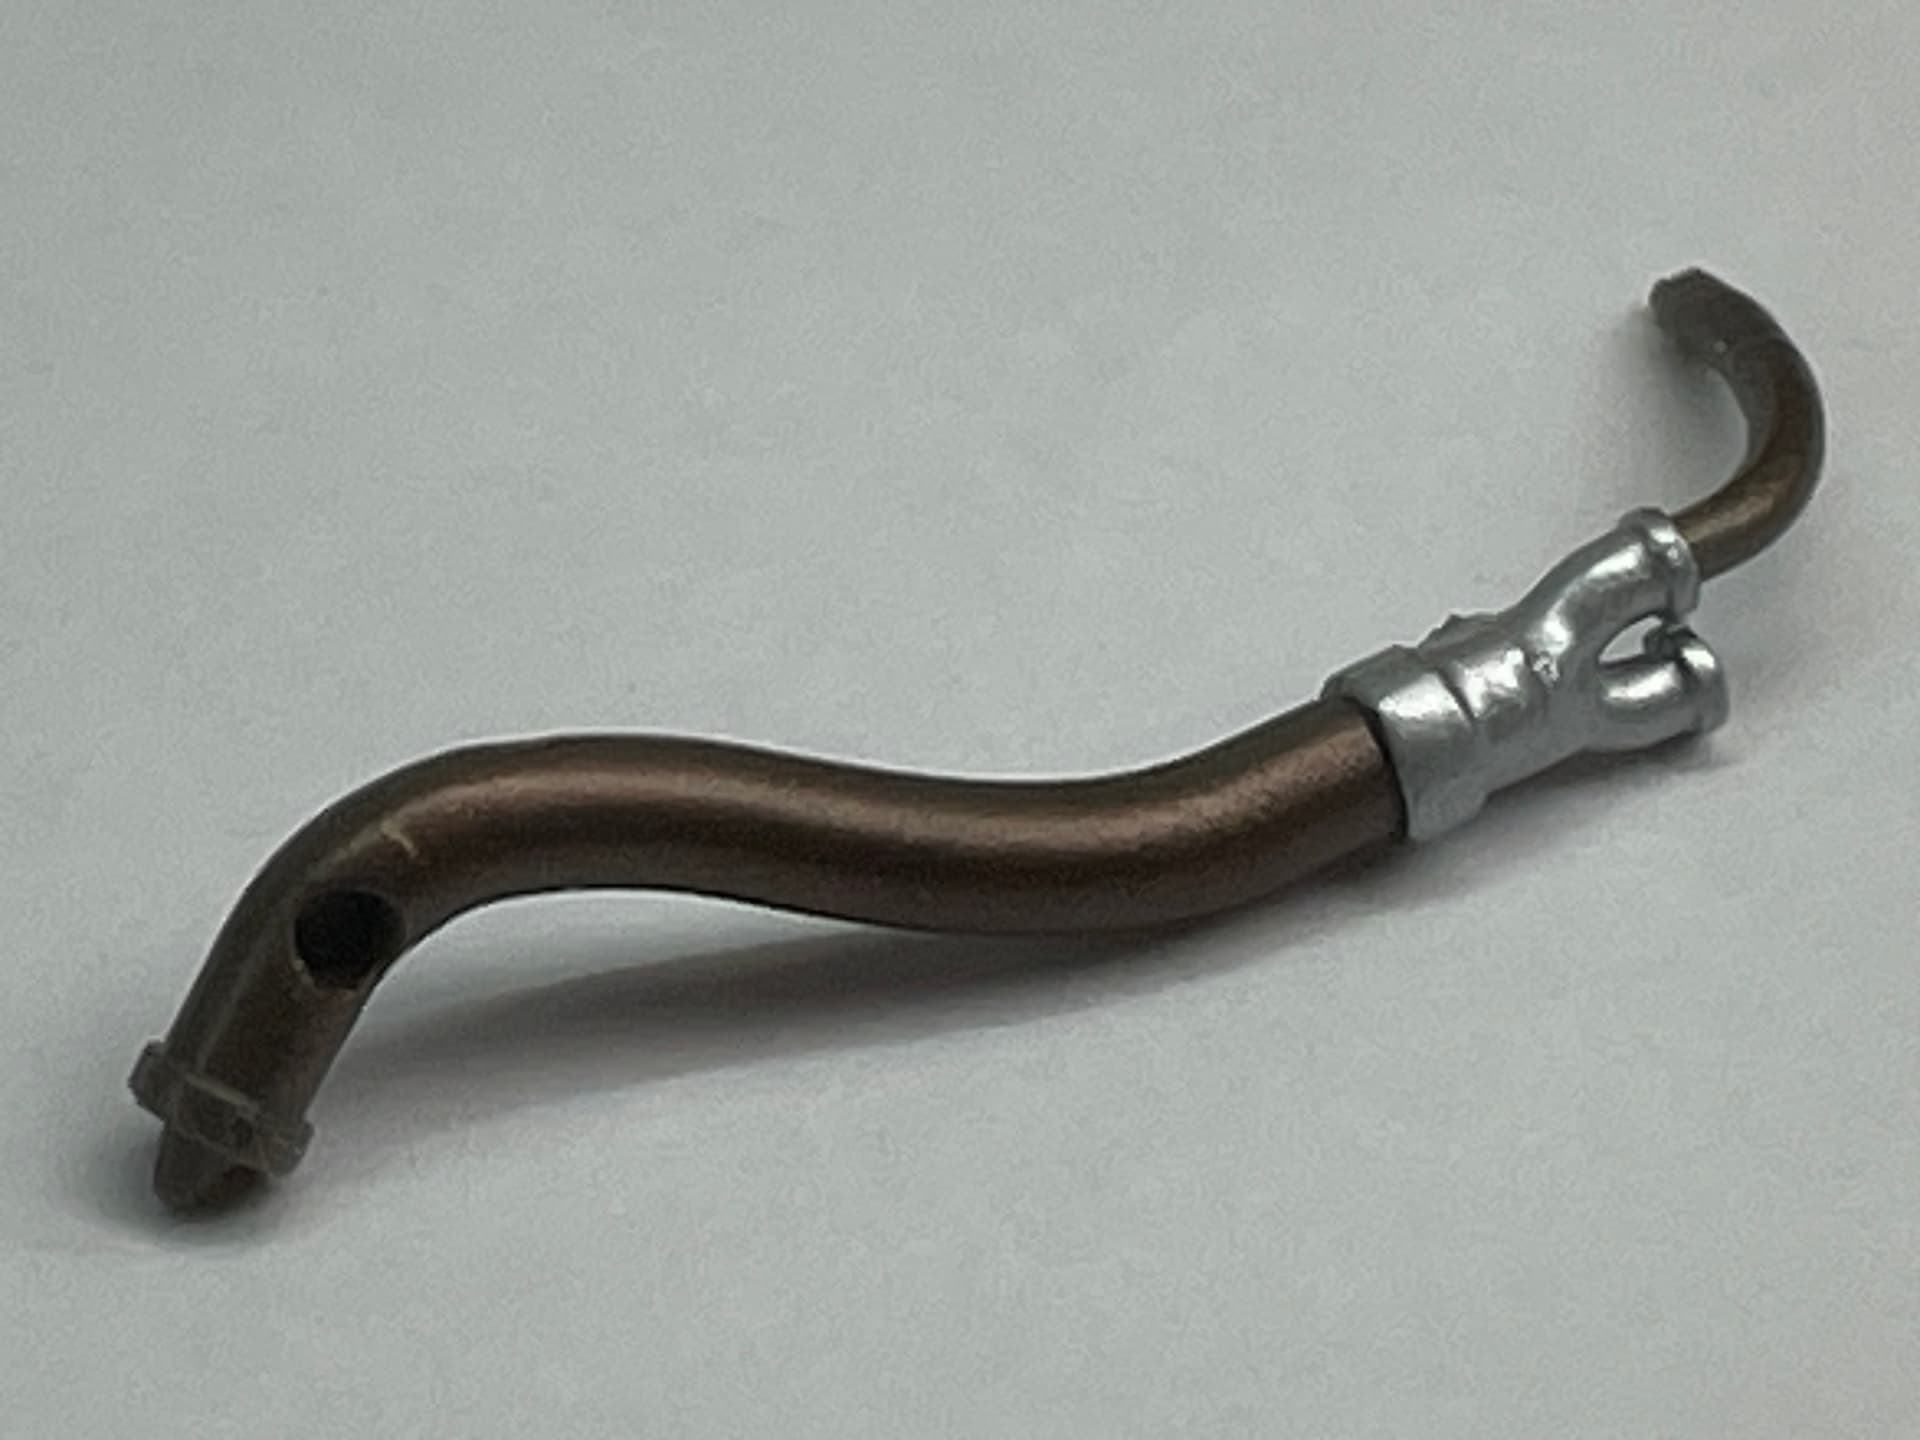
I then dedicated myself to the rear landing gear. Not much to say, easy easy assembly. Only the aging is missing.
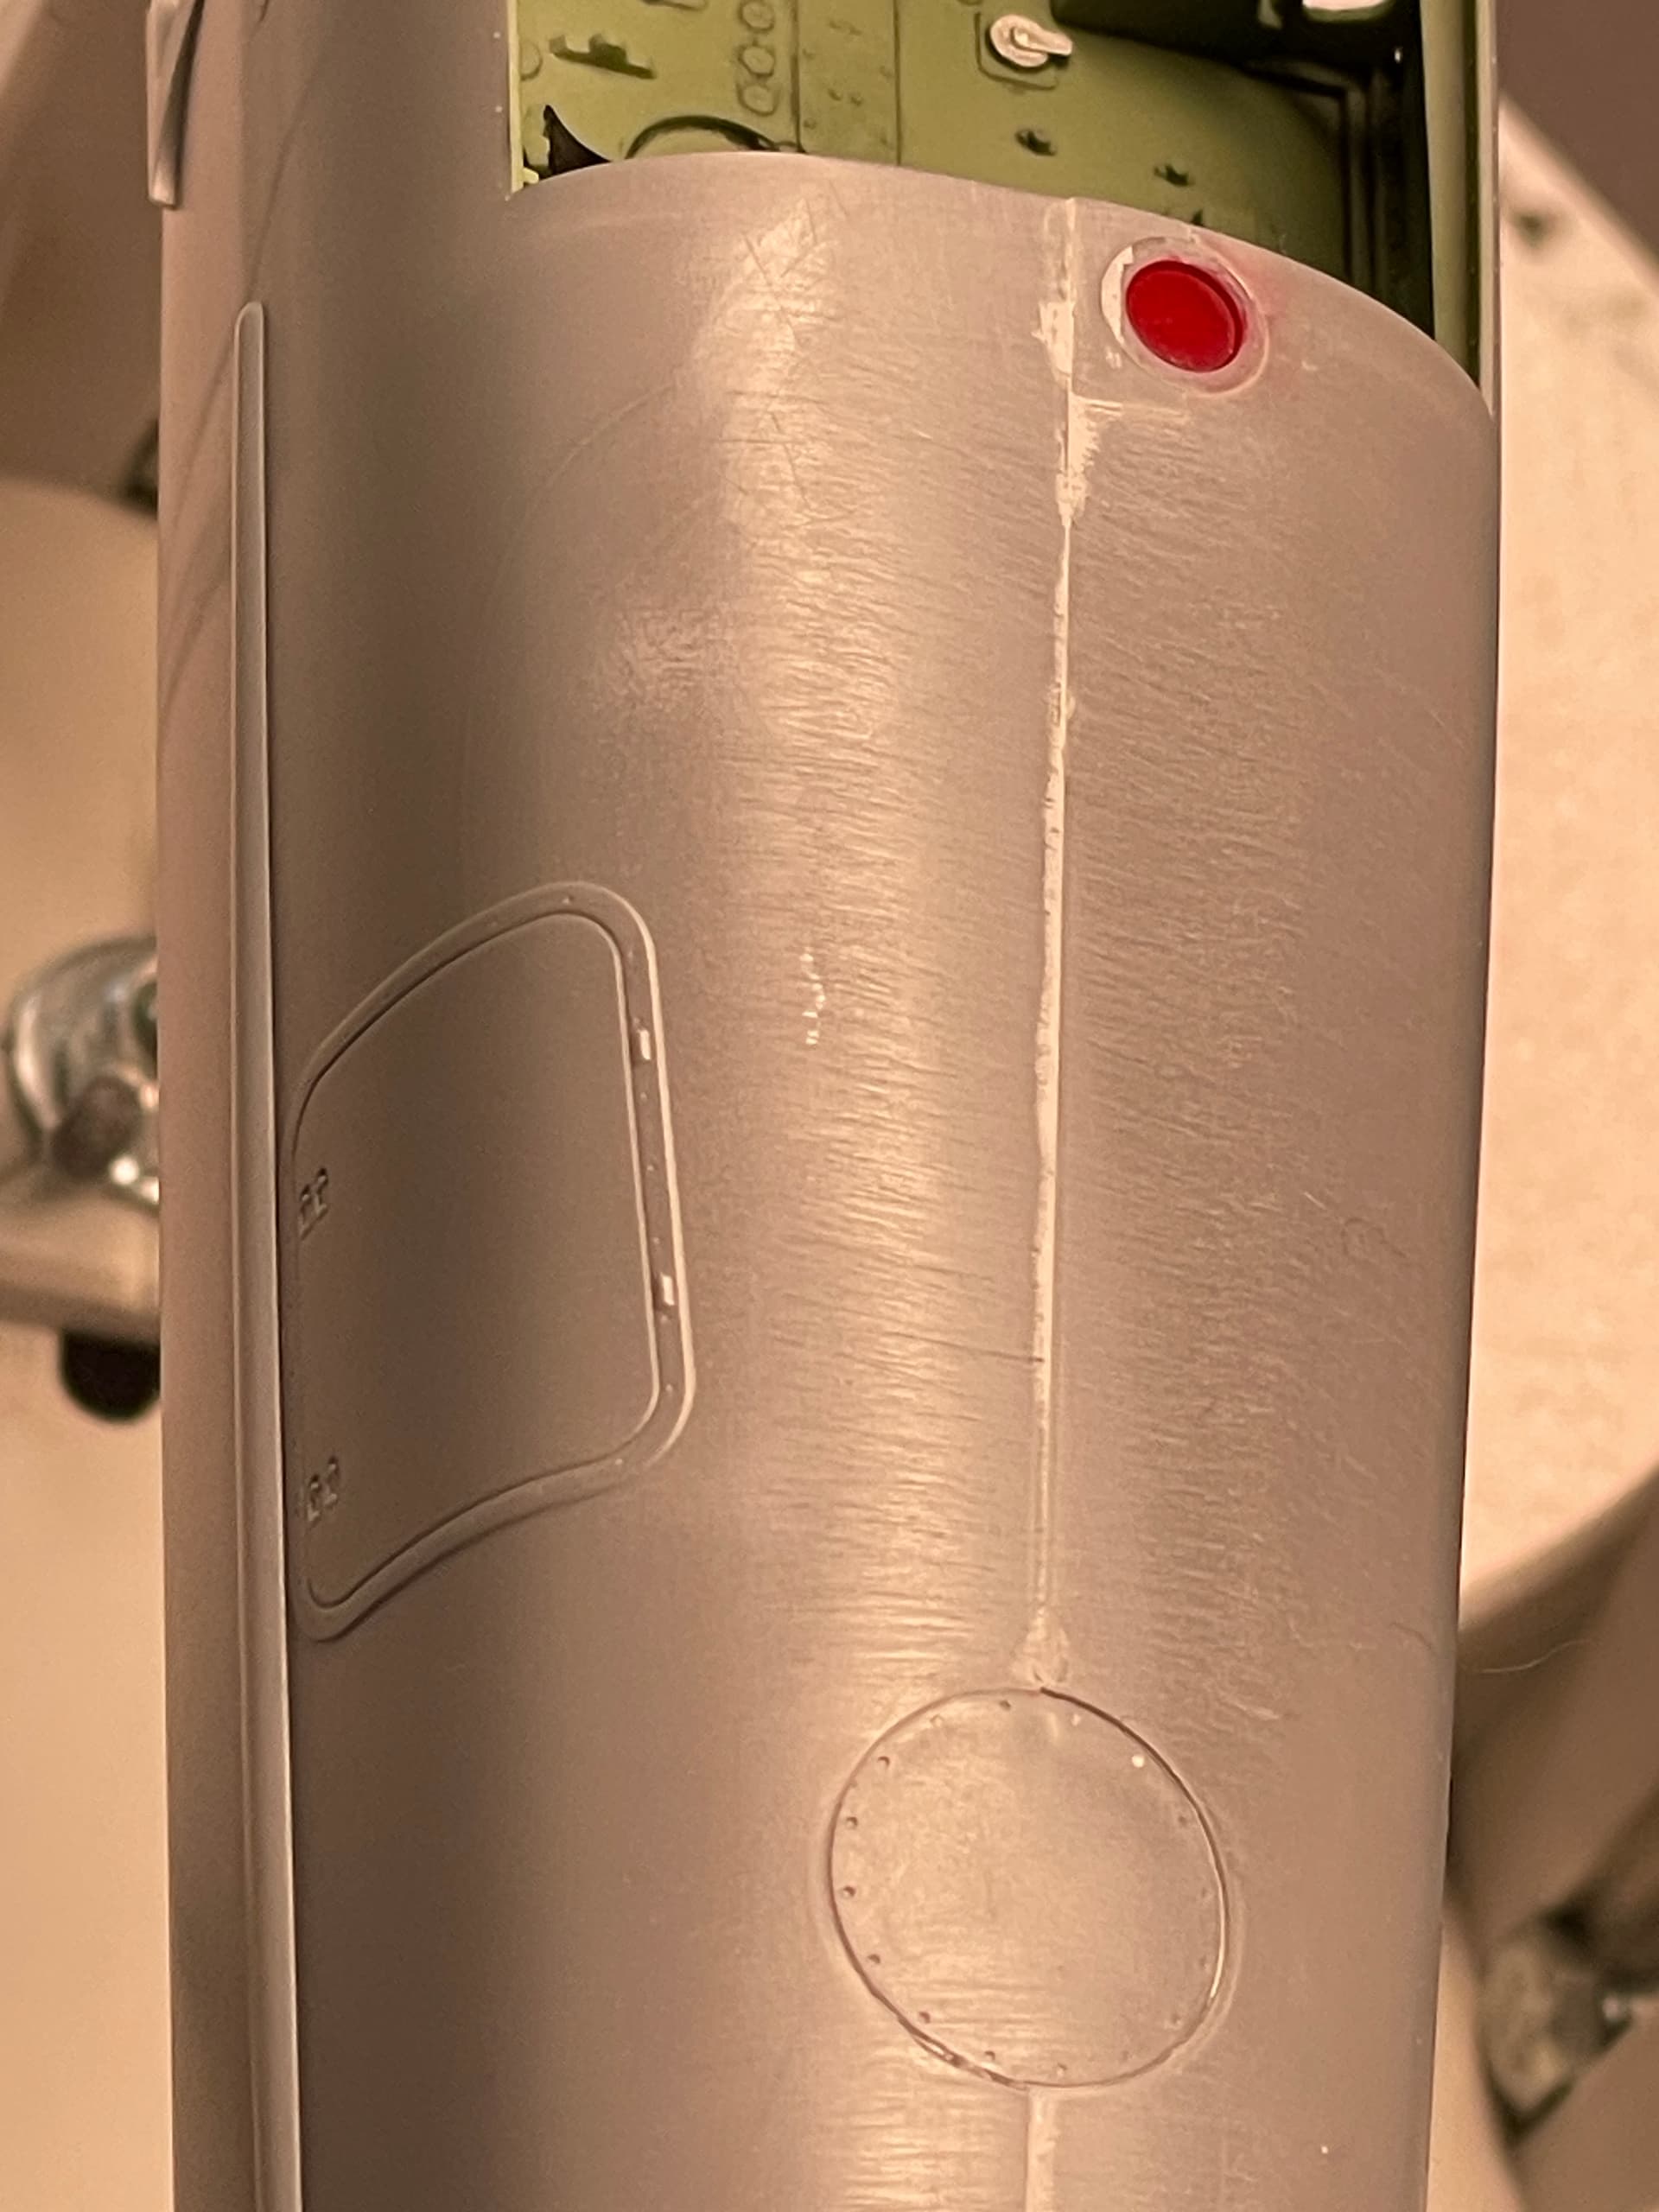
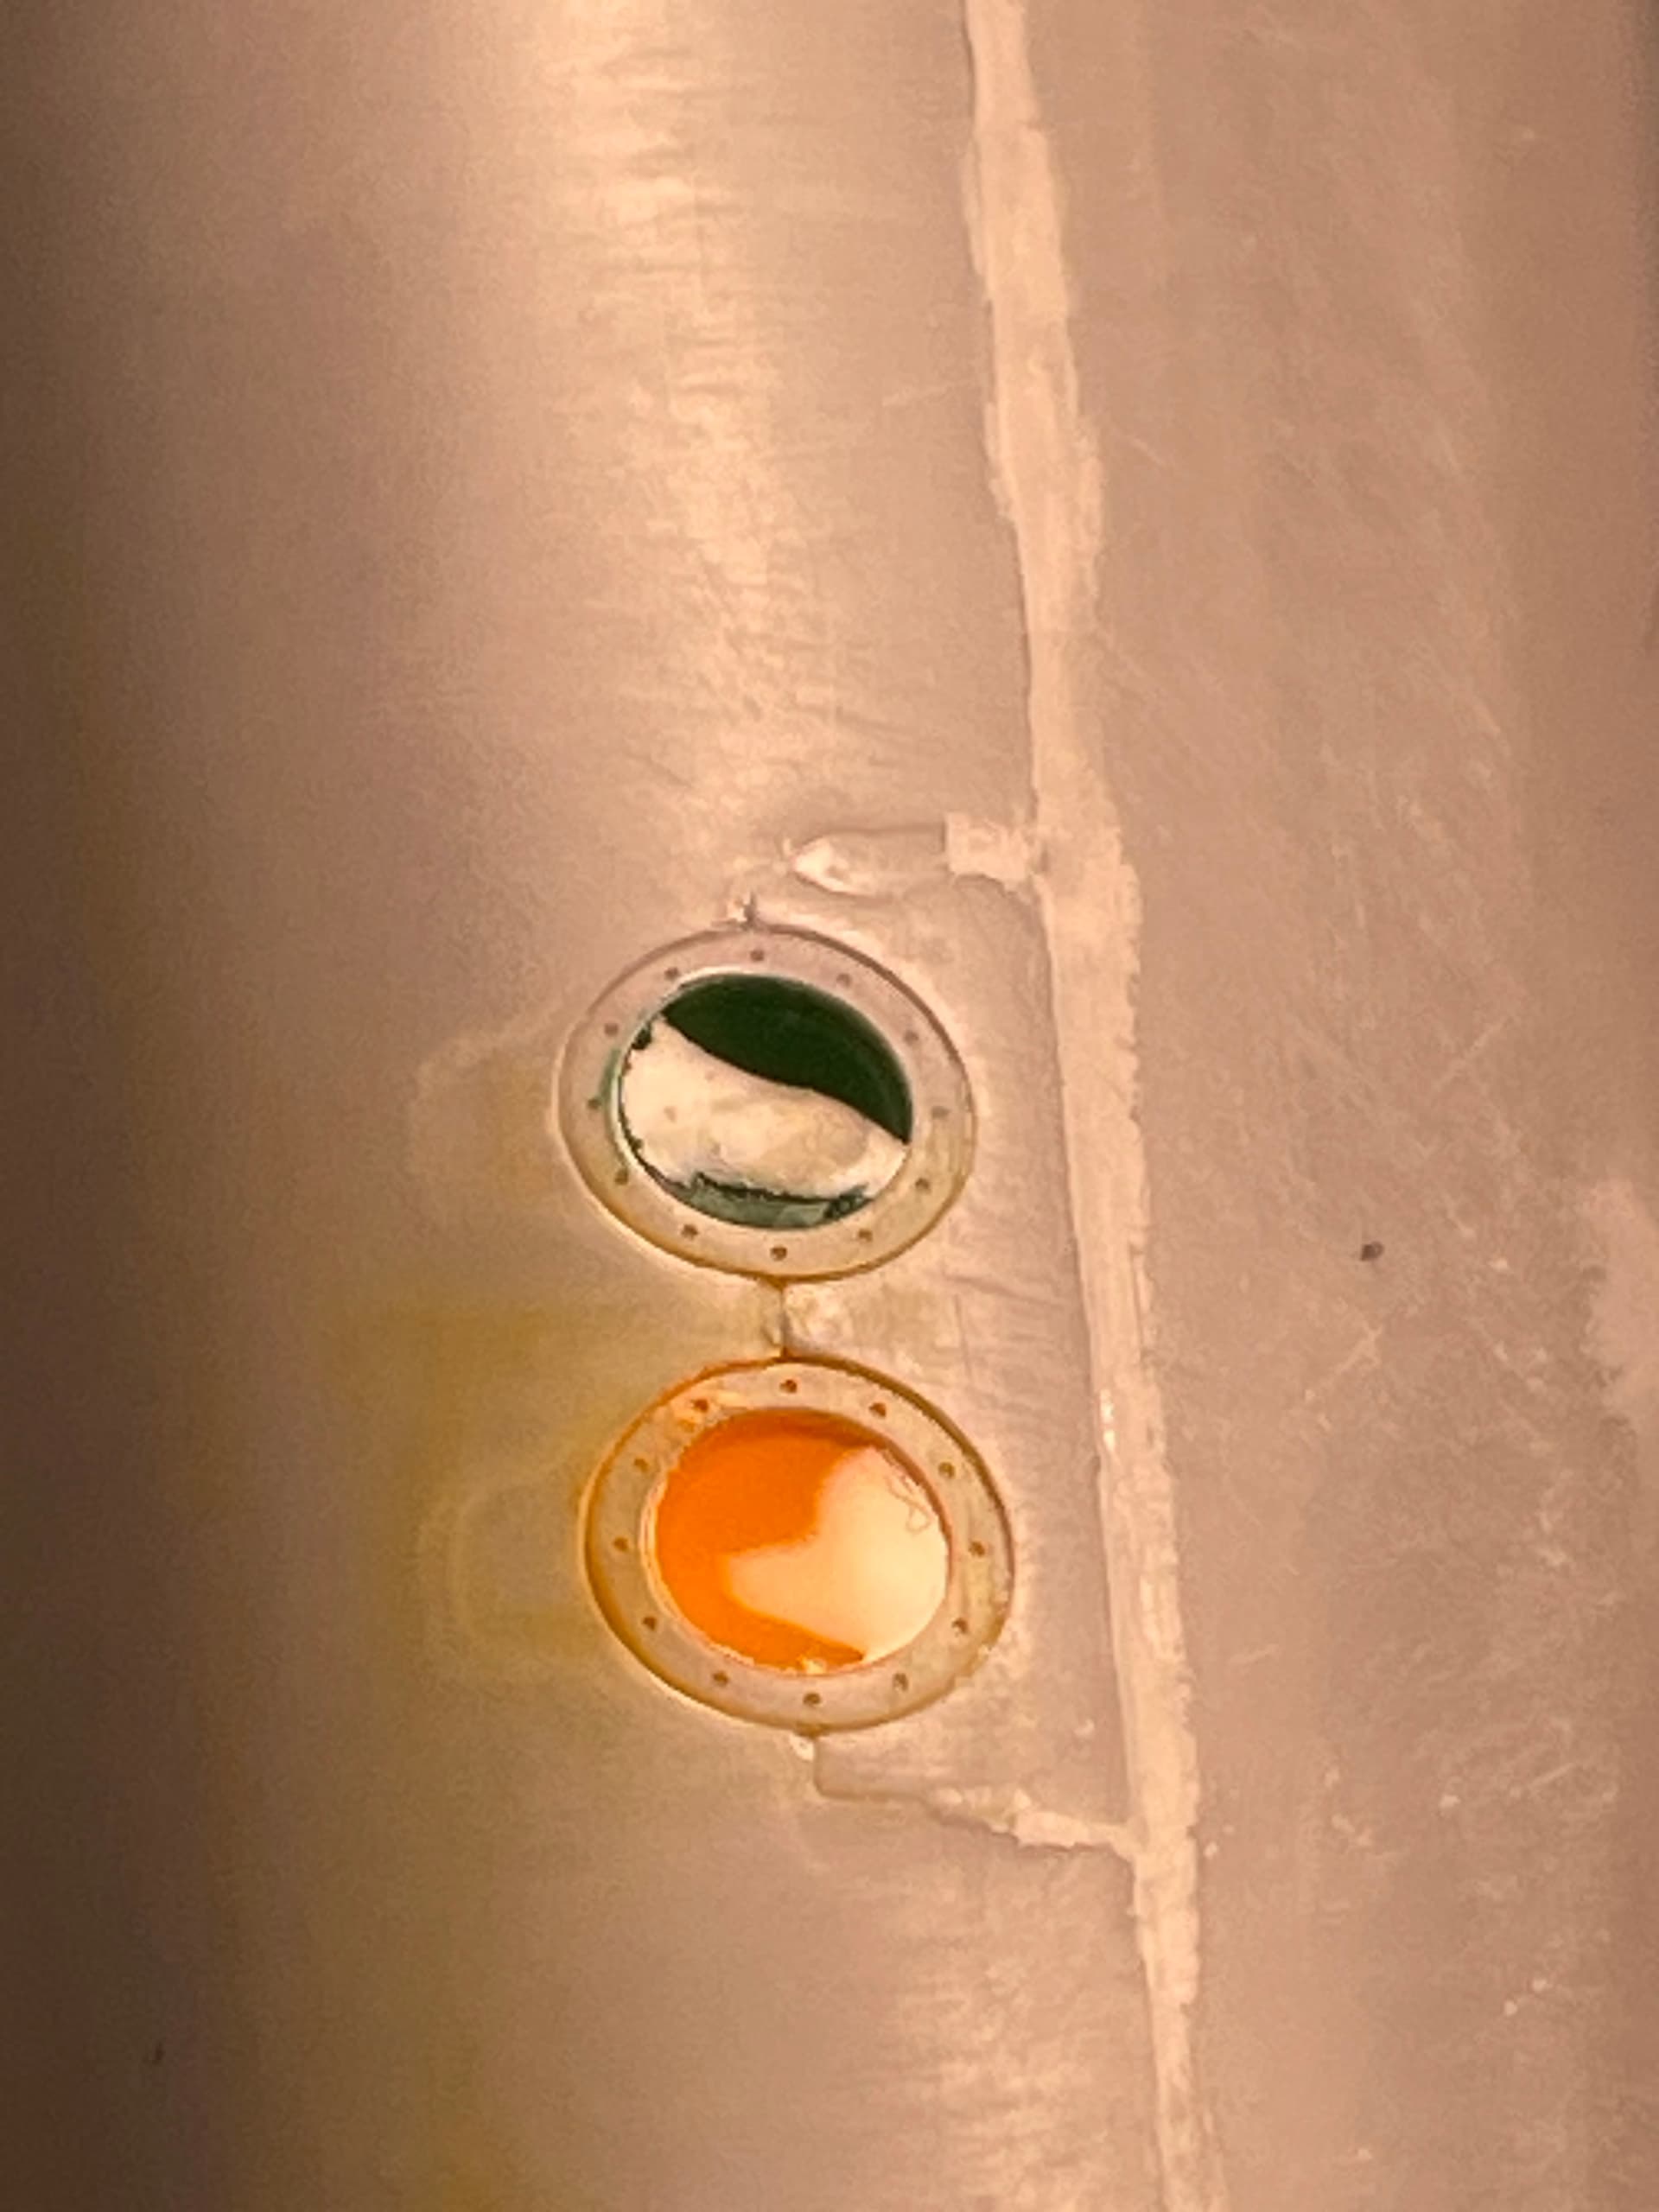
One more word on the identification lights under the fuselage. Unfortunately I lost one of the “glasses” provided in the kit and so I adopted this solution. Once the bulb was colored as per the instructions, I reconstituted the glass part with transparent resin that cures with UV light. The final effect seems acceptable to me.
See you soon! And if I can’t make it before Christmas, best wishes to everyone!!!
Dan
9 Likes
Really nicely done. Shame about the lens but your fix worked well.
Waiting with bait on my breath ![]()
1 Like
Hello everyone, first of all I wish a happy new year to all of you and your families.
I have a question that is perhaps off topic on this blog. Guys, do you think in general that it is easier and more enjoyable to follow the work of any member if he opens a continuous blog like Torsten did, or do you prefer that each single topic is treated with its own specific blog? I ask this question because, precisely, like Torsten did, I am tempted to open a blog in which I describe in detail my work on airplanes. In the end I think that in this way it is less dispersive and, anyone who wants to leave their comment or criticism on my work, can do it in one place. Let me know, I will appreciate every comment.
I apologize if this topic has already been discussed, but I have not found anything on the forum
1 Like
I prefer individual build blogs, but thats just me … I also check in to see what Torsten builds, so it works either way.
2 Likes
Same individual. Easier to search and find, imho. I also follow Torsten‘s builds.
2 Likes
Hi Daniele
Either way is fine, so it’s really finding what works for you ![]()
1 Like
Either way is fine tho I don’t look to see who is building so I wouldn’t know that you built kit A, B, C, and D if they were seperate blogs. I also follow Torsten’s builds
1 Like
Hello everyone.
As for my little poll, it seems to me that the majority clearly preferred to keep separate topics, so let’s move on.
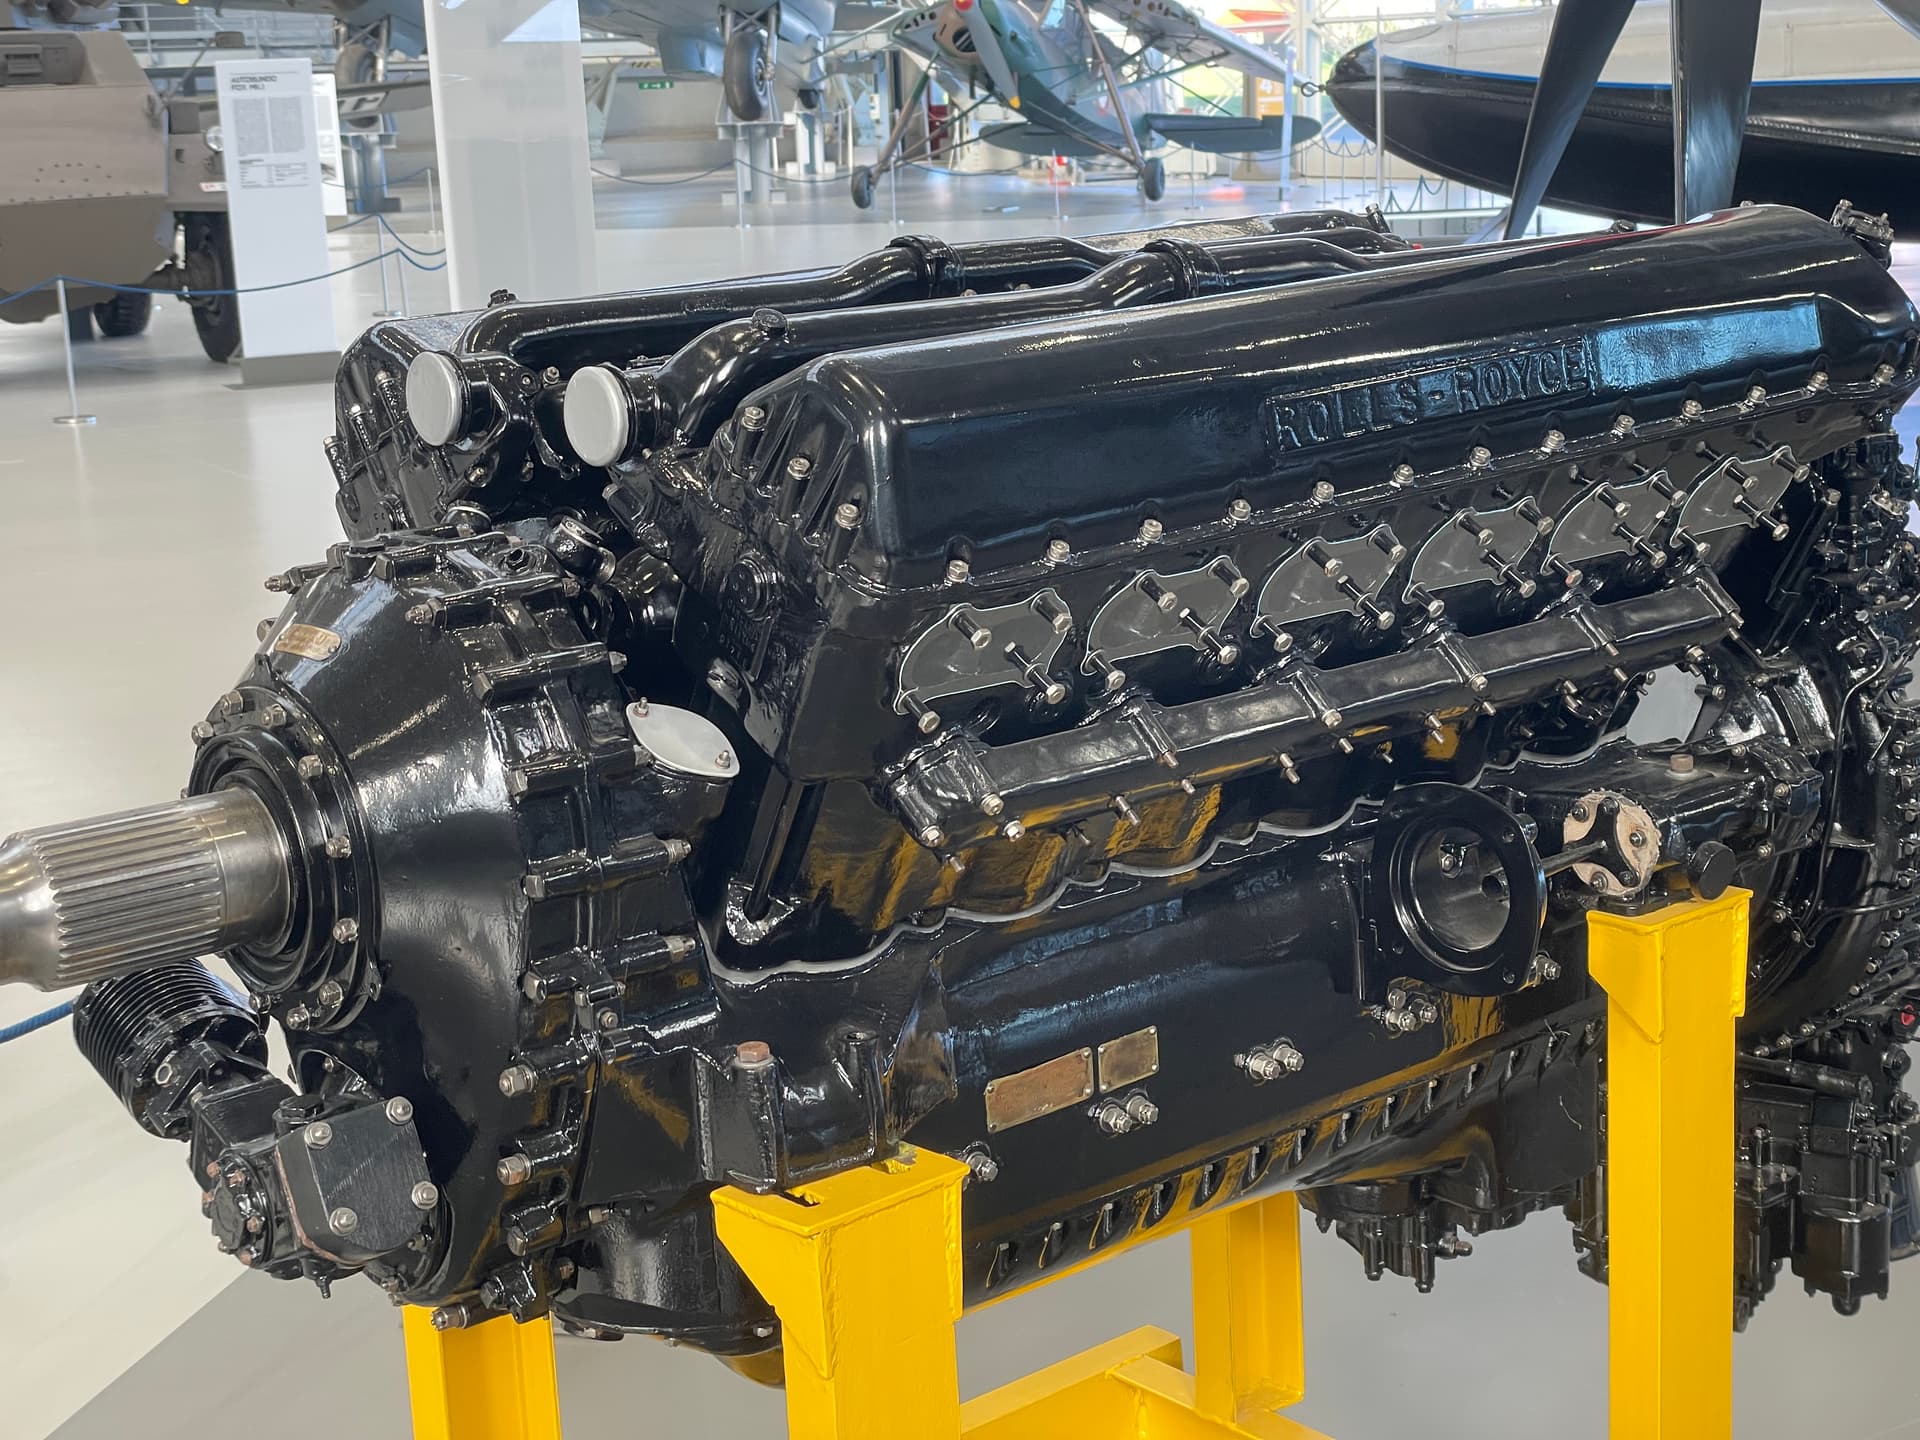
My Mosquito slept a bit during the past holidays, mainly due to his modeler who ate and drank like crazy during a nice stay in Sicily (back from his stay with a stop at the stunning Italian Air Force Museum in Vigna di Valle - my report in the appropriate section of this forum).
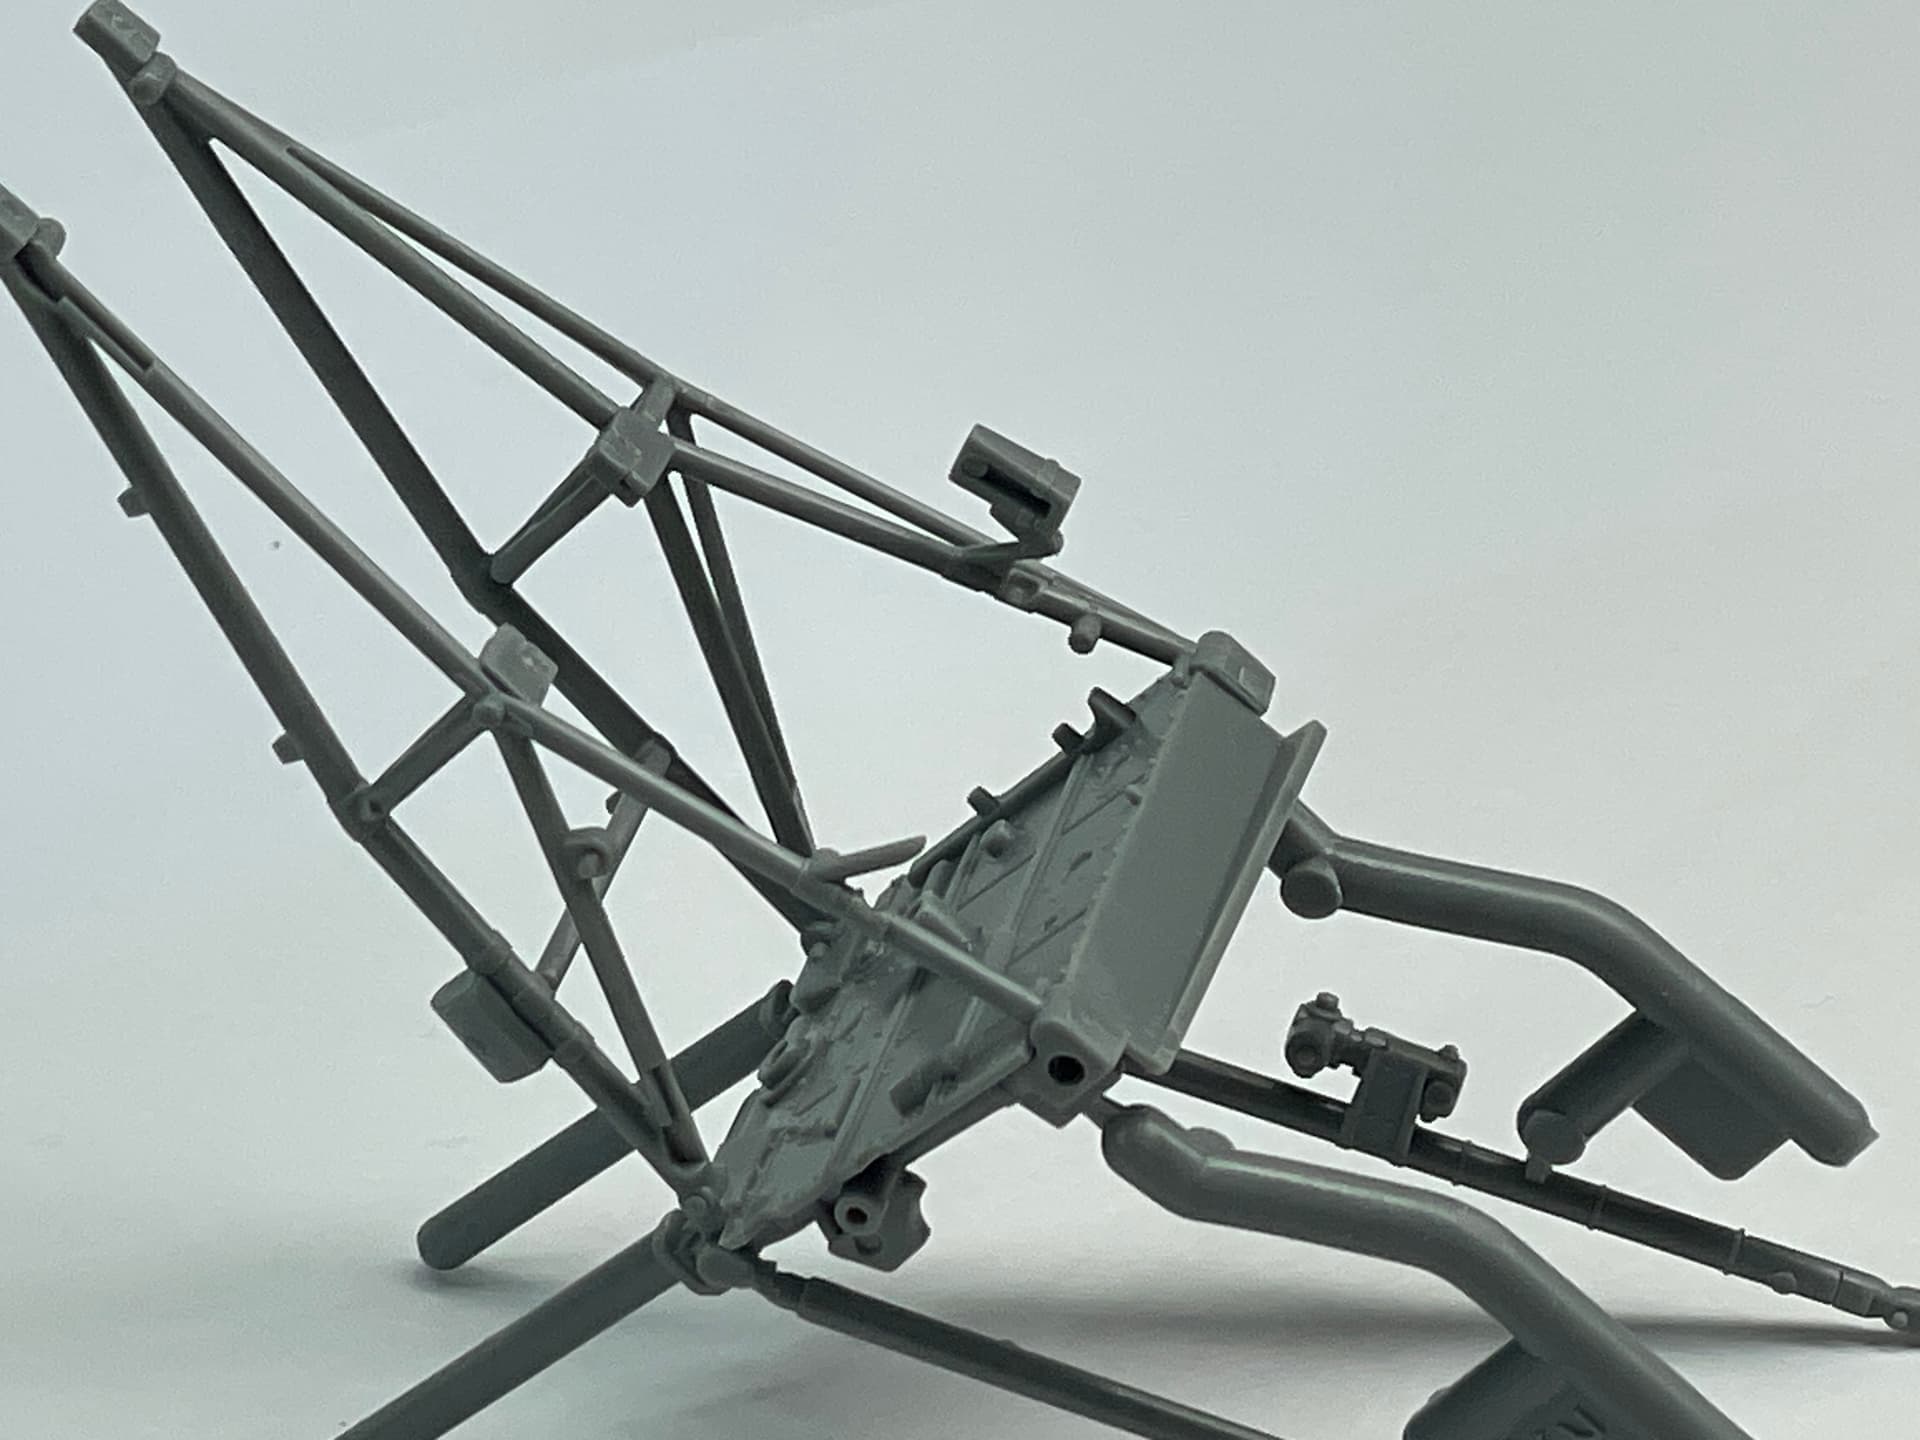
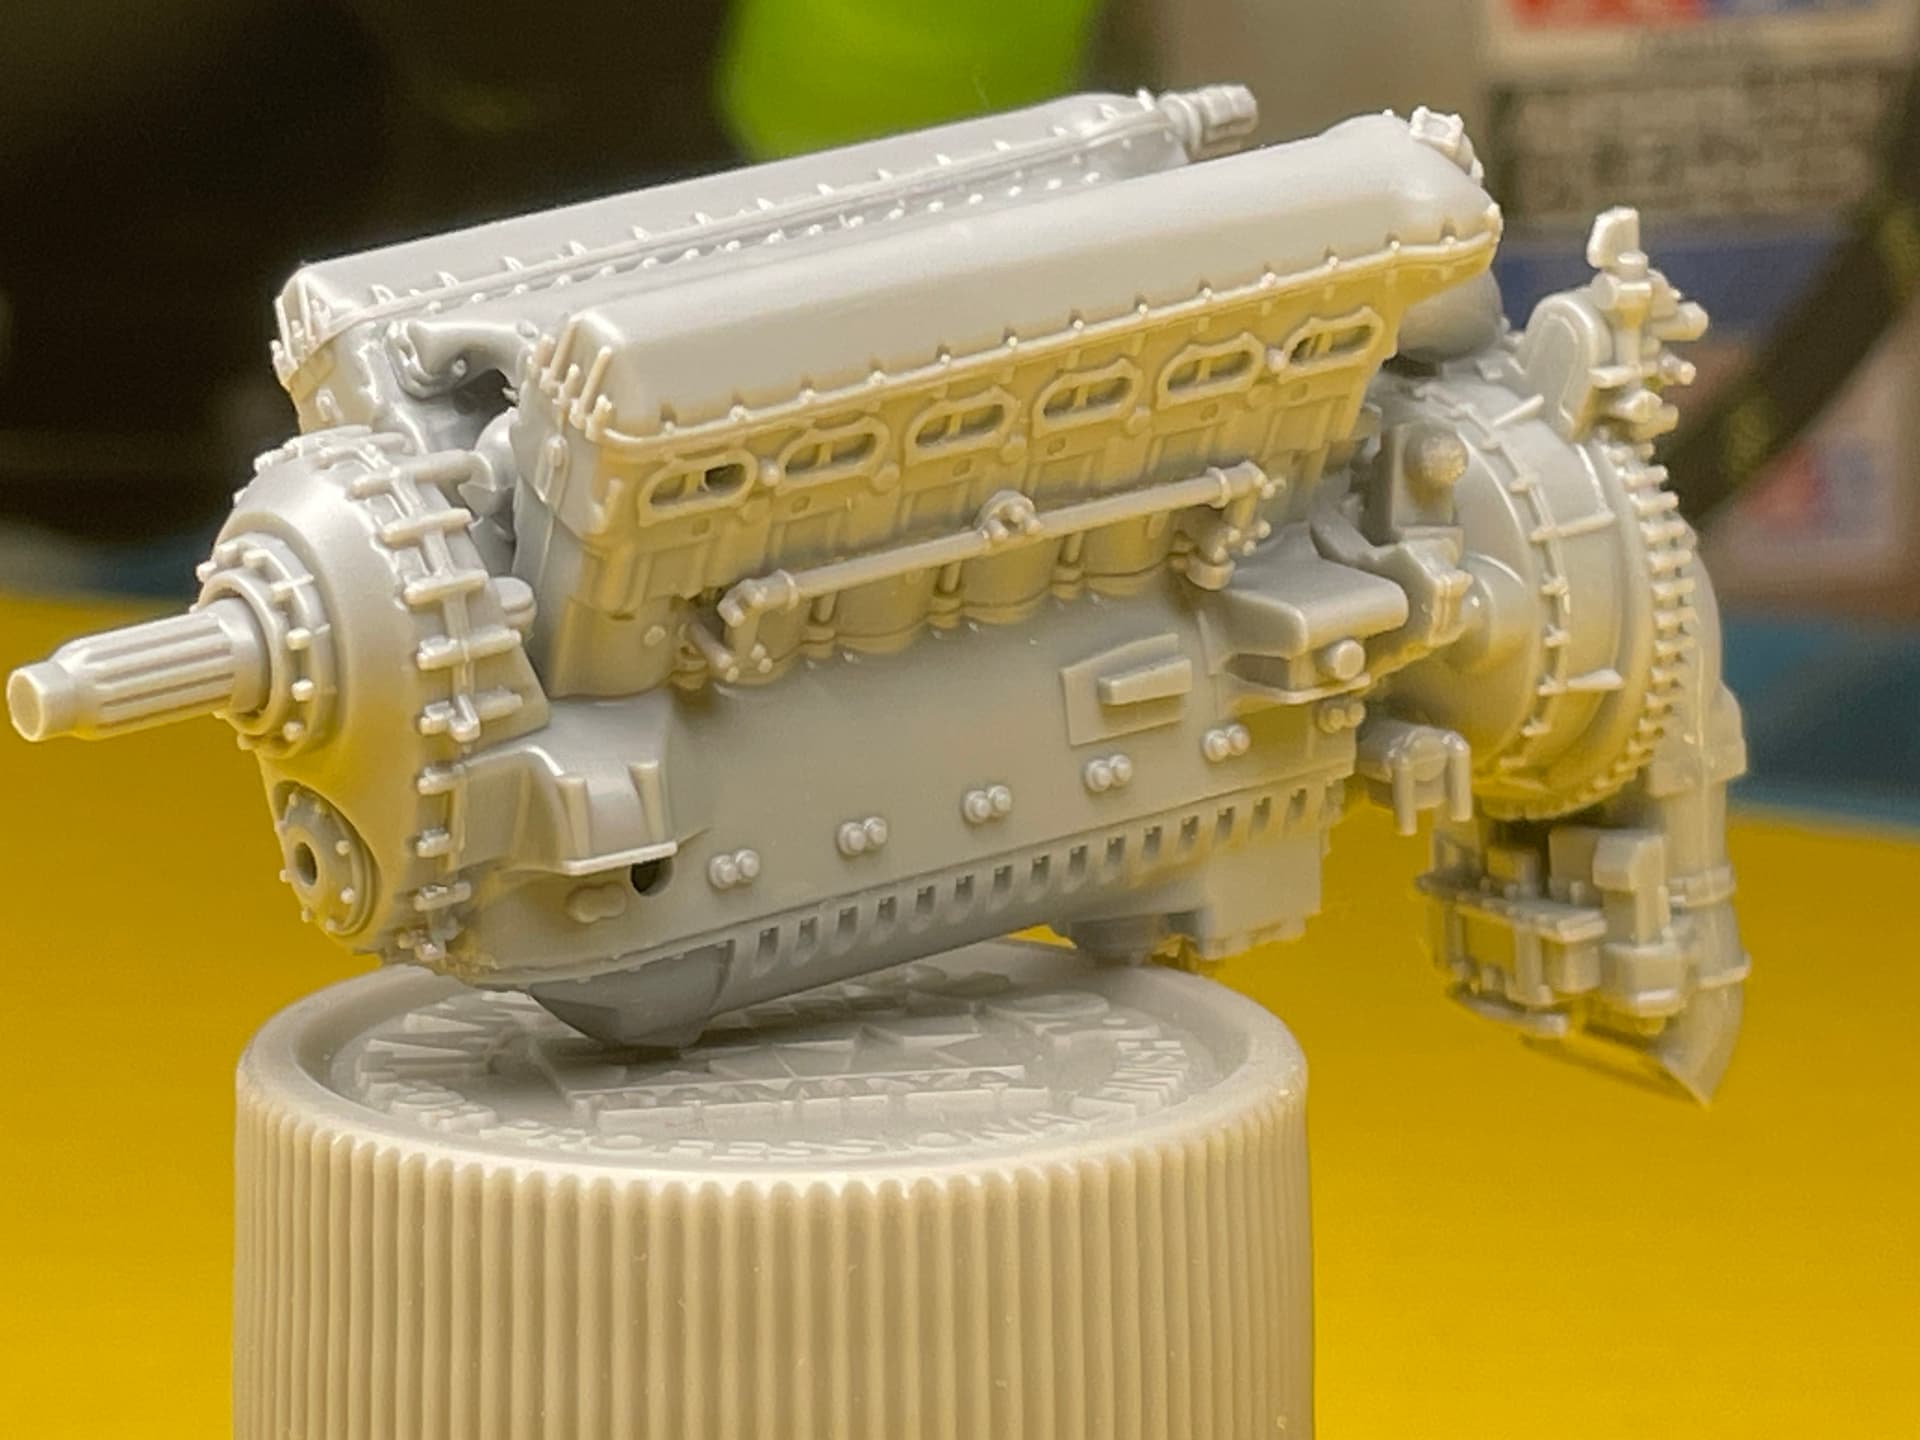
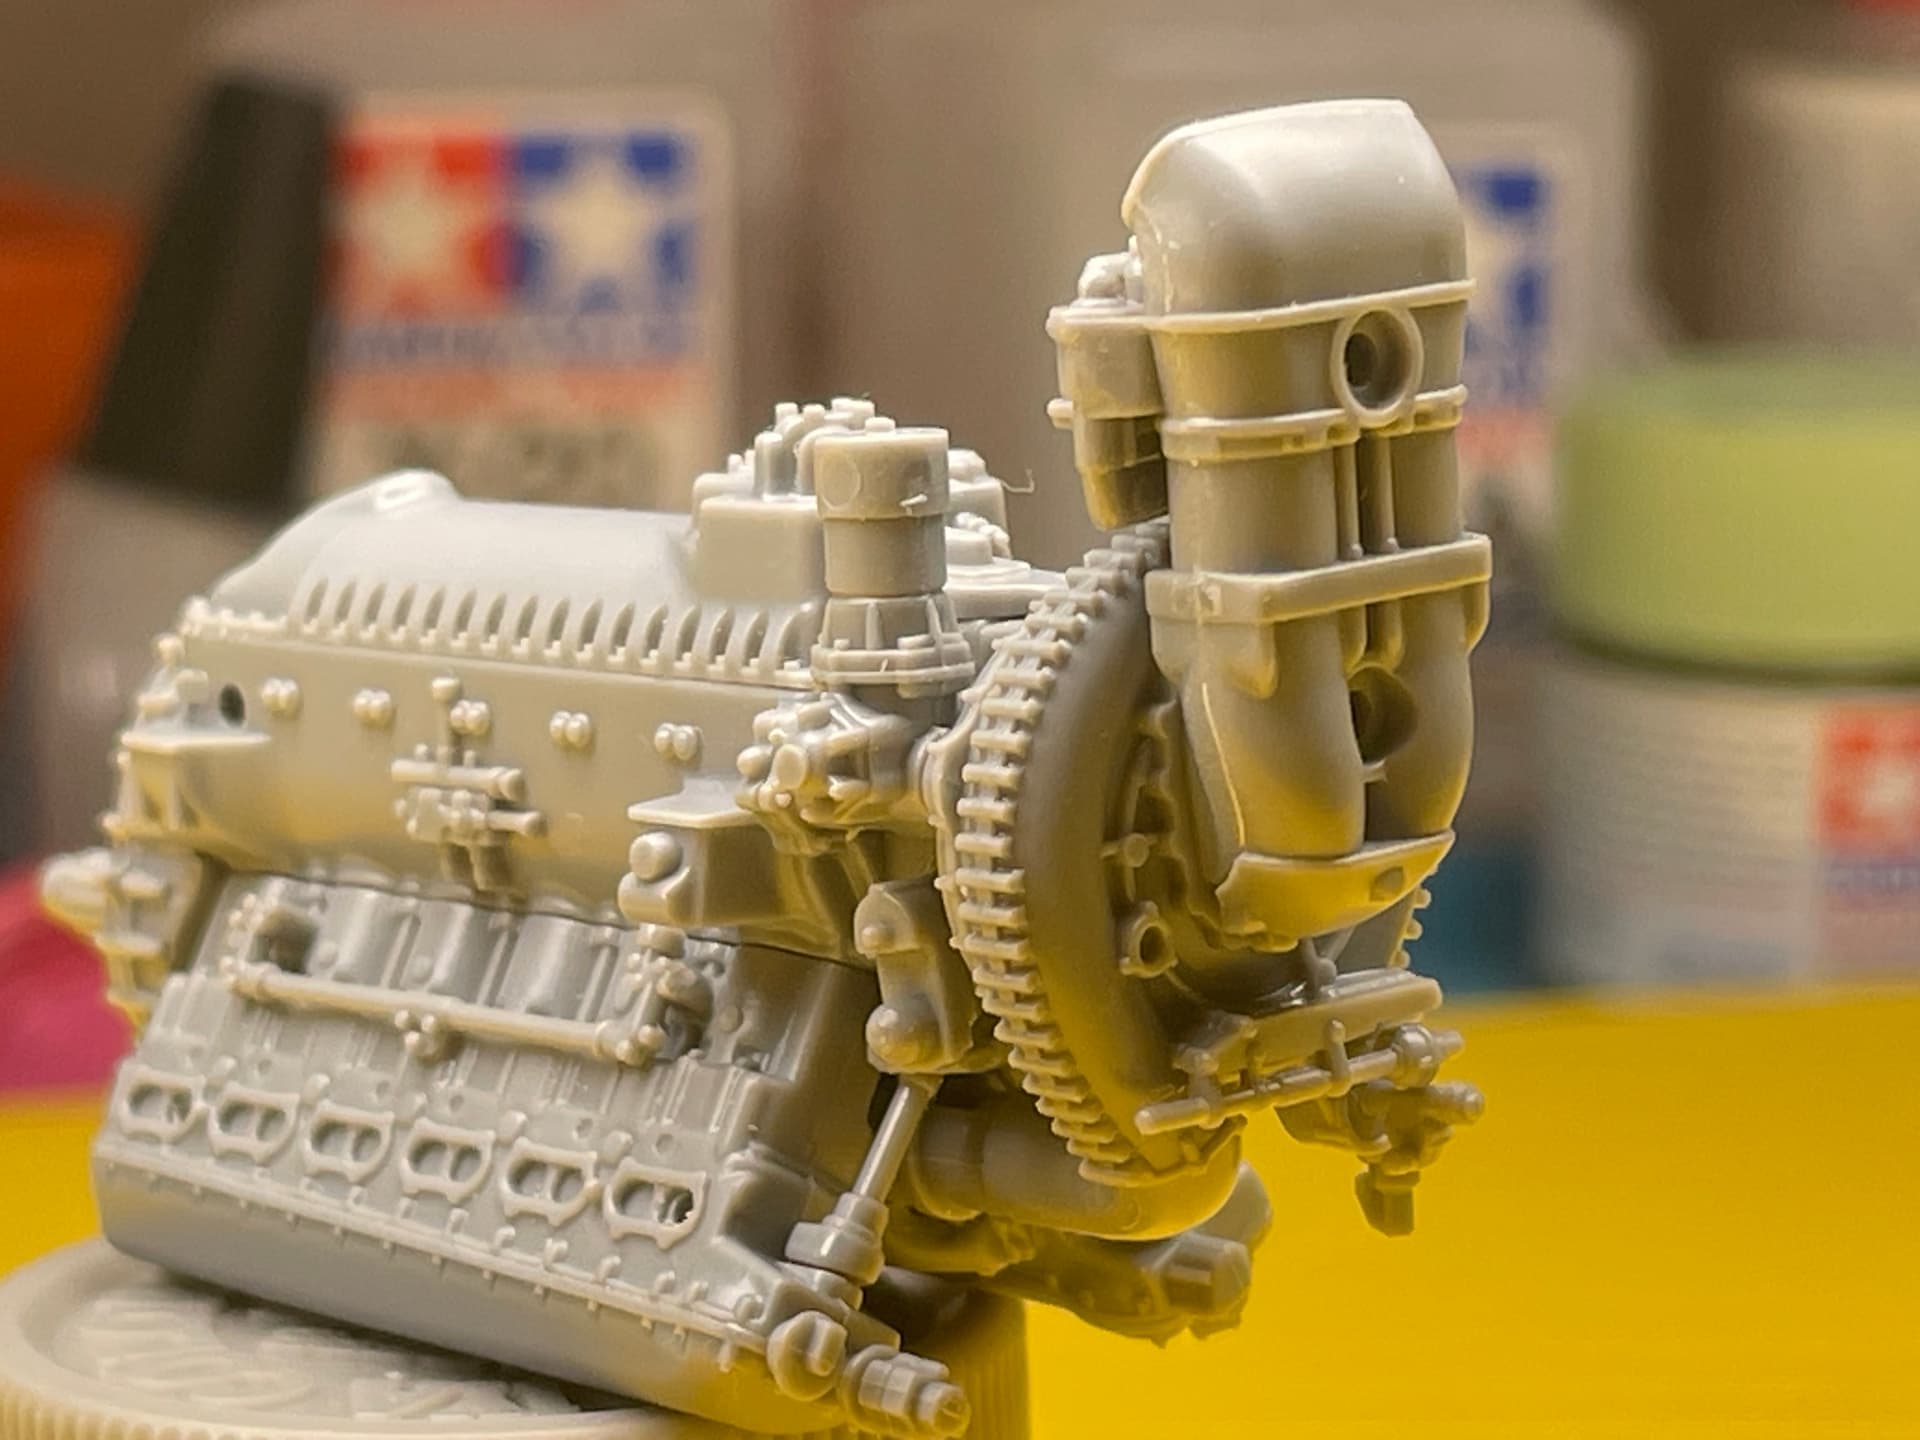
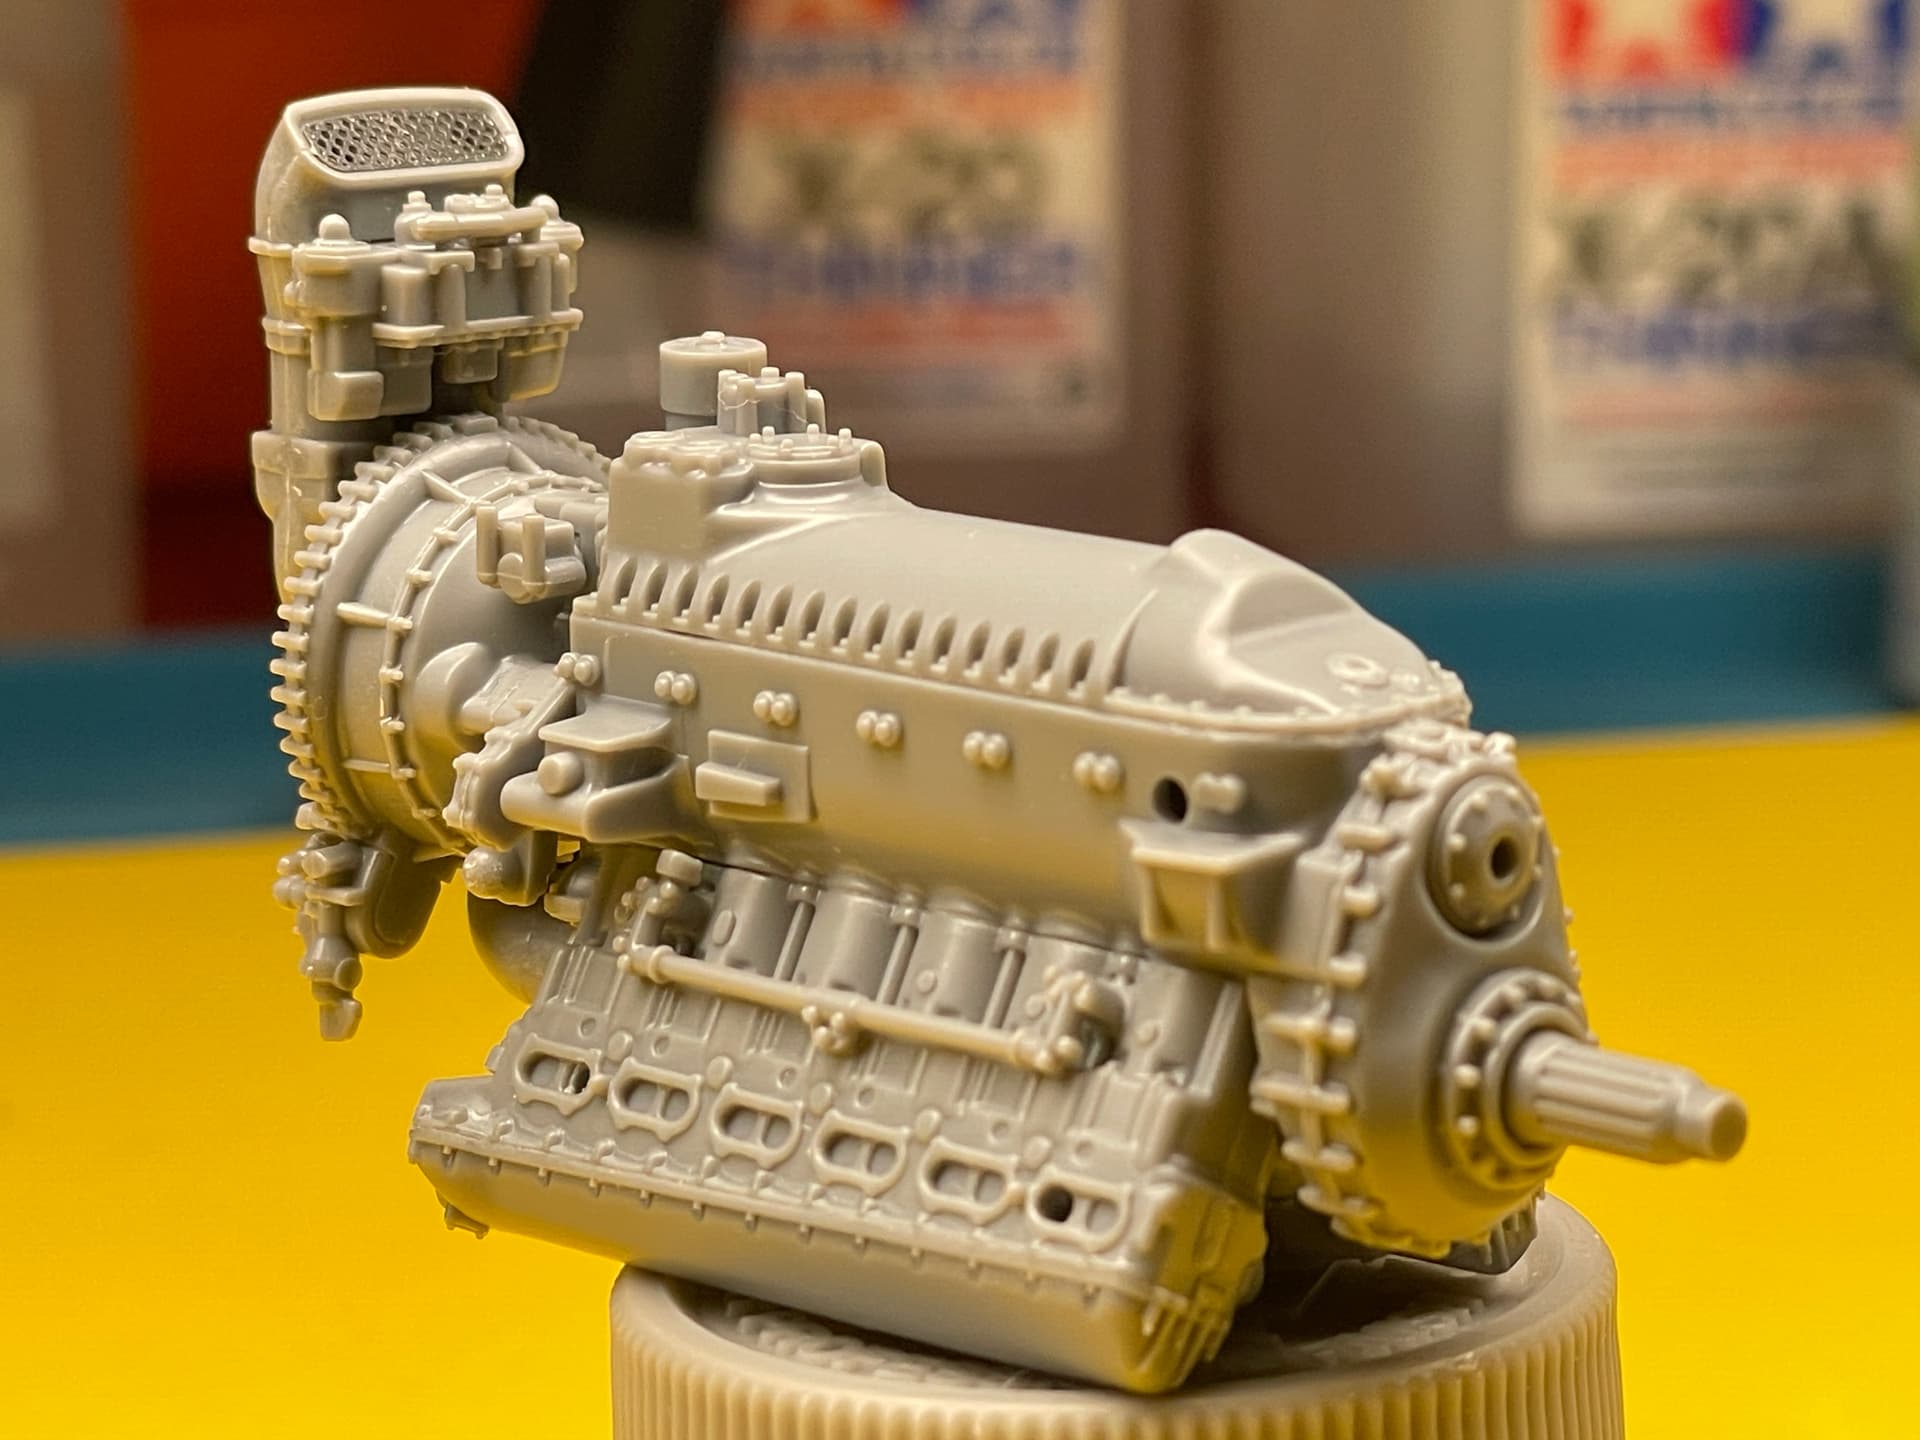
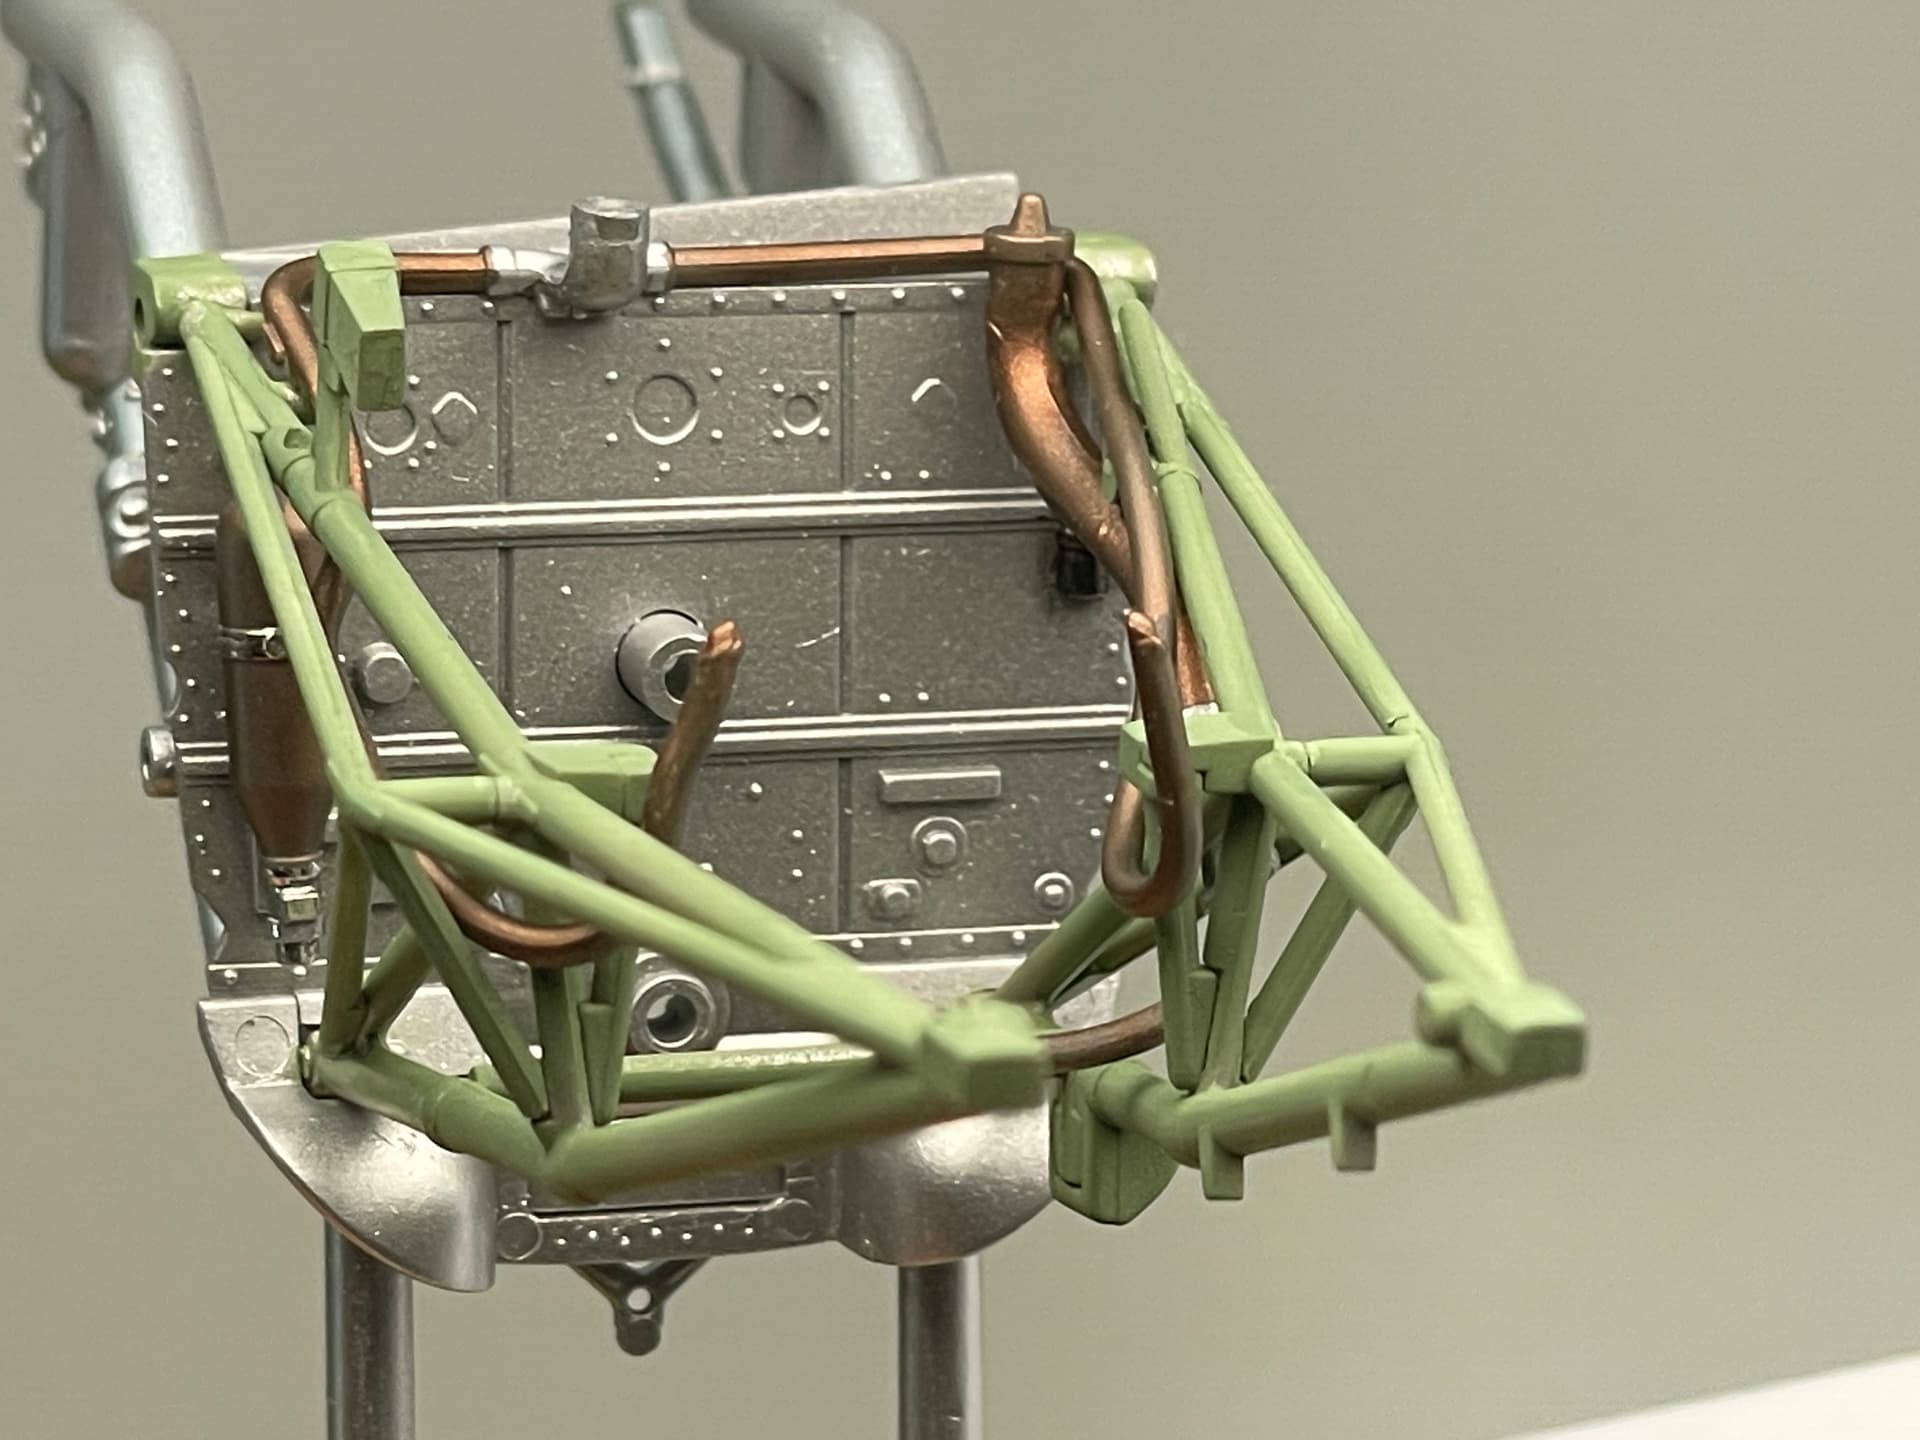
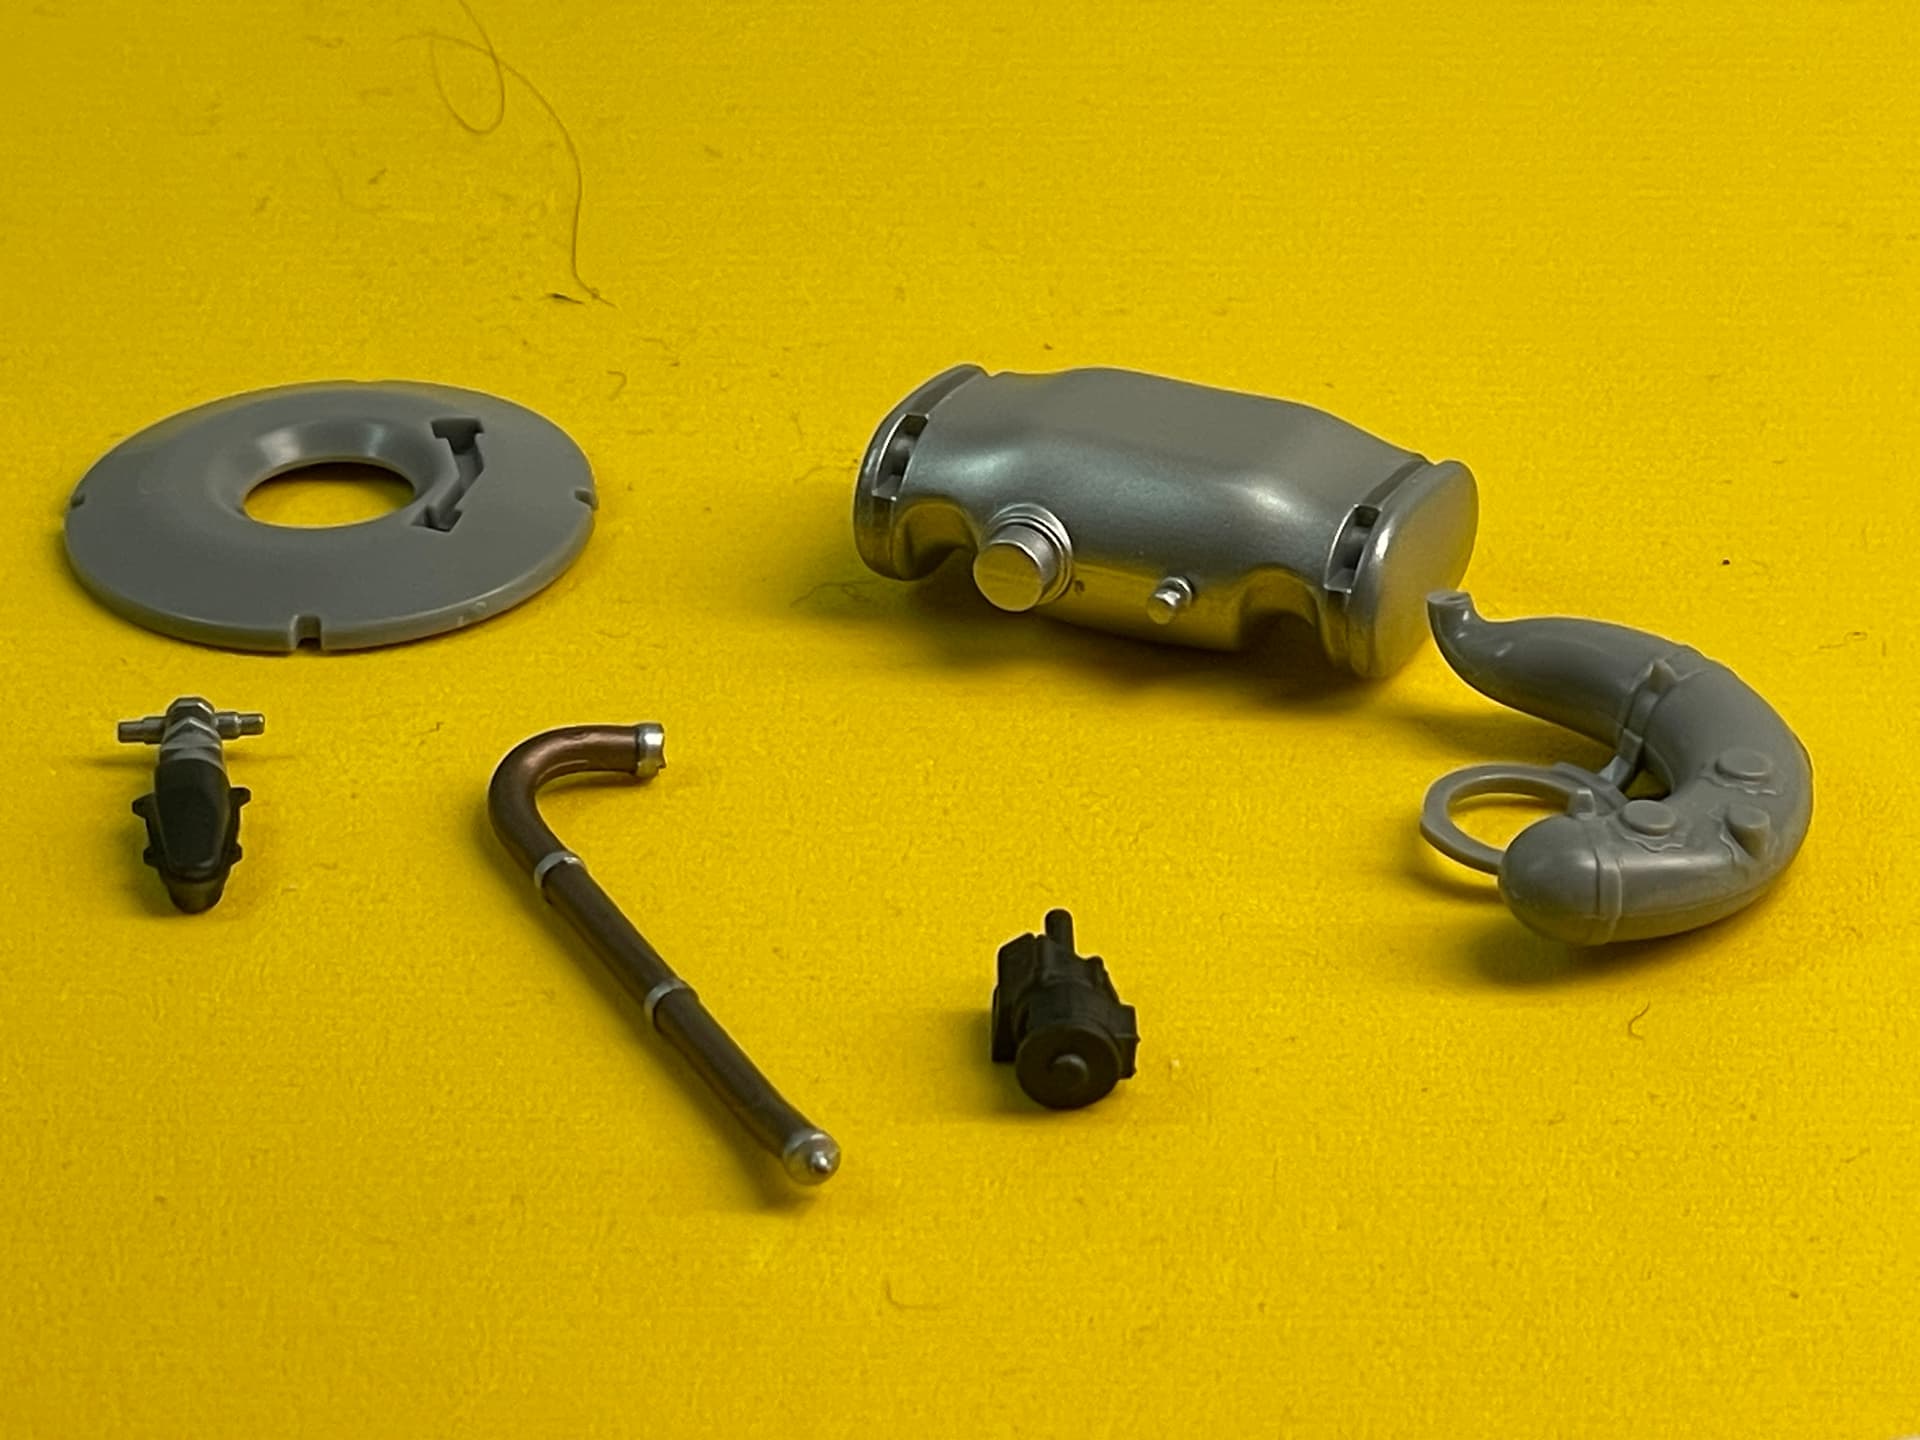
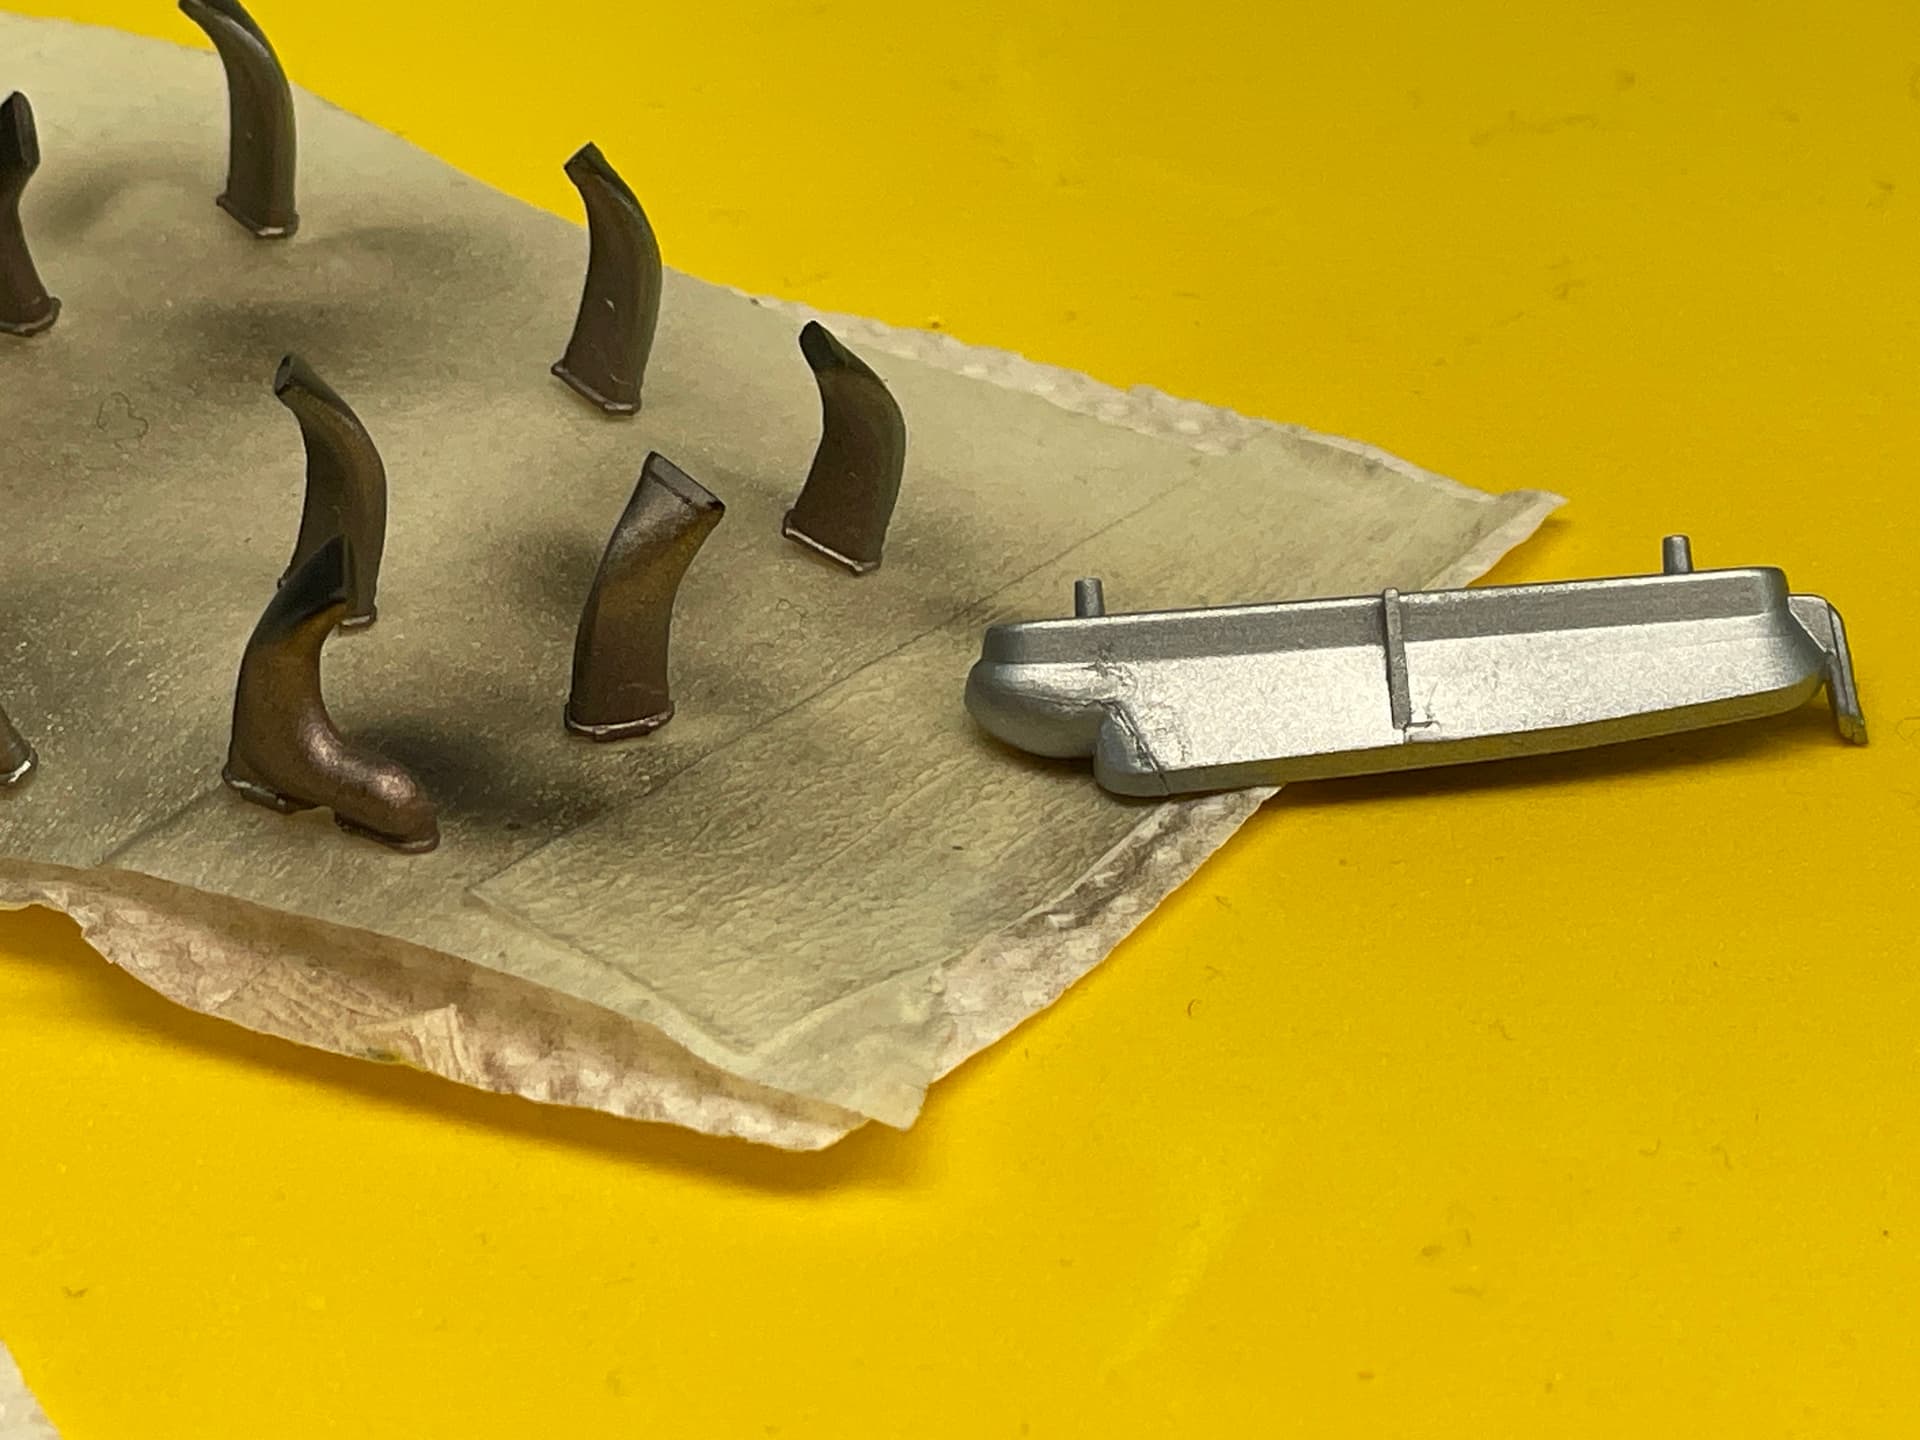
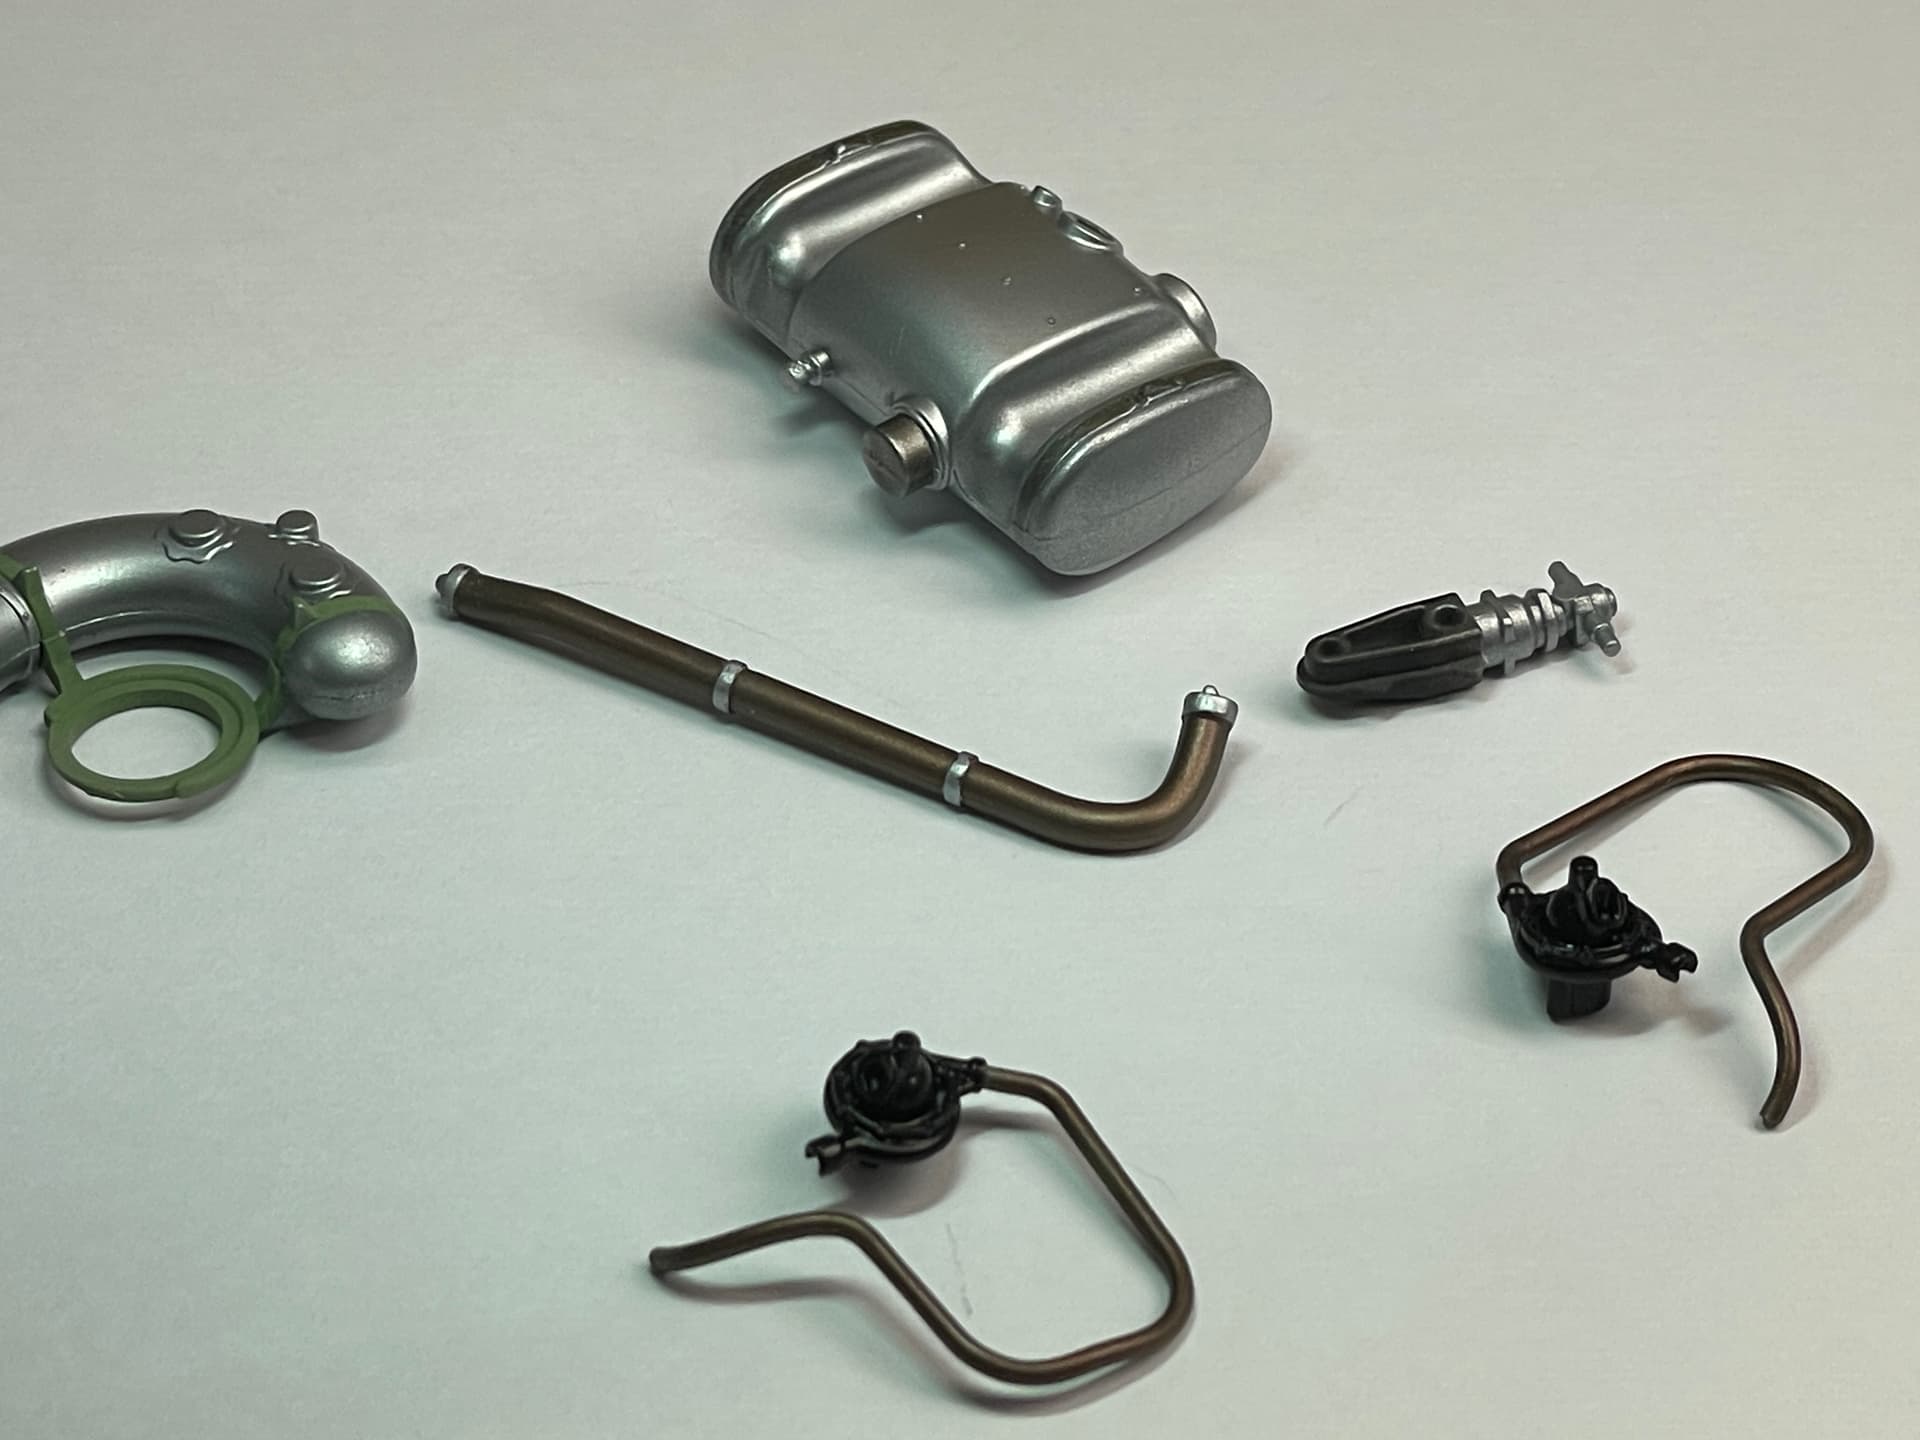
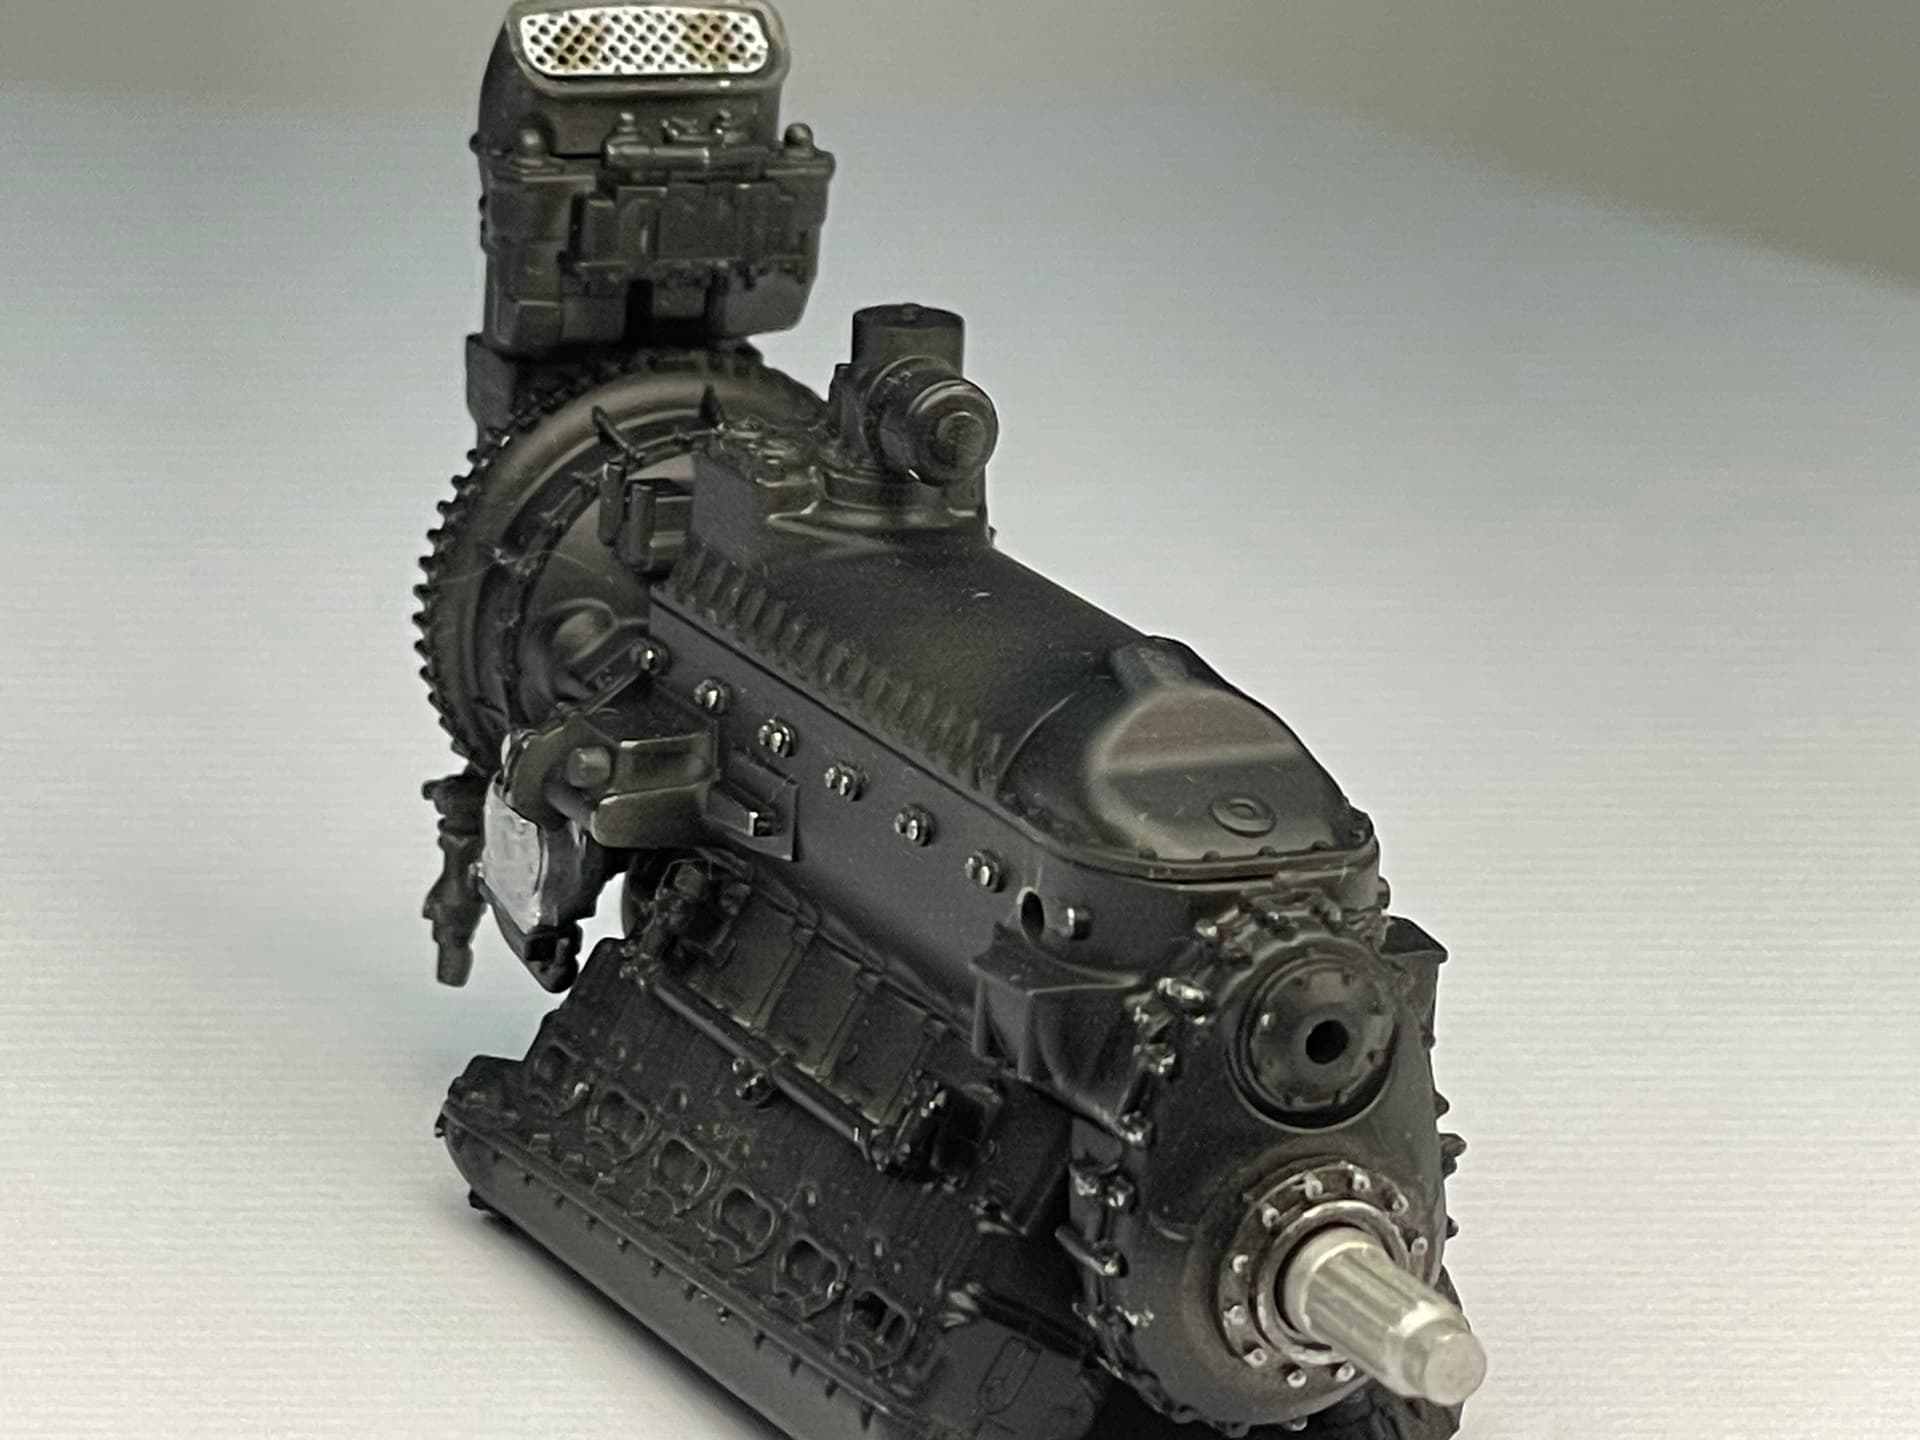
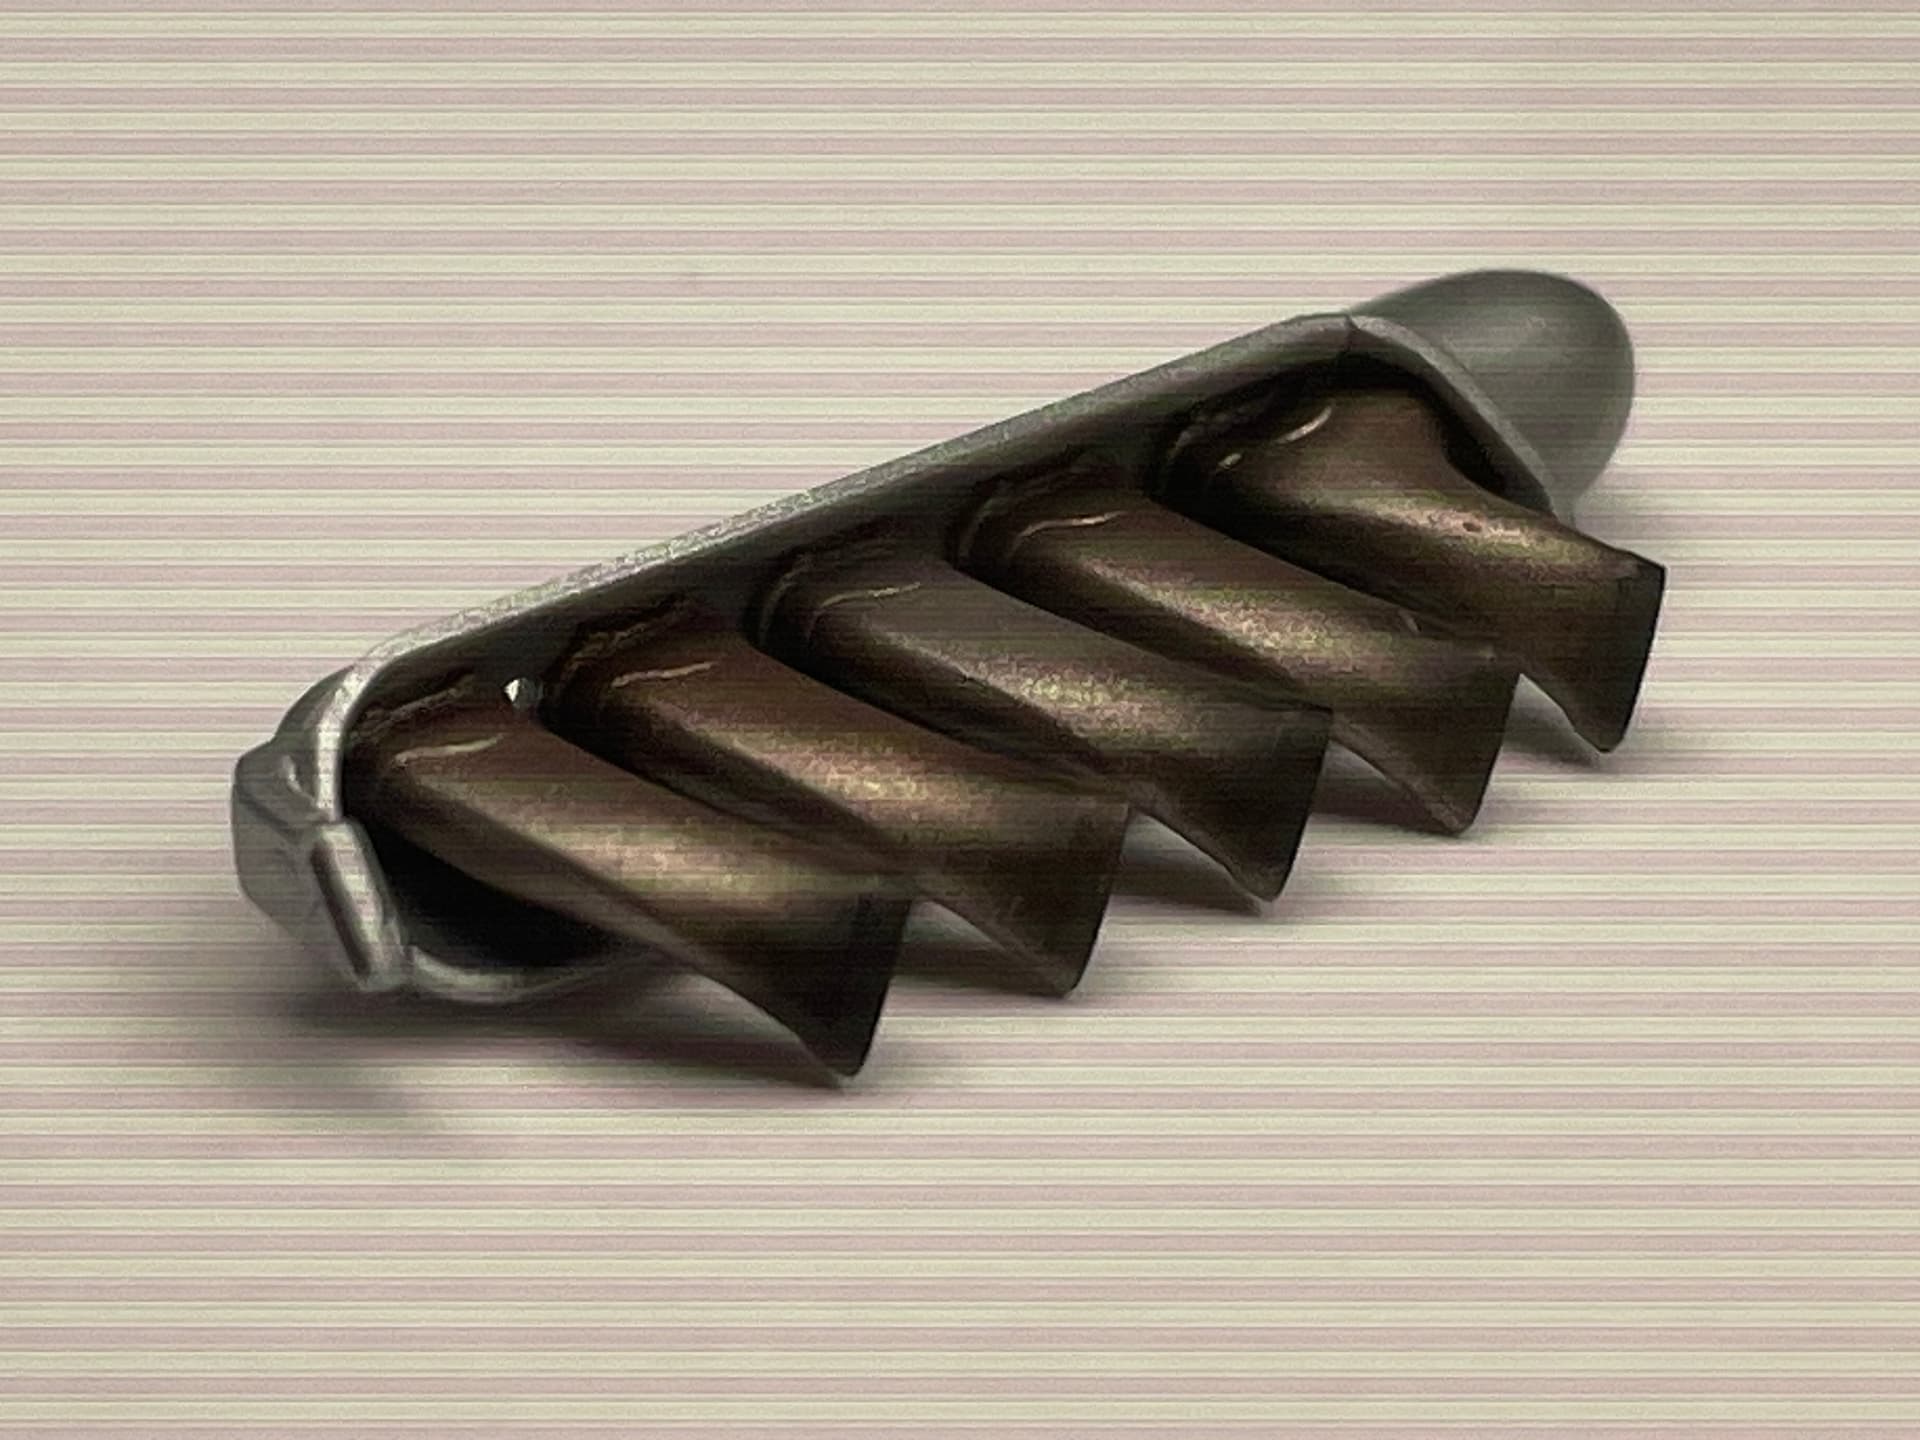
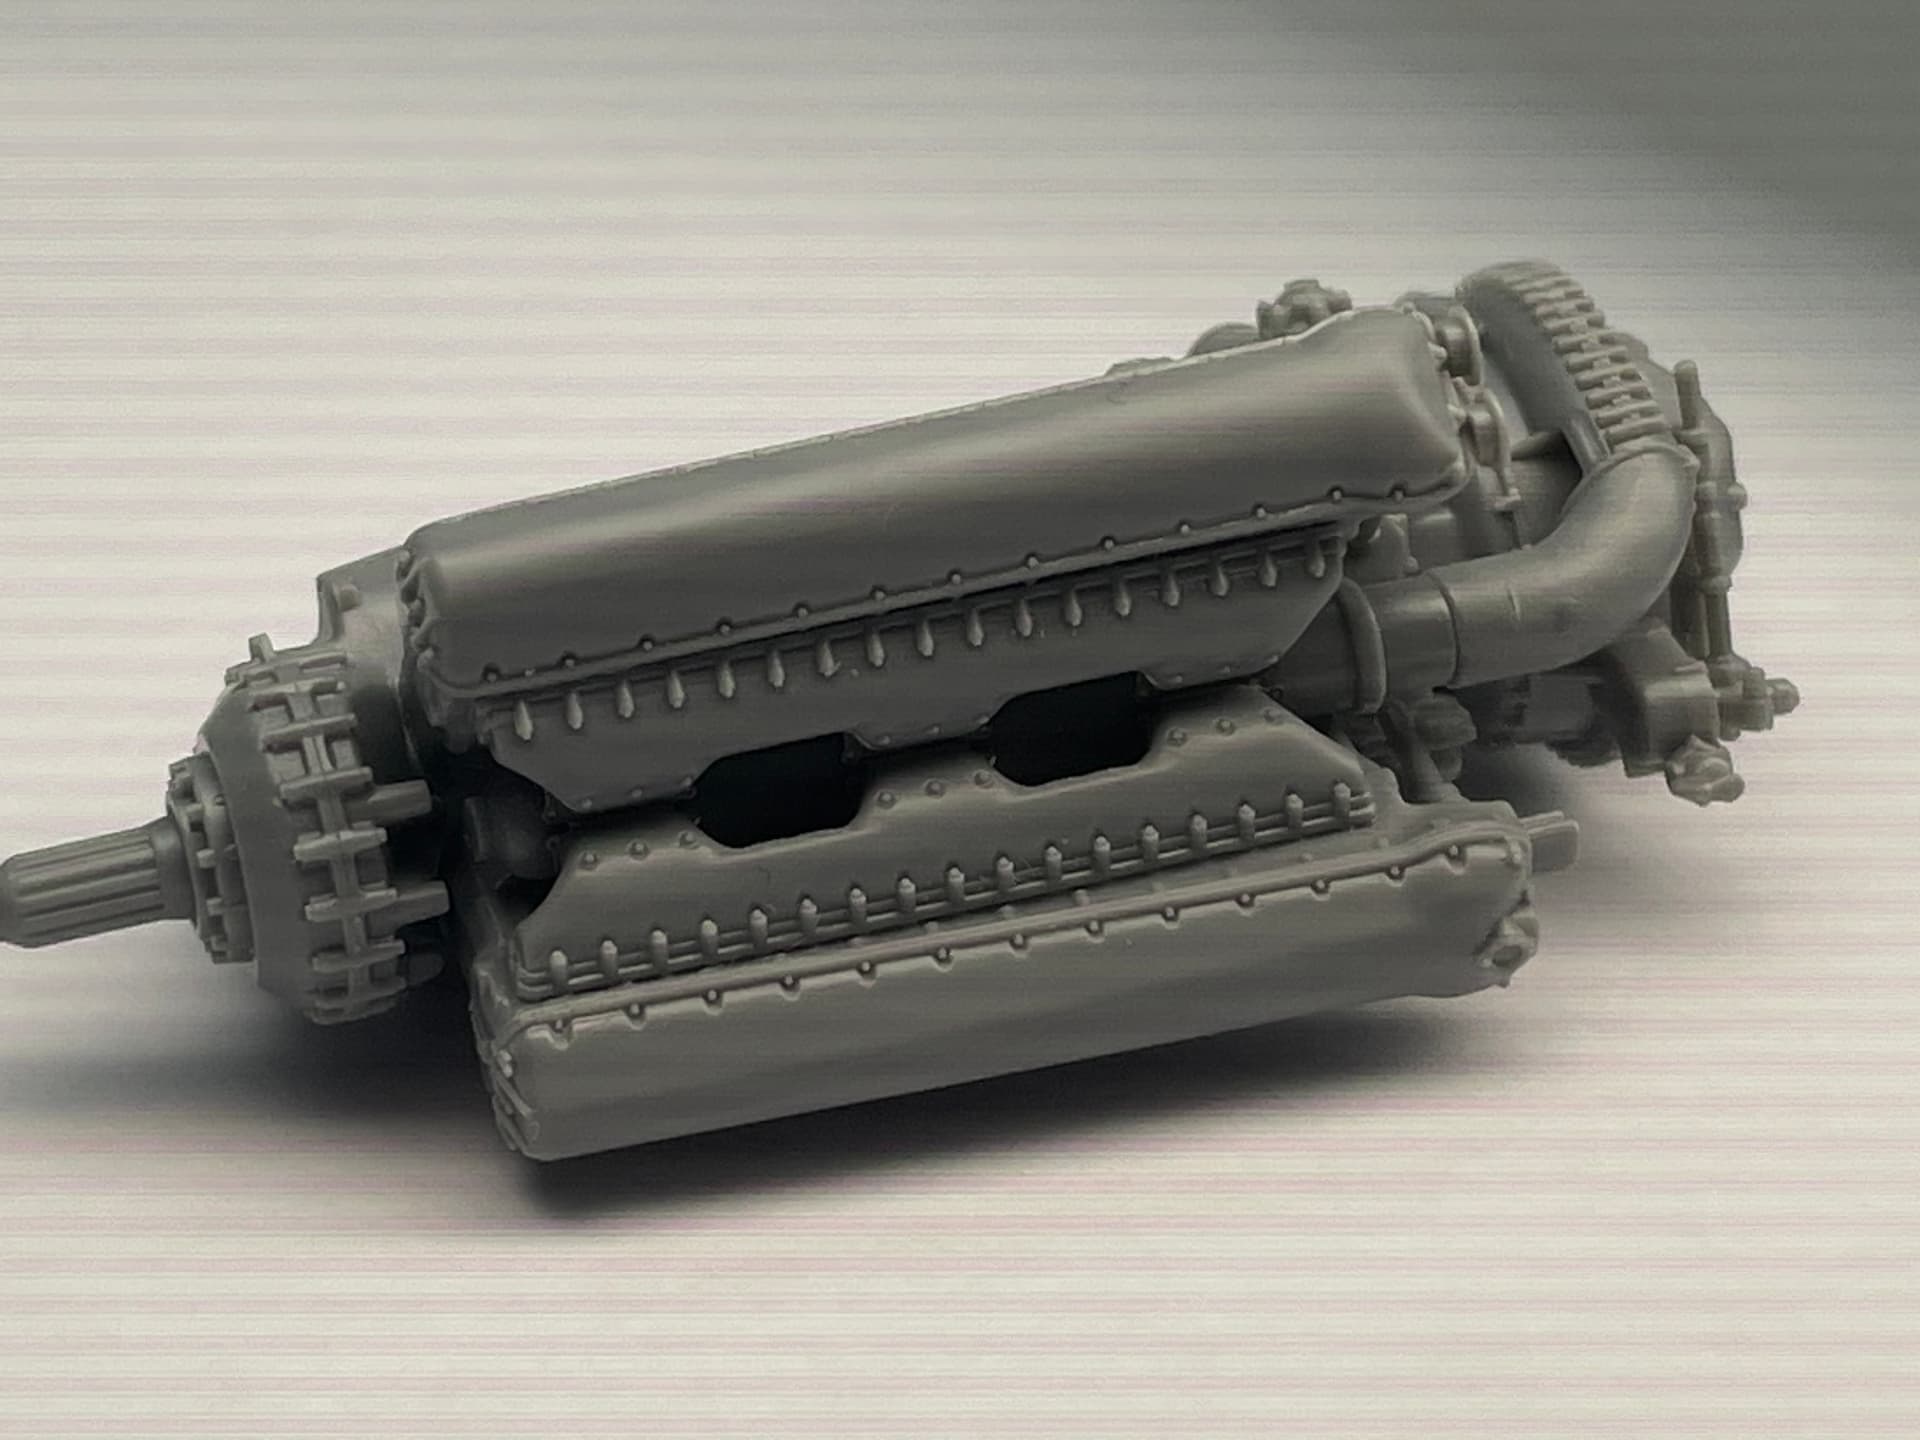
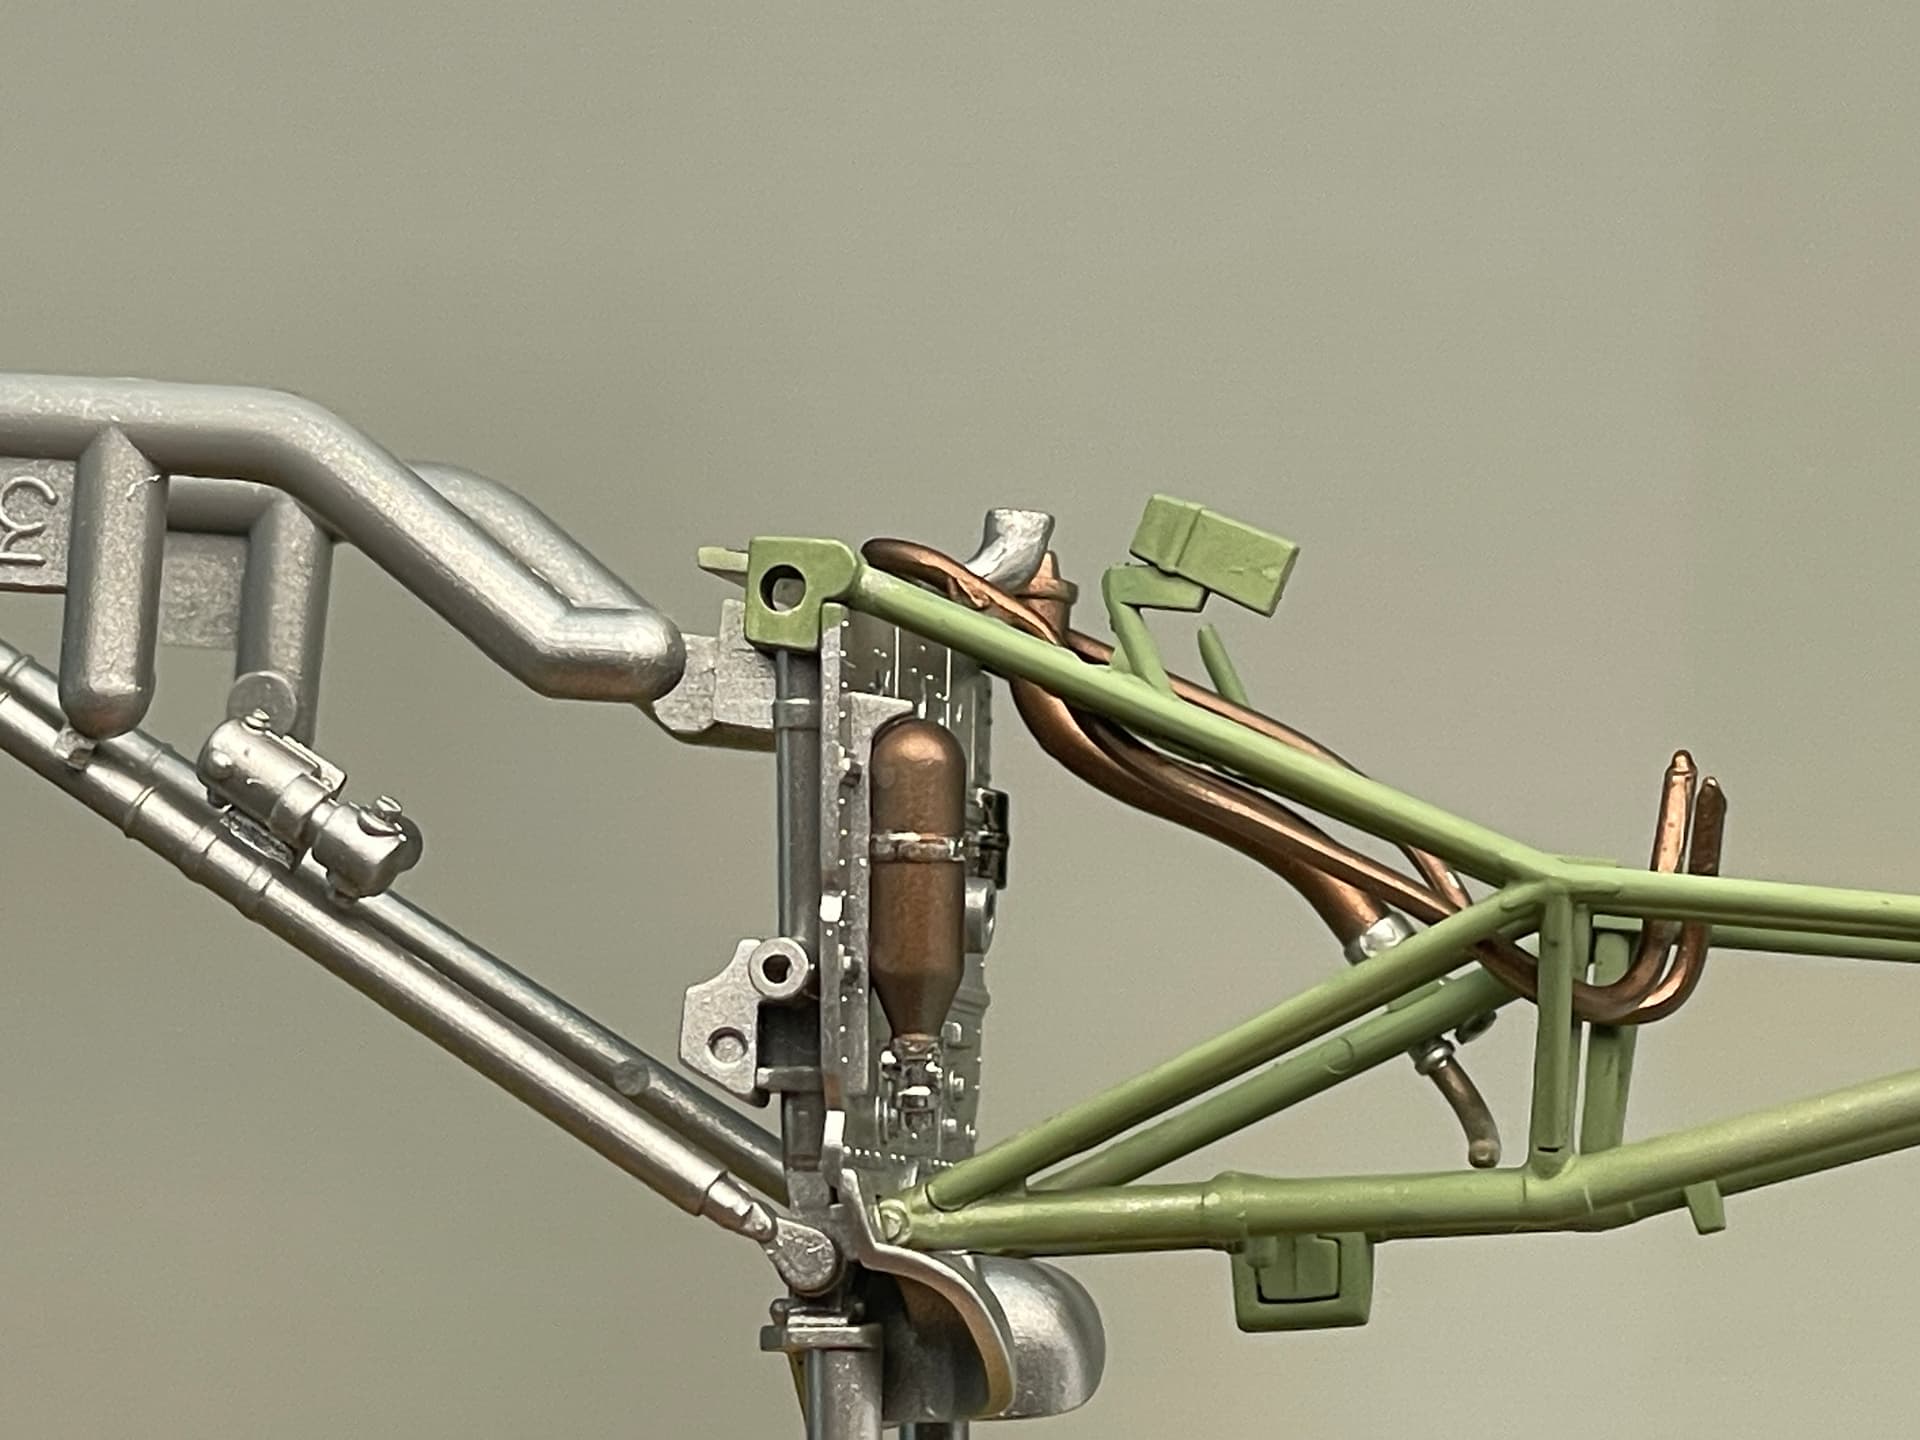
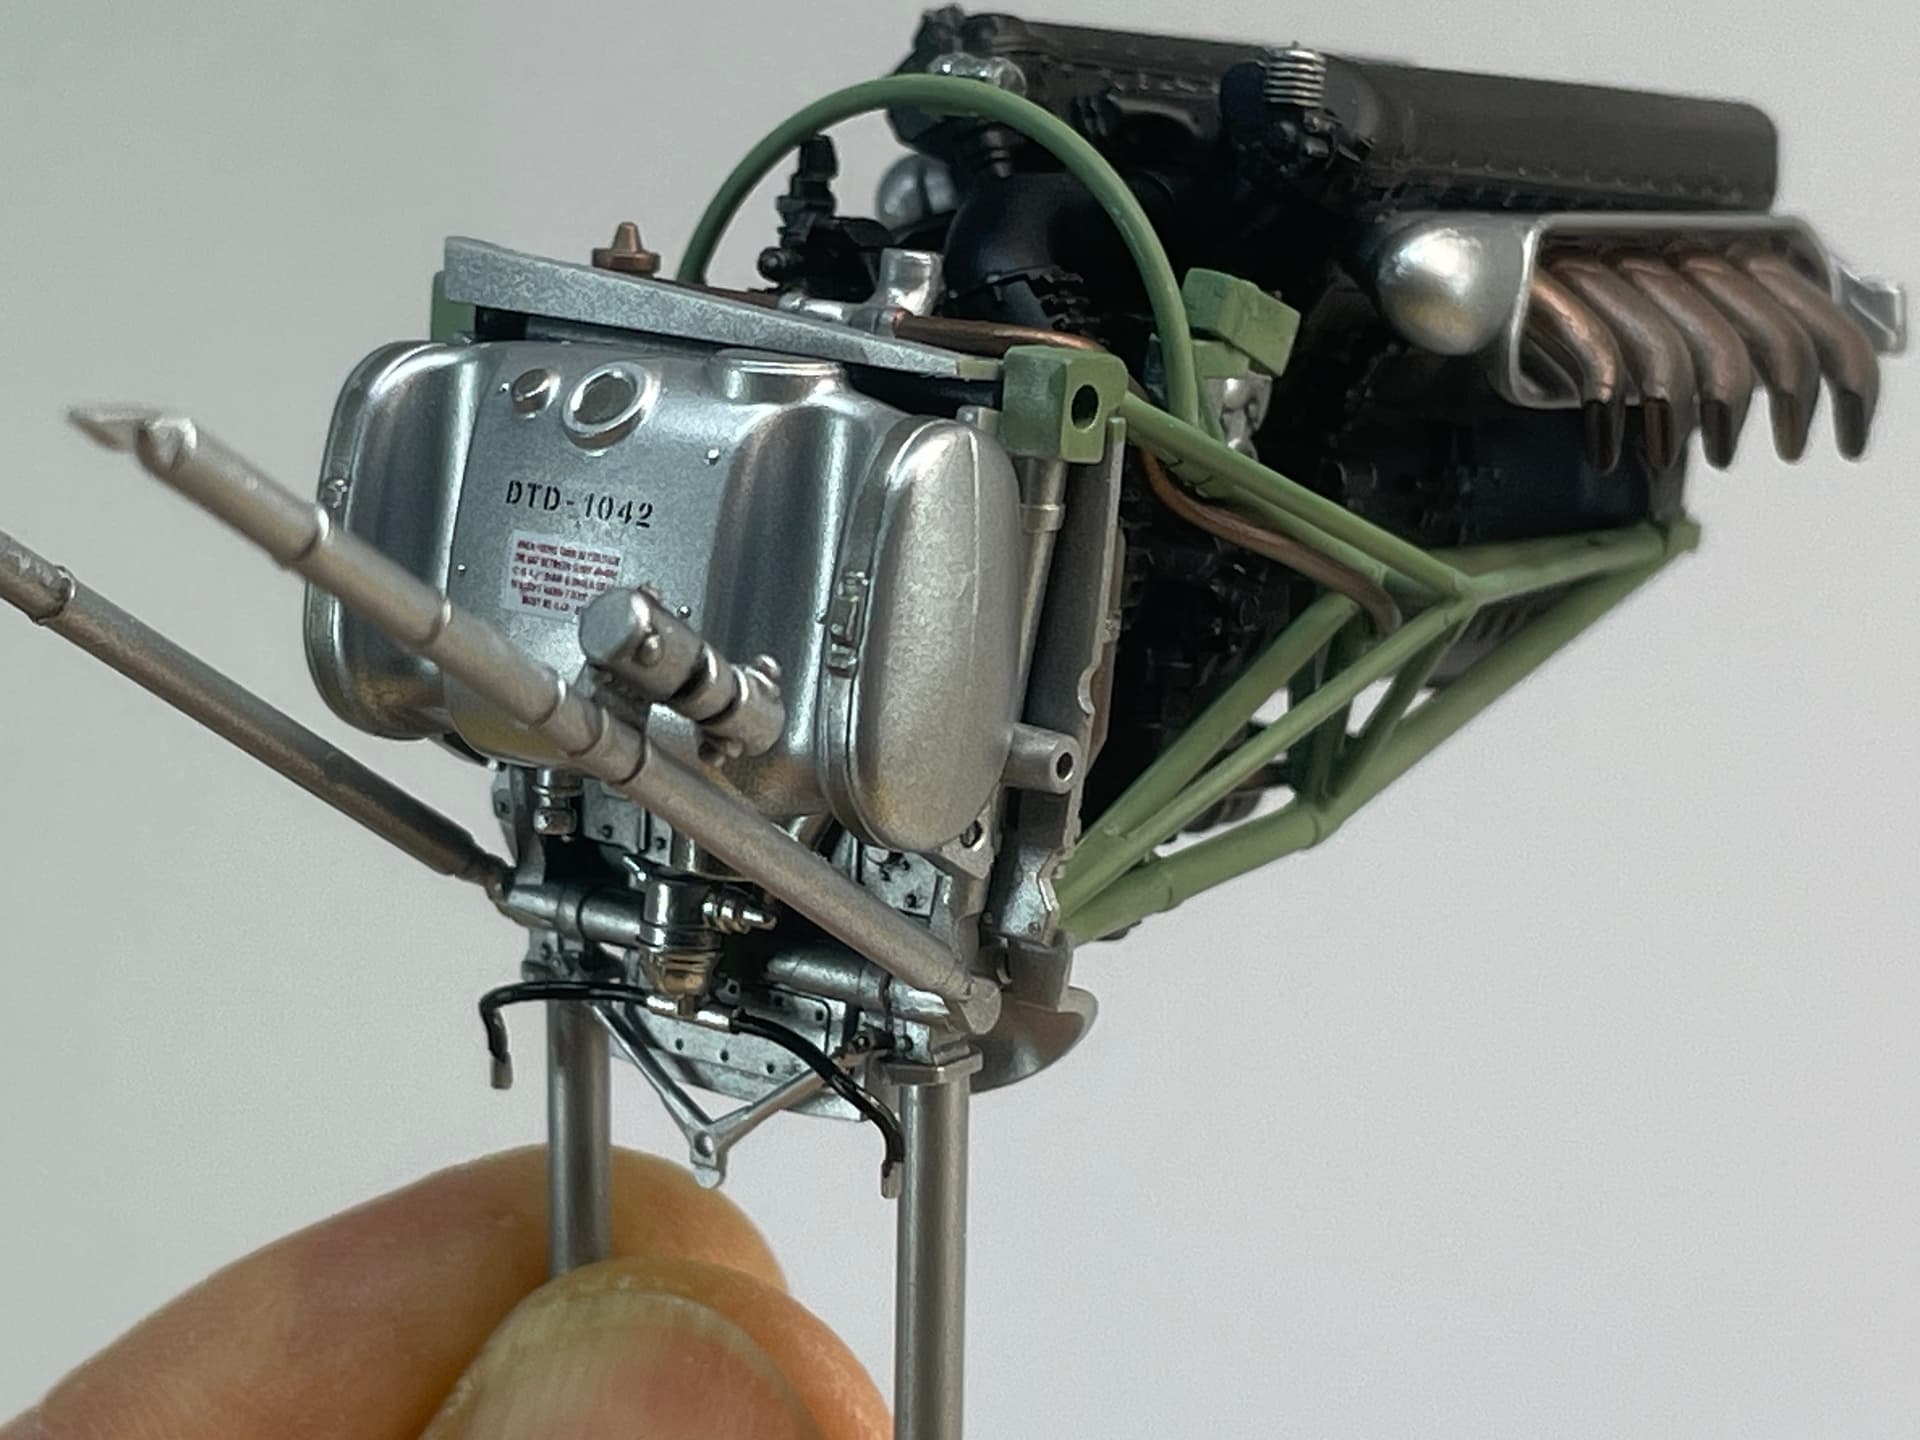
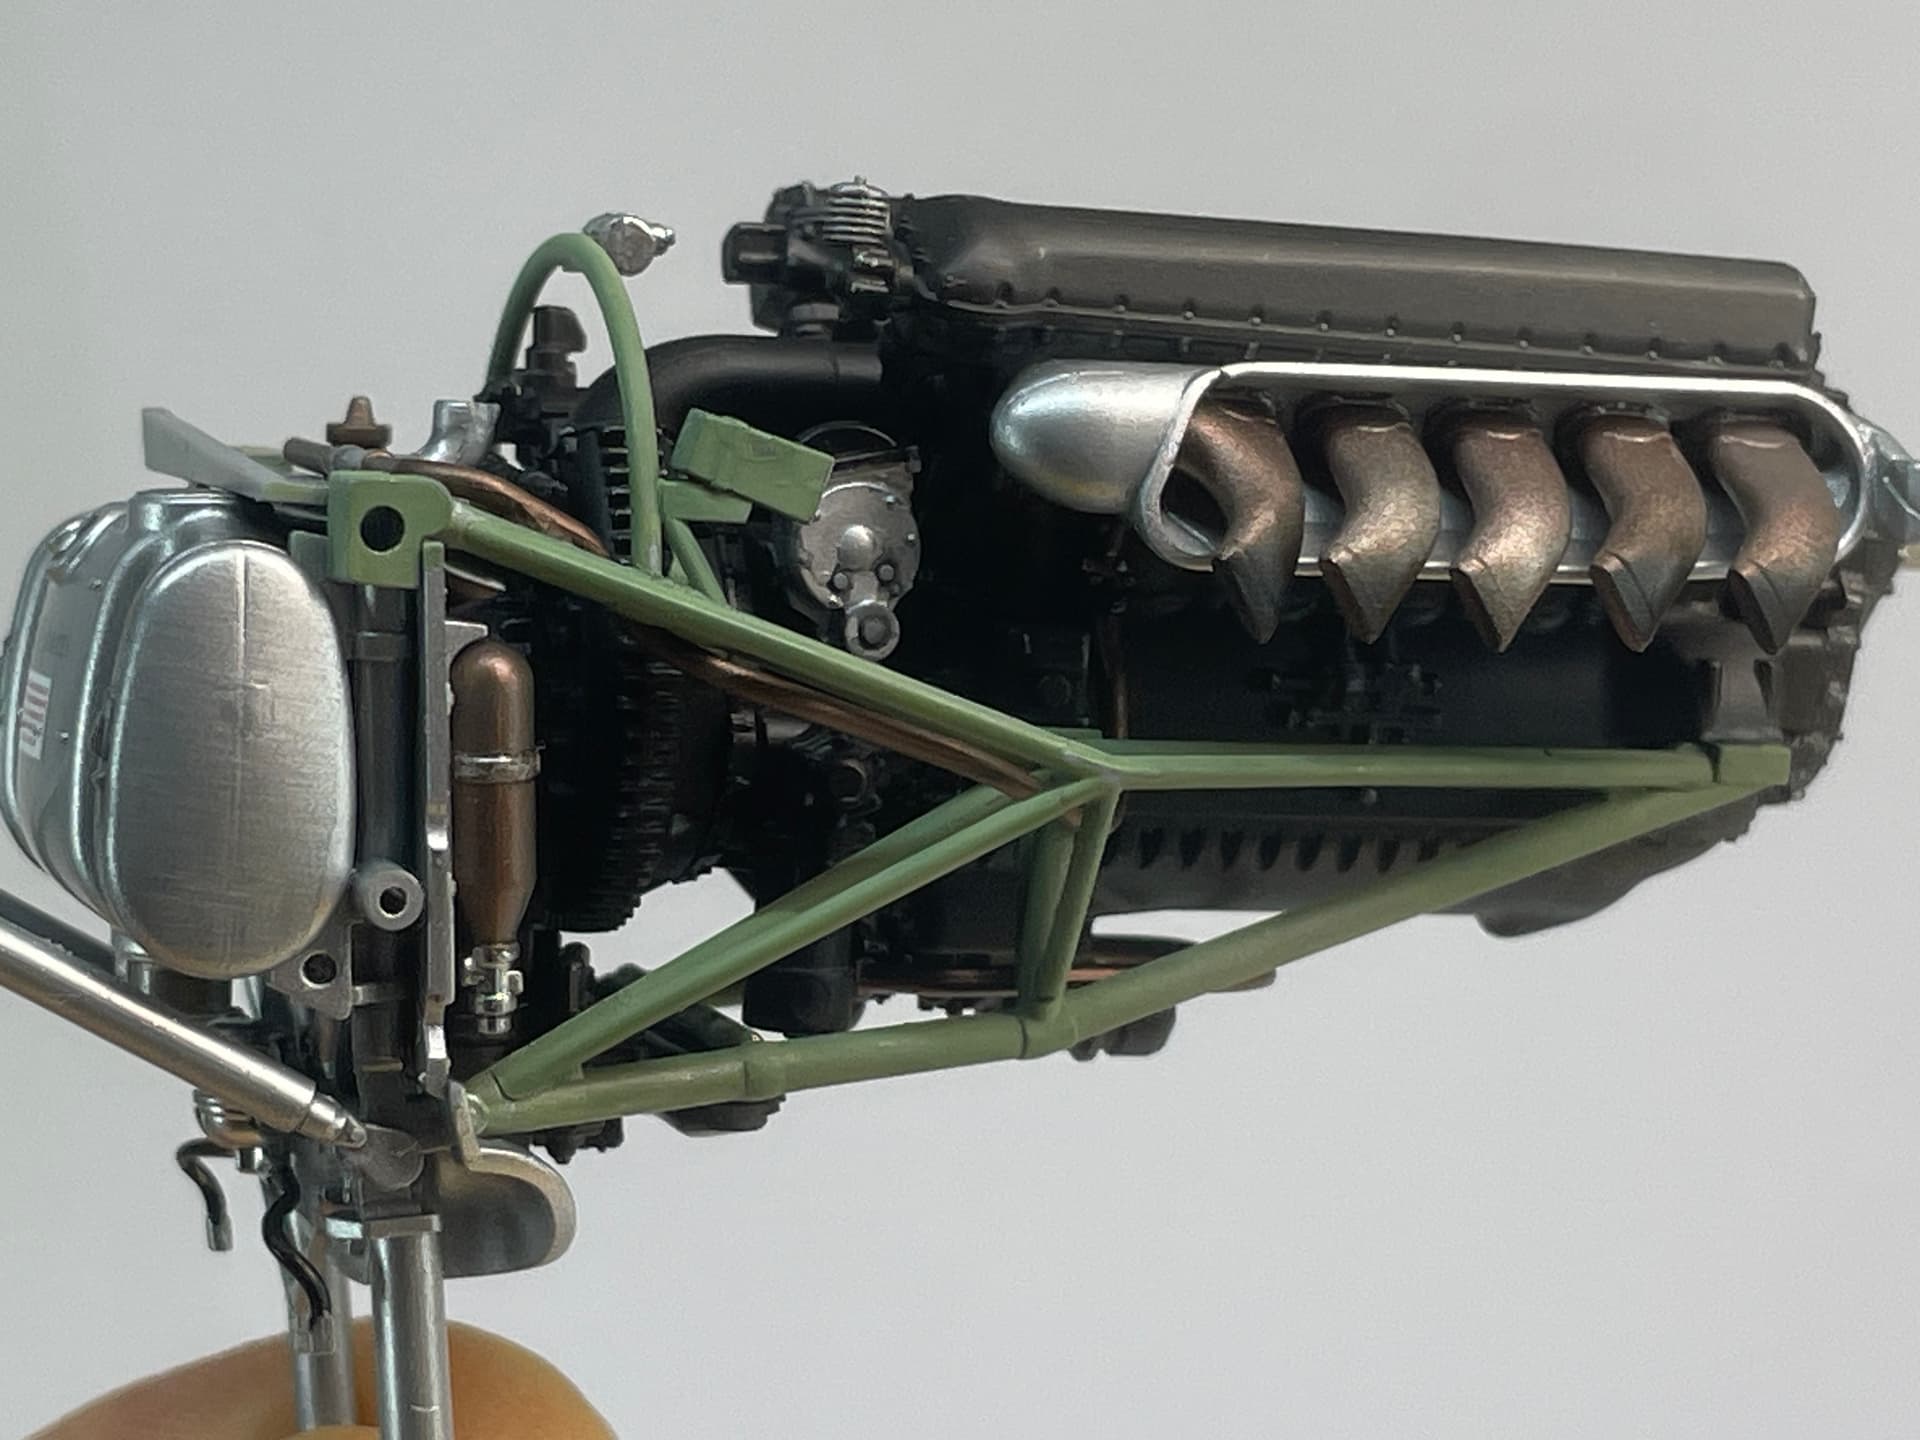
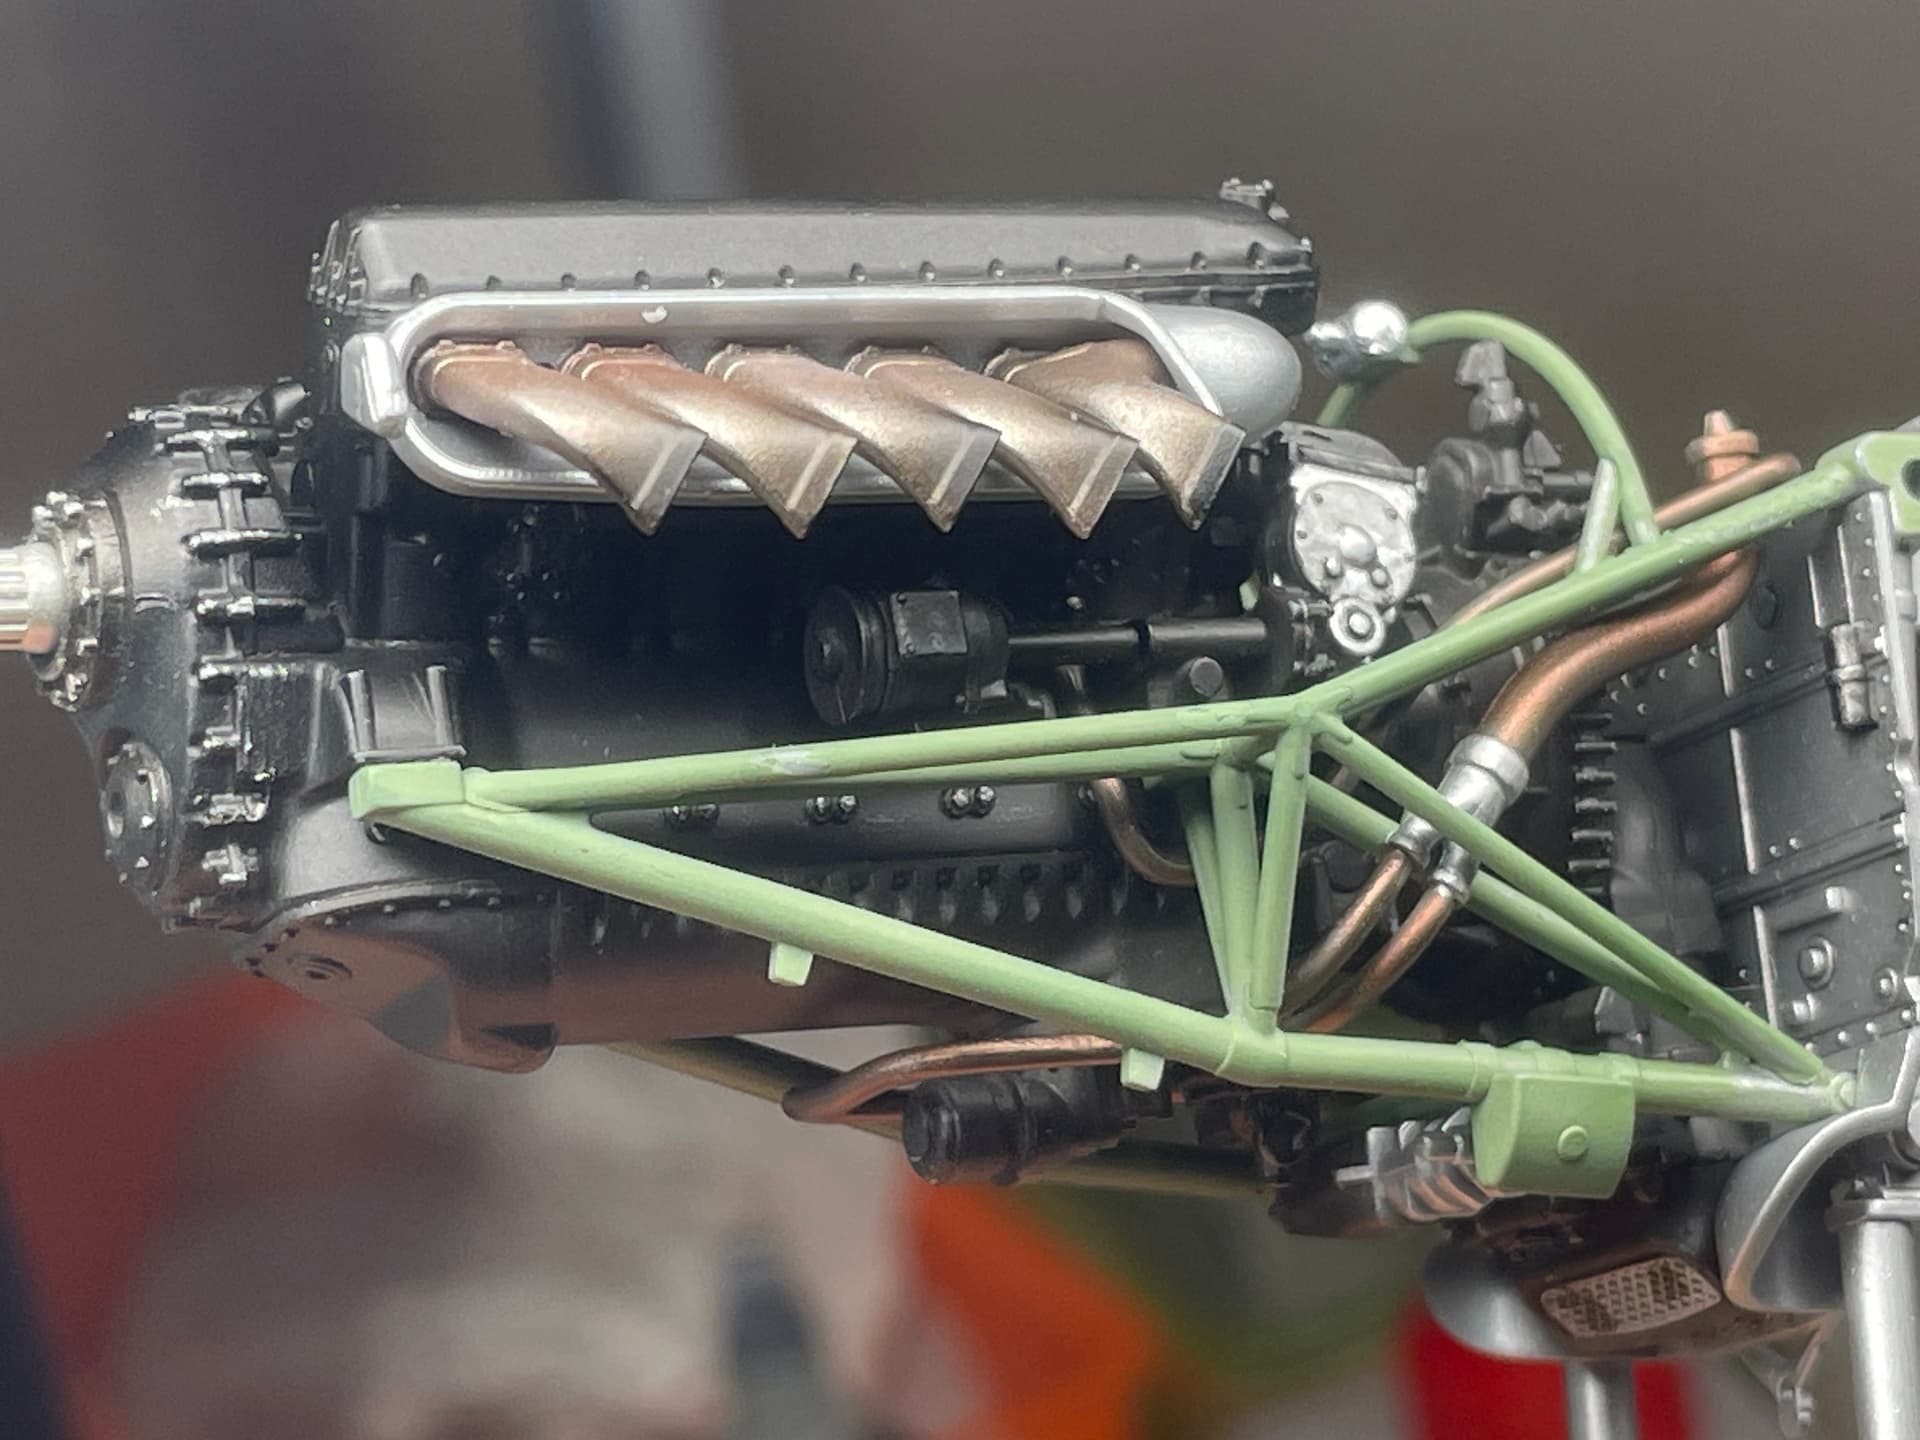
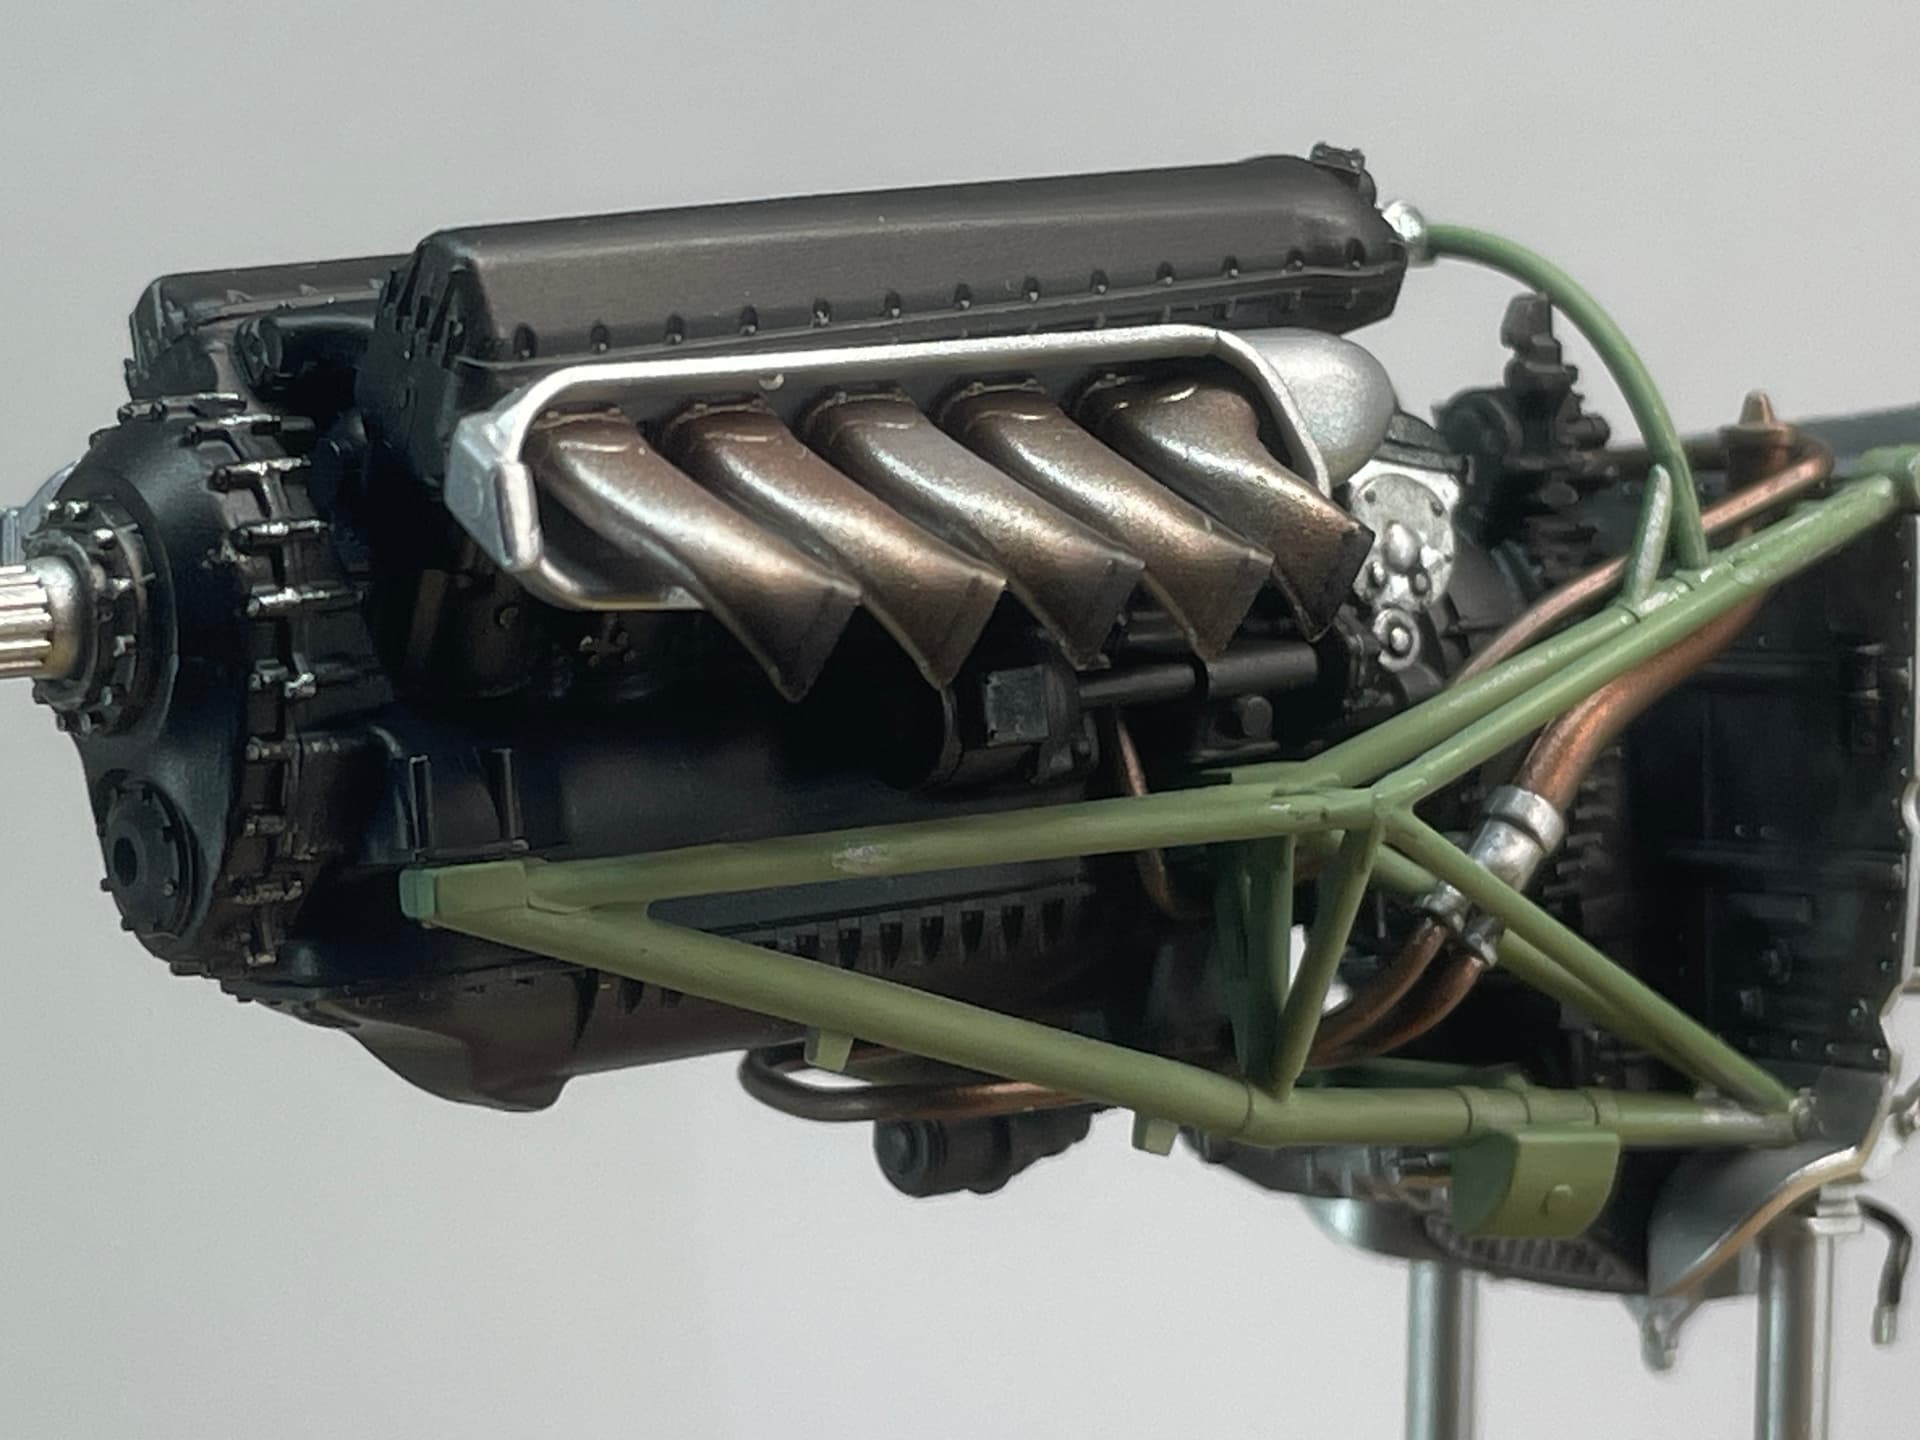
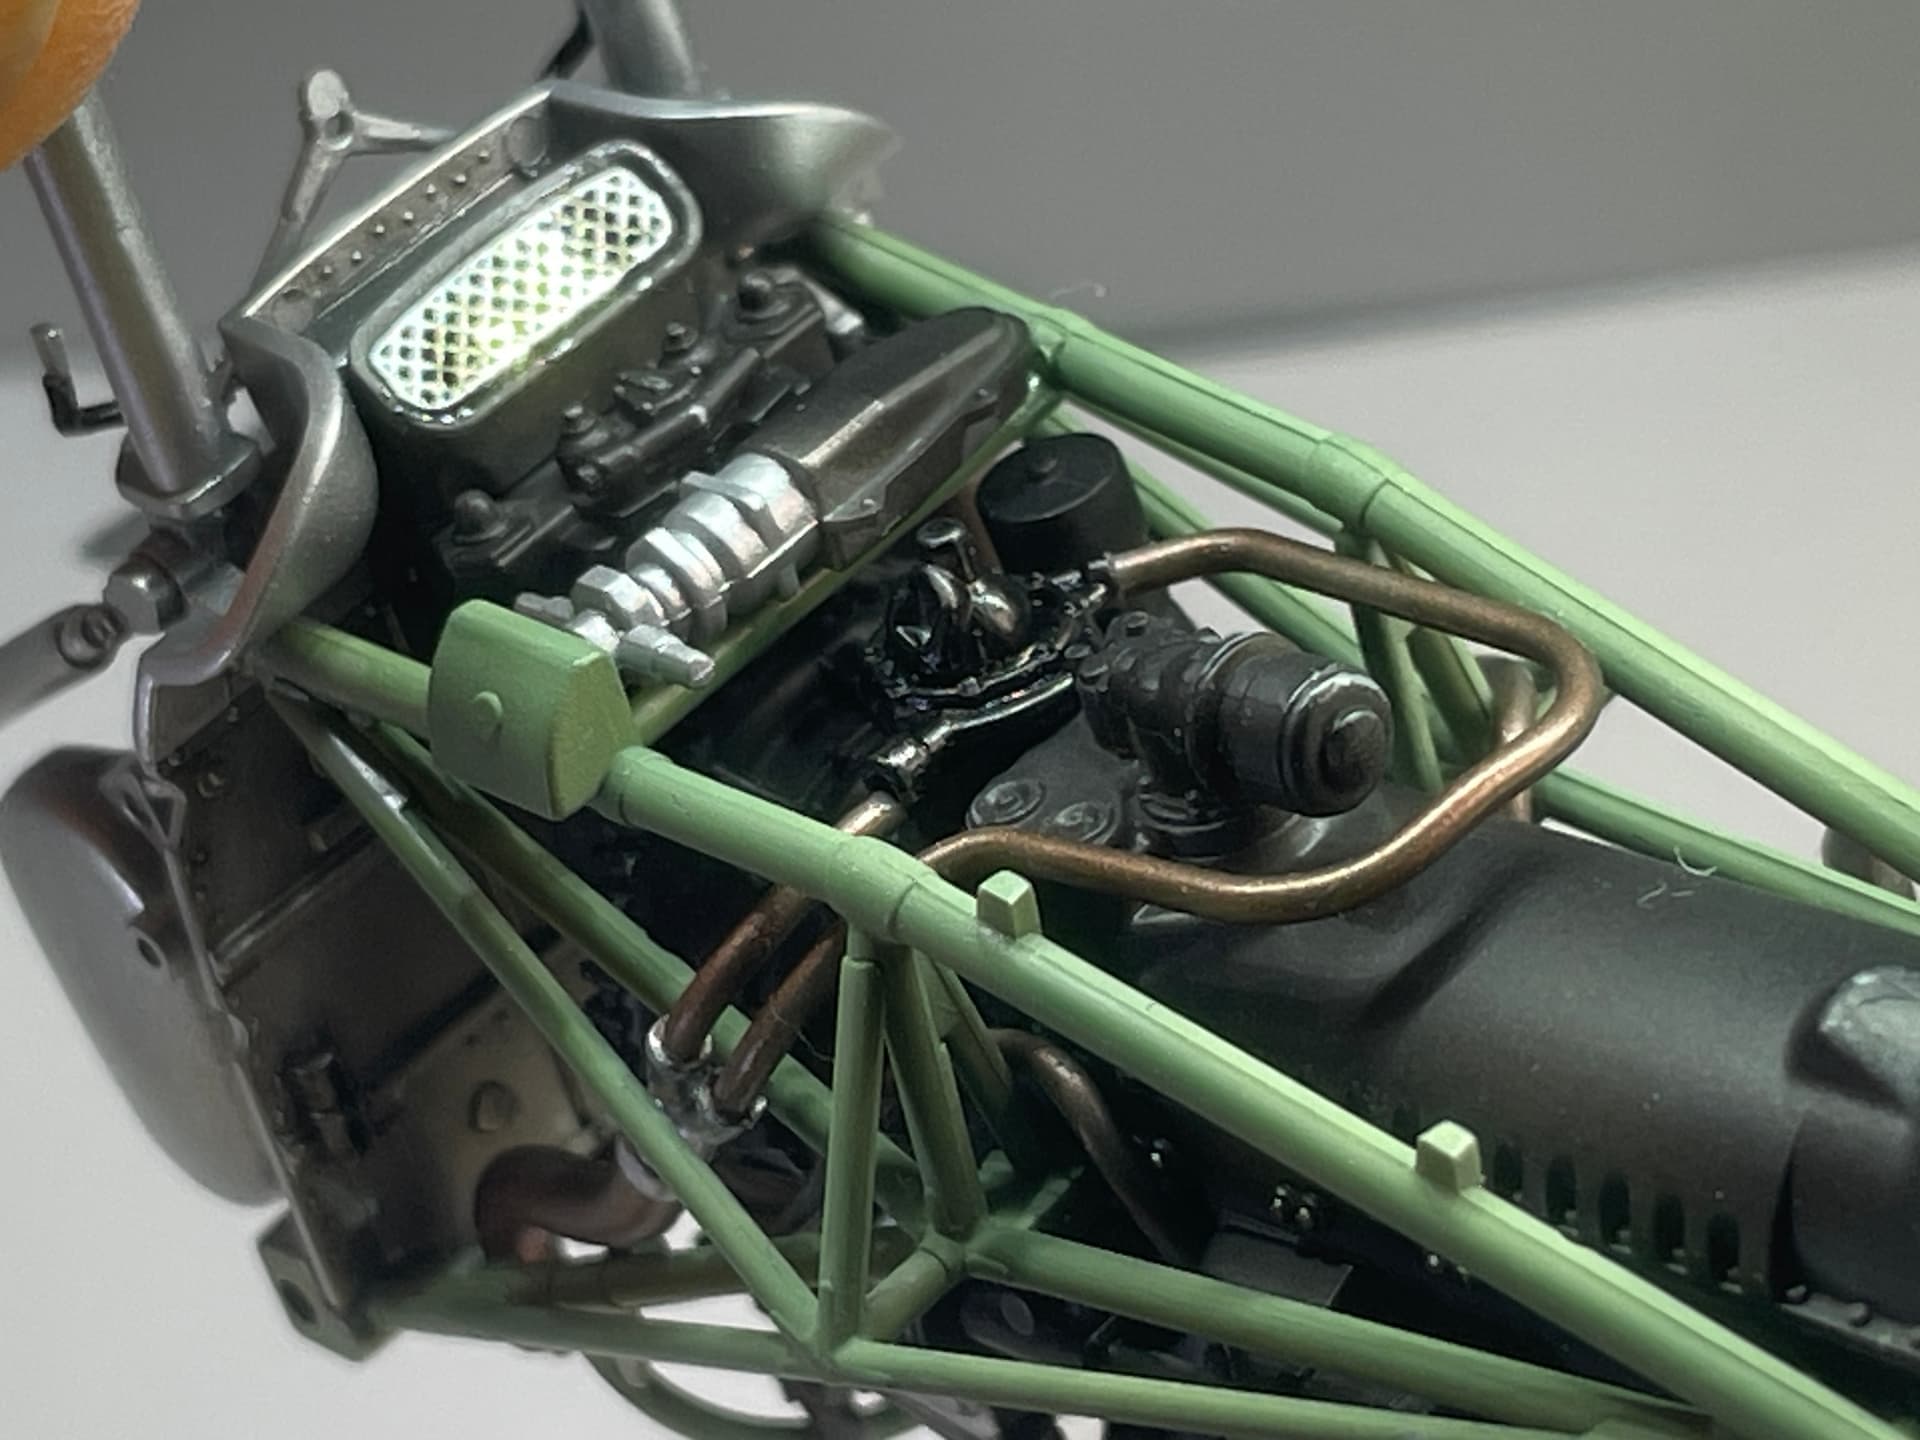
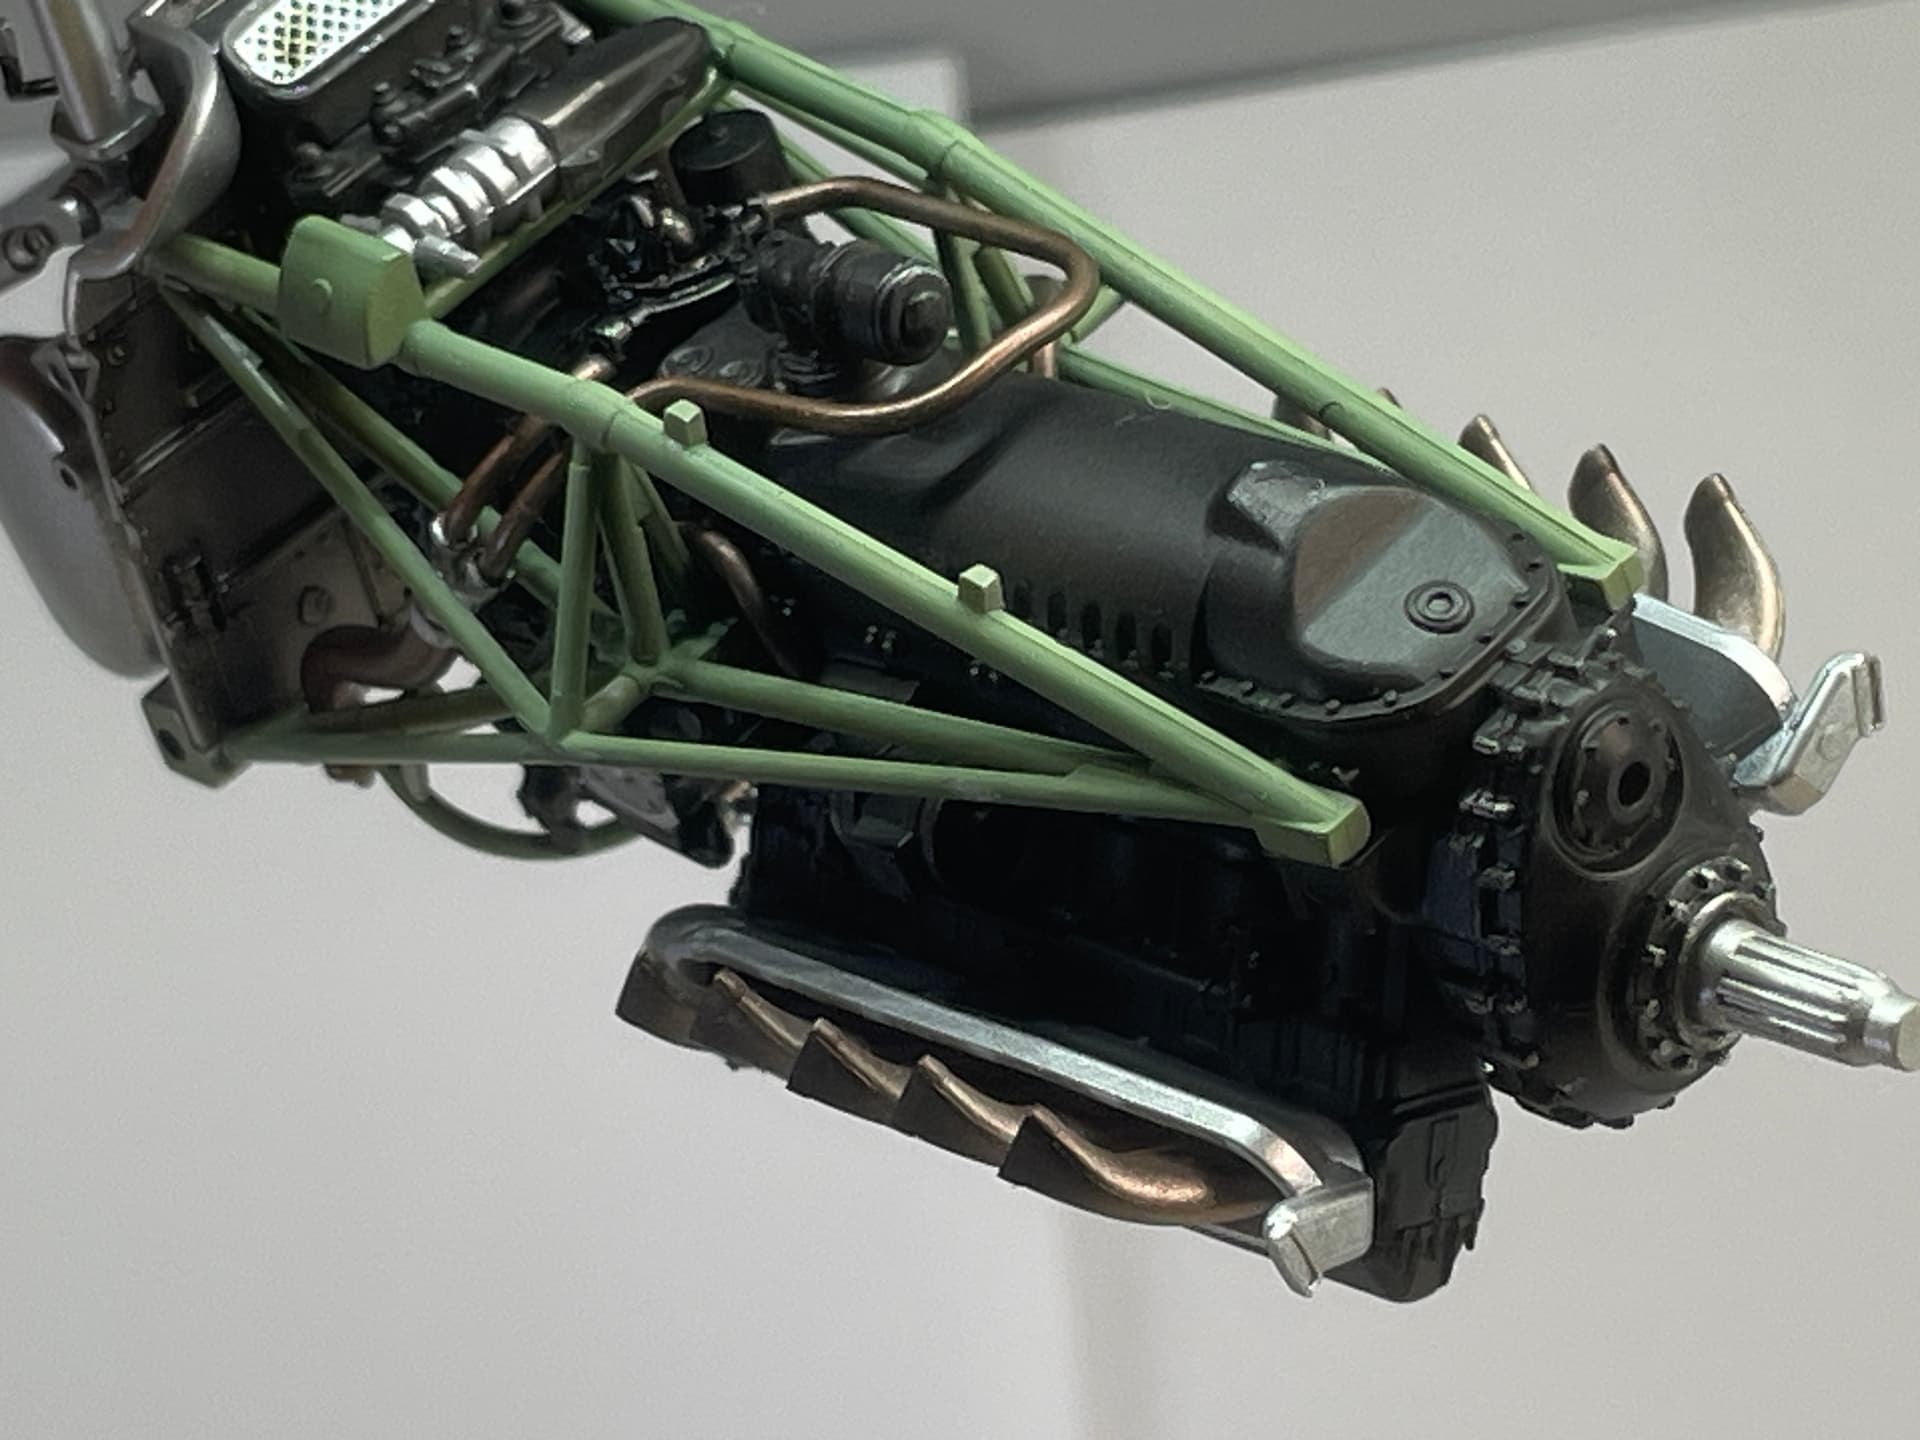
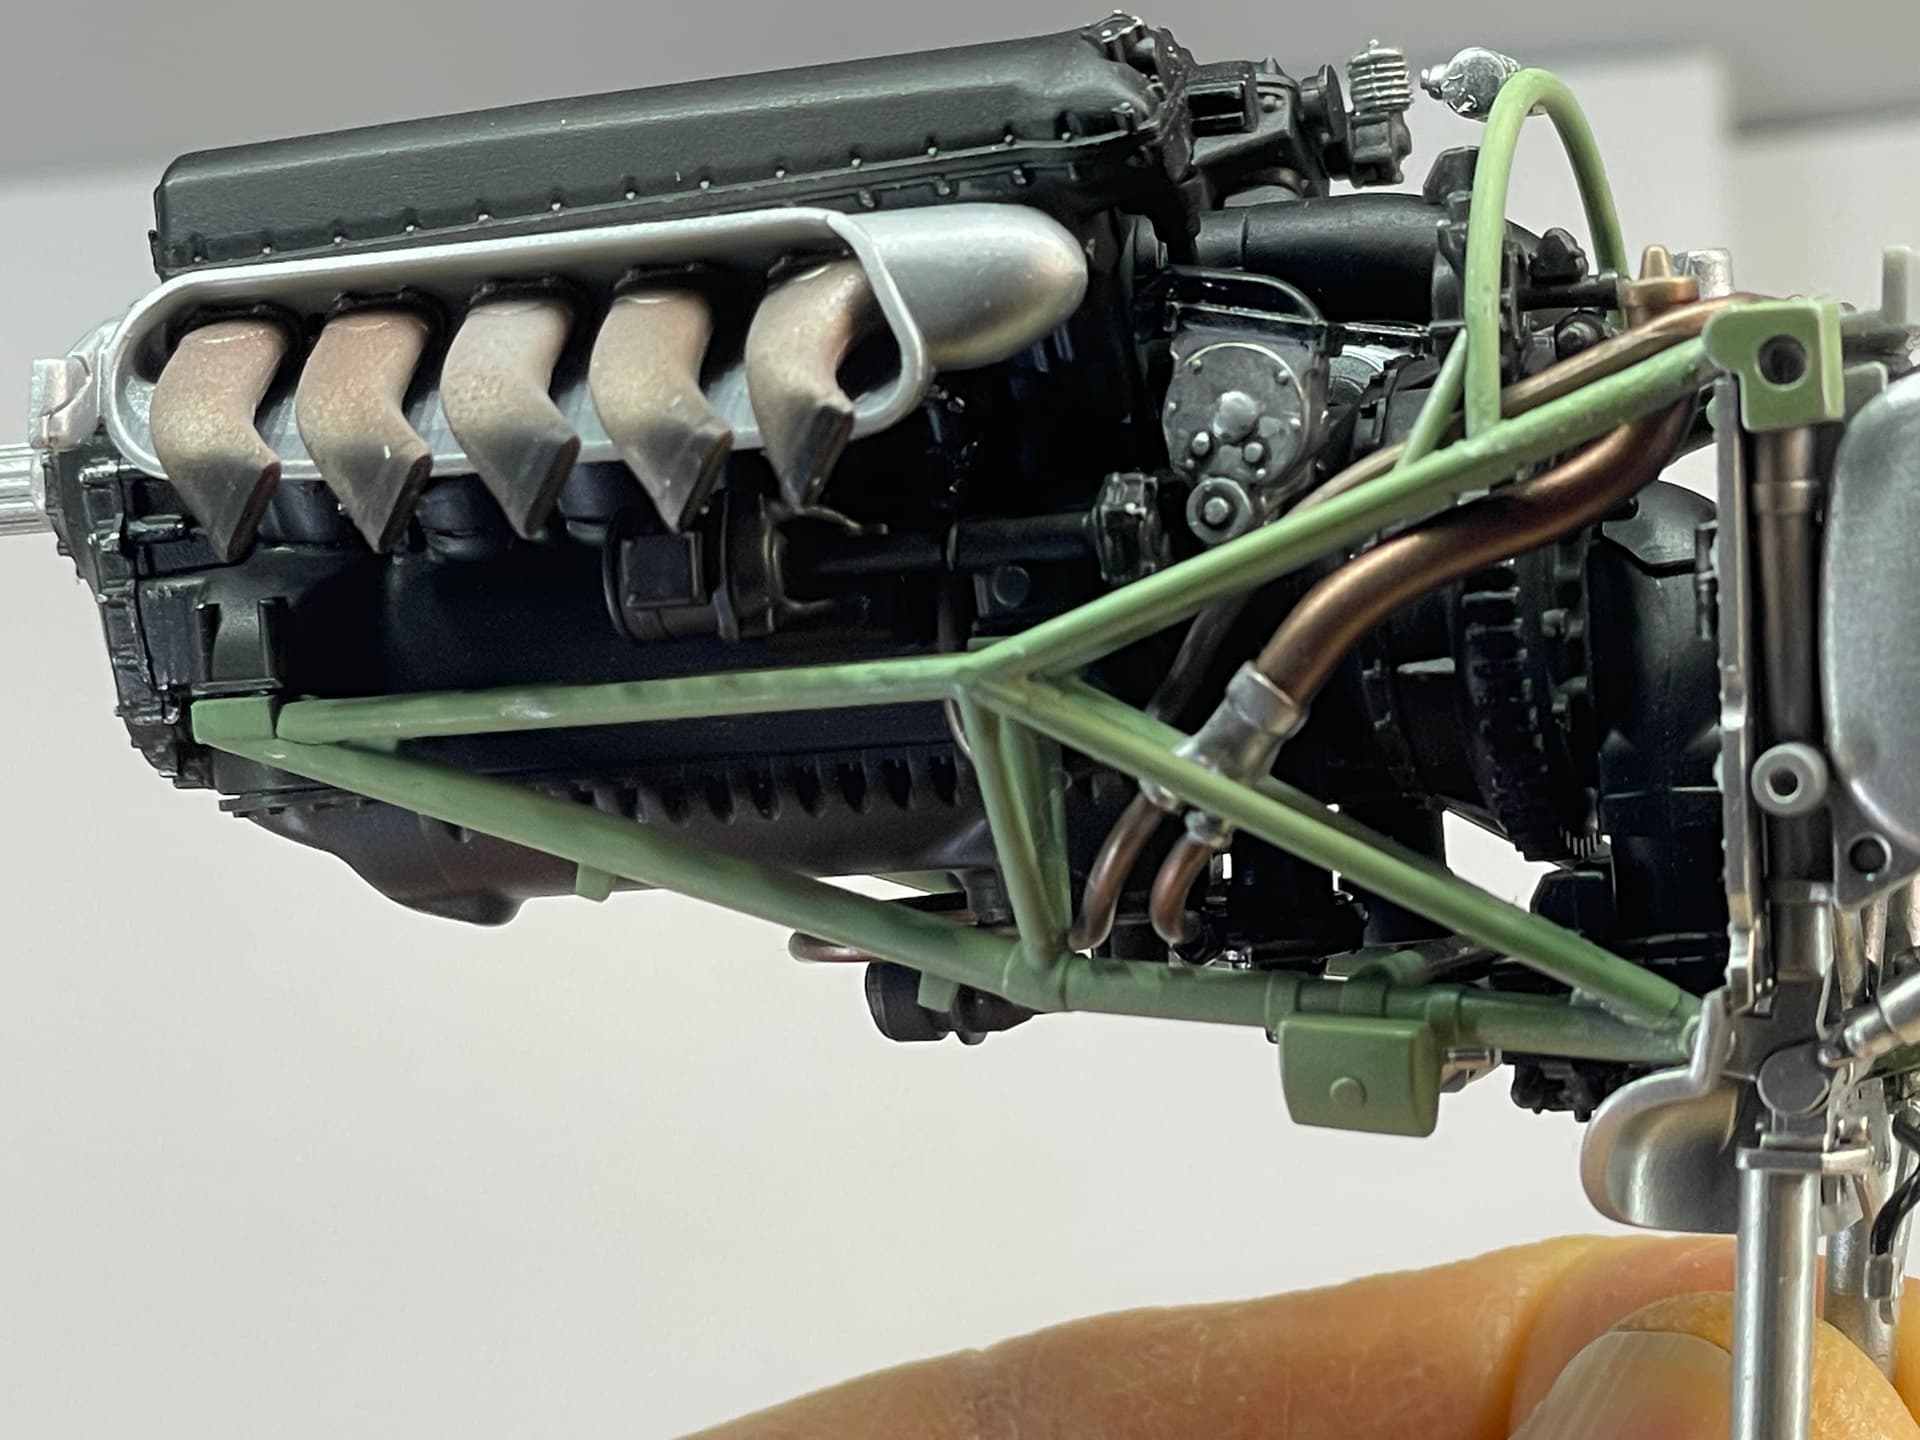
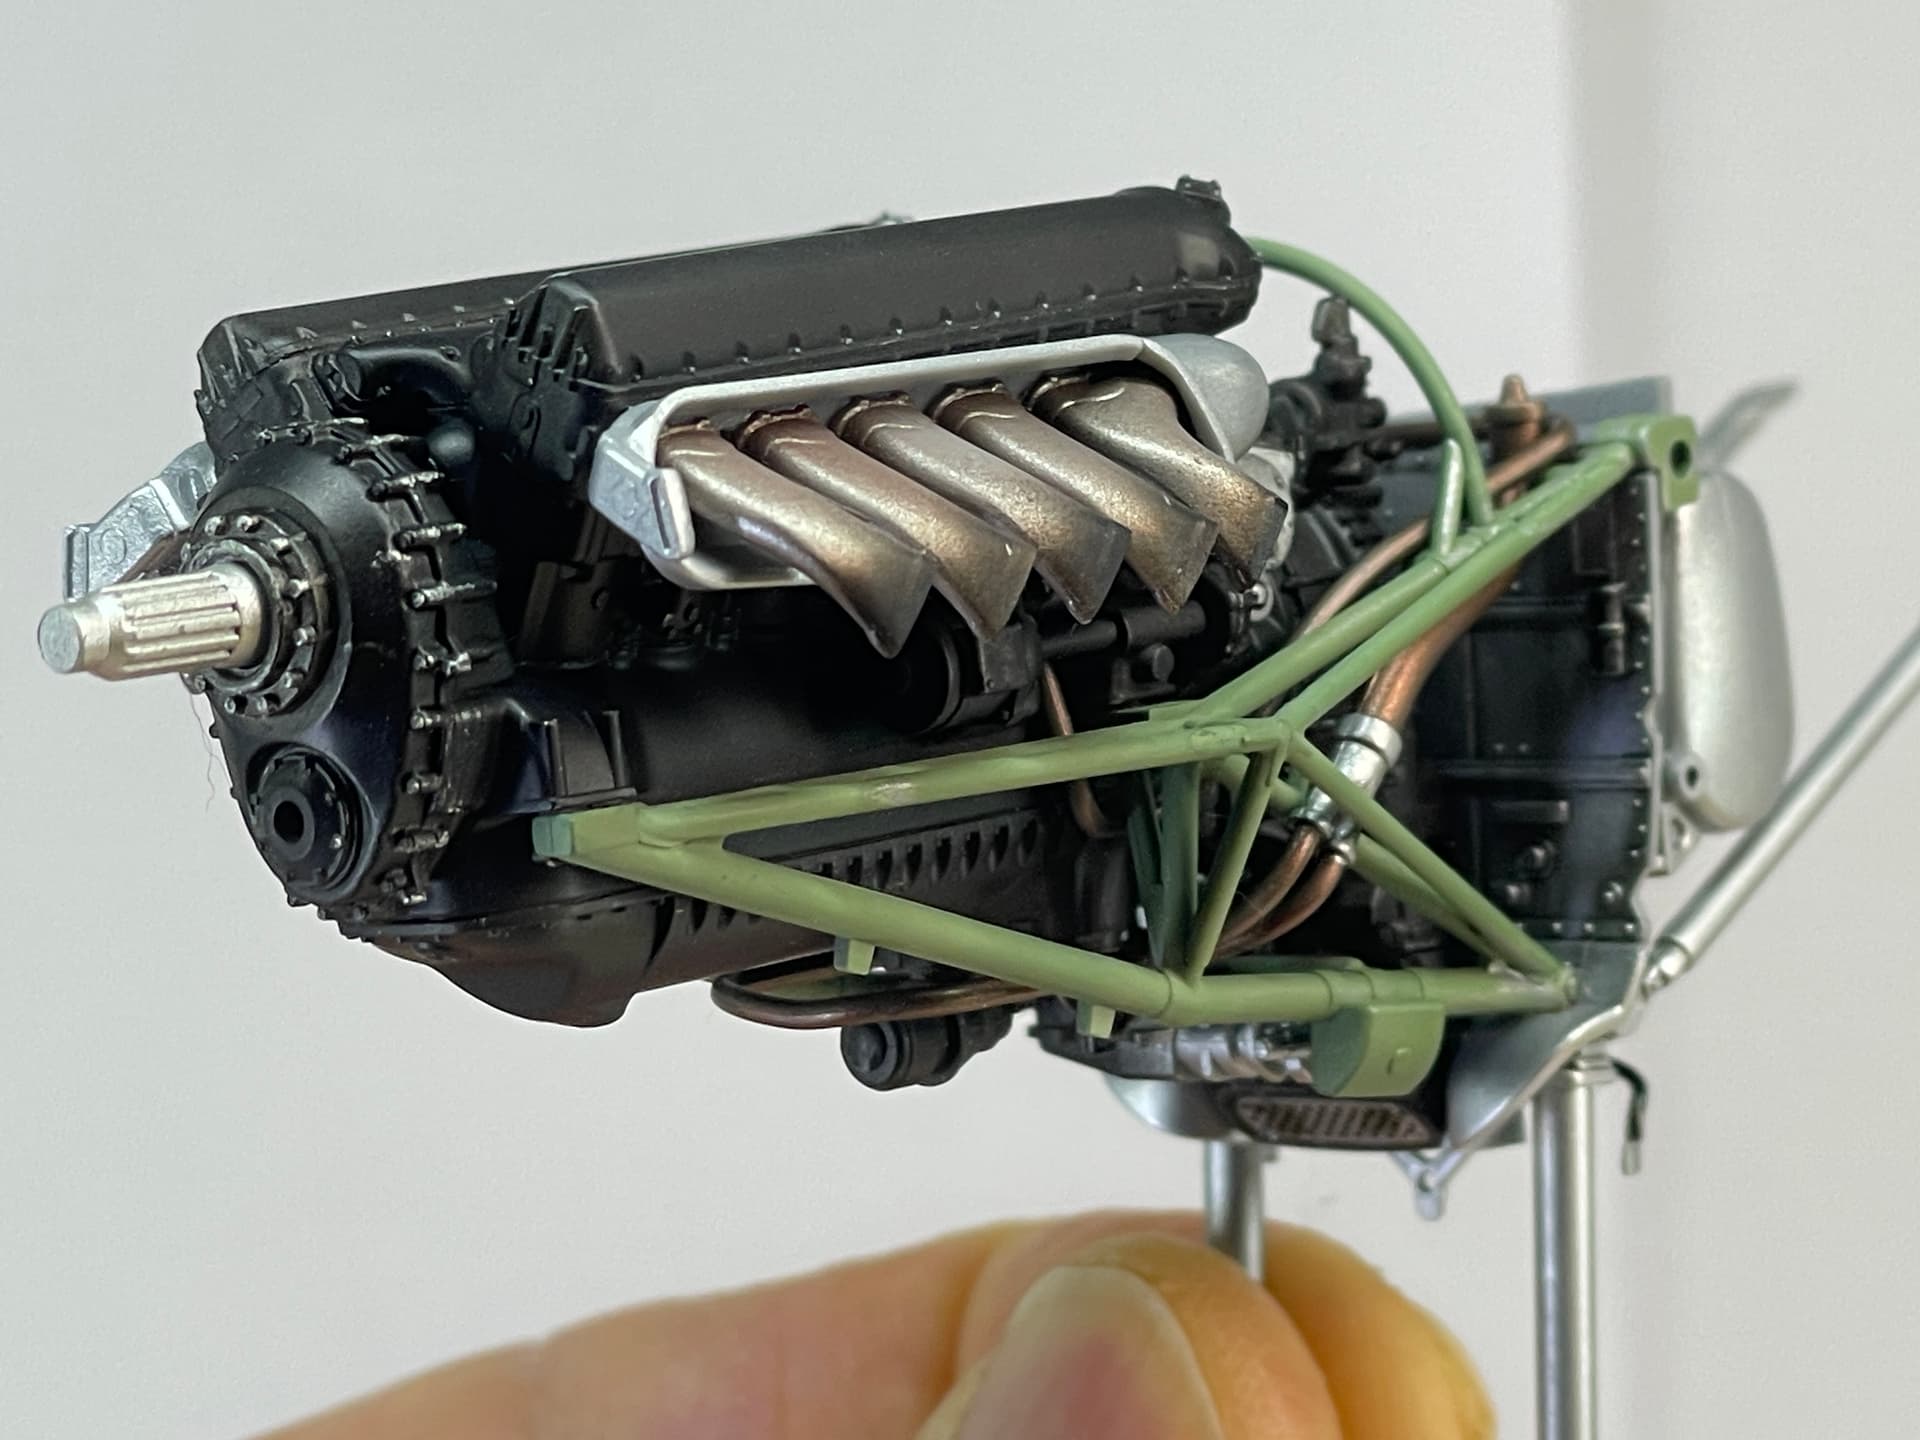
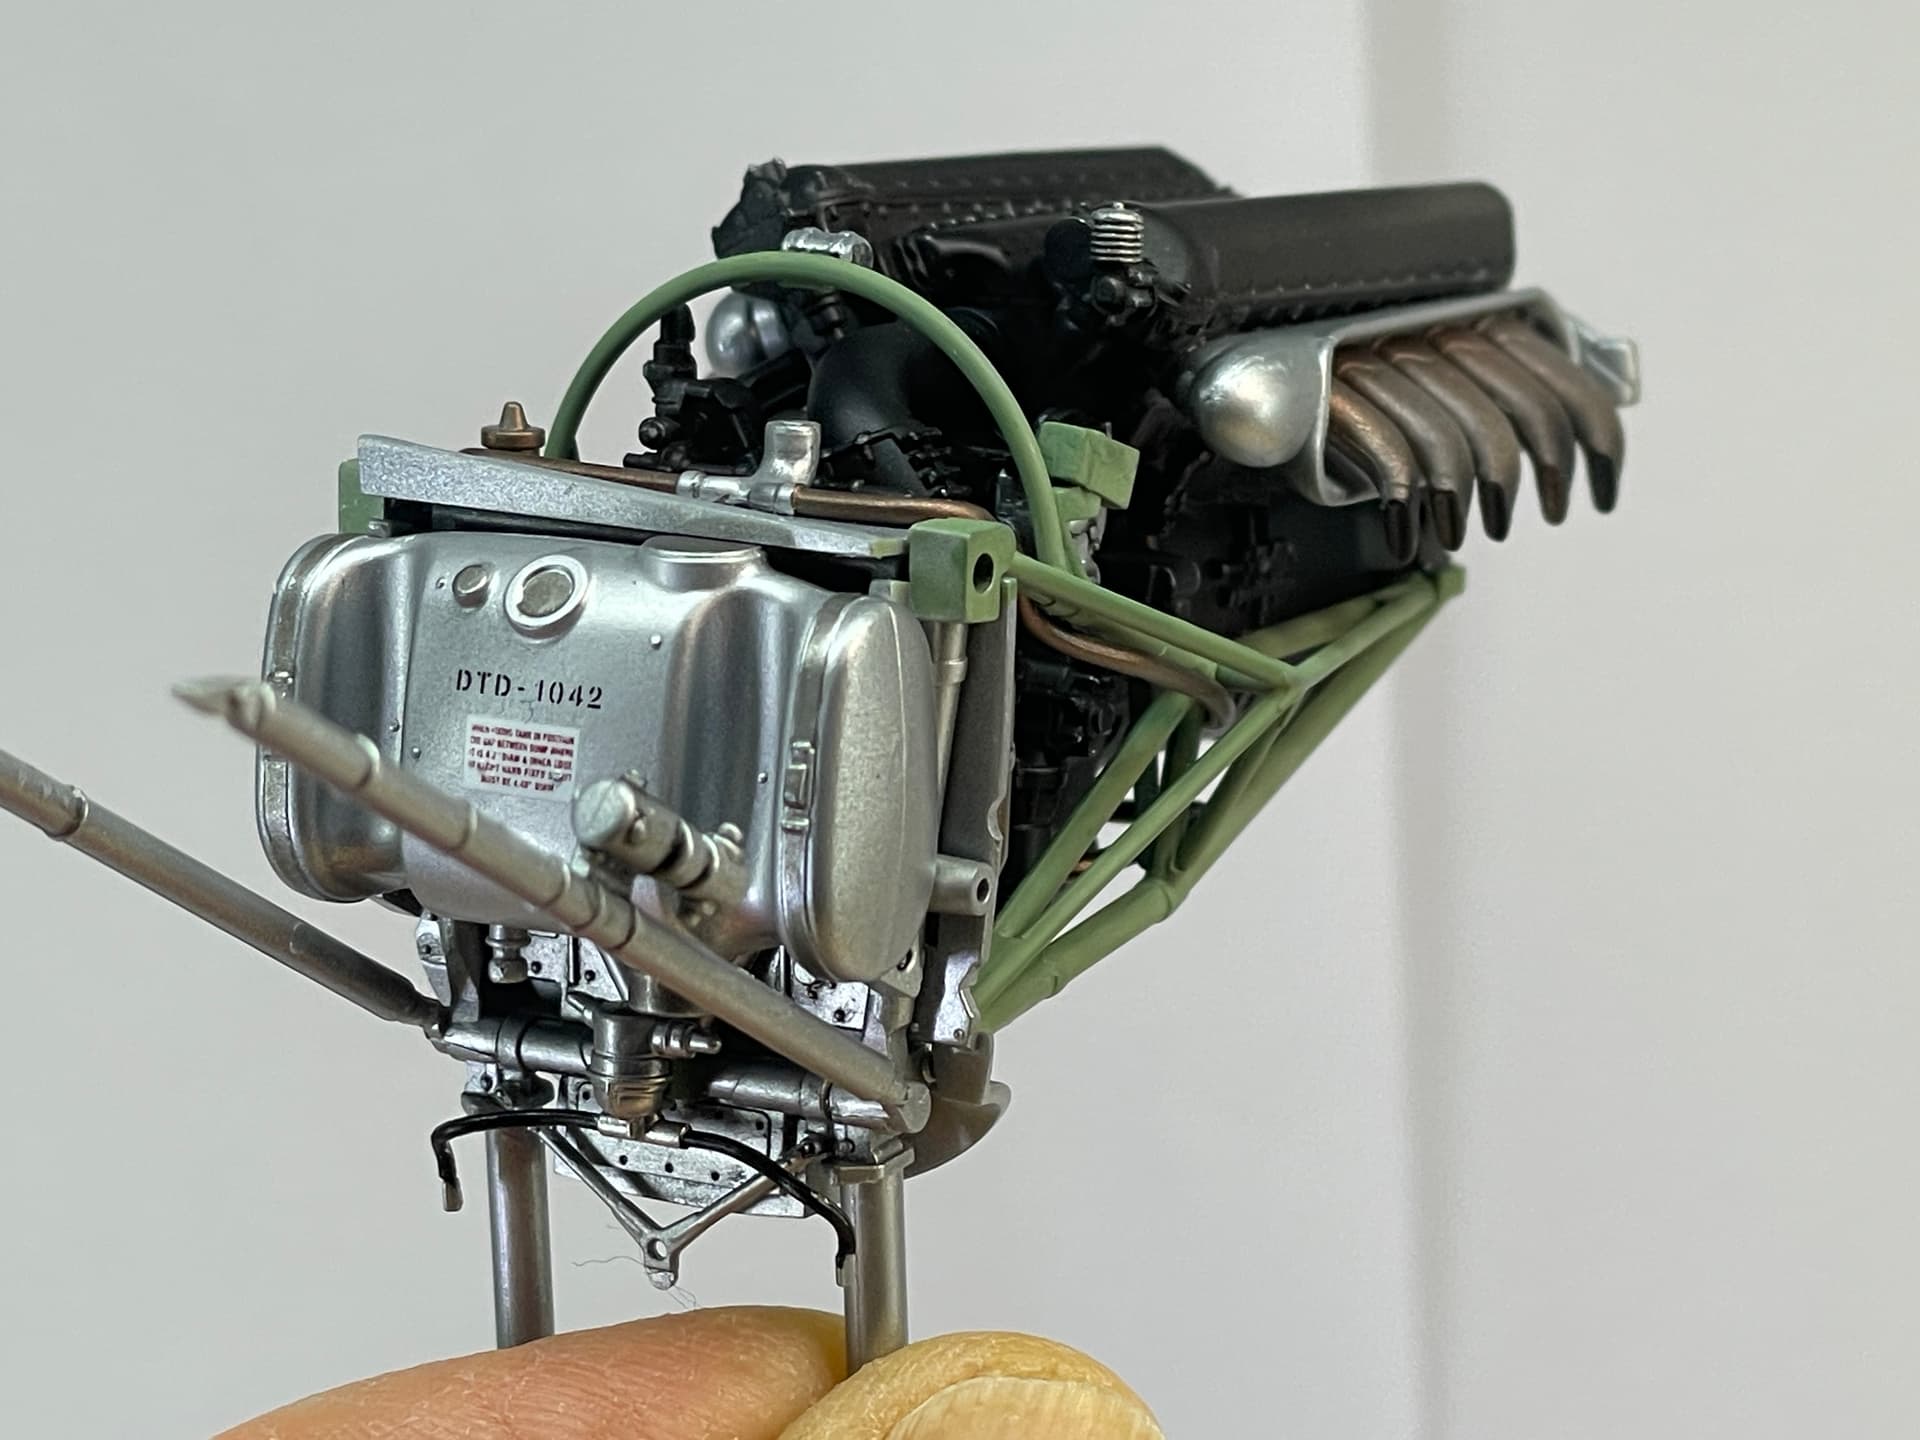
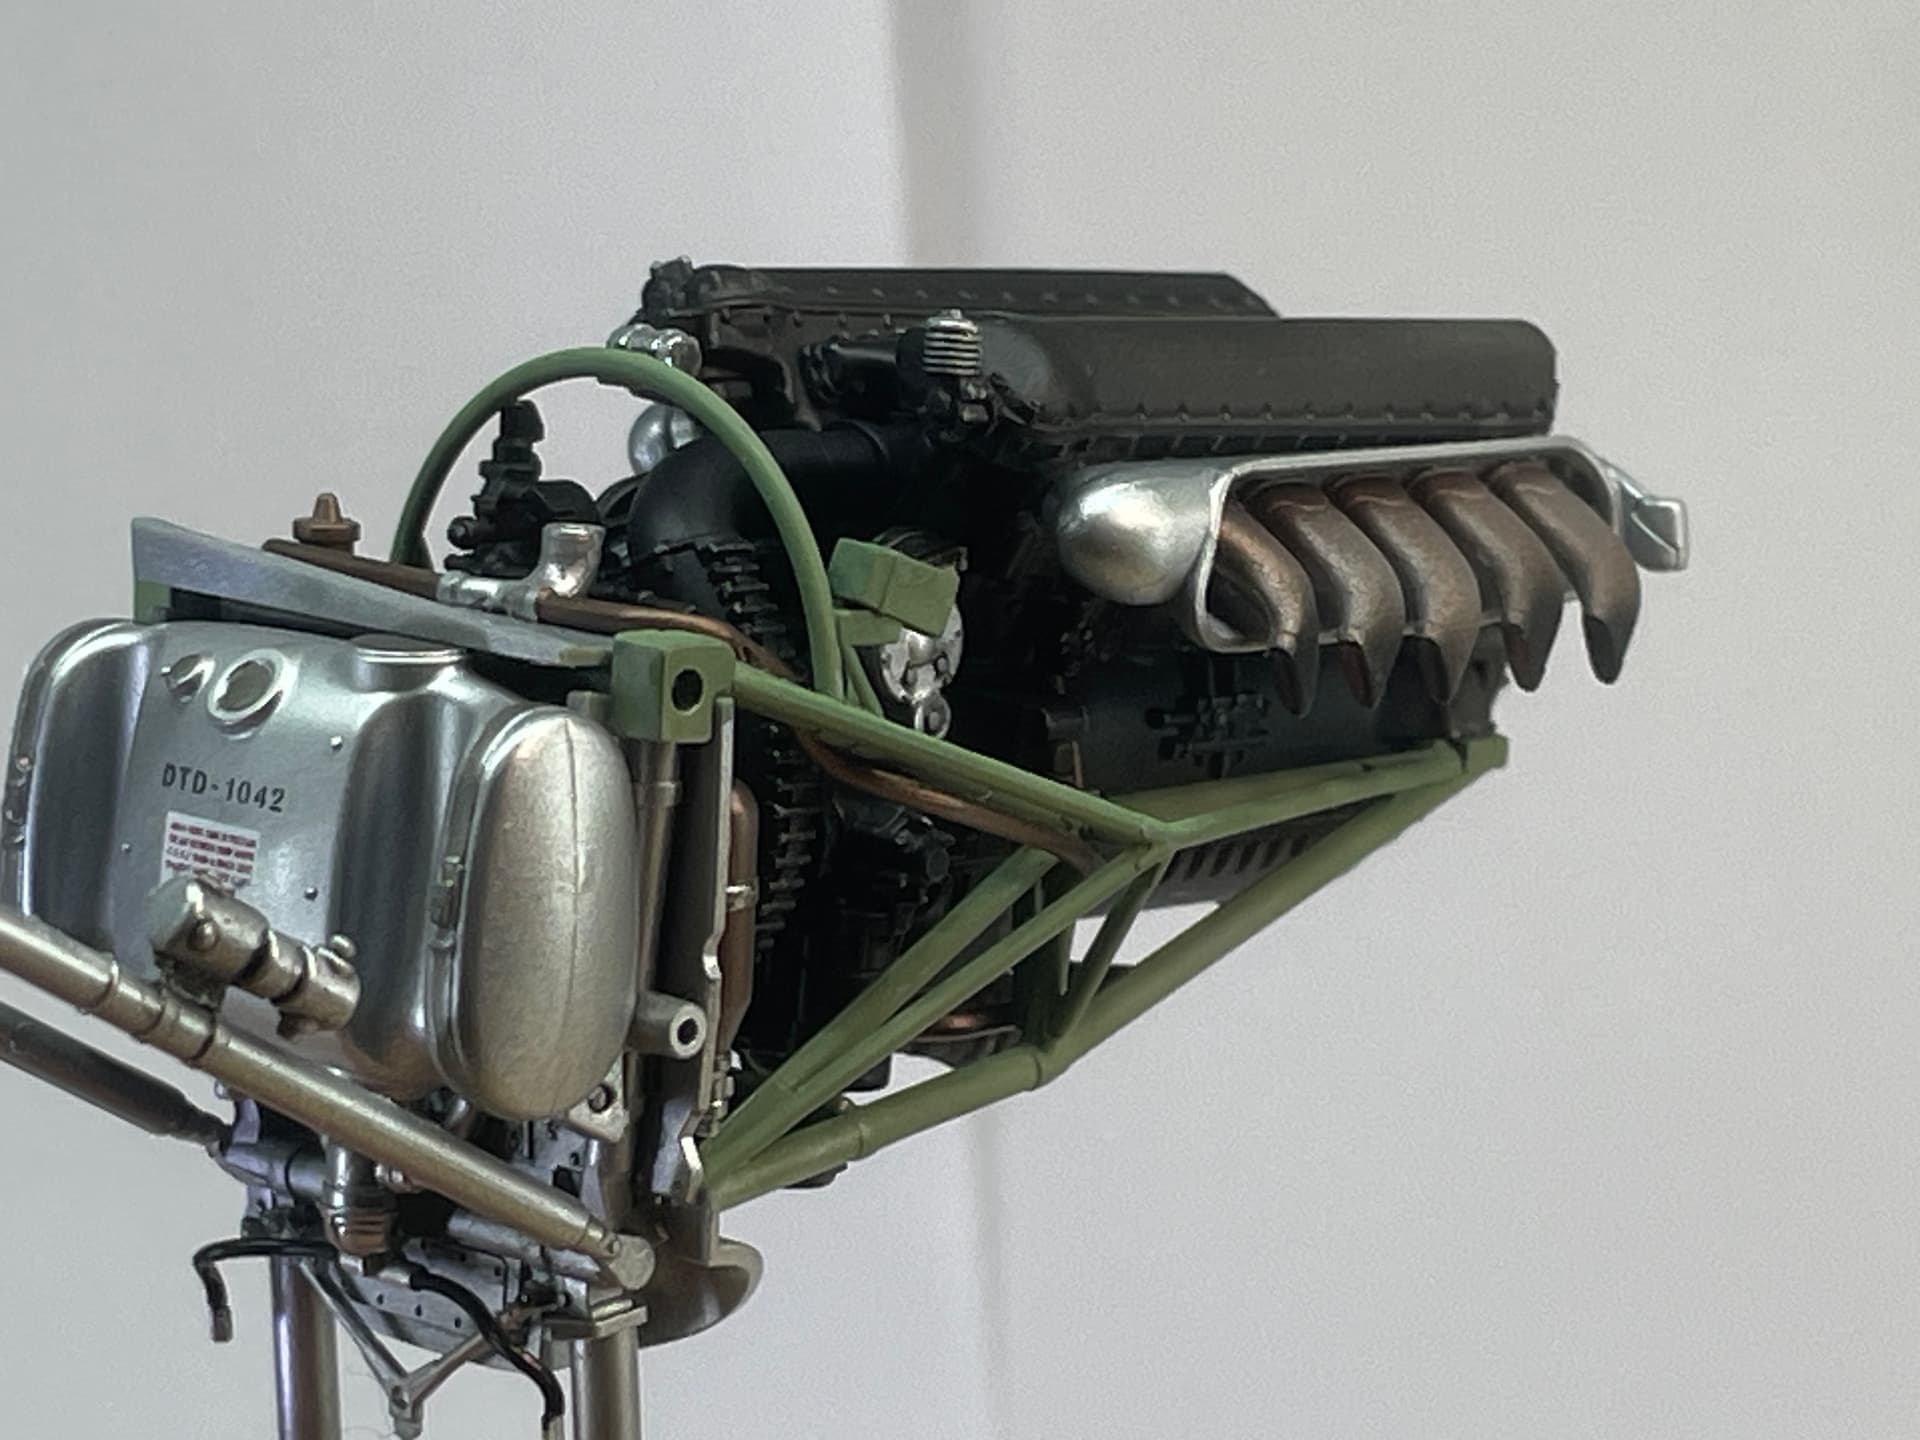
But, getting my hands back on the bench, it was “engine time”!
“Engine” is really an oversimplification. This (these) is (are) a real kit in the kit. Each one has about 40 pieces, not to mention the supports (16 pieces). Everything fits perfectly, but this is not new for Tamiya. I share some photos I took during the assembly, from partial assemblies to the finishing of one of the two
Regards
Dan


15 Likes