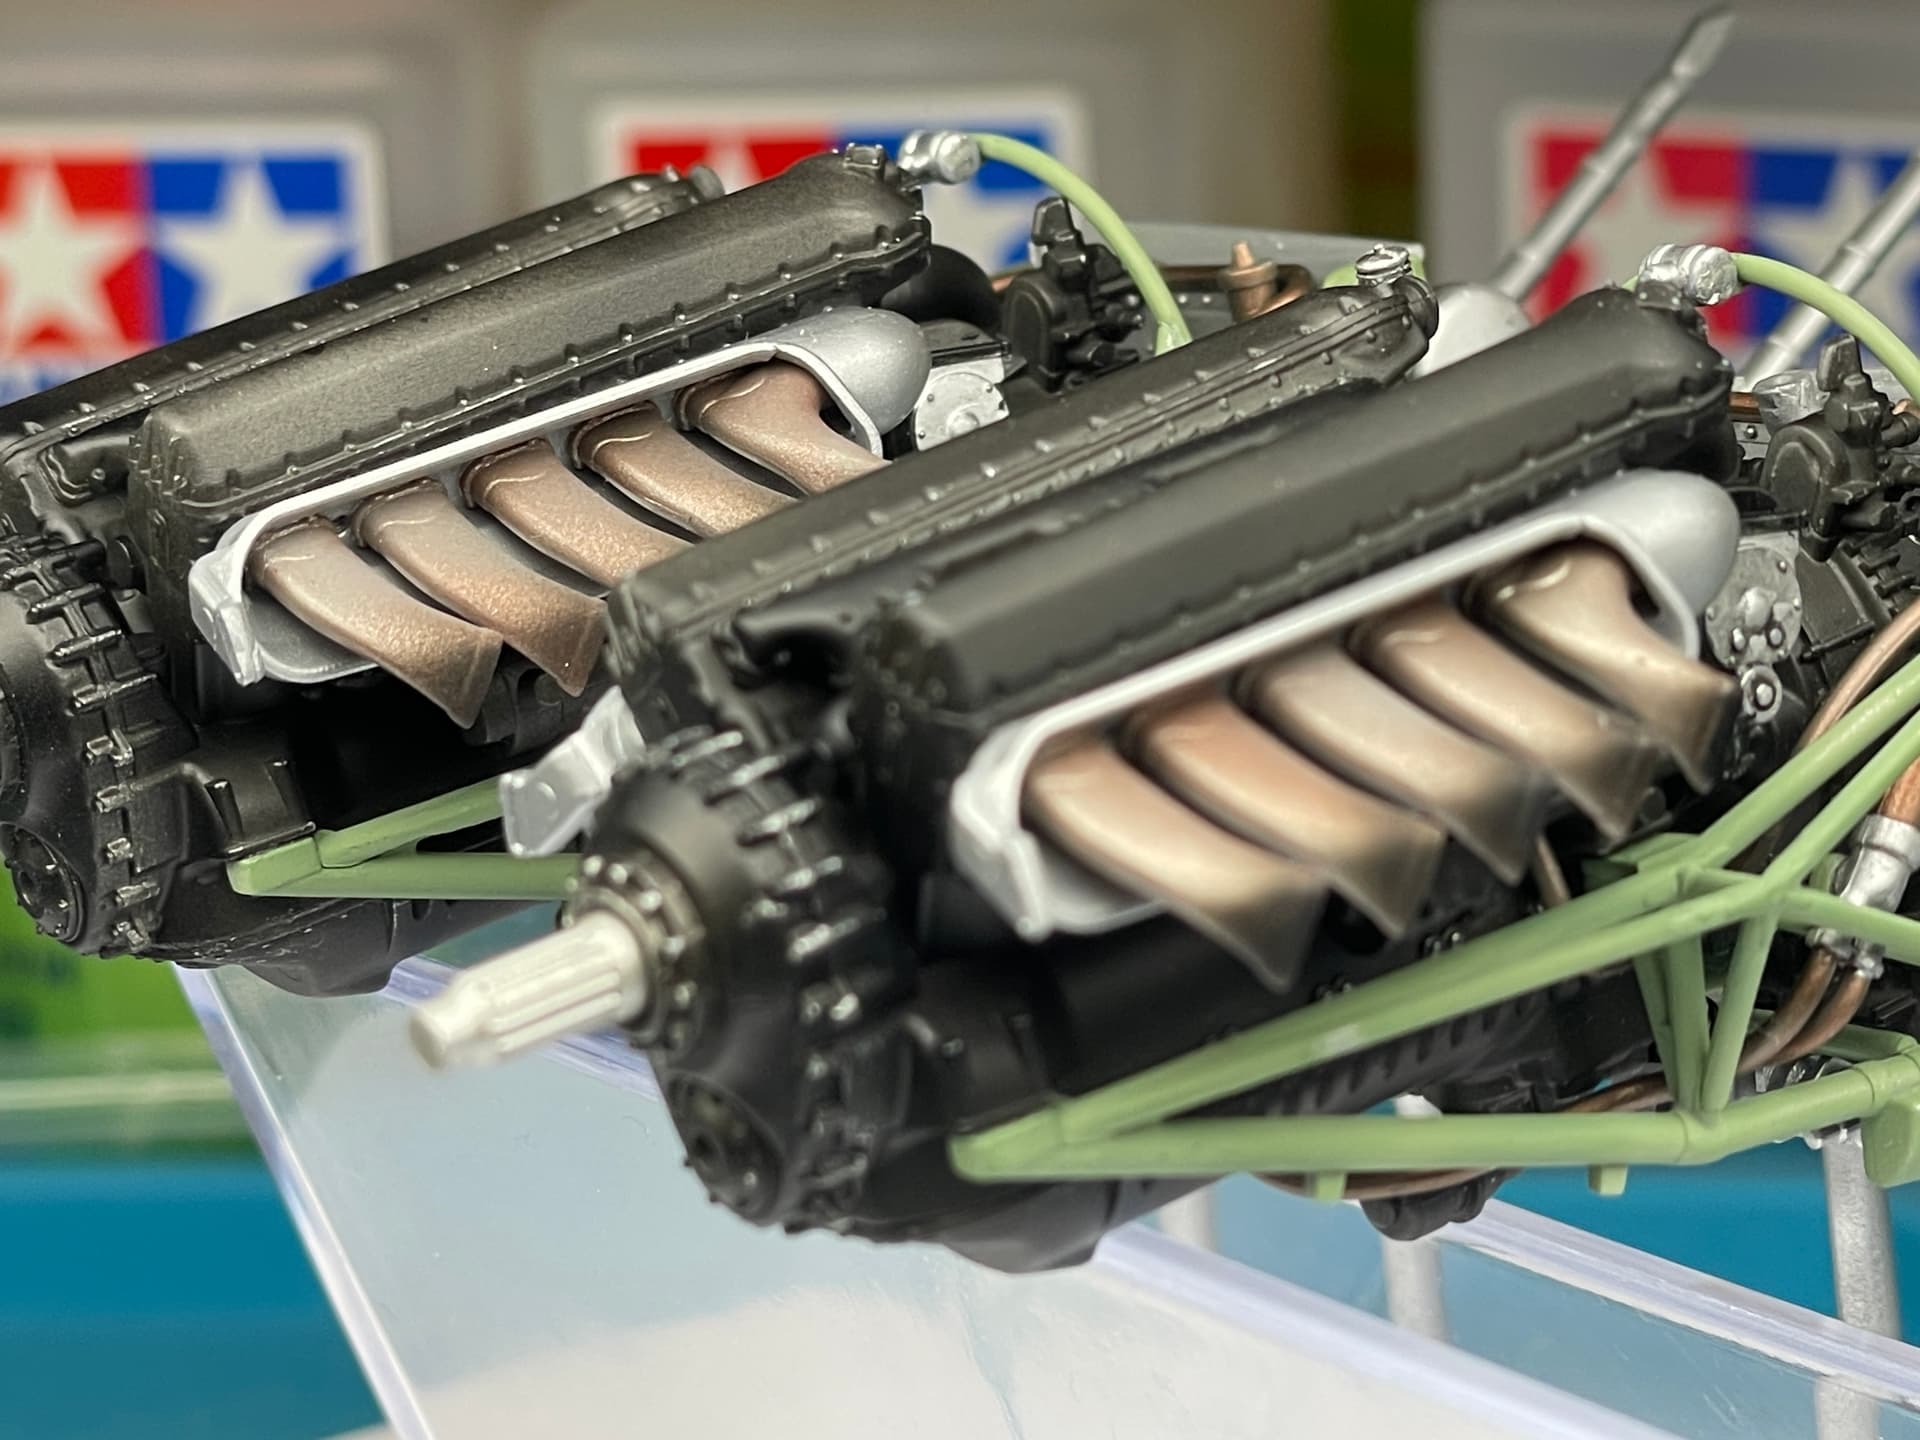
The last three photos are of the real thing, taken during my visit to the Vigna di Valle Museum. The engine example photographed is a different and later version than the one installed on the FB Mk. VI that I am building. The similarities are however, I think, evident.
3 Likes
Magnificent, truly a work of art Daniele! ![]()
![]()
1 Like
Thanks Tim, your kind words are really appreciated. I try my best.
1 Like
This thing is looking sharp Daniele, your engines look great!
Cajun ![]()
3 Likes
Lots of great detail and painting going into this … looks sweet.
3 Likes
Absolutely incredible. You are inspiring me to get into my aircraft model stash!
1 Like
![]()
![]() It’s strange to feel like you’re in the shoes of the inspirer. Anyway, thank you so much for the nice comment
It’s strange to feel like you’re in the shoes of the inspirer. Anyway, thank you so much for the nice comment
3 Likes
Your detail work is truly inspirational. There is a much more limited scope for such detail work like this in 1/35 armour which is my staple, but for sure my work could do with more accuracy, fine precision and attention to detail like yours. Seeing work like yours makes me a better modeller so thank you for sharing.
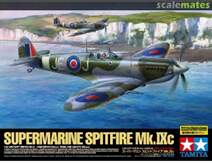
PS - pulled the trigger on the Tamiya Spitfire IX in 1:32…
1 Like
Once again, thank you very much.
And if this is the Spit IX you pulled the trigger on…
rest assured, my friend, that you will have great satisfaction and pleasure in building it. The same kit is on my starting line, jostling to be first on the workbench after the Mosquito.
Dan
2 Likes
It is indeed.
I just read your long post on the thread “Model Building - Don’t Hate It When…” I can’t stop laughing man!!
Your words are holy!!!
1 Like
Glad you enjoyed it brother.
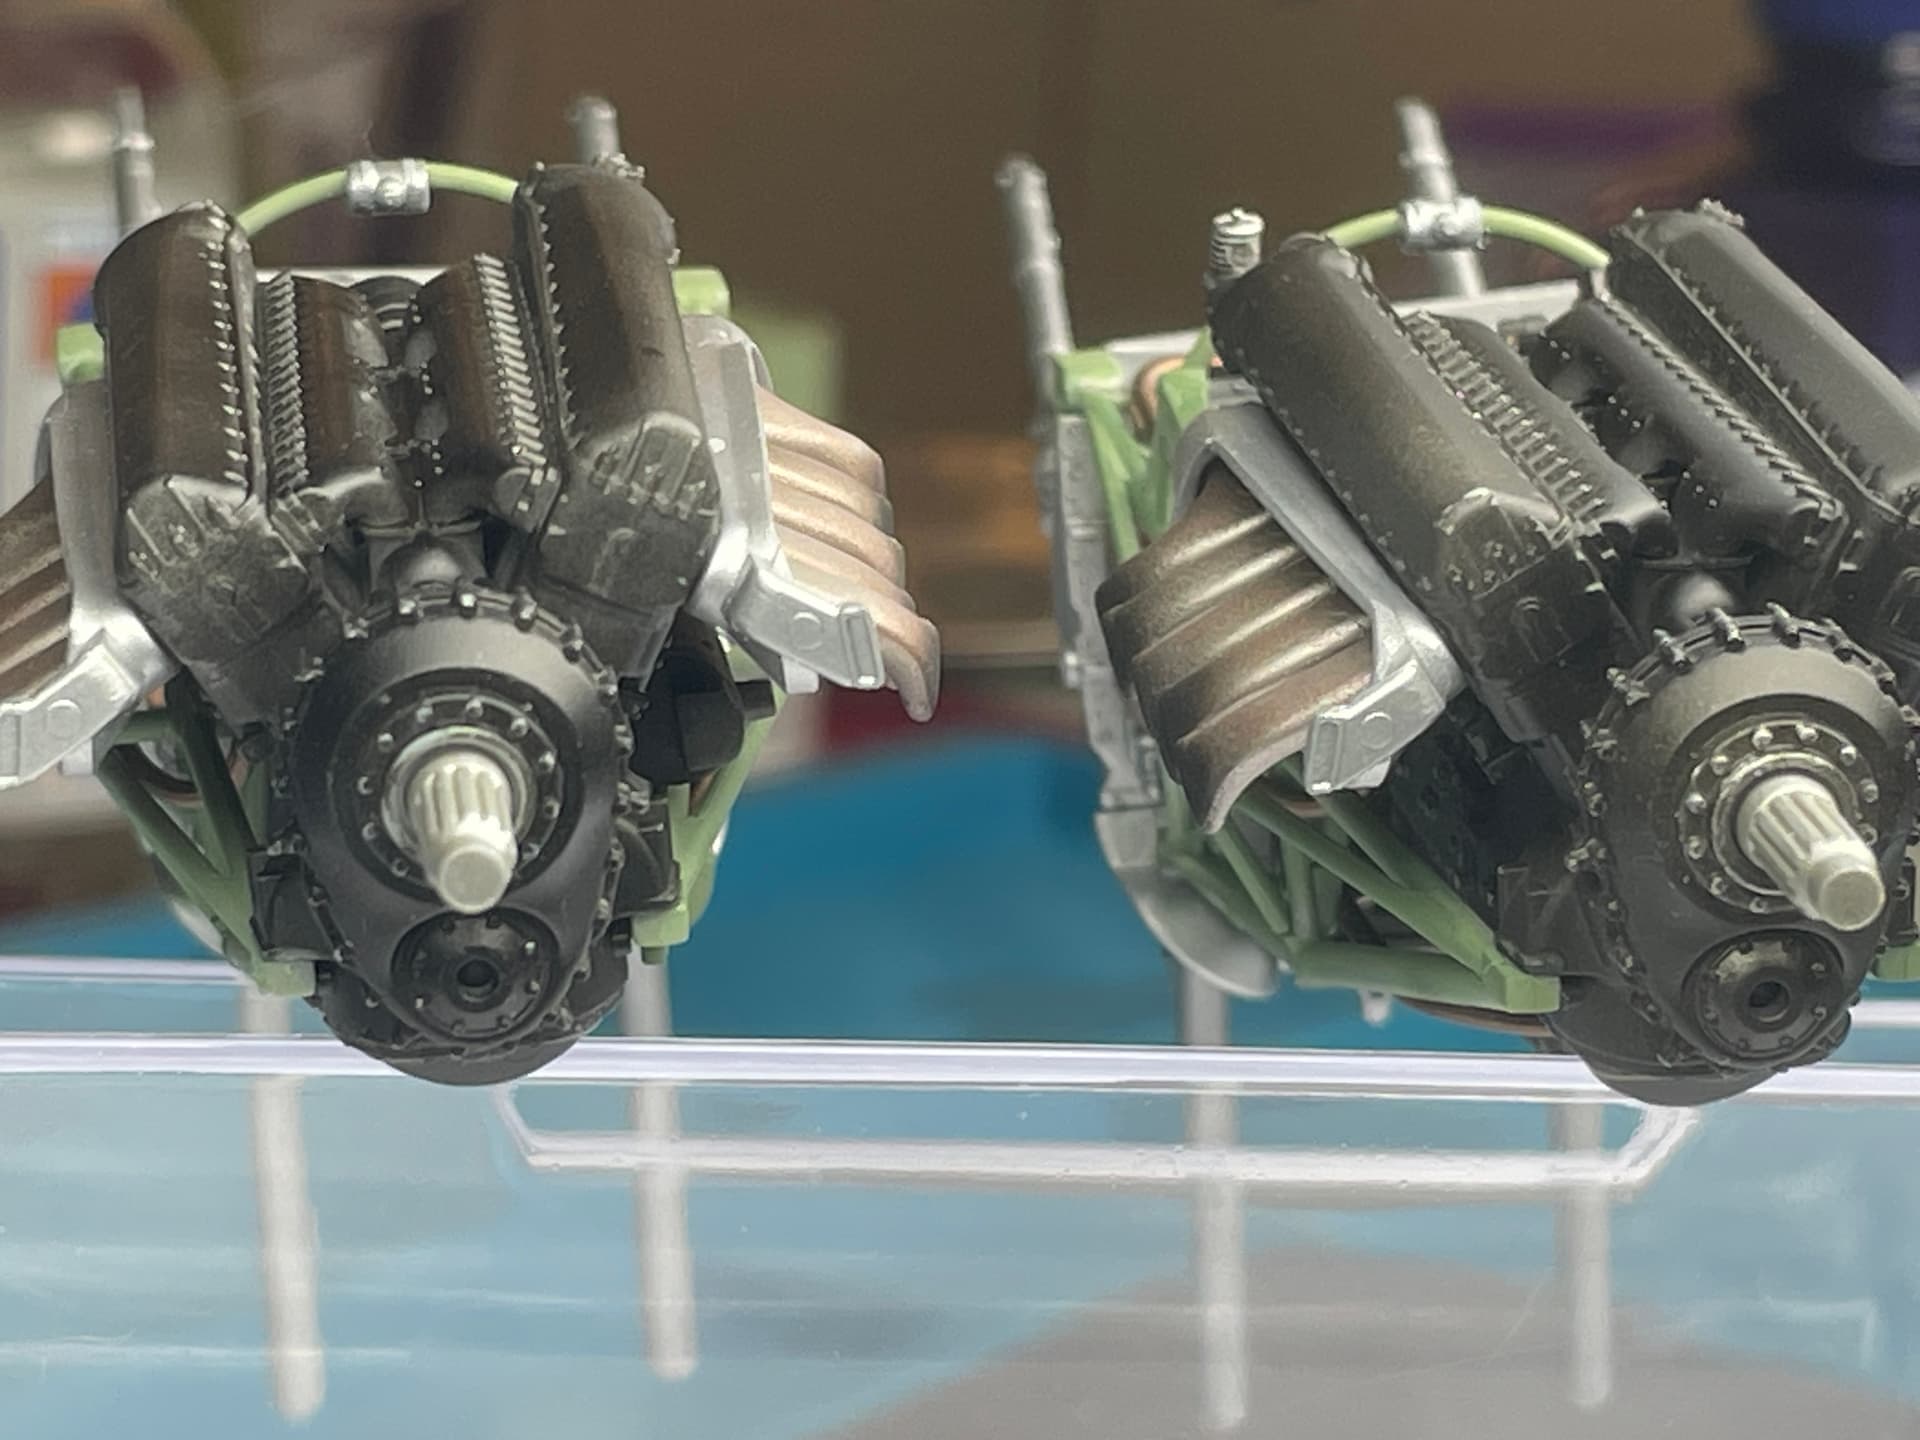
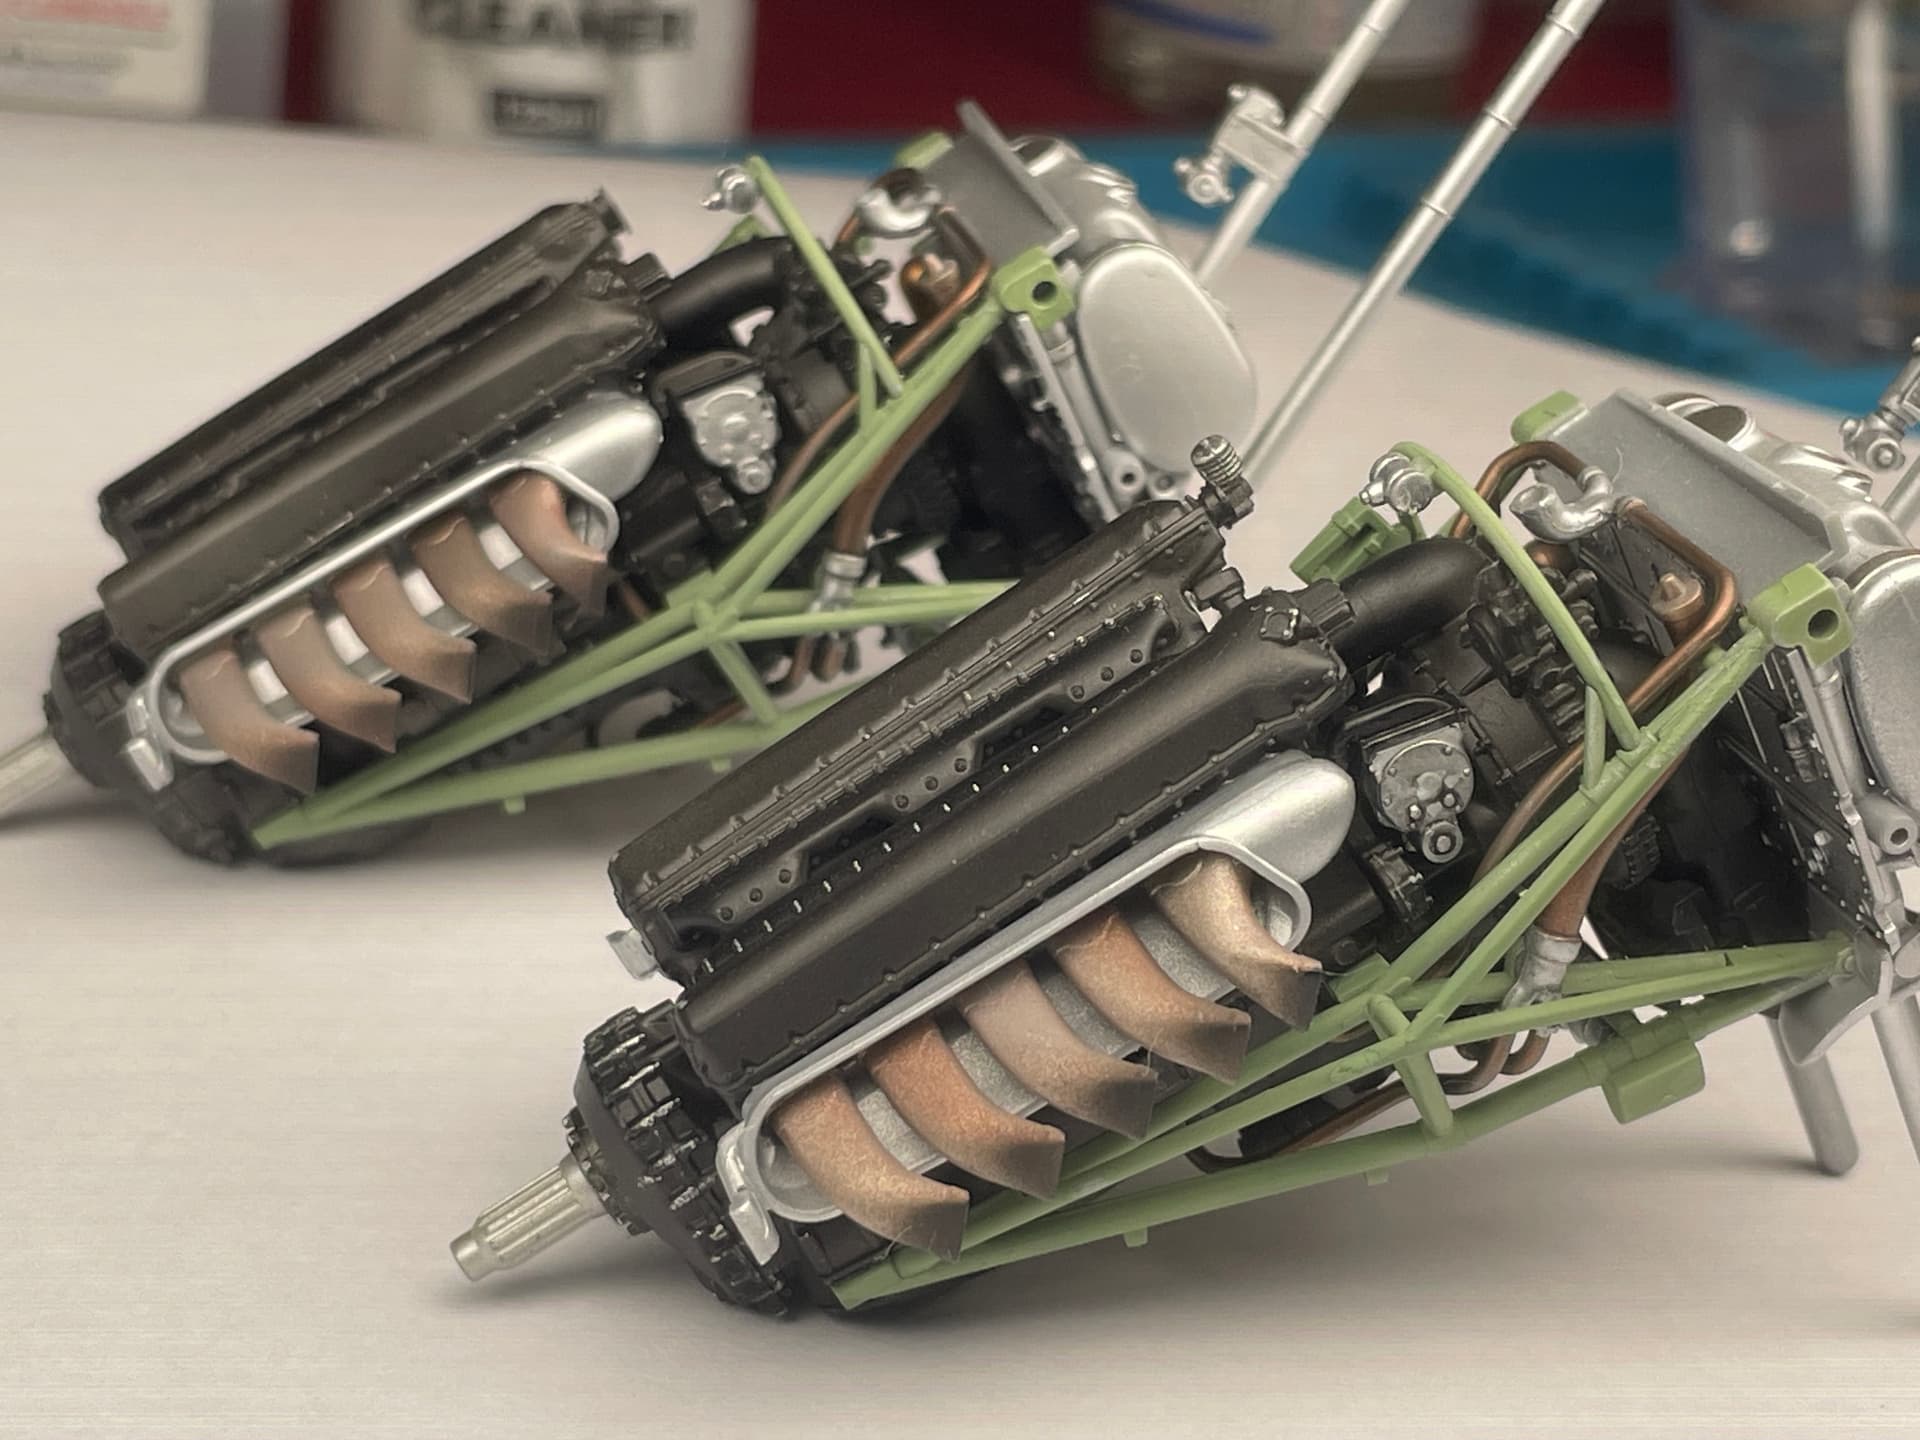
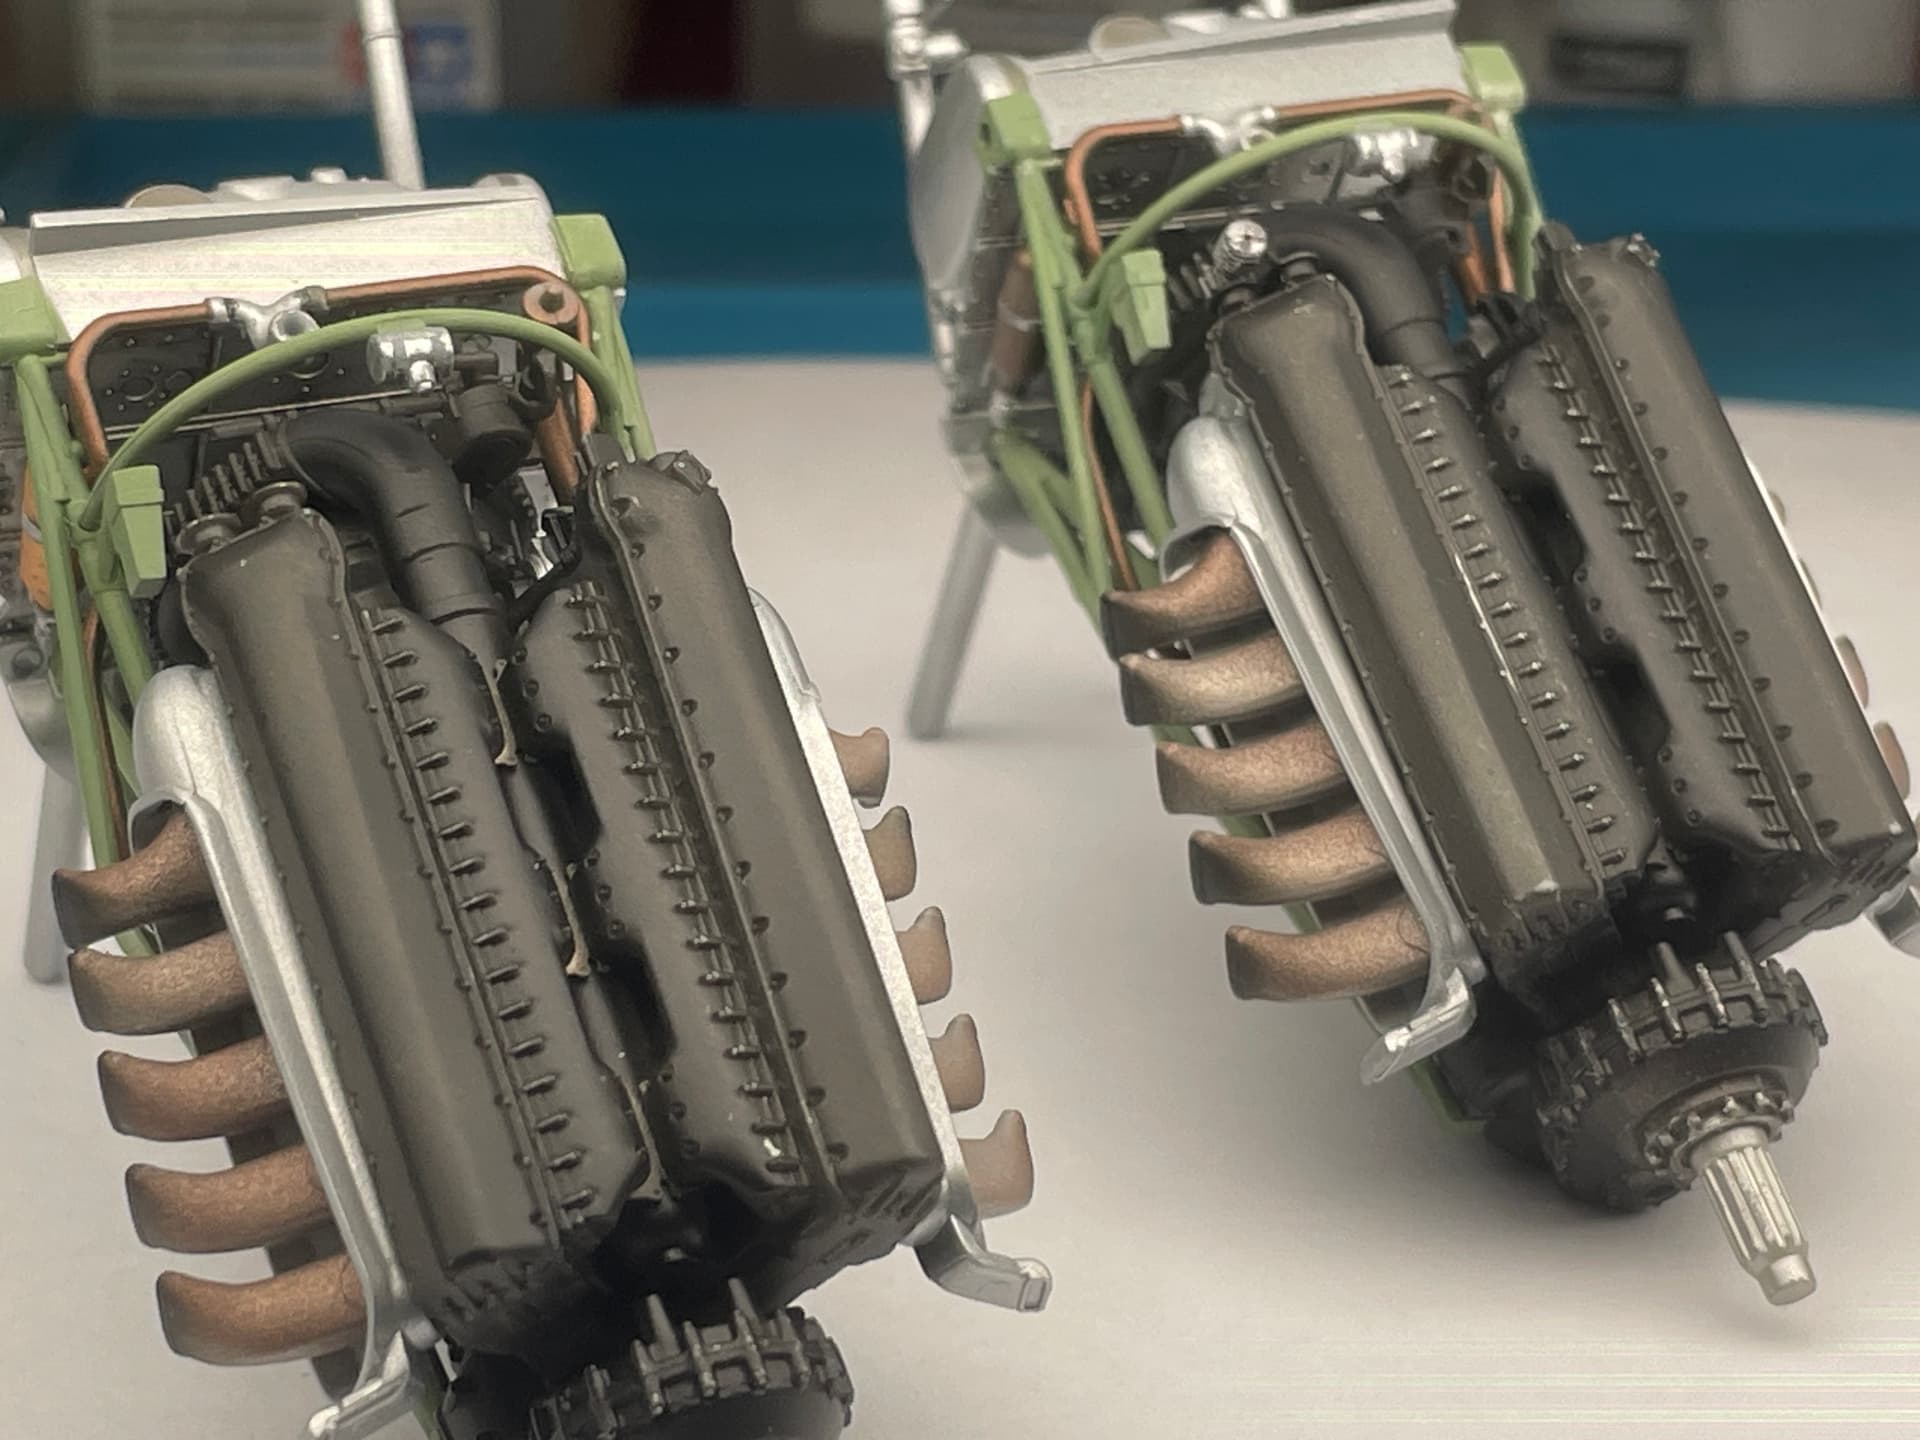
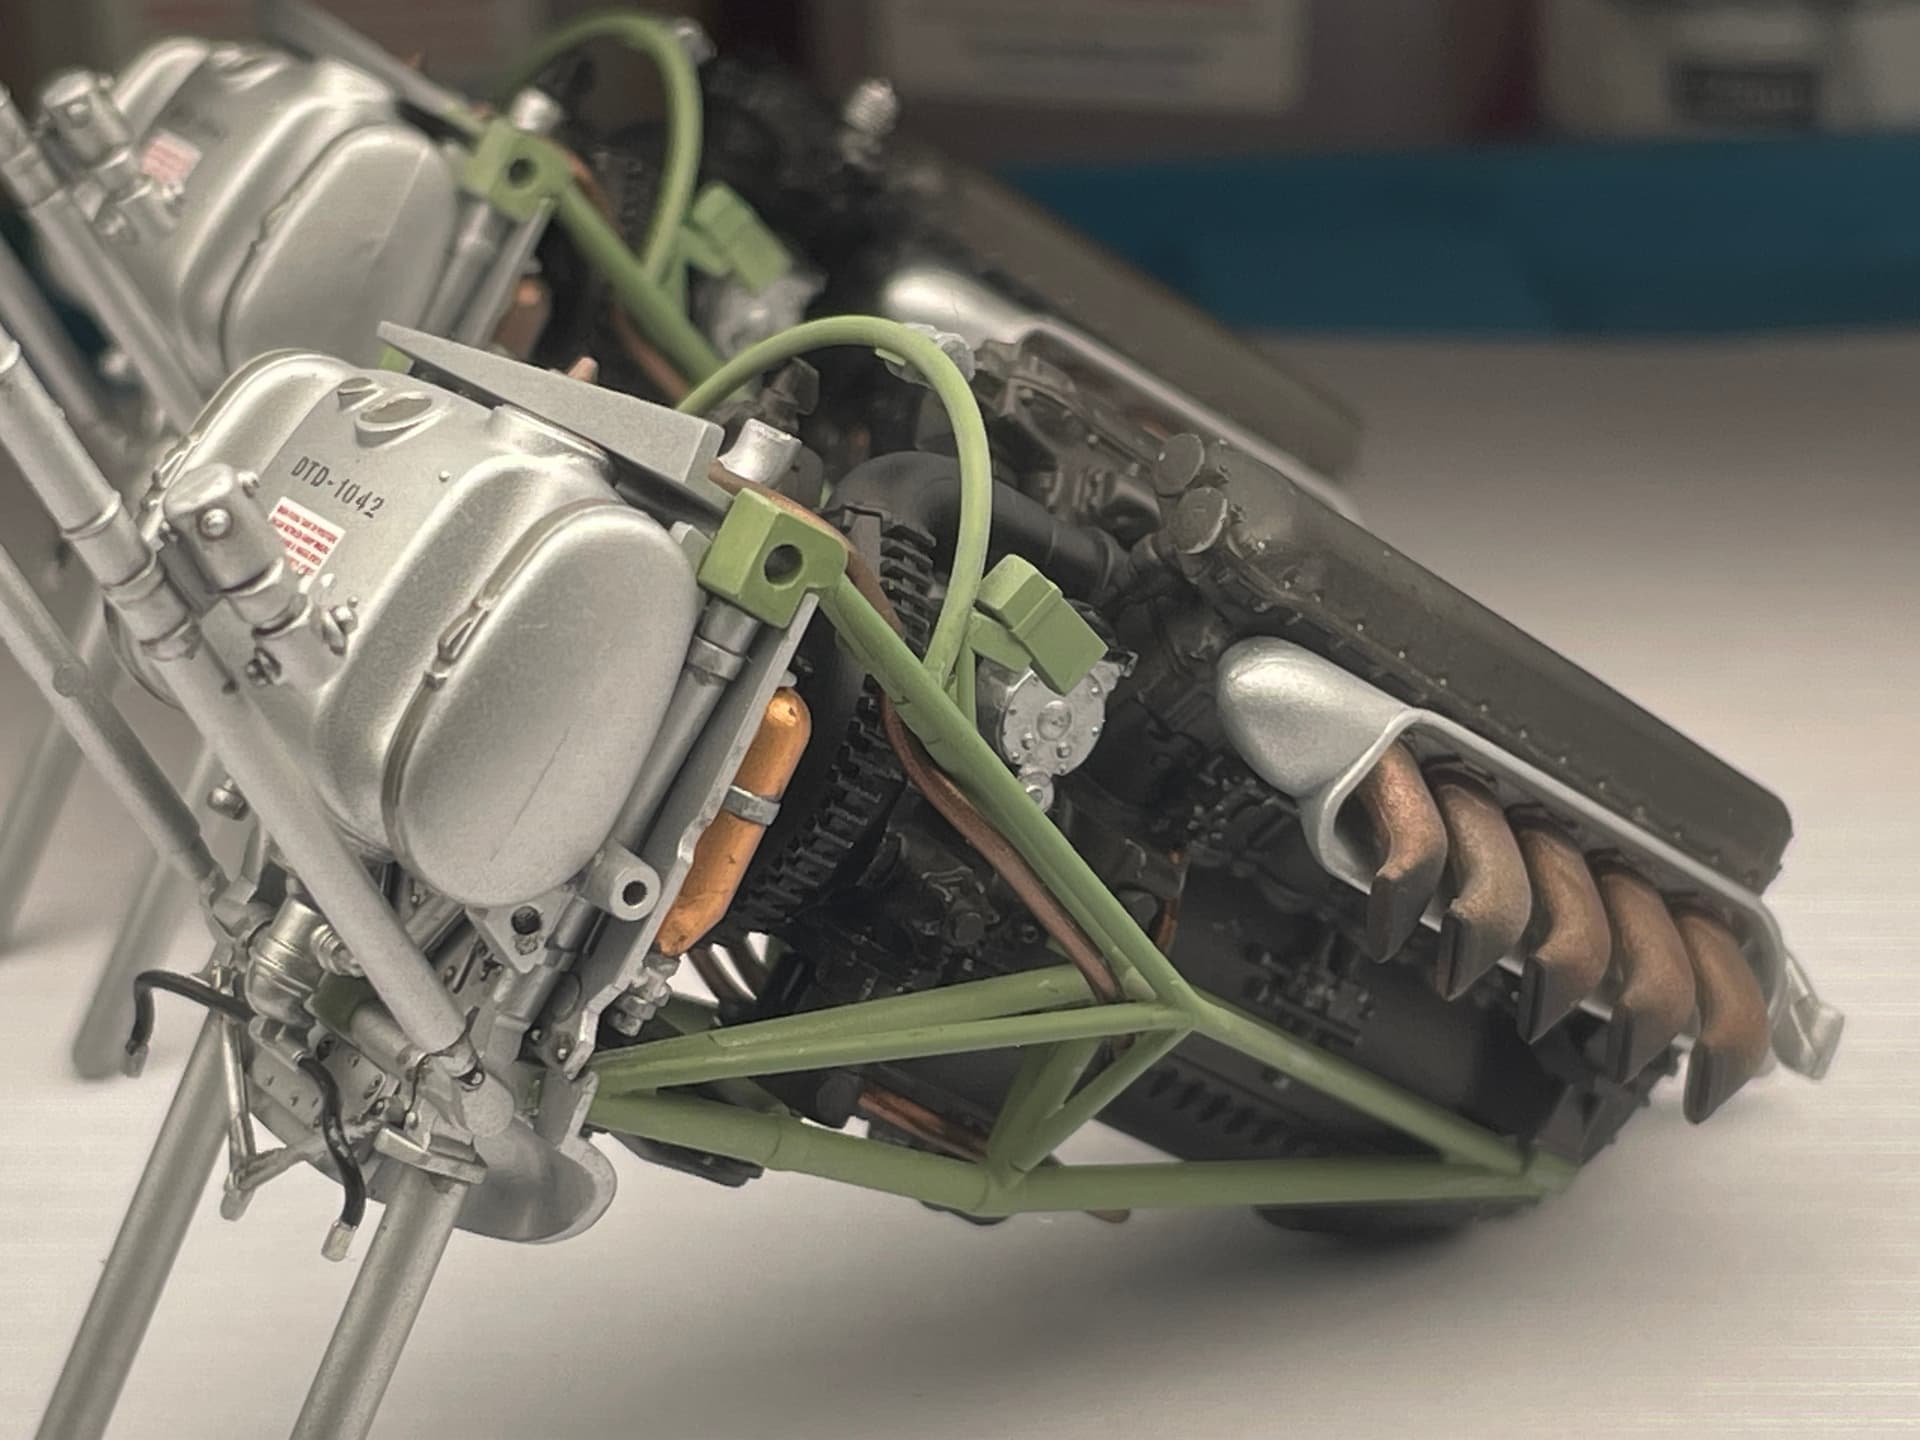
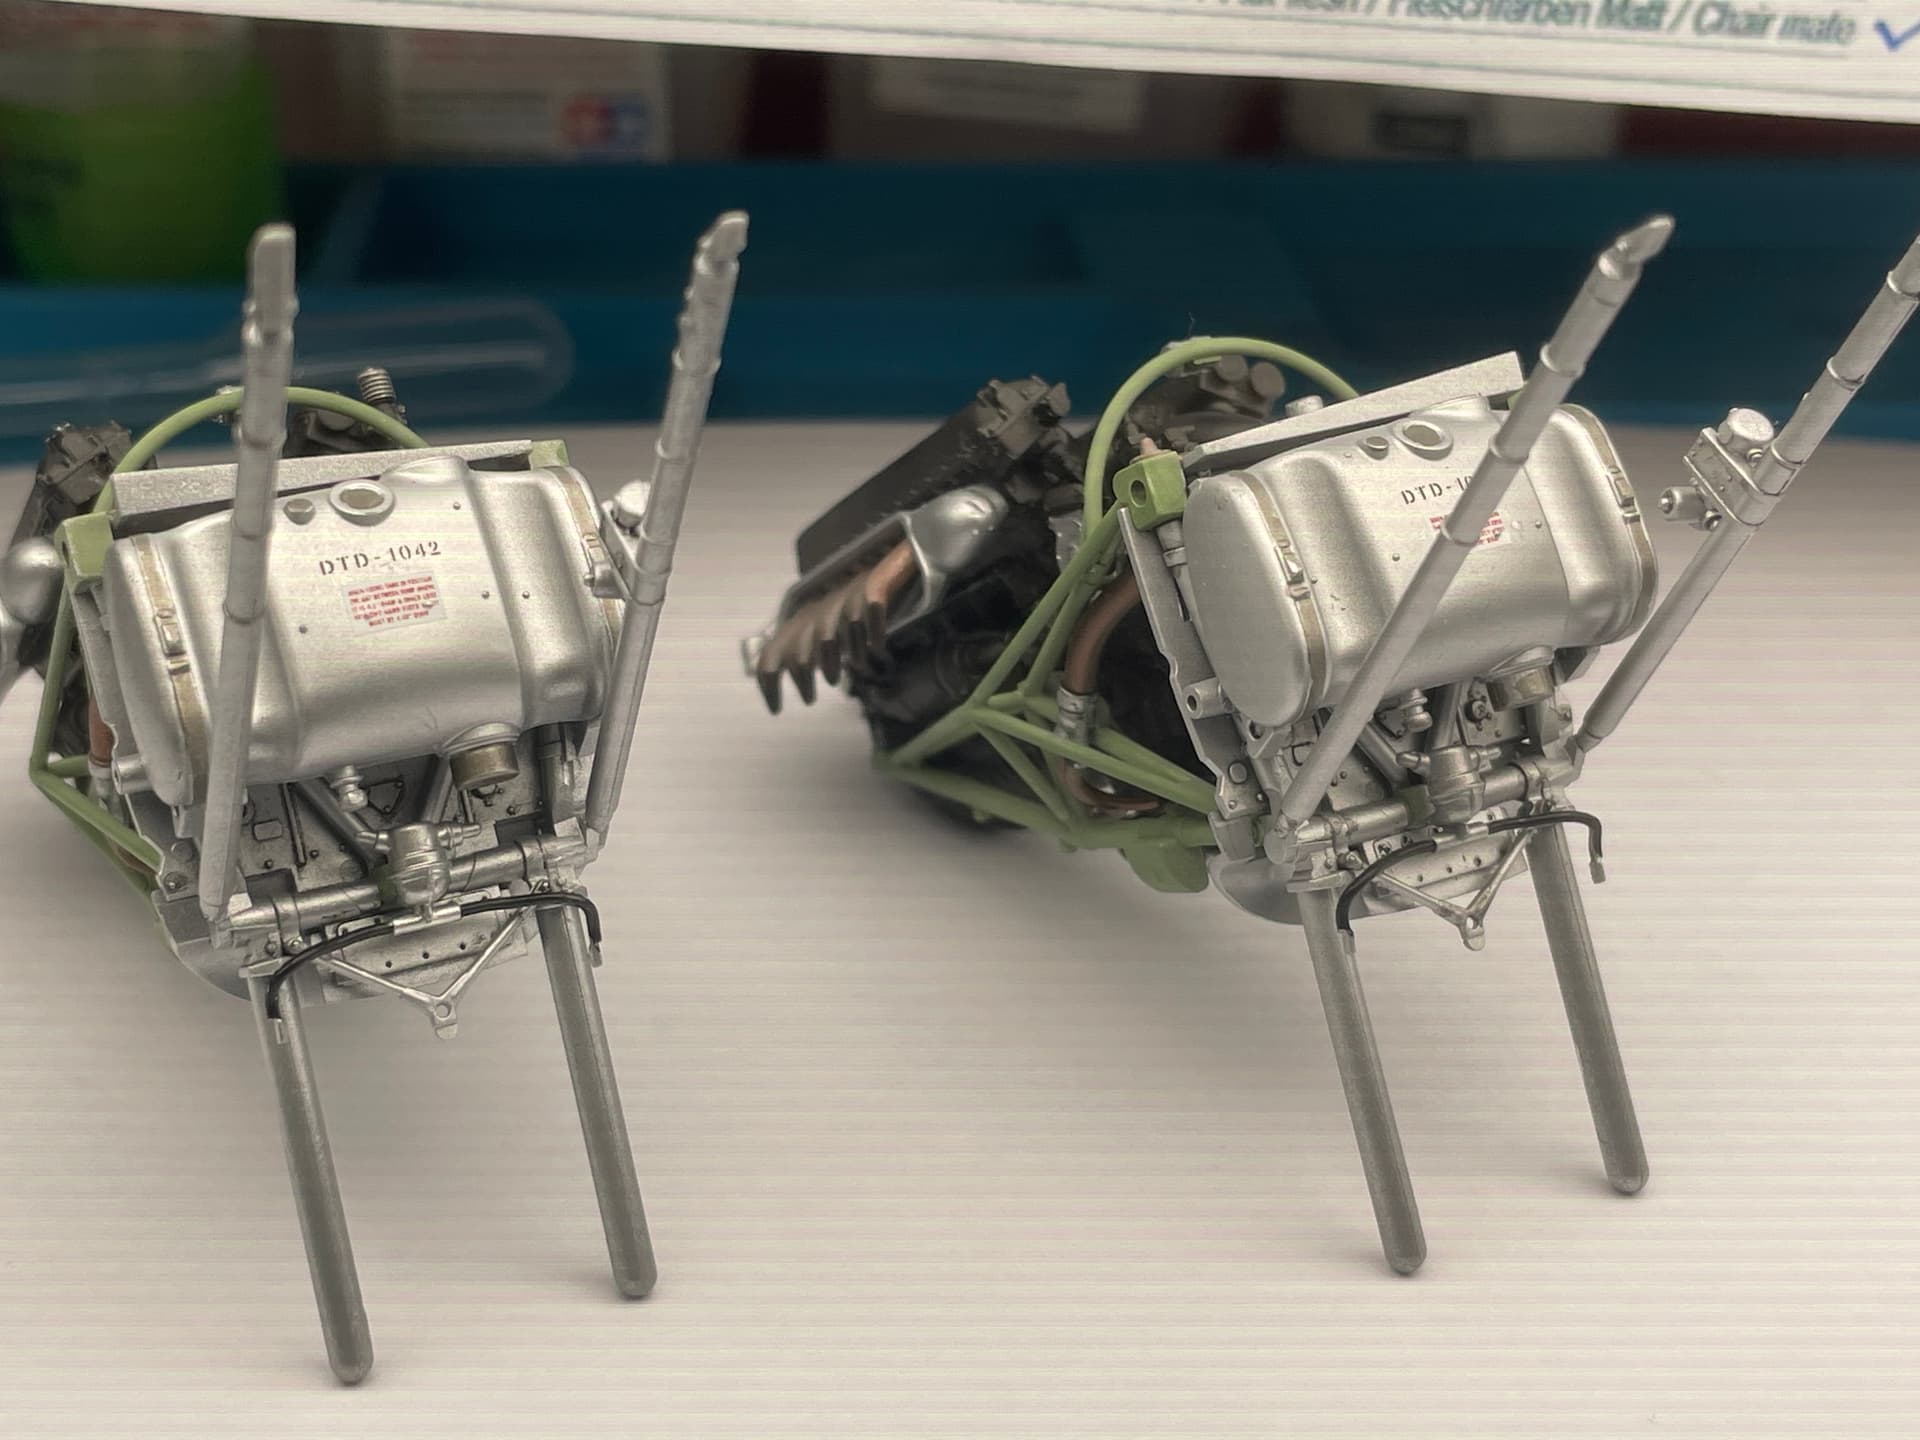
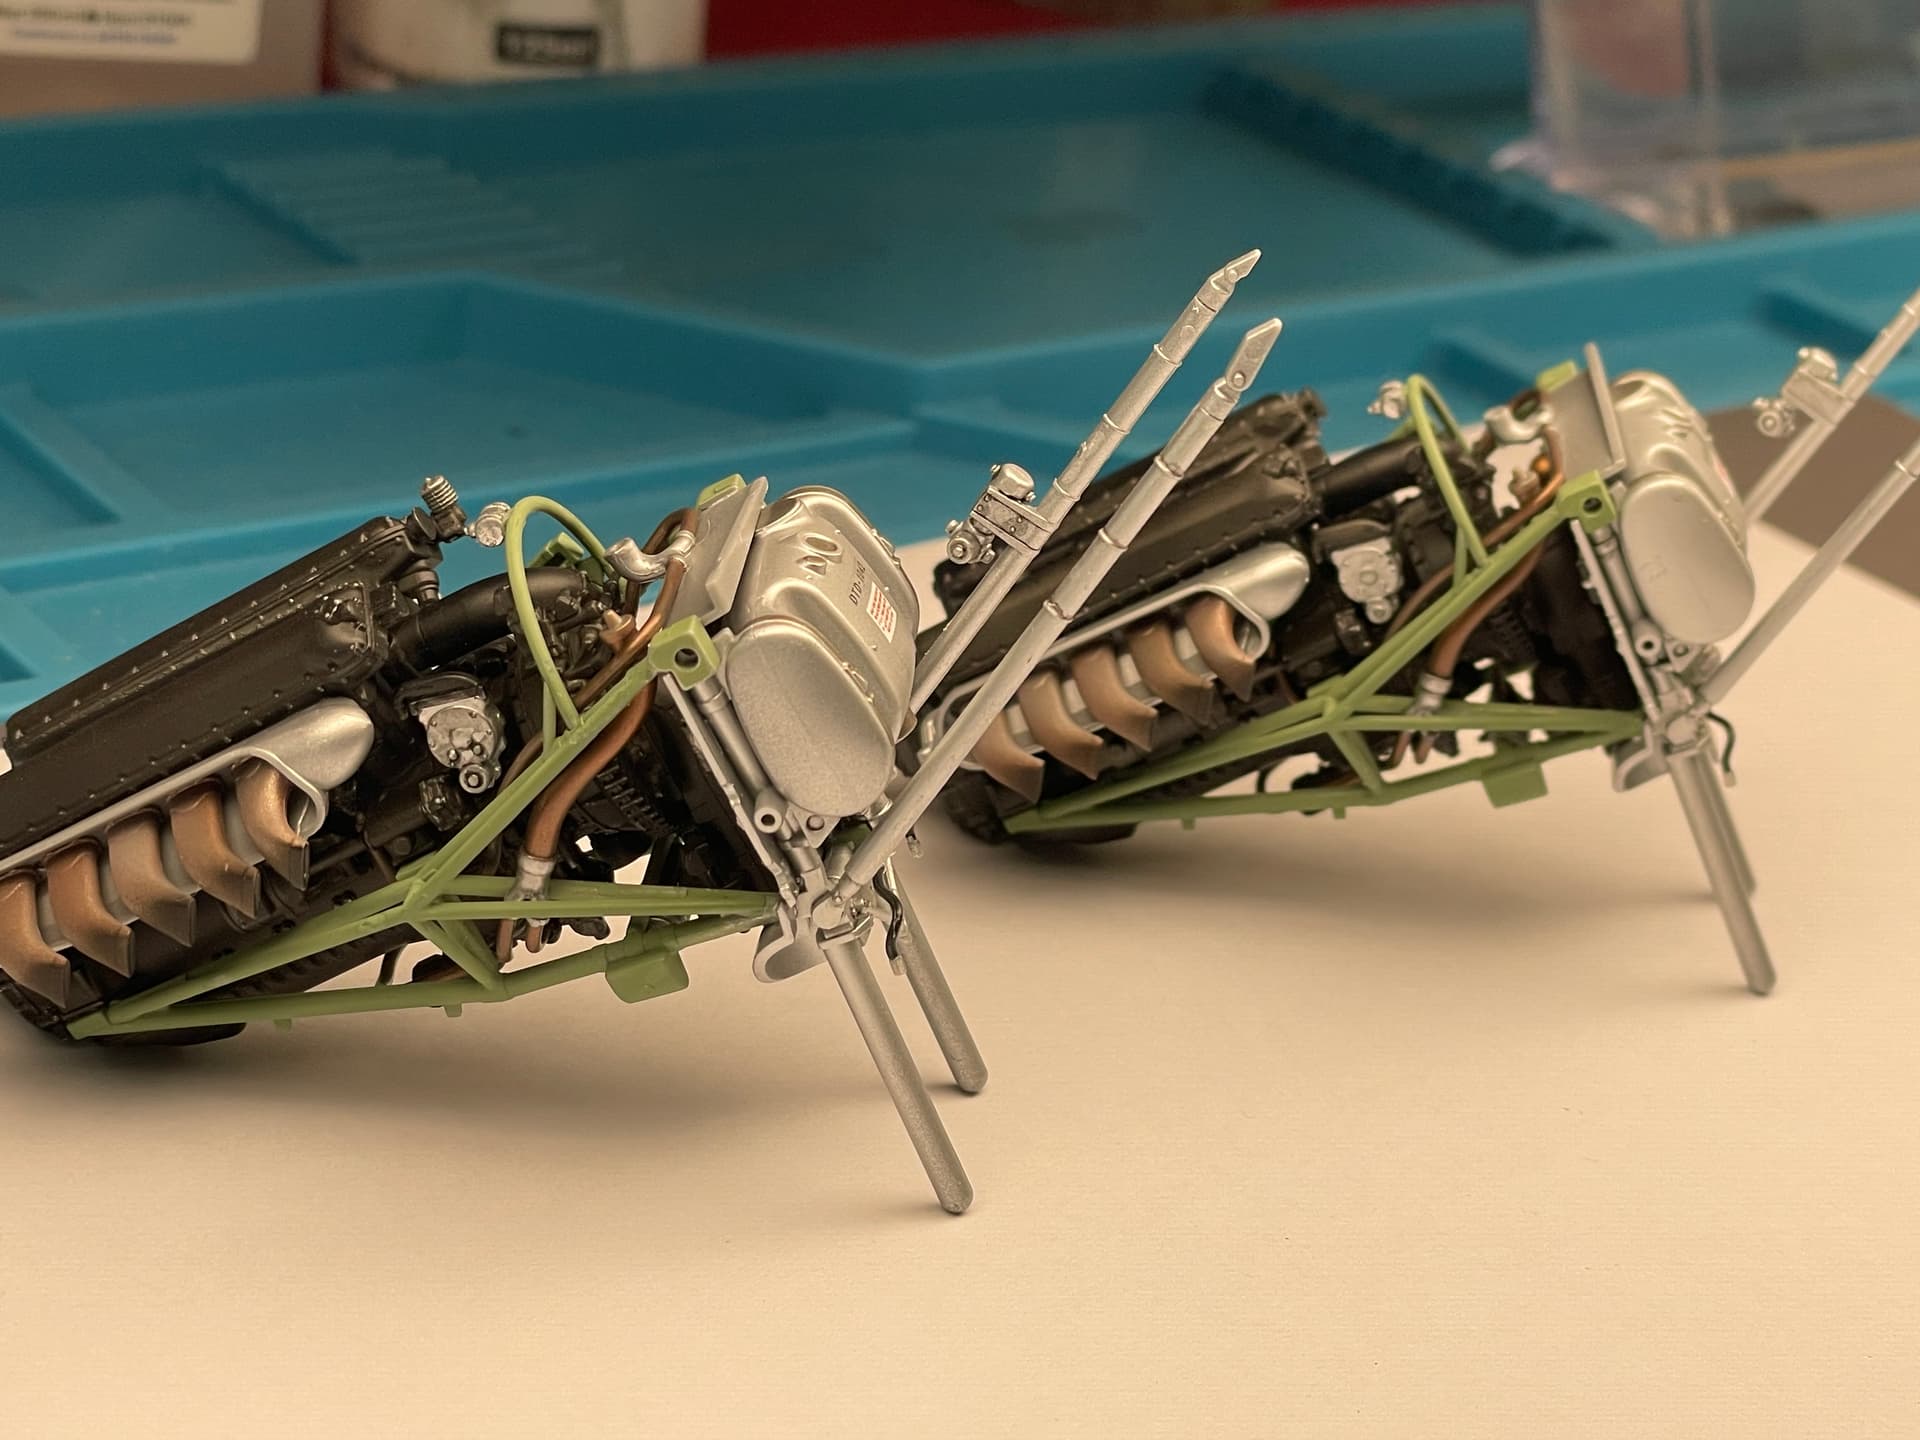
Hi, a minor update today, just to remind myself that I’m building a twin-engine plane ![]()
![]() .
.
By the way, they’re pretty much done, just missing the coolant tanks and their manifolds. All that to do after the nacelles are closed. With this second engine like finished I think (or rather: hope) that the hardest part of the build is behind me. The main landing gear will be another small challenge looking at the instructions, but the cockpit, pilots and engines took a lot of time and attention, and maybe a couple of diopters (Damn! I’m running out of them…) ![]()
![]() .
.
I hope I’ve produced a decent job so far.
If you like it, stay tuned for the next episode (starting with the engine nacelles and so on)
Dan


16 Likes
They look superb ![]()
1 Like
Thanks John!
2 Likes
I like it: clean and detailed ![]()
2 Likes
Russell, thank you so much.
1 Like
Awesome work Dan. This you’ve got a good handle on things with this detailed kit. As I said in my pm I too have this kit so going to grab a seat and ride along.
Btw, question about the the instrument glass representation on those dials. Did you covered those with resin? They look very good. ![]()
1 Like
Hi Mike, as usual you are very kind.
As for your question the answer is: no. What you see in the first photos of this topic came out of the Tamiya box. To be honest, before I realized the quality of this kit (in the last years after returning to the hobby, I had boxes of other brands on the bench) I had purchased a Red Fox upgrade for the panel instruments, but then I had some hesitation in using it, because in most cases it has an unconvincing background color. That’s why I used only a few parts of this aftermarket, leaving all the main parts of the instrument panel to the pieces of the box. I have used resin so far only on the three ventral lights, as mentioned above in my posts, to recreate the lenses that were lost.
Dan
2 Likes
Dan, thanks for the answer. I do hear what you are saying about those 3D color instrument panels and I am with you…most do not look realistic because they still look grainy to me. And of course, those close up sometimes don’t help either ![]() .
.
So far, my eyes are still ok to able to paint them and use decal instrument individually. There are several good decals for this process but I believe Peter has the best stuff at Airscale.
However, it all depends on the subject as well. If there is not much visibility inside the cockpit then easy route might be best.
Again, coming along nice. Cannot wait till you start spraying this thing.
3 Likes