@iwatajim i’m looking for a general double action airbrush as i won’t be doing any fine spraying work.
the aztek used to allow me to change nozzles whilst the paint was still attached which was a handy feature
@iwatajim i’m looking for a general double action airbrush as i won’t be doing any fine spraying work.
the aztek used to allow me to change nozzles whilst the paint was still attached which was a handy feature
The Aztec did have its advantages, but I must say I prefer the gravity feed brushes I use now. I would normally have said the Iwata Revolution would be ideal for you, but I like the look of the easier assembly/disassembly of the Eclipse. I find the 0.5mm in my Revolution ideal for laying down primer etc, but it is still capable of pretty fine stuff too. The Eclipse comes with 0.3mm but 0.5mm parts are available too. All the three parts you would change are removed during clean up anyway, so that’s straightforward enough. They are really actually pretty simple when you break it down, not much more complicated that a click pen!
Also seems the badger enthusiasts here are very happy with their brushes, but I can only speak of my own experiences.
Edit, I’m actually tempting myself with that Eclipse, £144, hhmmnn…
David @Klaus-Adler, I assure you, if you can build a model as well as I’ve seen you do then I am confident you have the skill level for breaking down and re-assembling the Iwata.
Cajun ![]()
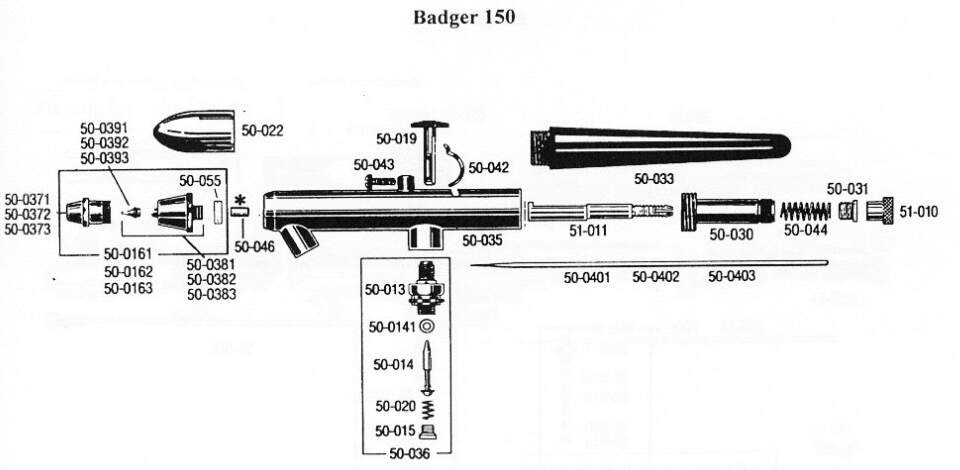
I cleaned my Badger 150 by blowing solvent through it,
then remove the head and soak it in solvent,
remove the rear end and loosen the needle,
push and then pull needle forward (never backwards),
clean needle with solvent and tissue/cloth (strips of worn out shirts …)
clean the paint cup (depending on variant of the 150) this is important
since left-over paint cloths will cause problems the next painting session.
The nozzle & head can be cleaned using the smallest interdental brushes.
Every now and then the head assembly needs to be disassembled to check the space
around the nozzle behind the front protection.
You need to clean the path taken by the paint: from cup into chamber around needle behind nozzle and then around the needle through the nozzle.
Paint can accumulate around the needle tip and leak back into the cavity around the nozzle.
Cleaning after a painting session results in 5 or 6 separate parts/assemblies
Re-assembly: First the complete head to the main body, then insert the needle from the rear, DO NOT force the needle into the nozzle. Lock needle in position and then the rear body cover.
solvent = depends on type of paint, I use enamels … acrylics would probably use less agressive solvents
+1 on the strong recommendations for one of the Badger airbrushes. They’re not only tried and true with a very, very long history with users, but Badger’s post-sales service sets the standard.
I’ve got a Badger model 200 that I originally purchased in 1980, and Badger has had no issues whatsoever taking it back for factory service - the last time was only just a couple of years ago. My cost? Basically just postage to and from. Airbrush works as well now as it did when brand new.
@SdAufKla @iwatajim @Uncle-Heavy
guys do these airbrushes come with videos that show you how to work them?
I’m curious about inserting the long needle into the rear of the airbrush, how far in do you push it it in, how tight do you screw it tight?
I’m not comfortable with gravity fed incase of accidents and i guess I’m just used to the little jars hanging off of the side which makes changing paint colours very easy.
@agincajun I’m flattered you think i do a good job building models, I’ve always viewed my work as just average at best.
The needle adjusting nut (paint flow adjusting nut) and the needle retaining nut are two pieces of the same assembly. The retaining nut is loosened or tightened to hold the needle together with the adjusting nut as the adjusting nut is screwed in and out to adjust the paint flow (by opening up the paint tip).
The needle retaining nut is loosened up allowing the needle to slide freely in the adjusting nut. The user slips the needle out to clean and then back into the airbrush for reassembly until it is stopped by the paint tip (i.e. needle has closed the paint tip completely). Just light finger pressure is all that is needed to push the needle into the paint tip. (Too much force can split the tip, but the first time you do this operation, how much is “too much” becomes self-evident.)
The needle adjusting nut is screwed in completely, the needle inserted to close the paint tip, and then the retaining nut is finger-tightened on the needle and adjusting nut.
Thus, when the adjusting nut is fully screwed in, the paint tip is closed by the needle with no excessive force from the needle into the tip.
It’s quite simple once done the first time. Writing out the explanation is much more difficult than the job itself.
Best cleaning practice actually recommends that the paint and air tips be removed before removing the needle, and the needle is PULLED out from the front of the airbrush rather than from the rear (i.e. adjusting nut end). This avoids pulling a dirty needle through the packing seal / washer that separates the compressed air side of the brush from the paint side. The dirty needle can abrade the packing seal / washer eventually leading to compressed air leaking into the paint cup.
However, to practice disassembly the first time, since the needle is already clean, pulling it out of the adjusting nut end won’t harm a thing. Using a needle lube is also a good practice. The lube mitigates wear on the needle and the packing seal / washer and makes cleaning the needle a bit easier sometimes. (Only ever use the barest amount of lube.)
Most double action internal-mix airbrushes are maintained the same way - just a variation of the above where the needle movement is spring loaded vice adjusted by the screwing the nut in and out.
Not sure about the needle, but my AB certainly has a loose nut on the trigger…
good god that sounds very complicated…i hope there is a YouTube video out there to help idiots like me.
here is the disassembly procedure for my aztek
step one:
step two:
and clean lol
@Klaus-Adler, there is a small booklet that explains the use of the AB that come with the package, I tighten everything finger tite, there’s a cap for the paint cup to avoid spills, and the Eclipse is actually side feed. when I’m filling the cup I usually rest the AB in the paint spray-out hanger and haven’t had any problems with spills. This AB is really stupid easy to use, @Armorsmith was the one that recommended pushing the needle through from the back when cleaning in another post quite some time ago and I thought to myself “well why didn’t I think of that?”. The only thing I wish I had done different was to get an AB with a locking nut on the rear of the barrel to maintain a consistent spray pressure every trigger pull instead of trying to do that manually with my fingertip during painting. As long as you’ve been using an airbrush I don’t foresee any significant difference in the care and use of your next unit as long as you don’t abuse it or drop the needle or such. You’re much more capable than you give yourself credit for, I’m excited for you getting a new tool. I have to say though, I’ve been using AK Lacquers almost exclusively except a few shots with enamels, I’ve never tried Acrylics of any brand so I can’t offer any expertise on that paint type, I’m sure others here are familiar with acrylic paints in these type ABs. Most importantly though, I don’t want to persuade you to get a AB you’re not 100% comfortable with so please keep researching until you’re satisfied you’ve made the best choice.
Cajun ![]()
i used to use enemal paints but tge clean up was a real pain so i switched to Tamiya acrylics and never looked back
Not really, just sounds that way if reading the directions. Basically, just about every other internal-mix airbrush will work like this. Almost all of them are simply variations on the same design.
External-mix airbrushes are somewhat different. The Aztek (and I think a similar version once made and marketed by Tamiya) work differently by packaging all of these moving parts together in the single assembly tip unit. However, the same needle-paint tip function is still there.
Just my experience but the Iwata HP-C Plus is a darn good brush. I’ve never had any issues with it, just feed a bit of cleaner through it from time to time. It’s reliable, and sprays some decent fine detail.
I would look at the Paasche VLS or iwata eclipse HP-CS I have both. I’ve yet to use the iwata, but it looks fantastic. I use the Paasche for most coverage type jobs. I plan to crack out the iawata soon for some camo jobs
Hello Klaus, if it is a A470 it can be disassembled. What i usually find is that the paint worked itself past the pin that controls the needle and blocks the mechanics inside. It is a bit fiddly to open the body but I found that the best way is to start at the back and gently pry it open.
Mine never failed me so far.
Henk
Iwata Neo is a great AB.
D
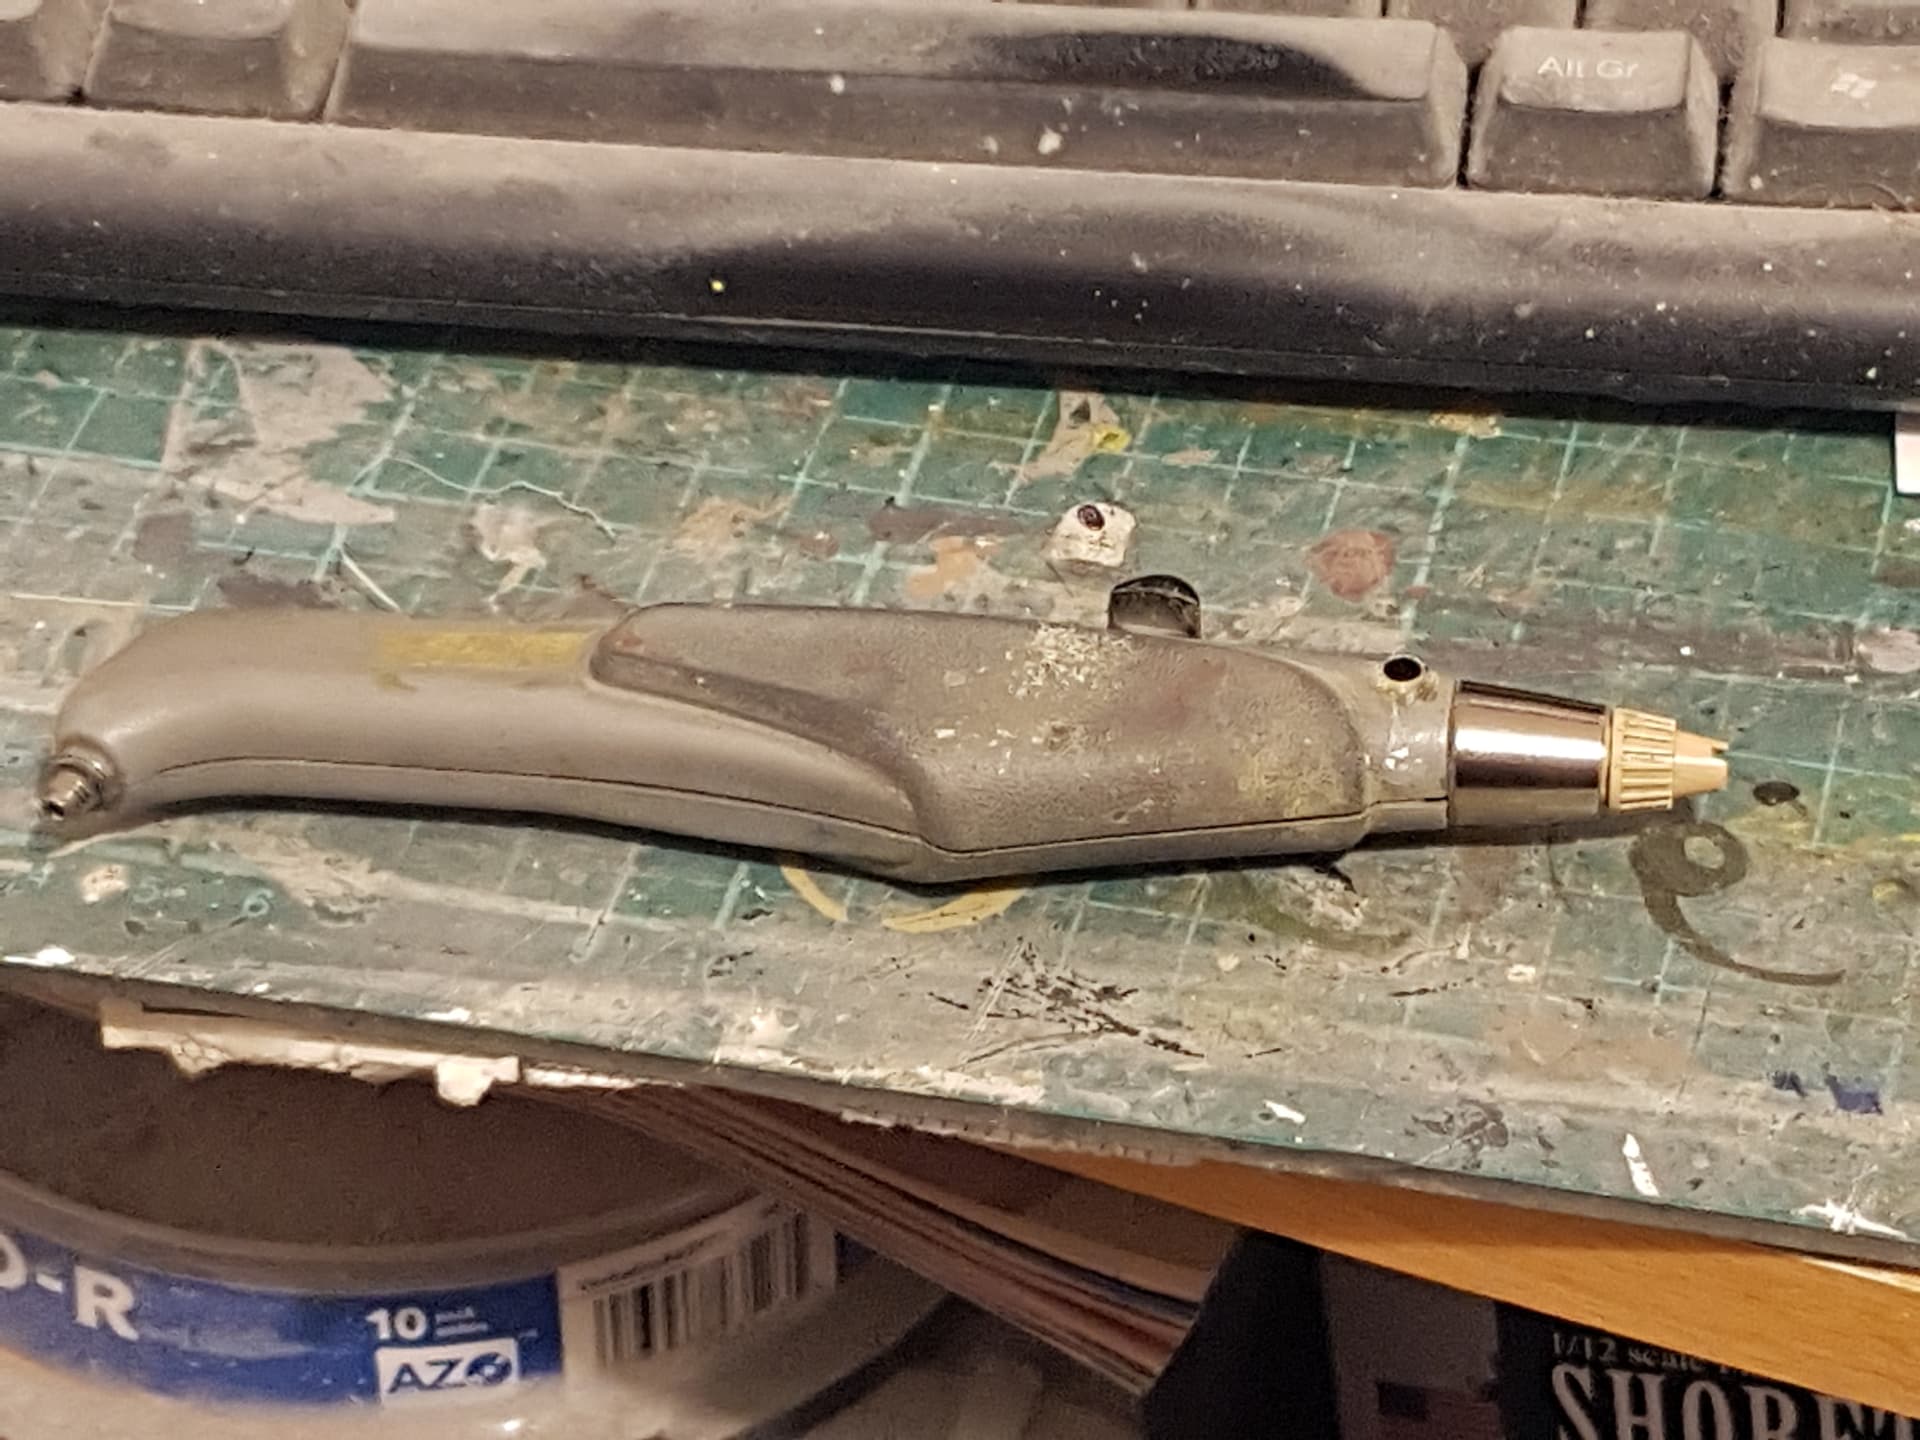
I have two Badger 150s and they’re tanks. had them for years and never had any issues with either of them. ![]()
The warranty states that if you open the airbrush (pop open the plastic body… and the evidence of that will be visible) the warranty will be voided. So if you try to clean it out, or do your own repair no matter how small, they’ll just send it right back to you. ![]()
![]()
![]()
Correct.