@CMOT thank you I’ll have to see if i can get ahold of it or at least some of the photos.
2 Likes
I found the infor you need
Dieppe Through The Lens (Hardback)
By Hugh G Henry Jr, Jean Paul Pallud
Imprint: After the Battle
Pages: 64
Illustrations: 71
ISBN: 9780900913761
Published: 30th May 1993
£12.95
3 Likes
@CMOT thank you I’m gonna see if Amazon had the book.
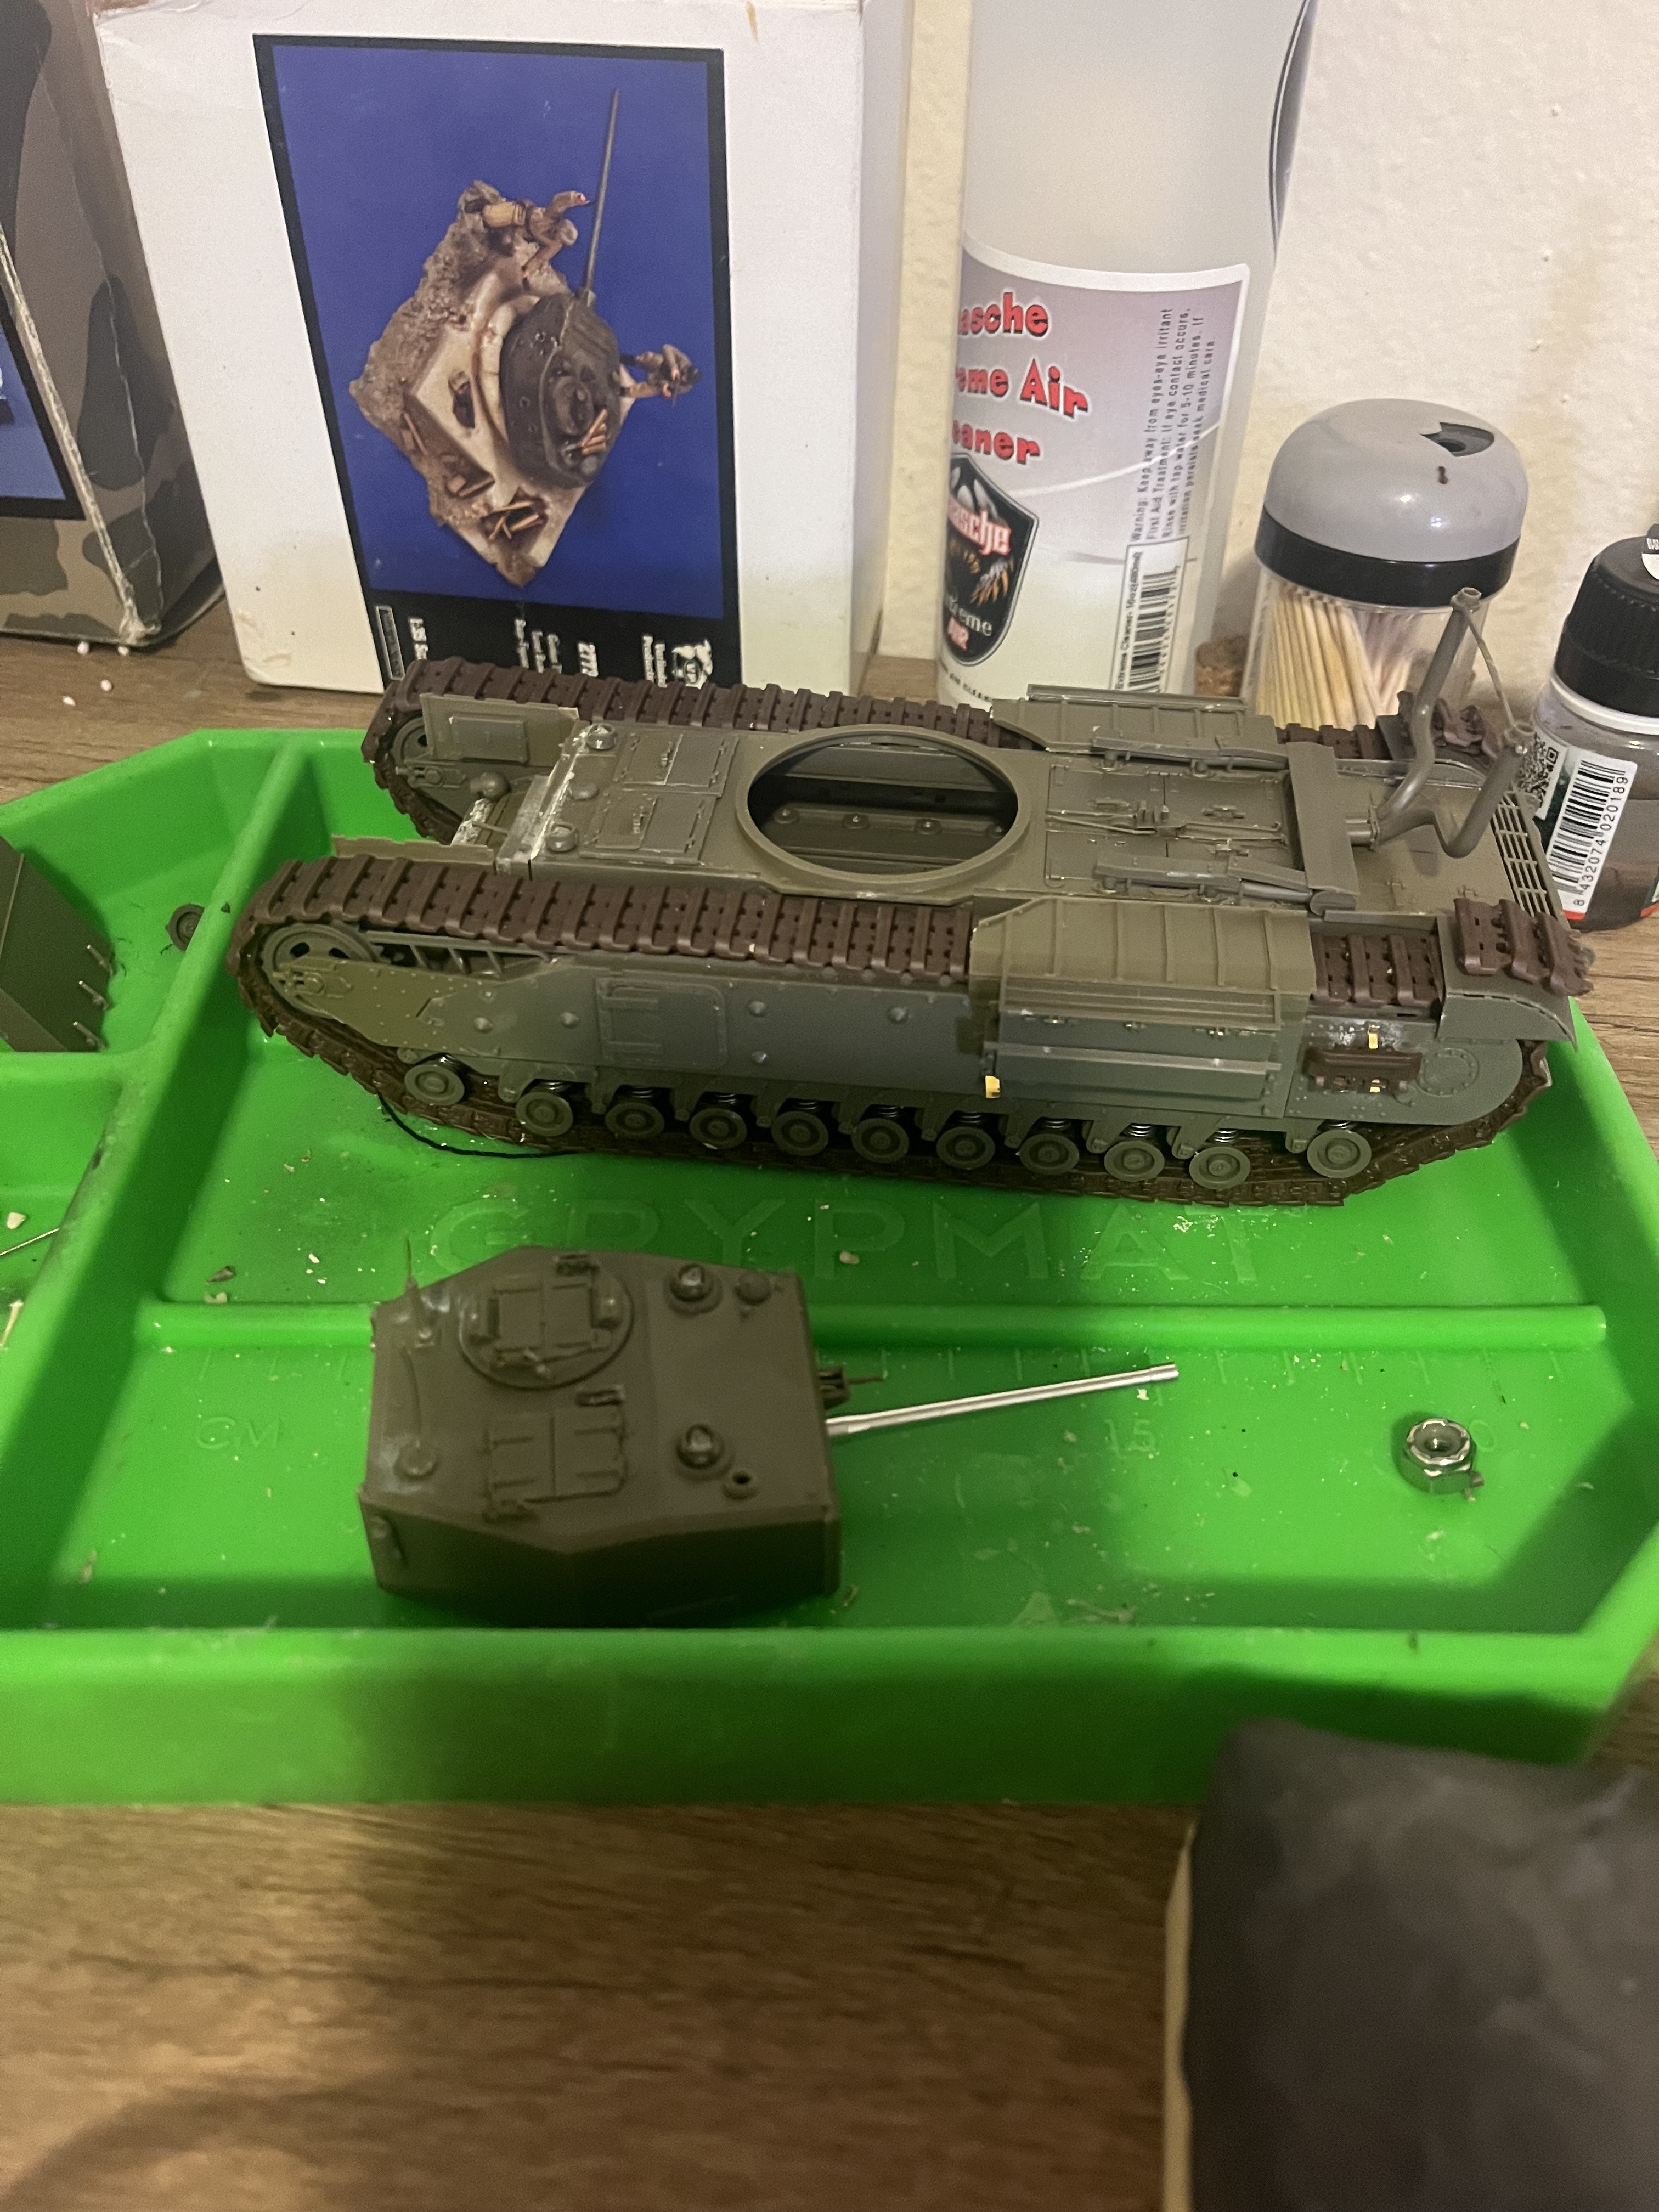
I’ve made more headway and started with the diorama base. I still need to do the taping on the tank around the key parts that @Jakko showed on his example.
So far i got clay on the base and am letting it dry. Tomorrow I’ll put down a layer of glue and do one layer of rocks. My thought is that i will have two layer of rocks on top of each other. From there i will give it a priming coat and then paint the rocks in a uniform color.

5 Likes
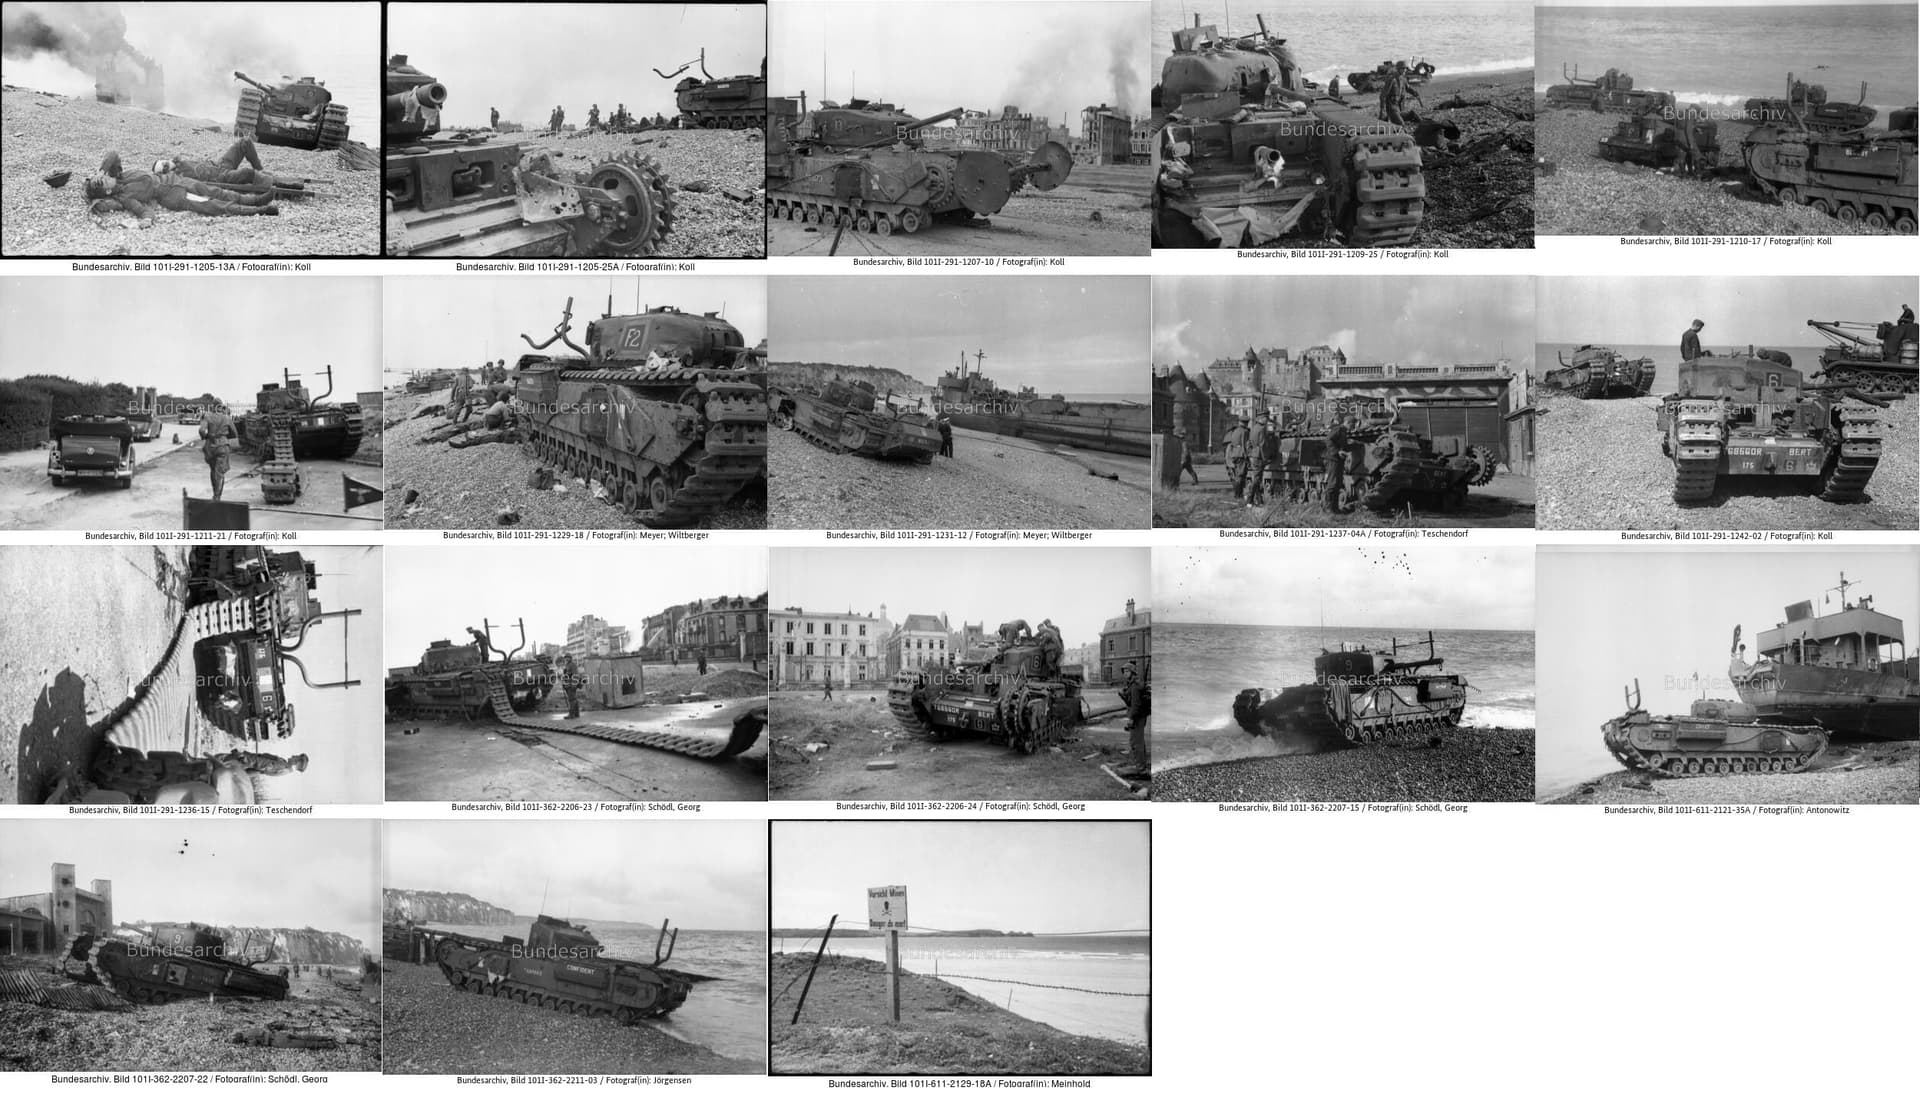
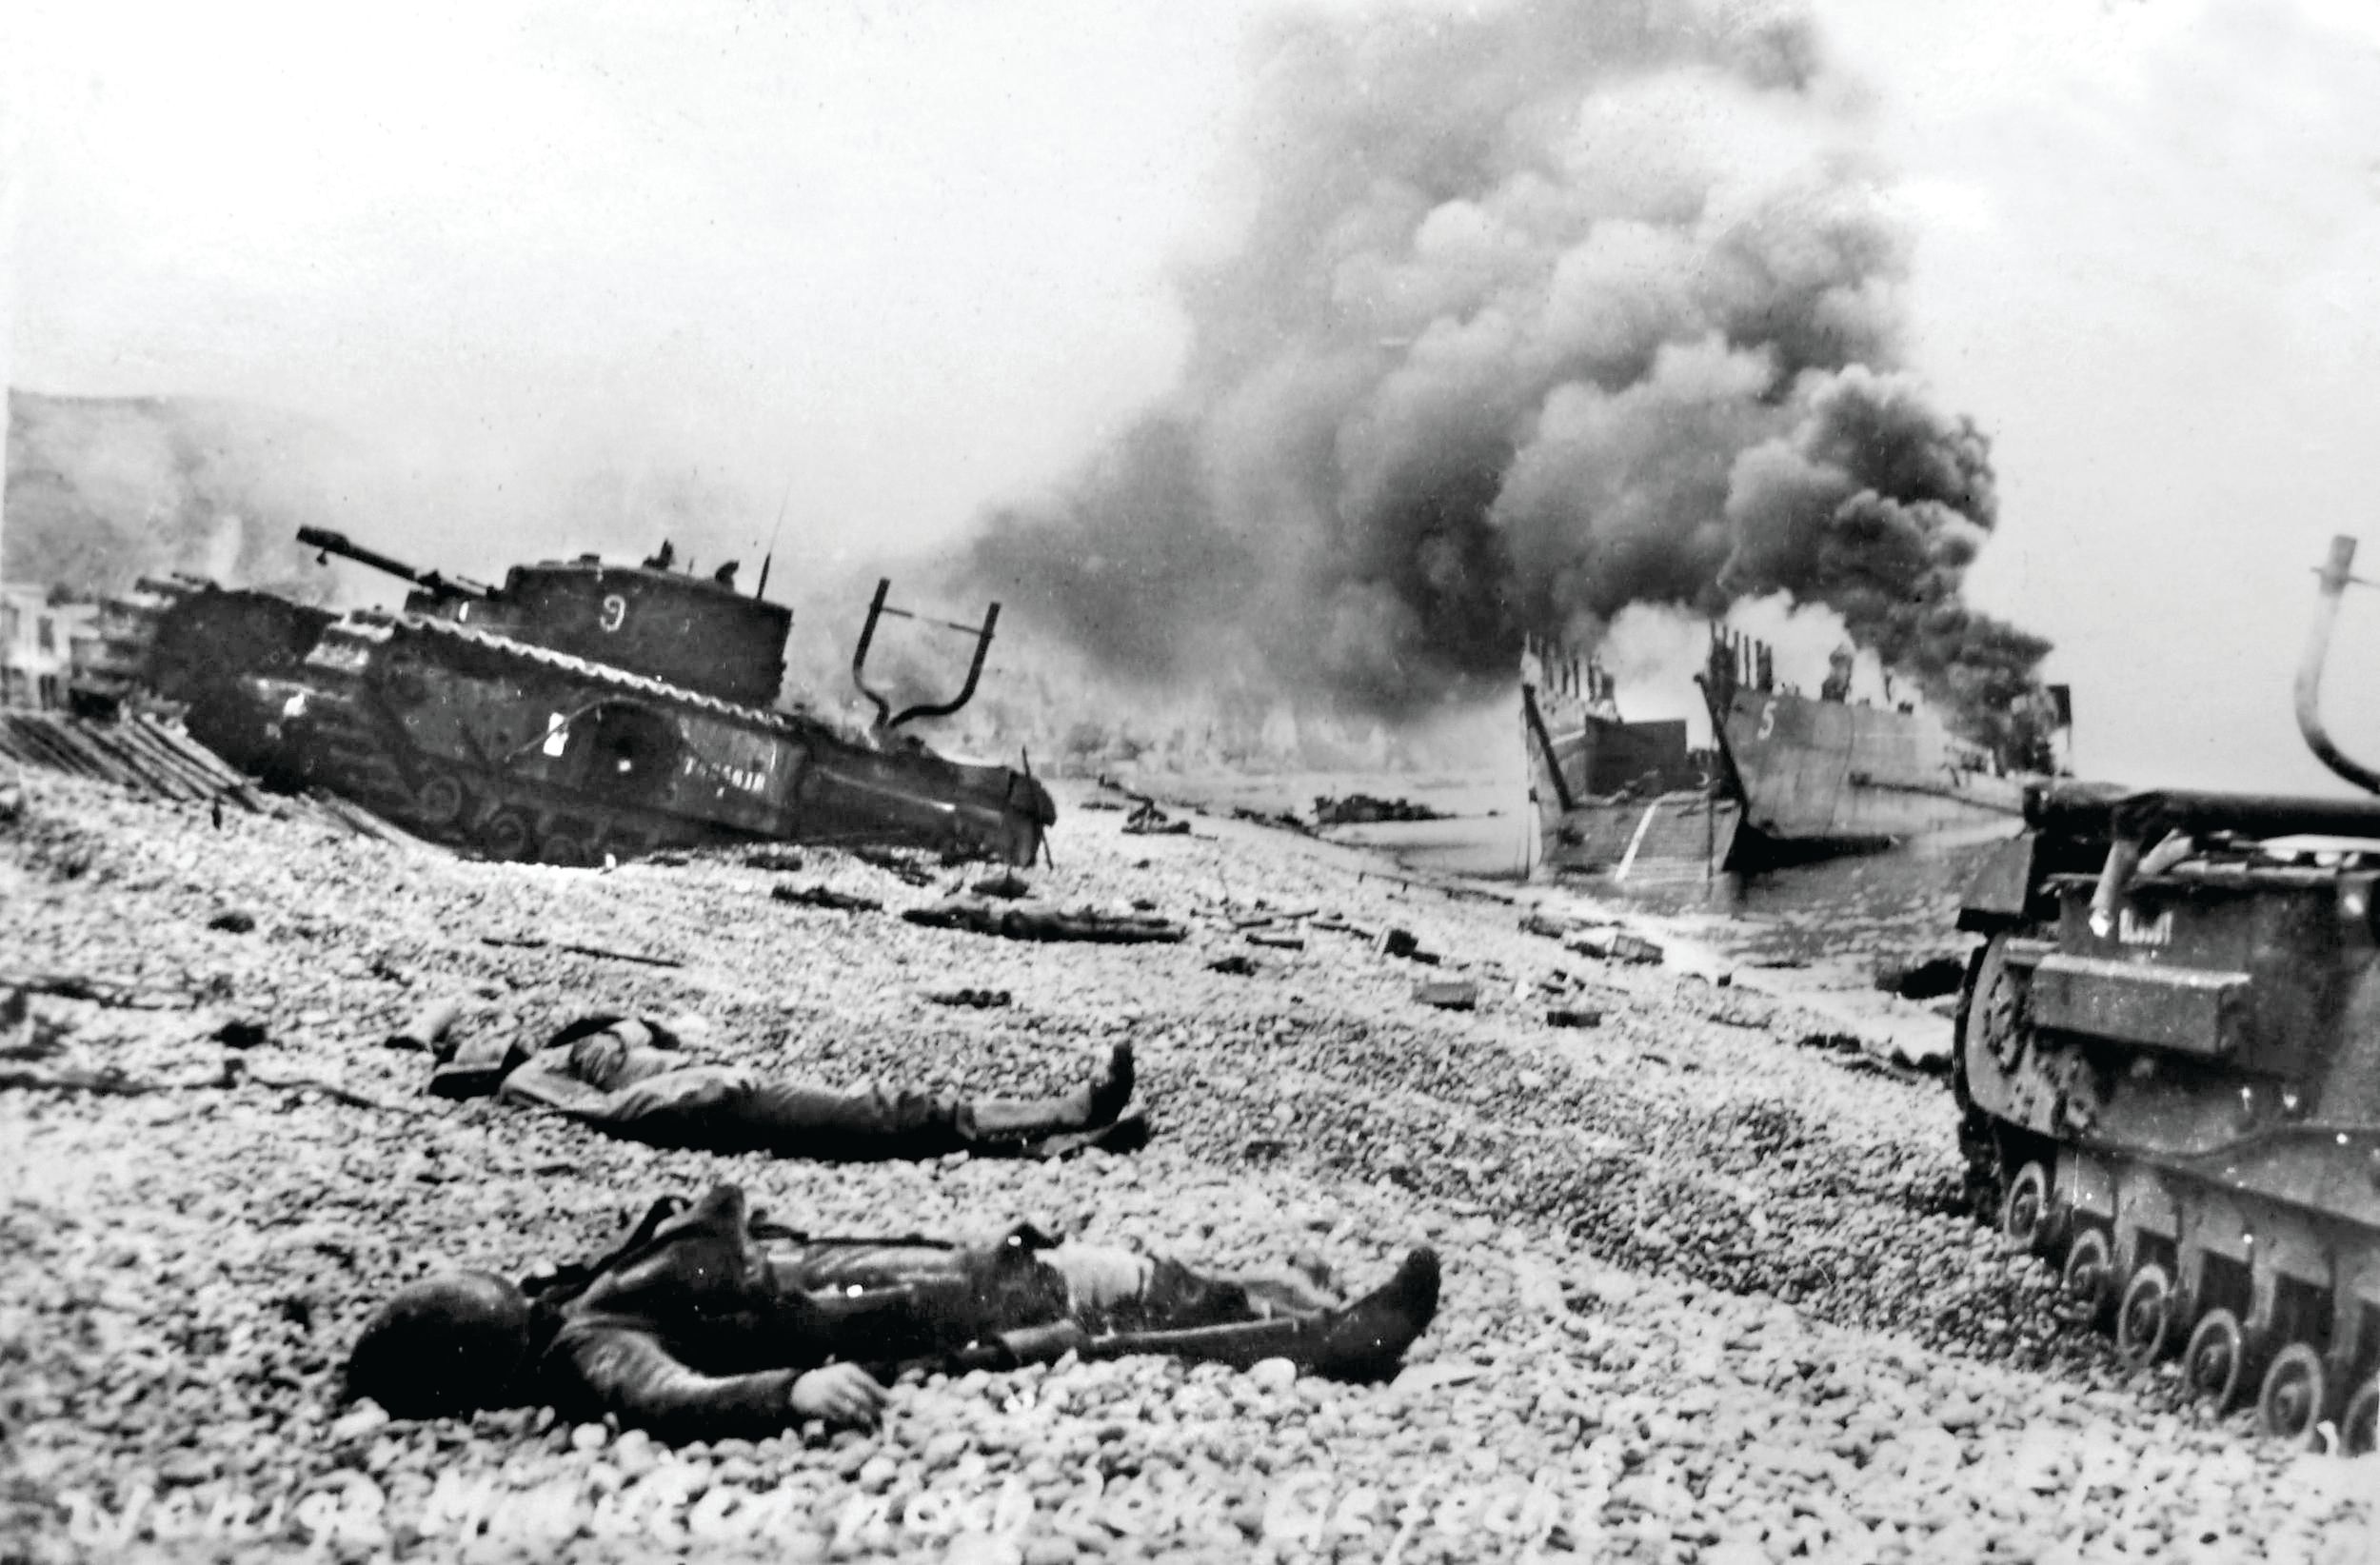
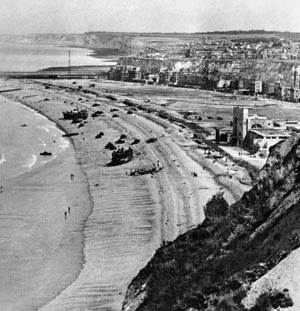
There are many images from the battle aftermath at Bundesarchiv
Here’s a few of them, giving a good idea of the scene and the weather/sea state on the day.
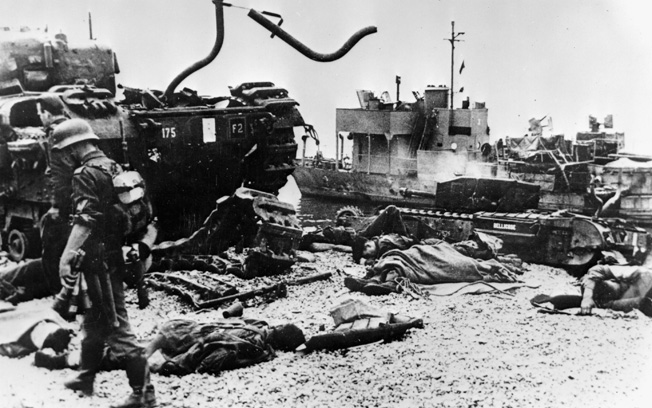
some others from WHN
2 Likes
I’d maybe divide the pebbles into a few lots and vary the colour slightly to give a bit of natural variation. ![]()
2 Likes
@jpwaller do you mean pre painting them before positioning them on the diorama? That’s not a bad idea if I’m understanding you correctly.
1 Like
Yes that is what I meant, divide into a few lots, paint, then random mix, so there is a bit of variability. ![]()
2 Likes
Adding the asbestos compound is also a good idea, because it will be quite visible on the model — if for no other reason than that it will cover a lot of the seams around hatches and things.
3 Likes
@Jakko thats the plan for today if i get time, illl do the seems around the hatches and wait to prime the model.
@jpwaller ill probably do about three different colors what do you think
3 Likes
@jpwaller after doing more thinking on this I’m going to do a base layer of shells. I’ll prime and paint these one color. Then I’ll do a second layer of varying colors. Almost like a shadow and highlight layer.
3 Likes
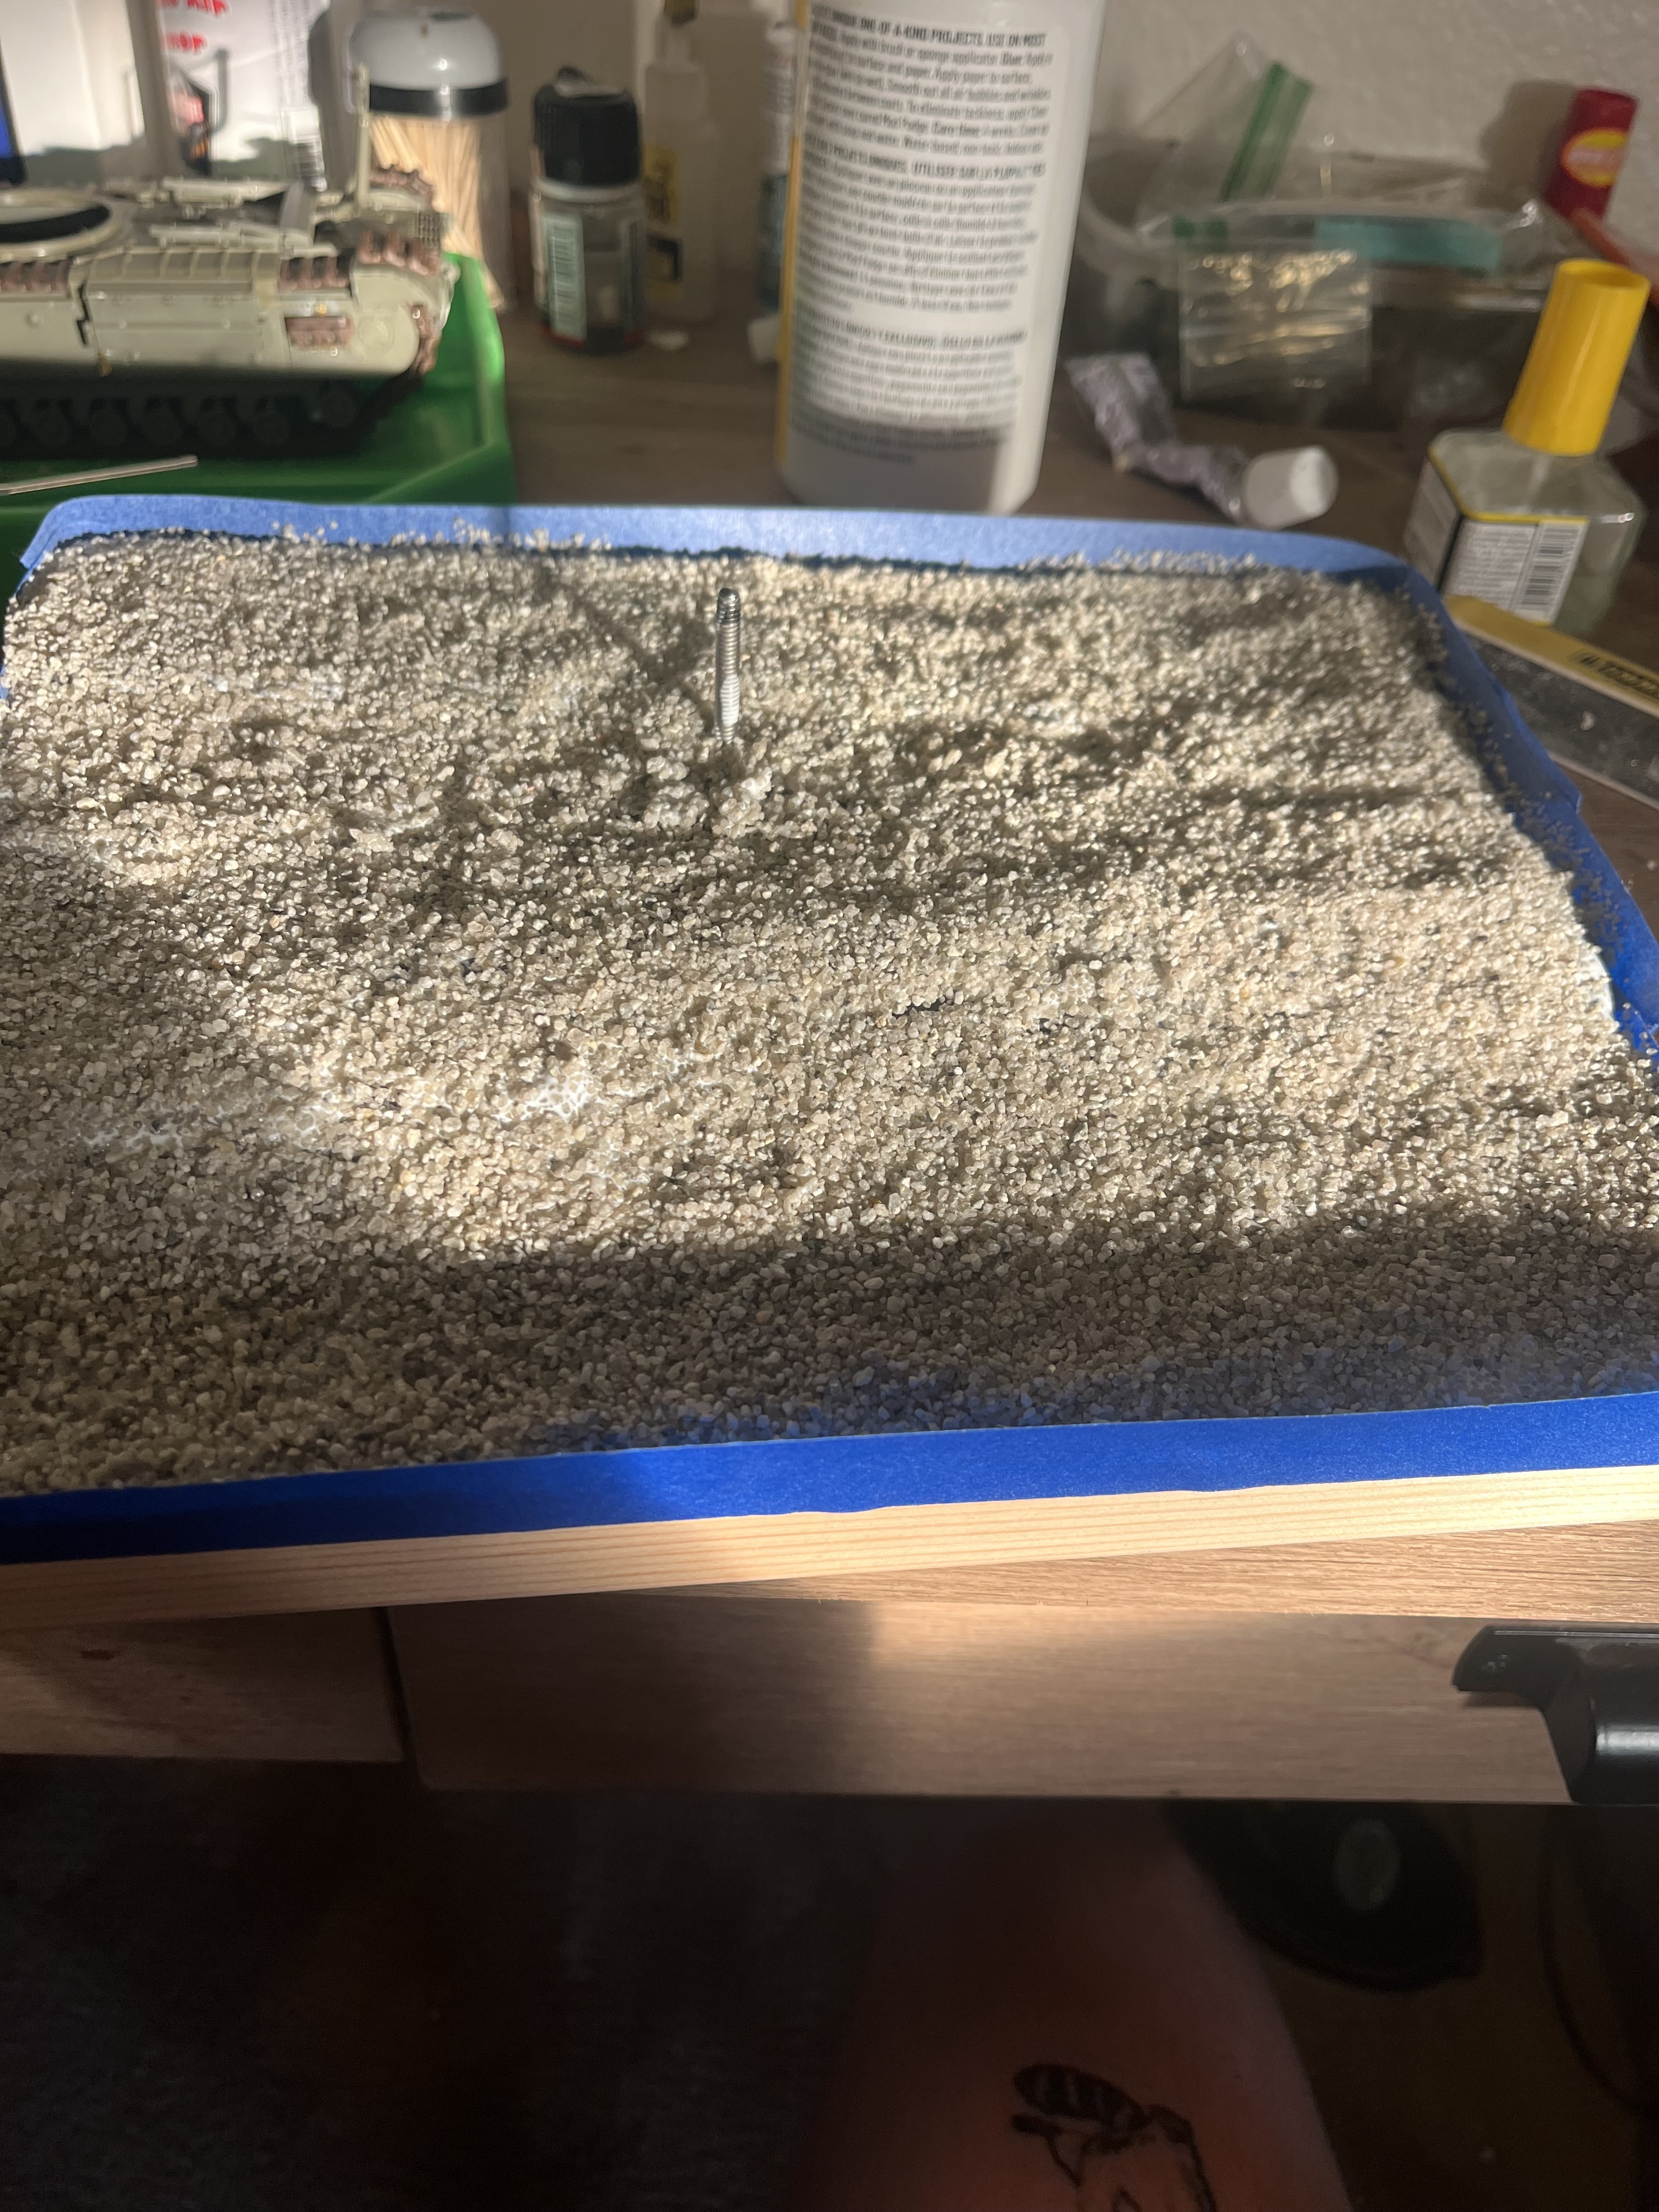
First layer of rocks down. One or two more to go. Thinking of soaking rocks in watered down primer tonight then soaking them in there respective colors the next night. Should give enough time for the glue on the to set and build a strong layer.
6 Likes
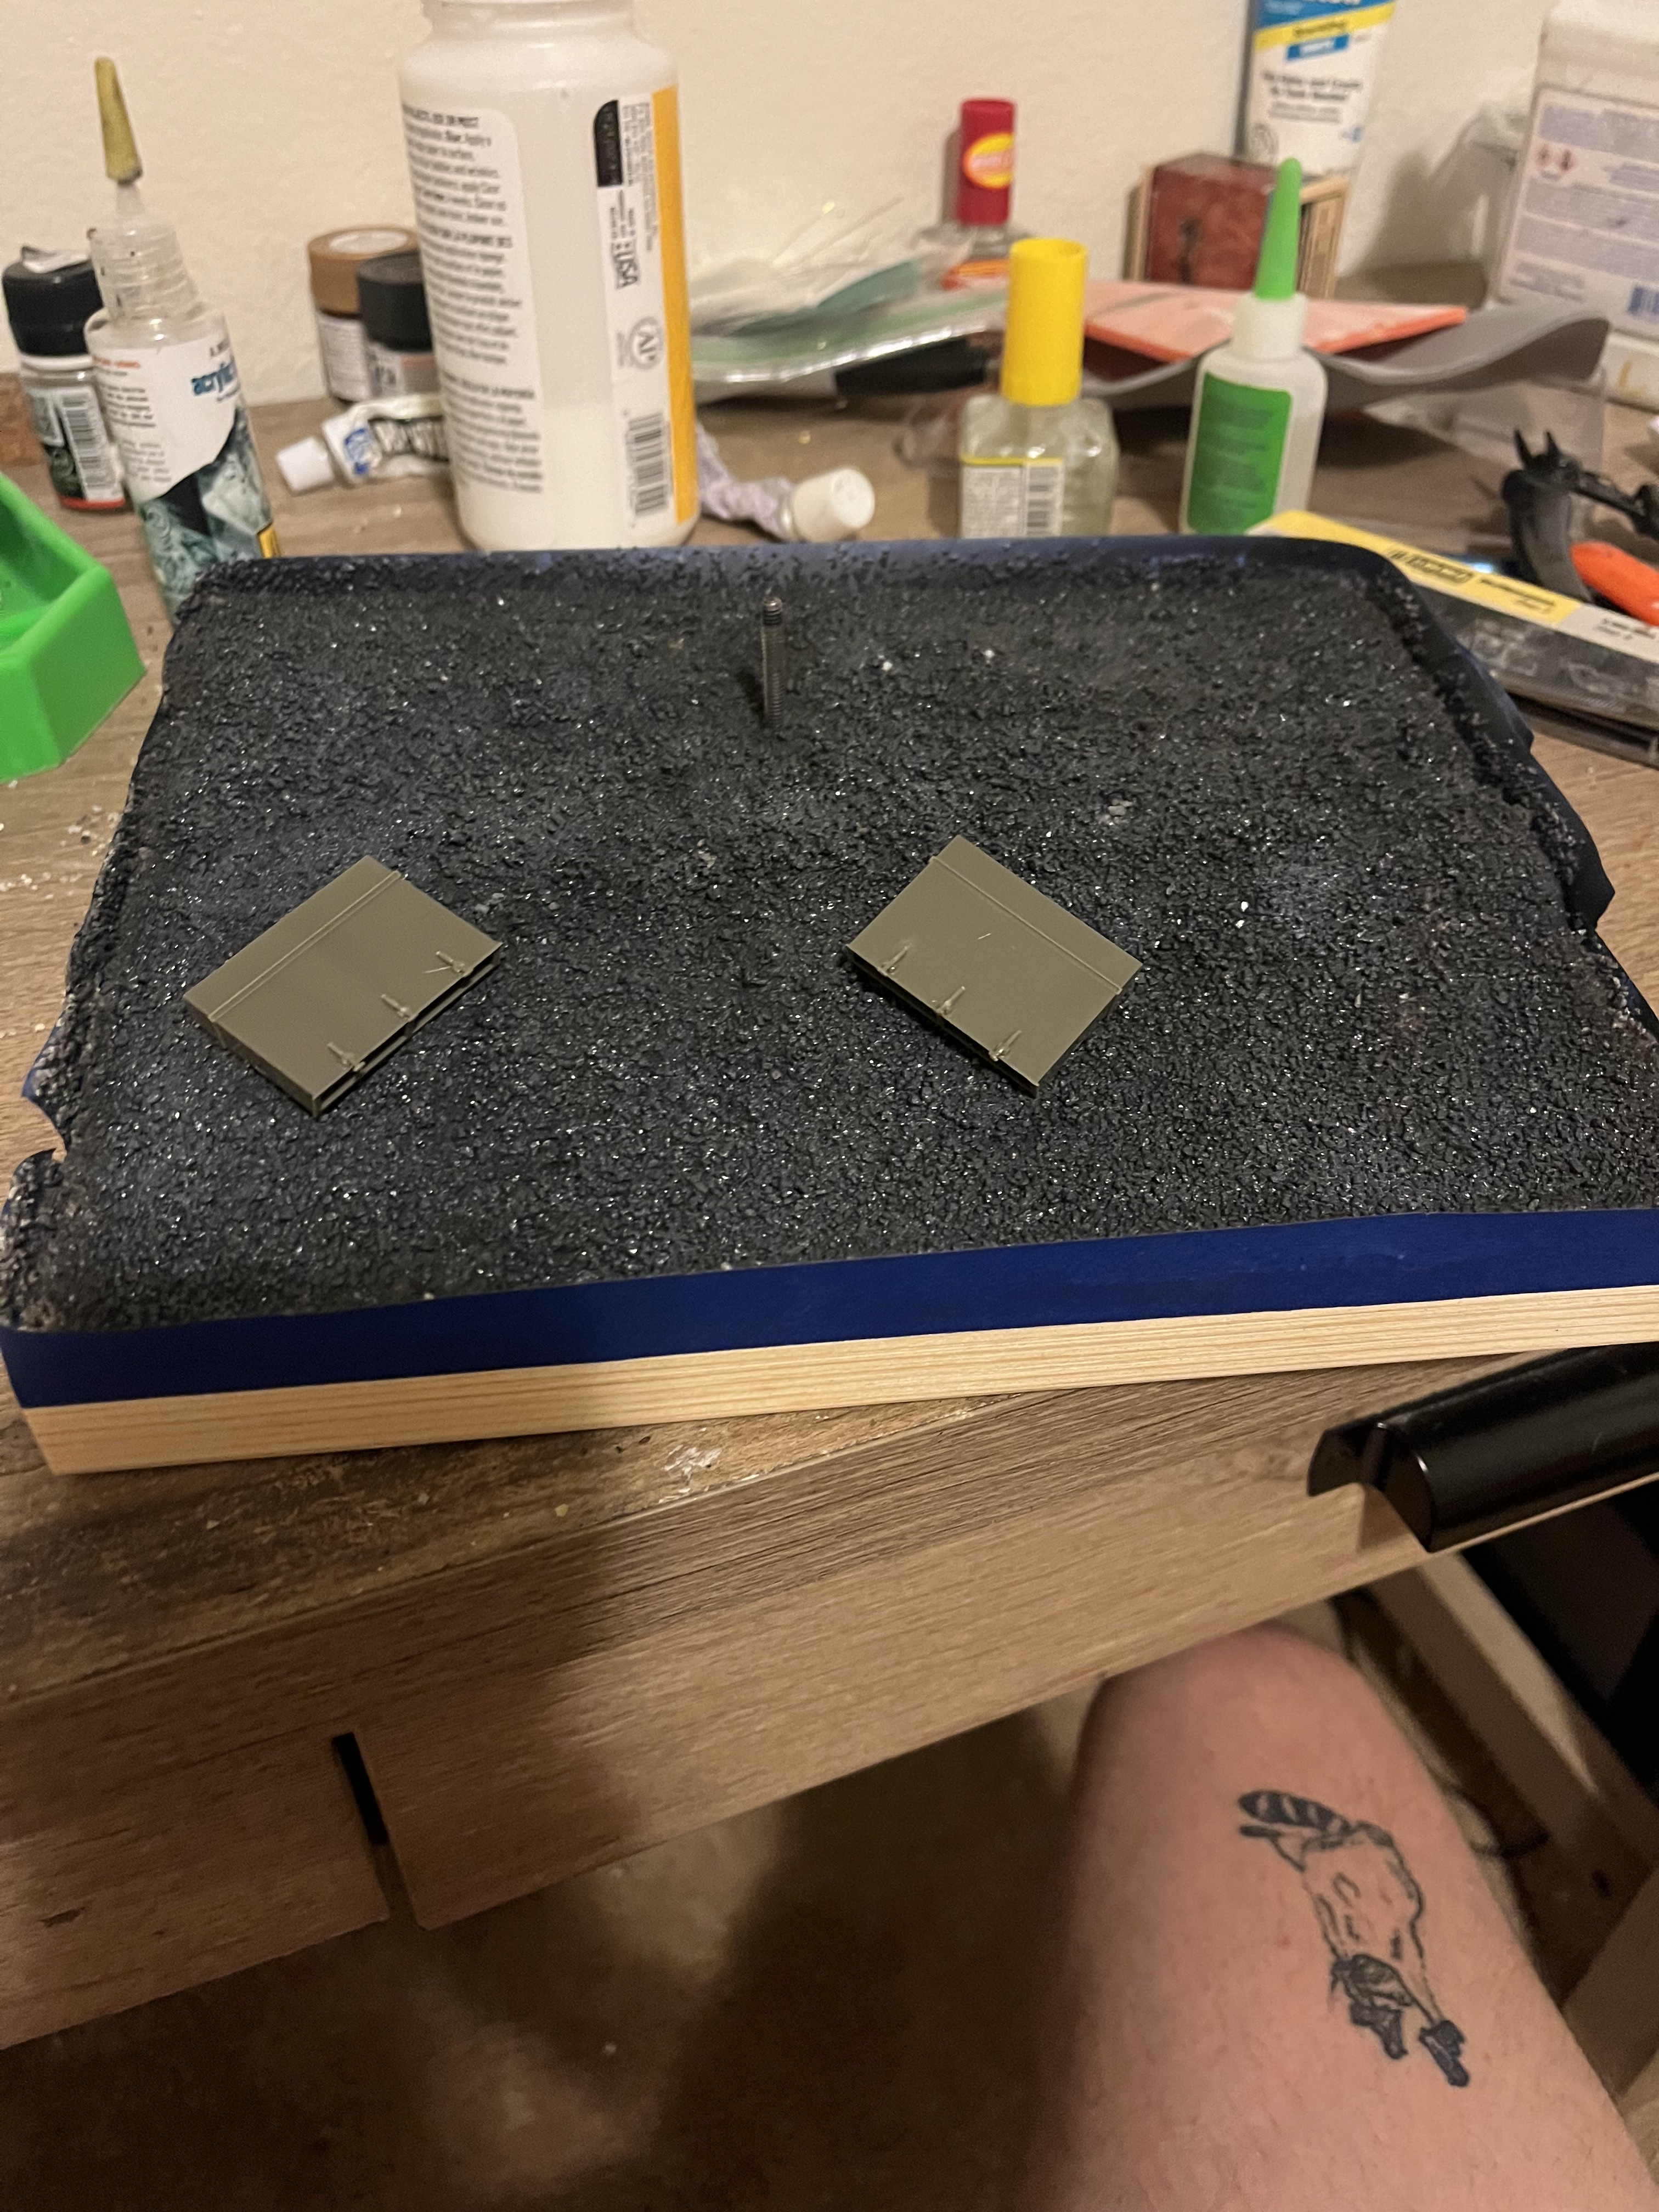
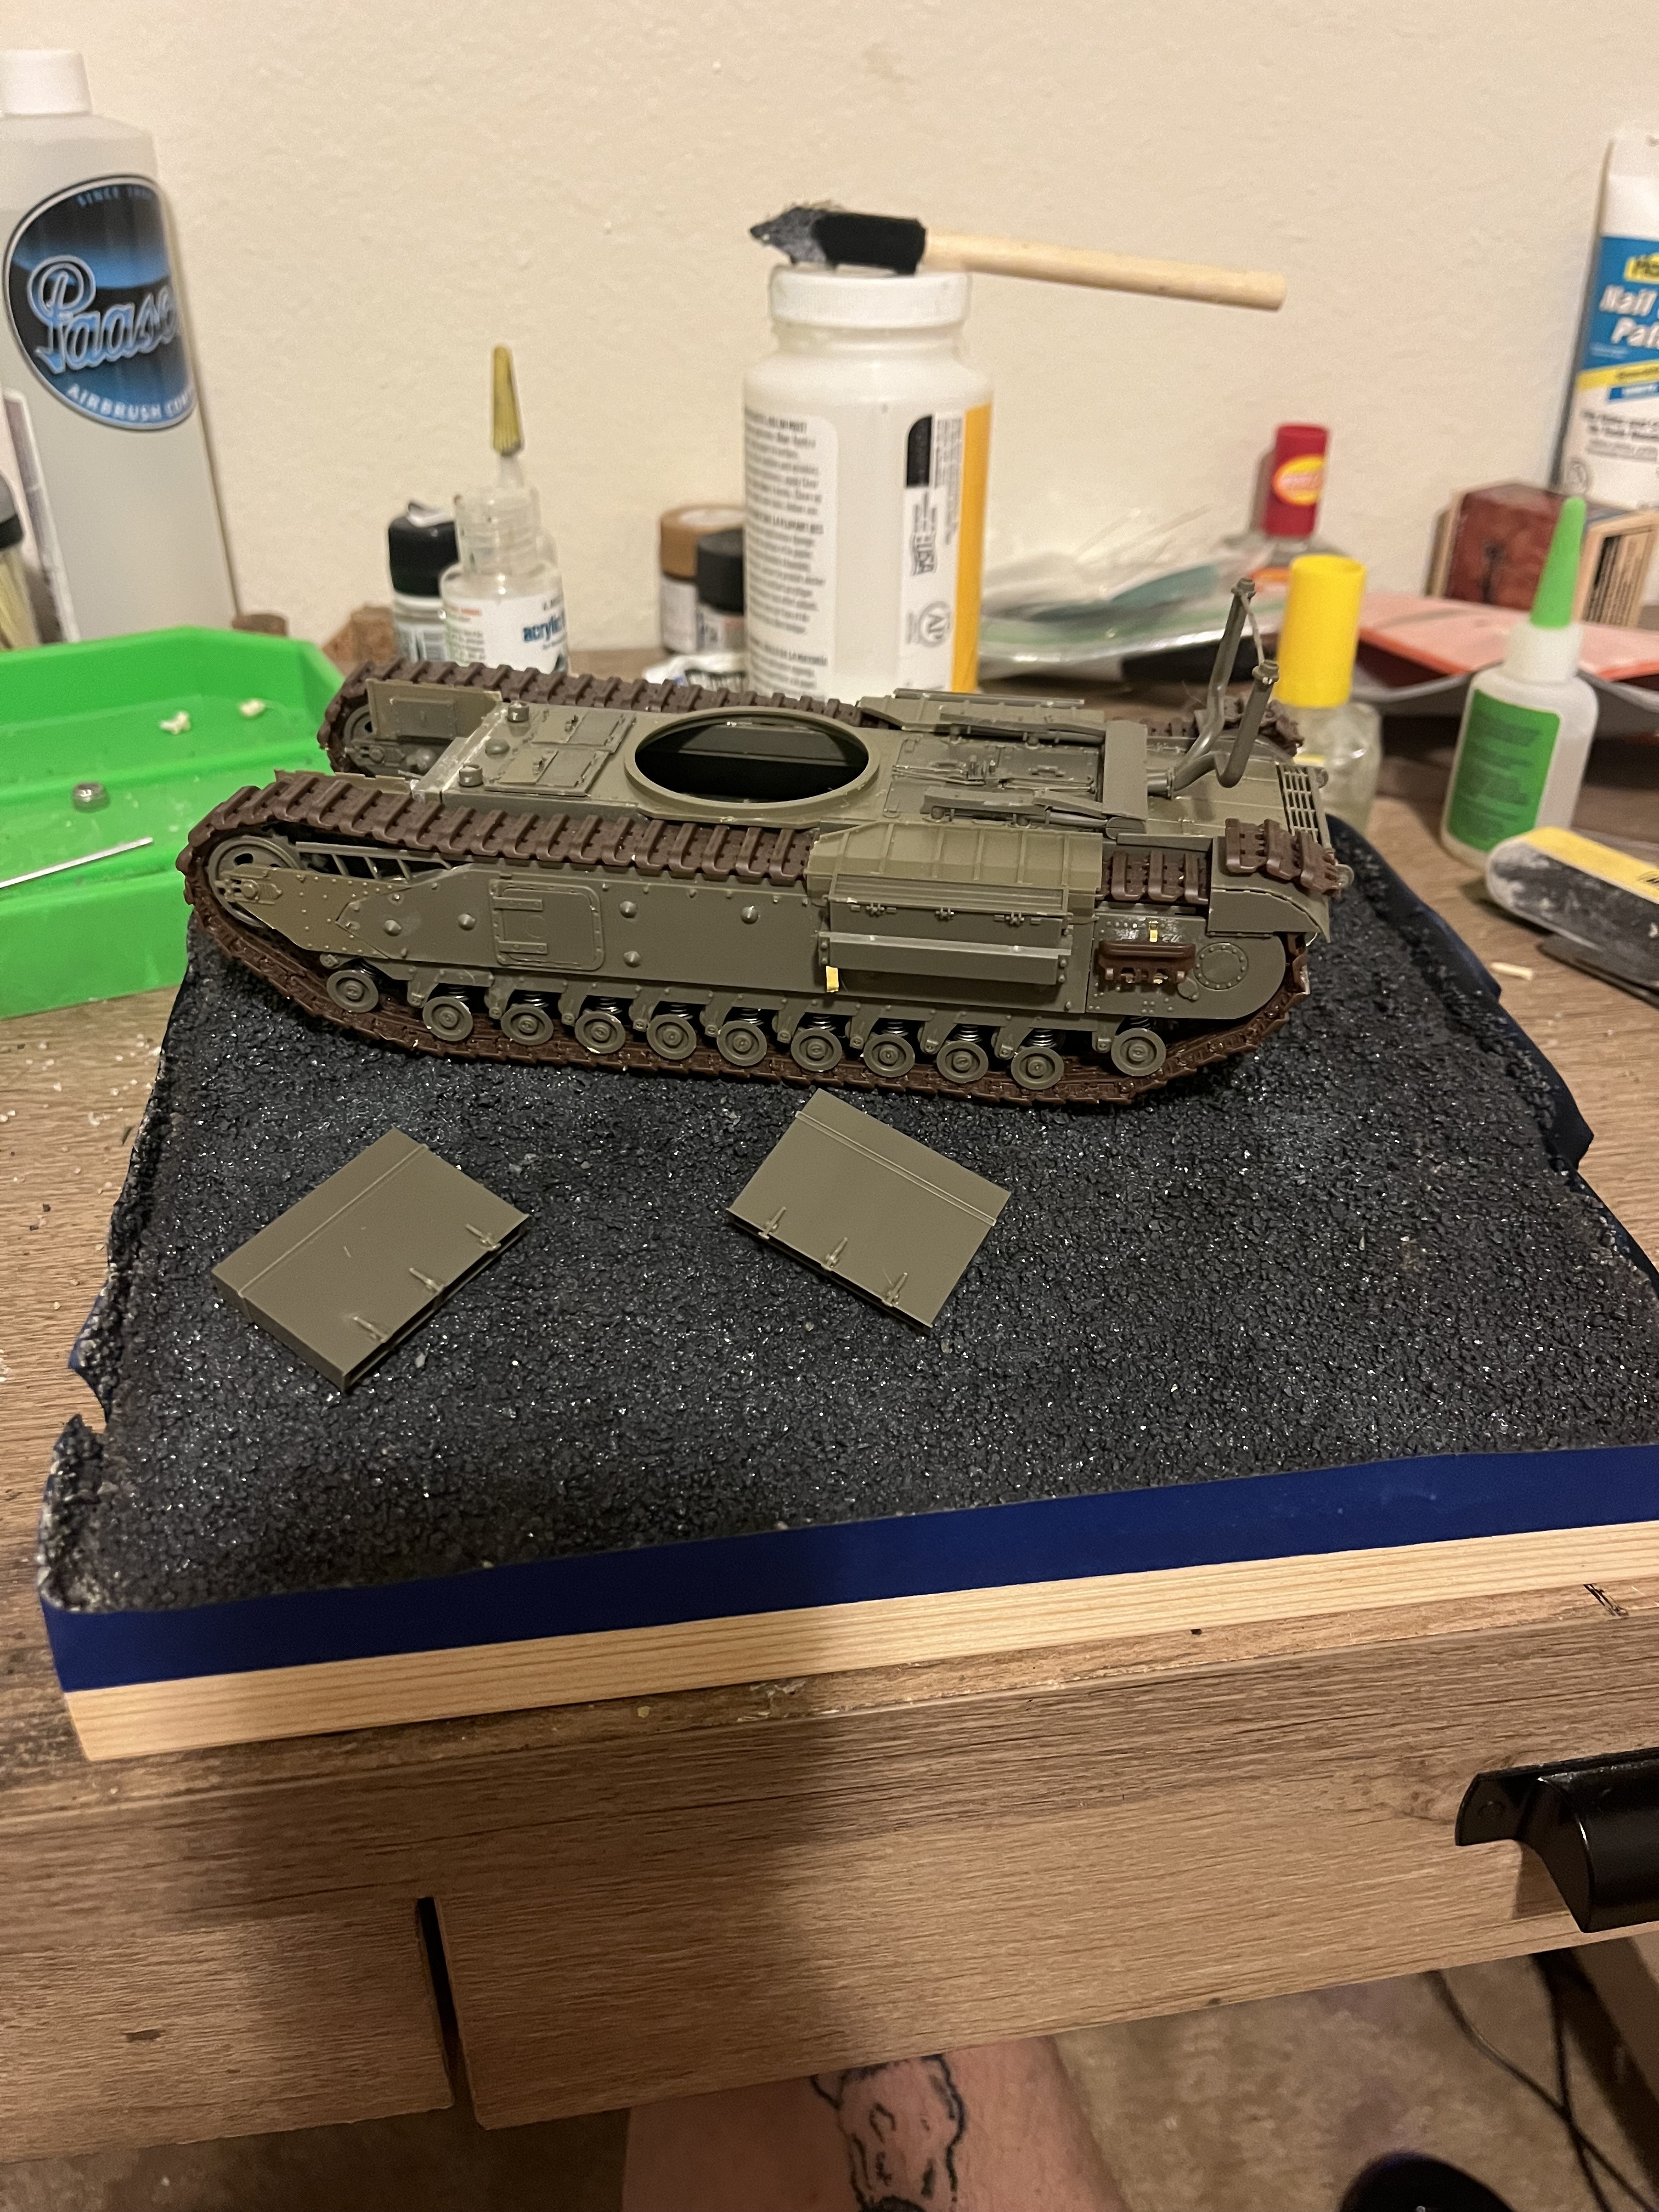
Got a little excited and got the first coat of primer on and did a mock up. My thoughts so far are the dio will look like this. The blown funnels to the wading kit will be on the water edge a quarter to half way submerged. The colored shells surrounding the tank and on the land. With maybe a minor layer near the tracks as if it’s been unsuccessfully driving and just causing shell displacement.
Here’s my different colors of shells soaking.
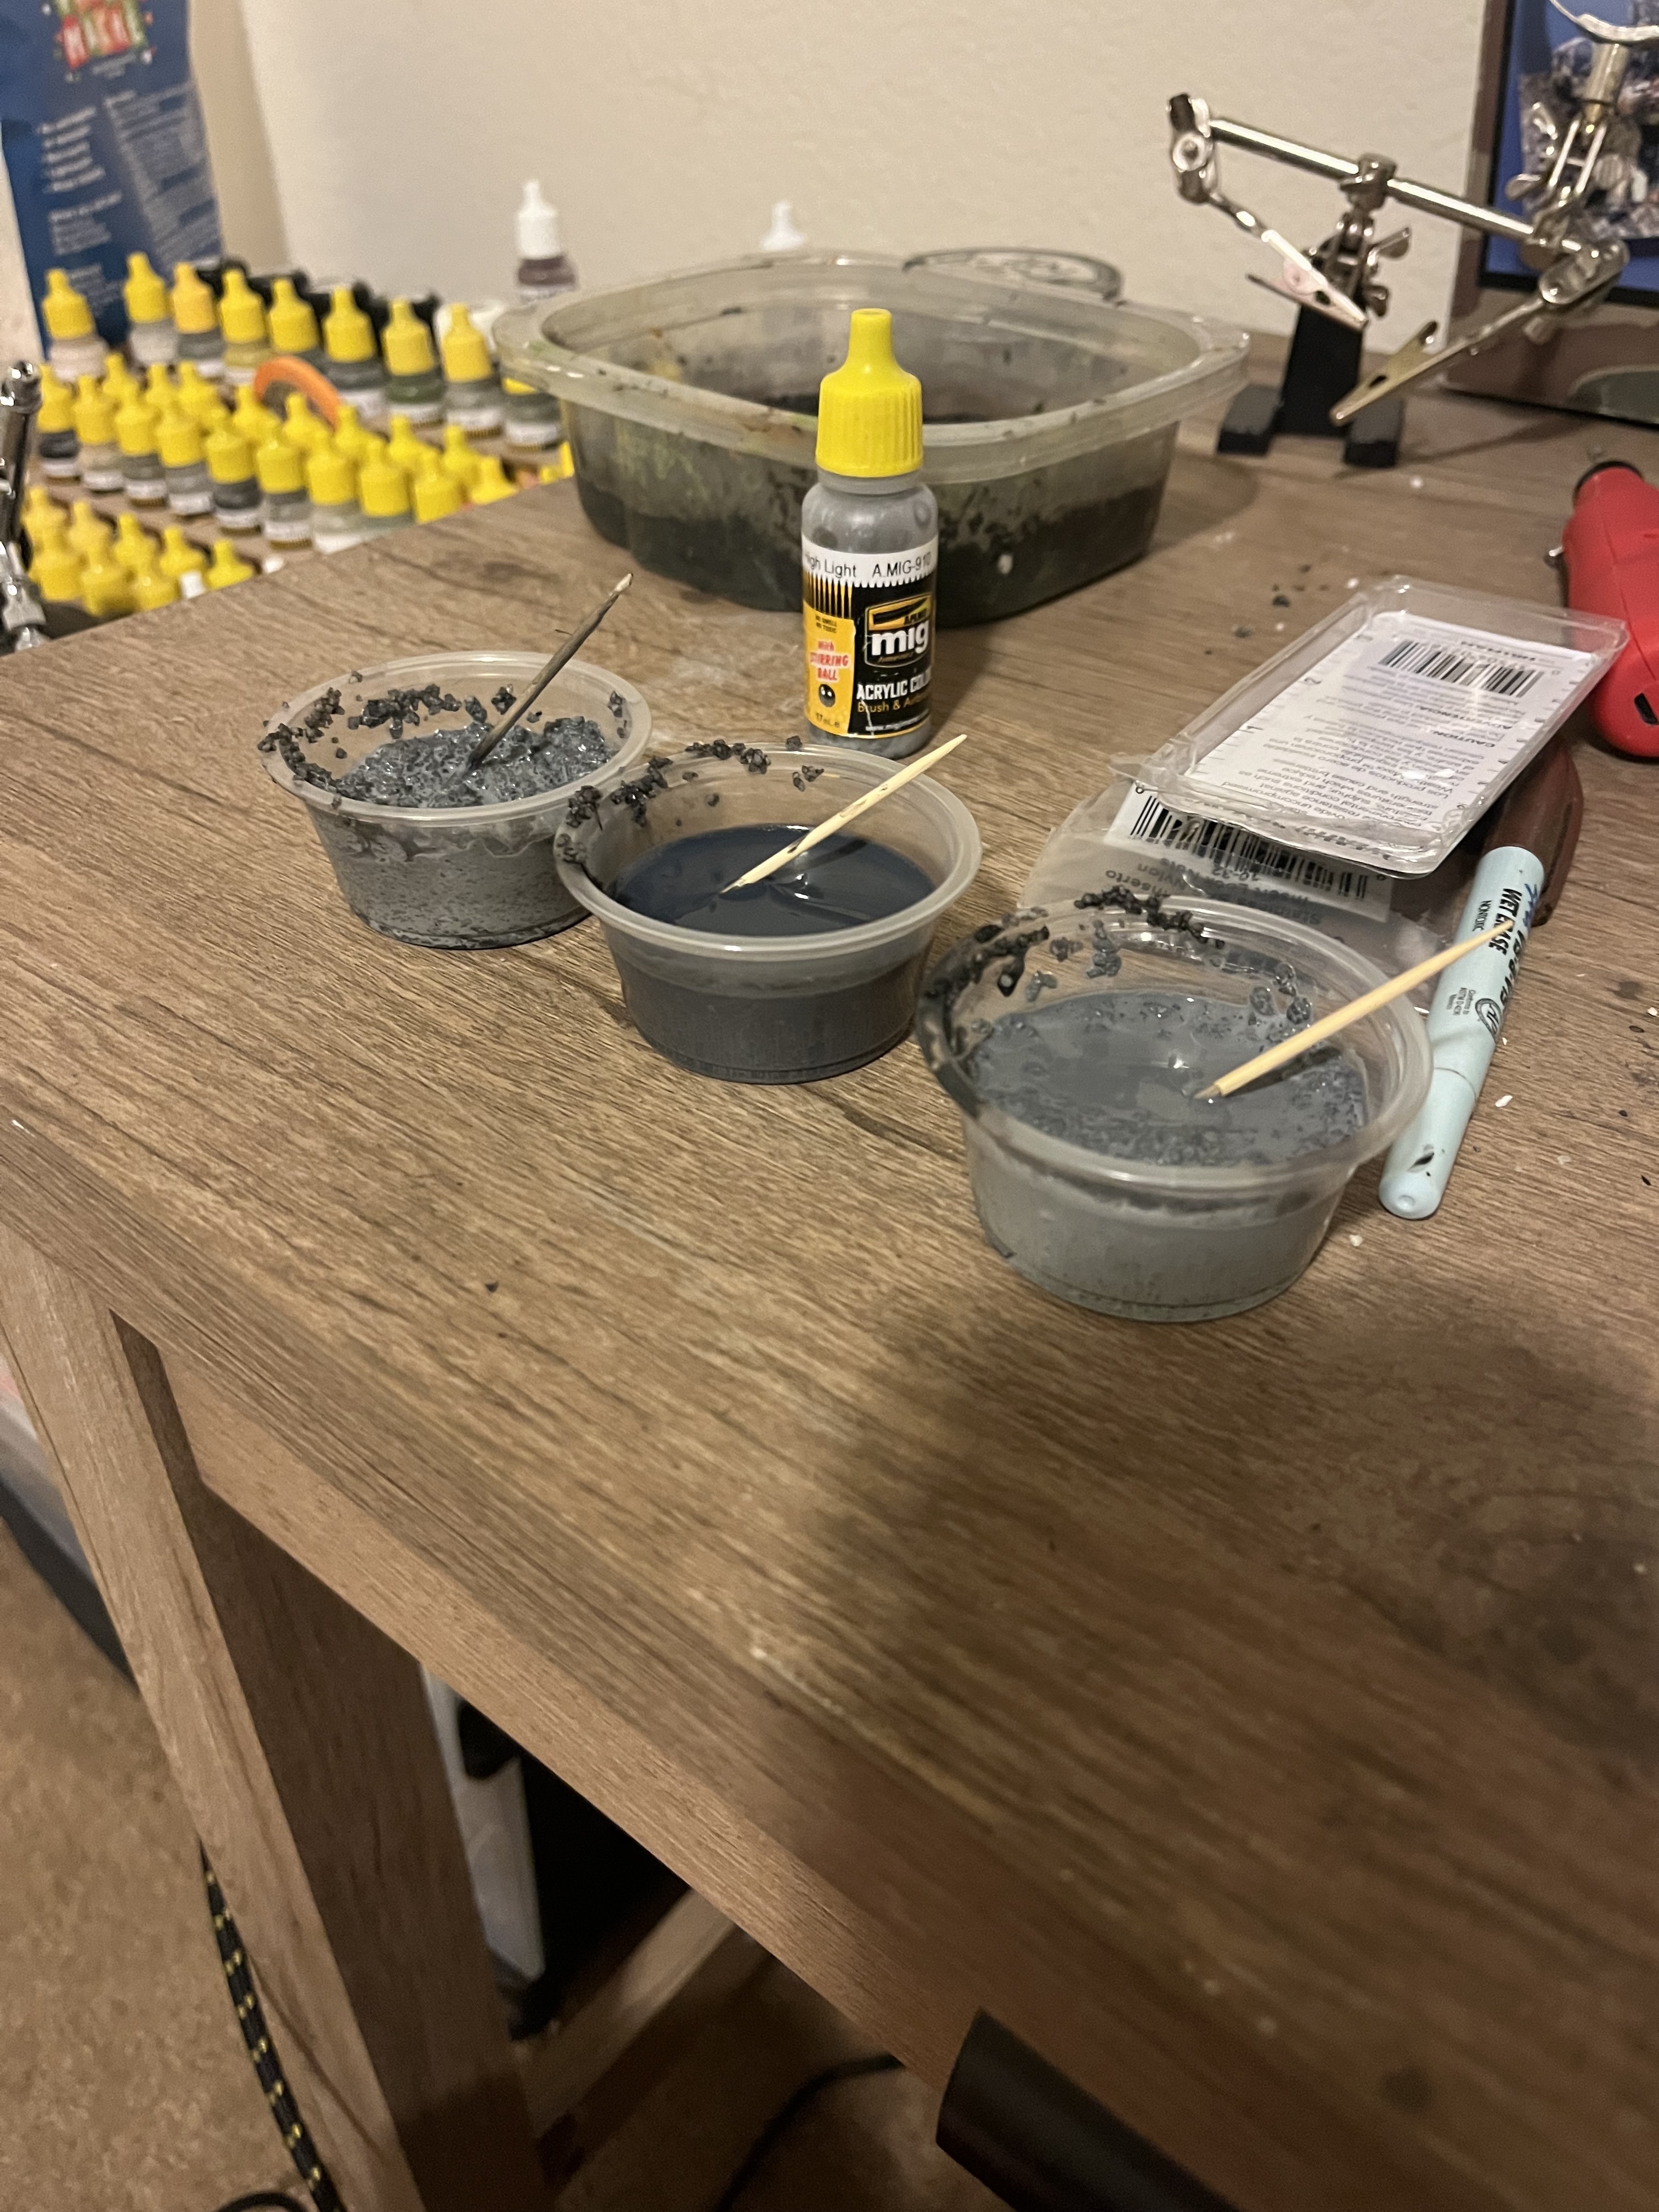
8 Likes
Looking good Greg – yeah I was wondering if/how you’d treat the loose pebbles between some bogies & maybe covering parts of the bottom run of tracks, as seen in the ref photos. They could just be left loose, or I was thinking they could be in a slurry of PVA glue – the sheen wouldn’t be out of place given how close to the waters edge they’ll be.
3 Likes
@Dioramartin yeah i was going through that last night. I have 10 pounds of excess pebbles that I’m going to do another layer. Next layer should be the highlight layer with the various colors of grey. After that I’ll see how high and thick it is and if it needs re attacking I’ll do a third layer. From there I’ll map out with shells where the tank will rest and start building up layers around the running gear and track.
3 Likes
Seque time…
I was assigned to a US Army TRADOC (Training and Doctrine Command - i.e. a “schoolhouse instructor”) position in the late 1980s. In that assignment I worked for two years as a field manual SME-writer. (The first 2 years I was a formal instructior).
To add some factual background to this observation, I’d point out that the changeover to line drawings vice photos in Army pubs actually followed the practice in the other services which had used similar line drawings since the 1950’s. The line drawings were both clearer in illustrating technical fine details while also allowing for better reproduction and printing at a lower cost. (Anyone who has tried use a photocopied TM or FM with photo illustrations will know just how bad some of those photos reproduce.)
With regard to the writing style and terminology, I was informed early on by my civilian editor that all text had to be written at an 8th grade reading level. (This is actually quite difficult, as you might imagine, for many technical subjects and can only be exceeded in case-by-case exceptions approved first by the editor and then by the military chain-of-command.) The reason for this Army-wide publication standard is that the service has to anticipate and prepare for “worst case scenarios,” and in the US that means that training has to be made ready for application to a wartime, emergency draftee cohort (and not to the standards of a peacetime all-volunteer military that can pick and choose enlistees according to higher mental and education standards.
So, yes, the TM and FM writing is “dumbed down,” but there is a method to the madness that is quite rational.
End segue. Back to your regularly scheduled thread…
4 Likes
@SdAufKla thats awesome, i just joked with one of my soldiers about kicking the tires on a Vic and if nothing happened to write no new faults.
This does put a lot into perspective and yeah it makes sense when you talk it out like that. The draftee cohort vs the peacetime army has a bigger gap of education requirements when you take it into consideration.
If you want an interesting read I’m told German army rank manuals in WW2 were essentially semi play boys to keep the crews interested in what they were reading.
Maybe a method to the madness.
2 Likes
True, and I must say I never understood why they went for airbrushed photos at all in the first place, except maybe that that was also very common in civilian technical publications in the US (my father owns a 1950 Oldsmobile, and its workshop manual has exactly the kind of illustrations you also find in US Army TMs). But if you think about it even a little, then tracing over photographs with an ink pen would be both simpler and cheaper than airbrushing those same photos, and will result in pictures that are easier to understand due to being less cluttered. Not to mention it will be simpler for the artist to de-emphasize the things that the illustration isn’t about.
However, for the modeller, of course, those airbrushed photos are much more useful ![]()
Or, as I was advised by a roleplaying-games publisher at one point, “Assume our audience is dumb” ![]() (I wish I could still find that e-mail, though.)
(I wish I could still find that e-mail, though.)
You’re probably thinking of things like the Tigerfibel and Pantherfibel (scroll down to “German Manuals”). They’re reminiscent of the US Army’s 1960s M16 comic book, but like that, it’s not a style that was adopted in general.
3 Likes
Sounds like a (great) plan re the beach layers. Btw what’s your preferred method of nailing the Churchie down? I can think of at least two methods but better I should just keep my trap shut ![]()
2 Likes
@Dioramartin so i used to just take paper clips and press them through the hull after heating or run them through track and into the base. Did this because primarily my base was made of styrofoam and model clay. This time i did a screw because i laid out and planned this build. Got a screw and a nut to place inside the tank once it’s painted so that it’s secured.
3 Likes
Yep, I did something similar with several dios using thickish wire thru the vehicles’ pans & base…in such a way I could still release them from underneath later if necessary. And it was, when we moved a few years ago I had to ditch some bases but kept the vehicles. However with Dieppe I guess that won’t be so easy with the pebbles invading the running gear…unless those pebbles are loose & not glued ![]() That’s kinda where I was going with the question, decisions decisions
That’s kinda where I was going with the question, decisions decisions ![]()
2 Likes