I’ve gotten everything I’ve needed to make this a reality. I’m currently building the Churchill dieppe kit from afv. Below are is a pic of in progress. I’m not sure if i want to add a figure or two but am open to it. I envisage a beach with a minor water line and the Churchill cocked at a 45 degree angle.
6 Likes
I look forward to seeing the updates for this diorama on such an interesting subject .
Thank you for sharing your work .
1 Like
@bootneck i realize I’m horrible about posting wip.
My only question isn’t his kit is it comes with the wading kit as well. It appears that all the photos after the battle show the Churchill’s with them off. The kit shows a wire that kept them on so I’m kind of wondering if i should show them off the tank after it got ashore?
2 Likes
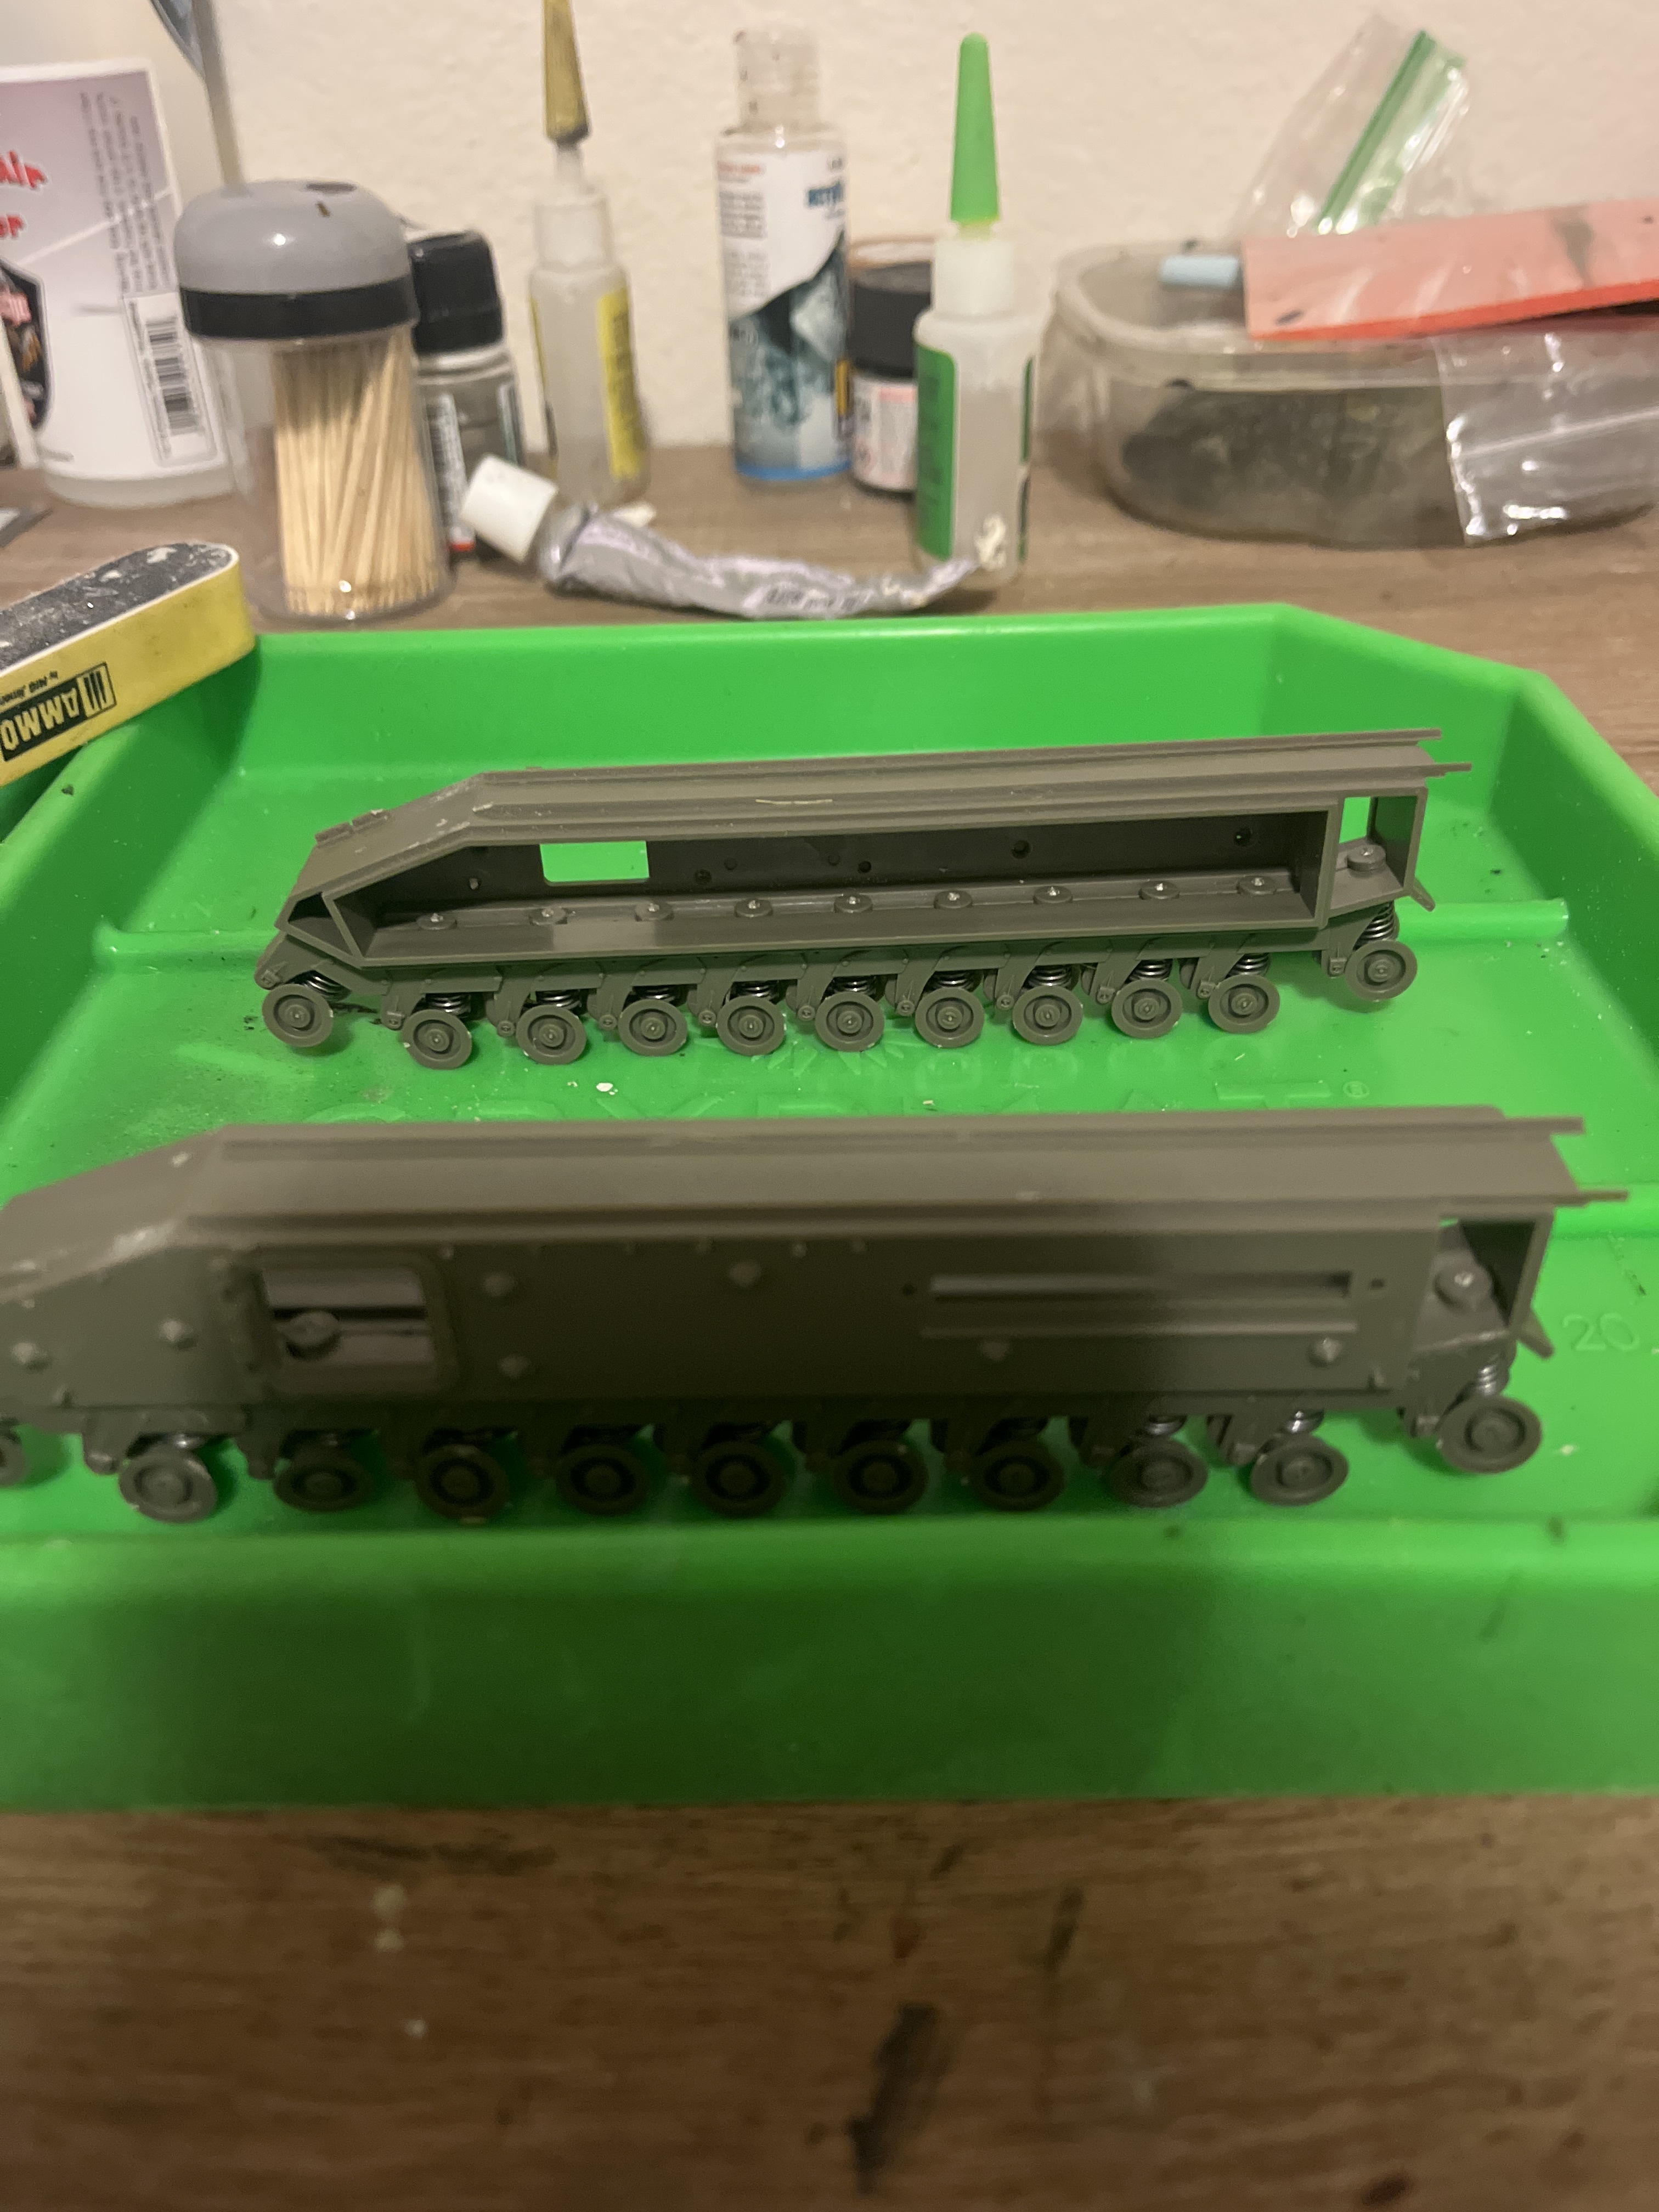
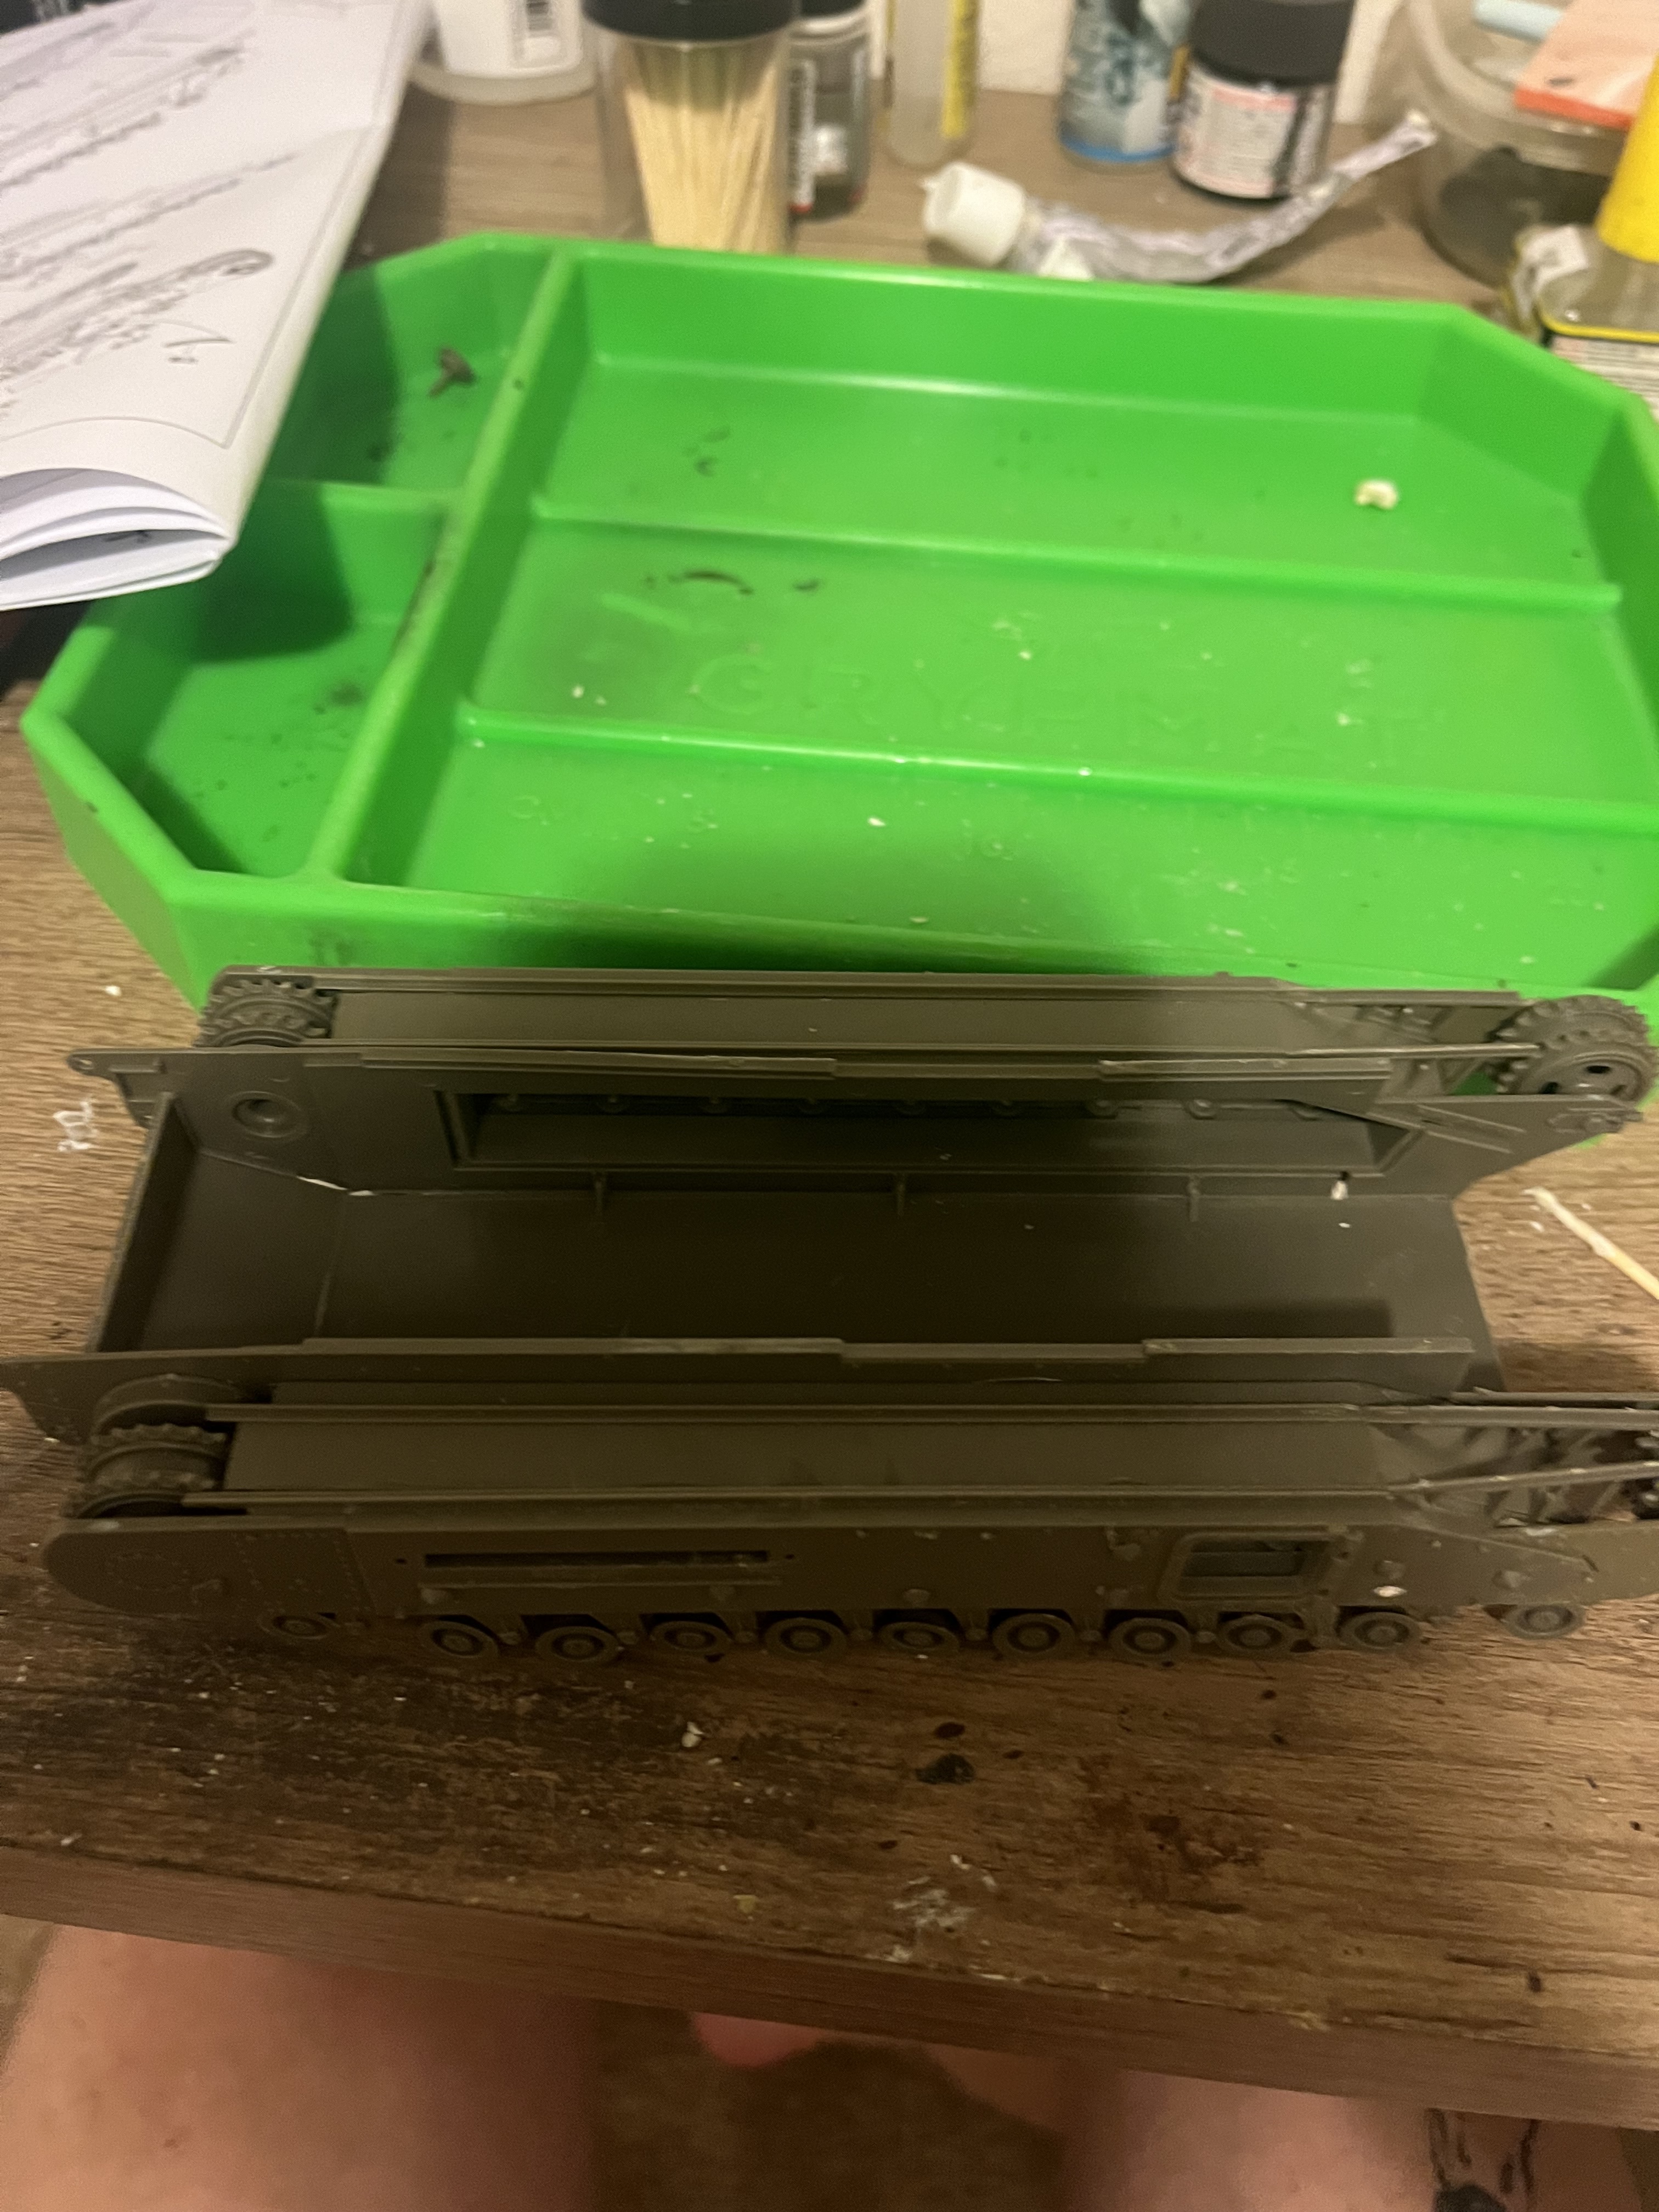
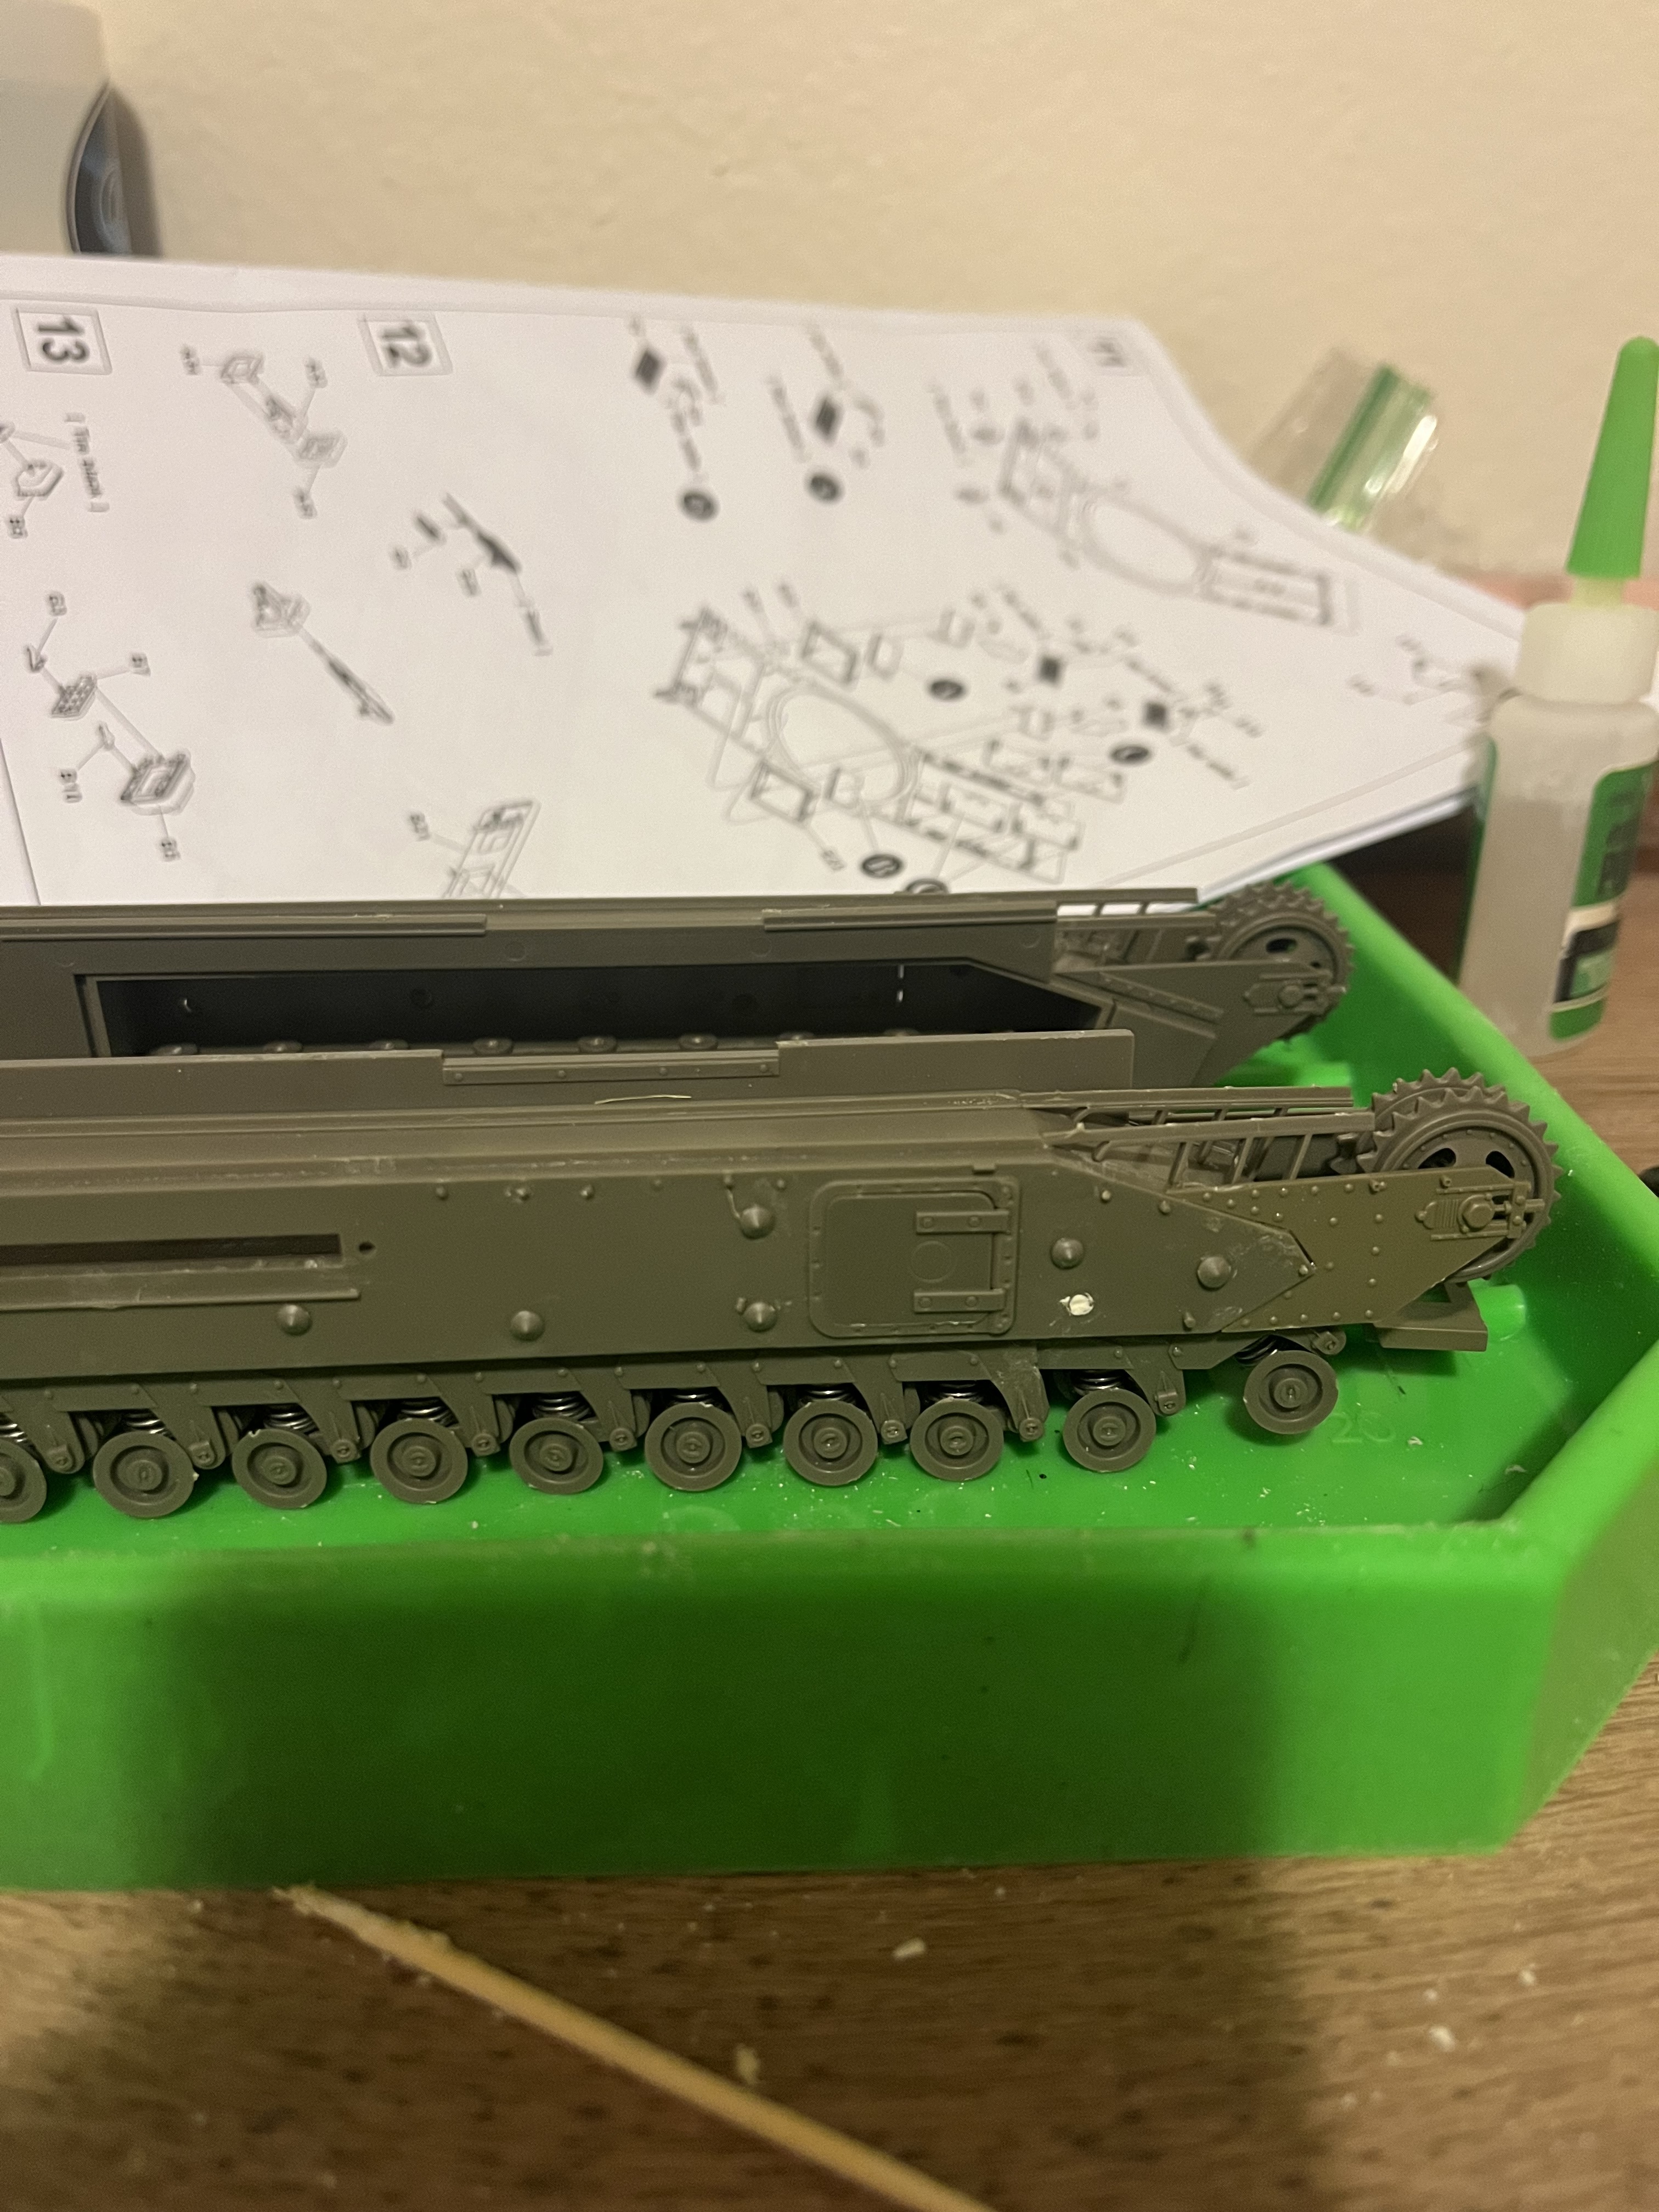
One update from today, made small headway on the lower hull. Was able to take both sides and connect them. Was some fit issues, primarily the lower hull piece being a bit warped but was able to get it to fit. Reinforced with putty and letting it sit for the night.
6 Likes
The deep-wading gear was released as soon as the tank got safely ashore. To get rid of the inlet and exhaust ducts, the commander had a handle with a bicycle brake lever on it, attached to a Bowden cable that ran to the fixture in the centre of the engine deck that held the rods which connected to the ducts. Pulling the lever pulled a plunger out of the device, releasing a spring-loaded locking plate, which in turn released the rods holding the ducts, which then just dropped off the tank. Still with me? ![]()
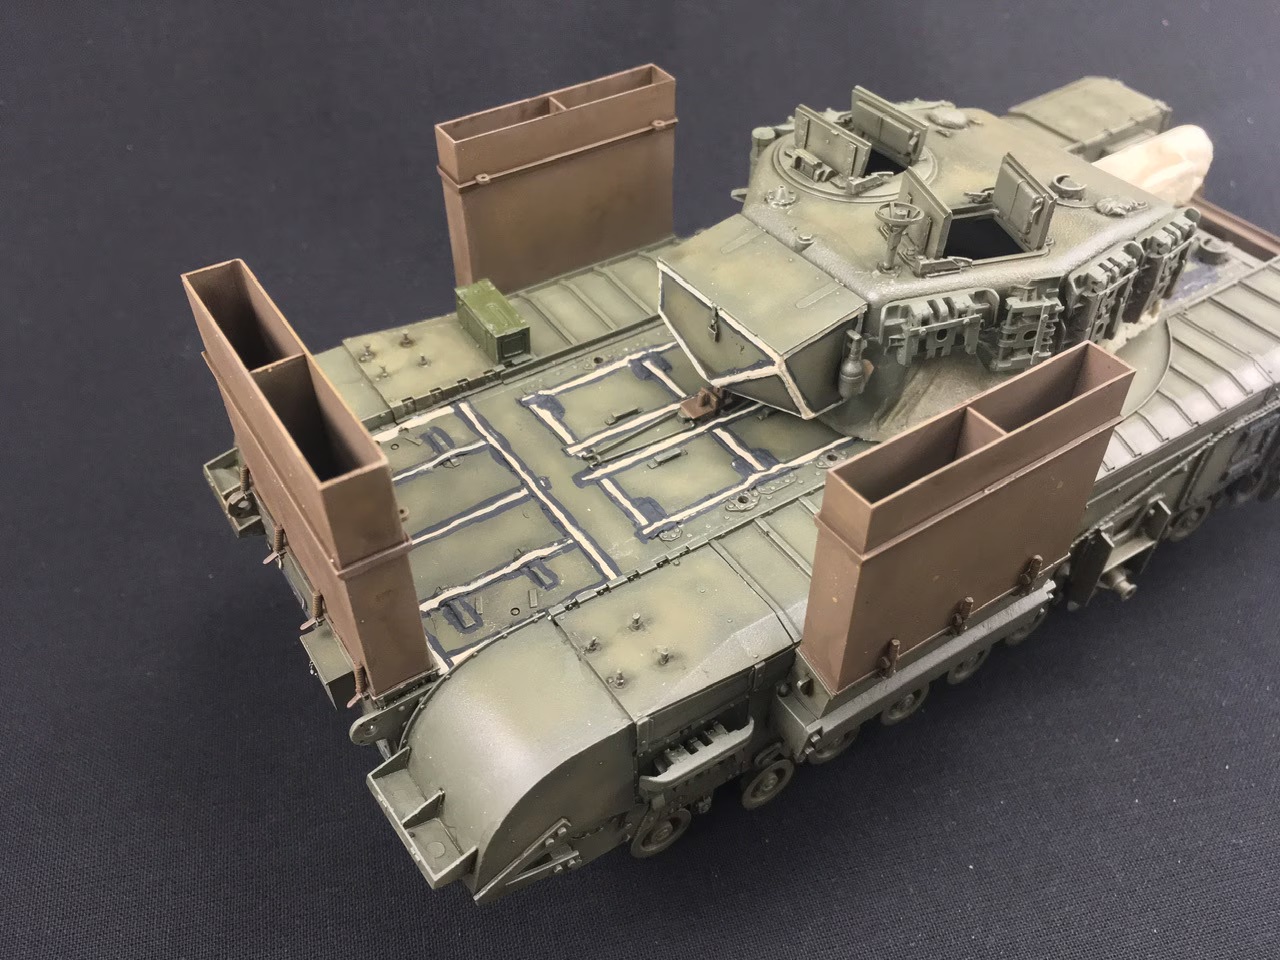
The extended engine exhausts, though, bolted onto the square flanges on the ends of the normal exhausts, and so would stay on the tank until removed later by hand. This is obvious from photographs:
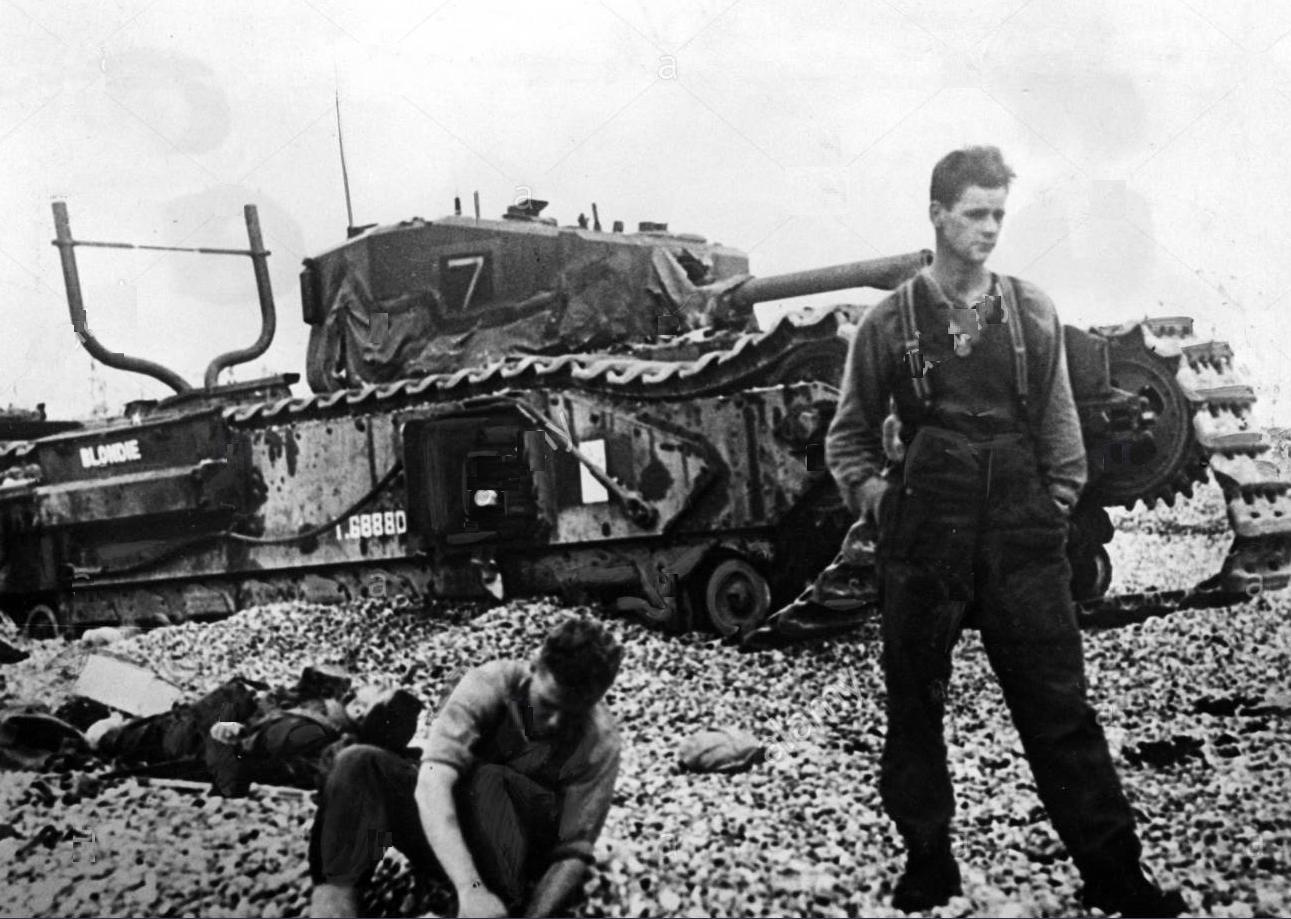
However, a Churchill prepared for deep wading would have more than just those ducts and extended exhaust pipes on it, but pretty much everybody modelling one, misses that. Take a look at the photo above ![]()
Waterproof fabric was applied around the turret, to seal both it to the hull and cover the pistol ports, and similar fabric went over the bow machine gun and the ventilator on the front hull roof. Waterproofing tape and compound (of which a major constituent, incidentally, was asbestos) was also used on all of the hull hatches and vision devices, and the lower exhaust on the hull rear was sealed with two sheet steel plates, either side of the towing hook.
The fabric and the sheet steel plates had detonating cord under them, fitted with an electrical detonator on a lead that went into the tank and either connected to the lighting system or with a plug for putting into a socket in the tank; these were all to be taped over to prevent accidental operation. Once ashore, the commander would first drop the ducts as I mentioned, and then the electrics were operated to blow the fabric and metal panels off the tank.
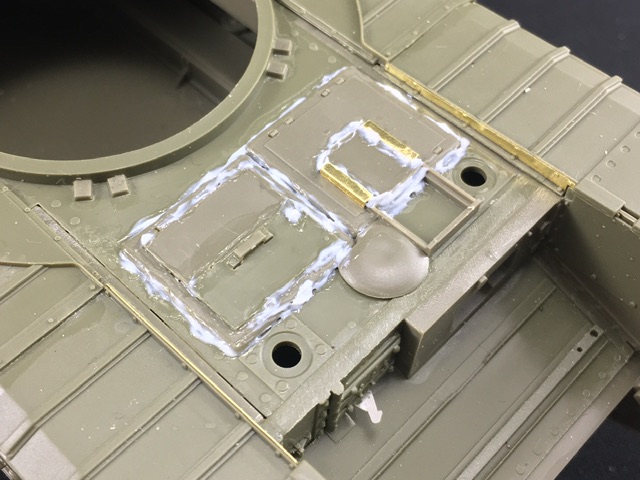
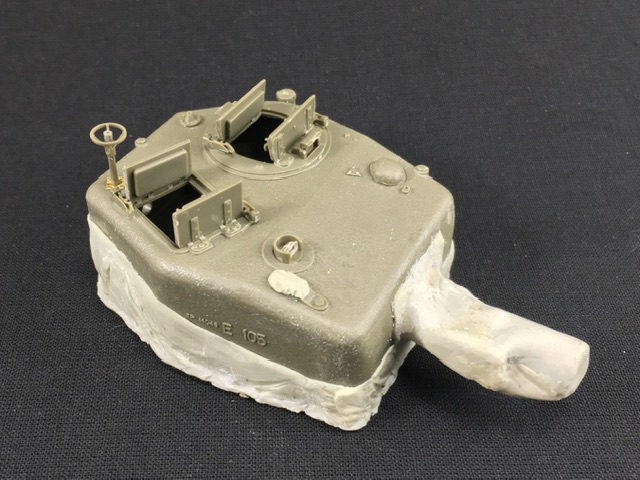
Anyway, on a model, all of that looks like this:

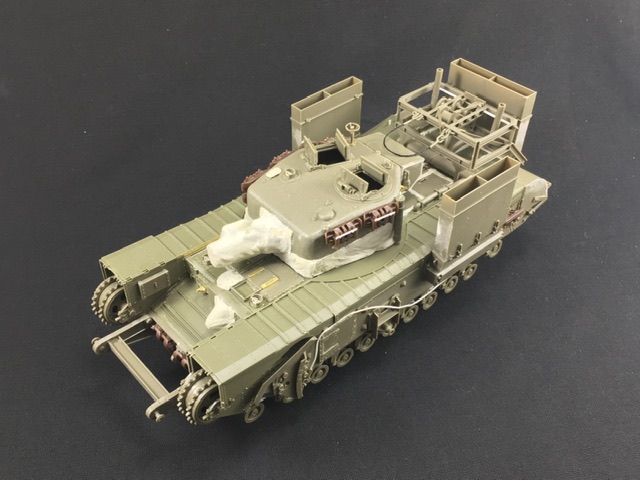
(Though I admit the cover over the spigot mortar here is conjecture, as I didn’t have the waterproofing manual for the AVRE, only for the regular Churchill tanks.)
If you want to portray the tank after landing, you would need to add the waterproofing tape and compound but not the fabric, though some shreds of that will add interest. Also, the stuff that the fabric was glued down with will leave visible black lines on the tank all along the edges of where the fabric was, including very prominently along the sides of the turret.
10 Likes
@Jakko now that is a wealth of information i didn’t know about. I guess my question is how would i go about making that tape, it appears that you did modeling putty but i could be mistaken? I’m thinking i could create it in a similar fashion to a tarp or flag by mixing water and white glue with paper?
I had thought about making the Churchill with the wading gear on but was also thinking of as you said, doing it with it off except for the handle bars still being up. I thought maybe show the gear off on the beach as part of the diorama.
3 Likes
I used three different materials here, basically.
- The fabric over the turret etc. is two-part epoxy putty that I tried to sculpt into the shapes I saw in photographs of the real thing.
- The “tape” over the engine hatches is Tamiya Pla-Paper (that I bought 35 years ago and still have plenty of). This is very thin plastic card, about the thickness of printer paper but smooth; applying liquid cement to it makes it soft and pliable, but too much will tear holes in it. I just cut strips and glued those down where the tape is to go. You could in all likelihood use paper glued down with PVA instead, I suppose.
- The waterproofing paste around the driver’s hatches, side doors, periscopes, etc. is acrylic texture gel sold in art shops, as painters use it to bulk up acrylic paint for effect. I very laboriously applied this with a thin brush into all the seams where the manual says to put the real stuff. I use the thick type of gel, but still had to add a second layer in places because this stuff shrinks a bit when it dries.
Talking of that manual: here you go ![]()
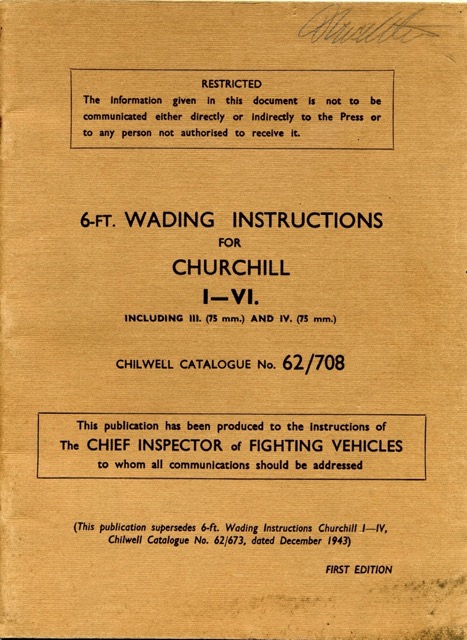
(With thanks to Peter Brown for giving me that PDF.)
OK, I got the order slightly wrong. Last page of the PDF:
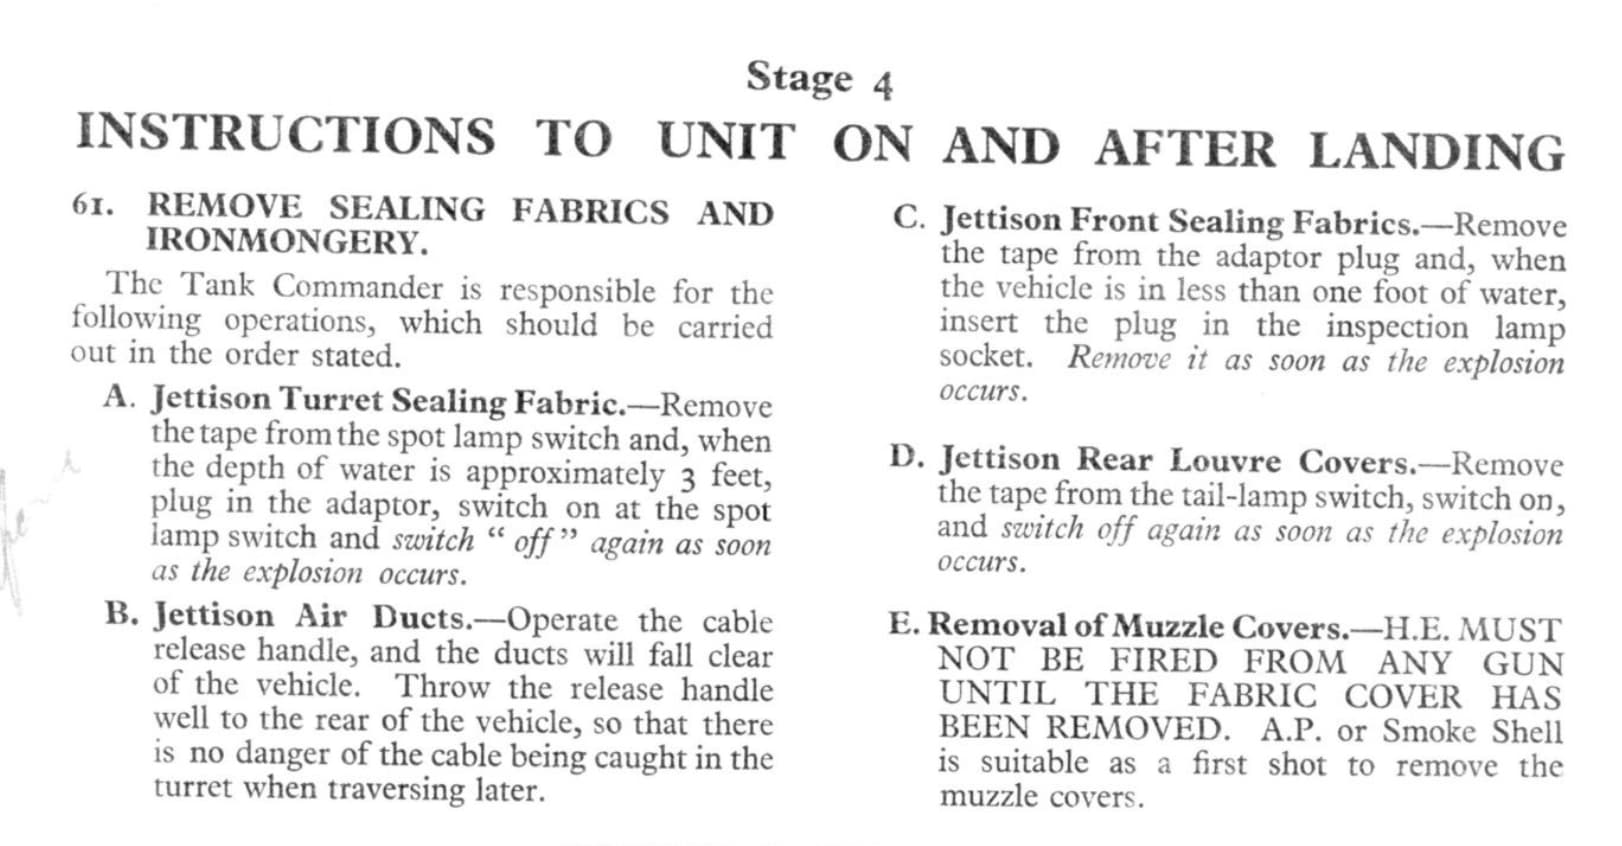
First of all the fabric around the turret was to be blown off, then the air ducts released. However, the tank in the photo I posted has the fabric on but not the ducts. You can’t see if the other fabric has been blown off as well, except at the gun muzzle, which should have been the last step. But combat is not training, so I guess they had a reason to do it differently.
Anyway, like I said before, if you want to display the tank landed, then IMHO shreds of the fabric would be a good idea, left stuck to the adhesive, and of course no ducts on the tank. Next to it would be a really good place if you’re building a diorama, I agree. You would still need to add the tape and waterproofing compounds to be accurate, of course.
3 Likes
@Jakko this is a wealth of great information. I think my plan to simplify some of it will be a Churchill just getting ashore and having discarded the wading gear. I plan on having a minimal water like in the diorama. This it primarily to practice for a few other resin pours i have planned this year.
I think I’m going to experiment with cutting strips of paper and outlining the areas you’ve highlighted and painting them in a more canvas/ khaki color.
2 Likes
FWIW I will be doing the same. I will be depicting mine with the stacks already blown off, and I will probably show one in the gravel behind the tank.
2 Likes
@Mead93 i wonder if one half submerged in the water would look good?
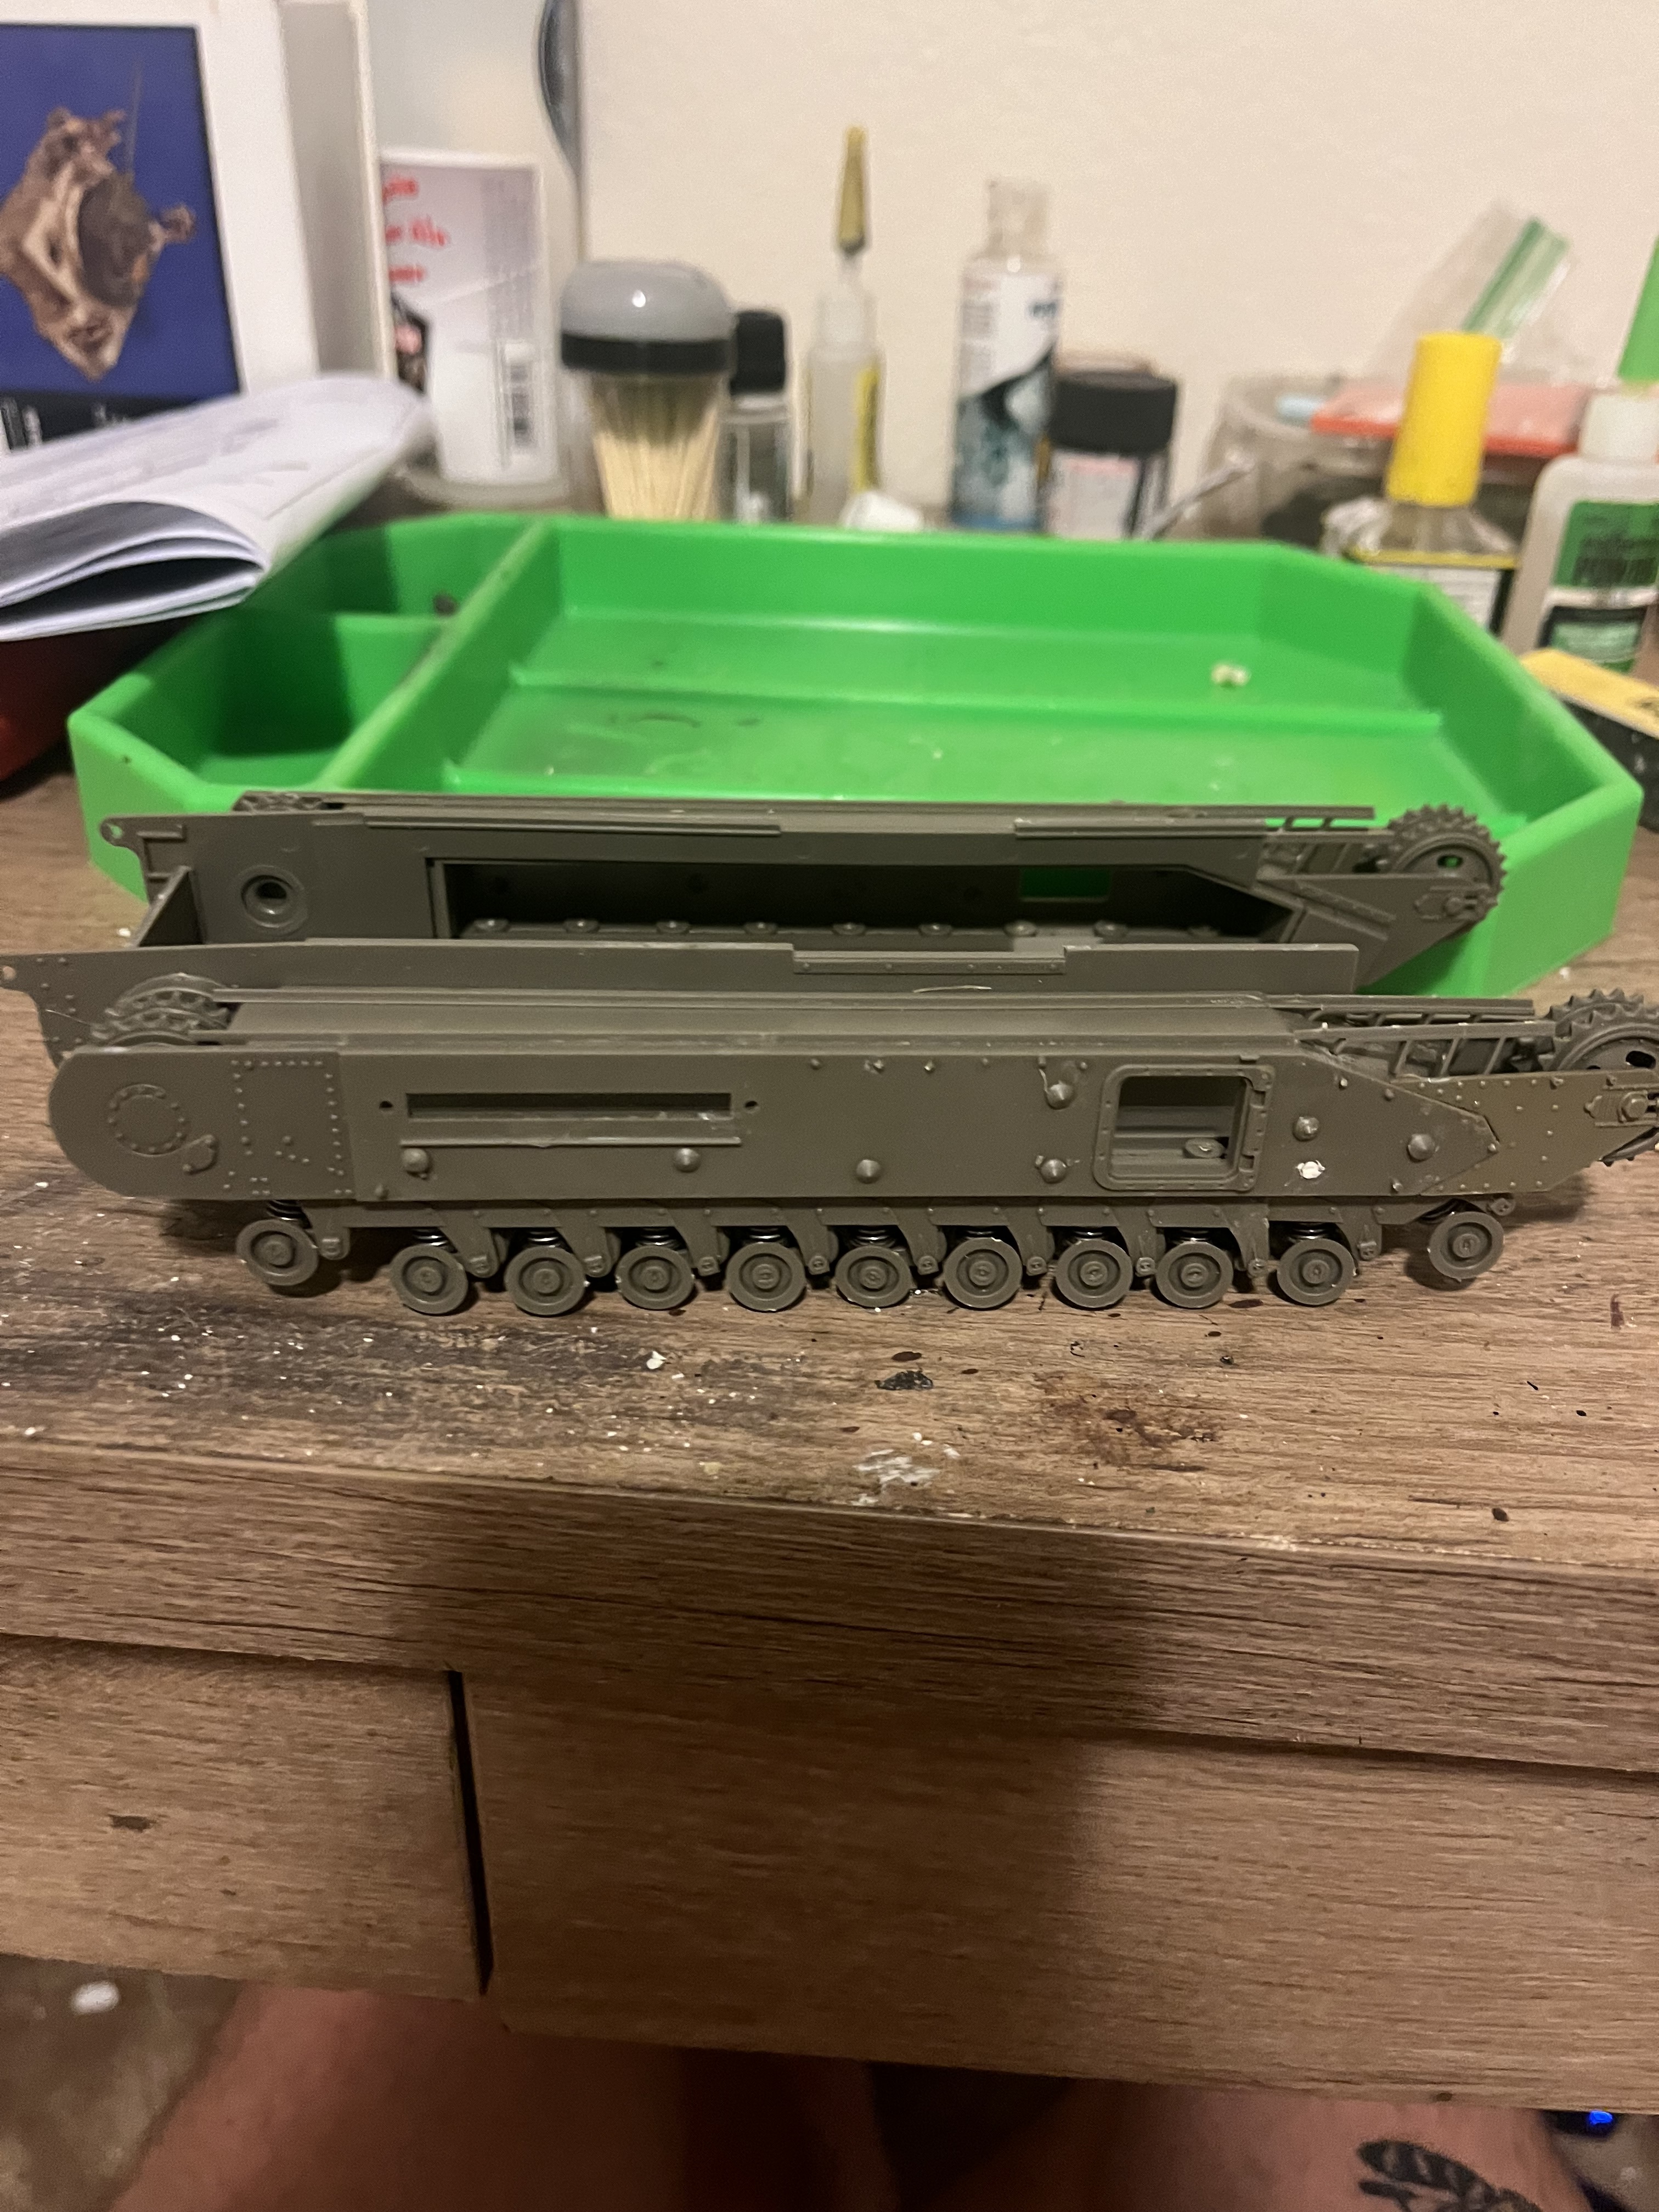
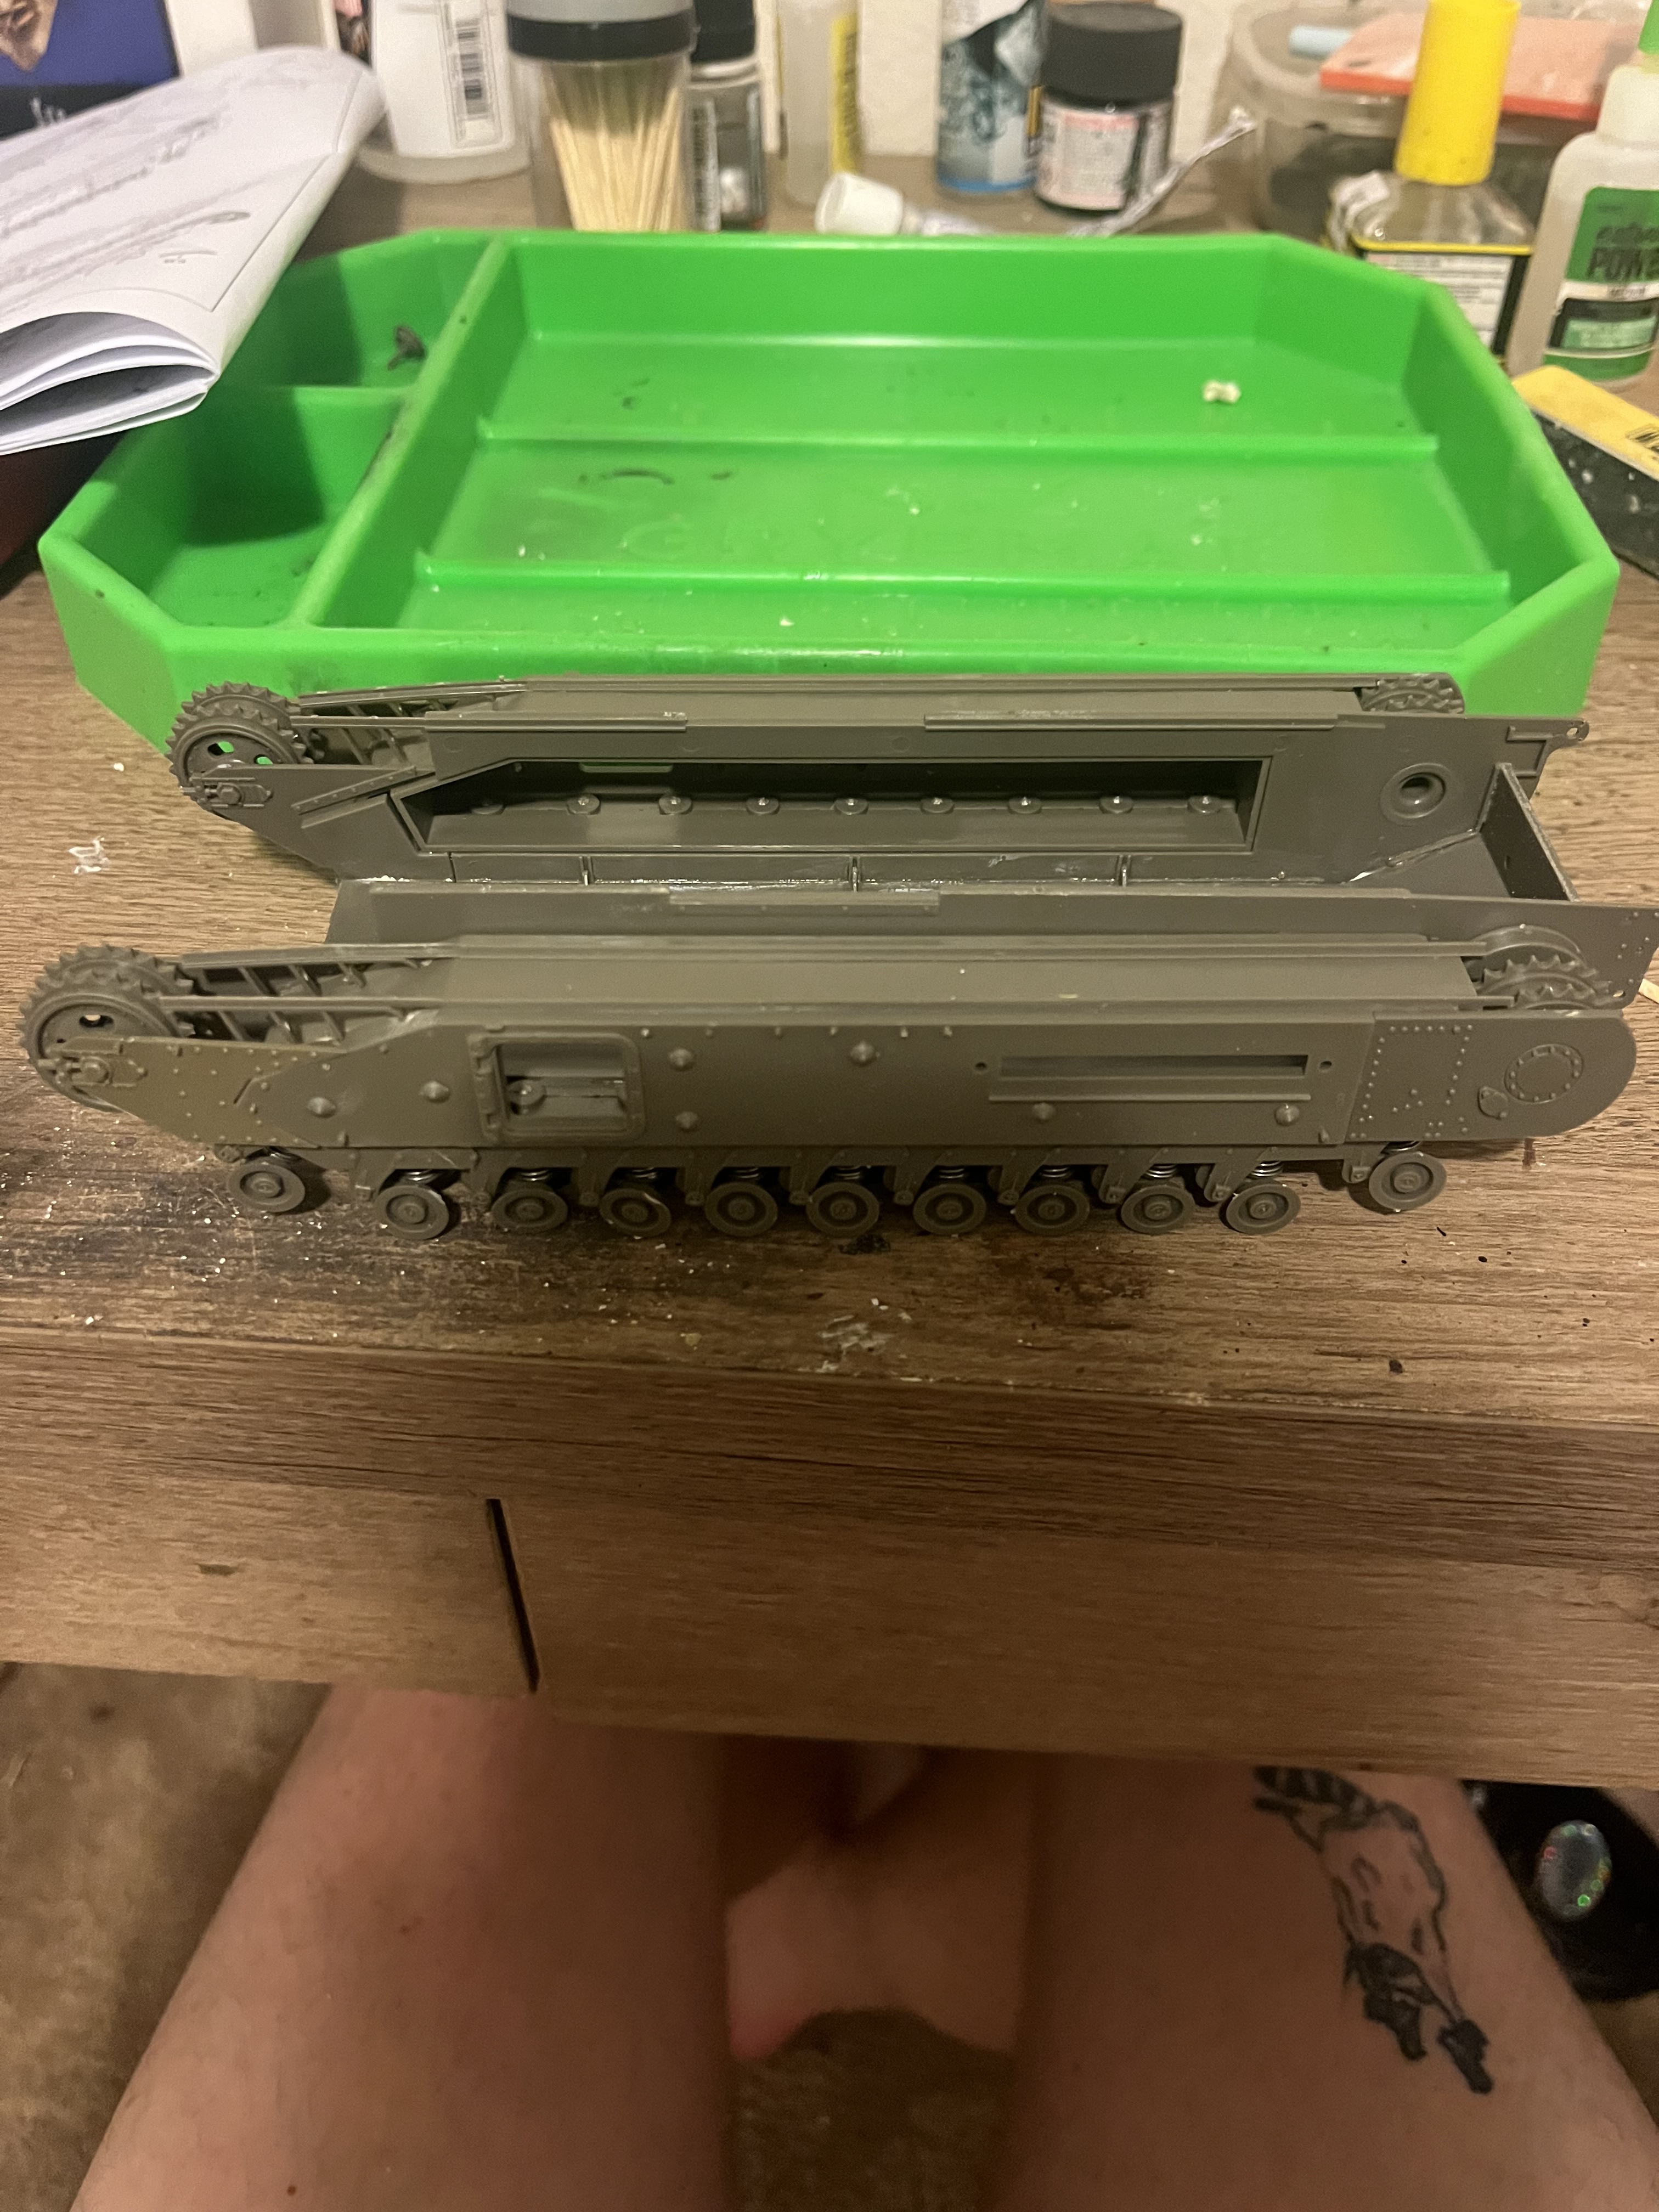
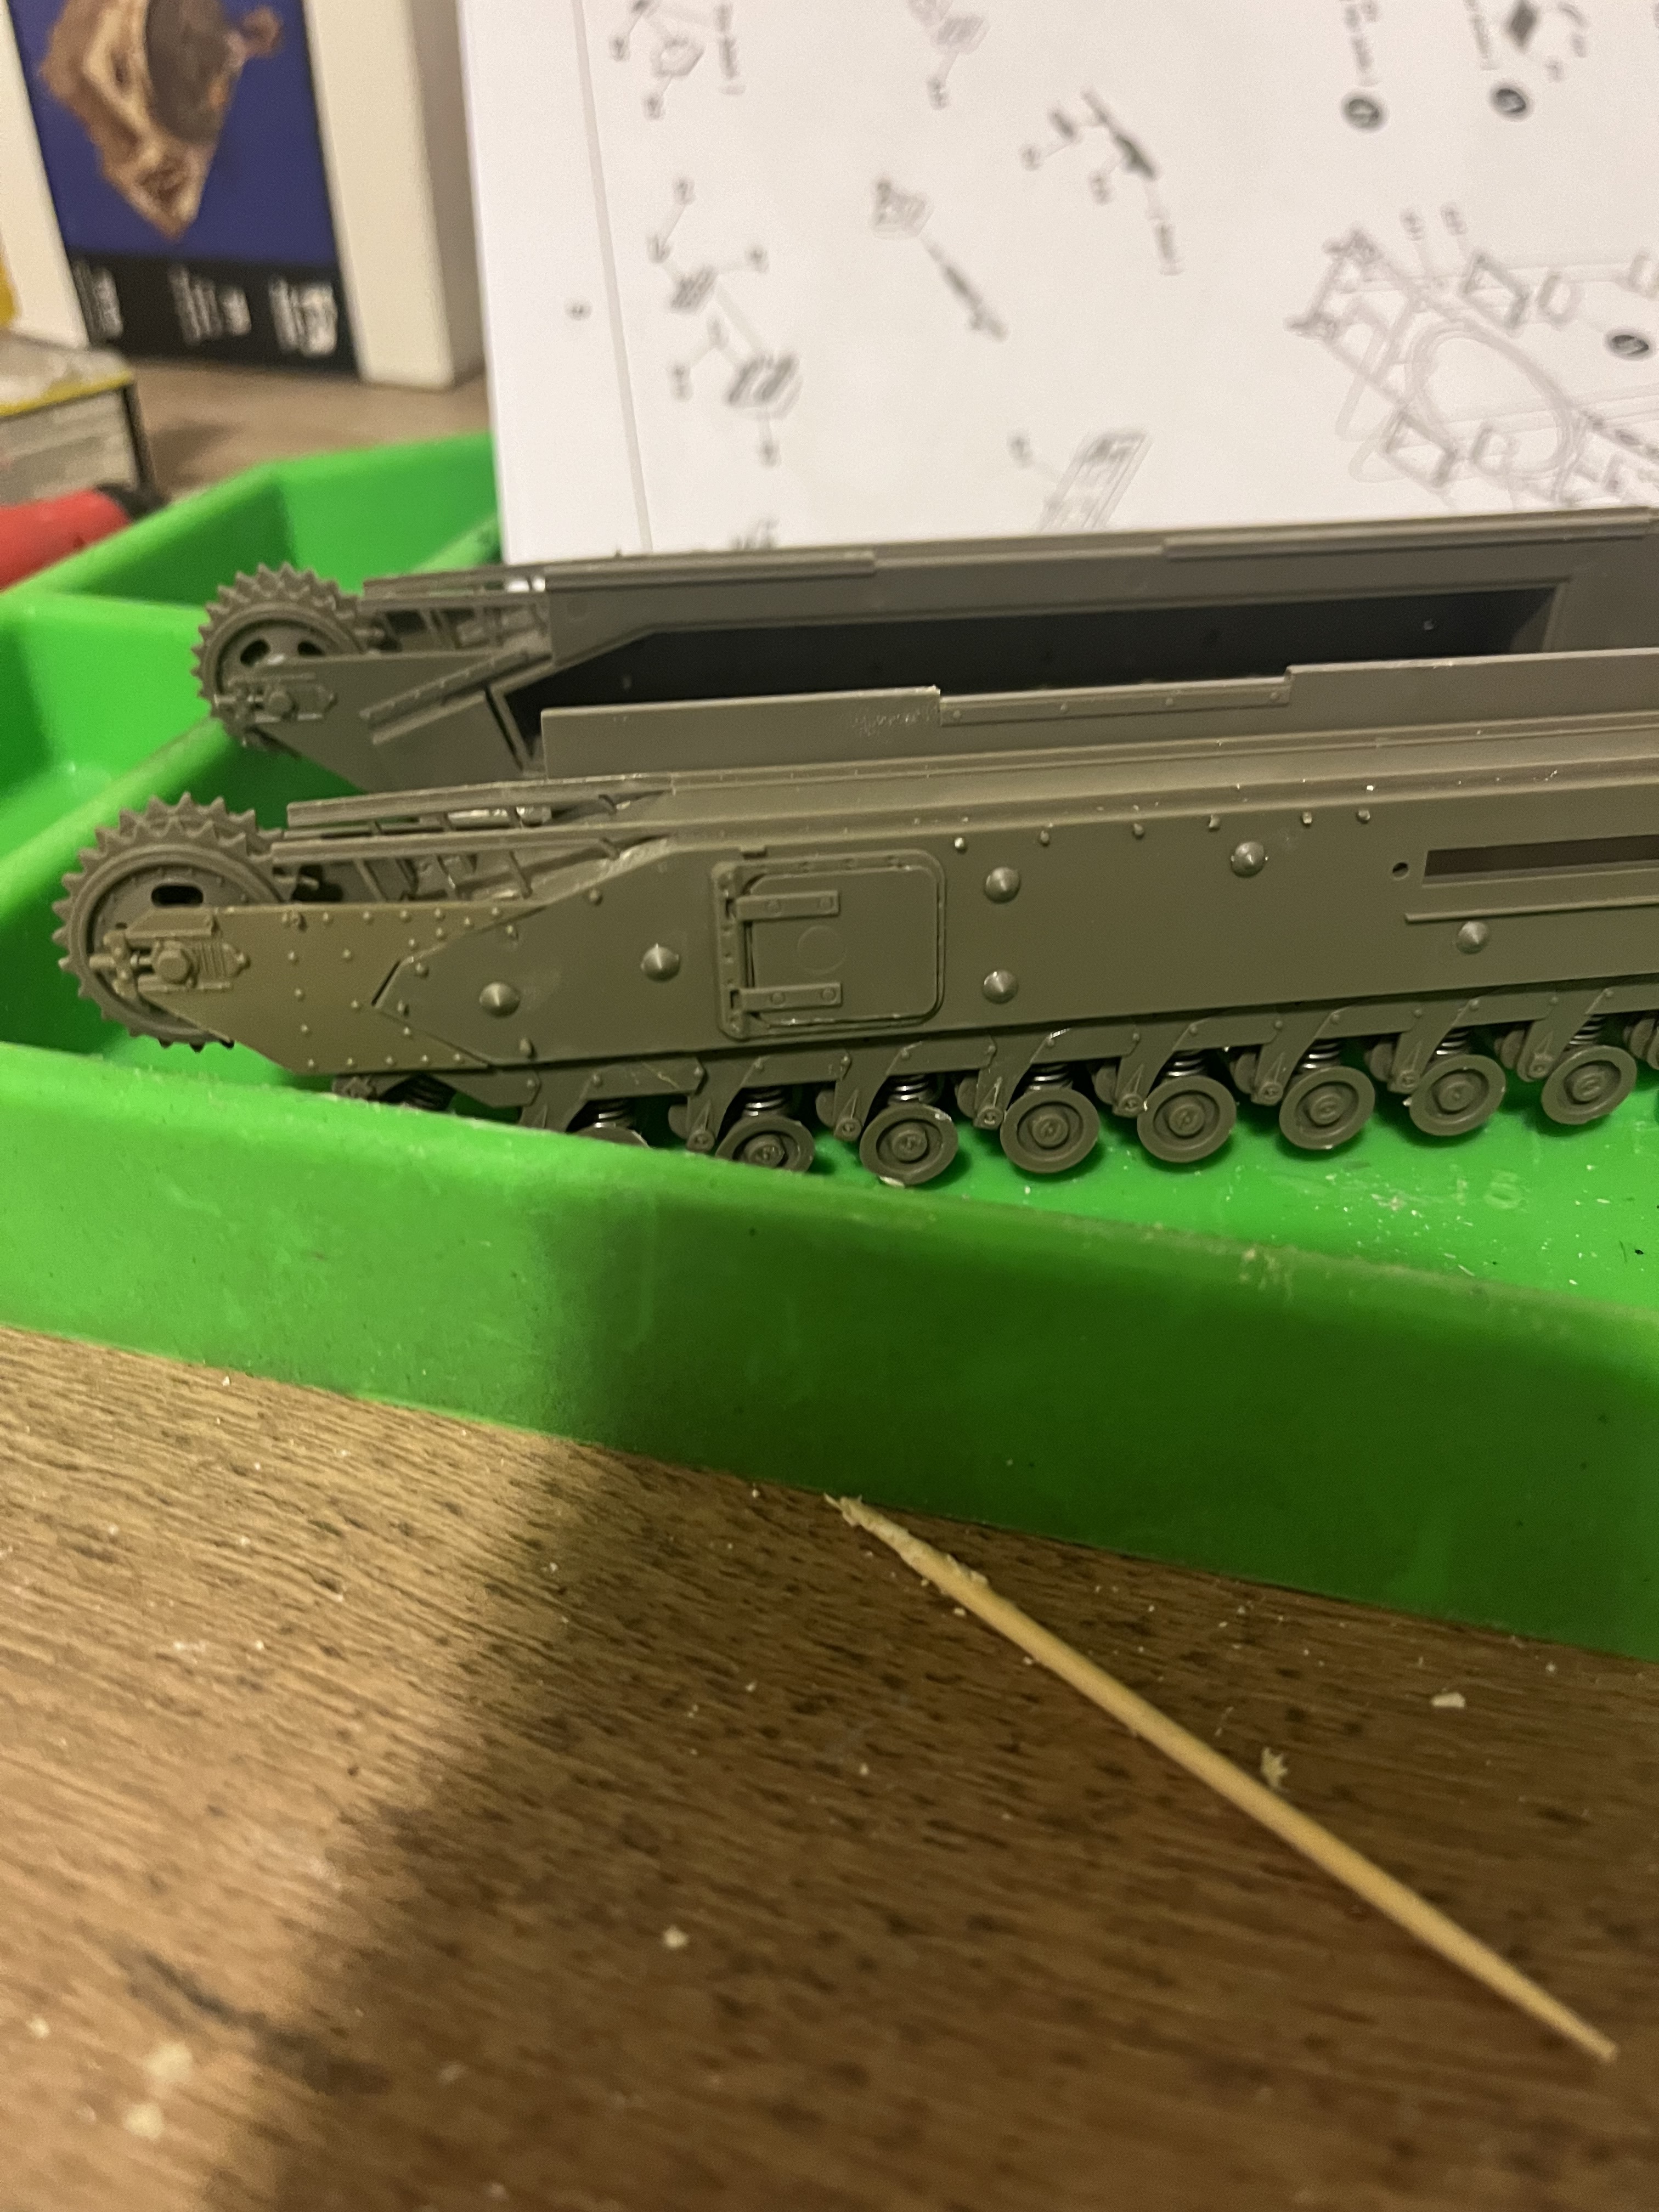
Here’s a quick update. I finished the lover hull now working up to the actual upper hull in the next steps. Tonight was a quick one added the side doors. Two parts were weirdly attached to the sprue and don’t make it.
I did get a bit of a chuckle when i read the step and realized it was 5 parts. I feel like sometimes there’s kits with 50 plus steps and half of it is for one or two parts In certain sequences

5 Likes
Also, any recommendations for figures to use in this diorama?
2 Likes
Looking good, I really need to get back to mine. It’s been on the shelf for a year or two now. Yours is coming along nicely. I am building “blossom” which made it about 25 yards a shore before throwing a track so mine will be fully onshore. There are pictures of some that are right at the water line disabled and certainly high tide would have partially submerged them
3 Likes
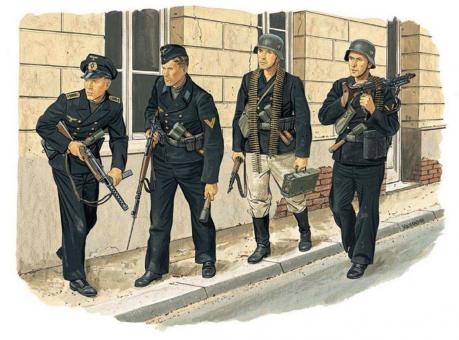
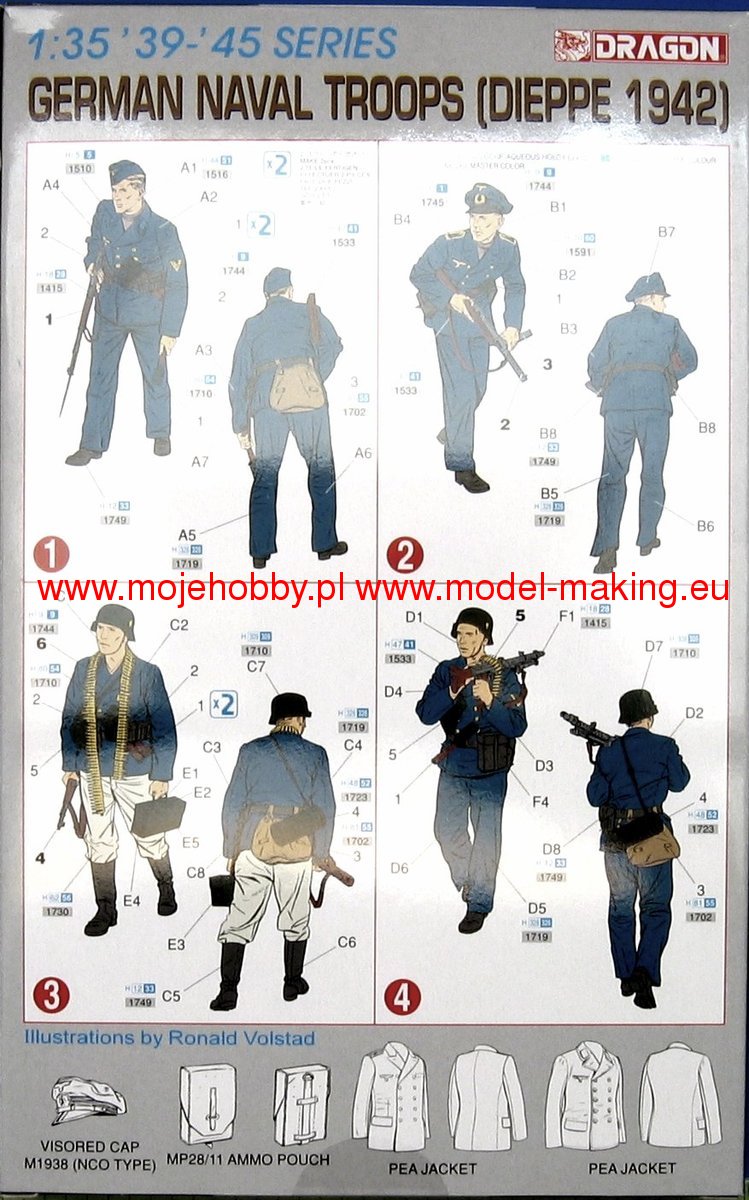
I am going to be using these guys from Stalingrad miniatures
I am using three figures from this set
https://archive.armorama.com/news/25775/index.htm
Inspecting the Churchill after it has been abandoned after the battle
1 Like
@Mead93 i have used those figures before and they are great.
I’m not sure which Churchill I’ll use. If i remember correctly a few made it to the wall.
3 Likes
Yeah they look fantastic. A few made it to the square!
3 Likes
There’s also the Dragon KM at Dieppe 6087
2 Likes
Having the real manual is the best source, of course. Even then, I still had to puzzle together some details because it mentions them but has no photos.
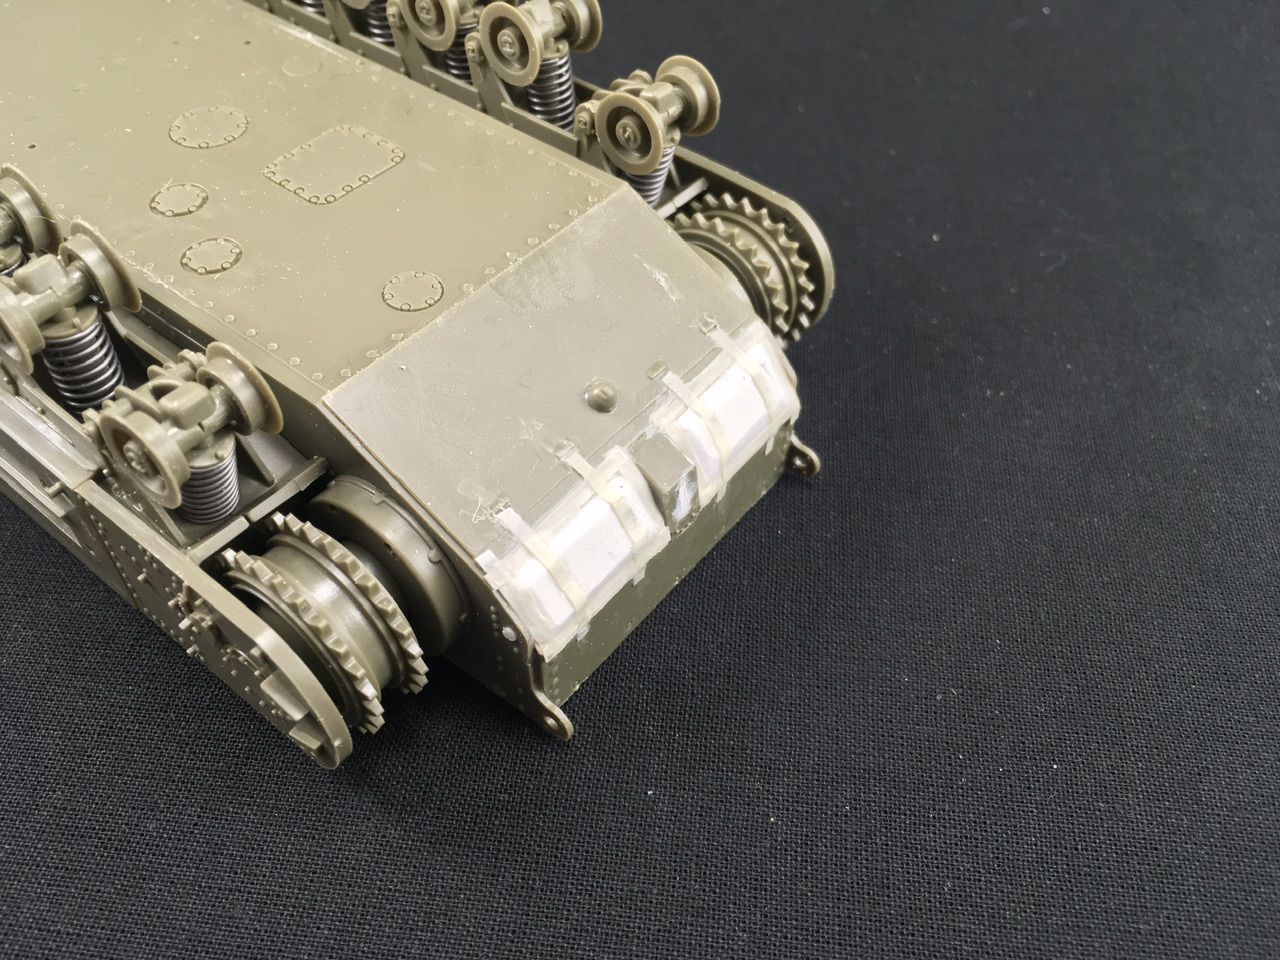
BTW, I forgot to mention that I made the covers over the exhaust from two pieces of plastic card each, one simply flat and the other a bit smaller with bevelled edges and rounded corners, glued onto the first to give the impression of pressed steel sheet.
That’s what I did with mine, too. Don’t forget to also add very dark grey or near-black along the edges, both on the tape and the hull to “seal” the tape.
I used Tamiya XF-69 NATO Black, FWIW.
7 Likes
That looks great! @Jakko i hate when manuals describe something and then don’t have pictures always leaves me scratching my head. But it makes it a fun puzzle once you piece it all together.
@jpwaller those look like a good set for an after the battle walking amongst the debris.
I’m looking for a Canadian figure or two to possibly add. Even if it’s someone running up the beach.
3 Likes
@Jakko what color of olive drab did you use on your Churchill? I did a color conversion chart online and it said that ammo migs zimmerit color was a good match for this tank at this time in history.
2 Likes
TBH, they were written for people who had the real tank at hand as well as the materials to be fitted, so they wouldn’t need more than “this bit goes there” for many parts. As a modeller, though, the question is not “where does this bit go?” but “what does that bit look like?!”
Mine is … um … what did I use again? Ah, yes, Mike Starmer’s Tamiya mix for SCC 15, of 5×XF-81 dark green + 1×XF-58 olive green + 1×XF-71 cockpit green, but with a little black added in because I felt it had come out too light. I then sprayed highlights with MIG IDF Green, followed by drybrushing with Revell Aqua Color 36145 light olive and then an overall wash of thinned Army Painter Strong Tone.
However, this is because my model represents a specific tank from Operation Infatuate II which took place on 1 November 1944, when it’s a reasonable assumption that the tanks were painted SCC 15 olive drab. The tanks at Dieppe would not have been ![]() That raid, Operation Jubilee, is not my field, really, but as I understand it, they would have been painted either khaki green No. 3 (the older ones) or SCC 2 brown (recently painted tanks).
That raid, Operation Jubilee, is not my field, really, but as I understand it, they would have been painted either khaki green No. 3 (the older ones) or SCC 2 brown (recently painted tanks).
4 Likes