Has anyone used tile thin set (mortar/cement) to make a base out of it? I have some from a bathroom remodel I was thinking of using.
I don’t see why not. I have used all sorts of house DIY materials in the past. I’m using a general quick dry filler at the moment for kits as it can be painted and doesn’t shrink and also you can smooth it with a damp finger for minimum sanding… And it cost £3 for a large squeeze tube of it.
1 Like
Ryan, it may also be testing some on a small area to start with. Just to see how it dries etc etc …
1 Like
I have some every day recyclable containers I have used Aves Clayshay in, I was wonder if thin set can do the same thing. Not a patch or top layer but the whole base.
Starting small like for figures, not sure a sheet of paper would work without a screen to prevent flexing but that is why I am asking, I am sure someone else tried it.
I use this sort of tiling cement as my prime base-making material these days. In UK it’s known as “Grout” and you can buy it pre-coloured (I use a sort of pinky-sand colour).
I use it as it’s also an adhesive so I can add texturing materials, ground scatter and anything else I wish and know it will all be secured; my bases are usually 12mm thick MDF cut to the following sizes: 7" square, 8" square then the paper sizes of A4 and A3. This selection is all predicated on the use of the boxes such paper comes in (these days I scrounge from my local print shop) as with the box inverted, I can place the base in the lid, and then the body of the box provides for antennae clearance. This facilitates both storage and transit (I display at around 6 shows a year - or at least in a pandemic-free year!).
I stress this is all based on using 1:35 scale models; I use the smaller squares for - obviously - smaller vehicles. The A4 base will normally take a standard MBT - think Leopard for instance - yet still give scope for a bit of activity (see my Leopard 1A1 within the Cold war bit if you like); for larger tanks and the like - especially some of the monsters from the 50s - I use the A3-sized base, with usually a secondary vehicle thrown in to augment whatever story I’m trying to tell; often there’s no story at all(!) but I do like to set the model in context as it were.
A4 and A3 are a European-wide “official” size of paper initiated by the Germans and must have now been the norm for God knows how long. Anyway, that’s the reasoning behind my selection of sizes; the smaller square bases will still fit into such boxes.
I sand the bases down and apply a stain and a varnish. If I need any contour changes I will simply glue on (PVA glue) cardboard shapes, almost a bit like replicating contour lines from a map until I have an approximate height. Once they’re dried I then apply the grout, having stirred it thoroughly; I use an old flexible-bladed kitchen knife, then sprinkle on any scenic effects such as described above. If I’m displaying a tracked AFV I wait for around 40 minutes or so when the grout is beginning to harden and cover it with some cling-film. I then press the AFV into the grout to replicate track marks. Tracks from wheeled vehicles can also be carried out like this.
Once completely dry I generally spray with a good base colour such as dark earth (for European-type terrain). If I want to add static grass I’ll do it now using a spray adhesive; this will then get a colour application too. The whole colouring is normally blended together, including the vehicle by good old Tamiya Buff. Along the way I sometimes add shaving brush bristles if I need to ring the changes with any need for longer grass clumps. Bushes and brambles can also be added to taste.
This may well be far more of an answer than you need, but hopefully will help somewhere(!)
3 Likes
That was a nice build and diorama. What I was thinking about in your example is to use thin set to replace the mdf board but not on that large of surface, maybe A5/6/7 size. I have some grout left over. Grout being what goes between the tile, thin set is the glue that holds the tile to the wall.
I haven’t tried thinset but something I’ve been meaning to share with the group is DAP Floor Leveling Compound.
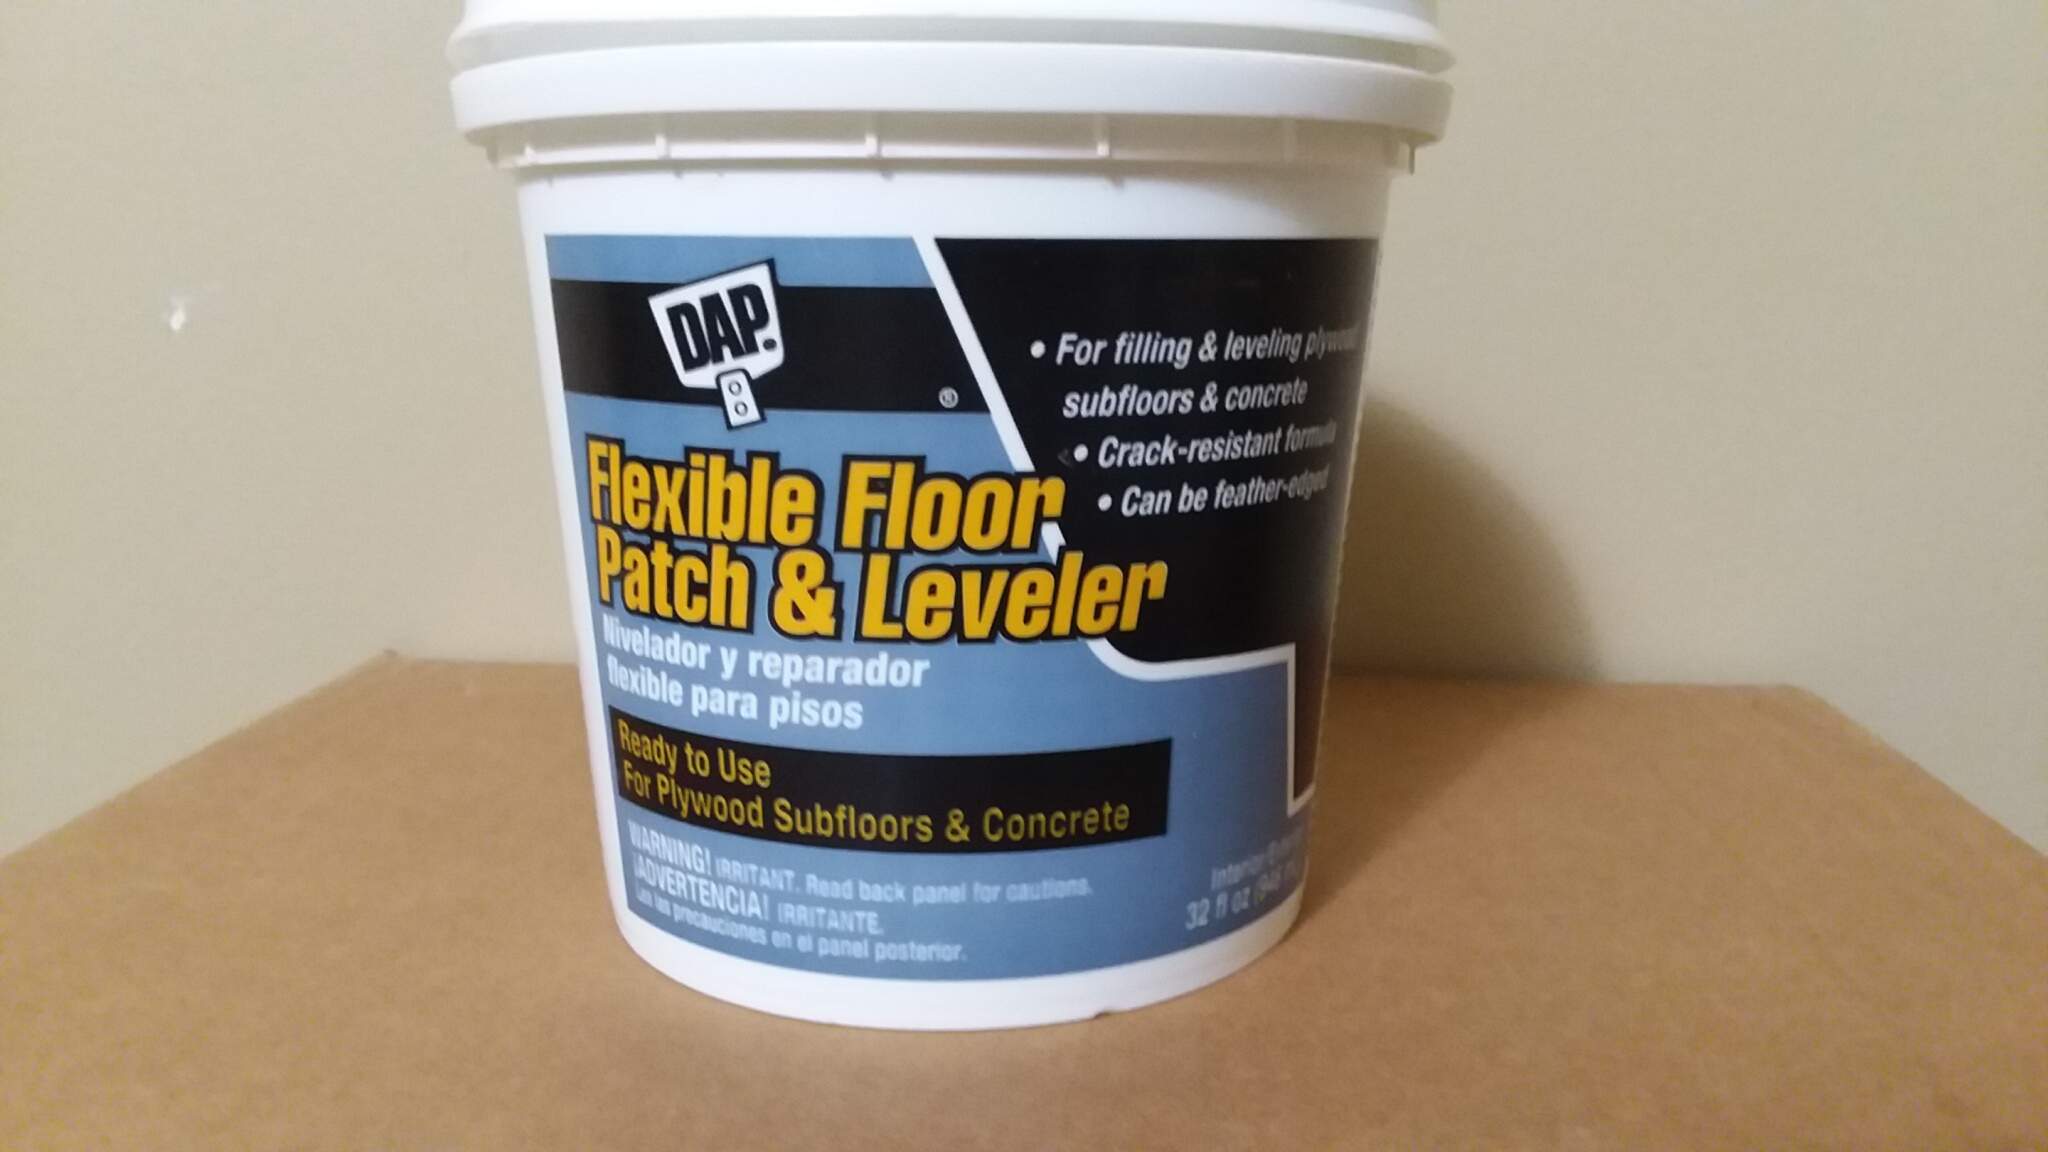
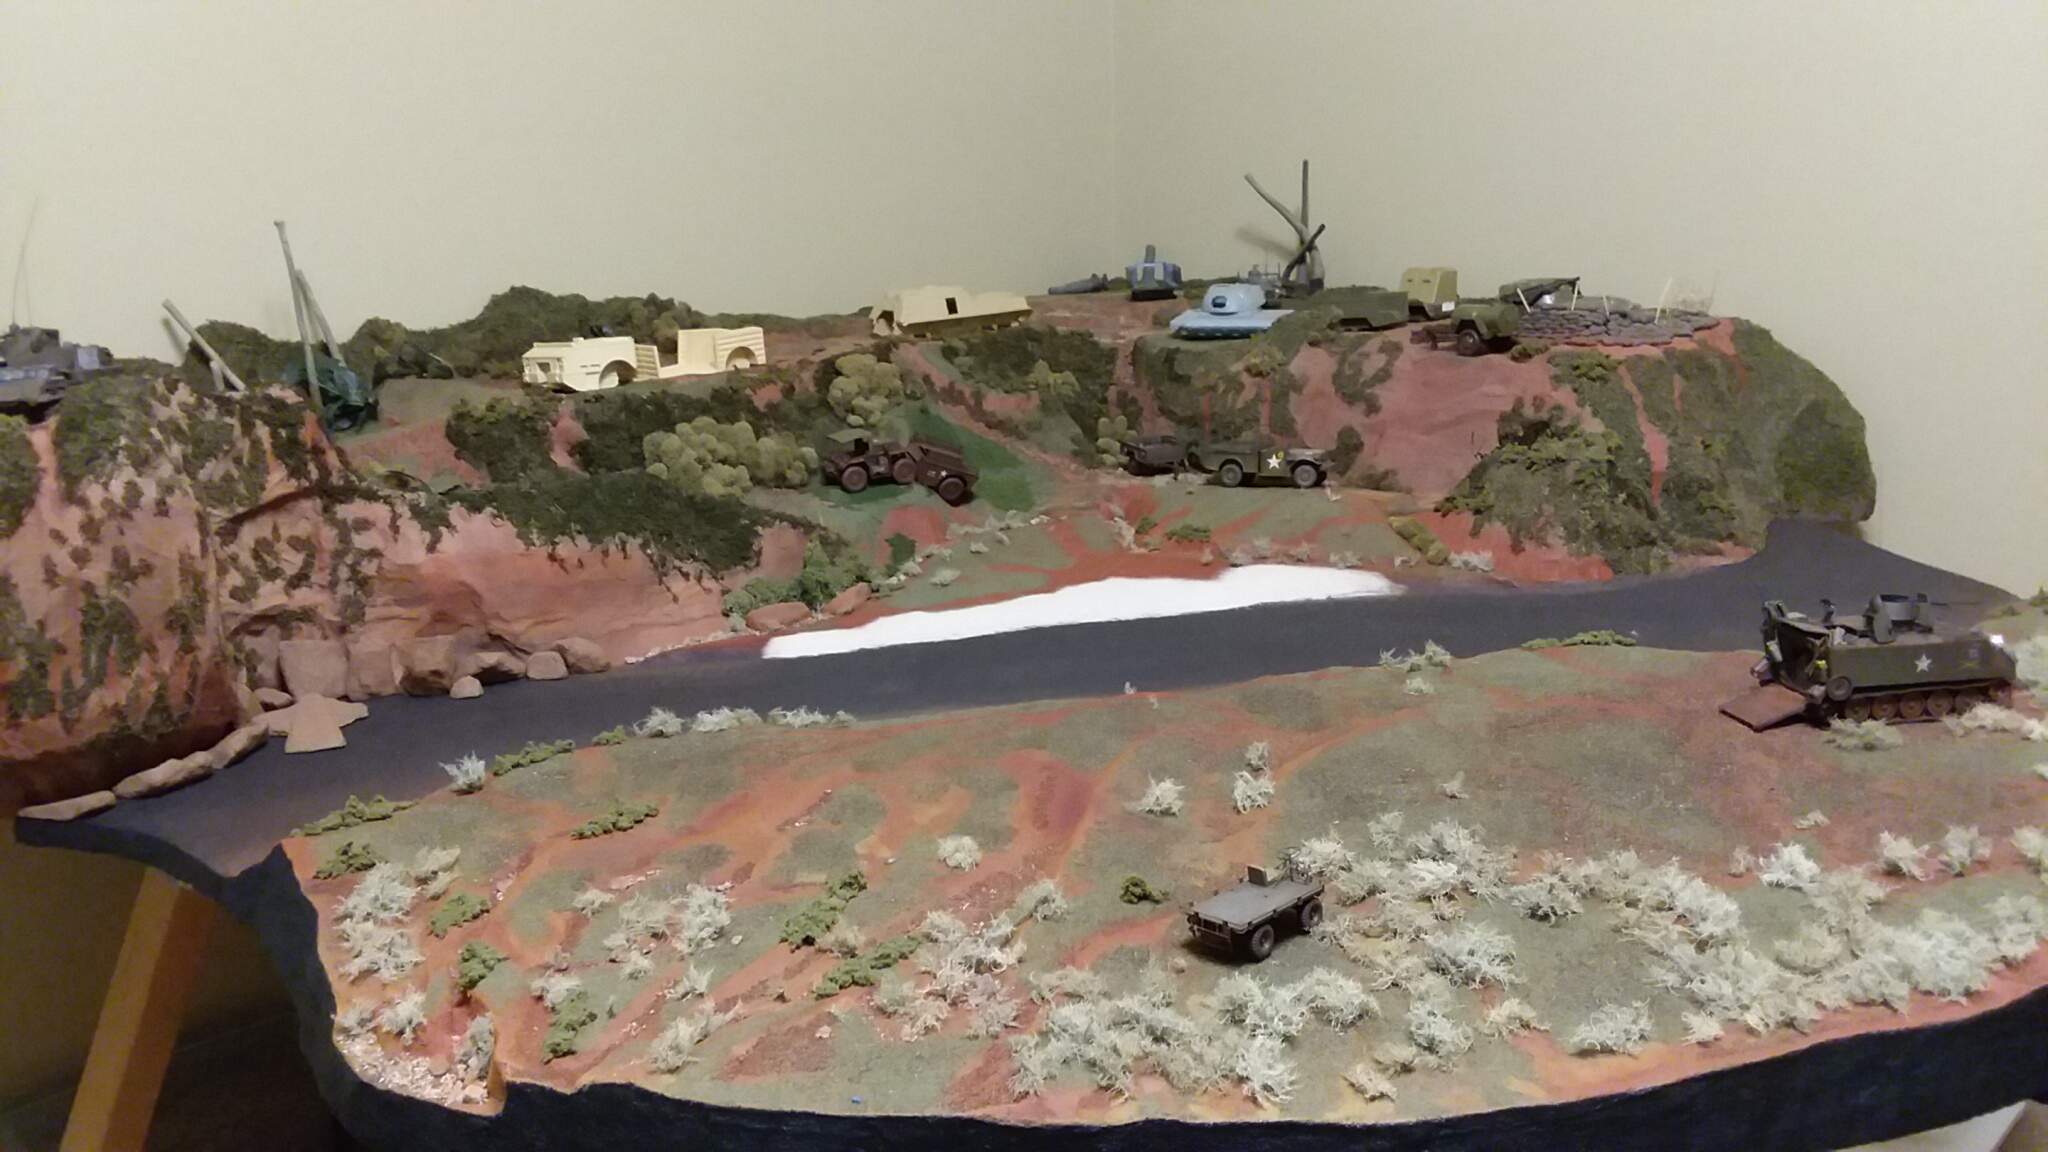
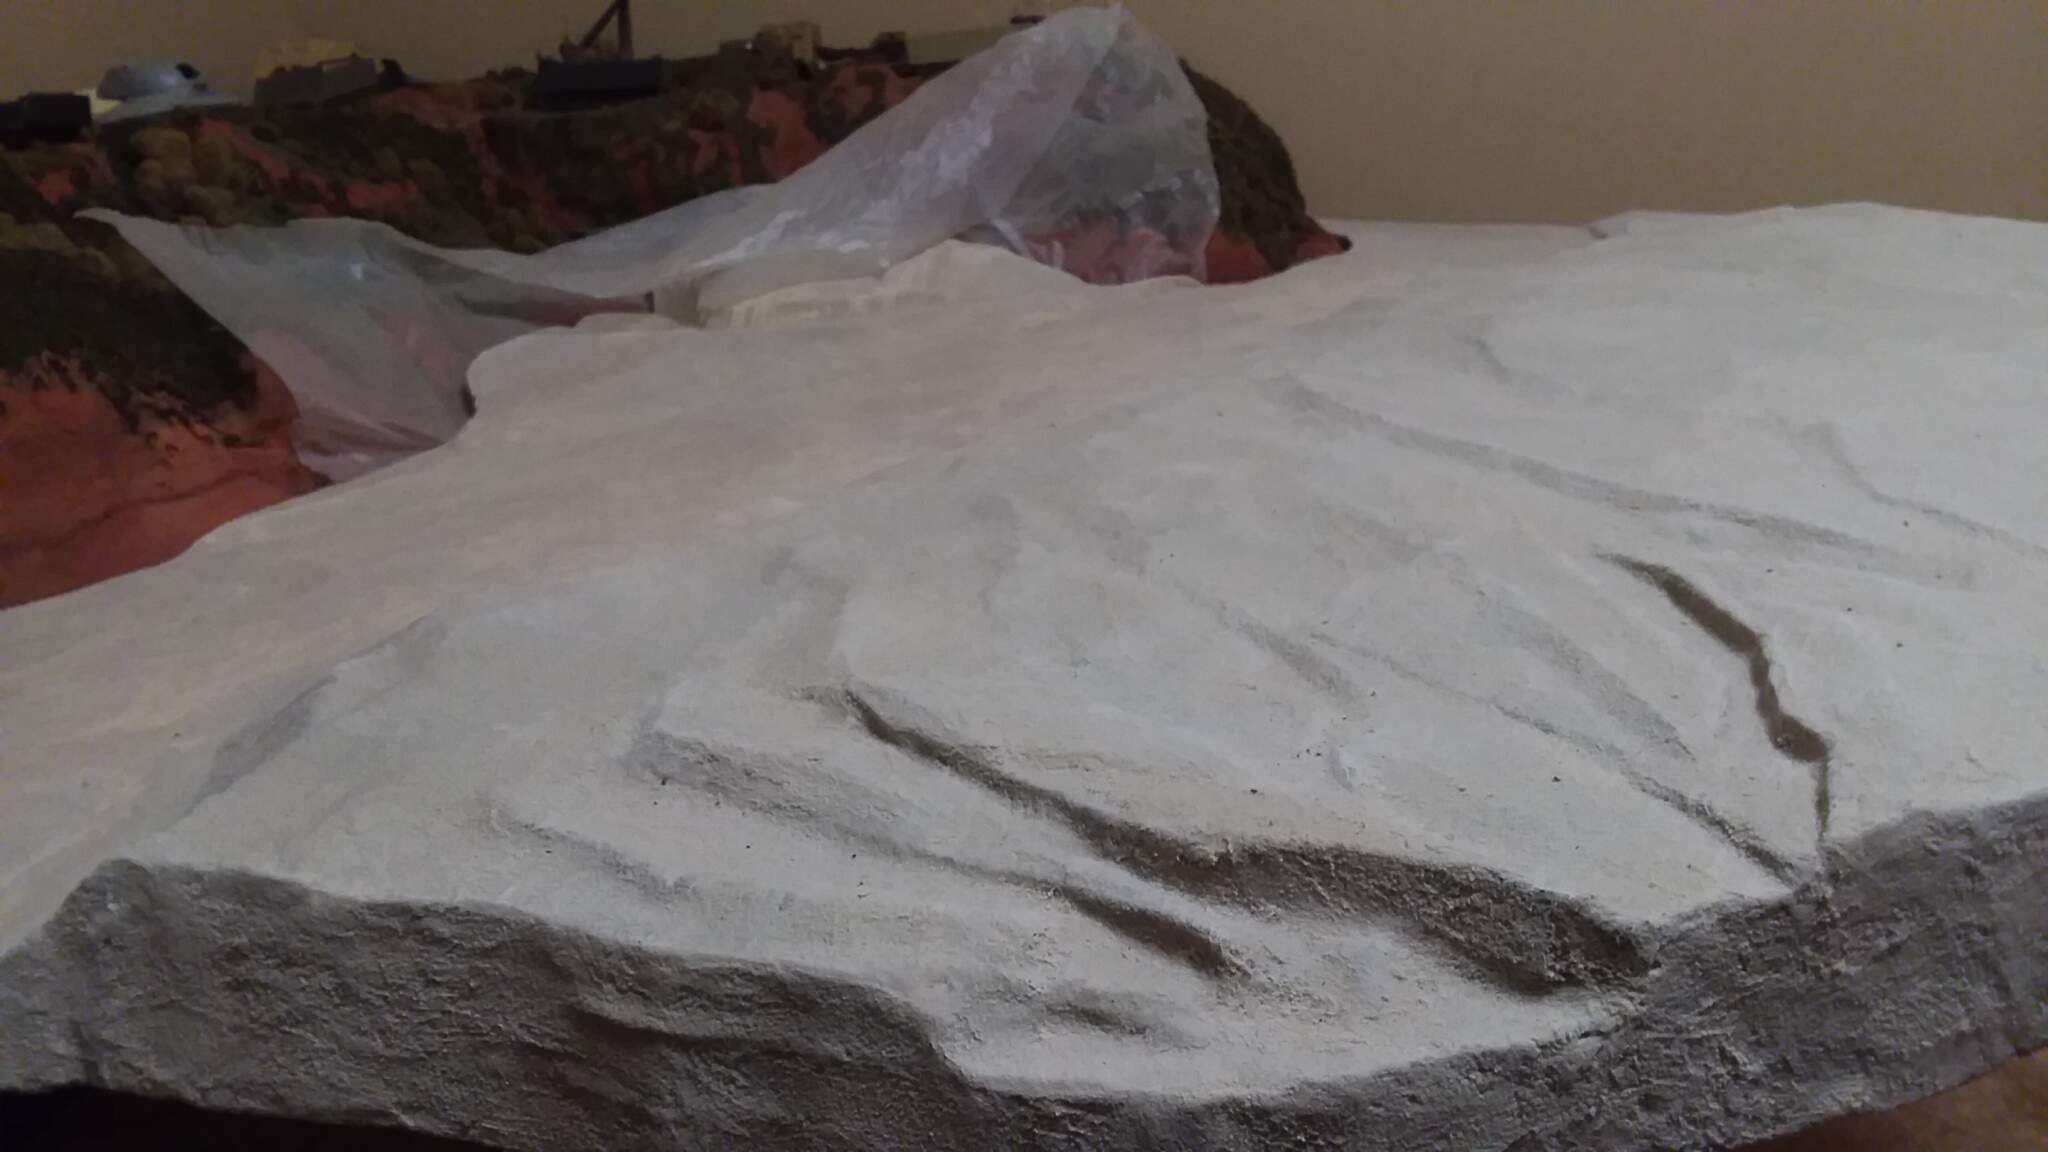
This is what I used on the 'Nam dio I’ve been working on for, well quite some time now,
it’s Latex based and water clean up, it has an aggregate (sandy) texture but dries in minuets,
about a half hour and it’s sand-able, depending on the thickness of the application, usually less than 1:16 inch, it’s flexable when dry and not brittle like plaster.
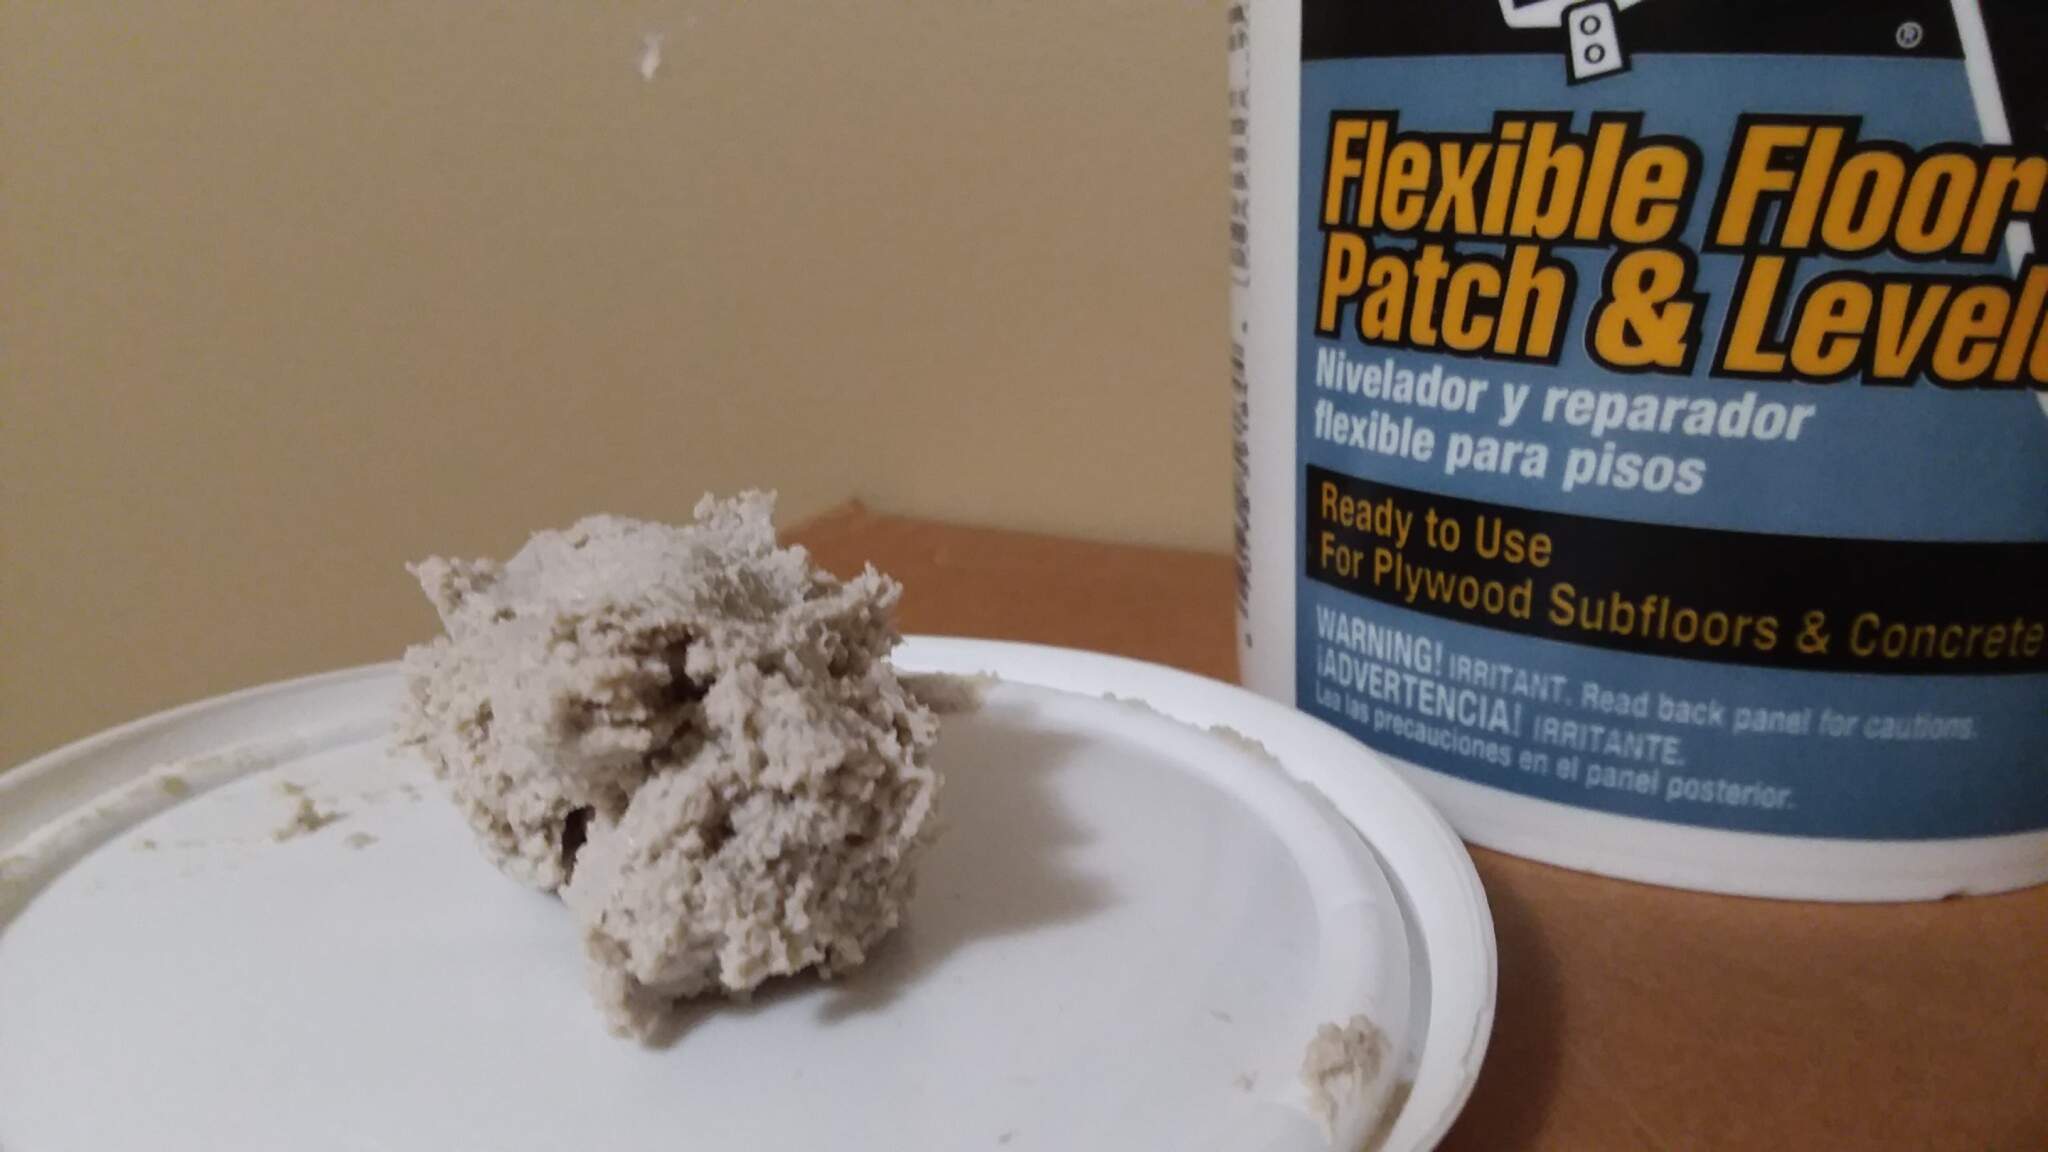
The technique I use to apply it is to shape the base from styrofoam, this is just a crude foundation on which I will glue very thin plastic sheet, the plastic grocery bags any shopping trip work well, this layer serves to provide a surface barrier to hold the compound and prevent the product from filling the large gaps between the styro peices. Next comes a layer of cheesecloth glued down with PVA or white glue ( used throughout the construction) this layer provides a surface that will “grab” the compound . . .
The compound is just smeared on with a couple fingers much like working with masonry mortar. After drying and useing a sanding block to knock off any loose bits it can be painted with whatever paint you choose, I used latex craft paint . .

The beauty of it is my diorama base, built in two sections, weighs less than twenty pounds which is much lighter than a plaster application would be considering the dio is about 6’ x 6’ and can be moved by one person . .
.
. . . the boulders are just chunks of styro wrapped with cheesecloth (gauze fabric) with compund applied and painted.
Well for what it’s worth just a different way I found to skin a cat.
Cajun 
3 Likes
Roger that; excuse my misunderstanding what the “thin-set” was. I think this side of the Pond we use grout as it is an adhesive in its own right.
Thanks for the comments re the Leo; I was really just using it to exemplify my reasoning of sizes.
I suppose any adhesive medium would work if it has, well, sort of substance enough, and doesn’t evaporate at all (like some glues seem to do). I agree with John, experiment on something small at first in case you release a modelling nightmare! Good luck.
1 Like
Nice example using DAP, maybe something the thread can expand in to with other materials.
Every region even within a country has different ways of doing things, one is not more right then another as it works for that area and may not work for the other.
Yeah as mentioned, thinset and grout are not the same thing. Setting tile with grout will have them popping up in no time, thinset has a much stronger bond. According to this UK website, the terms seem to have the same meaning as here.
.
As for using it as the entire base structure, I’d recommend putting something in it, like a mesh or wire mat of some sort Since it’s made to be applied in thin layers, building it up to thick proportions will have it much weaker and prone to breaking up into pieces.
1 Like
Thanks Ken. I have not played with thin set much to see if it can be sanded or messed with. I am thinking anything bigger then your VW truck dio would need screen/mesh to enforce but something that size maybe not.
Here is some small bases made with Aves Clayshay and recyclable containers.
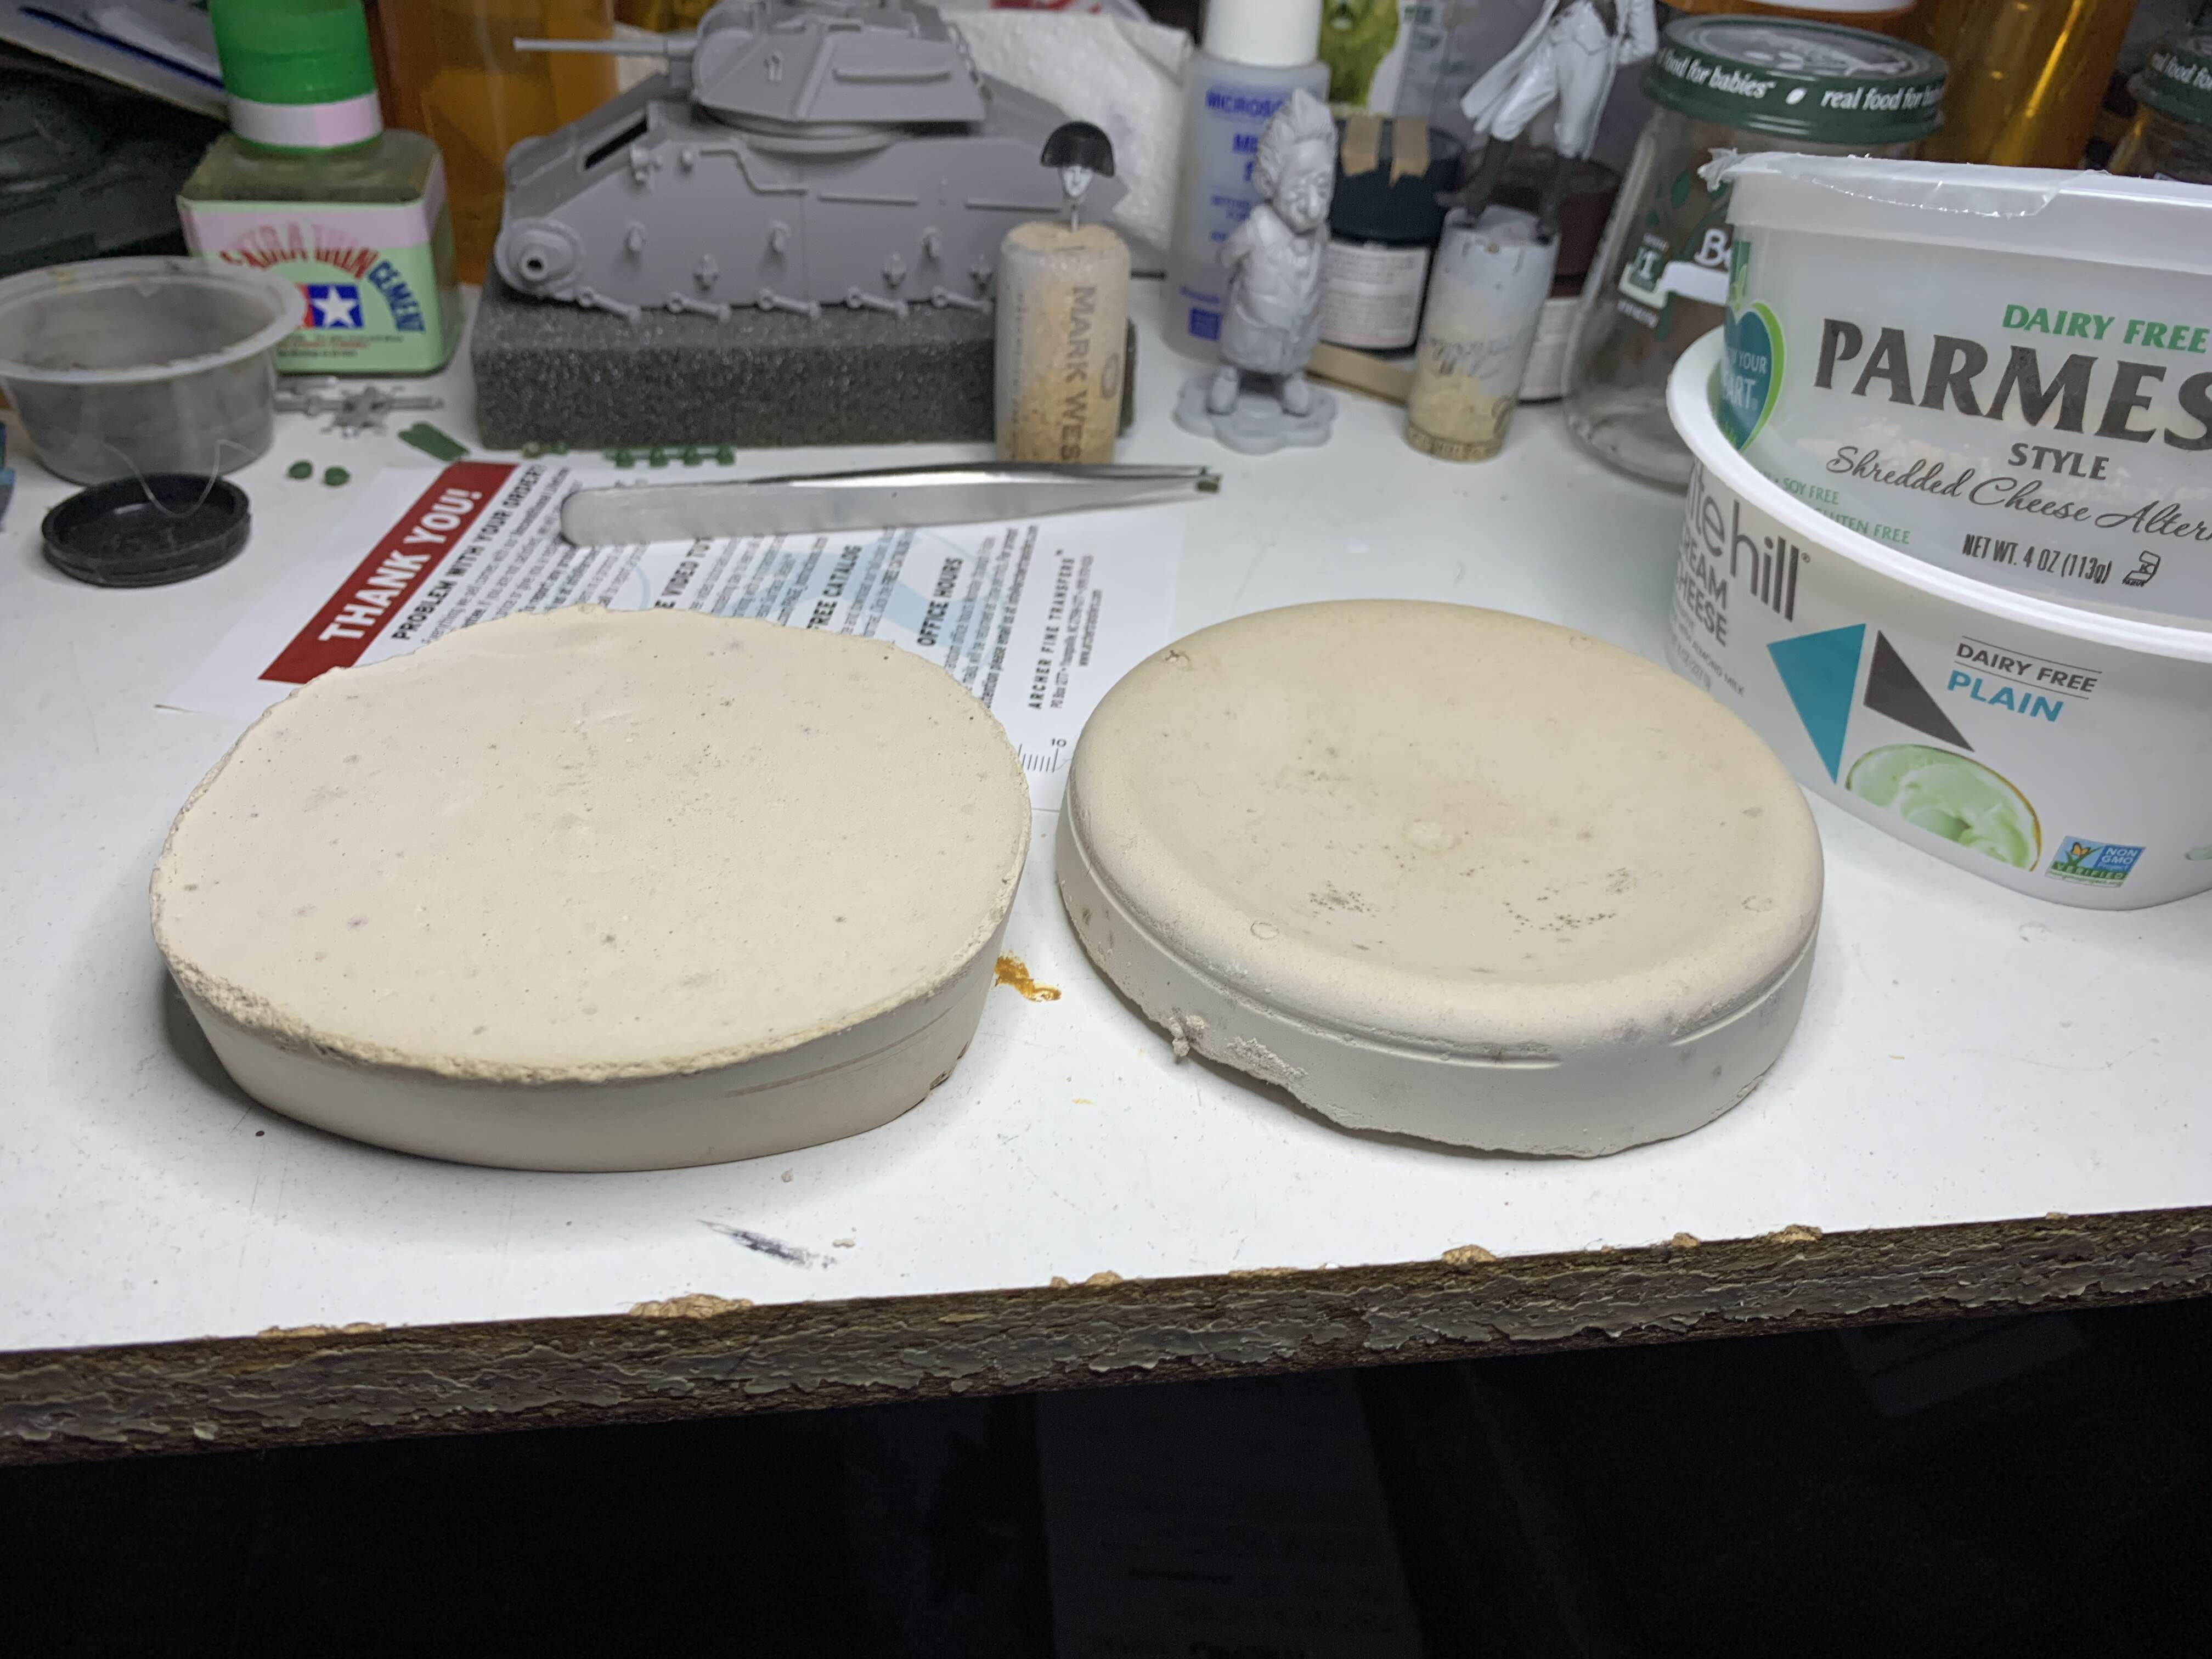
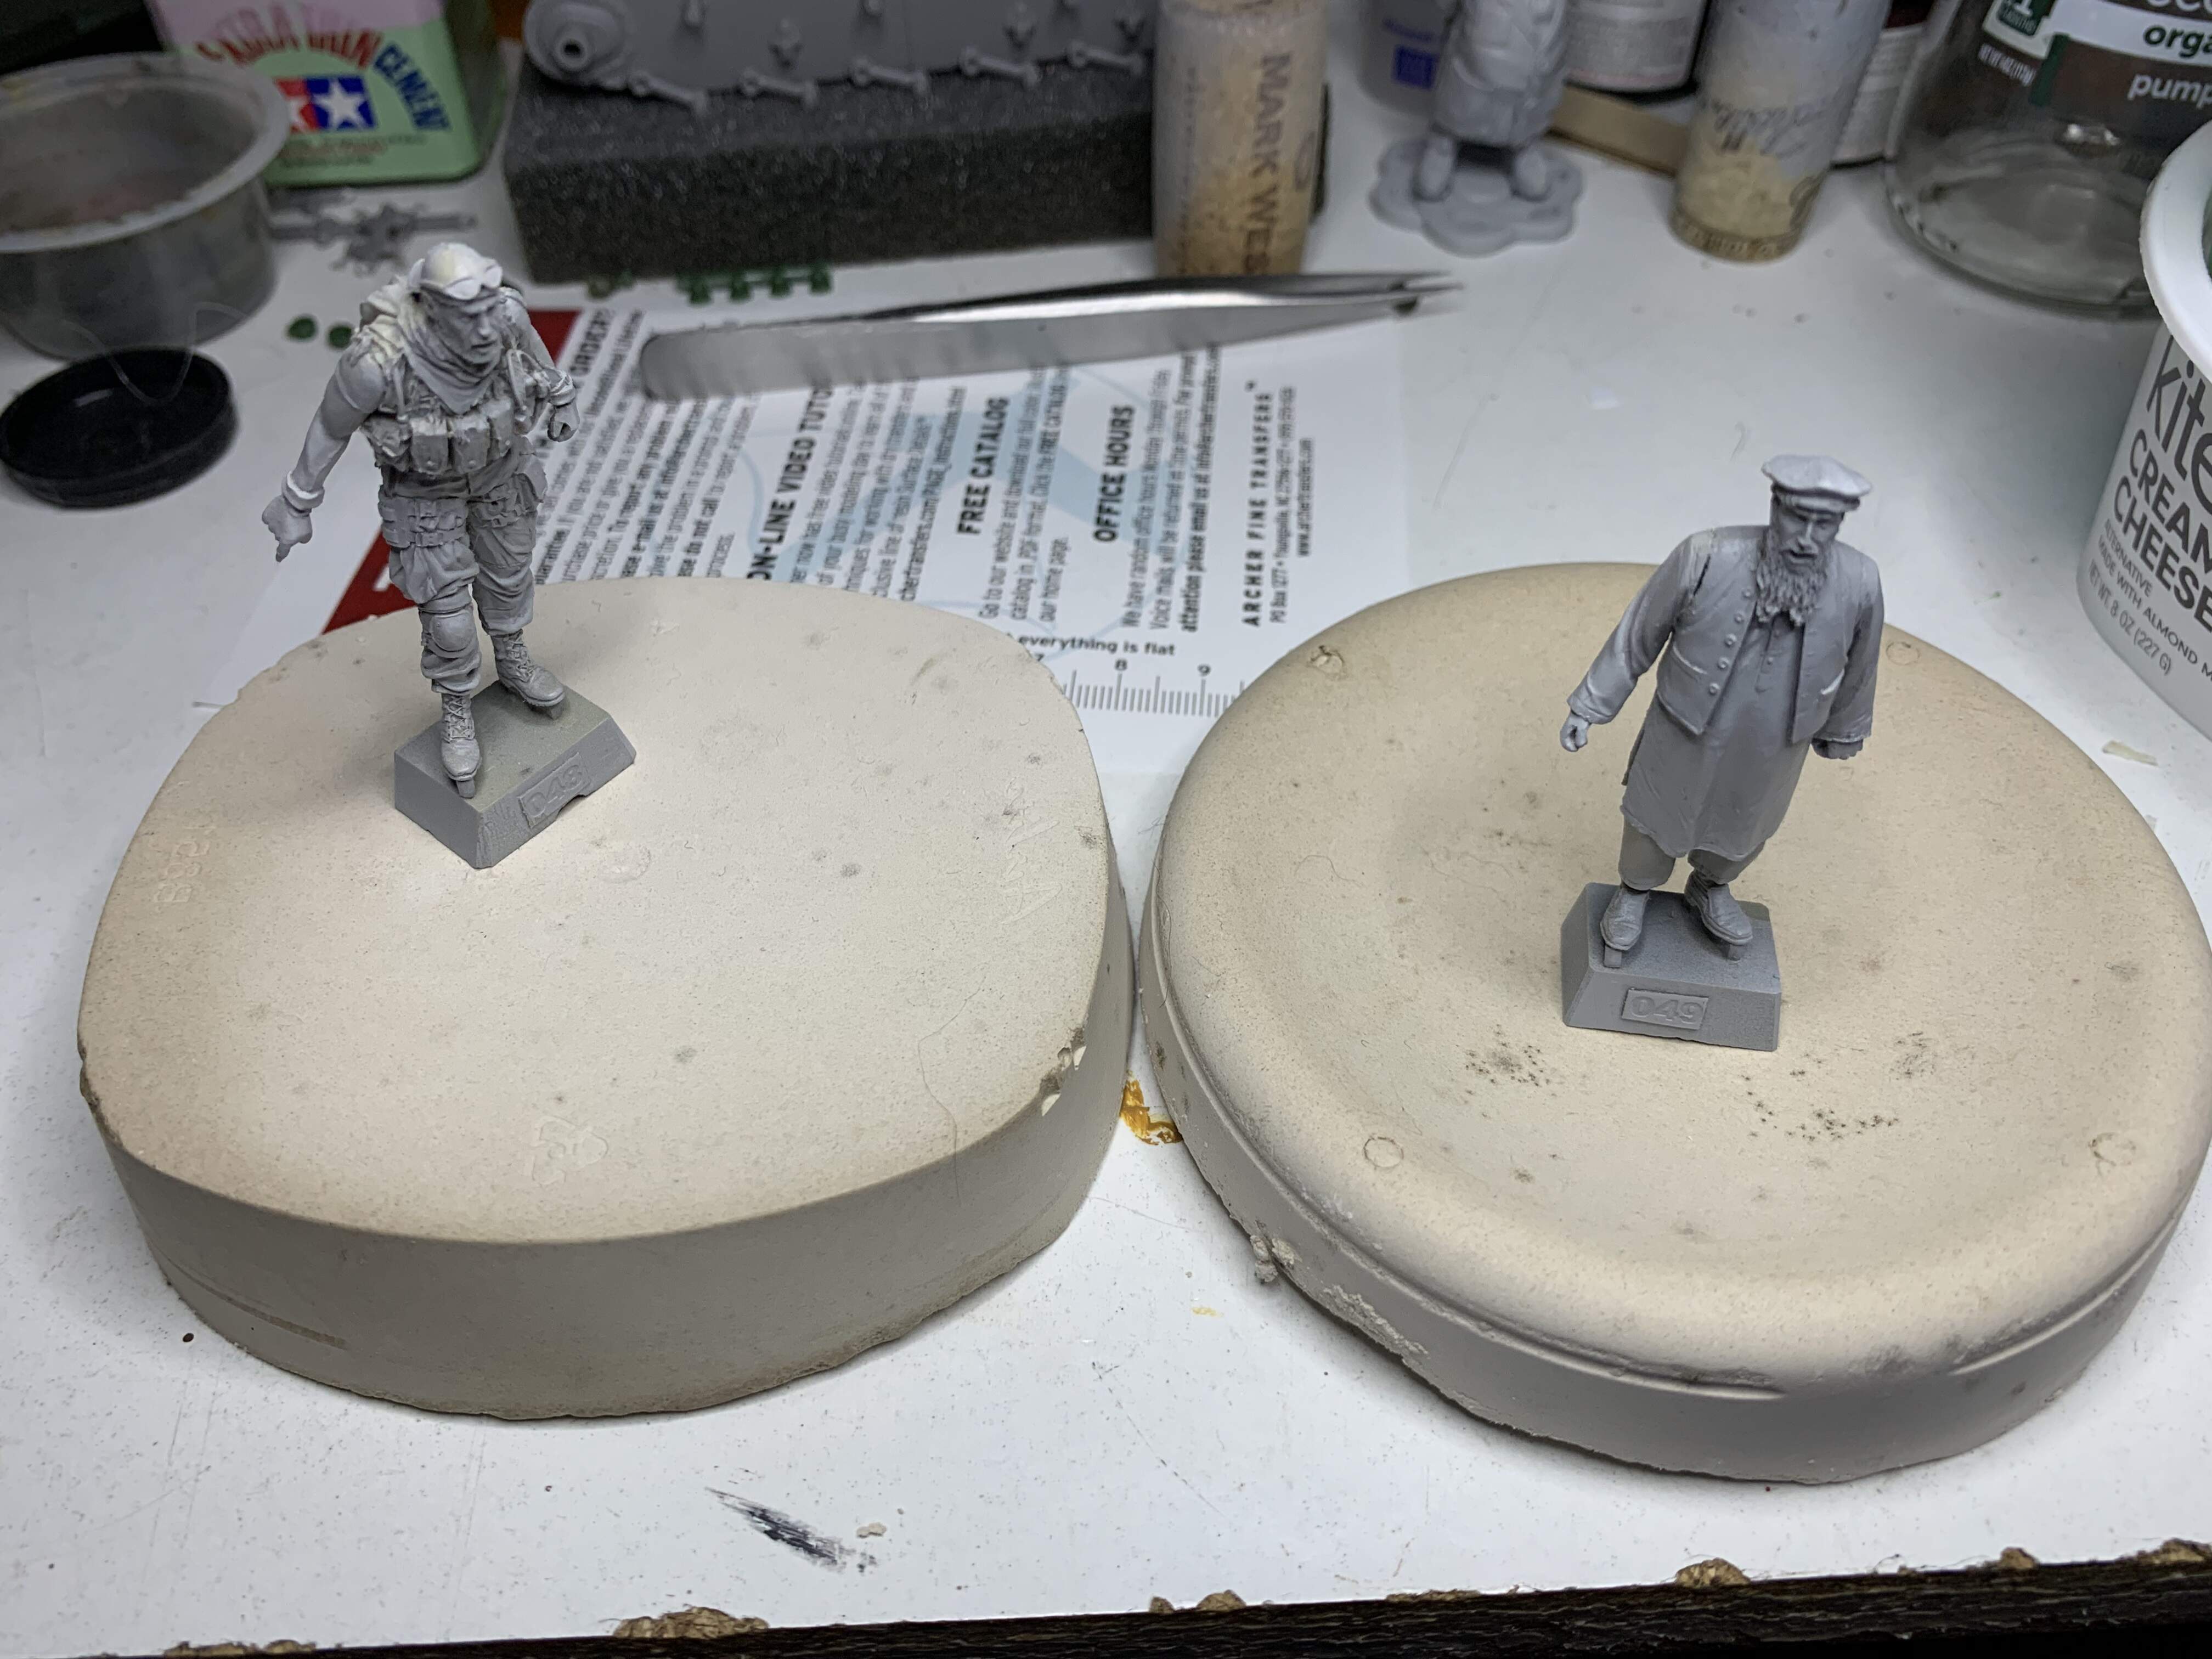
A few 1/35 figures for size reference.
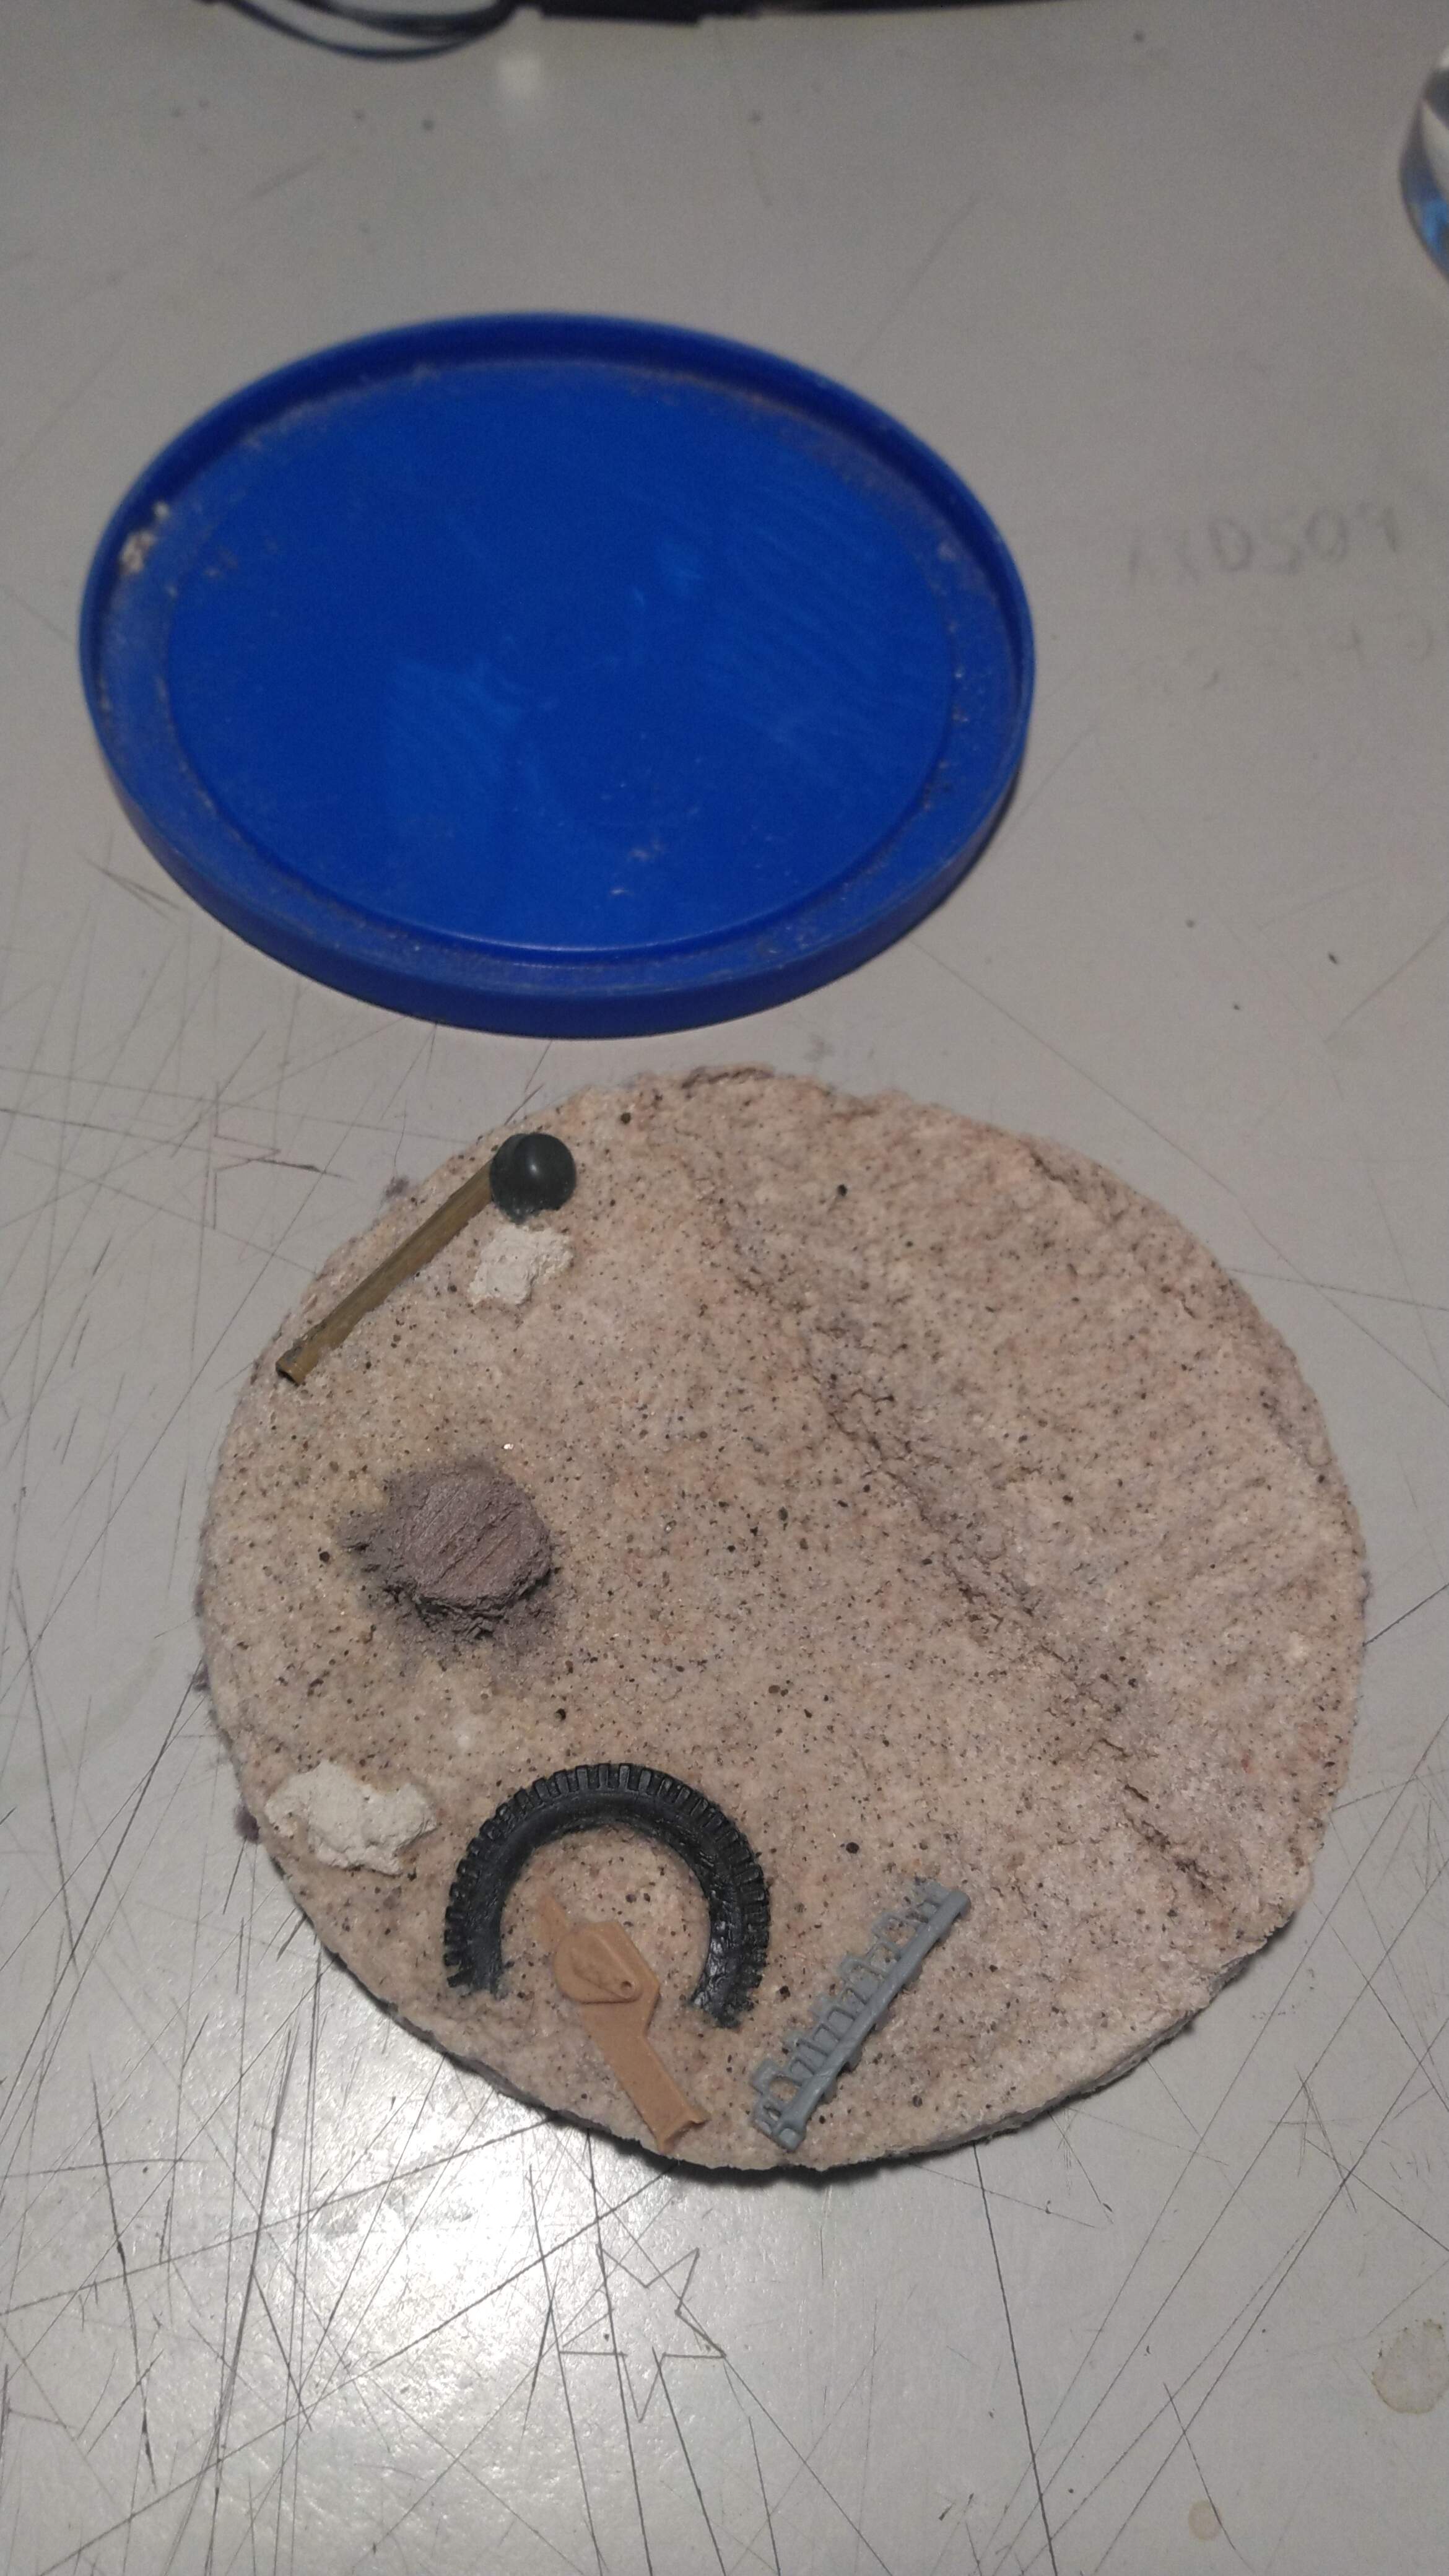
Yup, I’ve done similar things.
Like this lid off an old Maxwell House coffee can.
.
Yeah I have no idea how it will behave. I know when it’s thin, it’s hard as nails but when we knock the remaining extra out of the bucket afterwards and it hardens to a large pile, you can pick up that pile once dry and break it apart in your hands.
1 Like