DML 9059 Jagdpanzer IV A-0

Hey, hey. While I wait on yet another order of paint, I continue to work on a bunch of different models.

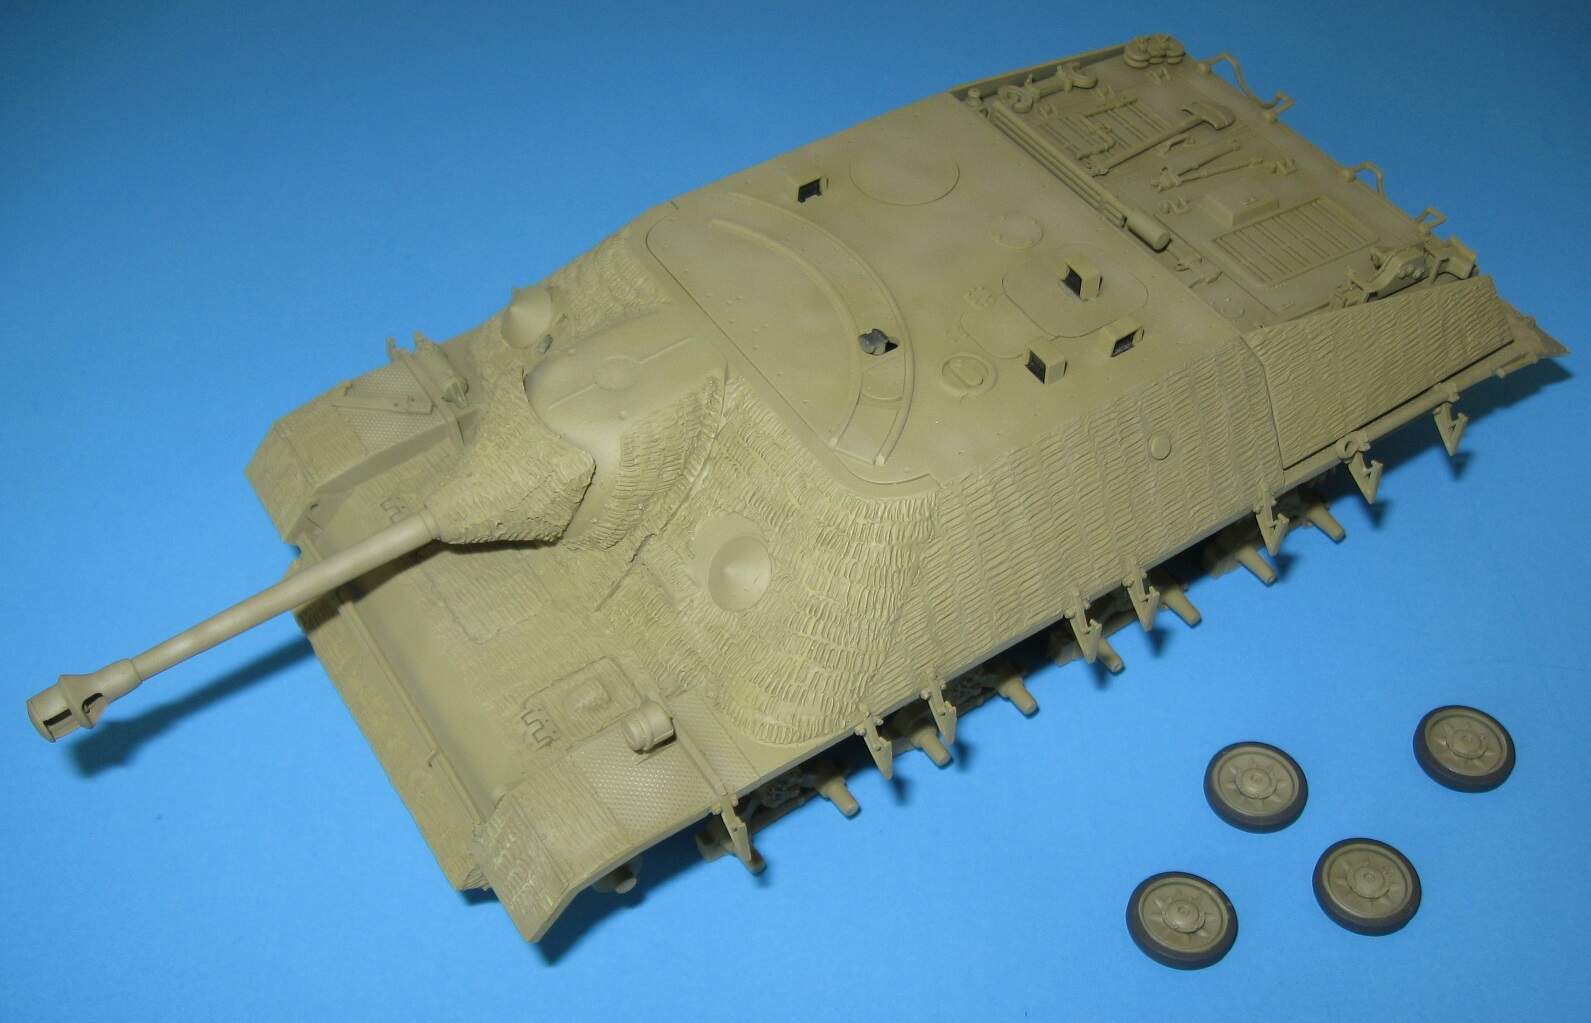
This DML 9059 Jagdpanzer IV A-0 was started four or five years ago during one of my previous attempts to return to model building but health stuff nixed that. I rediscovered the model mostly completed, spread over four different boxes, with a few parts painted. The Zimmerit paste was about two thirds completed.

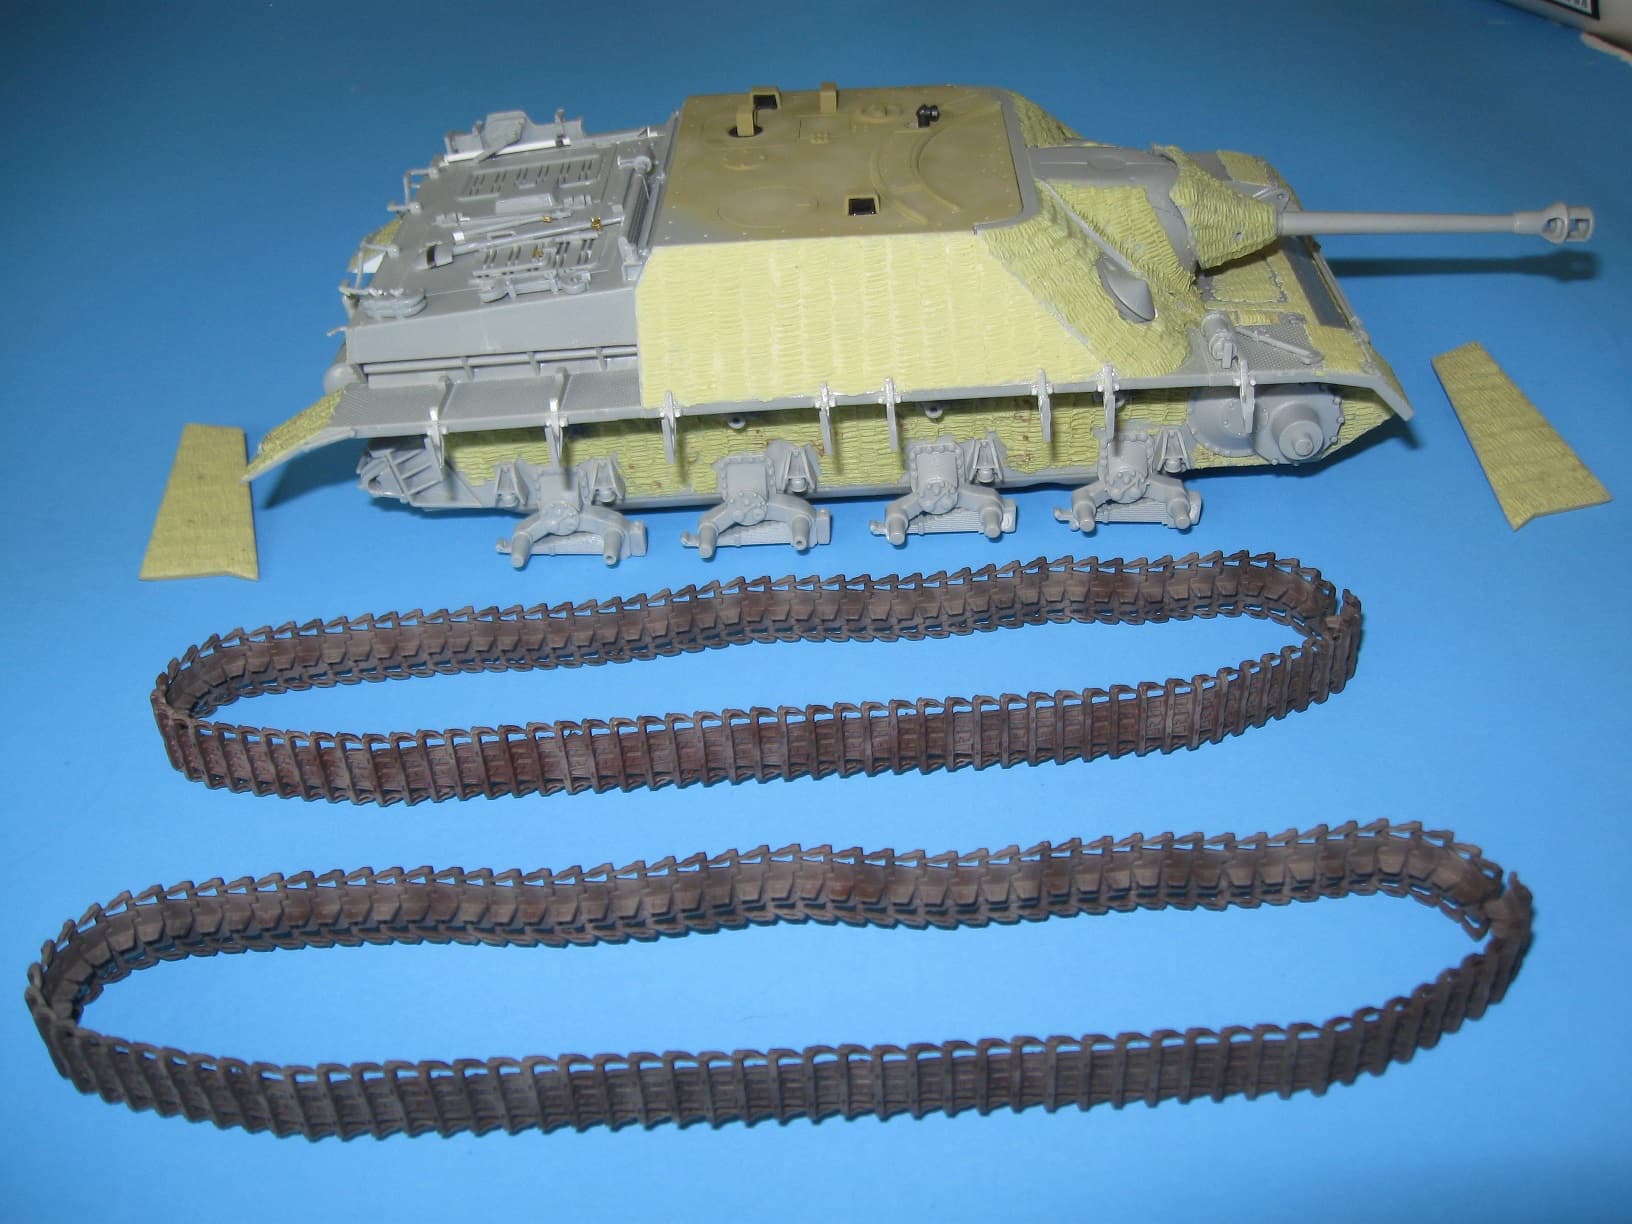
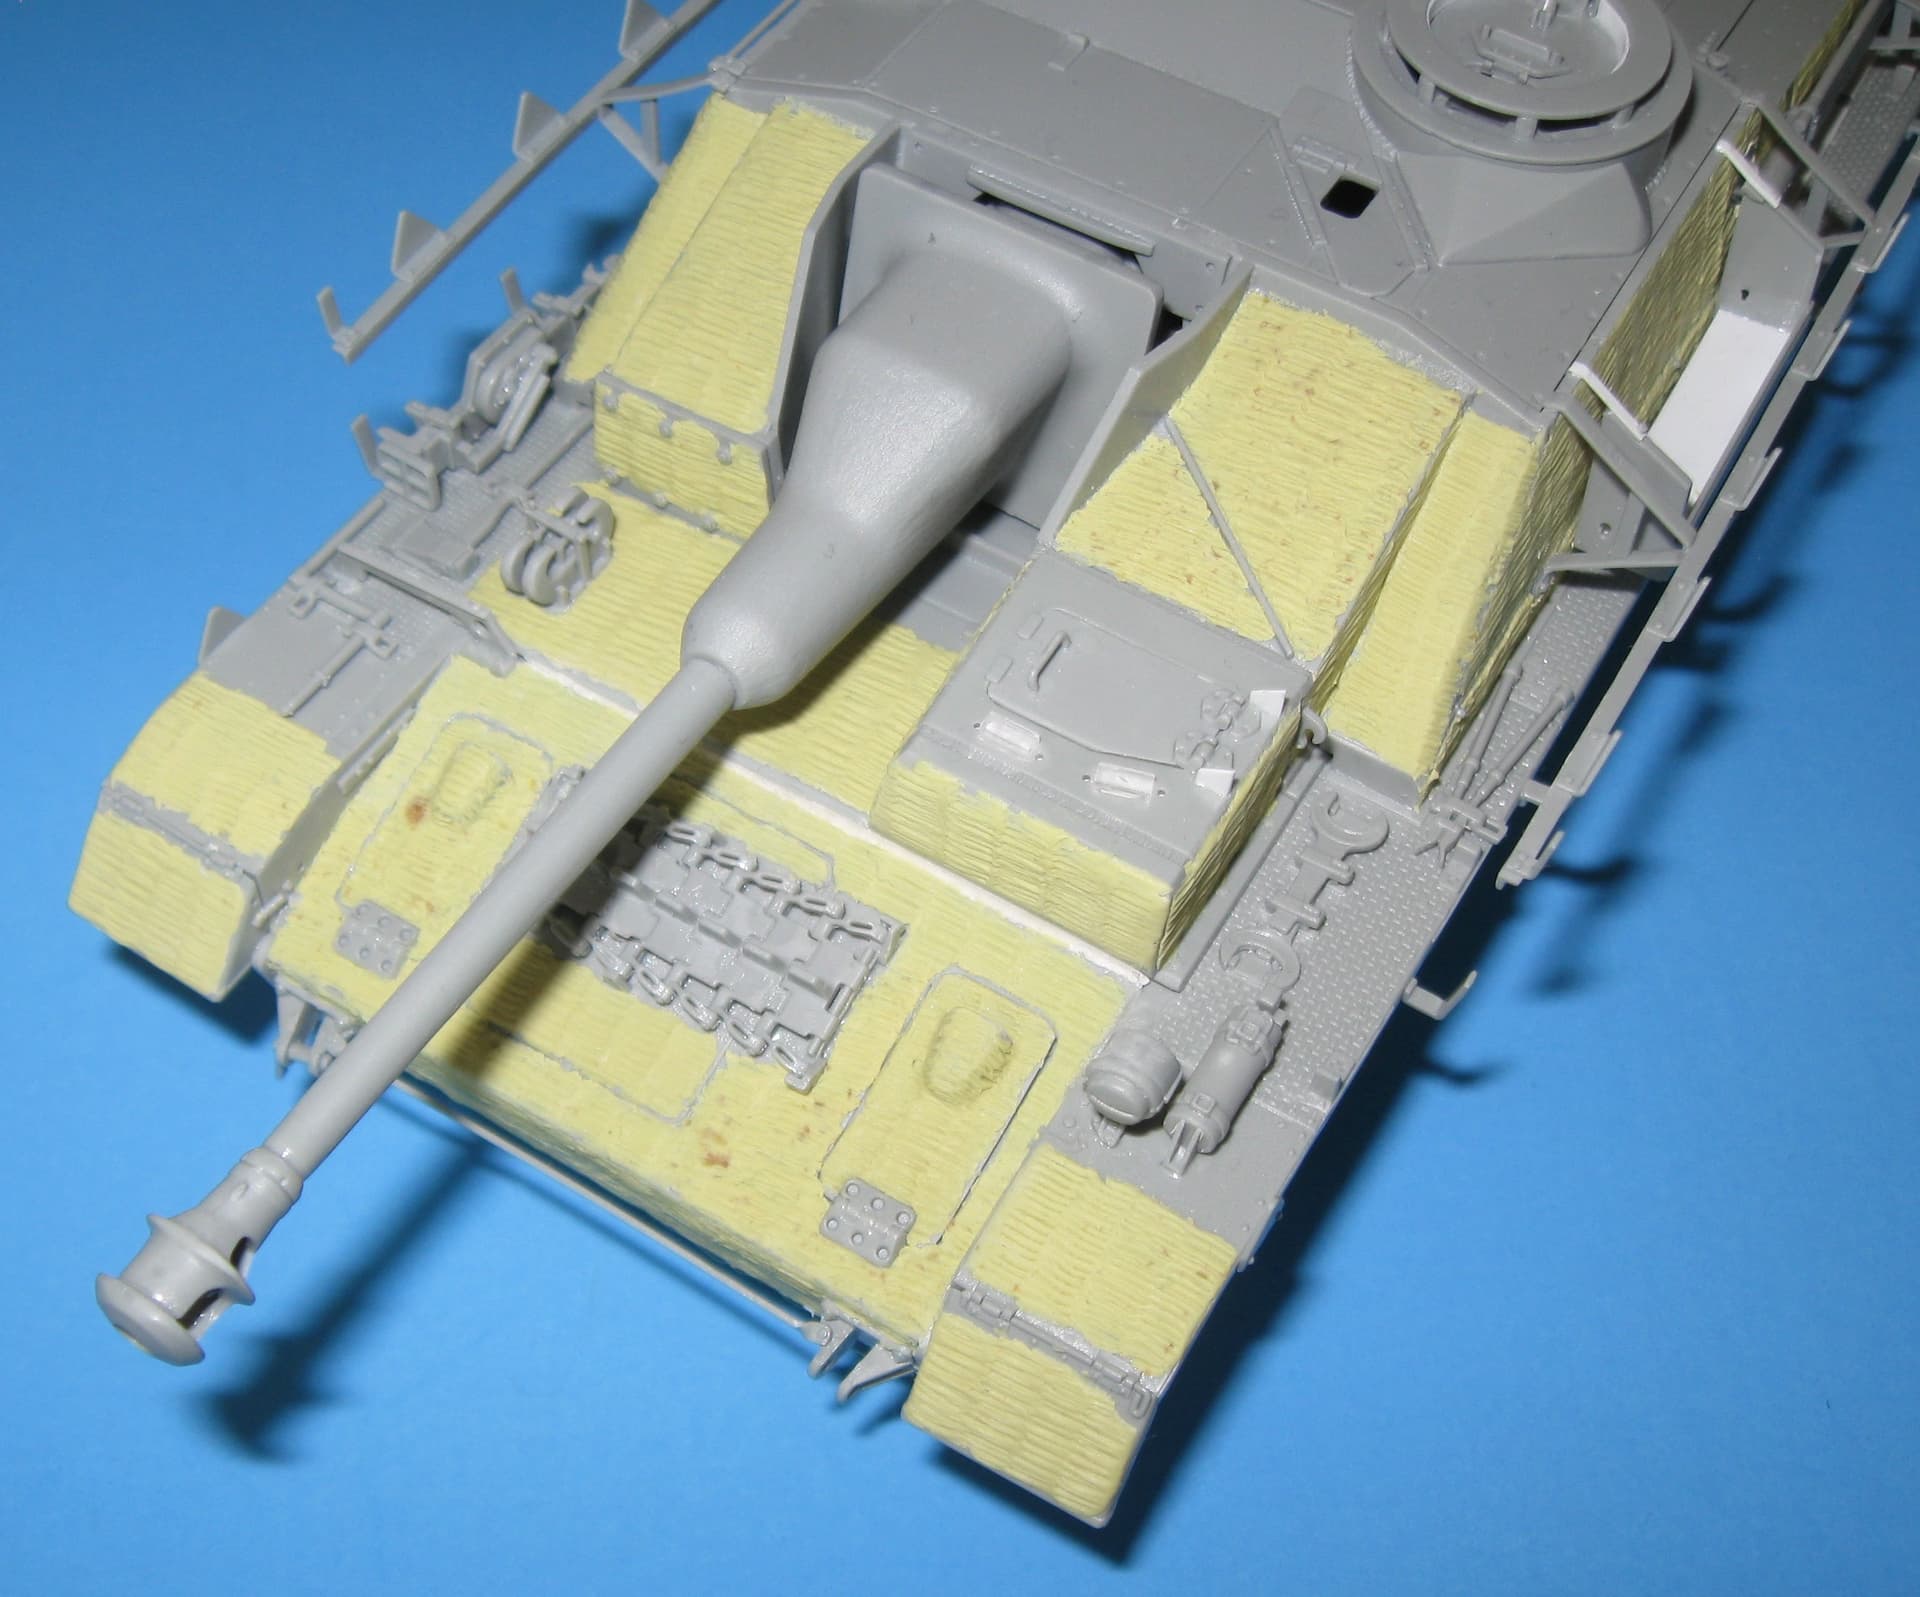
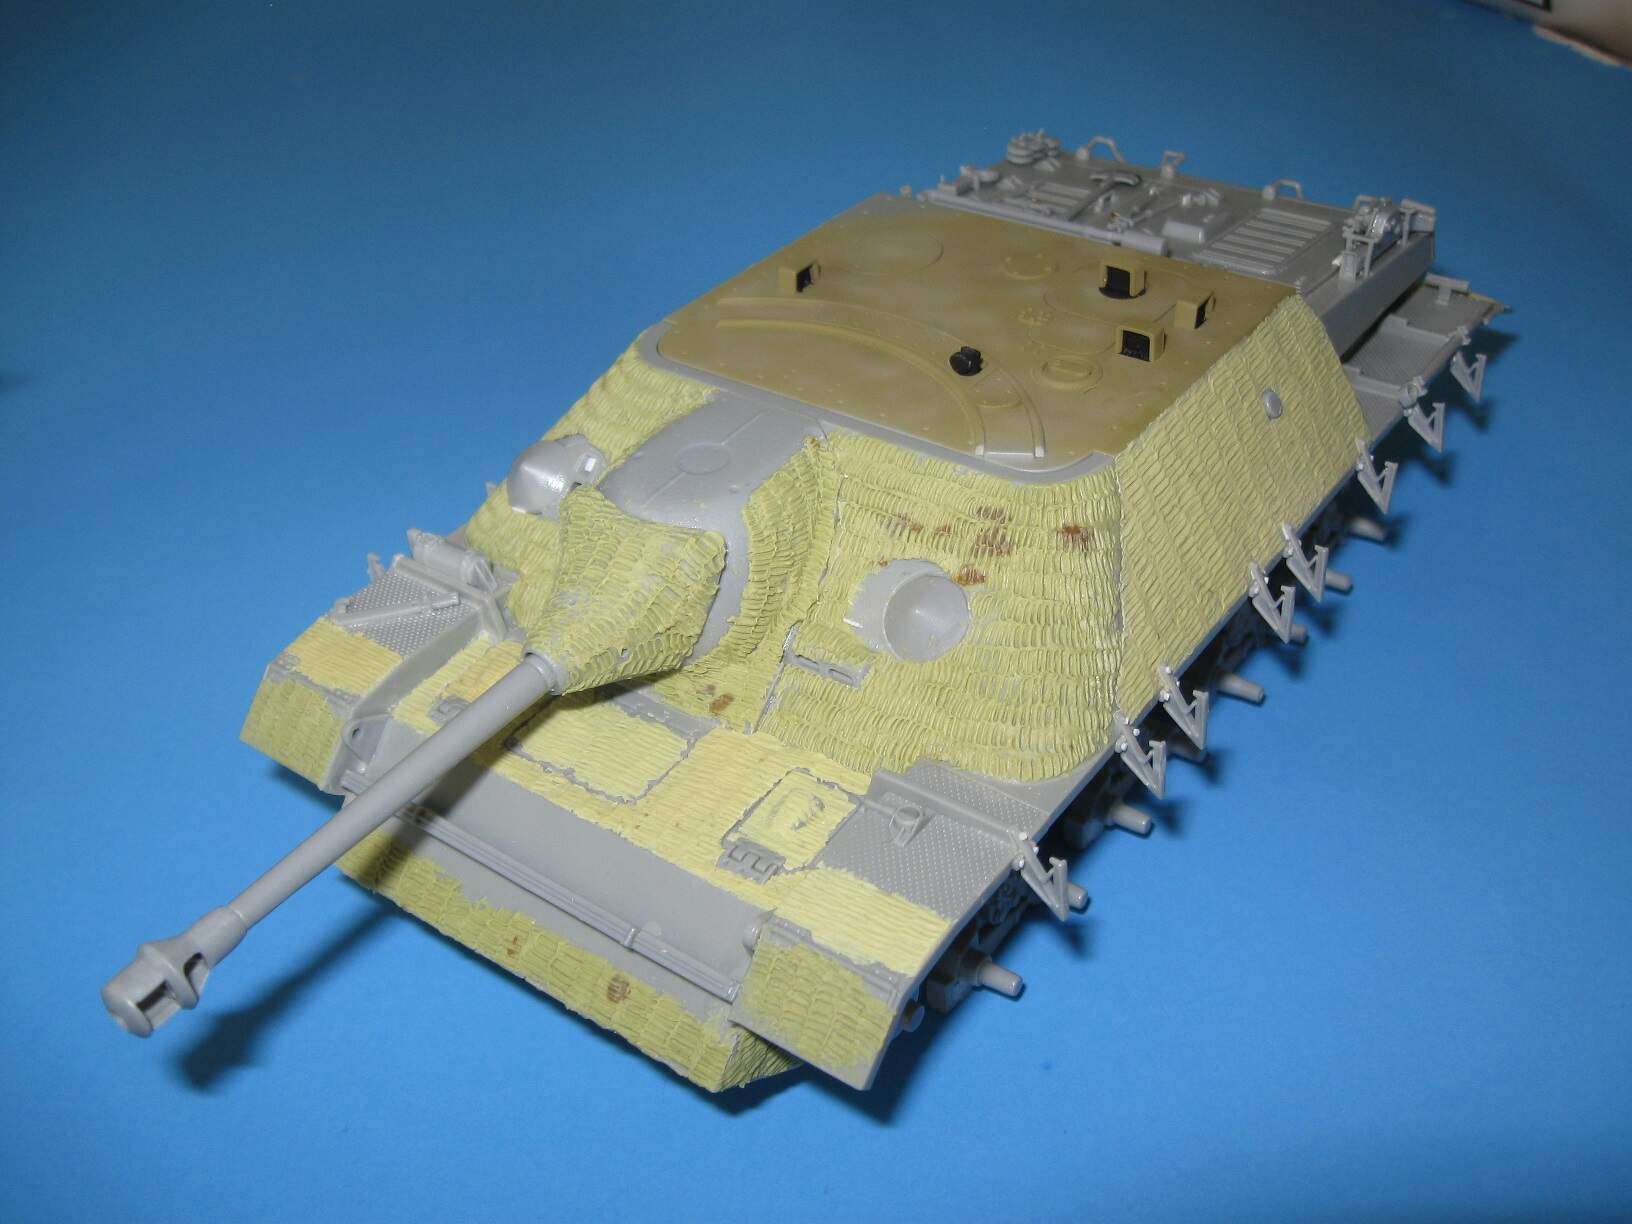
Over the last few days I fixed a few things and added the rest of the Zimmerit. Dark green areas represent old Milliput, Light green areas represent new Milliput. The Zimmerit looks over scale and the old versus new patterns do not match but…I tried. The original vehicle featured a somewhat haphazard Zimmerit coating and I attempted to model that.

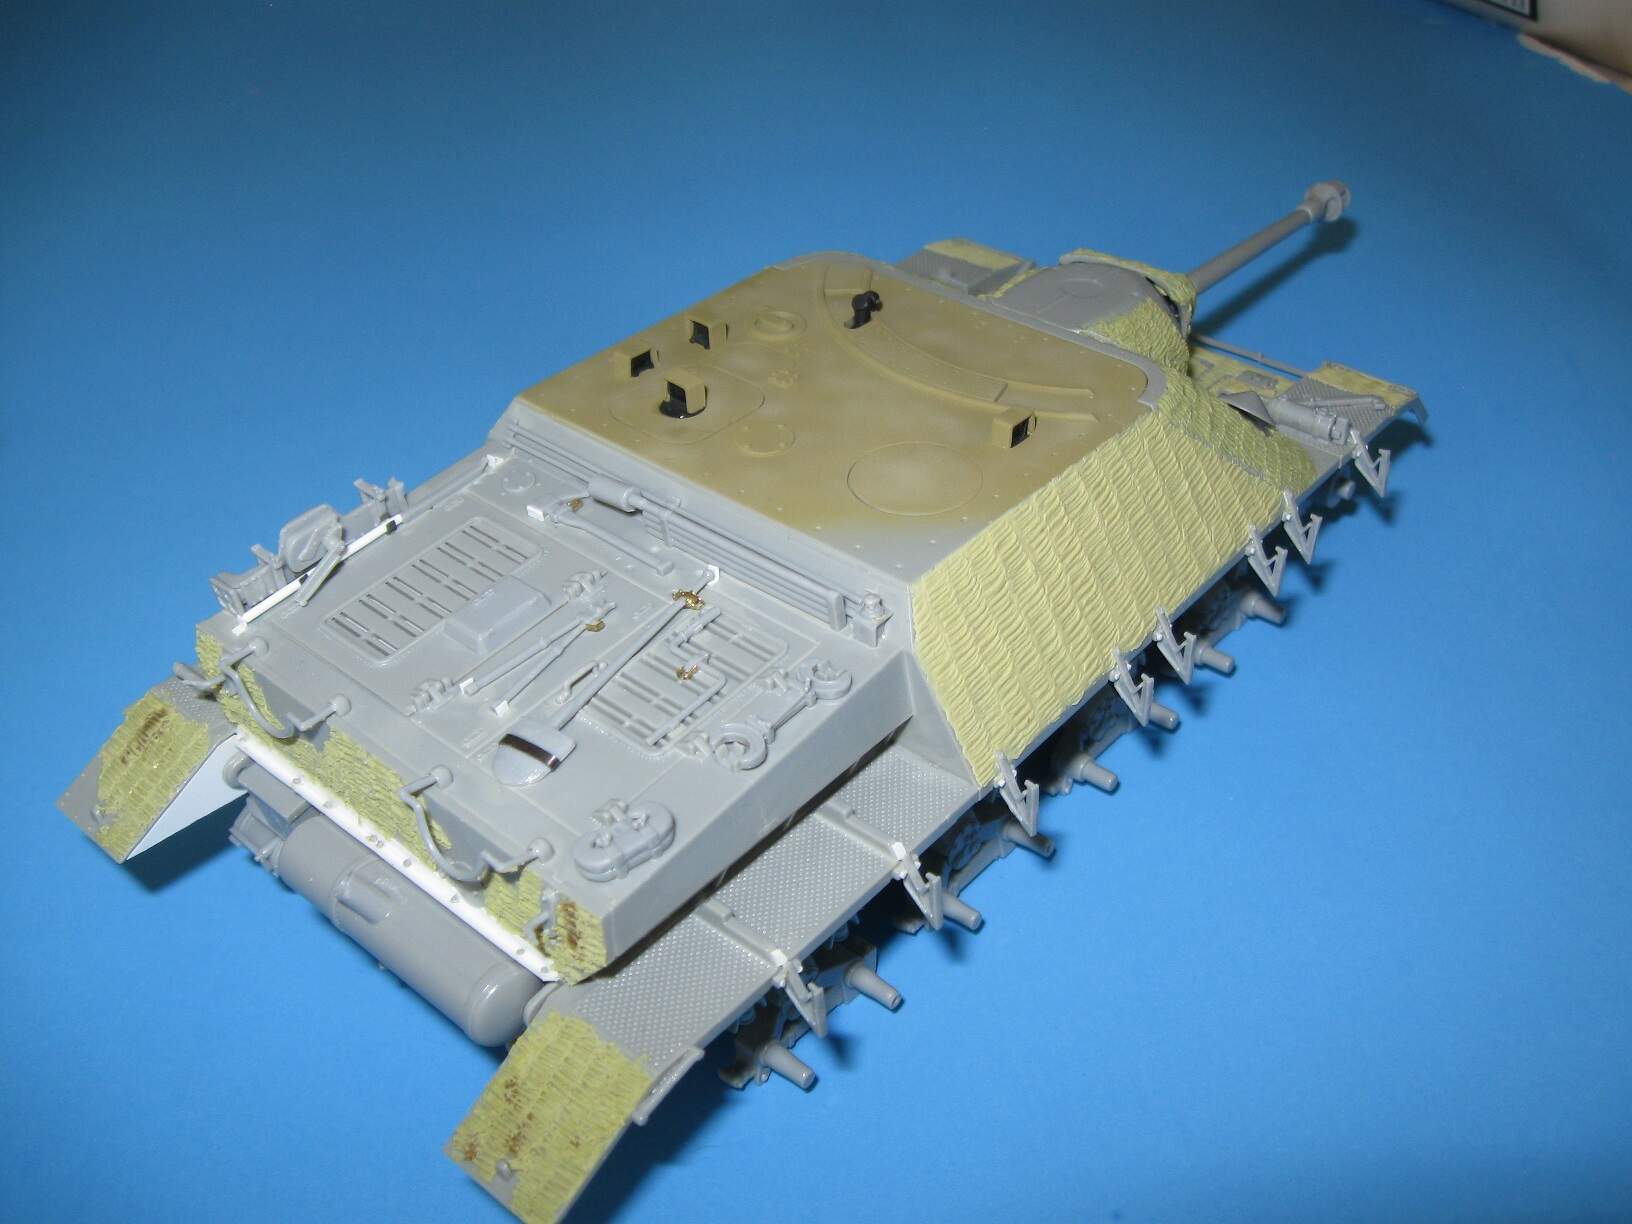
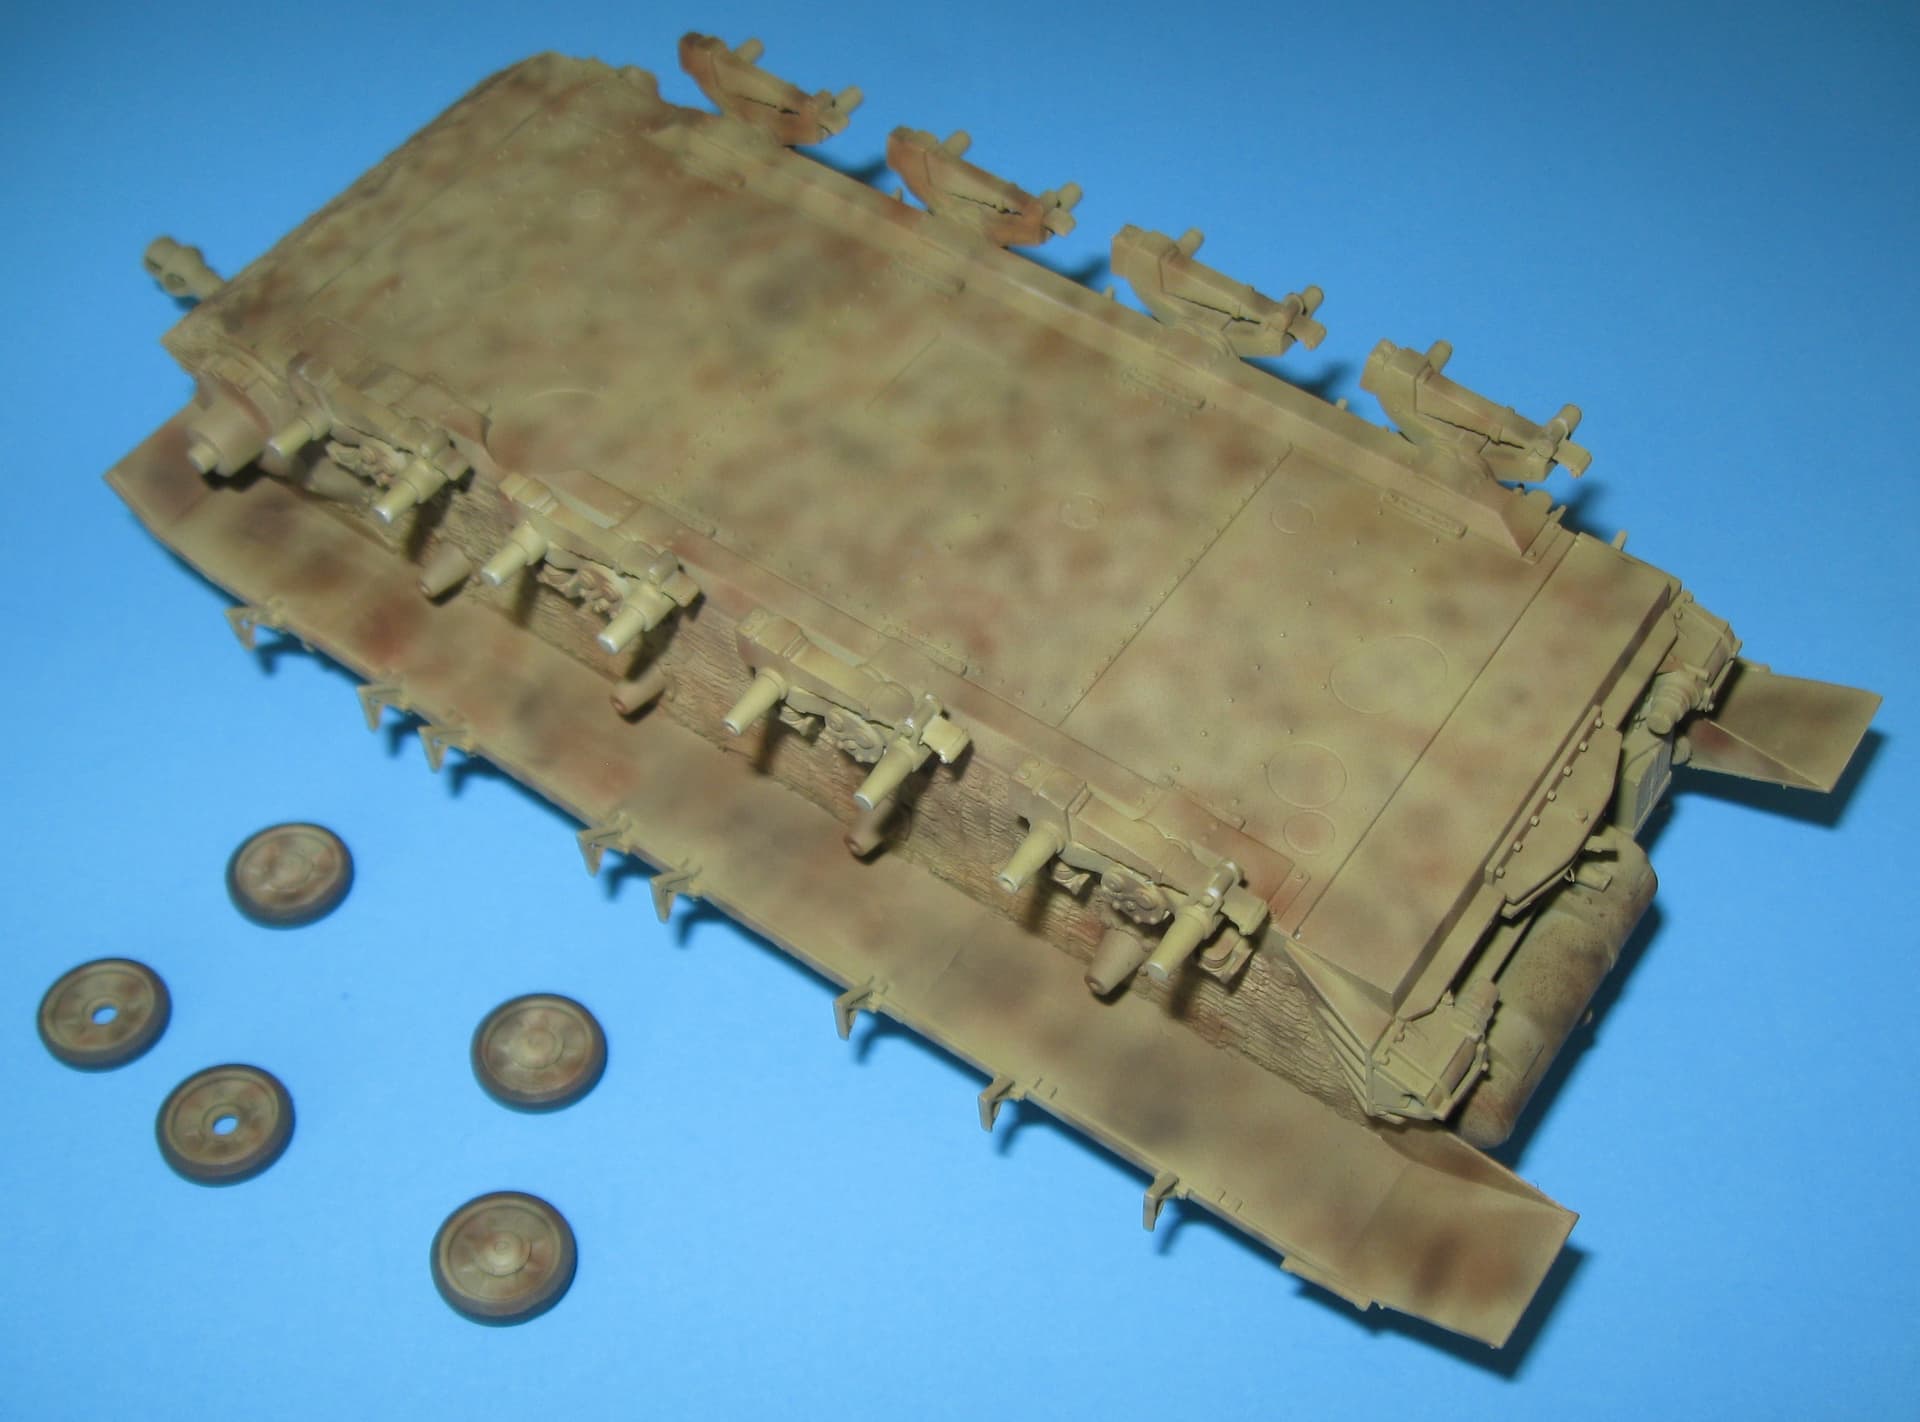
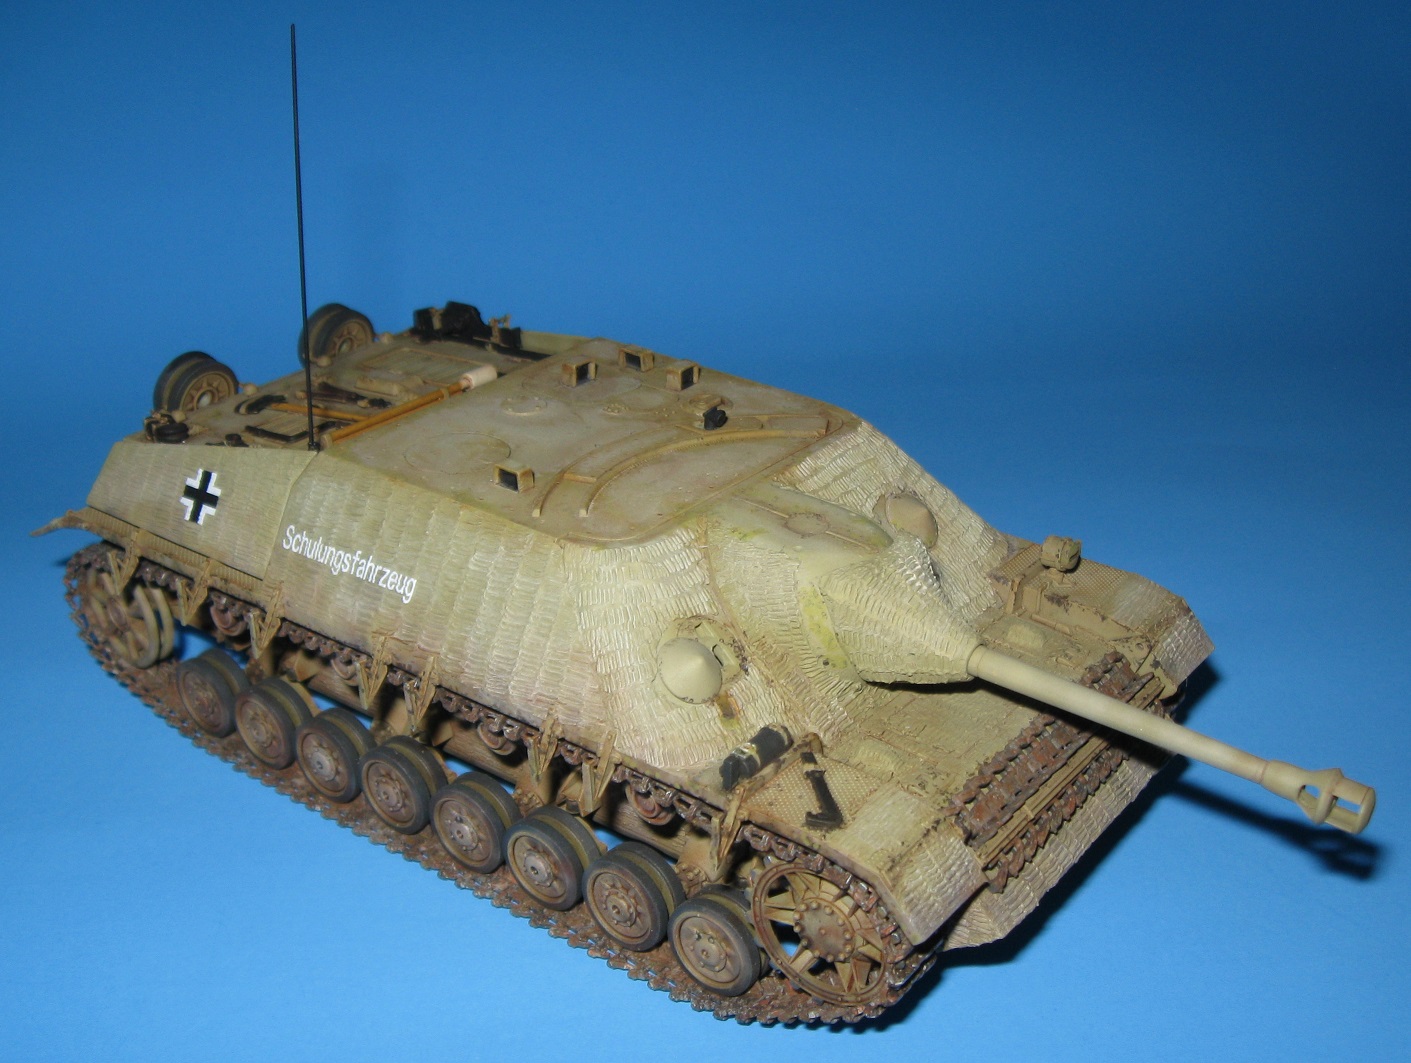
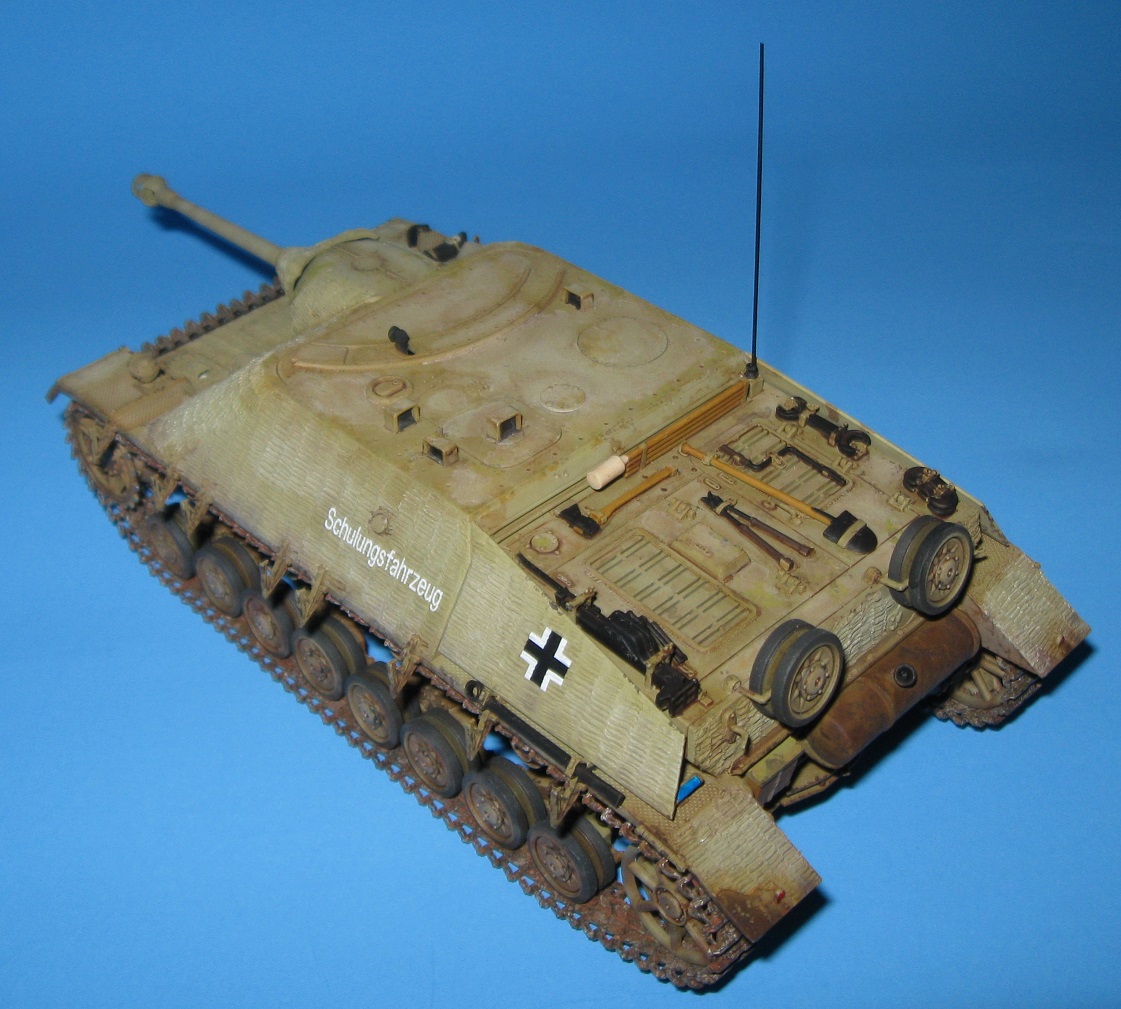
This version of the Jagdpanzer A-0 was released by DML in the mid 2000s. Most of my attempts to improve the model involved adding tool clamps and such to the engine deck. This model will depict the vehicle in driving school configuration, not the later version assigned to a combat unit. The tracks are wrong for the driving school vehicle–they should have cleats–but…oh well.

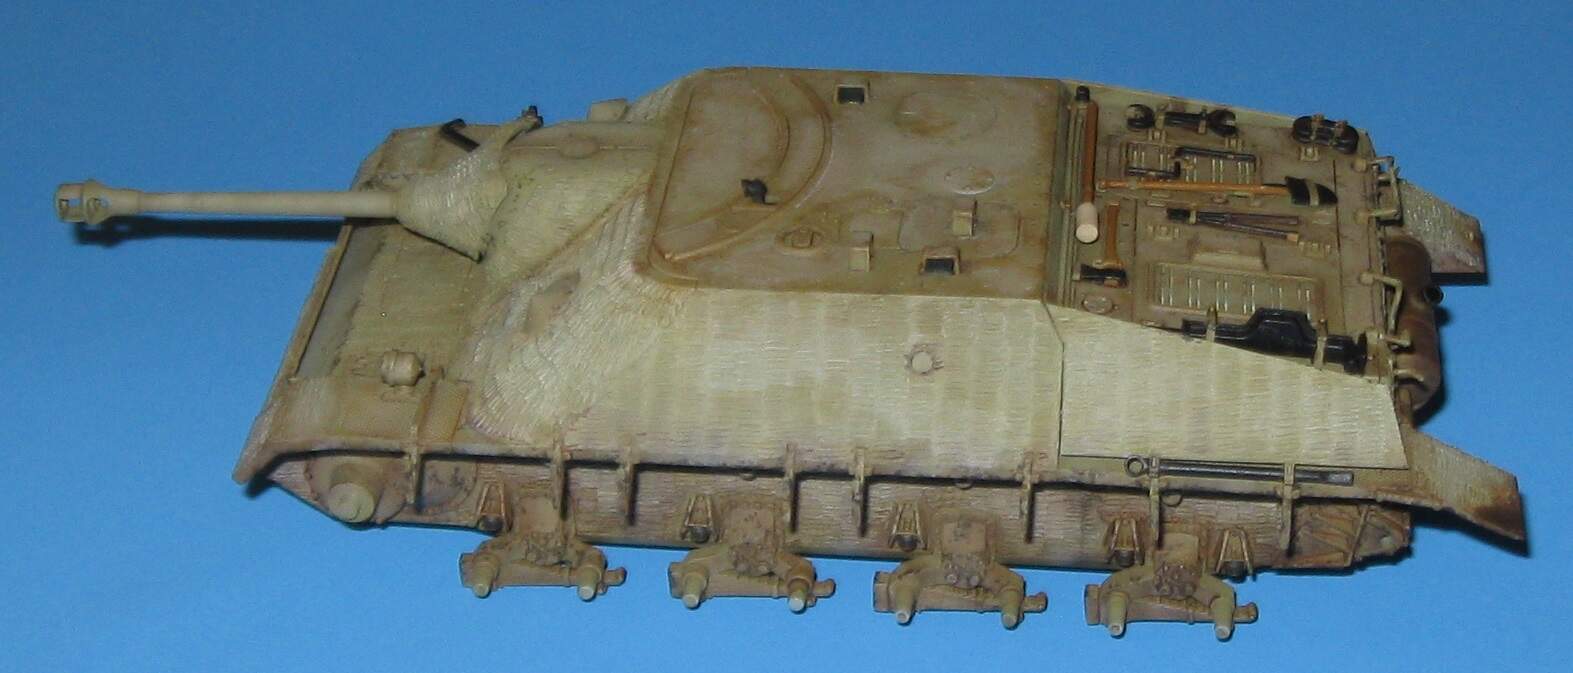
The model will receive monotone Panzer Dark Yellow camouflage and very modest weathering, under the assumption that a training vehicle would receive excellent maintenance. The schurzen came molded with all panels on a given side connected. While that is somewhat unrealistic, they look rather smart so I intend to use them.

Anyway, the model is currently taking a bath so that I can paint it tomorrow. If you have any thoughts on correcting or improving anything, please let me know!

11 Likes

I like the look of this, well done.

We’re making progress!

It took me three paint sessions to get this far. The sides and 8 road wheels still need more paint for the base coat, then I can start lightening the yellow and spraying crazy all over everything. I really envy people with those model holder clamp thingys.

3 Likes

Hey, hey. More progress.

It may not look like much, but this is three paint sessions and some significant surgery later. The Panzer Dark Yellow was way too dark, the Zimmerit looked way too crazy, putty work under the fenders sucked, and green Milliput was showing through all over the place. I ended up mixing 5 different shades of Panzer Dark Yellow before reaching this point, largely because I forgot how to paint. All putty work was sanded out and repainted. That was an adventure. Using a very sharp hobby knife, I removed the worst of the crazy in the Zimmerit. Unfortunately, some spray reached under the masks and hit a few periscopes, but I can touch that up later.

While making all these corrections, I also noticed something really bizarre–the side skirts do not fit the hangers. They are way off. There are positioning nubs for the hangers under the fenders but, for some reason, I placed the hangers in different positions and even added bolt details! Why did I do that? Why did I leave the nubs? It is too late to change things now without major surgery so I either need to scratch build new skirts or leave them off.

Important safety tip: Do not build 99% of a model then drop it in a box for 5 years. Finish what you start because by the time you get back to it, the project may end up spread over 4 boxes and you will have no clue what you were up to.

Onward.

3 Likes

You guessed it…progress.

Since I am fairly happy with the Panzer Dark Yellow, I started spraying crazy onto the muffler and underside of the vehicle.

This session was spent spraying Raw Umber and Burnt Sienna. In addition to serving as muddy stains, these colors work as preliminary painting for the muffler and exposed primer. I did not bother painting the inside surface of the road wheels with these colors because they hardly show and I was fatigued.

Relearning to drive an airbrush definitely takes a lot of practice.

Onward.

5 Likes

Looks like your coming back strong,stay with it.I’ve tried many methods for zimerrit and failed miserably,yours looks really good to me.a friend (Terry)member of the Washington, D.C. chapter of IPMS,and the WAC,turned me onto using common wall spackel and a section of h,o scale corrugated metal roof to apply it,made it simple,easy and to scale without much fuss but that’s just my way.waiting on more progress

@Damraska looks like you’re on a roll! Looking good :+1:

I love seeing older started model return to the bench and get completed! Along for the ride!

Oh, right. I’m working on a Jagdpanzer IV. :upside_down_face:

Thank you for the kind words, John_Chambers and Armor_Buff!

After almost a week of hand wringing I finally braved my airbrush and finished spray painting. At that point I should have put on a clear coat to prepare for using oil paints but, instead, I had the bright idea to ‘experiement’.

This Jagdpanzer includes Zimmerit applied many years apart and it shows!

Brief aside: I went through a pretty tough period where I spent a lot of time in bed. Model building was mostly out but I had an old brick of Milliput and took up sculpting. My sister, who is a Star, learned of this and knew I was feeling down, so she sent me 10 pounds of the stuff.

After a while, I started getting pretty good with Milliput.

Anyway, when I returned to modeling back in January of this year, having acquired so much more skill with Milliput, I finished the rest of the Zimmerit on the Jagdpanzer and it shows. In the first picture above, the Zimmerit on the side of the vehicle is far more controlled and restrained than that on the back. I toned down the old Zimmerit as best I could. Real Zimmerit was 6mm thick which is about 0.17mm in 1/35 scale.

Here is a picture of a Sturmgeshutz IV I started in mid January when my air compressor went belly up. I have not been posting pictures of this project because I want to focus on one thing at a time for purposes of these forums. This all represents new Zimmerit work and as you can see, it came out pretty good–not too far over scale, consistent, and restrained. Practice, practice, practice.

If I ever find a pen sized soldering iron that takes a very fine screwdriver head, I’d like to give it a try for Zimmerit.

4 Likes

Slow progress is slow.

It is difficult to practice painting on a model you would very much like to turn out well, knowing that your efforts are inferior, and that you are converting a lot of hard work into junk. I have managed to bumble into an artistic style that was common in the early 2000s, and that I was never particularly fond of. :face_with_diagonal_mouth:

Tomorrow I will try decals. I look forward to them silvering. Onward.

Edit: The bent cleaning rod head and broken spare road wheel hangers are making me crazy.

Edit: Are the two long rods on the back wall of the fighting compartment supposed to be black? I cannot remember what they are for.

7 Likes

Looks like you’re doing a fine job. Don’t be discouraged, it takes a while to warm up. I just mucked up two panzer models after being on a car modeling binge for some months.

I’m pretty sure the two long rods on the back wall are spare antenna containers. At least some versions of the stug had similar, so I think they’d be painted along with the rest of the tank.

@Damraska Doug, looks like good progress!. Tonal variation in painting is eye catching and that’s good.

I probably have an extra cleaning rod if you’d like it. Just DM message me your address and I’ll send it.

BTW - I’m know for converting junk into even more worthless junk in model hobby & car hobby - it’s one of my super powers!

Nice job on the JPz IV, but your alien garden is really an eye-catcher!

I hope you have plans to finish that, maybe with a classic, sci-fi astronaut (crazy ray gun, and all)…

That seems to be my normal modeling style! Not my intention, just how things usually work out.
Also, I think your zimmerit looks pretty good.
Ken

Thank you for the encouragement and information, Tommi_Lukkarinen! I sincerely hope we both have much better luck with our next armored vehicle models.

Armor_Buff, thank you for the nice comment and offer for the replacement cleaning rod. I made another attempt at fixing the cleaning rod head thingy and it looks somewhat better. Since this has become a learning project, the existing part is fine.

Thank you, SdAufKla. The creatures above are sculpted in 1:1 scale. They represent animals that might evolve on another world, deep under water near a volcanic vent. About 60 creatures currently exist and I hope to assemble them into an art exhibit. Unfortunately, that requires learning to paint figures well.

Thank you, tankerken! Let’s get them done. They’ve waited long enough.

And now…progress.

I am near exhaustion on this project and want a new canvas. Therefore, I have decided to wrap it up and move on.

After over four weeks, I still cannot find the shurzen for this thing. Where did they go?

This morning, while fitting the tracks, I was treated to a rather nasty surprise. The tracks actually belong to a different model which triggered many memories. This model was actually started in 2009 or 2010. The tracks included with the kit do not match the tracks in photos so I put the project aside until I could get the right ones. About 6 years later, I started another Jagdpanzer IV with three return rollers. It was stored in the same box as the A-0 but ultimately went into the trash. However, the shurzen and tracks from the trashed model remained in the box with the A-0. That is why the shurzen in the storage box with the A-0 do not fit this kit. It is also why the built up tracks in the storage box, the ones I painted up ever so lovingly over the last four weeks, do not fit this kit. Arggggg! Oh well. I tried to bend them into shape, accepted they would never look right, and left them on the vehicle.

In addition, over the last couple days, I relearned that super awesome white glue is neither super nor awesome. Also, super glue is amazingly good at removing paint and not sticking to the things you want it to stick to.

The model needs some more detail painting and decals, then I am calling it quits.

4 Likes

I think it’s looking good!
Instead of fighting decal silvering I’d either paint the crosses by hand or cut masks & spray them (they don’t need to be perfect anyway).

Woops! After a year long hiatus, I finally completed this project about two weeks ago but forgot to post the final two pictures here. For completeness and to cap off this thread, those pictures now appear below.

Thank you to everyone who offered advice and encouragement along the way. :slightly_smiling_face: While this is not a very good model by the standards of these forums, I learned a lot painting it and that is worth a measure of satisfaction.

Fini

6 Likes

Great job! Looks very nice. For some reason in those pictures it looks like it has a winter whitewash camo. Keep up the good work!

2 Likes

Thank you!

About the whitewash look: When I gave the model a pin wash with oil paints, a lot of dark colored oil paint got into the zimmerit, making the whole model look very dark. Using a brush dampened with mineral spirits to remove as much oil paint as possible from the zimmerit did not solve the problem. After some trial and error, I mixed up a buff color with oil paints and selectively painted it into the zimmerit. The color match was off, leaving light and dark areas in the zimmerit. That is what causes the washed out appearance in some spots. It was not intentional. I do not know how to paint a tank with zimmerit.

2 Likes

It still looks great! Makes sense about the wash, I would recommend putting the pin wash in the regular places but very carefully around the zimmerit. The zimmerit will create enough contrast by itself. The color match could just be attributed to fading of the paint, if this is a training vehicle that would probably be the most extreme weathering. If that’s not accurate, just call it artistic license.

2 Likes

Sadly, me too!!

1 Like