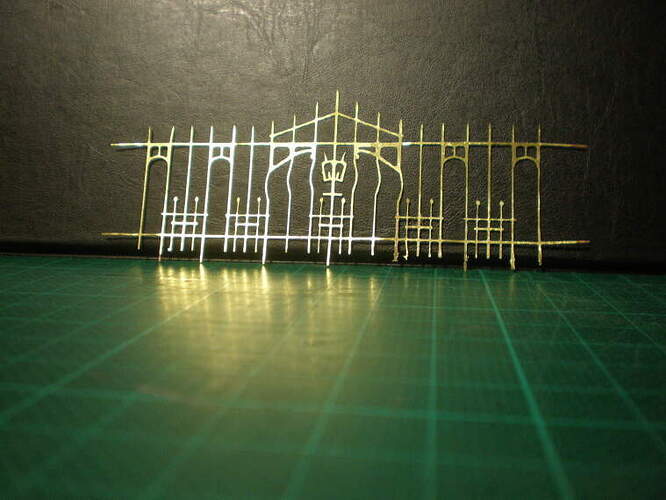
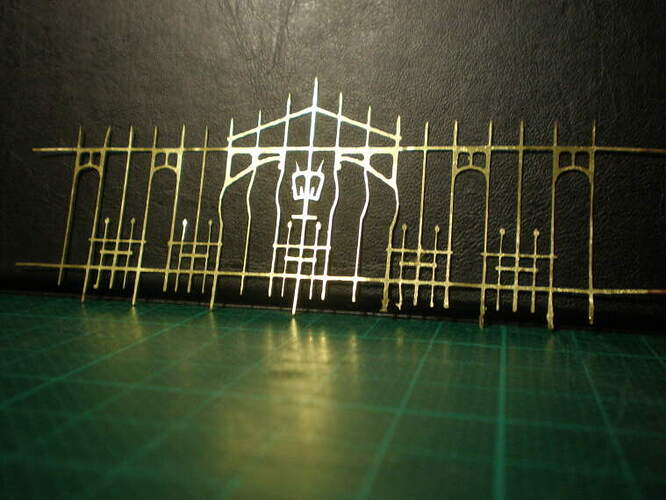
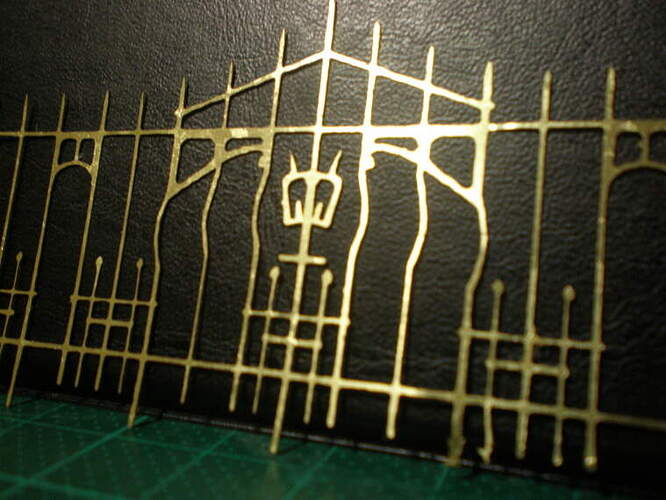
This is a revised version of an update I posted last week on Operation Anthropoid in the Diorama forum, reproduced here for the possible benefit of other model-makers of cars, ships, figures, planes, railroads etc. who might never go there.
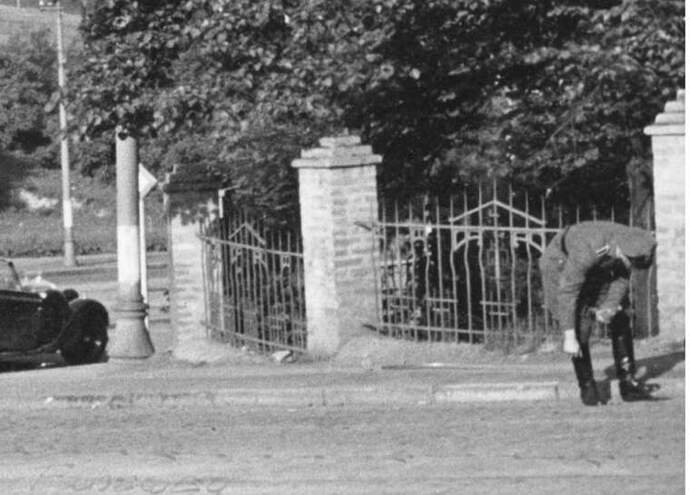
Last year I came across an excellent short tutorial on Youtube by David Damek about DIY brass photo-etching. I was particularly interested because the decorative wrought-iron gate he used as the example looked similar to the 11 park railings I needed to make for Anthropoid. Having gone out of my way to reproduce the Prague scene as faithfully as possible generic “off the shelf” railings were not an option…
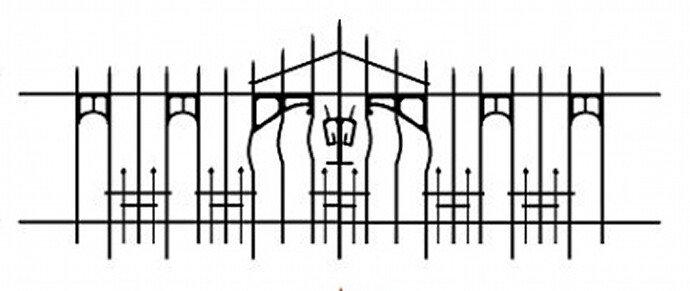
For the record I’d never attempted anything like this before, having no talent for chemistry and only rudimentary graphics skills – I wouldn’t know one end of a CAD from the other. I used the basic MS Paint program to draw the design and got it printed onto A4/ 80 micron transparency stock at a local copy shop. I then followed Mr Damek’s video to the letter, but before you click on it here’s a few pointers: his accent needs some tuning into; when he says “zinc” he means of course brass; he uses wide clear tape not “duct tape”; and ignore the part from 9 minutes on where he goes on to use the quicker/stronger etching agents (hydrogen peroxide/chloride), not relevant because I used his first method. WARNING – he ain’t kidding about the safety gear, anti-fume masks, rubber gloves & goggles are essential, and I’d add two buckets of water on stand-by:
So there you go, a snap right? Well, here’s one of those buckets of water to temper your excitement in the form of additional details & notes not sufficiently explained in the video:
Cost of all materials: not much change out of US $150, mostly imported to Australia so possibly cheaper for European & North American players. But I could probably make at least 40 more railings before needing to reorder any chemicals. The small UV light-box cost around US $60 incl. delivery, as used in most beauty parlours for quick nail-varnish drying it can take a brass sheet up to approx. 12 x 12 cms.
At 4.45 he uses the Positiv20 photo-sensitive lacquer and simply sprays it on the brass sheet holding the can nearly horizontal, seemingly in normal lighting conditions. However, the manufacturer’s instructions say: “To overcome discontinuities while spraying, the aerosol can should not be held too tilted. After application of the film, boards must be dried immediately in the dark. The drying temperature should be increased slowly (over 15 minutes) to 70°C and kept at that temperature for approximately 15 minutes. Infrared or forced air drying is possible. When air drying at ambient temperature is used (24 hrs minimum), the quality of the film will only allow very simple work. The adhesion is poor and the danger for dust entrapment and pinholes is high.” In fact I found letting it dry at room temp for 24 hours worked just fine, but spraying the brass sheet angled at 45° made for a better coverage, immediately laying them flat to avoid any “curtaining”.
Regarding the light exposure phase, manufacturer says “In practice the exposure time is between 60 and 120 seconds when lamps are used from a distance of 25-30 cm. It is recommended to allow the lamps to warm-up for approximately 3 minutes”. I need to experiment with the exposure time some more, early results suggest at least 75 secs produces a more solid image.
At 5.45 the “critical phase”, chemical development. He showed us a bottle of sodium hydroxide (NaOH, aka caustic soda) at the beginning of the video without any clue to its concentration – a crucial omission, as I found out the hard way. I was only able to source pure NaOH locally in the form of a sachet in crystal pellet form, 16g. which the instructions said made 1 litre when added to water. I trawled the net looking for recommended concentration, it’s also used to develop printed circuit board (PCB) layouts. Ranging from 50g per litre (which would melt the skin right off your hands) downwards, the general consensus amongst the PCB makers was 10g worked fine & takes about 30 seconds to work. Looking again at the video, the reaction’s instantaneous so he clearly used a much stronger mix…so I figured my 16g. should be OK. Whoosh, in a micro-second I saw my railing design appear…and disappear…before my eyes before I could fish it out.
In fact Positiv20 instructions say “Use a 7g. per litre NaOH solution” on the can or on-line 10g. per litre, whatever it’s a small variation & I’d clearly used about double the recommended concentration. So I cut the next attempt with a third of water and that dilution worked fine, taking maybe 30 or 40 seconds giving ample time to fish out the brass at the right time. I should add that some guys on the ‘net claim Drano or similar domestic drain-cleaners work for PCB’s, but the concentrations vary and there are usually other constituents at play, so most recommend using only pure NaOH.
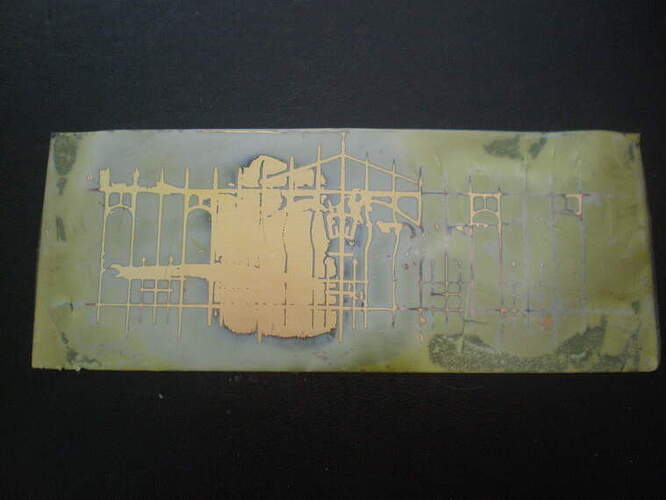
Then came the etching process which is indeed as simple as represented - like Damek I’m using the thinner (0.17 mm) brass sheet, this was how my first attempt looked…
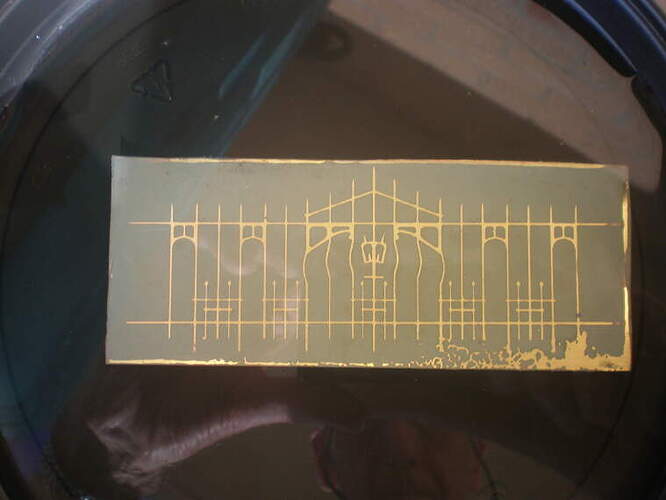
…and after learning everything the hard way this is what the latest attempt looked like…
…and after teasing off the backing tape…
Not perfect, but the excess brass can be trimmed off with a sharp blade. My last mistake here was using a too shallow bath (about 1 cm. deep) of ferric chloride, another thing not made clear in the video. The brass sheet floats on surface tension and the dissolved metal sludge gradually settles to the bottom, but unless the depth is around 1.5 cm or more it increasingly prevents the ferric chloride from continuing to attack the underside.
Ecological footnote: the sodium hydroxide is re-usable, but eventually loses its power. Being effectively drain cleaner it can go down the sink, flushed down with plenty of water unless your drain is actually blocked. Ferric chloride’s different, suffused with the metal sludge so NOT to go down any drain. I’ll dispose of it by first adding a solution containing dissolved bicarbonate of soda to neutralise it & then take it to the local waste-chemical disposal centre when I’ve done all 11 railings.
Once I’ve completely mastered the basic process I should work out how to make indent-lines so the brass can be folded e.g. to make a box. It must be a repeat process where the finished item is re-sprayed with lacquer with the ultra-fine fold lines masked, but the tricky part would be knowing when the etching fluid had bitten the fold lines just enough (remember the brass sheet must be upside down in the ferric chloride bath) and not gone right through the sheet. The other obvious enhancement would be to reproduce surface features like rivets or textures, more study required. For some items 3D printing might be more viable, but these railings would have been too fragile & delicate in resin and arguably with less resolution.
While I stared at that successful brass railing appearing in the etching bath the full implications for future projects began to dawn on me, maybe for you too? ![]()
