Completely new to the forum and model making in general so apologies in advance if these questions have been asked before!
I have purchased a Dragon 1/35 Tiger 1 kit (kit no. 6947), Late Production Normandy 1944.
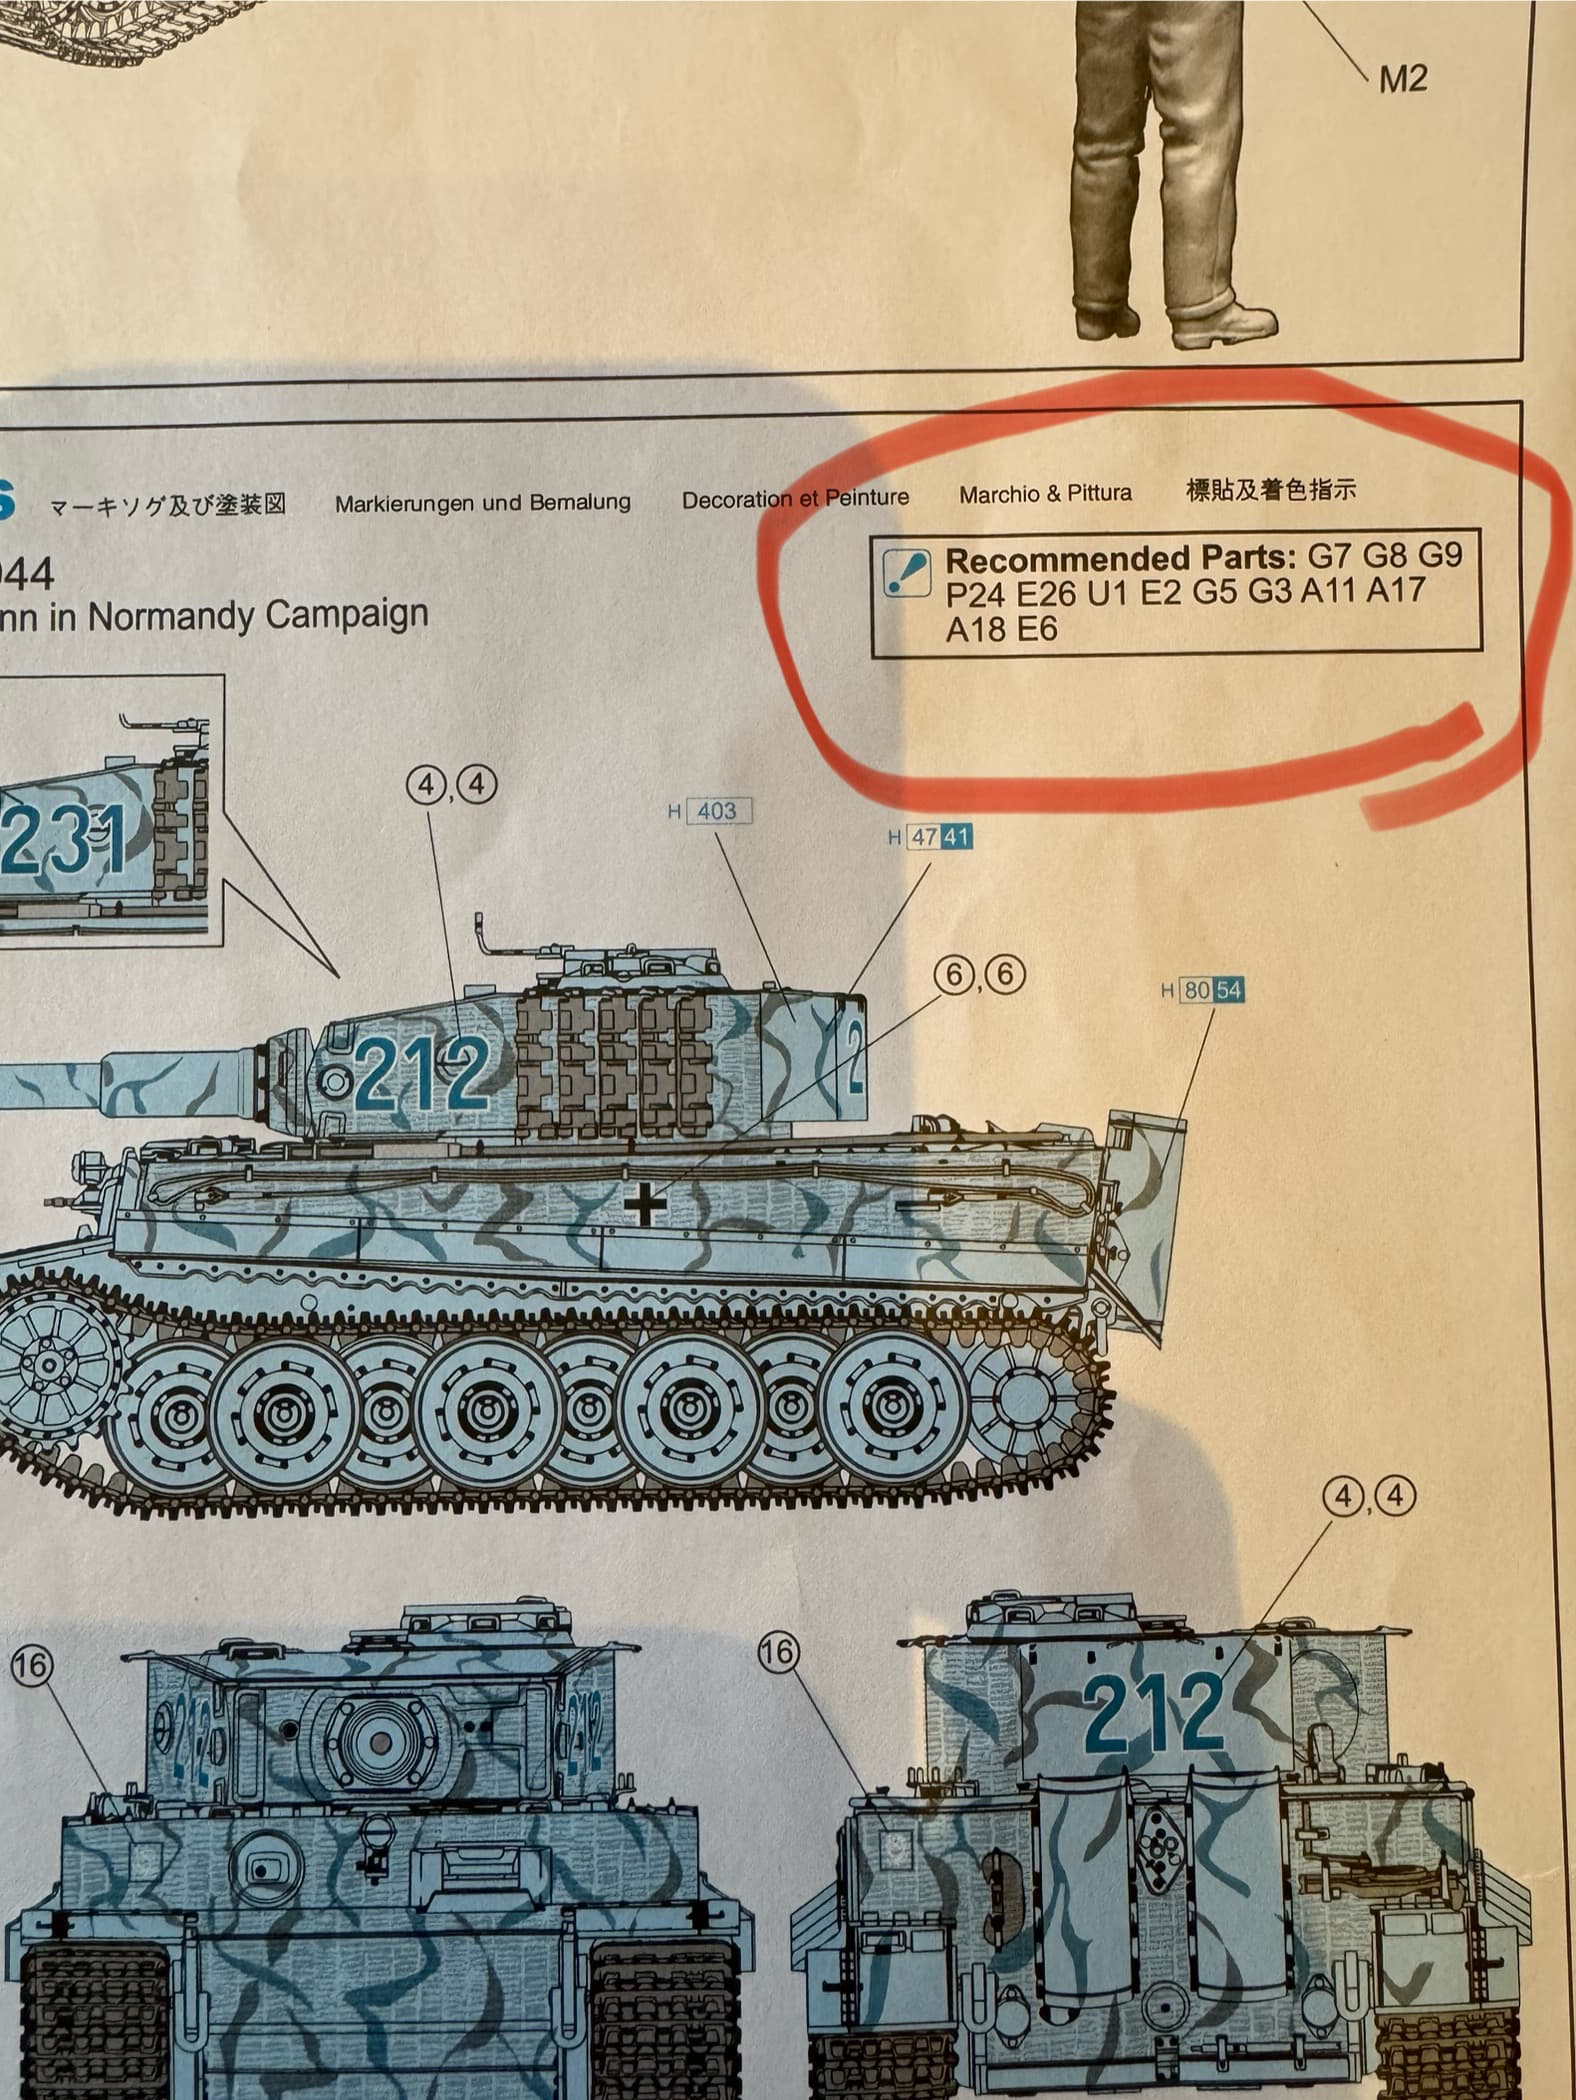
I want to build this up specifically as tank number 212, 2./s.Pz.Abt. 101, as suggested in the paint and markings section of the instructions but am struggling in choosing some of the correct optional parts and camo pattern.
On to the questions for which any help would be greatly appreciated:
can anyone recommend a good reference book for this subject? Ideally with images showing the camo patterns and installed parts configuration? I managed to find an ebook for purchase which was ok, but would much rather a physical book
On the front and rear hull plates there is an option to remove a square from the zimmerit and install a flat plate - to later apply the insignia decal. For this subject choice, should I remove the zimmerit and install this plate for the insignia, or apply the decal directly onto the zimmerit?
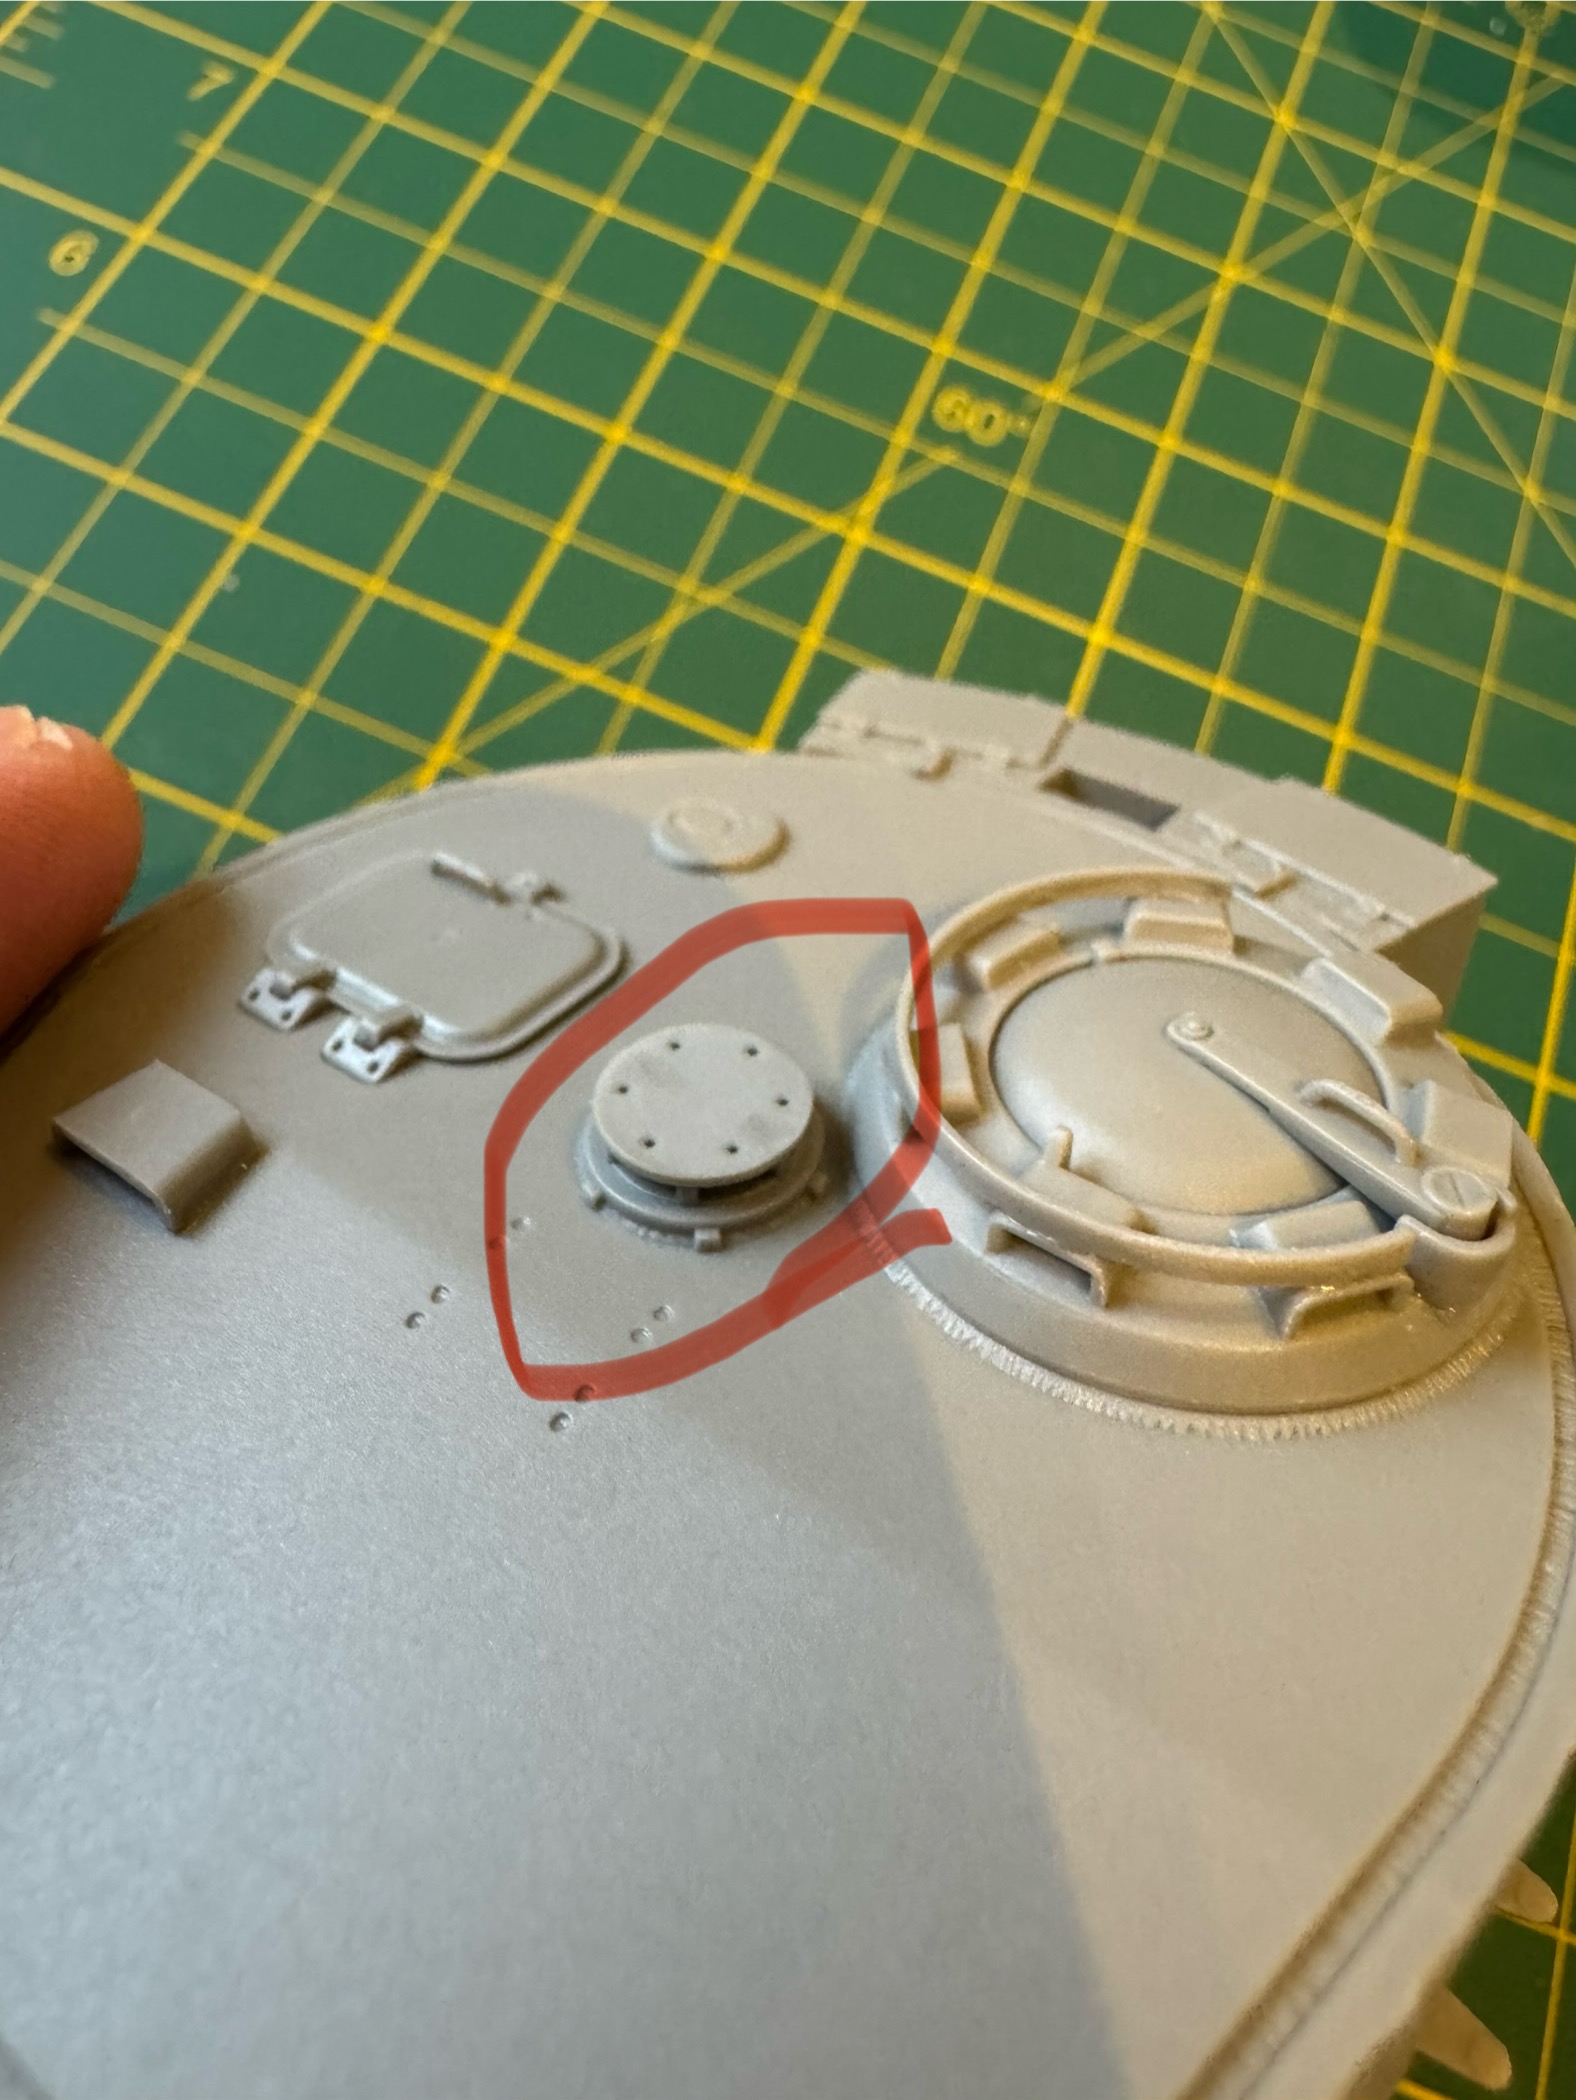
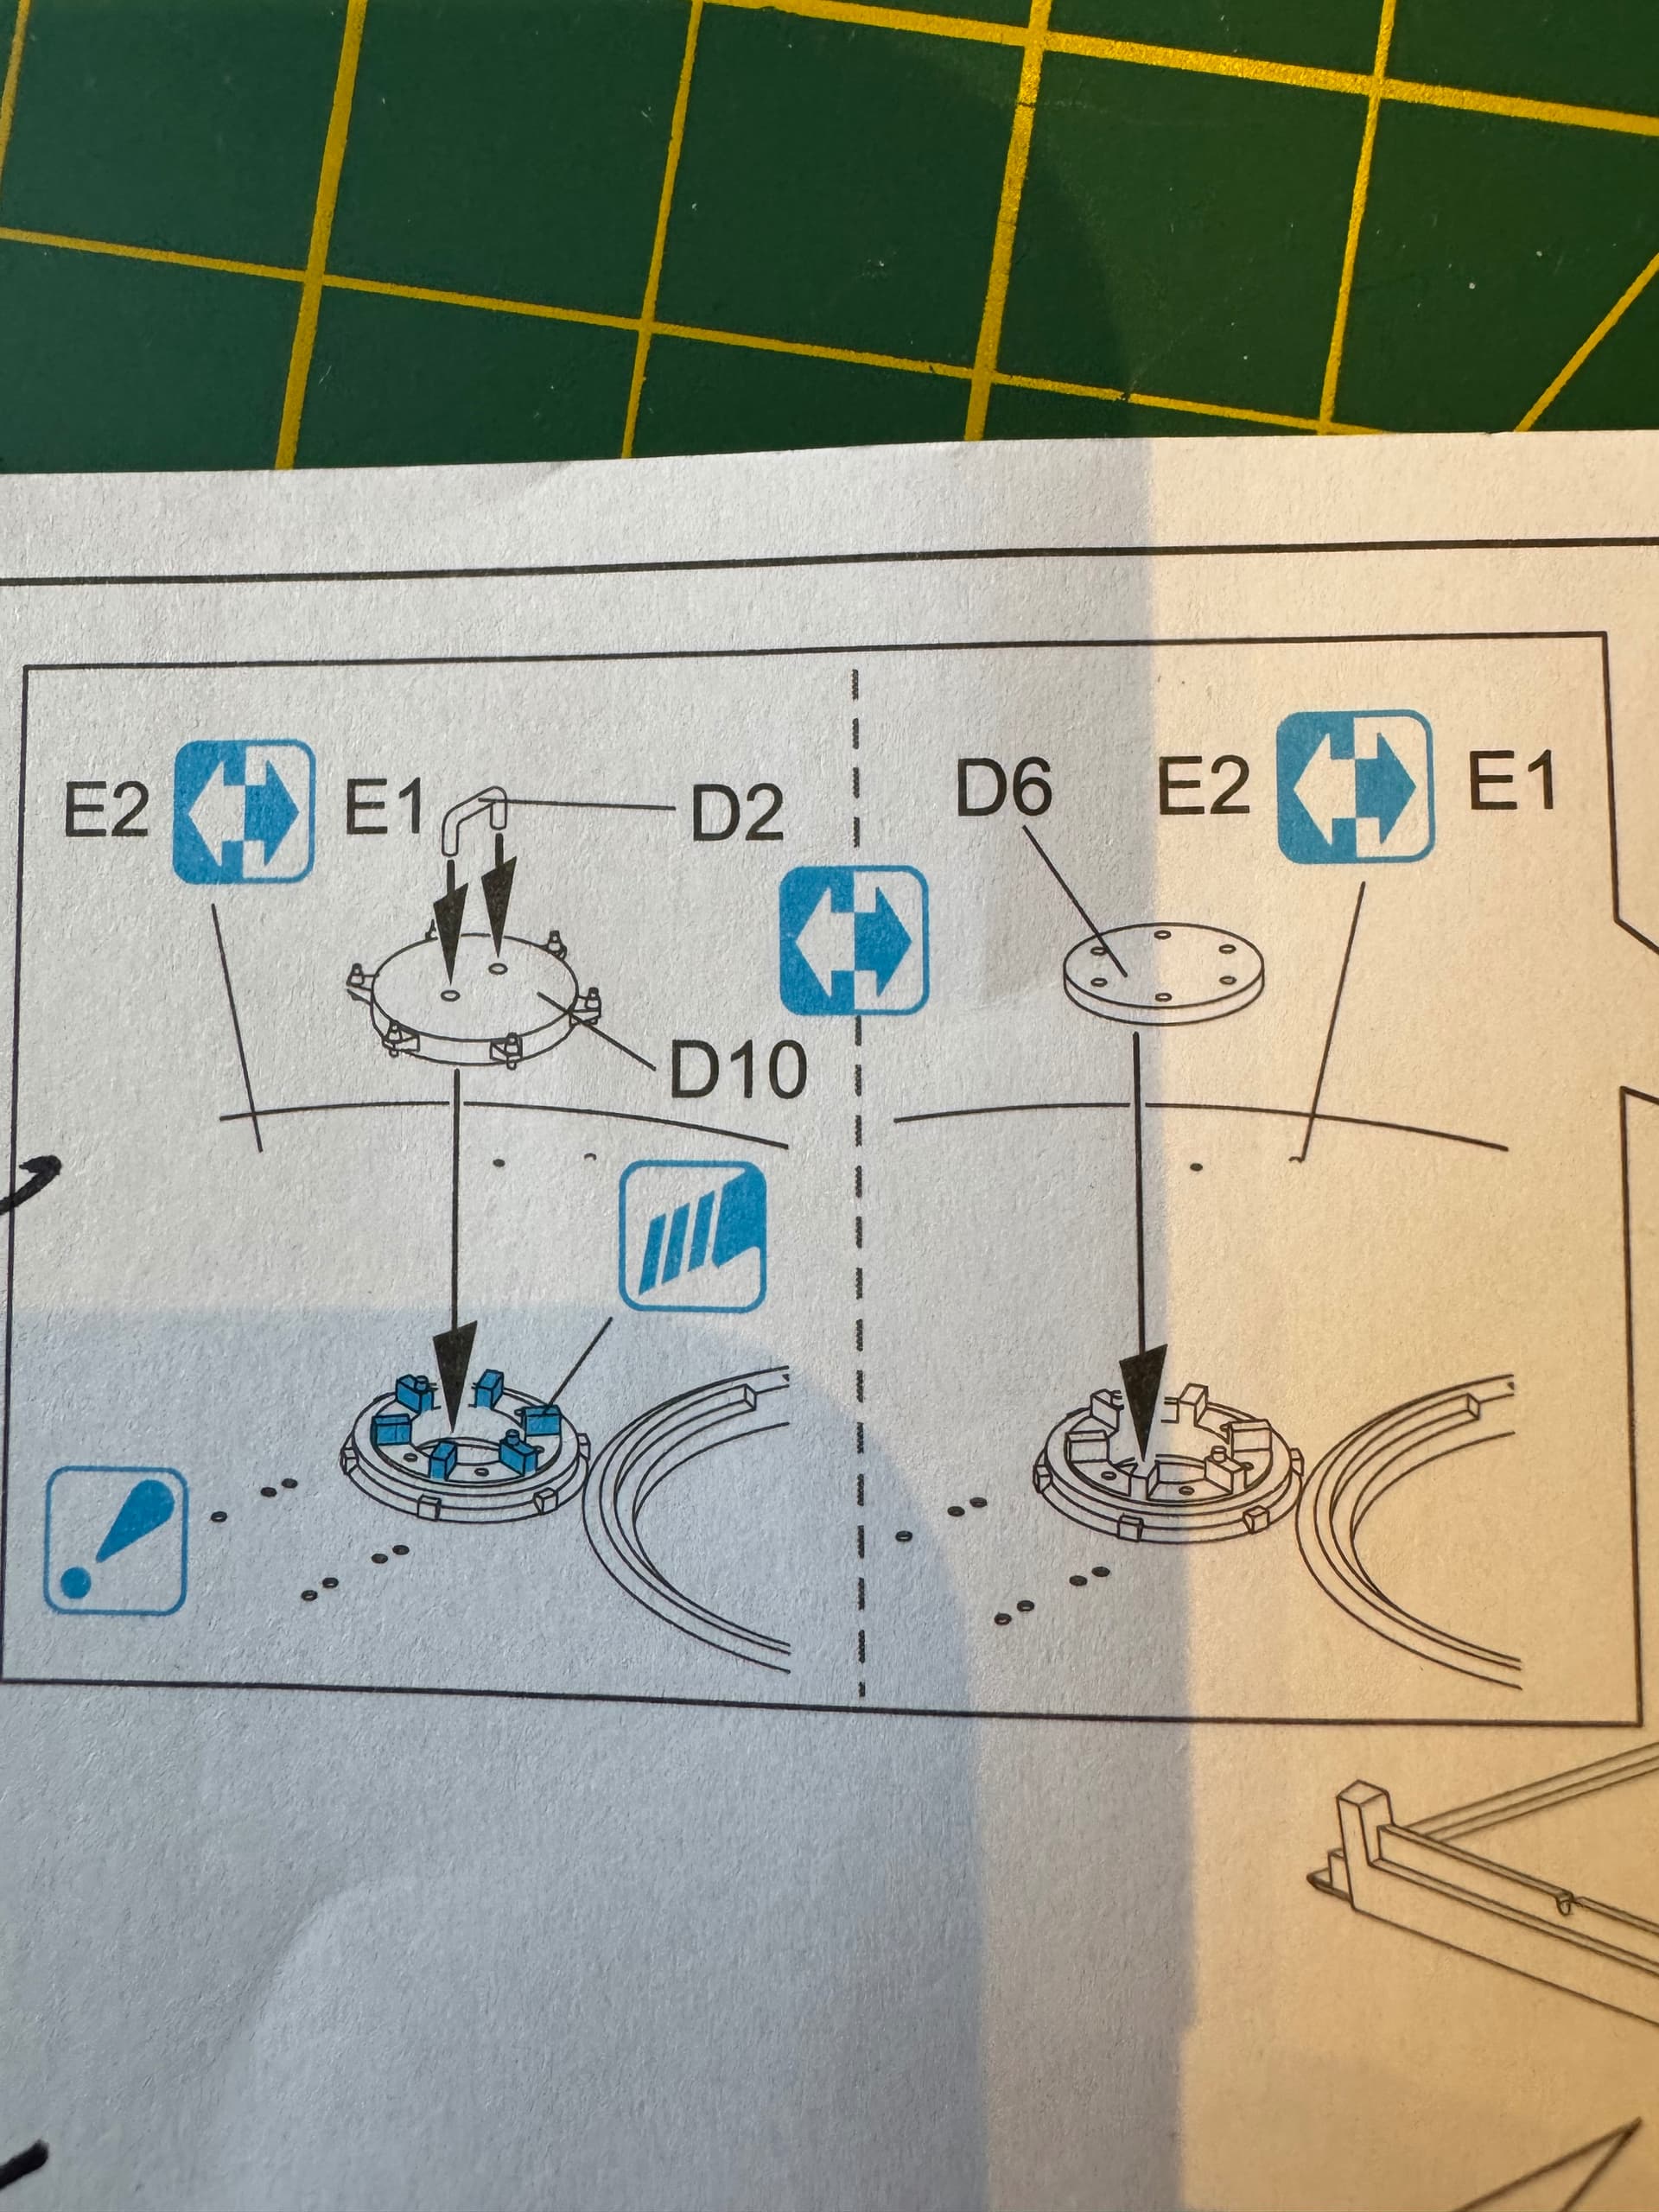
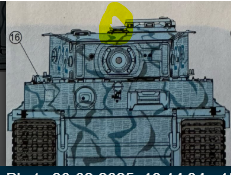
on the turret there as well as the hatches there is a smaller circle plate with 6 dots (bolts?) I think this is the ventilation cover. There are 2 options for this, one being the cover I have described (part D6), the other being a circular plate with no bolts but a grab handle (parts D10 and D2). The instructions are very unclear about which to use
lastly, the side fenders are provided as one complete piece. I believe that these were actually four separate fenders. Would an aftermarket kit be a better representation of this, and if so can someone recommend an option (I assume photo etch) that is not too difficult for beginners. I attempted a photo etch set on a previous model and it was a catastrophic failure!
Thank you all in advanced for taking the time to read and with any help you can provide.
Not being a Tiger connoisseur I can only offer some advice I’ve seen here. We have a campaign going at the moment which may have posts of relevance to your questions. It is Put a Tiger in Your Tank! - Tiger Build Thread
Also David Byrden has a lot of knowledge and experience with Tiger tanks. I believe he is often consulted by modelling companies regarding their planned Tiger releases, although unfortunately they don’t always listen to him! His site is https://tiger1.info/
A cover was always provided for the Tiger’s turret roof ventilator. The cover had a handle and is one of the parts in the Dragon kit.
While the real cover fit neatly over the ventilator, a small plastic part cannot be made so thin, so the kit’s ventilator top must be omitted if you put the cover in place.
The purpose of the cap was to seal the ventilator for underwater travel. By 1944 the Tiger was no longer equipped for underwater travel, therefore there was no use for the cap.
Hi and welcome to Armorama! Excellent books for the Tiger I with lots of reference photos are:
Tigers In Combat 1, 2, and 3 by Wolfgang Schneider.
Tigers I and II: and their variants by Spielberger.
You can get photo etch fenders that are very easy to bend and attach. Or you can cut apart the plastic fenders, bend the corners, and glue them on one at a time.
Thank you all so much for the quick responses and help so far.
I will be ordering the recommended books today; whilst internet searches are useful you can’t beat a physical book!
This has been really helpful so far (it didn’t even occur to me to cut and bend the existing plastic fenders). The ‘Put a Tiger in Your Tank’ forum and Davids website are both fantastic, so much useful information!
So going back to what David said, can I please just double check to be absolutely certain if I have installed the correct parts here on the turret for the subject I am building?