Mine wasn’t that bad as I still have other ways to order and one SB order showed up today and another has been placed. Should have a new card today.

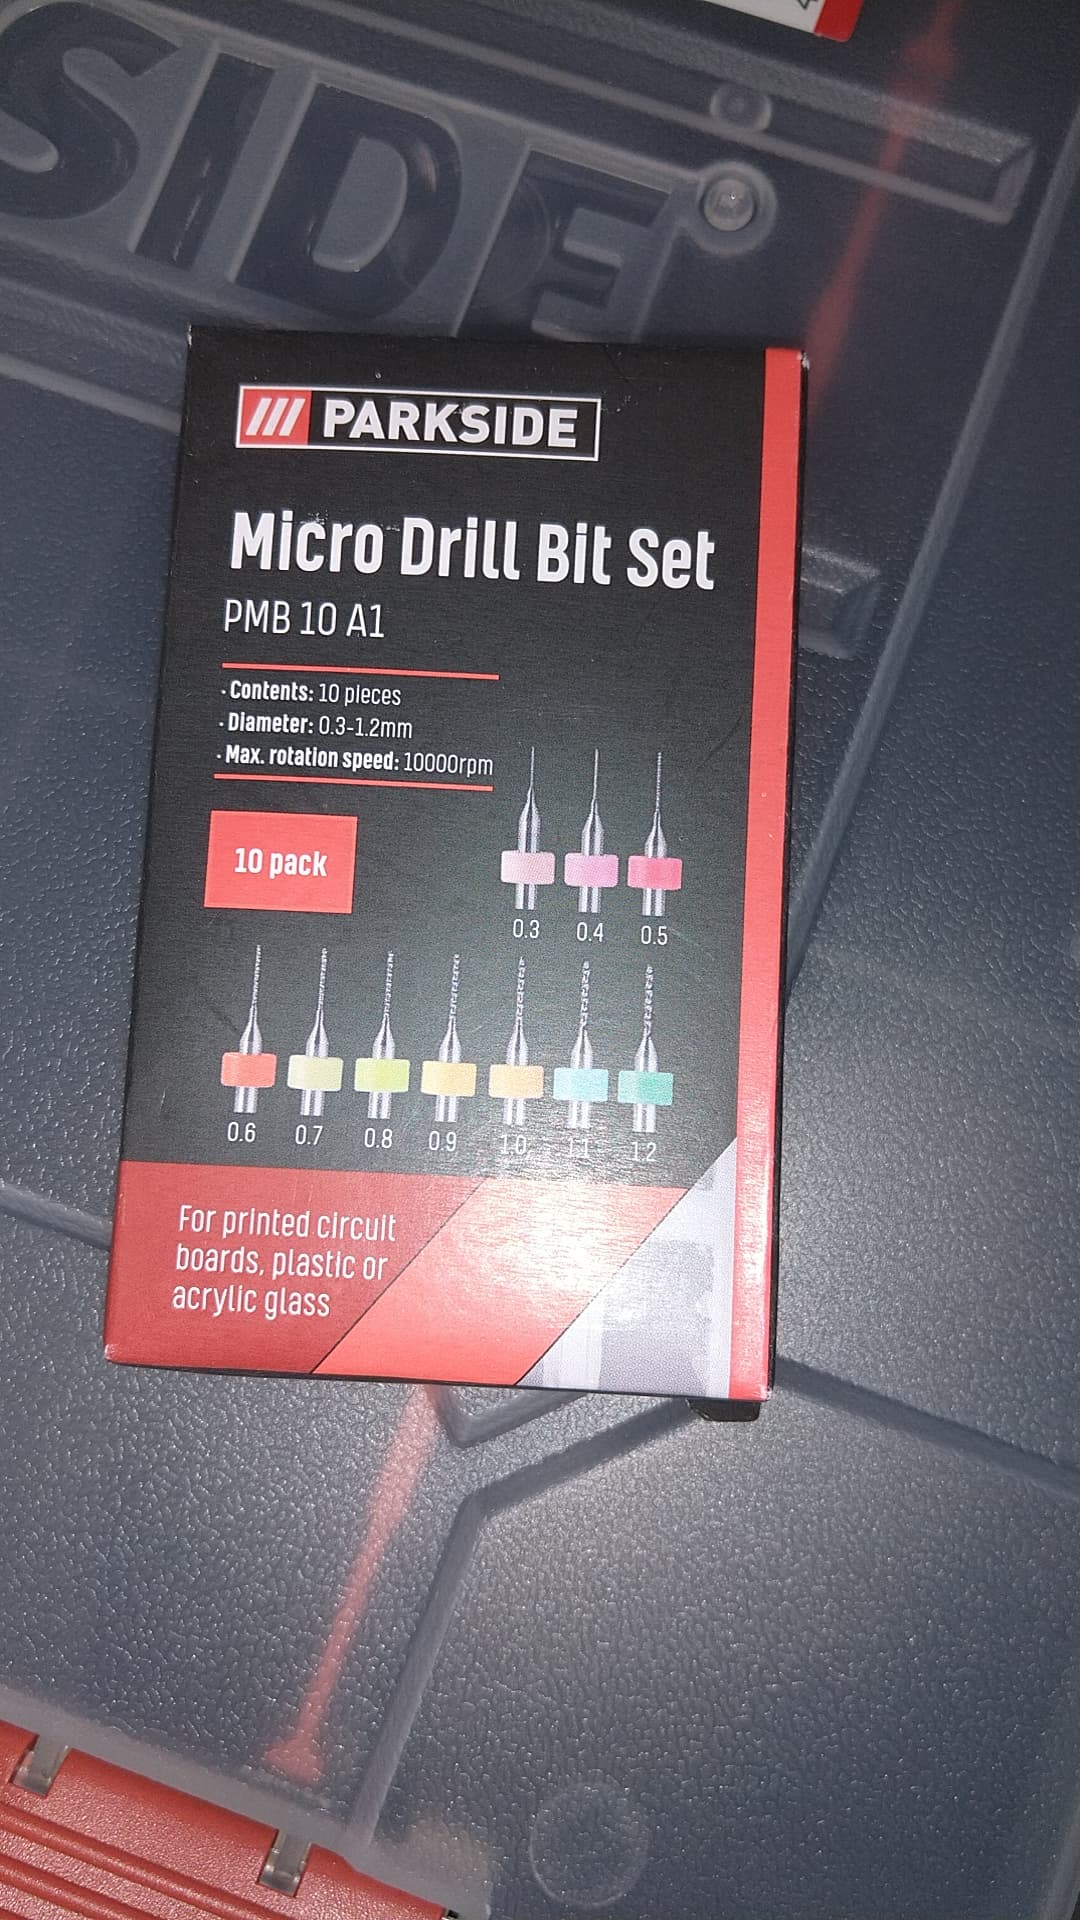
Those are designed and optimised for use in high speed machinery to drill holes in hard materials.
Be VERY careful when using them, they can be brittle …
Thanks robin.
@frank , Frank, brittle is an understatement. I had a brand new set and within 10 minutes 3 had snapped, its almost like heavy breathing will break them …
They’ll make more… SNAP!!! 
Will use them in my dremel then, when I dig it out.
They’ll snap even “before” you can get to your Dremel!
Kidding aside, I use these bits in my high-speed Dremel and/or by hand… just have to be really, really careful. If you drill deep enough into styrene, it will melt around the bit, thereby causing a fierce grab. At that point, it’s nearly impossible to back the bit out. Whatever method you choose (power or hand), it’s best to take very small bites (or stabs), carefully backing the bit out as you go. Note: DO NOT attempt to waller a hole with these. HTH.
1 Like
I just bought a 20 pack of these off BeezosCorp so this is very timely information!
Been there, before,
Handheld power tools is tricky, it is WAAYYYY too easy to move the Dremel (similar) a very small fraction of an inch and the drill bit will snap.
The proper way to operate these is:
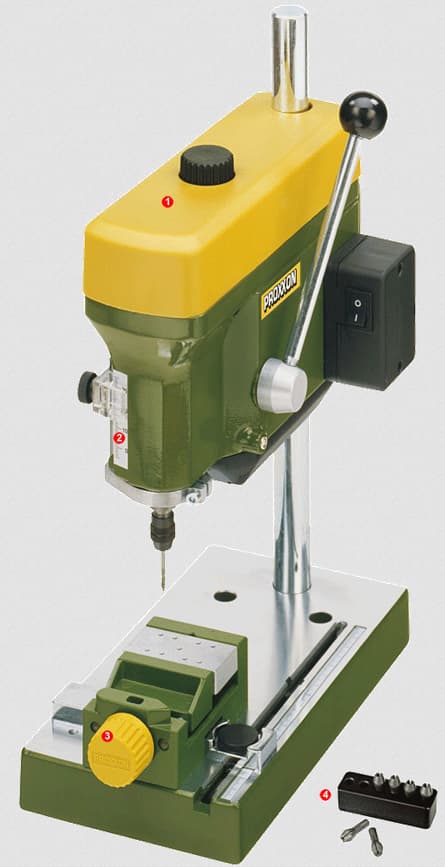
PROXXON - TBM 220 or something similar
As @justsendit explains above:
Metal tool at high rotational speed + styrene = tool glued to styrene and useless holes
Breaking drill bits, melting styrene, getting new drill bits, rinse and repeat
takes more precious modelling time than slowly and tediously drilling with a pin vise.
Really straight piano wire in the Dremel might possibly be used as a drill. It will
melt-drill but since it doesn’t have any flutes it doesn’t stick.
1 Like
Haha all this from a £3 vice pin and a £4.87 pack of micro drills  but you know what it’s a good thing as it might stop people buying something that turns out to be not much use. Not much money I know but it could always be better spent.
Now what were we originally blogging about?  Oh yeah… the ‘Dragon Black Label 1/35 Saladin Armoured Car’ build. Back to work, Maximus8425.
  Lol!
Lol!
4 Likes
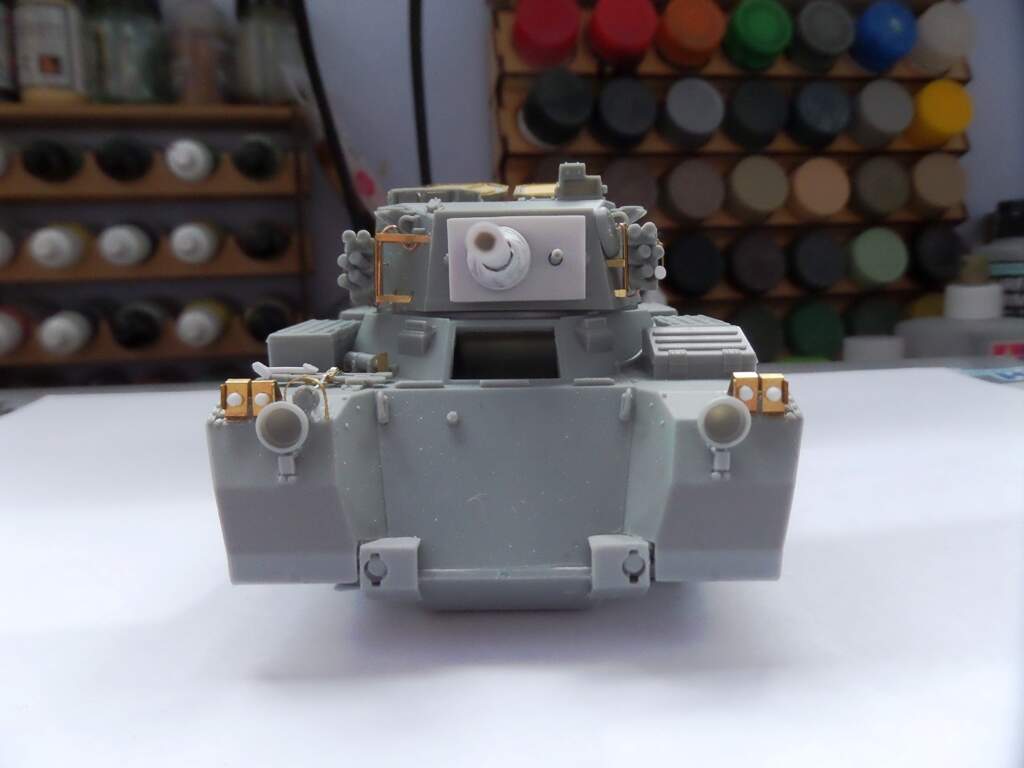
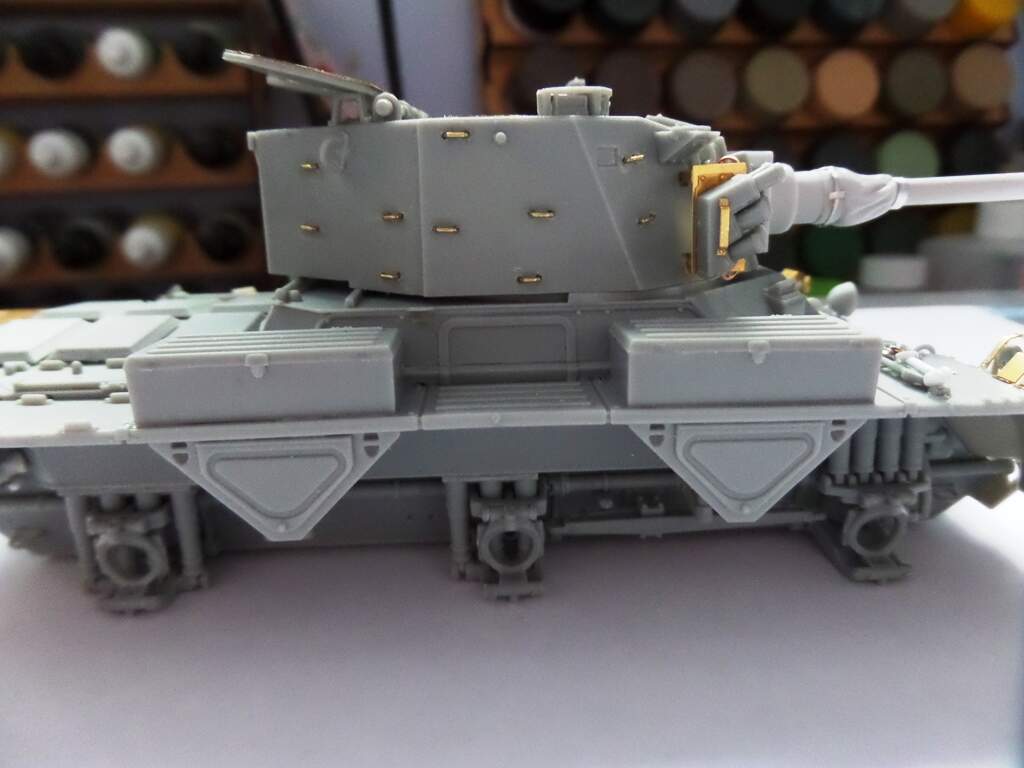
Smoke grenade dischargers fitted now. One of them was not on the sprue and so I used one from the spares box which was left over from an AFV club Centurion, it was the Shot Kal which didn’t have them fitted. Had to build up the end to show it with a cover. The holes where the dischargers fit the turret need filling, it could have been done easier before fitting but I feel this way will anchor them more securely. There is a noticeable seam on the real deal on the dischargers as the outer cover can be stripped off to get to the wiring inside so I haven’t filled and sanded the kit part. I think it will look tidier when painted. I’ve also used two fixed fire extinguisher handles from the Cent kit as the Saladin kit doesn’t have them.
I did a final straightening of the barrel warp as it kept pulling back in. This time instead of water I used the nuclear option of 0A’s hairdryer, heated it to within an inch of it’s life and held it till it cooled down. It’s not pulling out of shape now.
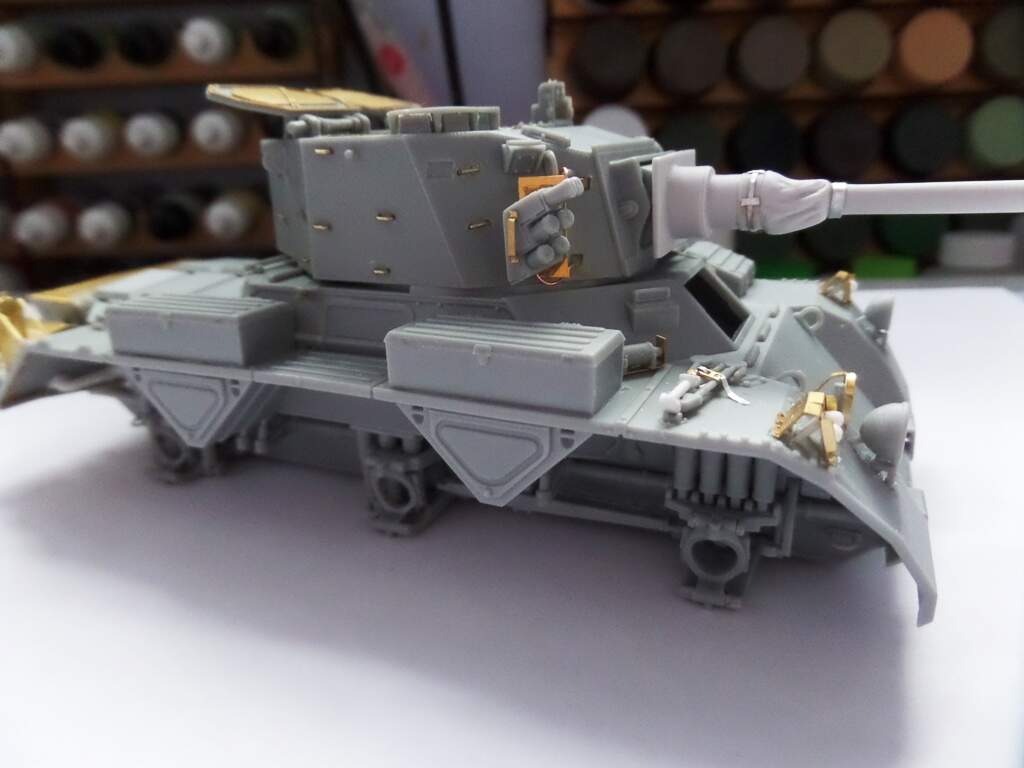
8 Likes
Lots of nice extra detail going into this one Max… And that’s taken it up a few levels for sure 
You’re sure making this into a showpiece.
I’ma likin’ it.
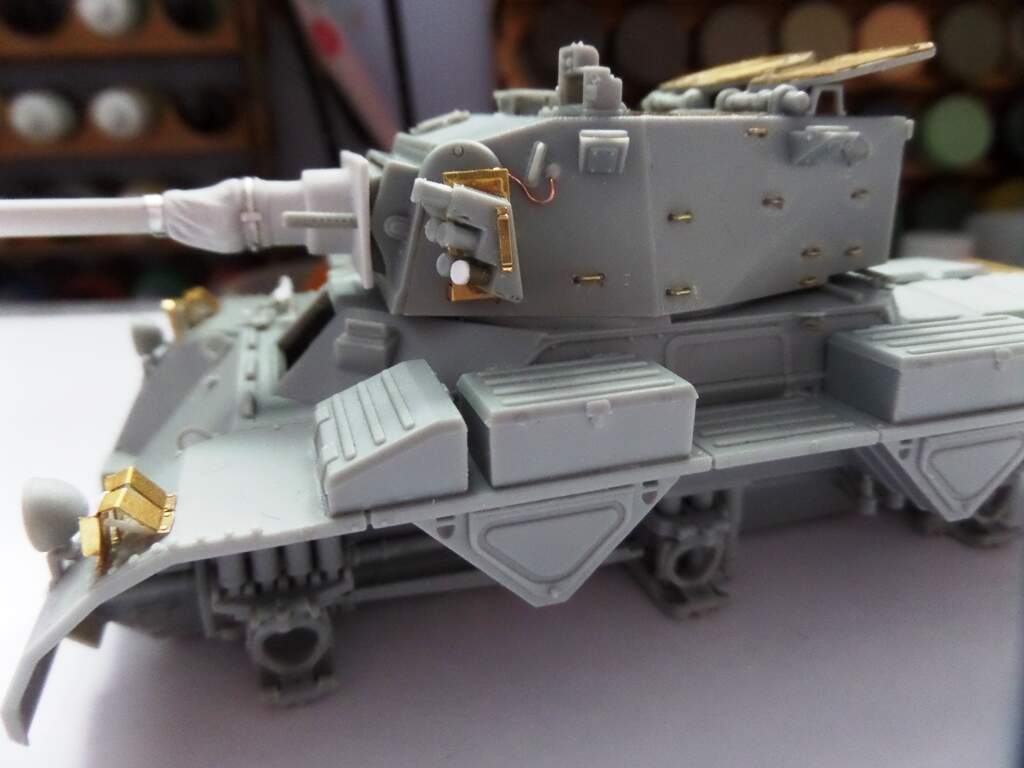
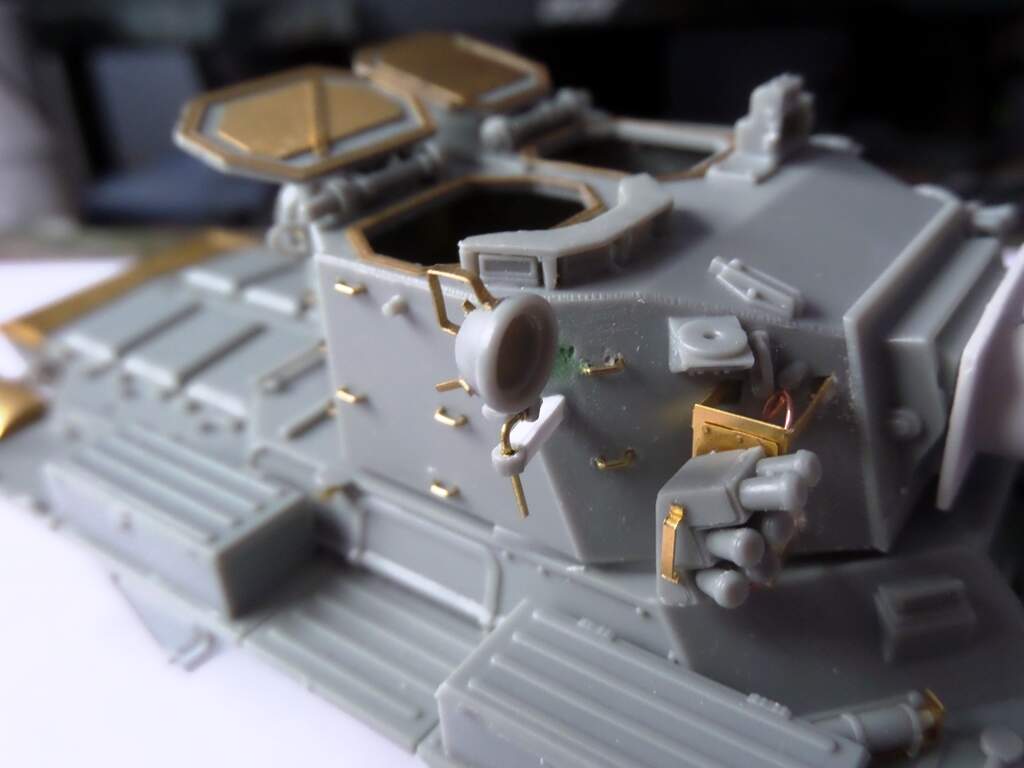
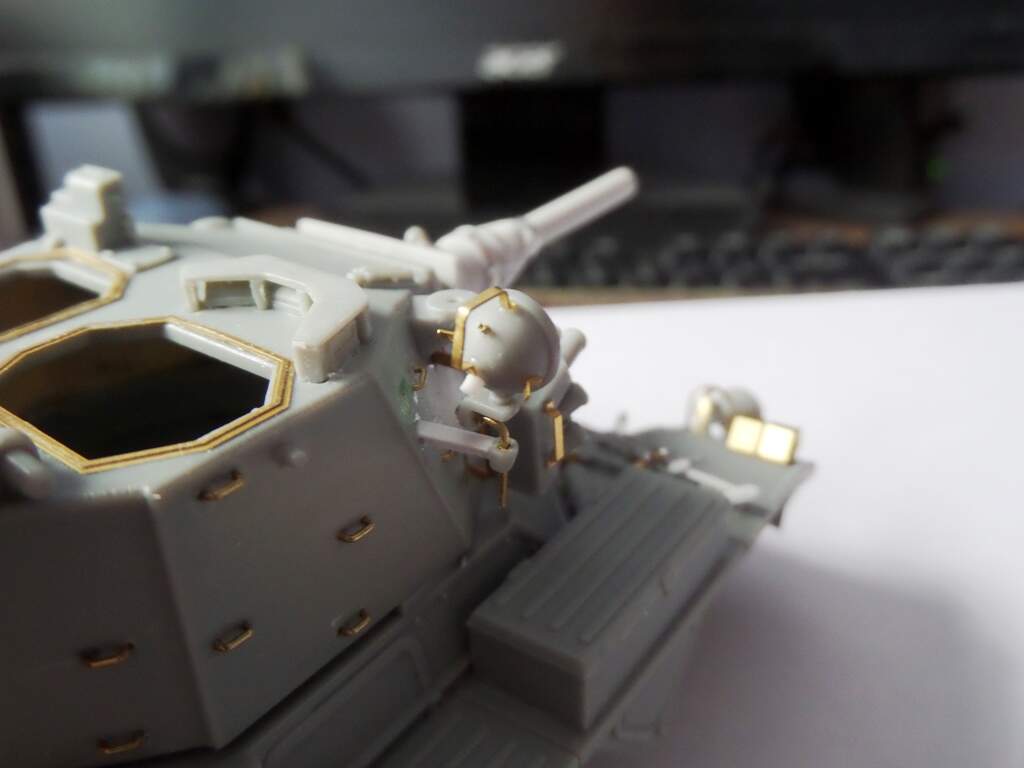
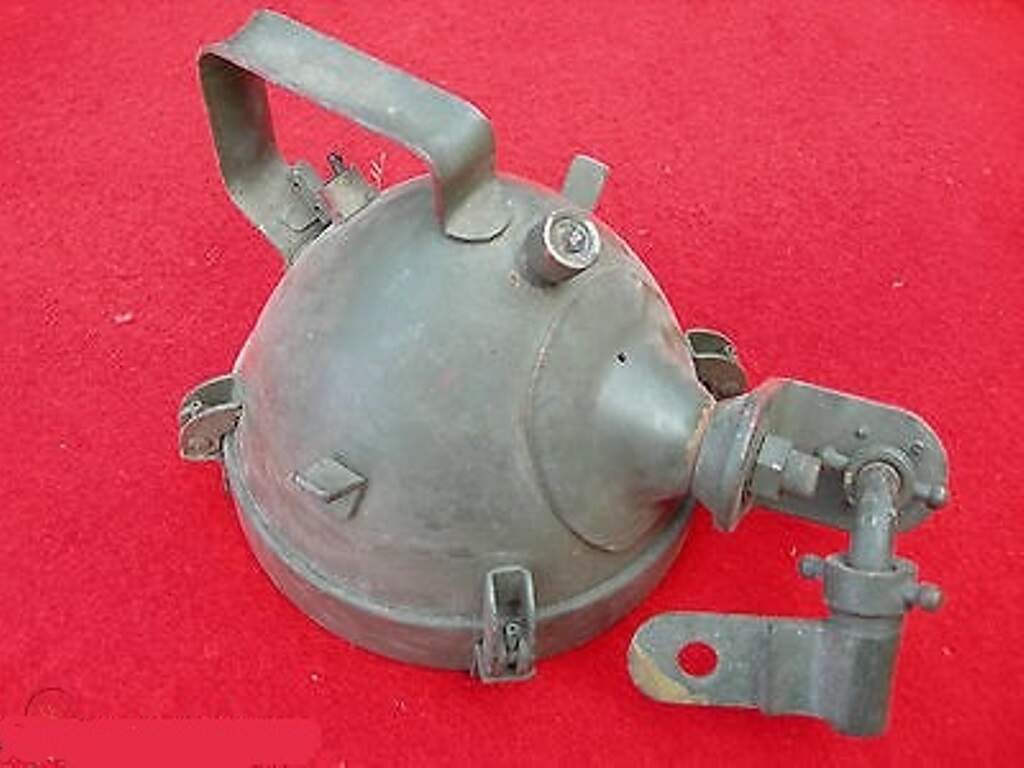
Worked on the commanders spotlight as the kit part detail was very heavy. The mount securing it to the turret was completely wrong as on the real wagon it is literally a length of angle iron welded to the turret with a hole in it. the spotlight is then bolted to that. I have changed the position of the electrical connection as it was in the wrong place, added a switch, handle and brackets to wind the cable around. Still got the brackets which hold the glass in place to fit. Not perfect but better than the kit part. Typically the light isn’t plugged in until needed as it plugs into a distribution box on the inside of the turret and so the cable would stop the hatch closing. Anyway pics below and one of the real thing.
9 Likes
Nice fix Max. What were they like to crew ? …were you in all the seats at some point ?
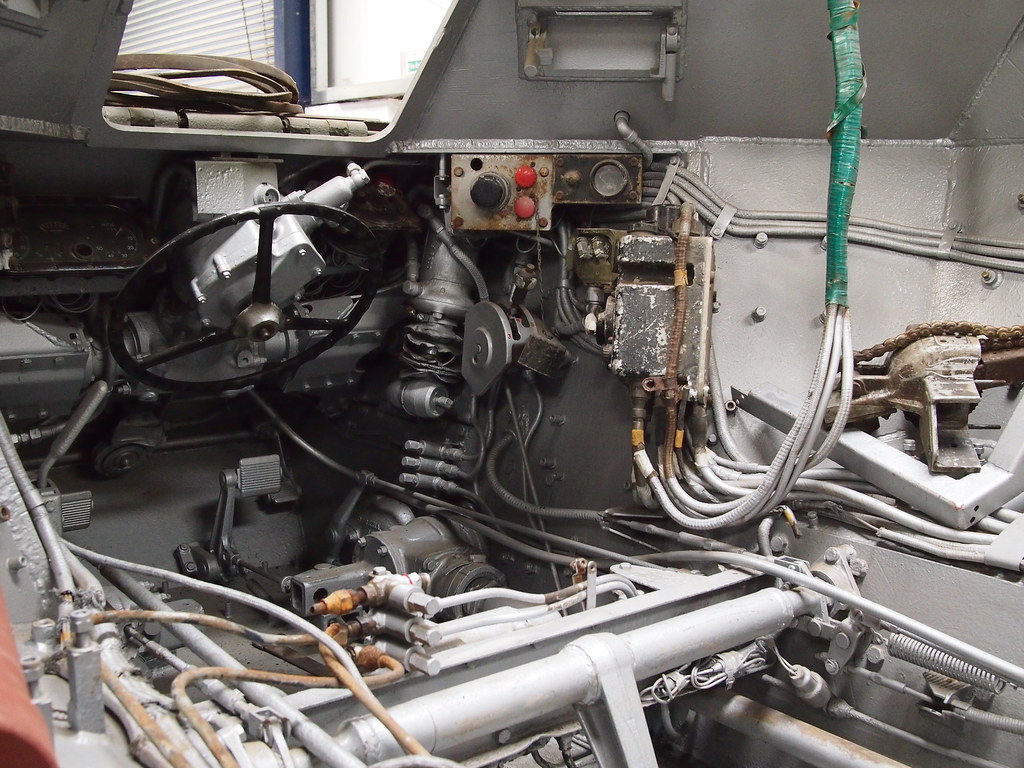
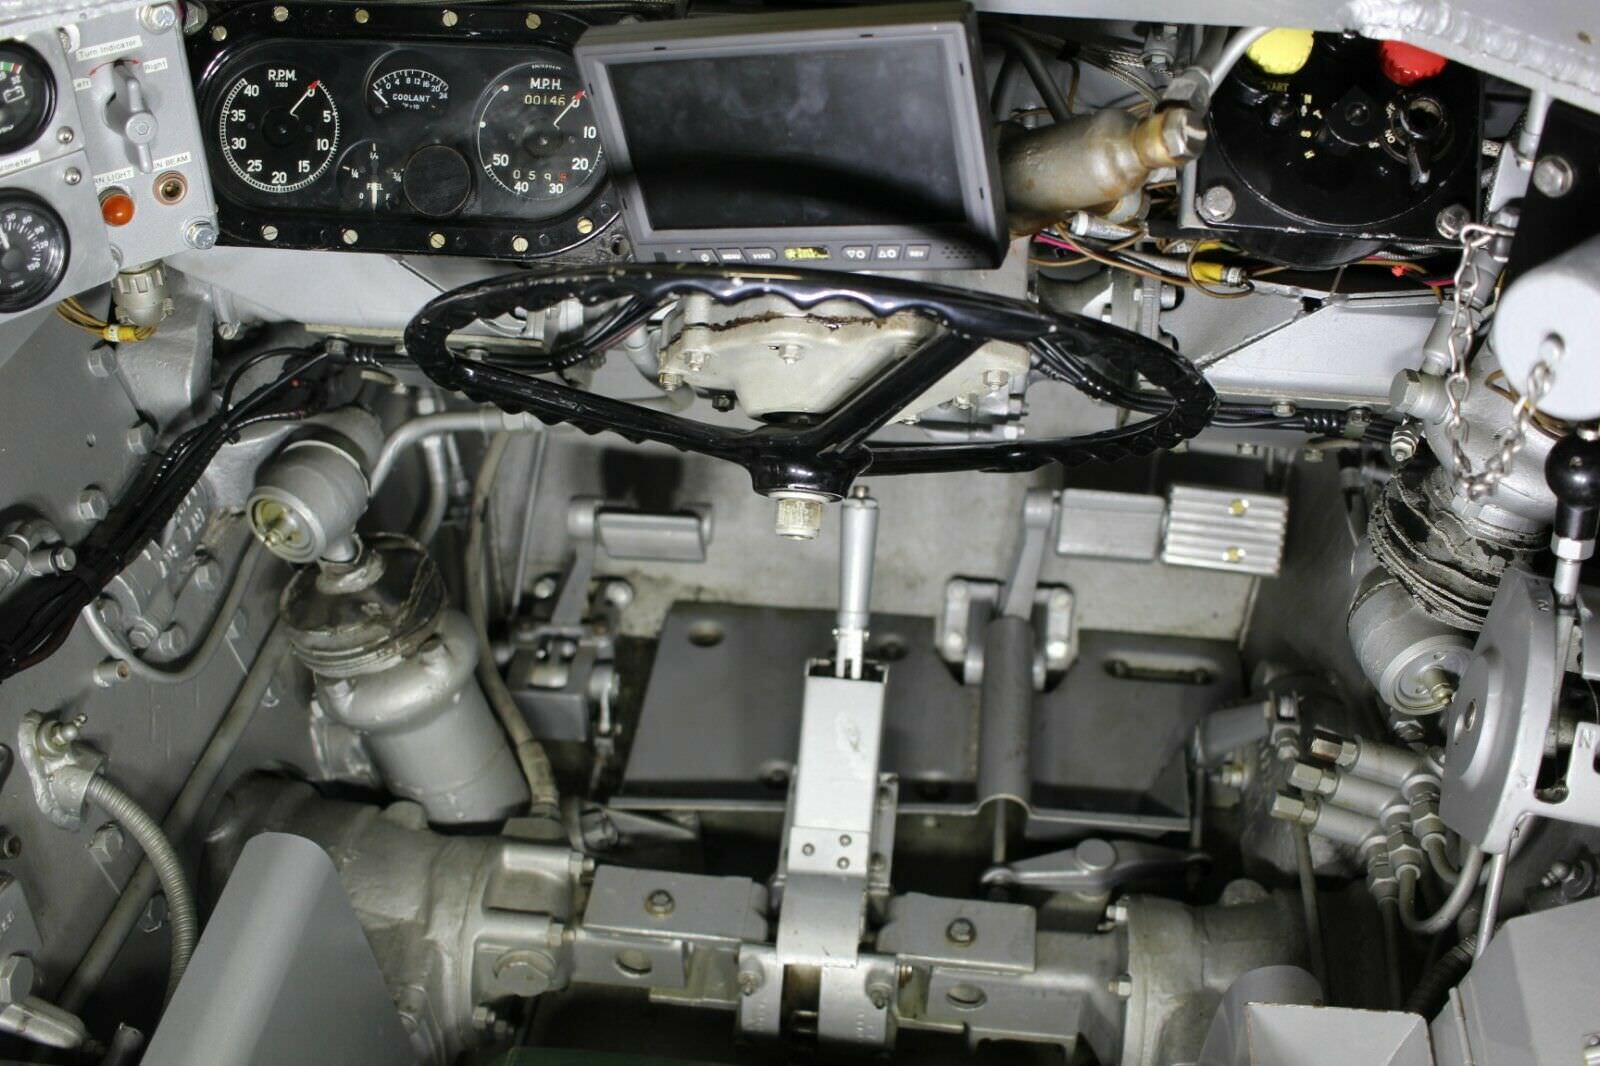
They were very big, or seemed so at the time. Stable, powerful and very good cross country and they had the same pre-select gearing system and strange steering wheel setup as the Ferret which is what I learnt to drive initially. I learnt my 76 gunnery on them but was never the gunner as I was too junior. I drove the Troop Corporals Ferret usually and the Saladin when needed but all the drivers could drive them. For an old wagon it had power traverse using a torque multiplier which is a surprise seeing as how Scorpion didn’t.
And for those that wonder what I mean by strange steering wheel setup, the picture below shows it. In the first picture the seat is removed but you can see the wheel is set “upside down” so you are looking at the edge of the wheel as you are driving. I’ve also hear it referred to as reverse sloped. The second picture shows how it looks from the seat.
5 Likes