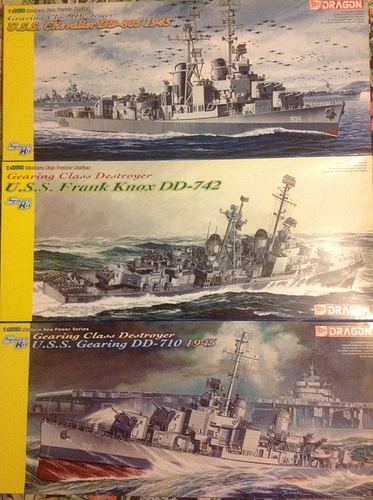
Dragon Gearing Class Odyssey

March 26, 2016

https://automodeler.kitmaker.net/modules.php?op=modload&name=SquawkBox&file=index&req=viewtopic&topic_id=246004#2077482

. . . . . And I couldn’t fit the subtitle “A Model Shipwrights Noobs Adventure!”

I have been a (virtually) silent observer here on the Shipwrights forums for a few years now and decided to overcome my reluctance and dive in, so to speak! I recently purchased the final chapter in the trilogy and now there are no excuses.

I chose this series for several reasons. Price wise they are very reasonable for the detail and inclusions, the only glaring omission is the railing. I like to build in themes, so having three very similar vessels will fit my quirky habits. They are relatively small, so I can fit them in to my limited display space together when they are finished. I have read a few reviews and they are recommended as decent kits for beginners in this field. There don’t seem to be any major difficulties or fit issues in the process. I am not scared of ill-fitting kits, having built some absolute shockers in the aircraft genre, but I really didn’t want to face this type of headache in my first trip down this road.

Now, all of that being said, I will be going very slowly and carefully on this project, so please don’t expect regular updates or massive progress reports. I will be fitting these in between commitments to Group Builds over on Aerscale and Automodeler. I like to work on subassemblies and put as much together as possible before I get to the airbrushing stage, and along the way I am going to be learning the terminology, the names and functions of the various parts of the vessels, and the best sequence for assembly and painting. What you CAN expect is lots of stupid questions! Following a few of the build log threads here I am absolutely amazed at what you guys achieve, the quality of the builds and the level of detail is just stunning, and the exchange of information, assistance and cameraderie is second to none. I am here to learn and improve my skill set, so please don’t hesitate to throw any comments, suggestions, critique or criticism in wherever warranted.

Who knows, maybe following along my fumbling path might persuade some more Wingy-Thingy or Muscle car nuts to try their hand here!

I have a couple of days off now and a few hours free time, so hopefully I can crack open one of these kits and introduce the styrene to the Xacto and Tamiya Extra Thin!

Happy Easter and thanks for checking in.

Cheers, D

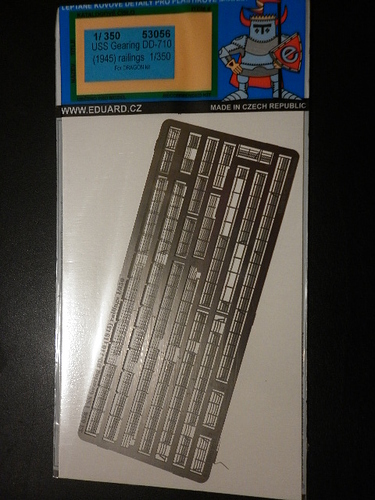
Oops, almost forgot my first question. I don’t want to go down the whole super-detail PE set path, is the Eduard Gearing PE railing set ( part number 53056) suitable for all three of these vessels?

Happy Easter Damian! Look at that…a triple threat! Looking forward to seeing you have your way with this! Enjoy!- Todd (TRM5150)
Good luck Damien. A triple build will something different to watch. I don’t know anything about the Gearing class so I’ll be interested to know if there are different mouldings between the kits. -
Michael (Cosimodo)
Hi Damien, Have fun with these three, I have build Gearing and it was a very enjoyable build indeed. - Si (RedDuster)
Subscribed!! - (damoore46)

March 27, 2016
Thanks for the warm welcome and the interest guys!

I had a bit of a browse through the boxes last night and I think I have settled on the Gearing to get the ball rolling. Looking at the profiles the Chevalier and the Frank Knox are almost identical, but the Gearing doesn’t have the central superstructure so it isn’t quite so scary for me :wink:

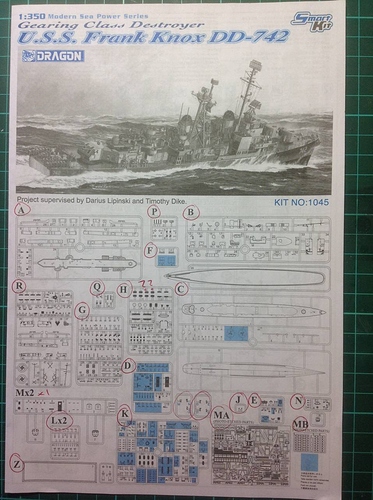
While reading some reviews on these kits a couple of reviewers found discrepancies in the sprues so I thought it would be best to do a quick inventory. The Chevalier and the Gearing were fine, but the Frank Knox has a couple of issues.

There should be 2 x Sprue “M” but there is only one.
There are 2 Sprues marked “H” but they bear no resemblance to the sprues on the instruction sheet. They look similar to Sprue “M” but quite a lot bigger, and have parts to make up a couple of turrets.
This will be a customer service test as I purchased this kit a couple of years ago from a local online store. I will email them today and see what sort of response I get.
Cheers, D

Hey Damian, I never knew we shared this ‘floaty’ secret. I have a couple of 1/350 tubs in my stash which I hope to touch on this year. Do you solder? It’s a great skill to have for shipbuilding as brass masts will stand the test of time better than the kit supplied plastic masts. If you need railing, BNA has heaps. On a personal note, railing is the hardest thing for me to do without stuffing up.
Best of luck on your builds! I’ll be following.
- Gaz (GazzaS)

G’day Gaz. Thanks for checking in mate! BNA is generally my go-to for after market accessories, they seem to carry good stocks and their service is great. I do have a soldering iron but I have never used it on brass, just repairing electronics. Another aspect of the hobby for me to try soon!

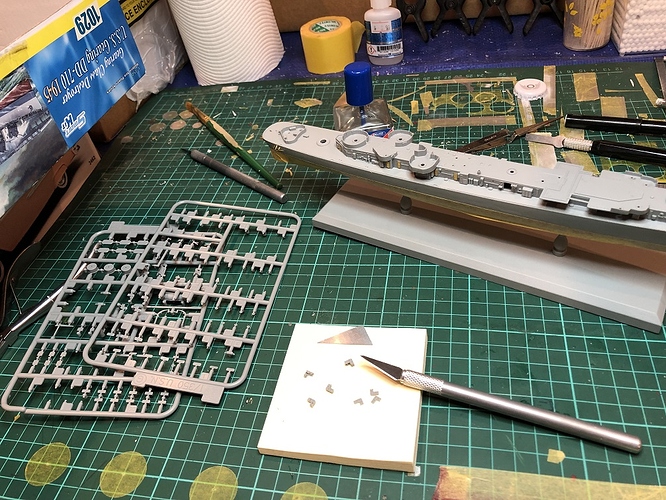
And so styrene meets Xacto, razor saws, Sprue cutters, assorted holding devices and Tamiya Extra Thin.

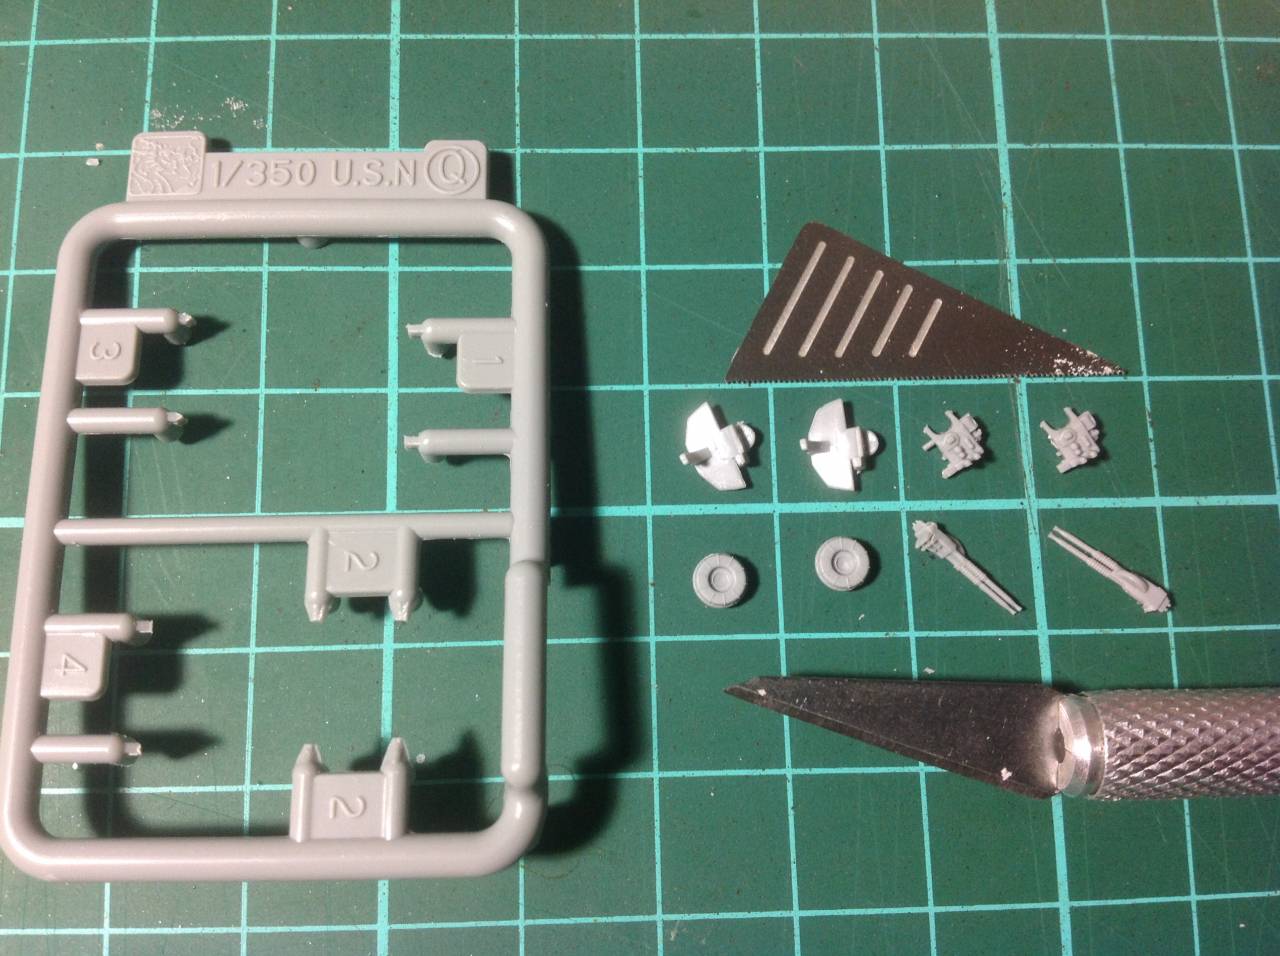
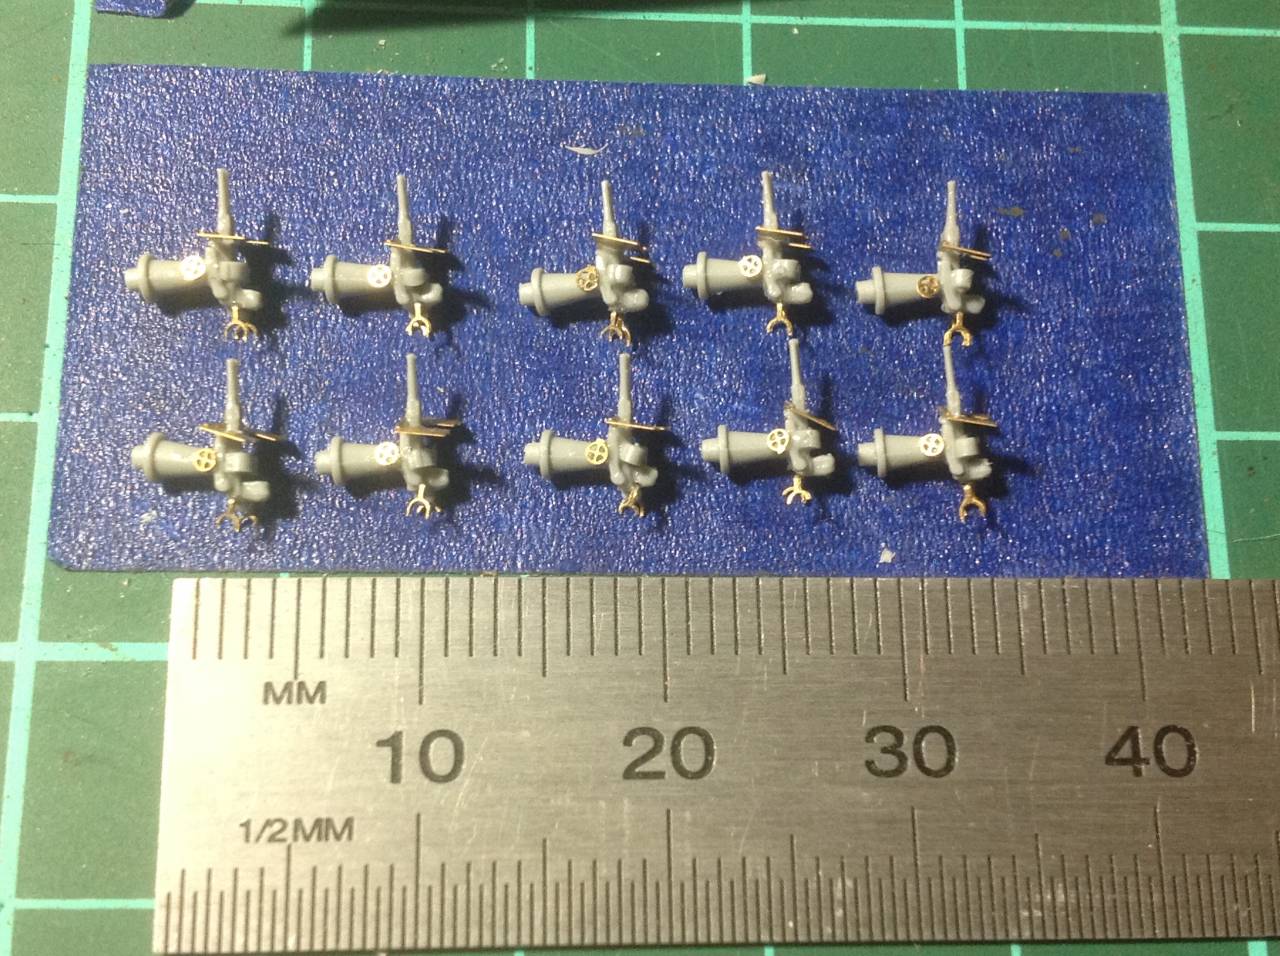
Instructions, Part 1, Step 1, Assembly “A” x 2. There are still 4 PE parts to add to this, so I haven’t glued the guns in place. The PE parts to add are seats and footrests, sights and what look to be handles to elevate the barrels. What caliber are these?

Is anybody interested in me posting images of the actual instructions here?

There are multiples of most of the assemblies in this stage, up to 10 of some, so folks must have a preferred method of storing and labelling them for protection and ease of selection in later stages. I was thinking a small fishing tackle organiser, which I have plenty of, but is there any risk of reaction between the plastics?

Like I said earlier, expect plenty of noobish questions as I get started here.

Cheers, D

Edit:Damn, these parts are small! I’m used to handling the fuselages and wings of 1/48 fighters that don’t disappear into the carpet and I can actually feel them between my fingers. This is going to take some real focus!
March 28, 2016

Wow, staying busy are you? I’m at least in your Hemisphere for the rest of the week, but all my kits are in the other one. I’ve had great luck with Gold Medal Models and Tom’s Modelworks for ship brass. Shipping down under might be a problem though. Best of luck, I’d love to see how this works out. - Mark (md72)
Hi Damian, Good to see a start, those twin 40mm are fun. The great fun, for me anyway, of building ships is the loads of small parts! Good luck with the trio mate - Si (RedDuster)

Mark, thanks for checking in mate, hope you enjoy your visit to our end of the globe!
Si, thanks for the feedback. I’m looking forward to this challenge, and learning more about the subject matter as I go. It feels vaguely wrong assembling AA weapons when my main passion is aircraft!

The sprue inventory issue continues. Sprue “Q” contains the parts for 2 of these 40mm AA guns, and only 2 guns are called up in the instructions, but the kit contains 2 x Sprue “Q”. Is it common for entire extra sprues to be packed in these kits, or is Dragon just a little off their game in this regard?

Once I get started on a project my mind tends to leap forward a few stages and look at further aspects. Looking at the three kits there are obviously a lot of common assemblies, numerous turrets and smaller guns in particular, just the numbers and arrangements on each vessel vary. Do I pull the sprues out of each kit and build them all together in an “assembly line” style process, which would involve several hours of repetitive building now but make the final assembly on each kit simpler, or do I take each kit separately and build in its own right?
I suppose if I was embarking on this project with a view to directly comparing the contents, the molds, the fit and the differences between the vessels, it would make sense to complete each stage of the three kits concurrently. Given that my aim is to learn about the vessels, the weapons, the parts and structure of the ship and the build process, I think that I will approach each kit separately. I won’t necessarily completely finish one before I start the next, because who ever does that?
Well there it is, I have answered my own question! Apologies for the rambling, I am just enjoying a quiet glass of red while I read over the instructions again and try to spot any traps for the unwary (that being me).

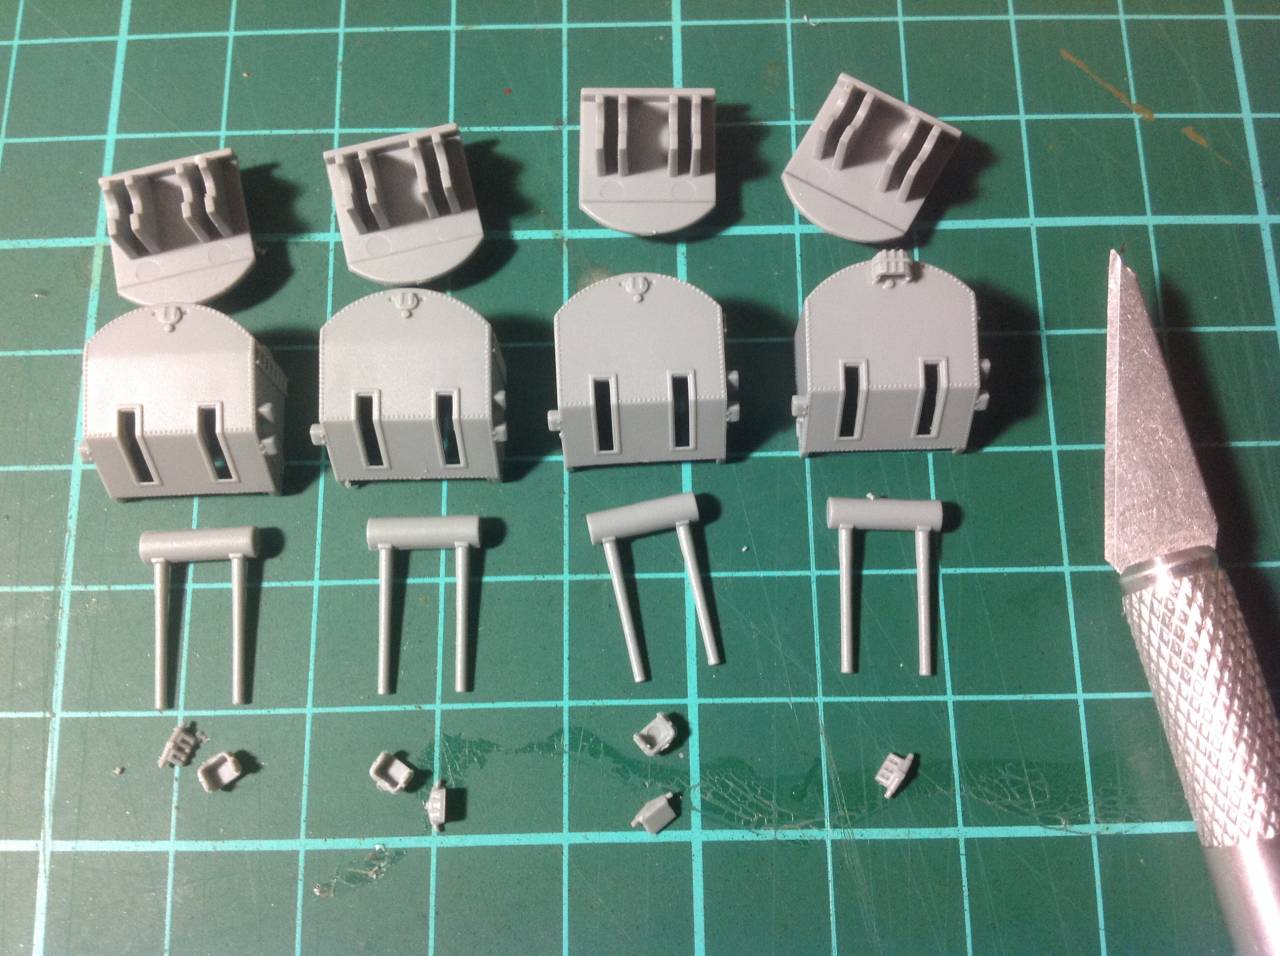
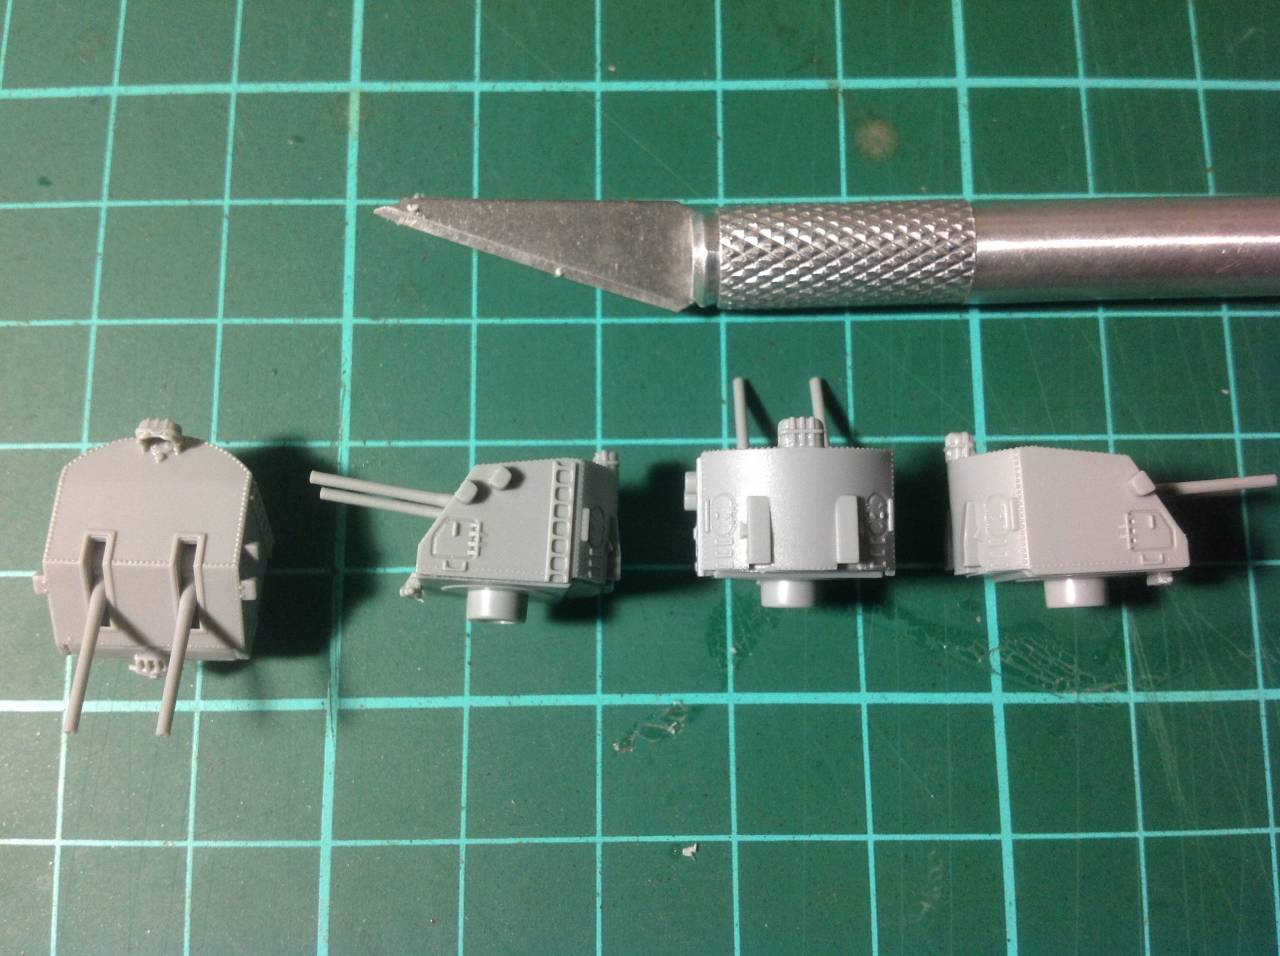
Next up are the main 5 inch twin guns. There are only 3 assemblies required, but parts are provided for 4, so I thought I would put all 4 together so that I can show the detail on all sides in one photo. I will attach the PE ladders at a later juncture.


Aw come on, itty bitty, try 1/700 ships. I’ve got at least two on the shelf of doom. Tell me more about your razor saws. I just bought one from UMW (?) and it’s working well in most cases, in other cases the screw clamp set in the middle gets in the way. Red? You’re drinking red? I thought all you Aussies went for beers in the 24 oz cans??? - Mark (md72)

Mark, I finished the last 6 or 7 barrels earlier today and all that was left was some of the magnum of Hanwood Cab Sav. Why I didn’t finish it last week I’m not sure.

After working on a couple of 1/350 subassemblies, 1/700 parts would probably look like a small pile of sanding debris with an odd shaving off the Sprue. I don’t even want to imagine 1/1200 !

I picked up the razor saws a few years back from the LHS, the set was one sheet similar to a PE frame. I don’t recall the manufacturer, sorry.

Hi Damian, Those turrets look nice. Dragon does make some amazingly detailed ship models. On the flip side, when I built my only Dragon warship, I found the directions had me do the armaments first.
I spent the next couple of months with them attached to a piece of cardboard with blutack. After much reading of experienced hardcore shipbuilder’s build threads, I saw that they worked from the keel upwards, saving the most delicate and topmost for last…I’m gonna try that next time.
- Gaz (GazzaS)

Nice work on the main turrets Damian. As Gaz says, Dragon instructions do have an odd habit of wanting you to build a lot of sub assemblies first, that you don’t need till much later. Keep a close eye, I have built their USS Independence (CVL22) and have Scharnhorst under way (thanks for looking in by the by) and in both cases there were a number of errors in the instructions. Don’t recall any on the on the Gearing, but it was a while bag that I built it. Cheers - Si (RedDuster)

Hasegawa makes a saw set very similar to the one you show. I think that Tamiya also makes a set. - Grant (GrantGoodale)

I found a couple of very similar sets http://www.militarymodelling.com/news/article/crazy-modeler-saw-sets/3595# HERE and I’m sure a bit more Googling will find more. I use them more often than the Squadron Sprue Cutters that I have, I find that there is very little clean-up and no distortion of the parts at the sprue connection point using the saw instead.
Gaz, Si, thanks for the feedback. I have noted in most threads that you guys tend to start at the hull and work upwards, but I suppose diverting from the instructions comes with experience in this type of build. I will stick with the sequence in the instructions on this build, then go with a bit of freestyling on the next. I can see the sense in getting the hull and structure assembled and painted first and then adding the detail, I wonder why Dragon would not take note and rewrite their instructions to that effect.
I got an email reply from the supplier of the Frank Knox and they are going to see what can be done to sort the sprue issue for me. Positive action at this point.

Cheers, D

March 29, 2016

Thanks D, I was thinking it might be an old Eduard set. I try to track them down when I get to the correct time zone. Good to hear that you’re doing you best to keep kids from eating raisins. Wouldn’t want good grapes to go to waste… - Mark (md72)

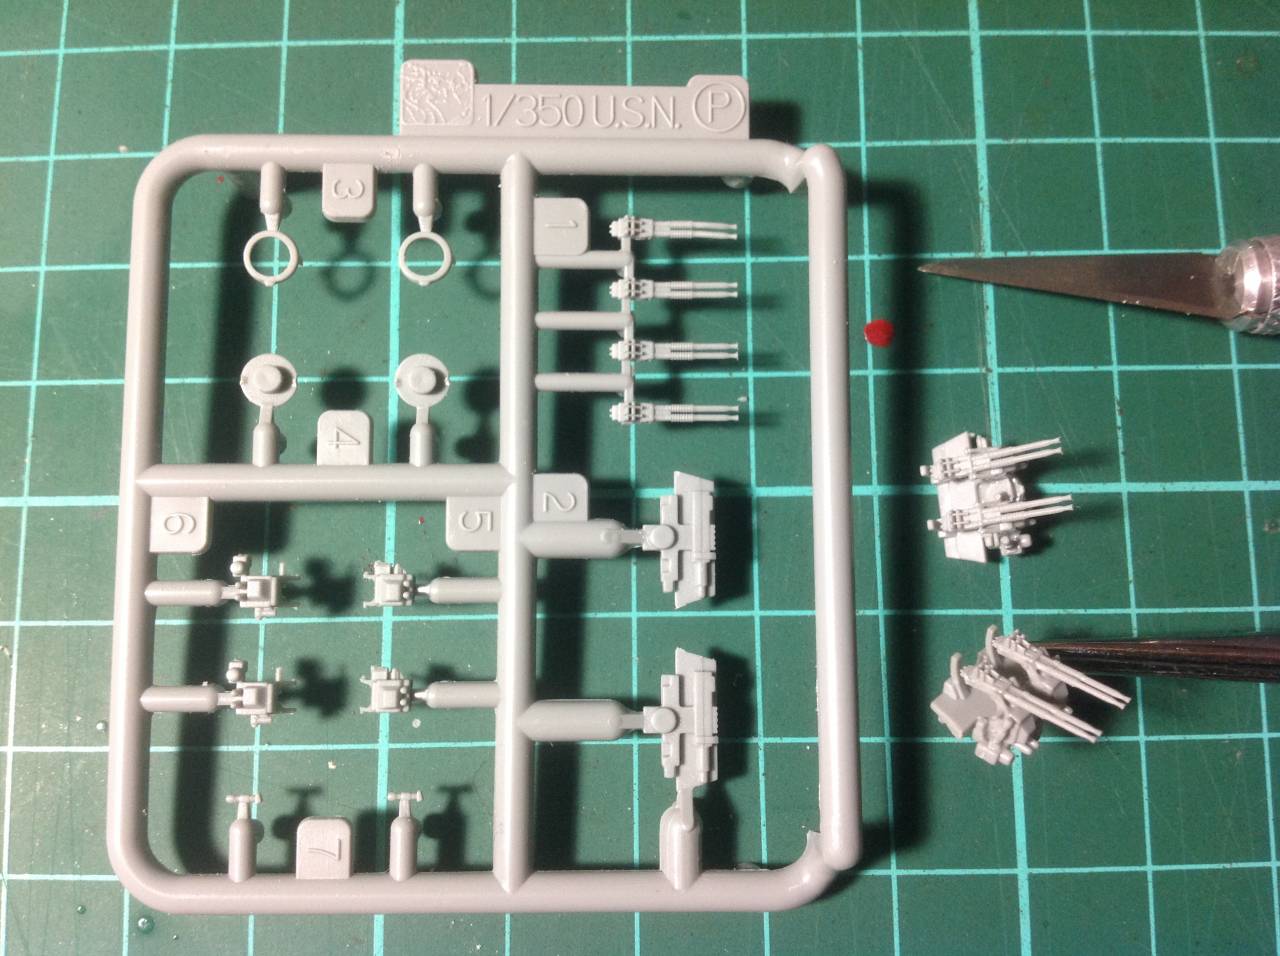
Step 1, Assembly “G” is the Quad 40mm gun. There are 8 plastic and 6 PE parts in each assembly, parts provided for 4 but only 3 required in this build. The photo below shows Sprue “P” which contains the parts for 2 assemblies, plus 2 completed assemblies from the second Sprue “P”, with the PE parts yet to be added.


Note, I have already trimmed quite a few pieces of Sprue off the parts in this photo, the pieces are very securely held in place.

Hi Damian, Those quad 40mm look pretty sharp. On build order no matter what the instructions say I can never help myself but assemble the big guns first to see what they look like. Usually they don’t see the light of day for another 3 months. cheers - Michael (Cosimodo)

March 30, 2016

Thanks Michael, I appreciate the feedback. I am very impressed with the detail on these tiny parts.
As is natural I find myself comparing this build with my past aircraft builds and there is a very obvious inversion between the two genres that has just struck me. On the aircraft we spend the first part of the build assembling and detailing the interior, cockpit, engine assemblies etc, and then go right on ahead and hide it away never again to see the light of day inside a smooth, aerodynamic solid fuselage or wing. We then go about painting, decaling, weathering this to give it some features. On the ships there is a beautifully streamlined hull that typically gets built first, and then all of the intricate detail sits there right on top, in your face!
And then there is Armorama , another field that I am yet to venture into, where the interior detail is generally covered up if it is present at all (like the aircraft), but then the exterior is absolutely carpeted with detail.
I think that I think too much!
Cheers, D

Me thinks you need another barrel or two of the red for this question. - Mark (md72)
Hi Damian!
Very nice project and a great start!! I’m definitely in and will be following, a very entertaining blog so far, just read it from the beginning.
I can’t be of much help with this kits, but maybe for more general questions of yours.
Most was answered already. Maybe my five cent - be careful in ‘simply’ following instructions! If you just end up building subassemblies that are not needed for the next weeks or month, so what. But sometimes there are steps that simply don’t work, or entirely mislead you when you try to follow. That is no speciality of Dragon, it is the same with Trumpeter, most aftermarket producers, Heller…
Consider at what point you paint stuff. That may deviate from the wings side, as well. Many subassemblies must be painted before they are installed on the ship, otherwise you can’t reach them. Others should be painted after installation, to blend in. There is not the ‘one way’.
And the ‘spare’ guns and parts you see, that’s just ‘laziness’ on part of the manufacturers. Or it might even be more economical. When a base kit is sold in different versions (as yours!) you’ll likely find the number of guns etc… required for the version of the ship the needs most. It’s probably cheaper than having different types of sprues with two or three items.
And I don’t start with the big guns - I do like them too, very much so. BUT - when you do all the fun stuff early on and find yourself with all those parts left to do that you don’t like that much, you’re likely to lose motivation towards the end of a build…just my approach. Cheers
- Jan (JJ1973)

Hello Jan. Thanks for checking in, and thanks so much for the feedback and advice!

I always take note of where and when the sub-assemblies are to be fitted to the major build, and look at what difficulties might arise around painting and decaling if they are installed too early. Following along with a few of the builds on these forums has given me (hopefully) a good insight into the timing of painting the various stages, and I have printed a couple of online build reviews of these kits to refer to as well. Fingers crossed I won’t get myself into too much trouble down the track

Cheers, D

April 02, 2016

A small progress update, I have the 4 x quad 40mm assemblies together (sans PE) and started to assemble the radar and director assembly (look at me throwing around naval terminology like I know what I’m talking about!), and this is how I have decided to store the subassemblies until they are required.

Cheers, D

Hi Damian. Great to see that You listened to the “Calling Of The Sea”. Maybe just a one small advices - assemble the hull first, then paint and weather the red bottom. Mask it up and dont remove the mask untill the built is finished. In doing so You will get a surface where You can hold and handle the model nicely while not damaging the paint. Works for me every time. - Jacob (Naseby)

April 03, 2016

Naseby, thanks for looking in on my adventure, and thanks for the advice. The more threads that investigate and the more I look over the instructions, it becomes more obvious that I need to get the hull together and painted before I go too much further. The gun assemblies that I have worked on to this point just need PE, so I might just pause the first stage and jump in to the hull assembly.
The Automodeler “Big Fins and Chrome” Group Build for cars from the '50s has just started and my '59 Cadillac Eldorado Biarritz has driven across the bow of the Gearing and brought it to a stop!

Hi Damian, your guns look really good!! And the way you are storing them, with the additional paper in your box, should be 110% proof I never had any interaction between any kit’s parts and a plastic box, and I tend to work more than a year on a single model…but better safe than sorry . Cheers, - Jan (JJ1973)
Nice storage solution for sub assemblies mate. Looking forward to seeing more progress. Cheers. - Si (RedDuster)
*Nice one D! I’m watching * - Russell (RussellE)

April 07, 2016

Thanks Russ, nice to have you on board.

Ok guys, you talked me into it!


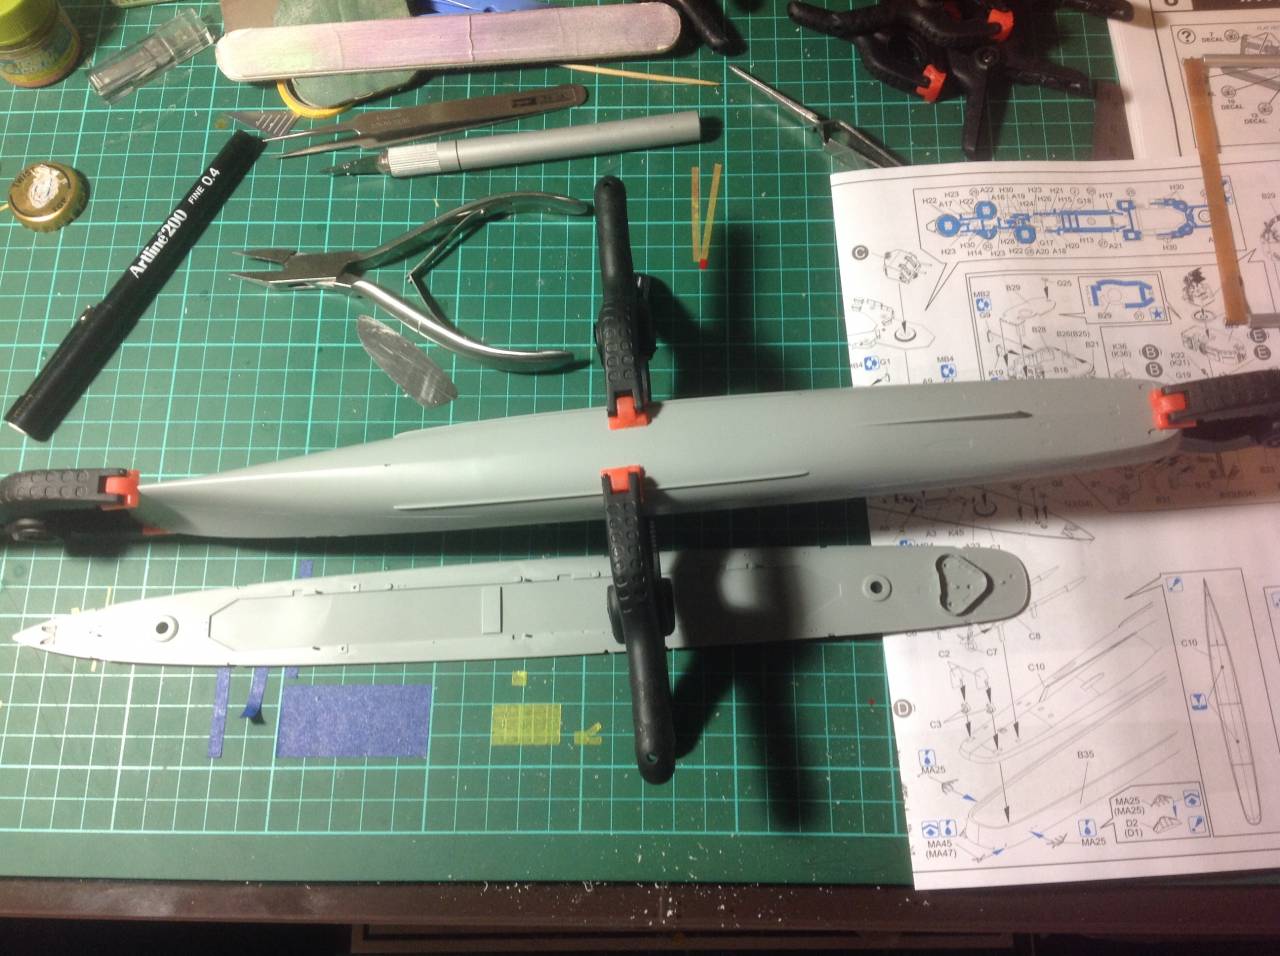
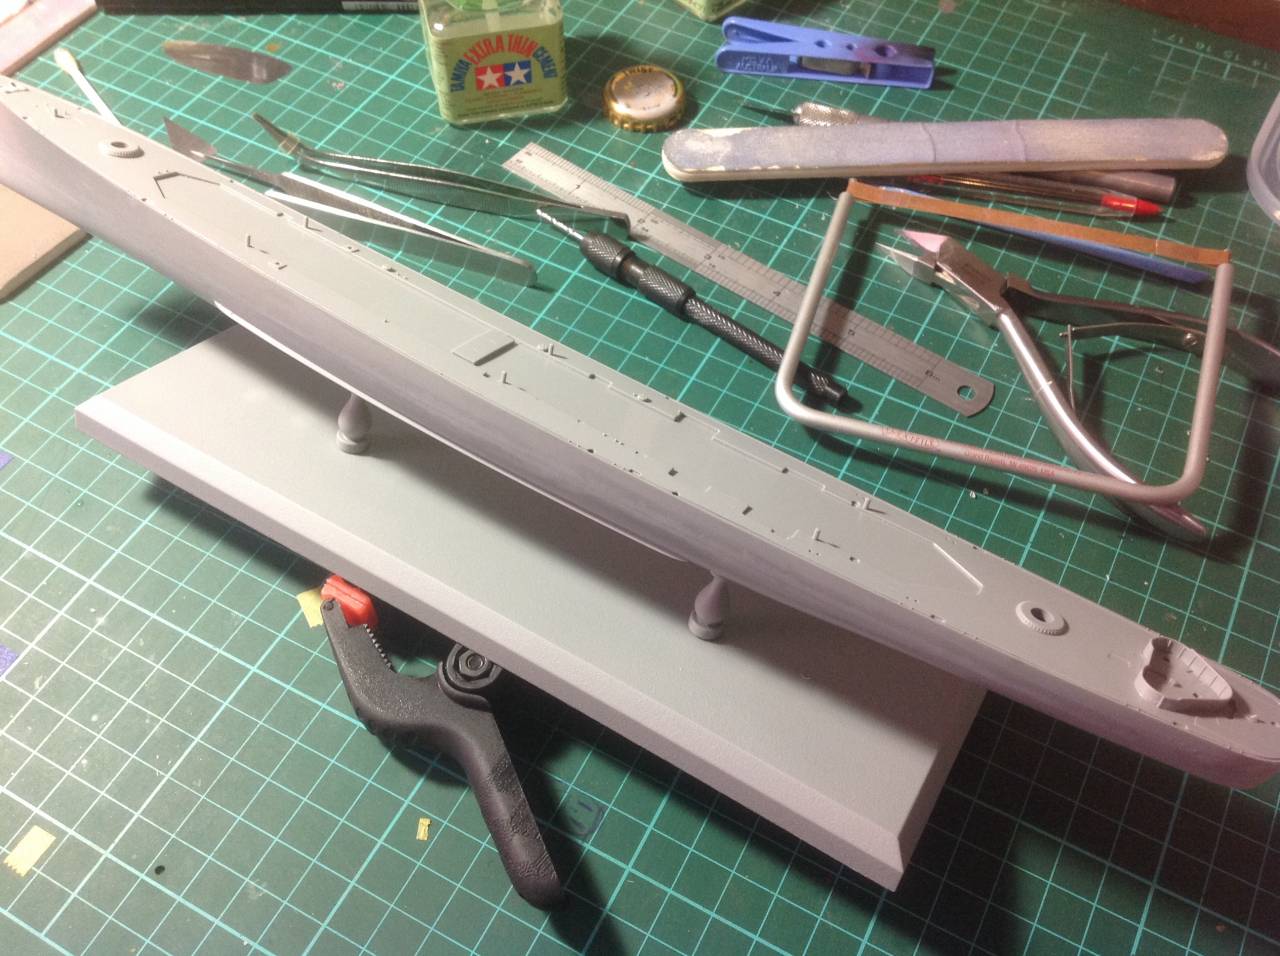
The hull is assembled, minor putty work along the join has been cleaned up, main deck installed. I have just noticed that in my enthusiasm to get this together I forgot to drill out the mounting holes for the stand :_|
I will grab the hull from one of the other kits and drill it out, then use this as a template to drill the holes in the Gearing from underneath.

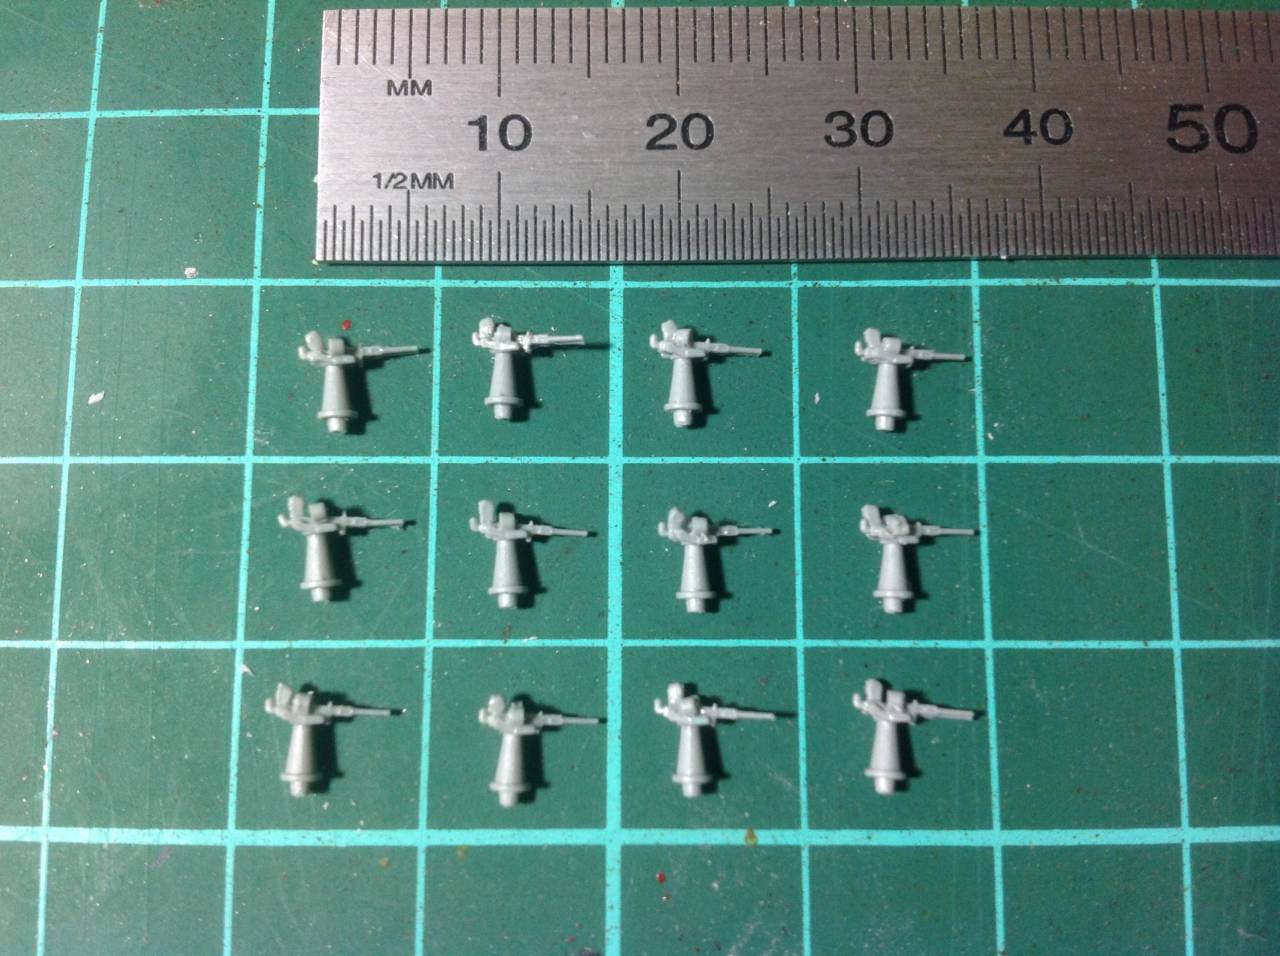
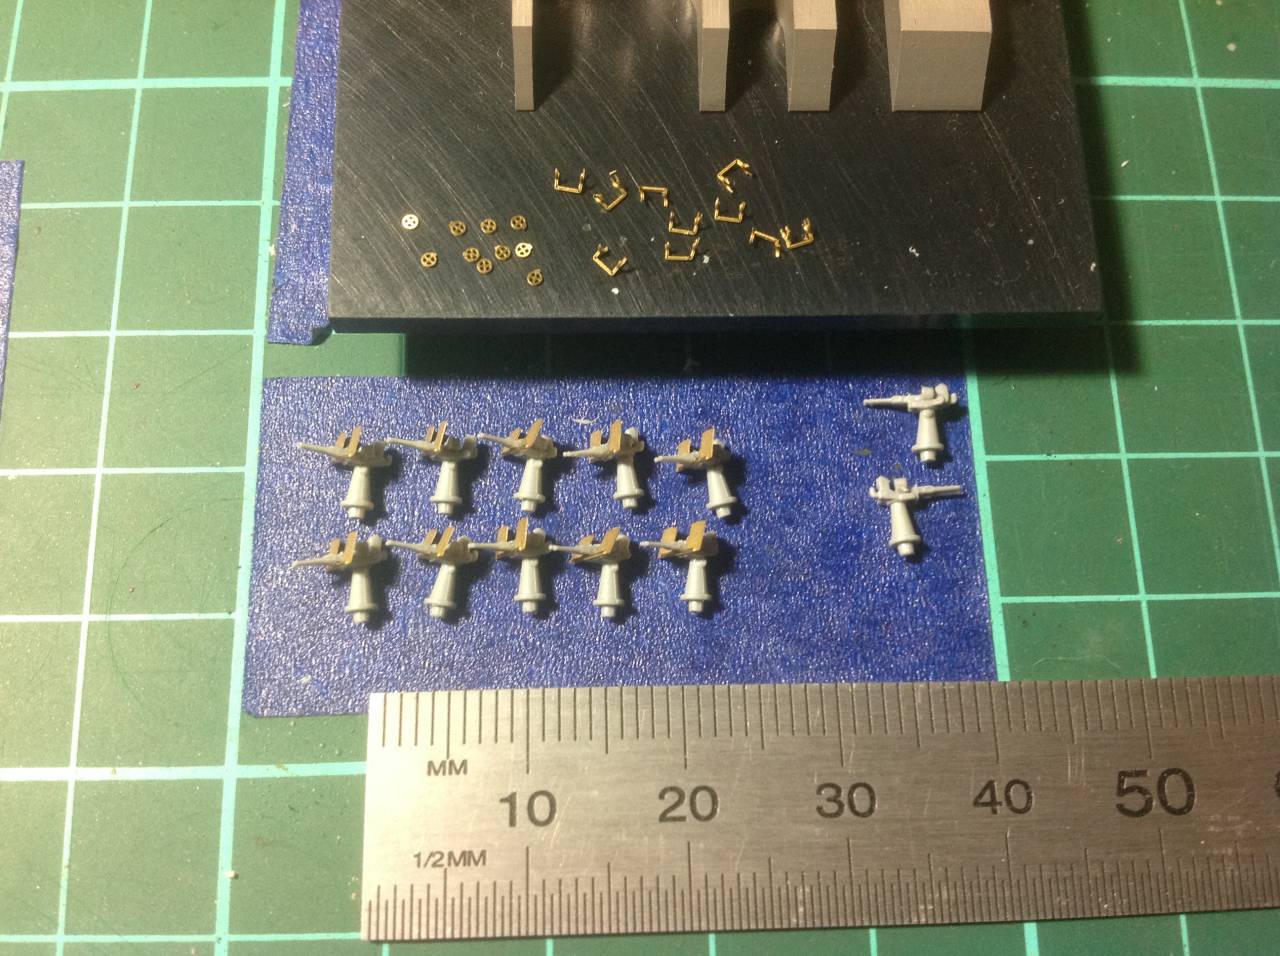
I also assembled the 12 twin 20mm guns. Only 10 are required for this build but given their size it is entirely likely that I will lose a couple! There are 6 styrene parts in each of these assemblies, and still 3 more PE parts to add as well.

Cheers, D

The hull looks good together Damian, been there done that, forgetting to drill out the stand holes. One tip to assist once you have your template, build up the stand, you should find subtle stress or sink marks around the hole locations. twin 20’s look good too mate. Cheers. - Si (RedDuster)

April 09, 2016

Thanks Si. I had a good close look at the bottom of the hull and there was no sign of any stress marks or sink holes. Typical, always there in the most obvious and unwanted places, but when you need them, not a chance!

I grabbed the hull from the Frank Knox and drilled the holes out, then measured off a couple of fixed points to give the hole centres. Job done!

Cheers, D

Looks good the right way up Damian. Nice recovery - Si (RedDuster)
Nice work Damian, looks good seeing the hull come together! Cheers - Jan (JJ1973)

Thanks for the feedback guys, much appreciated.
A quick question for those more learned than I. I have been checking out a couple of build reviews of this kit and on one build the main propellor shafts and supports were painted hull red with just the prop being gold or brass. The instructions call for hull red supports but gold for the shaft as well as the prop.
Which is correct?

Nice work D! Great to see some Styrene go together. I’m very dubious of ‘gold’ prop shafts. Myself, prefer either the hull red or steel. But could be totally wrong too - Russell (RussellE)
I definitiv agree with Russ here - golden prop shafts - NO WAY!! They can be either hull red or steel. I tend to do them steel, actually, they often appear to be pretty dark colored. That depends from shipyard to shipyard - whether they get some kind of coating and if, what kind. If you go with either hull red, steel or ‘dark steel’, you can’t really be all to wrong…Cheers - Jan (JJ1973)

Thanks for the feedback Russ, Jan. I think you have confirmed my suspicions, I couldn’t see a bare gold or brass prop shaft lasting long without some sort of protection.

Cheers, D

April 14, 2016

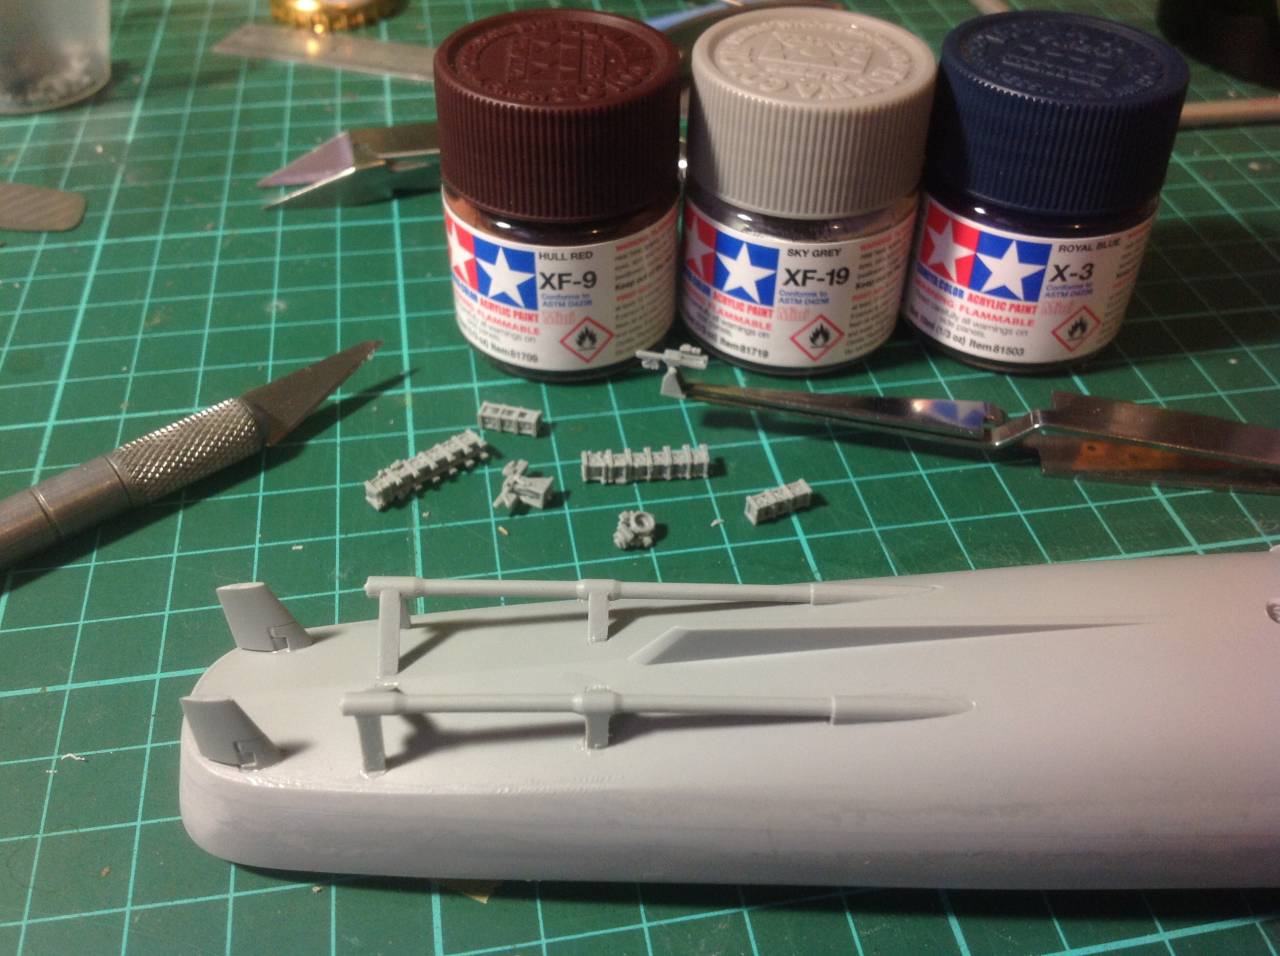
Next dilemma is colour! Tamiya Acrylic is my weapon of choice, so I need to identify the best options for Haze Grey and Deck Blue. I am happy to do a bit of mixing and matching, but the call-outs in the instructions involve up to 4 different Gunze colours mixed in different ratios. In the Tamiya Acrylic line, XF-9 Hull Red seems to look ok, possibly a bit on the dark or brown side, but a drop of red will sort that. I have read a few opinions on the Haze Grey, XF-19 Sky Grey appears to be a reasonable match. For the Deck Blue I have options of X-3 Royal Blue or XF-8 Flat Blue. Once again I can tweak these colours as necessary.

Has anybody gone down this path and found a good solution?

April 18, 2016

Small update, put together a few more little sub assemblies and made a call on the paint.


Oops, forgot, also got the shafts and rudders installed.

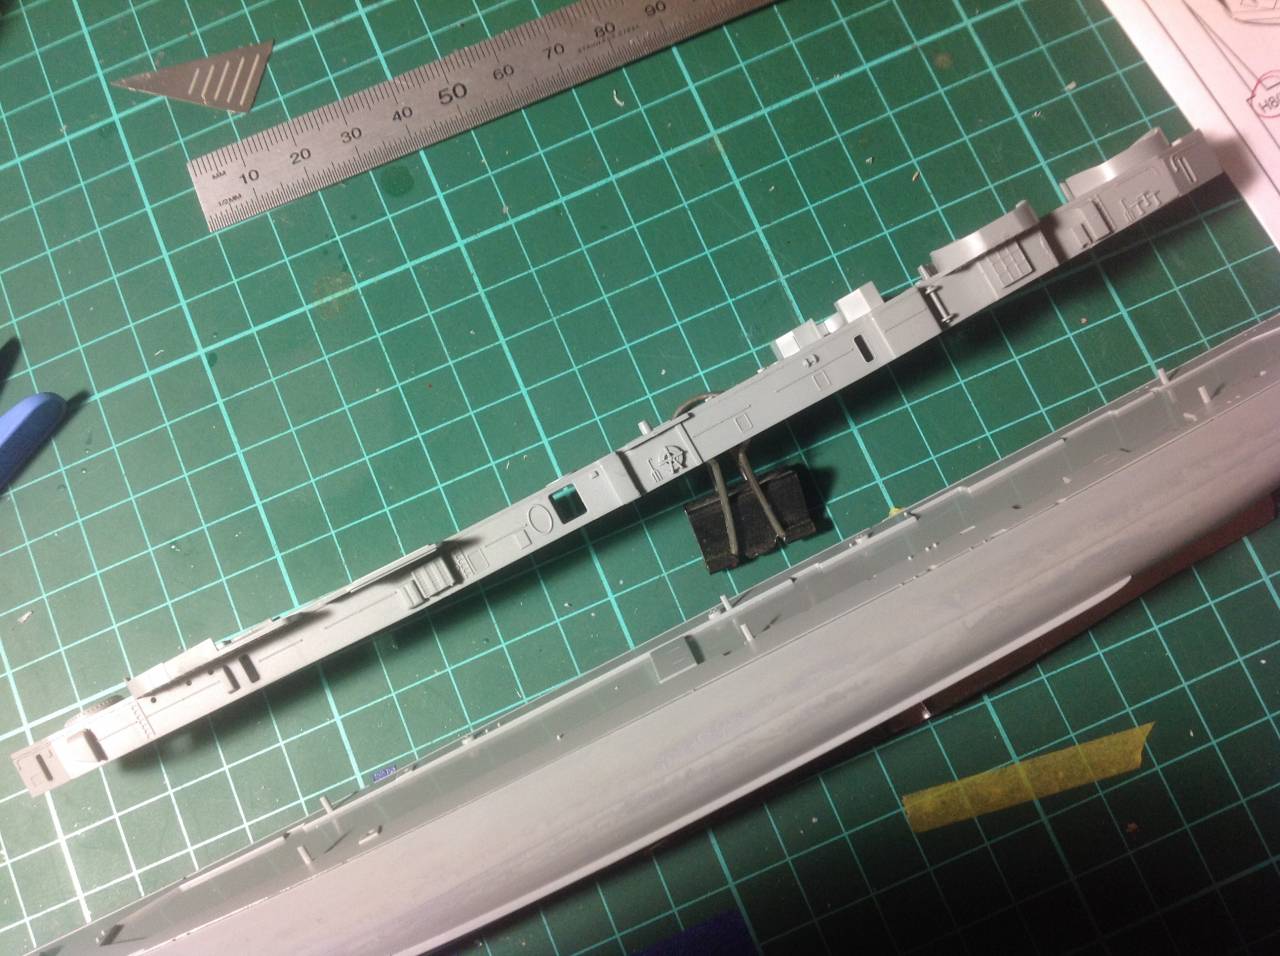
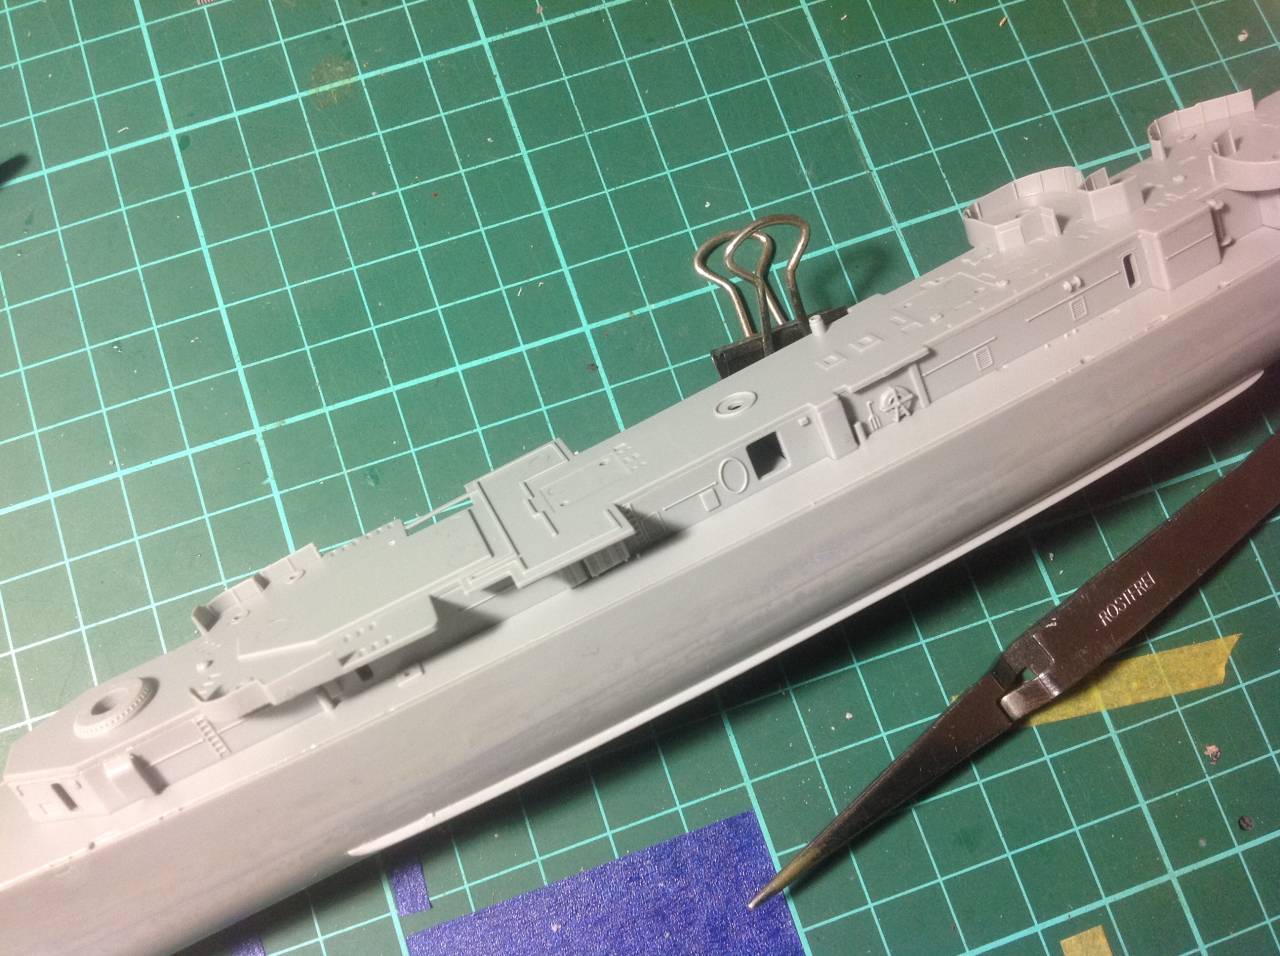
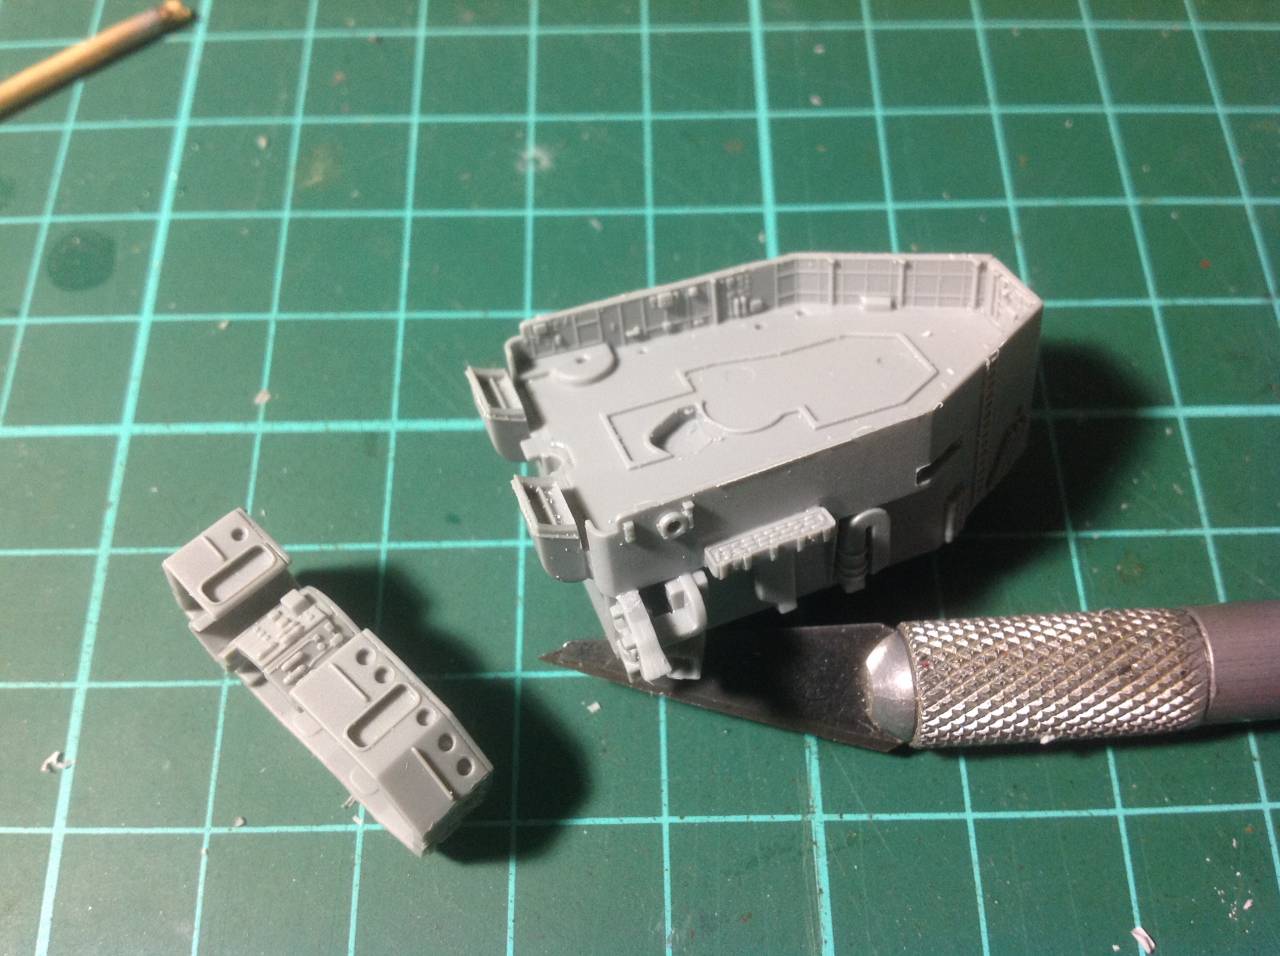
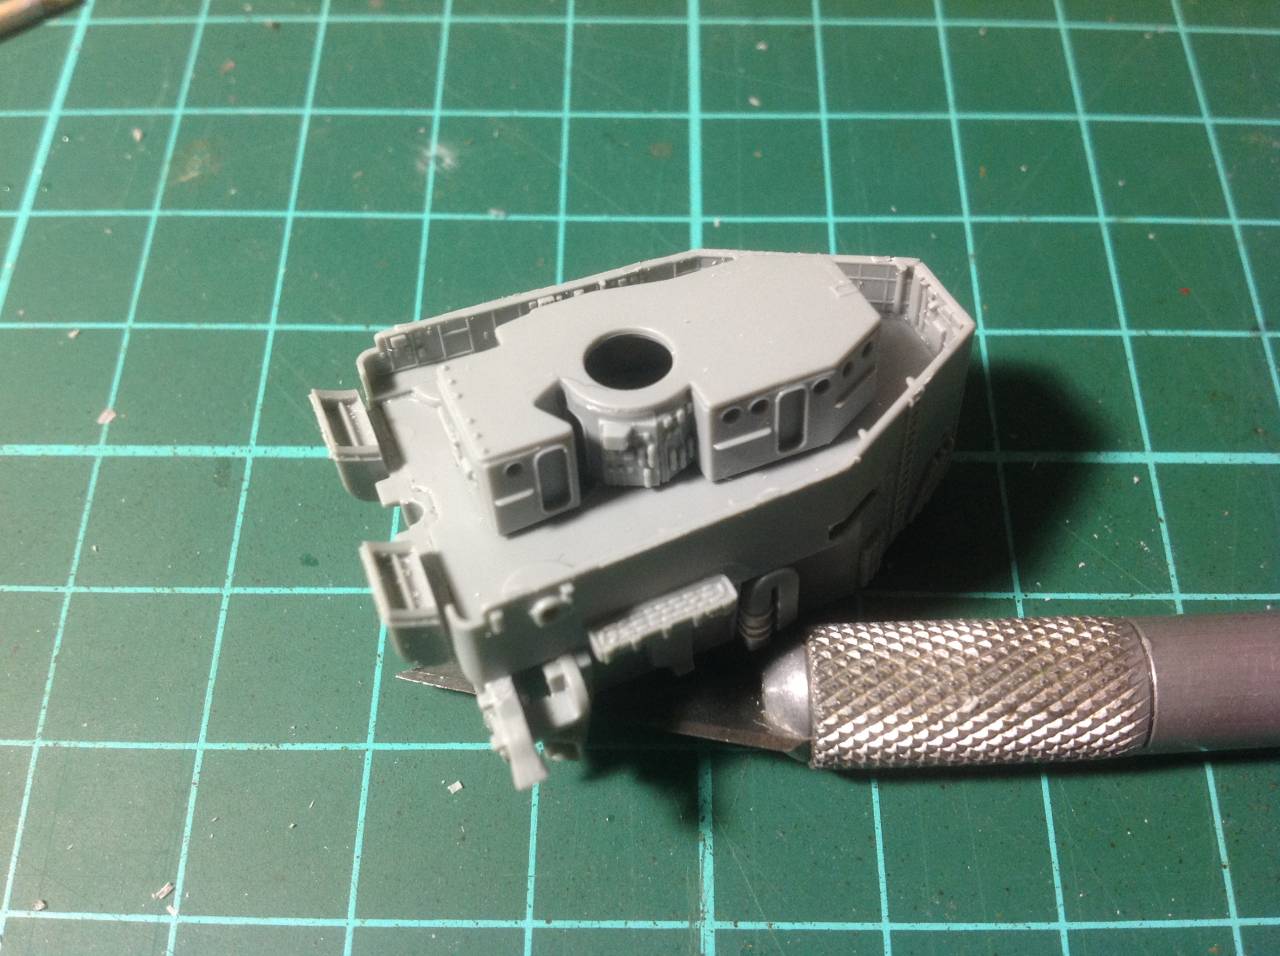
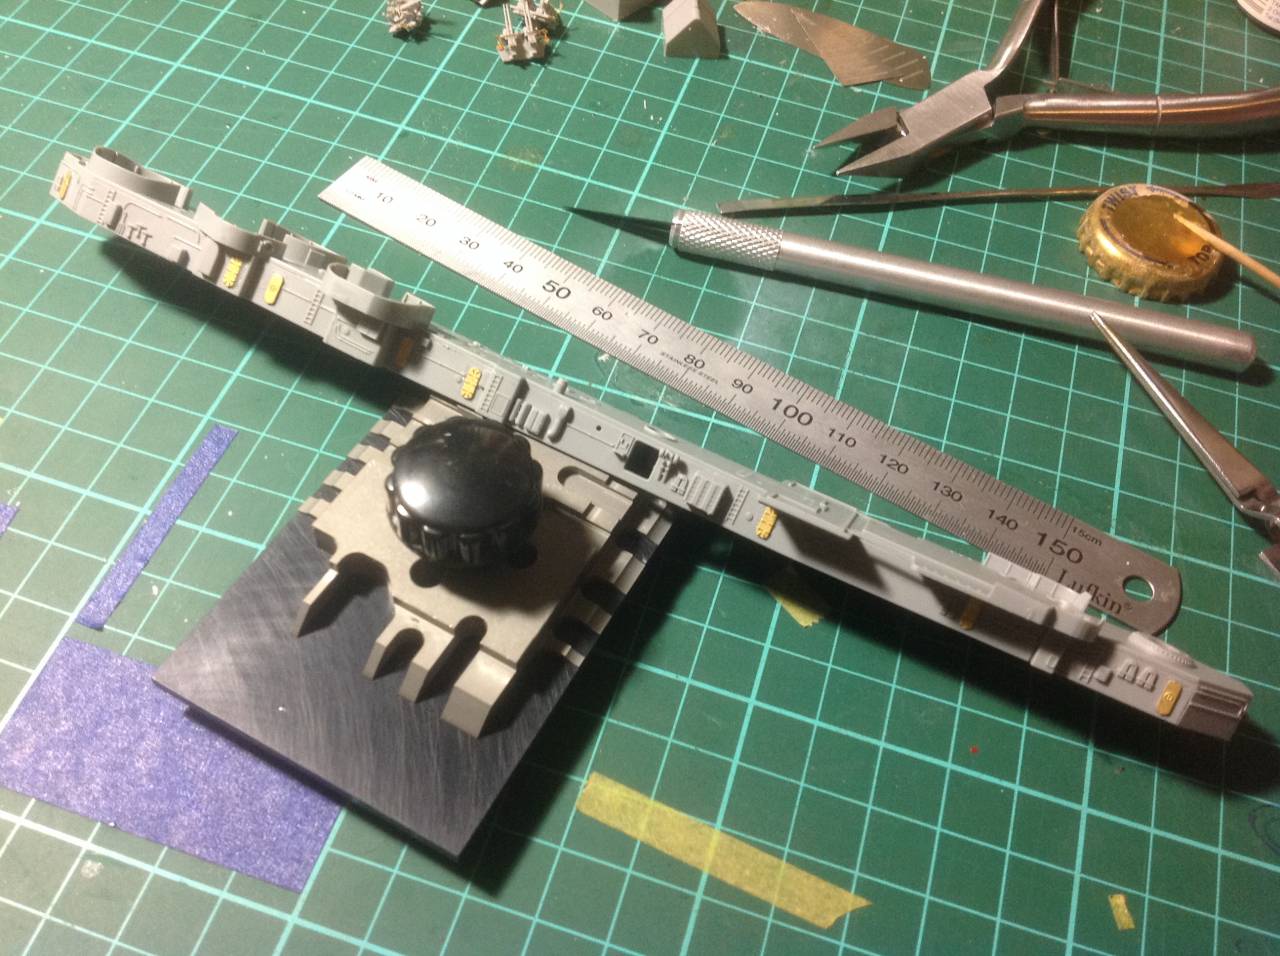
On a bit of a roll tonight, main superstructure assembled. There are 14 parts to this assembly. I trimmed them off the sprue with a razor saw, minor cleanup of the attachment points with the Xacto, and they fitted together perfectly! I am extremely impressed with the engineering on this kit I must say. The sweep of this assembly matches the hull and this sits in the recess of the main deck beautifully. My plan is to paint these assemblies separately and apply the anti skid walkway decals before any of the sub assemblies are attached and put in peril from my ham-fistedness :wink:


The detail molded on to these walls is great, a wash of highly thinned black enamel after the Haze Grey will highlight them and make them stand out nicely.

Cheers, D

Coming on very nicely Damien. The detail on the superstructure is impressive. Will you using the decals for the anti slip walkways? I used them on my USS Laffey, they did silver a bit, but they looked good; so if you are I would recommend a good gloss coat on the deck. Cheers. - Si (RedDuster)

Thanks for checking in Si.
I will probably use the local equivalent of Future, called Pledge One-Go, and brush it on the decks before I apply the decals.
Another quick question to the followers, what is the preferred tool for trimming the small PE parts from the frames? I have several sprue cutters, do you guys use these on the soft brass as well? My experience to now with PE has been mostly on larger parts for my aircraft builds and I have used a chisel blade in the Xacto, but I am concerned that this might bend the tiny parts on this build.

Cheers, D

April 20, 2016

Hey Damian, For your fine pieces of PE I recommend a sharp blade on a hard surface. You don’t want to bend it into a soft surface while you’re trying to cut. Also, a little blue tack on a toothpick to hold it down while your cutting will prevent it from flying into infinity. Best wishes - Gaz (GazzaS)
Hi Damian. yep-I agree with Gary, you don’t want to use a soft surface to cut on, as that will only bend the PE. I use a hold and fold BUG workstation for all my PE bending. This was a great set as it included a clear piece of Styrene to use to hold the PE while you cut it (so it doesn’t fly off into the carpet monster), and black styrene sheets to use as the base to cut the PE on using your exacto knife. The beauty of the black styrene is that the brass really stands out against the black making it easier to use. I then use a matchstick or toothpick with blue tack on the end to pick up the small parts and for handling etc. Hope this helps… - Russell (RussellE)

Thanks so much for the input Gaz, Russ, much appreciated.

I have “The Bug” in my toolbox and find it a great little tool. I will definitely take the advice of cutting on a hard surface, and I have read a couple of threads where the PE frame has been secured on some masking tape to stop the little blighters from blasting off “to infinity, and beyond” as they are cut free. I will try this as well as the toothpick/bluetac method and report back.
Hopefully I will be able to scam some benchtime over this ANZAC Day long weekend to give this a go.
I have been reading quite a bit about the Gator Glue as opposed to traditional CA, do you guys prefer either alternative, and if so, why? I have always used ZAP Thin CA for my PE additions to my aircraft builds and had no problems.

Hi Damian. with glue it’s a case of horses for courses: if i need a relatively quick bond, then i use CA (usually medium, sometimes with accelerator); if the bond is slower and under no stress then I’ll use what’s commonly referred to as Gator Glue (more on this later); If a high strength bond is required, and I can clamp the work piece, then it’s either a two part epoxy, or if i can i’ll solder.
Now, for Gator Glue, did you know you can make your own? Get on down to the hardware store, buy some generic PVA white glue and then dilute with a bit of water until you get a runny custard like consistency. You can then apply with a brush and wipe clean if need be with a damp cloth.
Some examples of what glue to use where: watertight doors to styrene-gator glue (or diluted PVA if you prefer); radar sets and other delicate items requiring a relatively quick bond-CA medium; railings-CA medium or thin at a few key points then Gator/PVA glue to finalise the bond along the entire length. (Gator/PVA is really good for railings as it flexes with temperature variations in the weather). For making brass masts solder or 2 part epoxy to assemble, with finer details added with CA. Then to mount to the deck, it’s 2 part epoxy; mounting small details and fittings to the deck that aren’t under load i use either diluted PVA or CA, where I can’t use styrene glue.
Confused yet? Really choice of glue comes down to what you’re assembling and the load they’re under…
- Russell (RussellE)

Well that is as clear as the Yarra!
All good Russ, thanks for the comprehensive reply. It all makes sense. I have both Aquadhere and Bondcrete PVA in the shed for my woodworking adventures, so I will have a play with them as you have described.

April 22, 2016

Making nice progress, Damian. - Jim (jimb)

Thanks for taking a look Jim, good to have another set of eyes checking things out here.

Some more superstructure sub assembly work tonight, nothing major.


Nice work on the Bridge Damian. Cheers - Si (RedDuster)
Looking good Damian! - Todd (TRM5150)

Thanks Si, Todd. Seriously, it is the engineering of this kit that makes it look good, I’m just a facilitator. Every part that I have cut, trimmed and fitted has literally fallen into place!

Very nice progress indeed, Damian The moulded on detail really looks good, and you are doing a fine job as well! As I see, you got all your answers from Russ, absolutely nothing to add… - Jan (JJ1973)

April 23, 2016

Thanks Jan. Yes, Russ gave me everything I need to know on the adhesives front!
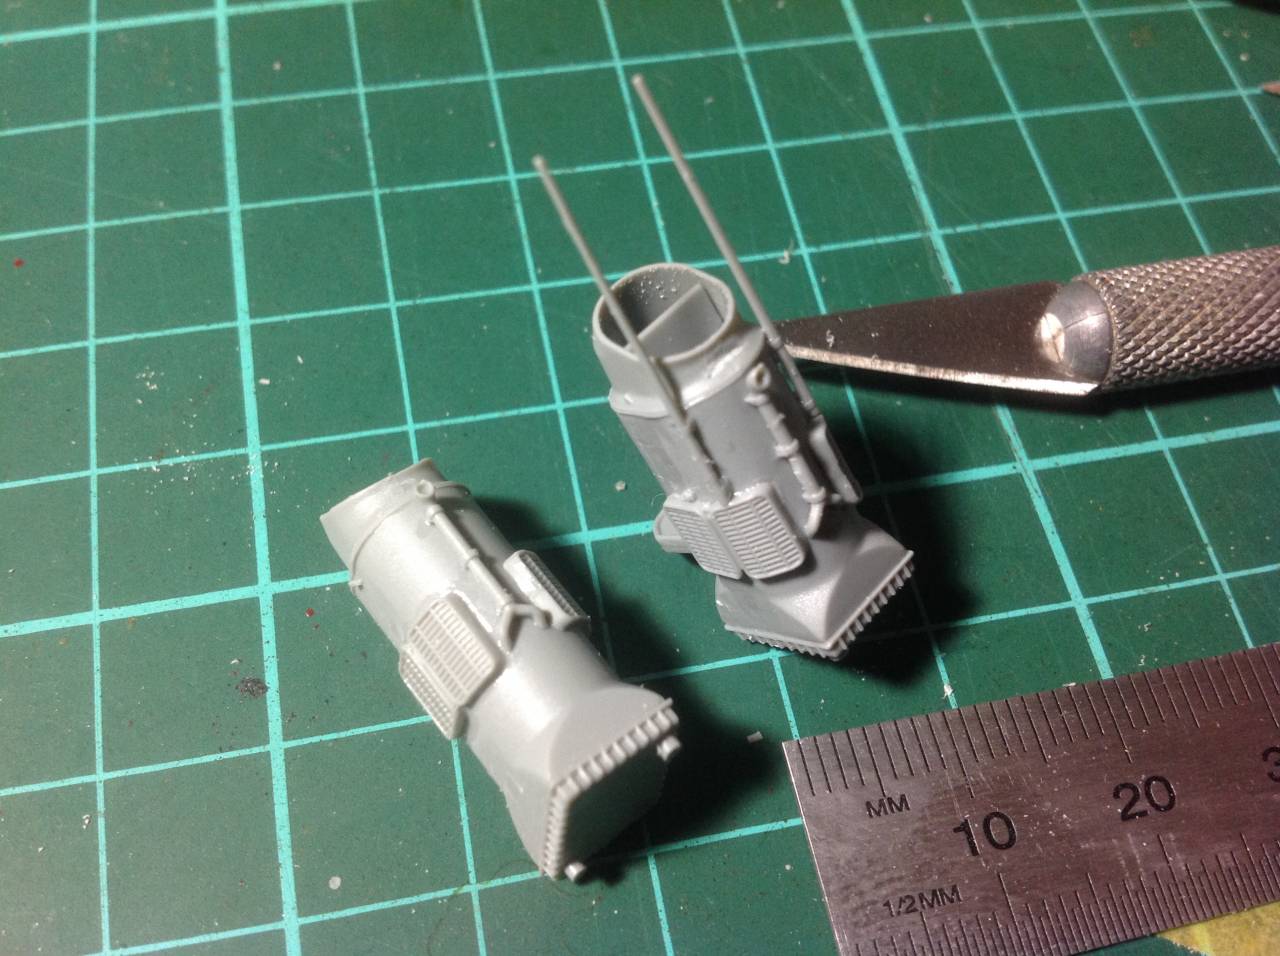
A couple more sub assemblies tonight, still plenty of PE parts to be added to both of these.

Nice job on the funnels Damian, Looking forward to seeing the etch go on. Cheers - Si (RedDuster)
hmmm… maybe some of the folk at Dragon could go teach Trumpy a thing or two. Seriously though, the model maker is just as important as the kit You’re doing a great job. - Russell (RussellE)

April 25, 2016

Thanks guys, good to hear that I seem to be on the right track!

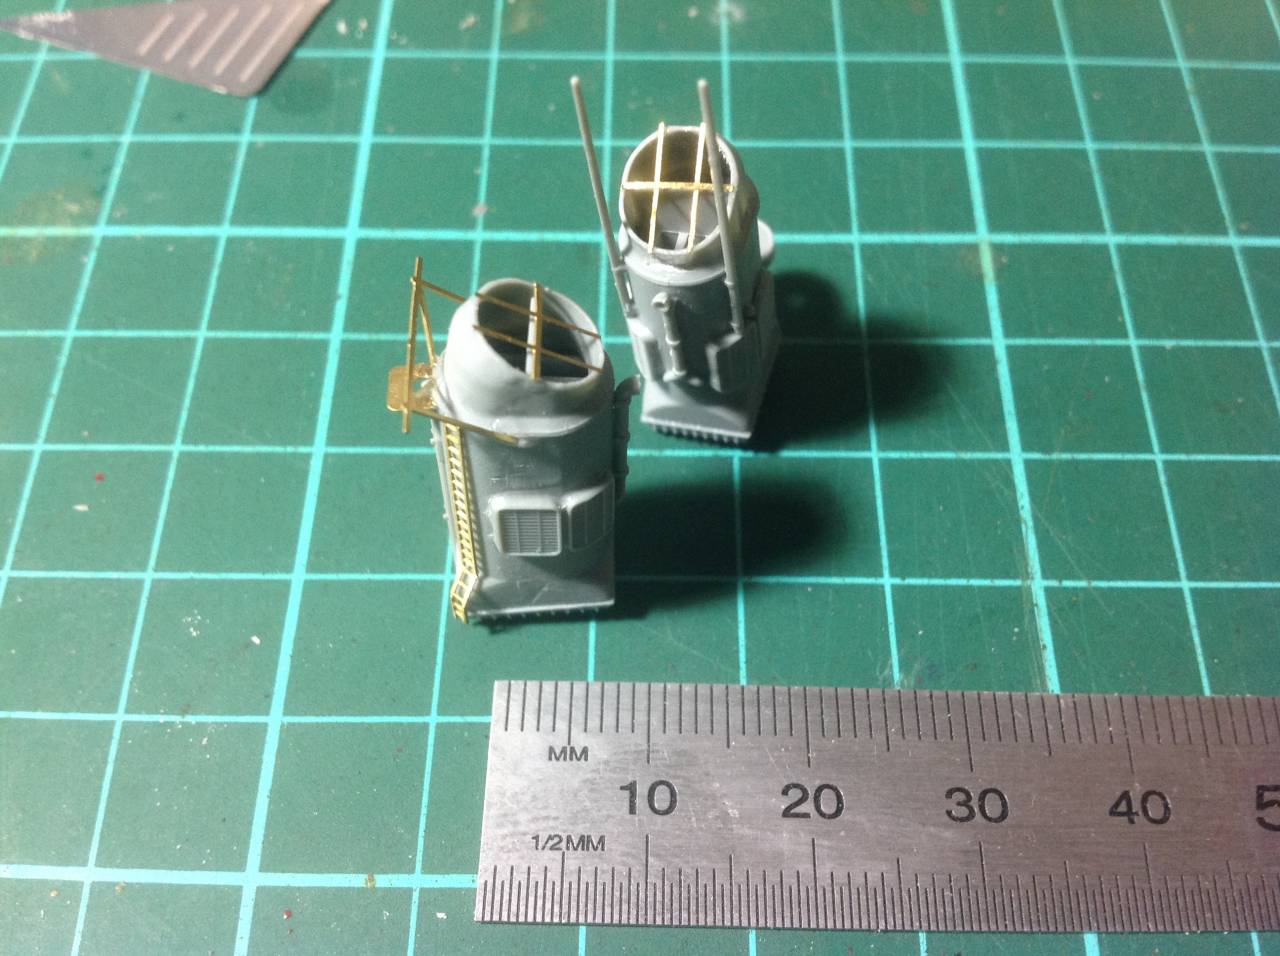
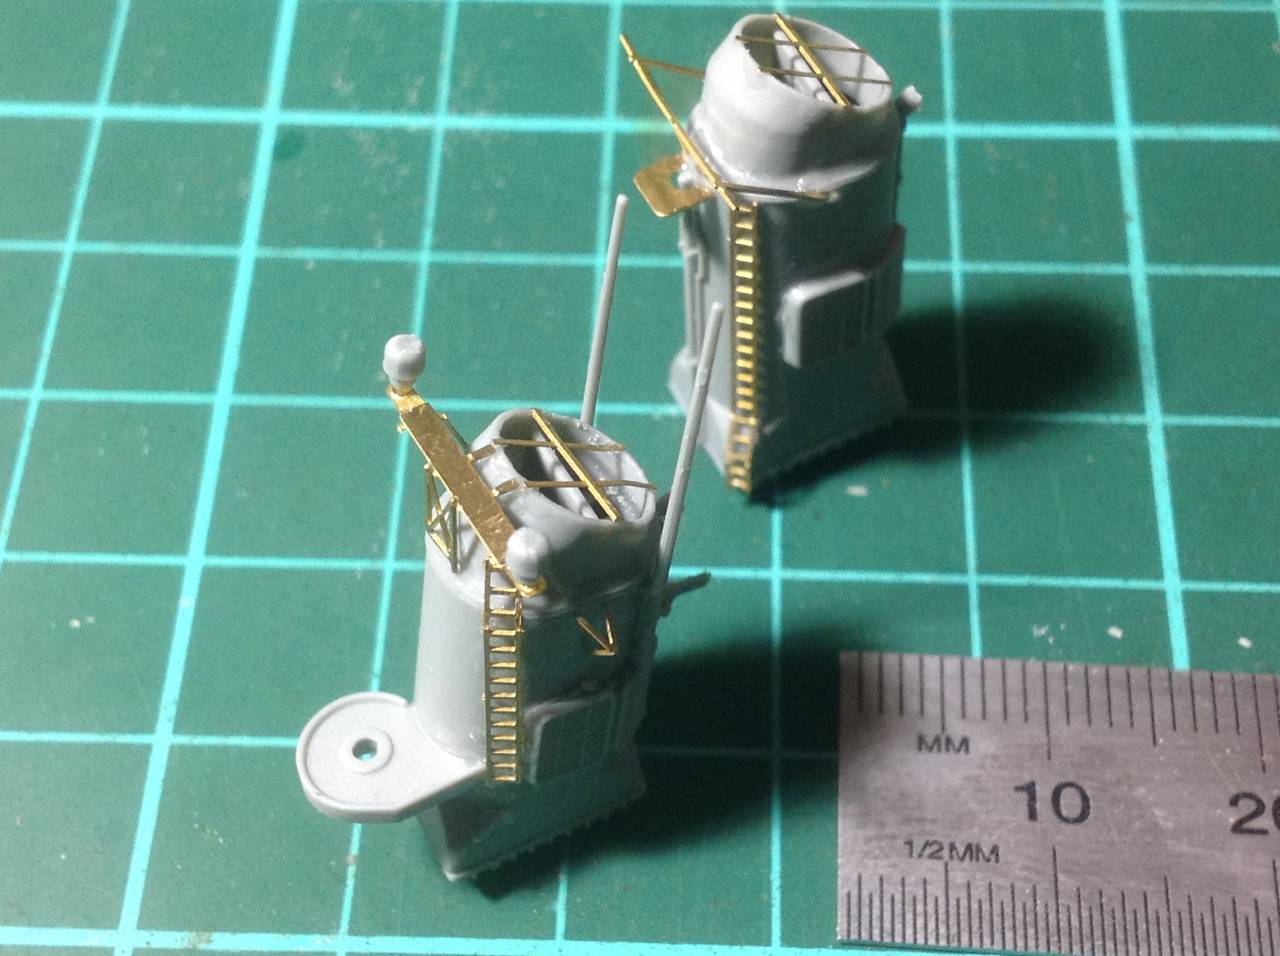
The PE adventure begins! The forward funnel is complete, the aft still has 10 PE and small styrene parts to add!

I used ZAP-A-GAP medium CA applied with a toothpick.

Cheers, D

Nice looking funnels, Damian. Looks like a well detailed kit. - Jim (jimb)
Very nice work Damian. You’re definitely right on track!! And your PE work looks really nice and clean! Good job!! Cheers - Jan (JJ1973)

April 27, 2016

Thanks so much James and Jan. I must say I am enjoying the PE a lot more that I expected. I have even managed to get away with gluing the ladder to my finger on only one occasion!

Aft funnel completed with the exception of the searchlight assembly which I want to detail and paint separately.

Thanks again for checking in, and please don’t hesitate to let me know if you spot any problems or errors in the process here. Even though the parts fit together beautifully, the instructions are a bit unclear on the locating points for the PE parts.

Cheers, D

Great work D! you’re really making me resent all of my missed bench time. - Mark (md72)
Very tidy work with etch Damian, Great job - Si (RedDuster)
D, remiss of me to not look in on your build and comment, your progress looks good and rightly so everyone got you to build the hull.
I think we can all say that no matter what the instructions say build the hull first, on that subject the Tamiya hull red is I believe slightly too dark a shade for USN ships I believe it is correct for IJN ships, all navies have a hull red but they are not all the same. Now as you’re a car man an option that I use and I believe Si also uses is red primer from a rattle can purchased from the local auto parts store this is a good match for most hull red’s and if you do weather it then it can be made lighter or darker in the process. On the glue front Russell nailed it, the advantage of PVA/Gator grip is the drying time when it comes to applying small parts in had to get to places which gives you some extra wiggle time.
As to the PE try and get a A4/Letter sized piece of black or dark coloured acrylic sheet and do your cutting on this, it’s hard and being dark you can see the PE more easily.
Your doing well so far and any instruction questions ask away as I have these in the stash.
Oh welcome to the salty side, you’re now hooked
- Luciano (Littorio)

Thanks for the feedback guys.
Luciano, thanks so much for checking in, once again it is good to have more sets of eyes looking over my work!
. . . the Tamiya hull red is I believe slightly too dark a shade for USN ships I believe it is correct for IJN ships . . .
I thought as much. My plan is to decant half of it into an empty jar and add some red to it until I get the shade I am happy with. I should have enough then for the three builds. I also have the Tamiya 1/350 Yamato in the stash courtesy of my uncle so I can use the remaining Hull Red for that.
Any comments regarding the Tamiya Deck Blue and Haze Grey options that I have shown?
Oh welcome to the salty side, you’re now hooked
Methinks you may be correct!

Cheers, D

Sorry D, I can’t help with the other Tamiya paints as I don’t use them, I’m a Lifecolor and Vallejo model air user. - Luciano (Littorio)

April 29, 2016

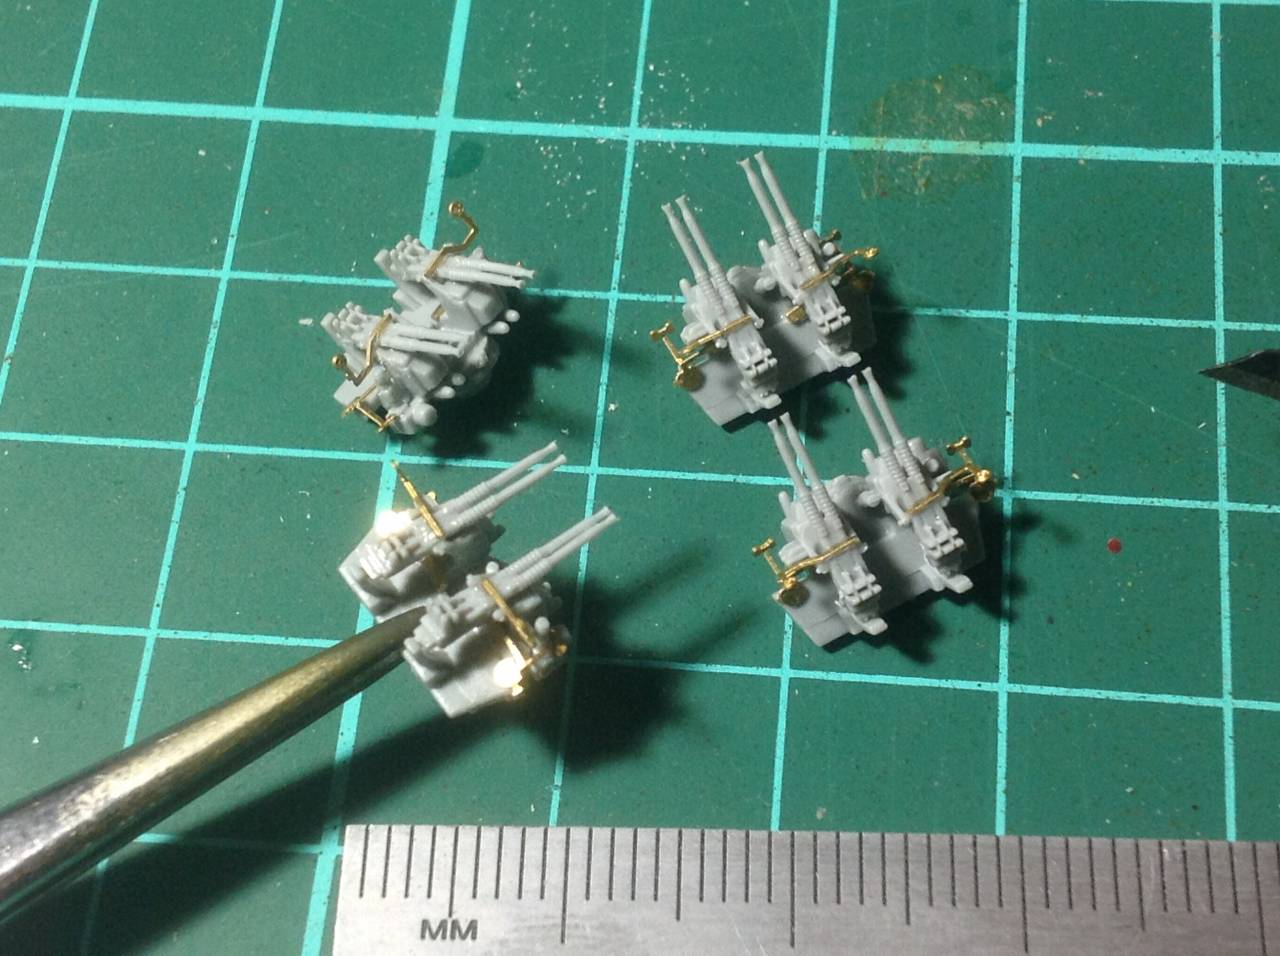
A little more PE adventuring tonight, sights and seats on the quad-40s and doors on the main superstructure.


Cheers, D

Those Quad 40’s look great Damian! You’re moving very quickly. - Gaz (GazzaS)
Hi Damian, The PE work looks excellent on the guns and superstructure. Realising it’s one of many it coming along very well. cheers - Michael (Cosimodo)

Thanks Gaz, Michael, your feedback and support is very much welcomed.

I have been considering giving “Pledge One Go” (our local version of Future) a try on gluing the PE in some places. I can apply it easily with a brush, it capillaries perfectly into tiny gaps, and cleans up easily. This will also remove the risk (i.e. extreme probability) of me gluing myself to the parts and the kit, and probably the workbench, with CA. The only down side would be curing time.

I use it as an adhesive on clear parts on my car and aircraft builds because it won’t cloud the clear plastic. Has anybody tried this?

April 30, 2016

A little bit more PE tonight, doors on the bridge superstructure, seats, sights and cranks on the twin-40’s, and assembly of the twin-40’s.


Cheers, D

Very tidy PE work Damian. Excellent job Cheers - Si (RedDuster)
What Si said, D: Very Tidy - Russell (RussellE)

May 09, 2016

Worked on one sub assembly tonight, 10 styrene and 3 PE parts, with two twin gun assemblies still to add after painting.

Cheers, D

Ups - sorry, I just realized that I missed quite a few updates and some very nice progress here!!
You are doing a great job, Damian, very nice and tidy work on the PE! Great to see that you are enjoying the wet side of modeling!! Cheers
- Jan (JJ1973)

May 10, 2016

Thanks Jan, I am enjoying this build a lot. I am enjoying that there is no pressure on this build for a change. Most of my builds are for Group Builds and Campaigns on Automodeler and Aeroscale where there are time frame pressures. On this one I can do as little or as much as I like and that is what I need on my first ship build.

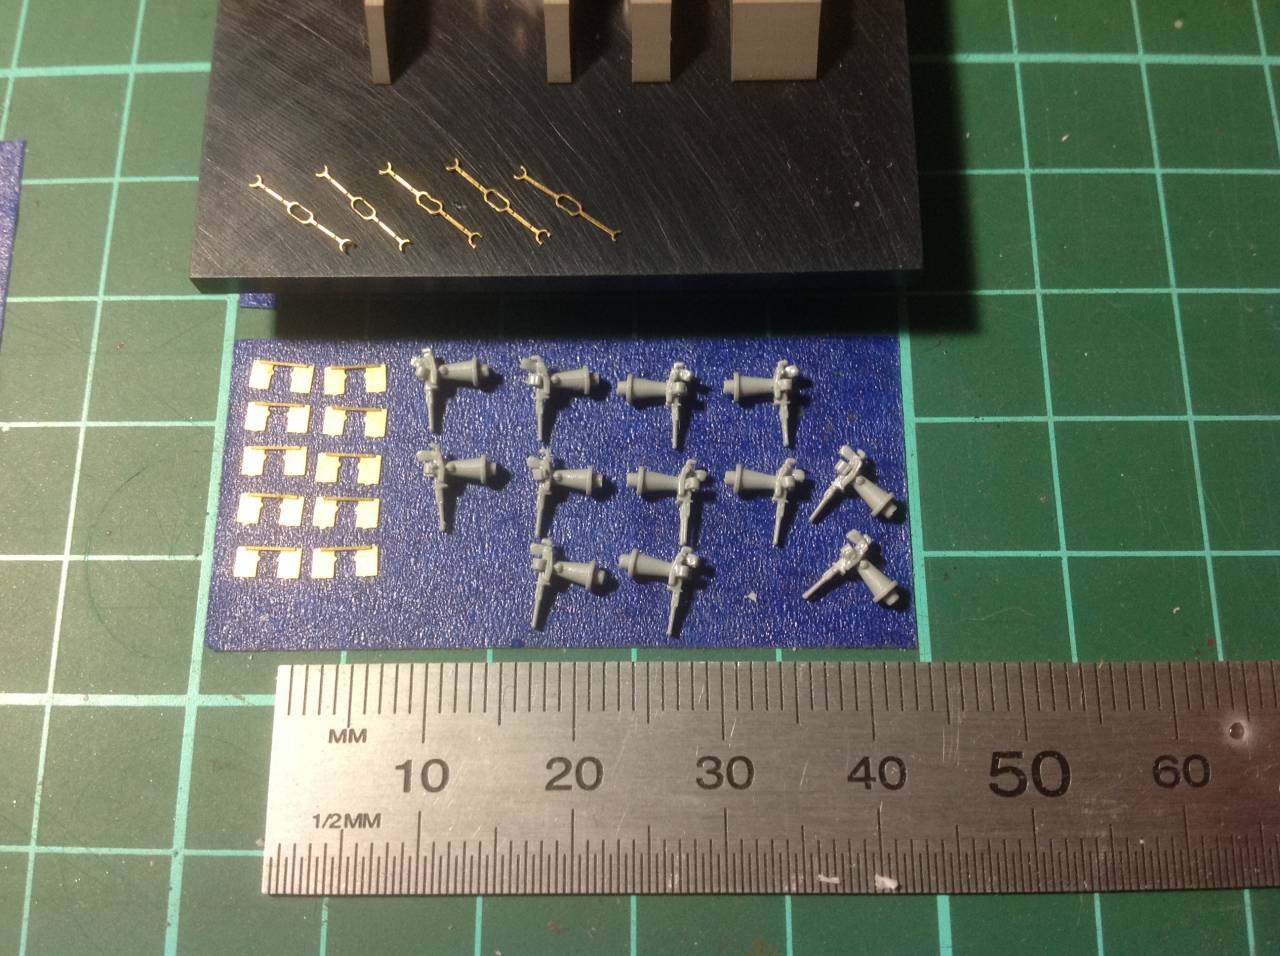
Time for tonight’s micro-shenanigans! The 10 x 20mm twin guns got their 3 PE parts each.

Cheers, D

Very neatly done with the etch Damian, Those twin twenty’s will look the business once in place. Cheers - Si (RedDuster)
looking very sharp, D - Russell (RussellE)
Great work on the Oerlikons, Damian. Those tiny bits of PE are very difficult for me. - Gaz (GazzaS)

May 12, 2016

Thanks guys, it seems that I have achieved a passing grade in micro-shenanigans, so the logical next step is nano-shenanigans!
The 2 assemblies in the left of this picture each have 2 PE parts that are approximately human hair diameter! The carpet monster tried its best to eat one part, but a few minutes on hands and knees with the trusty mobile phone torch and I managed to beat that monster into submission and retrieve the part.

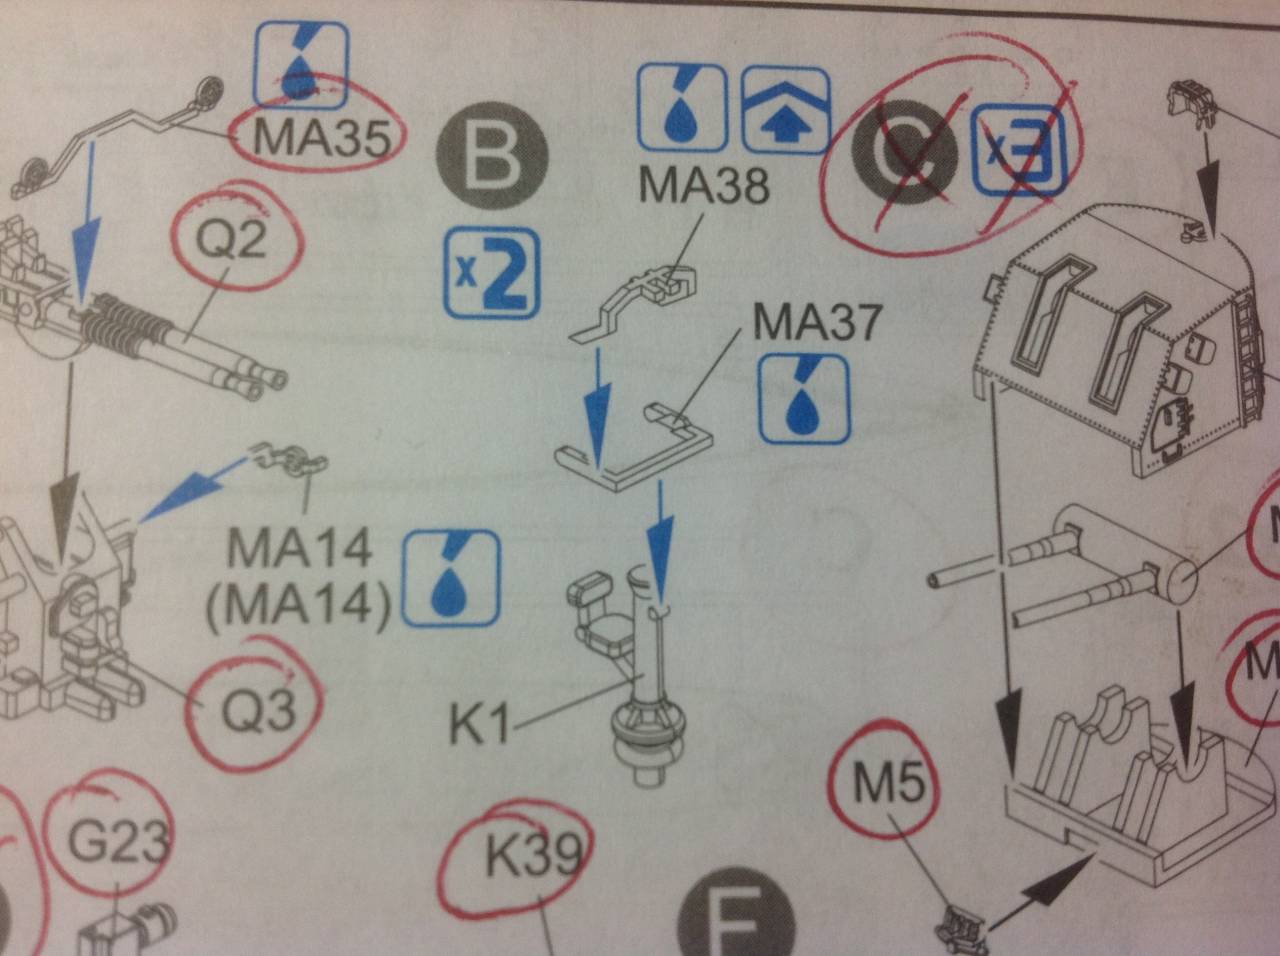
This is the step in the instructions, assembly “B” and I am interested to know what this is if anybody can help???

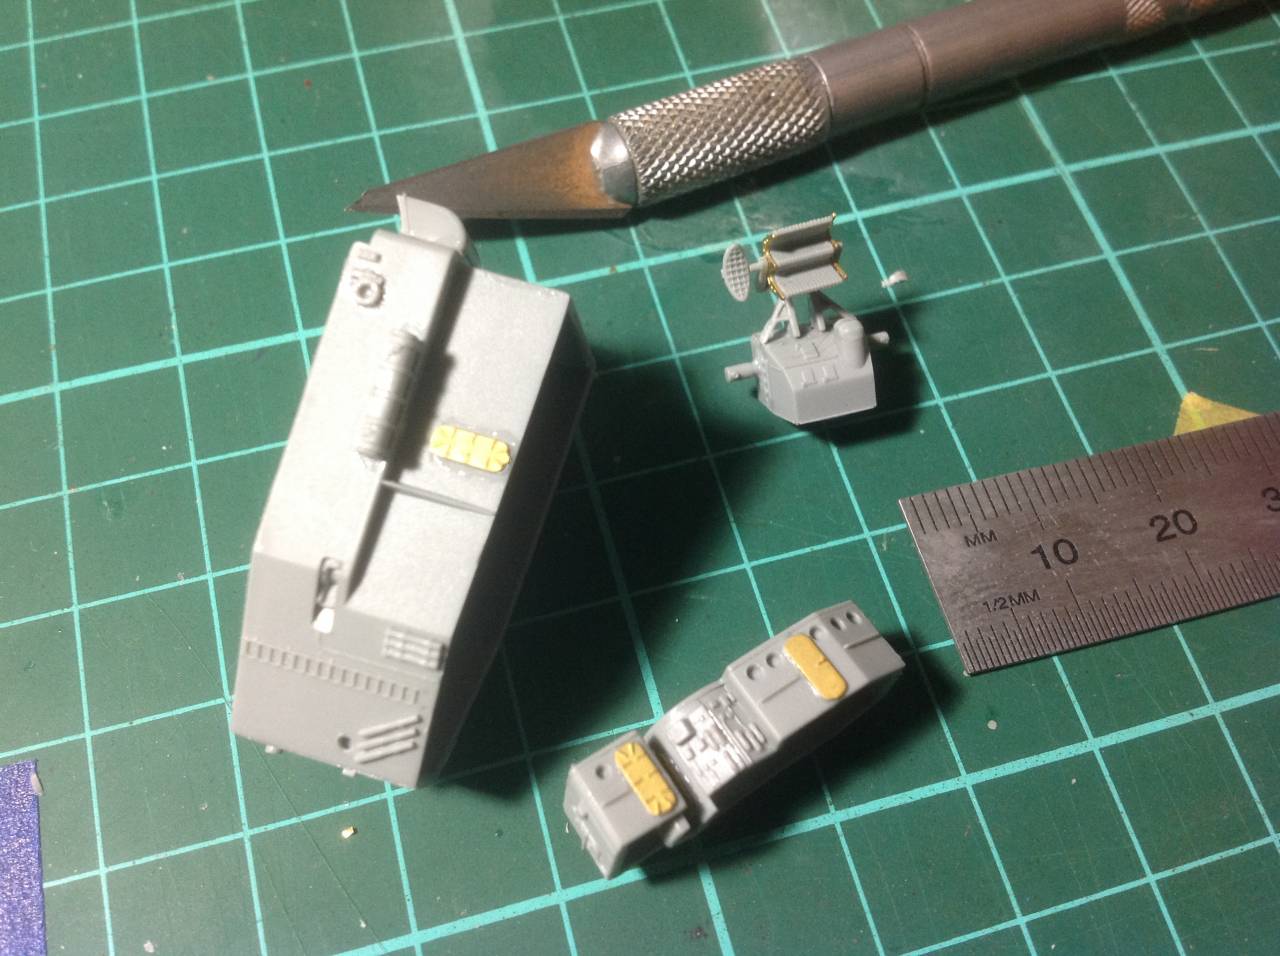
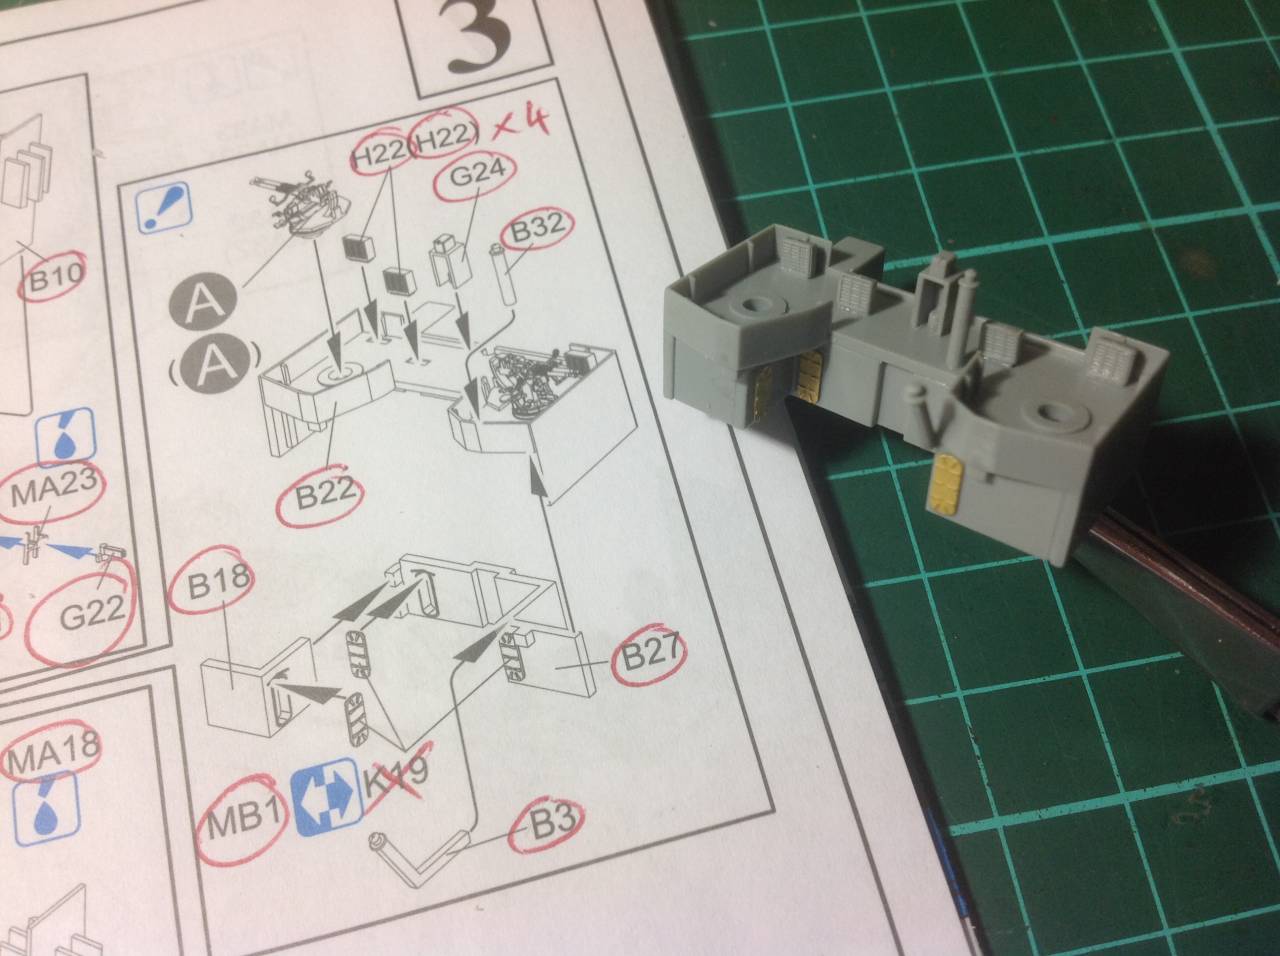
Another sub assembly together tonight, 13 styrene and 2 PE parts, with 2 of the twin-20mm guns to add later. I am interested to know what the vertical tubes are on this assembly, there are 4 x 2-tube pieces, 3 beside the ladder and 1 at the other end.

Cheers, D

Looking good Damian. I can’t help you with the tubes, but the piece of kit shown in assembly ‘B’ is a binocular mount, the two little prongs on the etched component going across top of the assembly represent a pair of powerful binoculars. Cheers - Si (RedDuster)
haha-nano shinaningans! good one D! I think that’s why we’re all cross eyed and hunch backed! - Russell (RussellE)
Great work, Damian!! Very delicate details, and very tidy work with the PE - you are building her into a beauty!! Si is correct about the binoculars, at least that would be my guess, too. But for those pipes…one would have to find some pics of the real thing. From the model, I can’t tell…Keep up your great work!! Cheers - Jan (JJ1973)
D, I’m going to guess that those tubes are the cases for spare 20 or 40mm gun barrels. - Luciano (Littorio)
Good point! - I think you are correct there!! - Jan (JJ1973)

May 16, 2016

Many thanks for the feedback guys, great to have you all overseeing operations here!

Si, I suspected as much, does anybody have a photo of the real thing easily accessible?

Luciano, your suggestion makes sense as well. Once again I might have to do a bit of googling to try to find some photos of the original article just to satisfy my curiosity.

I do believe that it is time to hit the paint shop next, I have run out of sub assemblies. On that note, the instructions call out for Sea Blue on the hull, but a couple of builds that I have been checking out online have been painted dark grey. Does anybody have any opinions on which is correct? I am inclined to go with the instructions, but I would love to find a definitive reference if possible.

Cheers, D

D, one of the best sources of information when painting US ships is Synder & Short Click on the ship camouflage database, then the type of ship and class, then find your named ship. In the case of USS Gearing in 1945 it wore MS33a / MS28D and MS22 which means it was repainted twice. If you then return to the measures page it will tell you what the colours were.
Also do a google image search for the ‘measure’ ie. MS33a and the class and you will find official USN camouflage drawings. Thats how I found what I needed when I did USS Hoel.
One more thing, see if you can find some photos of the ship in the measure you want to do as the official paint scheme was not always followed to the letter.
Find this out for a US ship which is laid up while I build some aircraft, the crew got lazy and missed a band of camouflage from the upper bridge on one side!
Good luck
- Luciano (Litorrio)

Excellent information Luciano, what a great website for reference materials.

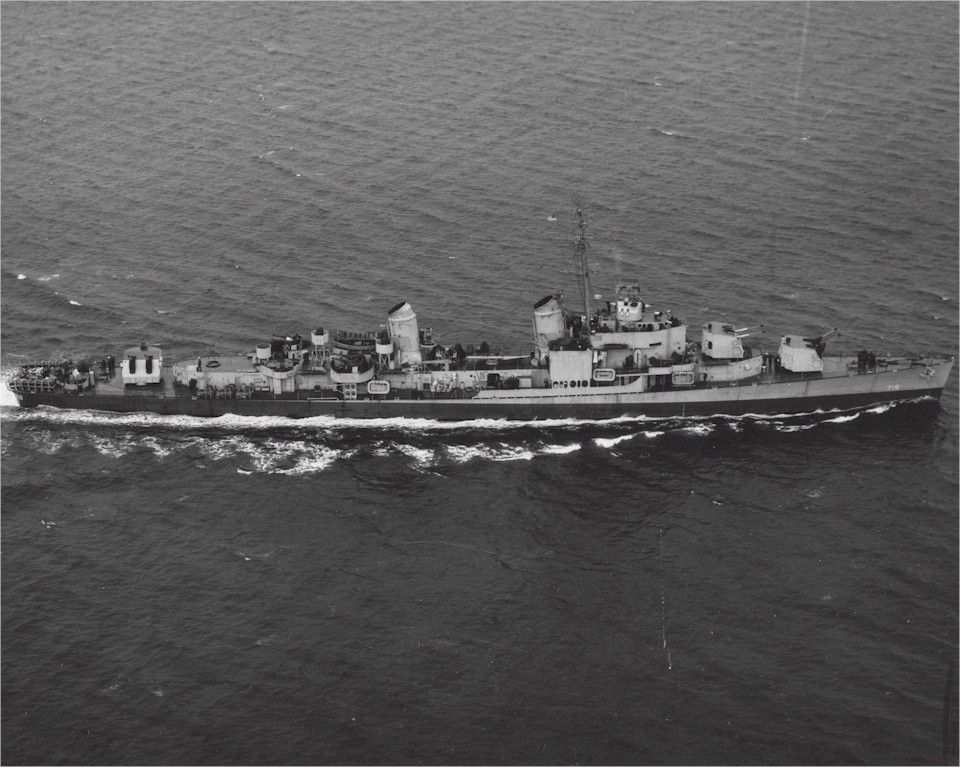
The photo below is from Navsource, and show the Gearing just after commissioning but prior to being fully outfitted, MS22 measure. I believe that this would be what is represented on the box art and the instructions, so this is how I will proceed. Thanks once again for the assistance, this really is opening up a new world for me!

Ok, the problem with opening up a new world is that you get drawn in and distracted from the task at hand :expressionless:

Trawling through the website that Luciano so kindly linked inevitably led to some discussion boards and further links and . . . . You know how it goes!
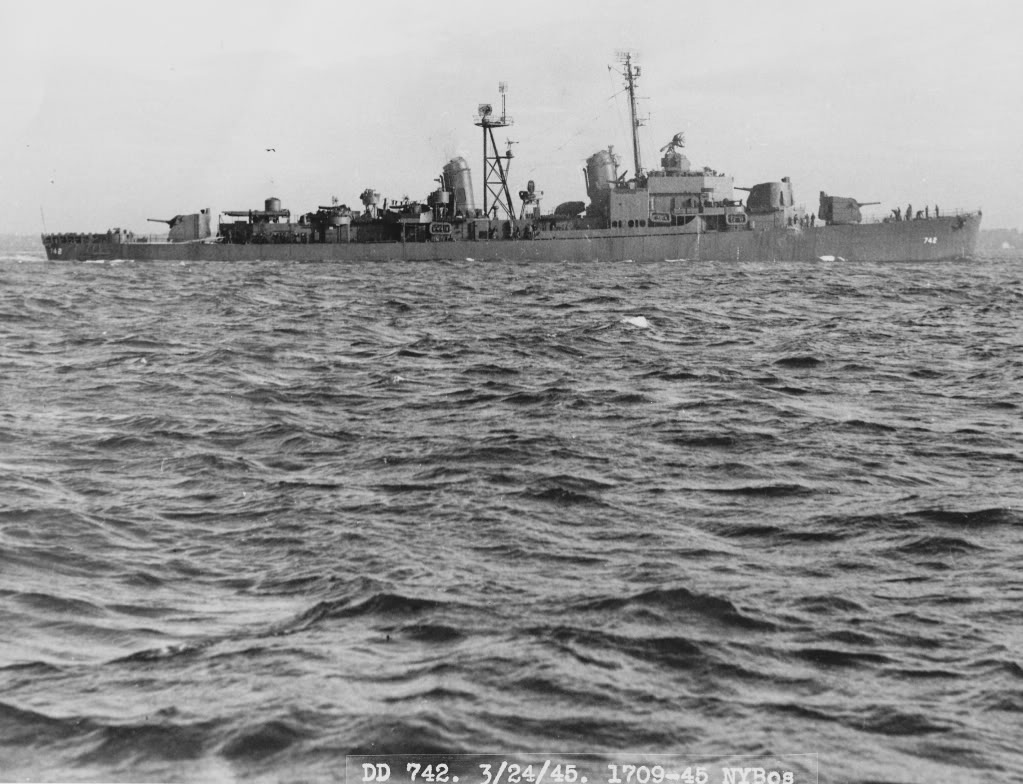
Looking forwards to the Frank Knox build I found the following couple of images which will give the eventual 3 ship display a good point of difference. The B&W photo is DD-742 Frank Knox in measure MS21, and the colour image is DD-366 USS Drayton in the same measure.


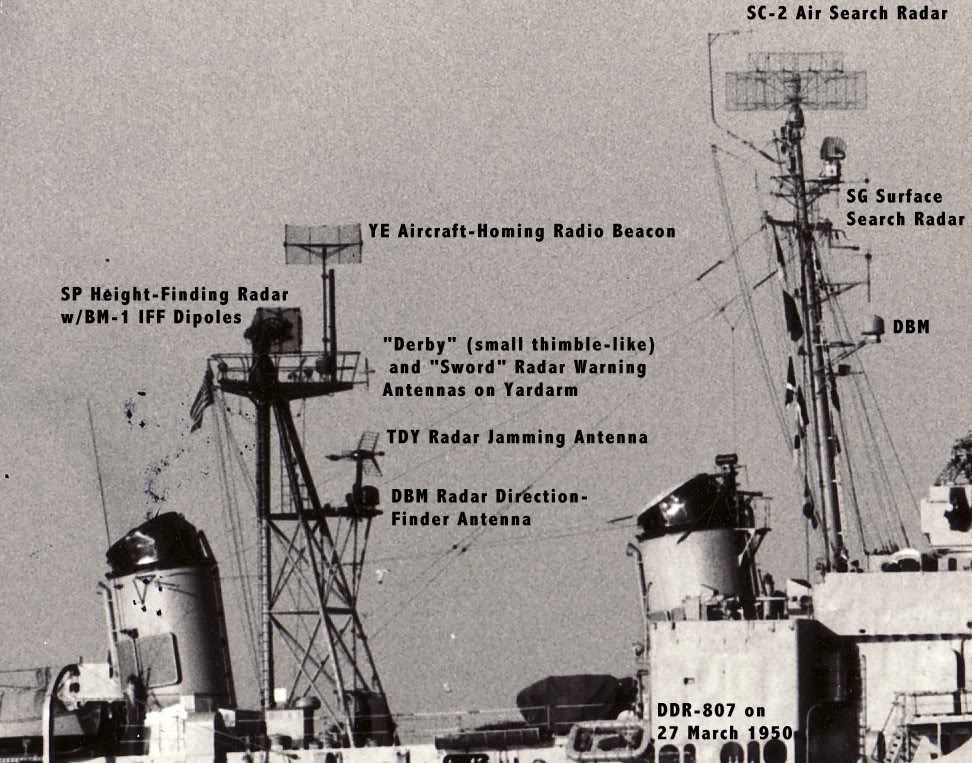
I also found this image which labels a few of the radar assembly items and will save a few questions from me down the track.

Now I need to check out the options for the Chevalier and come up with a third variation.

Cheers, D

May 17, 2016

I went on my typical Google journey today in a quiet moment and found the website for the USS Slater restoration which has some excellent photos of what I am assuming will be the same weapons and fittings as the Gearing.
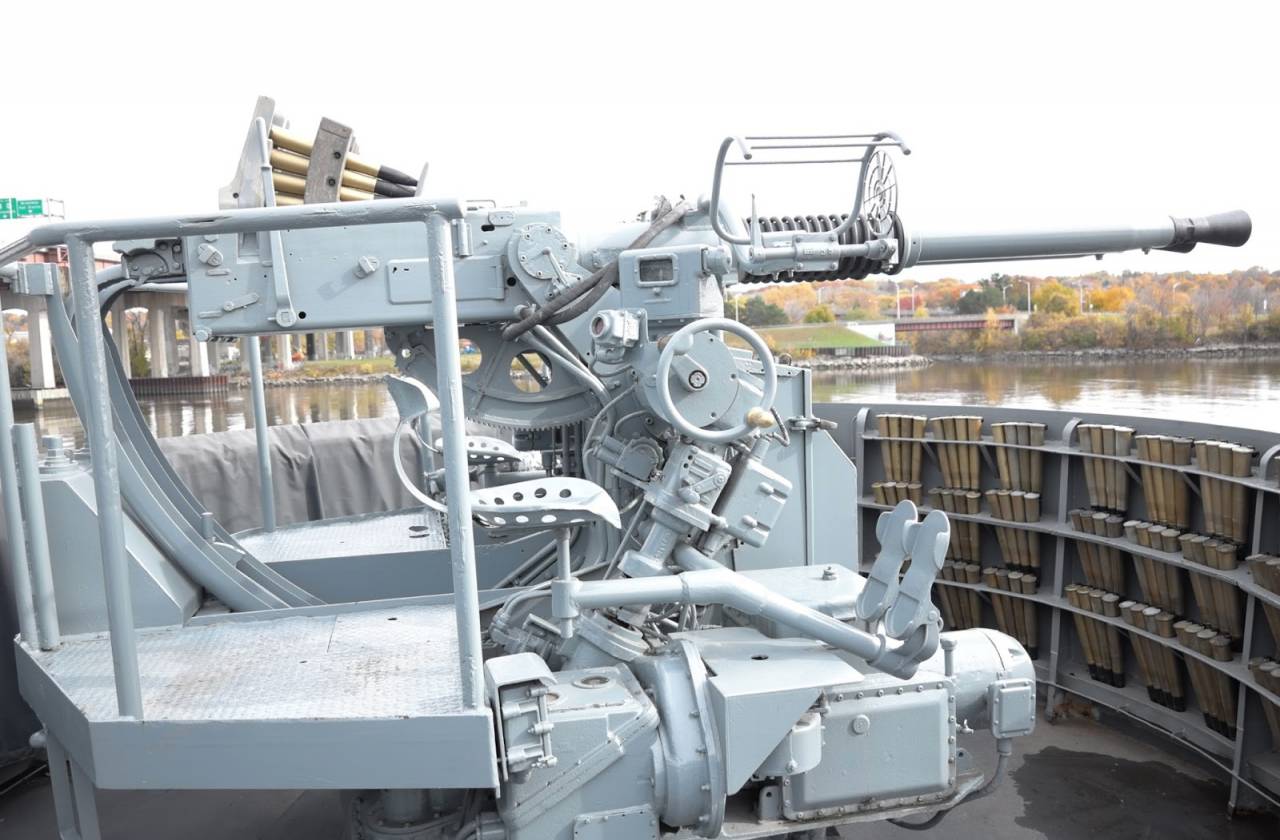
Twin 40mm mount


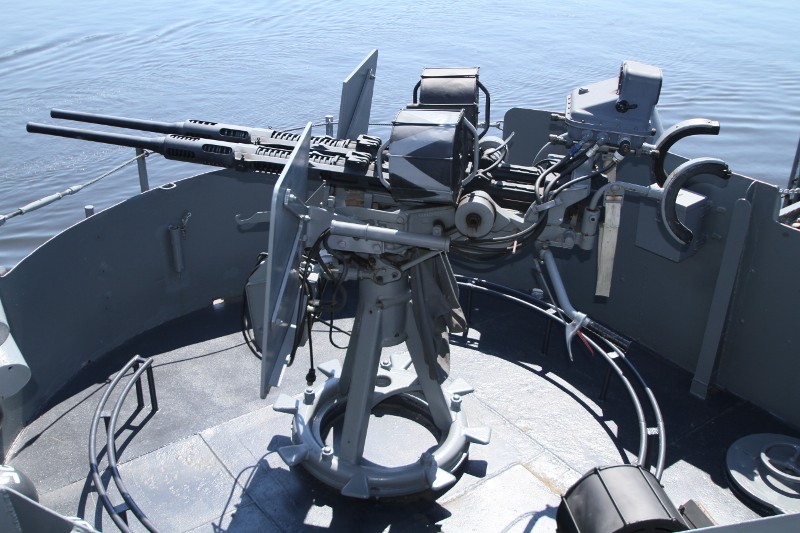
Twin 20mm mount

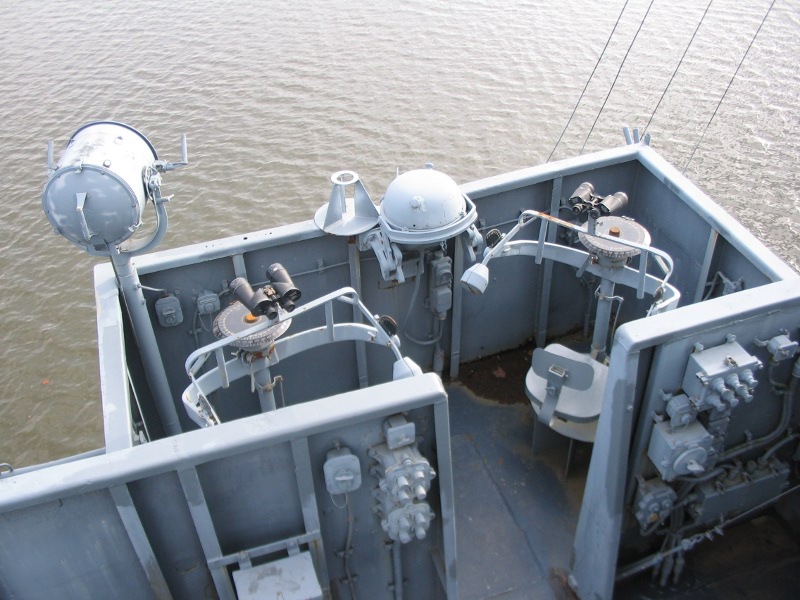
Binocular mount

Unfortunately the kit parts are too small for nano-super detailing but I am glad to have learned what these parts represent on the 1:1 vessel.

Cheers, D

Damian, your research looks pretty successful! Looks like the binoculars have gotten some significant improvement, those you found resemble the model ones pretty close, as it appears. - Jan (JJ1973)
nice research, D looks like you’re well and truly ‘hooked’ on the salty side - Russell (RussellE)

May 18, 2016

You might be right Russ, I might be in trouble!

Working on a couple of other builds tonight but I still found time to add 4 more PE parts to the Gearing.

No excuses now, the hull is ready for the paint shop.

Cheers, D

Small progress is still progress Mate. Nice work. Cheers - Si (RedDuster)
Very nice and clean!! Looking forward to see some paint!! Cheers - Jan (JJ1973)

May 30, 2016

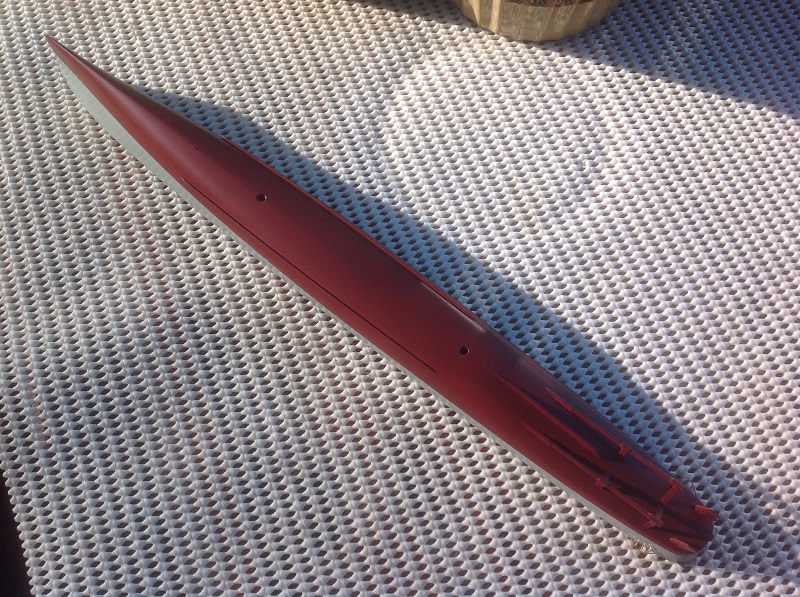
My interpretation of Hull Red, 3 parts X-7 Red mixed with 1 part XF-9 Hull Red, Tamiya acrylics.


I will let this cure for a day or two then on to the boot topping.

Cheers, D

Great stuff Damian, The colour looks very good to me mate, really coming together. Cheers - Si (RedDuster)
Damian, Been following along quietly. Glad to see you making steady progress. Your PE works is very nice! - Gaz (GazzaS)
The hull looks great and looking forward to see how the rest turns out with your chosen scheme. Cheers - Michael (Cosimodo)
Looking very nice, D - Russell (RussellE)
The color looks really good! Fine job on the lower hull, and your mixed red looks spot on to me! Cheers - Jan (JJ1973)
D, she looks great with a bit of colour on and the red looks like a very close match through my monitor. Keep up the fine work. - Lucaino (Littorio)

Thanks again for the feedback guys, very much appreciated. I am really pleased with the colour and the finish, and looking forward to getting the next couple of colours on.

Cheers, D

November 26, 2017

G’day folks.

Reading through Russell’s Prince Eugen thread a couple of days back, and seeing such great progress, I was motivated to revive this thread with a view to getting the Gearing back on the bench.

Several hours later I am still dealing with the Photobucket fiasco trying to cross-reference images, download them to my Kitmaker Gallery and replace them in the thread.

What a PAIN IN THE #$%&#@$ !!!

Cheers, D

Damian, I quite agree! Try Imgur. They are still a user friendly host for posting images - at least for the moment. I fear the days of the “free” Internet may be numbered. - Tim (TimReynaga)

I’m sure you are correct Tim. I think for the moment I will just focus on using my Kitmaker Gallery. It works fine and I have plenty of space there. Looking forward to getting back into this project.

I wondered where this had got to. It will be great to see it revived. Hope you sort out the pictures and I think using the Kitmaker gallery is a good idea. No worries about the future of third party photo sharing sites… touchwood. cheers - Michael (Cosimodo)
Hi Damian, very flattered indeed! It’s great to see this thread revived! Yep, photo bucket has put a lot of people out, but the Kitmaker gallery works great, and like Michael said, there’s no chance of it going astray - Russell (RussellE)

Thanks for checking in guys. If you look back through the thread I have replaced images up to about half way through page 4. I am hoping to finish the rest tonight so I am ready once I dig the kit out of the dark depths of my garage.
Edit: It’s done! All images have been updated. Now I just need to read through a couple more times to remember where I was at, and what I had planned.
Cheers, D

You’ve come a long way so far D! Looking forward to seeing more - Russell (RussellE)

April 30, 2019

Almost 3 years on since my last actual progress update, where does the time go?

I dragged this out tonight for a change of pace from my current car build fetish, and managed to install about 20 small styrene parts. At least I think I did, I couldn’t actually see them! The old eyesight is going backwards at a rate of knots lately (see what I did there ==) ).

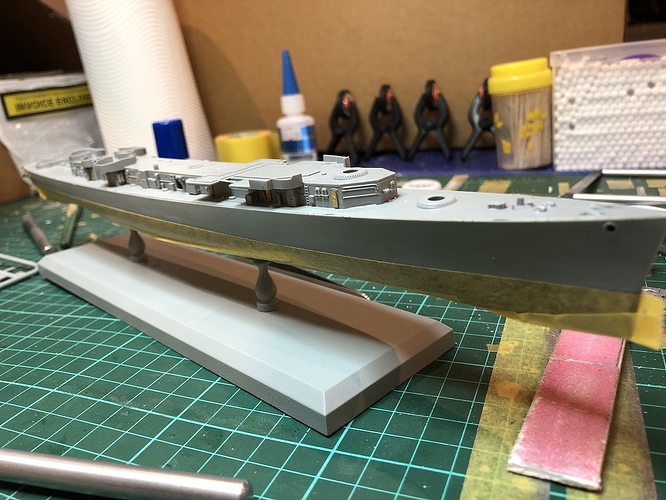
I also installed the main superstructure to the deck and masked off the hull red, almost ready for a primer coat on this stage.


Humble apologies, I definitely won’t keep you waiting another 3 years. I am determined to get this one finished for the 2019 “Dry Docked” Campaign.

Cheers, D

Good to see you back on this one Damien. Nice progress on getting the first level of the superstructure down. Cheers - Si (RedDuster)

May 01, 2019

Thanks for checking in on me Si, much appreciated.

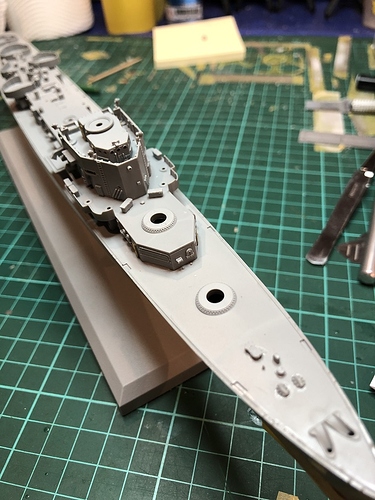
About 60 small styrene parts added to the first level and bridge superstructure (which is dry fitted to see how everything lines up).


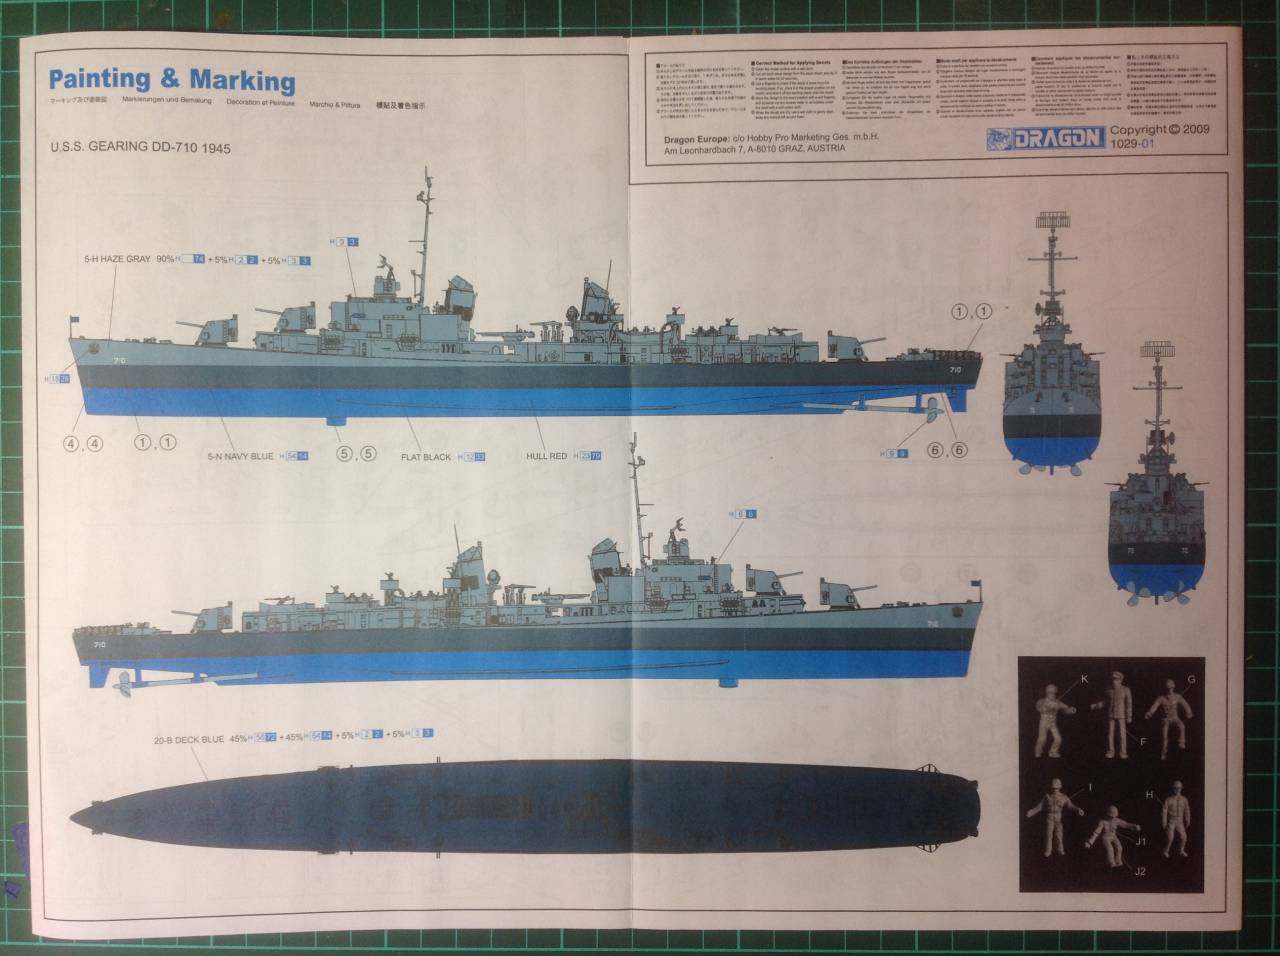
My plan for painting is to use a superfine black primer and microfiller over everything first, mask a fine line and leave that as the boot topping line, paint everything Haze Grey, then mask and paint the Navy Blue sides and Deck Blue topside. I will keep the main sub-assemblies all separate and install them after painting and touch-up as necessary.

Question to the master shipbuilders here, does this sound like a sound plan or have I got it completely backwards?

Cheers, D

It is probably a little late for me to say this, because you have already mounted the main superstructure block, but I will anyway.
Sumners and their kissing cousin Gearings both have the long superstructure block, and were I to paint one, my order would be locate and paint your boot top, then mask. Follow this with the Navy Blue on the hull. Then mask off the portion of the hull from the sheer line to the bow that will now be painted Haze Gray. Next paint the deck. Follow this by and individual paint job on each major component starting with the main superstructure block. Then assemble.
I know it is very fashionable to use the Measure 22 on the Gearing as shown in the instructions, but in truth (1) Gearing never spent much time in that measure (2) everybody does it.
My choice, were I doing this kit would be in overall Haze Gray with all deck surfaces in Deck Blue, using the small hull numbers, bow and stern, that come with the kit. That would depict Gearing from 46-47, and one need not fear that there was any modernization done to her, like was done from 49 onward. This last of course is pure opinion but your model would be unique, a one of, rather than one of many.
PS: I should also add that Gearing had no combat service in WWII, She spent her entire career in the Atlantic and Med. Should you choose to follow my suggestion, Gearing would also have her entire stack caps in a semi gloss black and some accessories like hoses and such painted in more appropriate peacetime colors. Her anti-skid deck surfacing a little darker than the deck blue (not much), and be kept in a nearly pristine state of paint maintenance. She was with her sisters Eugene A Greene, Gyatt, and others very much a show the flag in the Med showboats during this period, meaning very little weathering. You model would be Gearing in that short transition period from war to peace.
- Chuck (Quincannon)
Damian! Good to see this one back on the go! After all, you can’t spend all your time in the Auto shop.
Just one suggestion, along the lines of Chuck’s comments: For painting reasons, usually, I’d build the hull and deck up, then paint that before attaching (semi completed) painted superstructure blocks. This will alleviate the need for complicated masking in an effort to paint the decks
- Russell (RussellE)

Russ, Chuck, thanks once again for your input. Very valuable to me in my initiation into shipbuilding, and always much appreciated.
Chuck, I see exactly what you mean, but I wanted to depict the three ships during their brief service period in 1945. I have been wandering through the maze that is USN Measures and trying to decide on which appeal to me the most for these three builds as I want to do 3 different schemes. MS 22 will be one of them, and I think that I have settled on MS33a/28D for either Frank Knox or Chevalier.

I am also close to settling on the third scheme, being MS21, but I find a couple of options in there as well.
MS 21 June 1942 with Navy Blue 5-N on all vertical surfaces and Deck Blue 20-B on all horizontal surfaces, or MS 21 Feb 1945 Revision with Navy Grey (5-N as well!) and Deck Gray (20).
I’m thinking that the all Gray MS 21 scheme would work well on the third build, but then again I don’t recall ever seeing the all-blue scheme on any builds. Decisions, decisions ???

Once again, all input most welcome.

Cheers, D

May 01, 2019

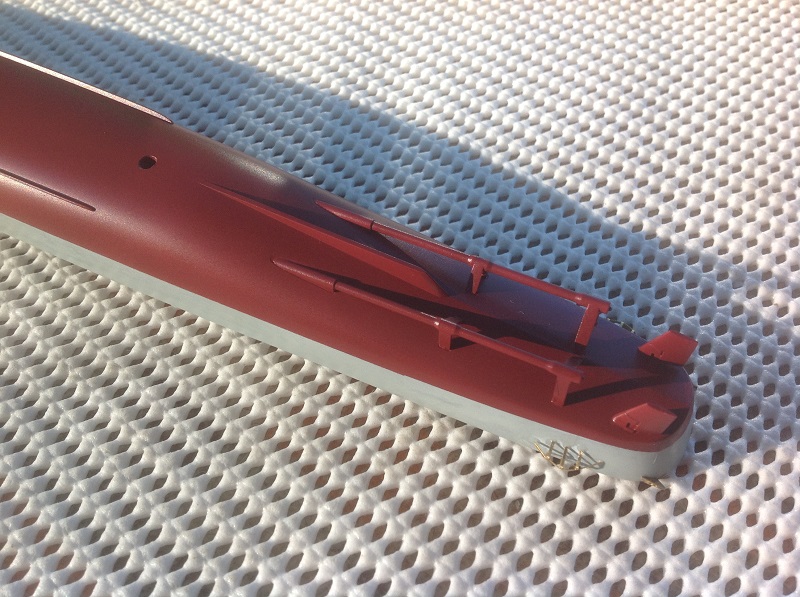
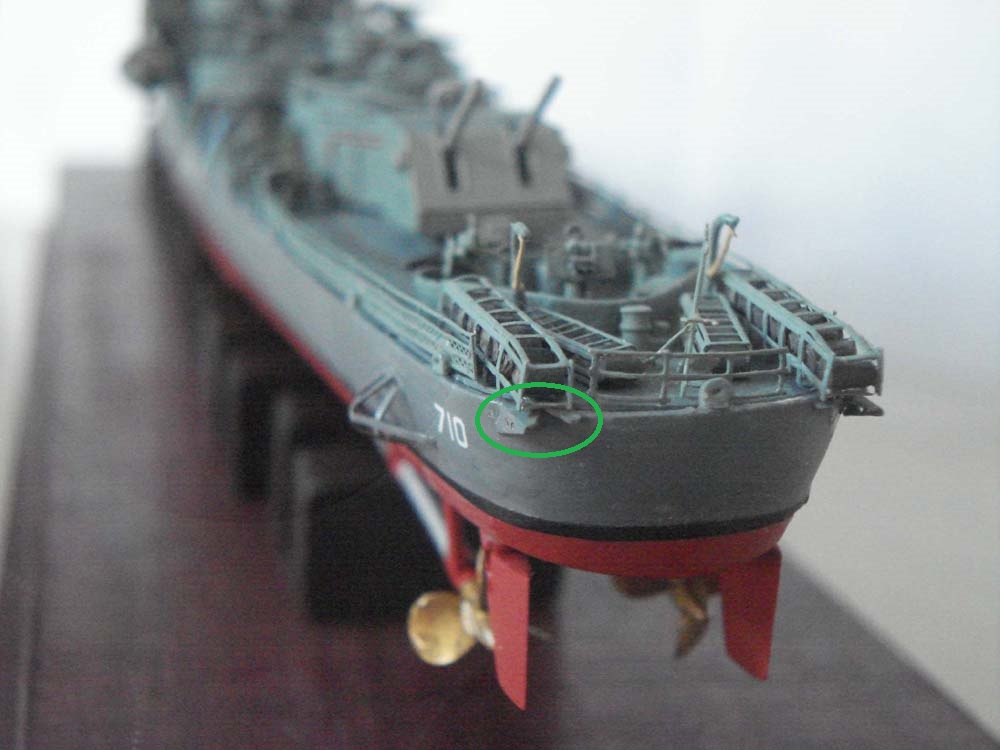
Another question to the experts. Can anybody educate me as to the name and function of the small parts on each side of the stern (circled in green in the image below)? Also, does anybody have a good image of where they are attached? The instructions are vague with no locating marks or angles, and in the colour scheme drawings they are shown on an angle to the horizontal, but it is not clear on the actual orientation of the part.

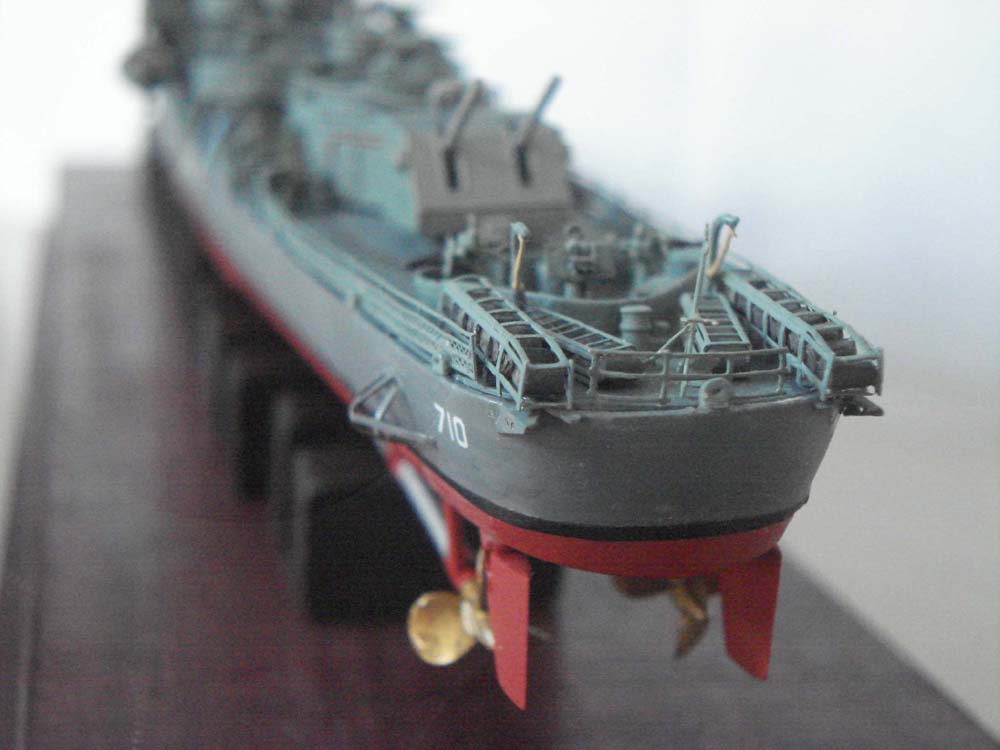
In the model below they are installed horizontal and flush with deck level, and to me it looks like they are there to make sure the depth charges clear the stern as they roll out.

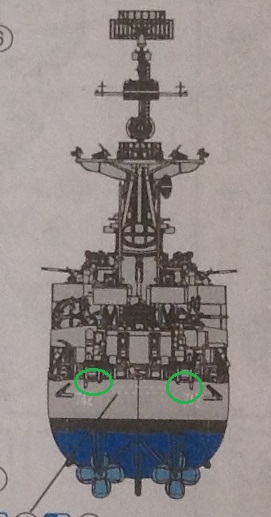
In the colour callout sheets from the kits they appear to be installed at an angle to the deck.

Heeeeeeeeelp???

Cheers, D

*They are propeller guards, and their purpose is to insure that the screws are not fouled. The model shows them correctly positioned.
Frank Knox carried measure 33 when she was commissioned.
As to the other I don’t know but will find out. Watch this space.
The following Gearing Class DD’s carried Measure 21. Most of them that carried this measure were shipyard carrying out Navy instructions that were overcome by the events of the war ending. Some of these commissioned in 46 yet retained the wartime measure when the Navy accepted the ship into service.
Frank Knox 742, Southerland 743, Rowan 782, Gurke 783, McKean 784, Henderson 785, Richard B. Anderson 786. James E, Keyes 787, Hollister 788, Eversole 789, Chevalier 805,Higbee 806, Benner 807, Dennis J. Buckley 808, New 818, Holder 819, Johnston 821, Samuel B. Roberts 824, Power 839, Bausell 845, Ozbourn 846, Robert L. Wilson 847, Richard E. Kraus 849, Leonard F. Mason 852, Fred T. Berry 858, Norris 859, McCaffery 860, Harwood 861, Cone 866, Brownson 868, Arnold J. Isbell 869, Damato 871, Hawkins 873, Perkins 877, Vesole 878, Leary 879, Dyess 880, Bordelon 881, Furse 882, Newman K. Perry 883, Orleck 886, Brinkley Bass 887, Stickell 888, O’Hare 889, Meredith 890

Now back to Measure 22. I am afraid I cannot help you on the substitution of Navy Gray for Navy Blue in this measure per the 1945 instructions, Don’t think anyone else can either. It seems that the Navy was running out of blue pigment in 1945. Instructions said to use up existing stocks of Navy Blue then switch over to Navy Gray. That is the short and dirty narration of it. I have never quite bought that story, because it seems that someone had enough in stock to paint all those DD’s listed above in Navy Blue.
Anyway, the photos that are available are mostly in black and white, and it is near impossible to tell the difference between the Navy Blue and Navy Gray. If you were to ask me which one would be the safer bet for Measure 21, I would say go with the Blue* - Chuck (Quincannon)

May 02, 2019

Thanks so much Chuck, your advice is invaluable and I hope you stick around for the rest of my odyssey here, as you can see I need all the help I can get!

I have been getting my information from “shipcamouflage.com” with the ship/measure information HERE and the colour details for each Measure HERE. In saying that, I have picked up a discrepancy in the site where the same colour image of the USS Drayton is listed in 2 places with 2 different Measures, so no site is perfect!

I will keep working on the kit and researching colours before I hit them with any paint, but the all blue MS 21 is slightly ahead for me at this point.

Many thanks once again.

Cheers, D

That’s where I go too, but then I verify with other sources, Navsource is a good on line resource for photos. Neither are perfect.
I will say one more thing about Frank Knox, one of my personal favorite DD’s. She was commissioned in Measure 33, and you will note from the pictures available that she carried single 20mm’s and two banks of tubes. Don’t know if Dragon gives you the option for two banks of tubes. and or the DDR tripod.
- Chuck (Quincannon)
Coming apace now Damian, looking great. Cheers - Si (RedDuster)
I reckon parts MA45/47 are actually supports for the depth charge racks. I suggest they should be flush to the deck and parallel and inline to the depth charge racks so you can mount them to them…
of course I could be wrong
- Russell (RussellE)
Russell: The prop guards as far as I know have nothing to do with depth charges. They are more concerned with cables interfering with the screws. They are fitted in the right place and at the right height off the waterline in the picture Damian posted. Most American warships cruisers and below had them fitted.
Depth charges on American destroyers and some of the cruisers that had them drop off the stern when the ship is in motion. Therefore there is no chance they will interfere with the screws. Other depth charges were shot off of the ship via K guns mounted on both the port and starboard flanks of the ship. Being “shot from a cannon” so to speak they too presented no danger to the screws.
German and Japanese destroyers had similar prop guards mounted. Not sure about the RN. I have never seen them, but to tell the truth I have never looked either.
We continue the practice of installing them to this day. They are relatively thin and don’t show up much on a distance shot of the ship, but close ups of the stern area of our latest, The Burkes, show them in the same place as found on the Gearing. Their location varies a bit from class to class, but most seem to be mounted about half way between deck and water line, and the half moon shape guard (not the supports) is horizontal.
- Cuck (Quincannon)

Hi Chuck.

I think you might be looking at the wrong part. I am talking about the small triangle-shaped part that is shown on the build model image tucked up underneath the depth charge rails. I have circled it in green in this image.

Looking very closely at the stern image of the Frank Knox from the instruction sheet, I can see where they fit now and the angle of the fold (again circled in green here). I couldn’t see this on the Gearing instructions because of the darker paint.

I would still like to see an actual photo of this part of the ship, so the search continues.
Problem solved, knowledge gained, all is good!

Cheers, D

I sure was looking at the wrong thing. Russell mention the MA parts numbers and I knew Dragon has MA designations for their etch, and that the prop guards were etched parts. See what assuming does.
I do not have a clue as to what they are. I am now as anxious as you to find out the answer.
Meanwhile you drive on with the three Gearings, and I will be following.
- Chuck (Quincannon)


*Looking at that stern shot of DD 593 I would fully agree they are supports for the depth charge racks.

I really do feel dumb. I looked at that photo of the instruction sheet, and this feeble old mind of mine translated MA45 to MA25, the prop guards. Accuracy in observation is a military virtue, and I just flunked.* - Chuck (Quincannon)
don’t worry Chuck, we’ve all been there and done that - Russell (RussellE)
Wow D. Glad to see you back at it. Where to you find the time? - Mark (md72)

G’day Mark. Thanks for checking in, good to have you on board. Basically, I don’t sleep much

Cheers, D

May 05, 2019

Darth Gearing !! :wink:

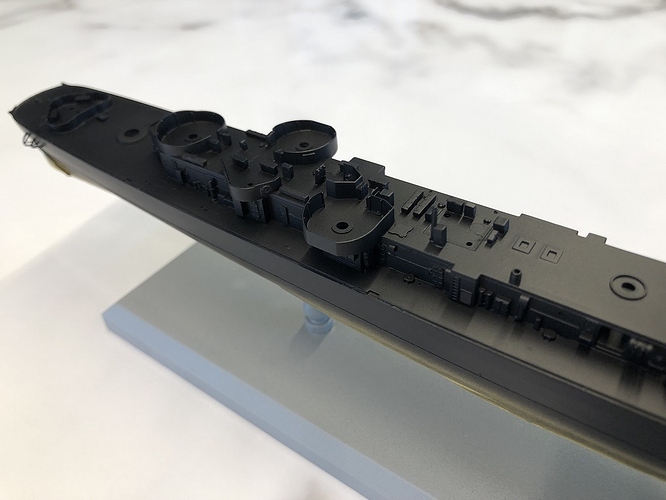
Primer is on. Mr Surfacer 1500 Black cut with about 60% MLT, shot at about 20psi through a 0.25 tip.


I went with black primer for a number of reasons.

  1. This stuff is silky smooth and tough as nails so I can just mask it off for the boot topping.
  2. Contrast with the grey kit parts so I know I’ve primed everywhere.
  3. Contrast with the Haze Grey so I know I’ve painted all of the vertical surfaces.
  4. If I’m careful with my Haze Grey application this will allow me to create depth with recessed and shadowed areas.

I’m really happy to have taken the next step with this build, enjoying my first nautical adventure here.

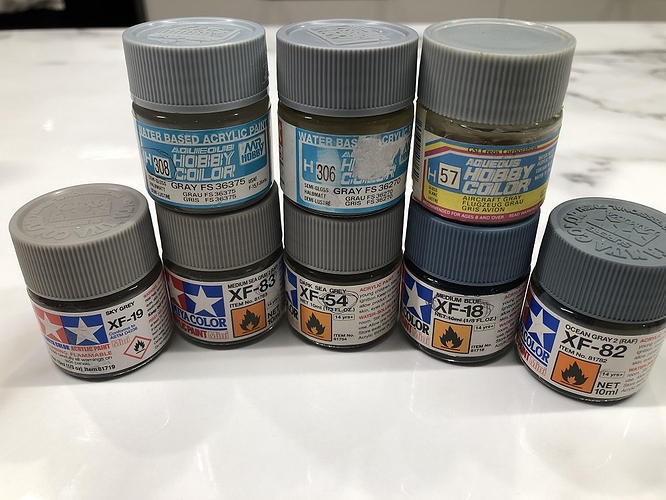
Appealing again to the brains trust here, I’m still looking for a reasonable formula for Haze Grey. I have been doing some reading and there seems to be equal liking for Tamiya XF-19 and XF-83, but also a few comments that neither of these is “blue” enough.

Below are the greys and blue-greys that I have at hand, does anybody here have an opinion on which would be best, or a possible mix to get closer? At present I am thinking of using XF-19 with a drop of XF-18


Cheers, D

Damien: The rub is that there are two Haze Grays. One was used during the war and the other came in in the 1950’s AK Interactive, and Color Coats makes both of them, and the only difference I can detect is one, the post war version, contains some blueish tint.
Were it me with your problem, I would use the XF19 Sky Gray, then let your Navy Blue lower portion of the hull take over from there. Paint is so fragile, in that the only day that it is right and meets manufactures standards is the day it is applied.
Take some scrap plastic. Apply your chosen Navy Blue and the XF19, in the same manner as on the hull of the ship. If it looks good to you, who is to say it is not Haze Gray.
A few years ago I built the Meng Lexington and painted her as she was in the Summer of 41. I used Tamiya Navy Blue AS8 straight out of the spray can, then XF19 for the remainder of the hull and superstructure. Then Dullcoat. I was quite pleased, and for me that is rare when viewing my own work.
- Chuck (Quincannon)
Honestly D, my first thoughts went to White Ensign Models Colourcoats. Unfortunately they don’t exist anymore. Now it’s Colourcoats I think their in the US. But they’ll be glad to price your order in Australian Dollars. - Mark (md72)

May 07, 2019

Thanks for the insight Chuck, XF-19 it is! I looked at a few online builds with different paint colours, and they all look good, and all look different in different light as well.

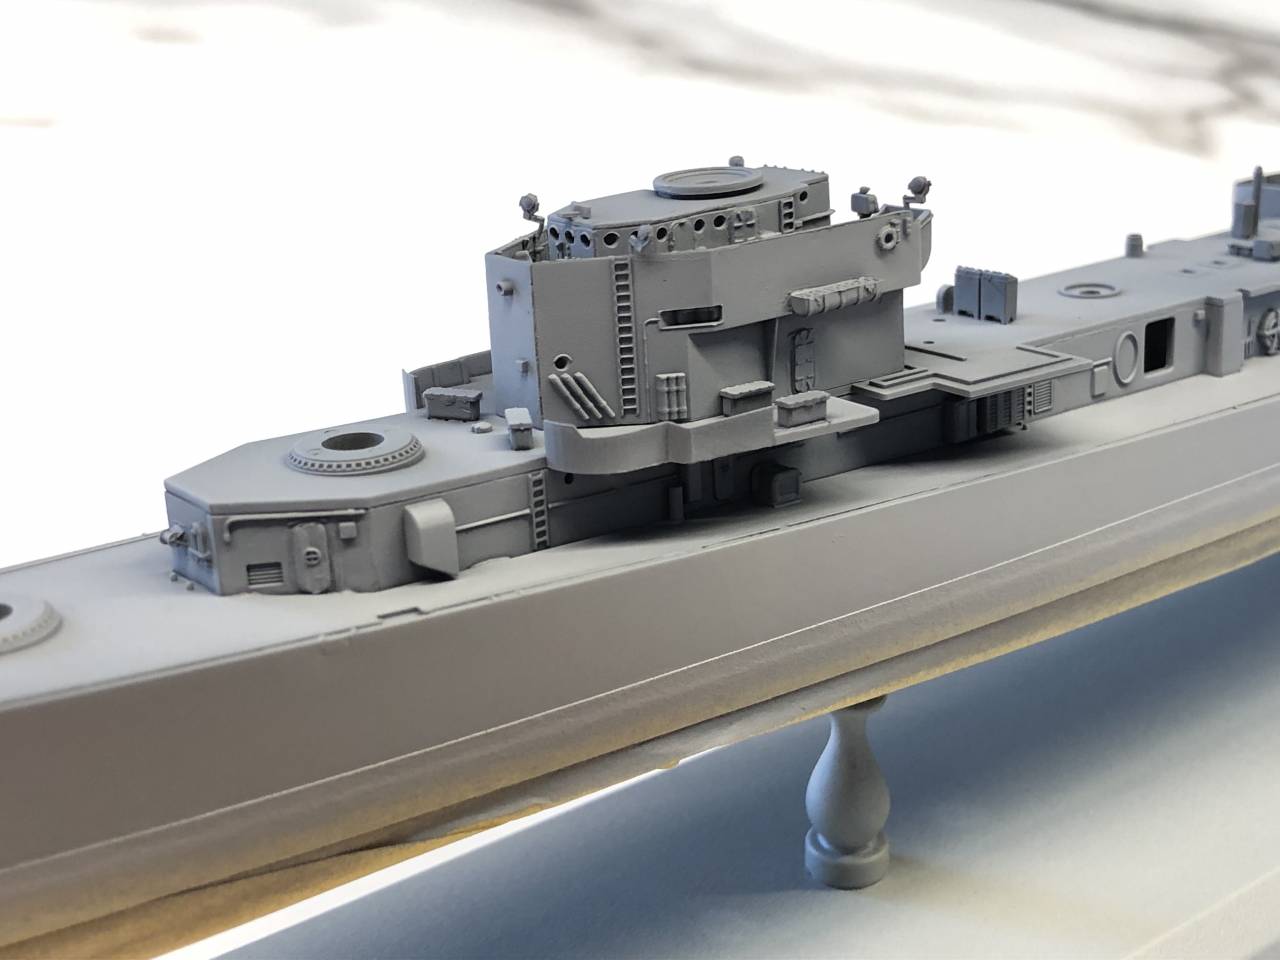
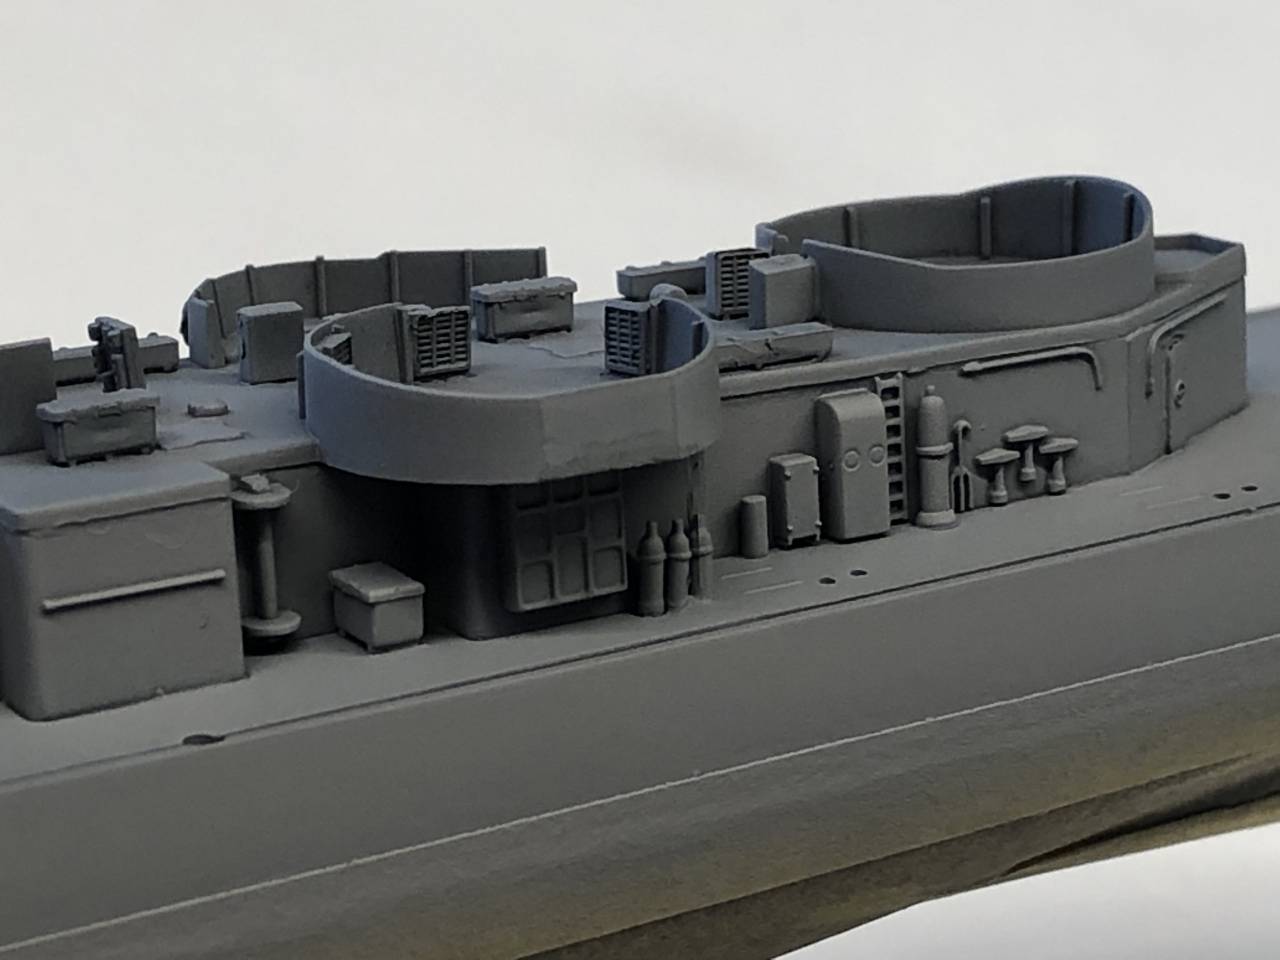
Ok, I think my cunning plan is working. I masked off about 2mm for the boot topping, then on went the XF-19. By having a black primer, and using highly thinned XF-19, I was able to “sneak up” on the depth of colour I want and by varying the application I have left some areas a bit darker and the more recessed places look good to me. The curse of the digital image is the sloppy glue application and lack of attention to parts clean-up. Off to the brig with me :expressionless: :wink:


Masking and painting the Sea Blue hull next.

Cheers, D

Damian, Nice work on laying the paint. Looks nice and even. - Mark (d6mst0)
That’ll be 9 lashes & no rum rations for you D Seriously though, looking very nice! Onwards & upwards! - Russell (RussellE)

Thanks Russ :wink:

And skip forward to the present day!

Well, now that I have managed to copy the old thread across, including comments from others in italics because most of them are critical to my learning and progress, it’s time to forge ahead!

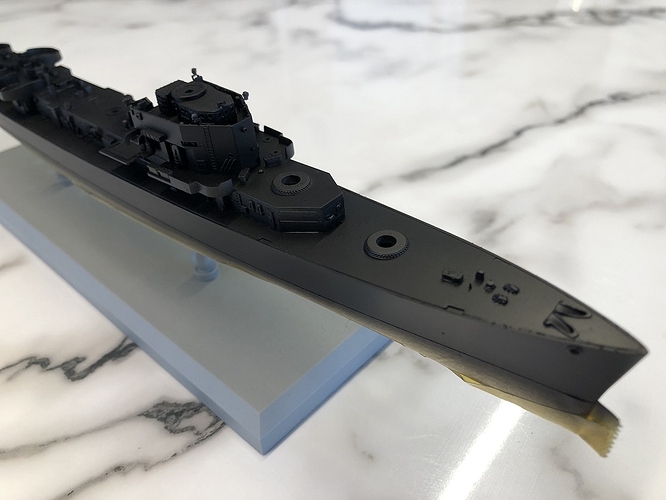
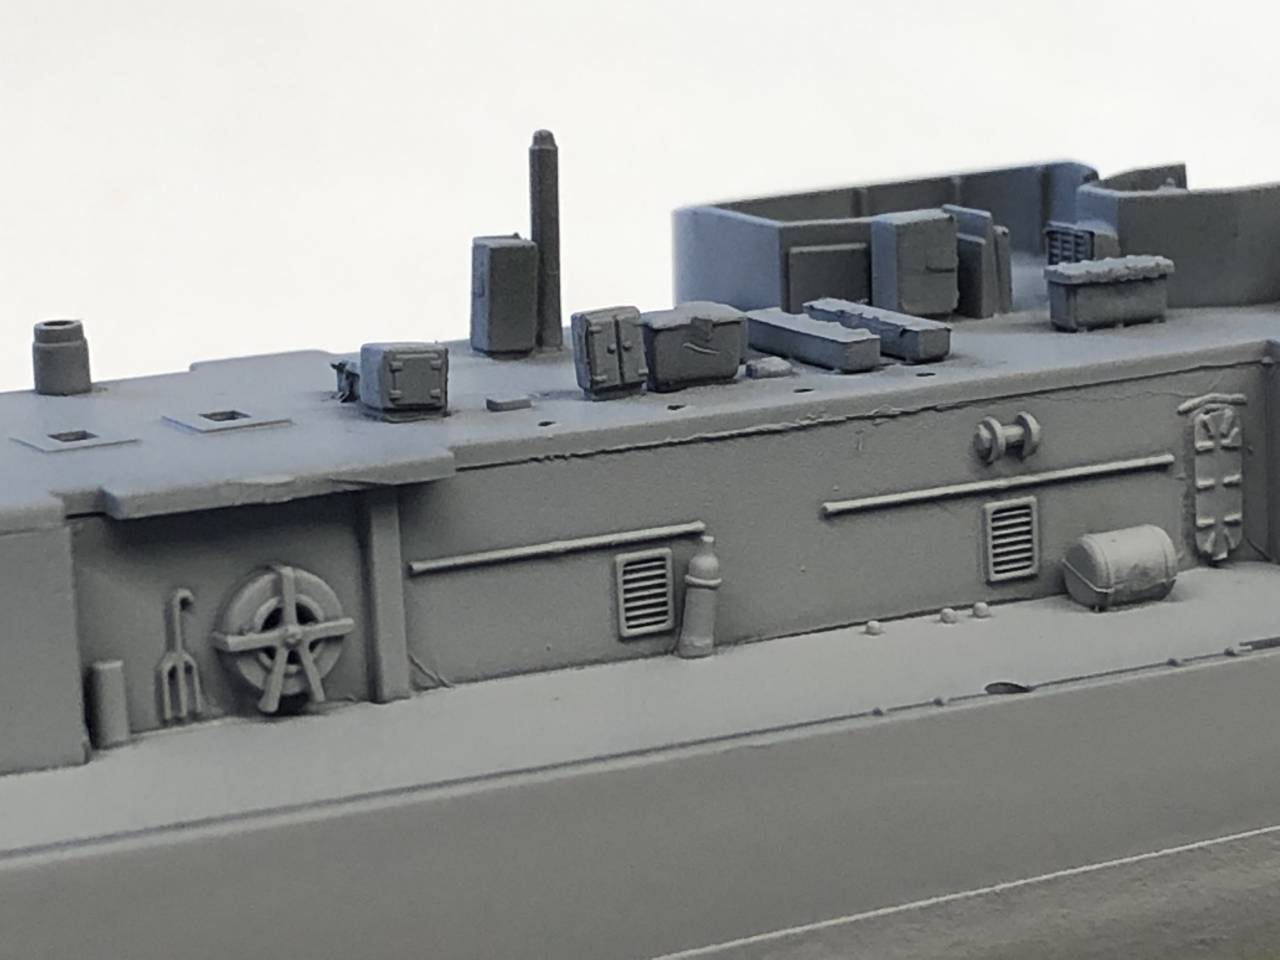
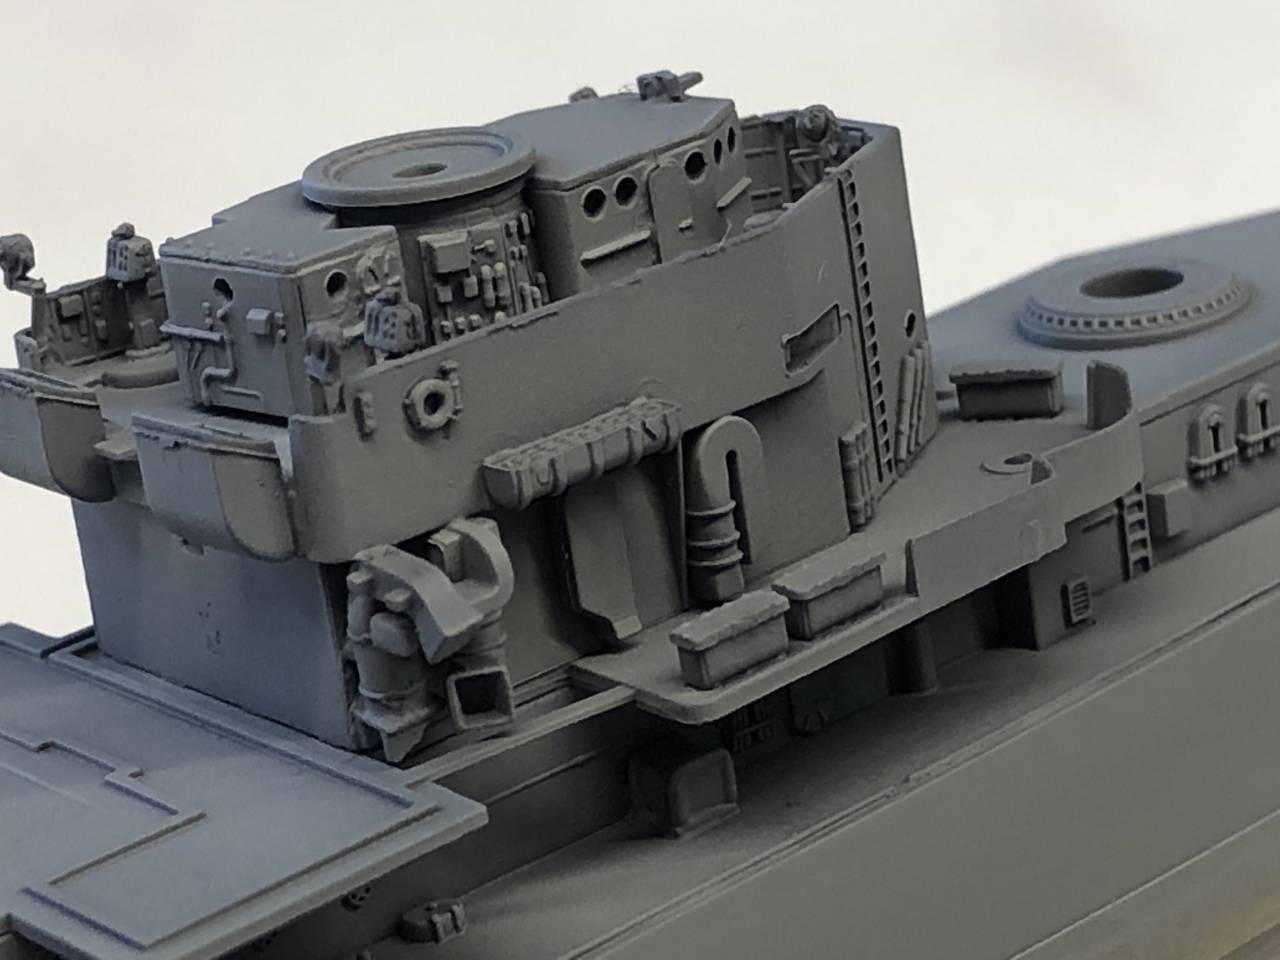
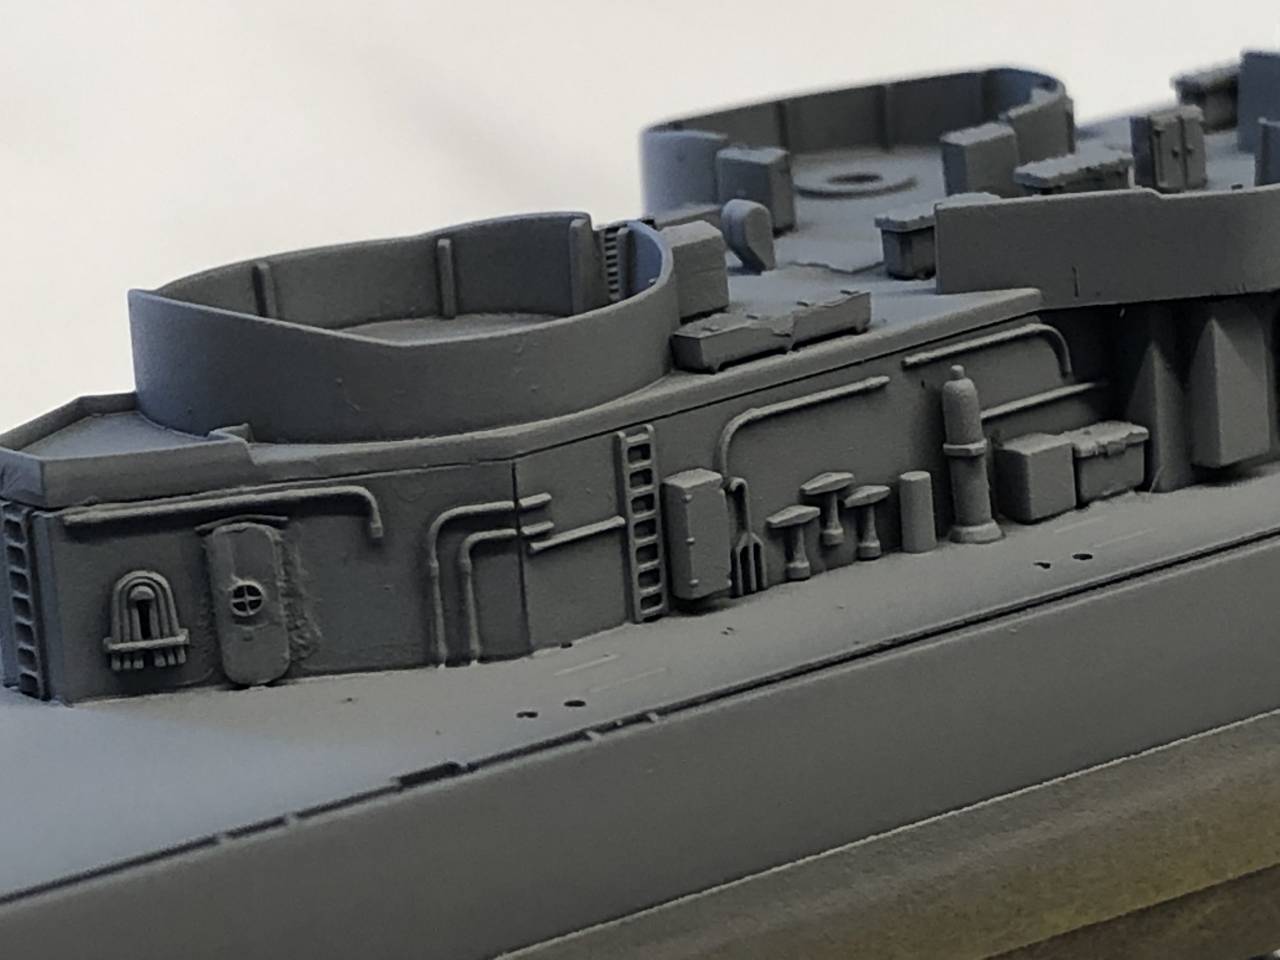
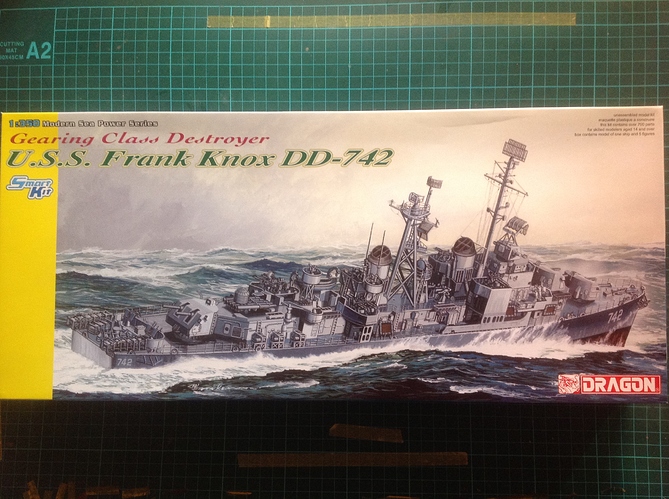
As part of the “Tin Can Sailors” Campaign I am building the second of the trilogy here, USS Frank Knox (DD-742), and have made a start on the hull and some of the smaller sub assemblies.


Unlike last time with the Gearing, I remembered to drill the mounting holes in the bottom before I assembled the two halves.

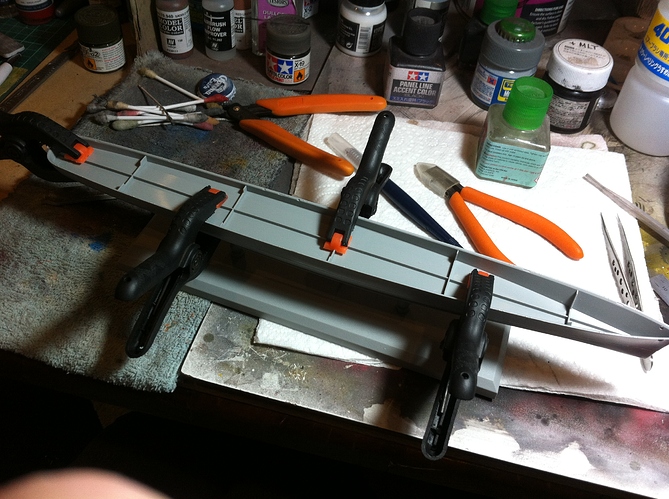
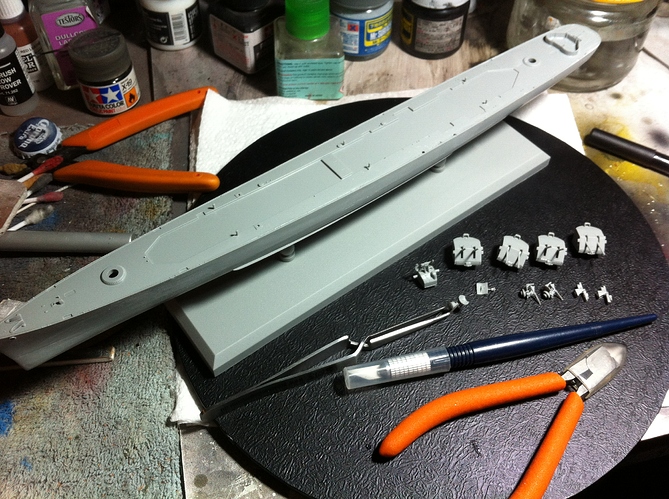
I have now applied some putty along the join line and will be able to sand it off tomorrow and get some shots prior to priming.

As always, I am completely open to any comments, suggestions, advice and constructive critique. I am a certified (certifiable) Shipwrights Noob and need all of the help I can get.

I hope everybody is staying safe and well, and thanks for checking in on my ramblings and shenanigans.

Cheers, D

2 Likes

Damian, I know it is a pain to redo things, but thanks for reposting this from the old MSW site! Now we can have the complete picture of the build right here as you progress. :+1:t3:

1 Like

Damian,

When you stated 1500 Mr Surfacer cut with 60% MLT what is the MLT?

Sorry for what might appears as a dumb question.

David

Great to see this one making the move, too, D :relaxed:

1 Like

Hi David.
Apologies, I’m just lazy and throw in acronyms everywhere! MLT is Mr Levelling Thinner from Mr Hobby which is my go-to thinner for lacquer, enamel and acrylic paints.

Cheers, D

Damian,

Thank you sir - really appreciate the information. Thinking of following your example, really like the results!!

David

1 Like

Cheers, Tim. It only took and hour or so, and thankfully it is my one and only MSW thread! I’m definitely glad I did it as I am constantly referring back to the older posts in the thread to remind myself of where I’m heading.

Damian,

as everybody said - great to see this build log here, and thank you very much for your effort to transfer the whole journey from start to today! That’s a find build log and I’m certainly in for the coming voyage.

Cheers
Jan

@JJ1973, thanks for checking in! I need all of the expert eyes I can get here.

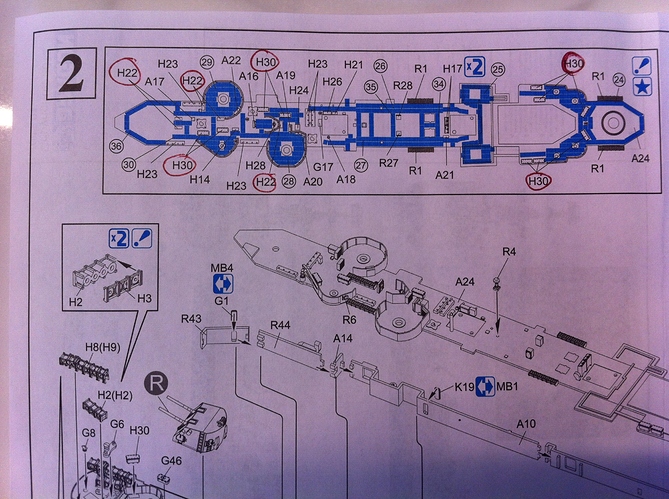
Speaking of which, I’ve found some discrepancies in the next stage and would love some opinions on which way to go. In the plan view below there are parts that are in different locations or completely missing when compared with the drawing immediately below it, and on the kit deck part, there are locating notches that don’t line up with either of the above drawings.
The main culprits are part numbers H23, H30 and R1.

What is the concensus when you strike these discrepancies? Do I go with the plan view which will also then line up with the decal placements, the “oblique” view which shows the placements clearly in 3D, or the locating notches in the actual kit part?

Cheers, D

Hey D! Never good when the instructions let us down…

From my own experiences I look to see if any references can help solve the problem… Check online…

Then if that fails, refer to my old rule of: if I can’t find out what’s correct, chances are, most other people won’t be able to either :slight_smile: