Nice job on the paint. Tonal variations make the monotone finish much more interesting. 
Nice build, nice photos too.
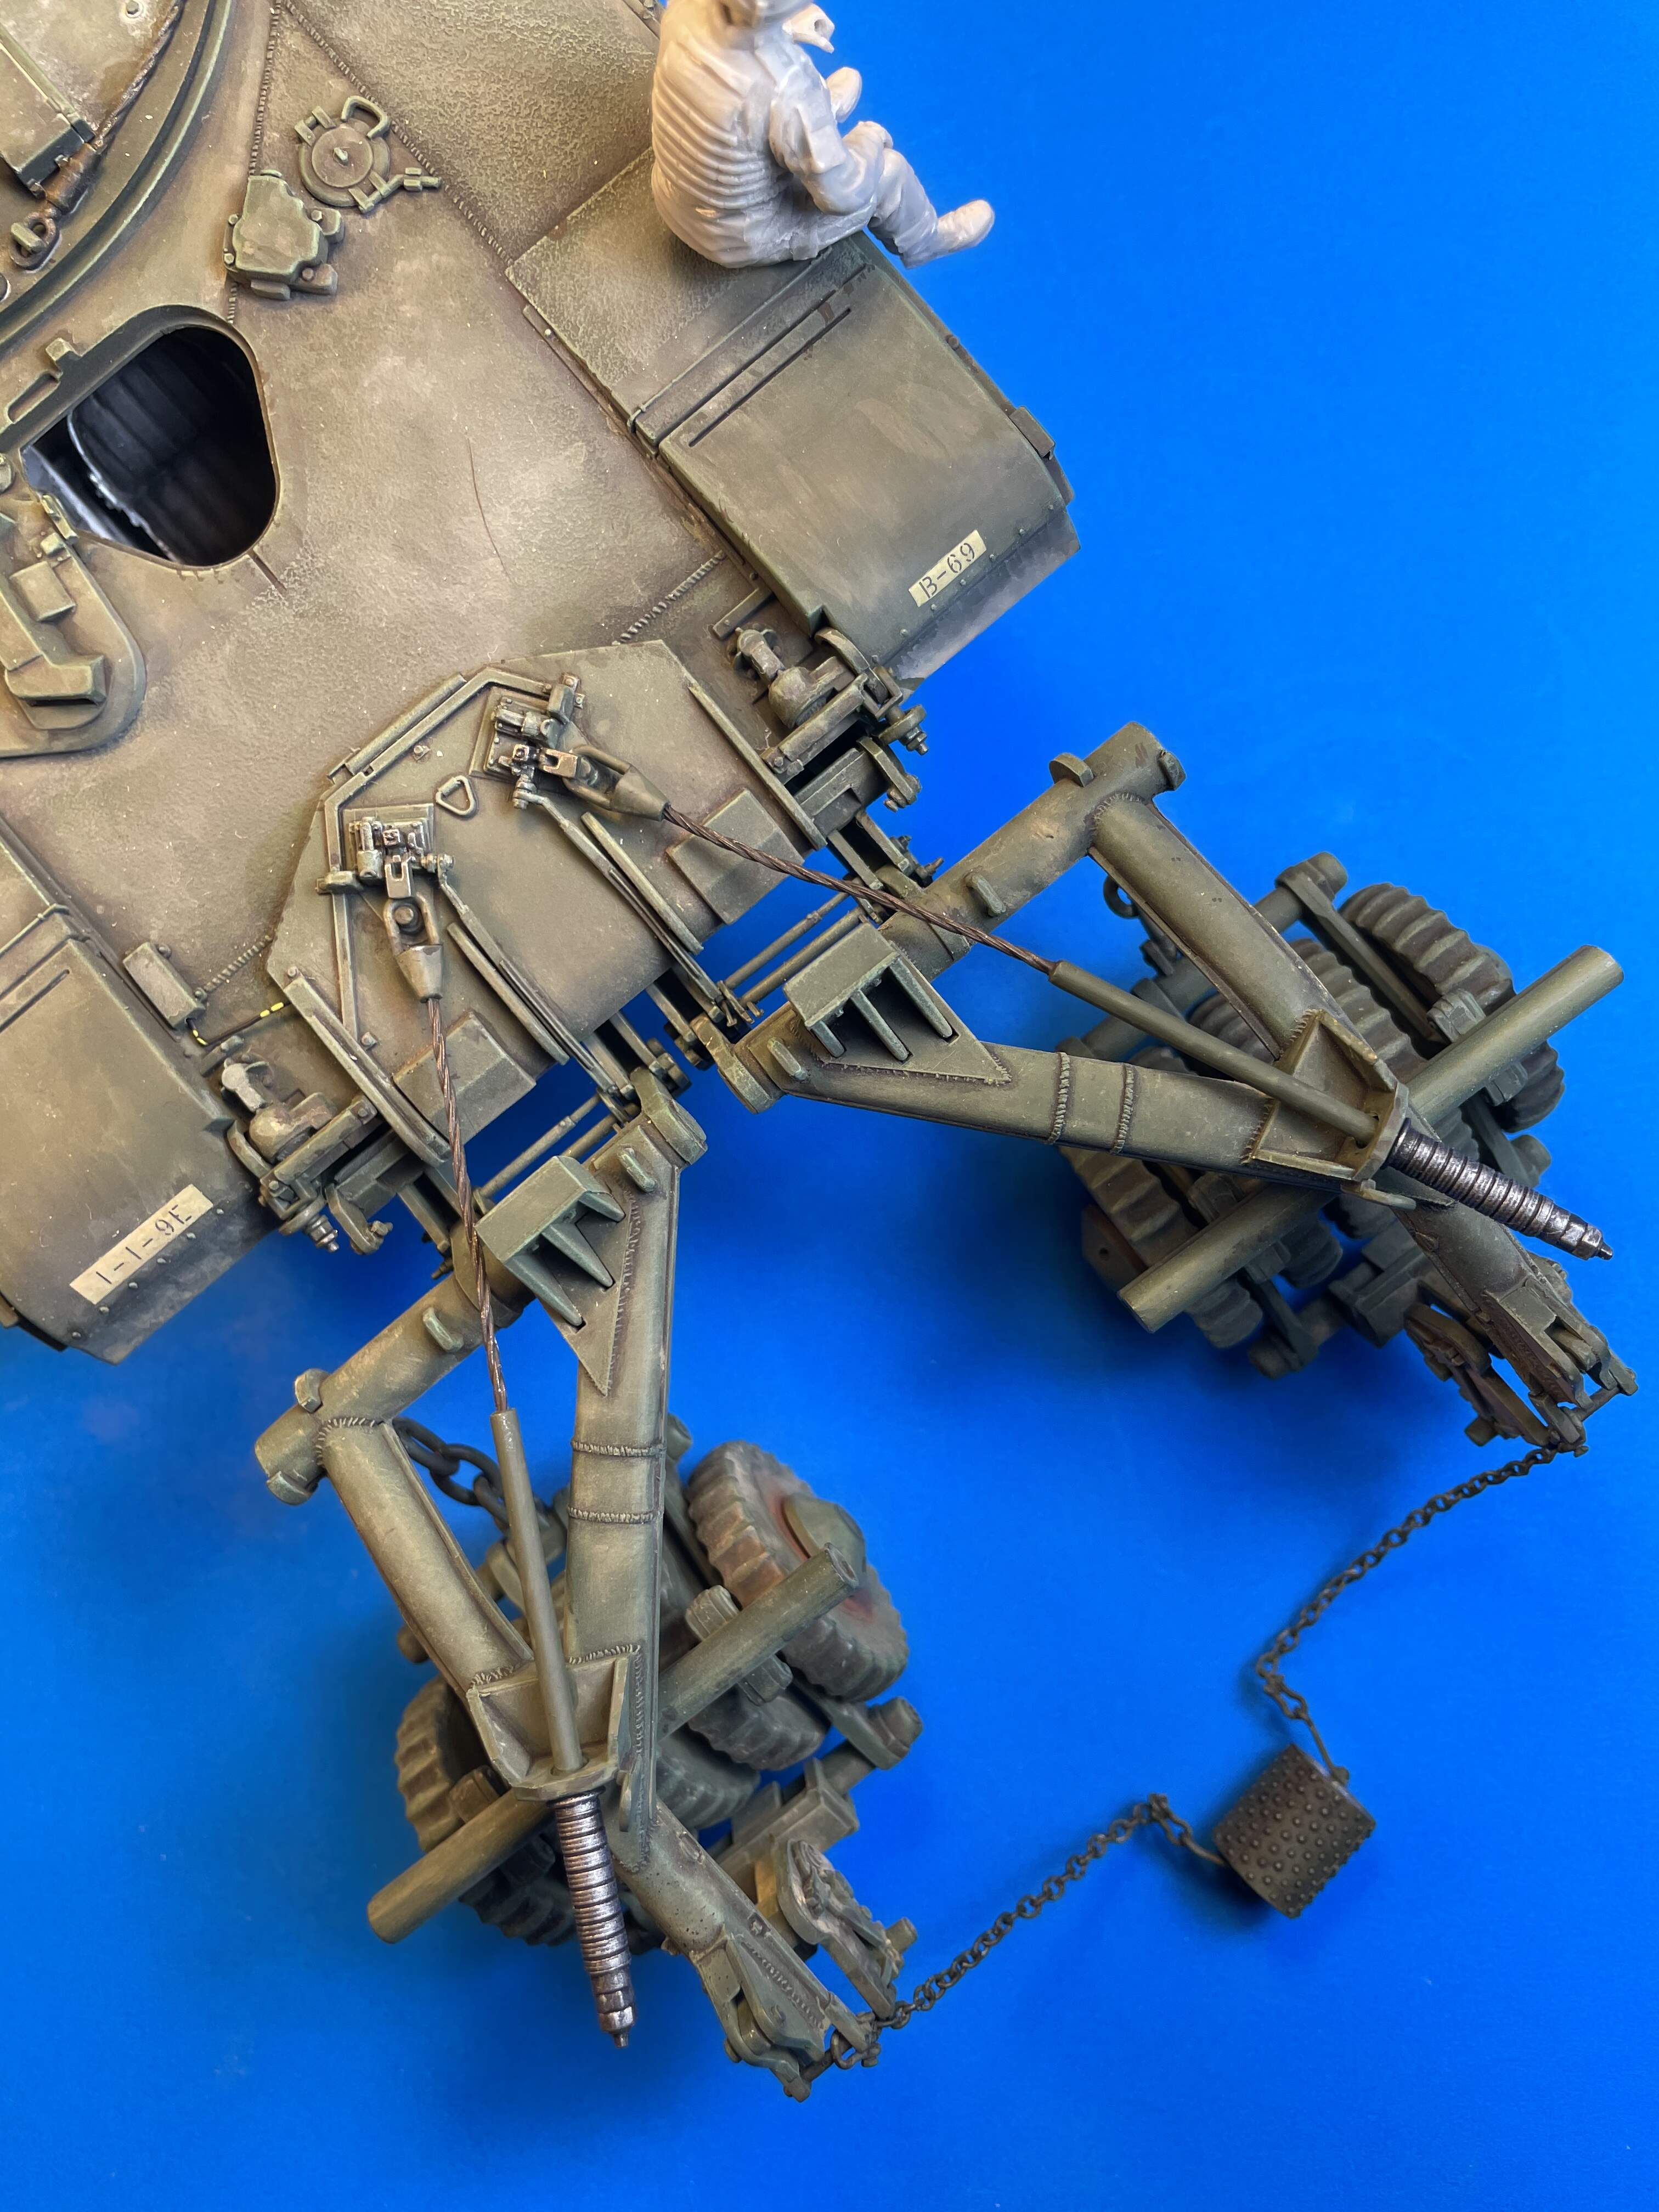
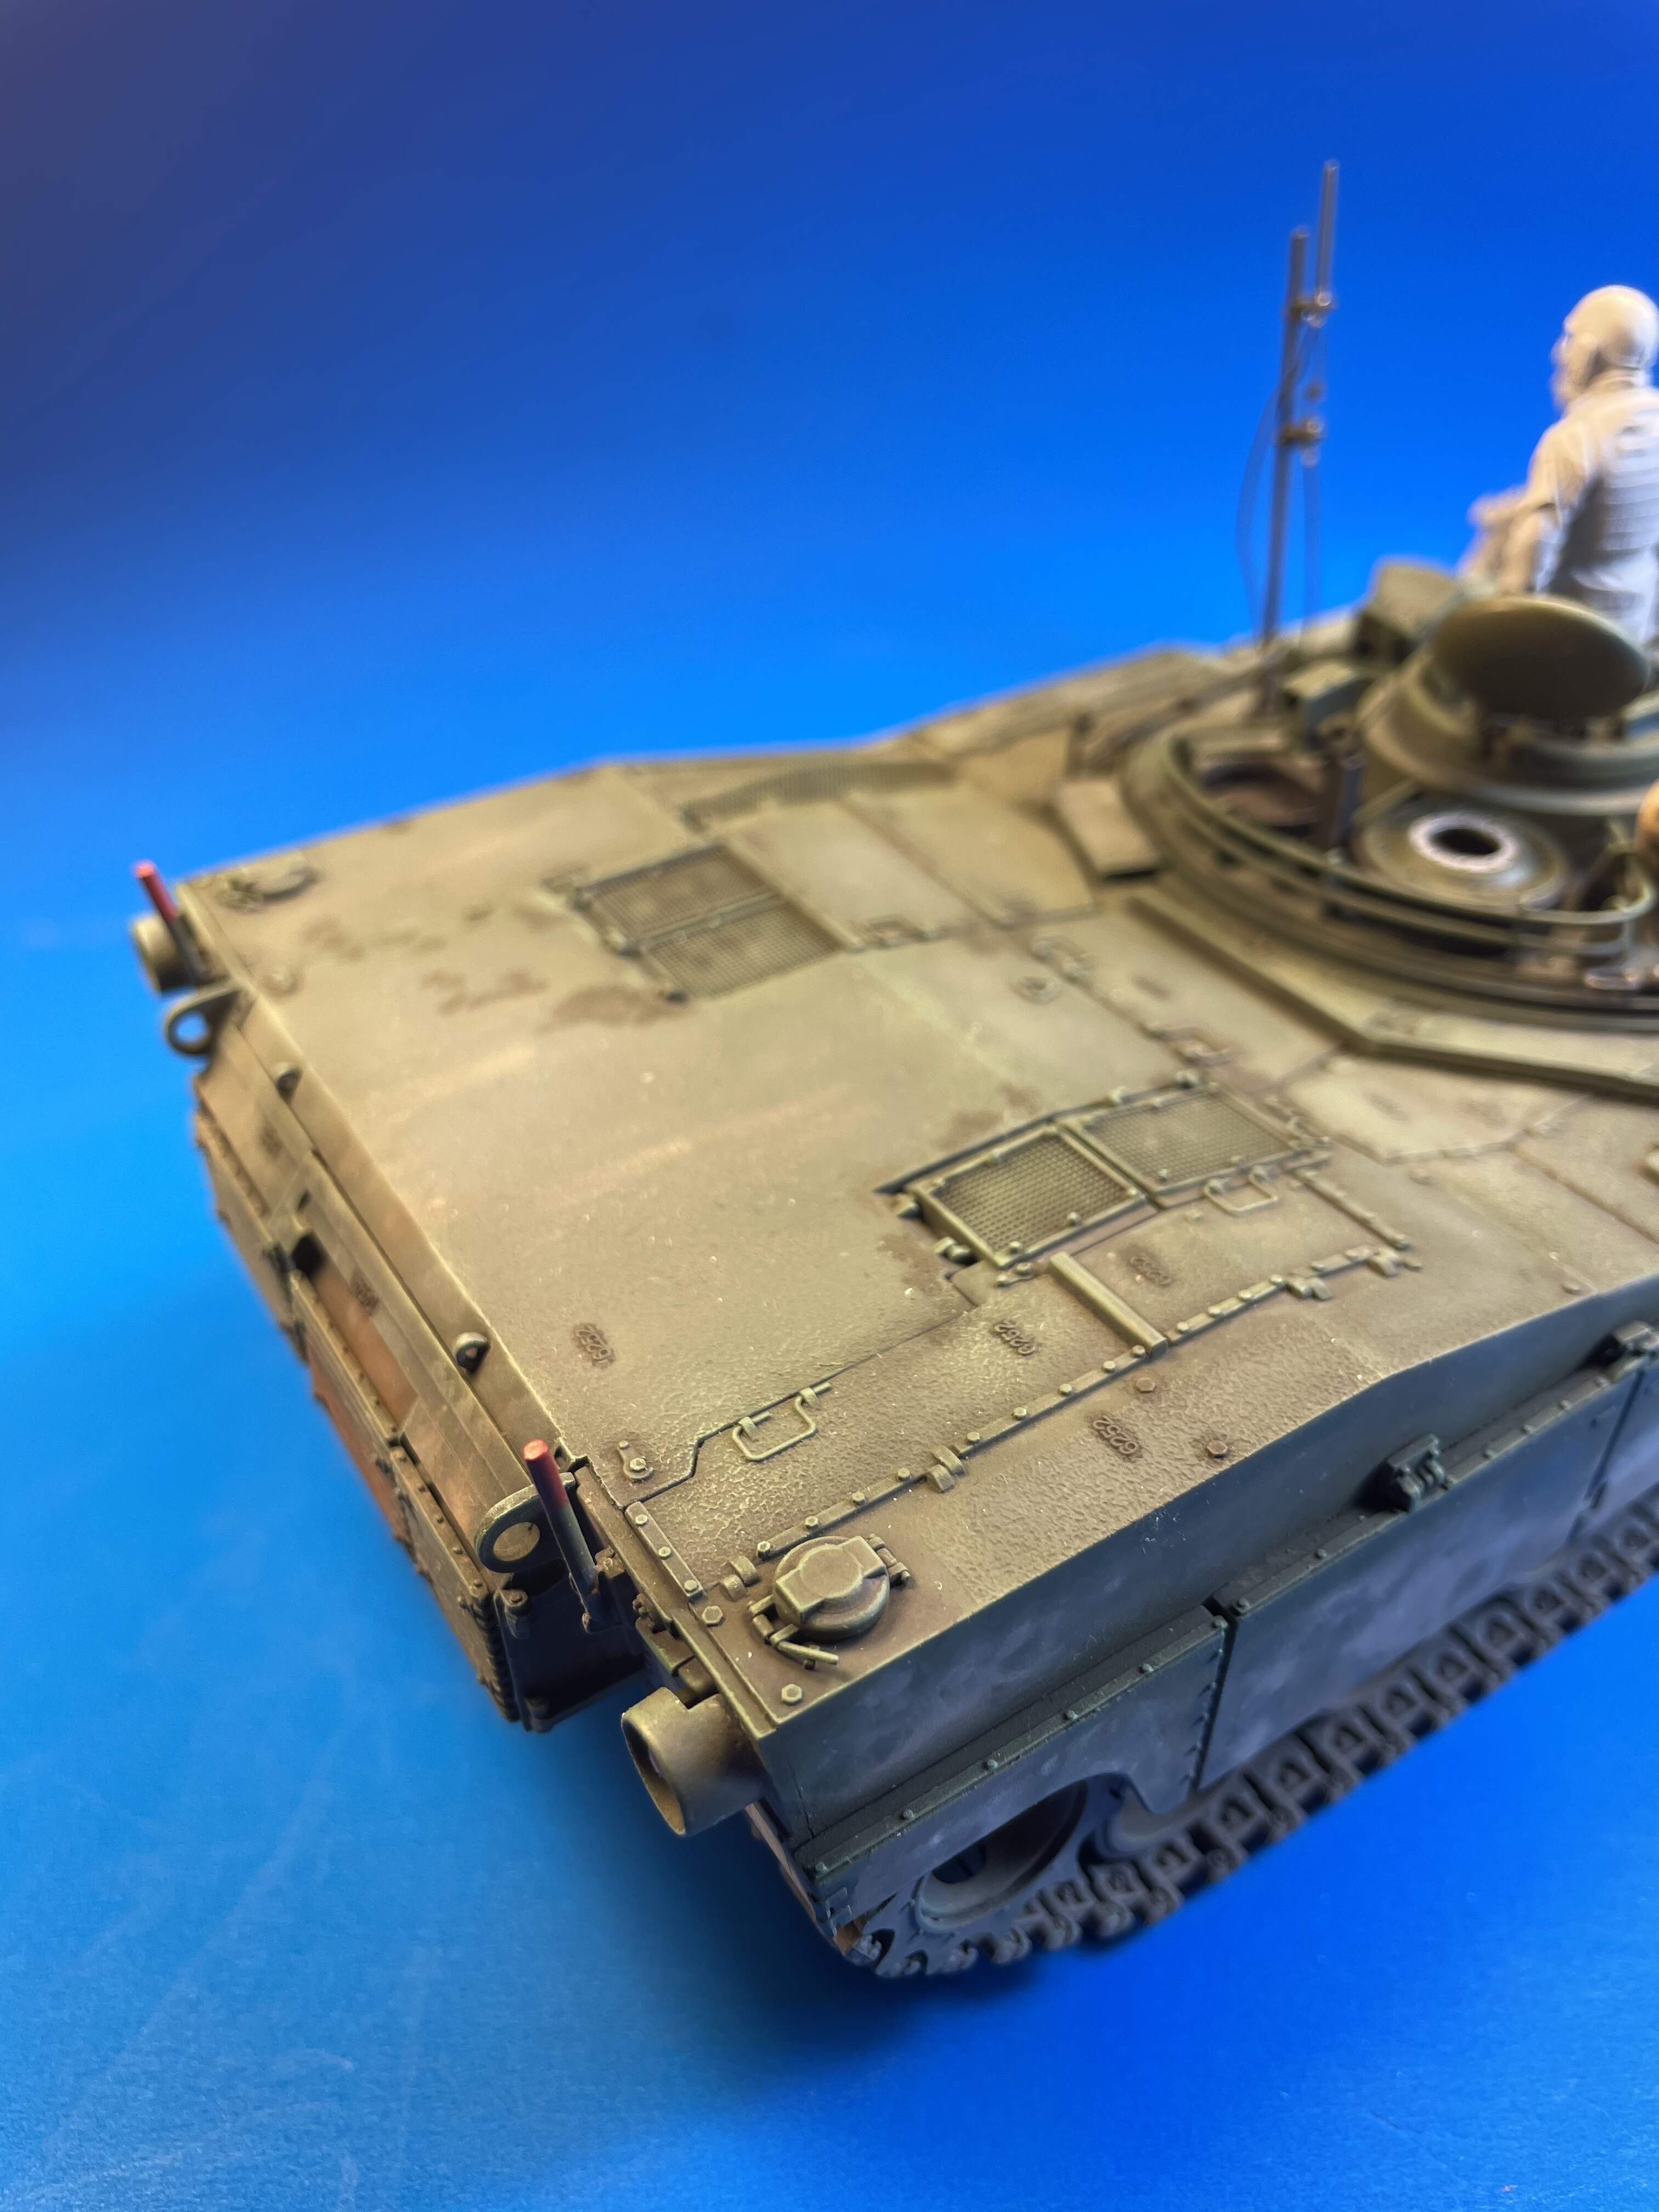
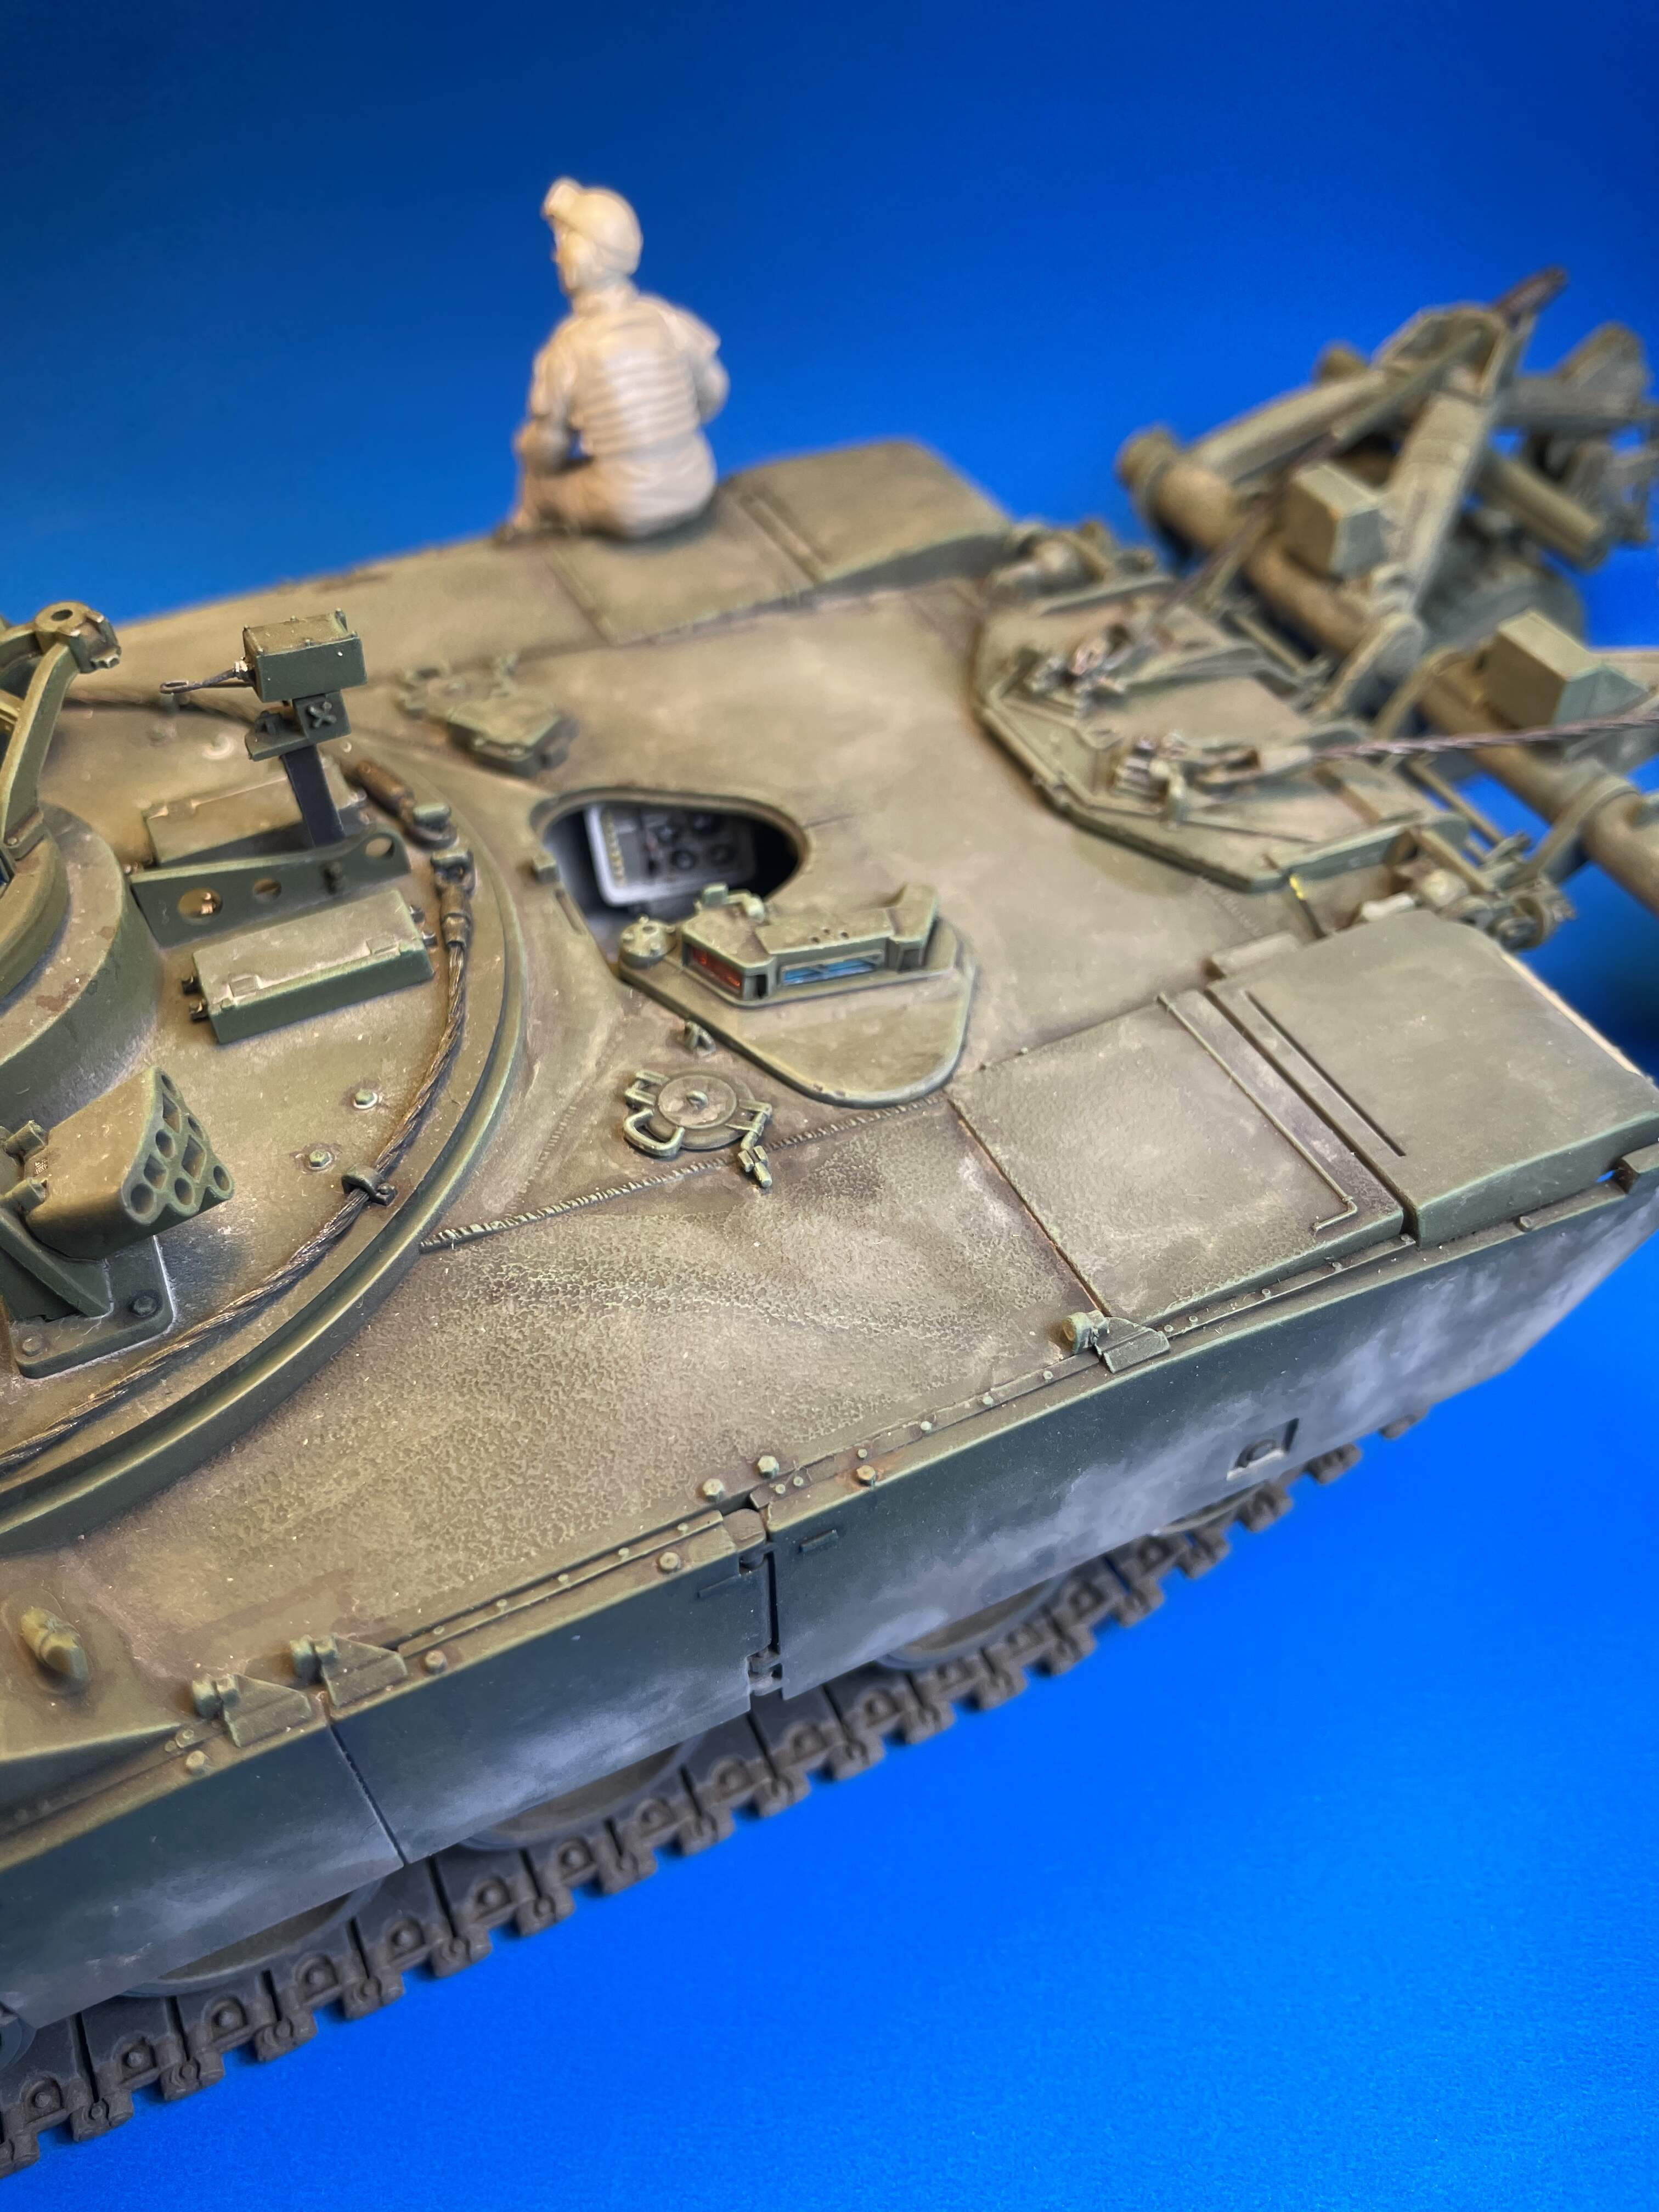
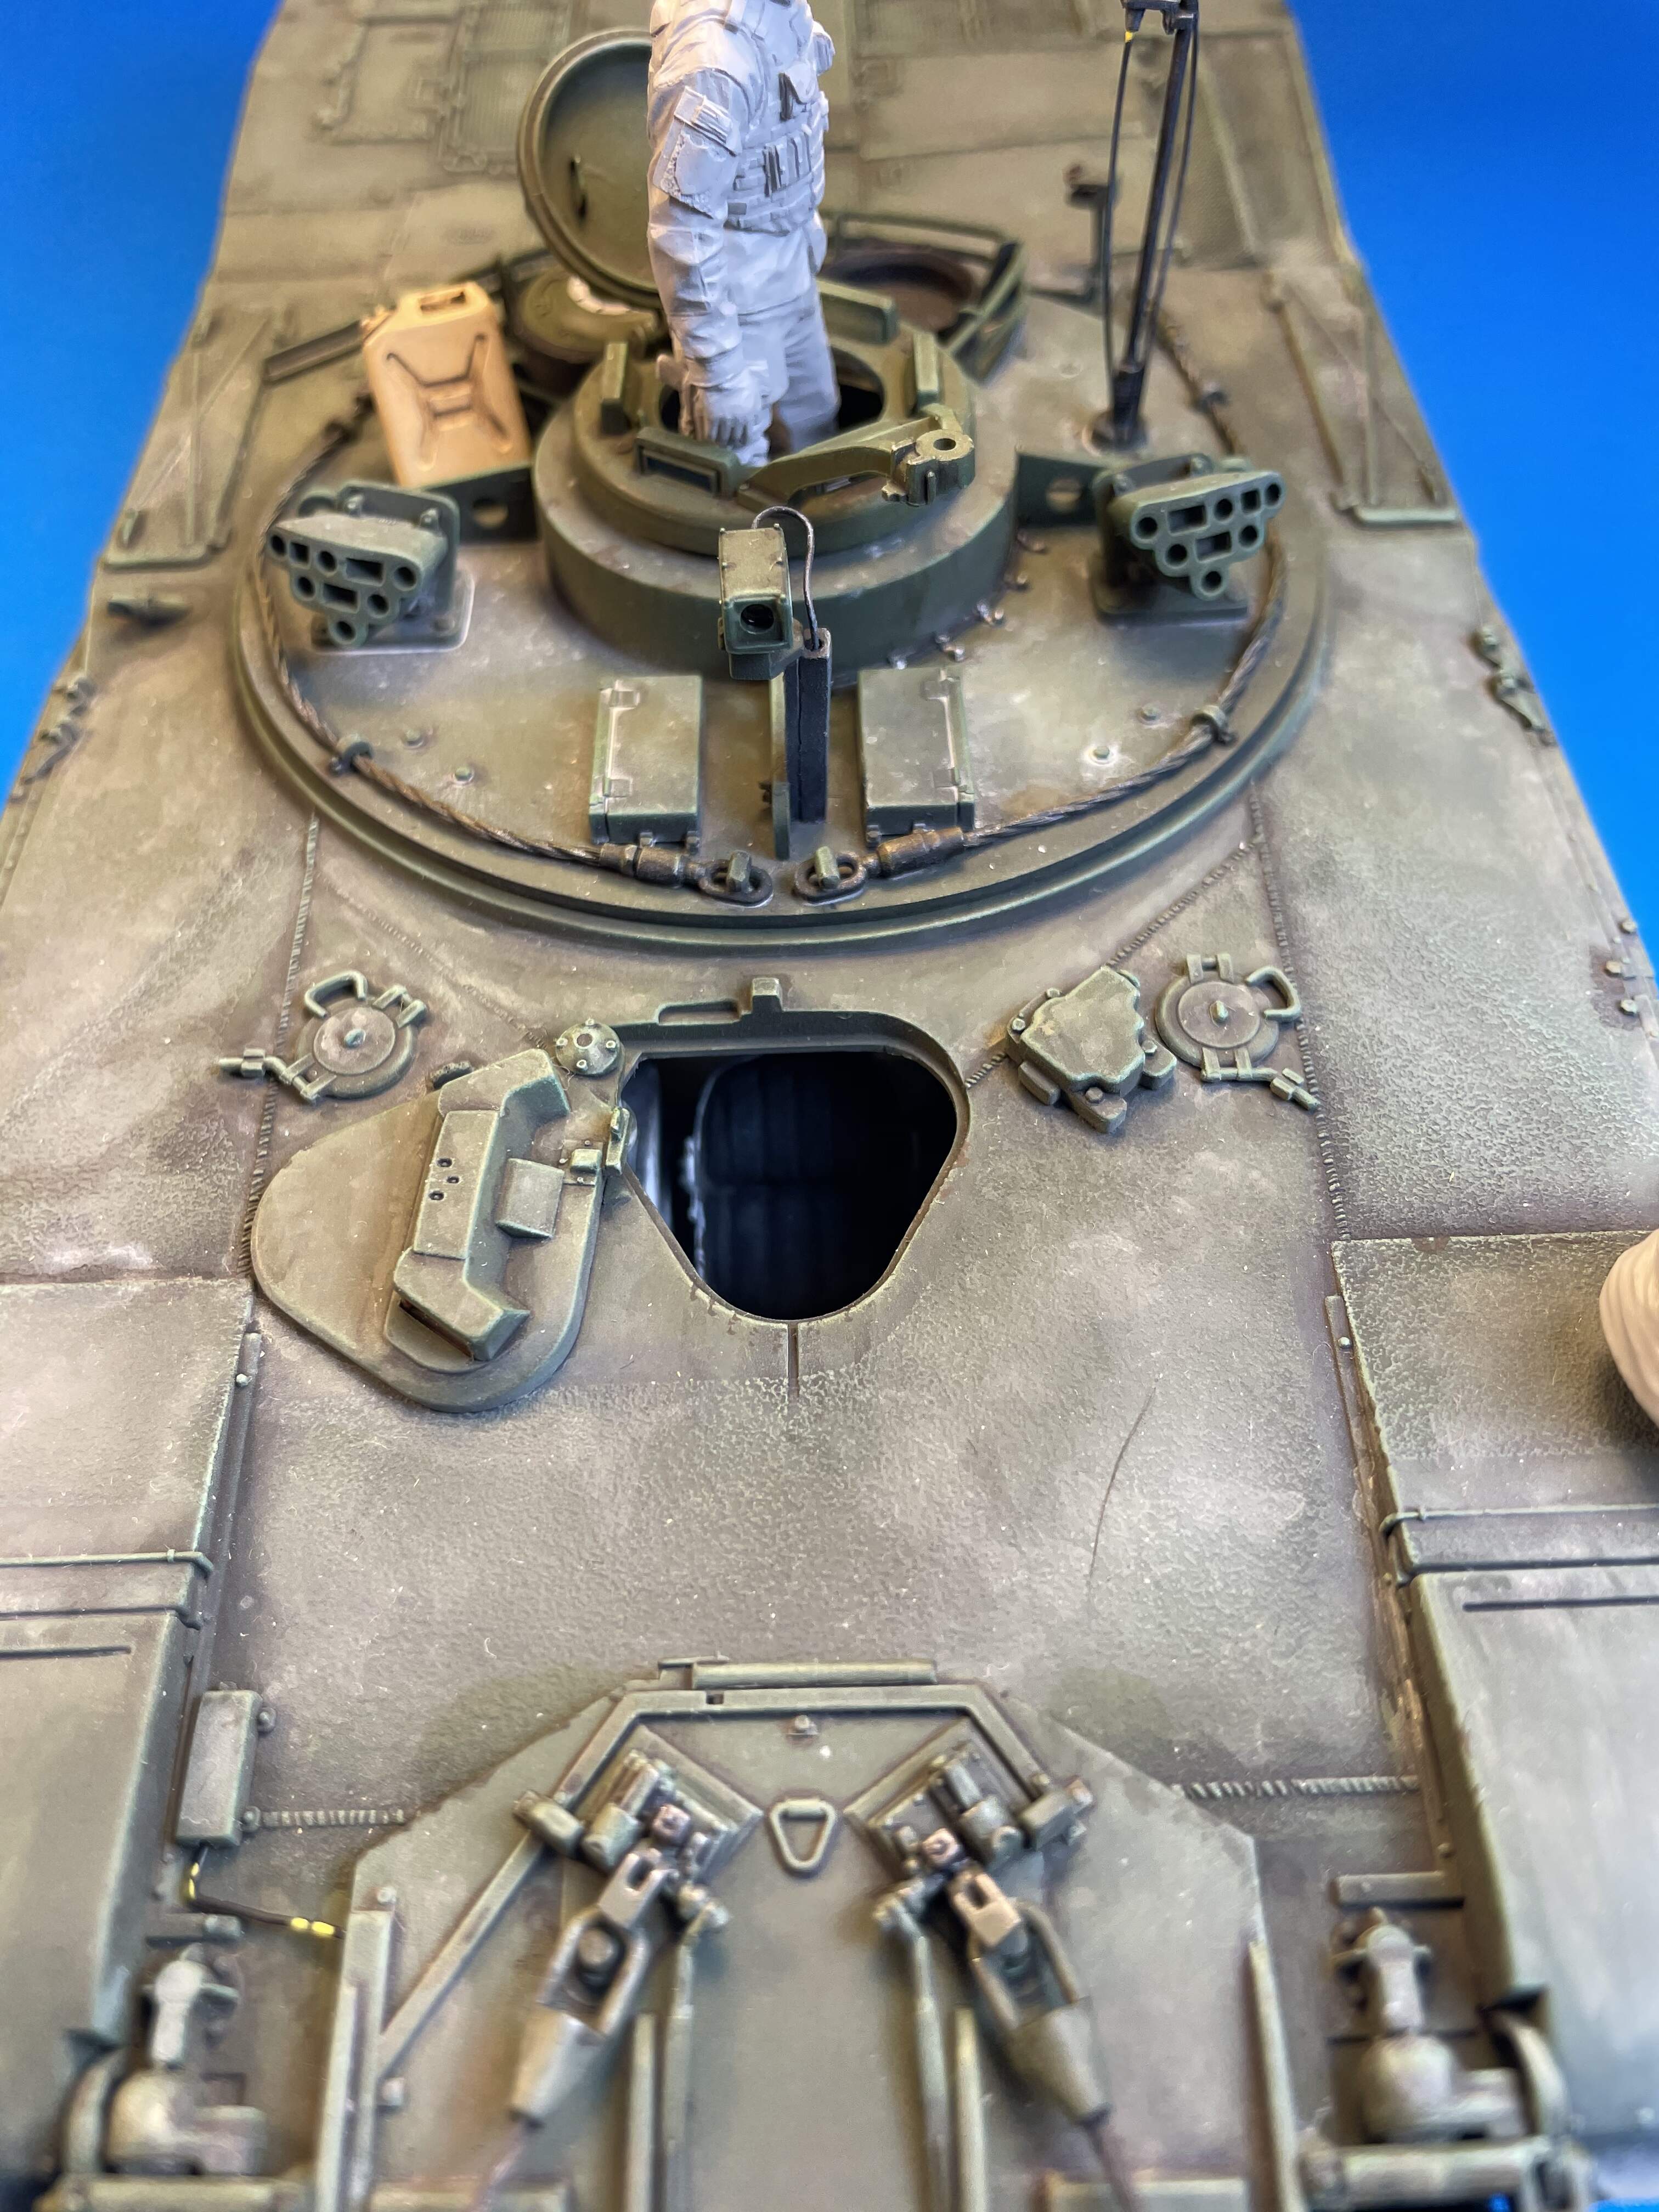
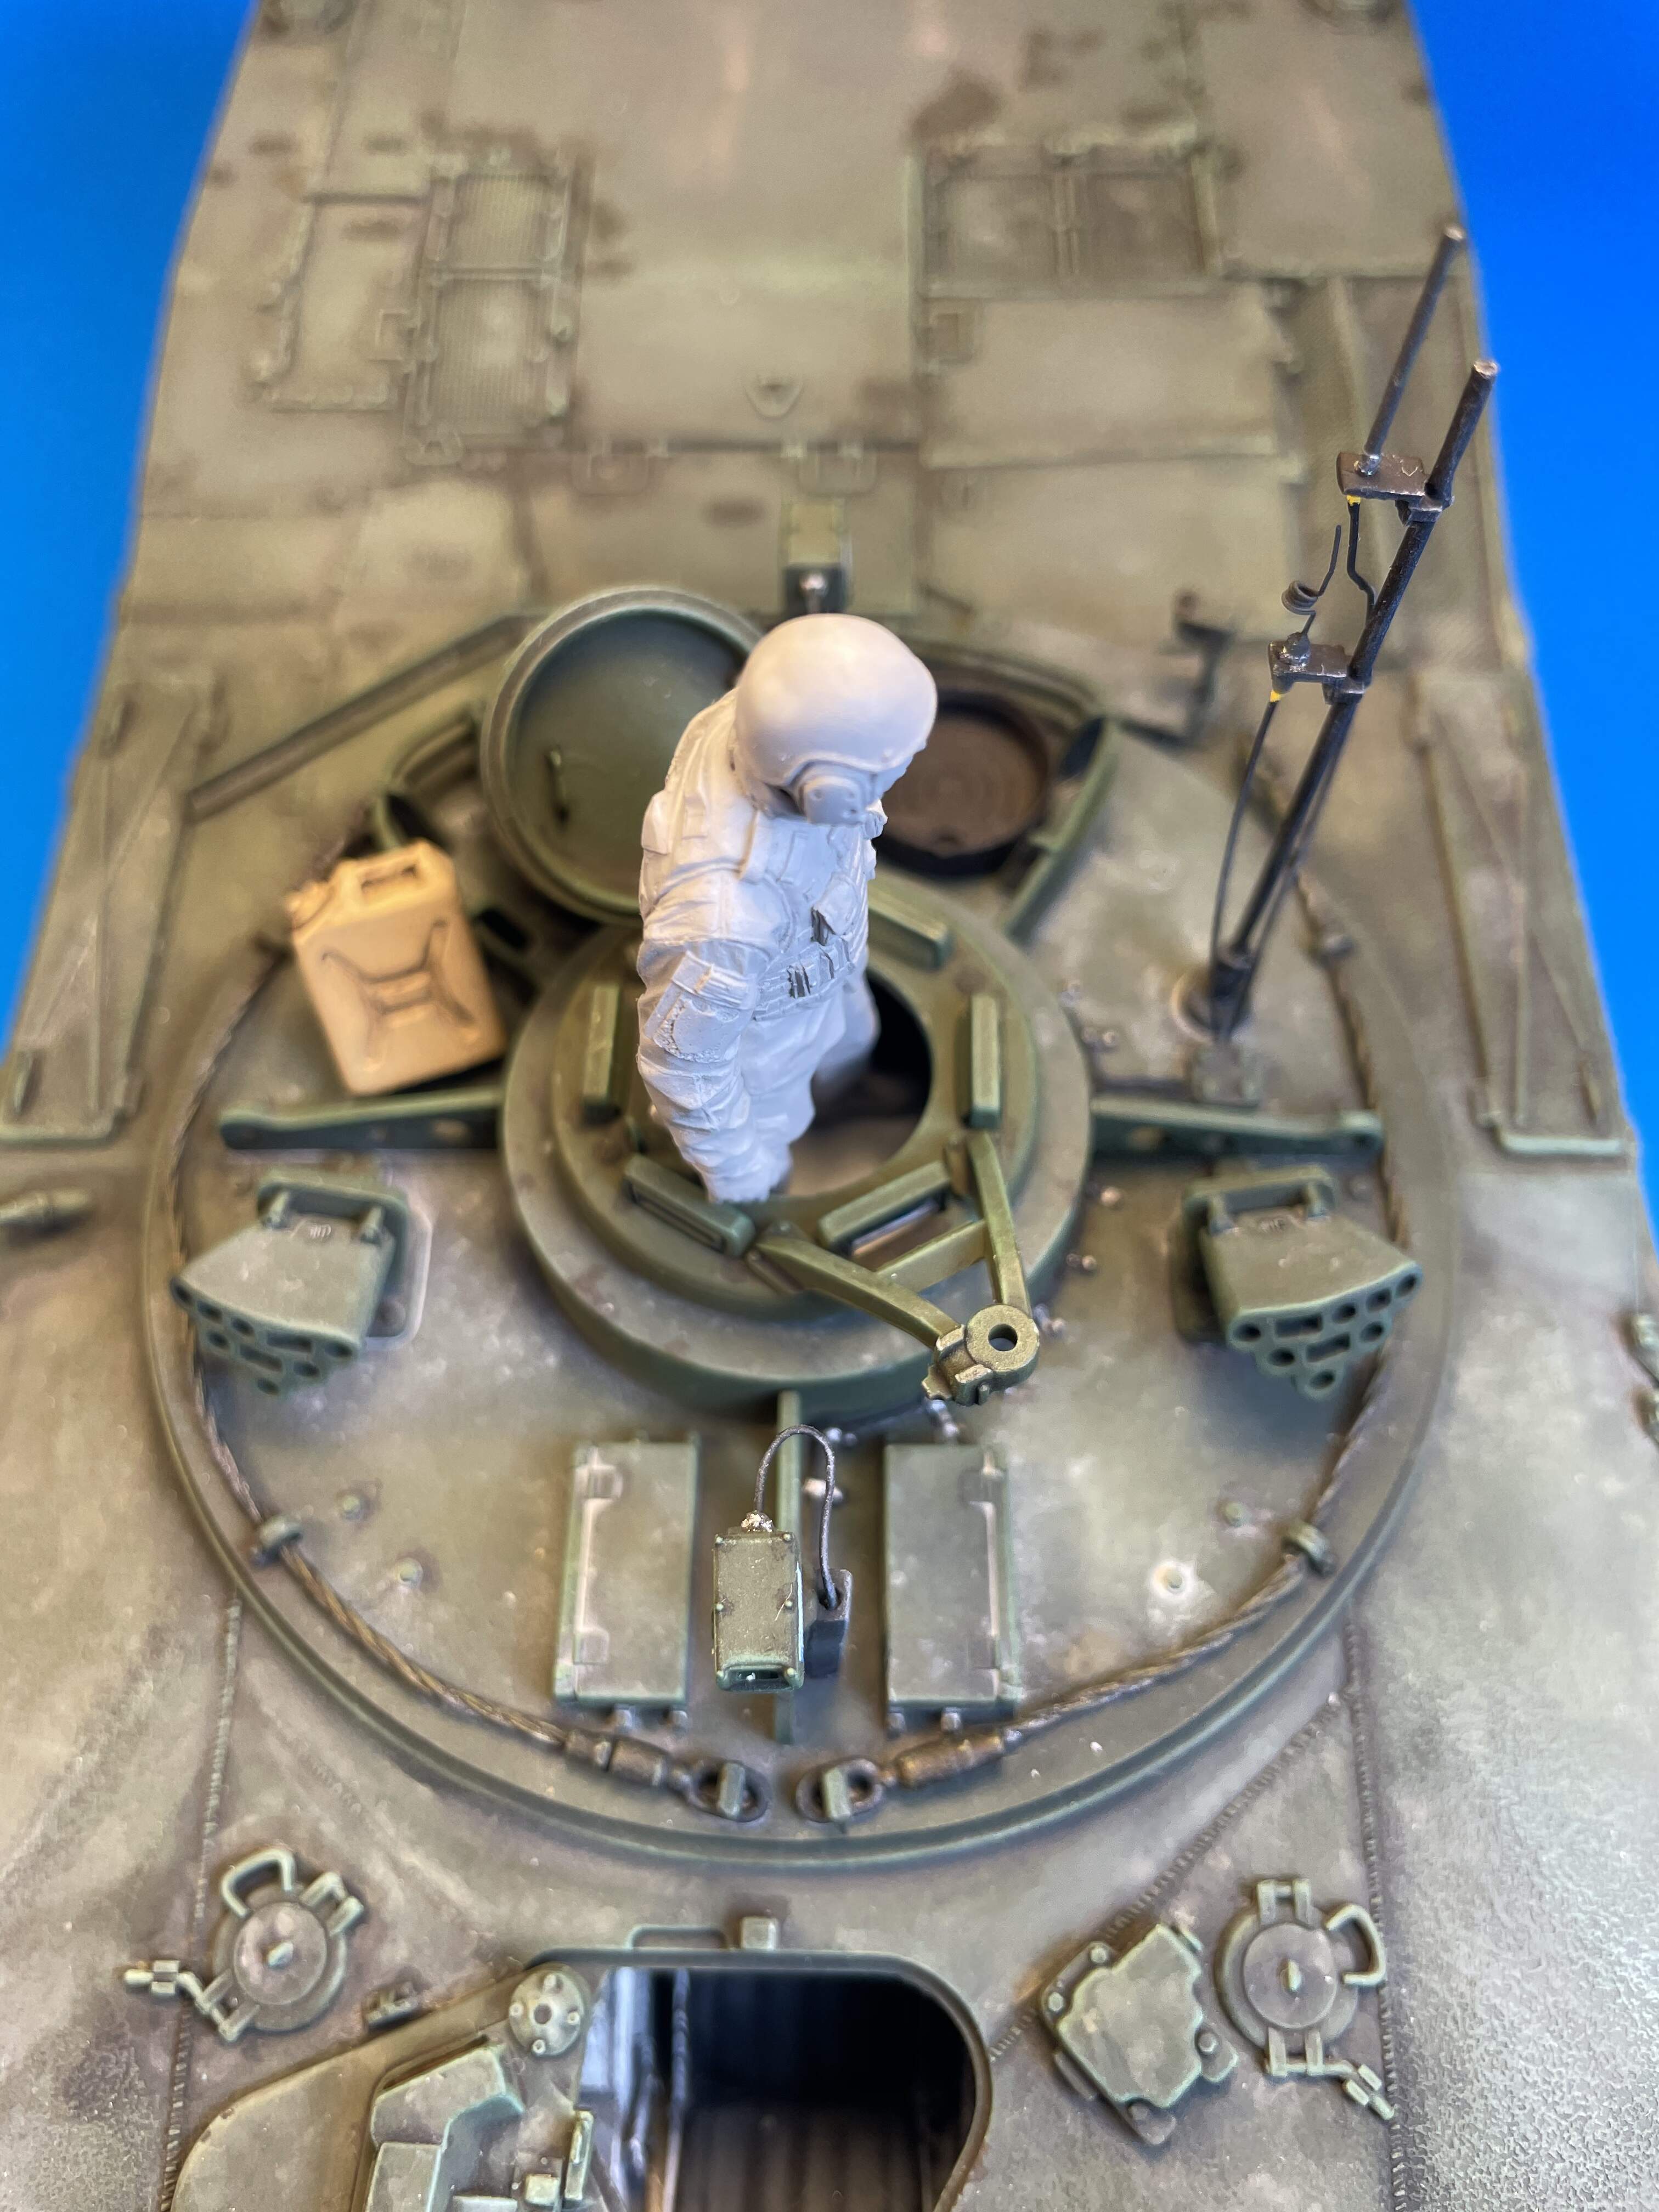
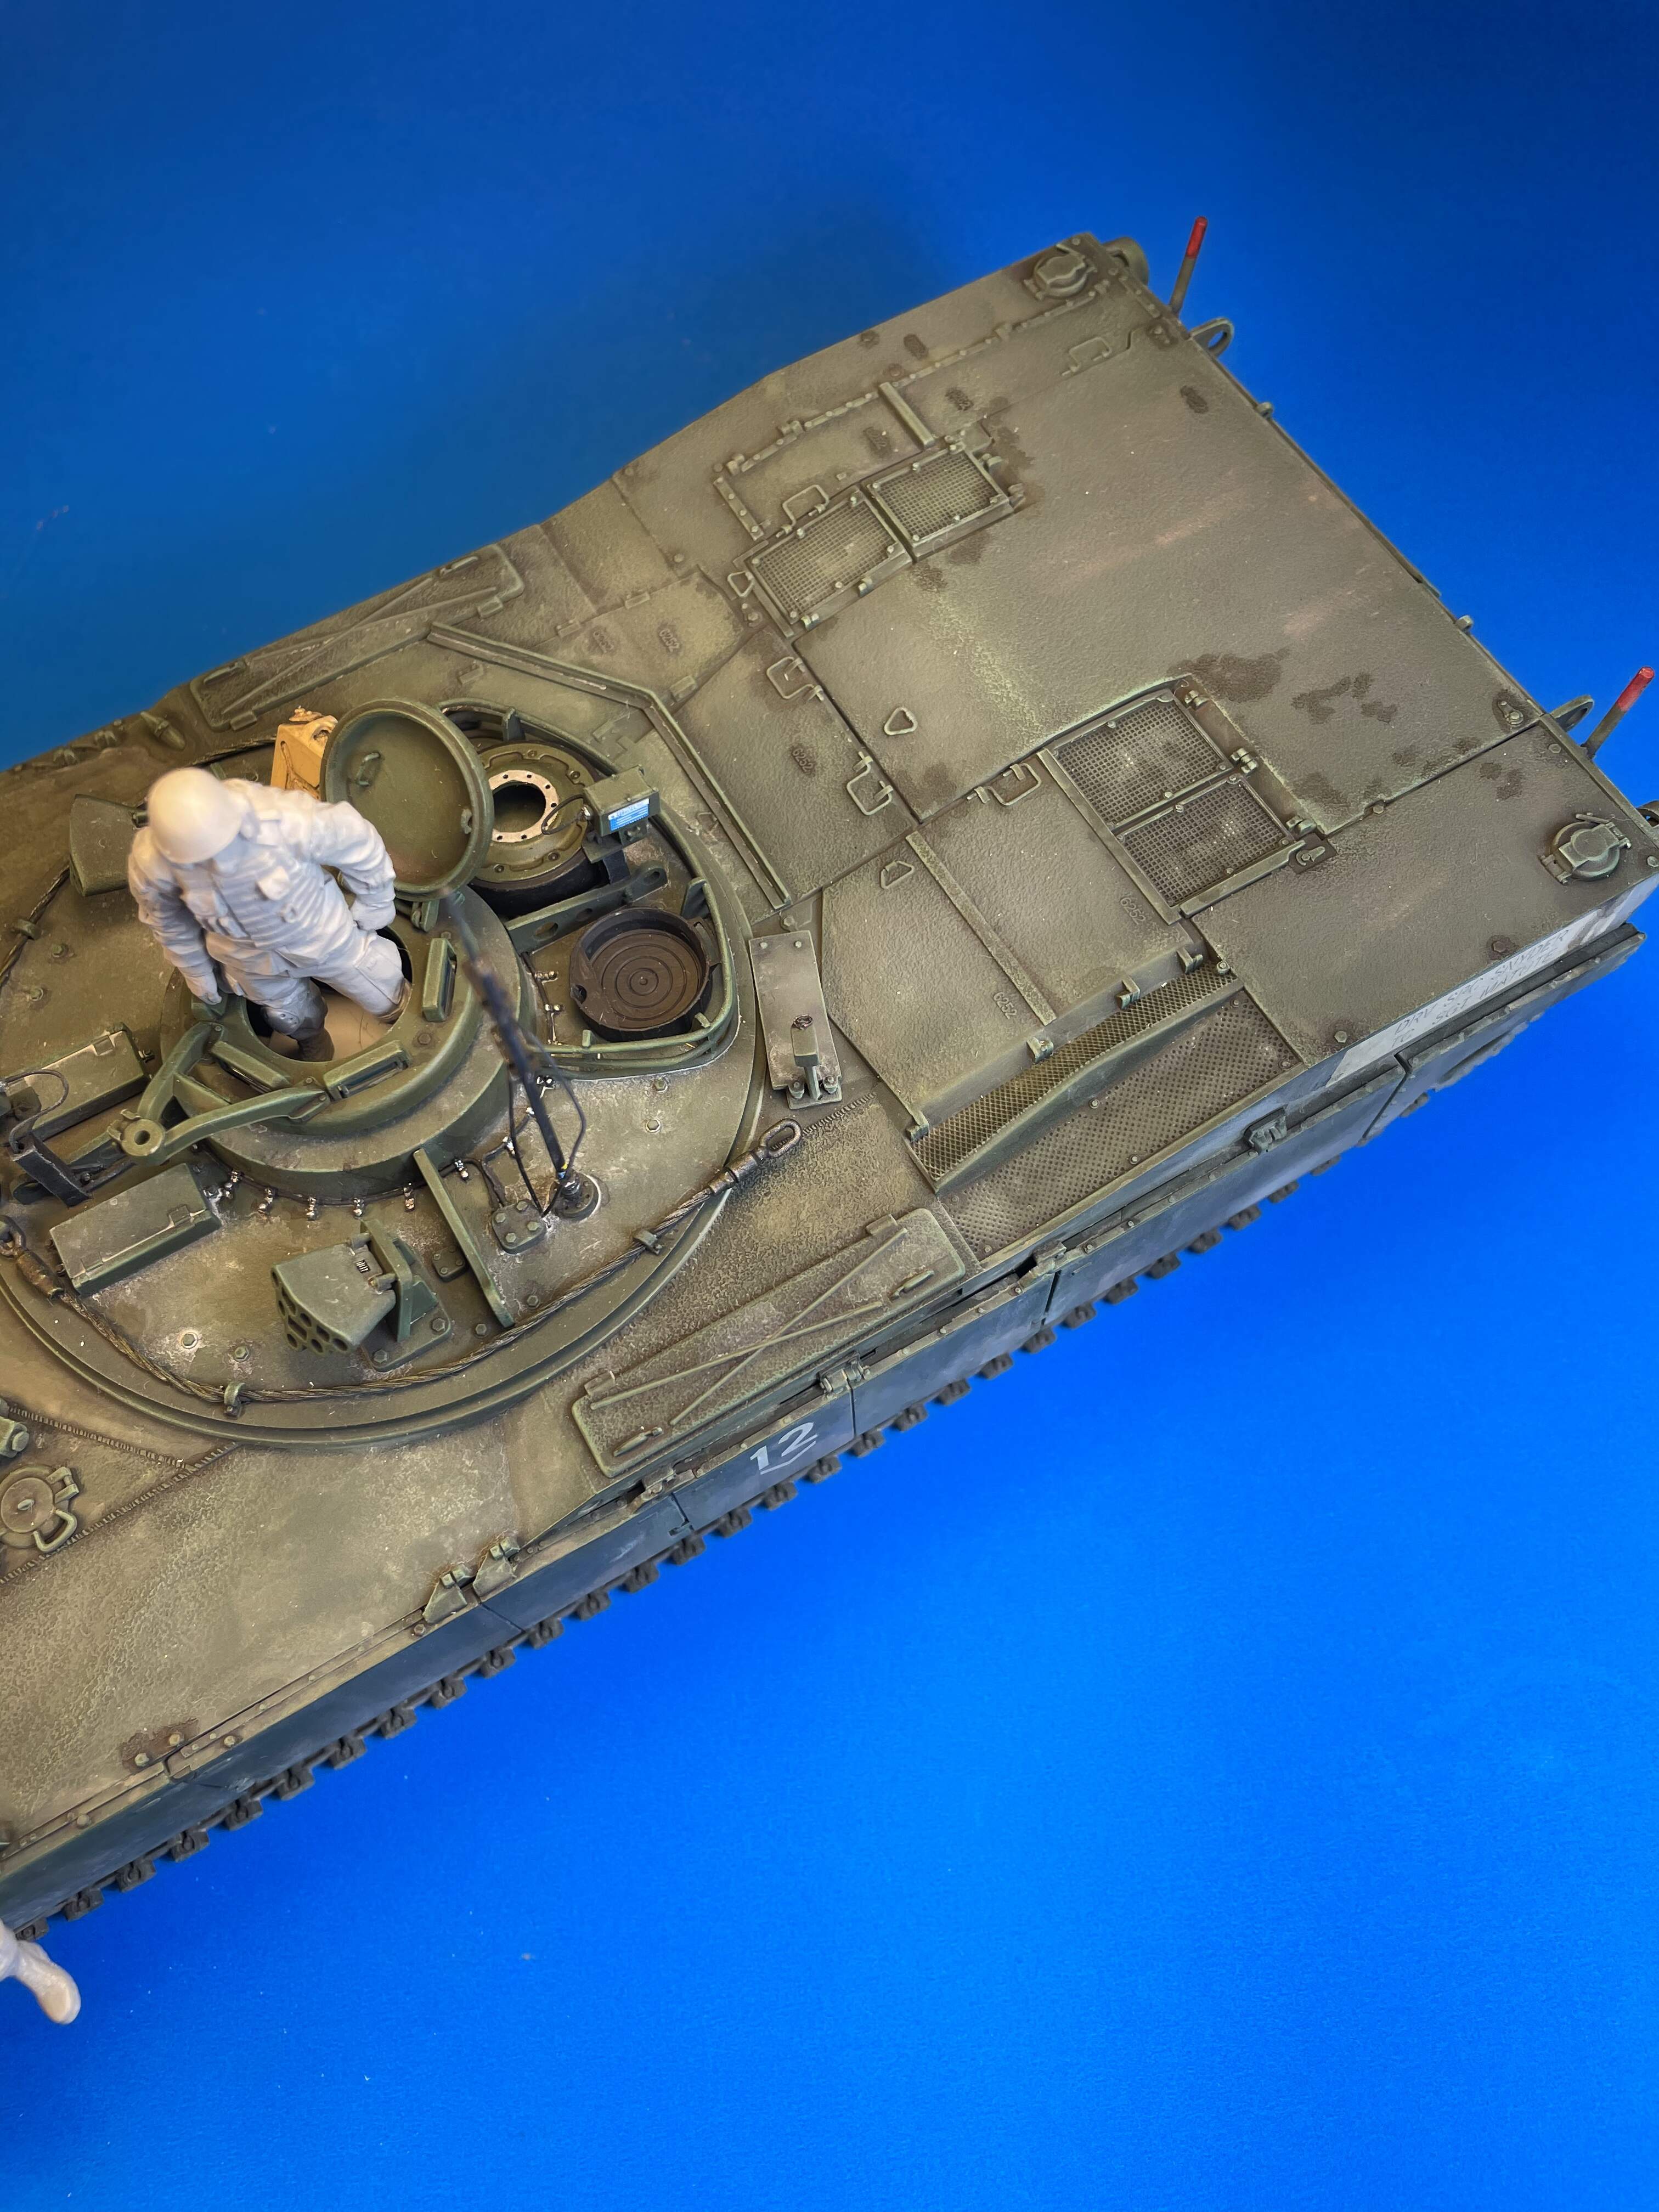
Thank you ! I painted it with Tamiya nato green, then did a little post shading with nato black. I used this model to experiment with a few new products. I used their enamel dark brown wash, dust effects and dirt and grime I think it was. Dry brushed with oils then I dusted it with Mig pigments. I really love the new products. I was using oil washes for many years but these are right out of the bottle ready to use. I tend to weather my models heavily but have backed off in the last few years. This vehicle is depicted in Iraq around 08. I still need to paint the figs; the one in the TCs hatch is from alpine and the other from Black dog with a hornet head. Comments welcome
Oh yeah , forgot to mention I used the driver’s compartment from the old verlinden set intended for the academy kit.
Thank you !
I’m a big proponent of pre/post shading on monotone vehicles. As you have discovered it can really enhance the look and make a solid color much more visually interesting. Still old school when it comes to washes, making my own. Heck a tube of Grumbacher and can of spirits last a long time and is much less expensive in the long run. Of course the ready made products do offer convenience. Will continue to follow for progress in the figures.
oh that’s where the driver compartment detail is from. I have this kit and know that this was not included. I had to double check just now though. I thought I missed something, Lol.
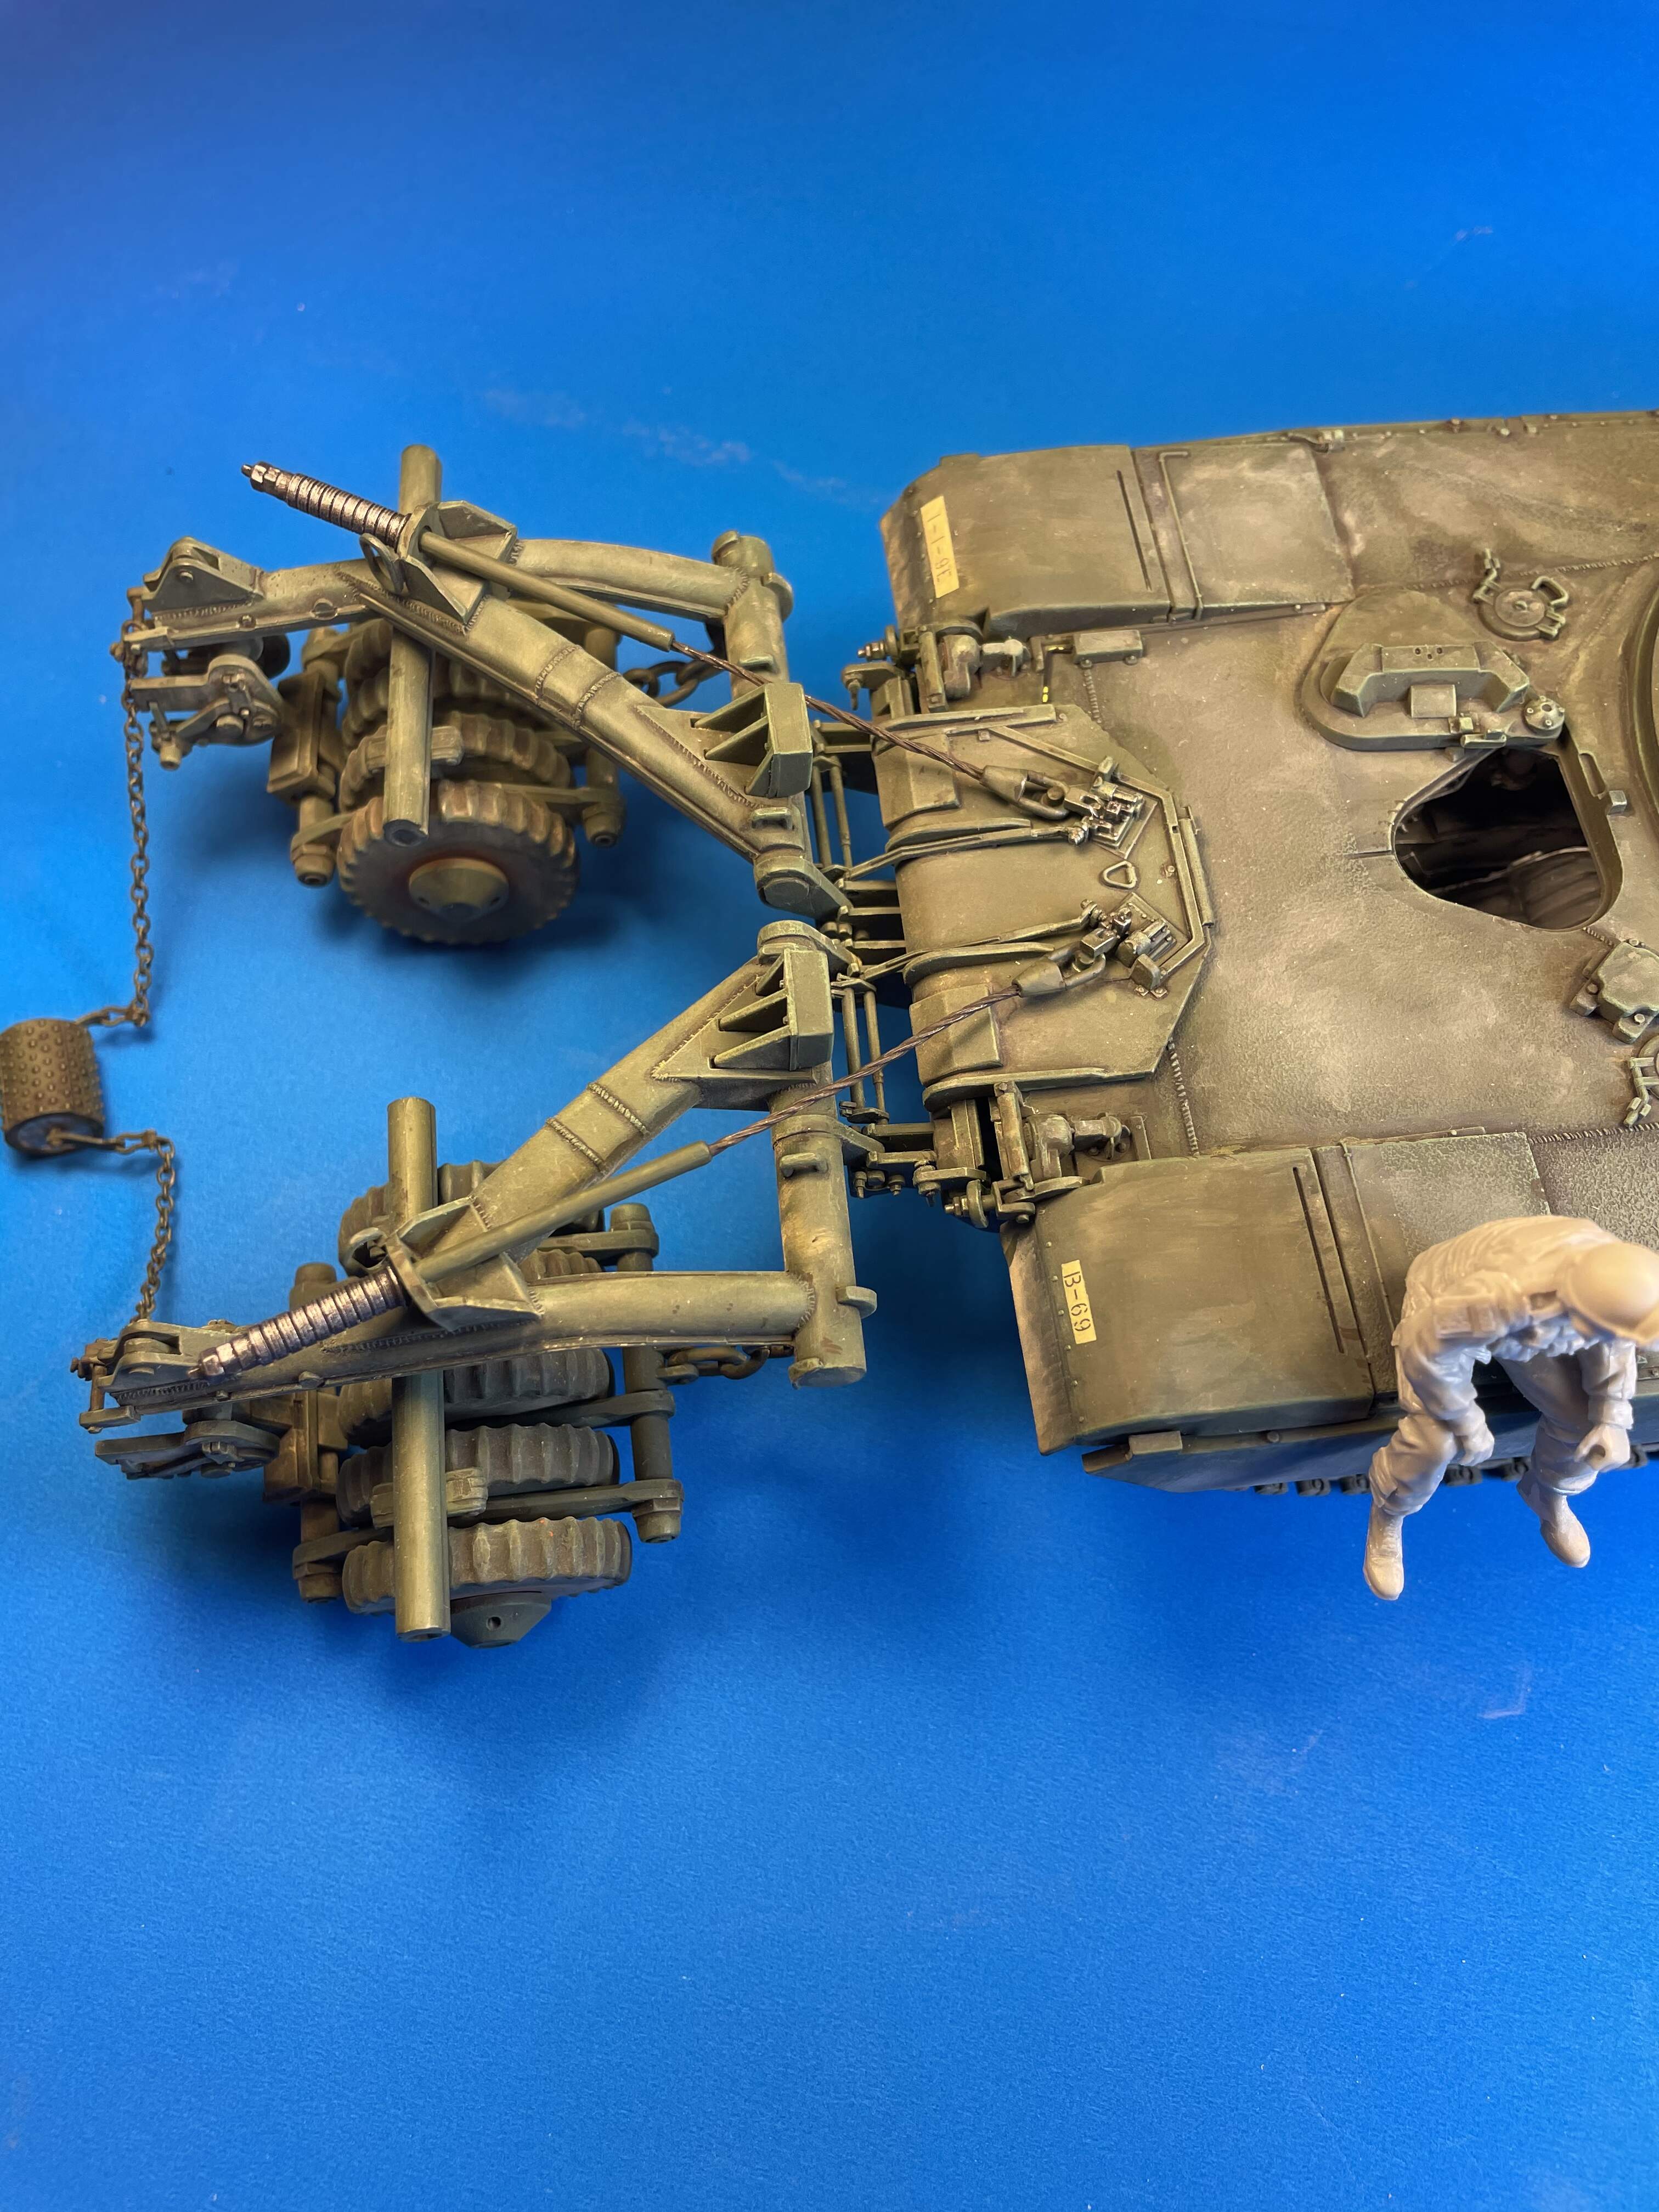
Very nice work on the antenna.
I’ll check in again to see progress on those figures.
Yes so am I . It really gives the model added depth imho.
I used those dust products from Mig through the airbrush as well just to see how they would perform and they were great. Another product I used was Tamiya aircraft panel liner in red brown. I used it on the end connectors of the tracks, to show some slight rust , it might be hard to see in the pics.
I used oil washes up til very recently. Some of the tubes are 10-20 years old lol, had to throw a few out. I used them for figures til about 10 years ago then switched to Vallejo’s. I use them with a slow dry medium for blending and have had success with them
Thanks for the kind words !
Bravo!!! That looks great! I’m really liking the dusty look on this. Everything looks just right with this one. Are you gonna do the crew is DCUs or the Digital UCPs?
Very nice build! Cant wait to see the final result.
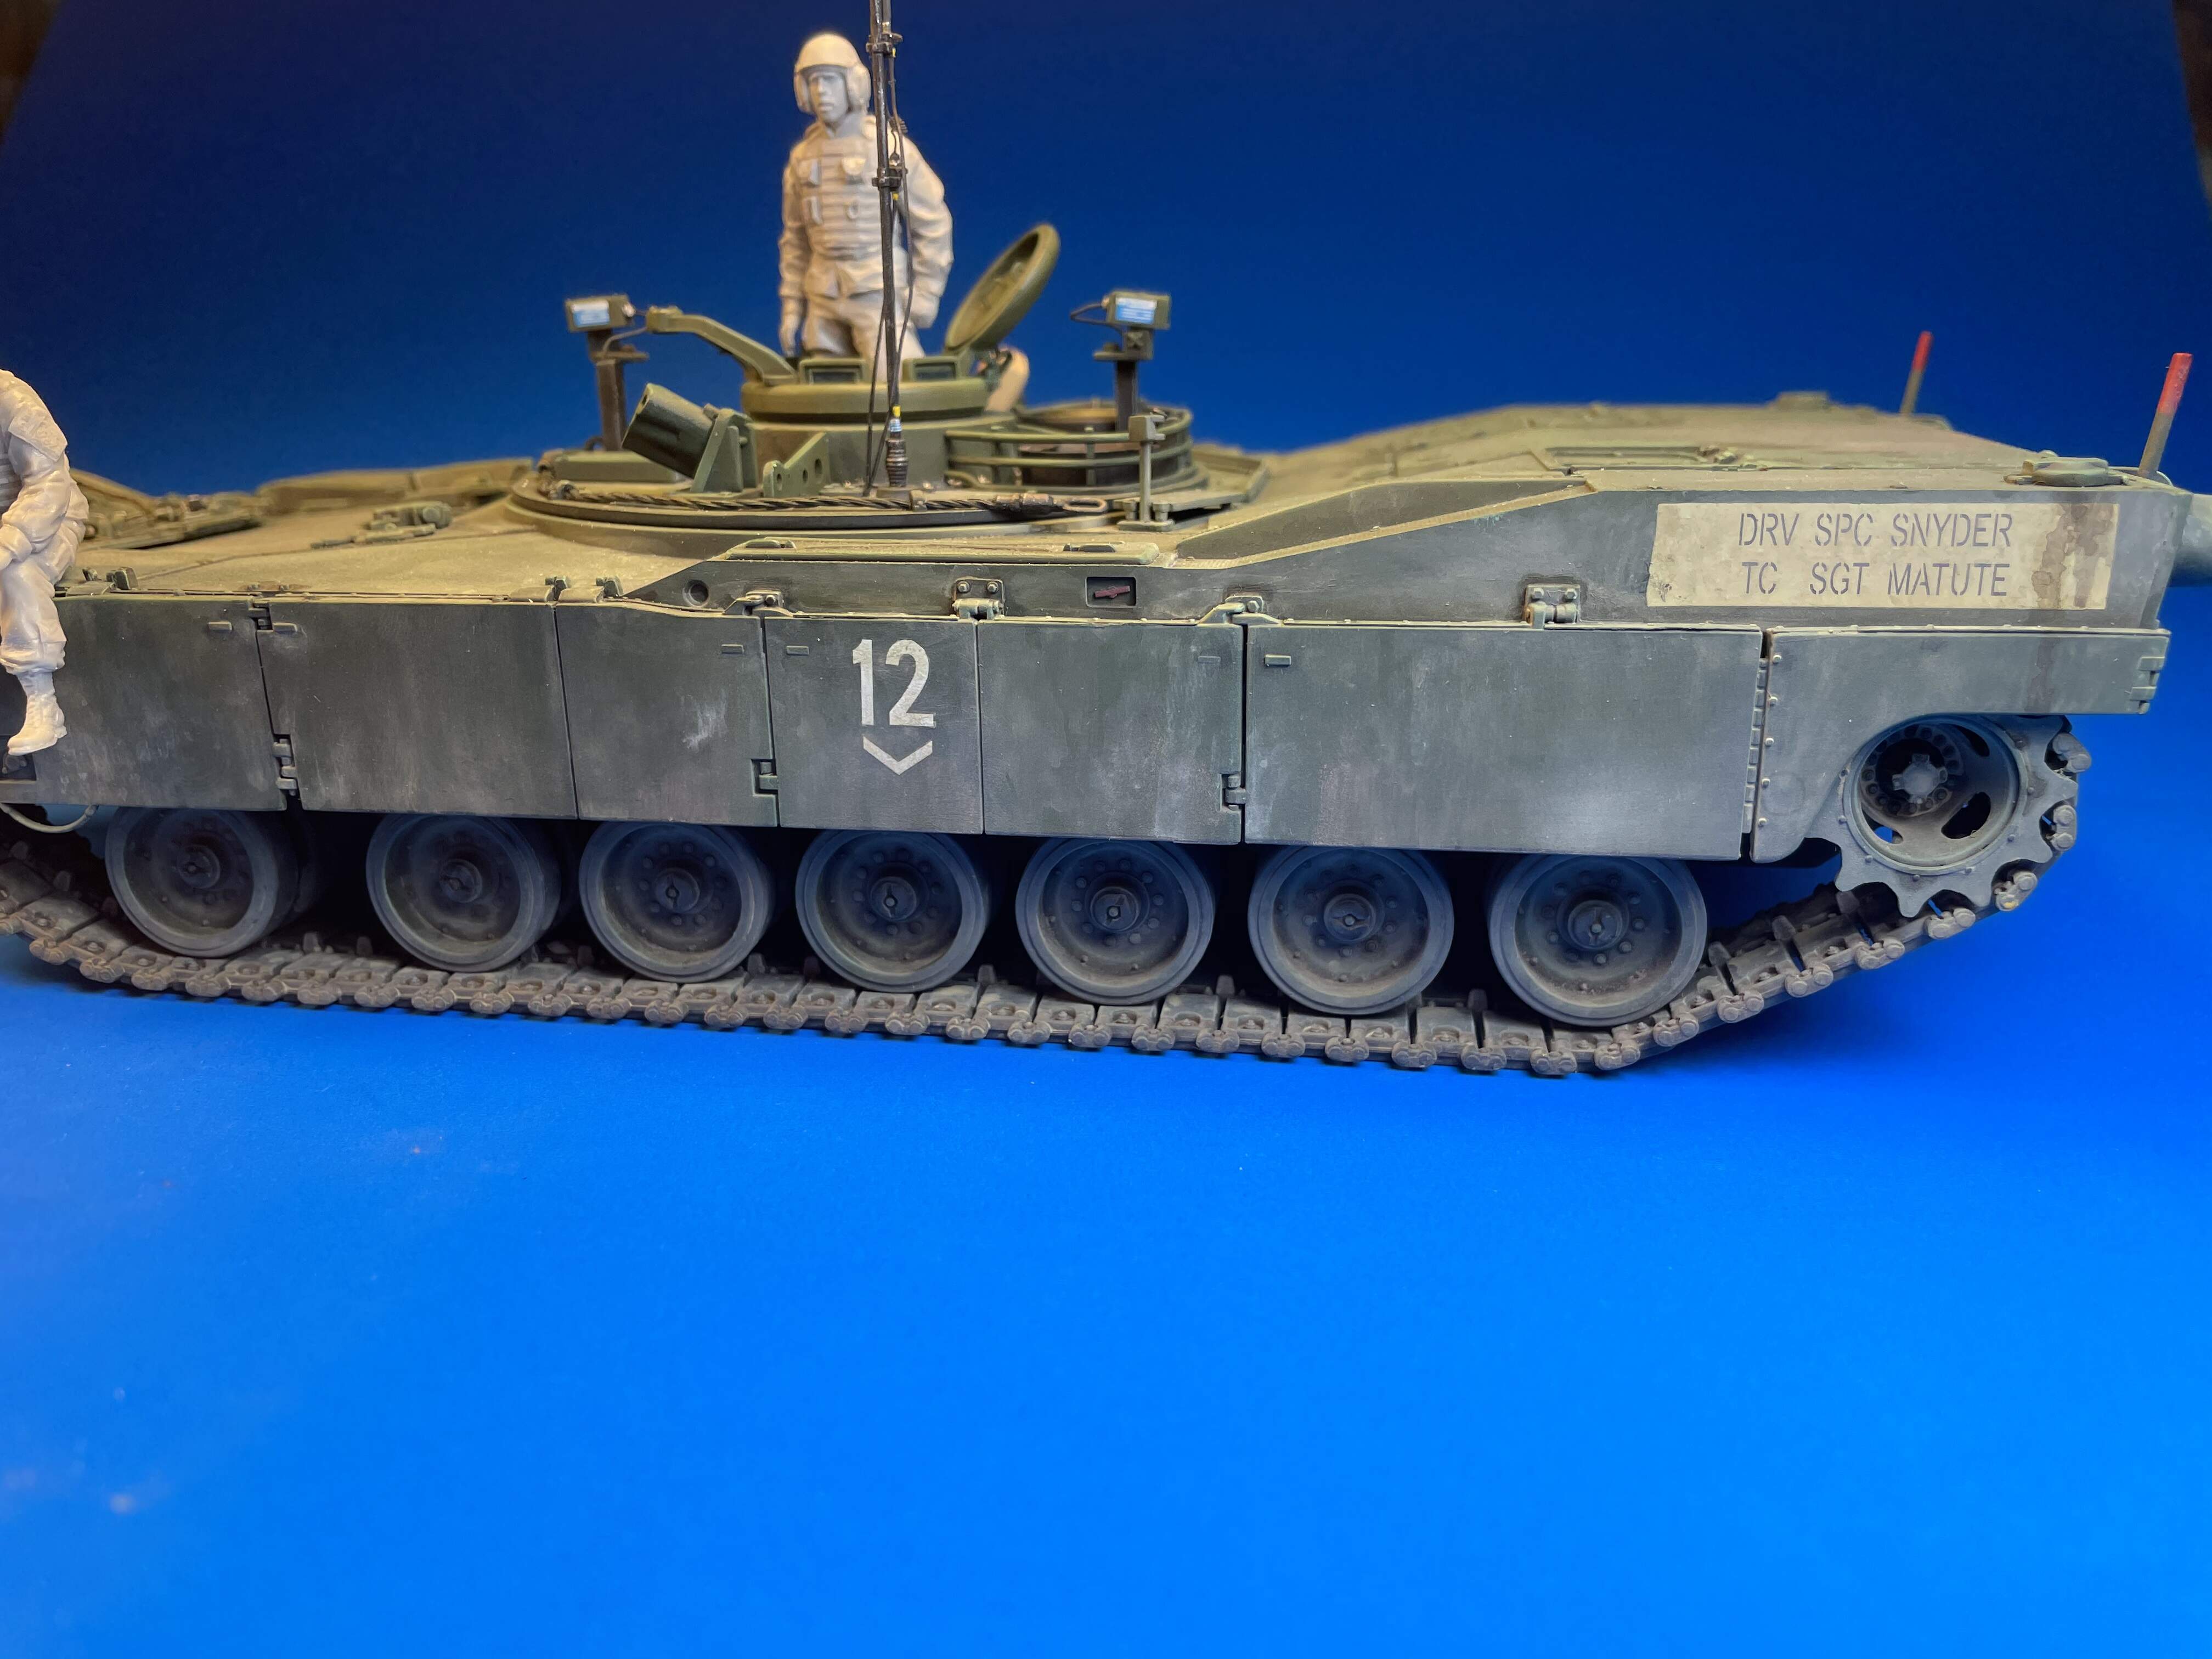
Thank you guys. I’m doing the crew in the ACUs , the digital camo. The vehicle served under the 1st Infantry division around the 08 timeframe so those uniforms should be appropriate.
How are you planning on replicating the ACUs? I know there are decals you can buy along with paint tricks like using a sponge that you use for chipping on the camo.
Great build! Maybe it’s just me, but the overall appearance of the weathered vehicle gives an impression of current IDF hardware.
@metalhead85,
Very nicely done! Excellent paint work!
Look forward to seeing the figures painted. Best wishes with the project.
I will be painting them by hand lol. I have a reference sheet from Calvin Tan who painted the box art for alpine I think ; it shows the colors he used so I’ll try that.
I was going for a very dusty look , I still have to fix a few areas where I got heavy handed but yeah that’s what I was looking for. I based it on a picture from an article in Tamiya military modeling international ( not sure of the title) back from 05.
Thanks to all for the comments!
I might try something like making up a template and try to spread it out on the figure.