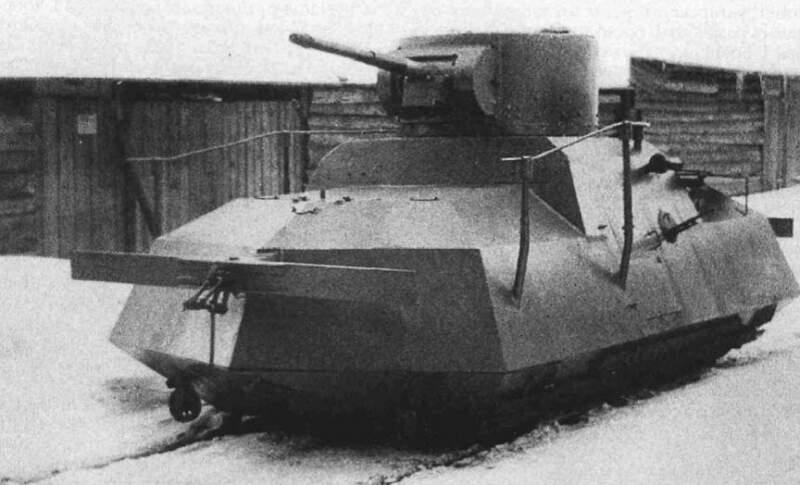
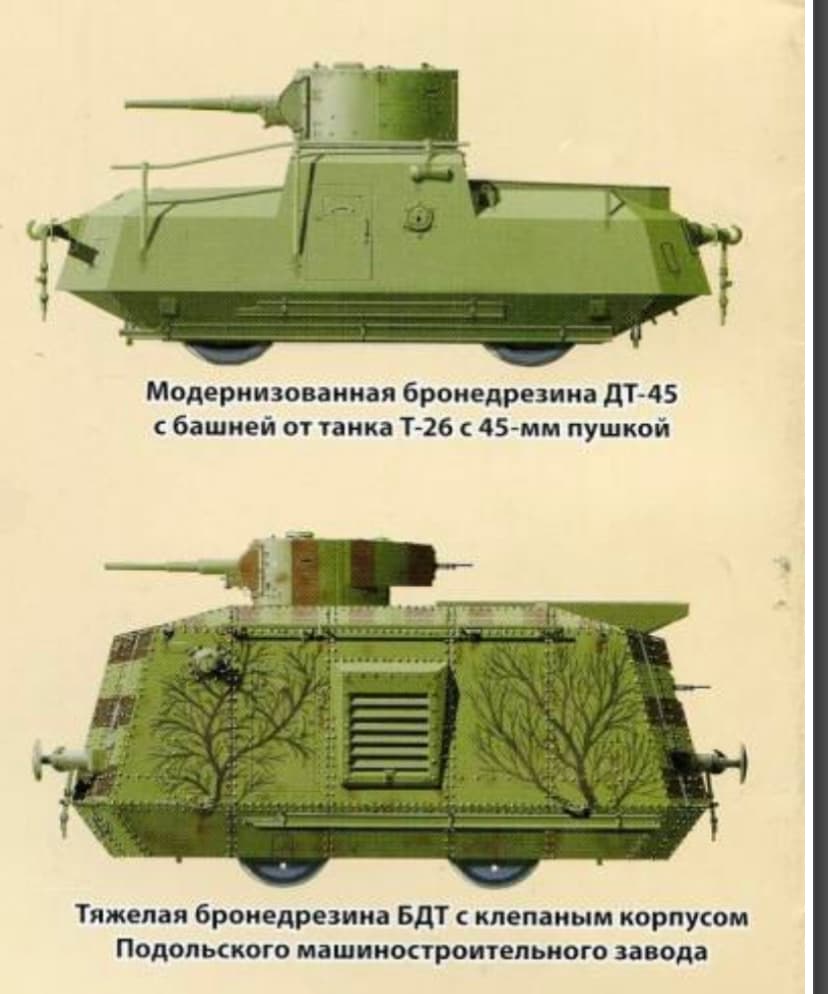
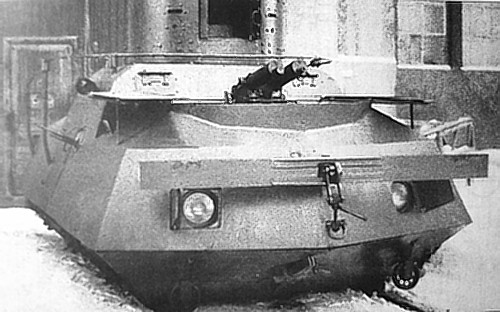
Weird Russian vehicle: check. Never done in 1/35: check. Railroad related: check.
Let’s do it. My reference book is in Russian, so I have no idea on the production quantities, years it served, and if it ever saw even saw action. If anyone knows, feel free to chime in.
Ever since the ST-26 I’ve been looking to expand into more conversions and even standalone kits. So getting a hold of a 3D printer has been on the wishlist for a while now. Finally pulled the trigger and caught an AnyCubic Photon Mono X on sale, just arrived yesterday.
I’m still lacking in resin, the curing station and isopropyl alcohol, so currently this is all theory. But I’ve been plugging away at the 3D design,
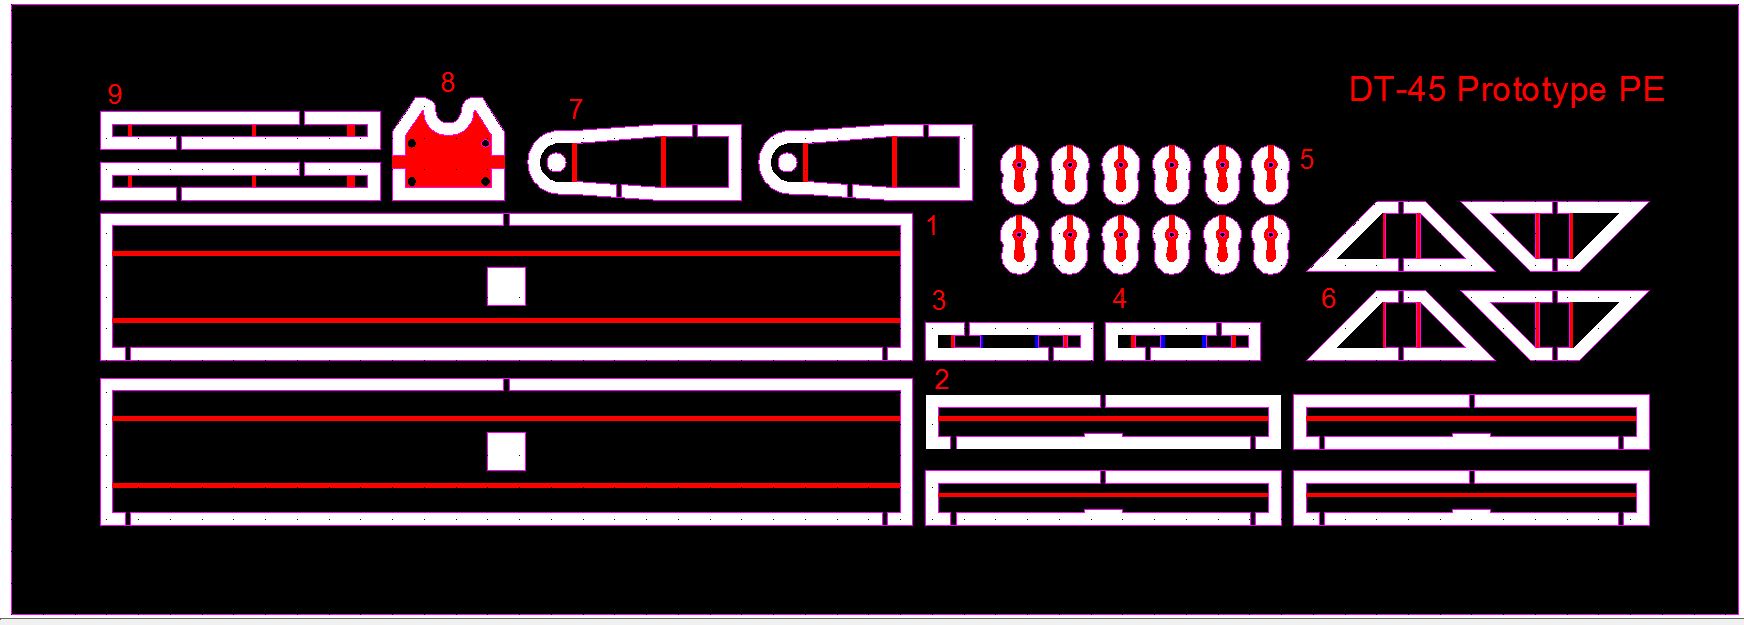
It’ll likely be a week or two before I get to any printing. Eager to get started and see how my design stacks up in real life. I feel there’s gonna be a learning curve and some rework, but that comes with the territory. Also plan on doing some custom PE for this as well.
Last day of work for the year is Dec. 15th. Should give me plenty of modeling time over the next couple weeks, hope to have updates soon.
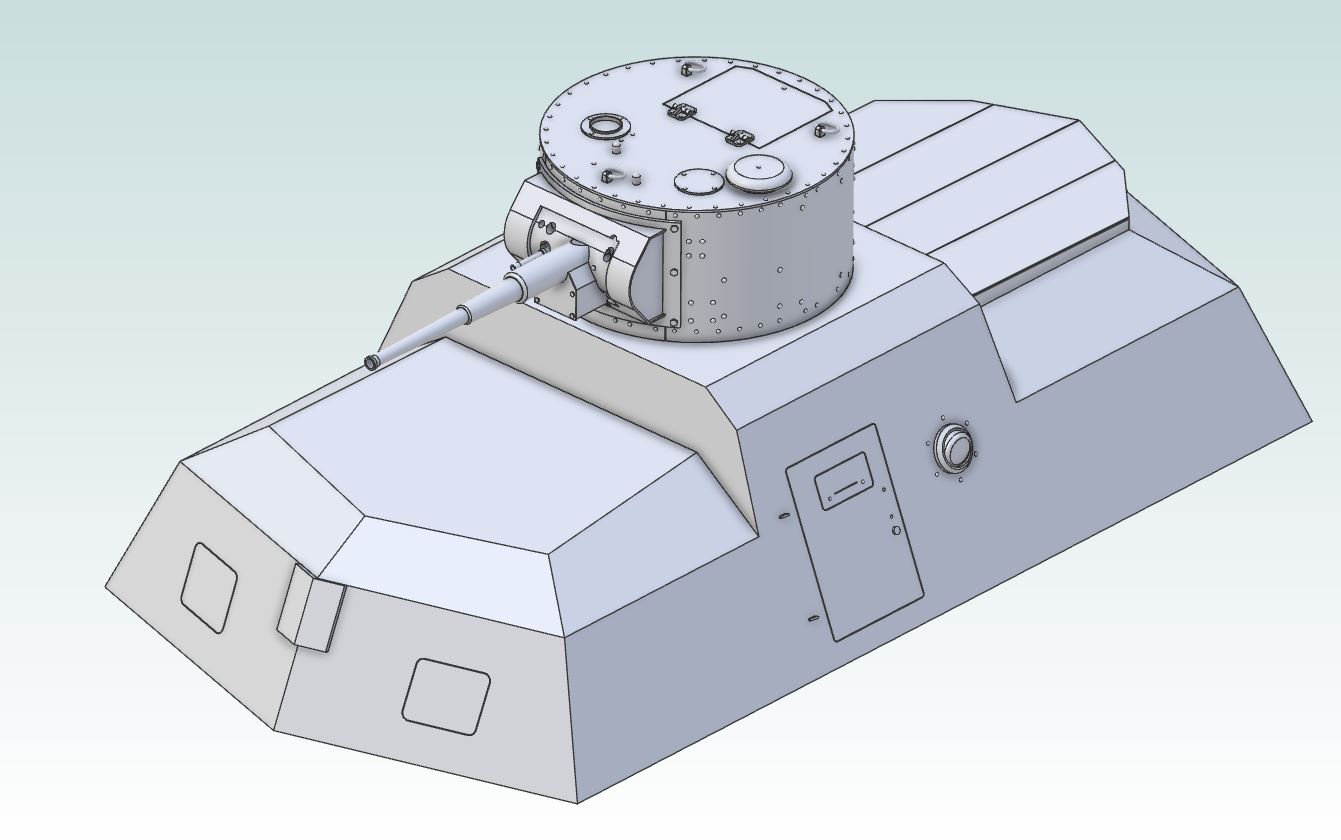
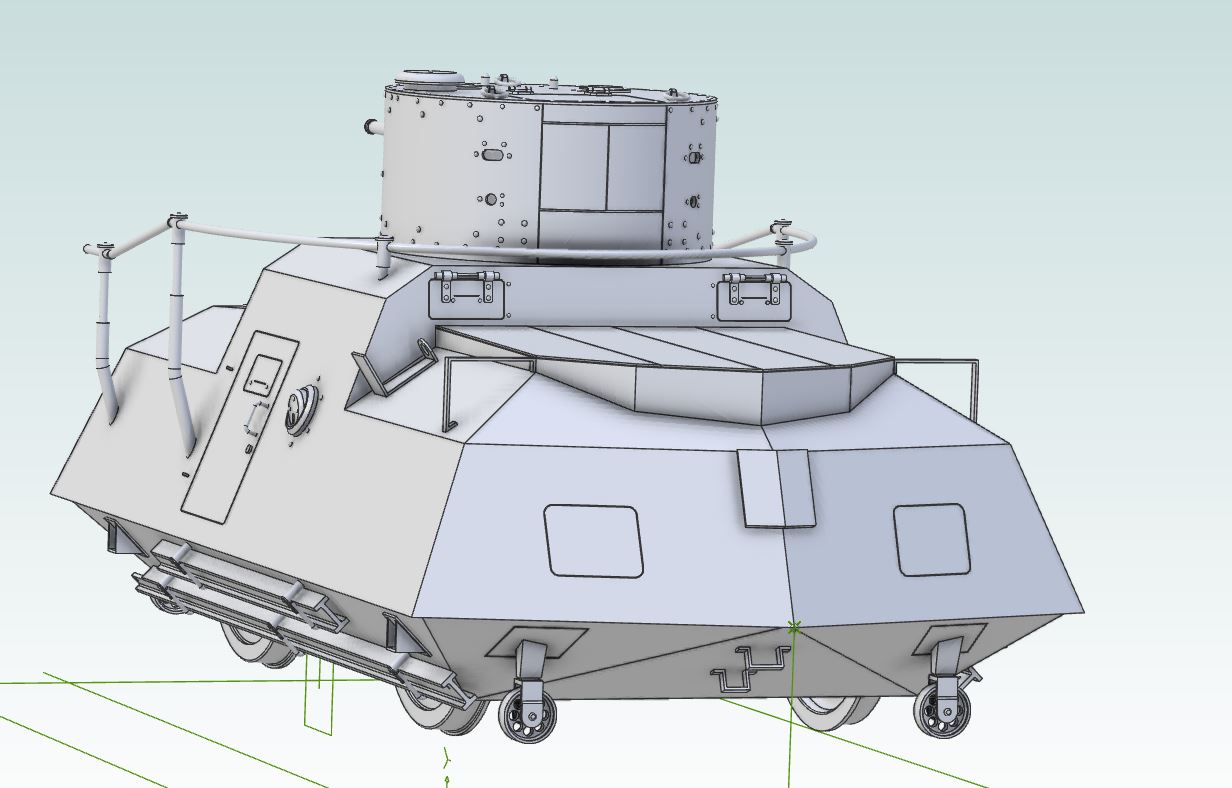
Many more parts and details added. Bulk of the work is done, next major hurdle is getting the tow hook assemblies for the front and back finished, plus some odds and ends.
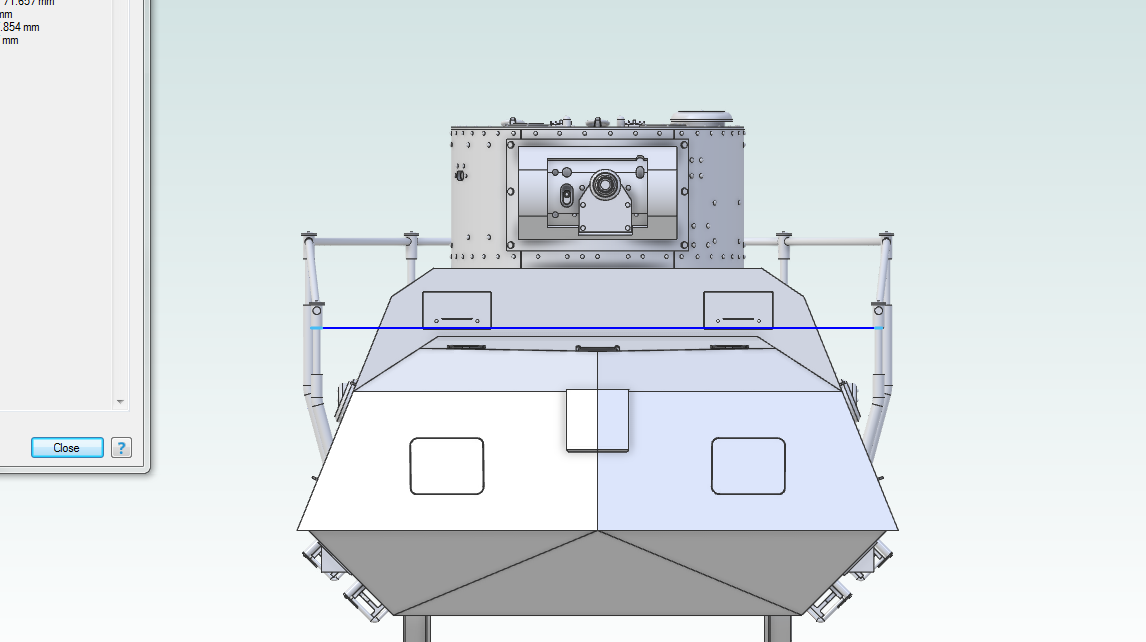
That blue line should line up with the vision slits on the front visors. But I did notice the rear two posts are too high, compounding the issue. Something to solve later this week, routing that antenna cable was not very fun. All of this is assuming that the drawings I’m referencing are correct.
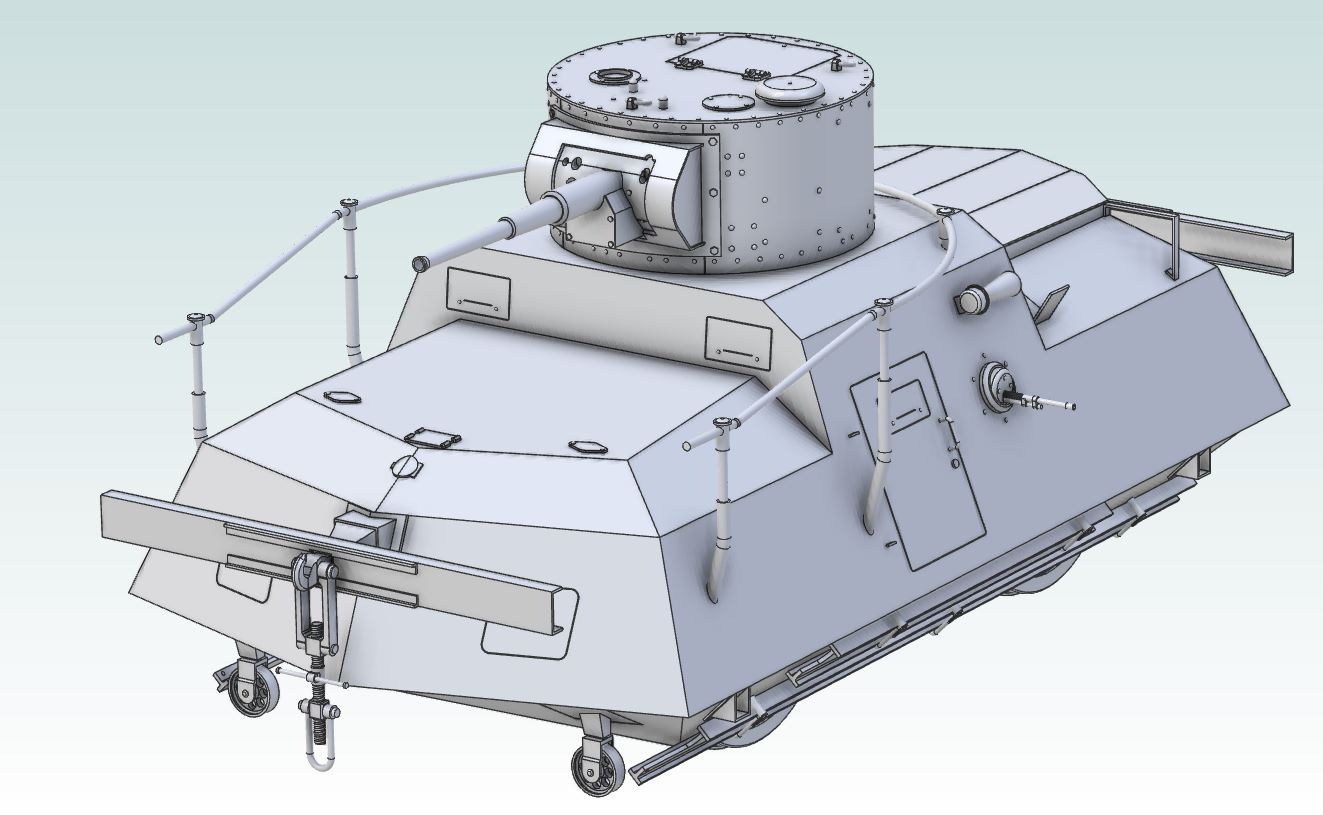
More modeling work the past couple nights. Corrected the antenna posts, raising the front ones and lowering the rear ones, plus some details here and there
Washing and curing machine came in the mail today, the resin should be here tomorrow. Still can’t start printing, gotta wait on the isopropyl alcohol. It’s getting there.
Looking good. I see some rework needed on my 1/72 kit.
I keep thinking about the rear deck and the panel lines. I think it’s a door for something like Maxim AA gun. Something similar to what was on the BDT-35. https://archive.armorama.com/forums/268615/
That’s exactly what it’s for. The reference book has a picture of the rear doors open with a dual Maxim mounted in the back, there’s a chance I may be able to find it online. I would have liked to include that, but having no plans or pictures of the interior, it would all be guess work, so I’m designing it buttoned-up.
According to the info you can find here (the Google translation helps but can be weird in places…) : https://naukatehnika.com/samoxodki-na-relsax.html, the DT-45 (or D-45) prototype was successfully tested in late 1933 but production was cancelled.
Resin came in the mail yesterday, apparently they ran out of the default grey so they shipped me a bottle of clear resin. So it might end up looking a little odd, and I’m guessing it’ll be harder to spot printing defects.
IPA isn’t due to come in for a couple weeks. Going to see if I can source some locally, surprised that the big box stores don’t carry it.
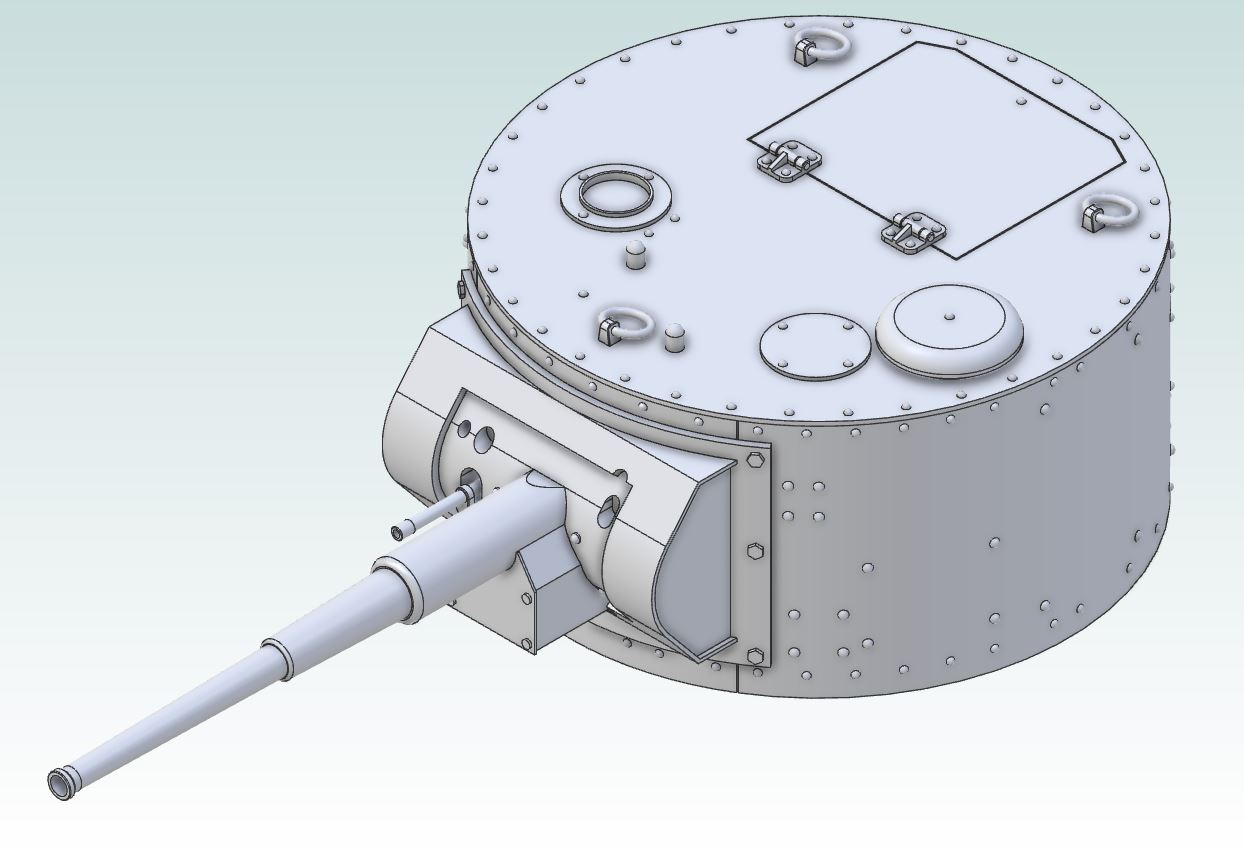
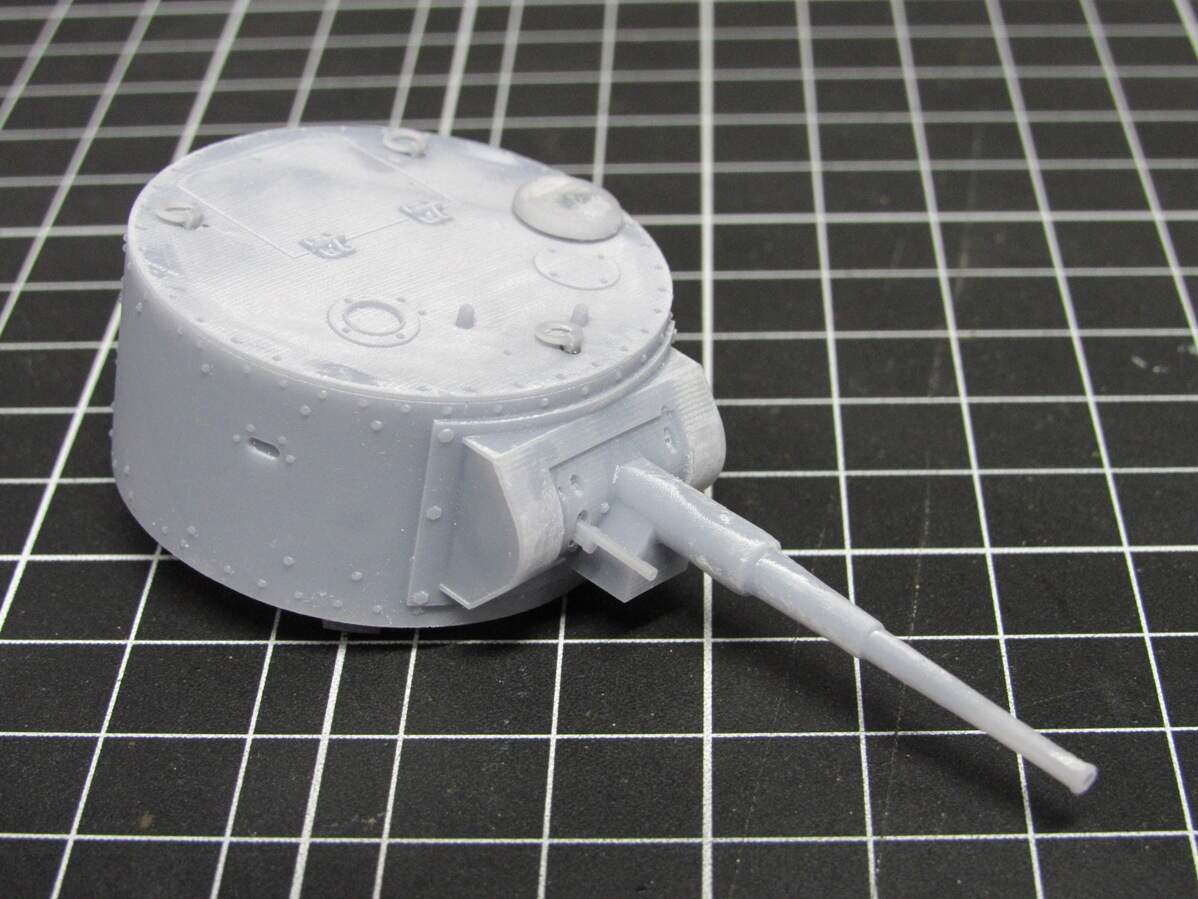
I learned it’s best to keep part counts to a minimum. So the turret top, mantlet and main gun were all printed in one go. The MG, lifting rings, turret bottom and vent cover are the only separate parts.
Hard to pick out the details in the picture but I think it’s coming out nicely so far. Have the railroad wheels and rails printing now. Tomorrow I hope to get the bottom hull printed, it’s a large part so it’s gonna take a while.
I may move to printing the gun separate, mainly to save on printing time. Right now the turret is angled 45 degrees in two directions to minimize print lines, which works well so far.
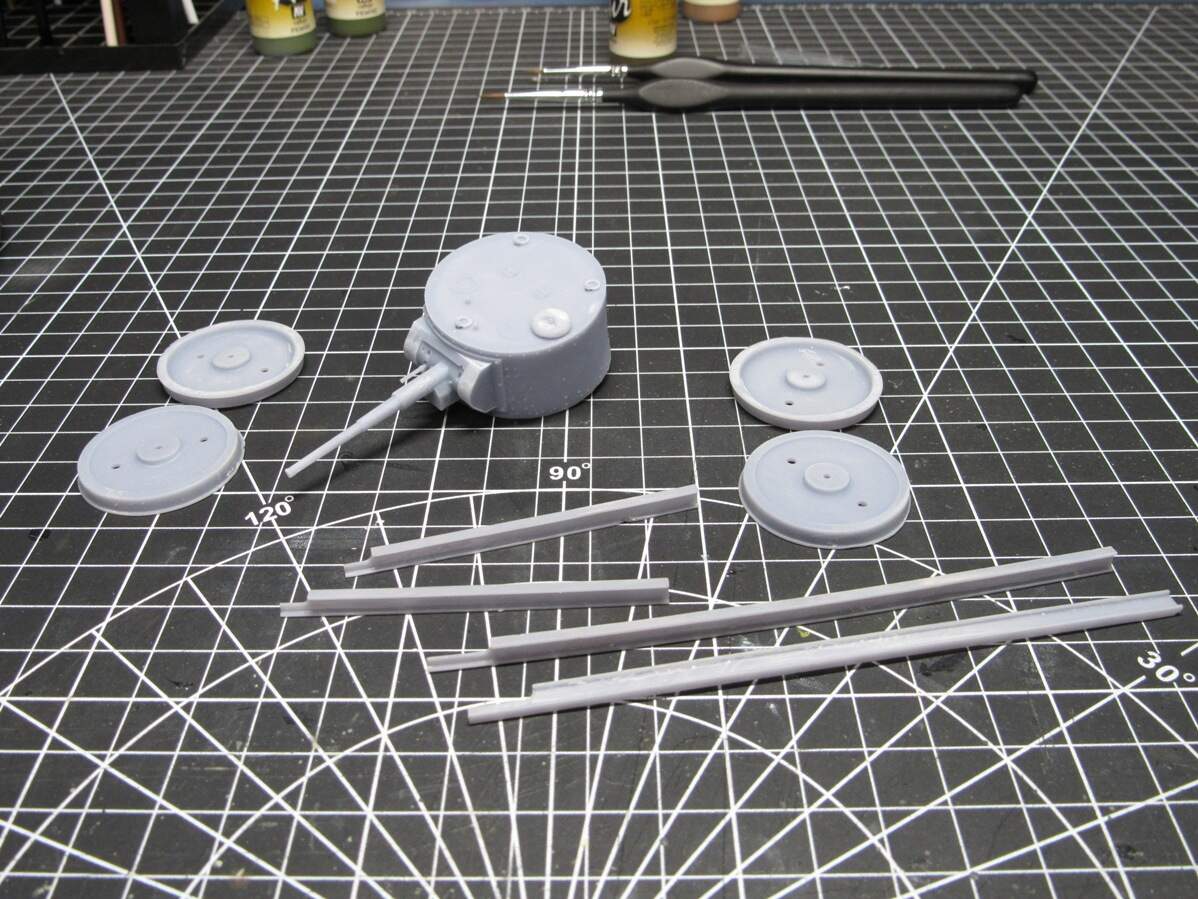
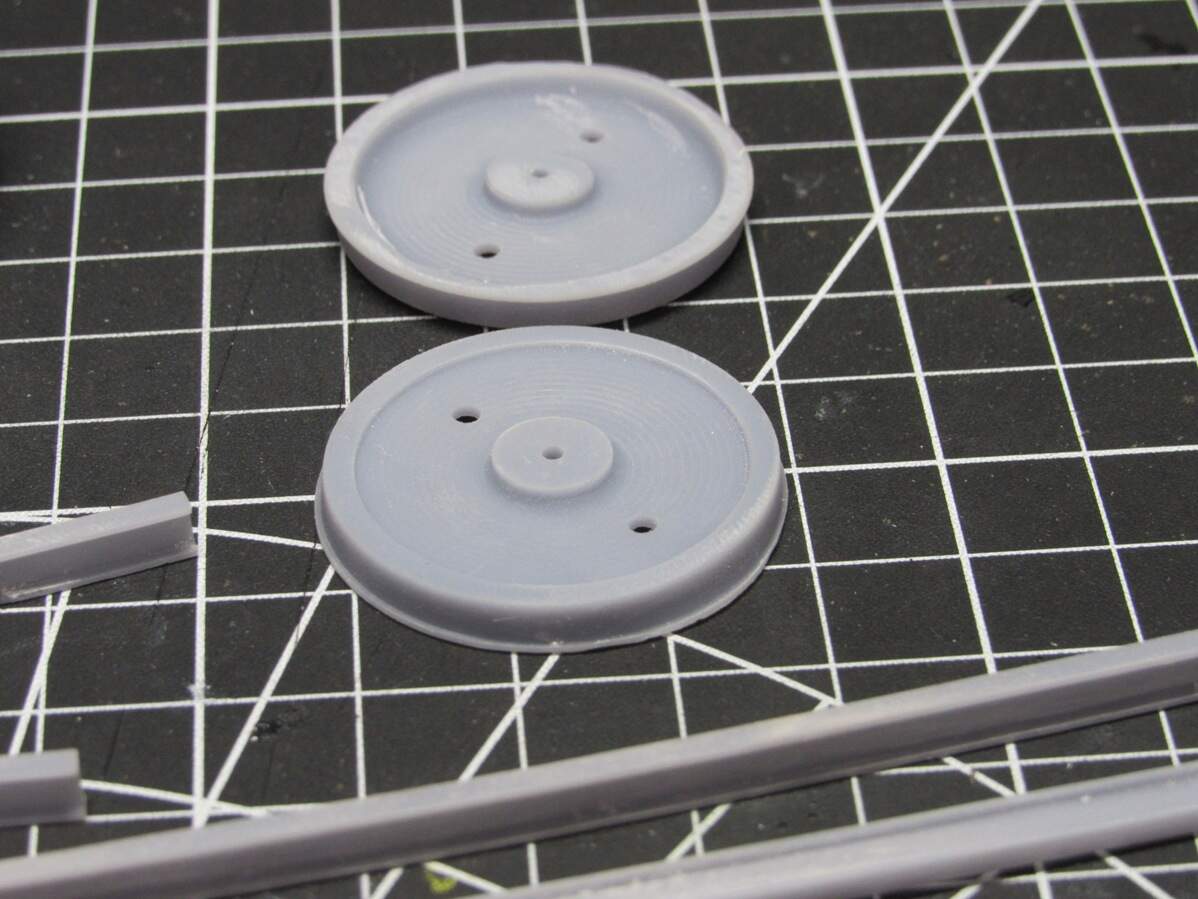
Didn’t get around to cleaning up the parts I printed last night until this morning. The rail wheels and rails.
I did make a start on printing the lower hull this morning, but the print failed, pulled off the build plate. I’ll up the first layer settings and try again later today.
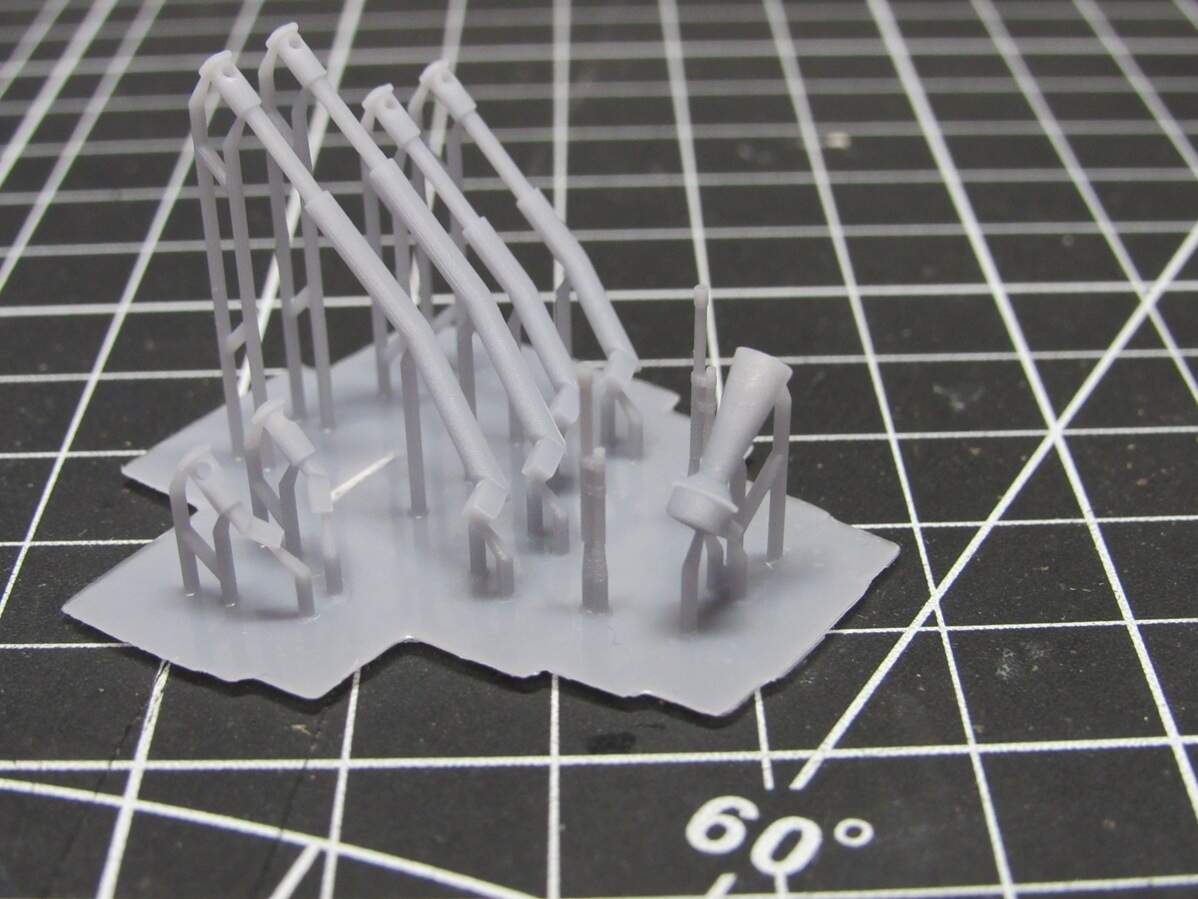
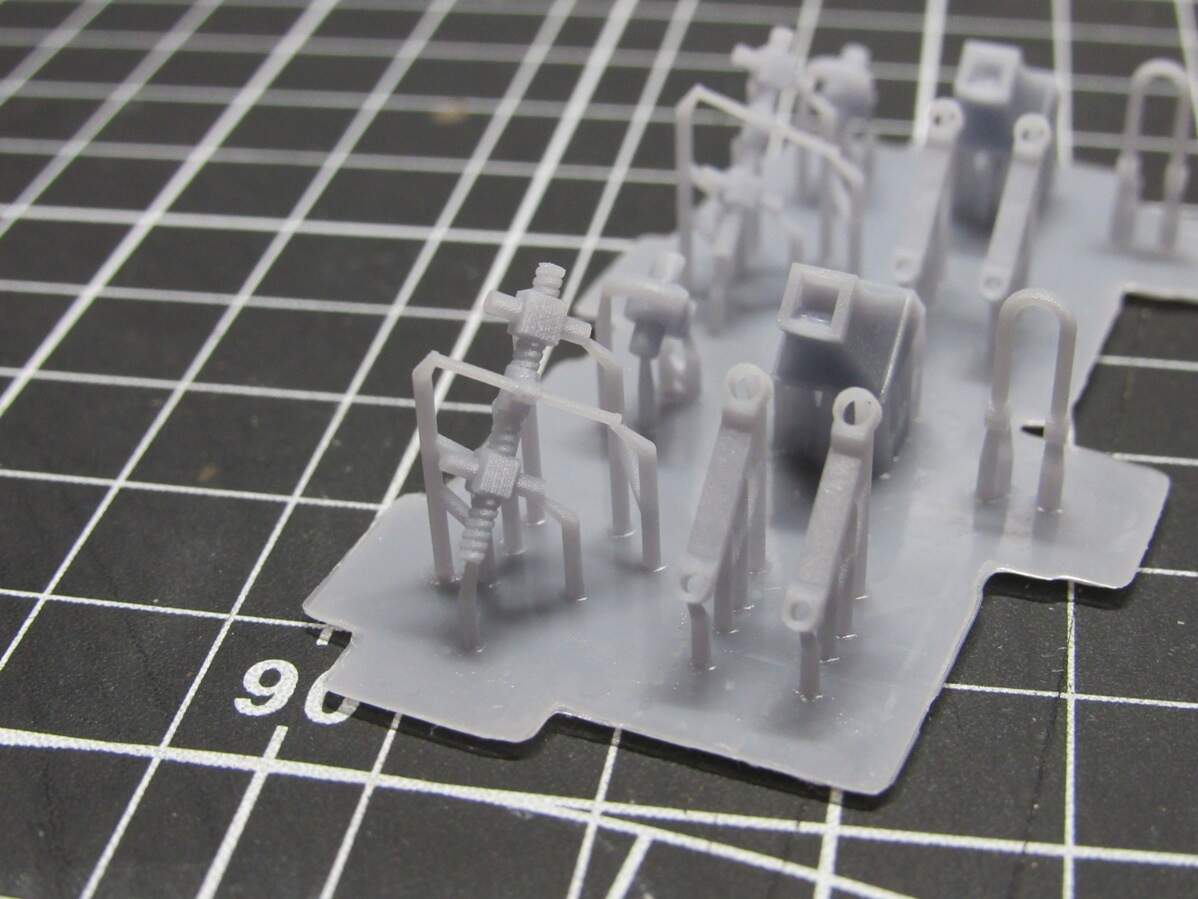
Had some more thoughts on the lower hull, and decided I would rework the slicing file before trying again. But in the meantime, I printed a handful of smaller parts:
I’m impressed with the fine detail the printer’s able to turn out. I have trouble getting the camera to focus but looking closely I can make out the ridges on those MGs. Thread pattern came out nice too, just gonna have to be careful cleaning that part.
I’m hoping to get the chassis halves done sometime this week so I can really start putting this thing together.
Given the flat angles of the vehicle, wouldn’t be more economically/easier to print out a jig or interior framework to attach plastic sheet to then to print out the body itself?
If I were any good at scratchbuilding, maybe. Those panel lines are probably what would get me the worst. And I feel like once I design the entire thing I might as well 3D print it. It’s also reproducible once I figure it out. First print failed since I didn’t harden the starting layers enough, last night’s failed since there weren’t enough supports, but once I get it right, I can set the machine and go to bed to wake up to a finished part.