Thanks Mead for asking this question.
Sure am glad I clicked on this one. Learned a lot from everyone.
Fantastic examples.
1 Like
thank you for your explanation, with the next tank I try your tecnique
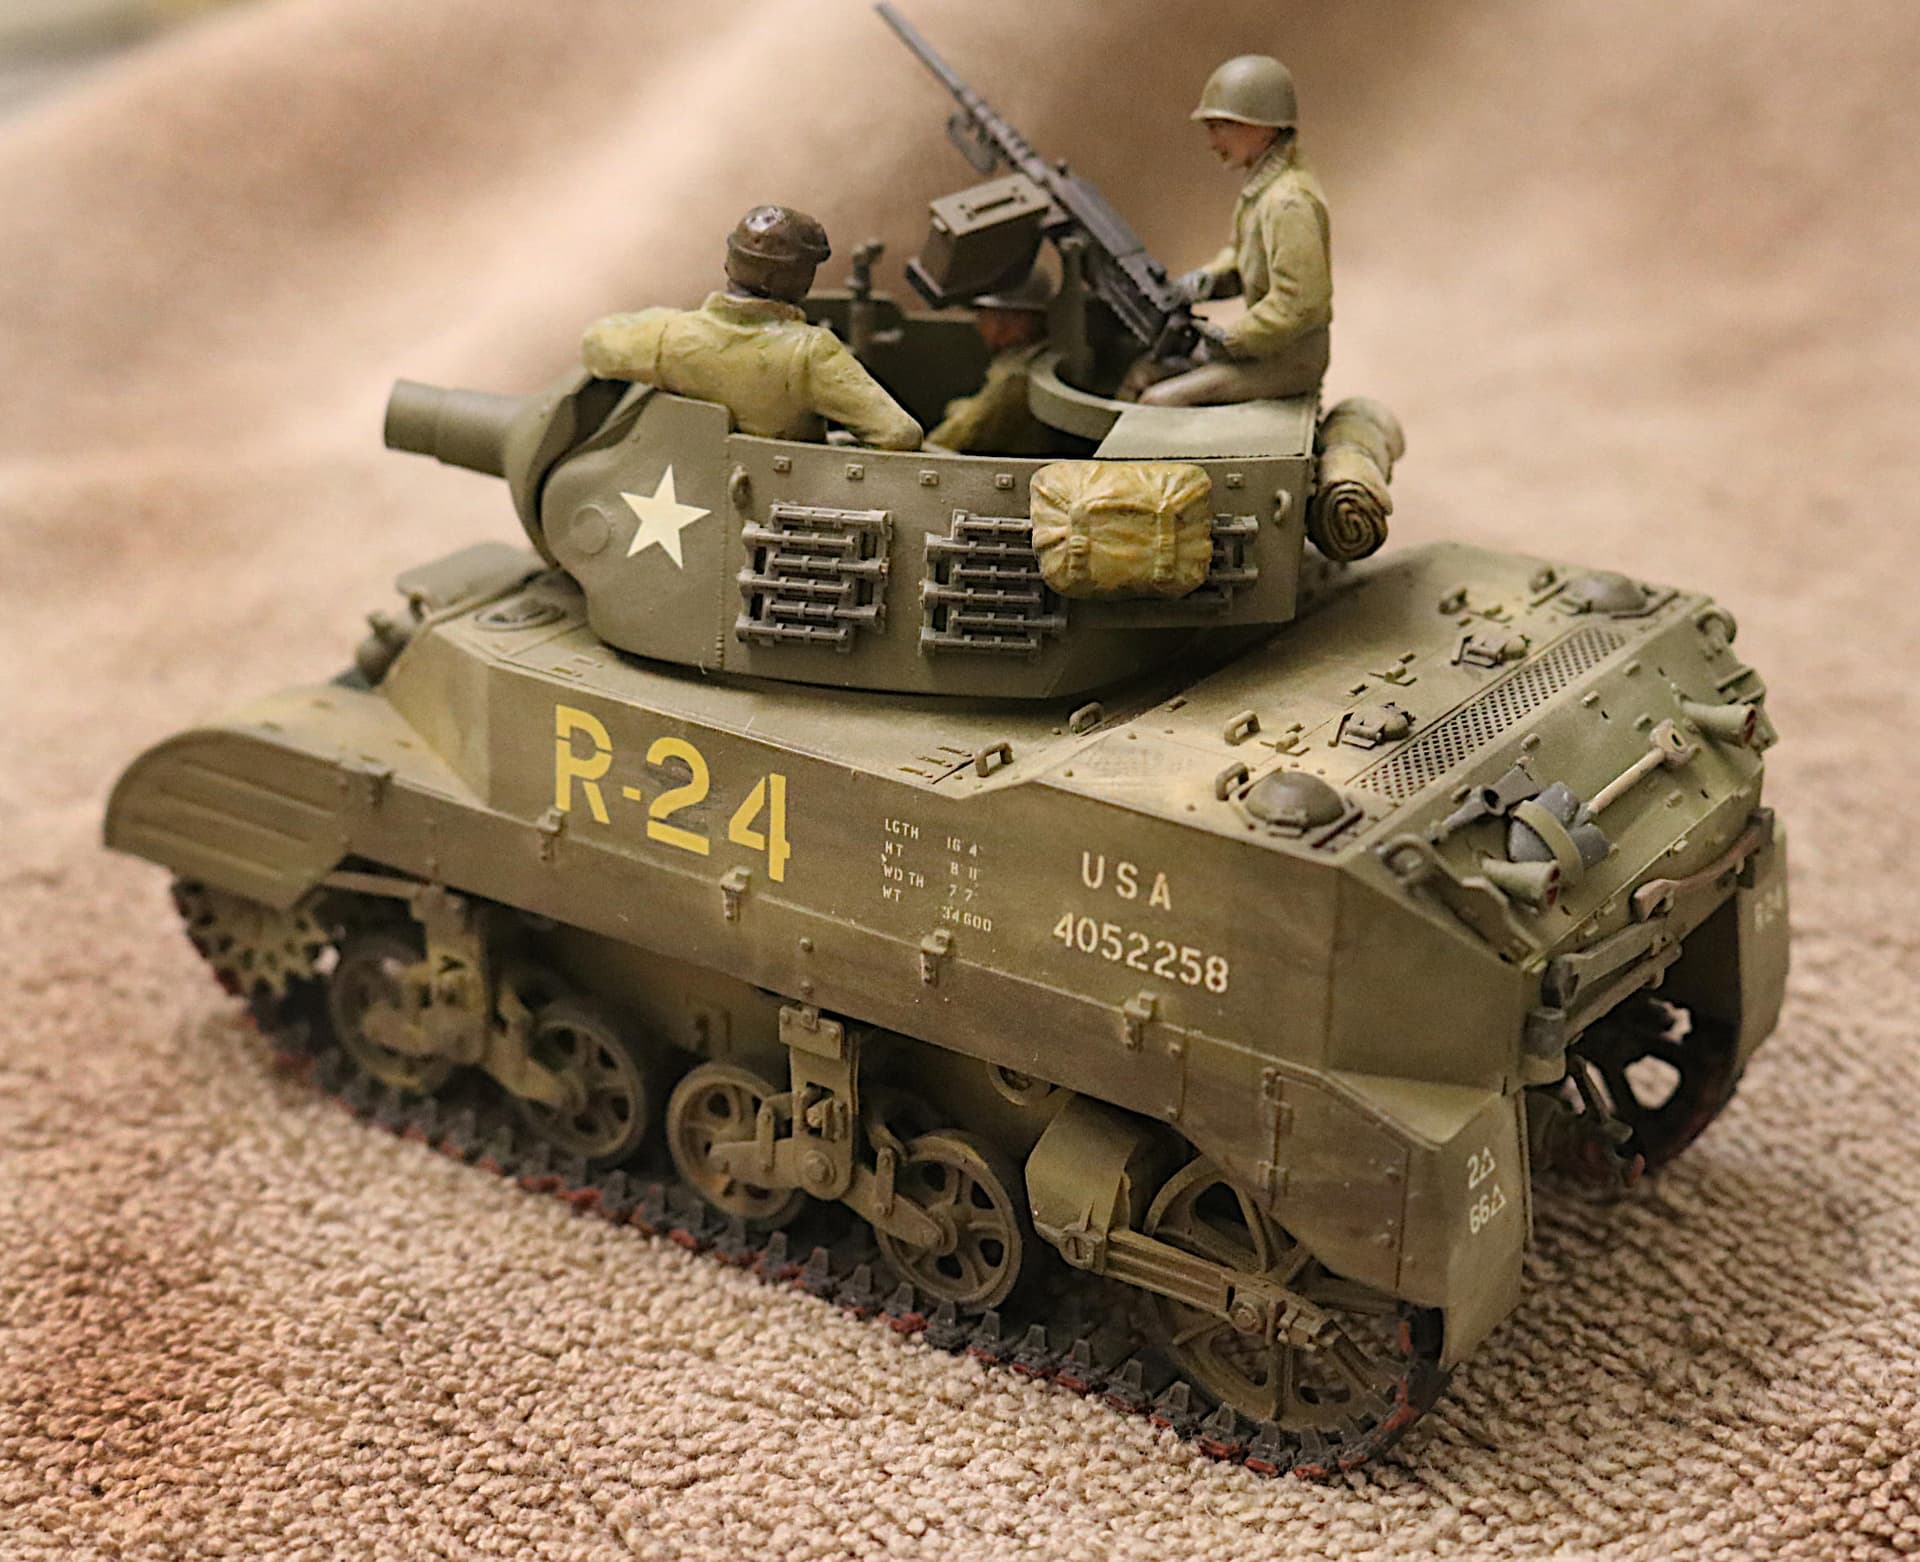
HEAVY DUST: A couple of recent efforts:
These Stuarts (& SPG) are both done with oil pastels over a very flat base of OD and Tamiya Matte Clear (TS-80) The matte clear, sprayed very dry, gives the surface a very fine rough 'tooth" and the pastels can be literally “scrubbed” into this tooth to give them an ALMOST permanent adhesion to the surface with no further over coat necessary.

3 Likes
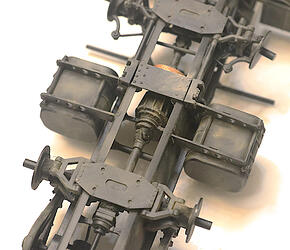
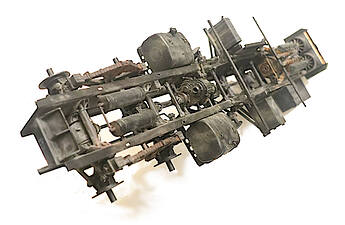
If I want to create just a general dustiness I use white and tan/yellow oil pastel chalk, especially on those monster big Russian 8x8 trucks with their solid jet black chassis. Spin Tires!
I painted it flat black and could no longer see all that beautiful detail. Oil Pastel “Dust” saved the day and had that chassis (I think) looking even better then ever!
6 Likes
Had another question cross my mind. Should I do pin washes, dry brush and then dust, or dust first then other weathering effects? My guess is dust last
1 Like
Dust last… but there may be some areas where you want to show the dust worn off by the crew.
2 Likes
I normally dust last, but I suppose it could vary based on the desired final effect. Think about how weathering layers for your particular vehicle would have accumulated naturally and work in that order.
1 Like
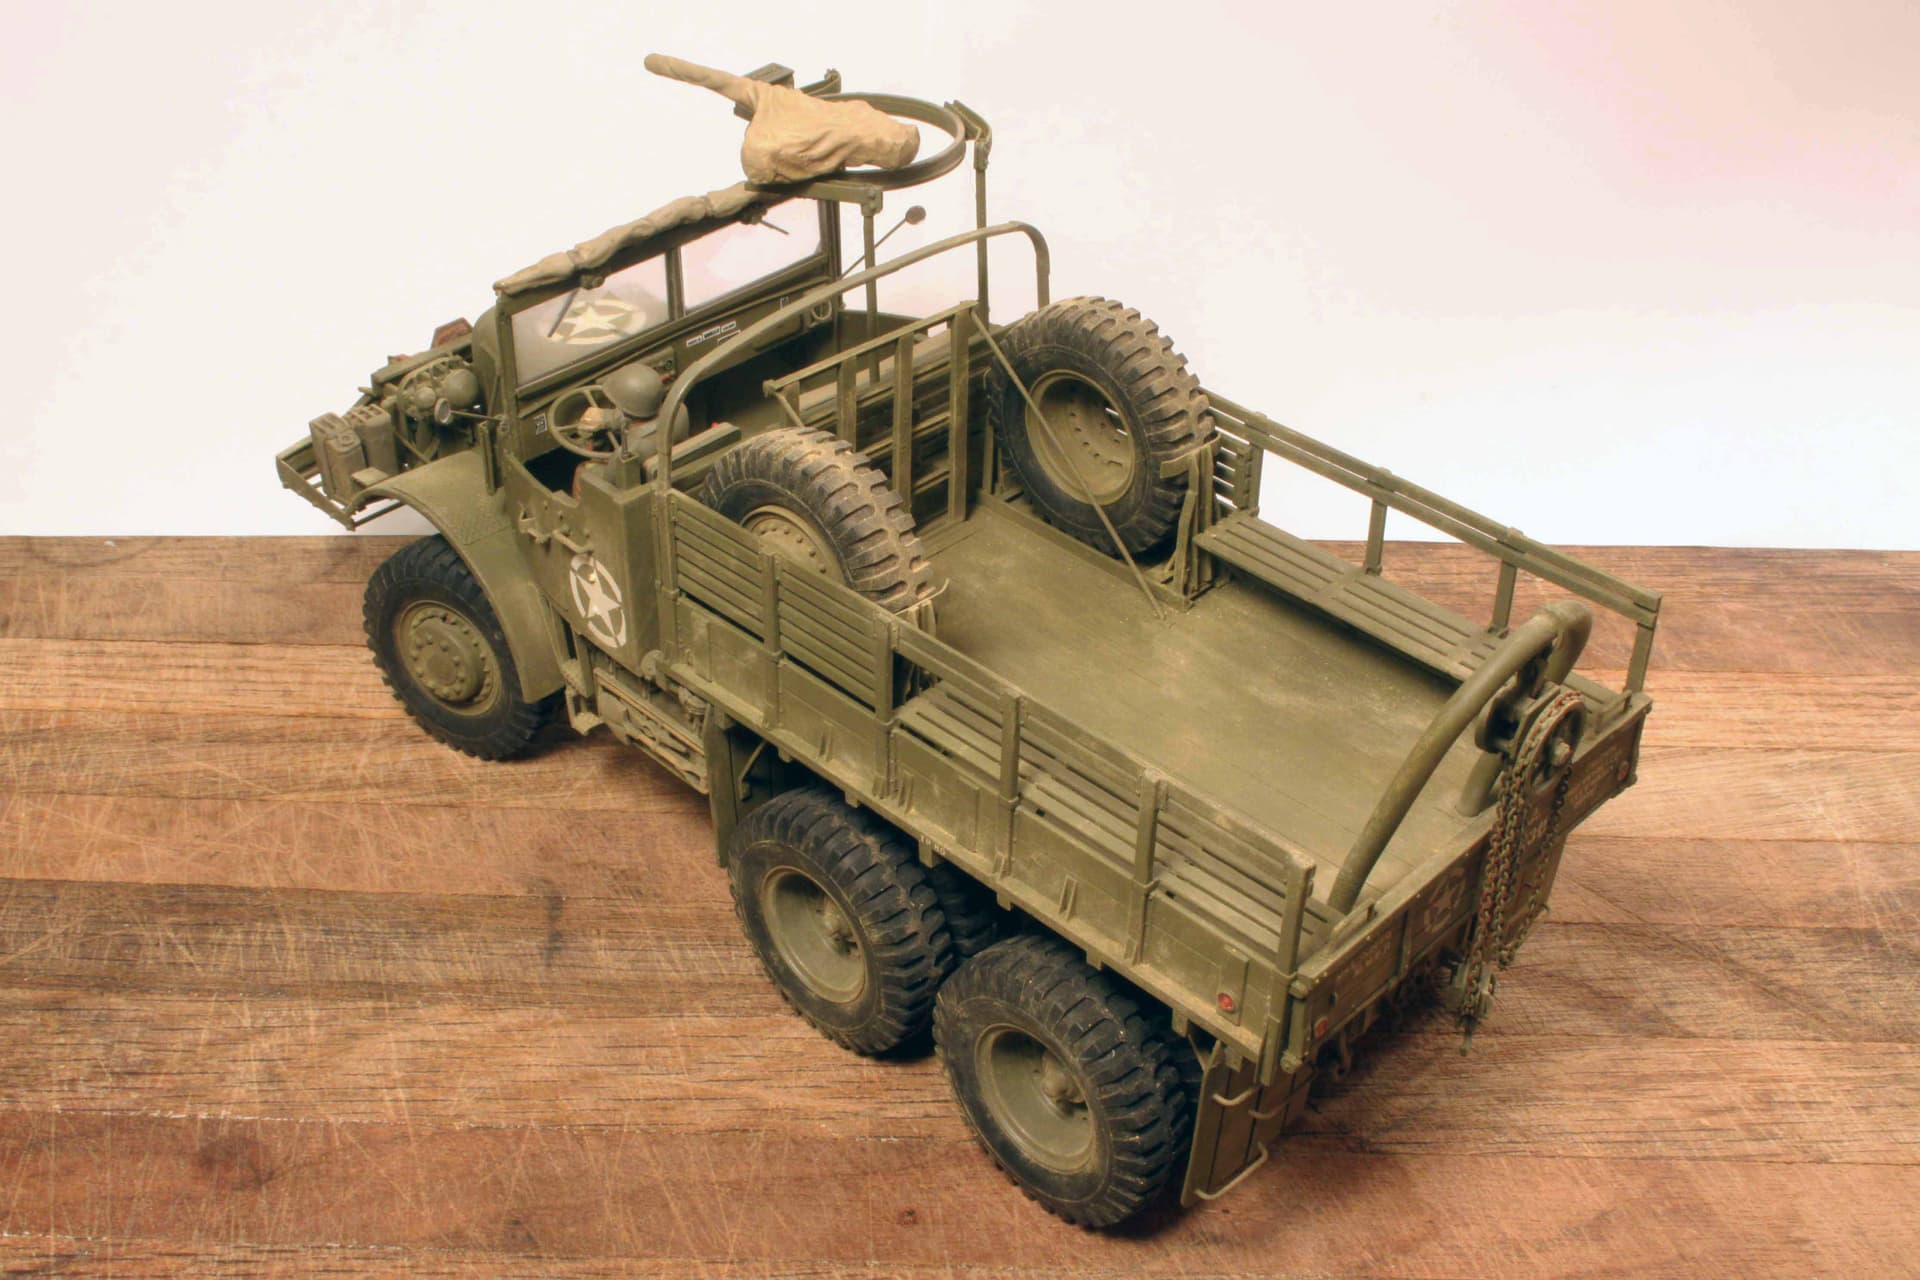

Example of spray can “dust” weathering:
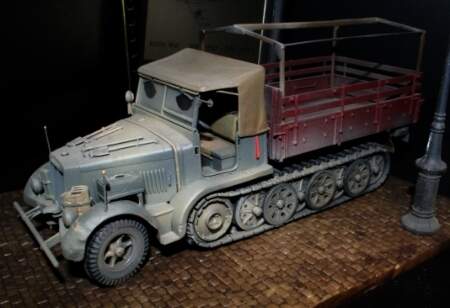
My Sd. Kfz. 7 MWS - Sort of a kit-bash with just a bit of “Paper Panzer” design thrown in. It started life as a Tamiya Flakvierling, then with a little cutting and an enlarged load box from an Italeri Maultier
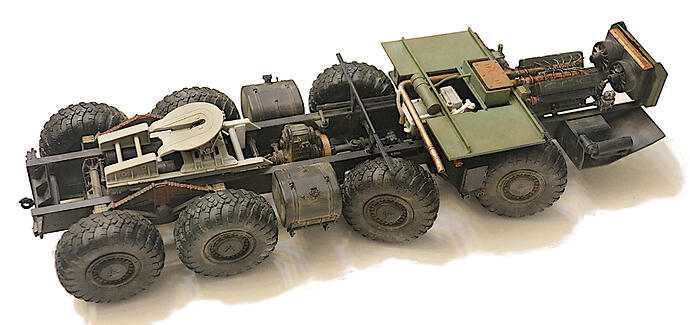
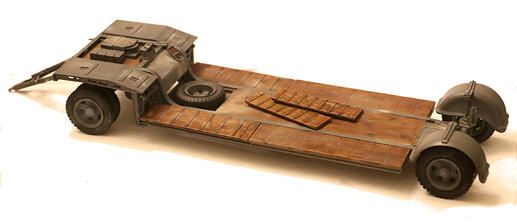
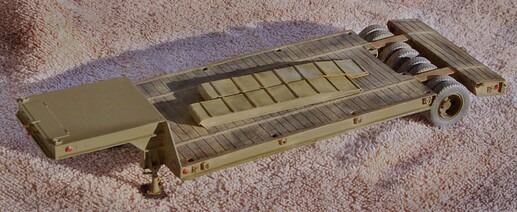
Example of Pastel “dust” weathering:
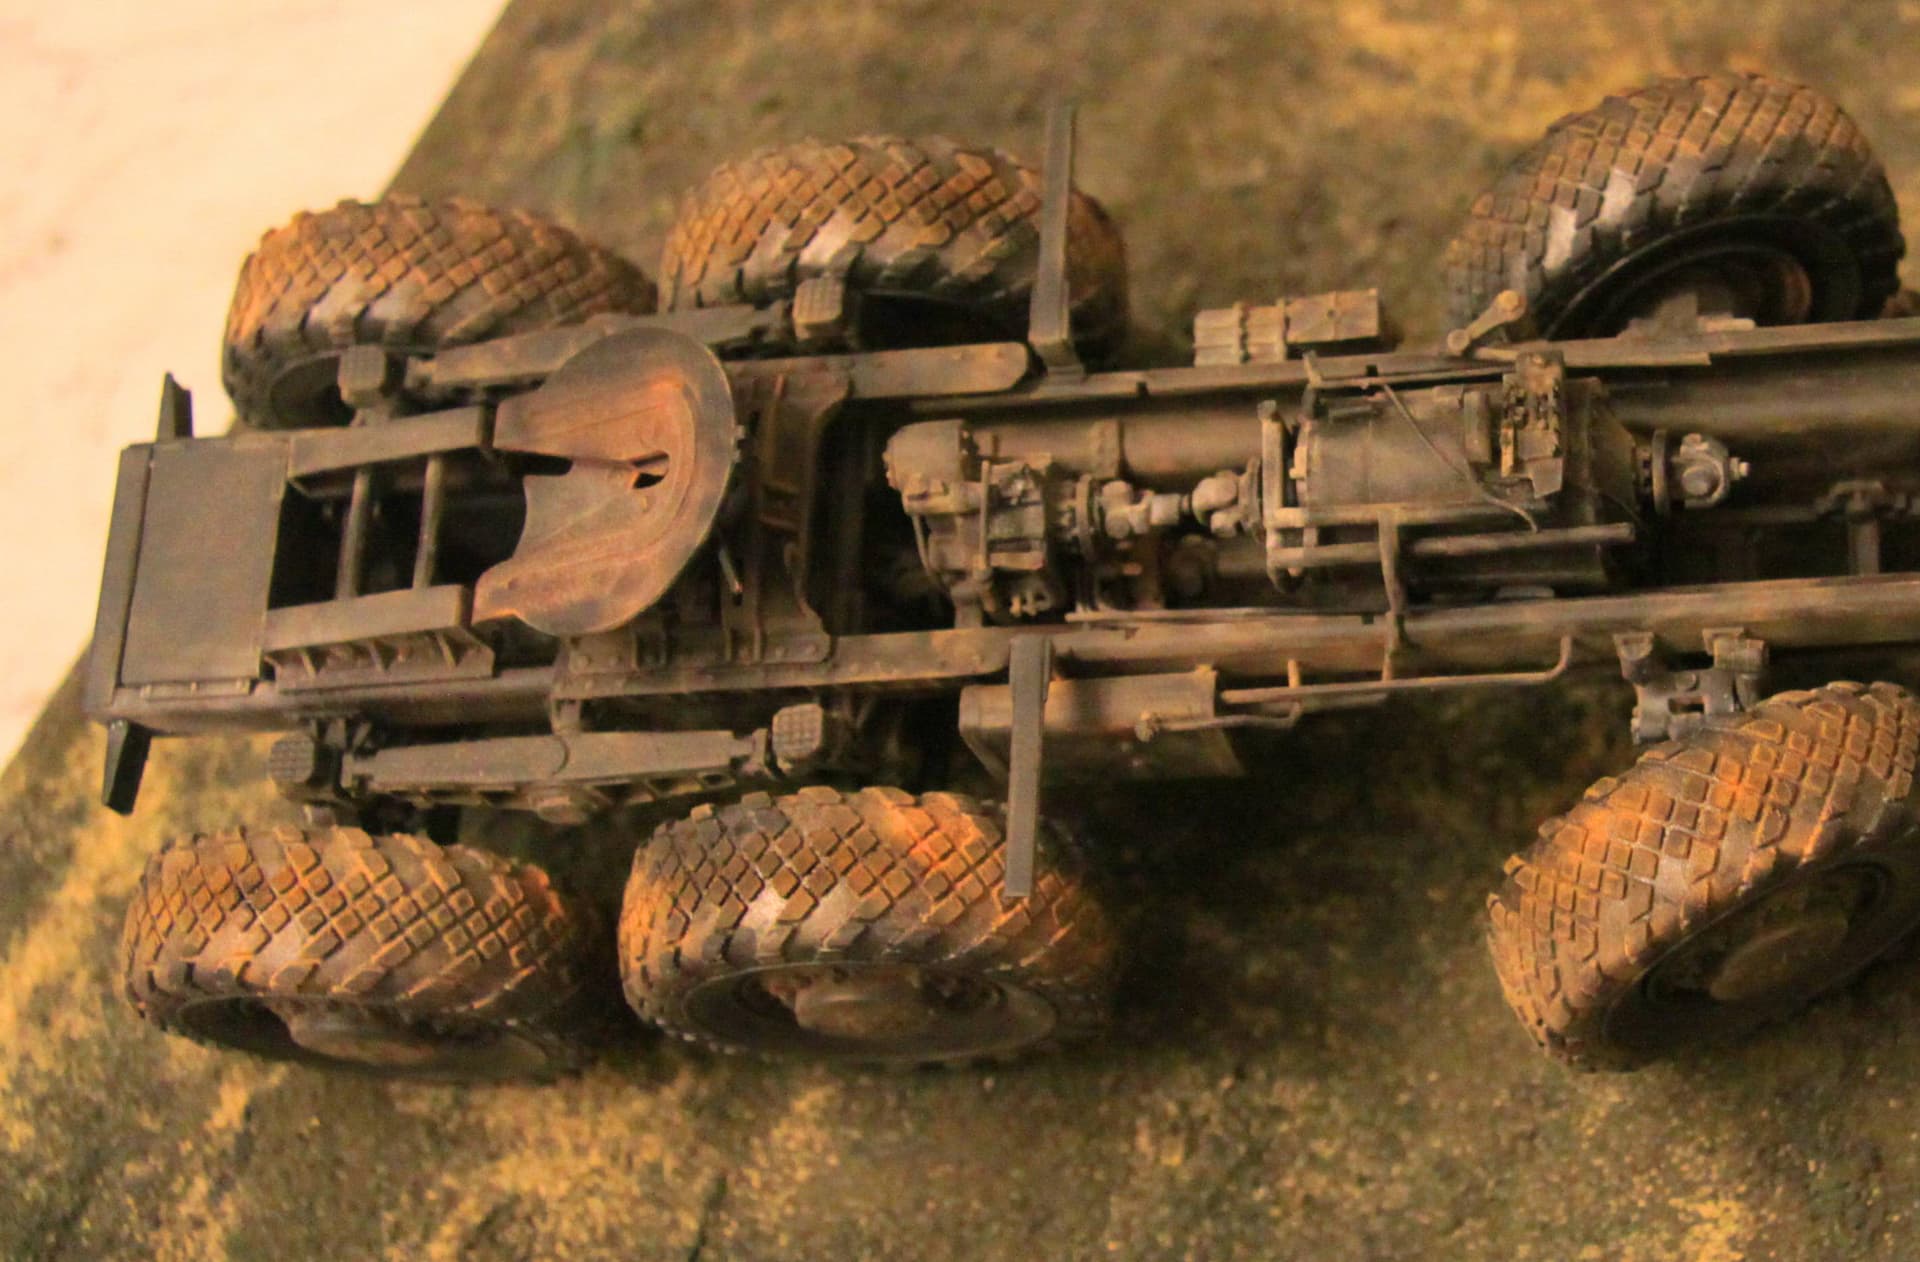
Super detailed MAZ-537 8x8 tractor chassis
I definitely prefer the “real” dust!
2 Likes
Wiper marks on the windscreen look cool, nice one.
1 Like
You need to build in layers like the actual weathering occured to get the same effect as the photo. Paint the tank as in parade ready. Using an airbrush start misting the dust/dirt color onto the lower hull and rear of the tank. When you get close to what the photo looks like, stop. Better to be a little light on weathering than too much. You can always add. Next do the stains. Do the scratches if any and then the mud or heavy dirt. Finish up with pastels/chalk dust.
3 Likes