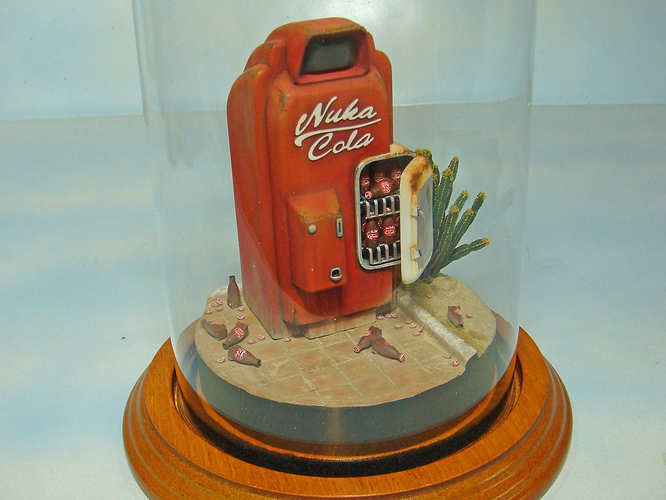
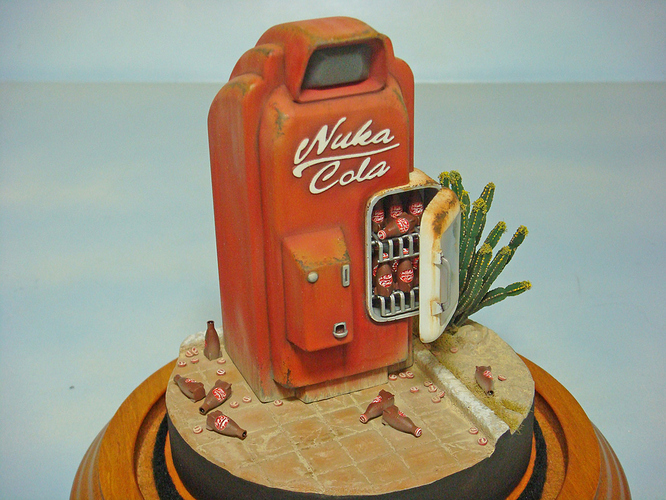
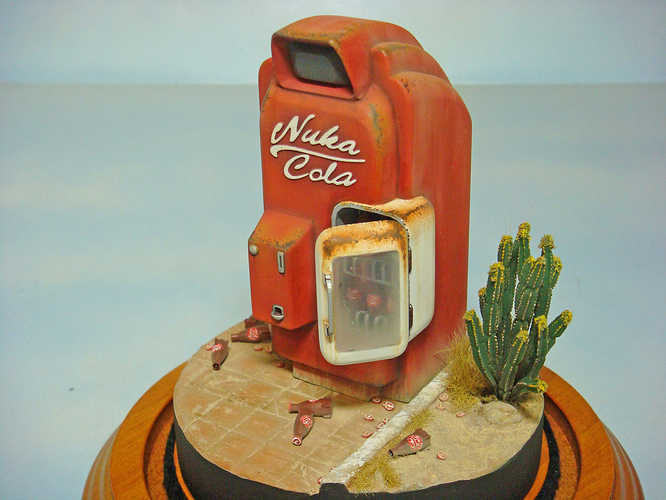
Fallout Nuka Cola Machine ~1/24 Scale

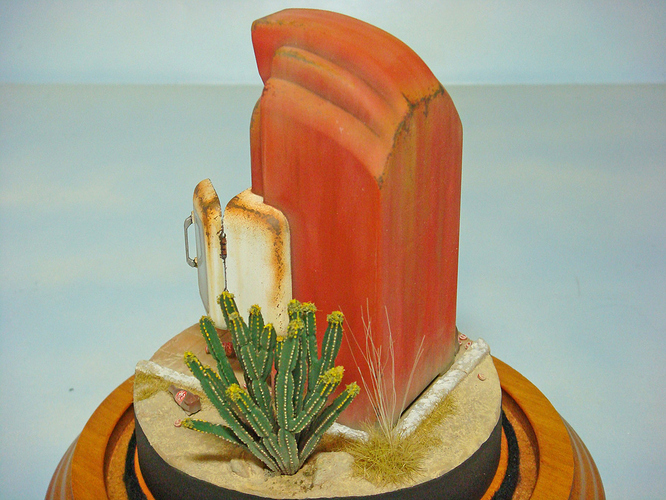
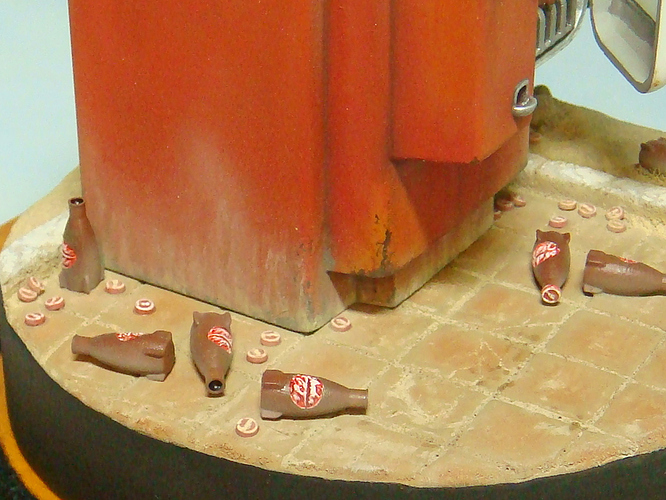
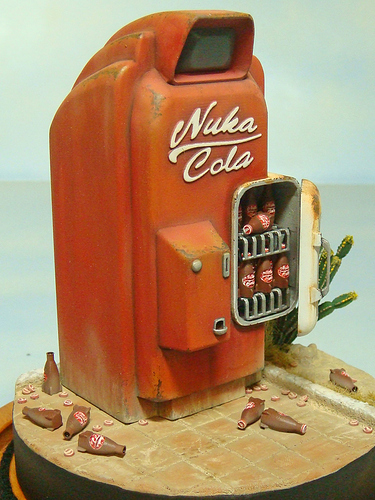
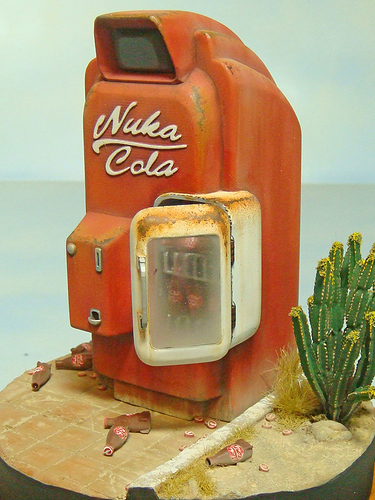
In order to give the new forums a test and share some of my recent work, I though I’d post up some pics of a Fallout Nuka Cola machine that I 3D printed.

The basic .stl file for the machine came from Thingiverse, but I did some re-mixing and added some more details in CAD before I printed it. I did the bottle and bottle cap designs myself and then 3D printed those.

I did add some more traditionally scratch-built details like the glass front to the dispenser door (made from clear Evergreen sheet). The cactus is from Pegausus models with flowers added using ground foam. The base was scratch built from two-part epoxy putty, styrene strip for the curbs, and other traditional basing materials.

Painting was mostly done with various Tamiya colors for the airbrushing bits, and Vallejo, Games Workshop, Citadel and other hobby acrylics for hand brushing.

The scale is approximately 1/24, but since I couldn’t actually find any dimensioned drawings of the Nuka Cola machine, who really knows? LOL!

14 Likes

Very cool. Nice job. :slight_smile:

Randy

1 Like

@Harv

Thanks for the props! It was a fun little project.

1 Like

reminds me of the drink machine in call of duty black ops zombies missions

1 Like

Outstanding presentation! … Is the setting in “Nucla, Colorado?” :radioactive: :sweat_smile:

—mike

1 Like

Thanks for the props! It was a fun little project.

You’re welcome. It’s a cool vignette. Something a little different and I guess that’s why I like it. :+1:

1 Like

@justsendit … LOL! Nuka-cola-rado! LOL! (I might bust my daughter’s chops about that since she lives in Denver!)

Actually, my wife is a huge fan of the Fallout games, so I made this for her to put at here gaming table. It normally has a glass globe over it, and the base was sized to fit the globe.

It was a neat little project to practice some 3D design and printing. It was also a good weathering and finish exercise since… well… how could you screw it up?

2 Likes

excellent painting job

1 Like

@SdAufKla

what 3D printer do have and is it easy to use?

it’s something I want to learn about and experiment with but I don’t know how they work?

@Klaus-Adler

I’ve had an Anycubic Photon for about three years now. The technology for this class of desktop UV resin printers is really getting quite mature and reliable.

I would recommend any of the UV resin 3D printers from Anycubic, Mars, or Epax. Actually, Epax X-10 would be my choice for a new purchase right now, but the older X-1 has come down in price and would be an excellent value. Having said that, both Anycubic and Mars have both introduced new models that appear to be comparable. Price points are also comparable, too.

In so far as the capability and potential resolution, all of the printers in the same general price range use the pretty much the same components since none of them manufacture their own LCD screens or stepper motors or (probably) mother boards. In fact, replacement LCD screens for one model in the same class generally will fit all models across brands. LCD resolution and stepper motor capability combine to establish the X, Y and Z resolution in microns, so, since the machines use the same spec components, their potential resolution is the same.

Anyway, being able to design and 3D print parts has been a great addition to my workshop. I find myself designing and printing 3D parts that I would have once used traditional scratch-building techniques to master and RTV rubber molds and urethane resin to copy. However, I find my best results come from combining both methods. This is where I see a lot of 3D printers having trouble. They lack traditional model making skills, knowledge and abilities, and rely on the 3D printer to do all the work. They’re then disappointed at the results.

If you pay attention to the details, study the way the machines actually work and understand the why’s and how’s to prepare files for printing, then these little UV resin desktop printers are really very easy to use. There is a bit of a learning curve, but it’s similar to learning to use an airbrush. Go beyond the simple mechanics and understand the process, and then using and trouble-shooting are straight forward.

All of the more experienced model makers that I know who have added 3D printers to their tool boxes (either FDM or DLP printers) have mastered the machines quickly and get generally very good results. They’re also not afraid to just use whatever methods or techniques will get the best results. They all understand that it’s the model maker and not the tools that make the difference.

2 Likes

@SdAufKla do these 3D printers come with some sort of instructional video? i have never used one before and have no idea where to start really.

None that I am aware of. However, there are quite literally hundreds (if not thousands) of YouTube videos on all sorts of makes, models, and printing processes, so research is not too difficult. My advice is just start doing some research on the printers by looking at YouTube reviews and checking out FaceBook user groups for the machines you’re considering.

(Keeping in mind that the majority of post on FB are by people who have problems and not the ones who are happy. This makes it seem like there are more bad experiences than there really are.)

I actually got started after watching a video review of the AnyCubic Photon posted up a few years ago on a model railroader’s YouTube channel, and from there, I just followed the bread crumbs, so to speak.

Actually operating the printer and preparing the .stl (stereolithographic files) for printing is fairly straightforward with a shallow learning curve. Figuring out how to operate the machine is not too hard, and between FaceBook groups dedicated to the particular brand and type along with YouTube videos, it’s also pretty easy to find answers to questions or suggestions to remedy problems. However, the key is not expecting to be able to take short cuts or expect the printers to work with nothing more than the press of a button. The user must do his or her part, first.

Honestly, the one thing that held me up getting a 3D printer was searching for, finding and learning a simple CAD program that I could use to create my own designs. Anyone can download and print other peoples’ models and designs, but without knowing how to create your own, you’re stuck with whatever other people are willing to give away. Not much use for me in my modeling workshop. I want to build models of subjects I’m interested in, not models of what other people like.

(Not that there are not thousands of free or low cost print files to be found on the ol’ interweb. There are. The problem is, very few of them are really of any interest or use for fine scale modeling. There are some. The modeling community that is best served with ready to print files is the table-top gaming community followed by collectors of super hero and other fantasy figures. If that’s someone’s main modeling interest, then there is no shortage of ready to print designs that can be purchased. The user still needs to do his or her part in setting those files up properly to print, though.)

I finally came across a program called TinkerCad. It’s a free, on-line basic CAD system that is used by a lot of teachers and students for introductory CAD lessons.

TinkerCad

Although TinkerCad seems pretty childish, it’s actually capable of doing some very nice work (IMO). Learning to use it is as easy as following the self-paced tutorial. More advanced tips are easy to find on line since so many school teachers use it. There are probably hundreds of TinkerCad videos on YourTube, some of which are very good and offer tips on figuring out various complicated designs.

The main issue with TinkerCad (IMO) is that the overall file size of any single design is limited. This can be worked around by breaking up a very complicated, overall design into sub-assemblies or components. These can be saved as .stl’s and then reimported into other designs while using much, much less of the available file space in those subsequent designs. This seems confusing, but once you actually start doing it, the details (which are unimportant for this discussion) become clear.

For example, ALL of the parts I printed for the Nuka Cola project were either designed from scratch or modified (aka "re-mixed) in TinkerCad.

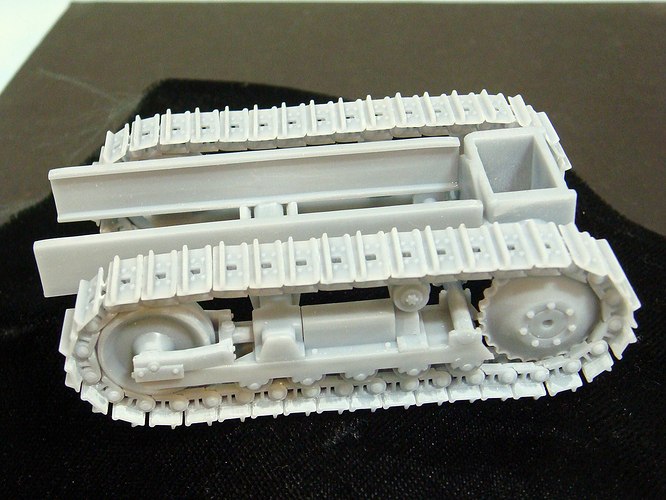
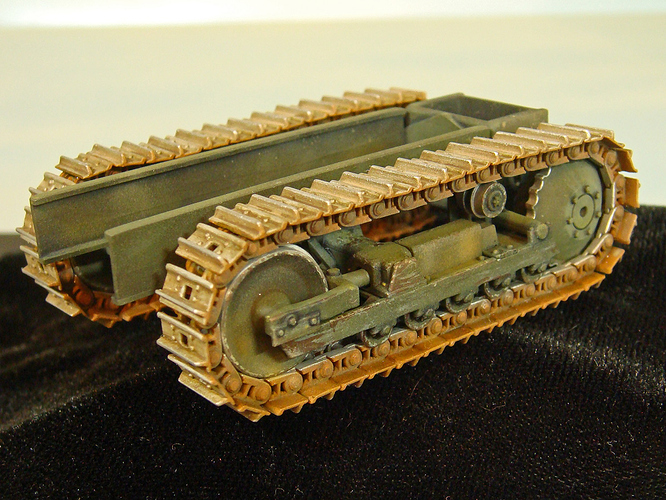
Here are some other examples of scale model parts that I designed - from scratch - using TinkerCad:

This is a 1/35 scale model of the M450 air transportable dozer suspension and chassis.

And here are the raw and painted (assembled) 3D parts:

Note that the tracks are individual, movable link-to-link. 100% of this was done using TinkerCad for the design work and to create the .stl files of the various parts.

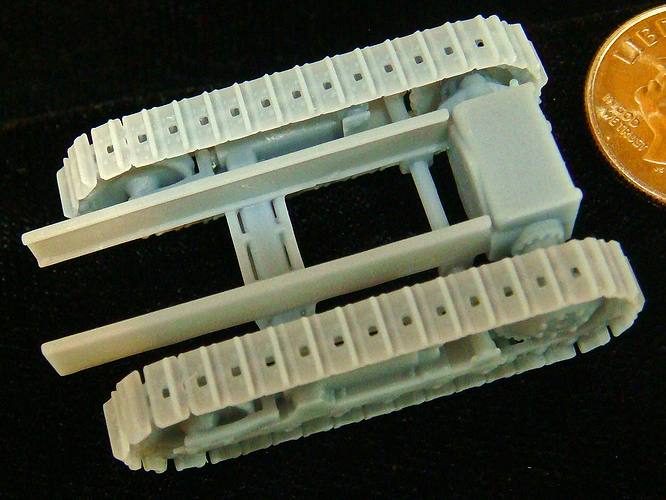
I actually needed the suspension for a 1/72 scale model of the dozer which went onto a large Vietnam war diorama commissioned by a local museum. A club mate scratch built the rest of the dozer (which was quicker and faster than me completing the design in CAD).

Here’s photo of the ONE PIECE 1/72 suspension and chassis printed out for his dozer build (note the US dime in the corner of the picture for scale):

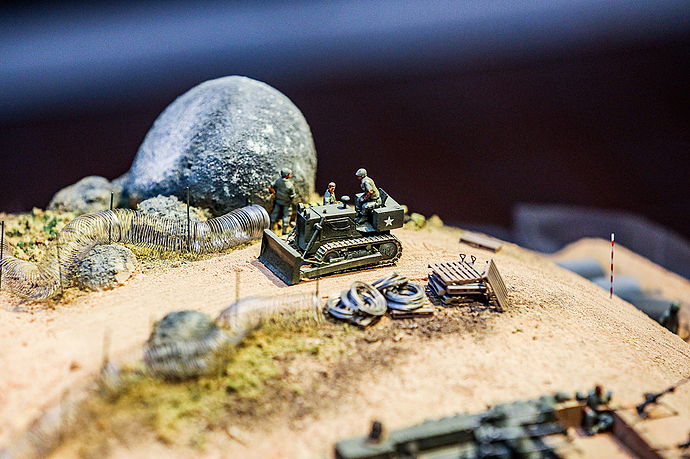
And here’s a final photo of the completed M450 dozer scratch-built by my club mate Ben Brandes on the diorama at the museum. (BTW, I also designed the wooden pallets in the photo using TinkerCad and printed them on my Photon.)
3 Likes

Love the detail you’ve added to this machine and the outstanding paint job. I’ve seen the original design and thought it was very interesting but you’ve taken it to a whole new level. Well done!

Jim
LSA

1 Like

@LSArmory Thanks for the kind words, Jim!

Unfortunately for me, it wasn’t until I was almost done with the build that I found some screen grabs and renders from the game that showed a lot of additional details on the rear of the machine. They would have been easy enough to add during the re-mix of the original .stl… :frowning_face:

Oh well, the researcher’s corollary to Murphy’s Law rears its ugly head once again: “The last bit of information needed always shows up right after the project is completed.”

Cheers!

Only thing missing is a bobble-head inside the door. After all those are the best rewards in the game. And surely deserves to be in there. Love it.

1 Like

Brilliant!

:beer:

1 Like

Love that vending machine. Excellent detailing and weathering.

2 Likes

having played a few of the fallout games, I will say that you got that machine spot on!
Cheers!
L

1 Like