Hi all
for the Fire for effect campaign, I have decided to enter this self propelled mortar. The kit issued in 2018 by Trumpeter uses several older sprues coming from their BTR-70 and BTR-80 kits.
The turret is newly tooled as well as the PE plate.
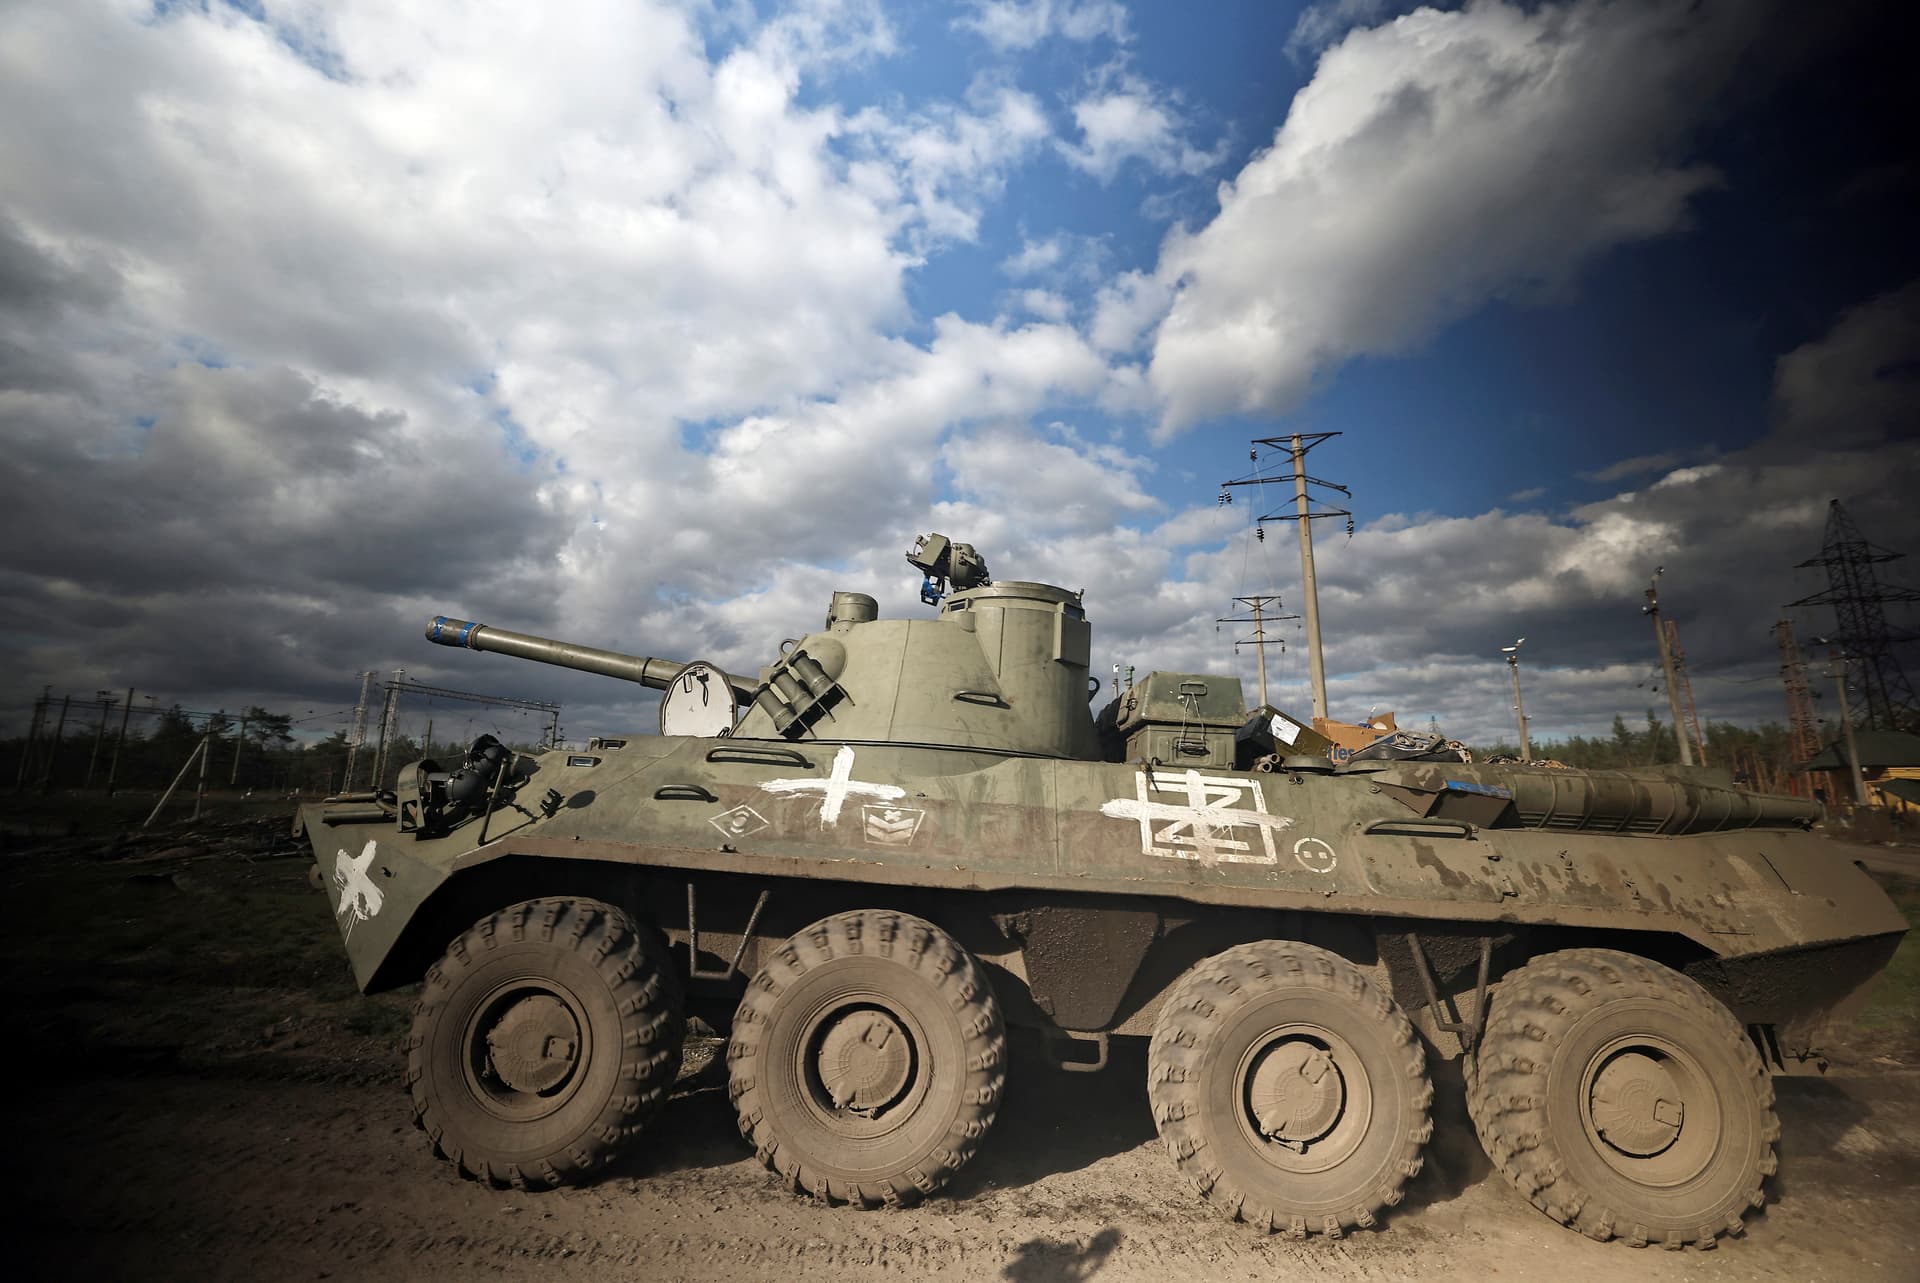
For the campaign I was inspired by this vehicle.
I don’t pretend making an accurate copy of the picture. Hopefully the result will be close enough if I manage to master the weathering.
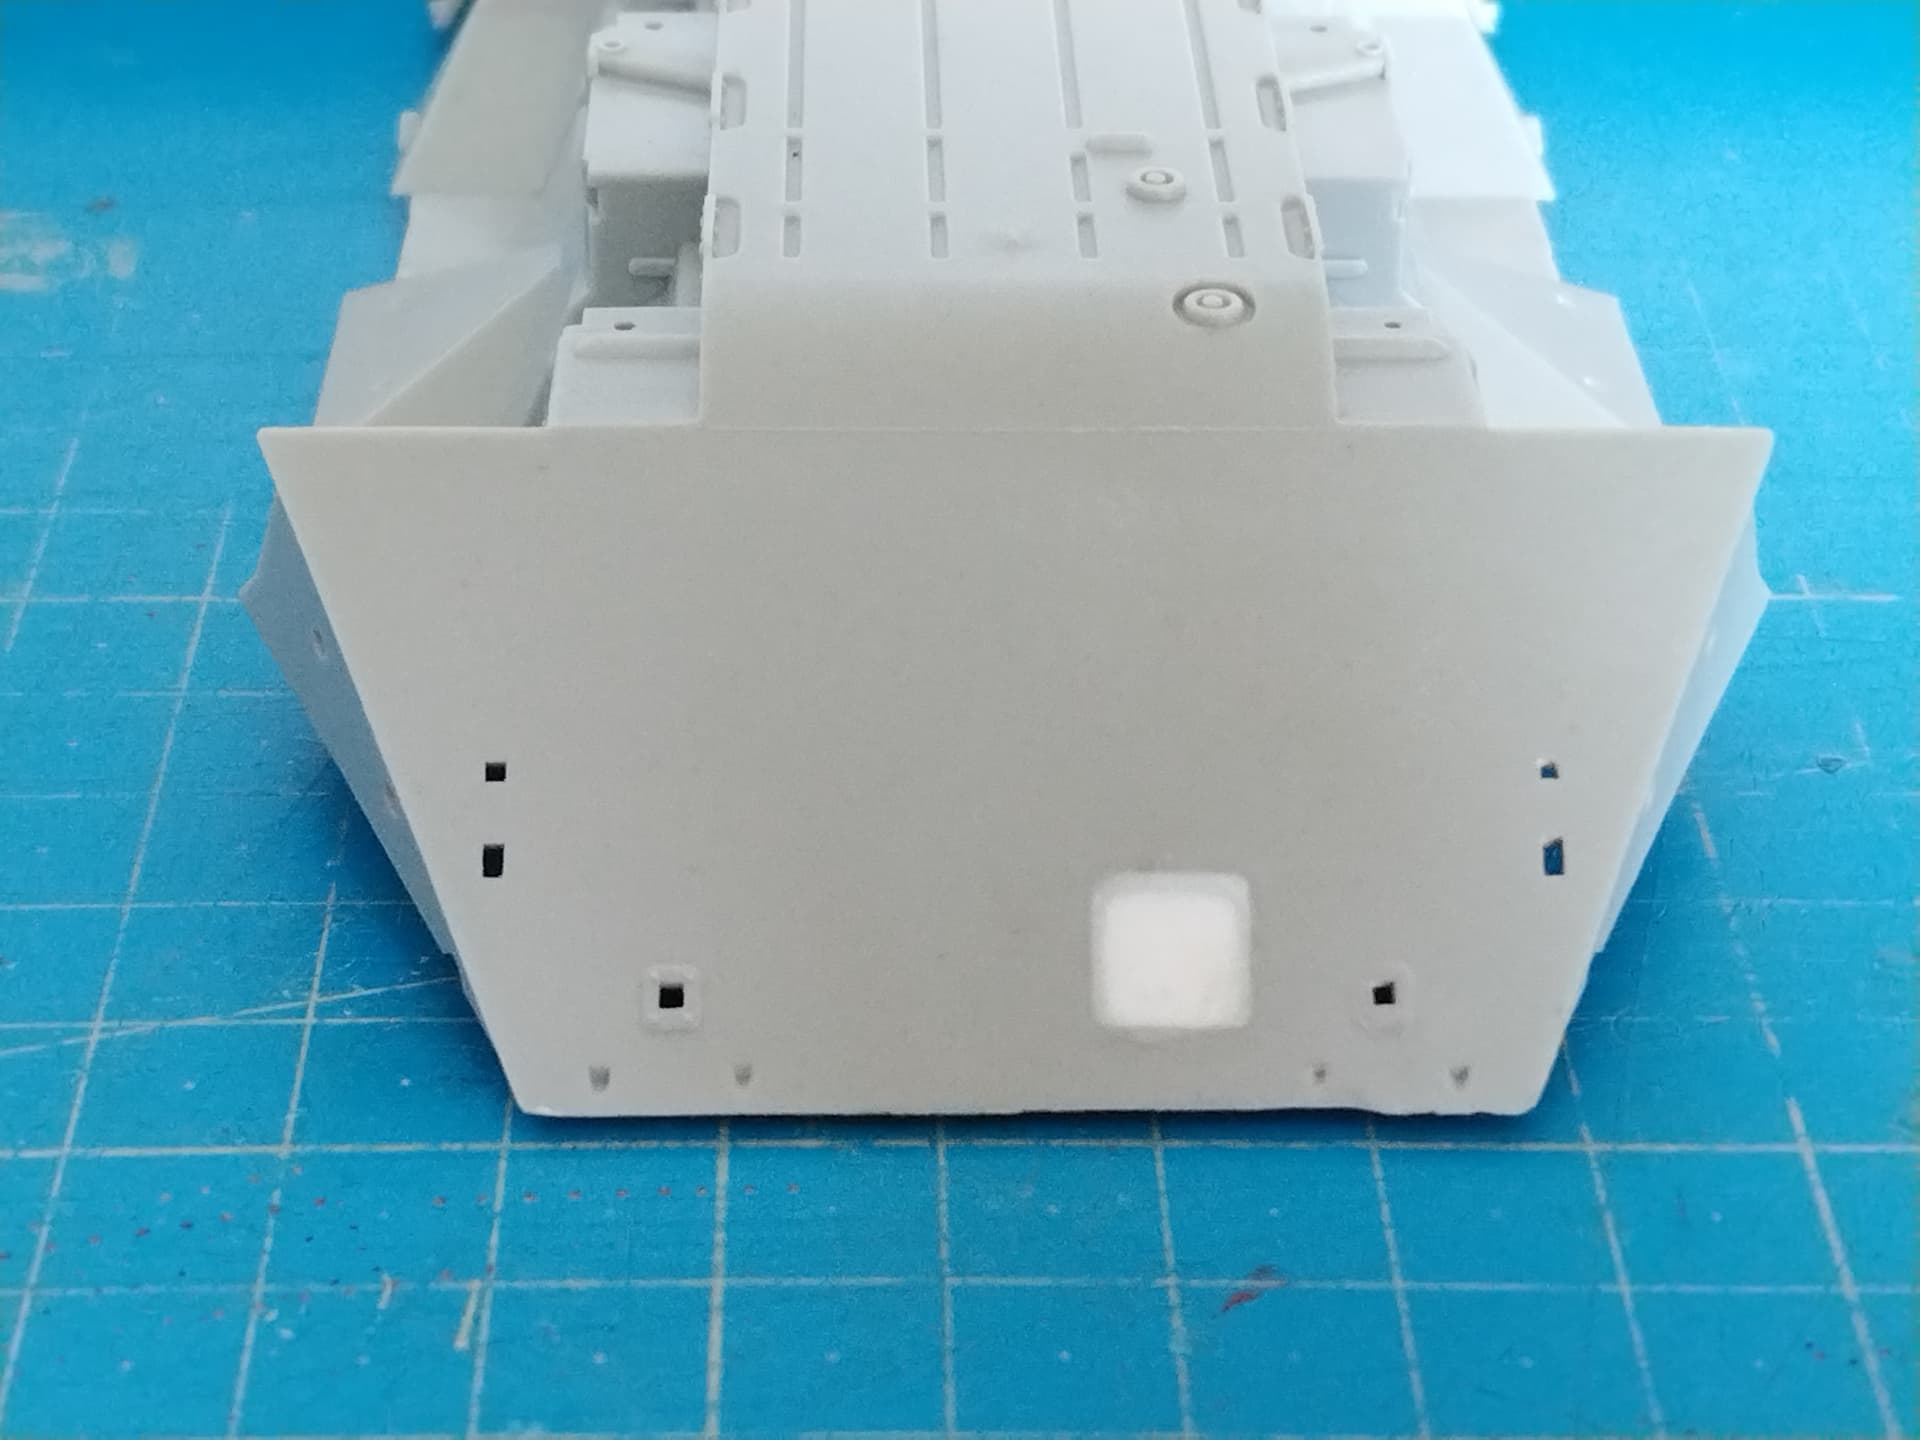
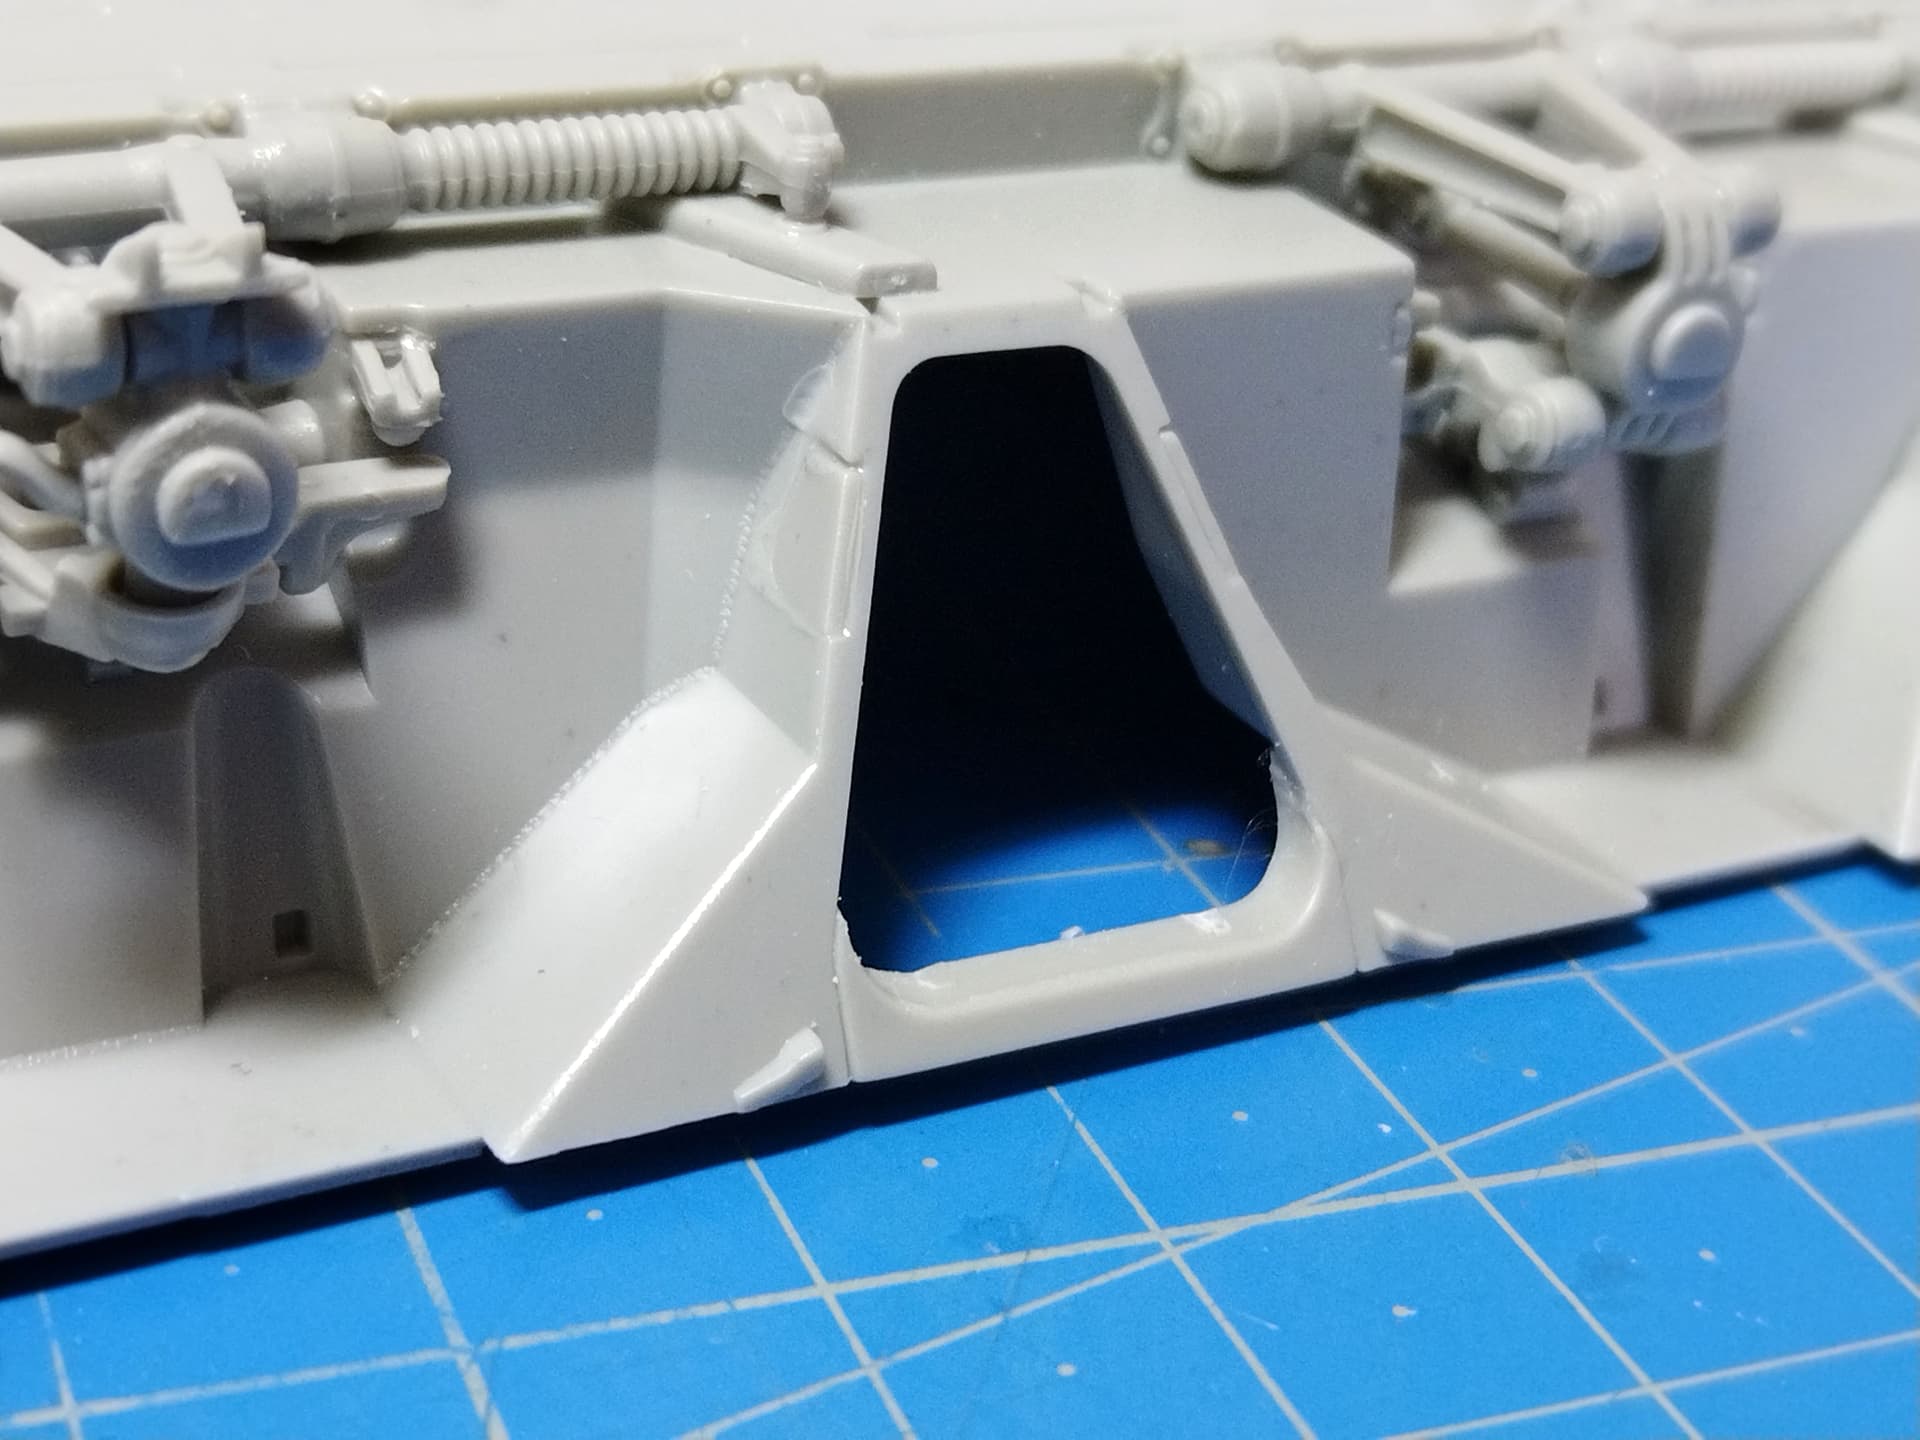
As first I wanted an OOB build however Trumpeter using their BTR-80 lower hull didn’t notice that the 2S23 doesn’t have the winch access hatch at the front. So the first step was to remove the details around and fill the opening.
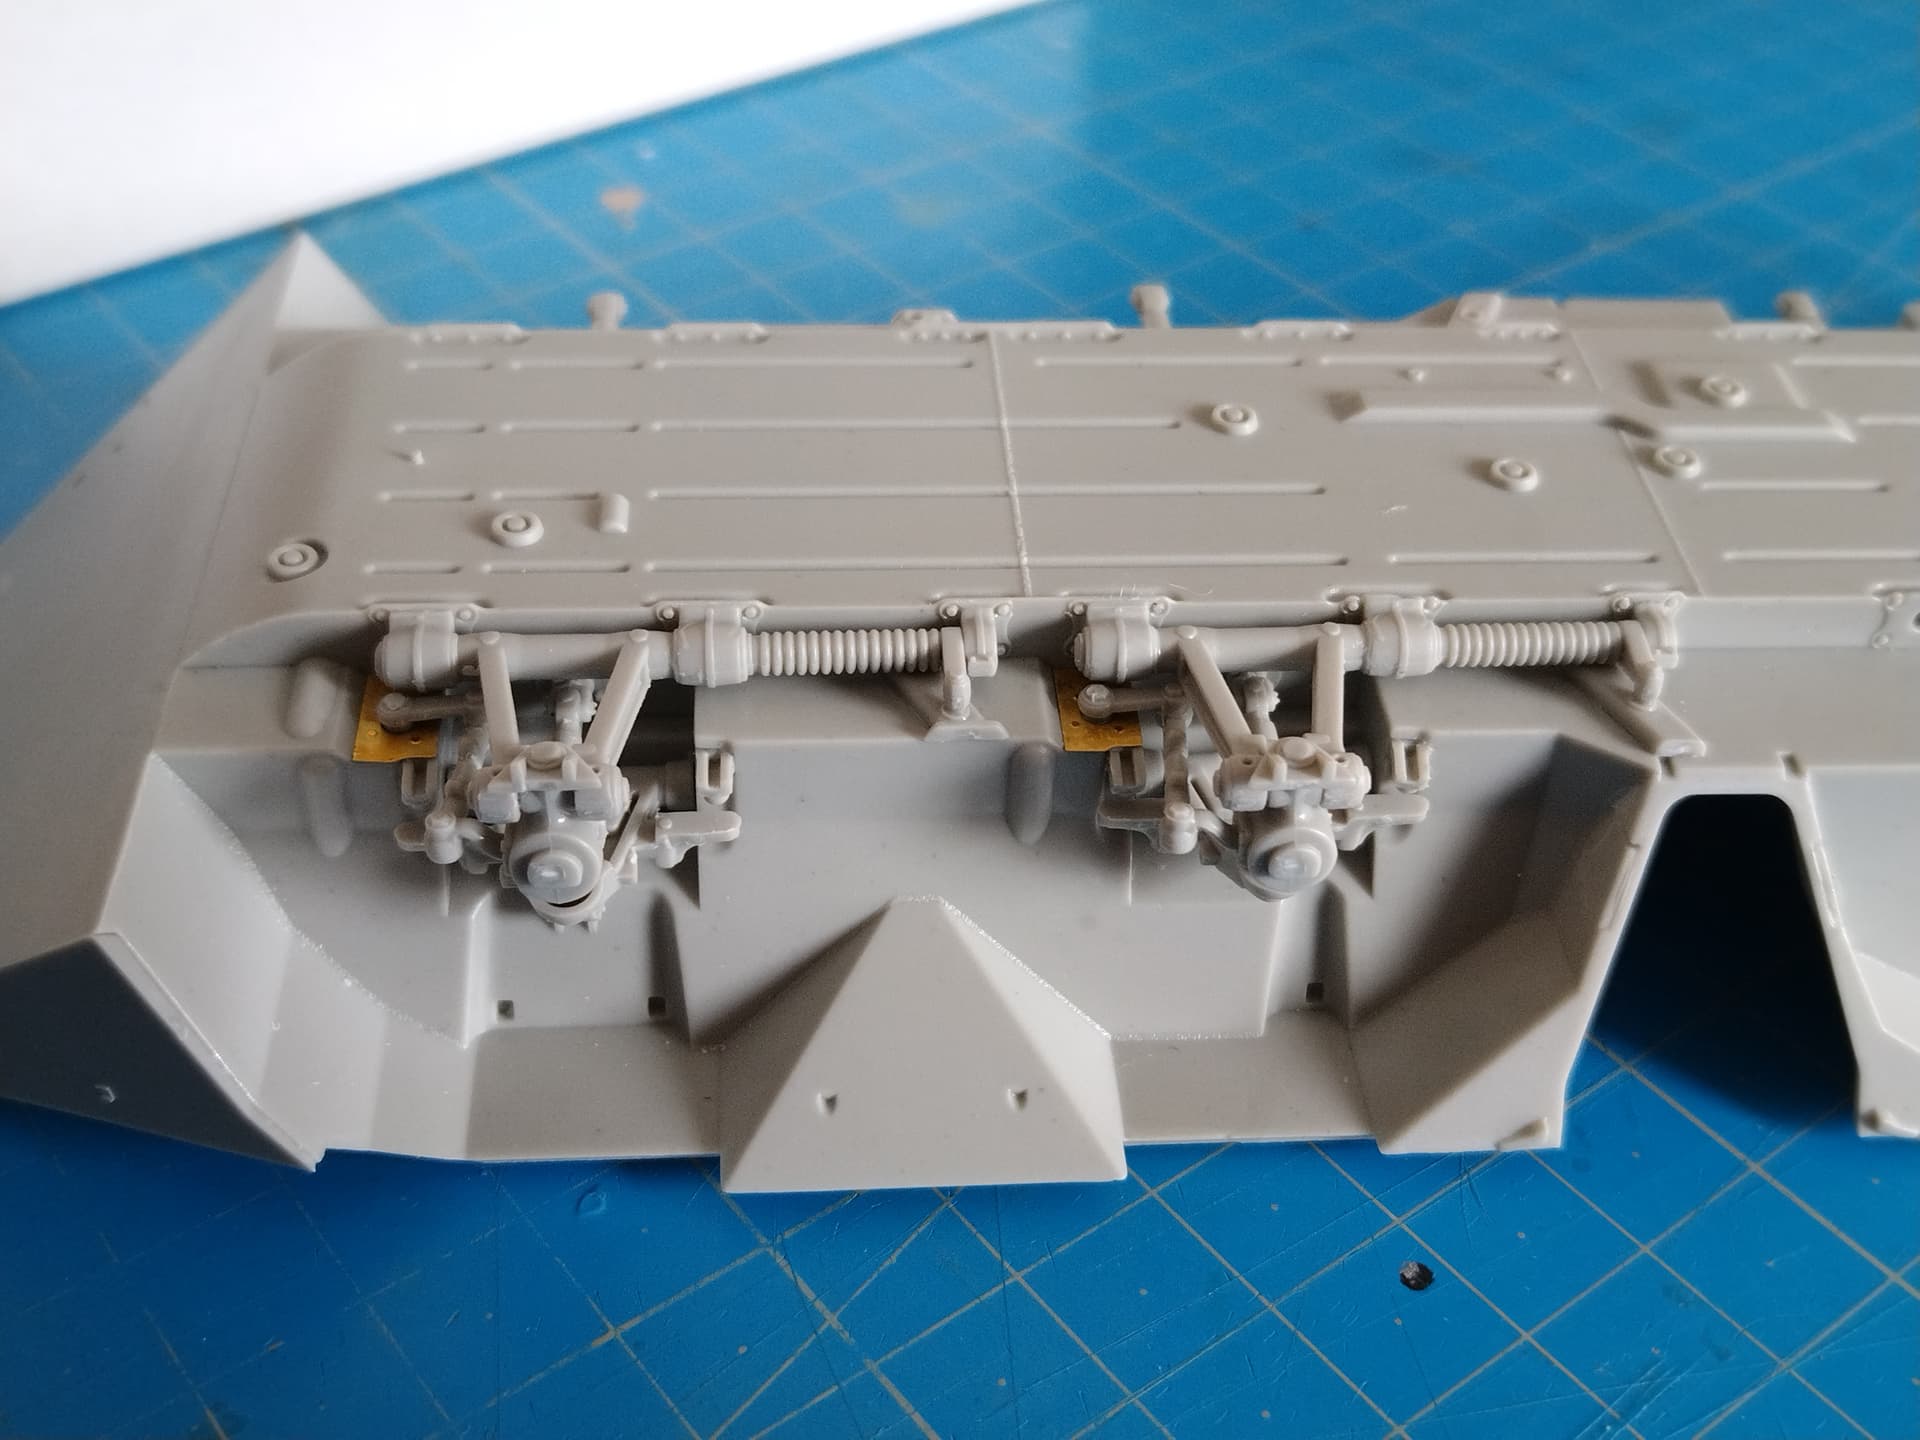
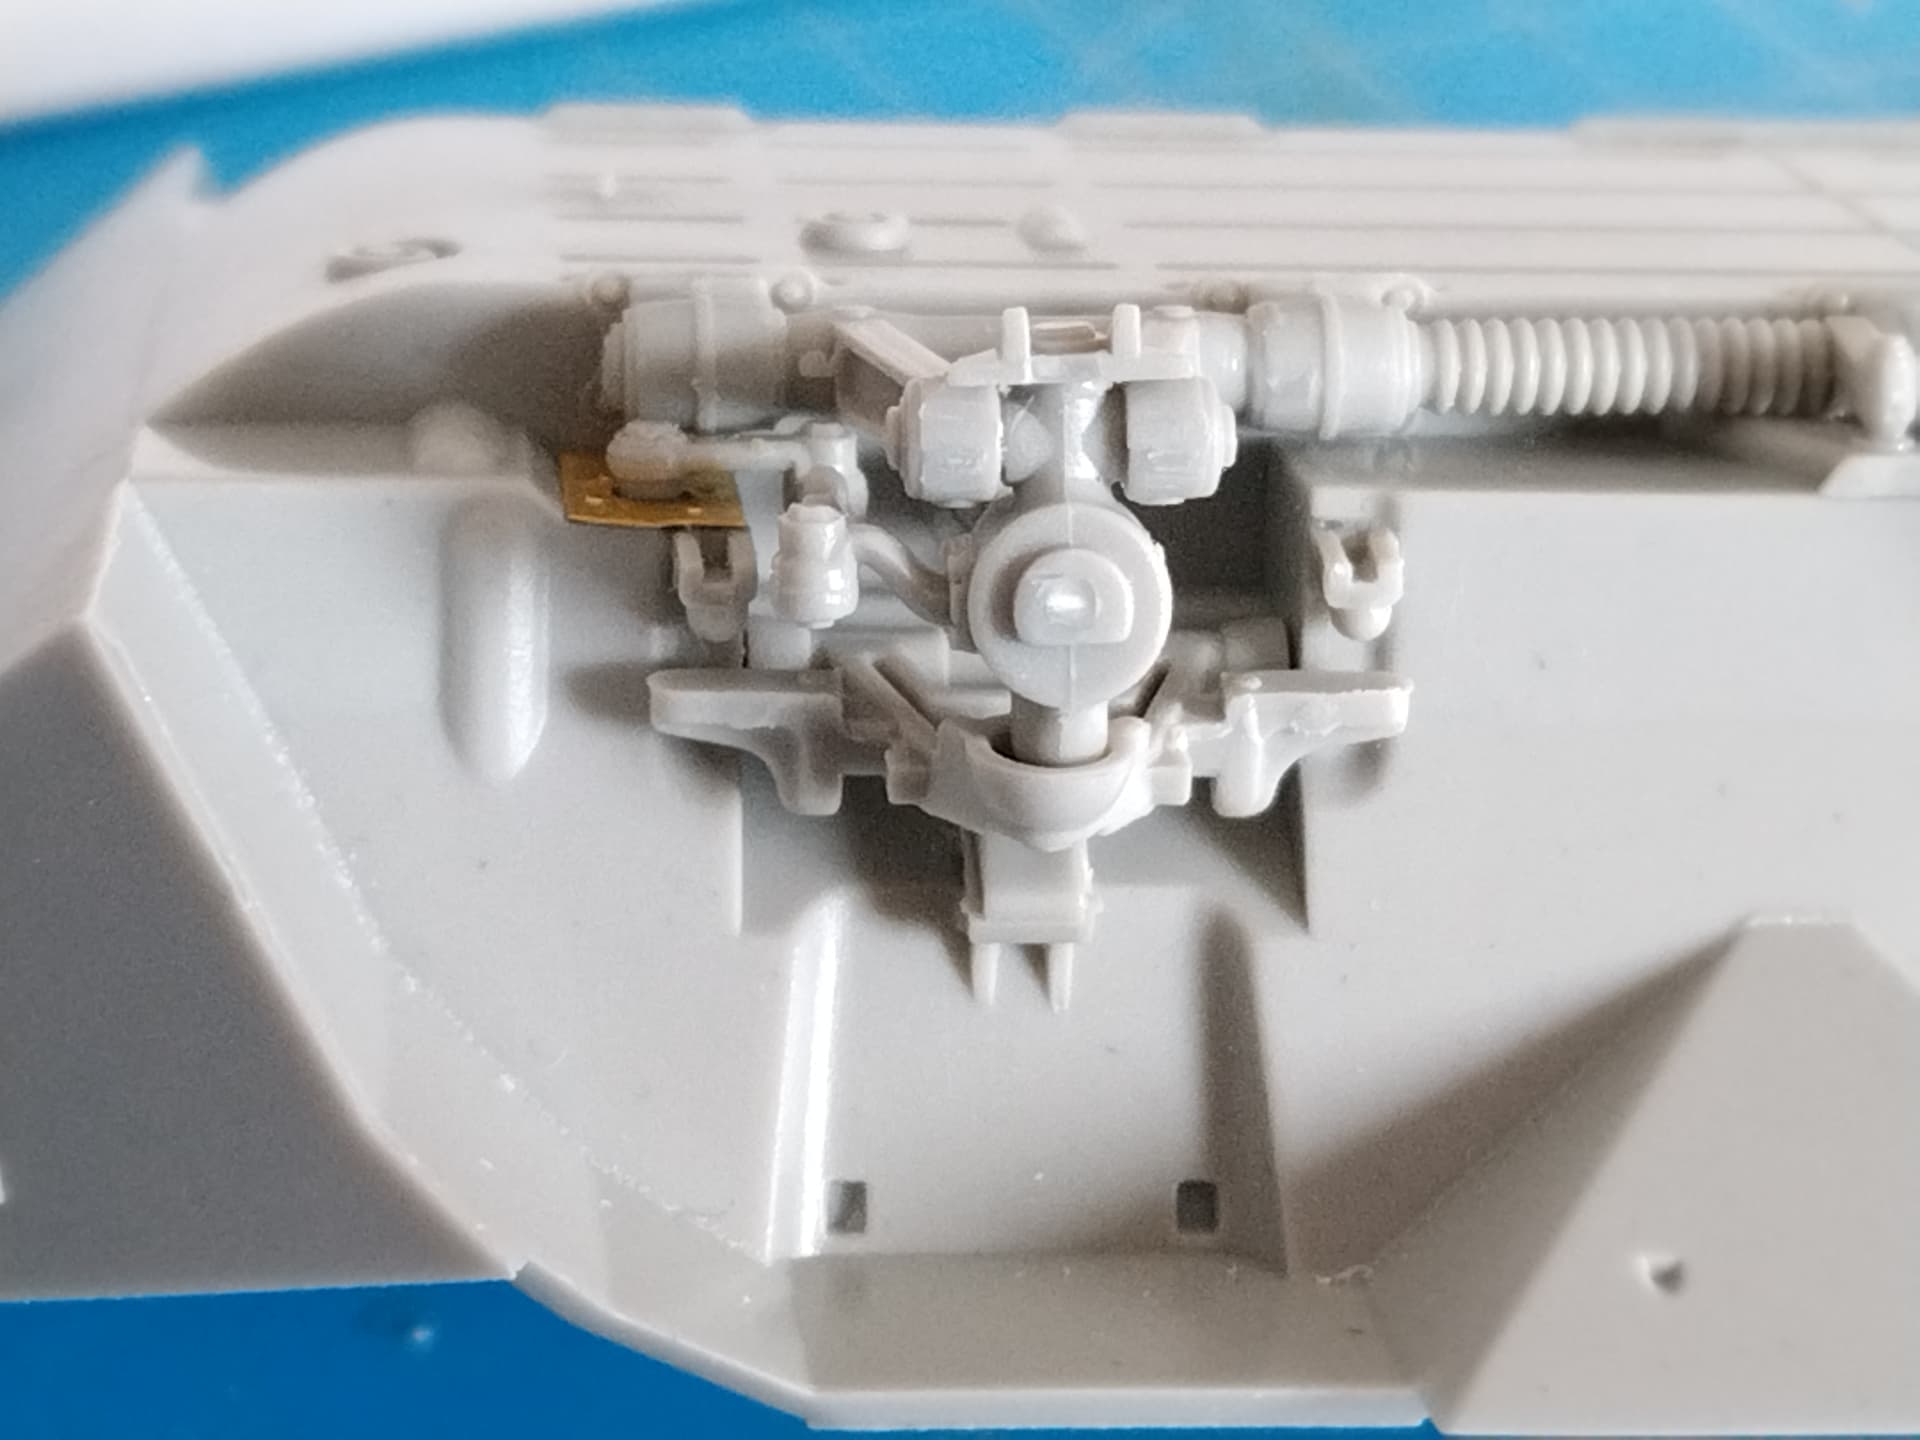
This being done I started the suspension. Unlike what Trumpeter tells you to do, I prefered making one set after another The upper suspension triangle at the bottom on the picture (sorry for the non professional word!) is a bit loose so I feared that gluing them all prior to gluing the lower ones as per the instructions might have generated some wheels alignment issue. Time will tell if I was right.
Olivier
11 Likes
Great start Olivier, will be tagging along as always 
3 Likes
Due to connection issues. I didn’t post pictures lately.
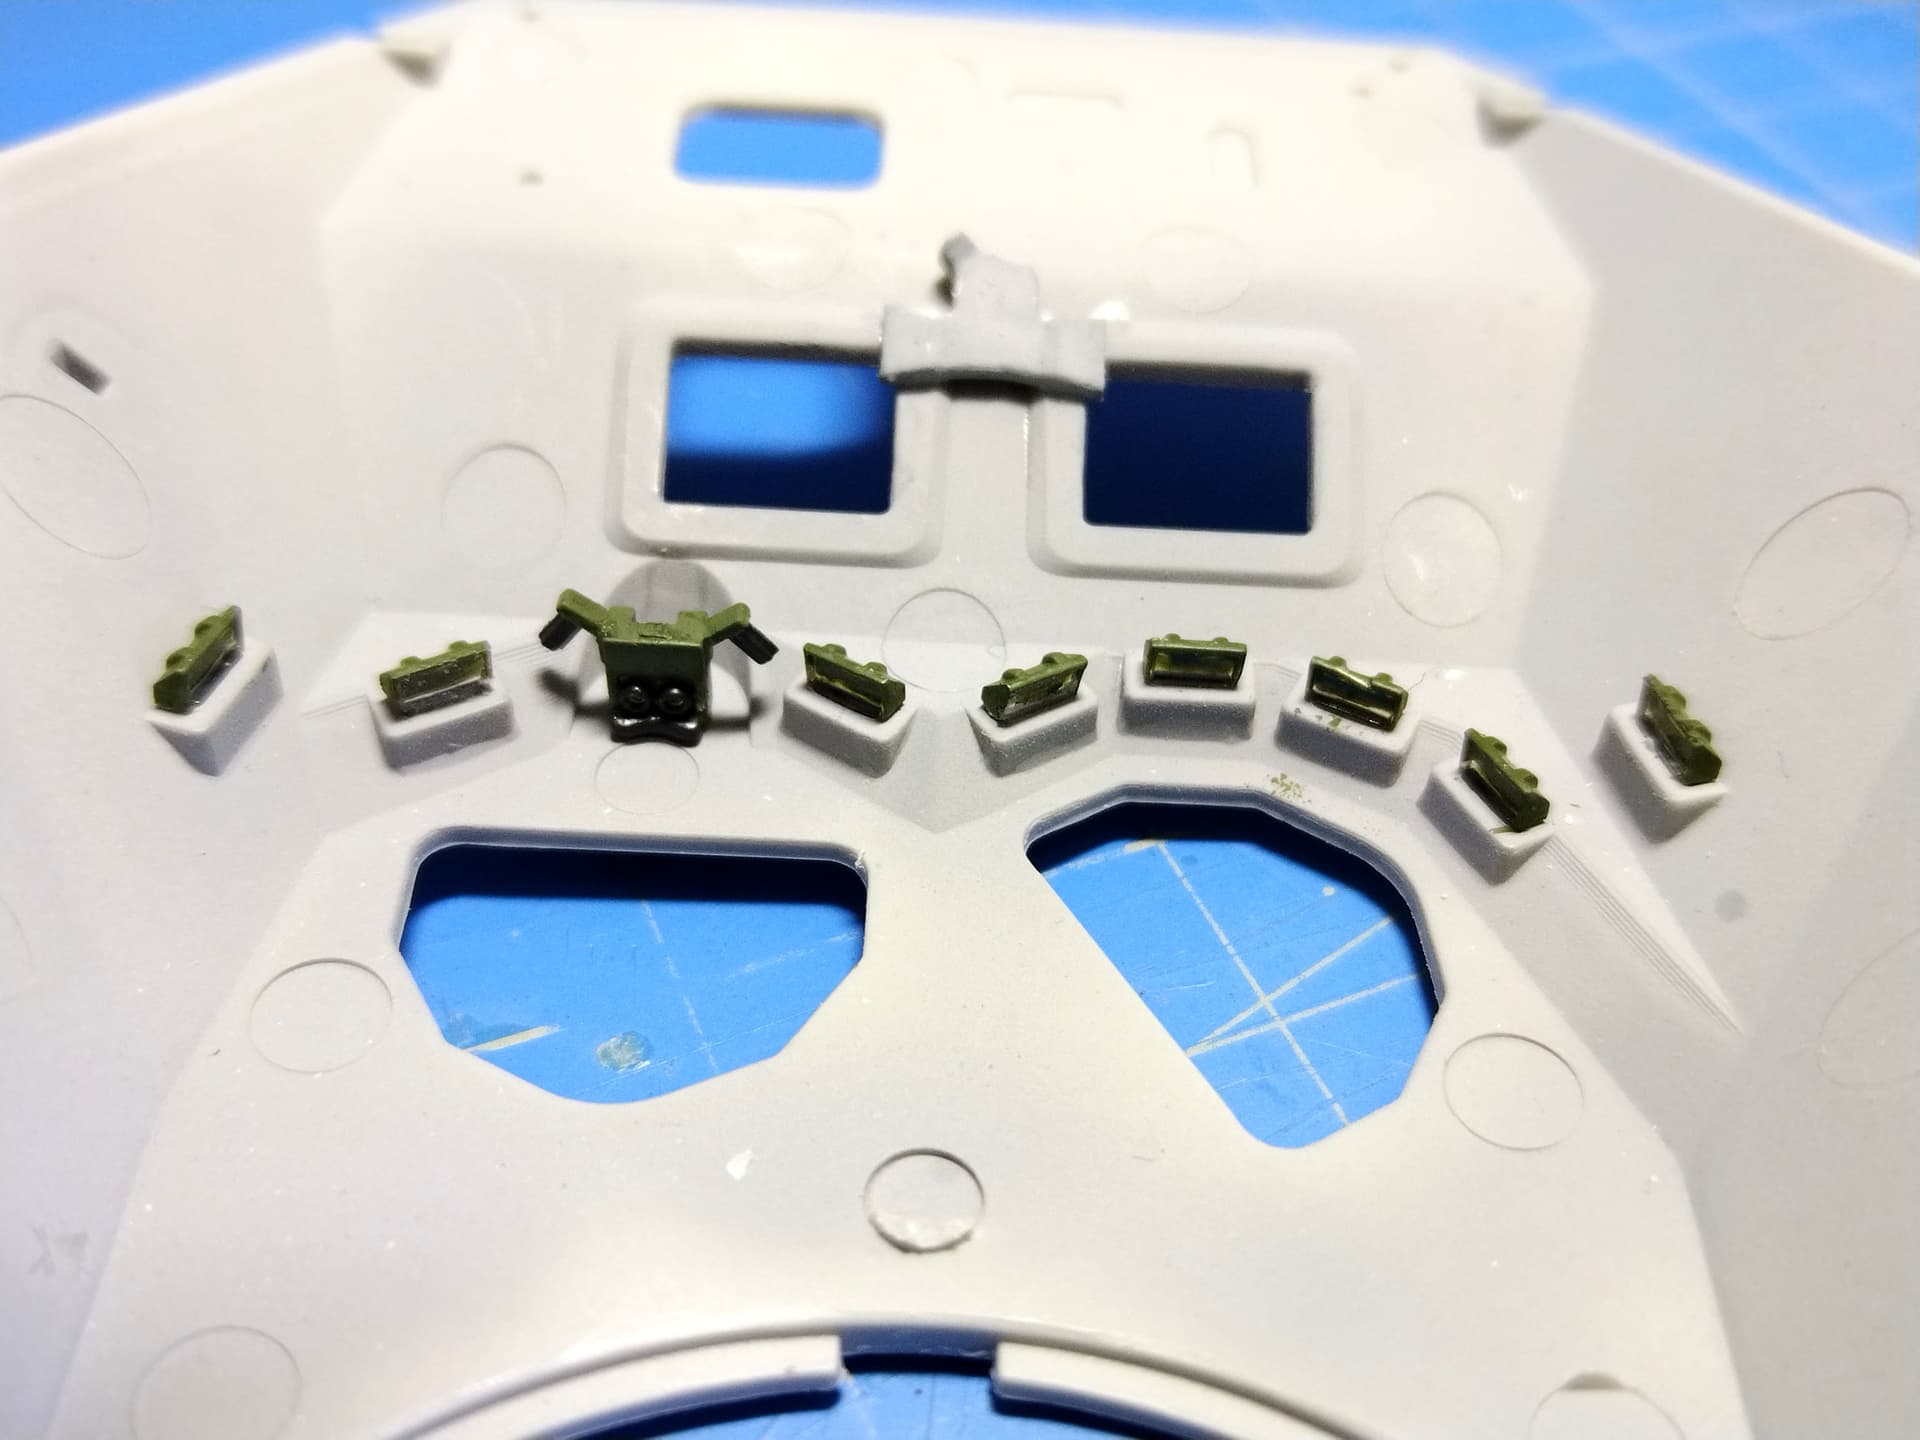
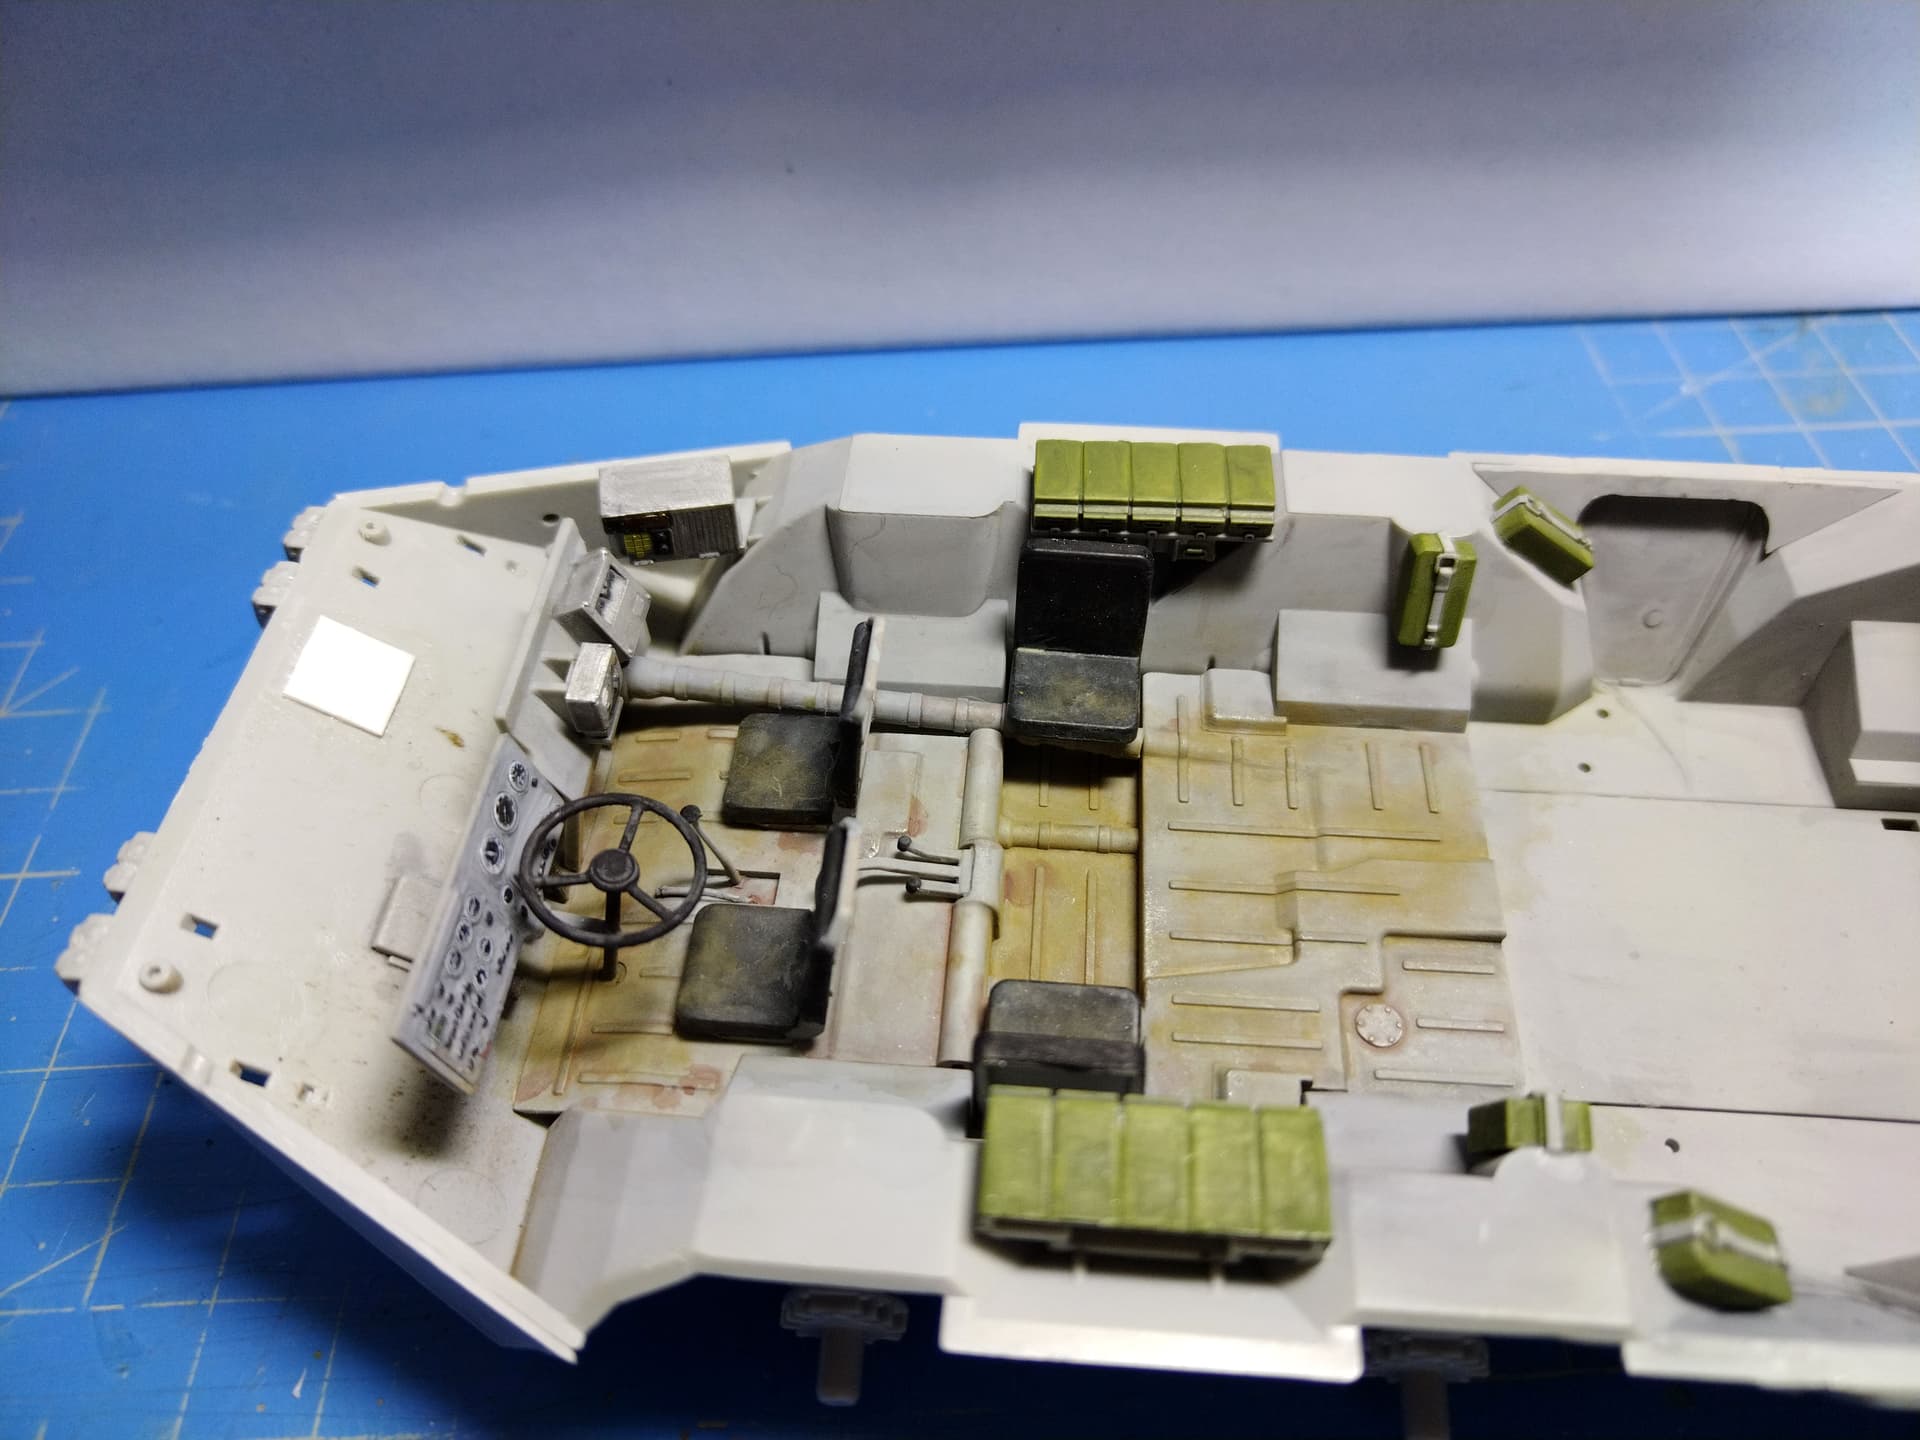
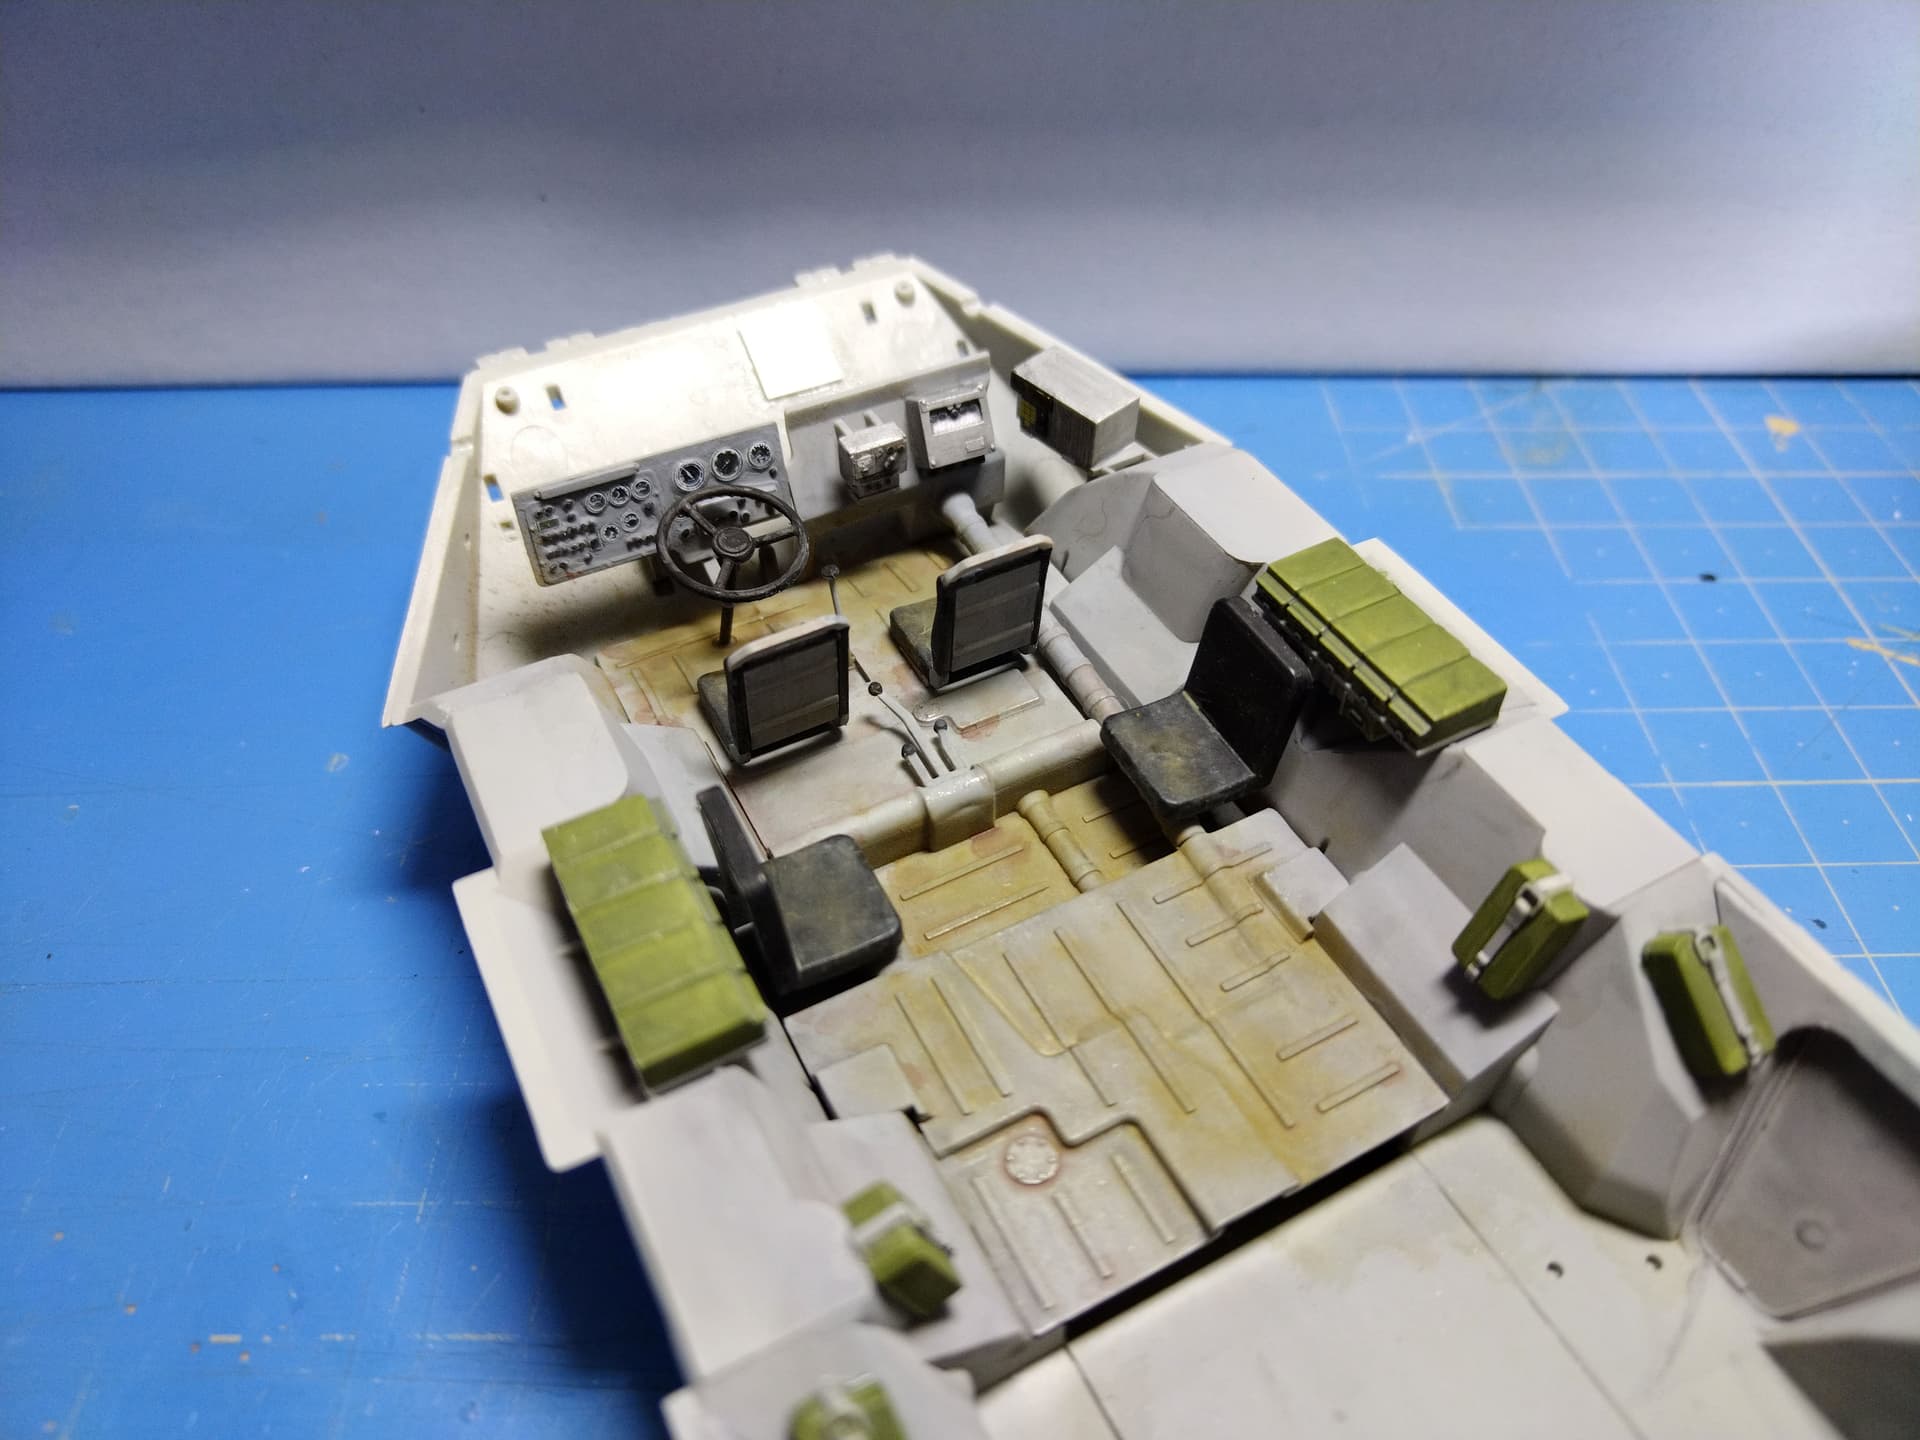
I managed to finish the suspension and tackle the basic interior. Only the front part is issued by Trumpeter. Anyway very little will remain visible through the hatches.
Olivier
6 Likes
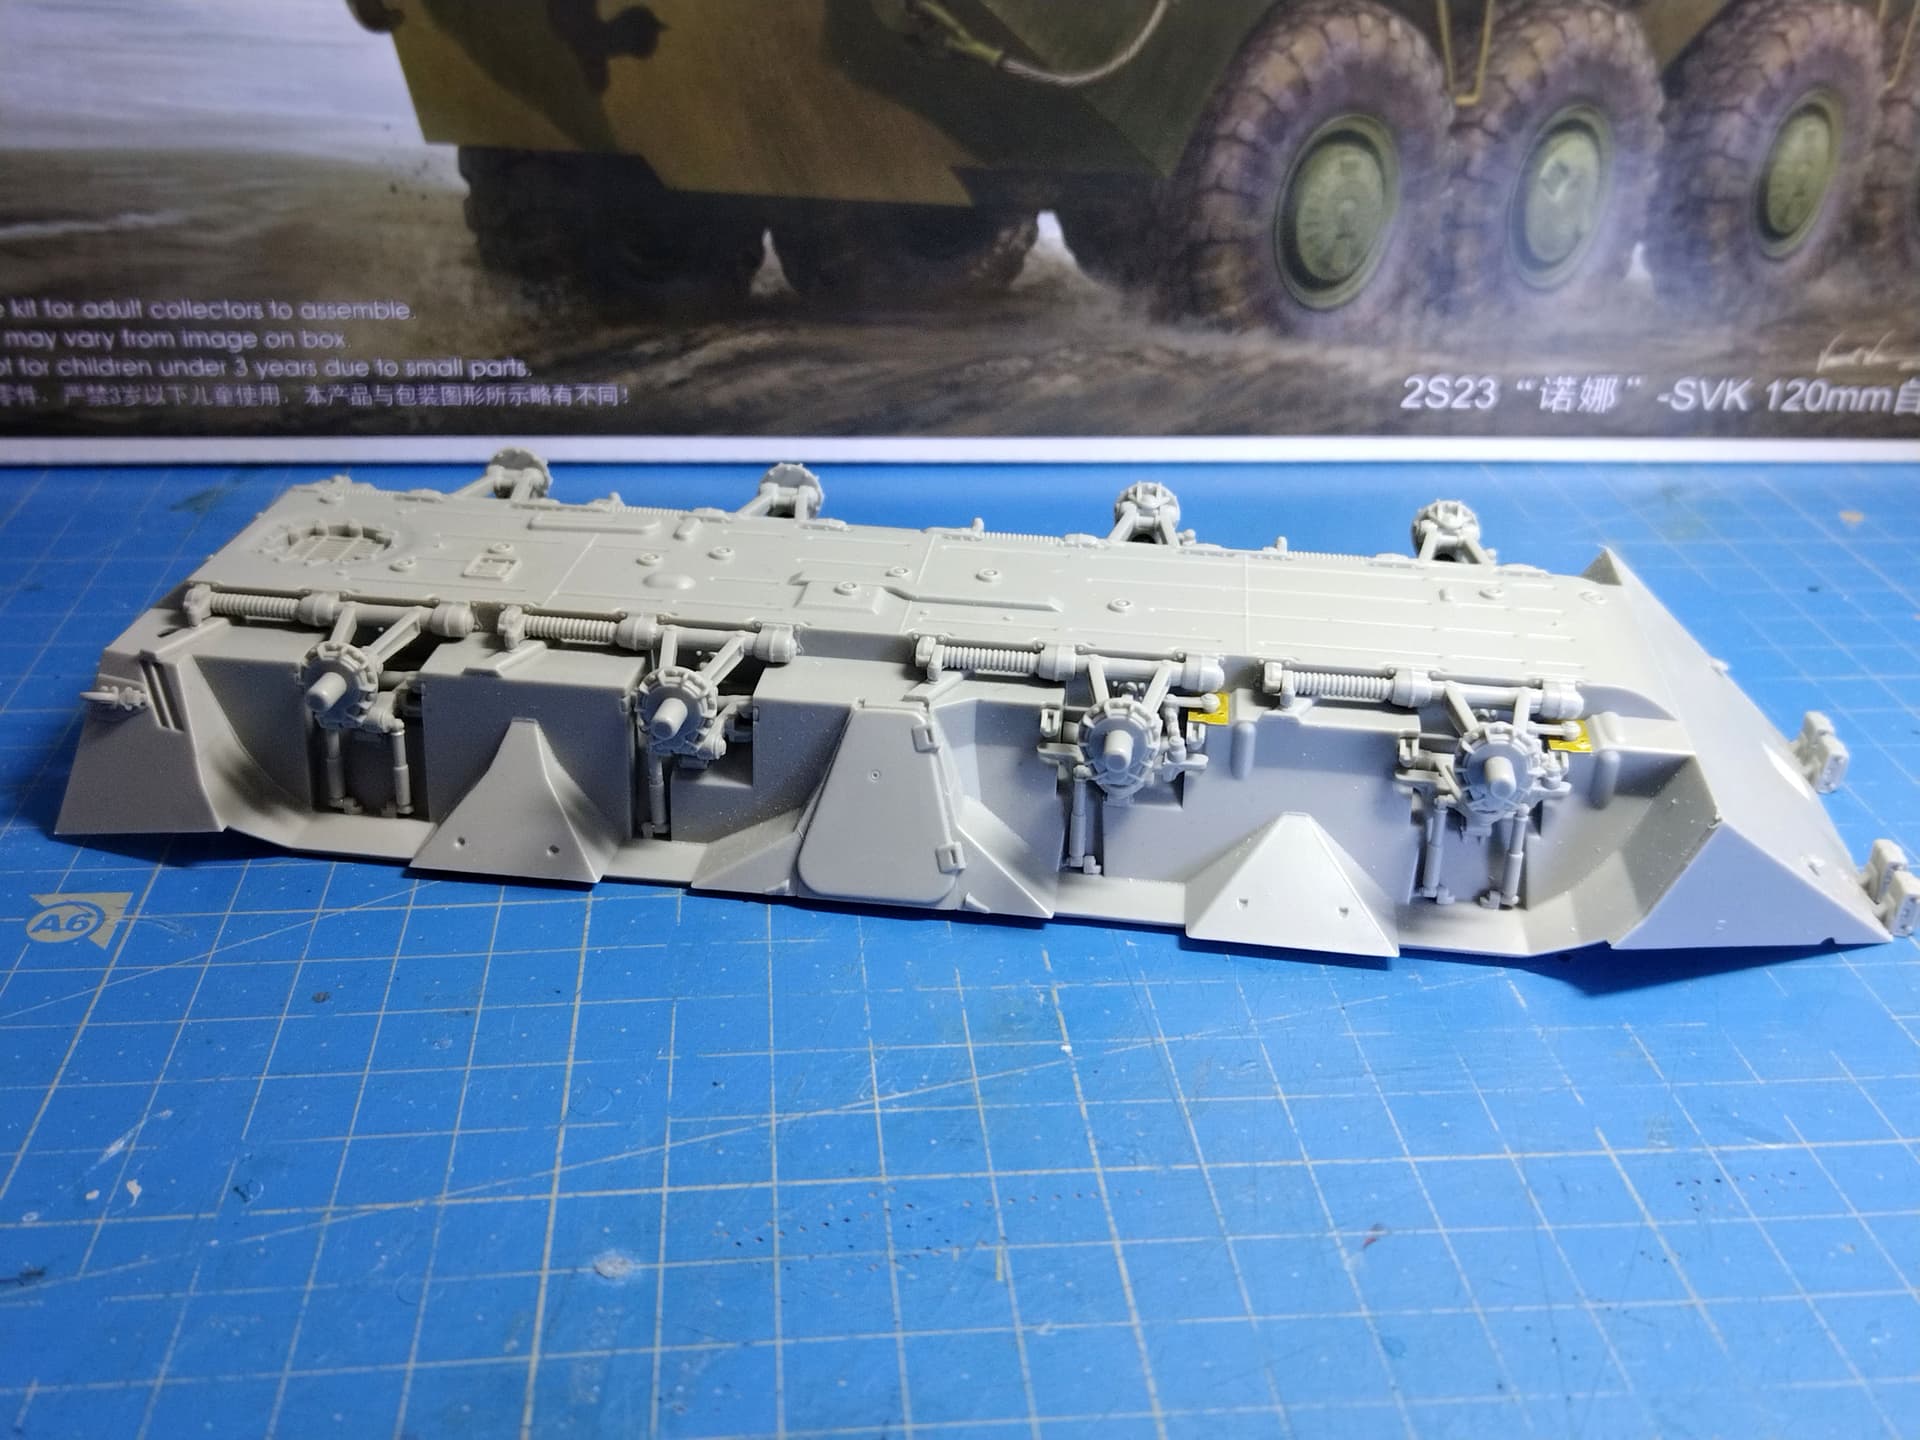
A few days ago I assembled the whole hull unlike what Trumpeter asks you to do. I think it easier to glue the details on a complete hull rather than on separate parts to assemble later.
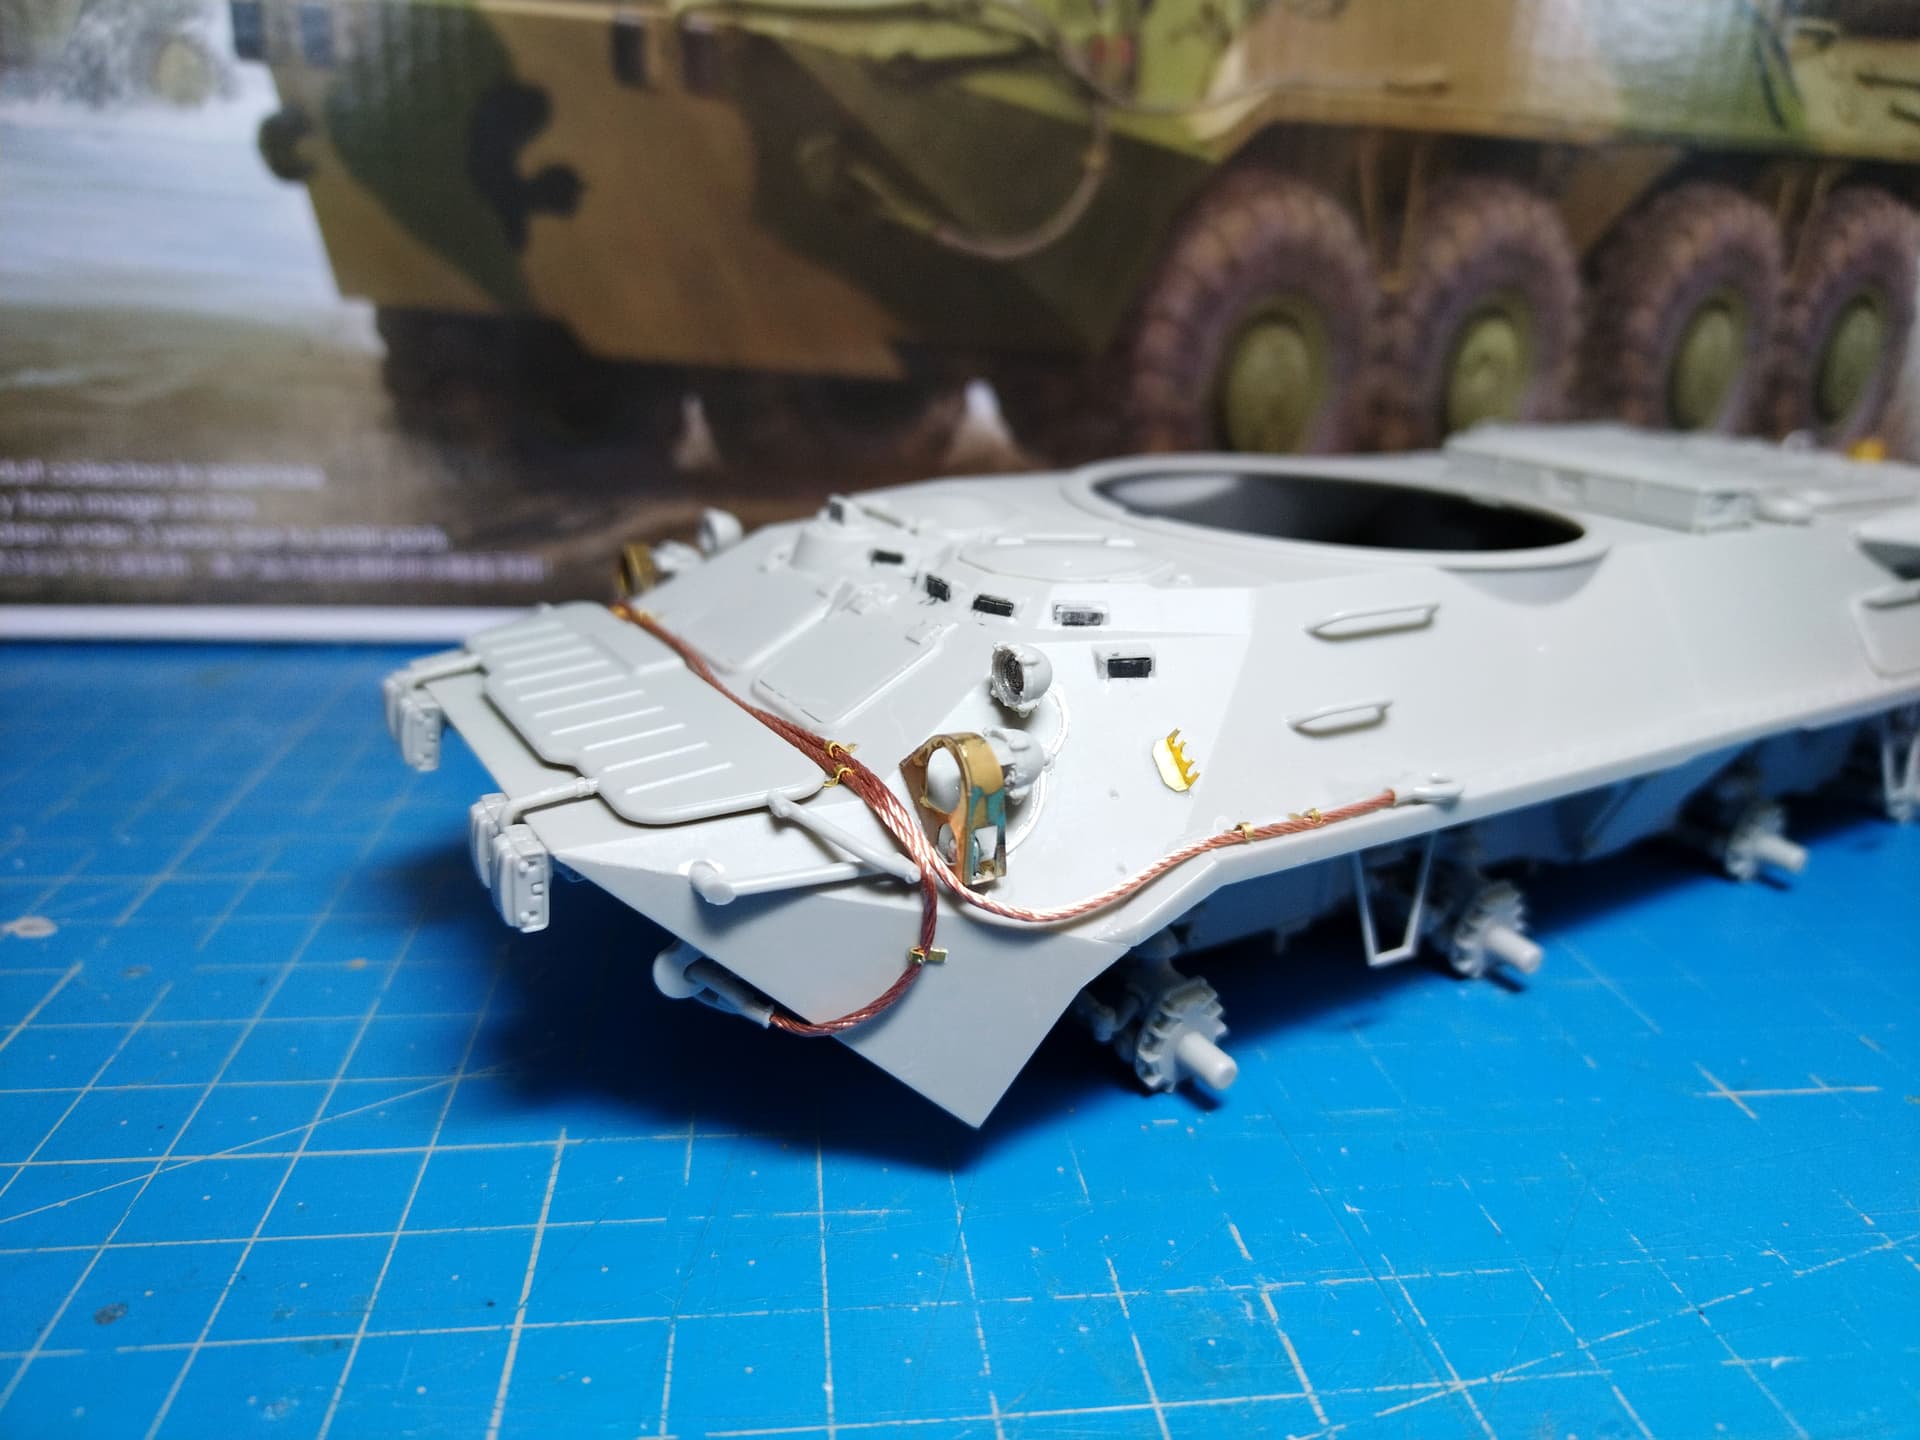
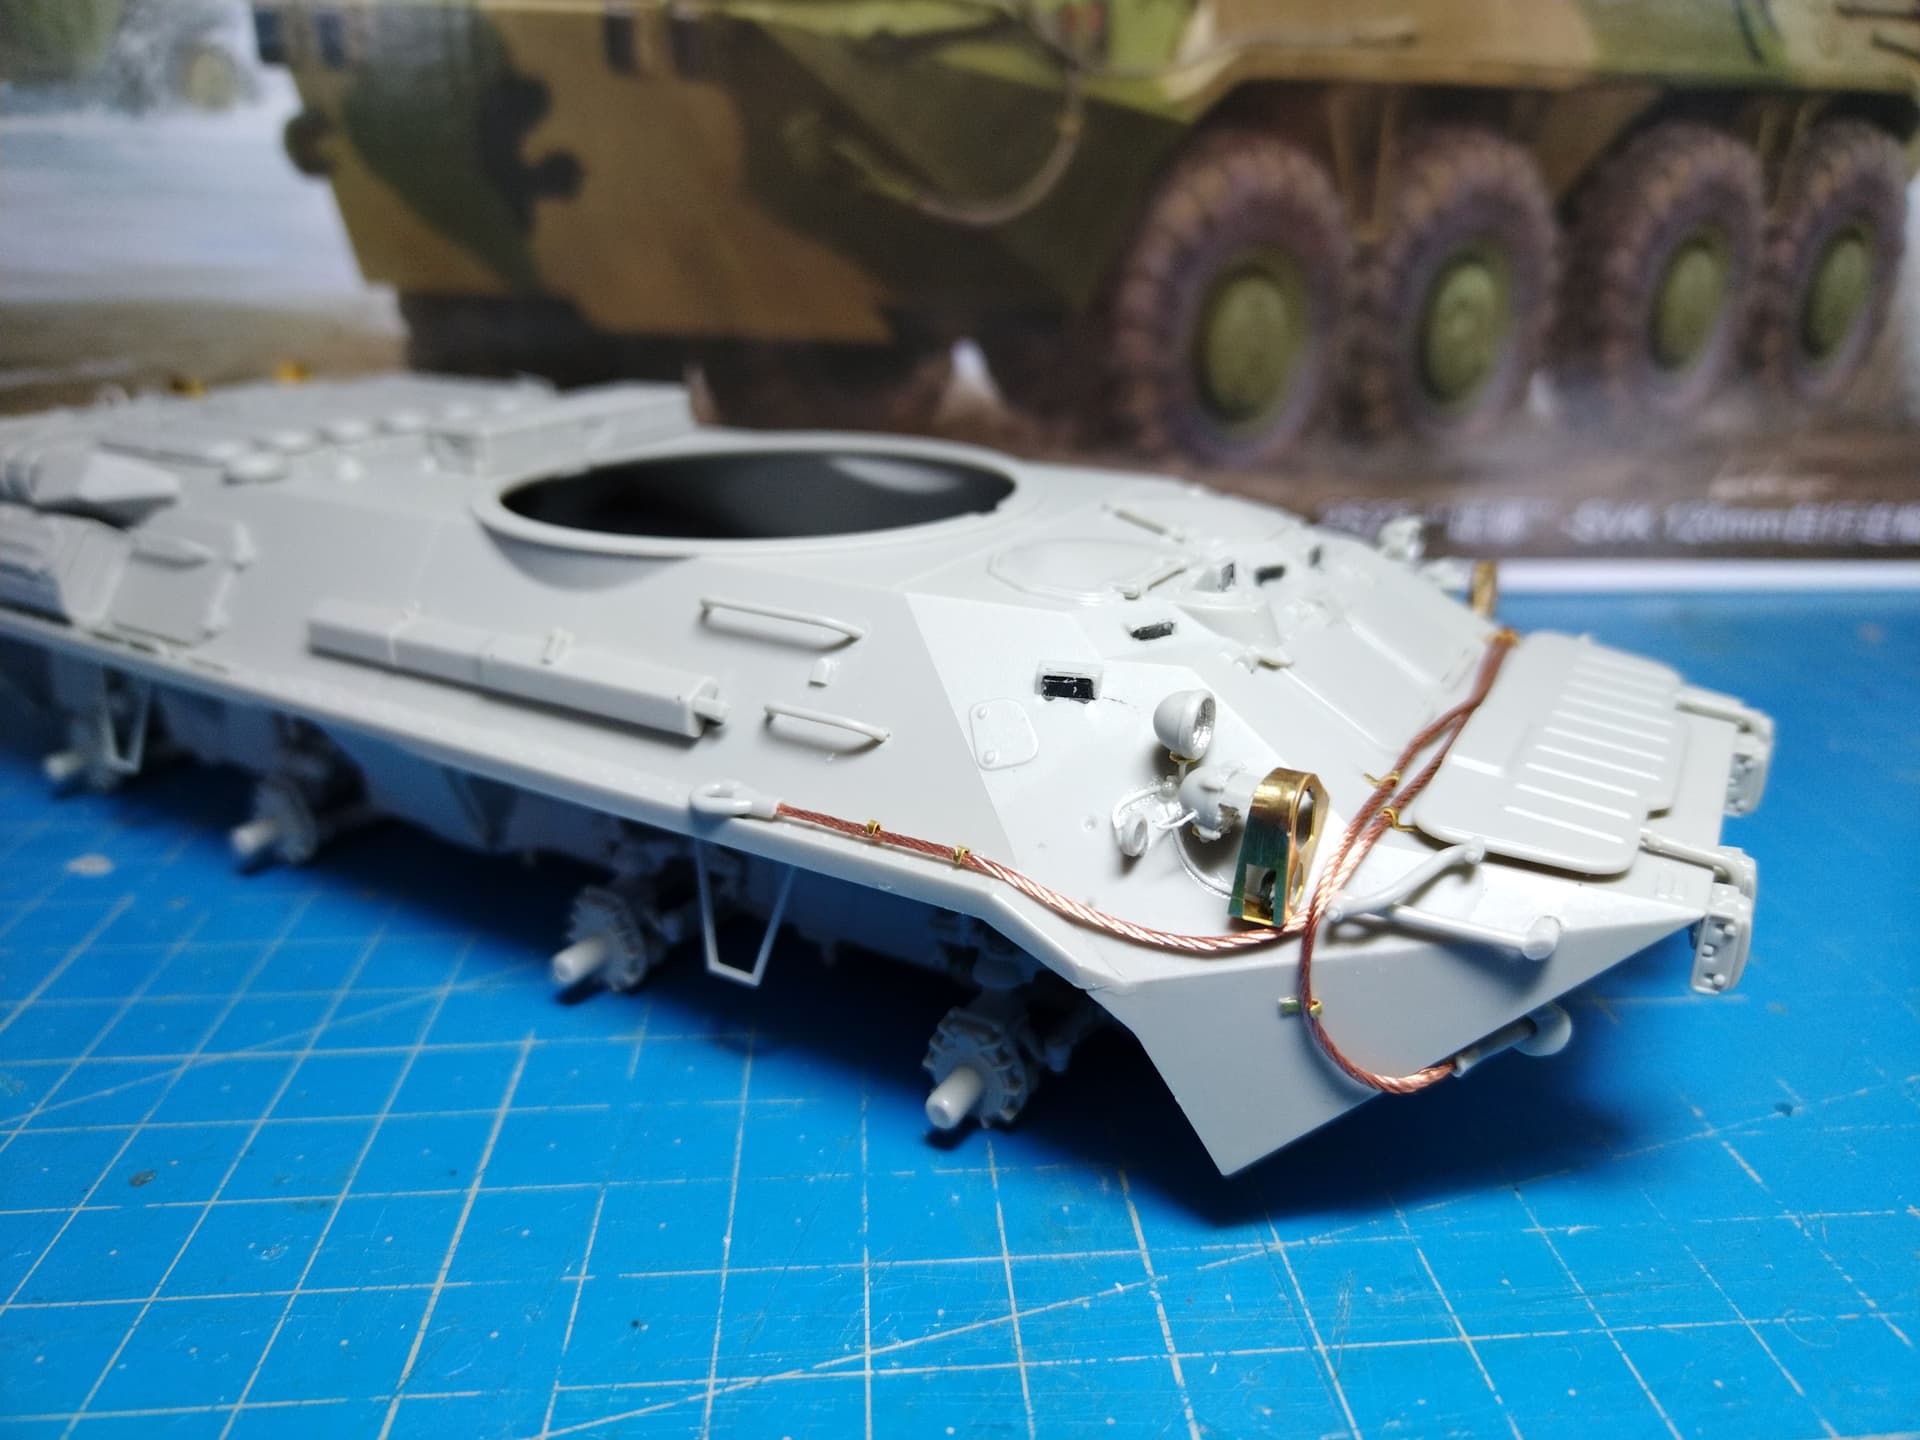
I’ve erased the conduits for the lights power cords as they were wrong. I replaced them with bits of 0.3 and 0.4 mm styrene rods. Shaping the PE protection has been tedious. I still have one more to do.
The turning lights are clear parts. I painted them clear orange on both faces. Then the rear one has been painted green. The front clear part is protected by some blu-tac till the model is painted.
Olivier
5 Likes
That looks good Olivier, very neat… also a lot more realistic
2 Likes
Lovely bit of detailing there Olivier!
2 Likes
Thank you all for the kind words.
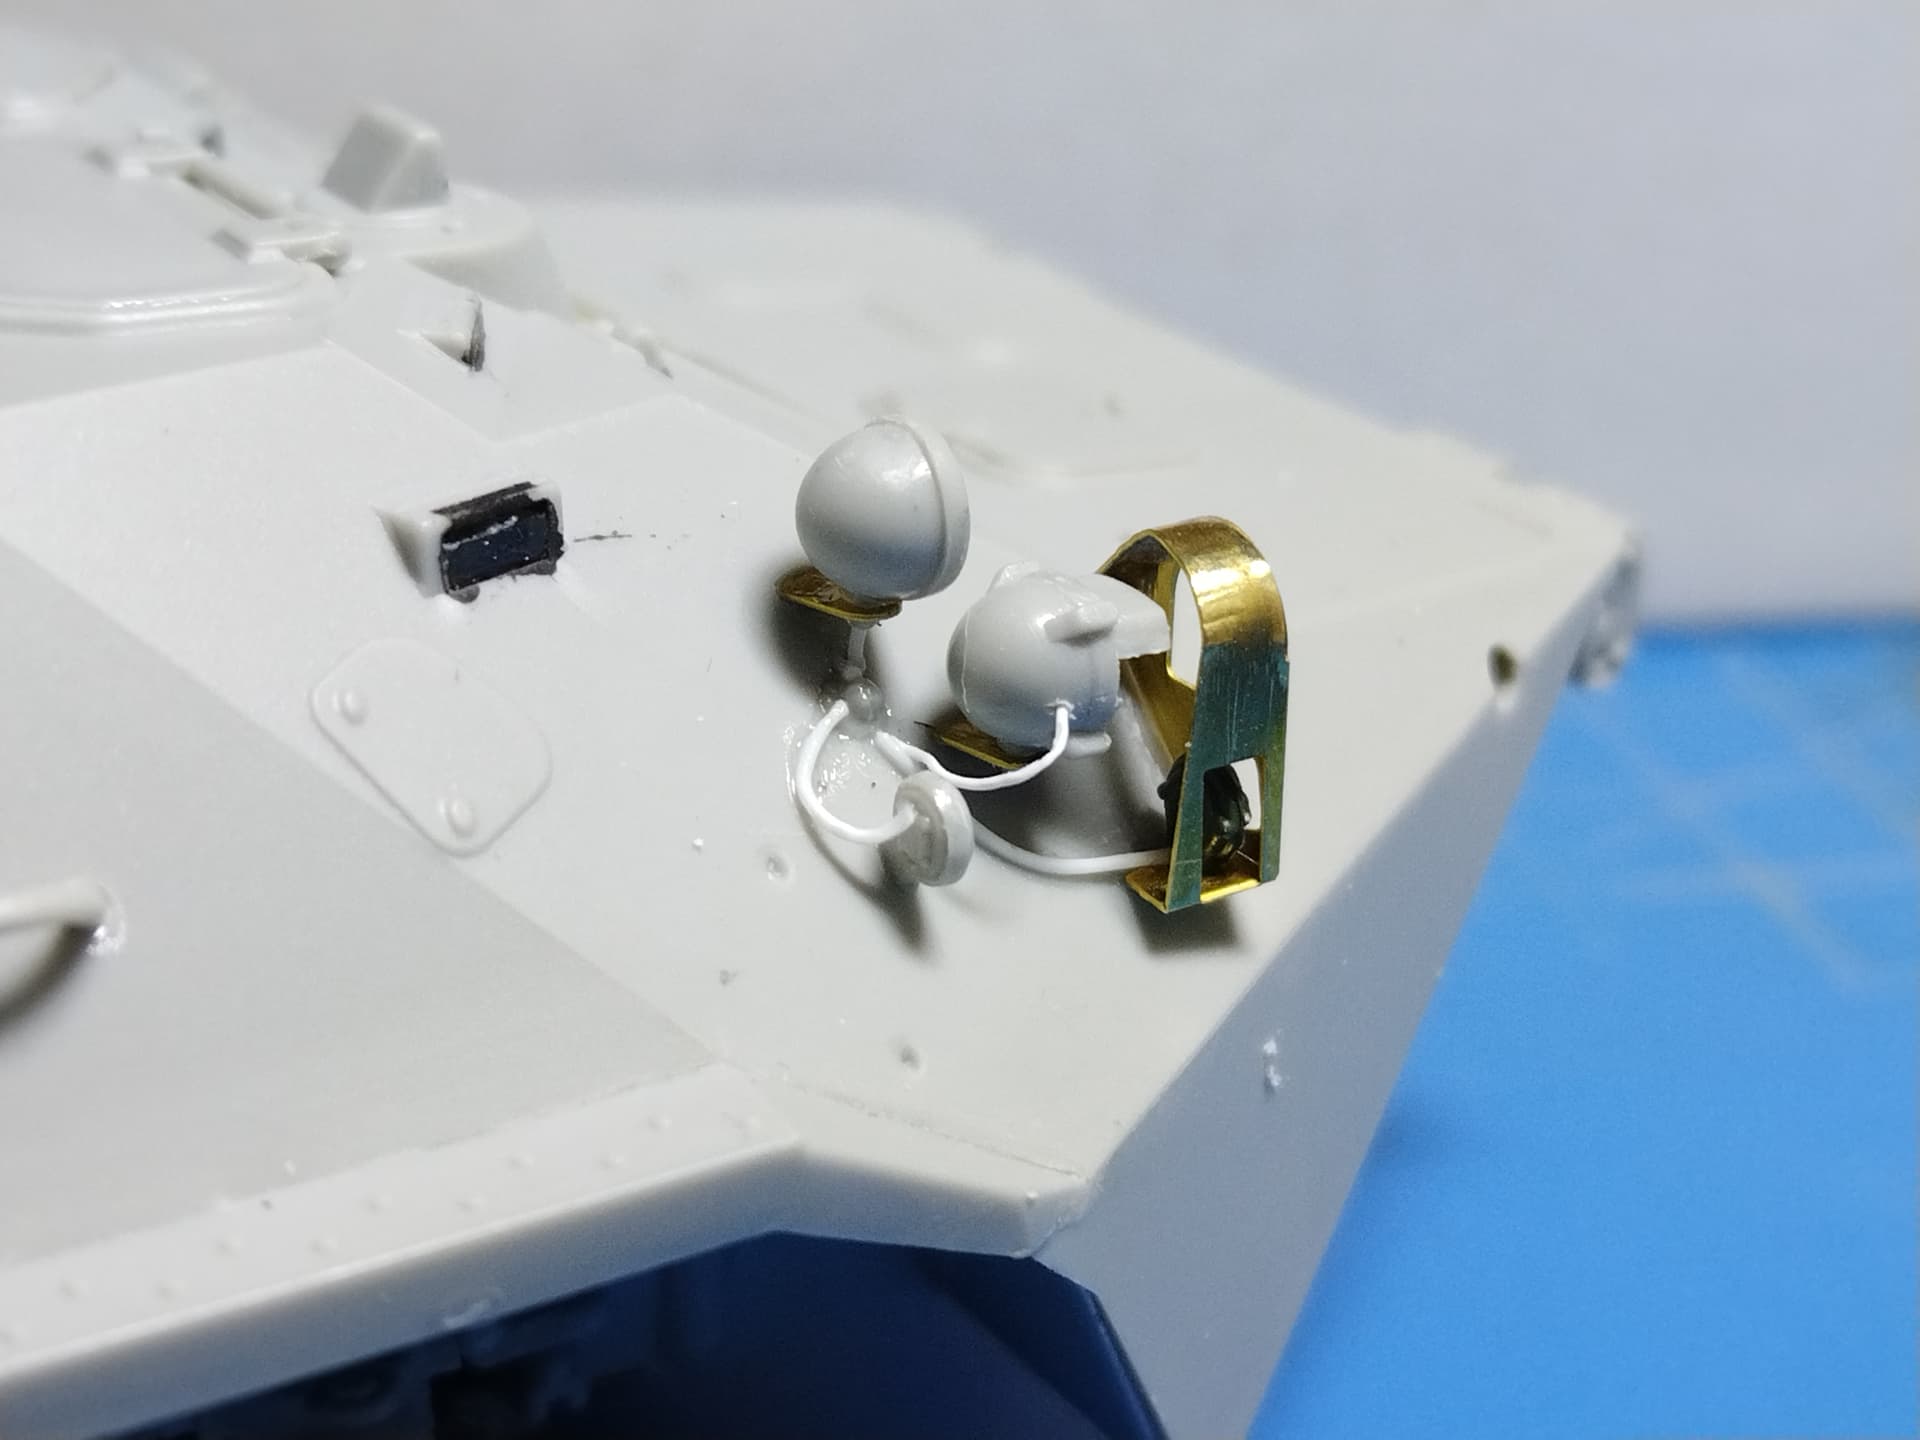
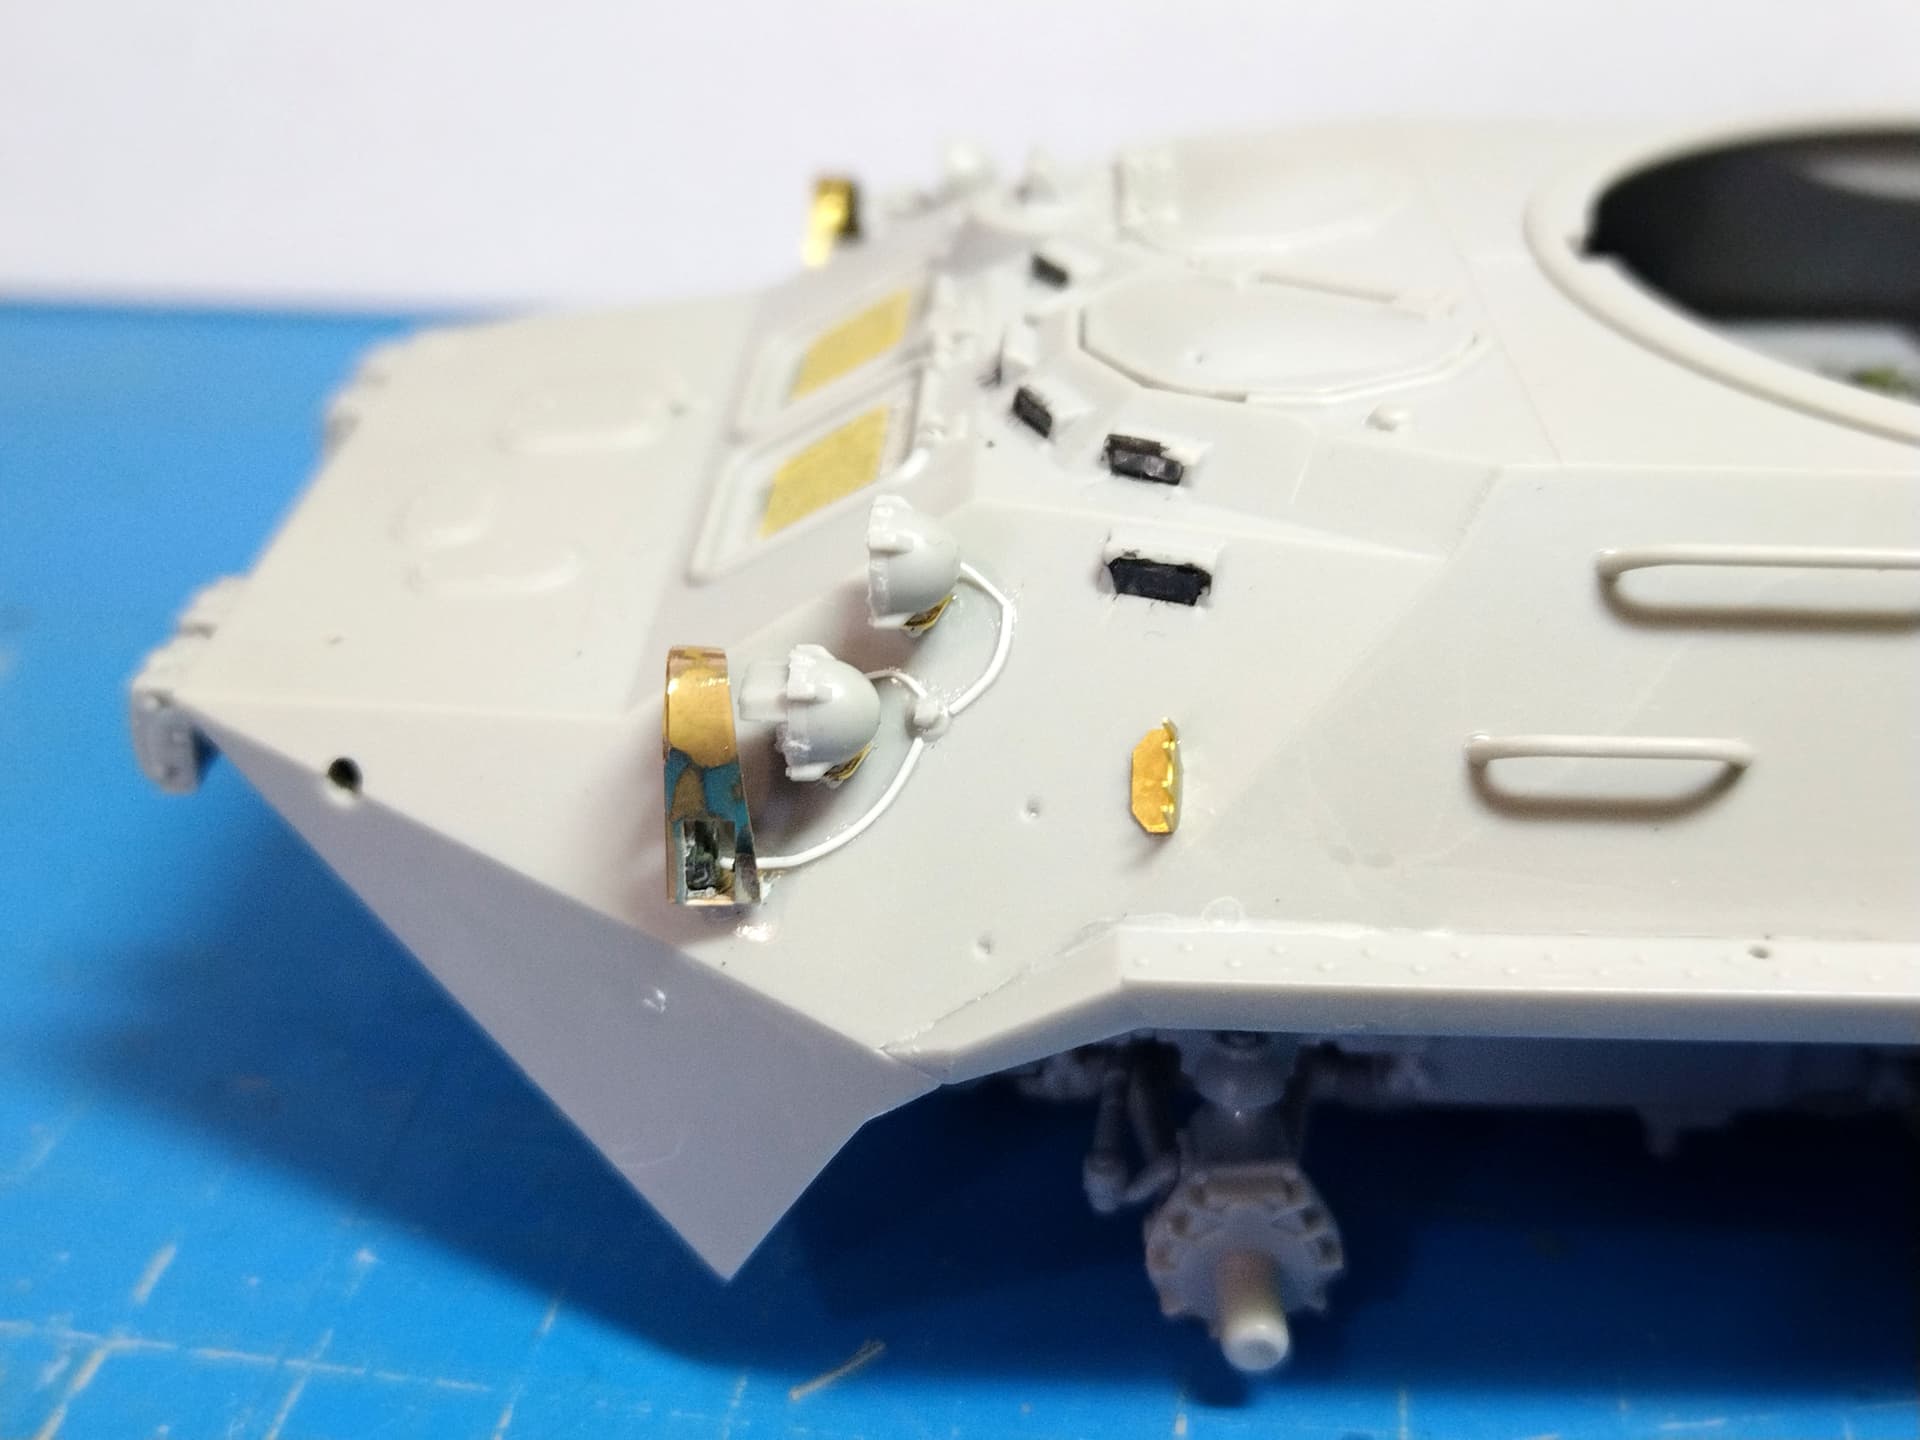
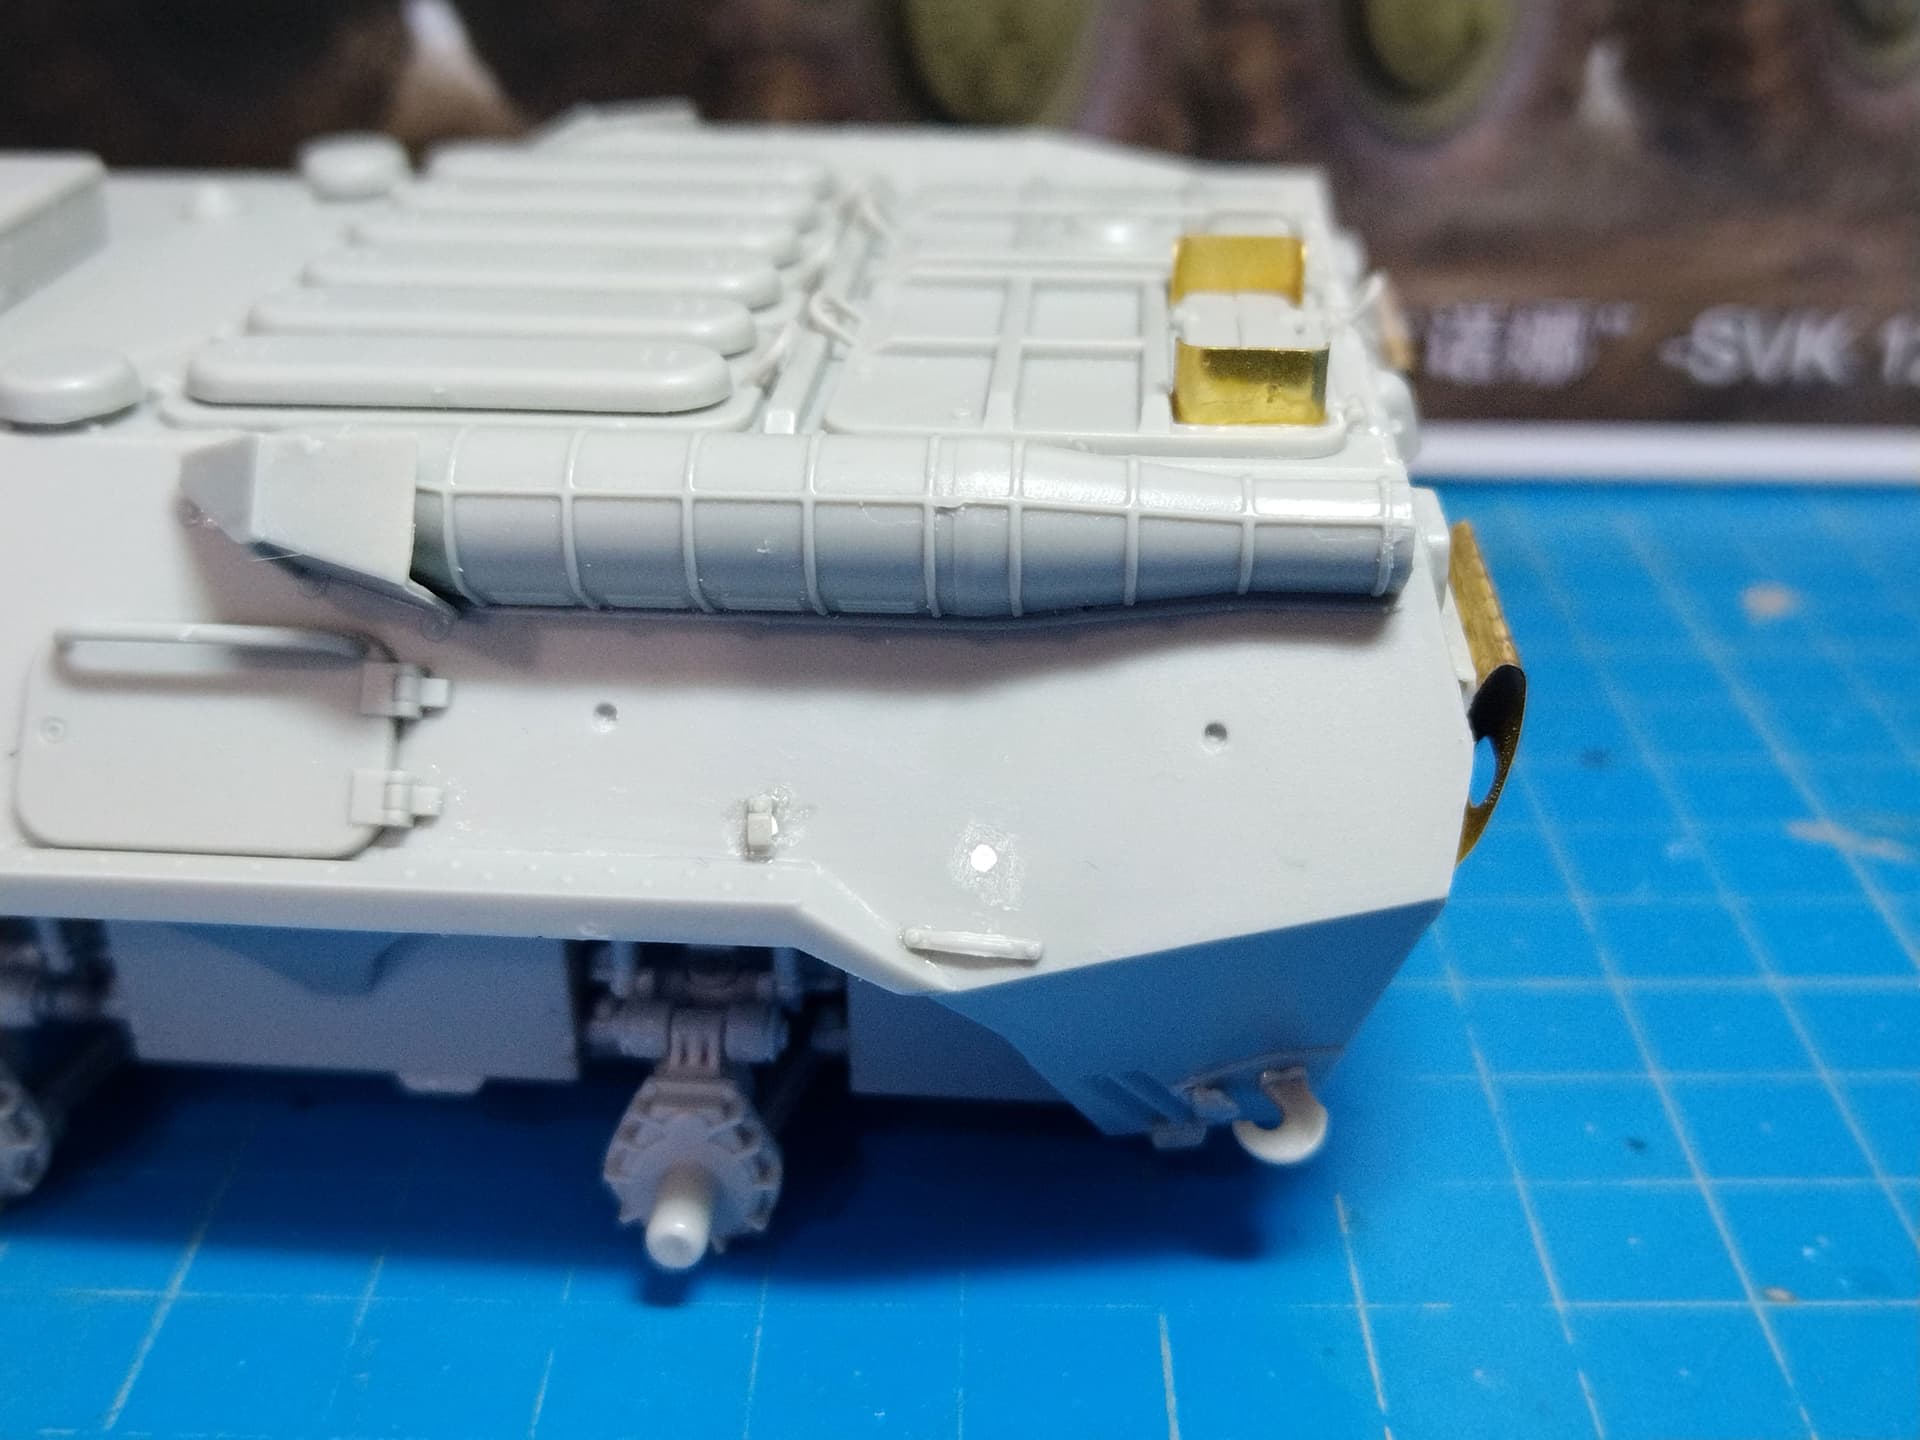
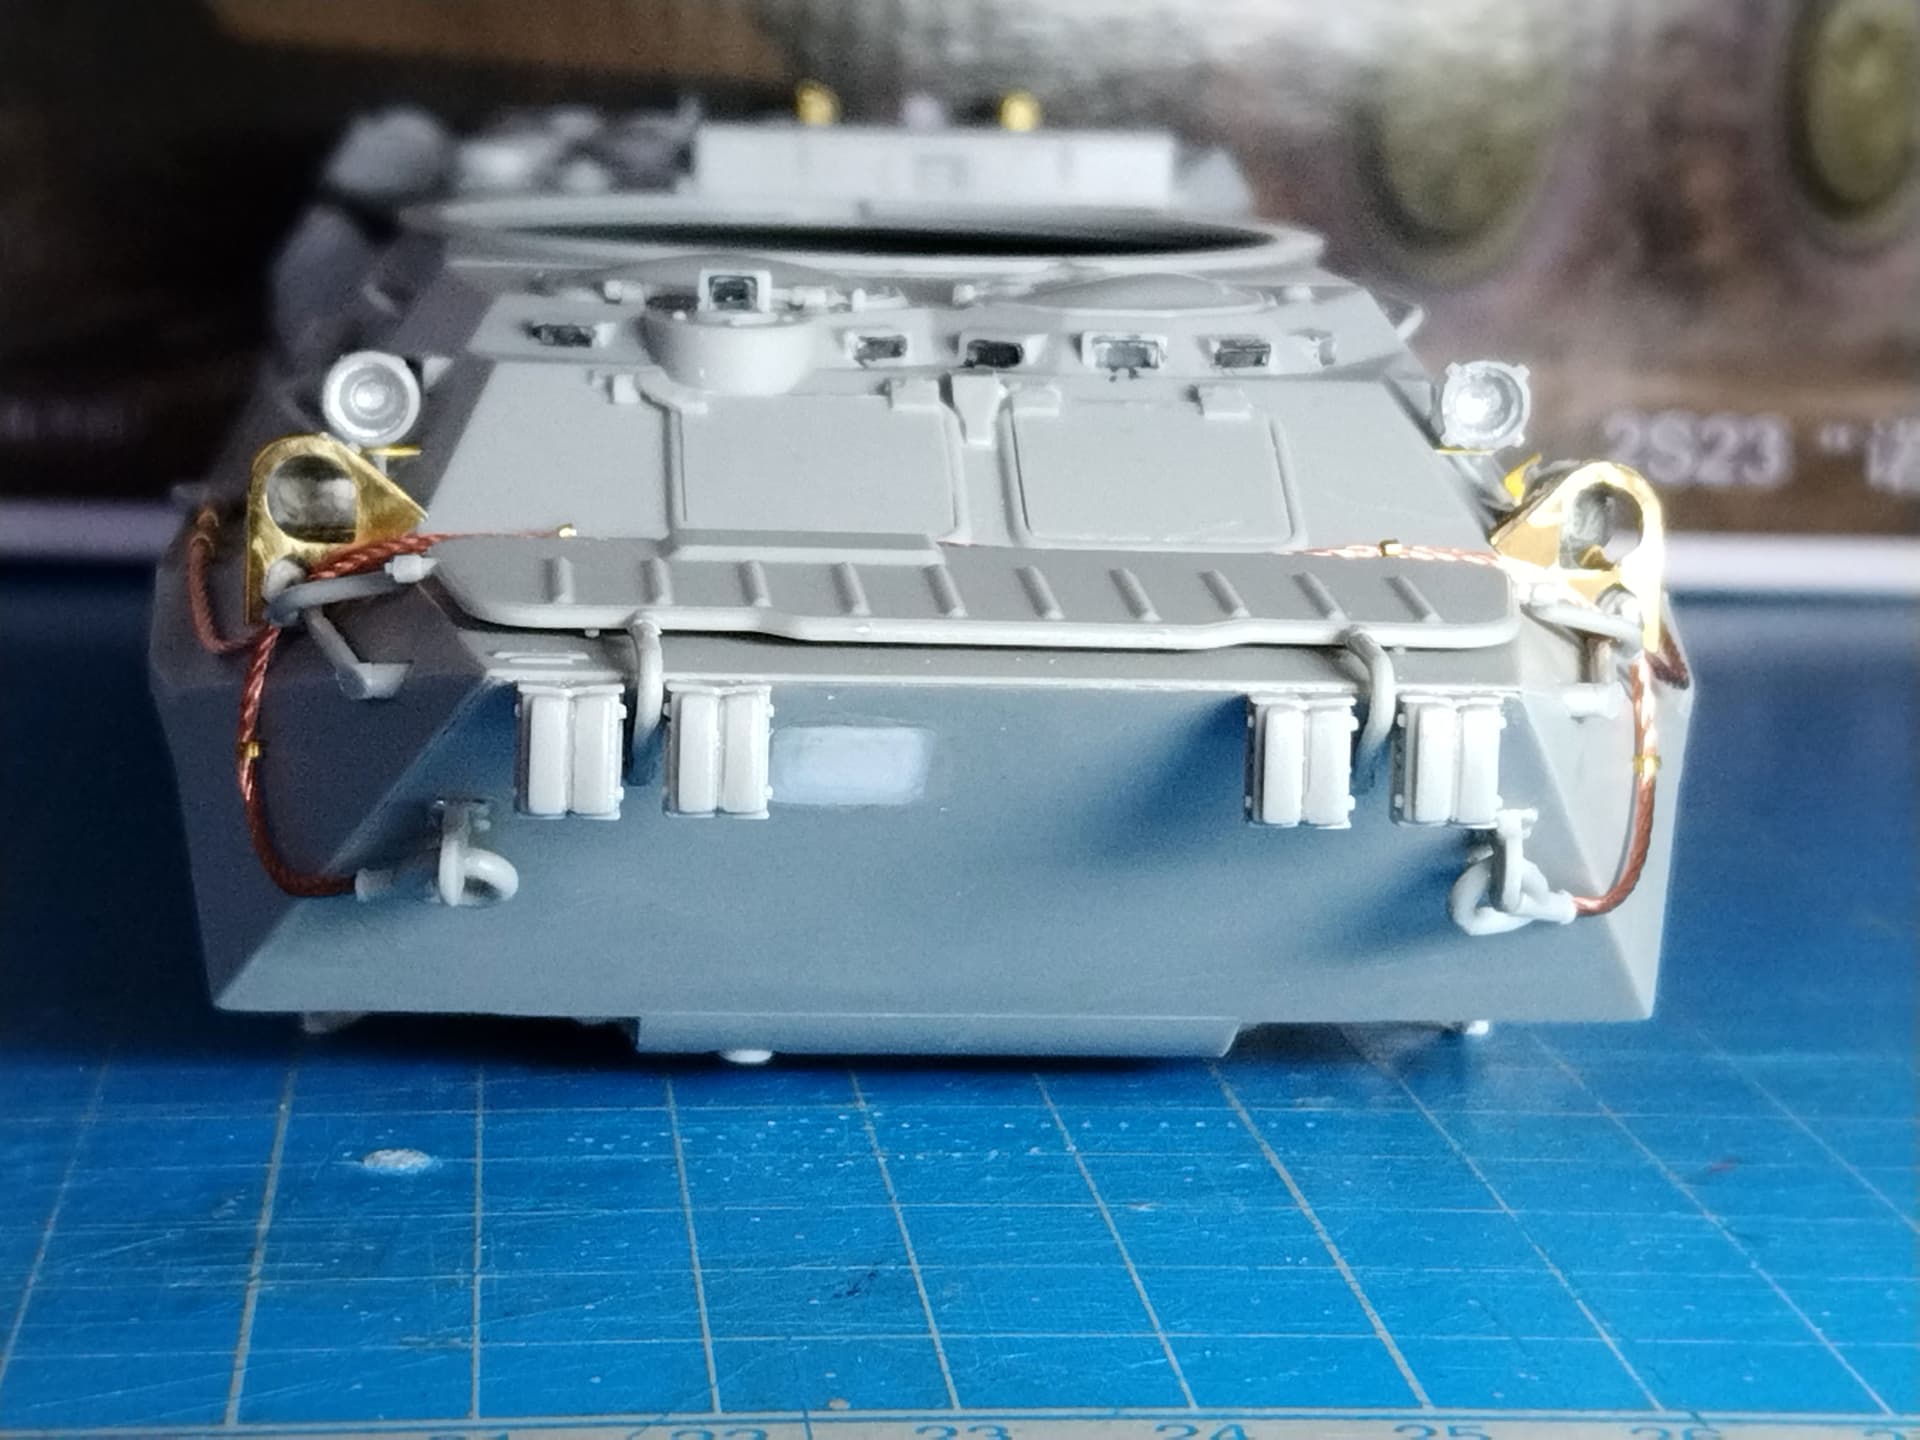
I had few time available for modeling lately however I managed to add some parts to the hull. The left side headlights are glued and wired. I’ve modified the kit hatchet to keep only the straps like on my ref picture. I’ll try to do the same for the shovel.
The rear bumpers were a pain to shape. It is better to anneal them prior to bending them. Even after getting exactly the same shape for the both is not an easy task.
Here are some pictures of the full hull and some details.
For your information Trumpeter requires you install a searchlight at the passenger station. None of my reference pictures shows it so I’ve decided not to use it.
Olivier
5 Likes
Nice PE additions and the headlights with your added cables really look good. Great progress.
2 Likes
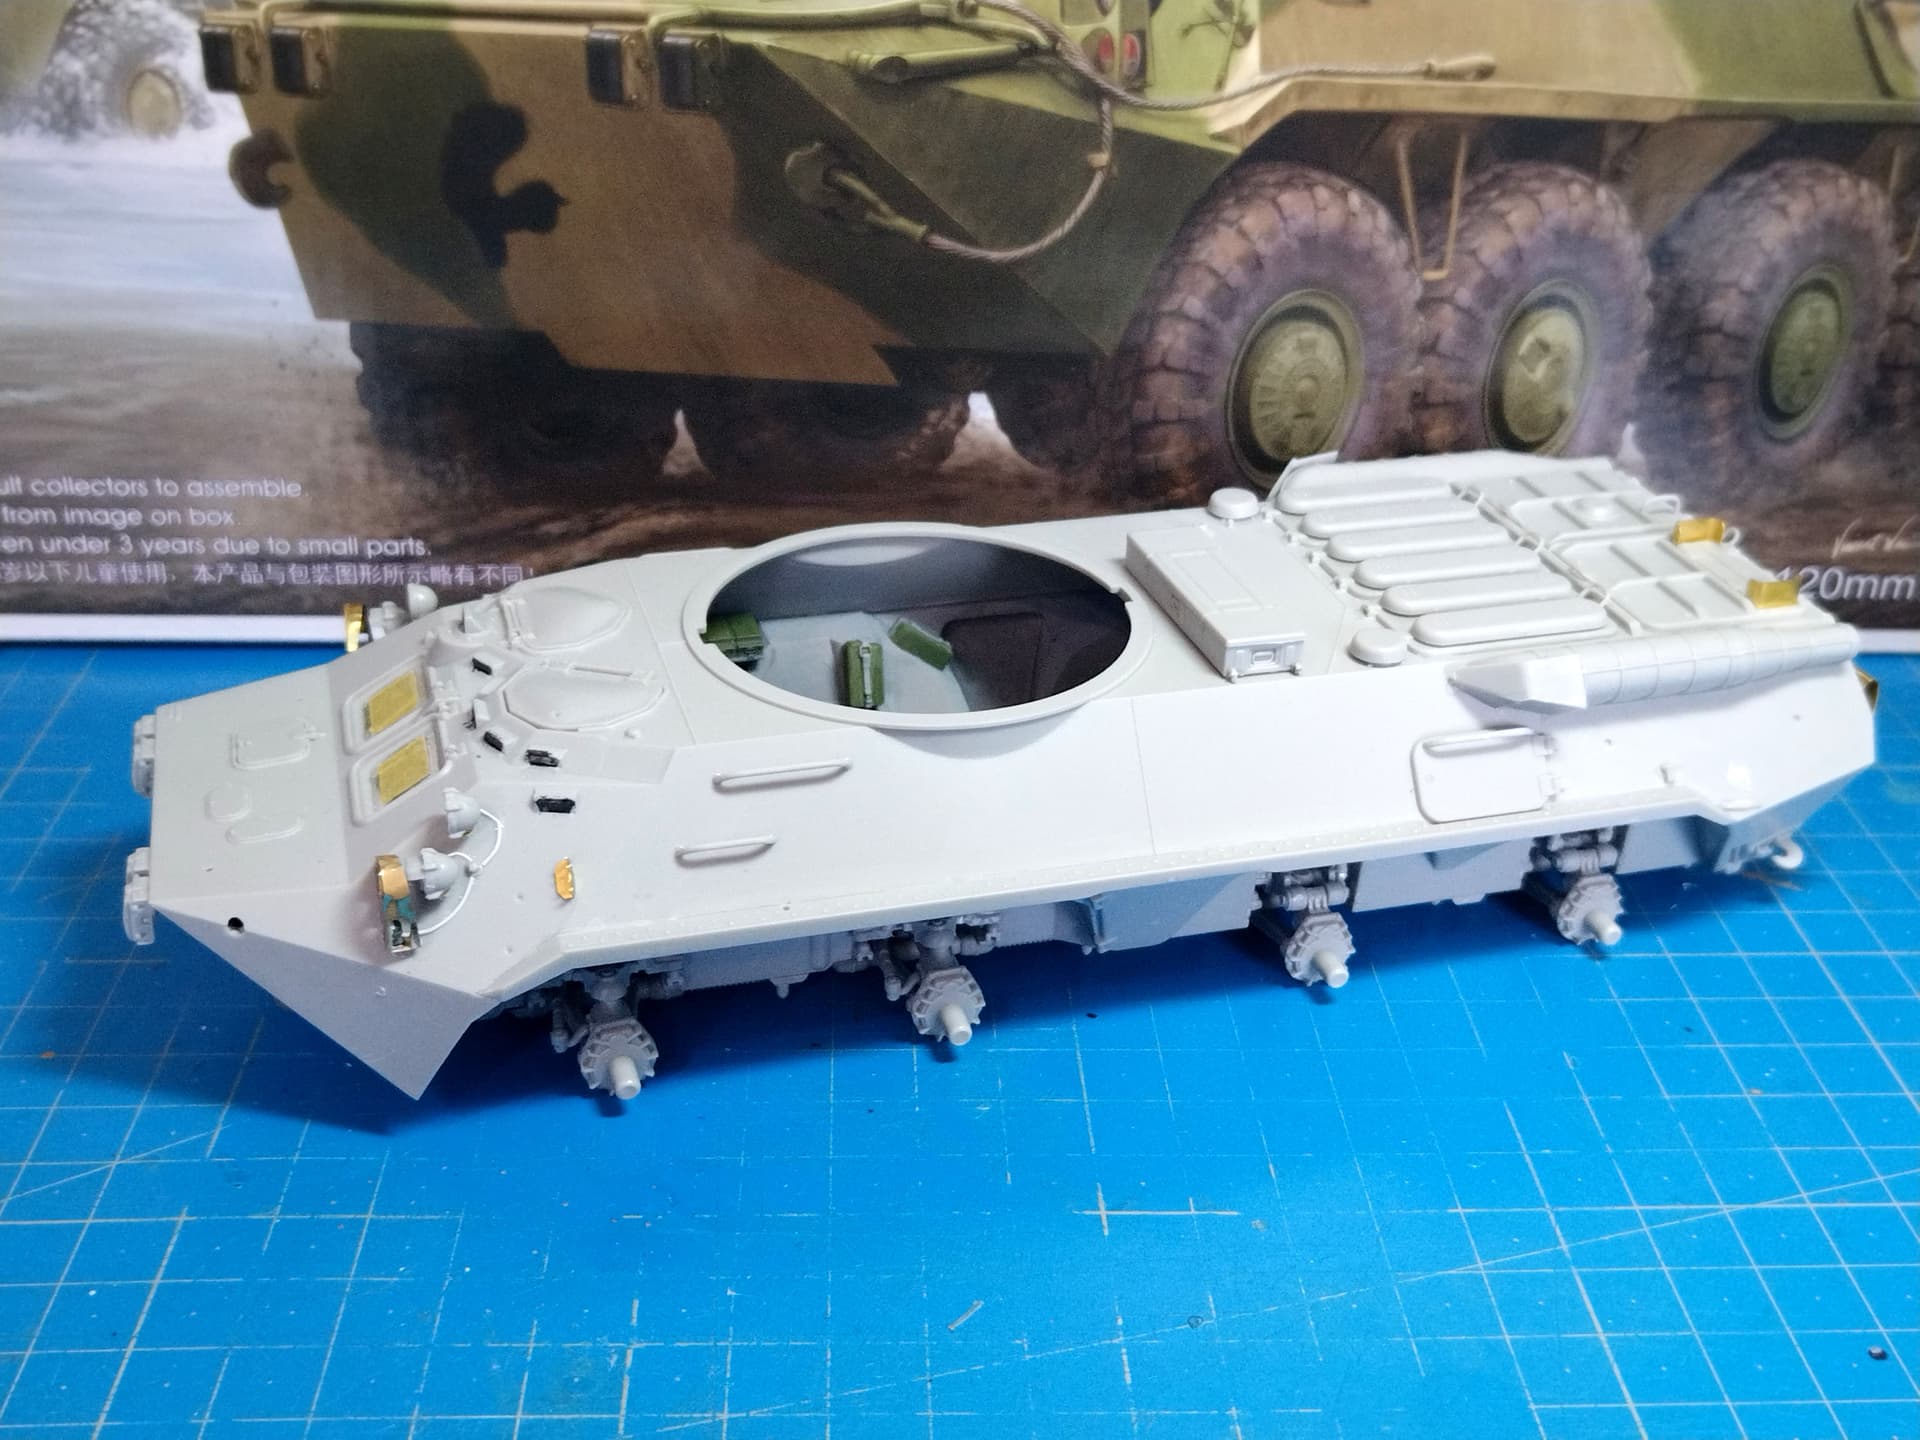
The hull is complete less the rear view mirrors which are so fragile that I prefer adding them after the first coat of paint is applied.
The cables securing brackets are glued with eyeball mkI as Trumpeter has not molded any position marks on the fenders and the front glacis.
Olivier
7 Likes
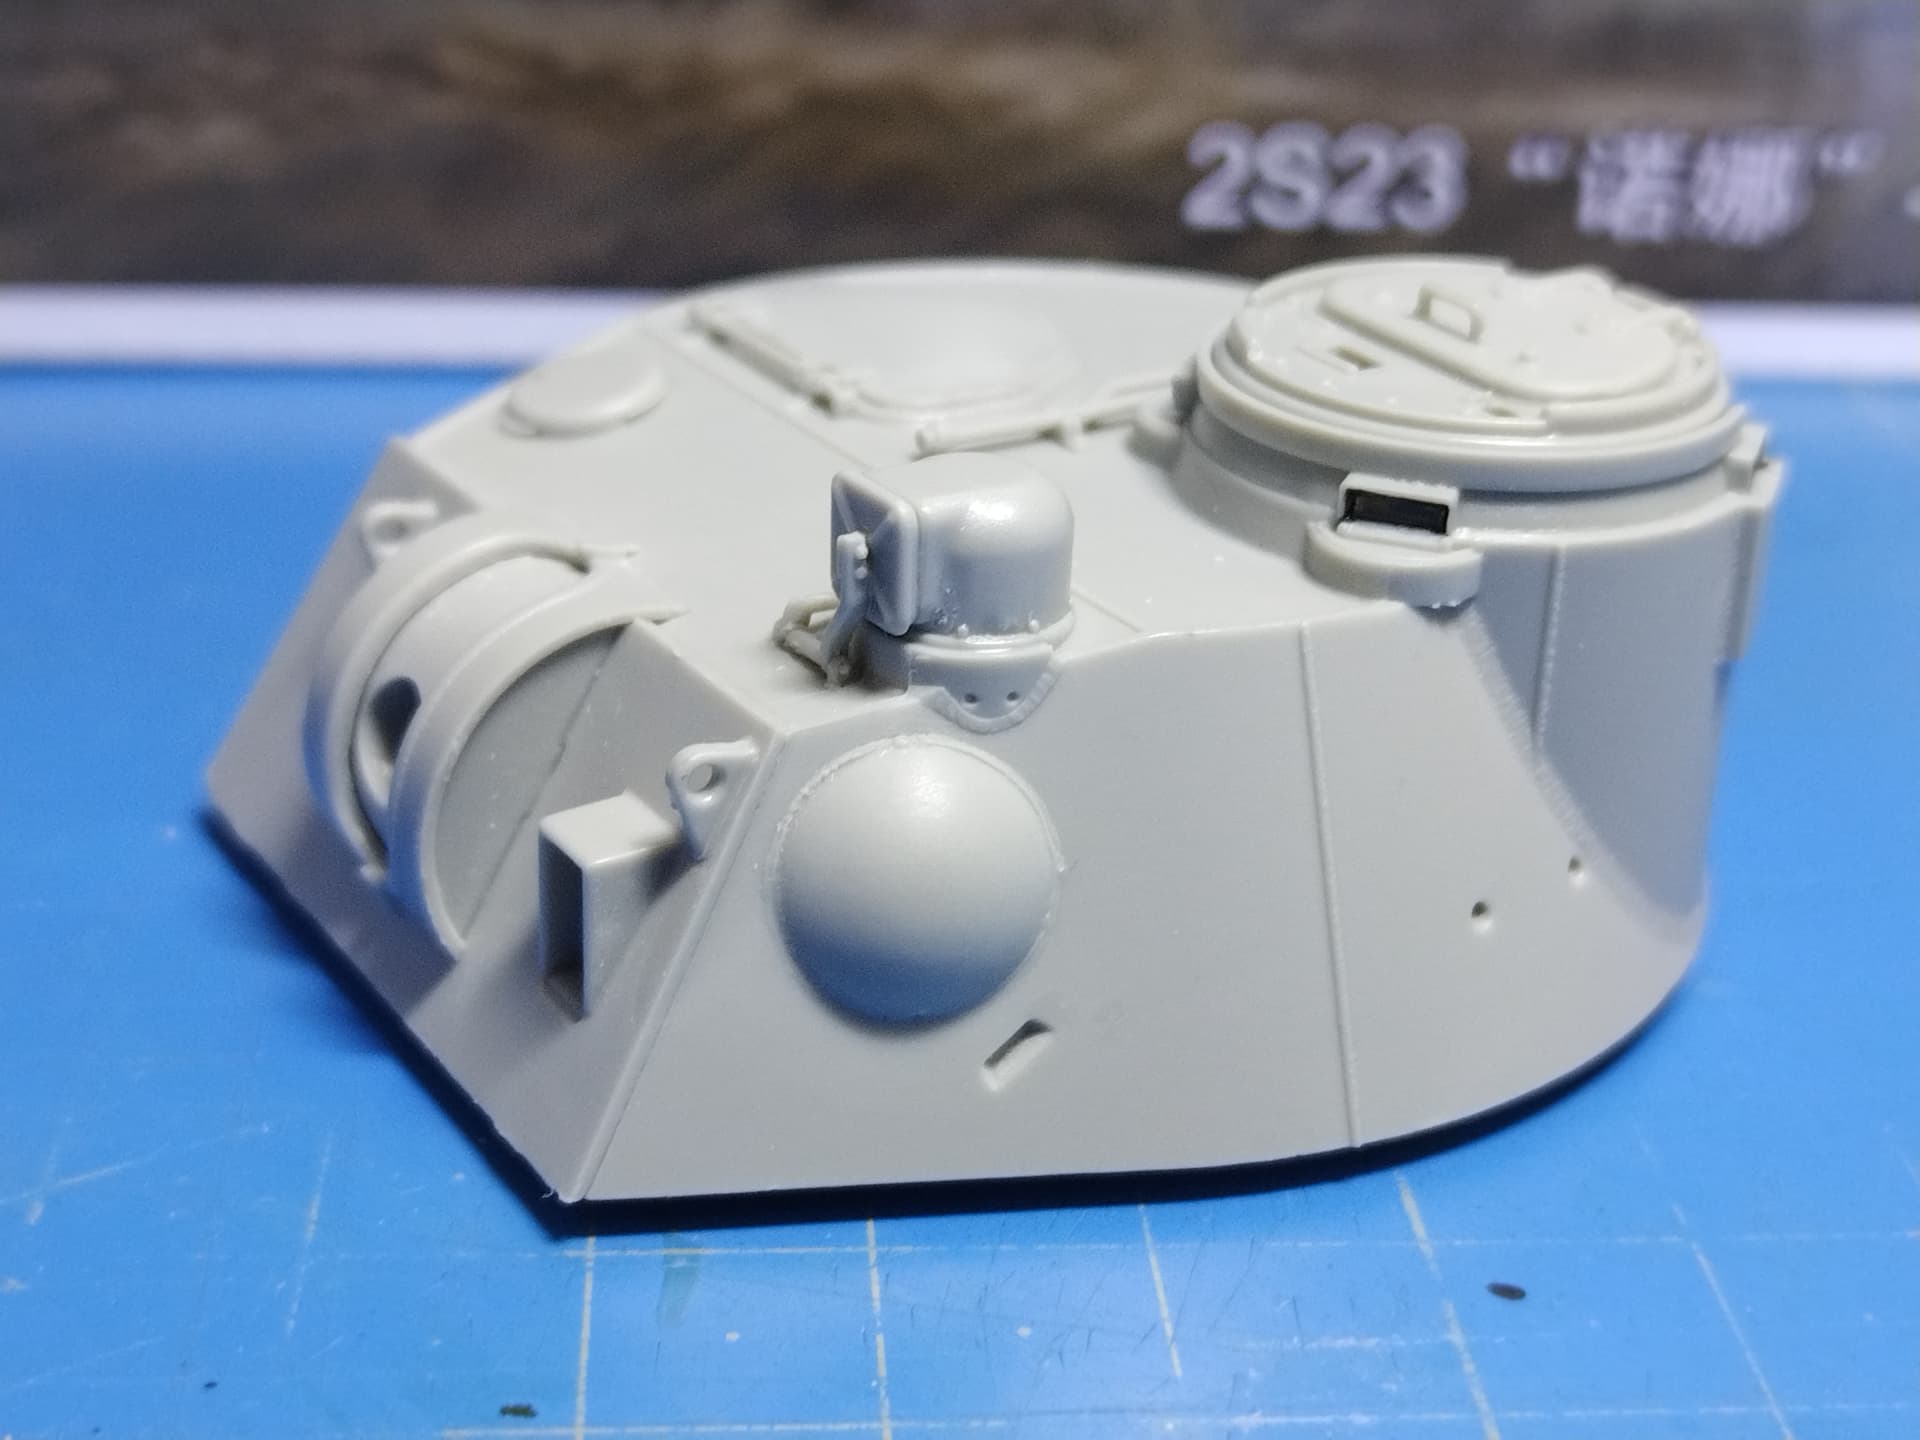
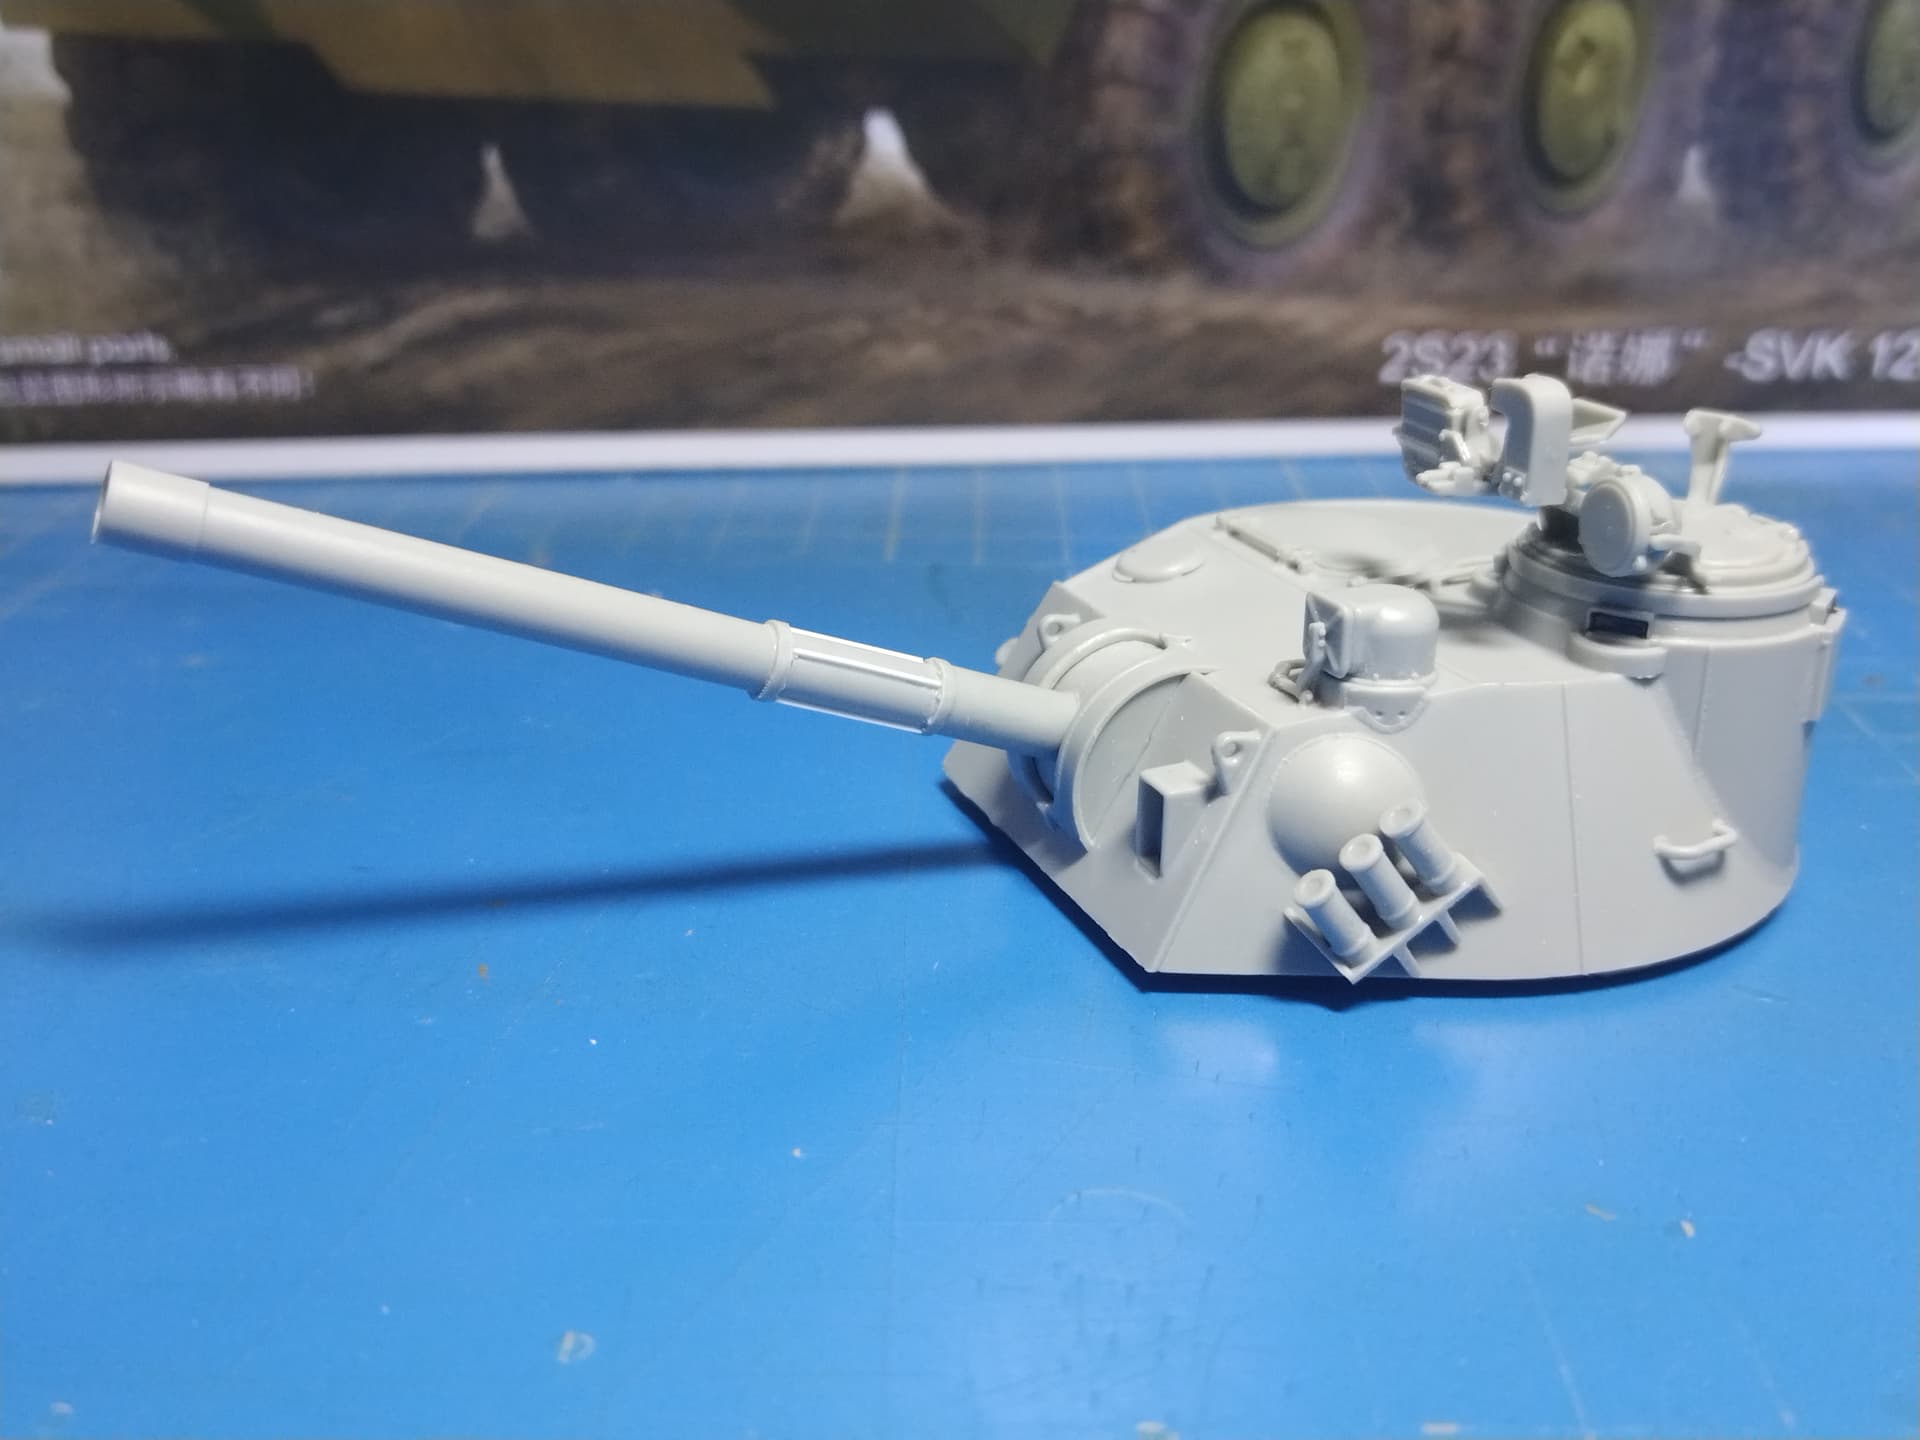
Haven’t had a lot of bench time lately however I managed to start the turret assembly.
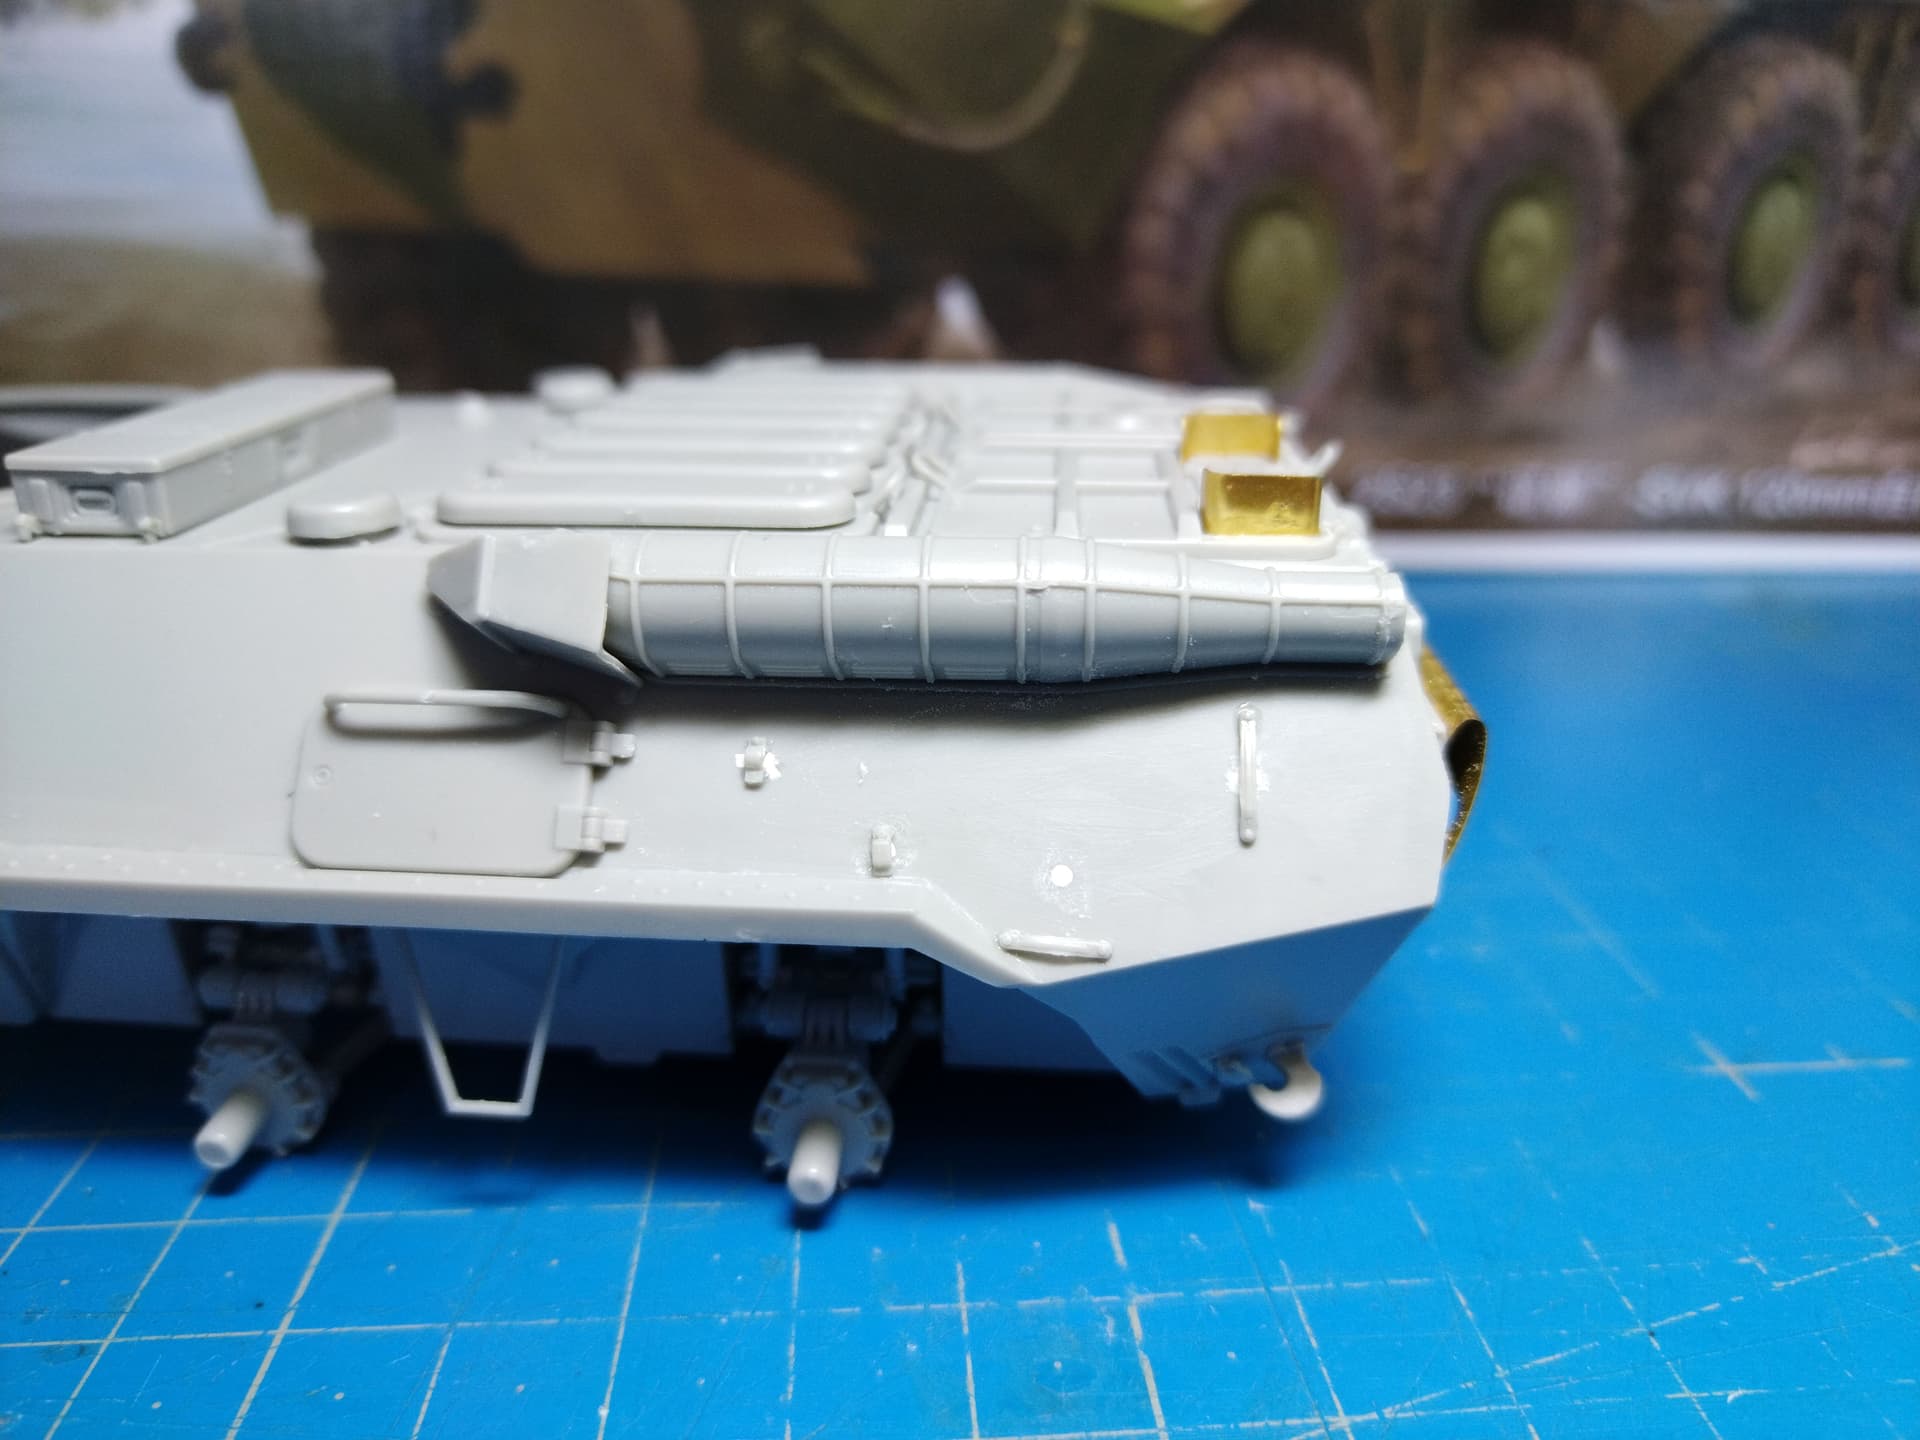
The fit of several small parts is not perfect. You need to trim the positioning tab(s), sand the hinge parts … The larger parts are pretty good though. The front armor plate is a add-on plate. There are many ejection pin-marks you have to deal with before gluing the plate. Not a big issue but time consuming.
Next step is adding 4 “fins” around the gun tube. Trumpeter gives you tiny PE parts that I’ll replace by styrene ones for the ease of gluing.
Olivier
5 Likes
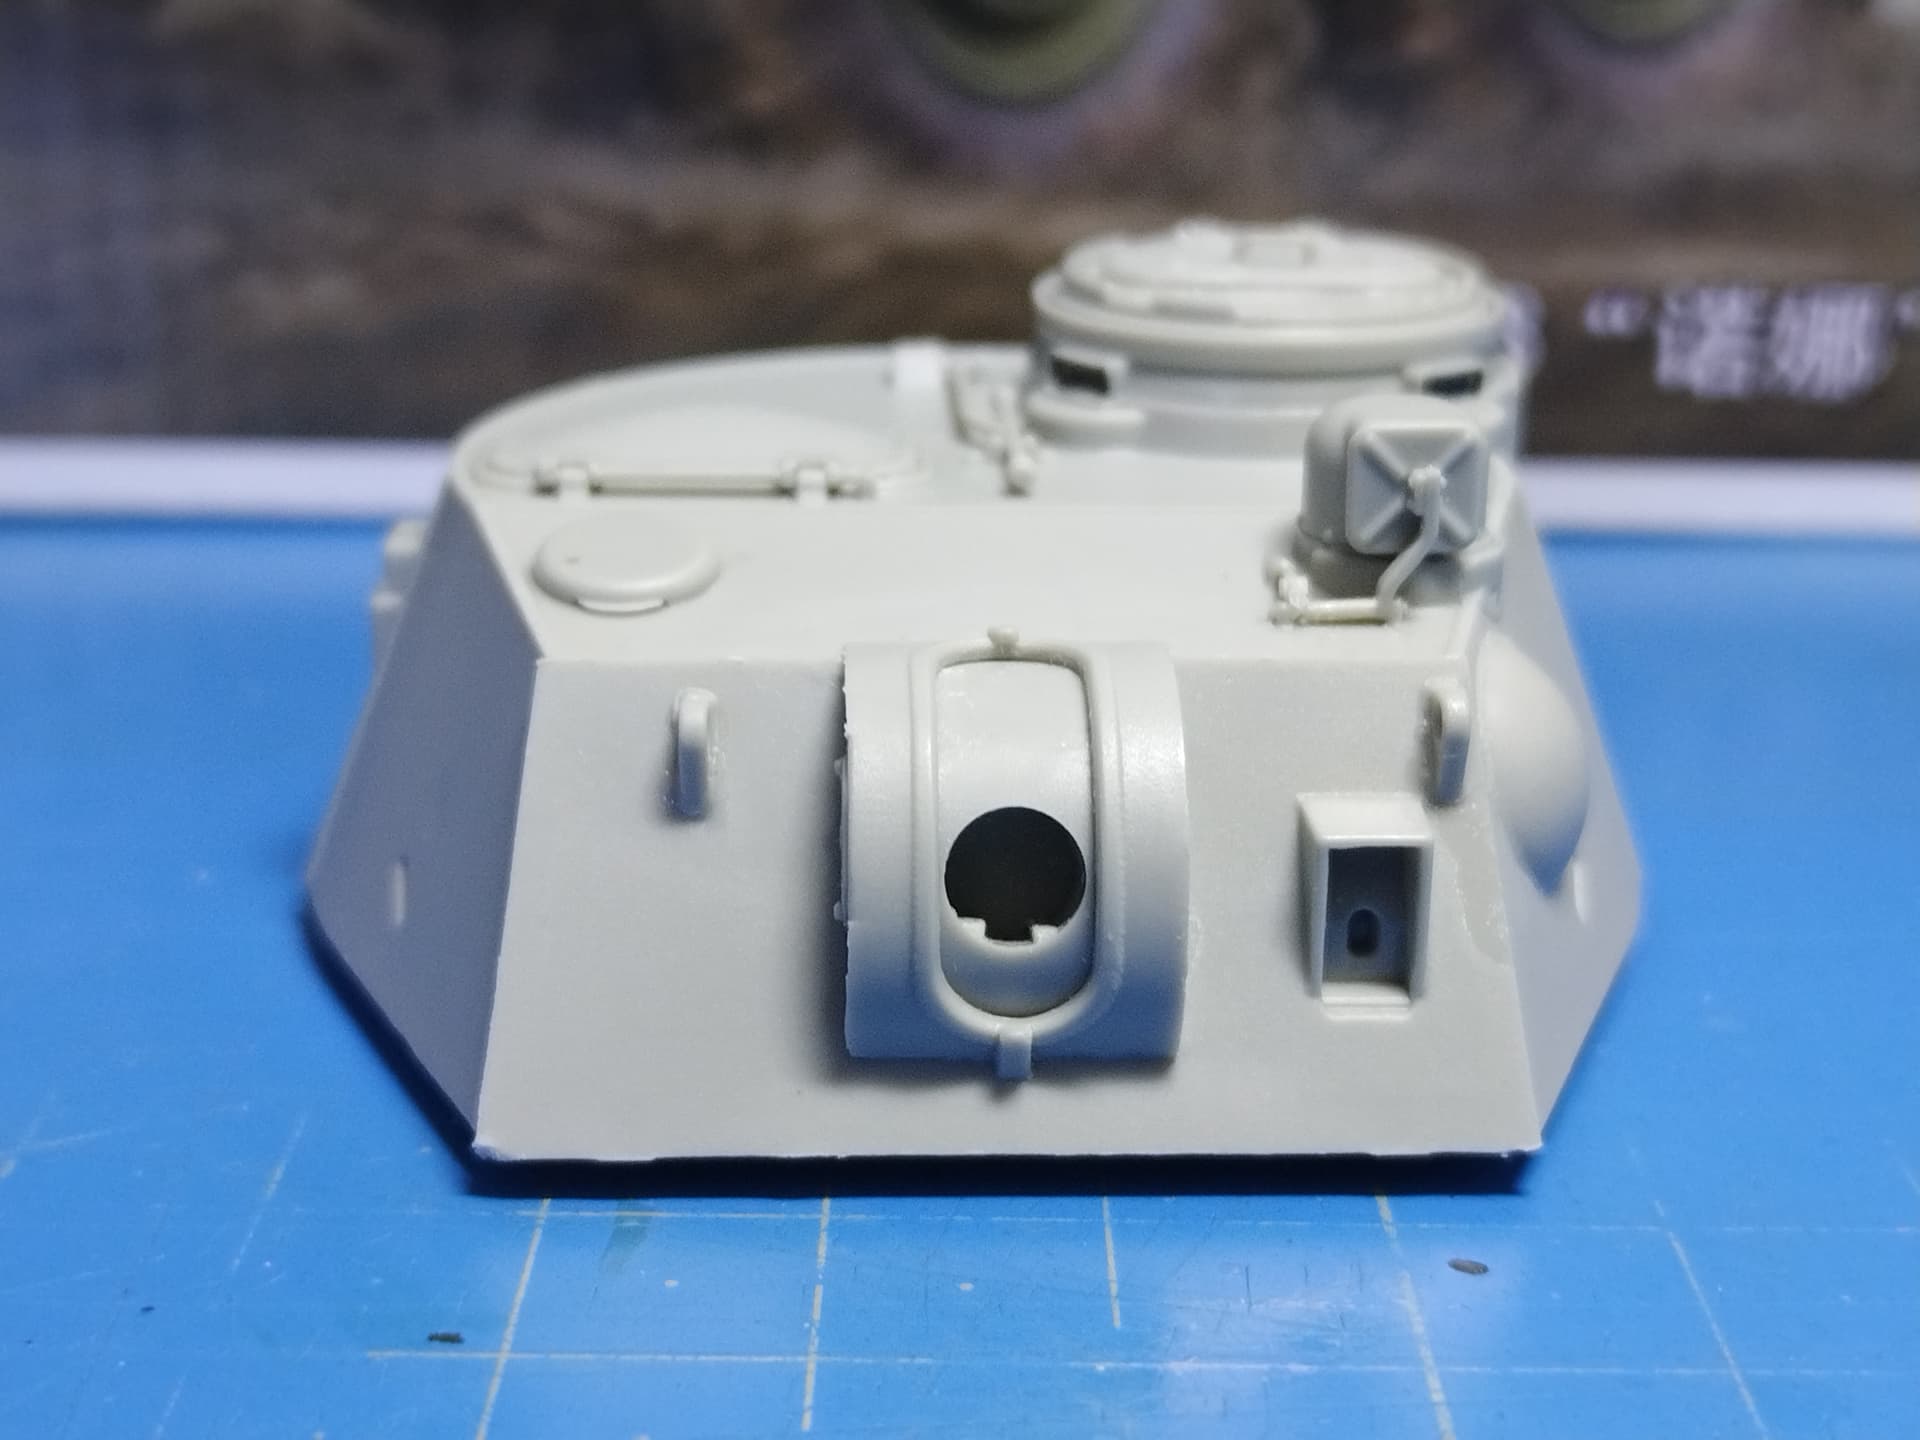
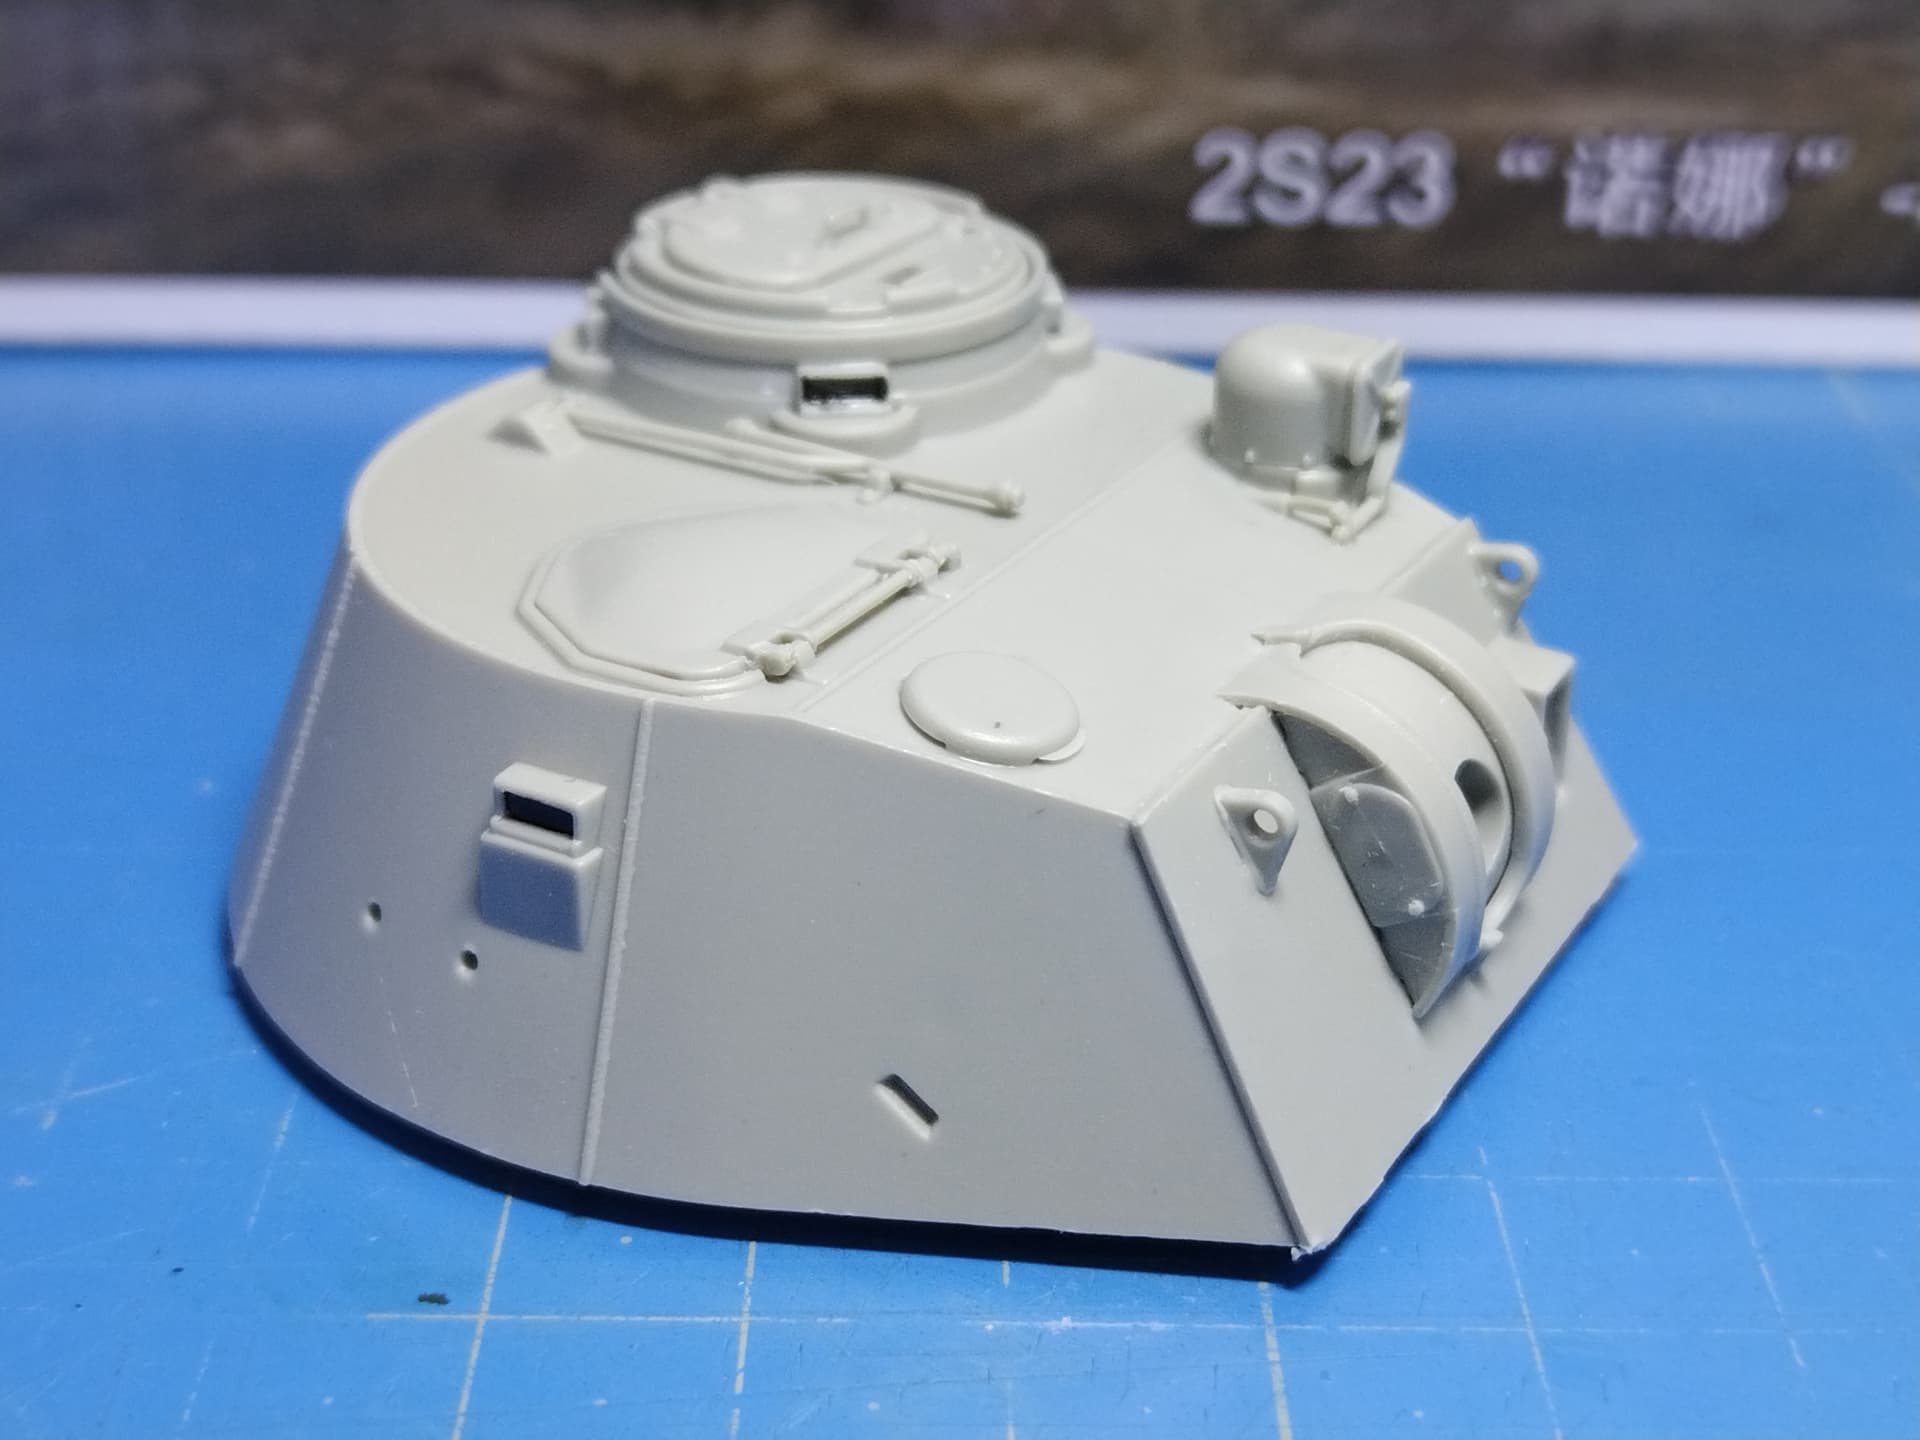
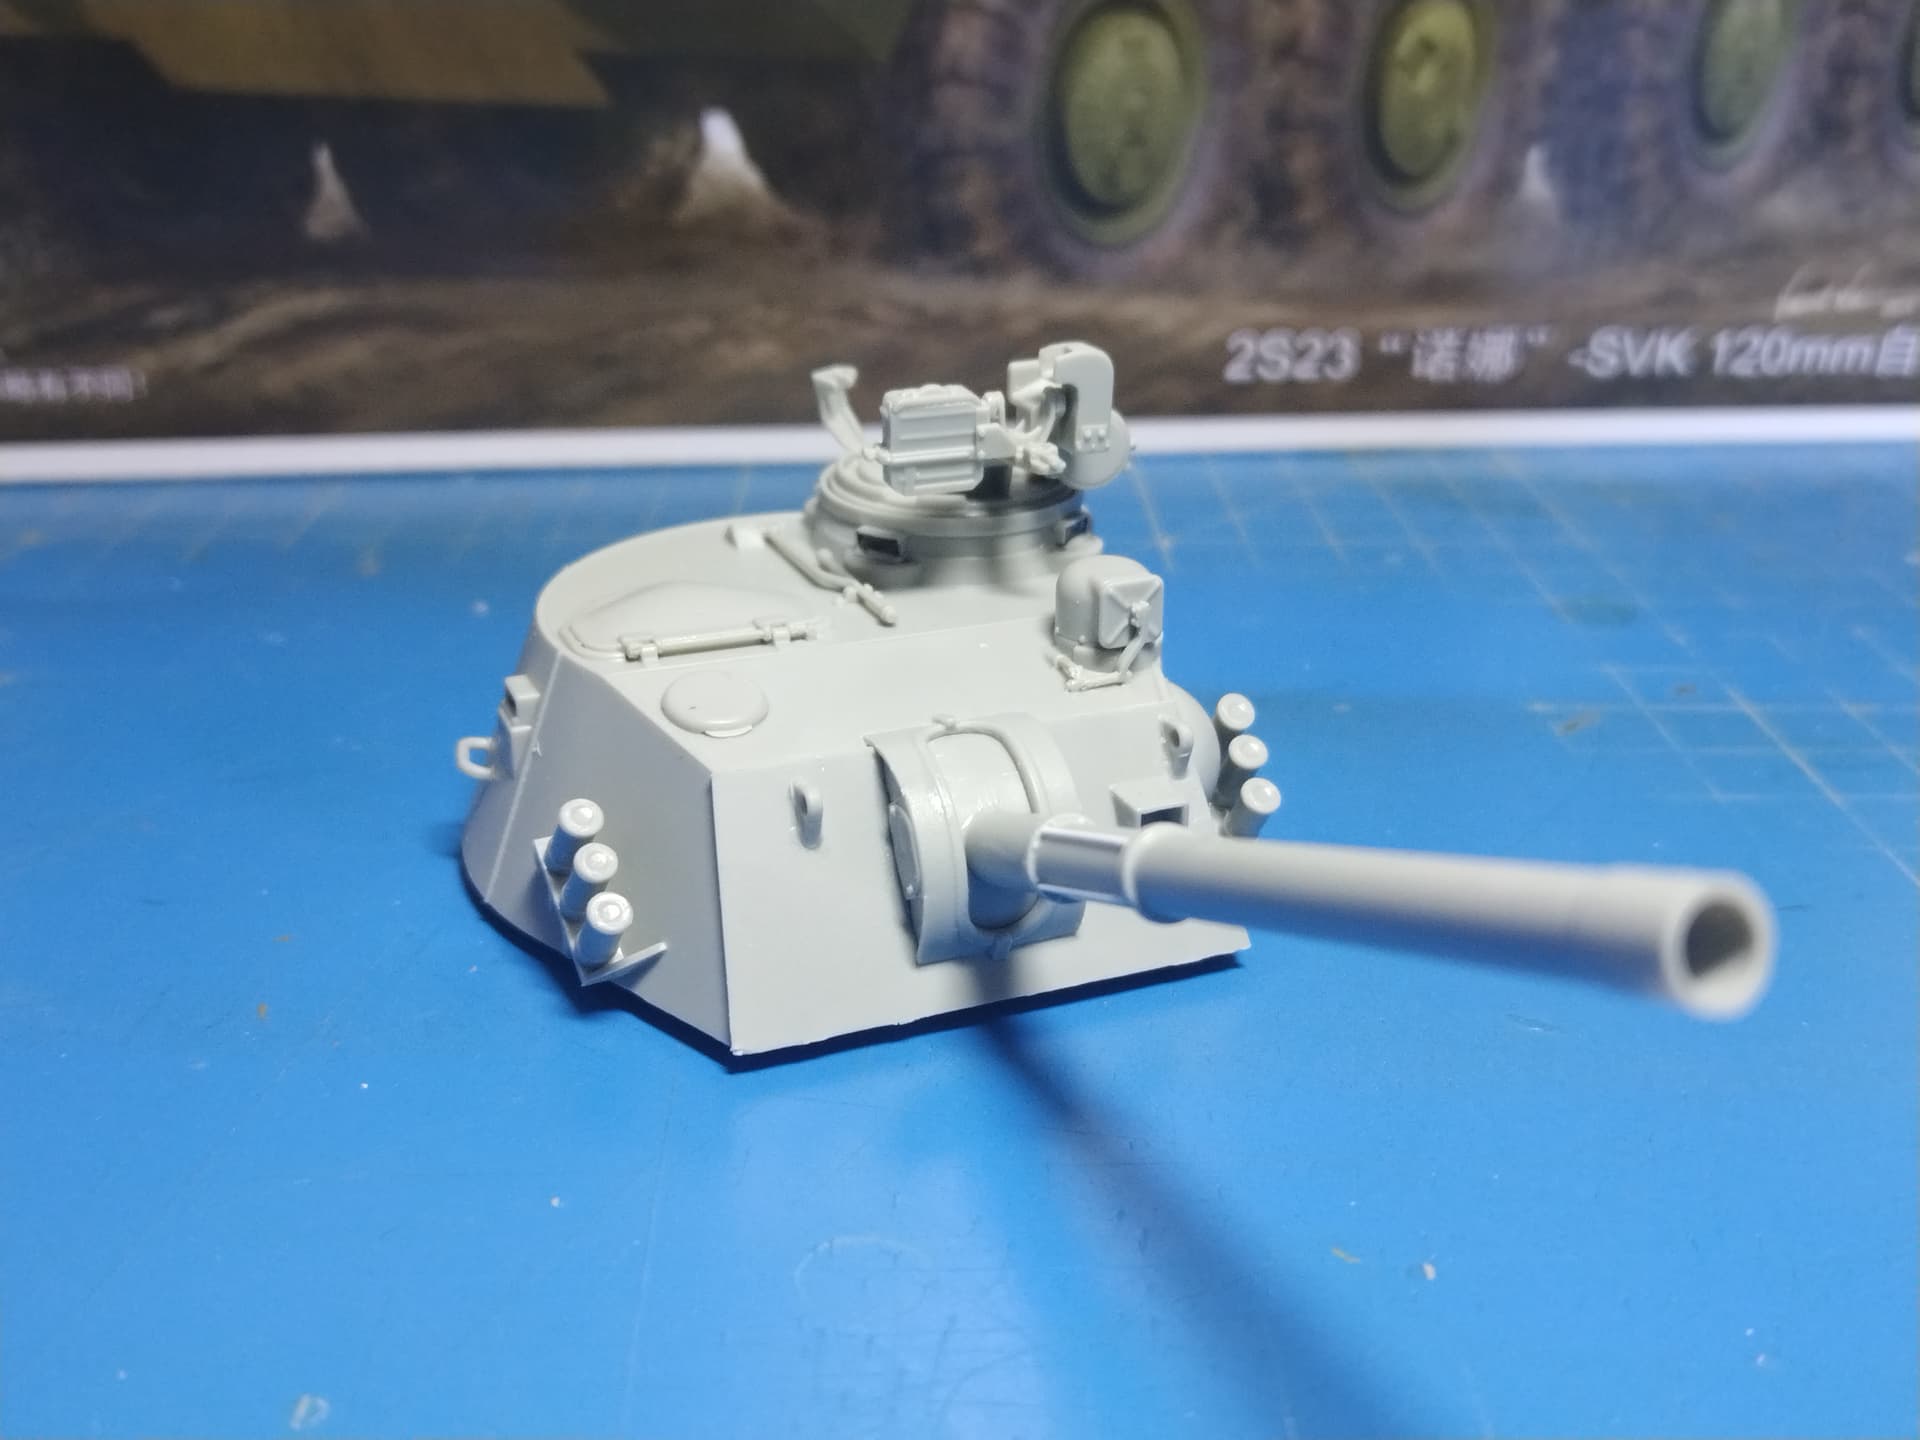
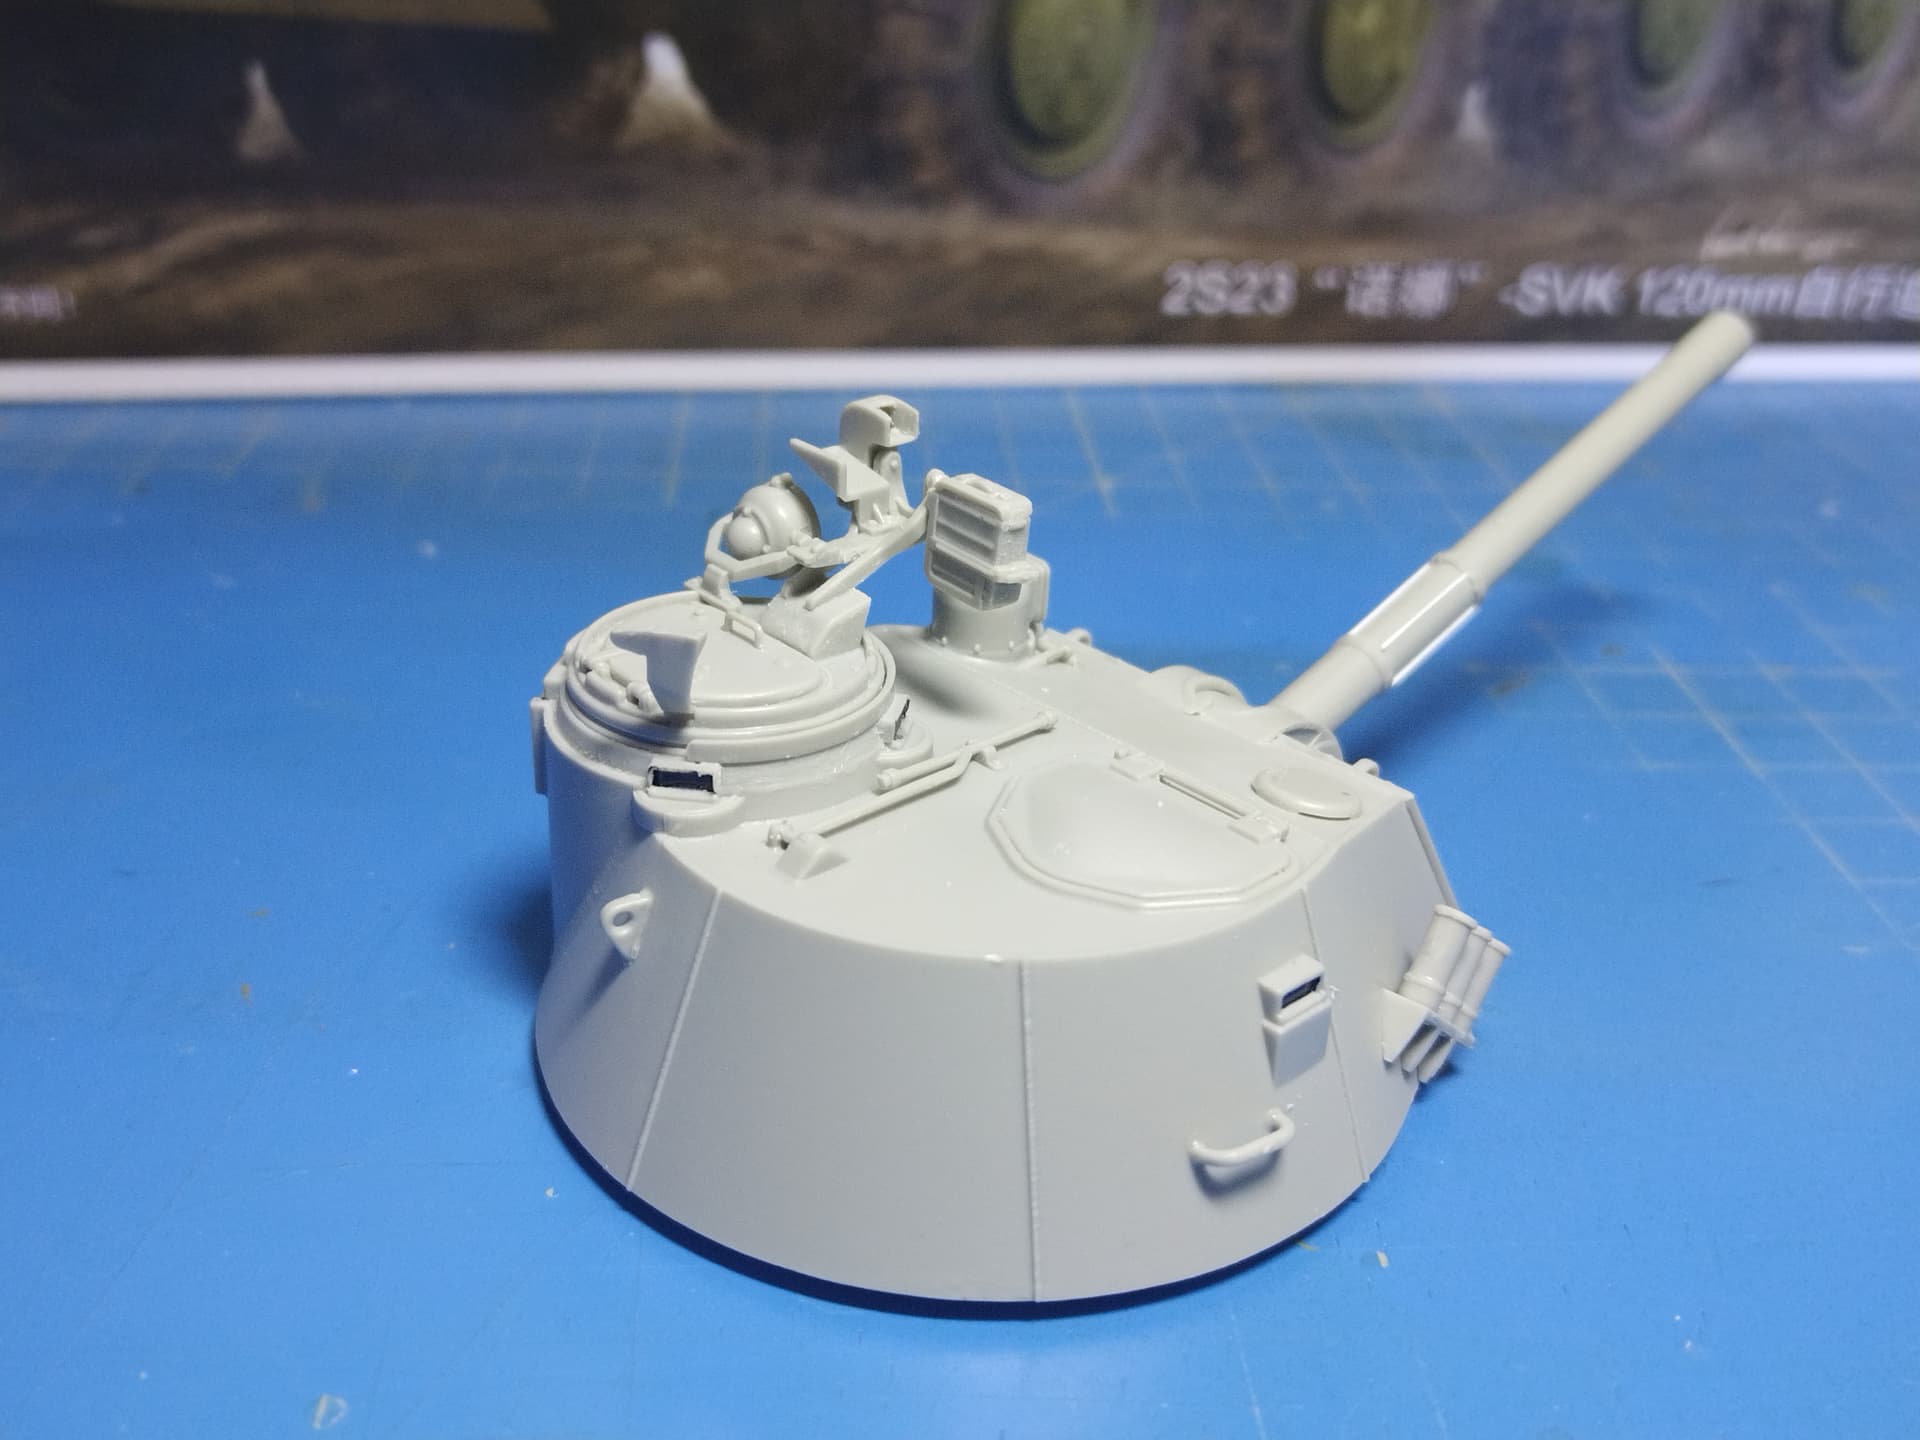
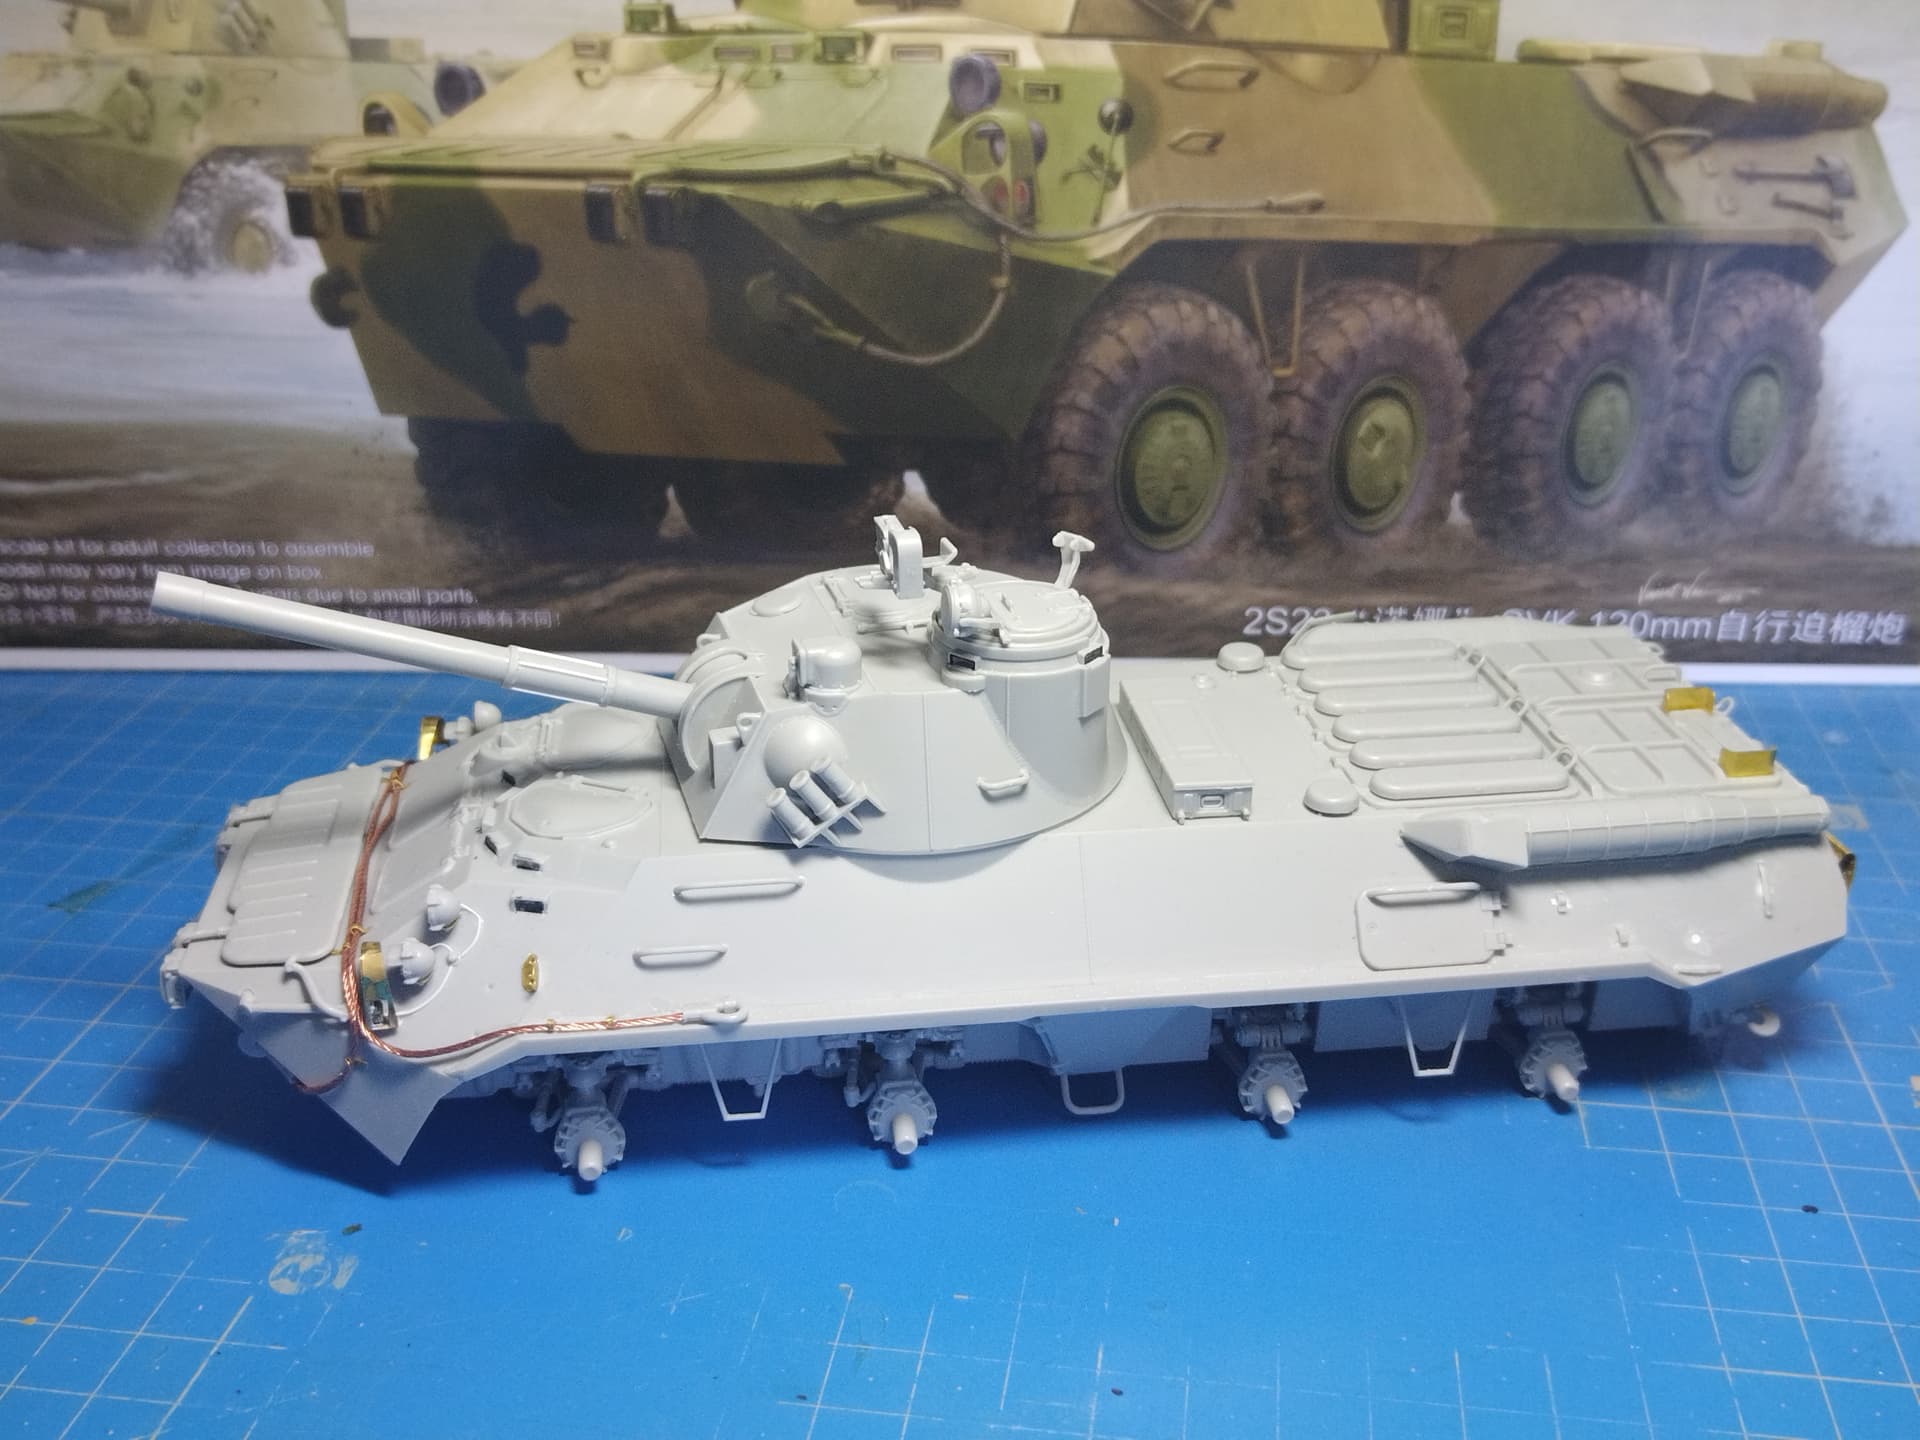
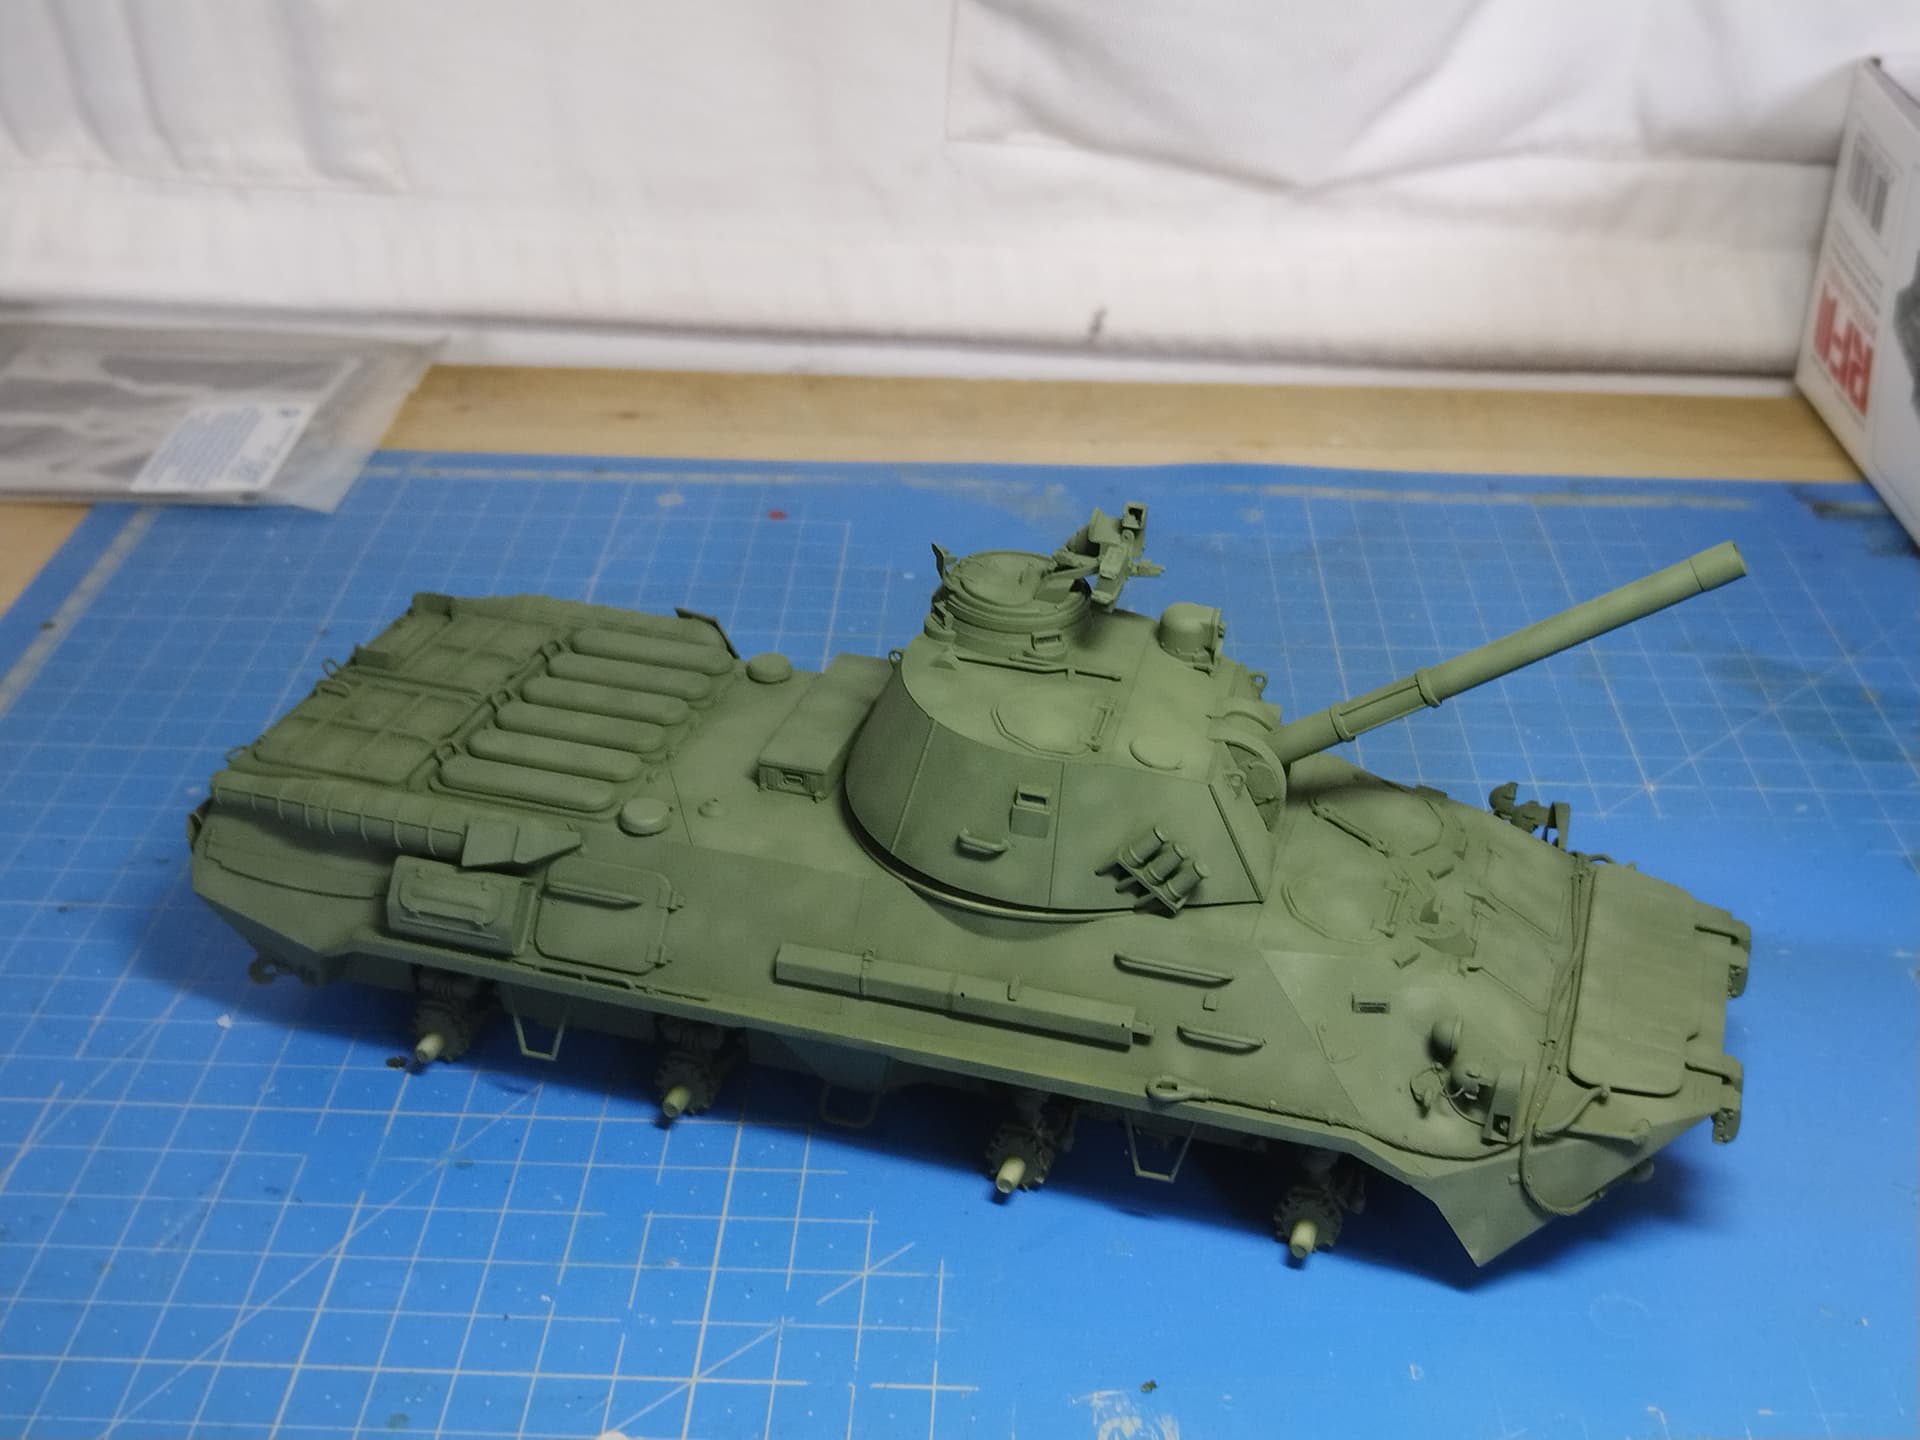
The turret is complete. Many parts have needed some work on their tabs or slots so the insertion could be possible. A lot of them had large or very large attachments to the sprue which made the cleaning tedious.
As stated above I replaced the PE strips around the barrel by styrene ones.
The turret still misses a clear part on the sight beside the barrel.
Here is the turret mated to the hull.
Olivier
4 Likes
Very neat assembly with this build Olivier, looks like it’s going to be a great kit. The styrene on the barrel gives it a better 3 dimensional look as well…
2 Likes
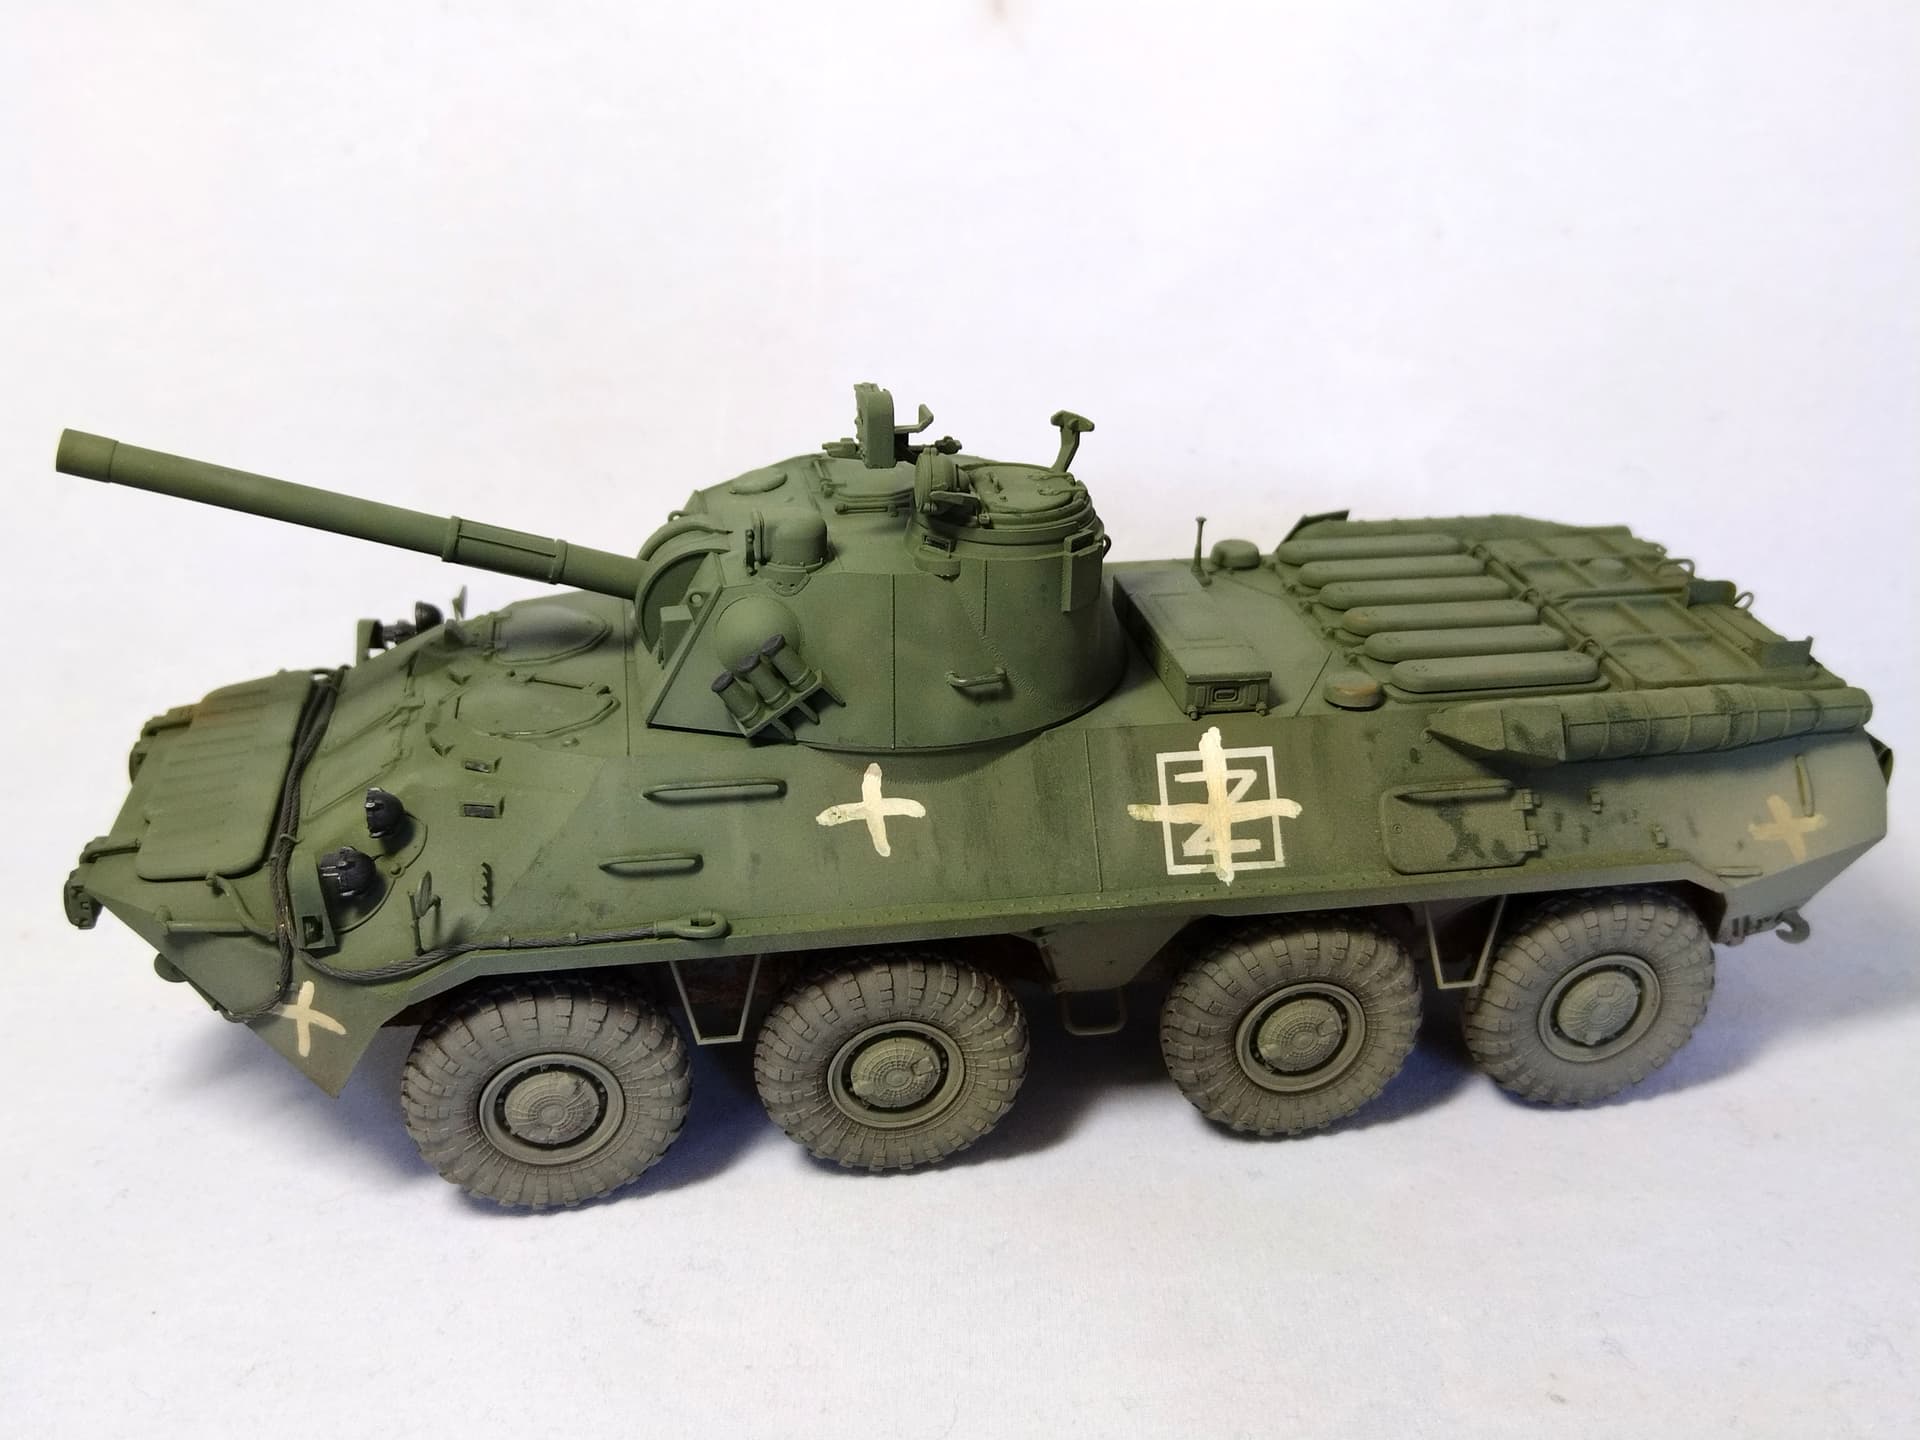
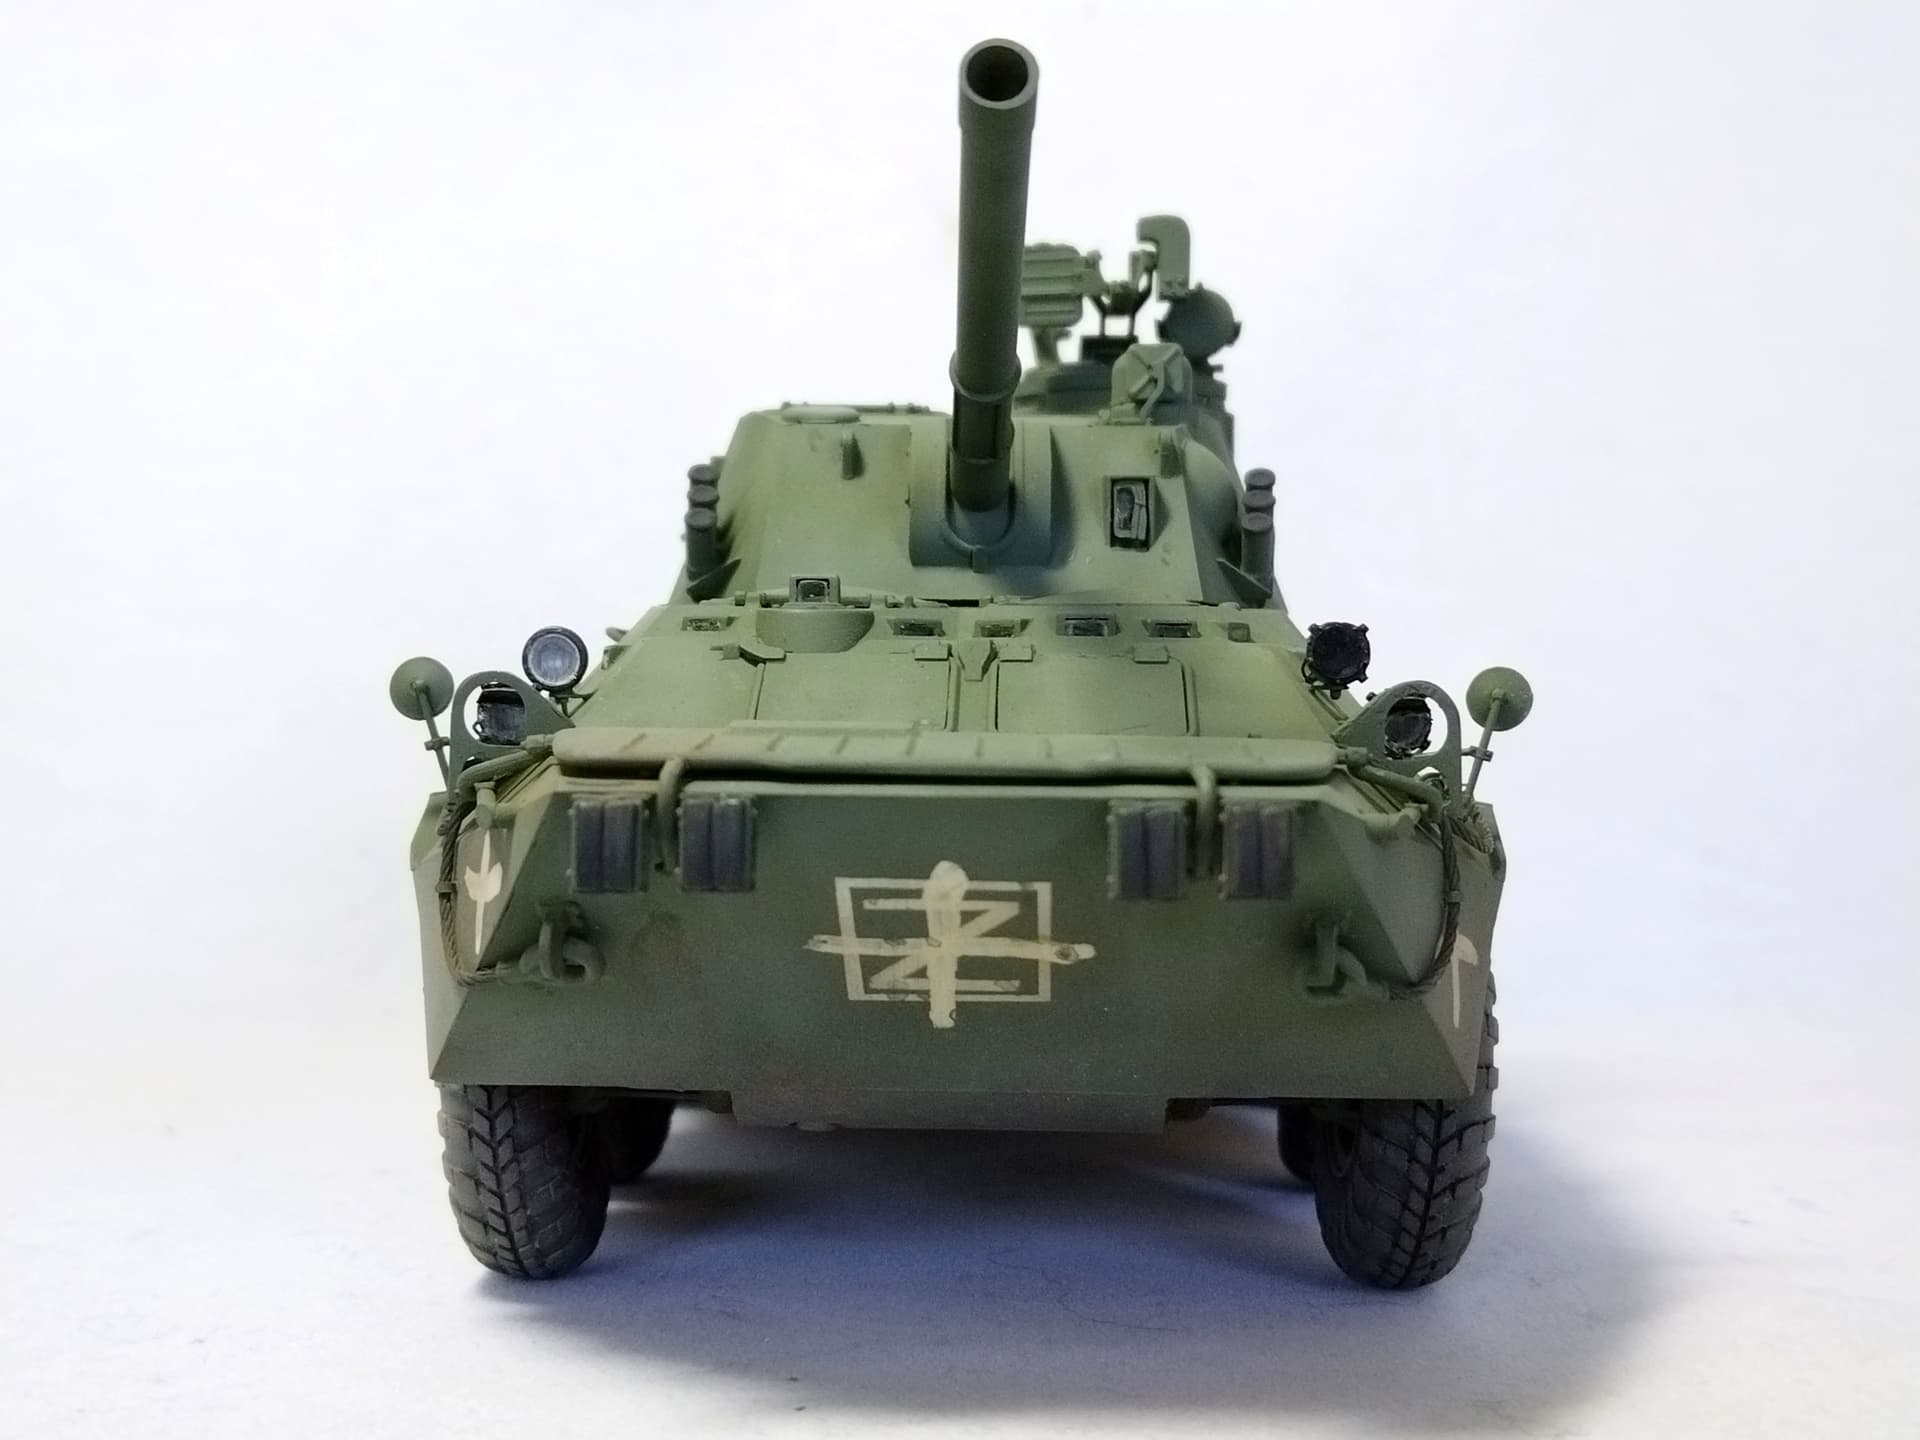
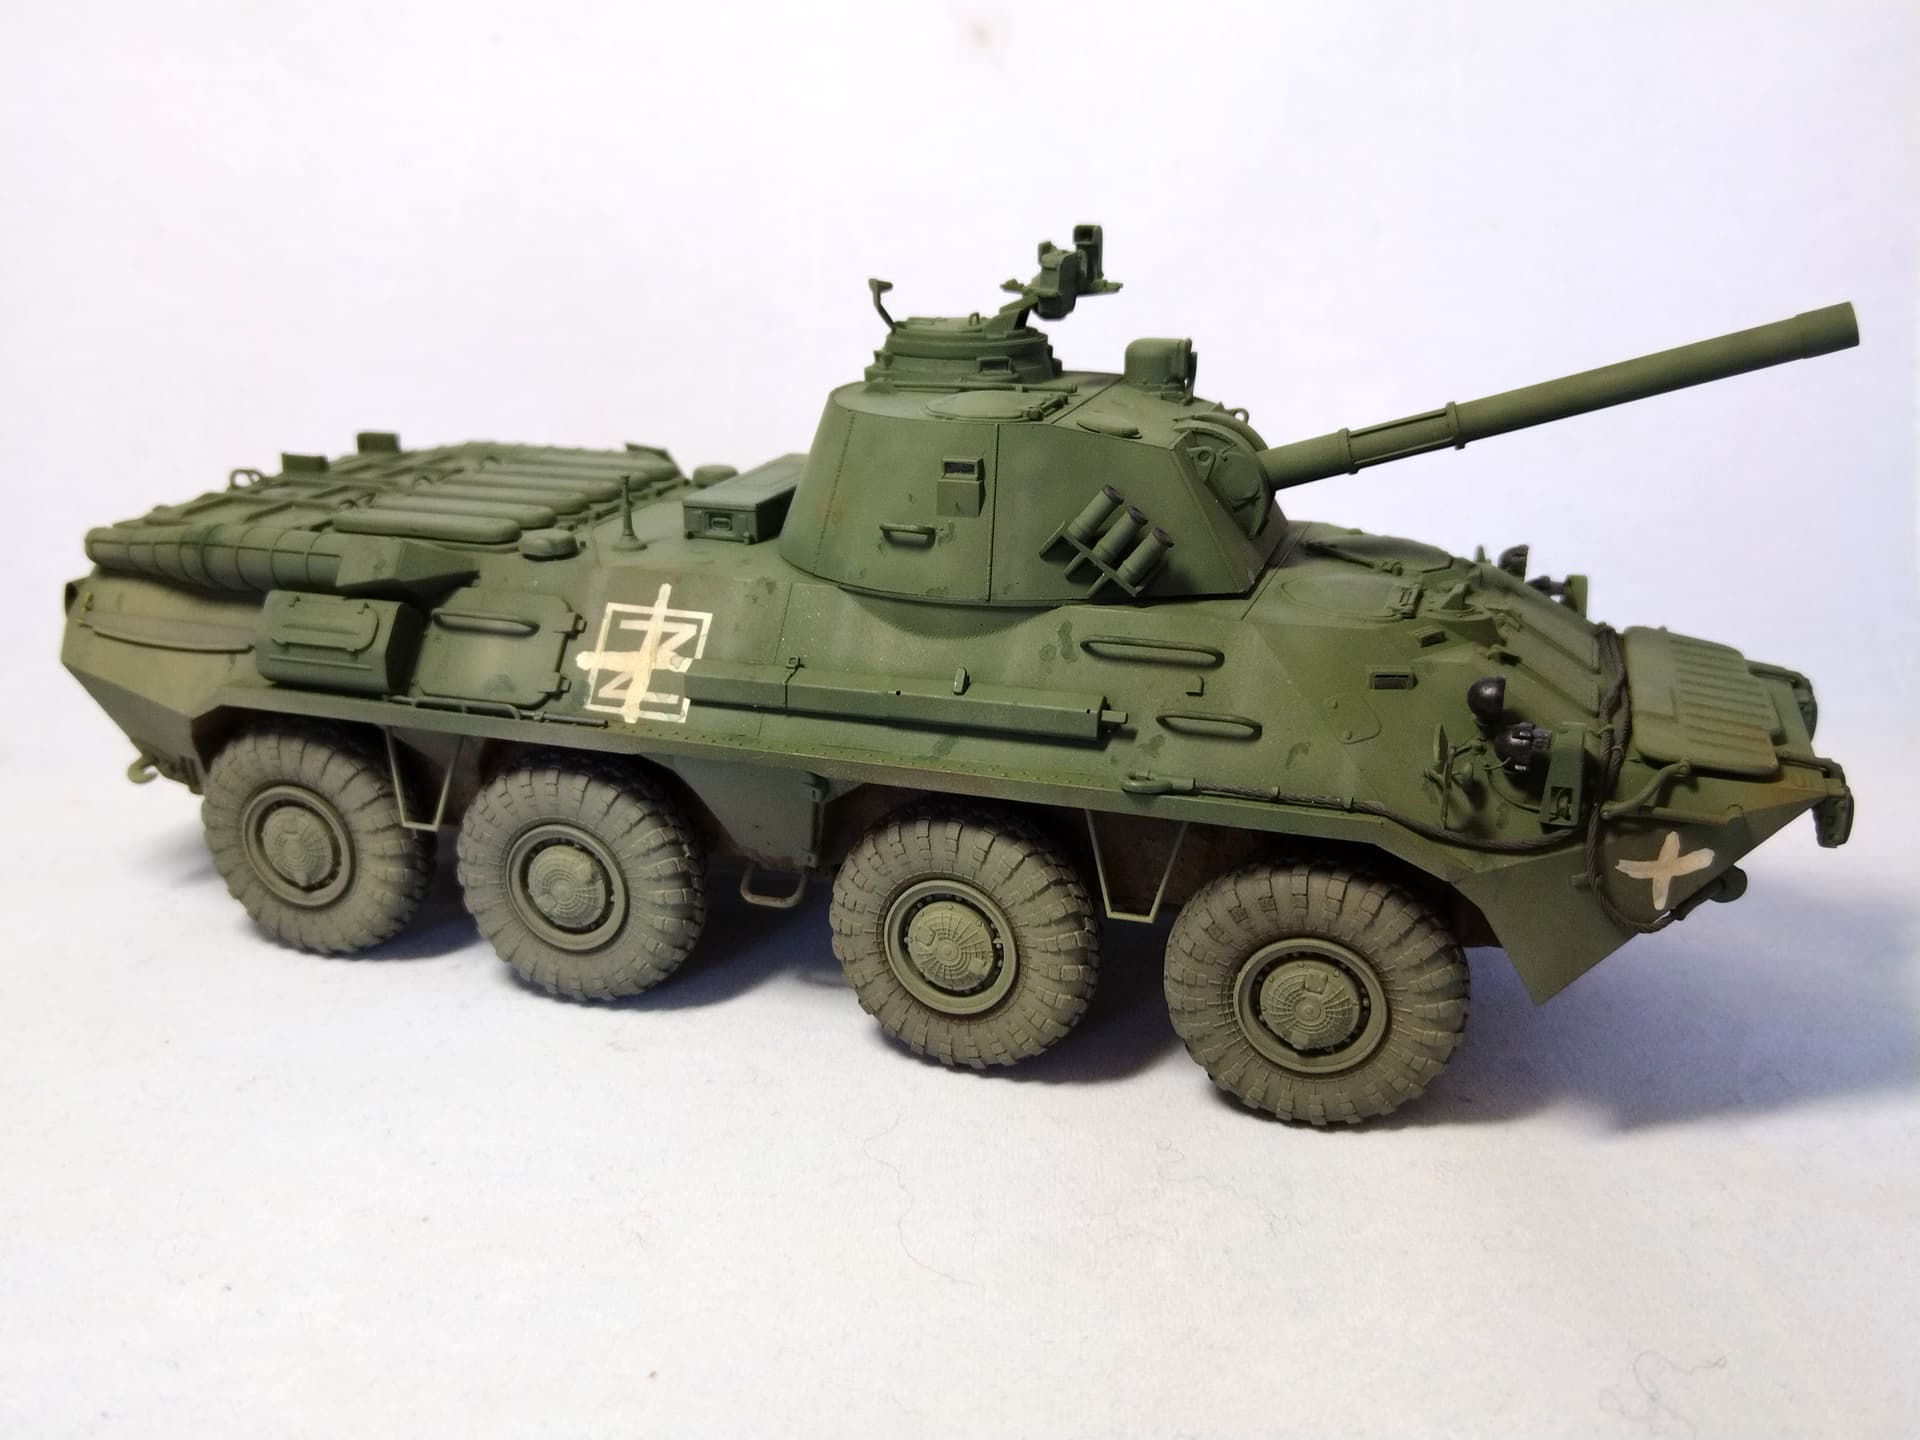
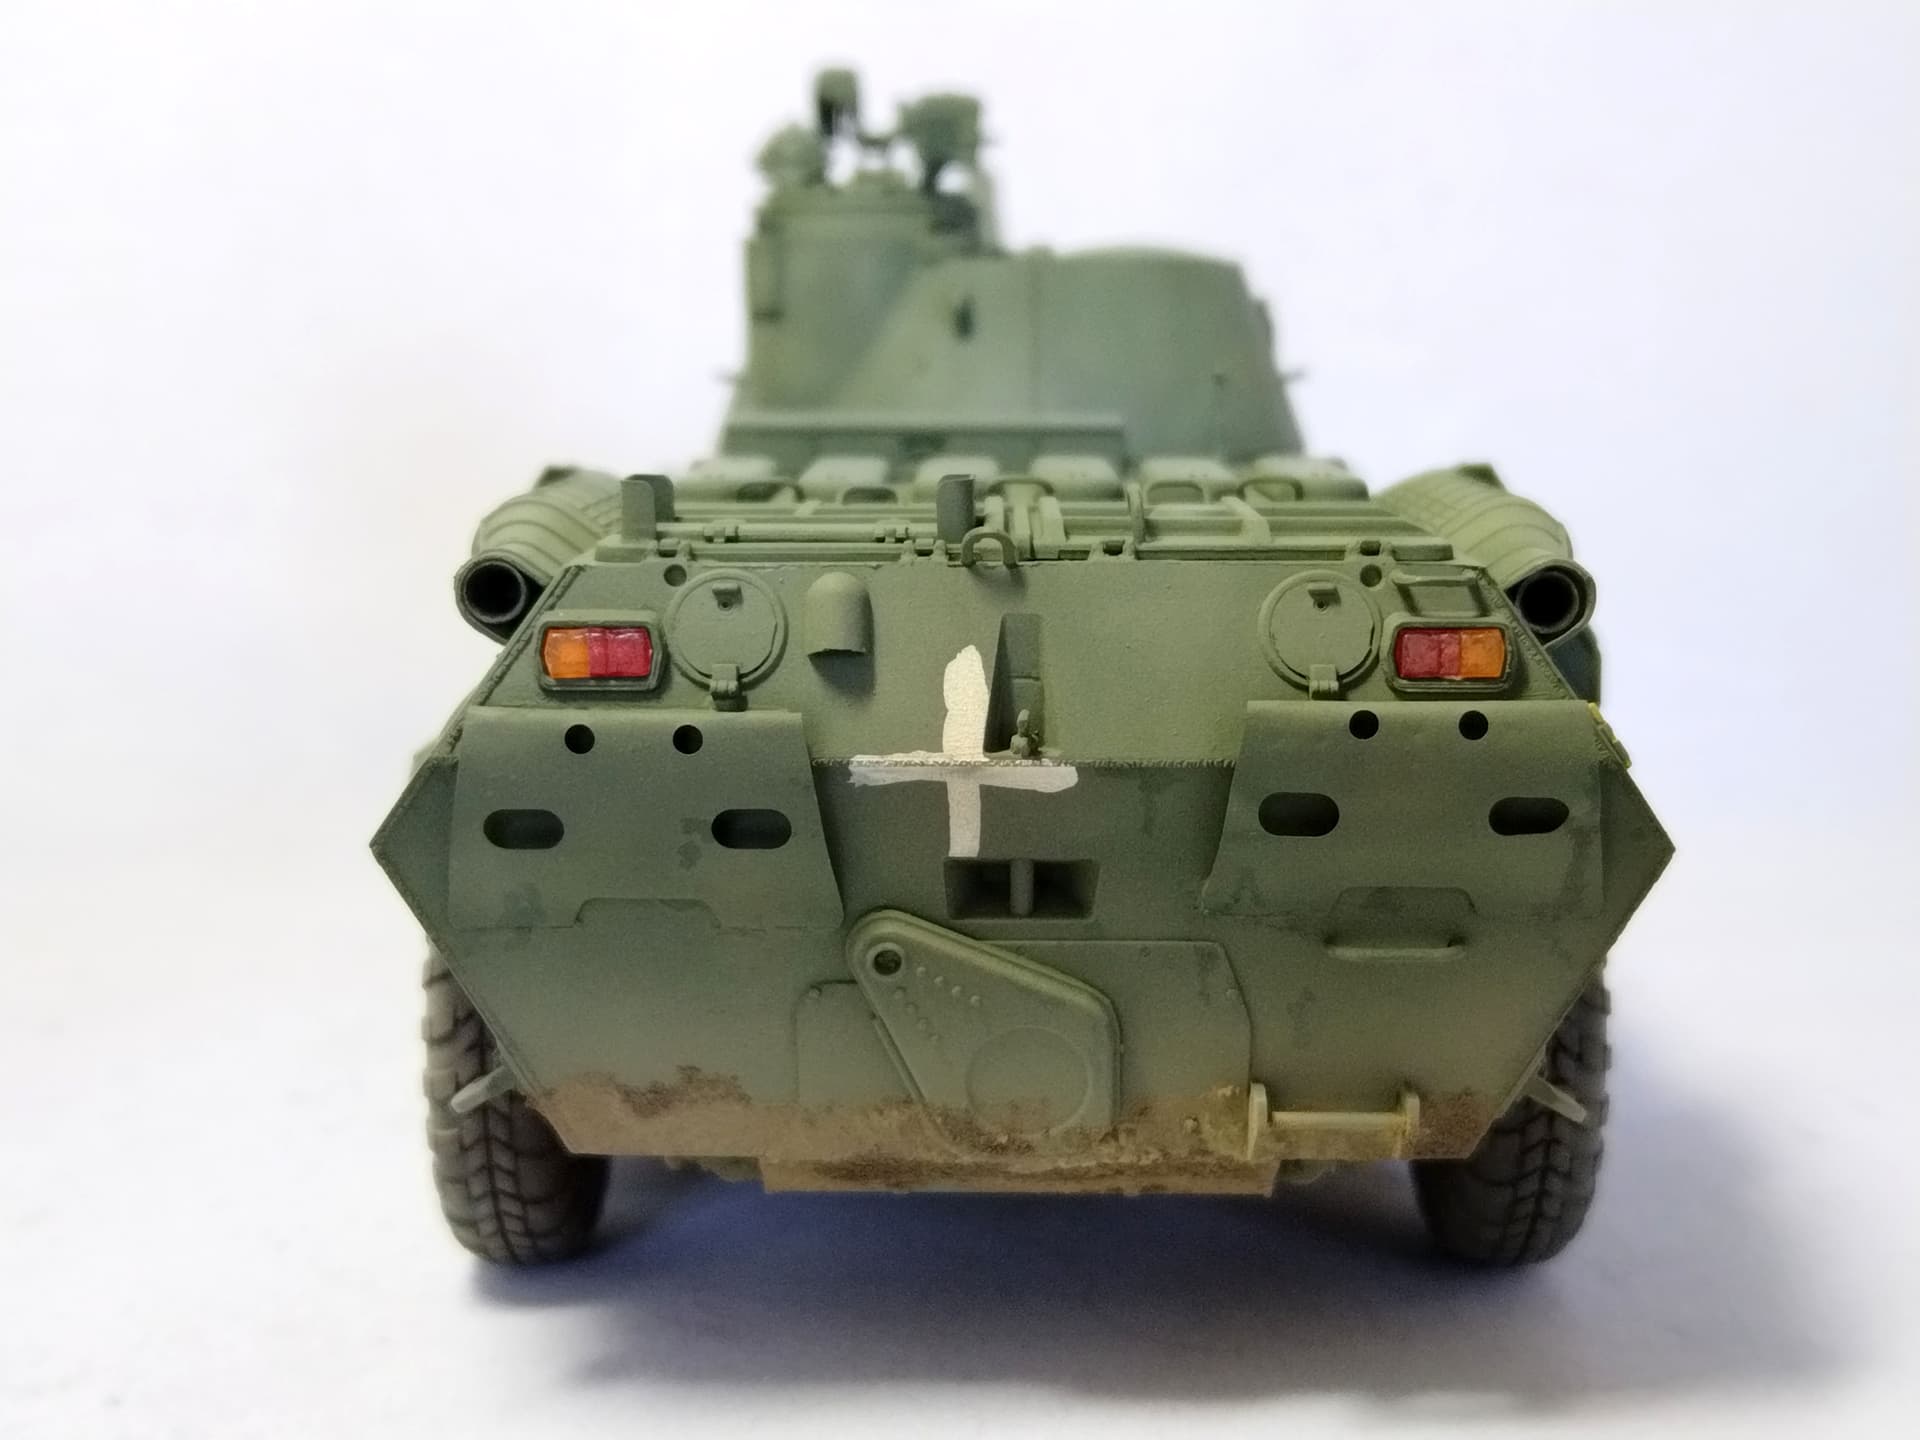
The base paint is on. It’s XF-65 Field Grey on which I applied a kind of mottled effect with the same color slightly enlightened.
I’m still not decided on how to depict the markings. I don’t want them to be hard edges as the actual ones are probably applied with spraycans.
Olivier
5 Likes
That mottled effect has worked really well. Some nice variations all over to unequal weathering and wear and tear.
2 Likes
Thank you Johnny.
I have made the markings with masking tape for the Russian original ones and I just hand painted the Ukrainian white crosses according to the reference picture. I didn’t intend to make an accurate rendition of the picture however it inspired me a lot for the stain, wear and mud even though I didn’t go the same way for the mud.
When the stains and streaking were dry I melted them together with several layers of earth.
Olivier
7 Likes
Excellent finish Olivier… The colours you worked with and the difference in tones really stands out. Another top build
2 Likes