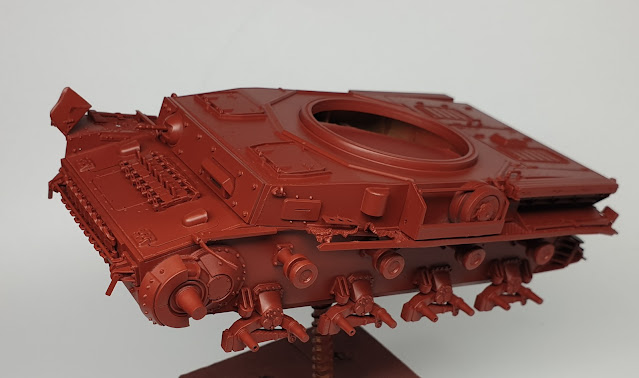
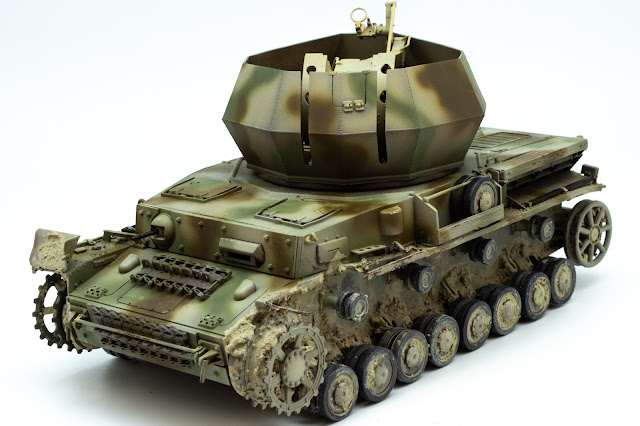
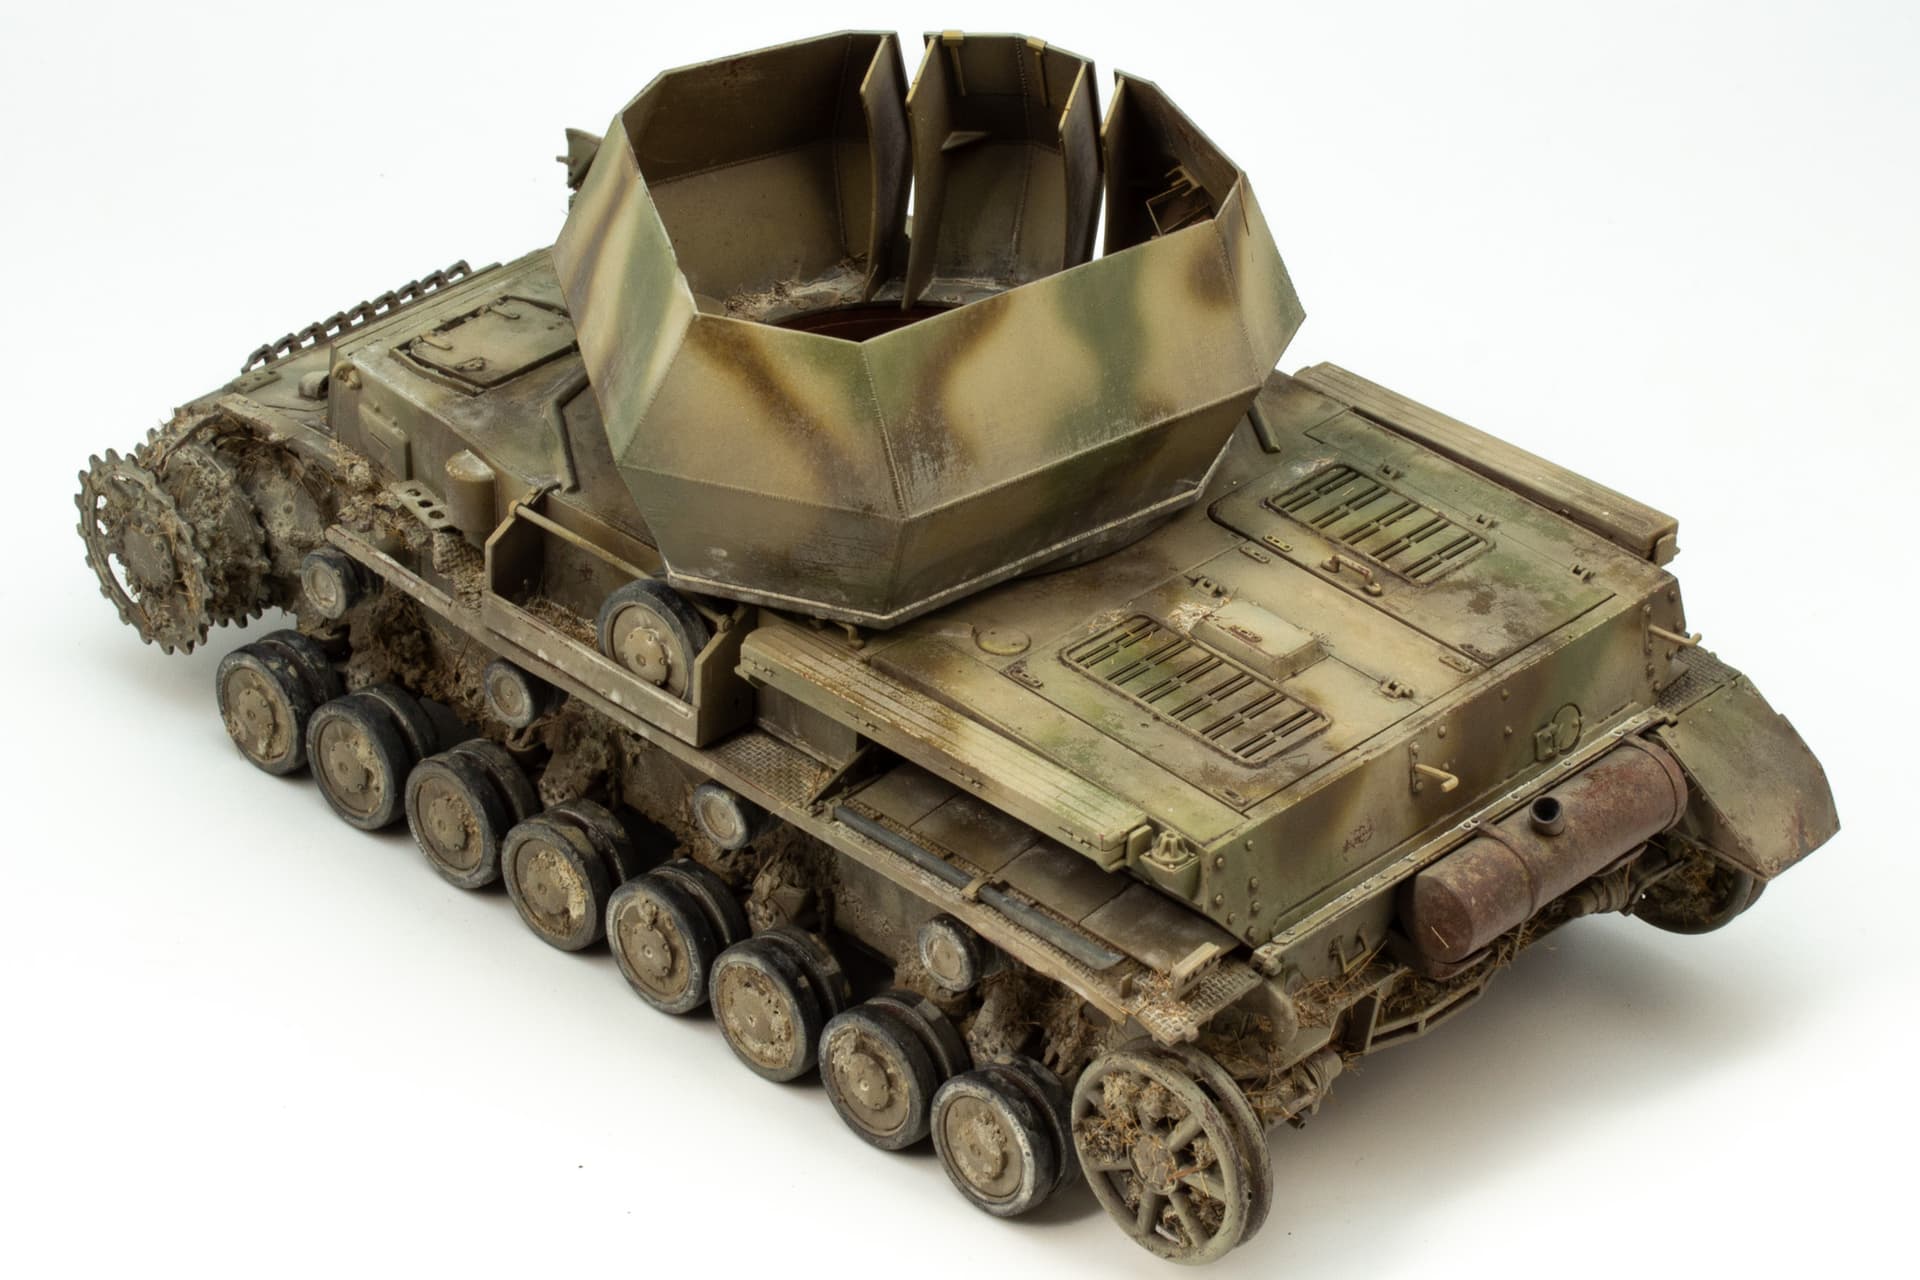
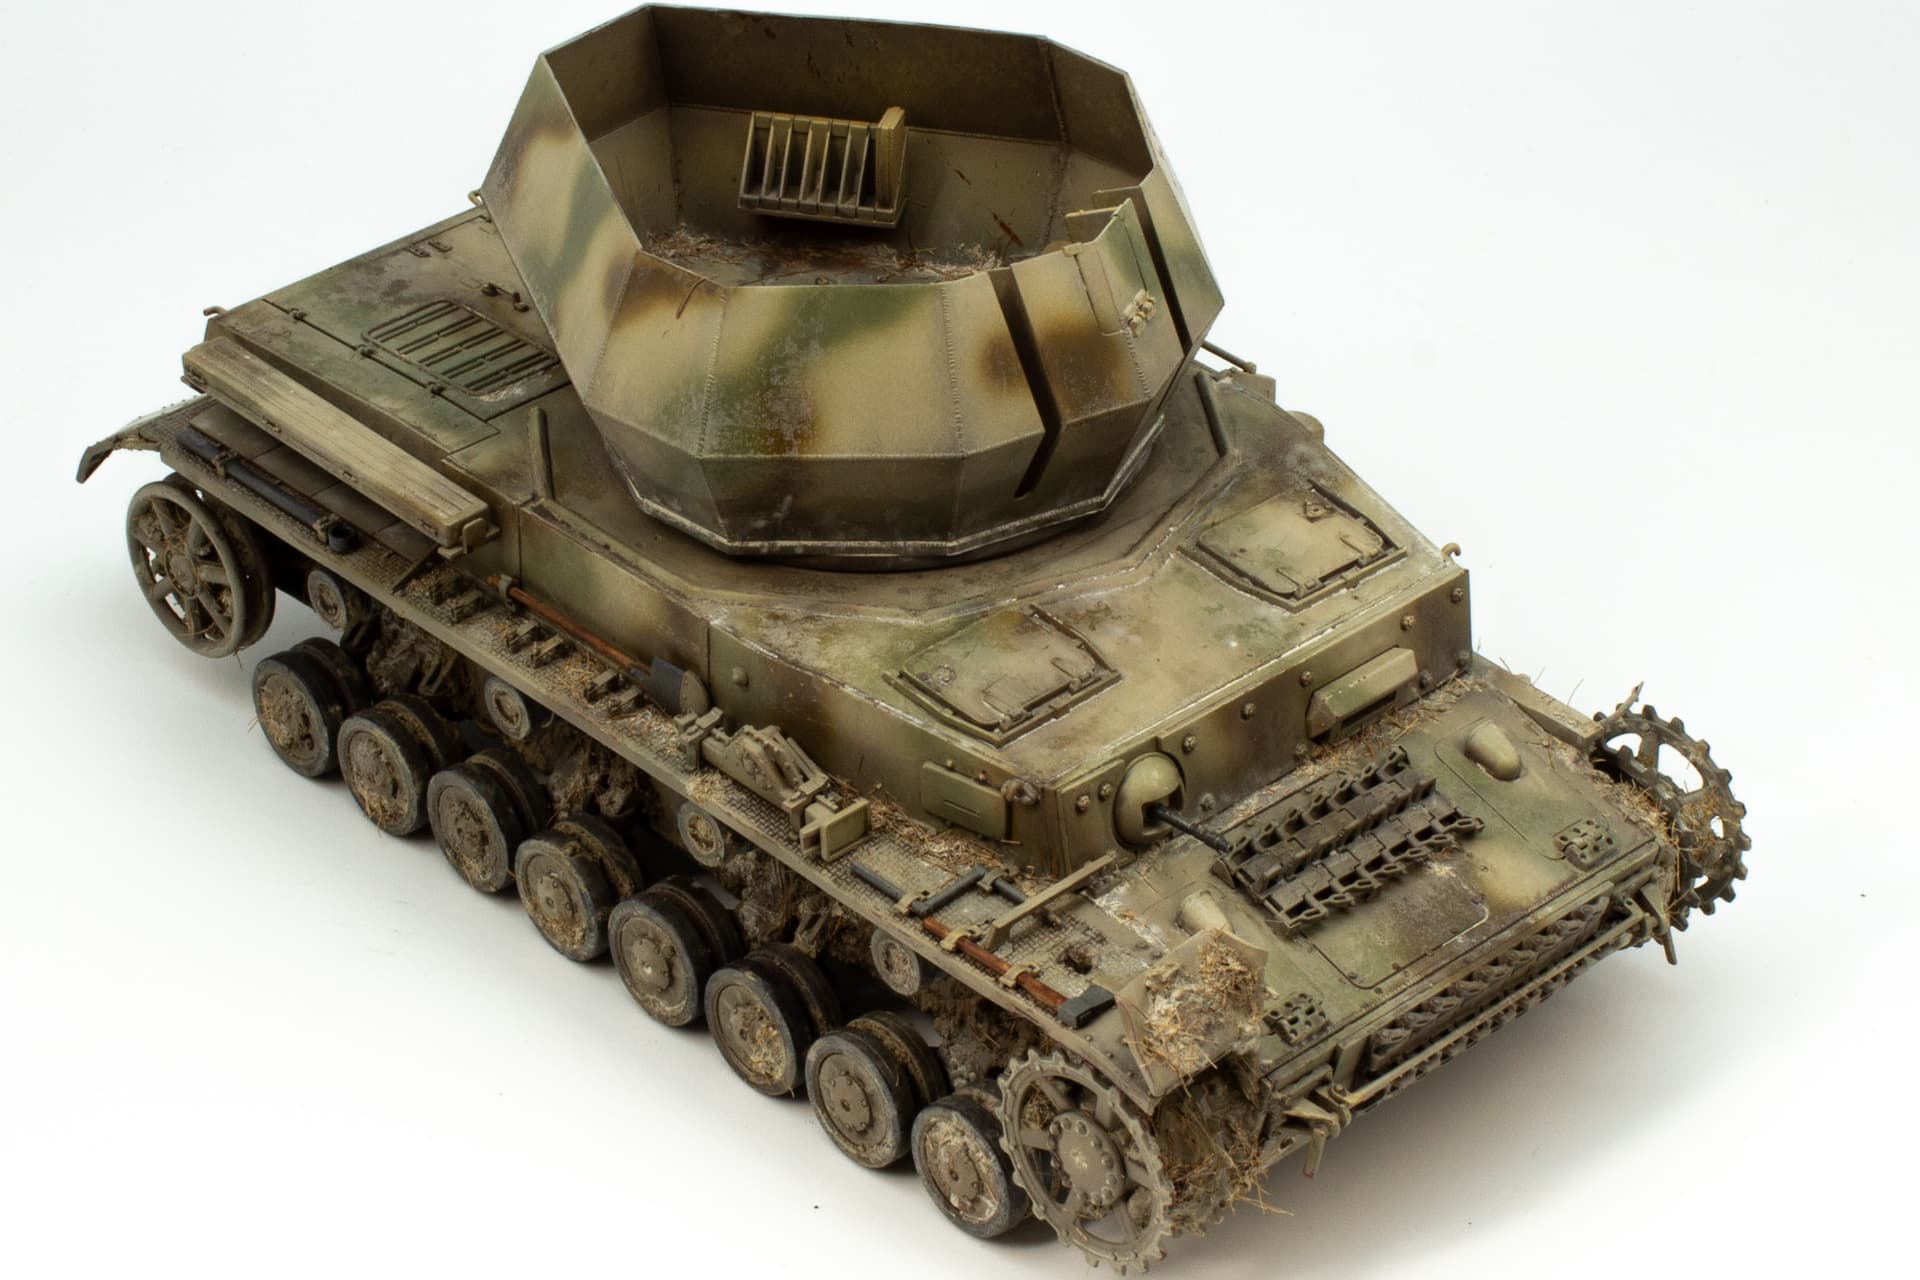
Trying out a bunch of new lacquer paints, enamels, and acrylic mud paste on a Dragon Flakpanzer shelf queen that had sat in primer for far too long.
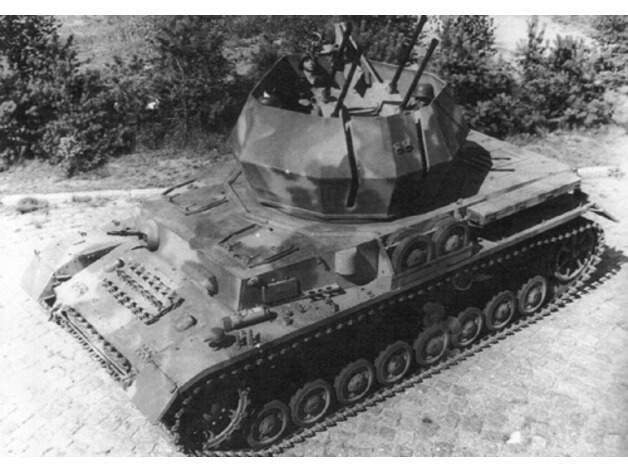
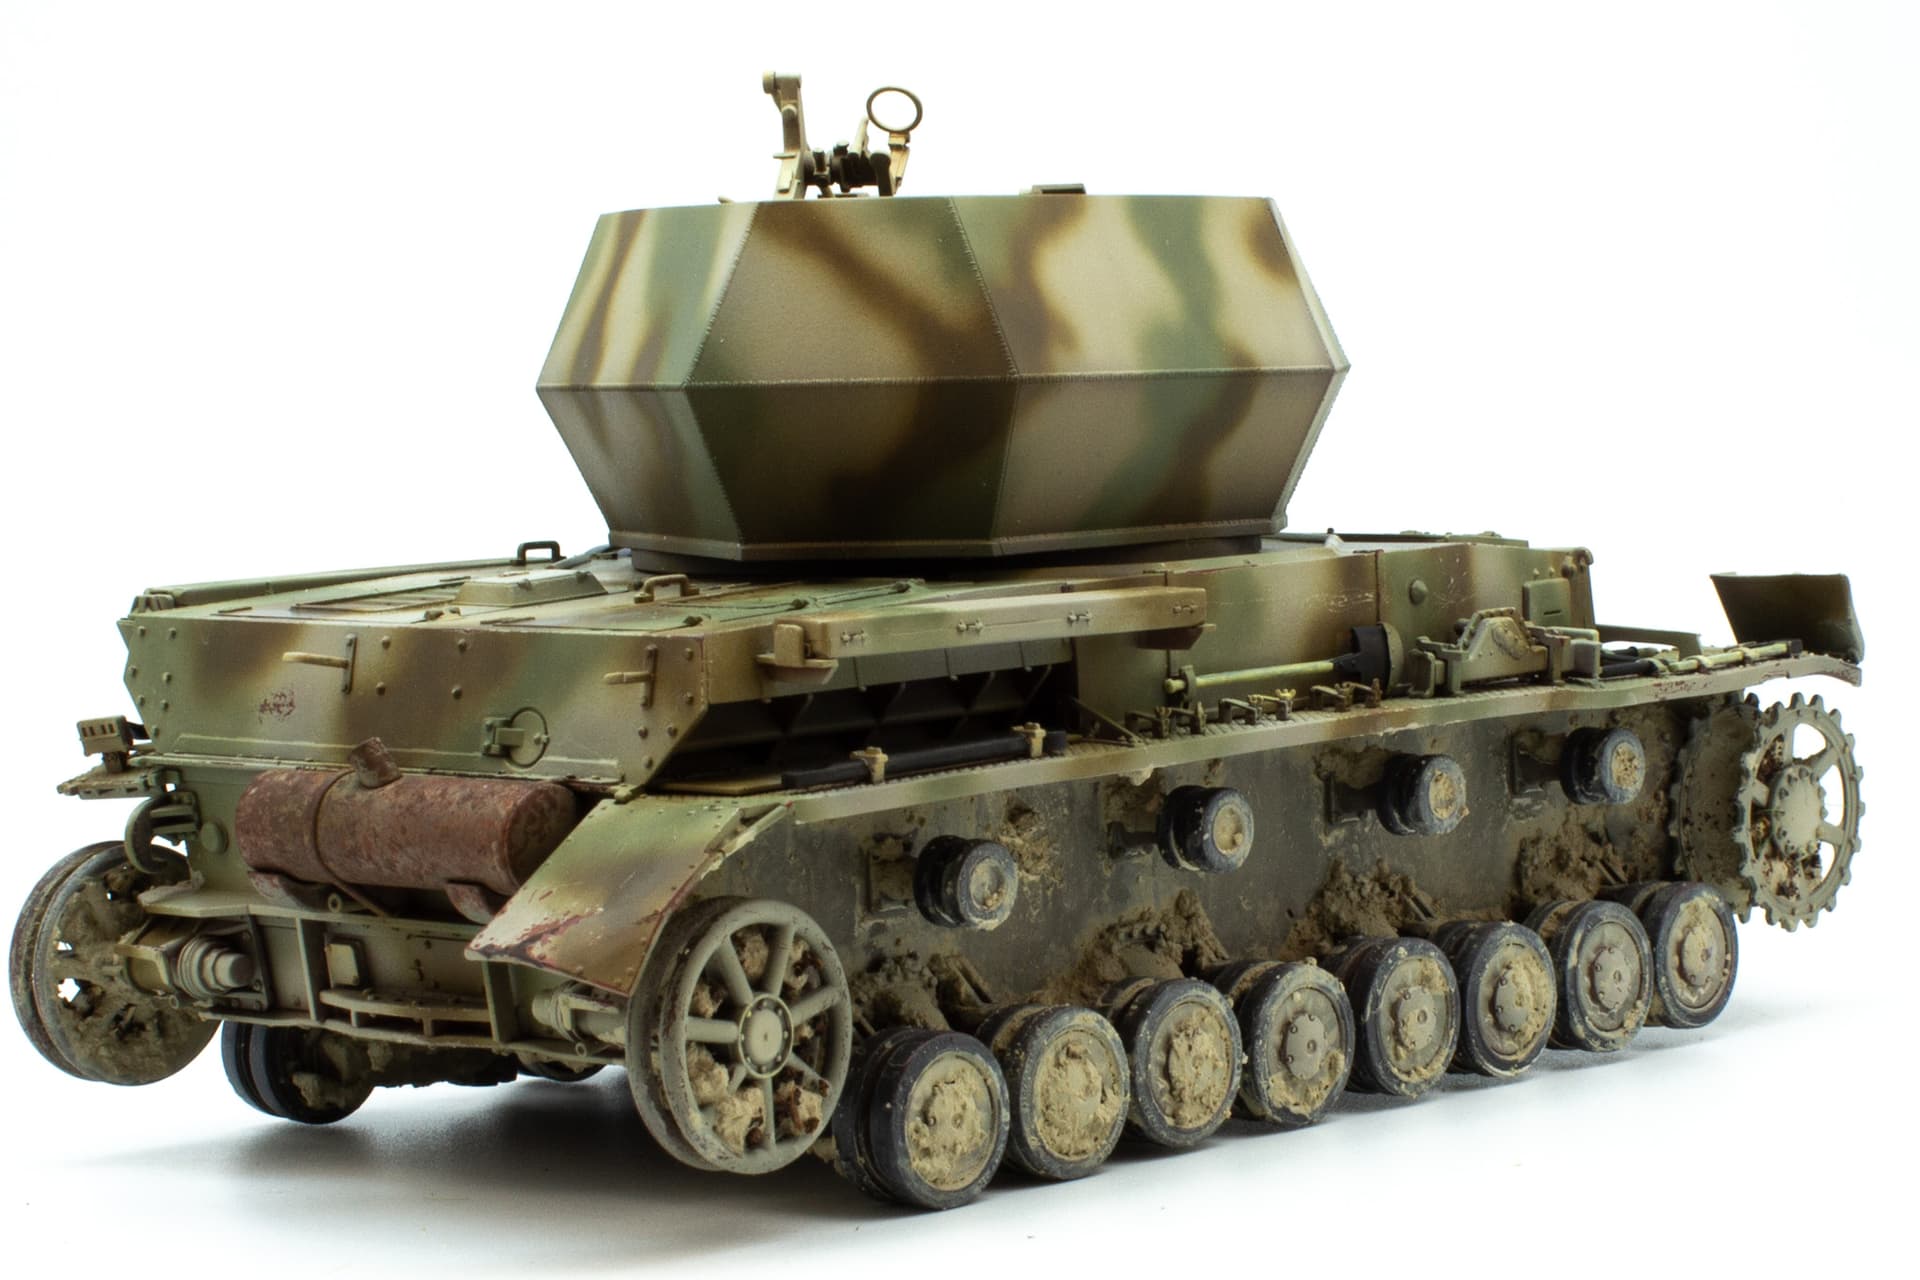
Kit # 6342 is based on an early Ausf G hull without Zimmerit
Its been so long I’ve forgotten why it never progressed beyond the primer painting stage😳
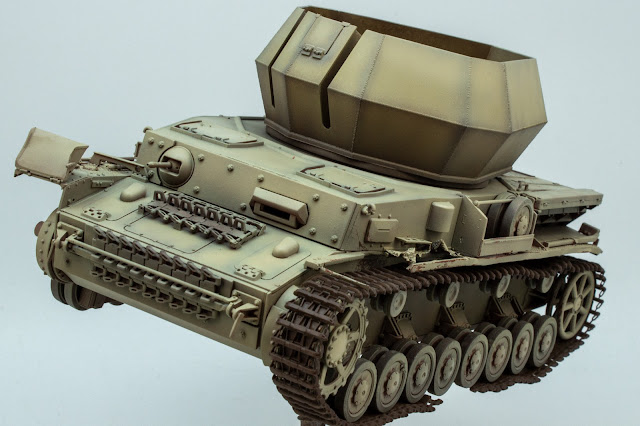
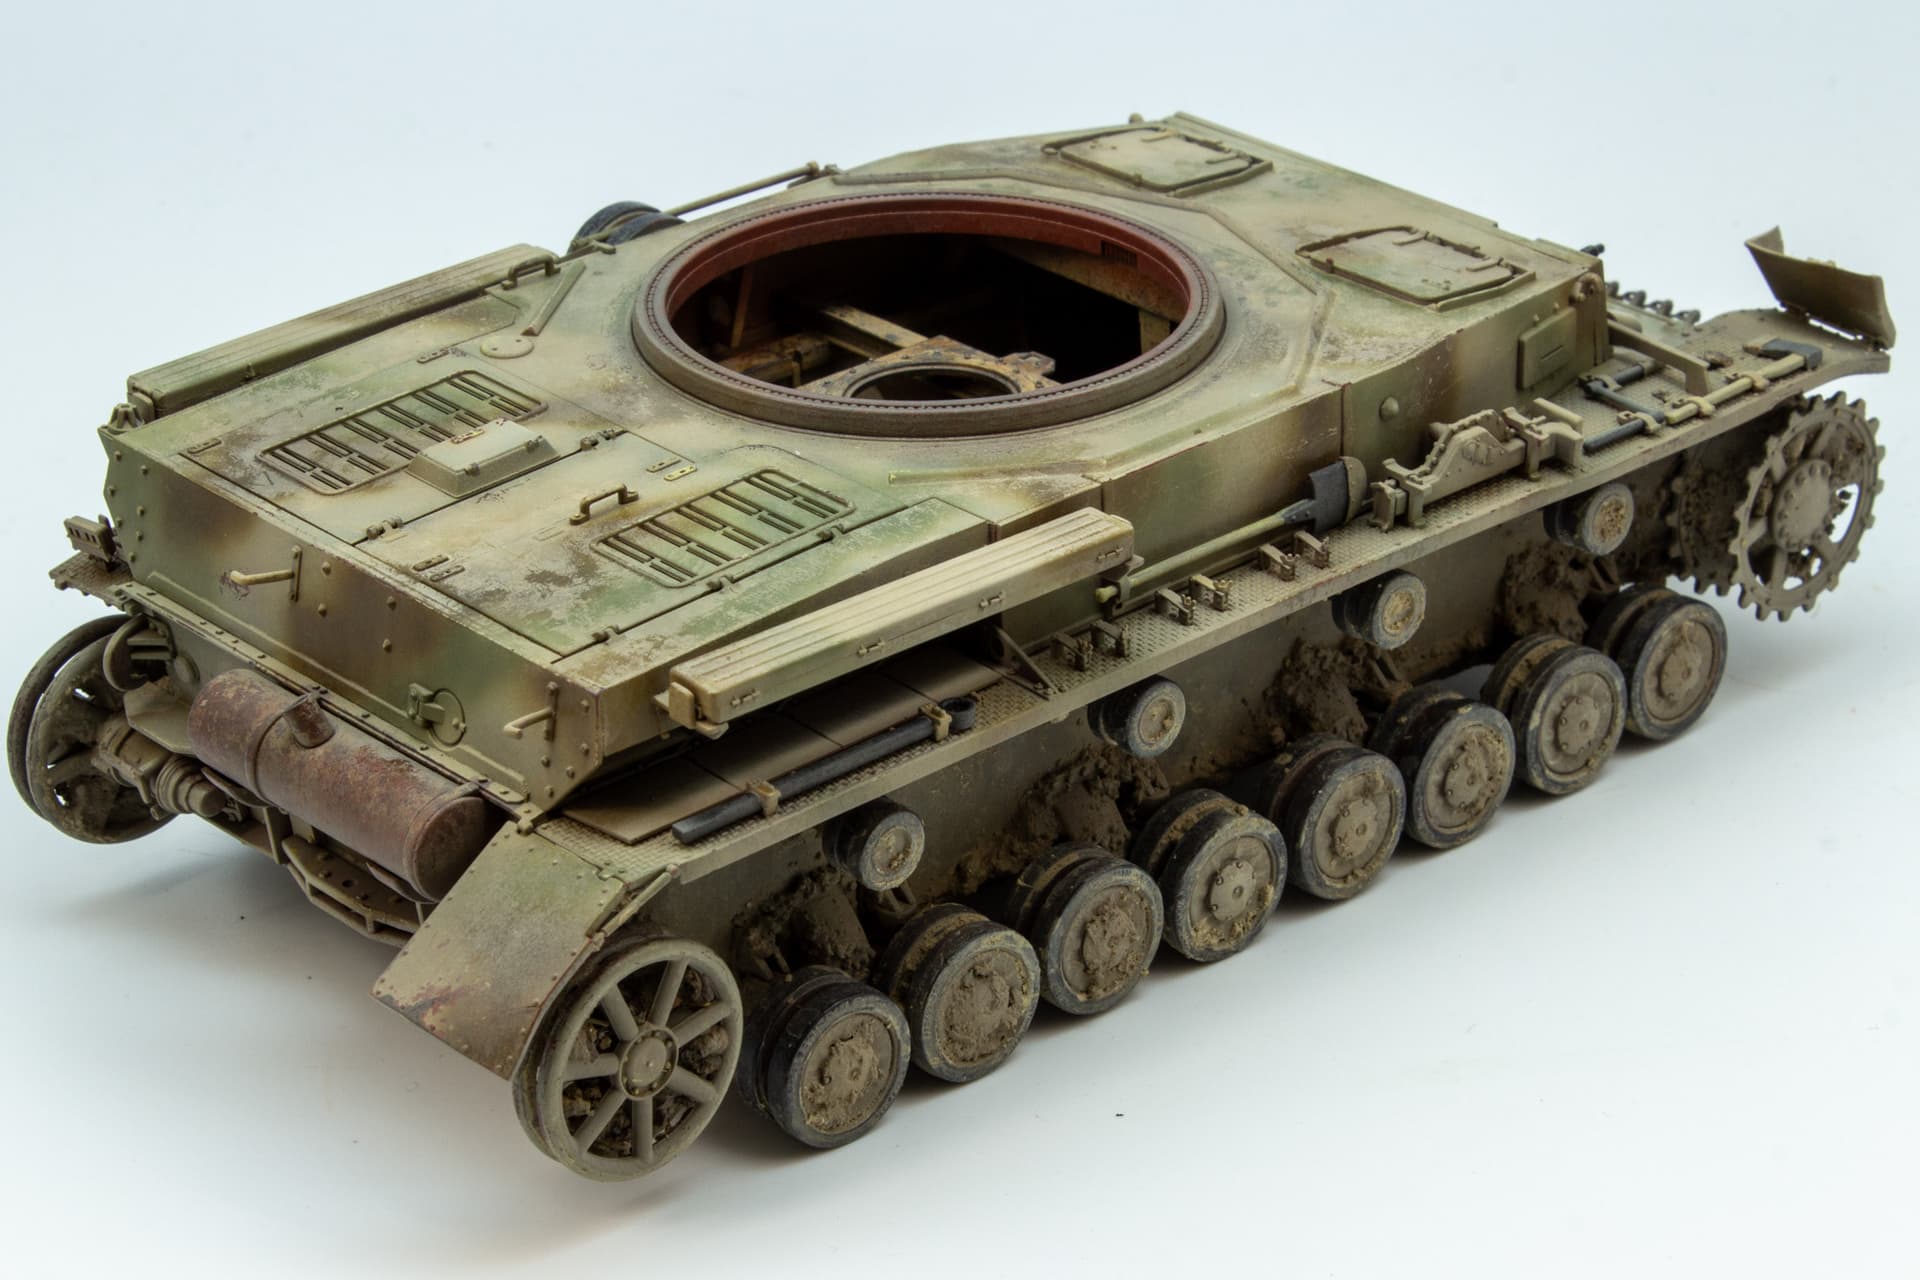
Tamiya lacquer dark yellow 2 base coat over a Mr Mahogany surfacer pre-shade. Conservative amount of chipping added
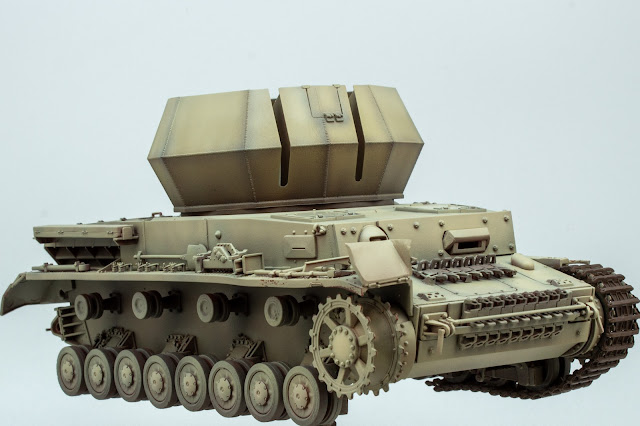
Tamiya lacquer green 2 and red brown 2 camo, again with very light chipping. AK acrylic light mud texture paste added to the running gear
14 Likes
Thanks. Tamiya lacquer’s lay down so, so smooth. Stinky but great trouble free airbrush session.
2 Likes
i remember building the Mobelwagen version from Tamiya; nice build. But i like yours a lot.
3 Likes
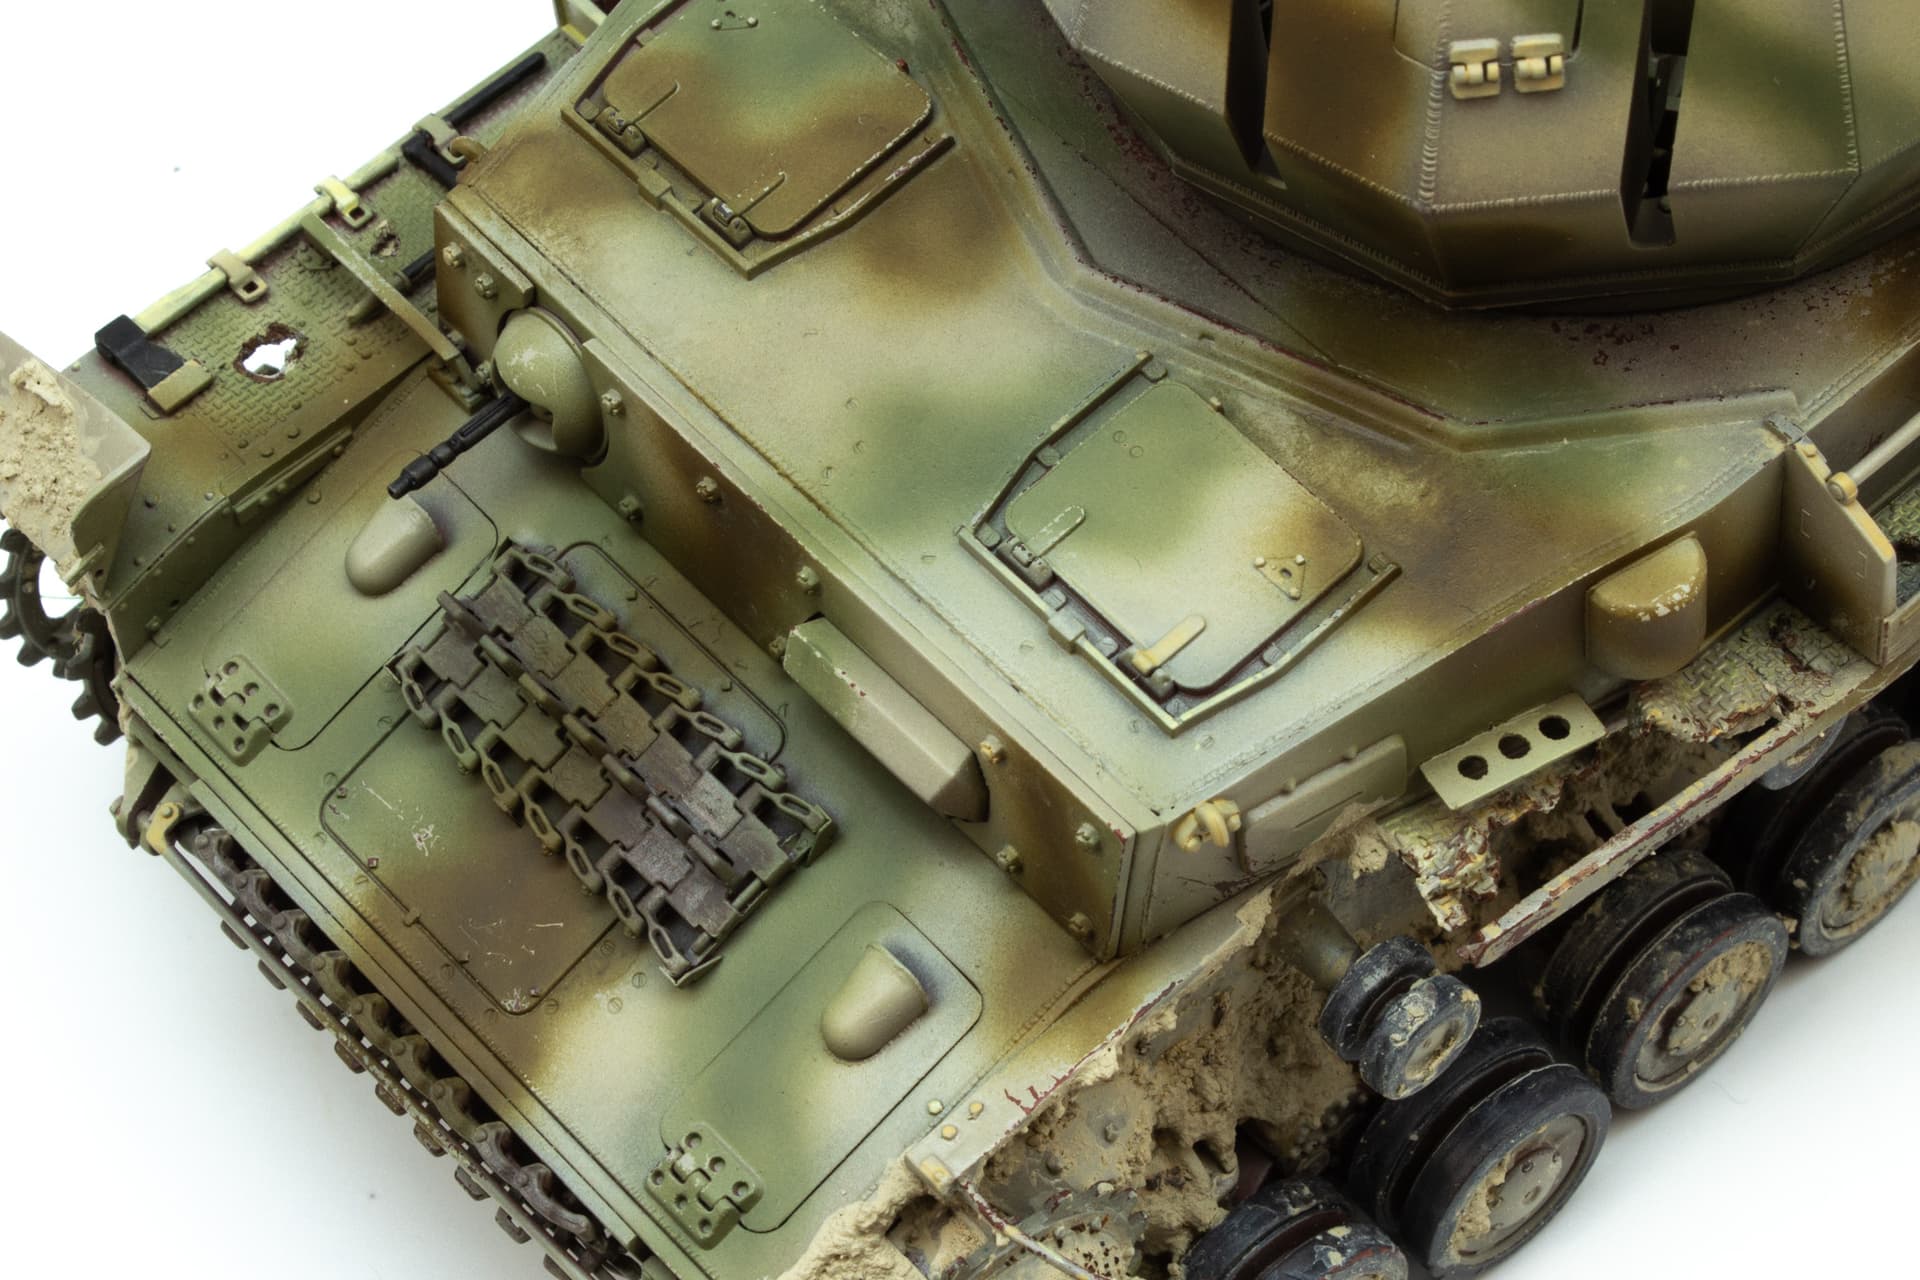
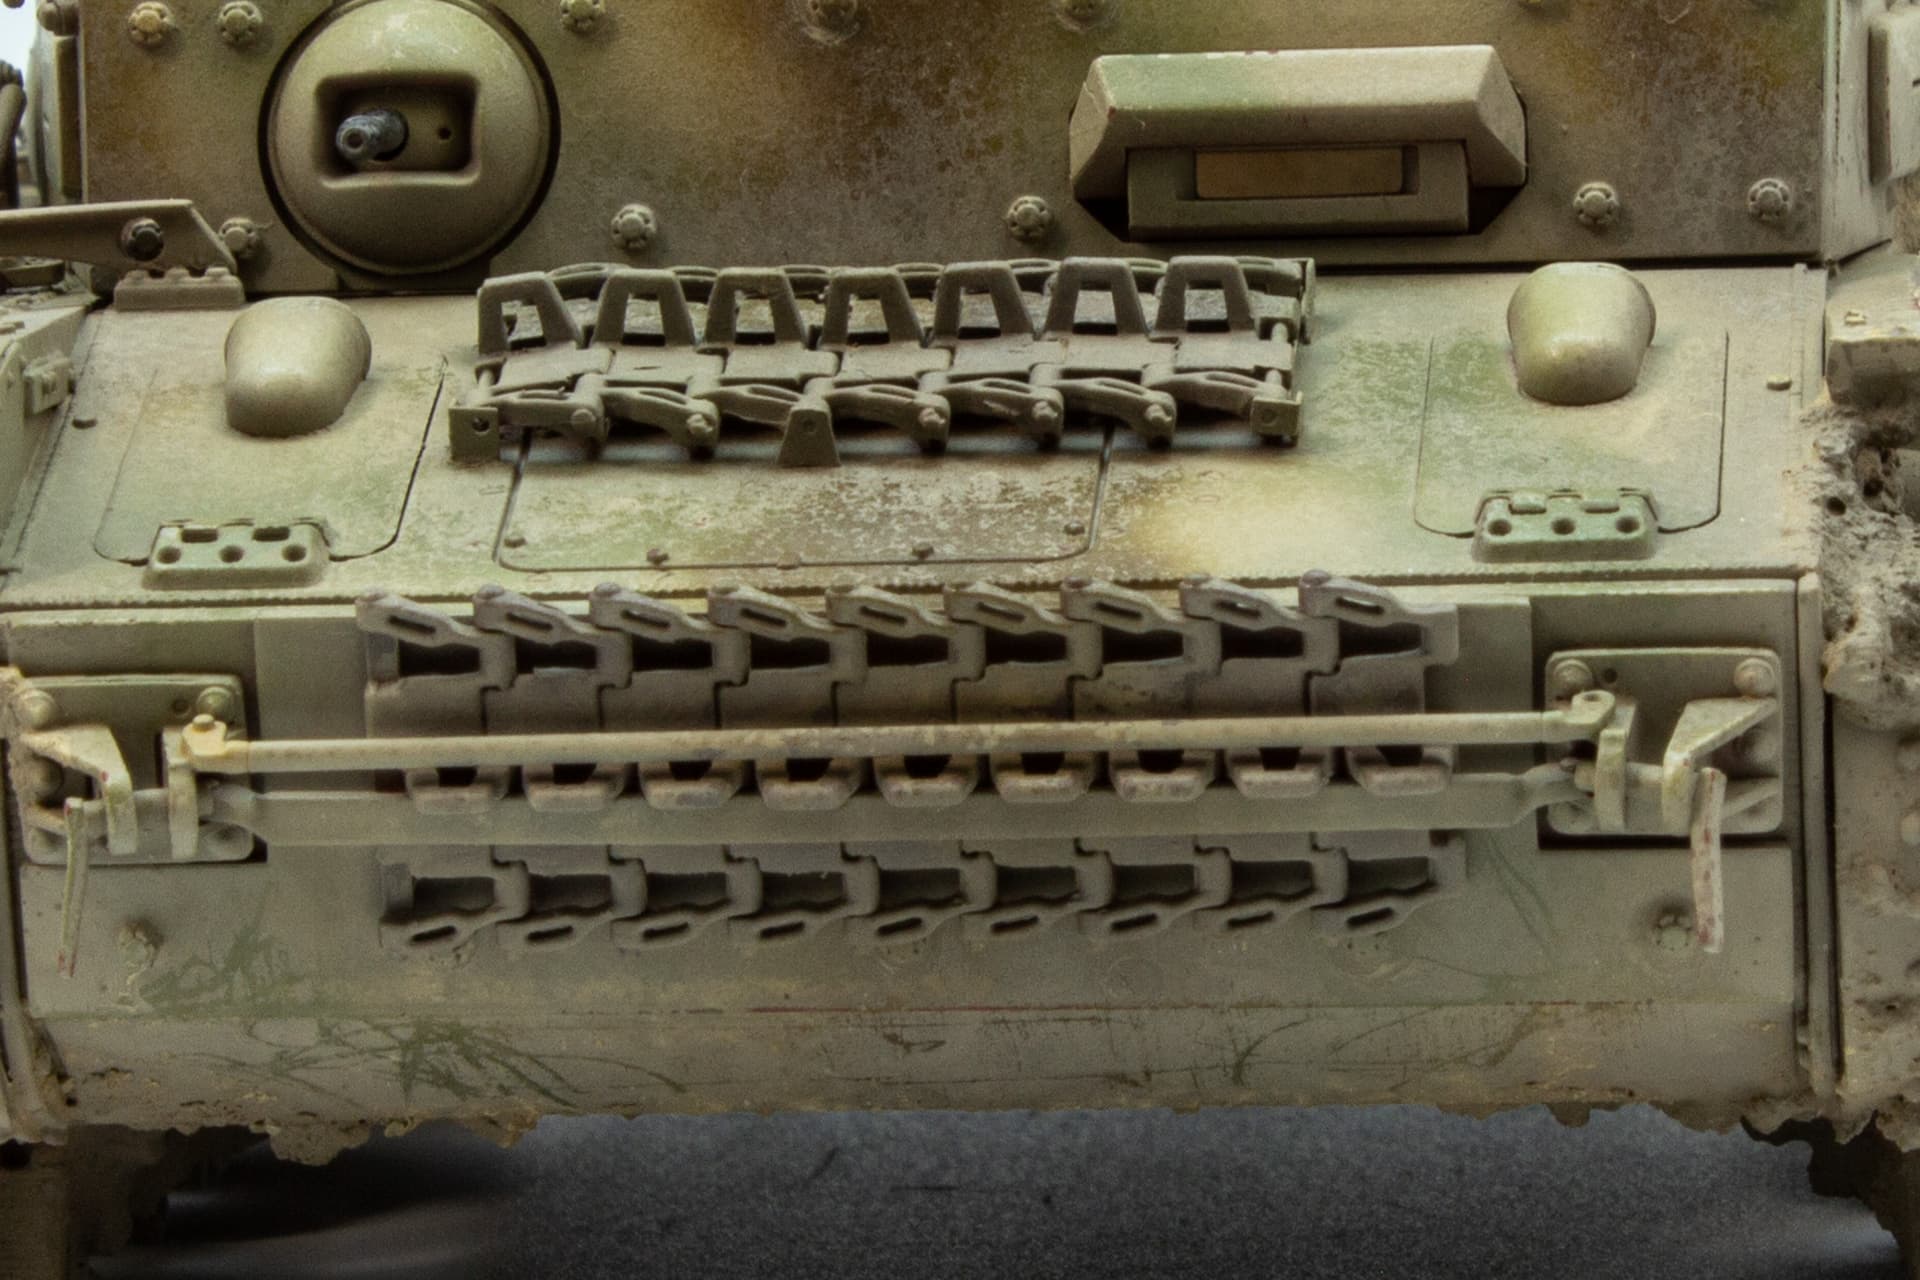
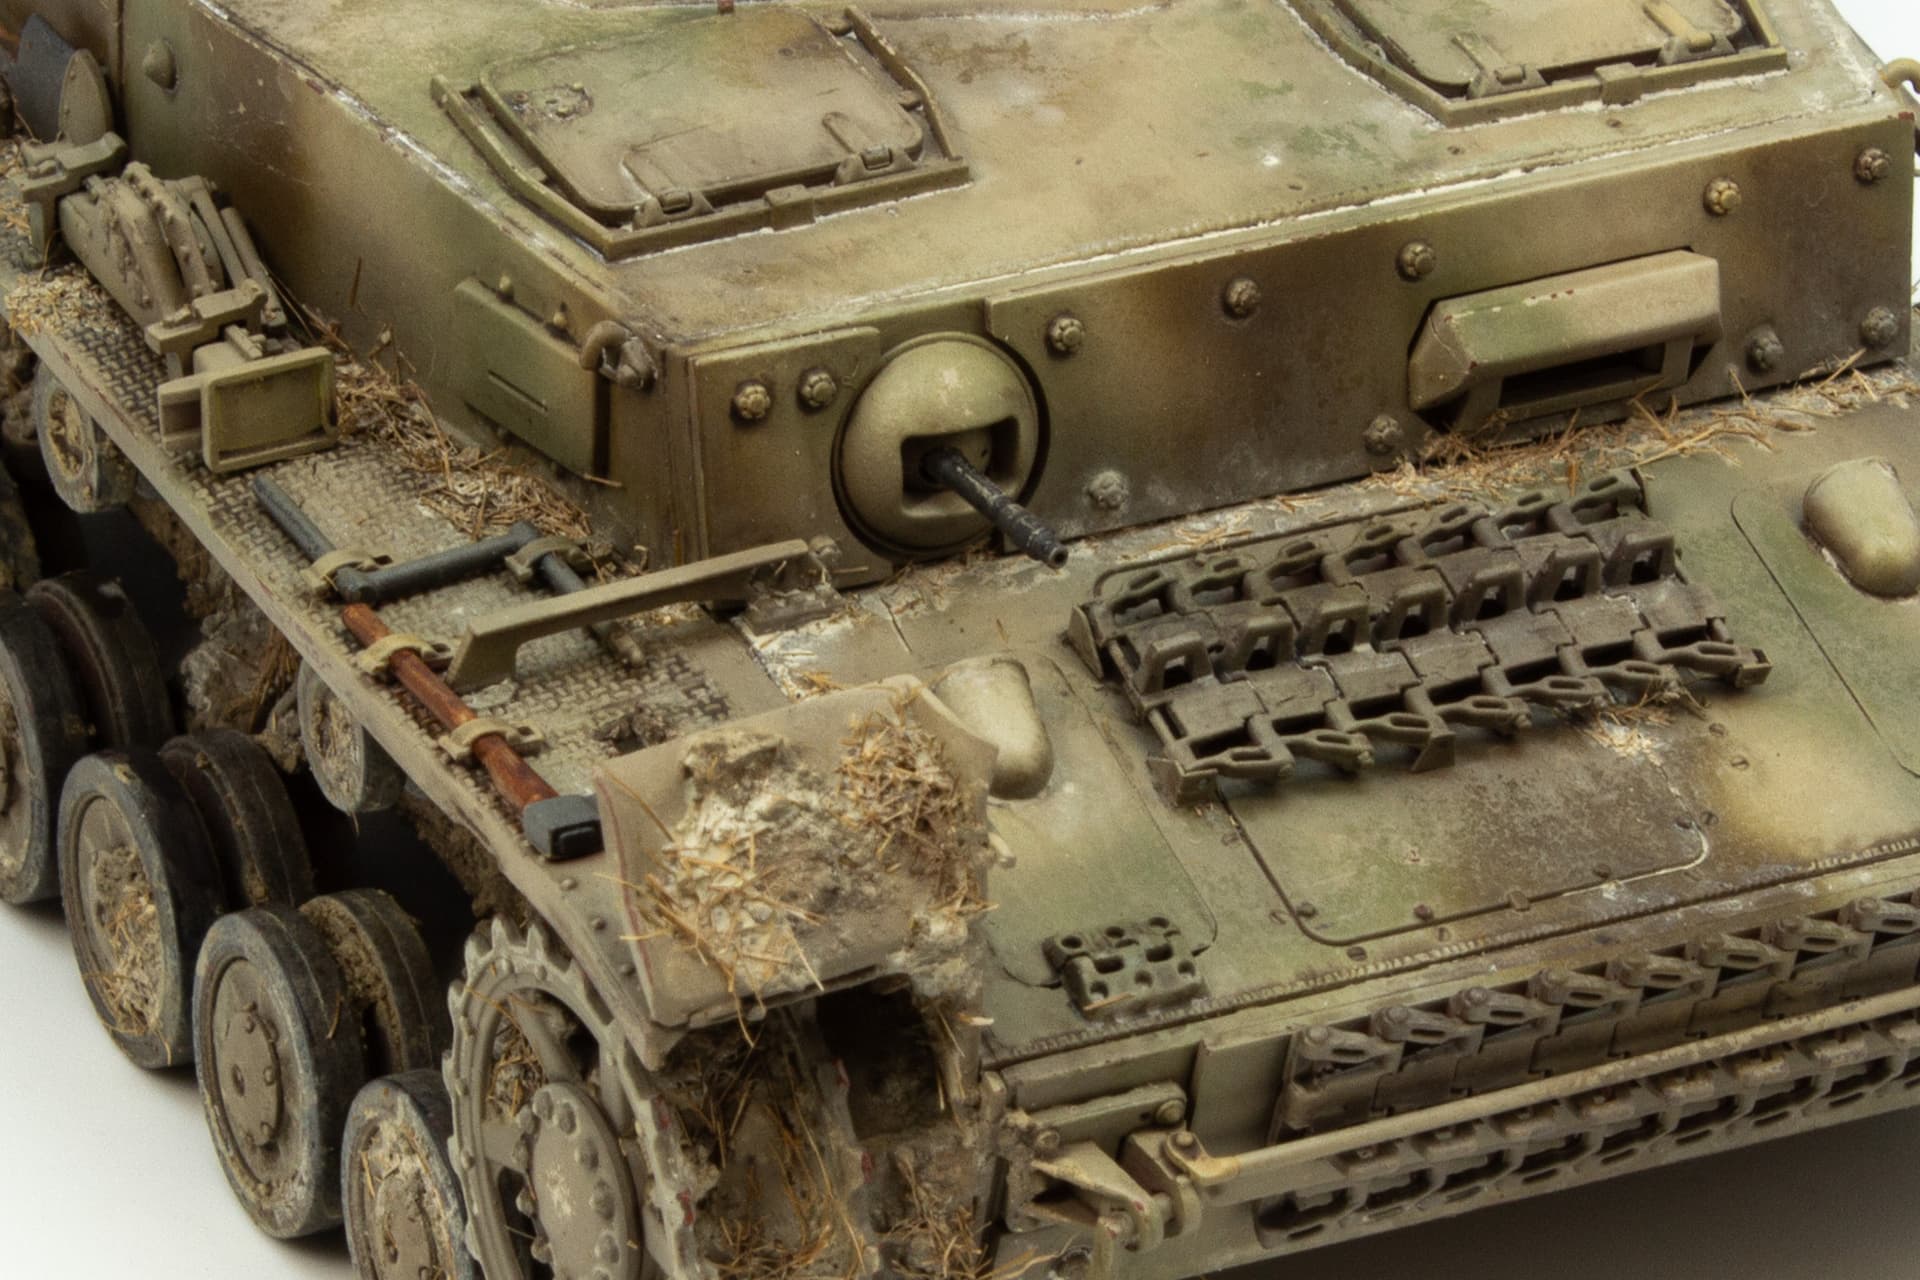
With the aid of underlying hairspray layers, damaged areas, edges and a few scrapes and scratches were added into the paintwork. Occasionally exposing the primer, but mainly just wearing off the camo layers. The spare tracks were first painted in Vallejo track primer and covered in the camo. Overlying paintwork was then worn down in a few selected places.
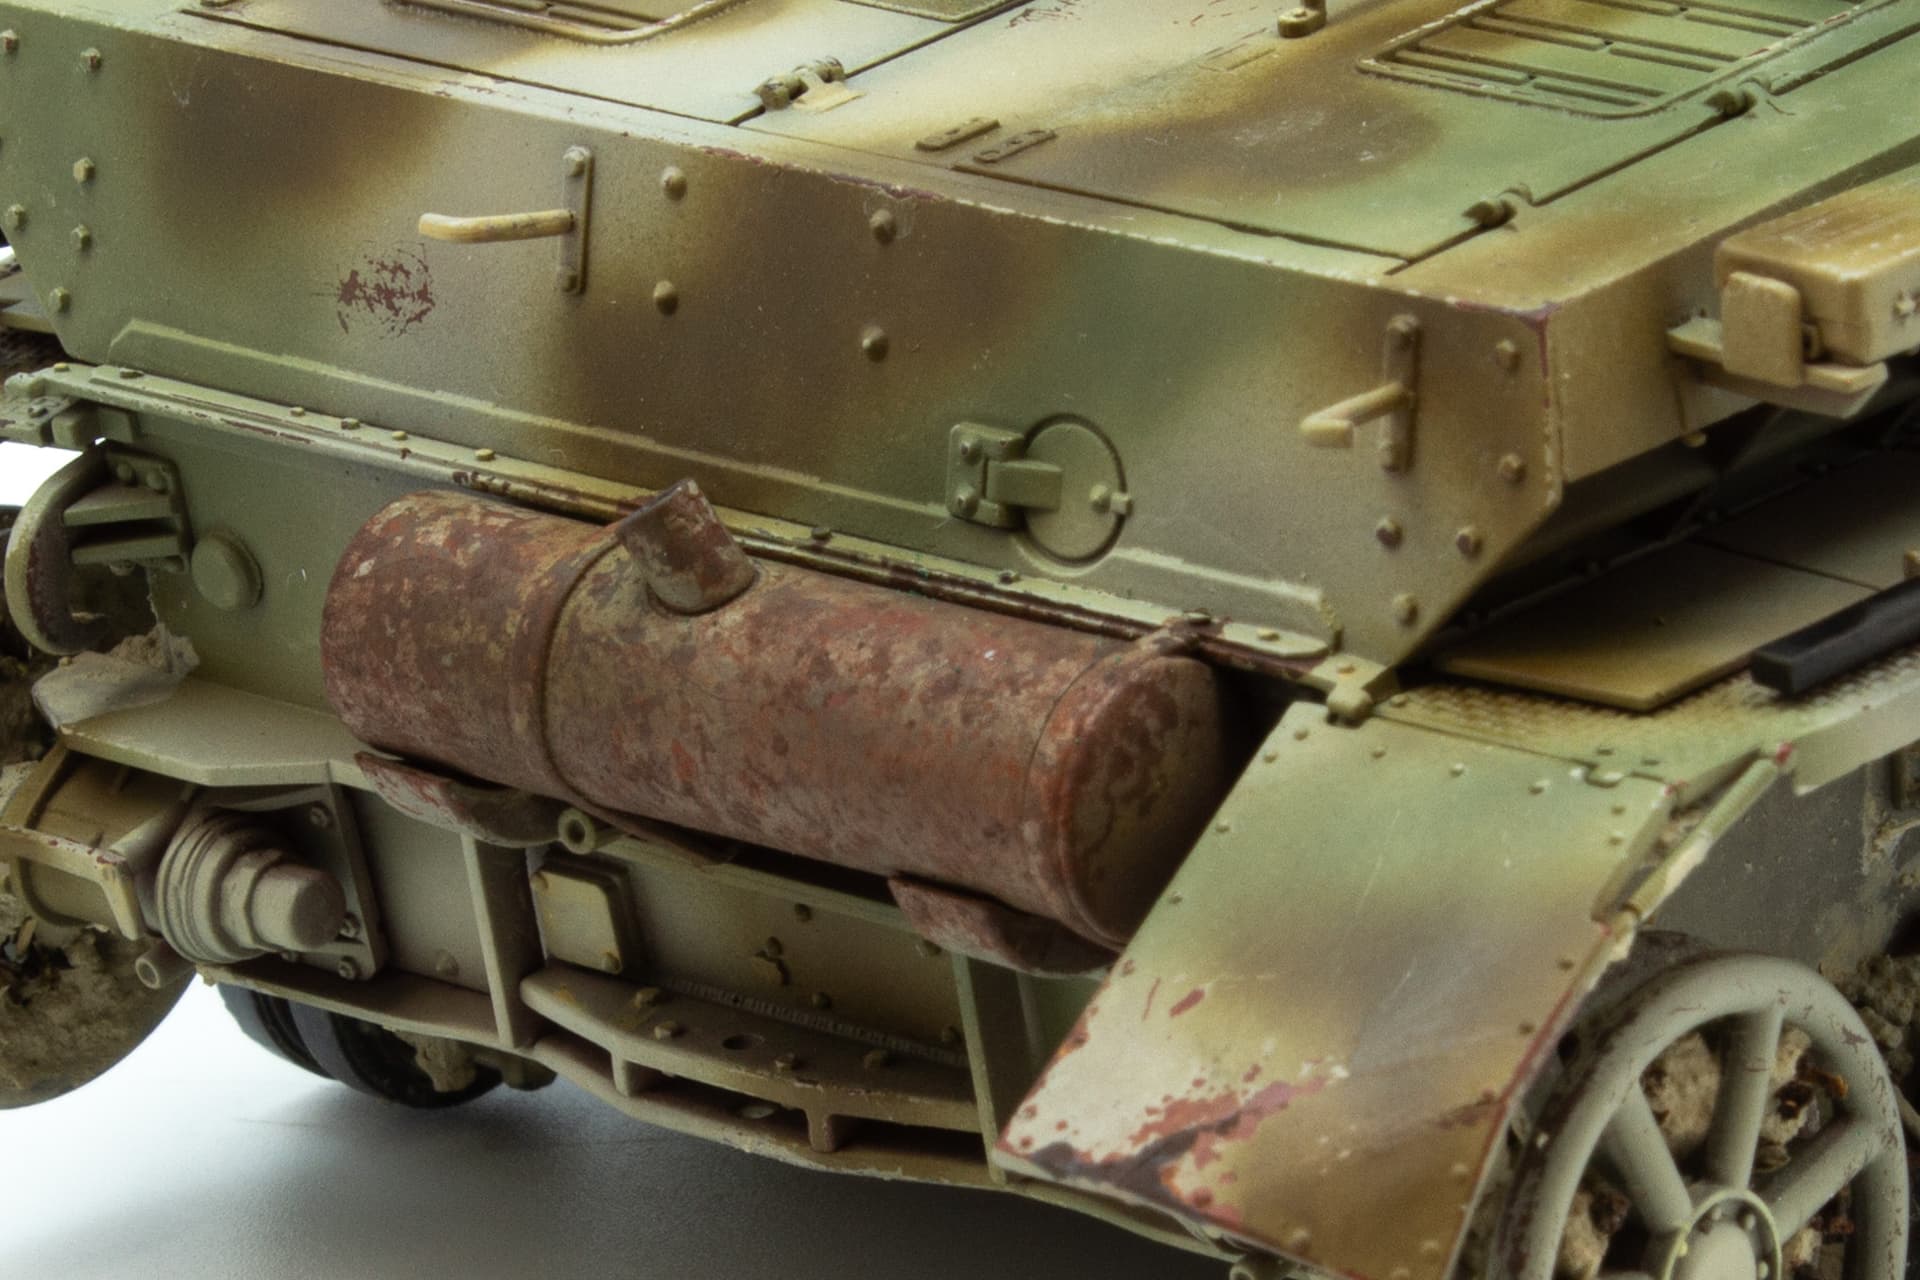
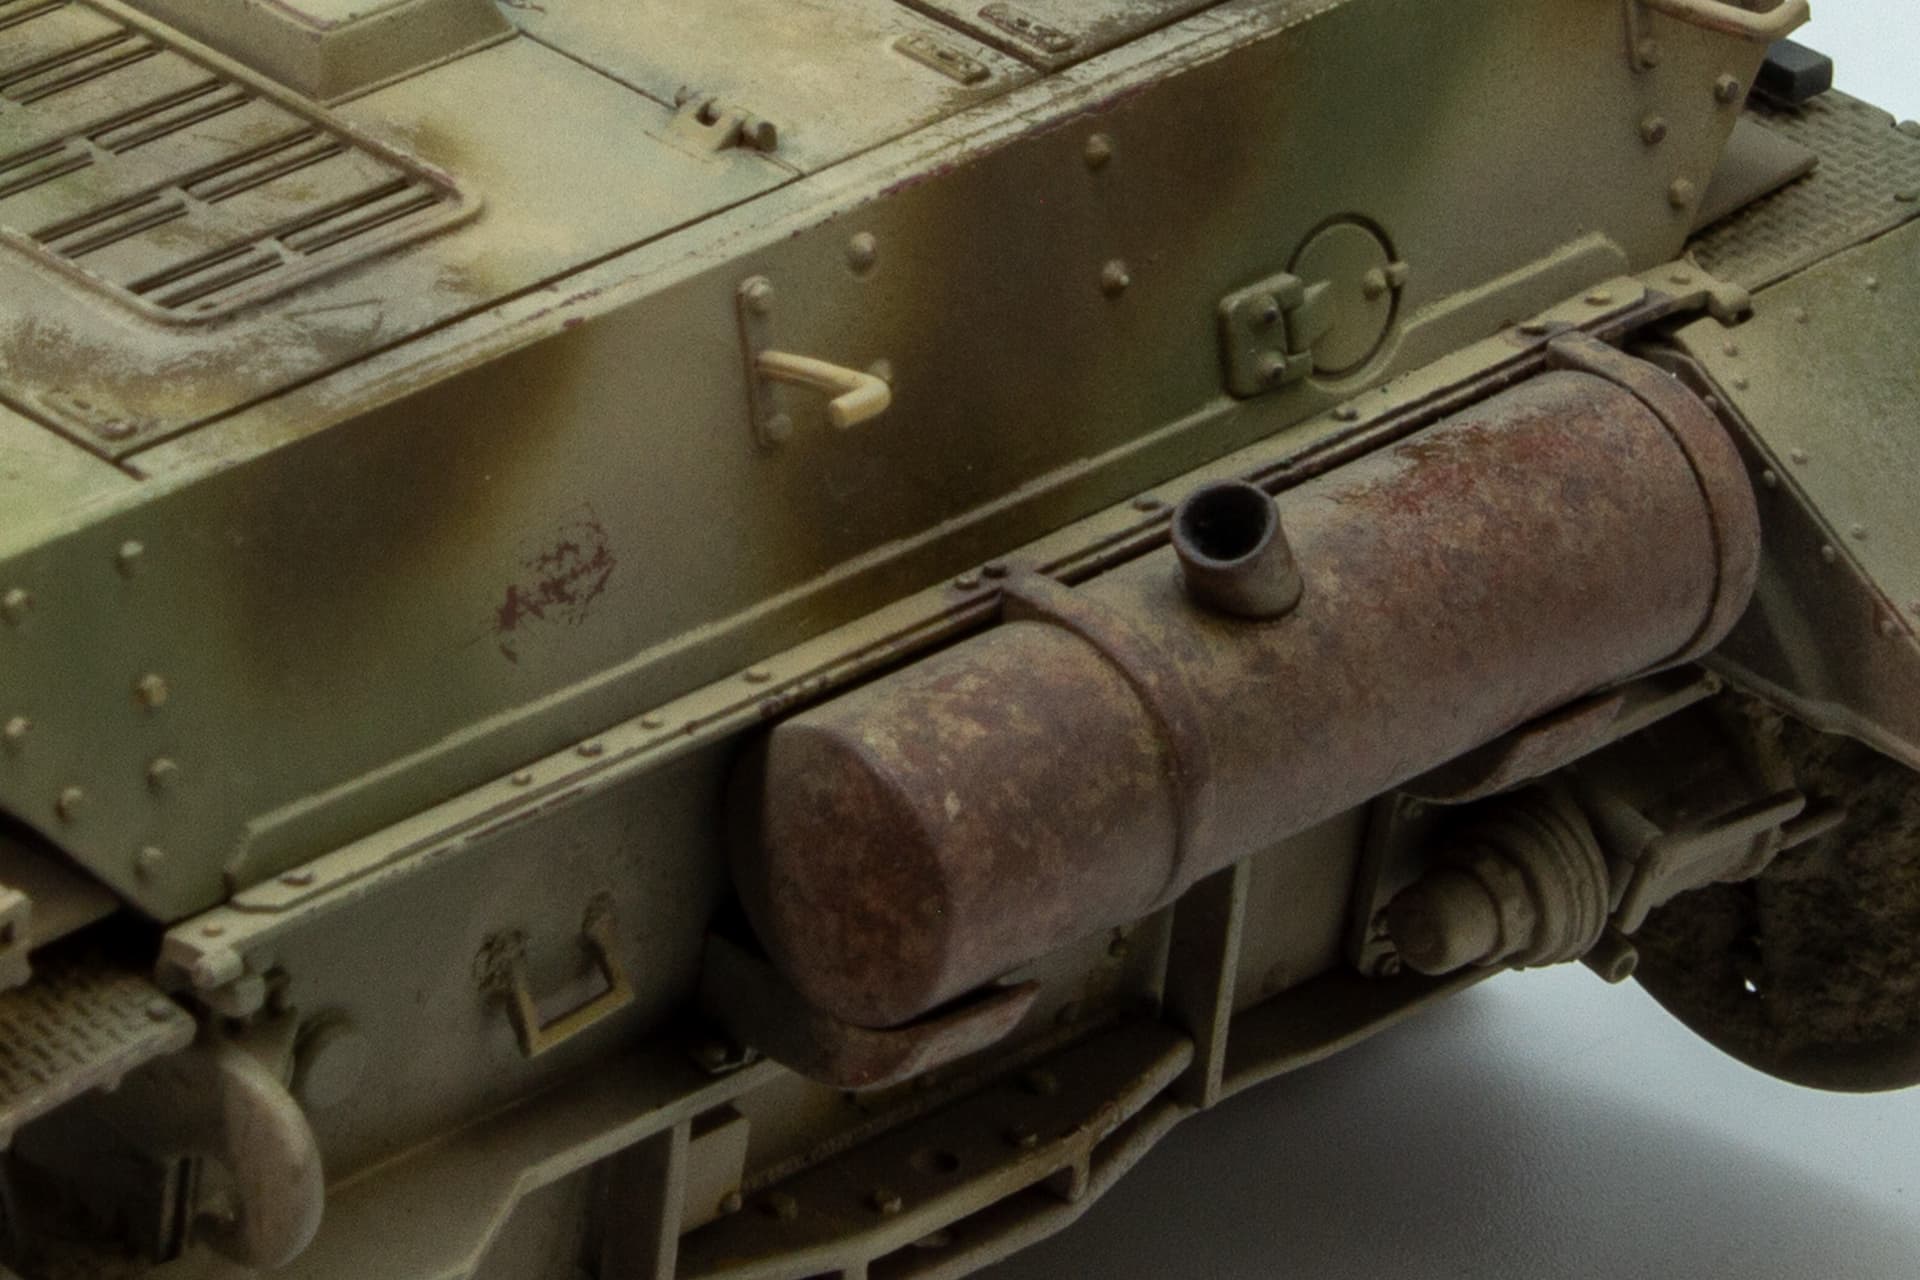
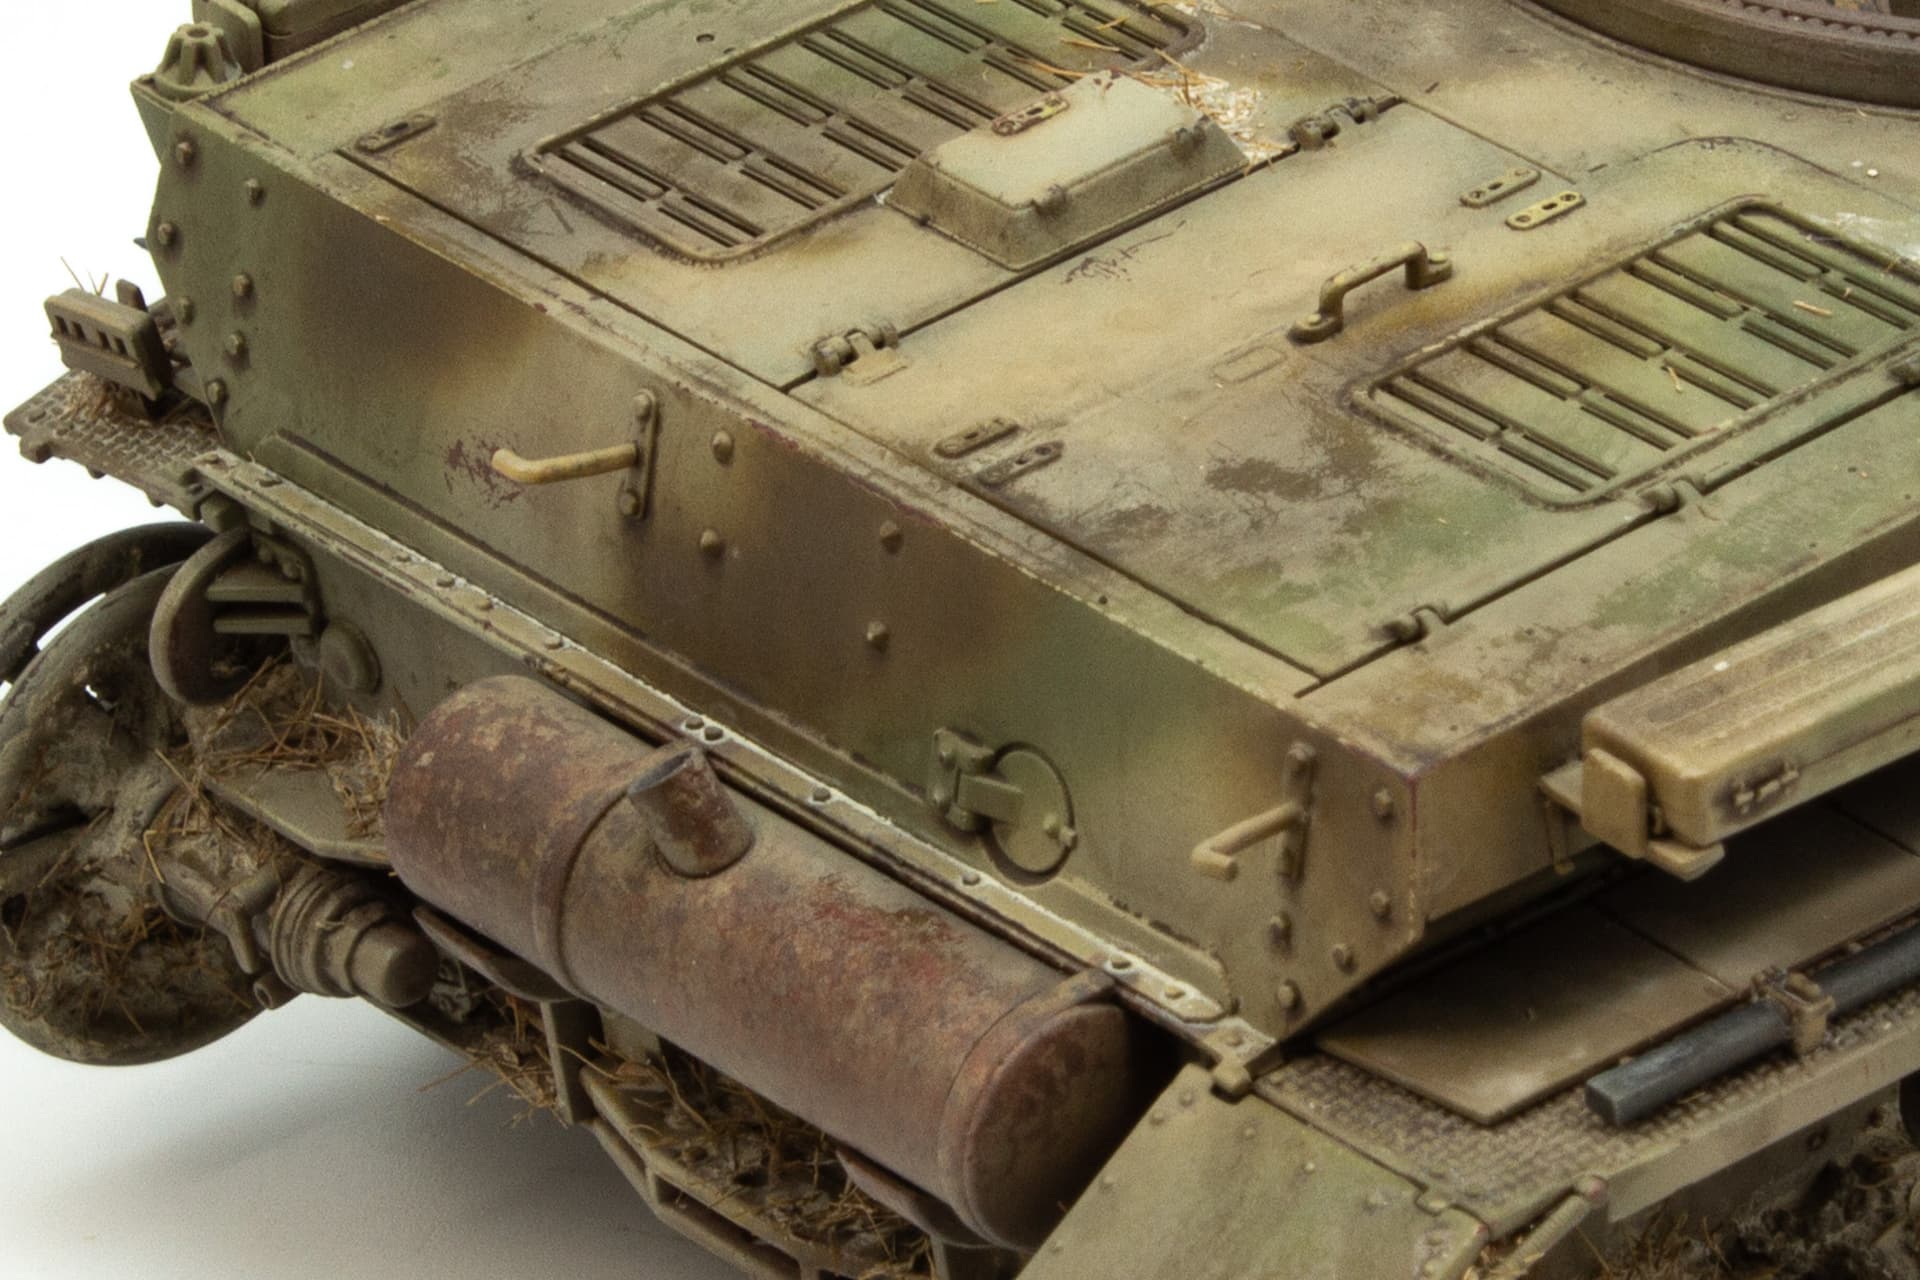
The exhaust muffler was first completely covered in the Mr Surfacer Mahogany and again using hairspray, proceeding layers of Vallejo track primer, dark yellow and camo colours were all worked on and worn back. The exhaust also received some sponge chipping with the two darkest tones in the Lifecolor rust set. The odd raised detail was picked out and brush painted with a slight variant of the dark yellow tone.
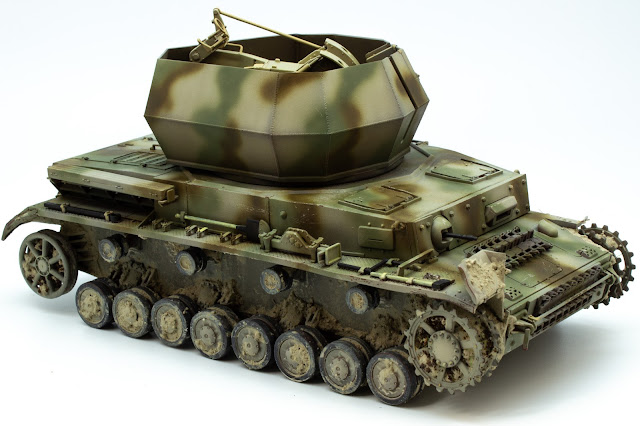
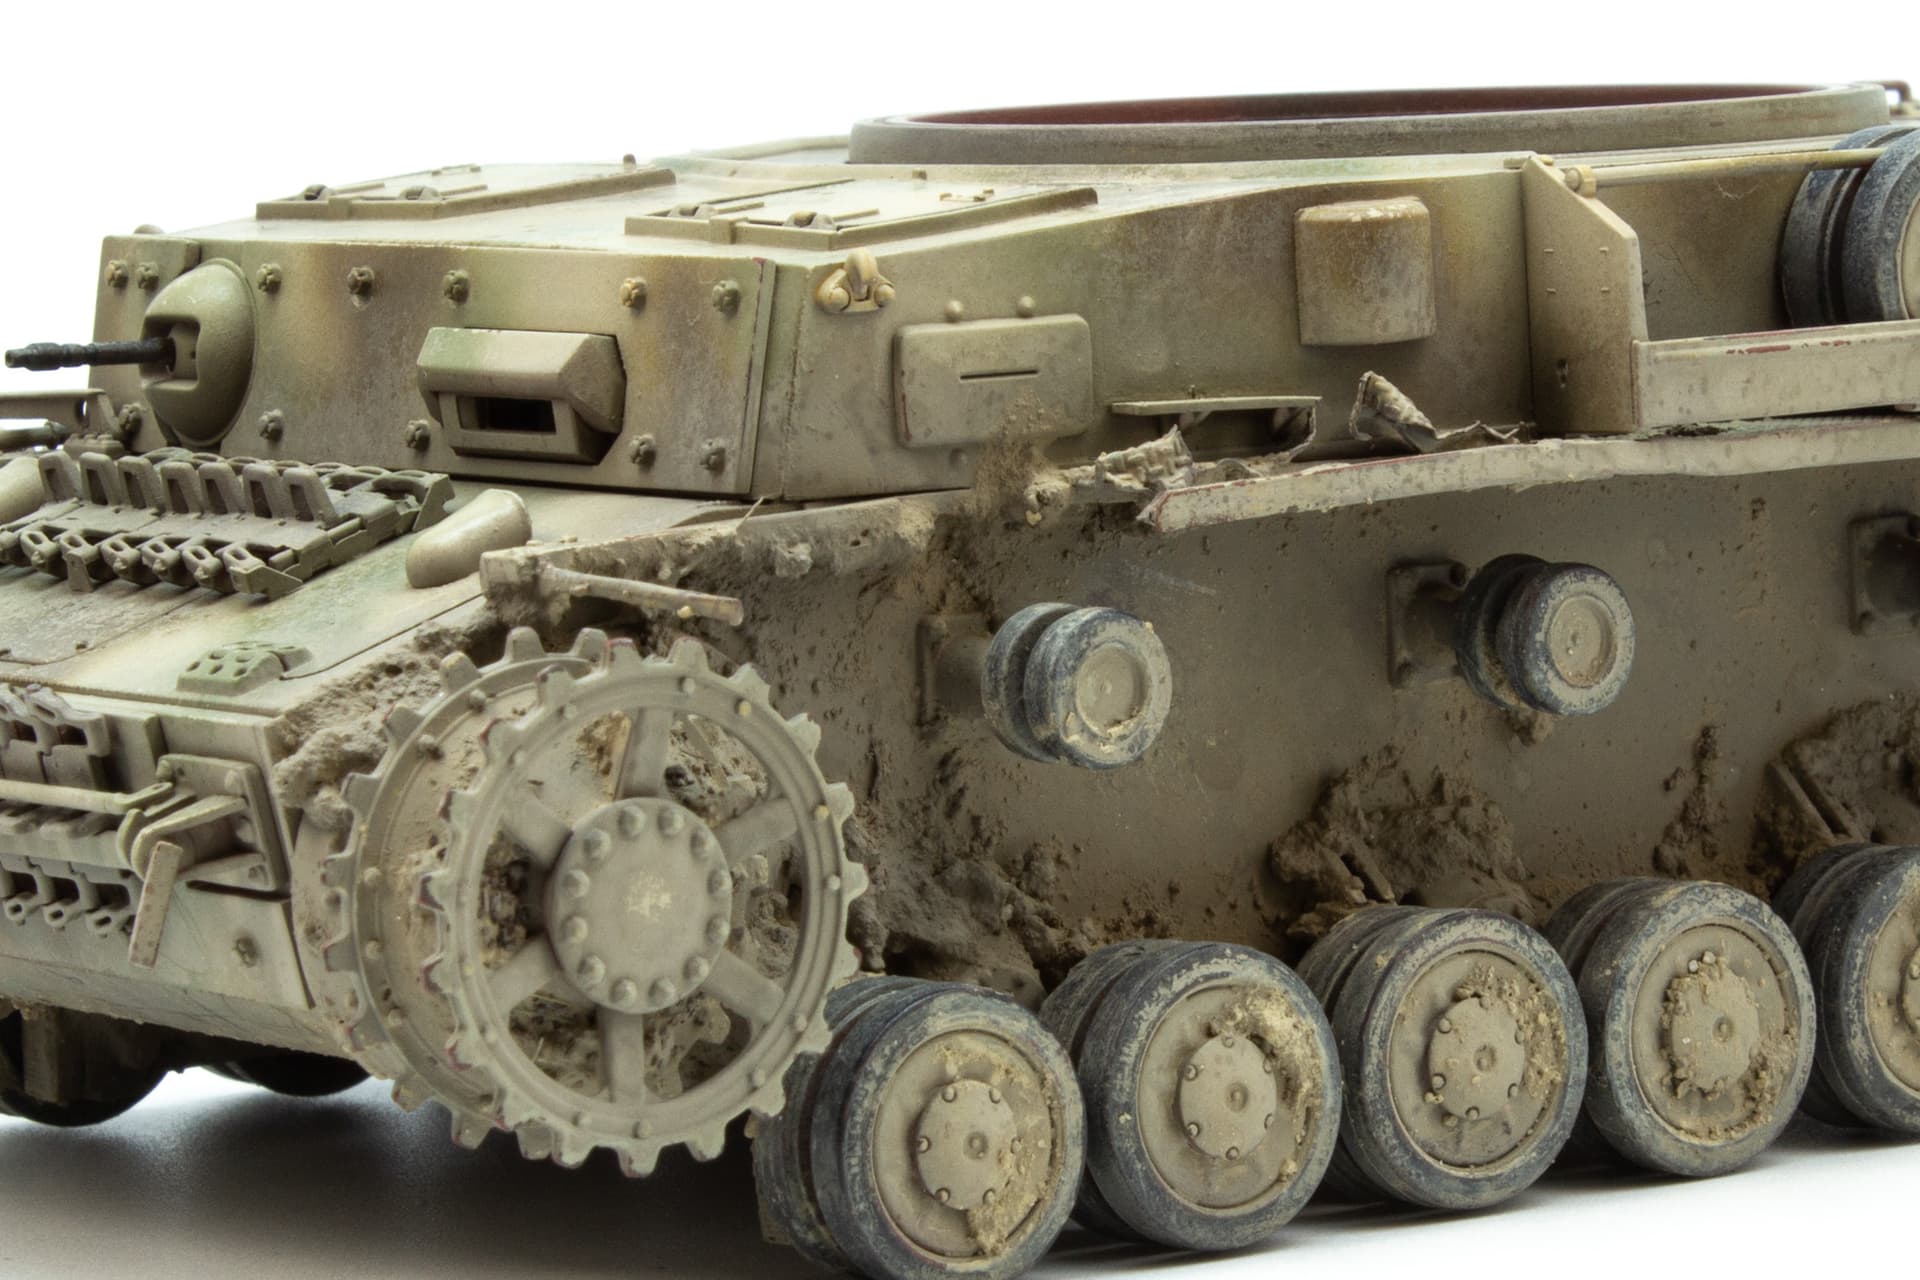
The tyres were brush painted with Vallejo dark rubber and the pioneer tools and bow machine gun brush painted in their base tones. AK light mud acrylic texture paste was then applied with a brush around the running gear, the sprockets, and the idlers to add some built up mud texture. Being acrylic it can be easily manipulated, removed, and blended into the surface with H2O.
AK’s acrylic light mud texture paste added around the lower hull and running gear. The first layers always look crude but these effects will be enhanced with more texture layers and additional airbrushed acrylic dust tones, and eventually with enamel and oil washes in later steps.
12 Likes
Beautiful finish on that mobelwagen. Excellent job with the airbrush! I love the texture on that muffler- one of the best I’ve ever seen.
4 Likes
Most of my projects are usually beat up or abandoned Axis AVFs so creating wear and tear is just another step of the painting process for me. I’m hopeless at creating my own paint chips by hand. I’ve tried and failed miserably, so relying heavily on the hairspray method has allowed me back some control over effecting certain types of heavy wear marks on painted surfaces. I love how some folks can create multiple chipped layers with a paintbrush, but I’ve had to find an alternative. Often with camo painted vehicles I will lay down a few misting coats of hairspray between each layer of paint. With this method it’s no issue if the following layer is not immediately chipped back but it always gives me the option to chip back every layer of paint should I wish to. And right back to the primer if necessary. Combining it at the painting stage also speeds up the process for me.
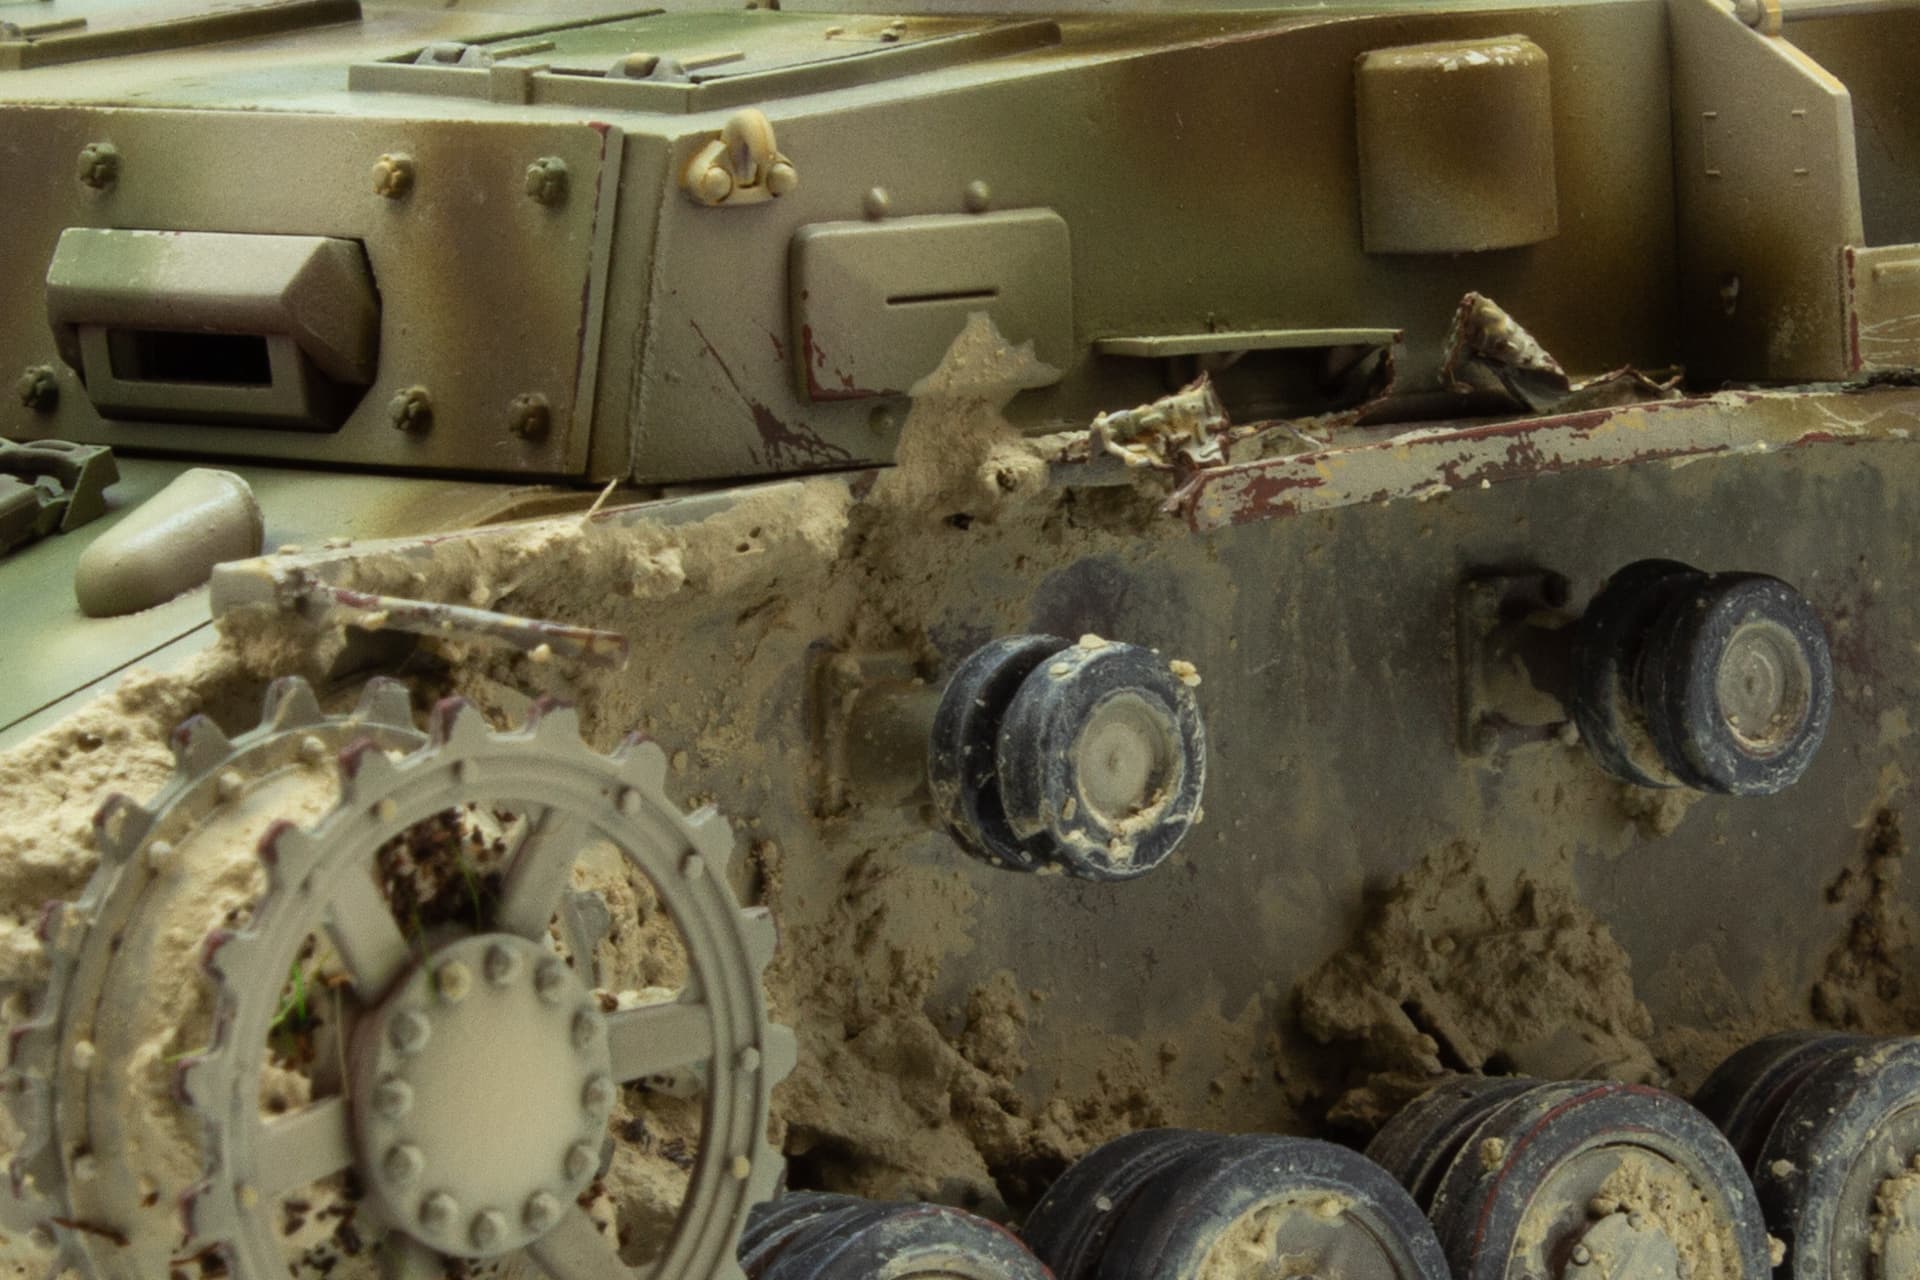
As many talented modellers have proved this very same technique can also be adopted onto airbrushed dust layers. The method of paint removal is different as it becomes just as important to focus on where to remove the dust layer as it is on where it remains.
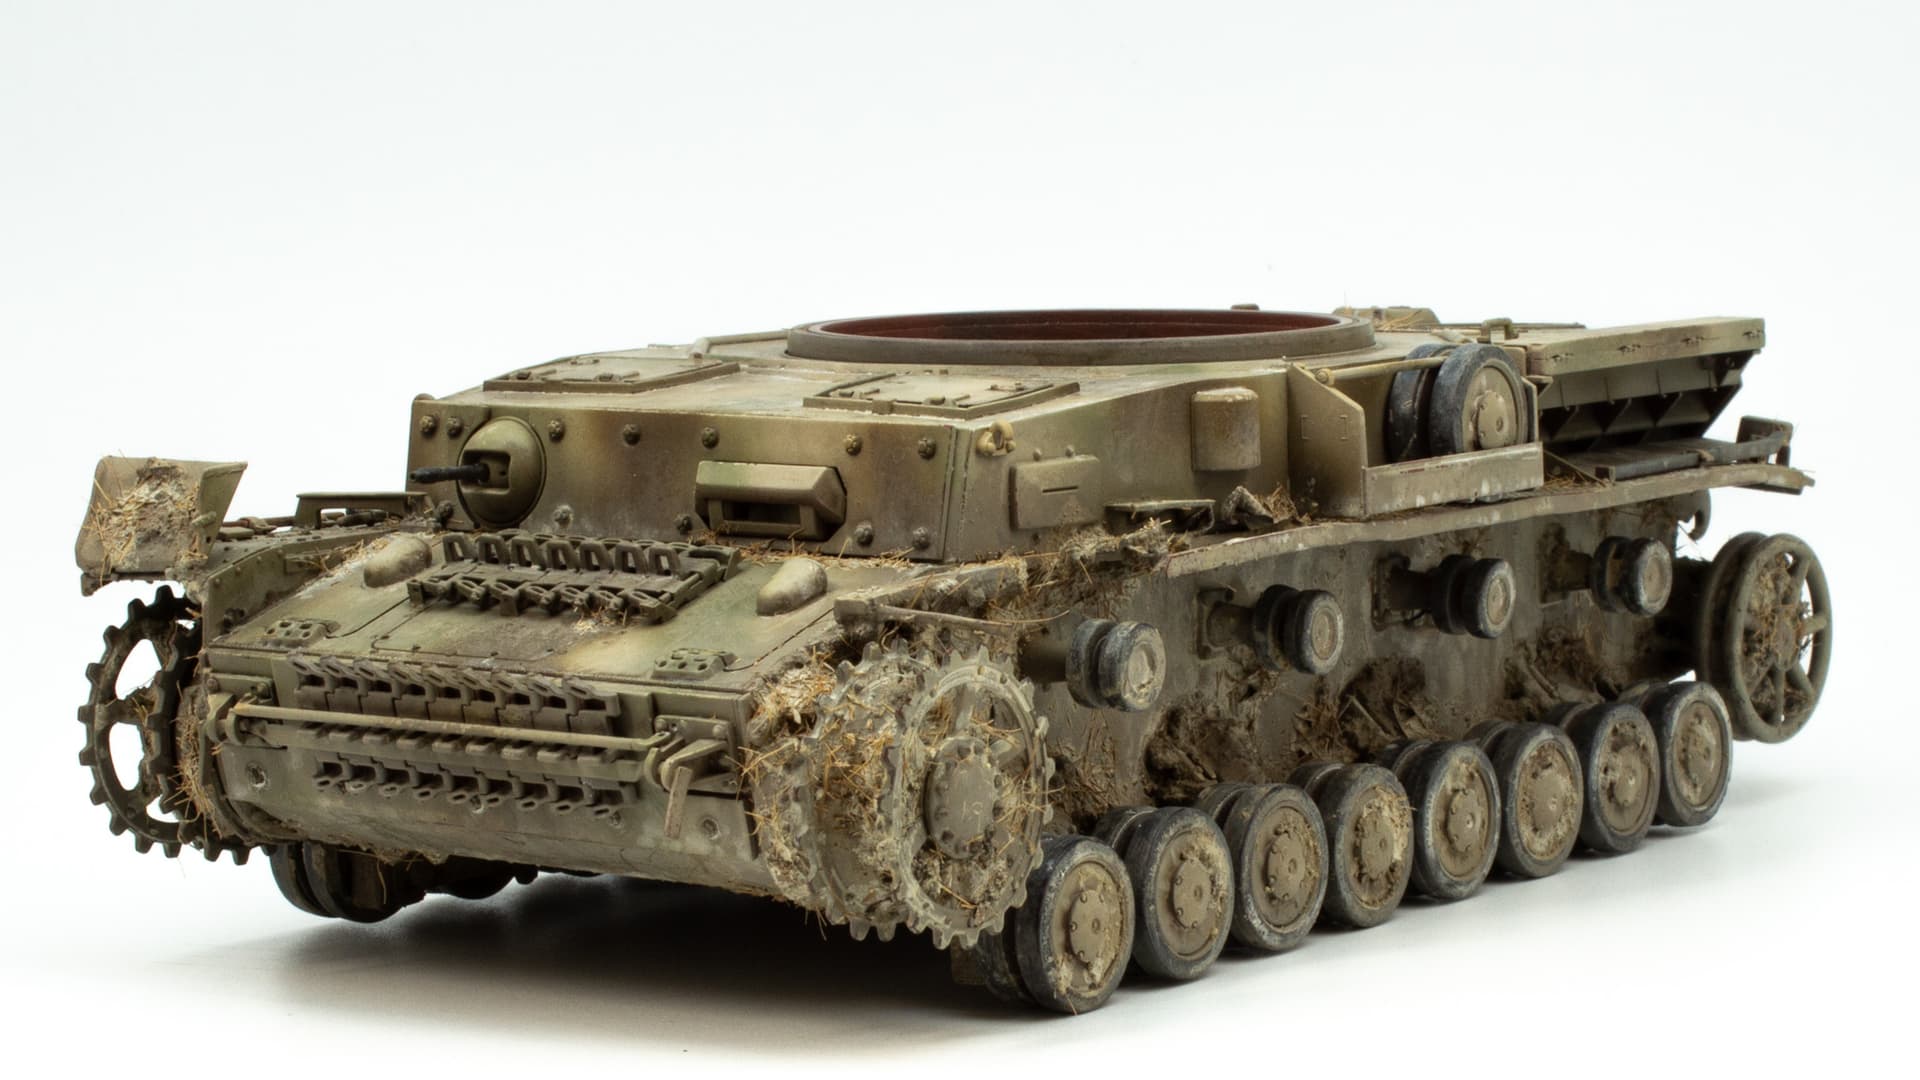
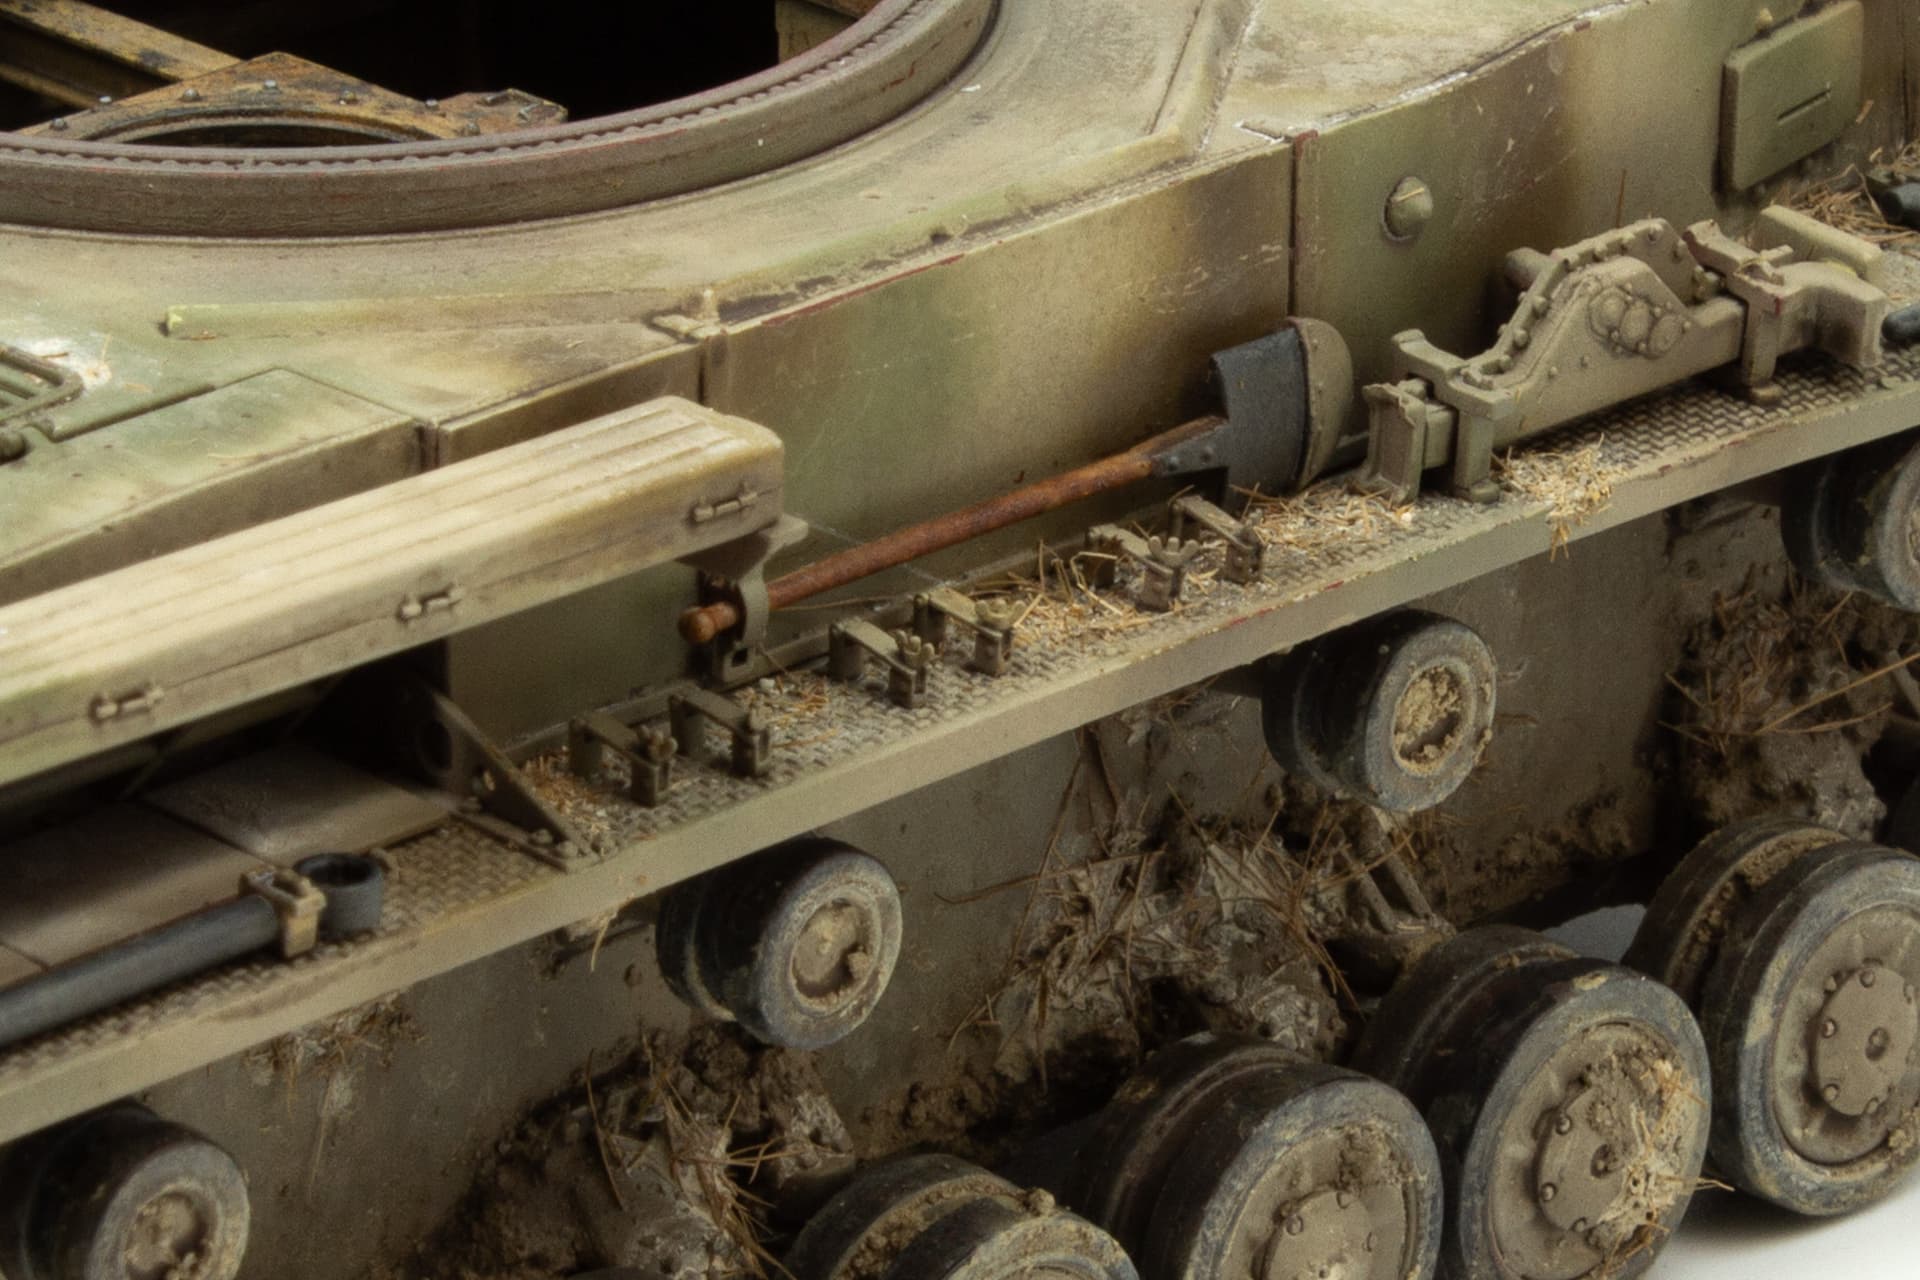
First acrylic dust layer applied and worked on. It has softened the transition of mud effects on the lower hull. Most of the dust is removed on contact surfaces of the tyres, Sprocket teeth and idler, leaving deposits around raised detail on the outer surface of the wheels and tyres
4 Likes
Very interesting technique- and it obviously works, it looks excellent. I do a minimal amount of chipping on my vehicles in the usual places like around hatches, engine access areas etc, but I can do some chipping by hand but it’s hard to get it to look random. The sponge method works nicely.
2 Likes
I’ve only recently started to regularily use the sponge method. I’ve always had mixed results in the past so never really adopted it into any linear process within the weathering steps. I did lay down a few layers of sponge chipping onto this exhaust muffler and used it in combination with other techniques and I’m happy so far with how its turned out.
The dust layers do mute the underlying paint surfaces but that’s what happens in reality.
1 Like
That muffler looks fantastic! Great job of rusting but also the dust layer on top. Very thoughtful
2 Likes
the exhaust muffler looks great
2 Likes
It was time to add more layers. I did start with an MIG enamel neutral pin wash but It felt it overwhelmed the dust layers allready laid down. It muddied the effect rather than added to it! Fortunately, as it was enamel based, I dialled it back with white spirit and just left the initial darker layer in selected areas.
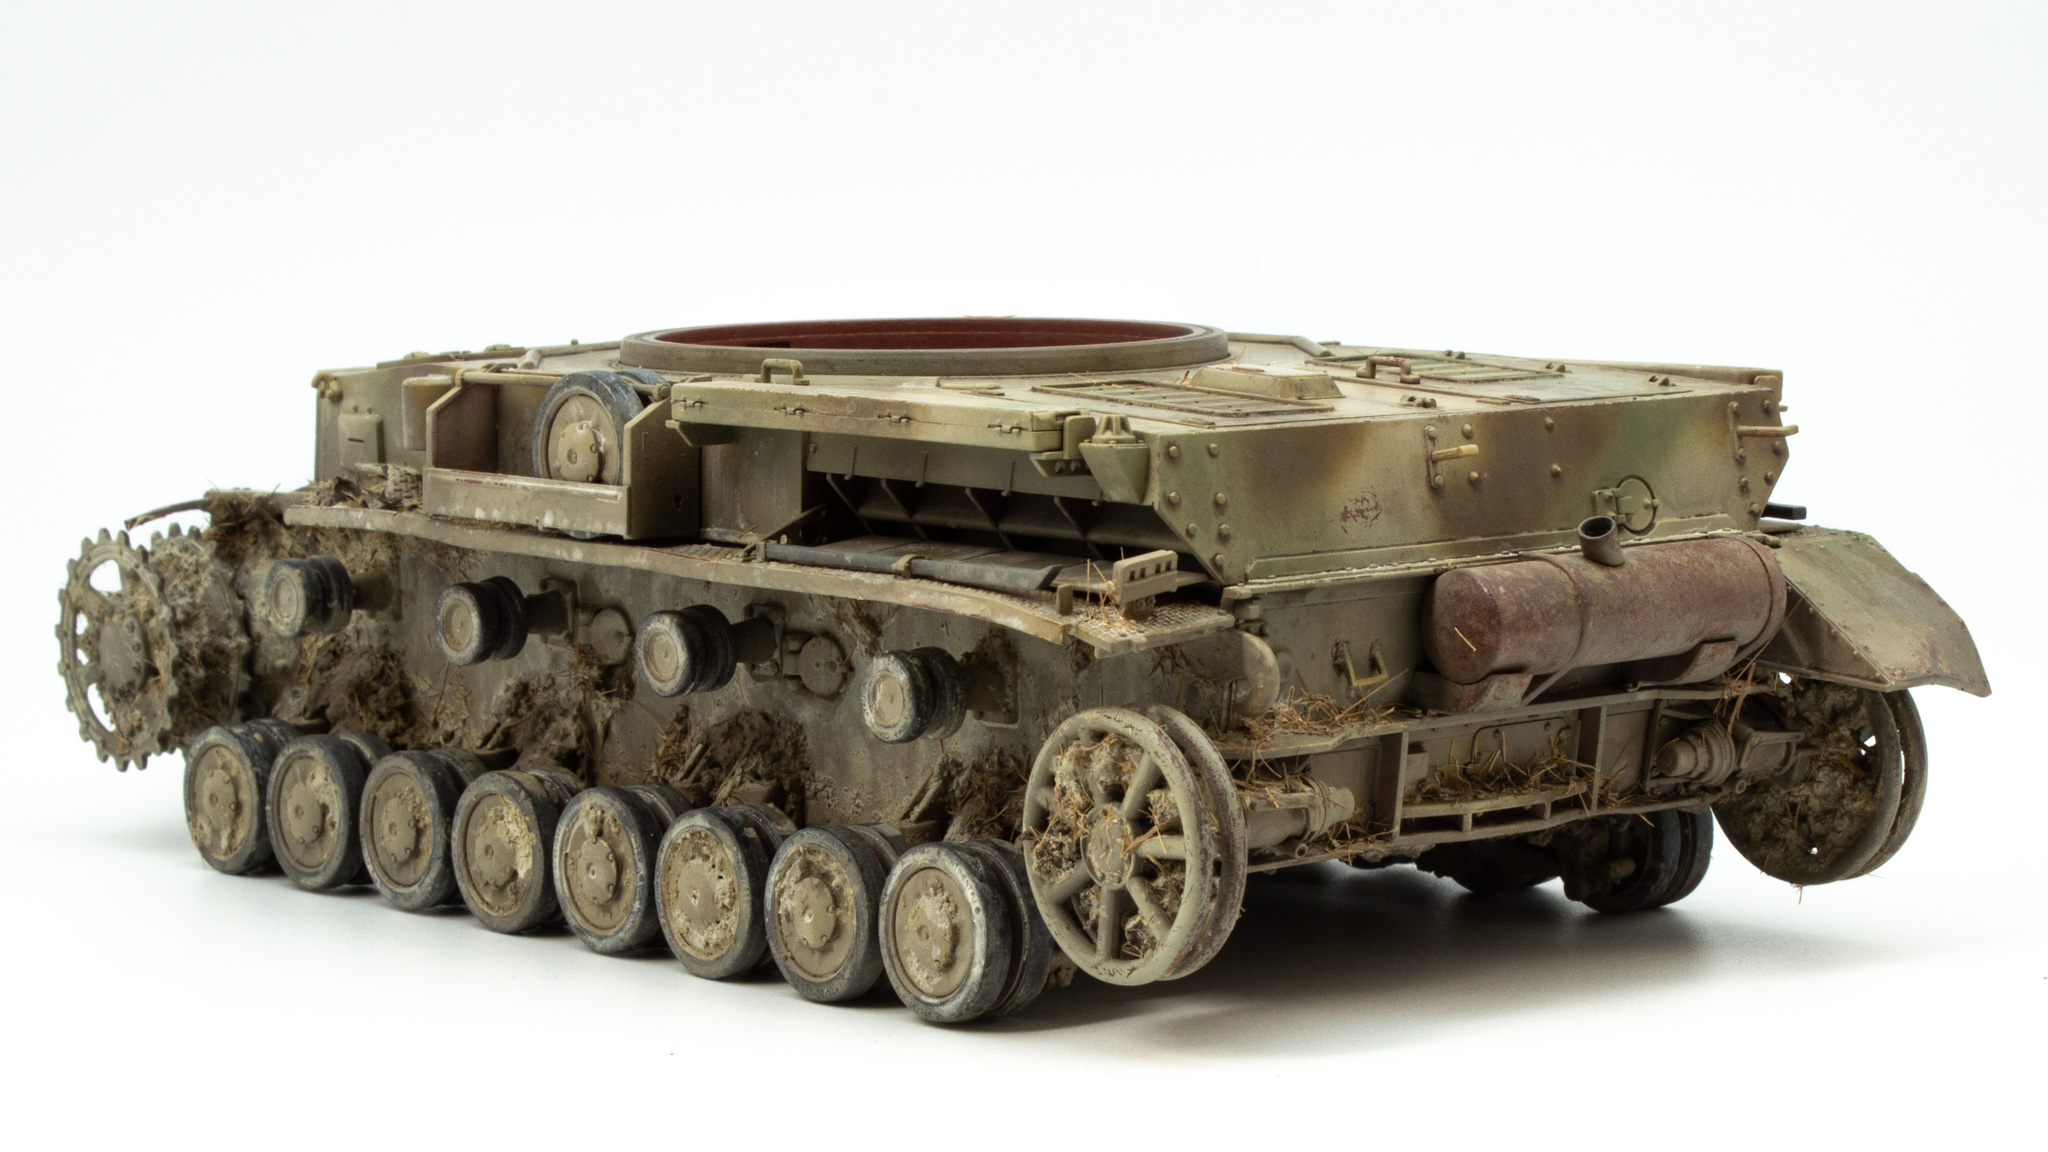
To add another layer that would complement the previous dust effects a selective pin wash with a lighter mud tone (AK splatter effects) was added. As this has a little texture it was also added over an application of chopped seagrass which had been fixed with VMS ballast freeze onto the running gear, glacis plate and track guards. This does unfortunately leave a few glossy tidemarks, but another round of airbrushed dusting will fix that.
The turret received a much lighter application of airbrushed dust, a very small pin wash of the lighter AK splatter effects and some seagrass was added and fixed in place onto the horizontal surfaces of the interior.
As I really liked how the previous airbrushed dust layers were shaping up, I plan to adopt the same technique but with a slight tonal variation to unify these new effects together on both hull and turret. I think if that all goes to plan, I should be able to move on to some mapping and OPR type stuff with oils.
3 Likes