How did they tackle the loop antenna? Injection moulded?
1 Like
The base is plastic with the loop being a piece of PE you bend into an oval.
1 Like
I would have preferred an injection moulded part. Is there a bending jig included?
1 Like
No, but it is a big oval so, easy to bend into shape.
1 Like
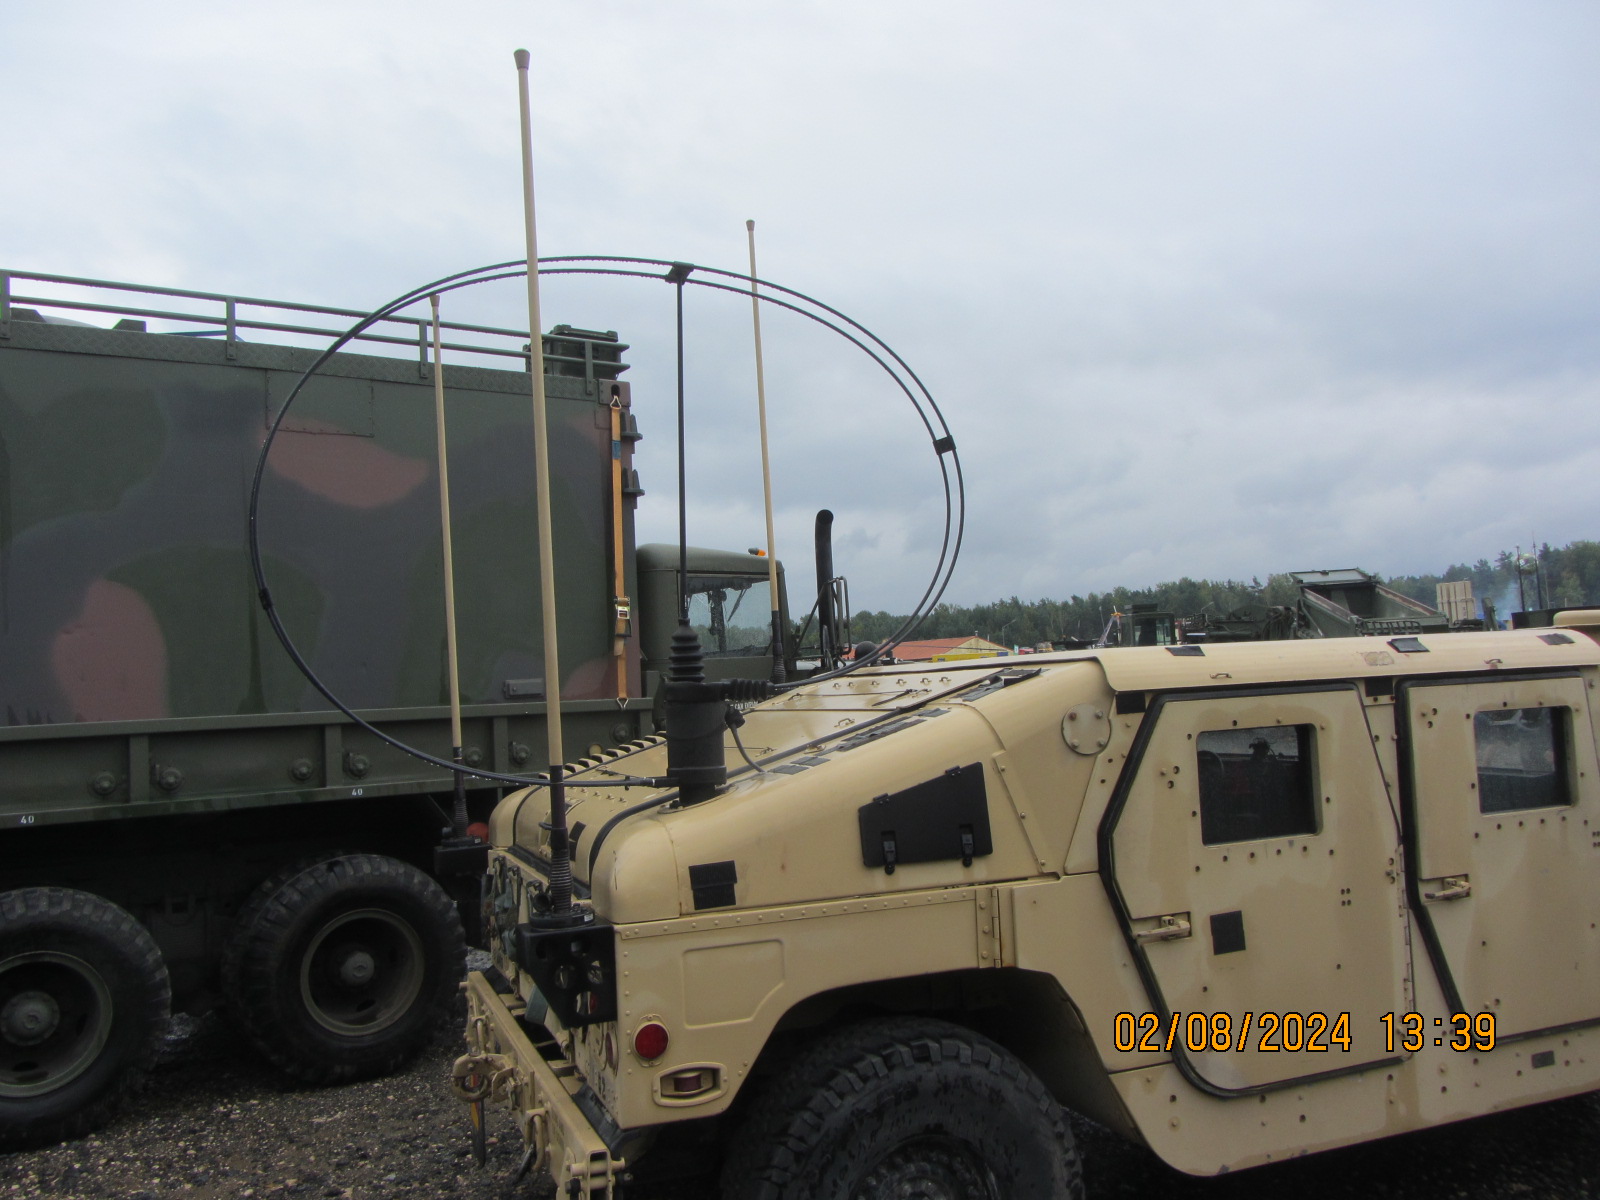
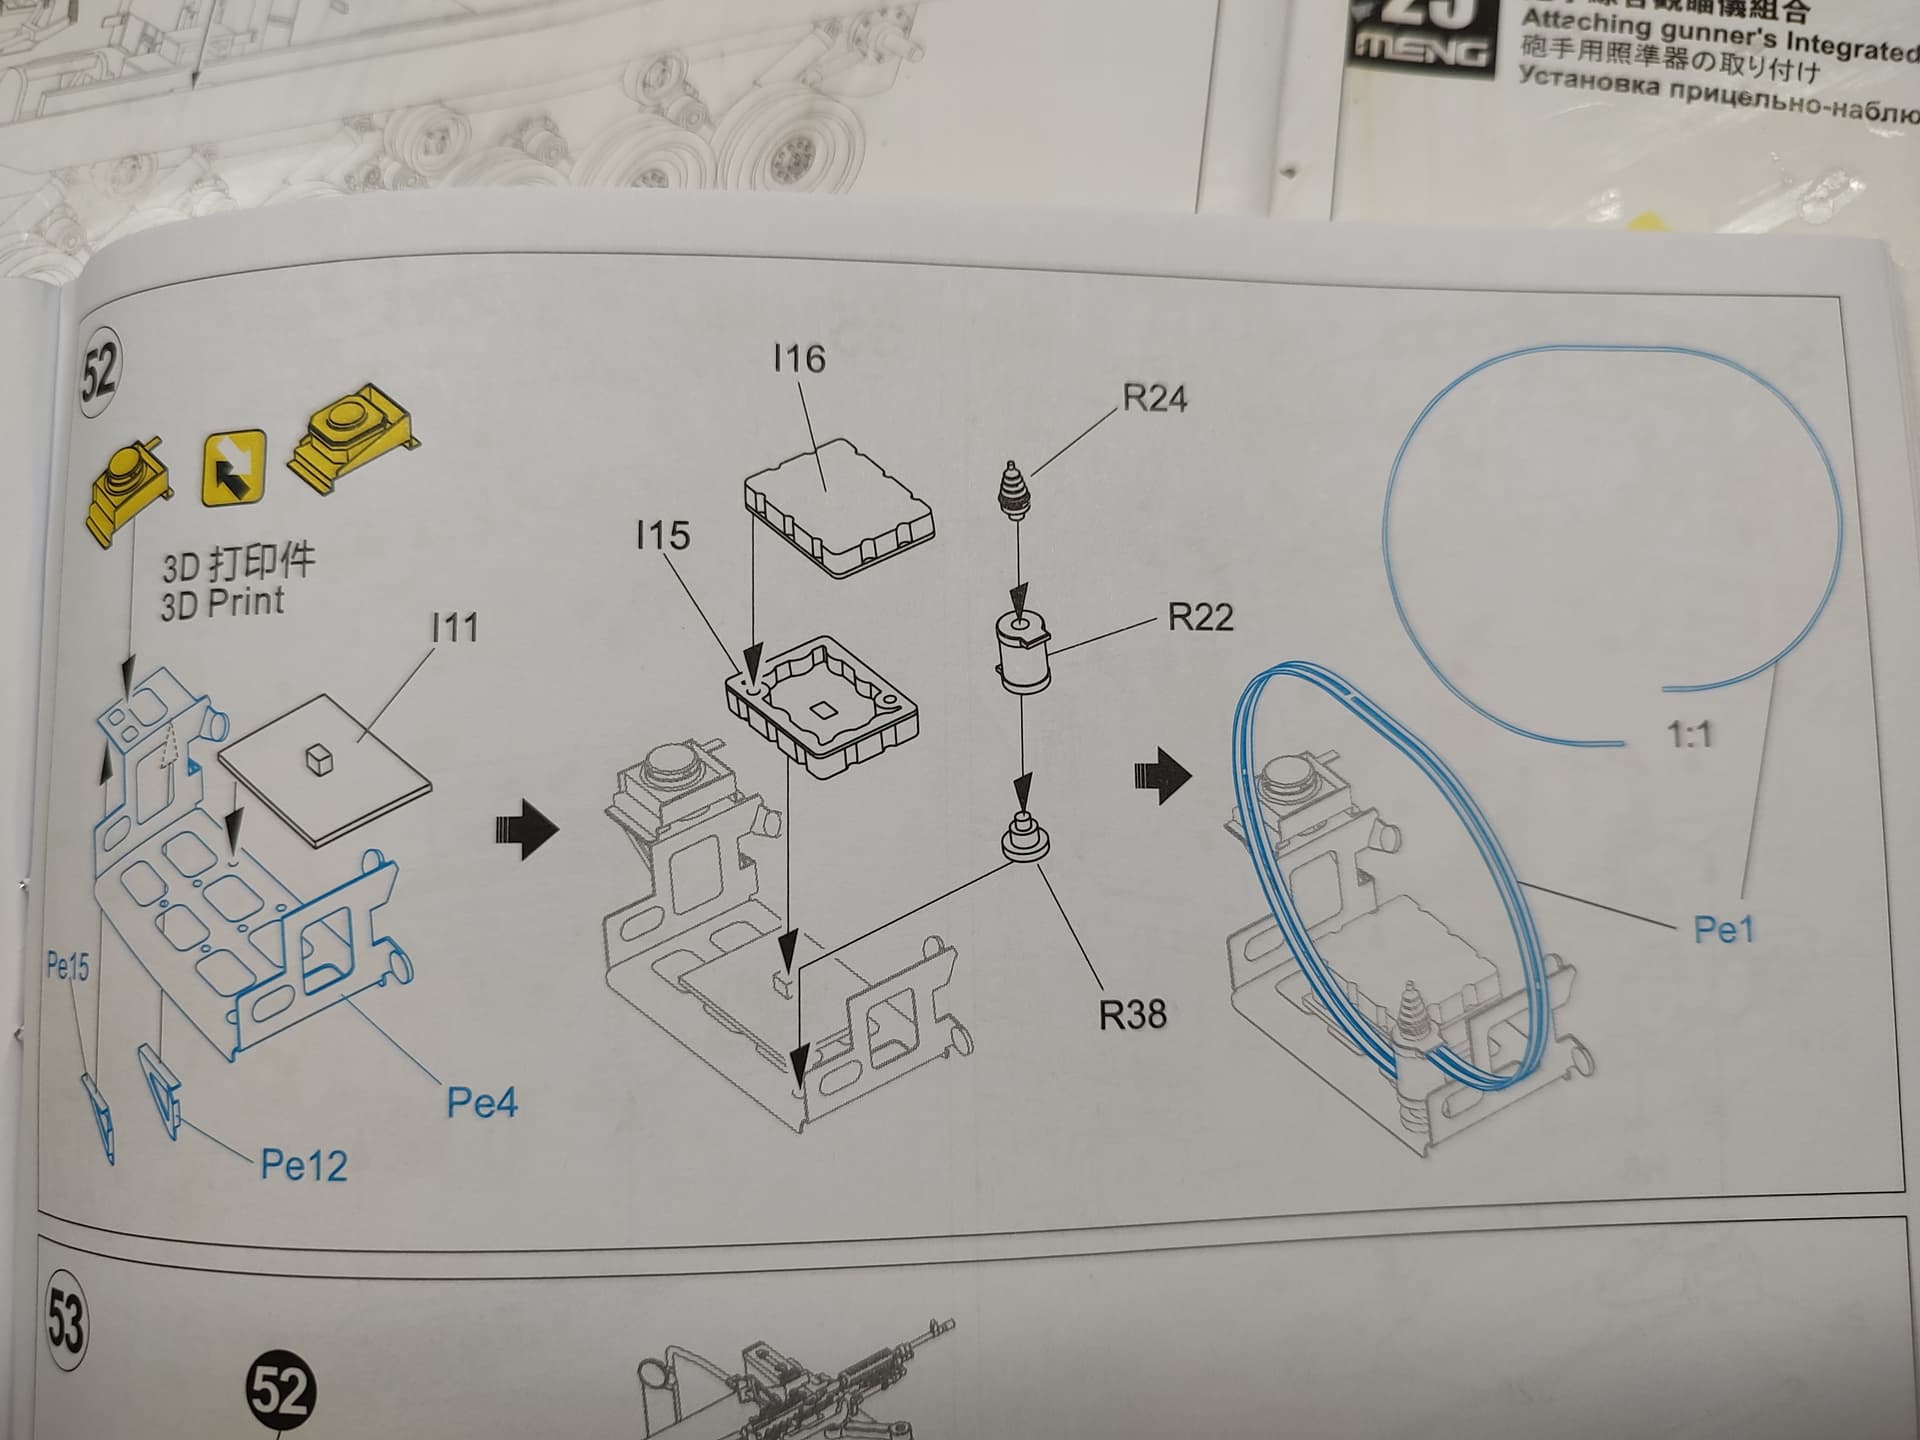
Can you please copy the instructions for me to see how they made the loop antenna?
1 Like
Not the best solution in my eyes. ![]() I am sure that bending the part to the requested is VERY difficult. And a 3D print might be too fragile.
I am sure that bending the part to the requested is VERY difficult. And a 3D print might be too fragile. ![]()
1 Like
Definitely. I think PE is the best option as an injected part would be too brittle as well.
1 Like
Snan that page of the instructions and print it on paper. Glue the paper to some cardboard. Cut out the shape. Add another layer of cardboard and cut out the shape. Repeat until you like the thickness. I would also run a cardboard strip around the edge to make it really nice. Now you have a jig for the antenna. You can sandwich the jig between two more pieces of cardboard if you want a channel type jig.
2 Likes
Thanks! I will see when the kit hits my bench.
1 Like
That is a good method. I would be tempted to take the instructions and trace the pattern onto some wood either to create a groove channel or to cut out a jig. As pe is 2d, you can use wire to replicate the pattern twice.
1 Like
No matter what you do, the likelihood of the PE retaining the shape of any jig is slim.
Even when you anneal it, which I will, PE will always spring out a little after curving. I am simply going to curve it around a paint jar (or similar) that is of slightly less radius than necessary. I’ll work it around the same form with more or less pressure to get the varying radii necessary. This is the way I’ve always worked brass, and it works well for me.
4 Likes
Good news - you don’t need jigs or patterns to do the antenna.
Use the method I described above. A Testors liquid cement bottle is exactly the right diametr for the left hand portion in the drawing - which means you need something about 1/4 inch less than that.
First, insure you clean off the little nubs before you start:

Anneal the piece. Make a circle smaller than what you need. It will spring back as I said. Then do the right side with something even smaller. Flatten where needed. (I’ll flatten it a tad more - it “unsprung” a bit)

YMMV
5 Likes
It’s been a month, fellas. Anyone got any updates?
3 Likes
Now that 24 hours have passed, I will assume everyone in every time zone has had a chance to respond. The lack of response may indicate several of you have not started yet, which could be good news for some. I have looked for build reviews online, and found none, In fact, so far I’ve only found one build online period, and for whatever reason the rail protectors were missing from it. Perhaps the guy who built it hadn’t made a decision yet as to how to pose them.
At any rate, I’m wrapping up the second build, and will probably start the third after the weekend, That said, the second build was easier. There were a couple of build sequences that I discovered could be changed out for the better, so I saved some minor aggravation the second time around. That and a misidentification in the instructions that will could go totally unnoticed until it’s too late.
I’ve taken photos along the way and made notes, and am considering posting a build review along with a few of my reference photos.
The question is, are any of you receptive to that, or would you rather plod along on your own? I’m easy either way.
5 Likes
Sorry for not responding sooner. ![]() I have the both of them but at the moment I have a few health problems preventing me from actually doing anything other than posting photos and gathering parts for future builds. I understand it can-be frustrating . as you mentioned there are time zones many people actually purchased these kits
I have the both of them but at the moment I have a few health problems preventing me from actually doing anything other than posting photos and gathering parts for future builds. I understand it can-be frustrating . as you mentioned there are time zones many people actually purchased these kits
Please keep doing what you do best it is much Appreciated.![]()
![]()
![]()
1 Like
I’d certainly like to see a build review.
4 Likes
I’m waiting for mine
2 Likes
I am in agreement with you. Please post Rob.
3 Likes