French M201 Hotchkiss build

My next build is another I have wanted to do for a while. It is a license-built Willys MB by Hotchkiss of France for the French military and was known as an M201.

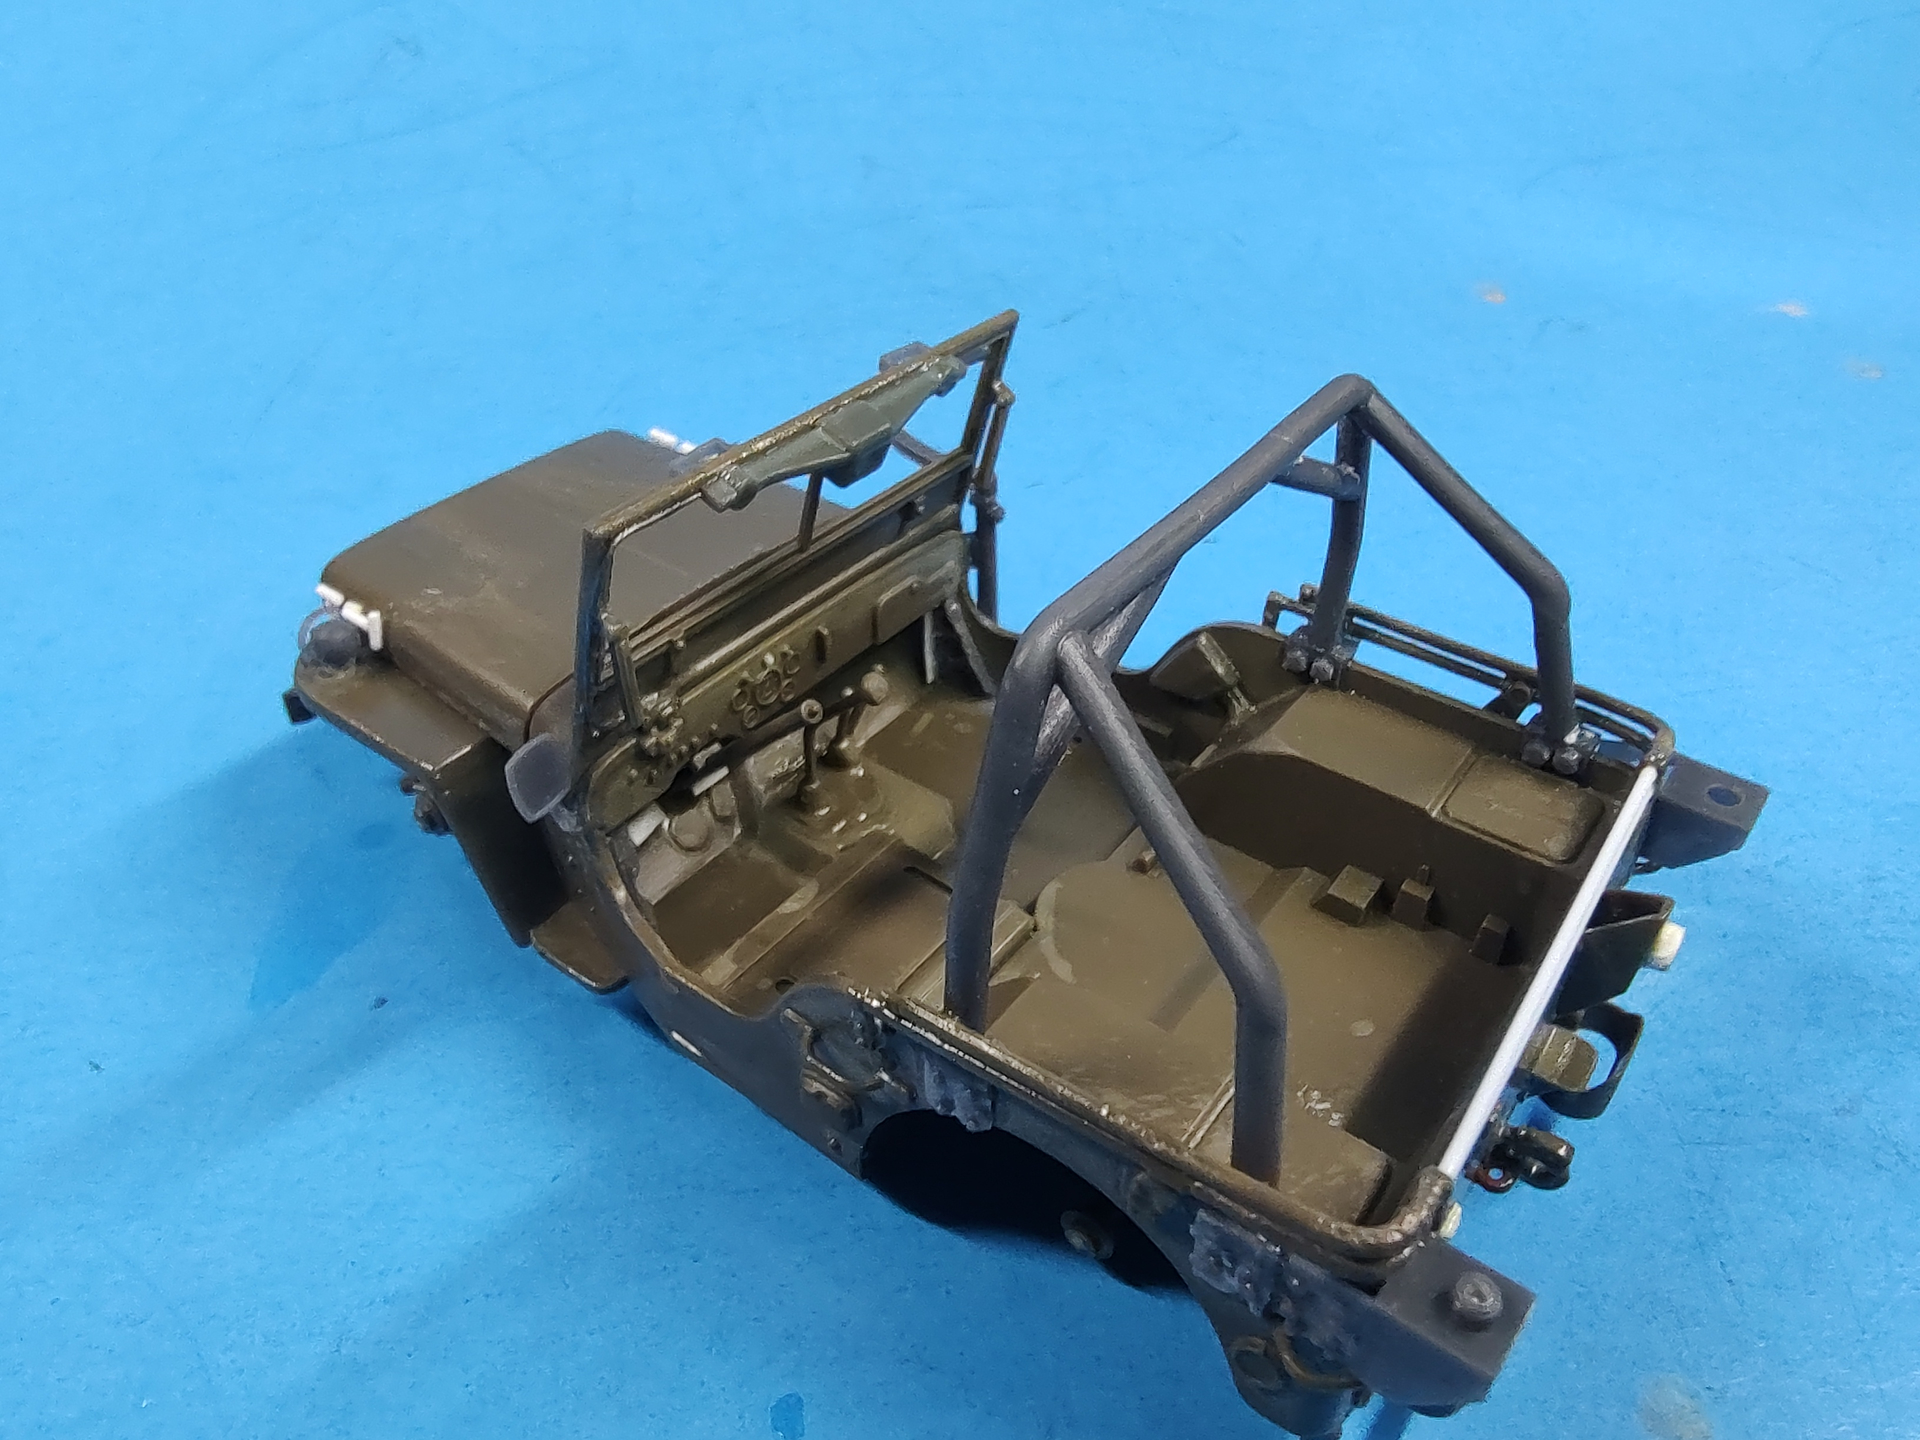
I plan on building a late model one in NATO camo with a roll bar.


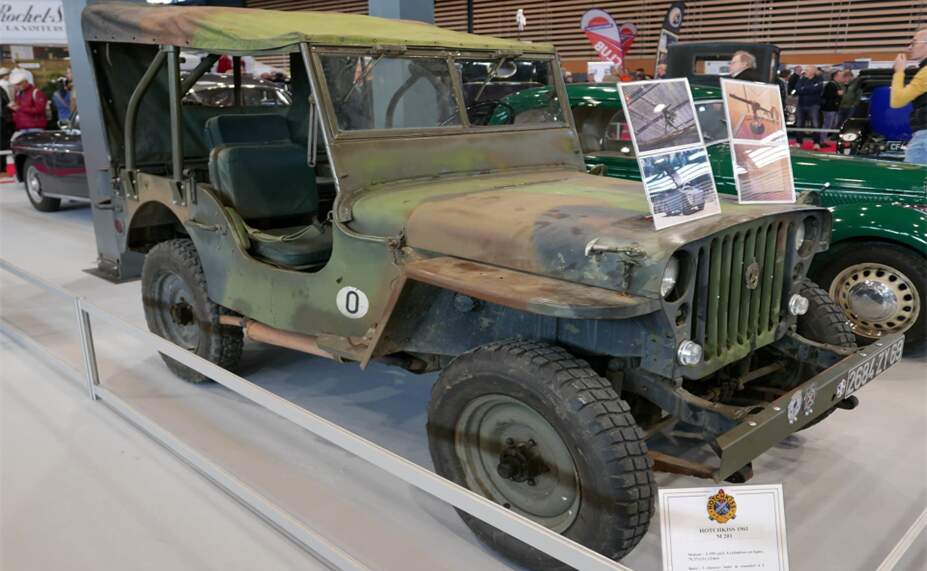
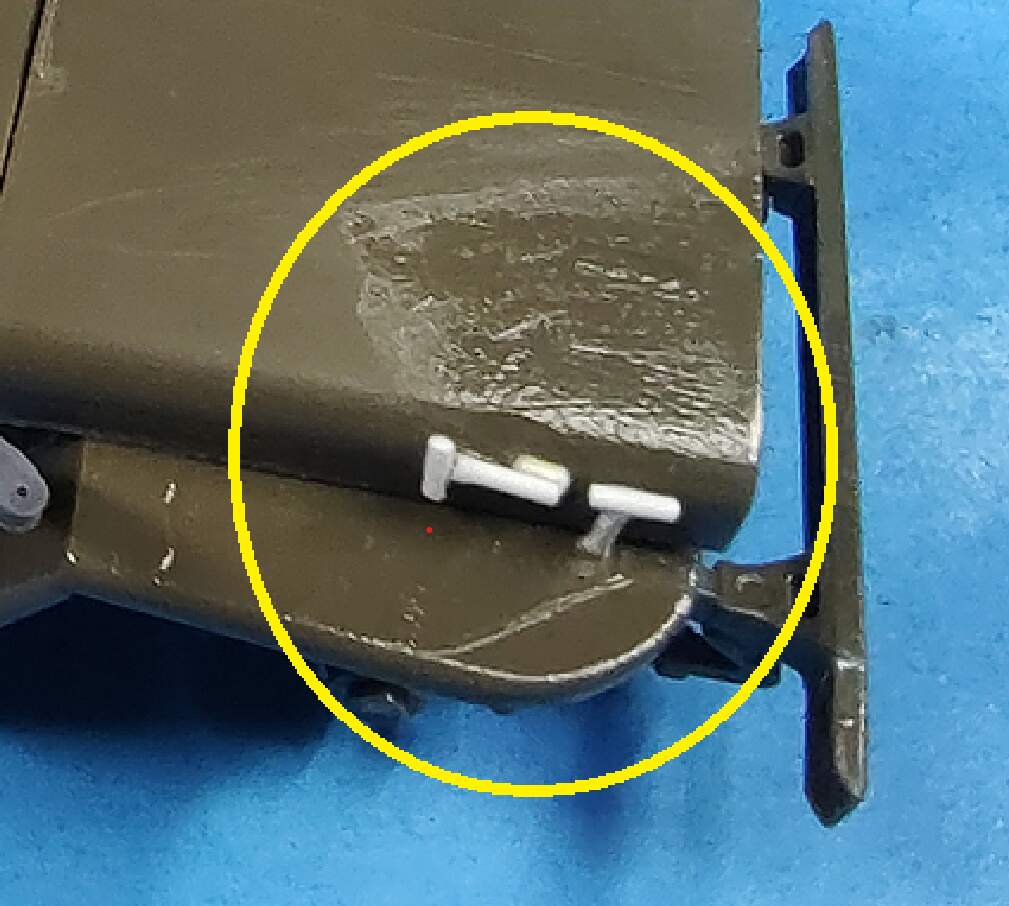
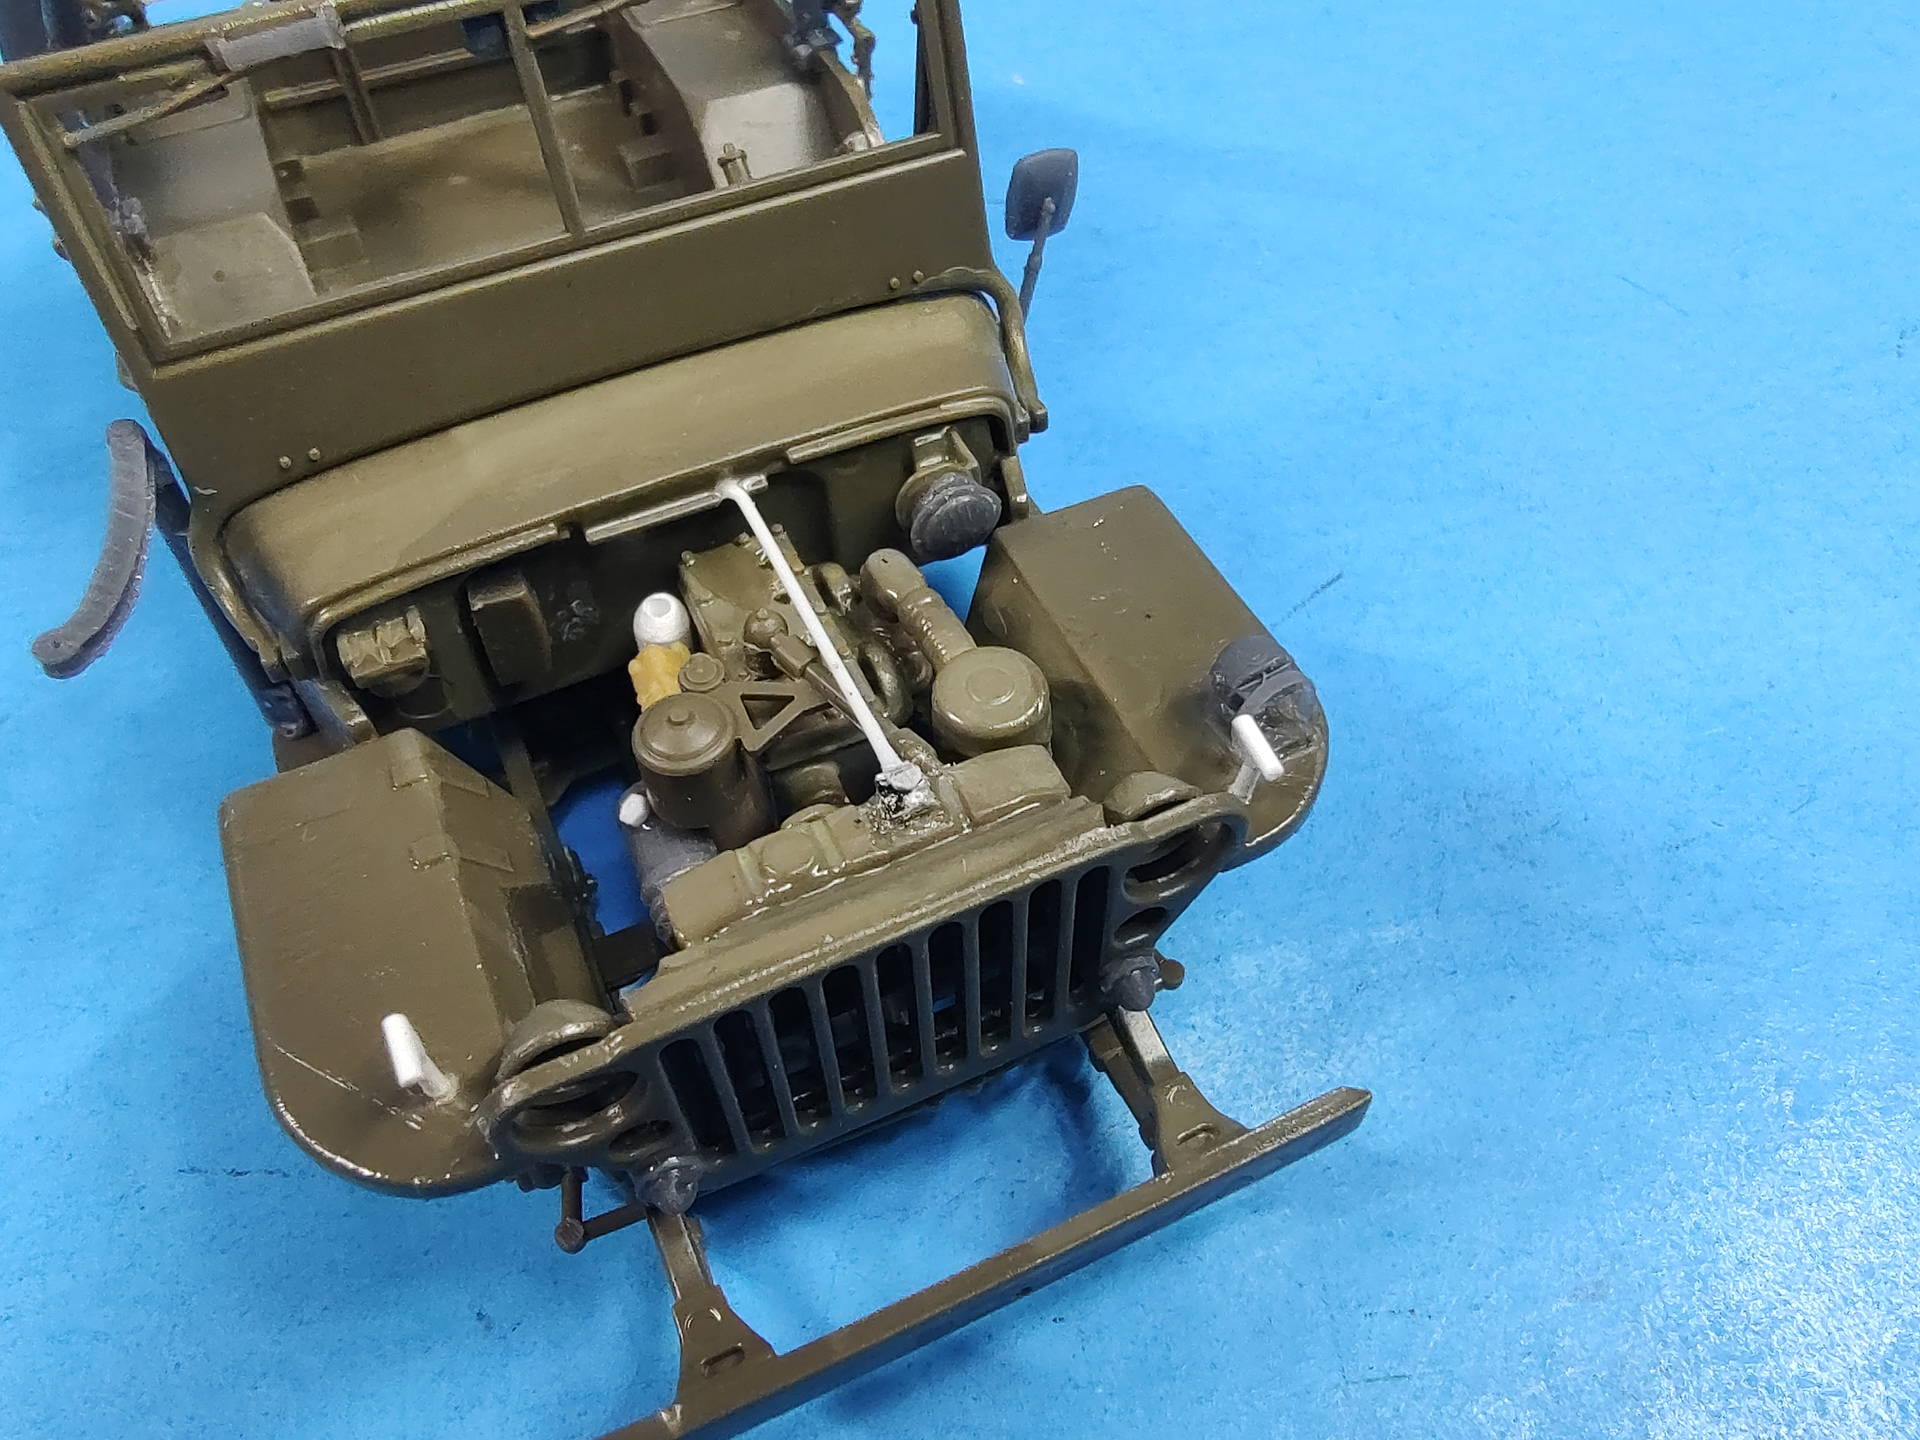
The French military used the M201 until the final one was retired in 2000. Hotchkiss made some French-specific mods to the M201 over the years. The most visible that applies to the model include the following: a new windshield wiper motor with its protective casing; a French-specific blackout drive light, which is flatter than the US version; removing the windshield rest blocks on hood and replacing them with two brackets on the windshield; a French-style jerrycan; a larger rectangular side rearview mirror; turn signal lights on the grille, and two rear brackets to accommodate turn signal lights compliant with French traffic regulations; one or two French antenna bases; a chemical decontamination bottle and support on the right fender support; a side mount weapons pintle; and Kleber tires.

I have made all these mods (and a few others - more later). Most of the mods were achieved by 3D designing and printing the needed parts.

Here it is so far. The base is the Tamiya Willys MB kit (35219). All of the dark gray parts are 3D printed. The white parts are styrene. The windshield wiper motor and bracket part is from a Heller French jeep kit. It is about all that is usable in the kit; the rest is junk.


I found a set of the Kleber tires on Cults 3D and printed the off. They are very nice and fit the Tamiya kit perfectly.

The other major changes are under the hood. Hotchkiss modified the M201 by upgrading to a 12v electrical system. The original Willys MB had a 6 volt system. To do this, they added another battery under the hood. To fit the battery, they had to move some stuff around. The voltage regulator was moved from the side panel behind the battery to the firewall. They also had to move the air cleaner from the passenger side to the driver’s side facing forward. They also used a different, flatter horn and a square distributer. Lastly, they added a second set of pulleys and a second fan belt.

Willys MB engine compartment.

M201 engine compartment.

I reworked the engine compartment to an M201 compartment. The batteries will be added later and are 3D printed. I made a 3D printed double fan belt setup and horn. The distributer came from an M38 detail set and I made a ignition coil from a piece of tubing. Lastly, it will be plumbed after painting.

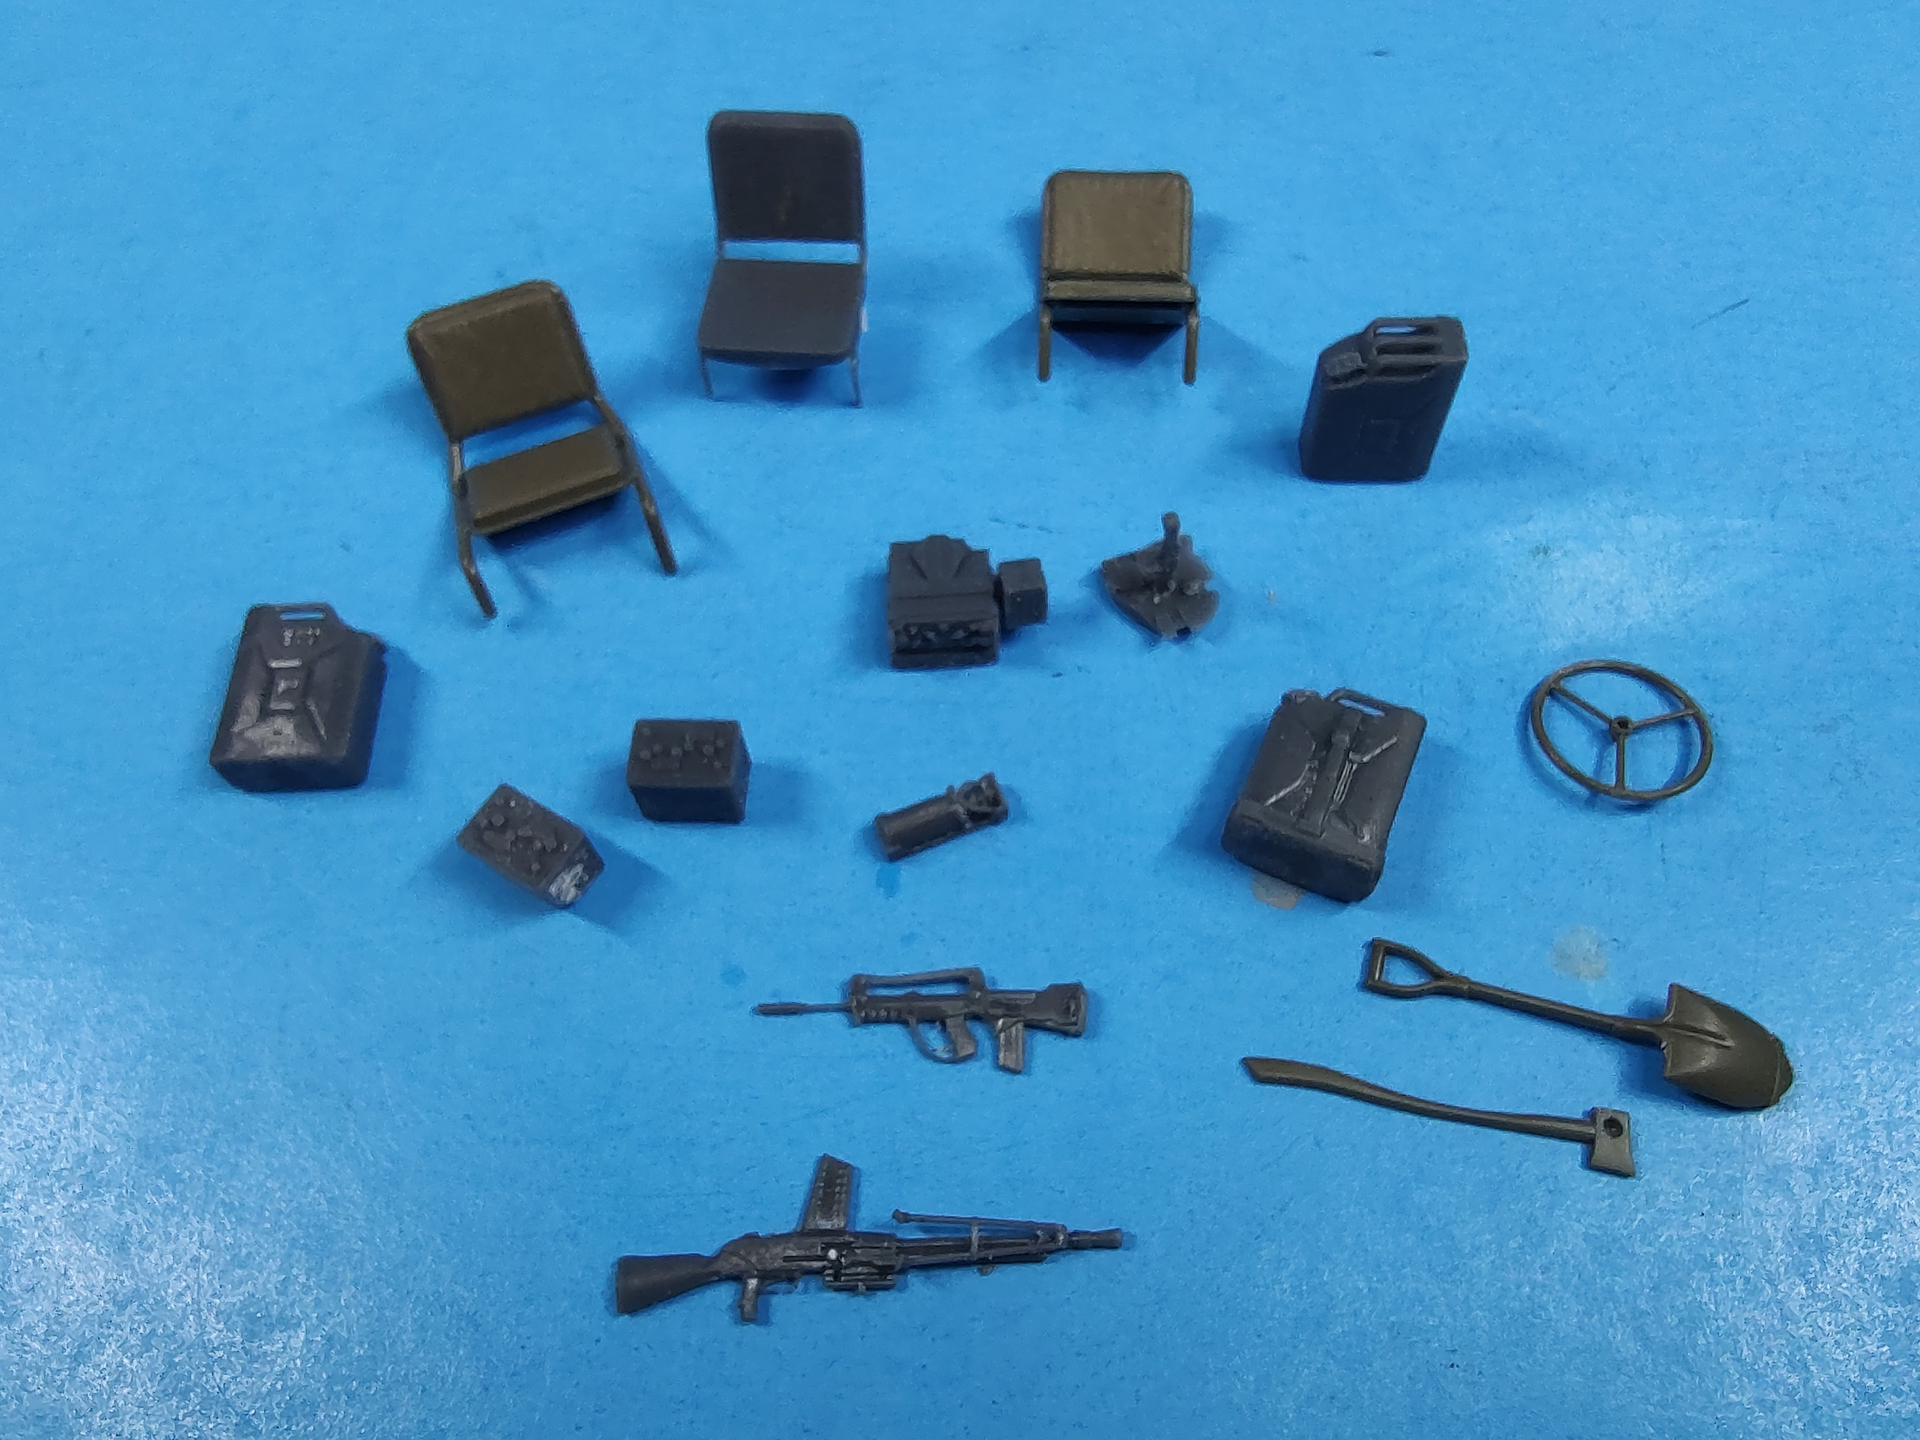
Here are the rest of the detail parts. Seats, a French TRVP-13 radio and handset, French jerry cans, batteries, decon bottle in bracket, weapons, and tools.

Next up is painting and then decals from the Heller French jeep kit.

13 Likes

Great build Gino, every time I see another one it makes me itch to invest in a 3D printer

2 Likes

Nice job.

1 Like

Hello Gino!

Nice one!

I was wondering - what is “French style jerry can” - and after looking at your model I can tell you it’s a German style jerry can! Germans left a lot of tooling in countries where there were factories so I suppose French inherited at least one jerry can factory. Same here in Poland - we use that design even today, the “Wehrmacht” inscription just had to be removed…

Thanks for sharing and good luck with your next jeep projects, have a nice day!

Paweł

1 Like

Interesting subject. I think it could use some latches that were a tad more in scale though.

I’ve posted a few suggestions over the years, although I can’t find the one that had photos. If you round the top of the "T” portion they look quite good.

JLTV UTL M1278 and an RG-33 SOCOM AUV Build Conversion - Armor/AFV / Modern - KitMaker Network

T style storage box latches - Armor/AFV - KitMaker Network

I’d post photos of mine, but I don’t do that on others’ threads.

1 Like

Thanks gents. It is a unique subject that you don’t see many of. I like the look of the roll bar as well.

Thanks Pawel. The can is now the NATO standard as well. Many nations use that style, these have French writing on them though, even though it can’t really be read in 1/35. The US used this style early in WWII as well and called then Blitz Cans.

The latches don’t look bad when not blown up 300% and they blend in when painted. I am going to leave them.

1 Like

Nice job on this build and especially on the engine.

Be aware that the FAMAS in service with the French army generally didn’t have the handguard on the pistol grip. I would use a regular FAMAS. What LMG is this ? It looks like a FM 24/29 which was out of service when the FAMAS was adopted. You’d better use either a AA-52 or a later AA-NF1.

Olivier

2 Likes

It’s a FAMAS G1 or G2, neither of which was used by the French Army AFAIK, but the Navy did use the G2. The machine gun looks like an FM 24/29 to me, too.

1 Like

Thanks for the tips guys. I just found some French weapons and went with them. I know nothing about them other than they are French. I’ll take your advice and also do some more research to see which ones go together.

1 Like

Found a FAMAS F1 and AA-52 files. Is this version correct (w/out bipod) w/the below AA-52 LMG on a late M201?


1 Like

You’ve got a FAMAS F1 there, which is the version used by the French Army. The easiest way to tell it apart from the G-series is that the F1 has a trigger guard for only the index finger, while the G1 and G2 have one that covers the whole pistol grip. All FAMAS F1s have bipods: you can see it folded up on the one on the right in your image.

Here’s a comparison of the G2 and the F1:

(Your 1:35 G-series FAMAS is a G1, not a G2 — I hadn’t looked closely at the magazine in your photo, but your FAMAS has the 25-round type that the F1 also used, while the G2 uses STANAG magazines instead.)

2 Likes

Great, thanks. Glad you were able to confirm what I thought I had found.

1 Like

This set will give you a compatible LMG - AA-52:

2 Likes

Thanks Brian, but I found a 3D file for the AA-52 as well. The correct weapons will be printed later today.

2 Likes

Wow Gino, that’s an interresting subject. I owns a BVM conversion but at this time i didn’t go serriously on it. Your build will save me a lot of time!!! A para version in Africa will be interresting to build even with the old Mat49 weapon.

I’ll have to buy a 3D printer, i see that is a nice add to upgrade our hobby..

I’ll follow your build Gino, thanks for posting

2 Likes

Thanks Stephane. Good luck w/your conversion. I’m sure it will come out great looking.

Yes, a 3D printer is a great tool. It has opened up all sorts of new avenues for modeling. You definitely need one.

1 Like

Though in the same 1970s quality as the M201 kit Gino used exactly one part of :slight_smile:

1 Like

Hey! I love Heller! The only game in town for an awful lot - that is - if one models French kit; I haven’t done many models but as ever, have the intent (and that’ll be on my tombstone).

That accessory kit is worth its weight in gold - or at least to me, and besides, who else makes one of these?

Mine - all mine!

4 Likes

I have its parts somewhere, having bought it 35+ years ago and built all the weapons. I remember I kept the ones I didn’t use in dioramas etc. in a soap dish with a lid, and I suppose I still have that somewhere, likely with the weapons etc. still in it. They soon smelled of scented soap back then already, they must do even worse now …

1 Like

AA-52 m.g. is also included in the m.g. set from Dragon. What do you want to display with the M201?

1 Like