After the RFM Stug with interior, I promised myself a “shake and bake” Tamiya kit to unwind and found this, the Afrika Korps version in my stash. I’ve made this a couple of times previously in the original format, but of course not using the supplied scheme. Nor did I intend to this time, making one of the three examples of either the 231 (standard armoured car) or 232 (with additional radio gear, the way the kit is meant to be made) known to have served with “Hohenstaufen” (9SS) at Arnhem. Naturally, this would be a late version and referring to the book below, I found there were more differences than I had previously thought:

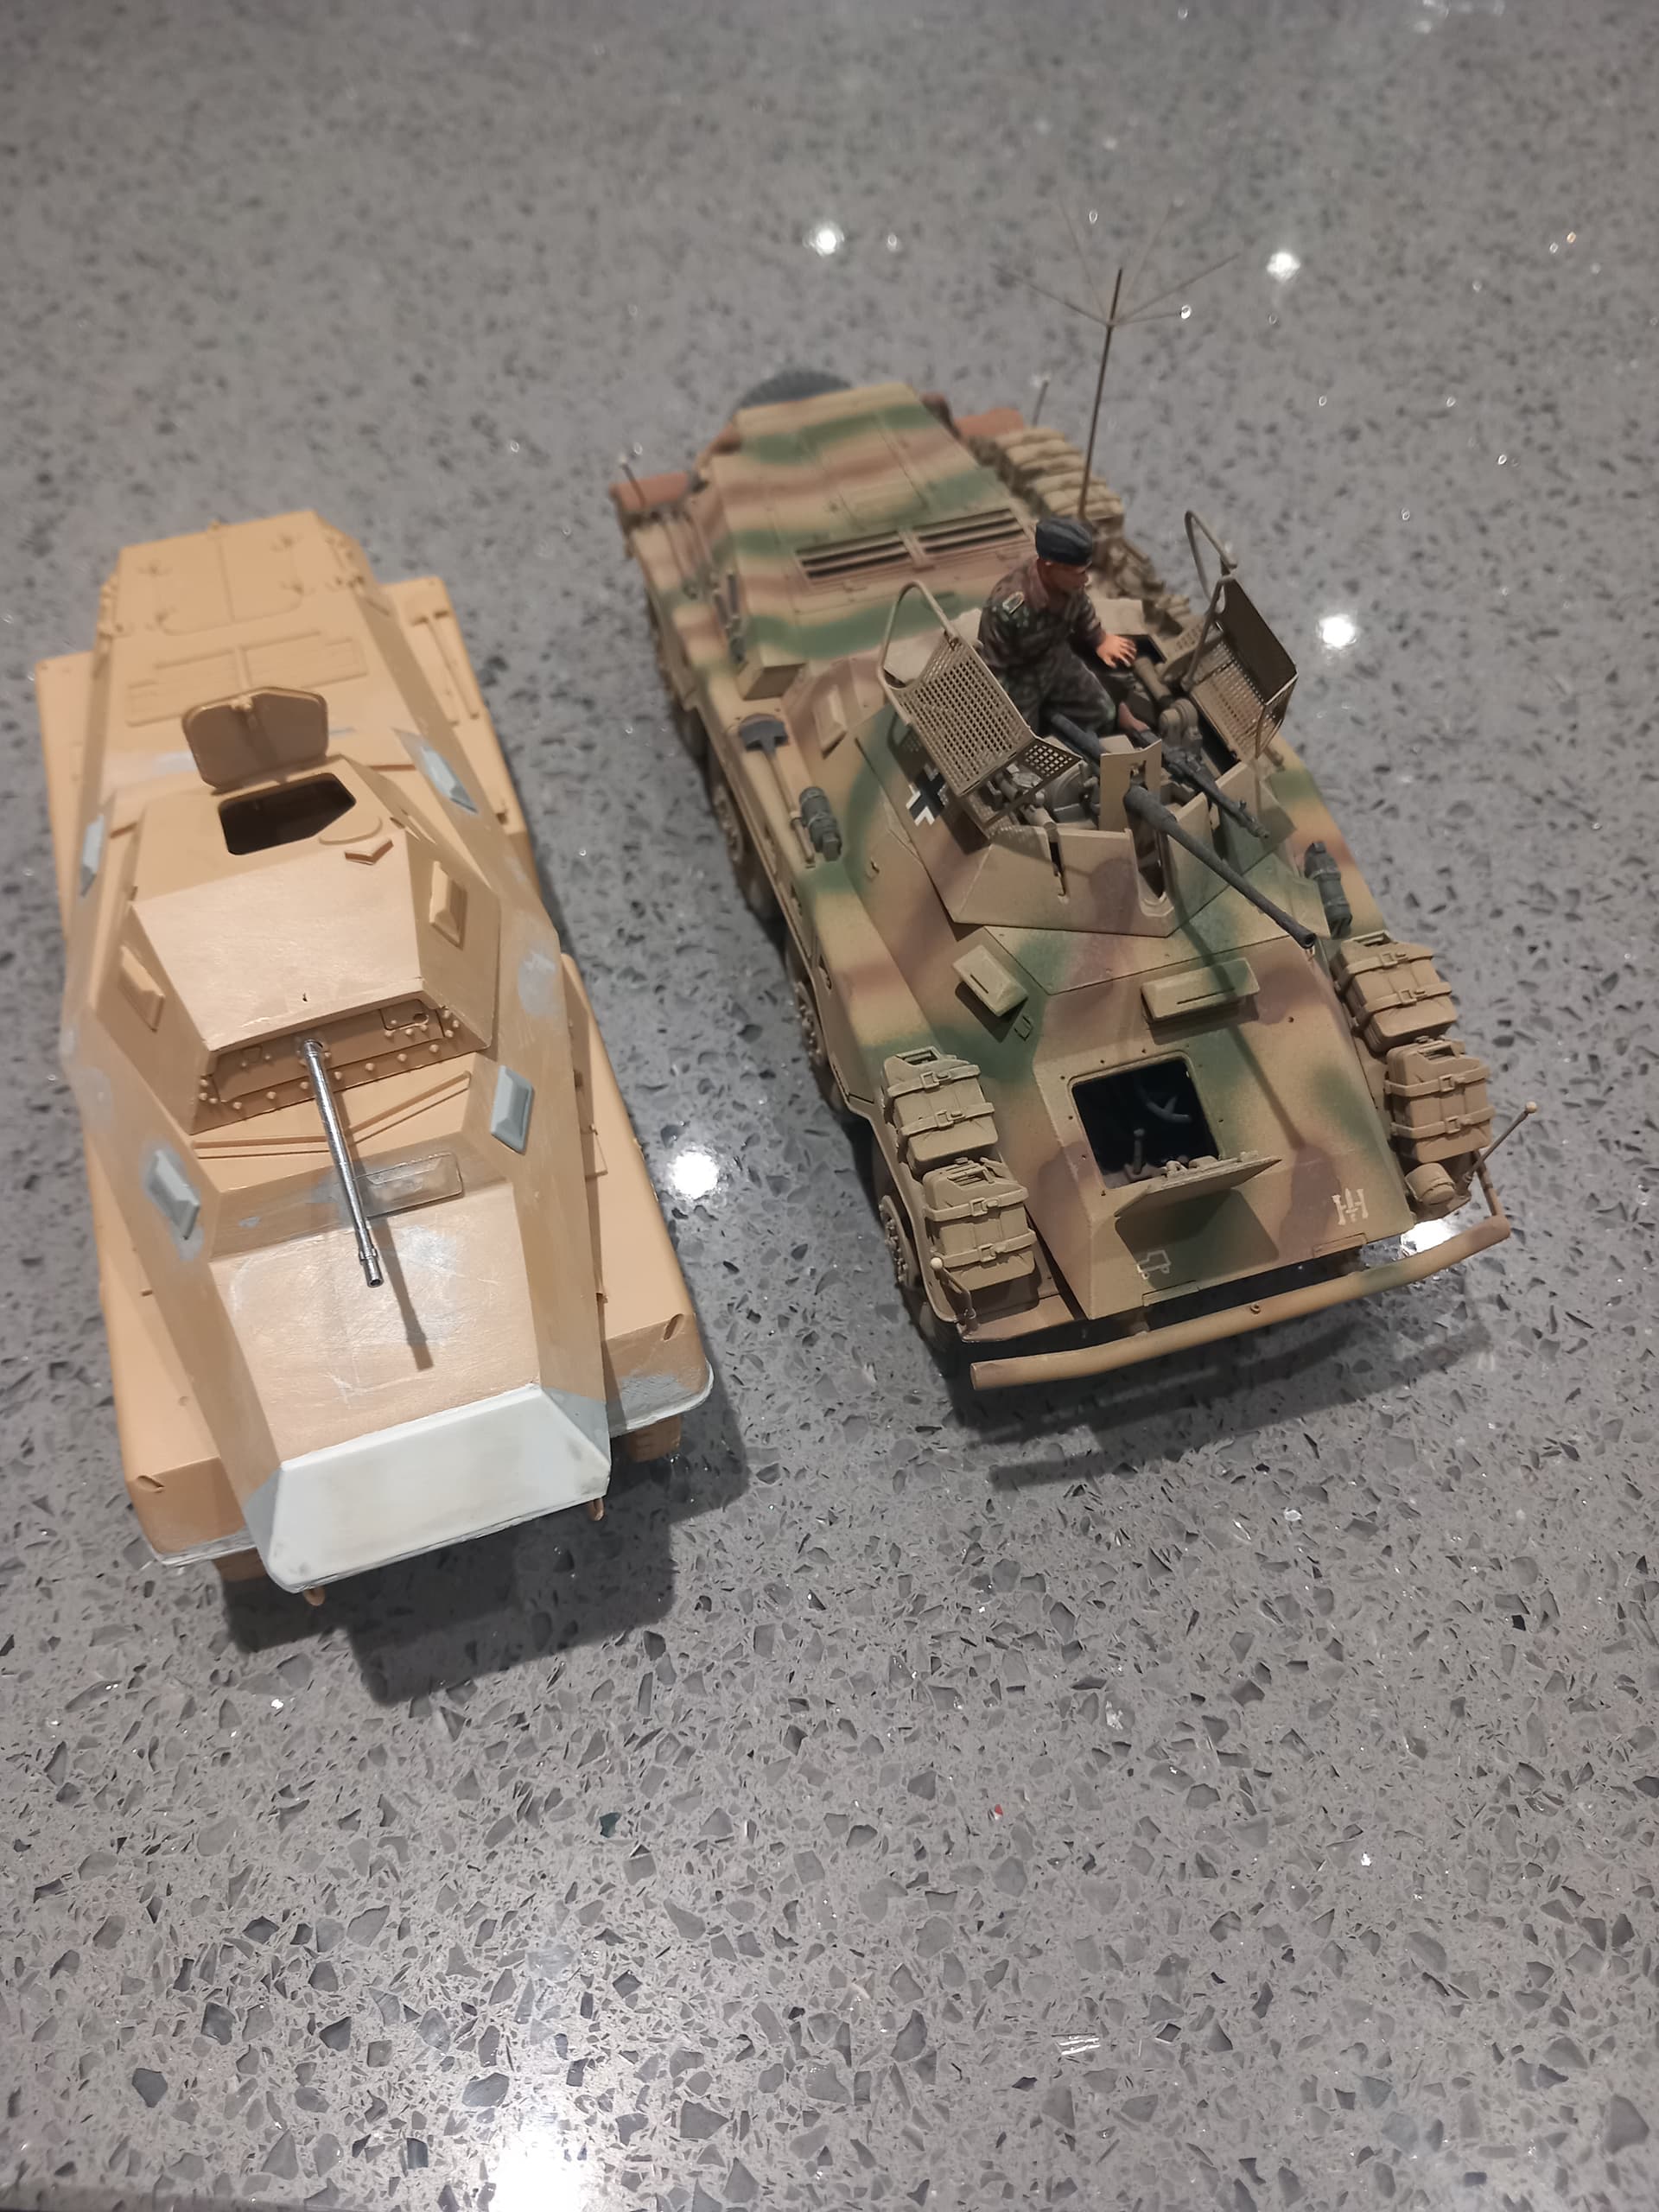
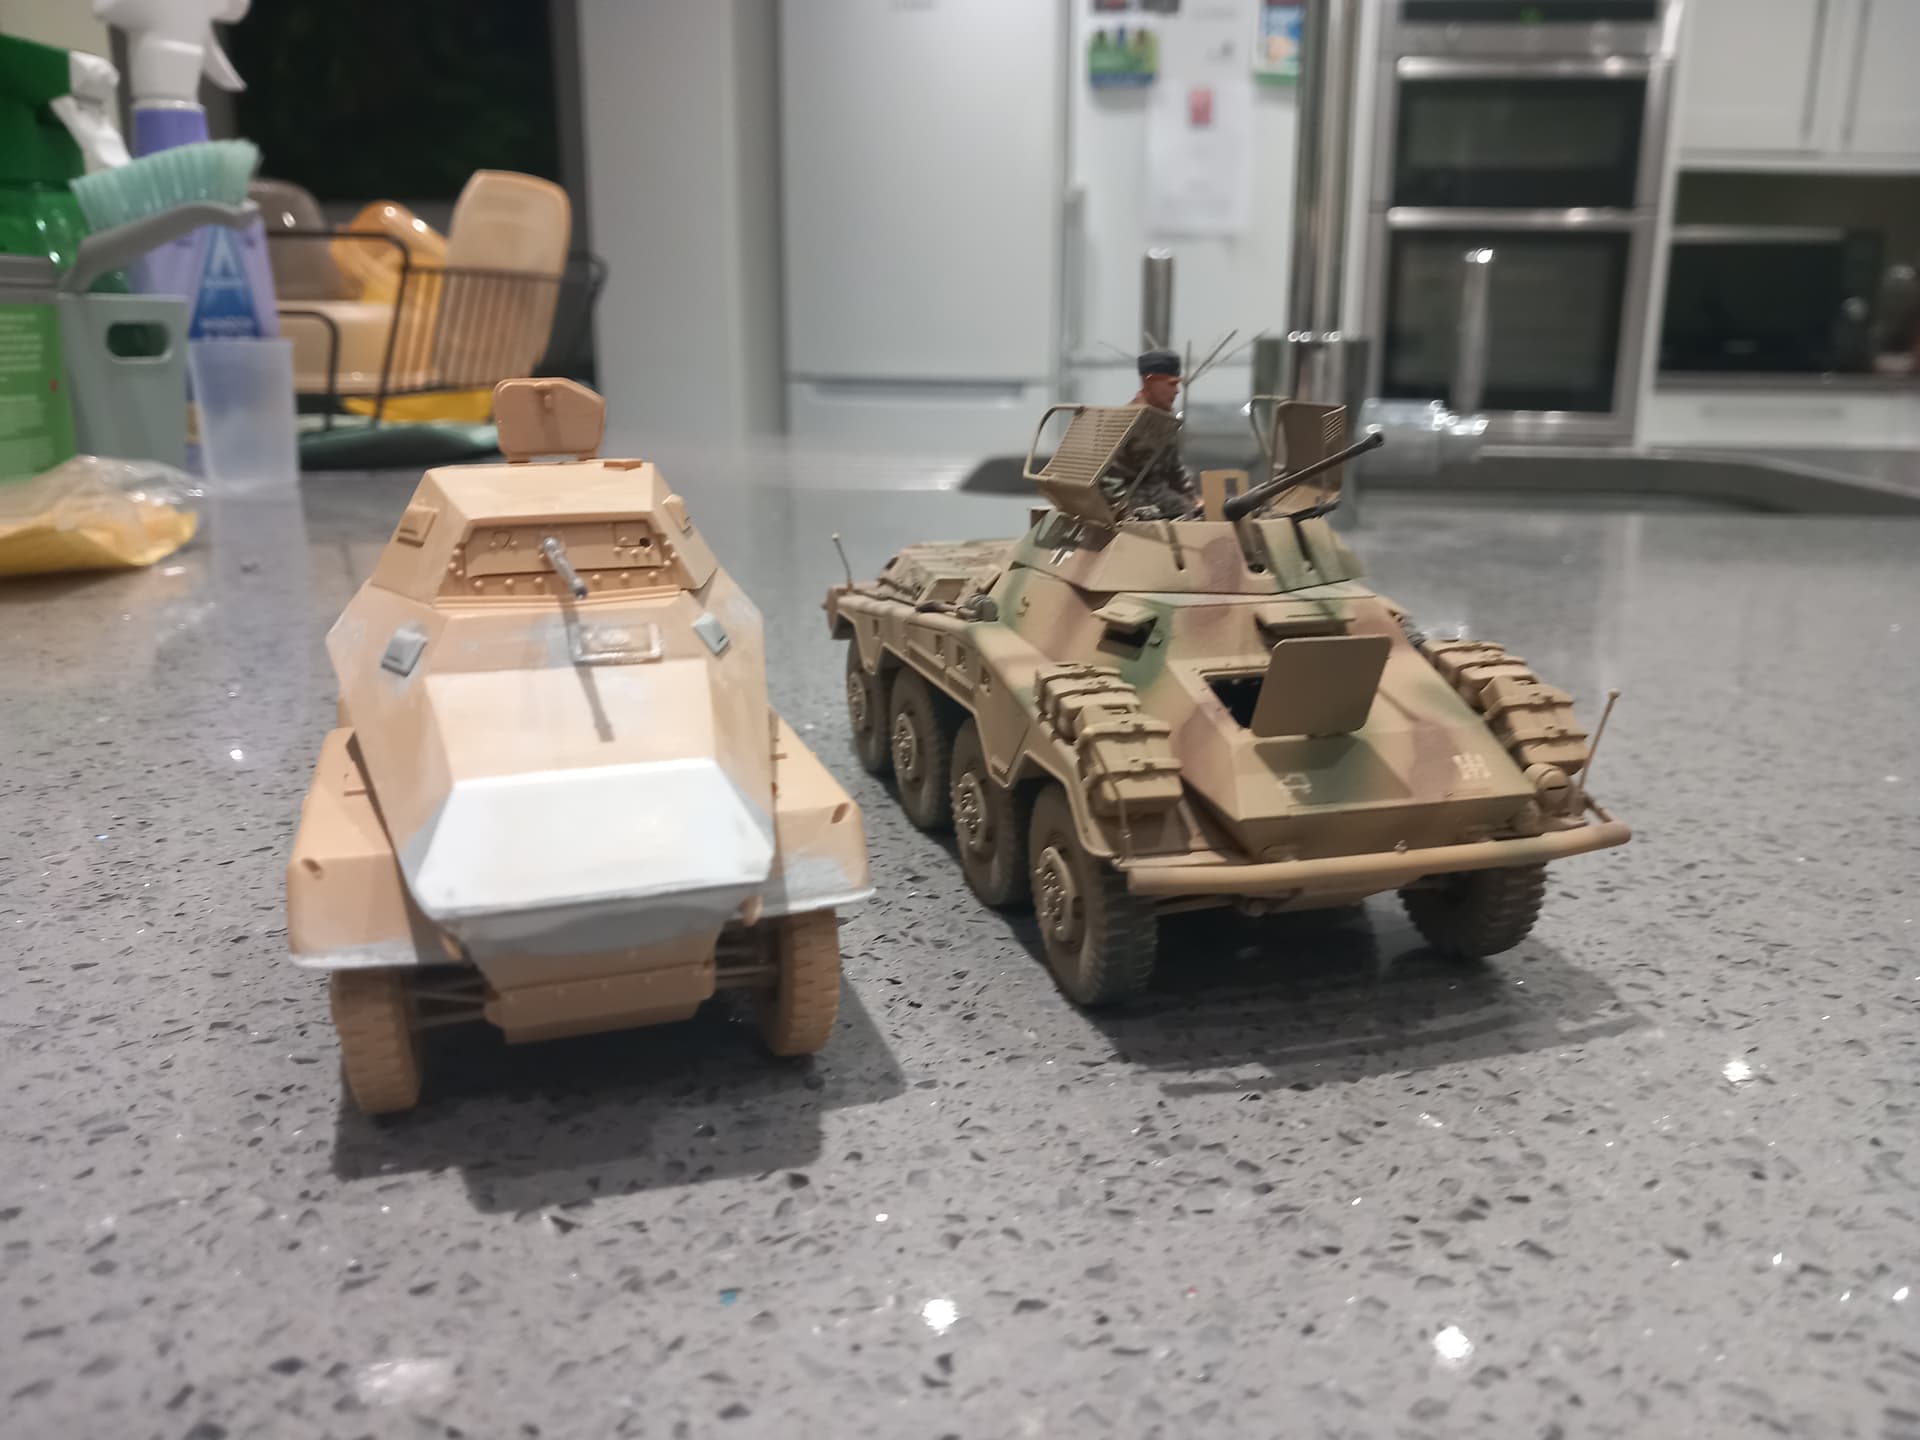
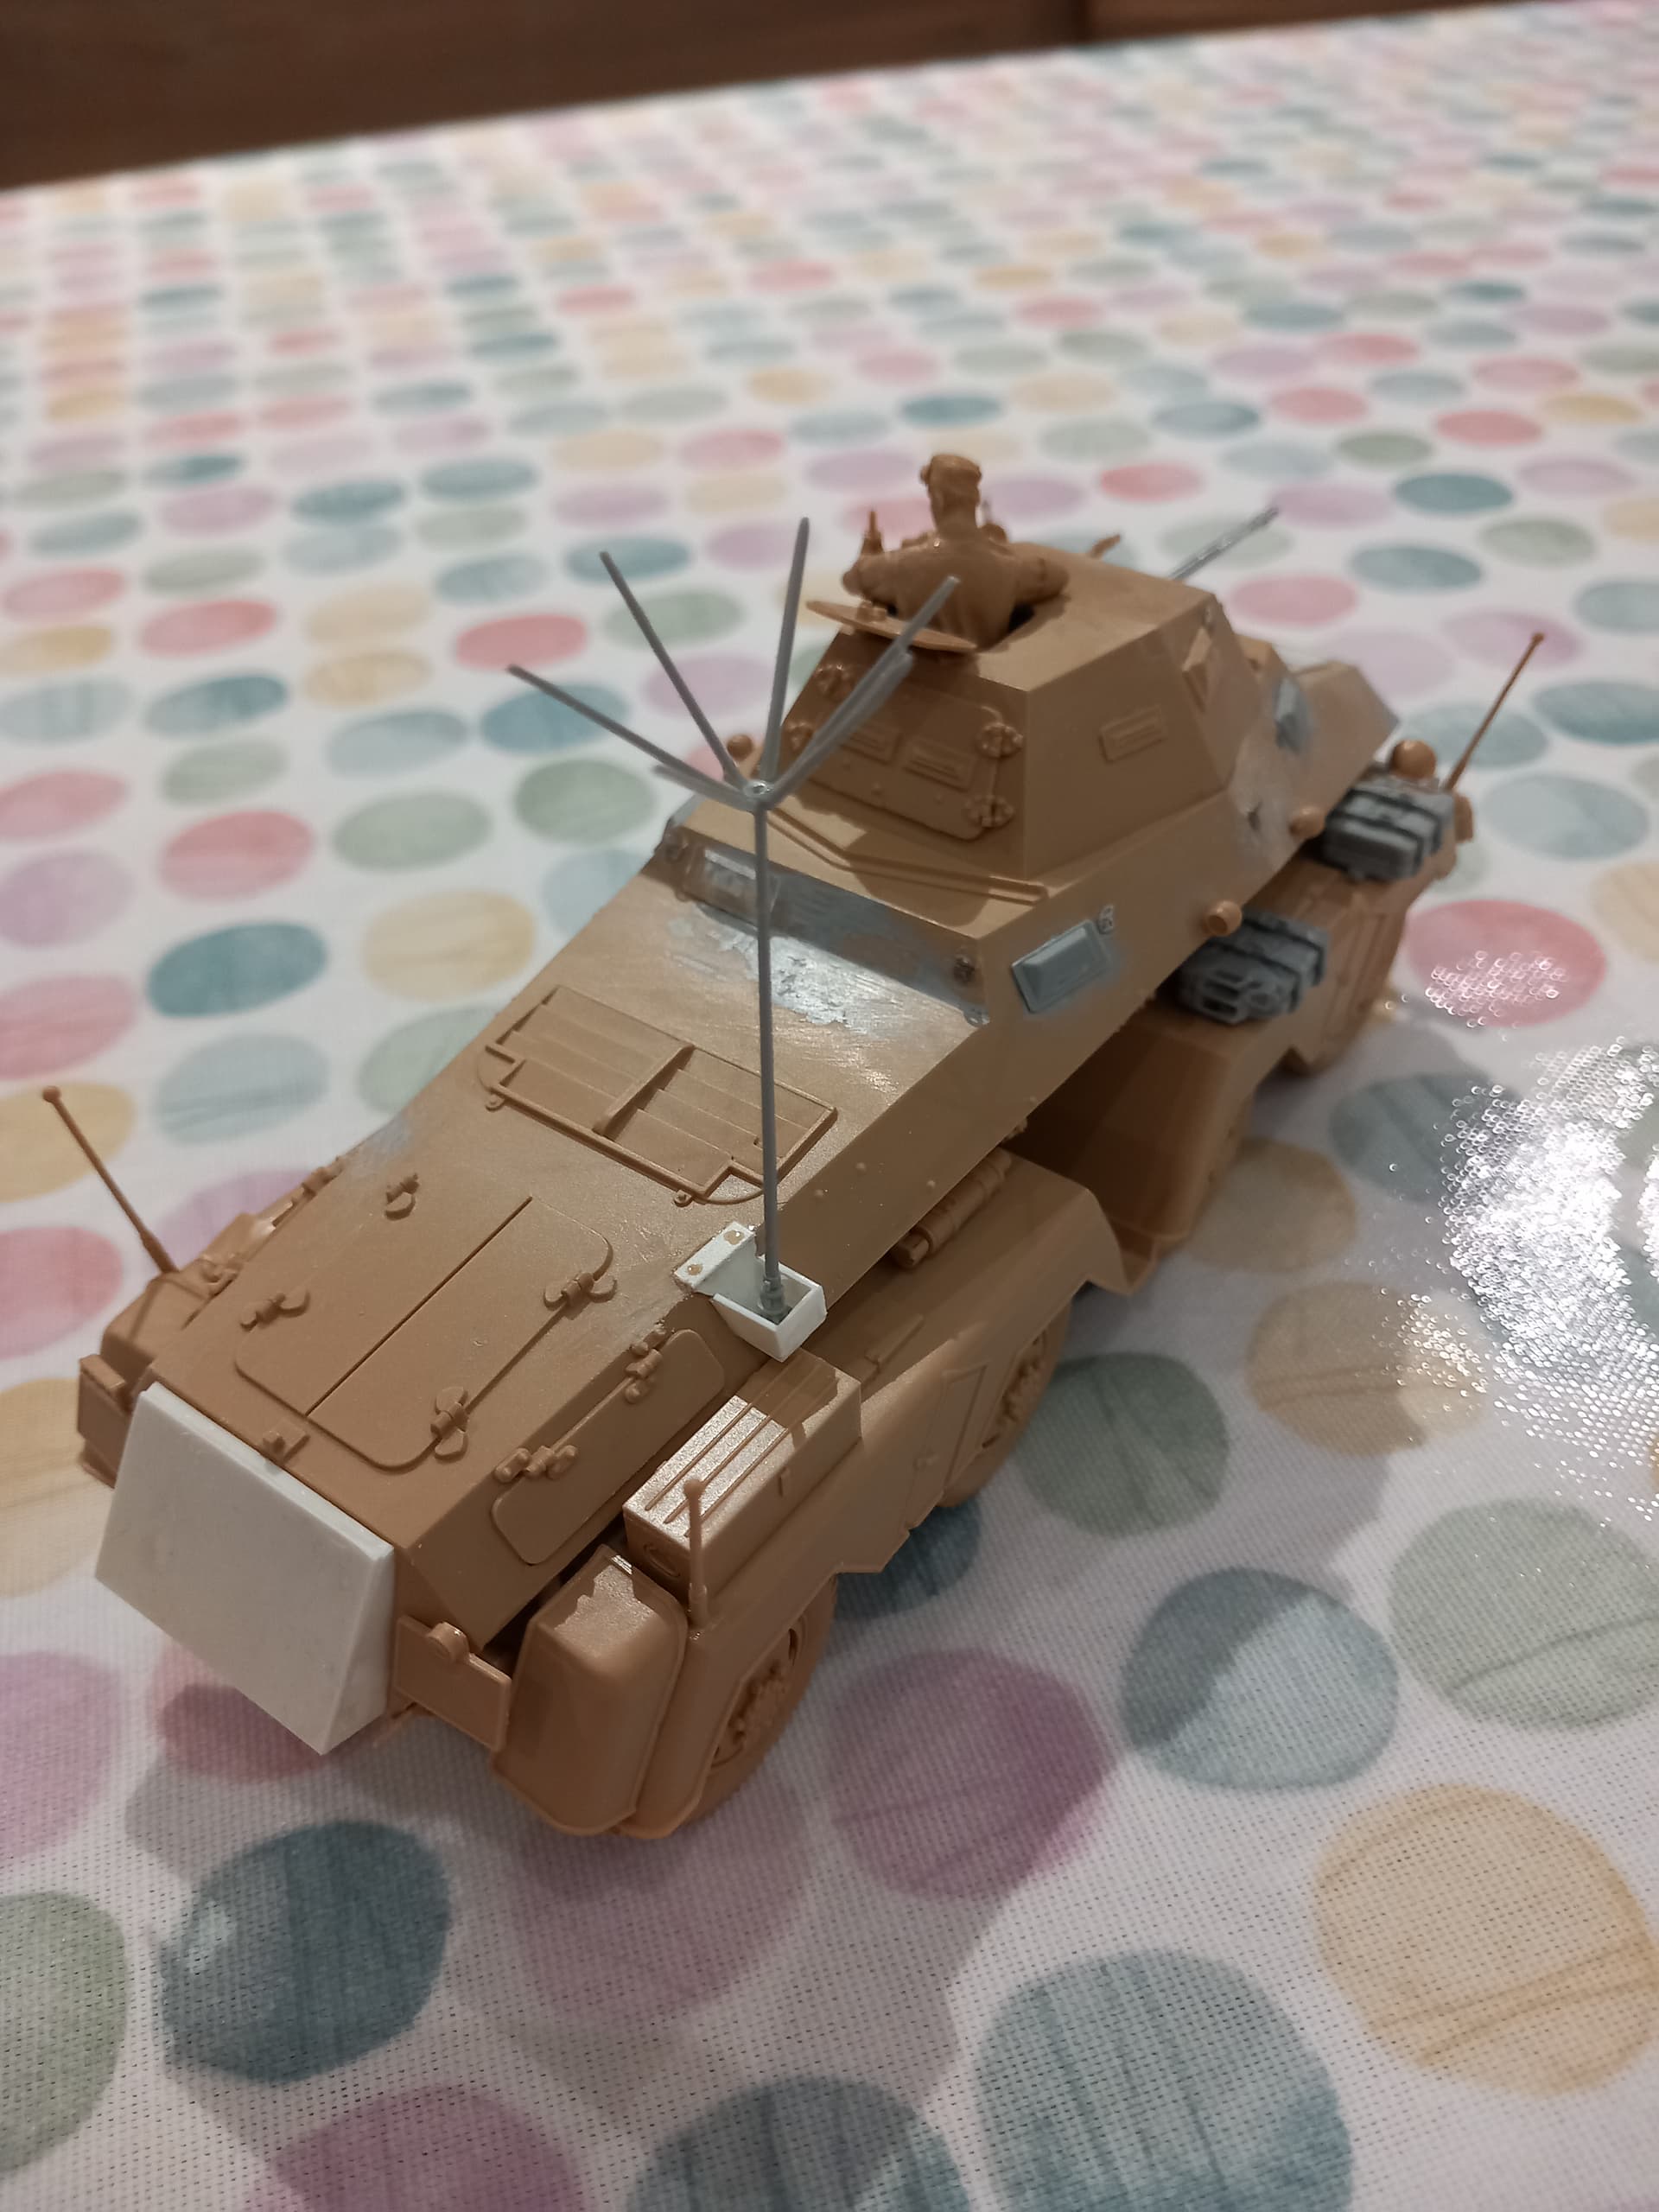
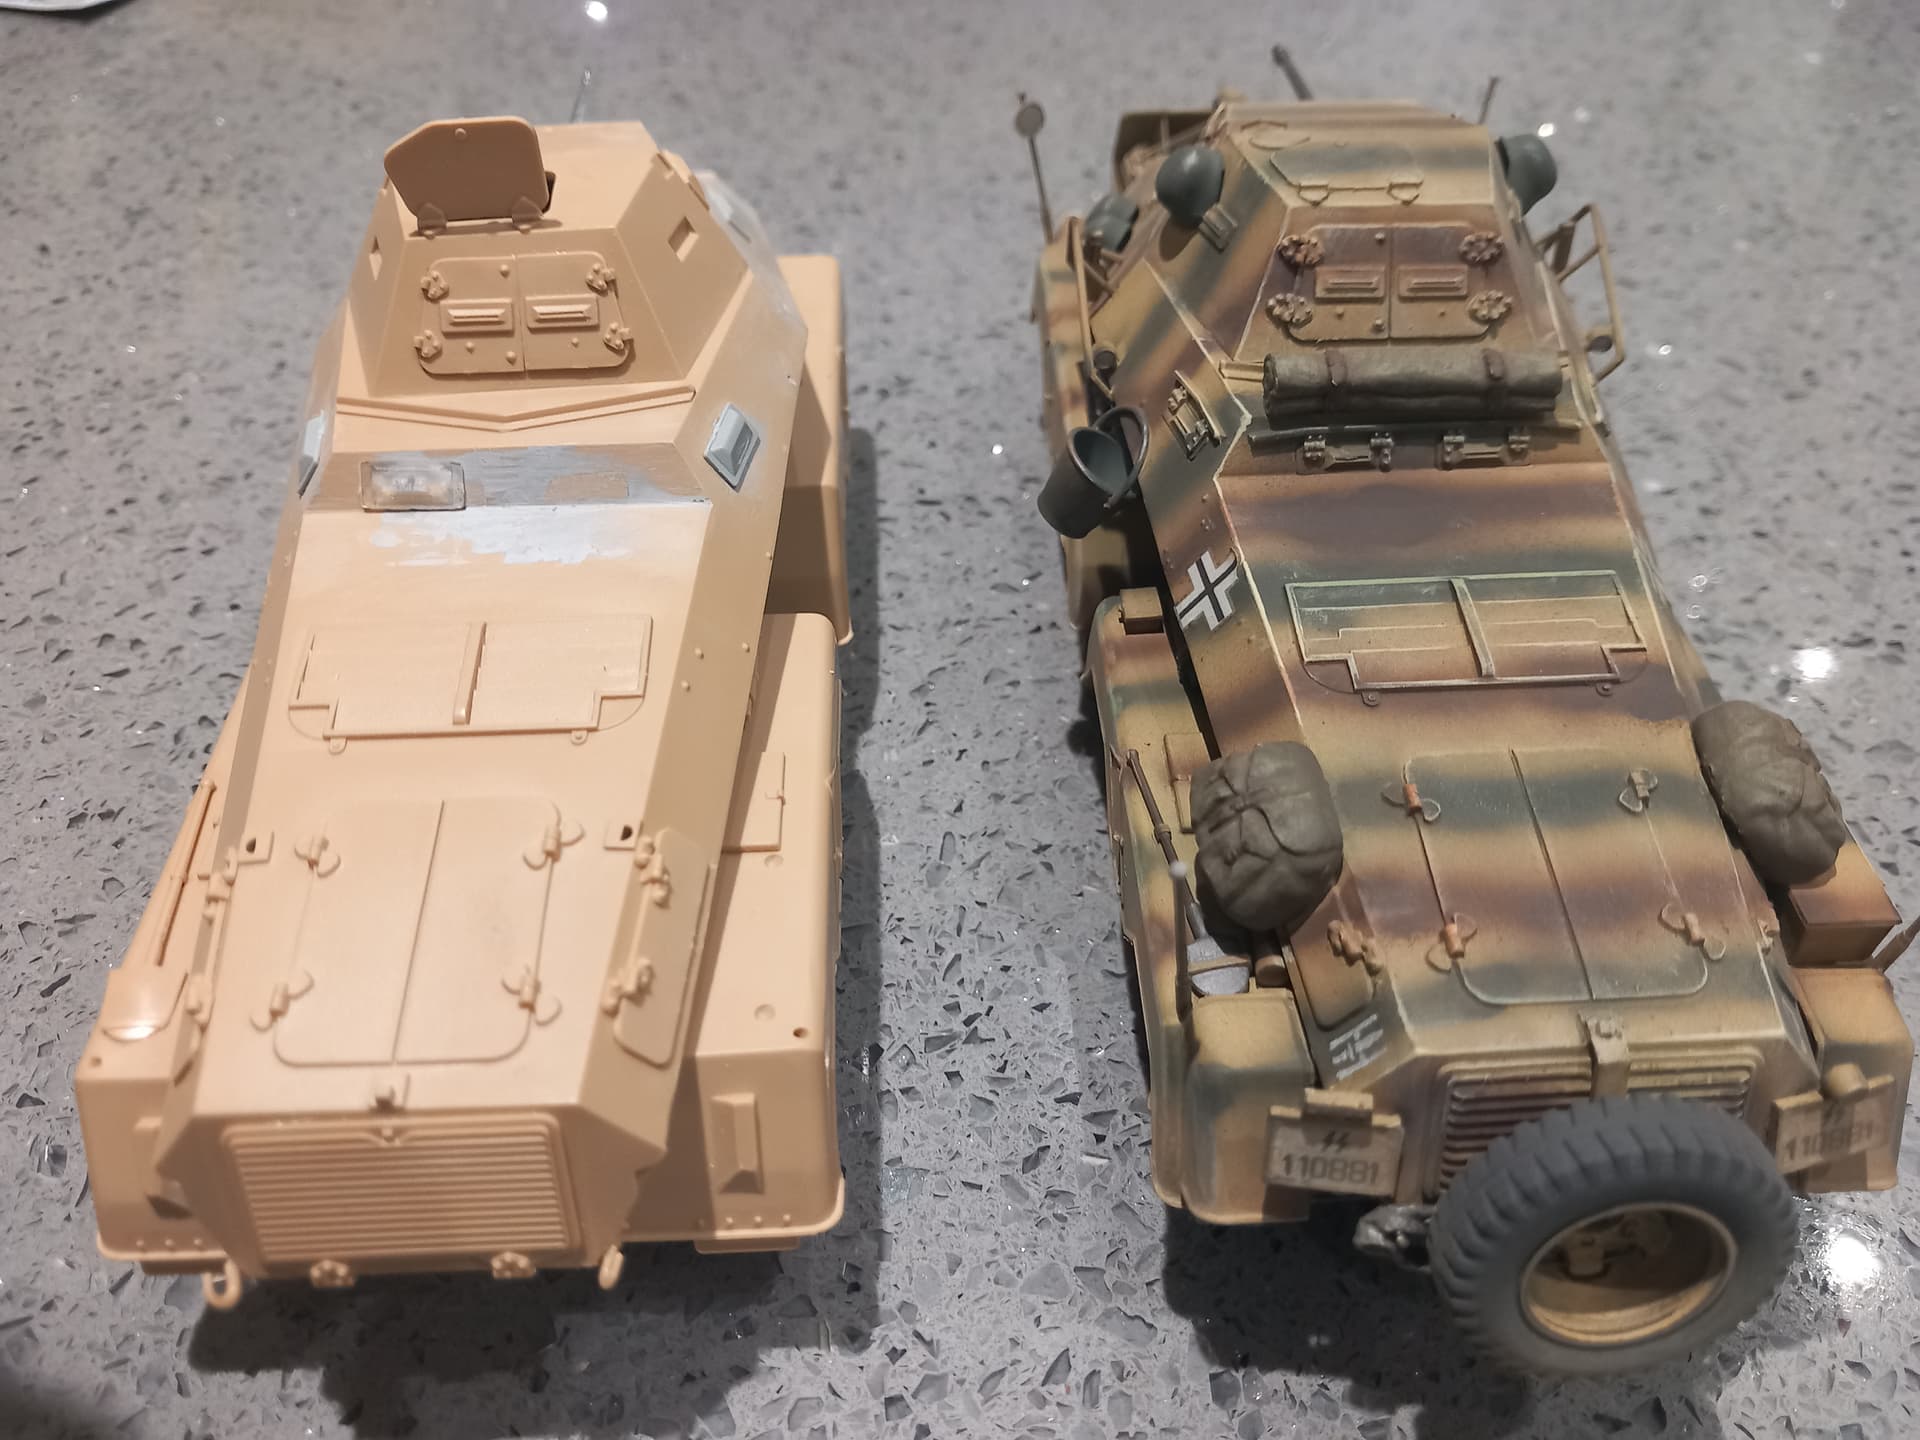
Interestingly, none of the other references I have made any mention of the changes introduced during the late production run of this vehicle, which include simplification of the hull shape and the Sdkfz 234 type driver’s hatch, replacement of the flush fitting visors with the later type and shortening of the front mudguards, all differences which are very noticeable when the two are put side by side. The other big difference is that the bulky, ungainly and very noticeable (by the enemy!) frame antenna was replaced by a “sternantenna”. The differences make it look like a rather different vehicle.
I won’t bore you with the initial assembly, which being a Tamiya kit is straightforward. All the changes to hull shape were performed with Plasticard and Humbrol putty, following the illustrations in Thomas Anderson’s book. The visors came from the spares box. The drivers hatch will be cut from plastic and attached later, it does appear to stand slightly proud, not flush, which is fortunate for me. It’s not going to be bang on for accuracy (there’s a slight issue with the mantlet for the 2Cm in the turret), but it looks close. There was a conversion set for the Tamiya kit available from New Connections, see link here for a construction by Mark Bannerman: missing-lynx.com - Gallery - Mark Bannerman’s SdKfz 232 8-rad
But when I tried searching on it no one had any stock so I’m going to plug on with my version. You will note a few other details; elimination of the brush guards over the side lights, removal of the Pakschutze at the front (the later vehicles have their frontal armour increased to 30mm, so don’t need it) and I also need to scratch a front bumper.
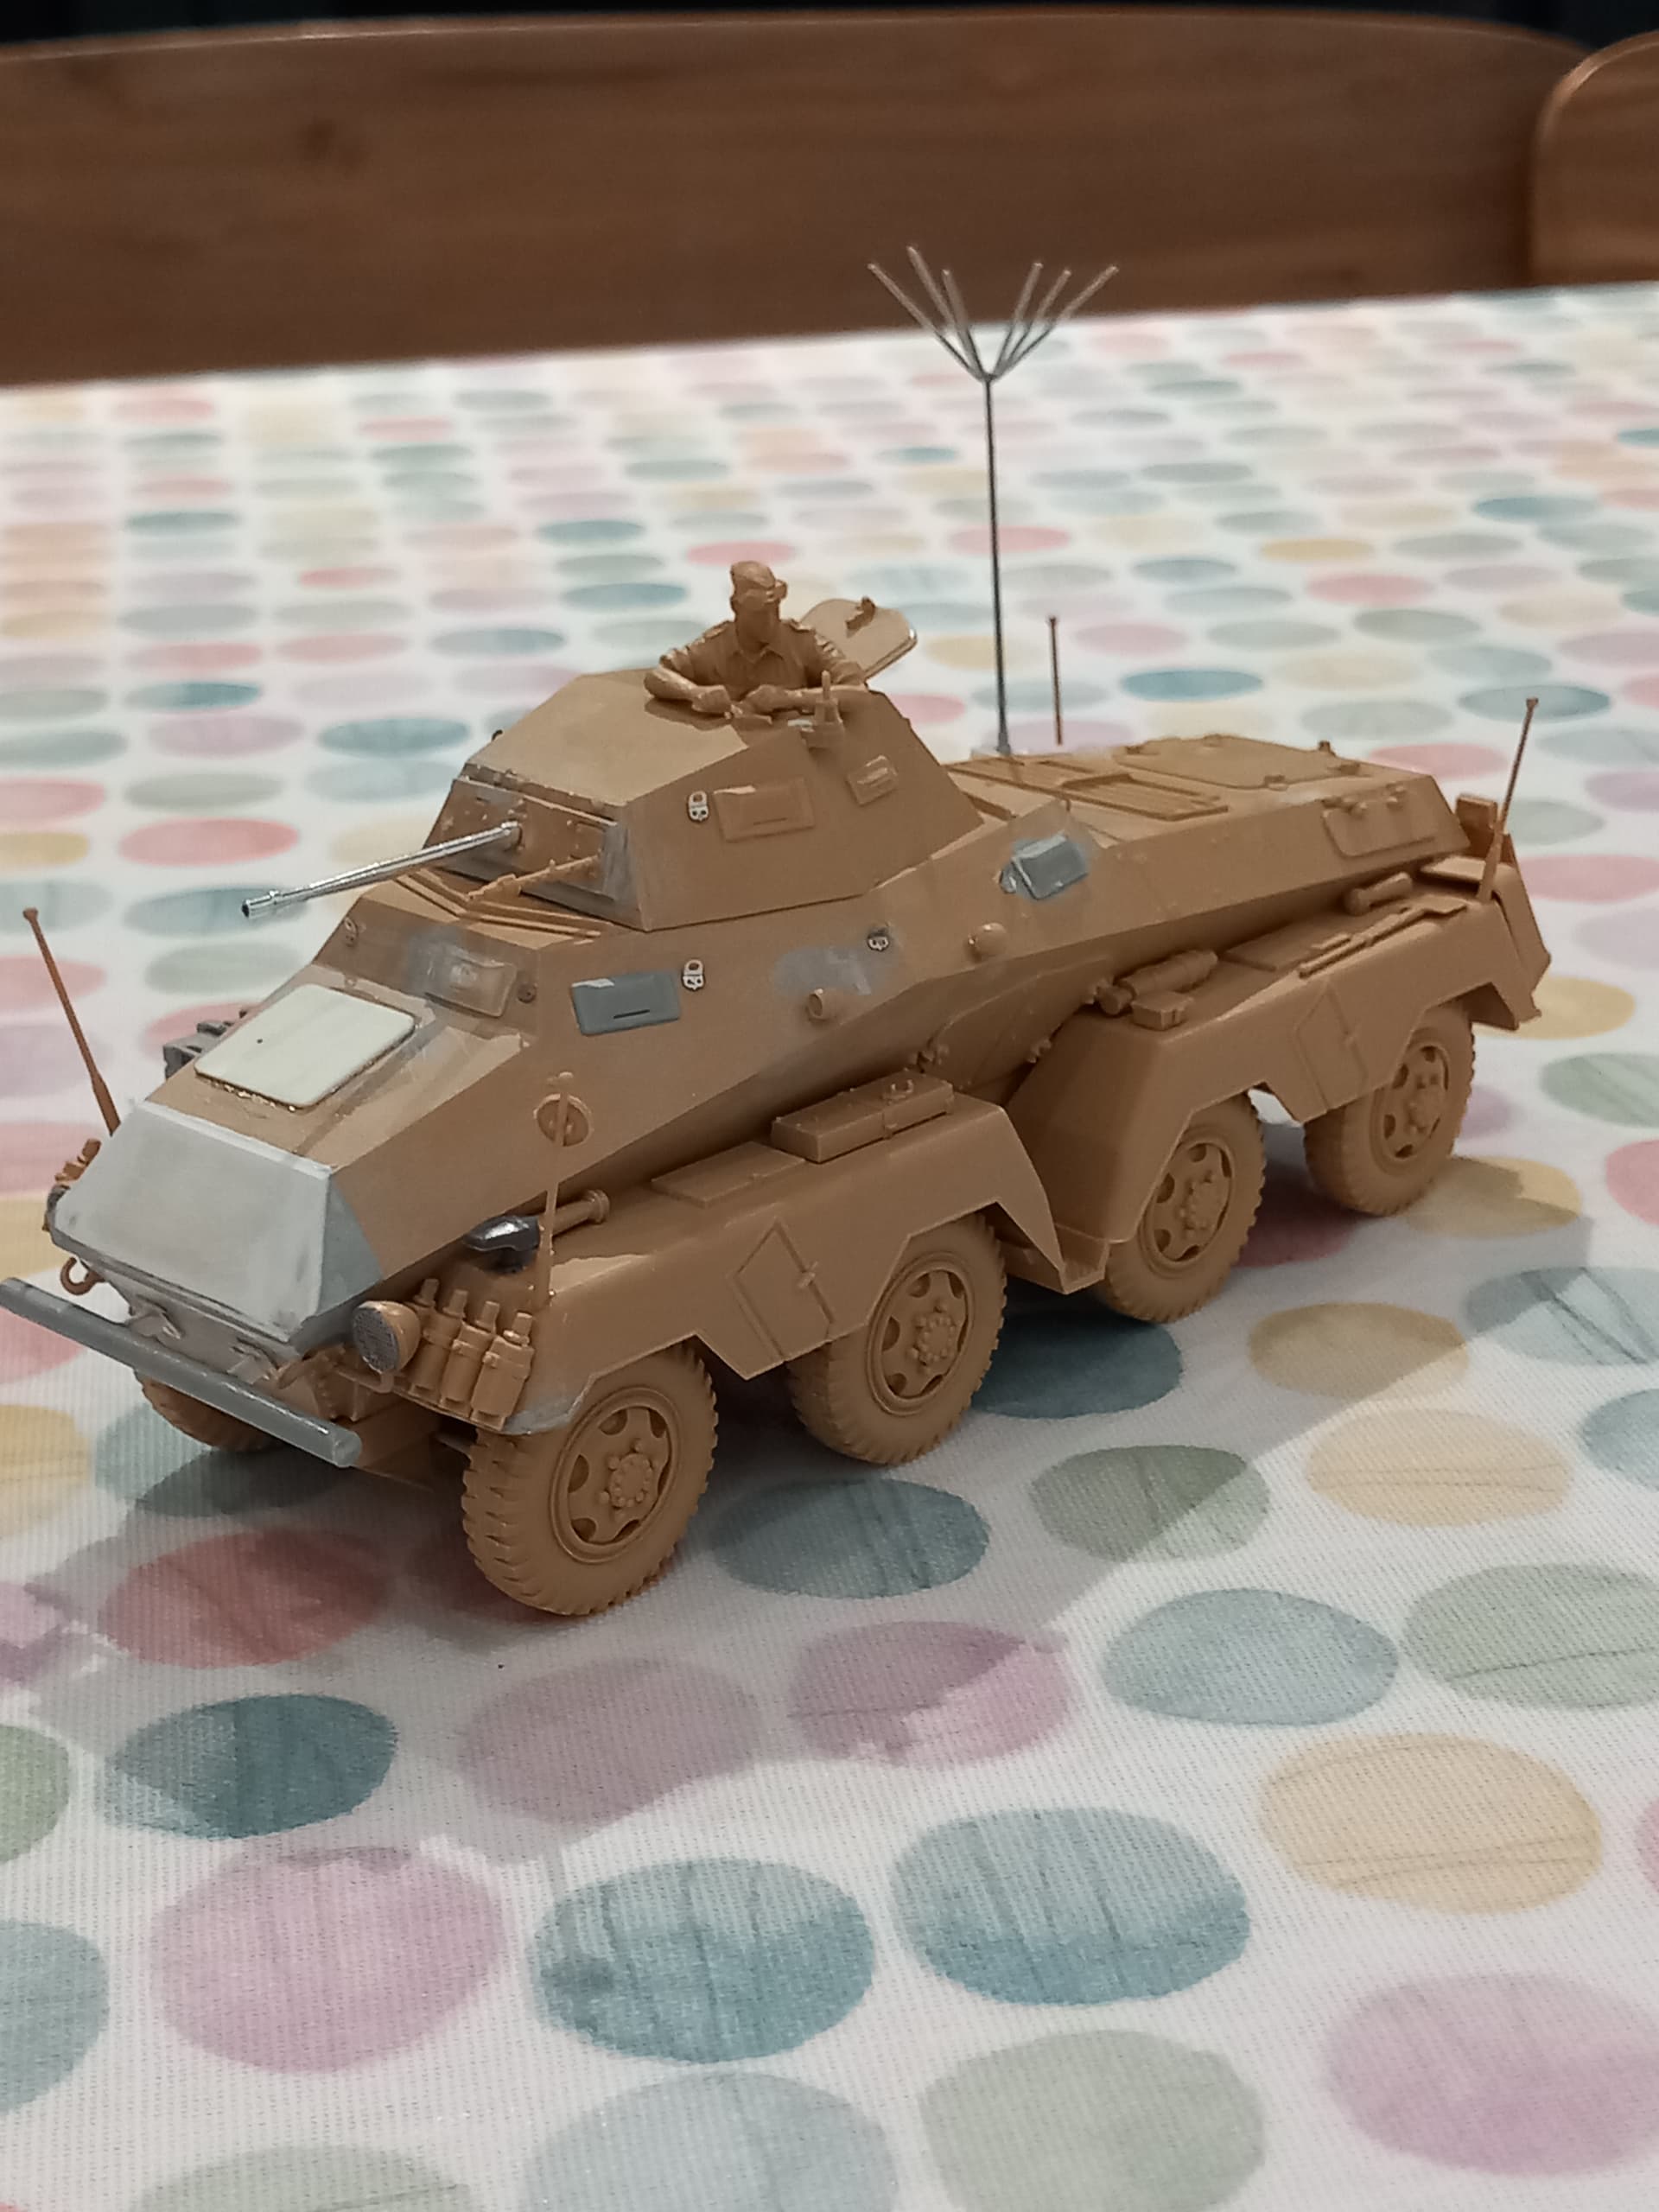
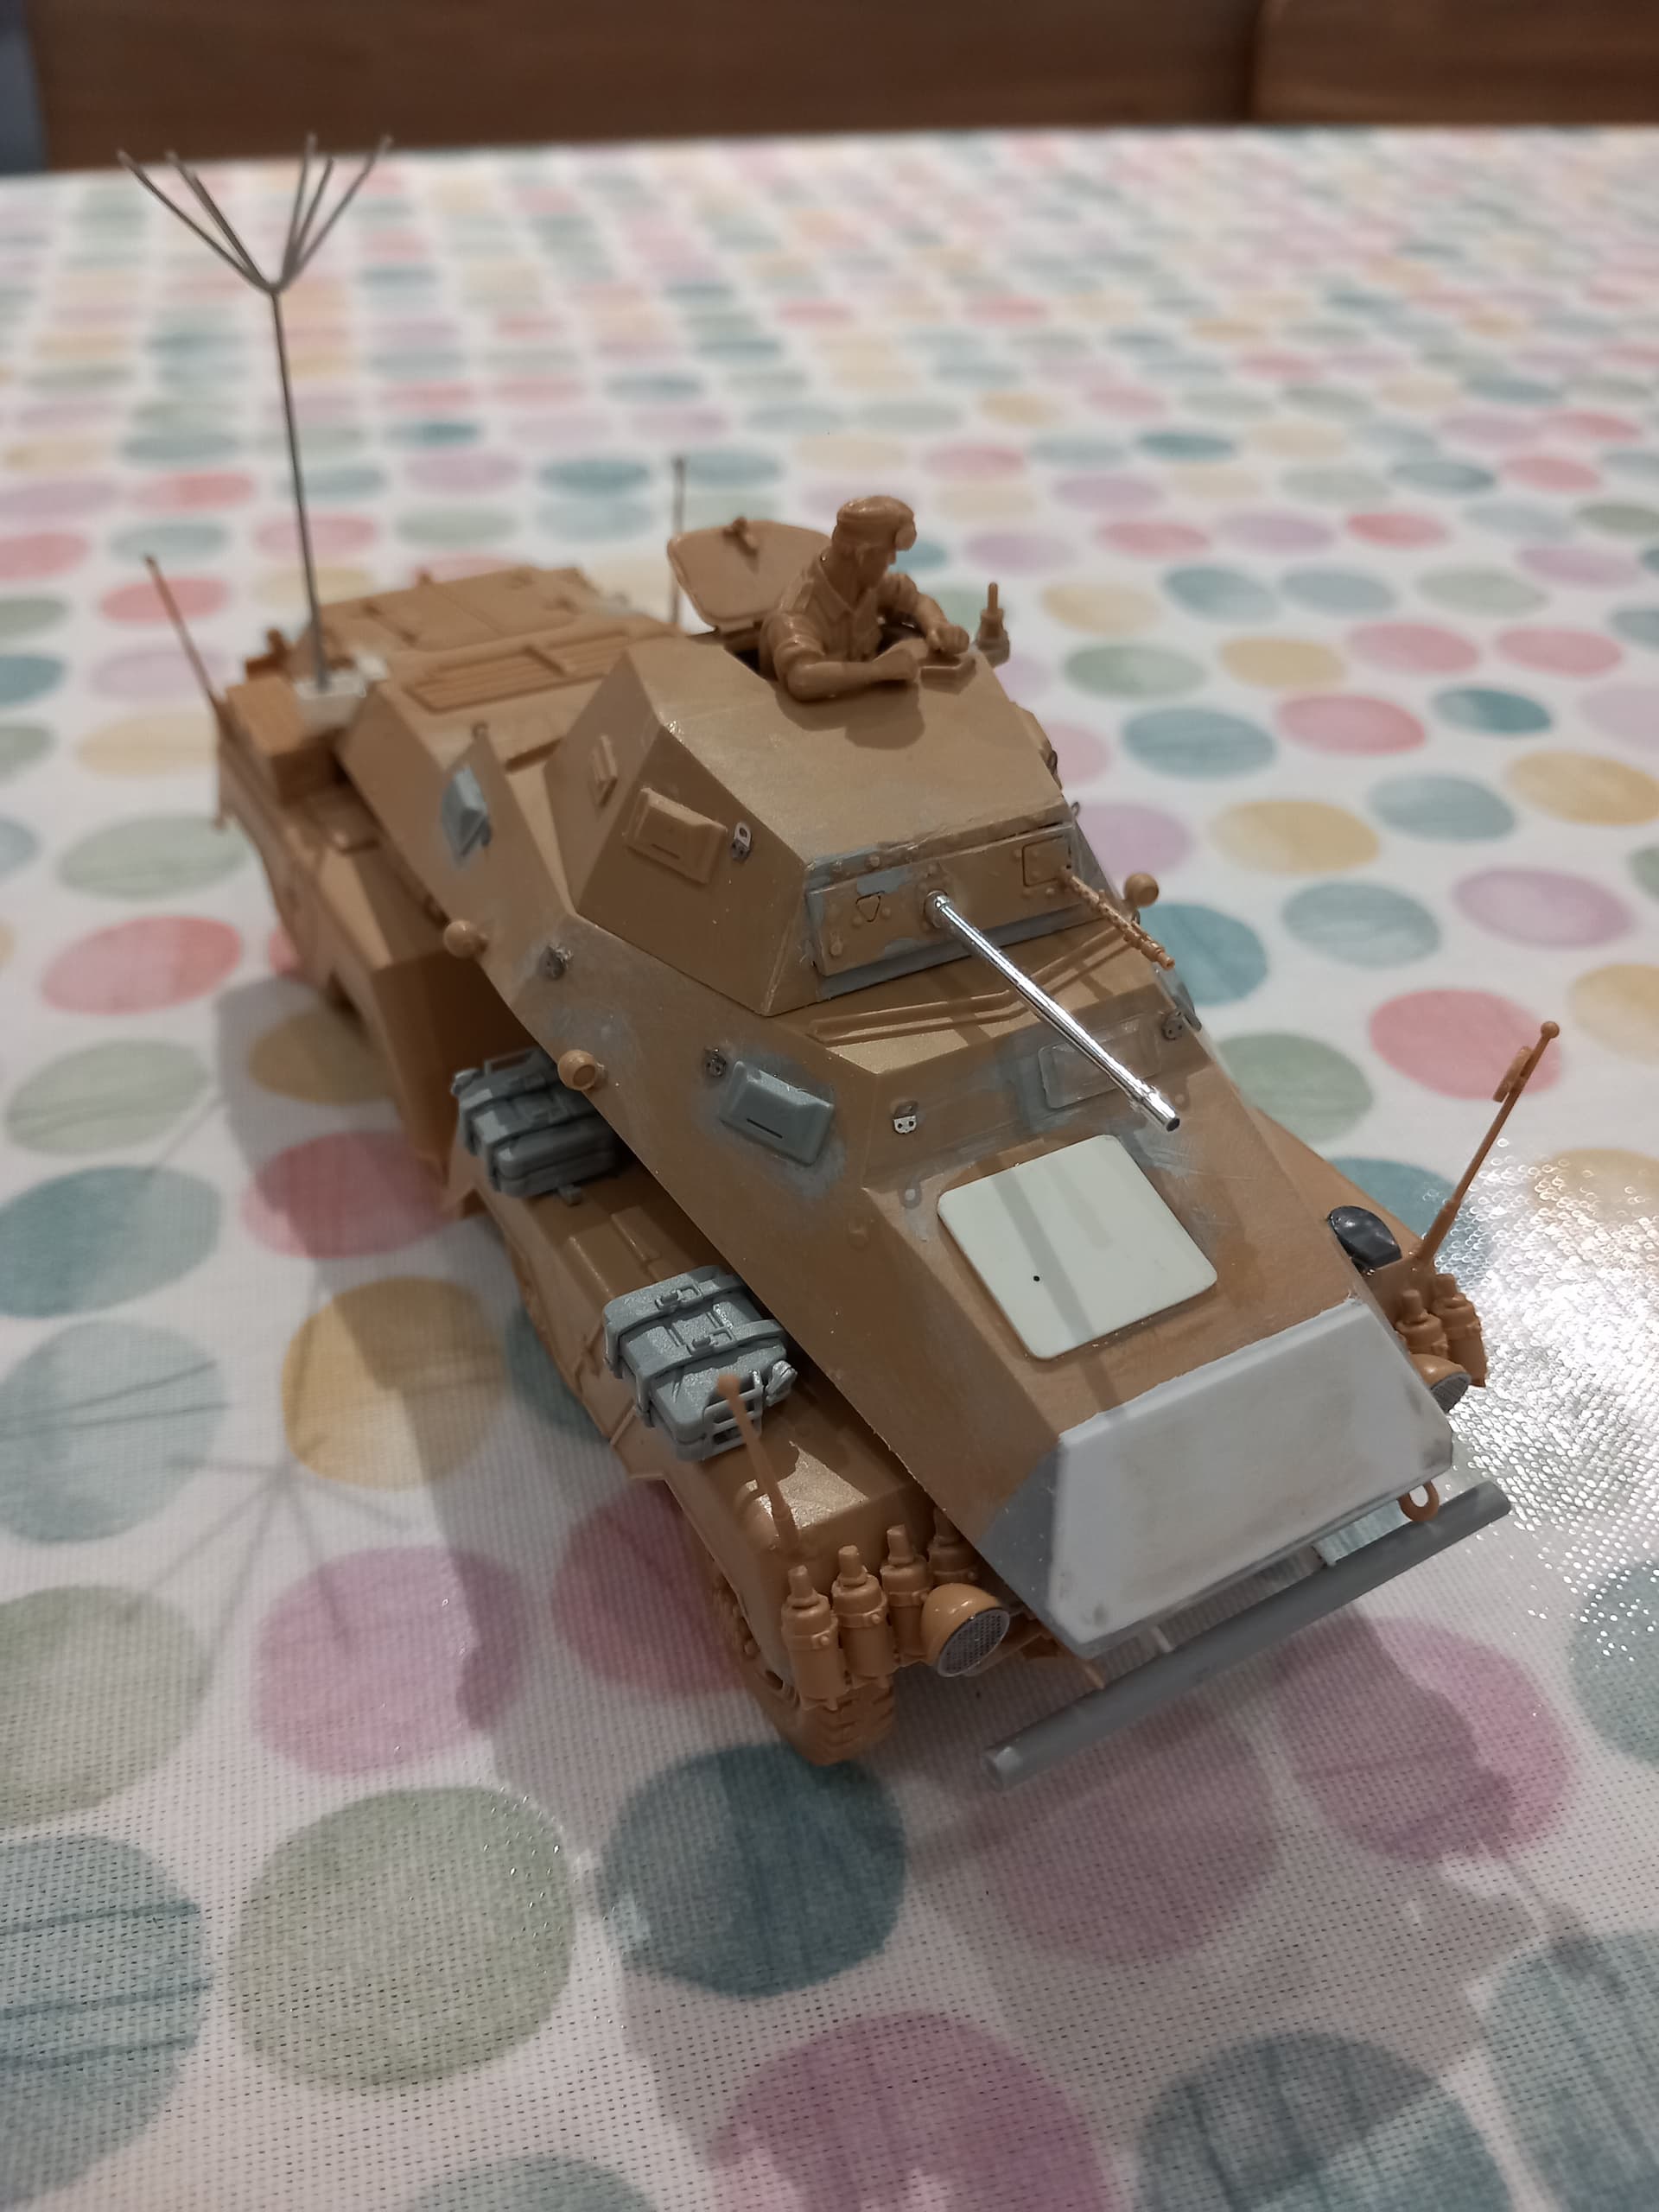
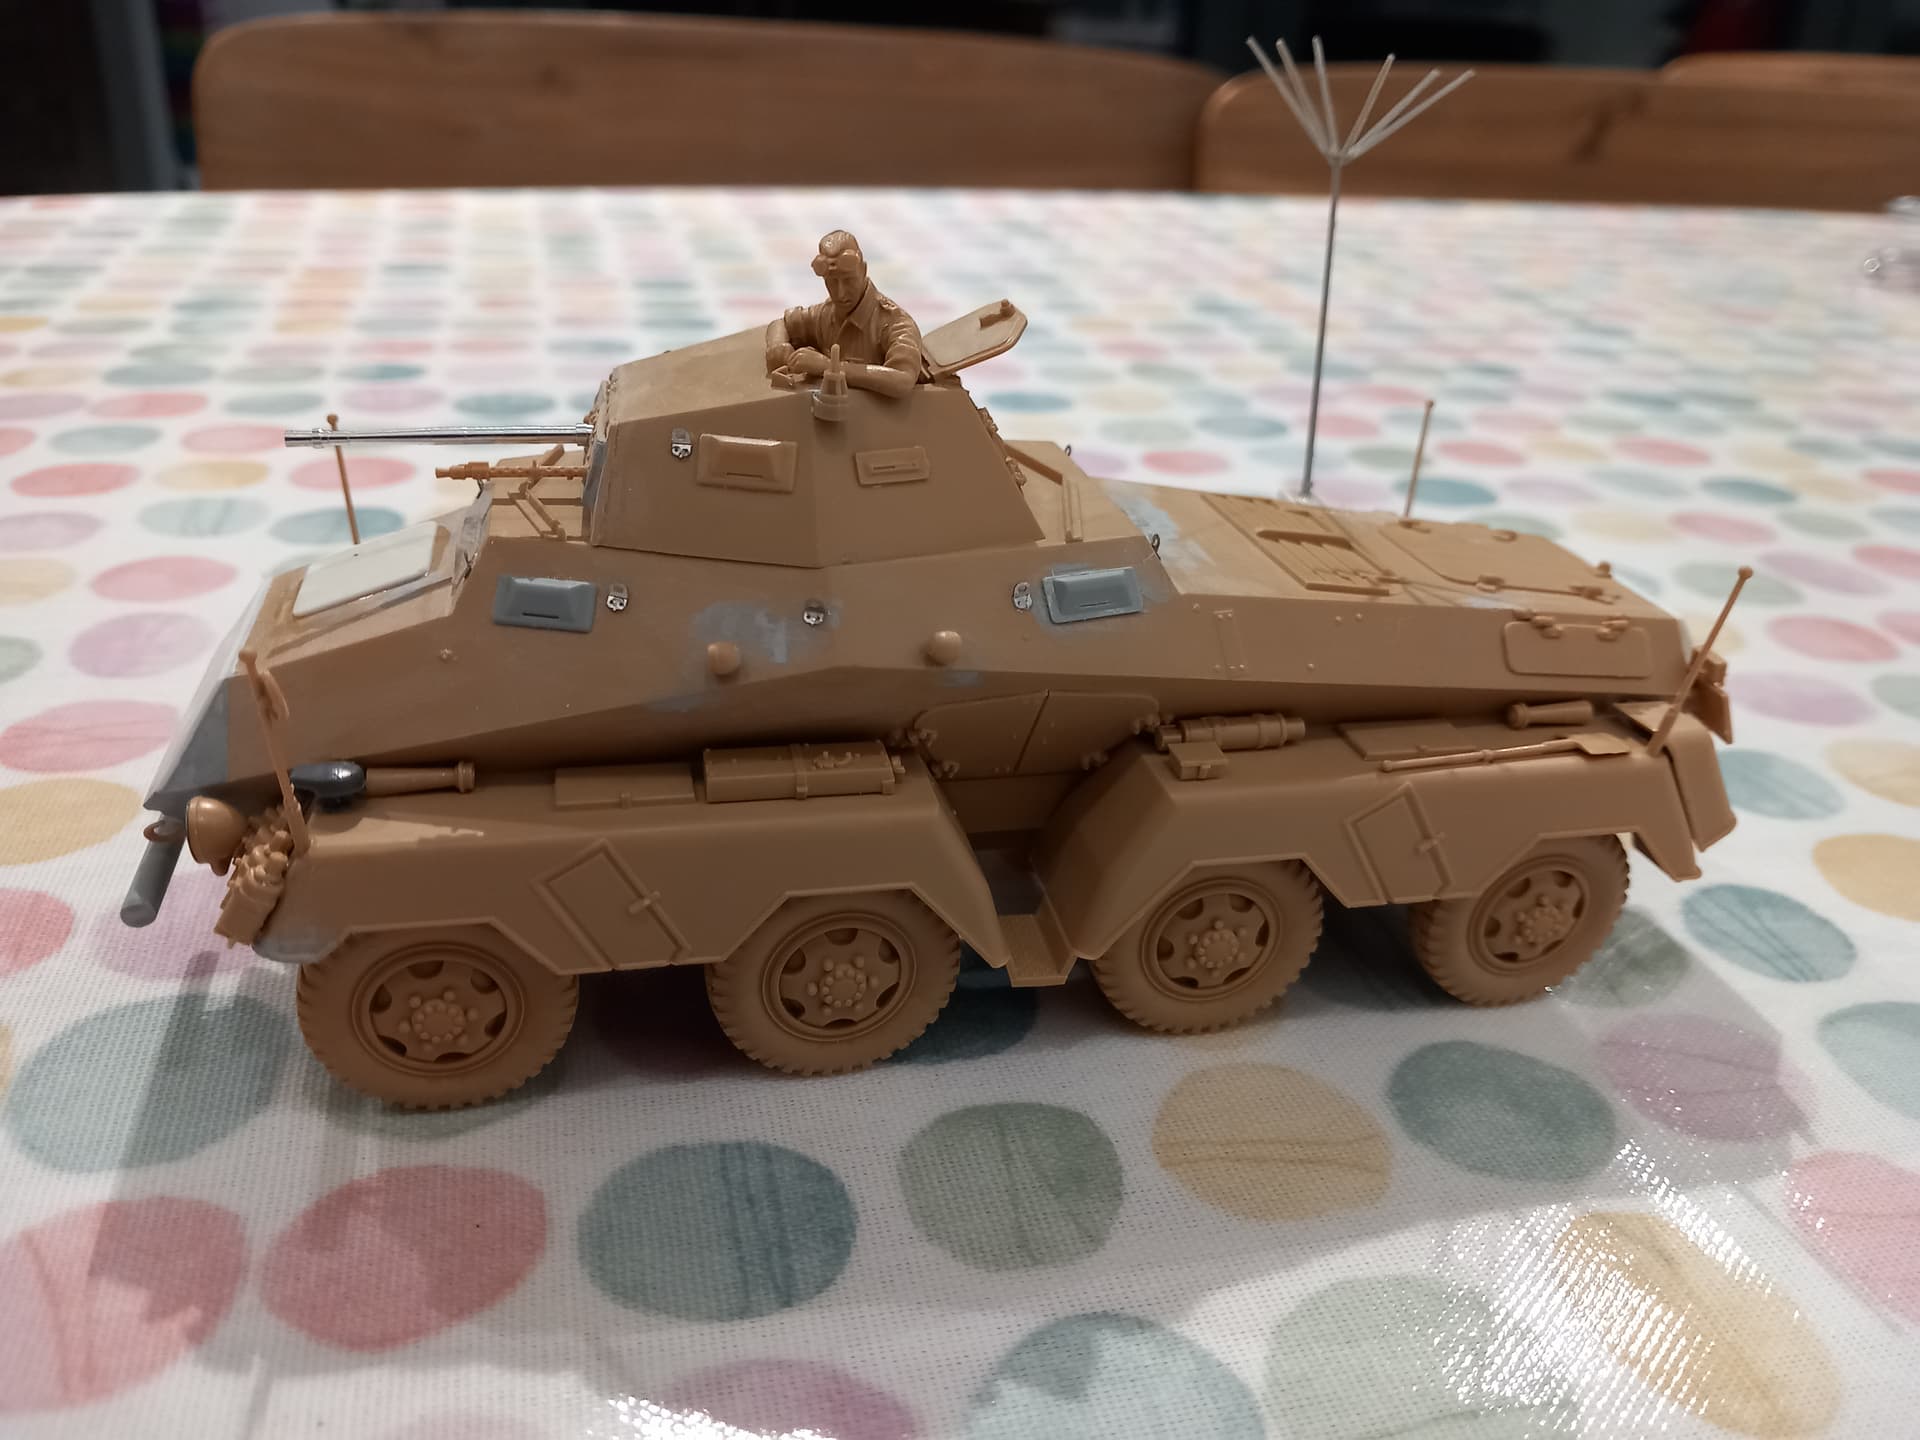
Here’s where I am so far:

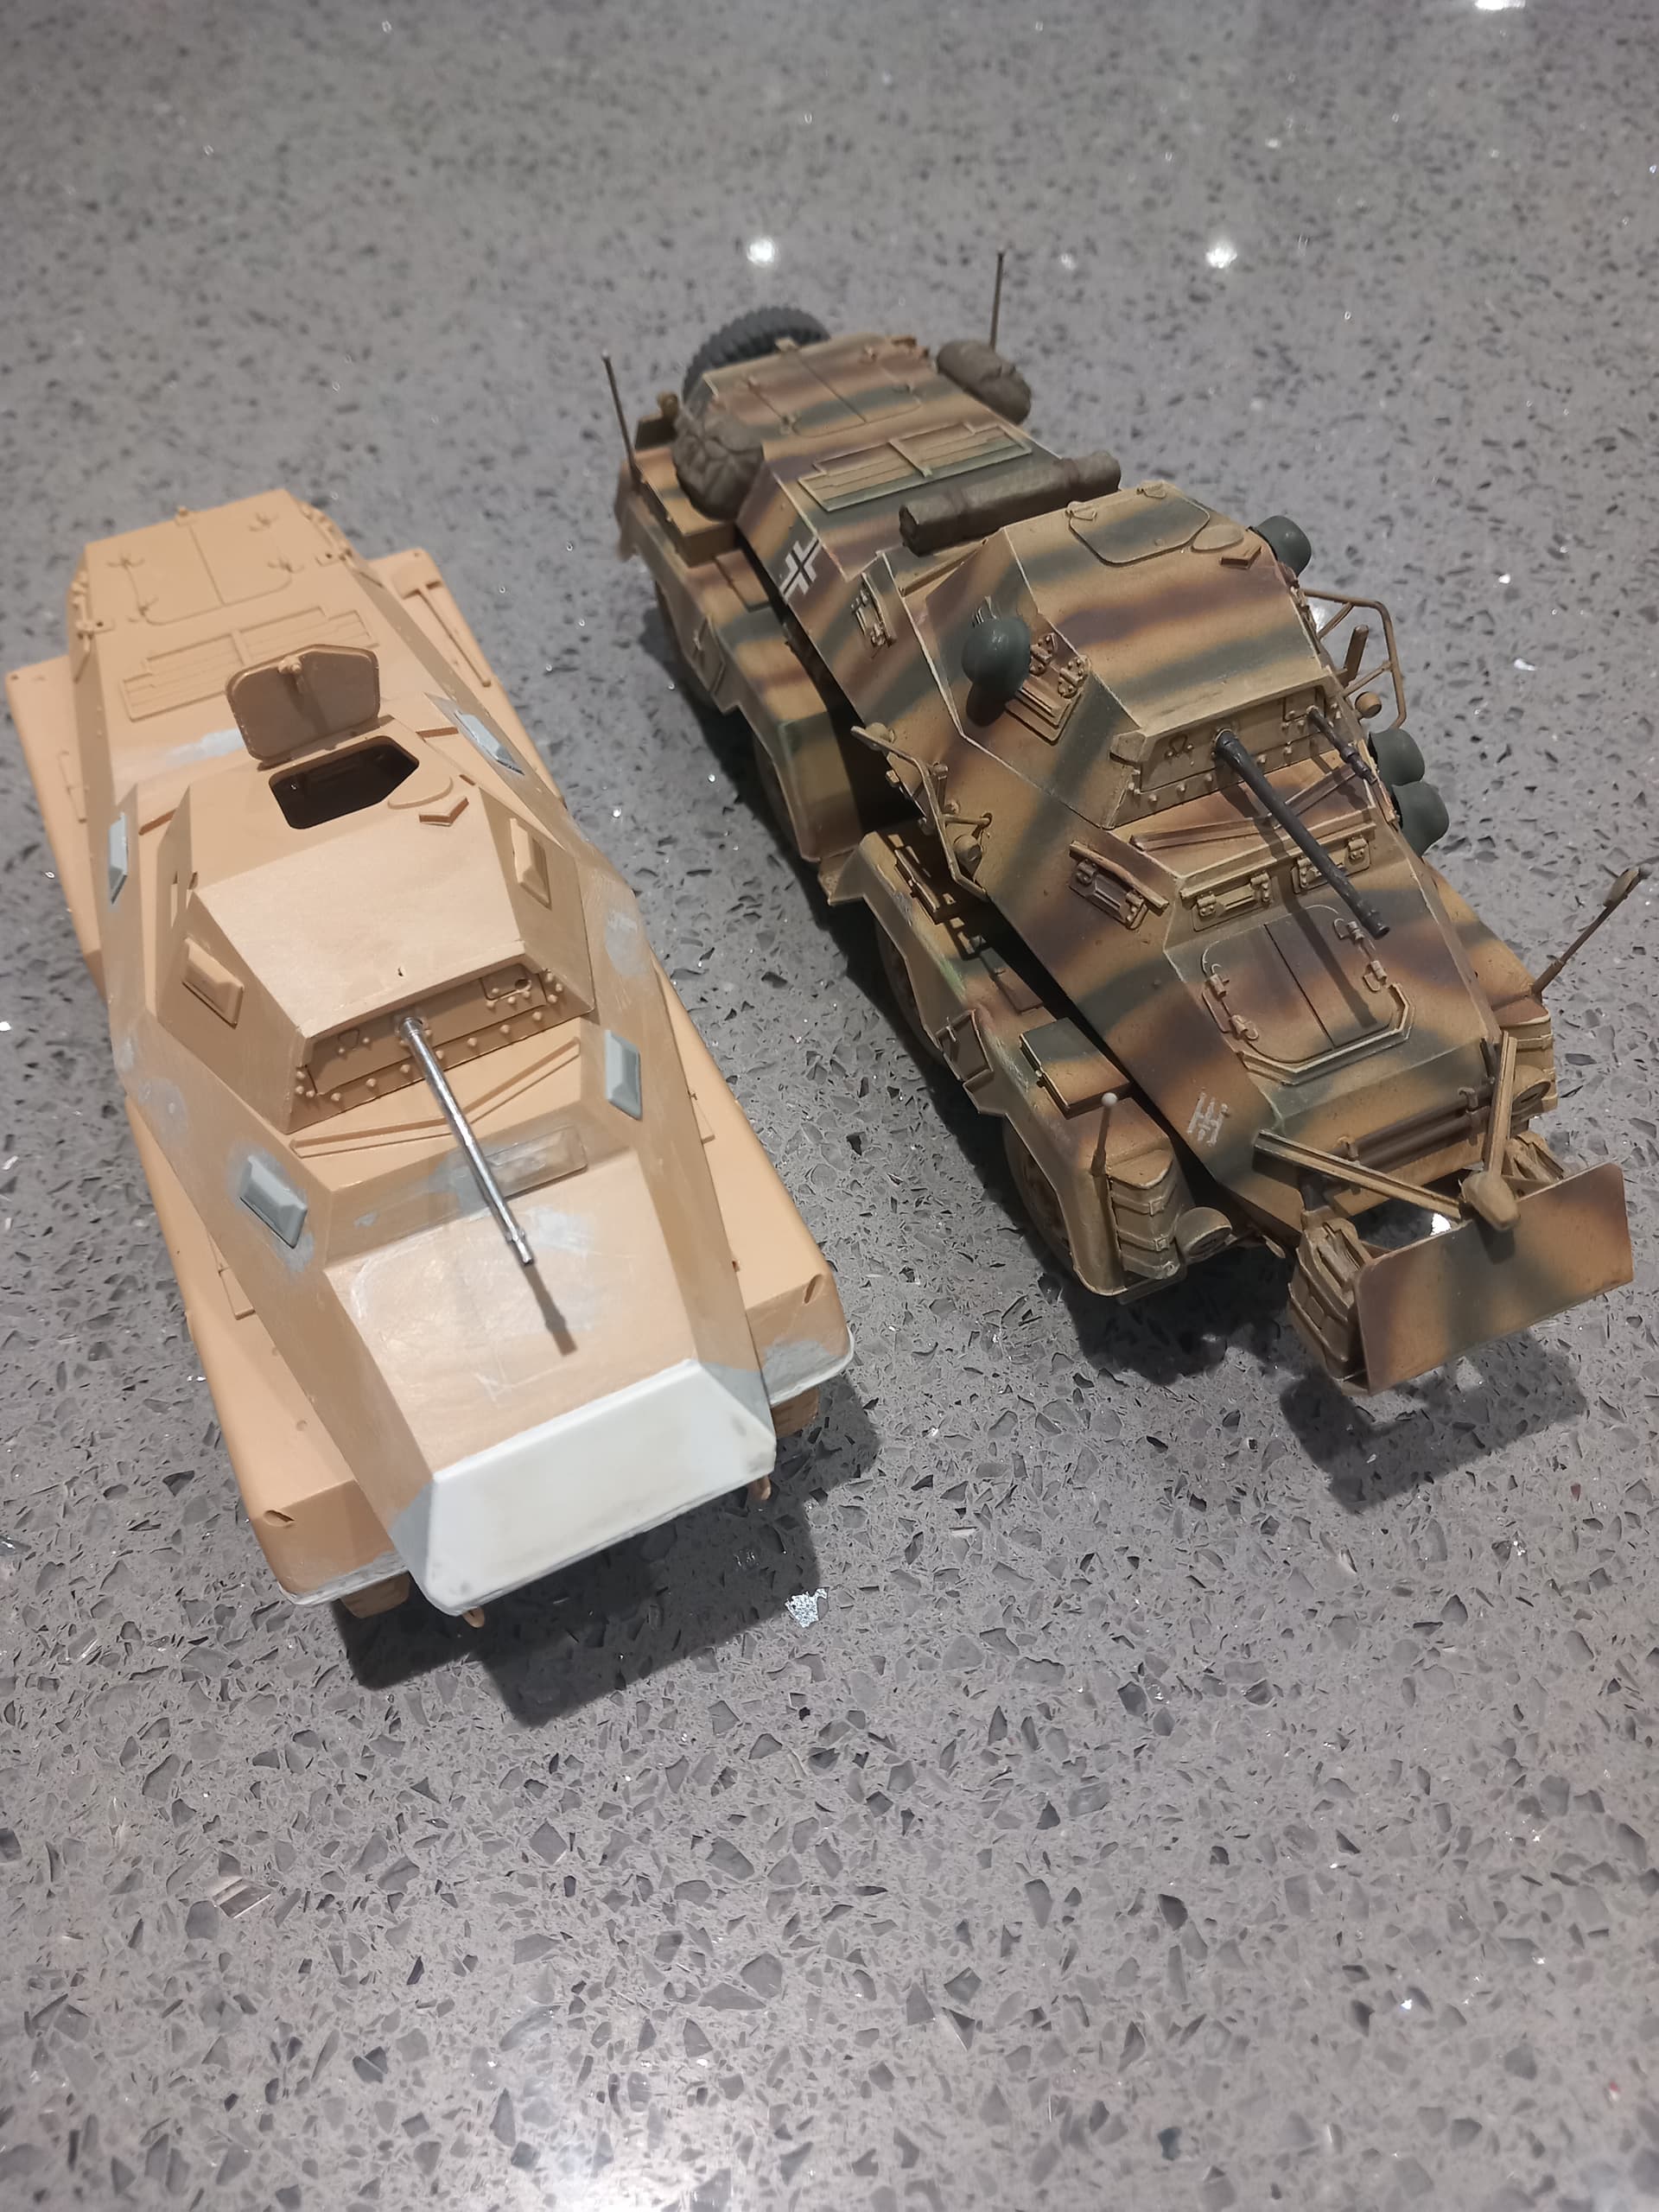
contrasted against an old Tamiya kit to show the changes:
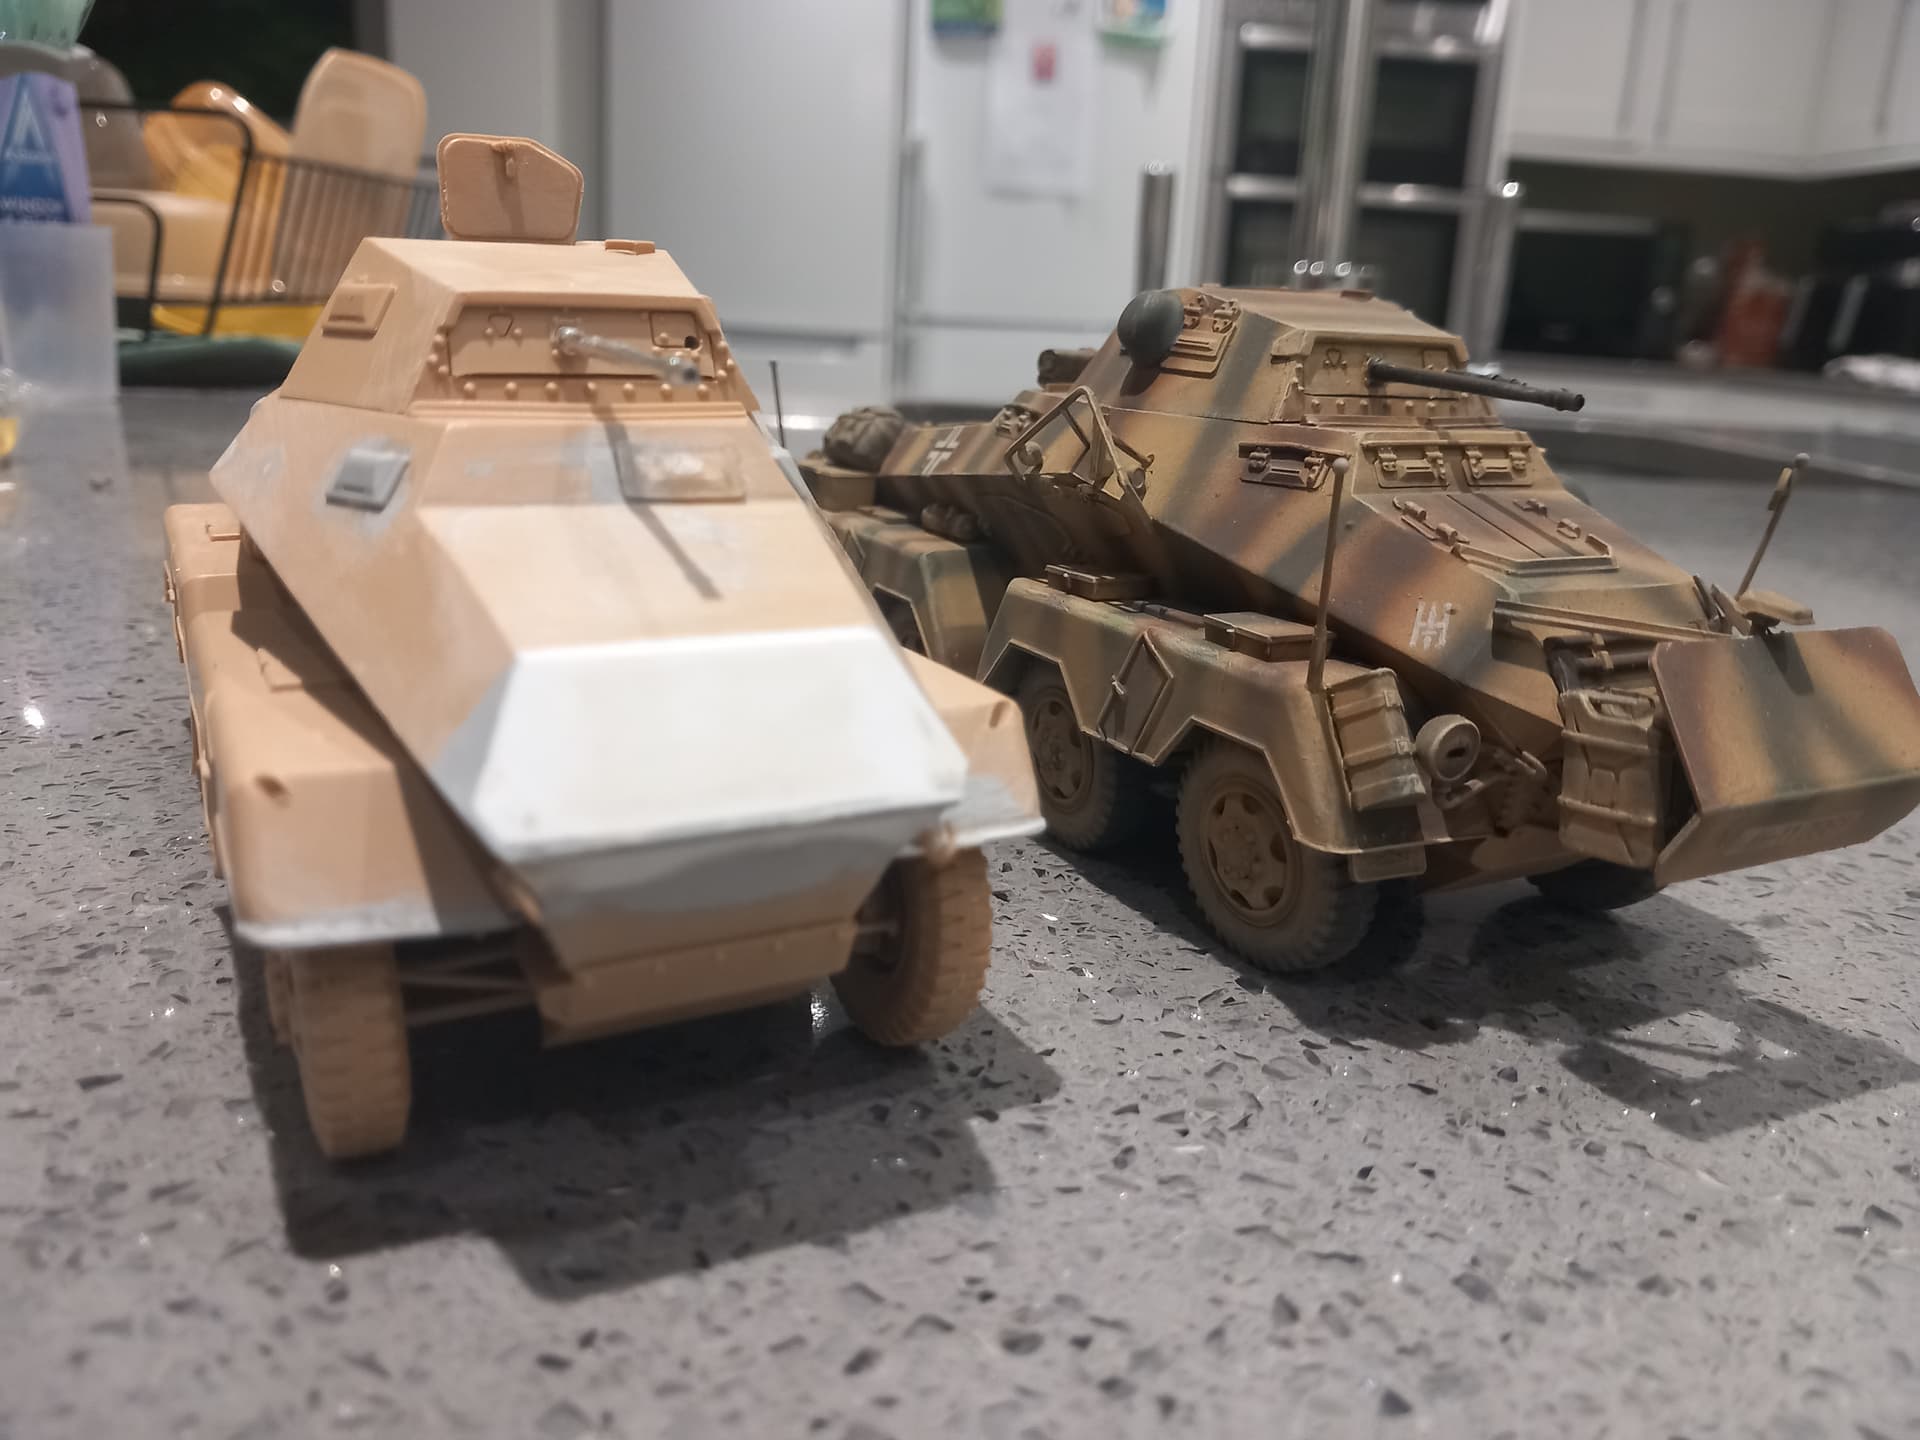

and a Dragon 234/1 to highlight the similarities, the changes seem to be almost a “try-out” for the 234: