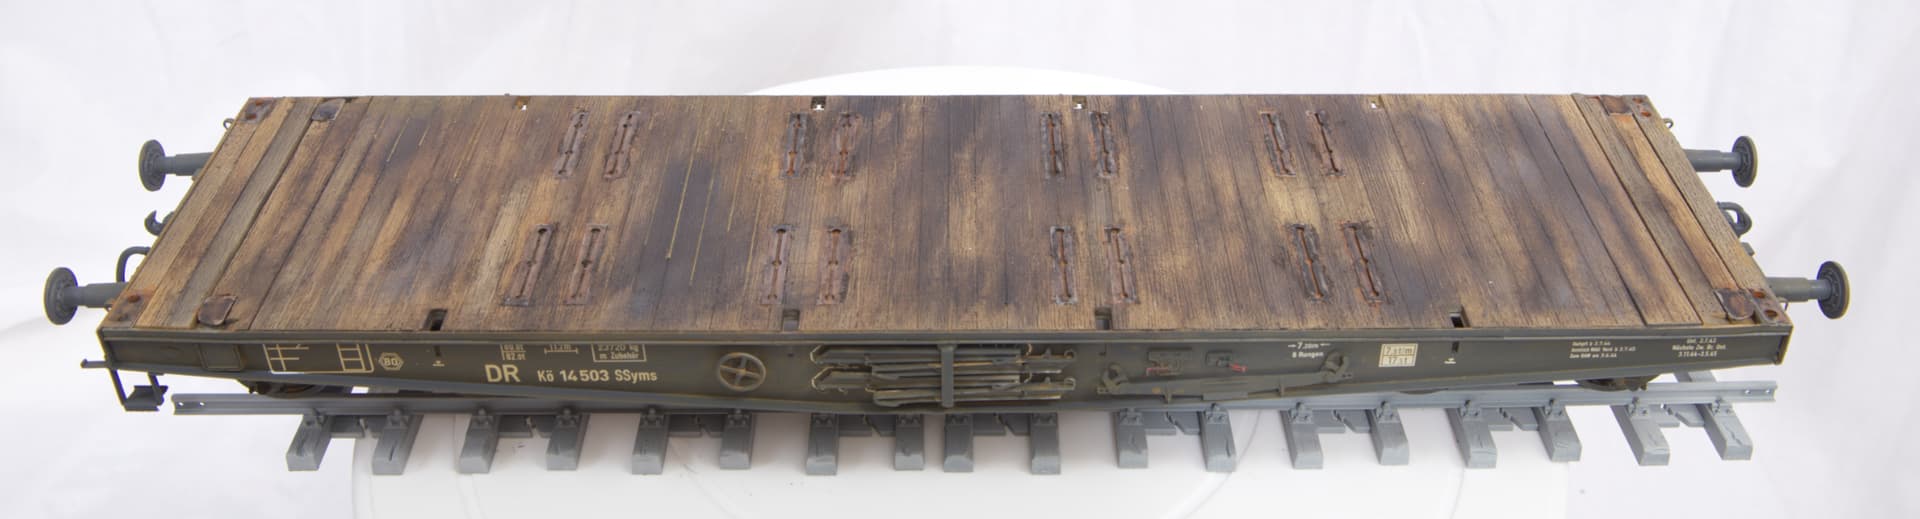
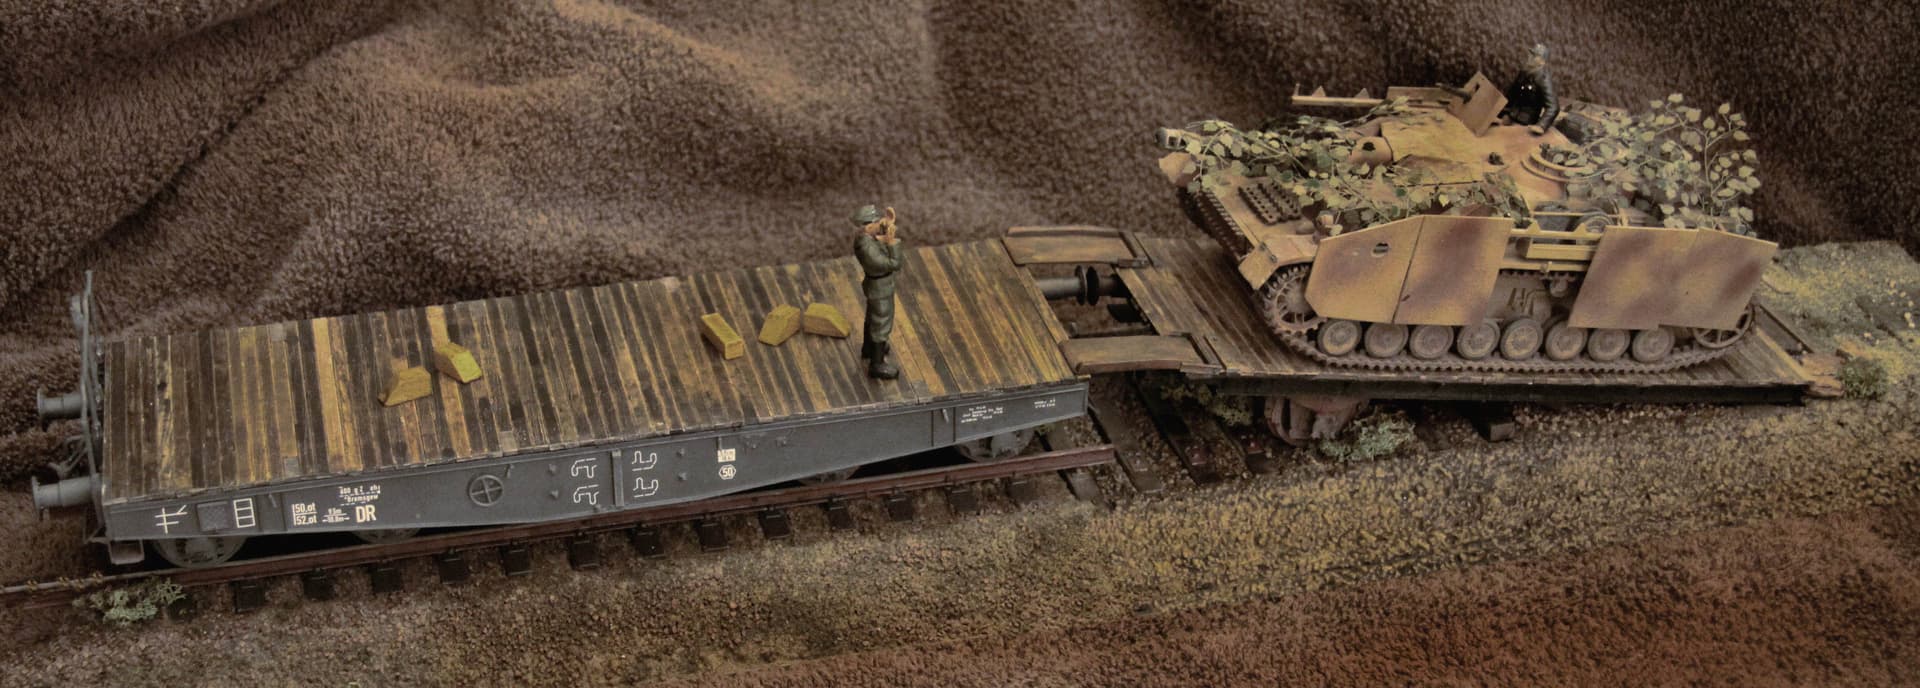
Nice build Cats, especially like the wooden decking, extremely well done, .
As a matter of interest, does such decking get chewed up with an almost 70 ton tracked vehicle driving on it, or was the speed so slow, and the spread of weight through the wide tracks enough to prevent such wear-and-tear?
I would imagine there would be a bit of wear and tear on those… Most the images I have seen, they load the wagon on at an angle, so then need to steer turn gently or neutral turn gently to straighten up on the flatbed … add that it’s done with steel track, they are bound to dig in a bit and cause a bit of damage over time.
If you compare that to how we used load our chieftains on ; we would load from the rear of the train and either the first wagon would have to drive on, or reverse on the whole length of the train …which absolutely no one liked doing … So track movement on ours was fairly minimal with only gentle movement to keep it straight… Then you’d have to endure the 20 hour train ride to Hohne, where we were the lowest priority on the rail network… Farm livestock was higher than us lol
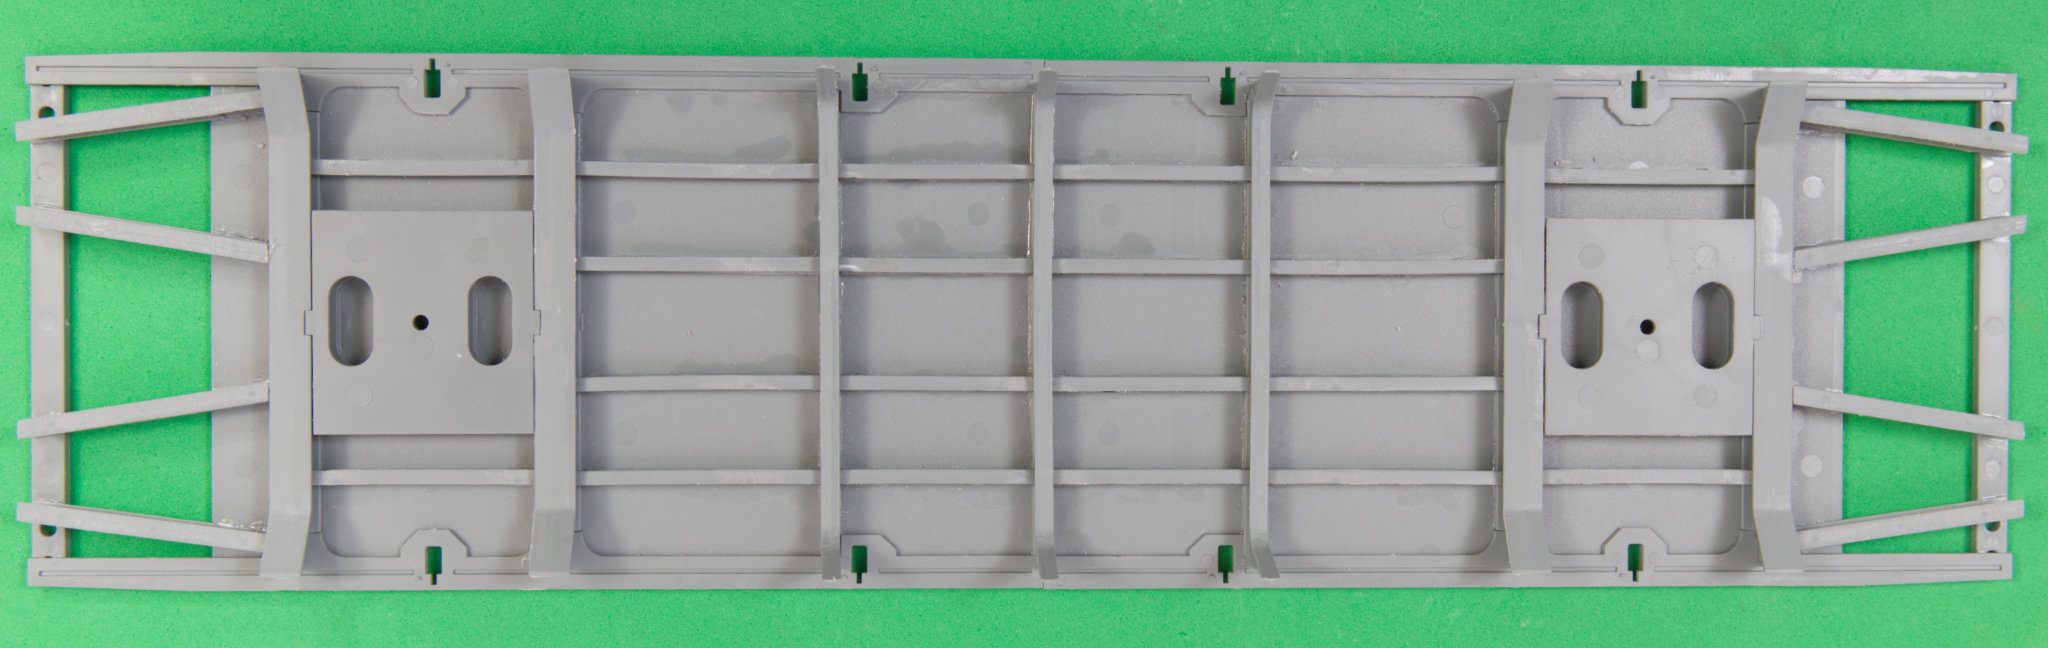
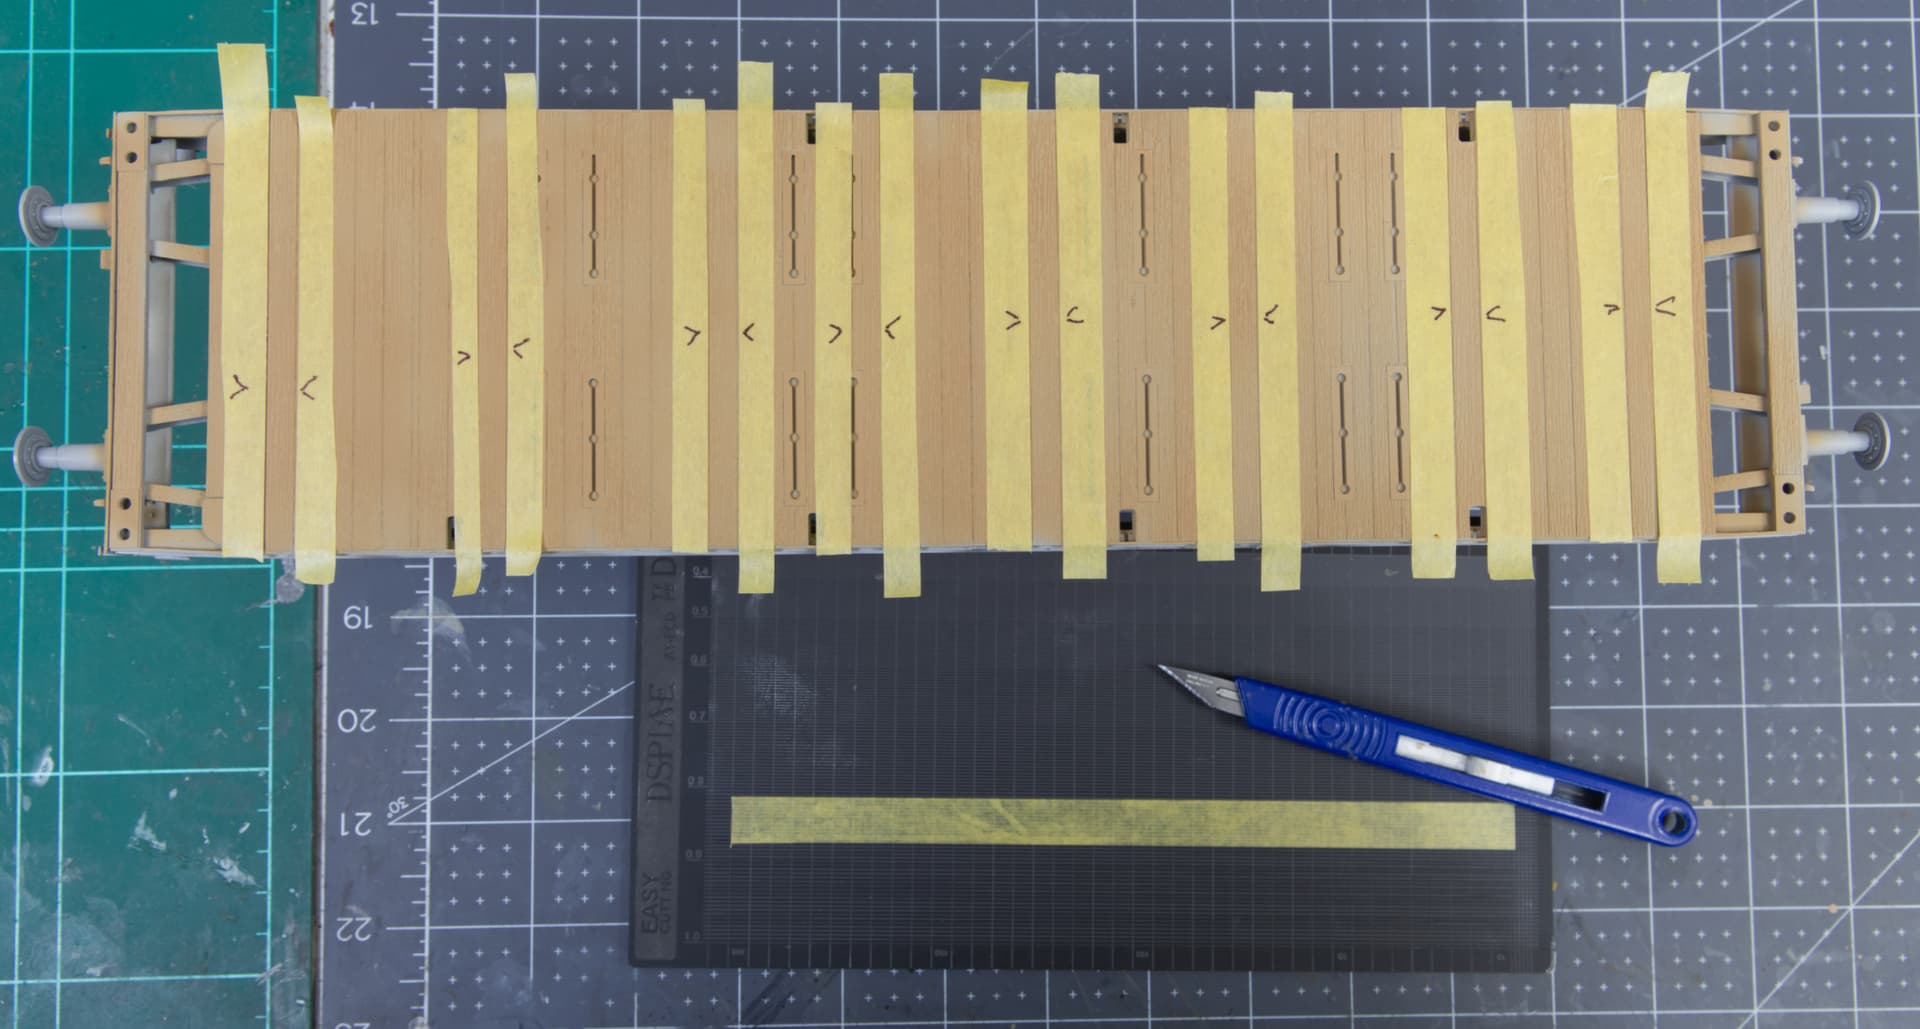
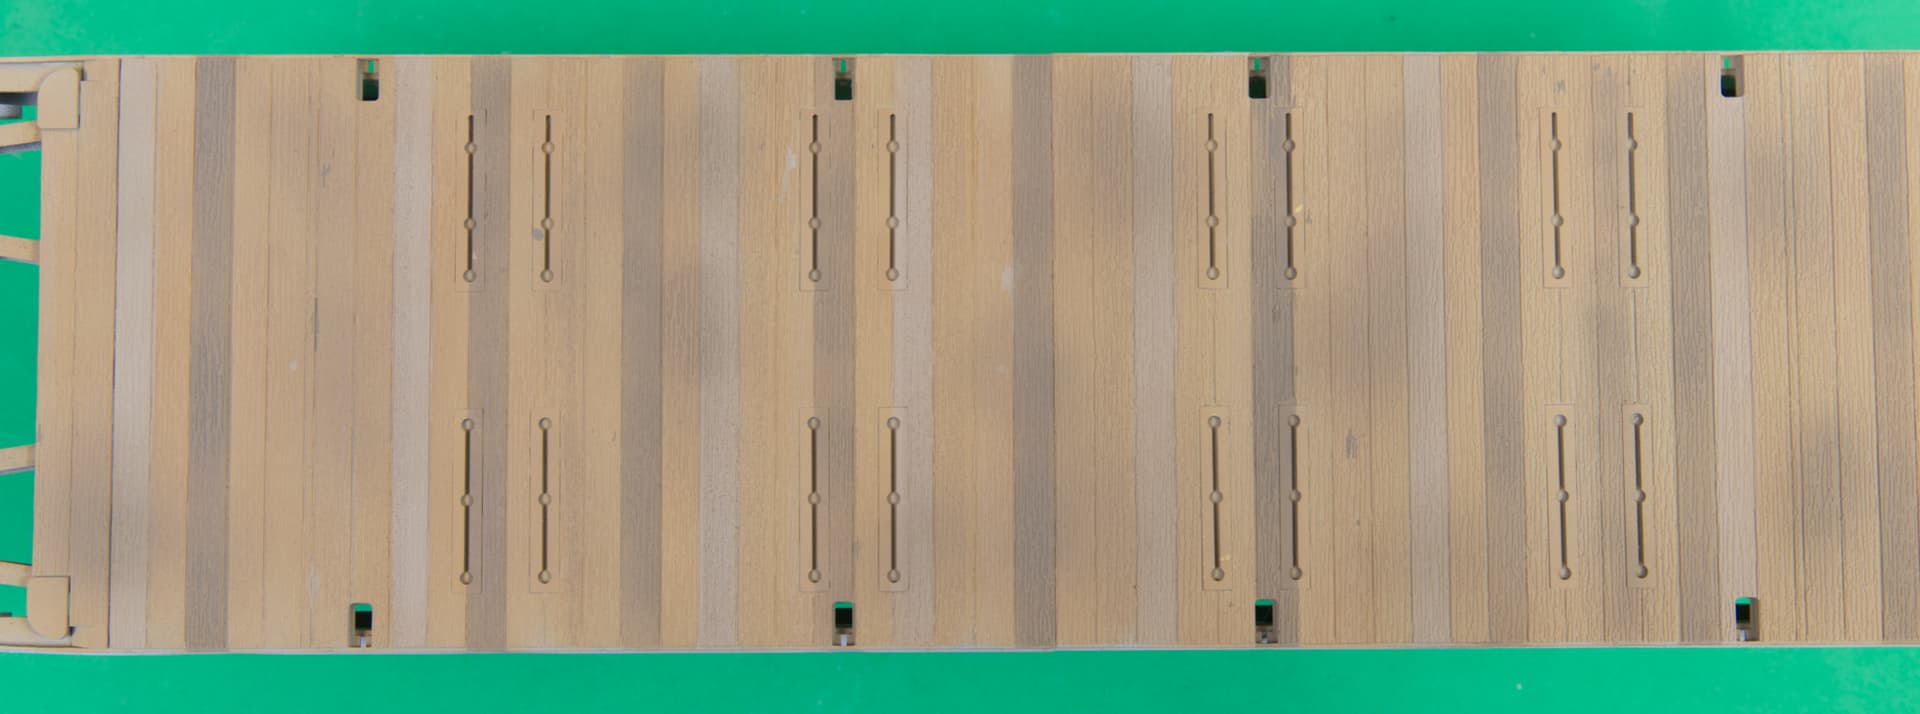
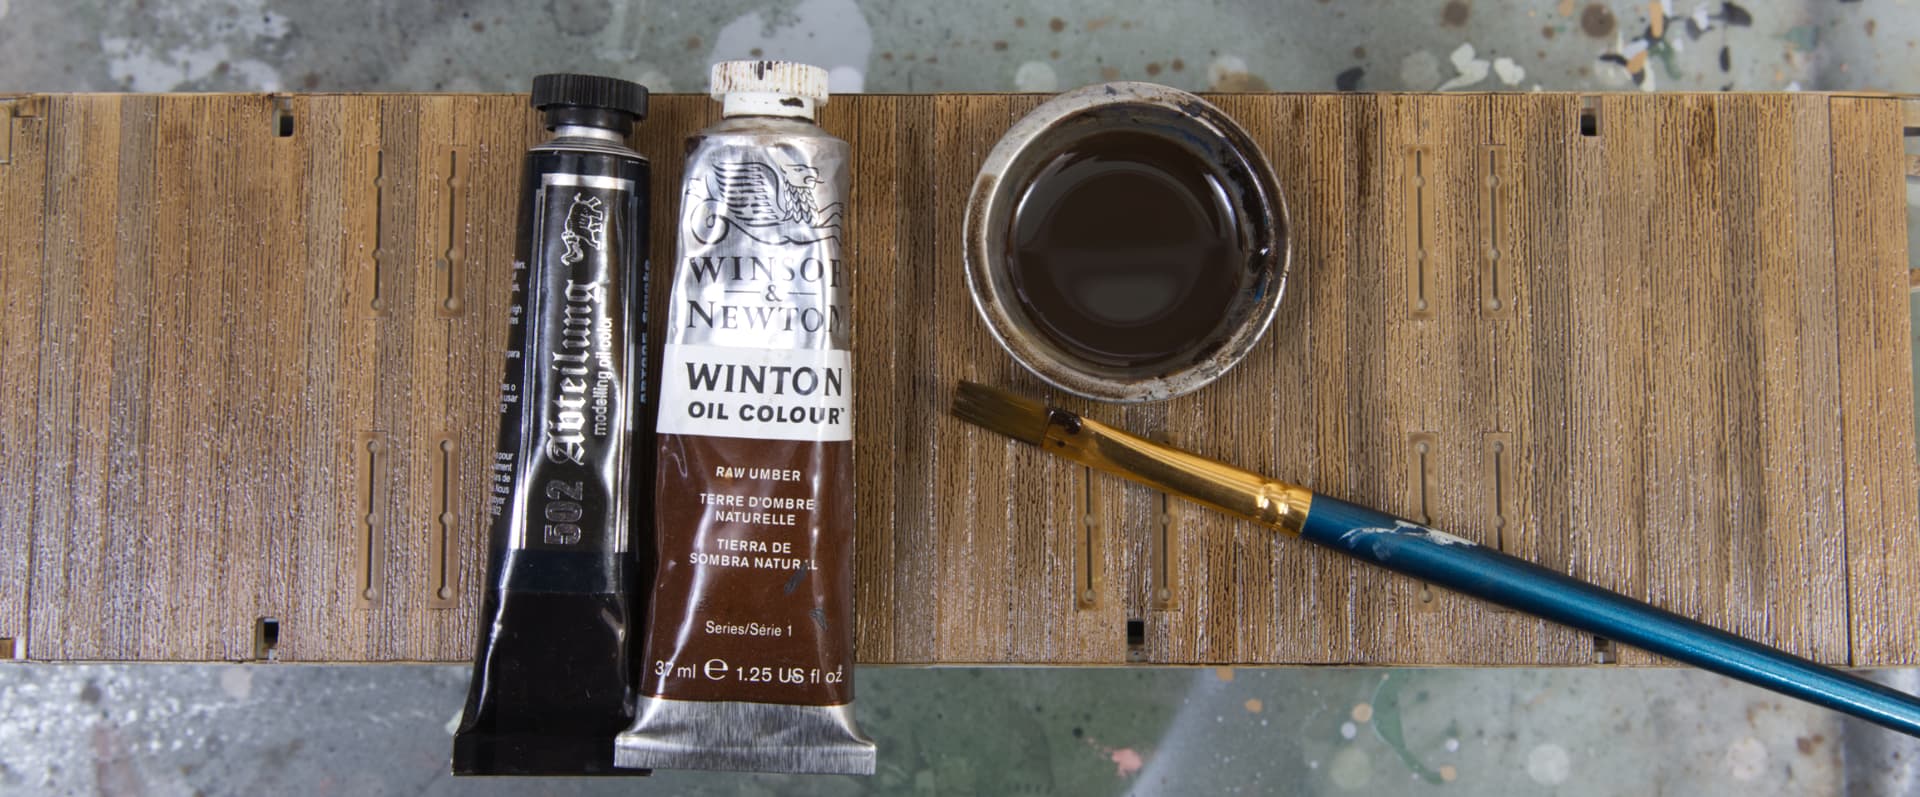
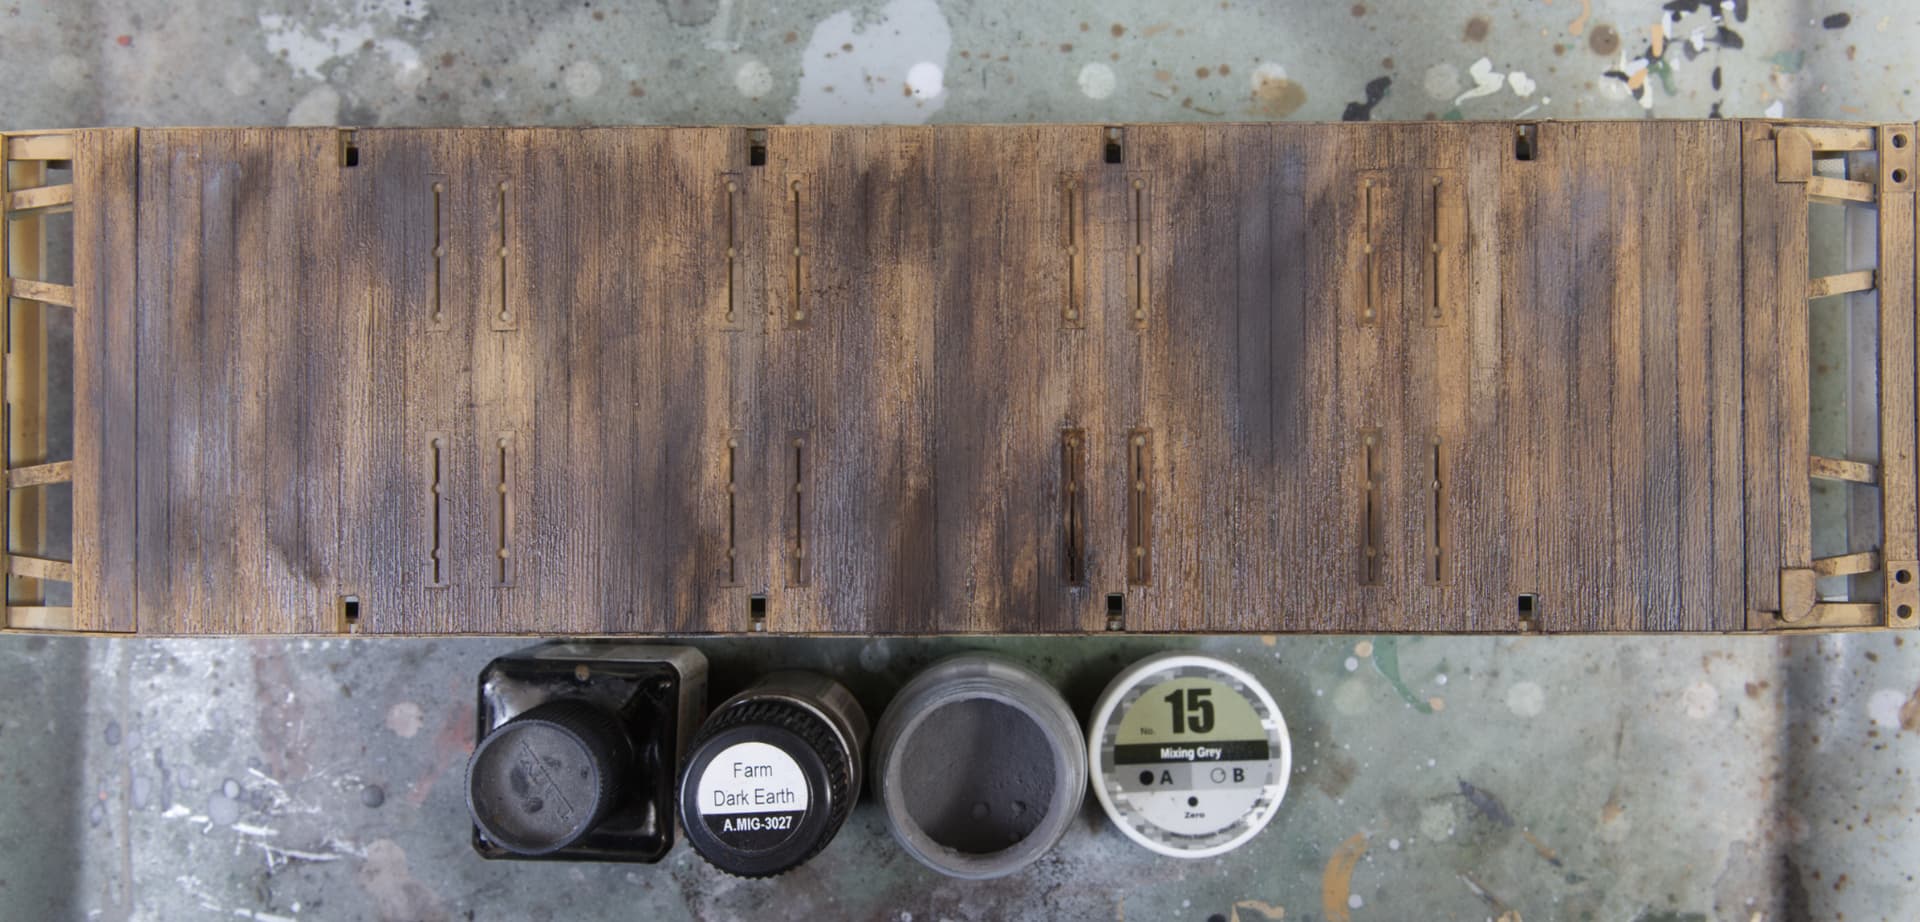
Thank you, the kit came with wood grain decals but I thought they were too uniform so opted for “DIY”.
As @Johnnych01 says the wear on the wood must have been considerable but despite there being quite a lot of pictures online of German military equipment on railcars I have not found one yet that shows the decking in its worn/degraded state.
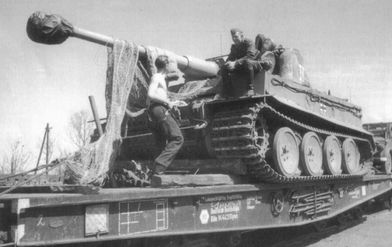
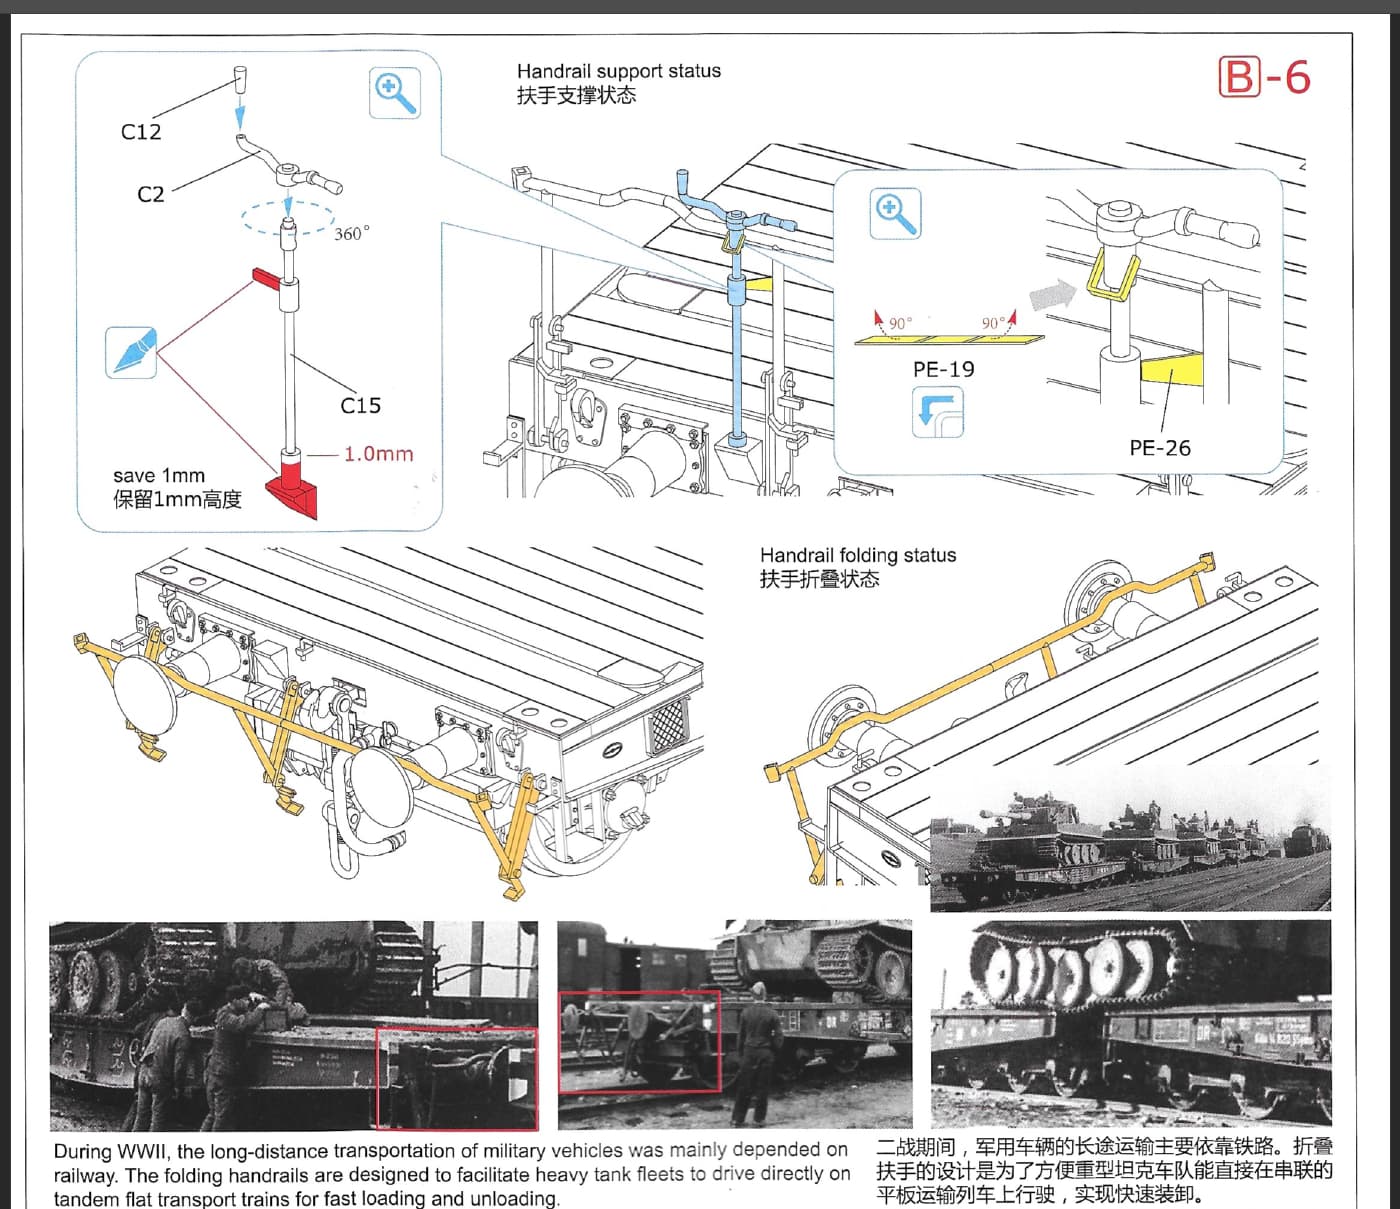
For my diorama my tank will be on the decking tied down something like this:
note that it was not always a requirement that transport tracks needed to be fitted!
My vehicle which will be a E-75 loaded on it will have gotten aboard using this which I have got:
What would you use for glue and what sort of substrate to put it on?
If you want to show it in a yard or a load/unload spur, you can get away with having the track on the ground with minimal subroadbed. The idea of pressing it into some putty is good, or fill in around the ties with dirt or fine sand - which can be black as many sidings and yards were ballasted with cinders.
If you want to show it on a mainline or branch line, to be authentic, it should be elevated above the ground on roadbed with sloping sides, with crushed stone ballast level with the top of the ties.
Depending on what material you will use for the diorama base, I would simply glue the track down with a bit of superglue, epoxy, or Liquid Nails.
HTH,
Fred
I’d agree with others the flat-bed would likely be scuffed/scraped, sandpaper(s) being the weapon of choice. Assuming the rolling stock had been used multiple times to transport tanks they would surely show signs of wear & tear beyond just stains.
Personally I’d paint the tracks/sleepers first. I might even ensure no movement by pinning a couple of sleepers through the base with wire or similar - then, pile the ballast up against the sleepers to further keep the track in place, rather than risk glue seeping out.
Thank you for the suggestions.
I have sheets of insulating foam in various thicknesses and that will be the base of the trackbed.
I have modelling compound that is mixed with water and that will be the base over the foam and form the shoulders.
I am going to paint the track first as you suggest and have real crushed granite on order for the ballast.
AFAIK they would have been especially driving up the ramp as I assume there was a chance that the barrel would “dig in”.
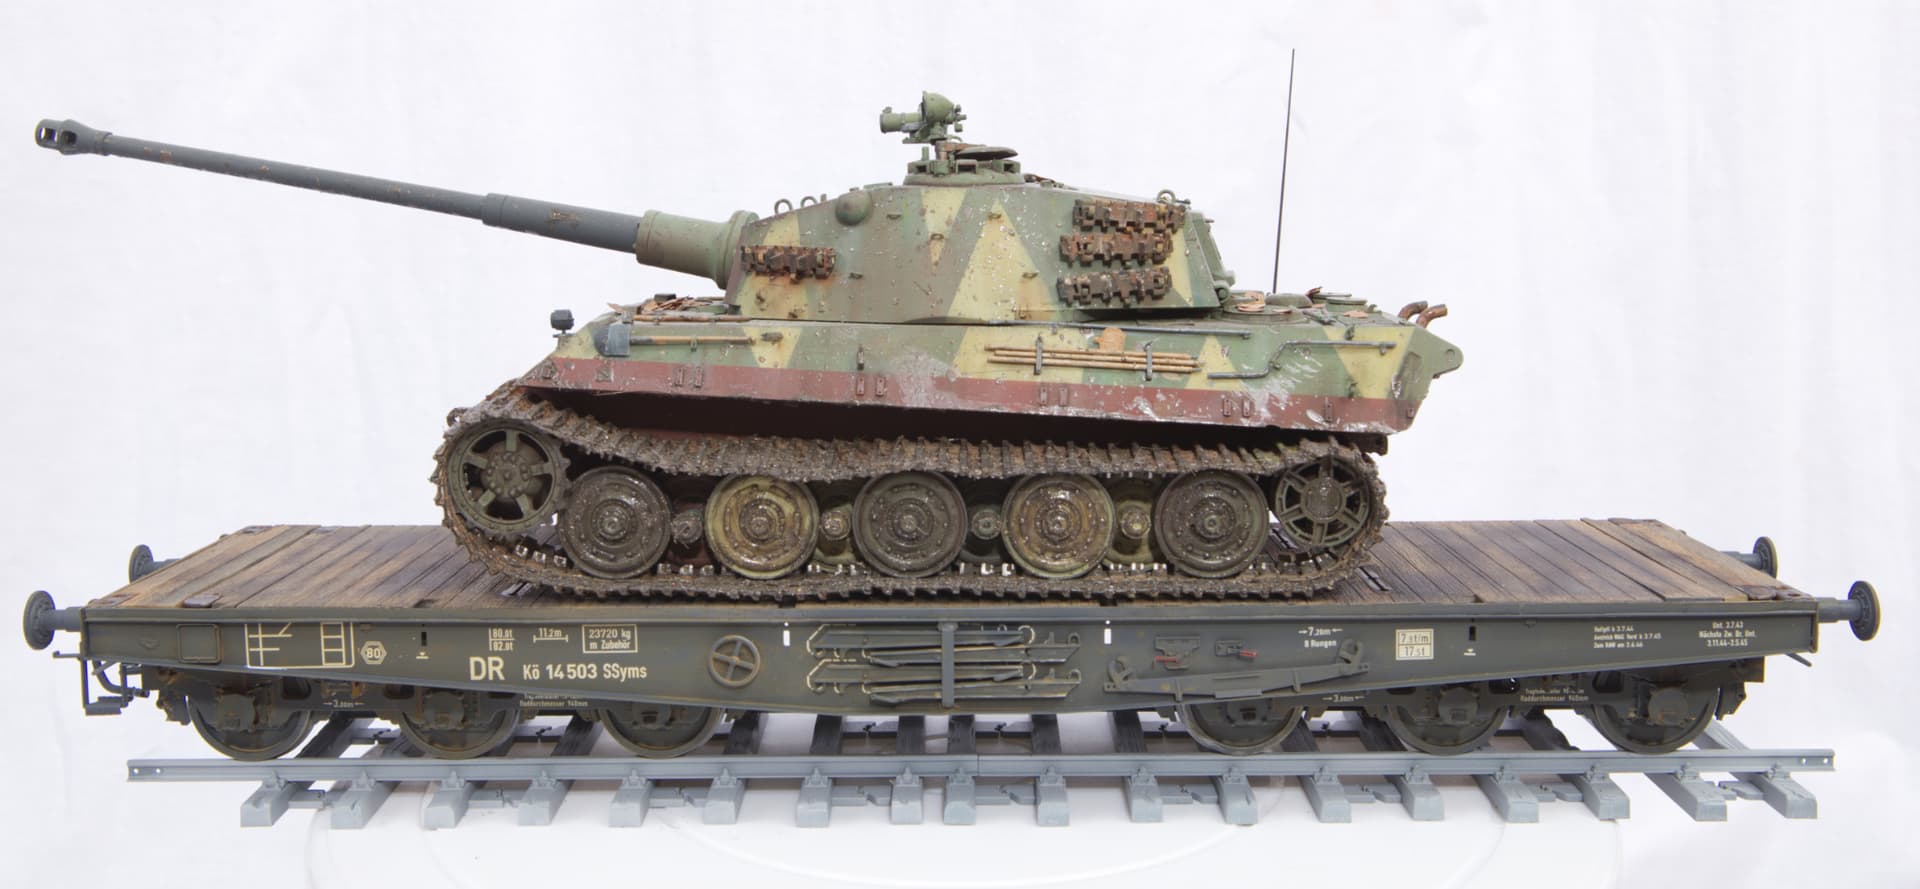
As you can see this has the turret facing forward.
The model that is going to be on the flatbed is a E-75 which I have not made yet. I just put the KT on the flatcar to make it a more interesting picture. I’m sure your right the IR gear would have been stowed before loading.
Yes I have seen some models where the flatcar has marks like the rungs of a ladder running down the platform, so I will try and at least give a hint of something similar.
Yes I think I am going to do exactly that.
Thank you, Long way to go yet and my nemesis may well be the figure painting.
I am definitely not an expert on rail transportation for panzers.
I did read though that the striped MNH camo on Panther Gs is thought by some to not continue to horizontal portions in order to protect from air attack.
Super nice build you have going here. I have the Sabre model in my stash but am a little daunted bu all the detail.
I am highly impressed with your wood deck staining job. Doing it your way will make my build much easier. On my Dragon 4-axle flatcar I replaced the decking with individually stained & distressed plastic “boards.” Very labor intensive but produced a similarly good affect.