Anyone have any tips or tricks for making British/Commonwealth camo nets?
I’ve been trying to work from this article on Missing Lynx but it’s not super detailed on the instruction front and I’m not really loving the results I’m getting.
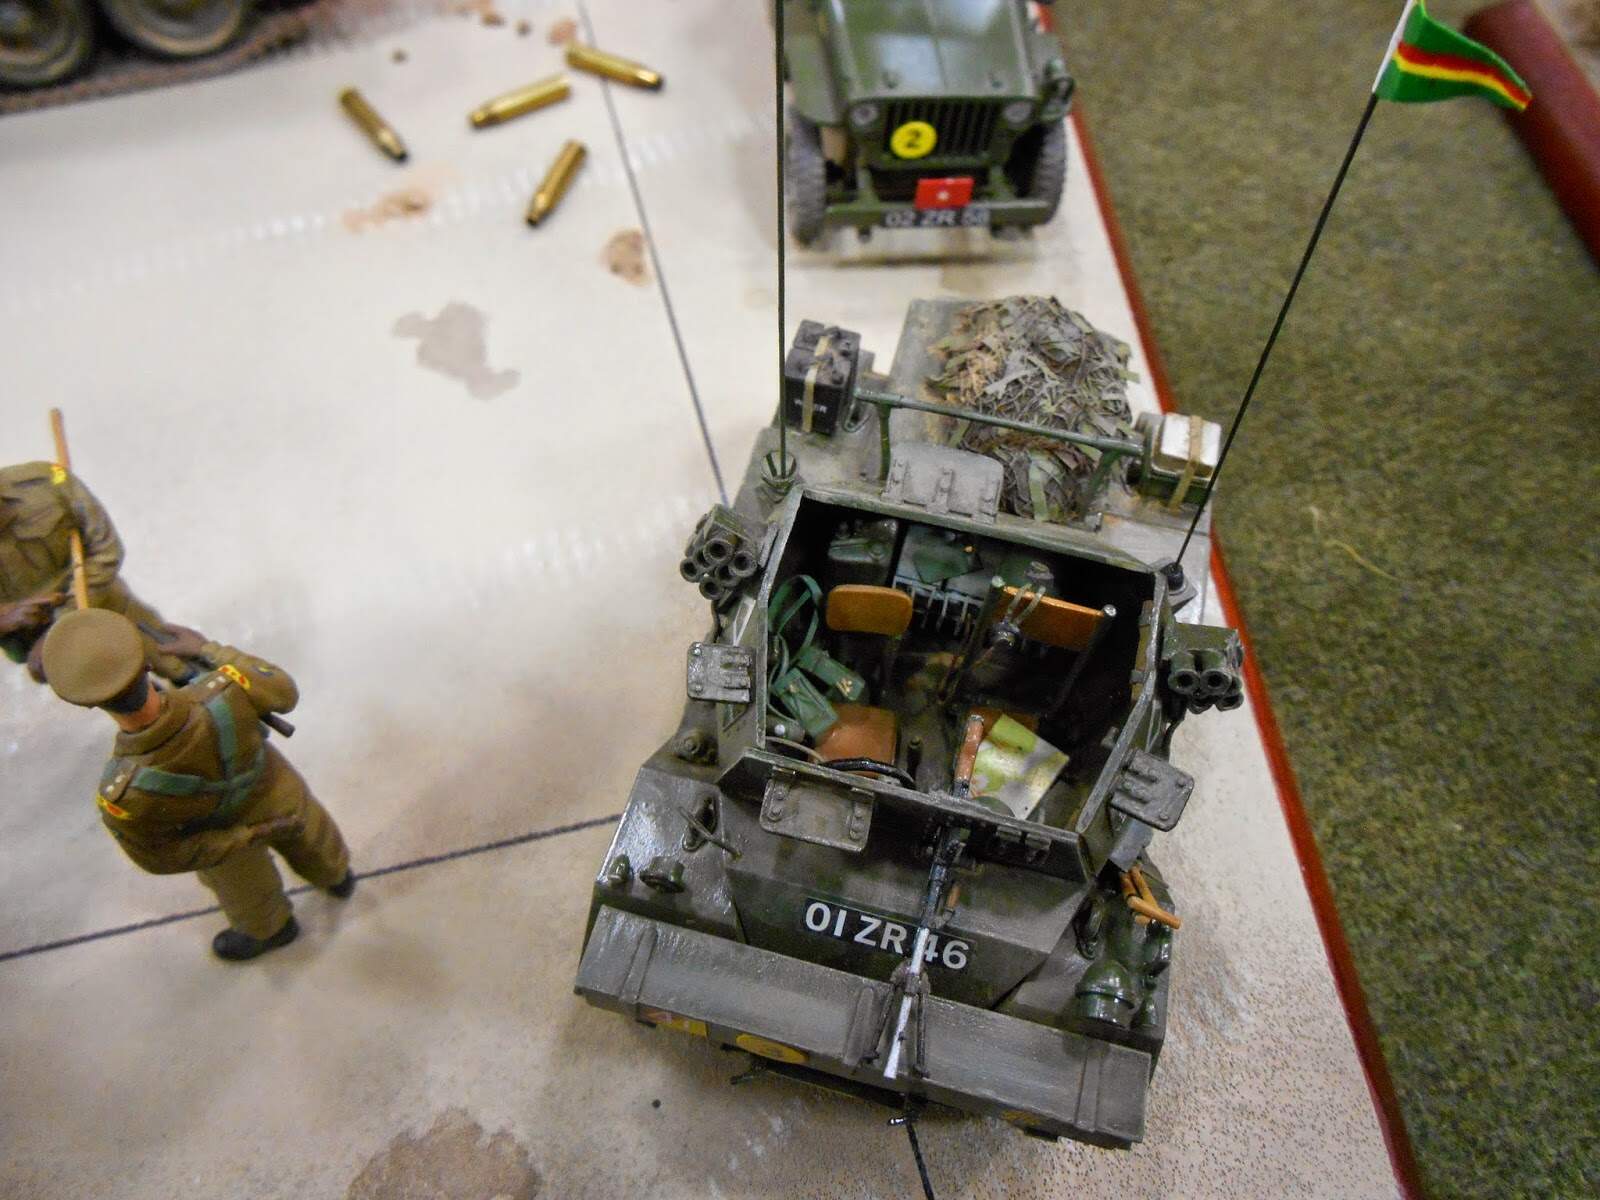
The mesh I’m ok with. I’ve got a couple nets from Wee Friends that seem to fit the bill.
My issue is laying out the hessian strips and getting things to drape naturally. After watching that second video that Joe posted above, I think i might try larger strips and lay them a little more densely than I have been.
The key to getting porous materials (paper, cloth, etc.) to drape properly is to use water or diluted white glue. Sometimes I will use multiple applications of water to get the material “almost there” then go with the glue to get it down the last bit and stick it into place.
Ken.
I’m not sure if this is relevant but it may help. I always put the tissue on first then soak it with water/pva solution. But I watched this video from Laser Creation World. Skip to the 16 minute mark. He soaked the tissue/material then draped it.https://www.youtube.com/watch?v=5EBRfGIWkNI
I go for the thin paper option Don, I cut the strips to length, then start to glue them into the mesh of the netting with small blobs of white glue until I have something that looks like a paper hedgehog. Once the glue has dried and the paper is firmly fixed to the netting I take a diluted mix of white glue and soak each strip. Almost immediately the strips begin to droop as the mix soaks in, you can then drape the strips as best suits the location.
Once everything has dried an application of a suitable undercoat seals and strengthens the strips in readiness for painting (see images below).
I tend to use Tamiya masking tape cut into appropriate-sized strips. Certainly during my early days in the Army (1971) we were still garnishing (as it was then called) nets with both the new plastic strip material, the sort of “crinkle cut” triangular-shaped patches, and the old Hessian strips. The latter came - back then - in 2 colours, green and brown - in large rolls around 3" wide. And believe me, garnishing nets was a real pain, involving the nets laid out on the barrack’s square then the laborious attaching, weaving and tieing-off. Then the Hessian sheets (as opposed to rolls of tape) which we used under the cam nets to disguise windscreen shine and say gloss paint (Bronze Green),were also laid out and painted in all sorts of shapes and swirls.
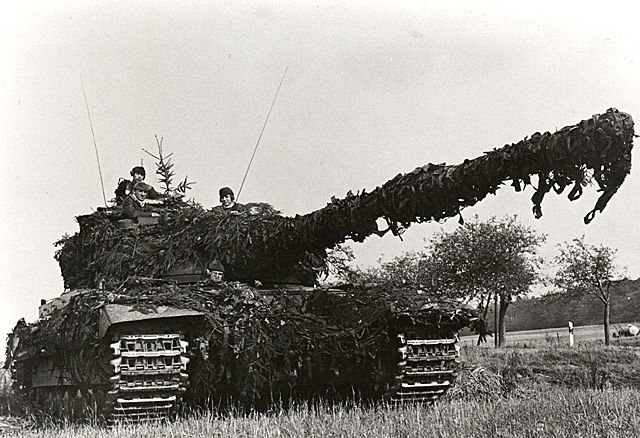
Now, I fully admit that perhaps Tamiya tape is too untextured to represent the Hessian, but then again, a Hessian weave in 1:35 isn’t going to show that much. For what it’s worth my ancient Conqueror build utilized Tamiya tape:
Thanks Don; also of course, it’s a question of reality and effect; if the model is depicted as per the real thing, then one doesn’t see much of the model, which I suppose sort of defeats the whole hobby! For instance, the Conqueror which gave me my inspiration:
but drastically reduced on my model. I found that diluted white glue helped on the tape, save that it tended to curl up and needed constant poking and prodding as it dried. As you note, all a matter of practice and I certainly don’t claim to have it right just yet.
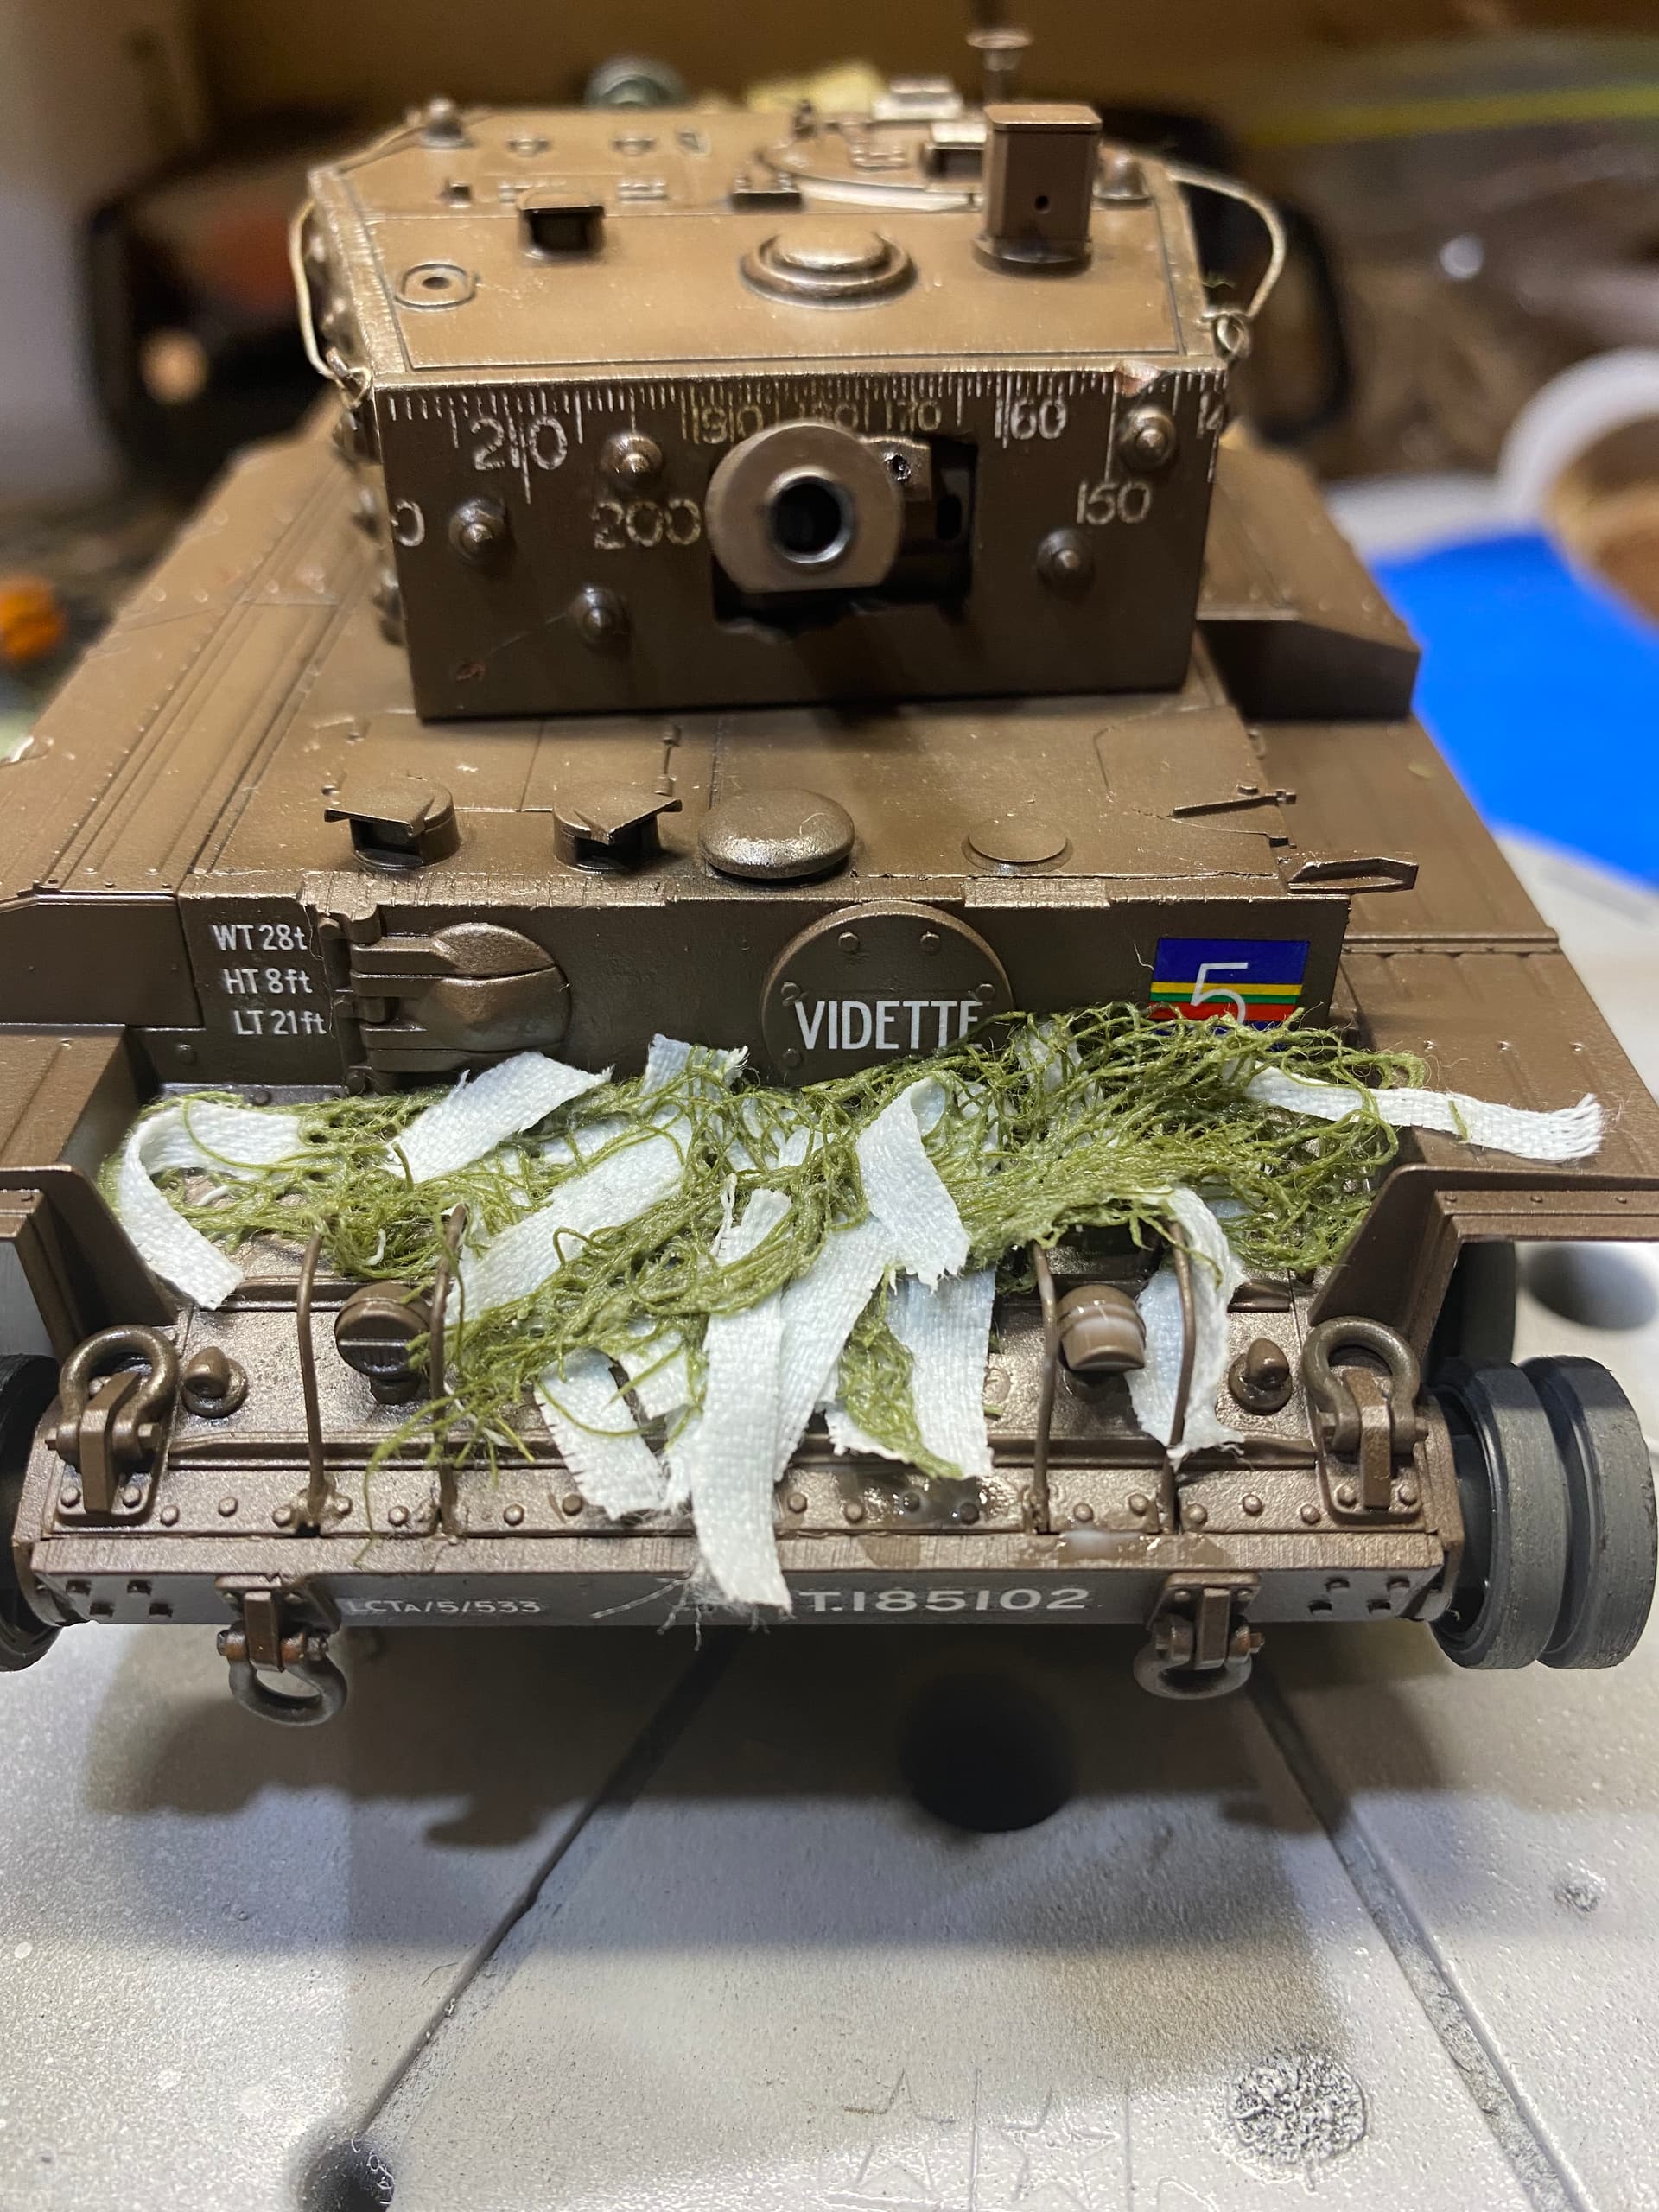
The pocket liner seems to work quite well Don, . As for the netting I initially cut an area of mesh the scale equivalent to the full size thing, think from memory that I read that full size the net would typically be about 30’ x 18’, you’d need to double check that, or get someone who knows better than me, . I seem to recall that I settled on a cut size roughly 250x150mm (1/35th scale size).
I then cut the sheet into 3 strips, e.g. each approximately 80x150mm, I wasn’t worried about exact size, neither is 3 critical, it could be 4 or more to suit…
I then soaked a strip in diluted white glue and positioned it as I wanted. Once dry I then applied any paper strips and soaked them as described in my previous post. Once this had dried I repeated the process with the second strip, and then again with the third.
My reasons for doing it in stages was 1) it was easier to lay down smaller elements than try to fold and position one big one, and 2) it better gives the impression of strips throughout the depth of the netting as opposed to all planted on top…if that makes sense, .
At the end of the day it’s impossible to spot the joins, .
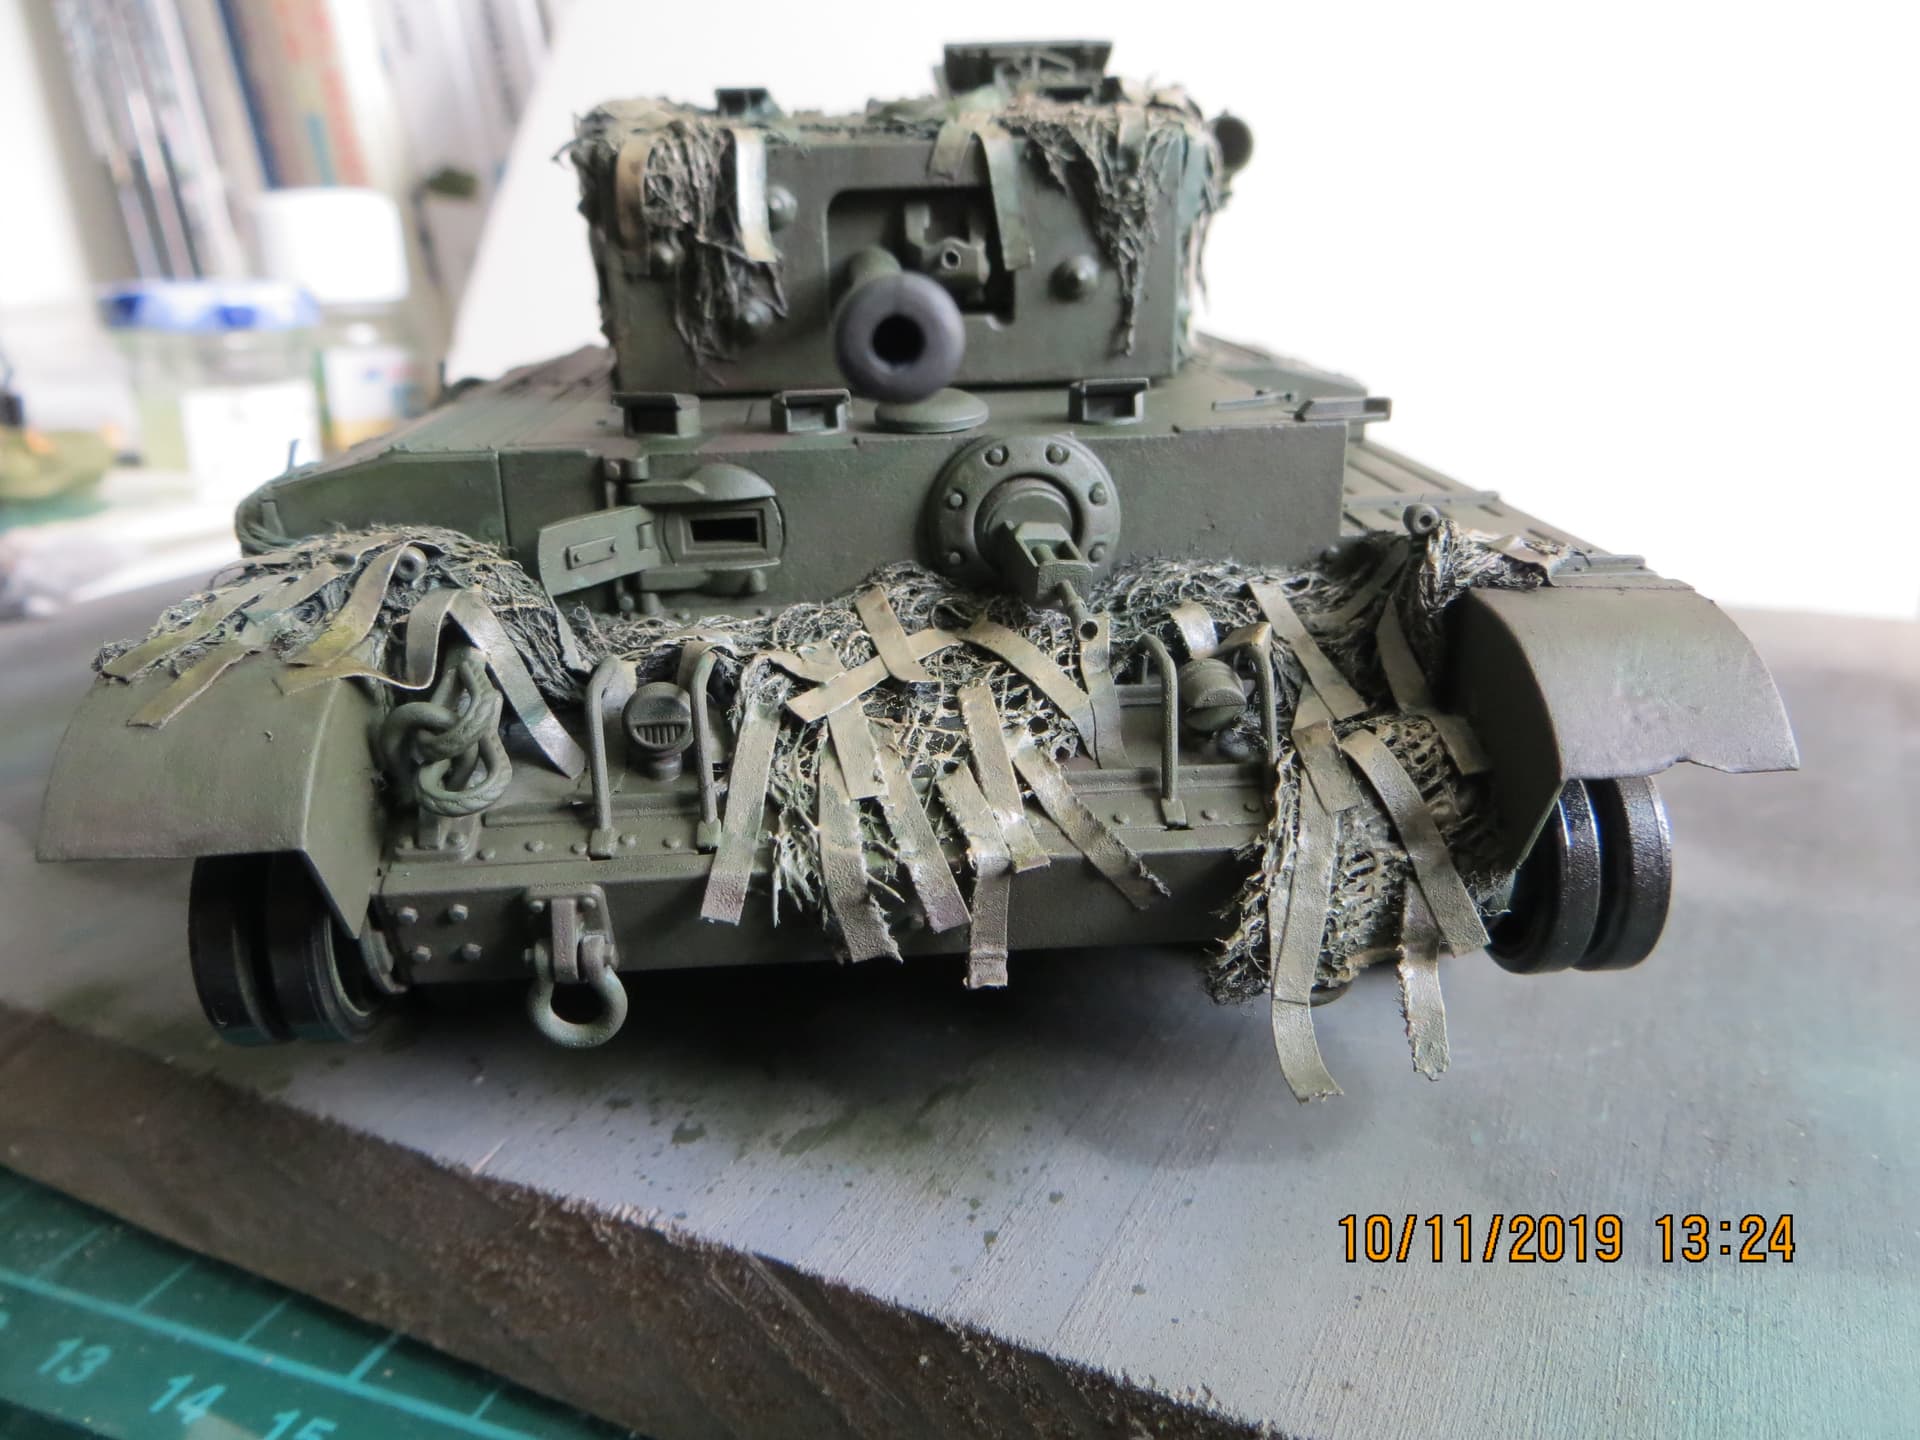
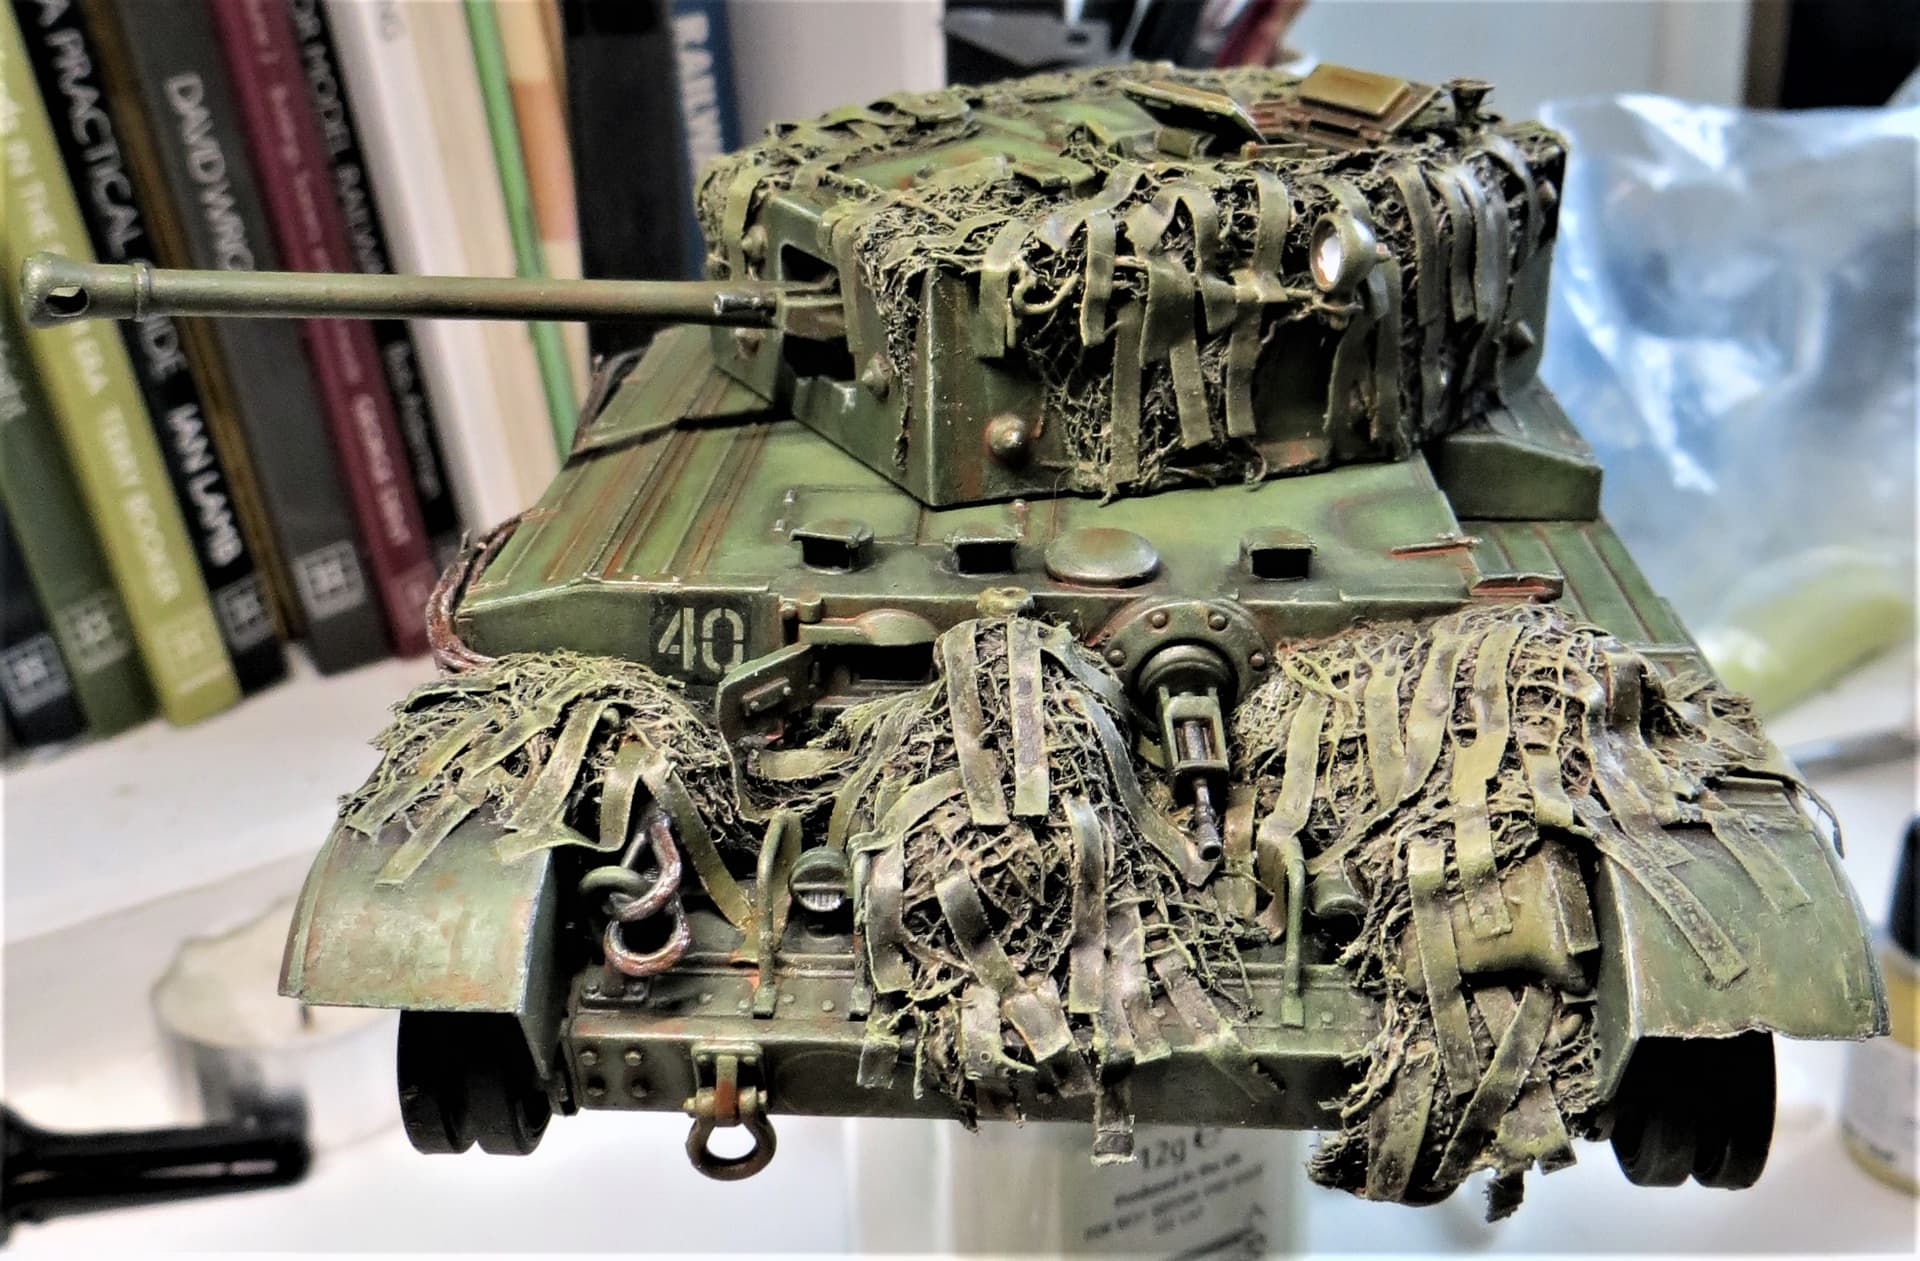
I’d say not too shabby for a first go. I can see some areas of white poking through from the denim that’ll need to be touched up, but I’m quite pleased with the look.
I’m going to experiment with dying my fabric first for my next attempt to eliminate the hard to reach areas.
Hi Don,
Looks real good to me…great job!..some variation of tones and a light drybrushing should really make it standout. Really like the texture of the denim.
Cheers,
Not too shabby at all from where I’m looking Don, I think you’ve done a great job on the draping of the strips, very natural and realistic looking to me, excellently rendered, .
")
")

 .
.

 , what method did you adopt in the end?

 .
.