It could be worse. on an actual ship or larger-scale model, each ratline (the horizontal bits) gets an eye-splice in one end, then the eye is seized (lashed) to the outermost shroud, then knotted to each of the middle ones, taking care to leave just the right tension, then an eye-splice made in the other end , to JUST the right length, then that seized to the other outermost shroud. Then on to the next one!
1 Like
Definitely. I remember walking round her on the times I’ve been to see it, when you look at all the multitude of little parts that you would of needed and to manually operated to say get a sail to function is mind blowing and then like you say how that rigging is made, it’s so complex, you have to tip your hat to those sailors of that era … They certainly worked hard.
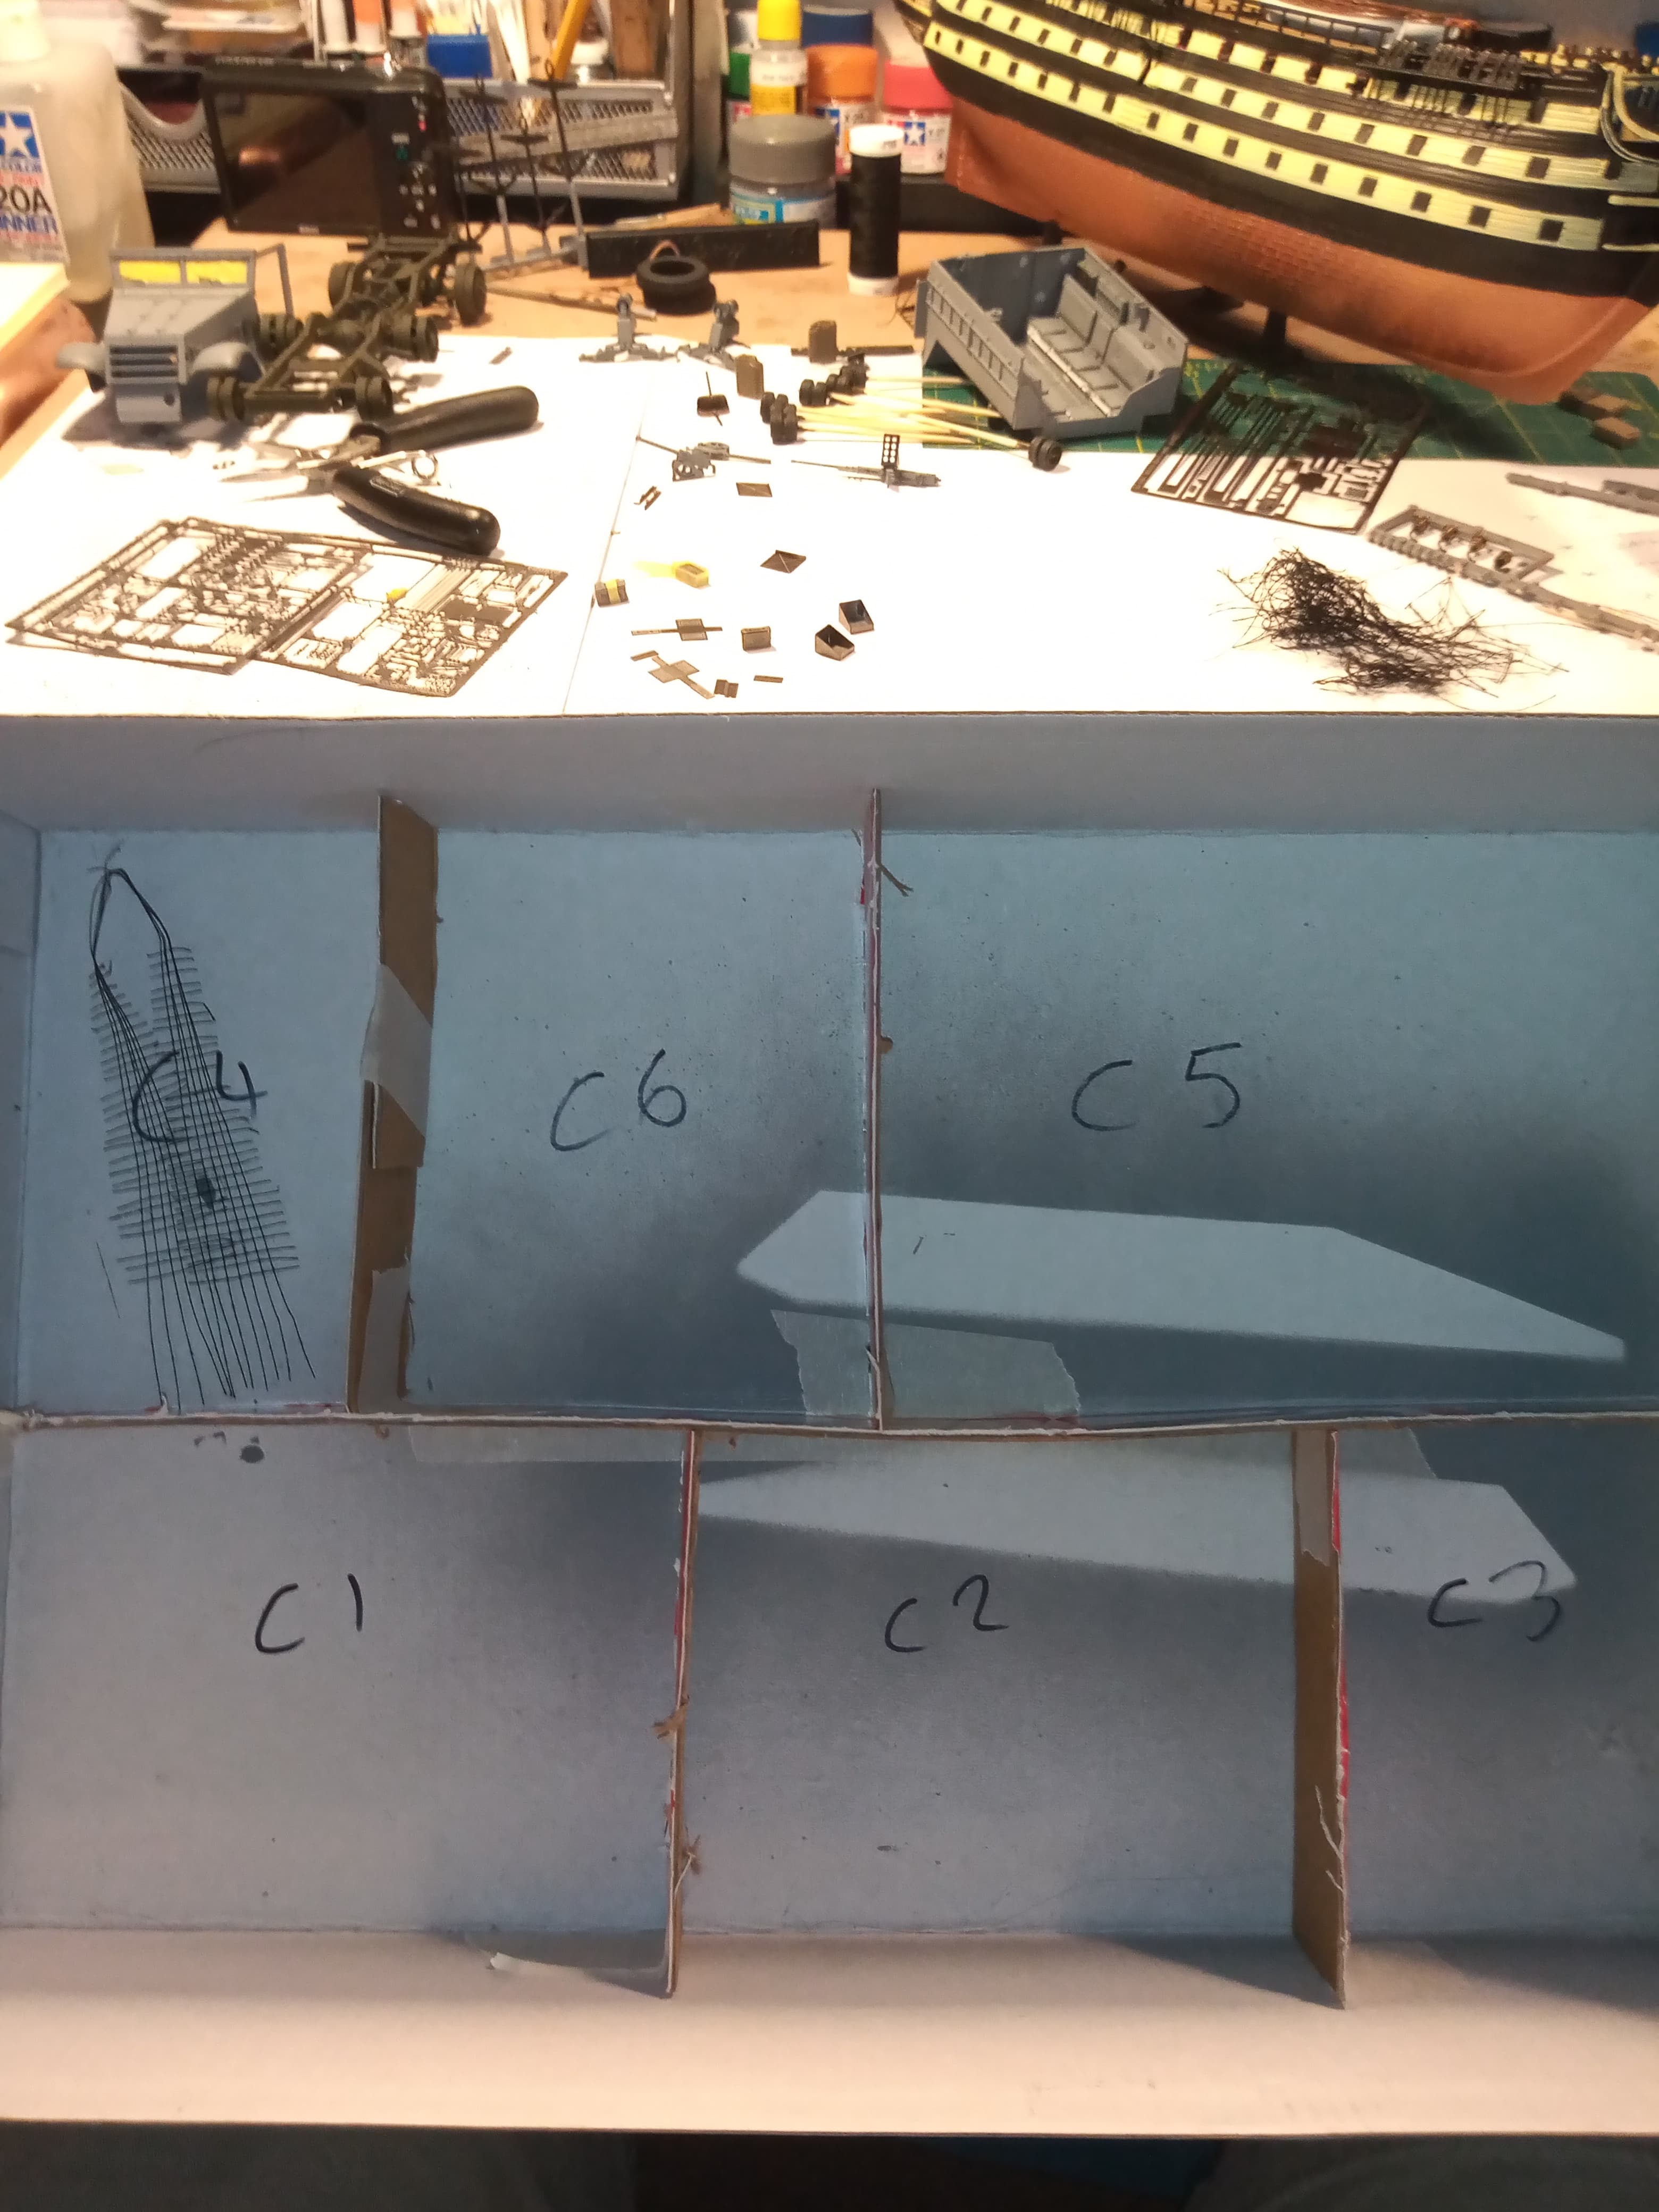
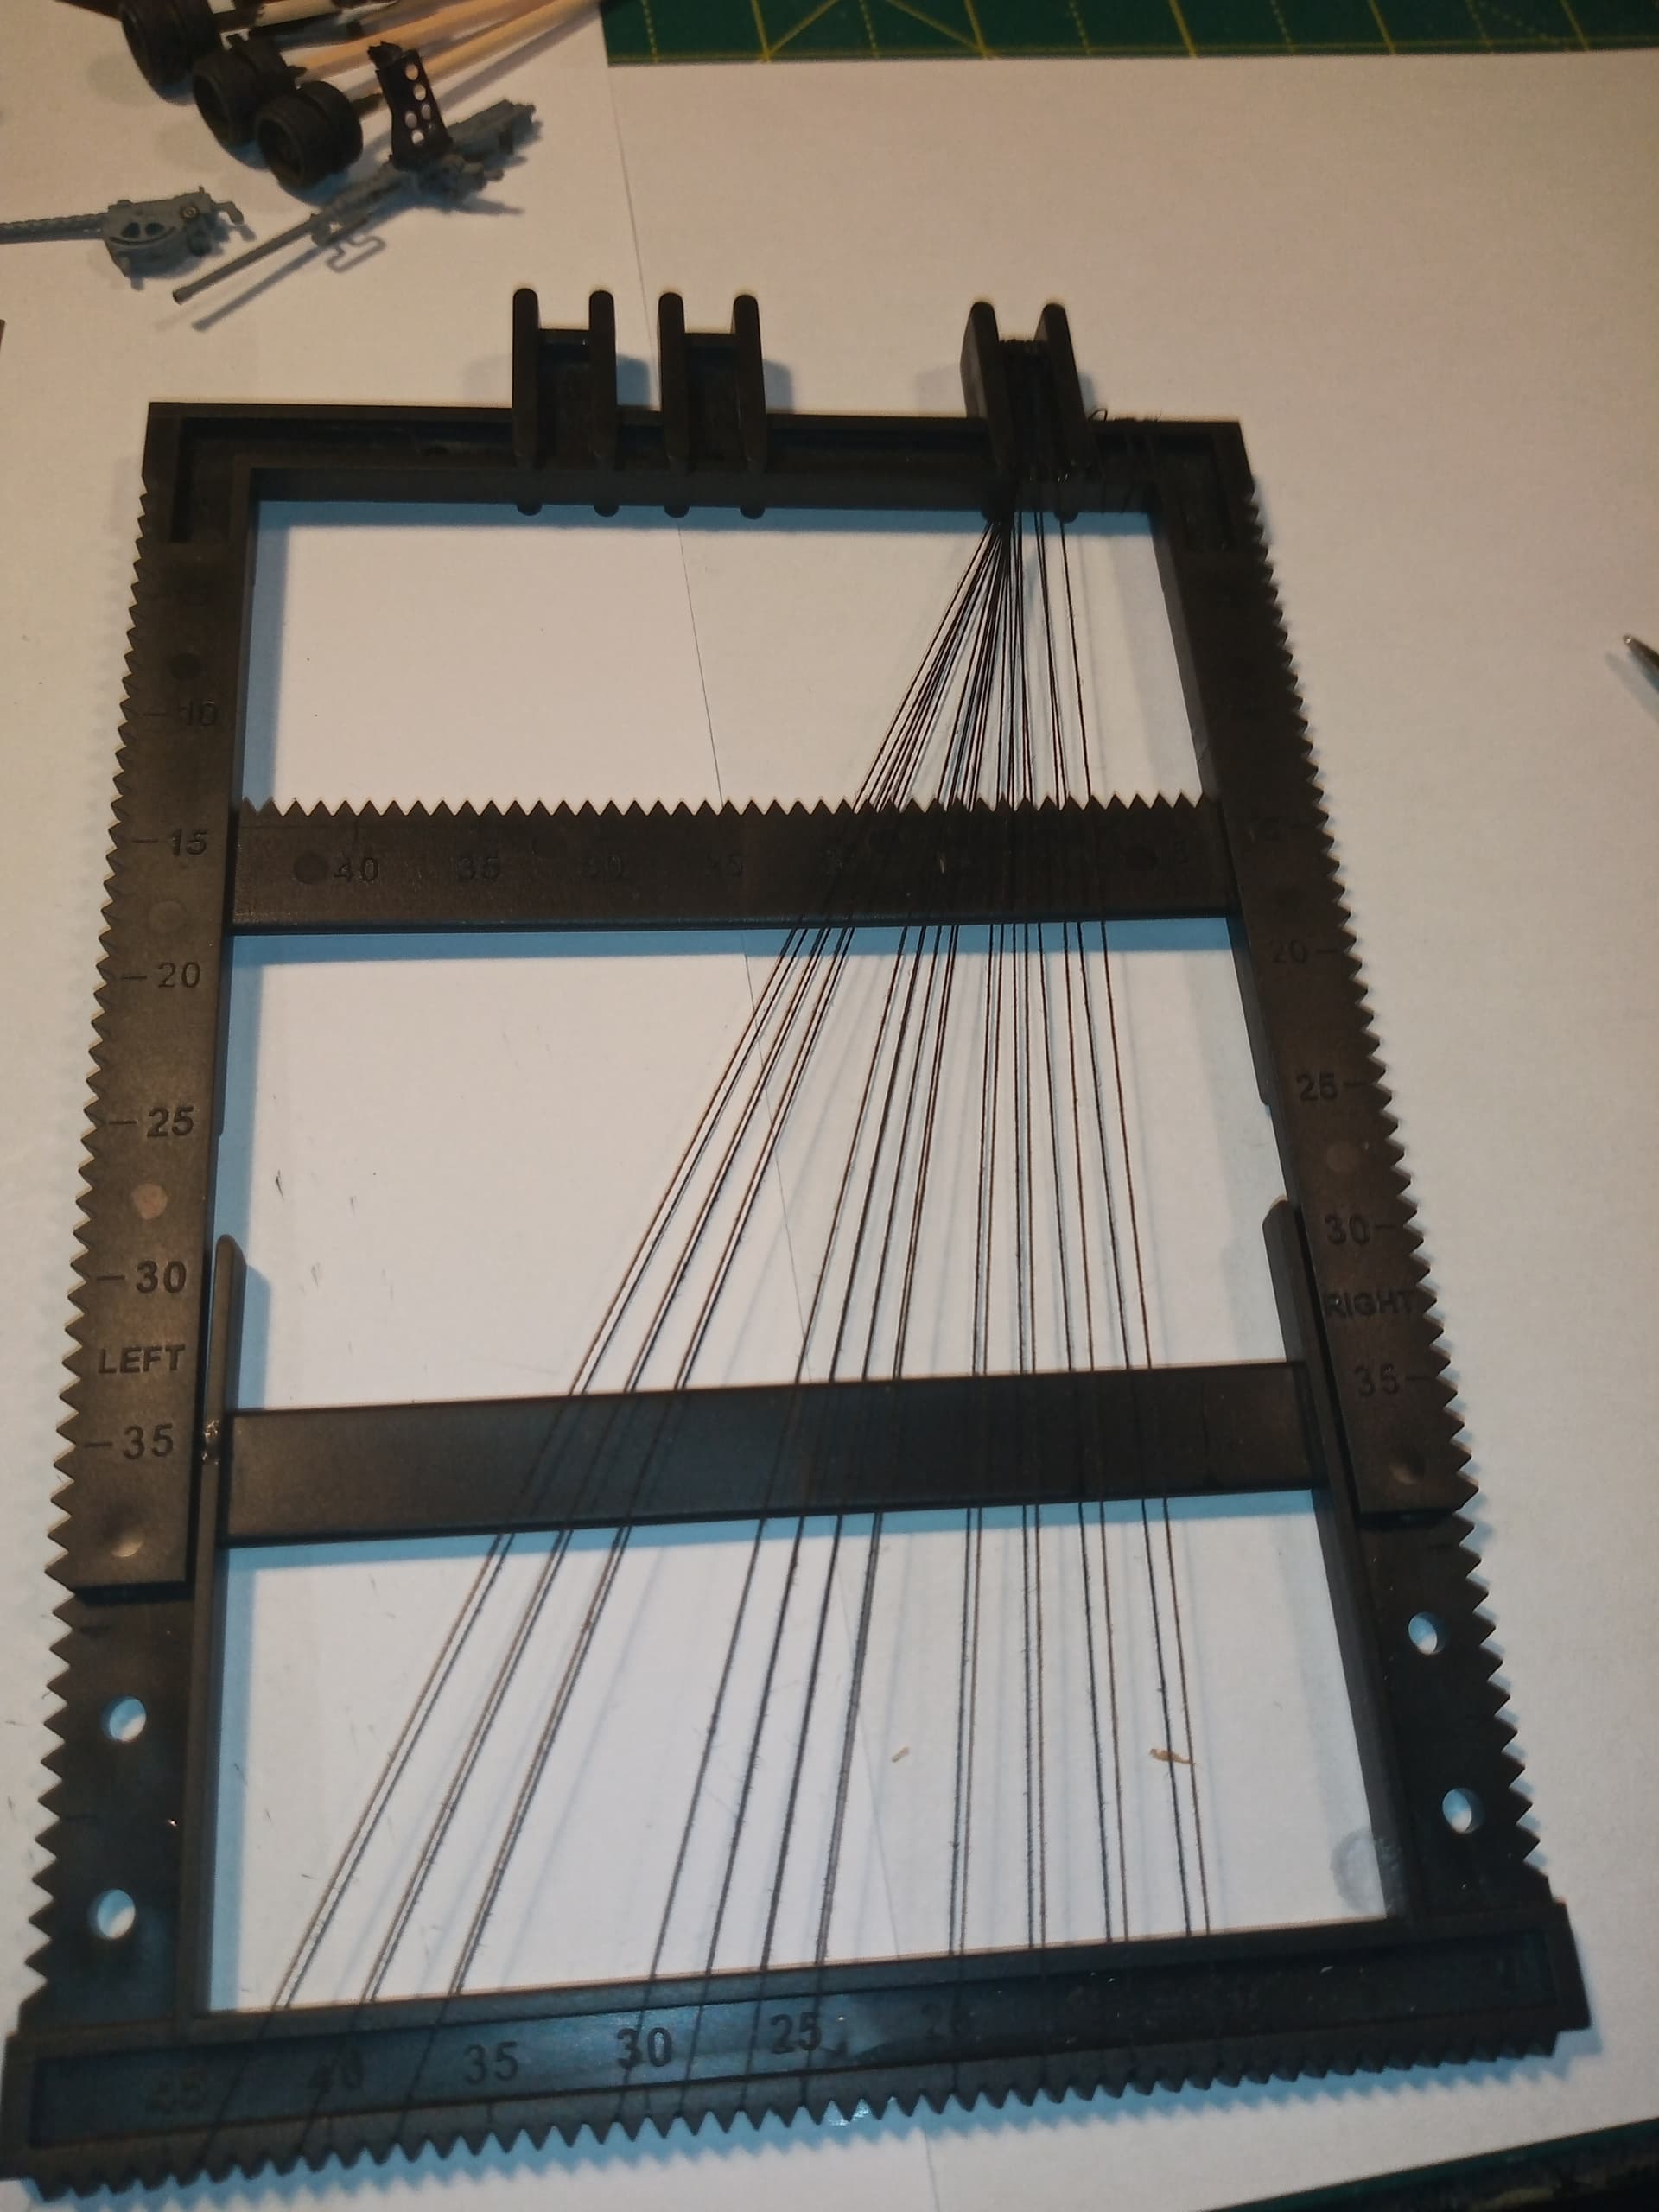
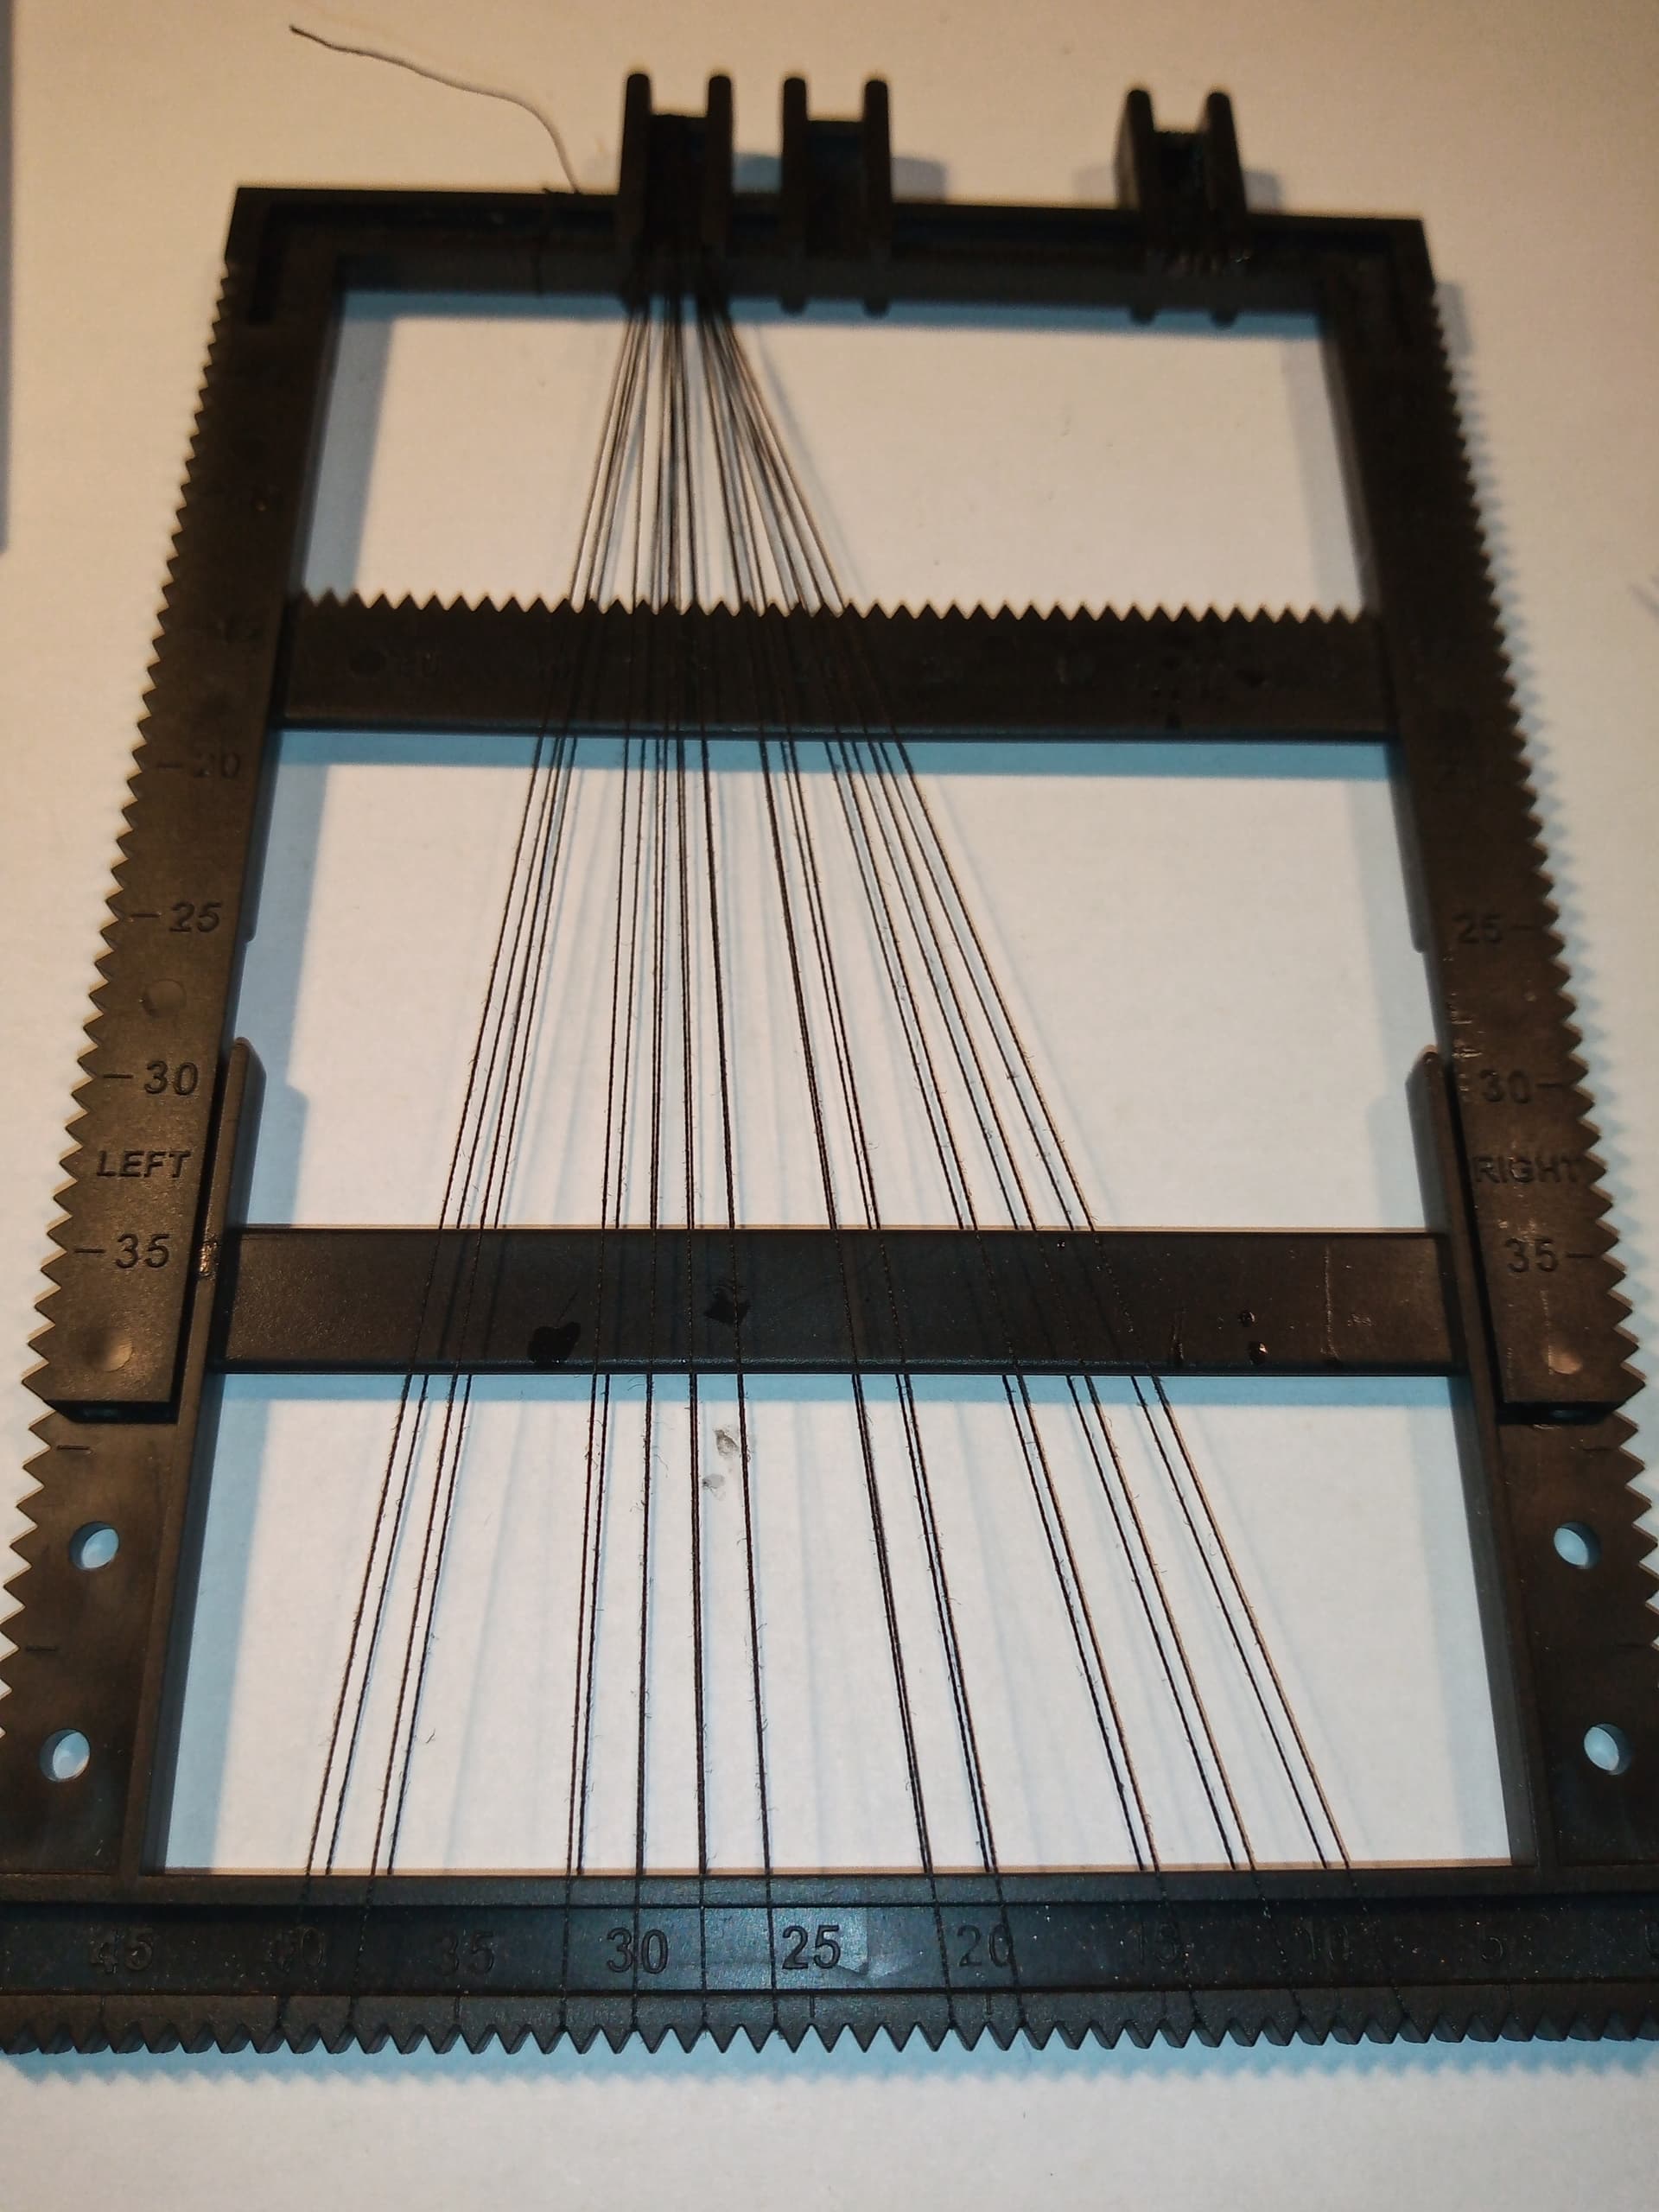
I am happy to say the first set of the mast rigging came out ok. It’s only the first cut to get it from the jig. It still needs the edges tidying up, C4 is the top run on the front mast.

There are 2 ratlines that the Tamiya clear didn’t take on, so I will redo those by hand later … Only 5 more sets to go, and will try and do 1 per day.
Also made a storage area for the completed runs…
4 Likes
The jig you have looks identical to the one that came with my kit. I used clear fingernail polish to get the ratlines to adhere to the shrouds. There are some places that didn’t adhere well, but it’s an easy fix.
Tim
1 Like
The jig is a massive help. It would be a nightmare without it …
I’m still trying to think of a way to do the really thick bracing ropes ? That go from the middle of the mast to the bottom of the one in front, and from the 2/3 up the mast to half way up the one in front…will have to experiment with that one.
Have started C1, this the bottom section on the front mast.
And completed.
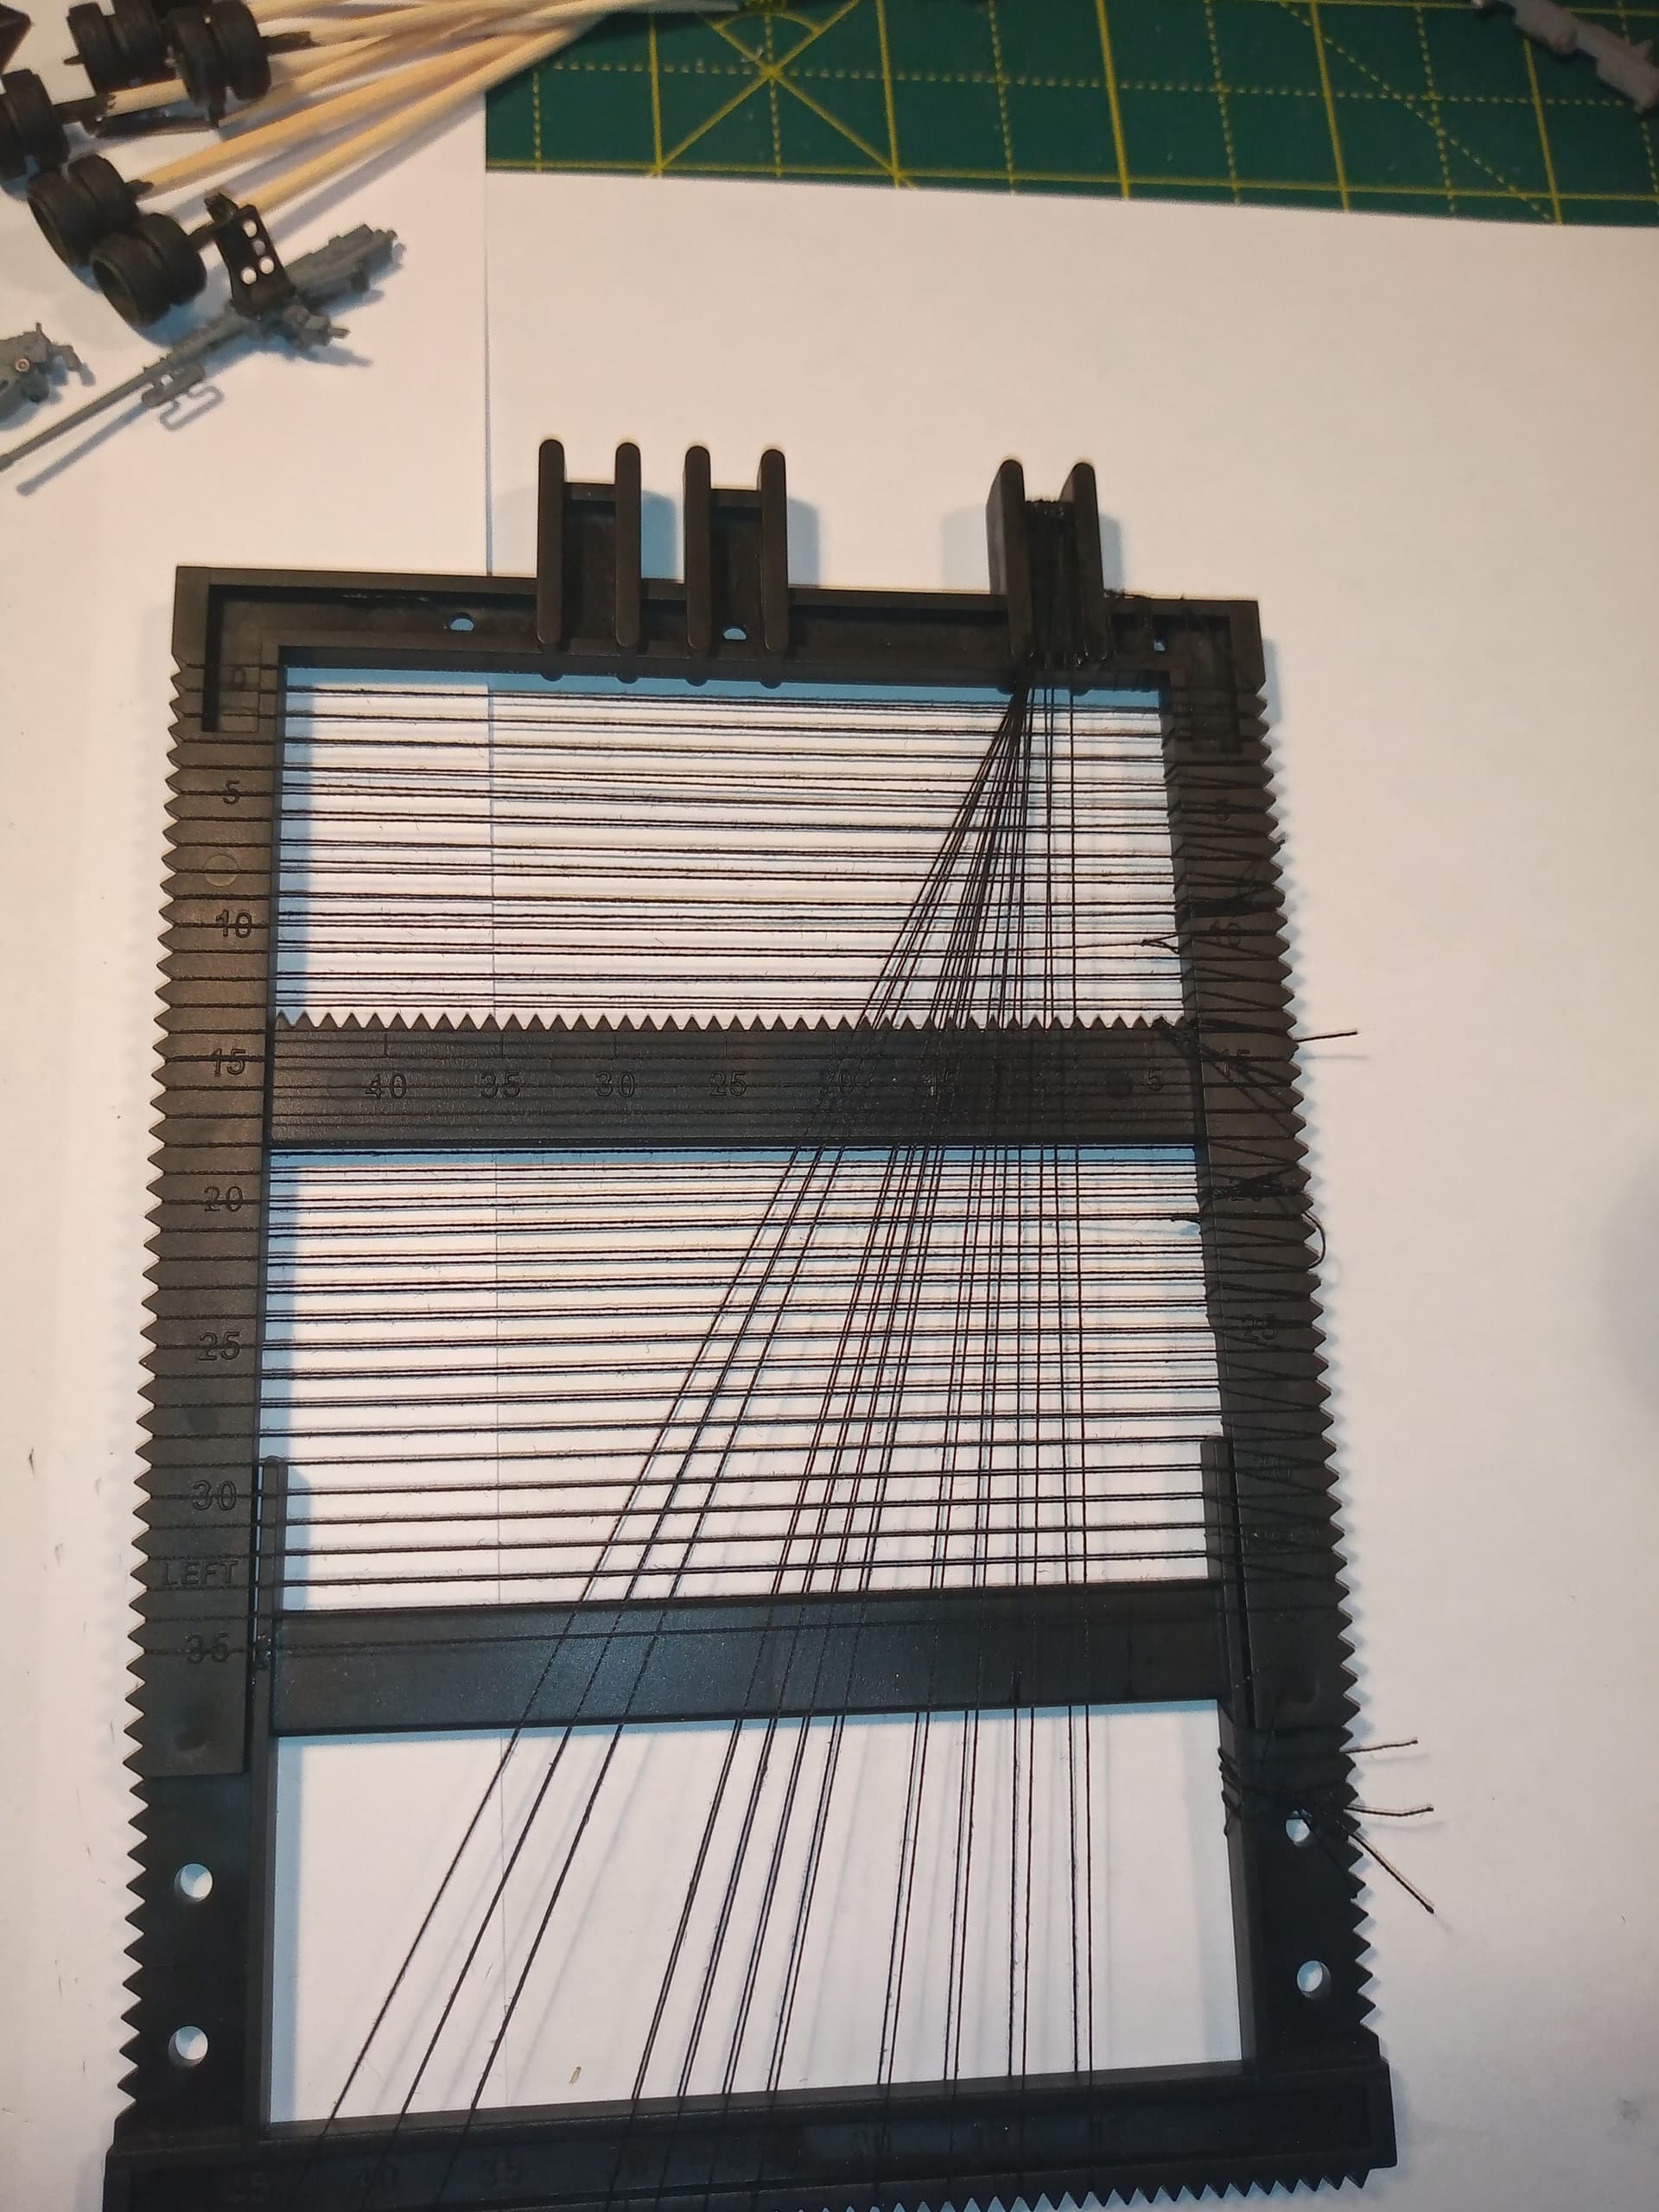
The Tamiya clear is now on it, and it’s drying over night … 4 more to go ![]()
![]()
2 Likes
Those lines you’re referring to (the braces) are called stays. If you have different sizes of thread, the mainstay would be made of the thickest thread, and the one above it (the one that’s 2/3 of the way up the mast) would be a slightly smaller thread. I’m pretty sure in my “old” blog postings, I went on at some length about how I constructed those stays.
1 Like
Outstanding work John, that rigging will certainly help bring the whole build to life, so will be worth all the investment in time and patience you’re expending, ![]()
![]() .
.
Did the jig come with the kit, as it looks like it could be a useful tool for future use?
G, ![]()
Cheers G. Yeah, jig came with the kit, and I’m sure it could be used for other ships and the mast rigging, it would just need some working out as to where the shroud lines would need placing as the kit instructions give up exact placement locations for each shroud and ratlines…
I’m bizarrely looking forward to the single rope rigging. That will be the final bit that brings it to life as a fighting tall ship ![]()
![]()
1 Like
I have now done shroud C3, which is the lower on the mizzen mast ? Anyway the rear one. That’s now waiting for the clear to dry… only 3 to go. The plan is do the top one for the mizzen, then the top one on the main mast, then connect them, then fix in the masts… Well that’s the plan…
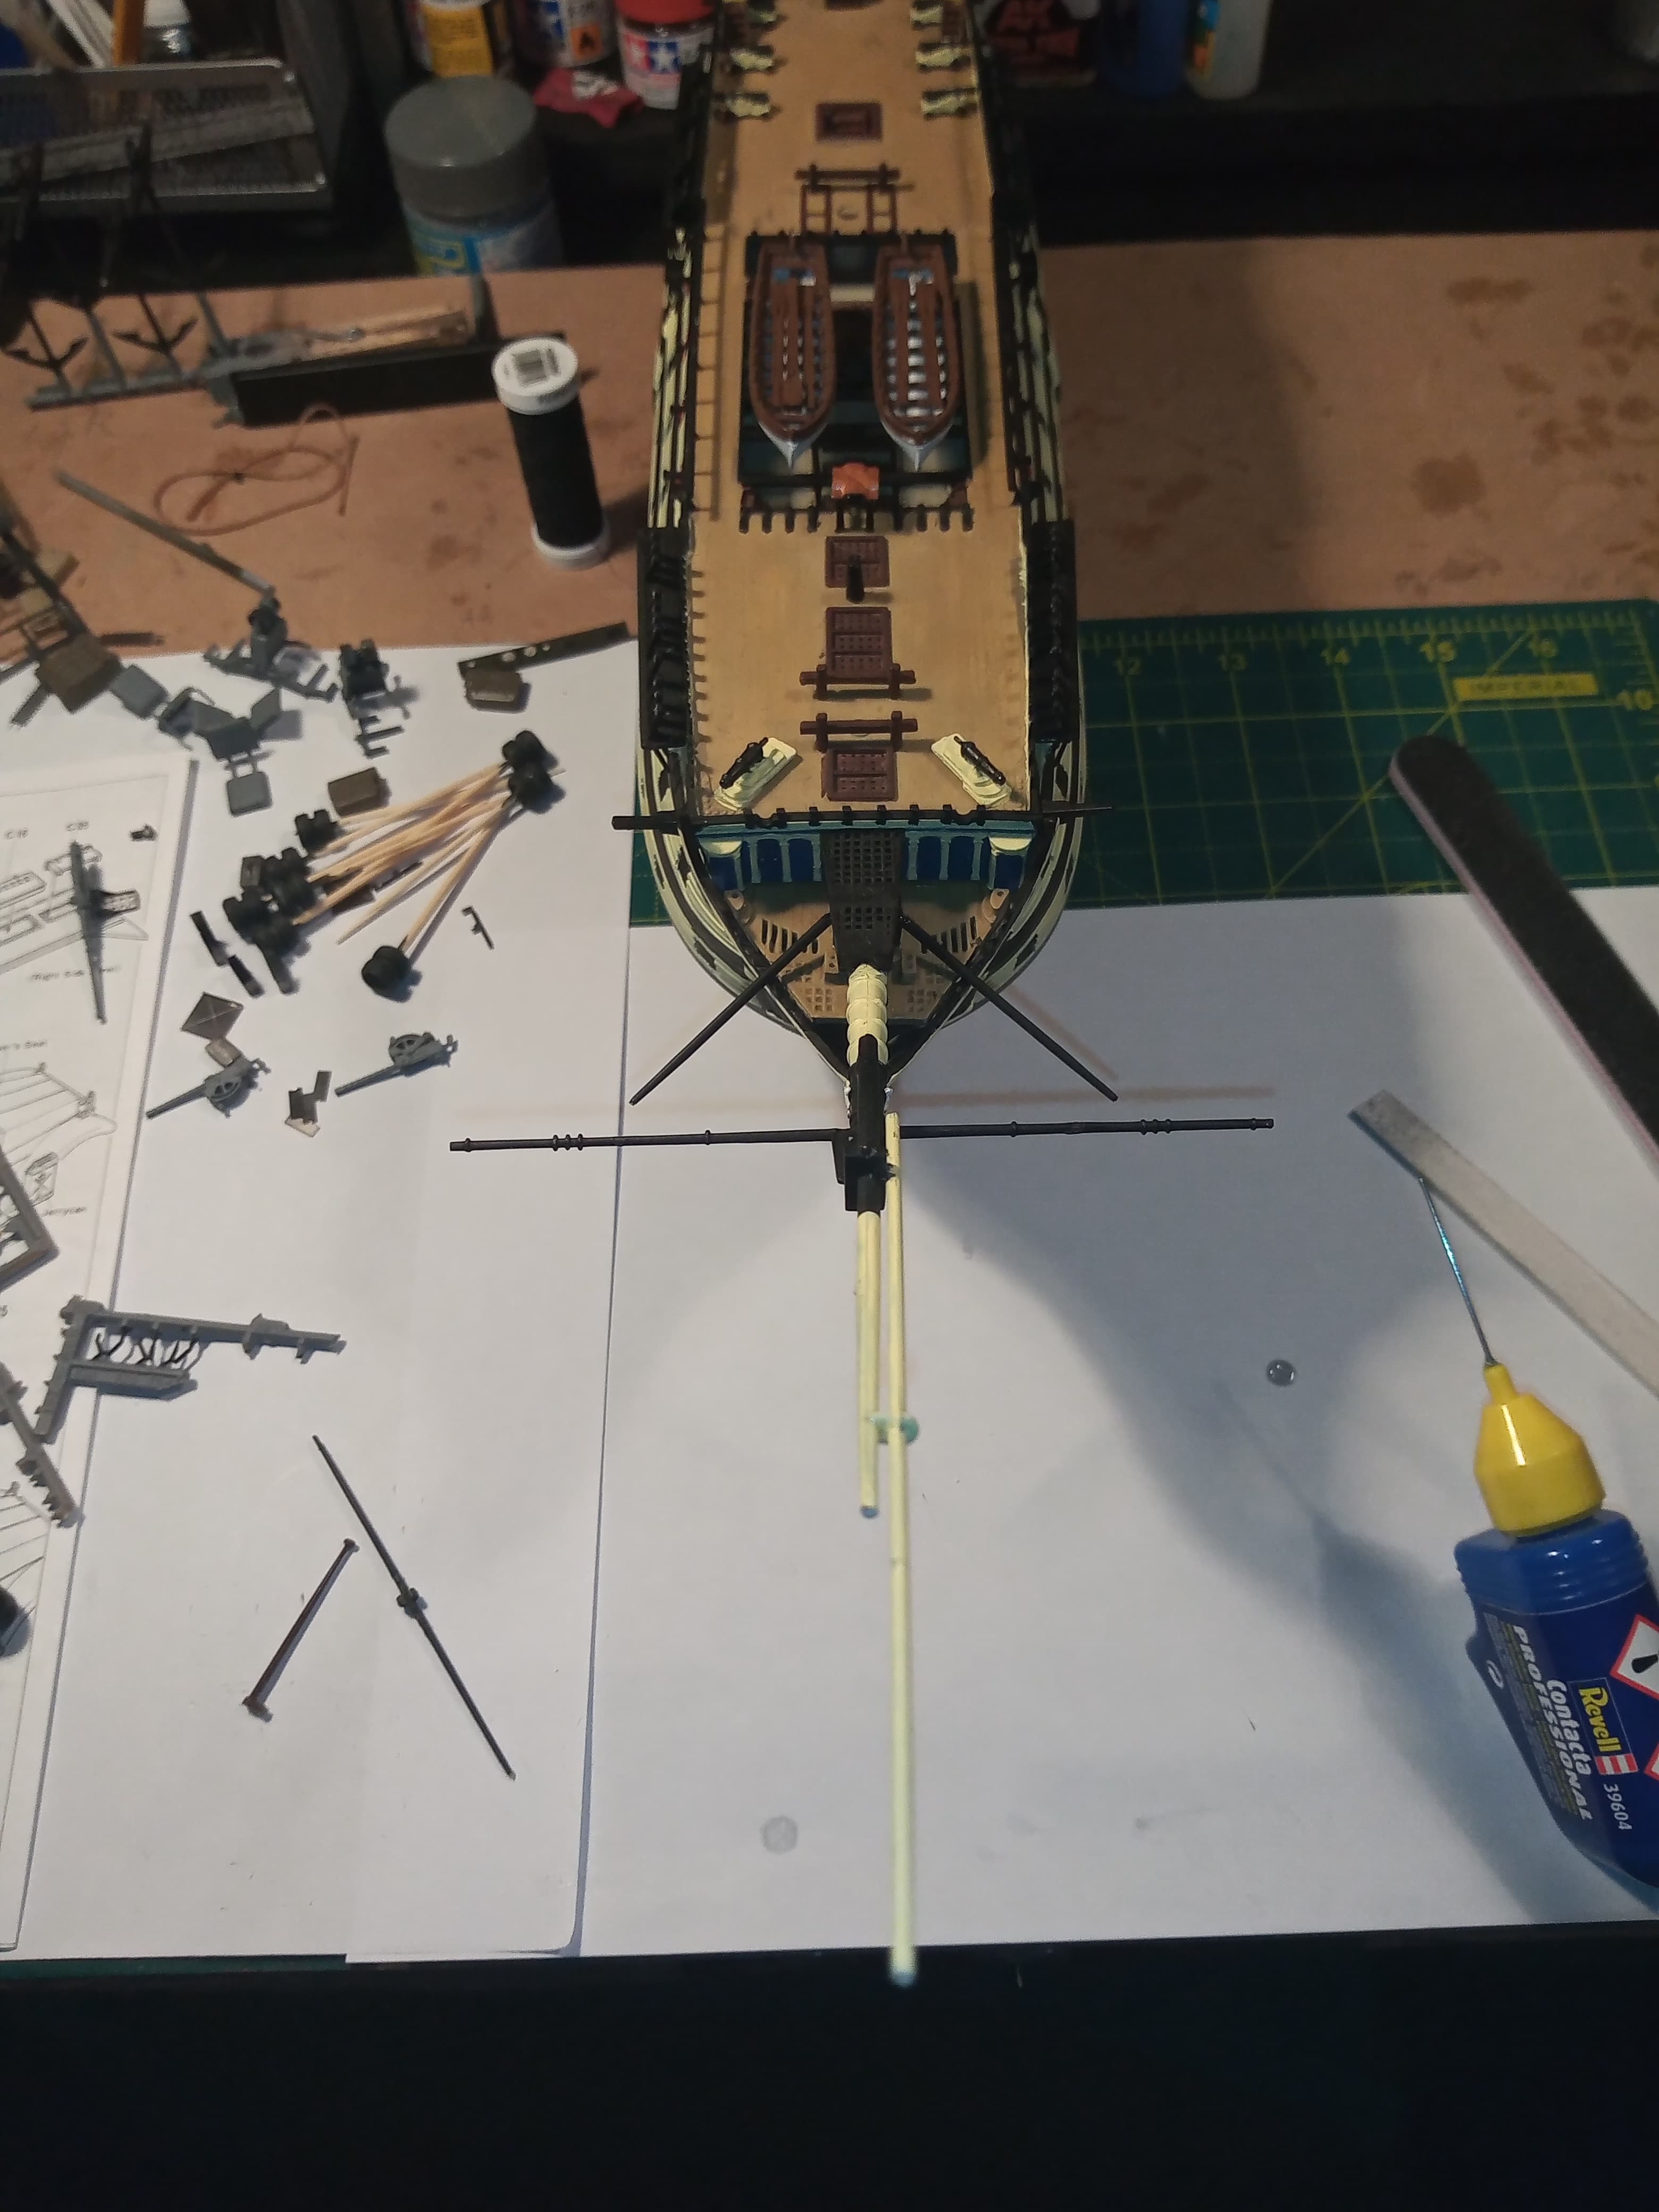
I have also attached the extension to the bowmast, is it bowsprit ? That is ringing a bell, but I really don’t know… Also put on one of the yard arms on that.
I was also made a start on the braces I think Tim called them.
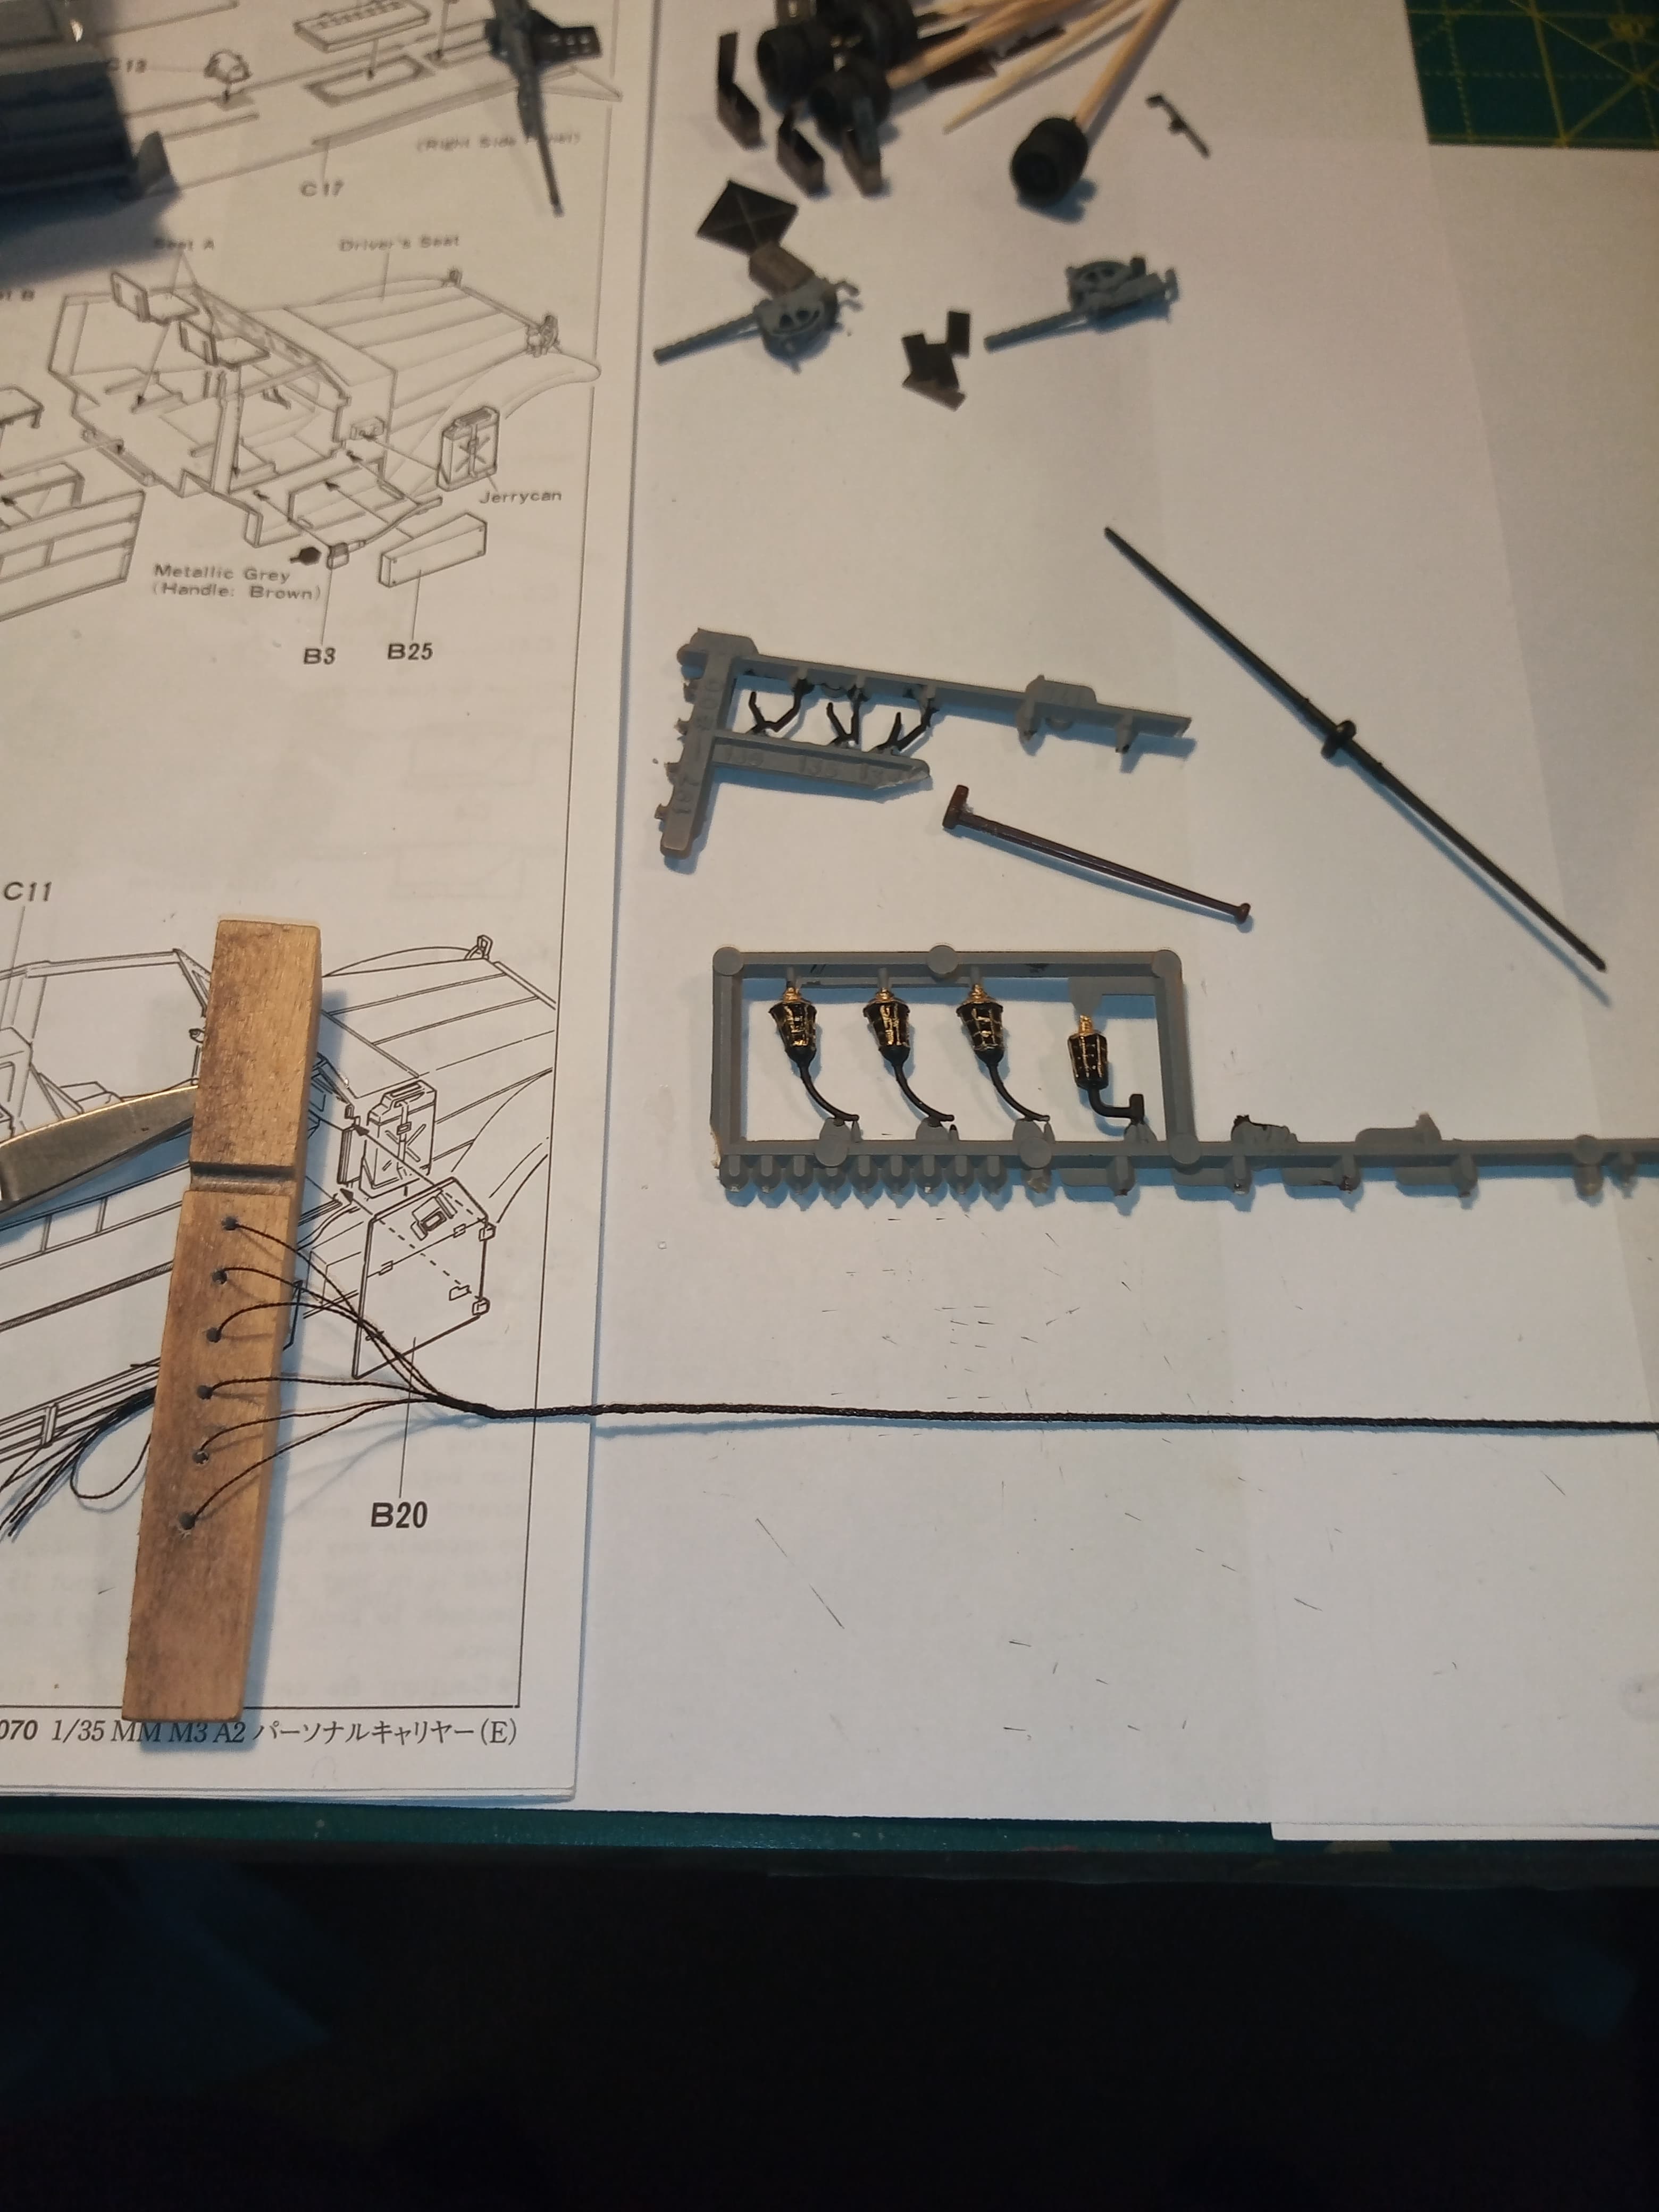
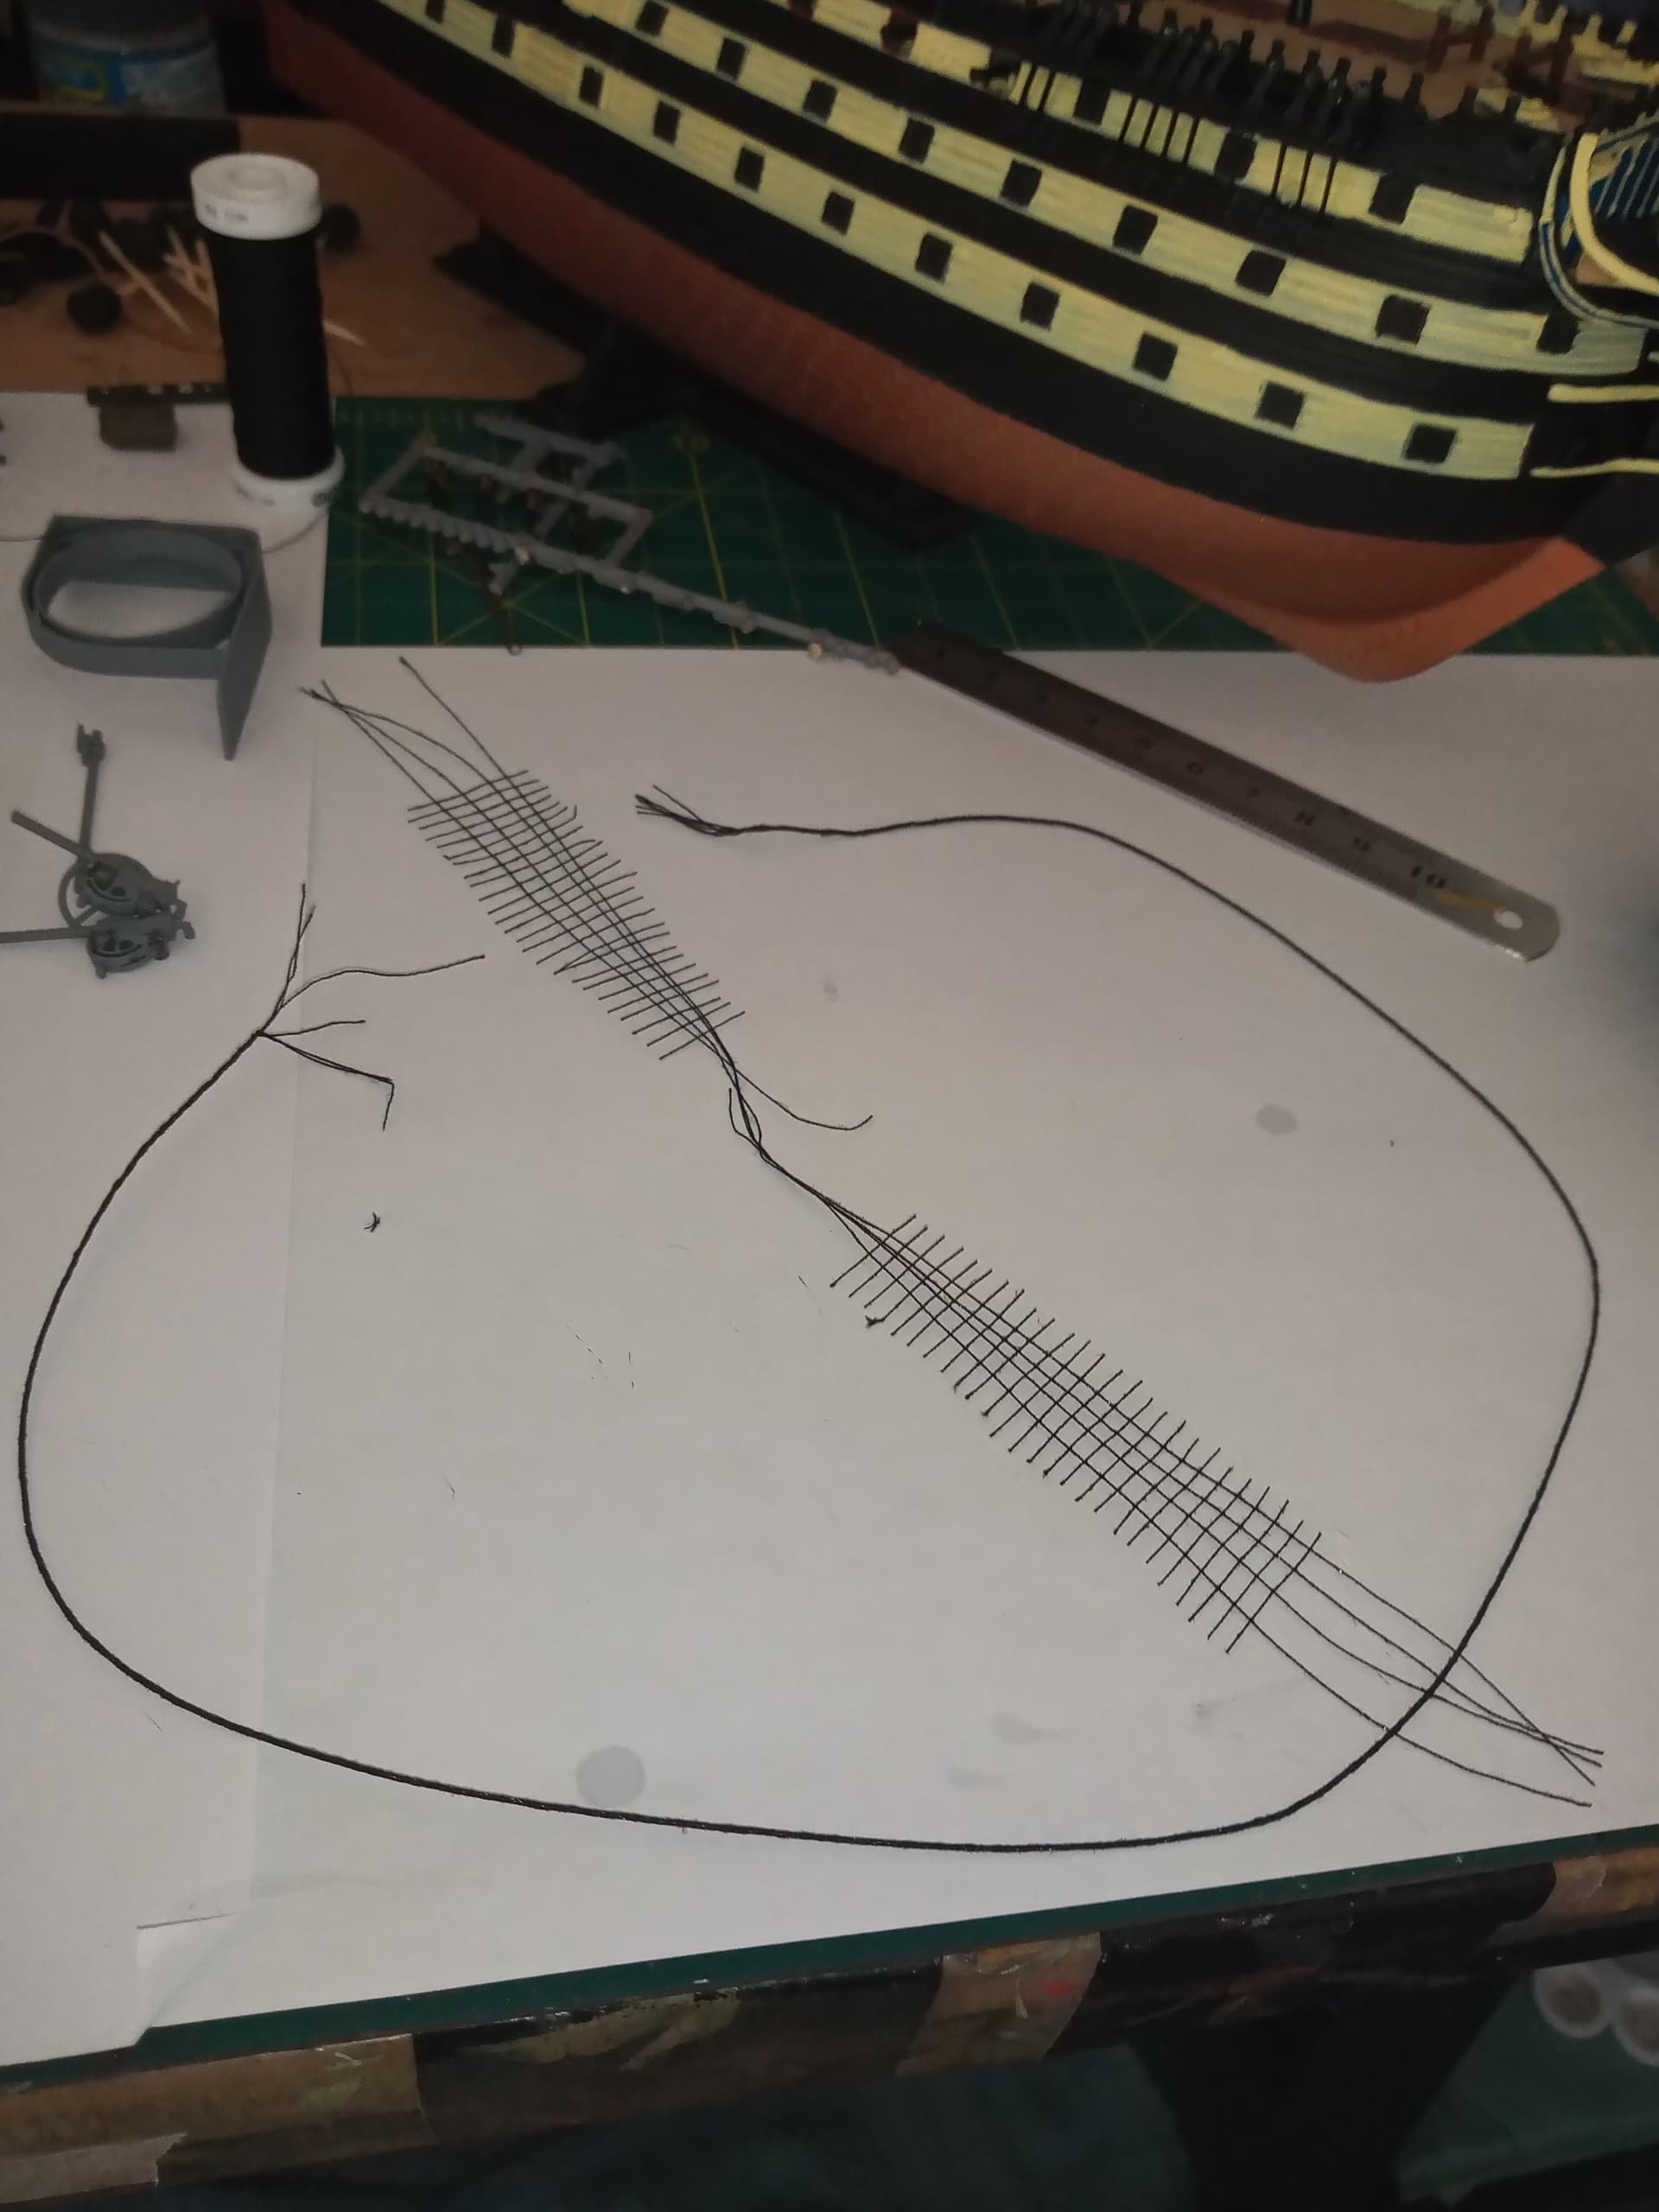
The way I did it was pretty rudimentary… I drilled 6 evenly spaced holes in one half of a wooden clothes peg. Pushed through a piece of cotton. Then tied off that end and proceeded to twist the other end off the open cotton strands… I then clamped off that end and set up a jig to let me hang the cotton brace down, while under 75% tension. Once it was all anchored in place, I coated it in Tamiya clear. Seems to work ok…won’t know till morning ![]()
![]()
1 Like
Each section of shrouds is named for its mast. so there are main shrouds, port & starboard, maintopmast shrouds, and main topgallent shrouds etc.
The extension on the bowsprit is called the jib boom.
Still looking great!
2 Likes
Thanks Danie, and thanks for the various name parts. All useful ![]()
![]()
C3 is now set and in the storage box.

That’s the mizzen main ? Have just made a start on C6 which is the mizzen upper.
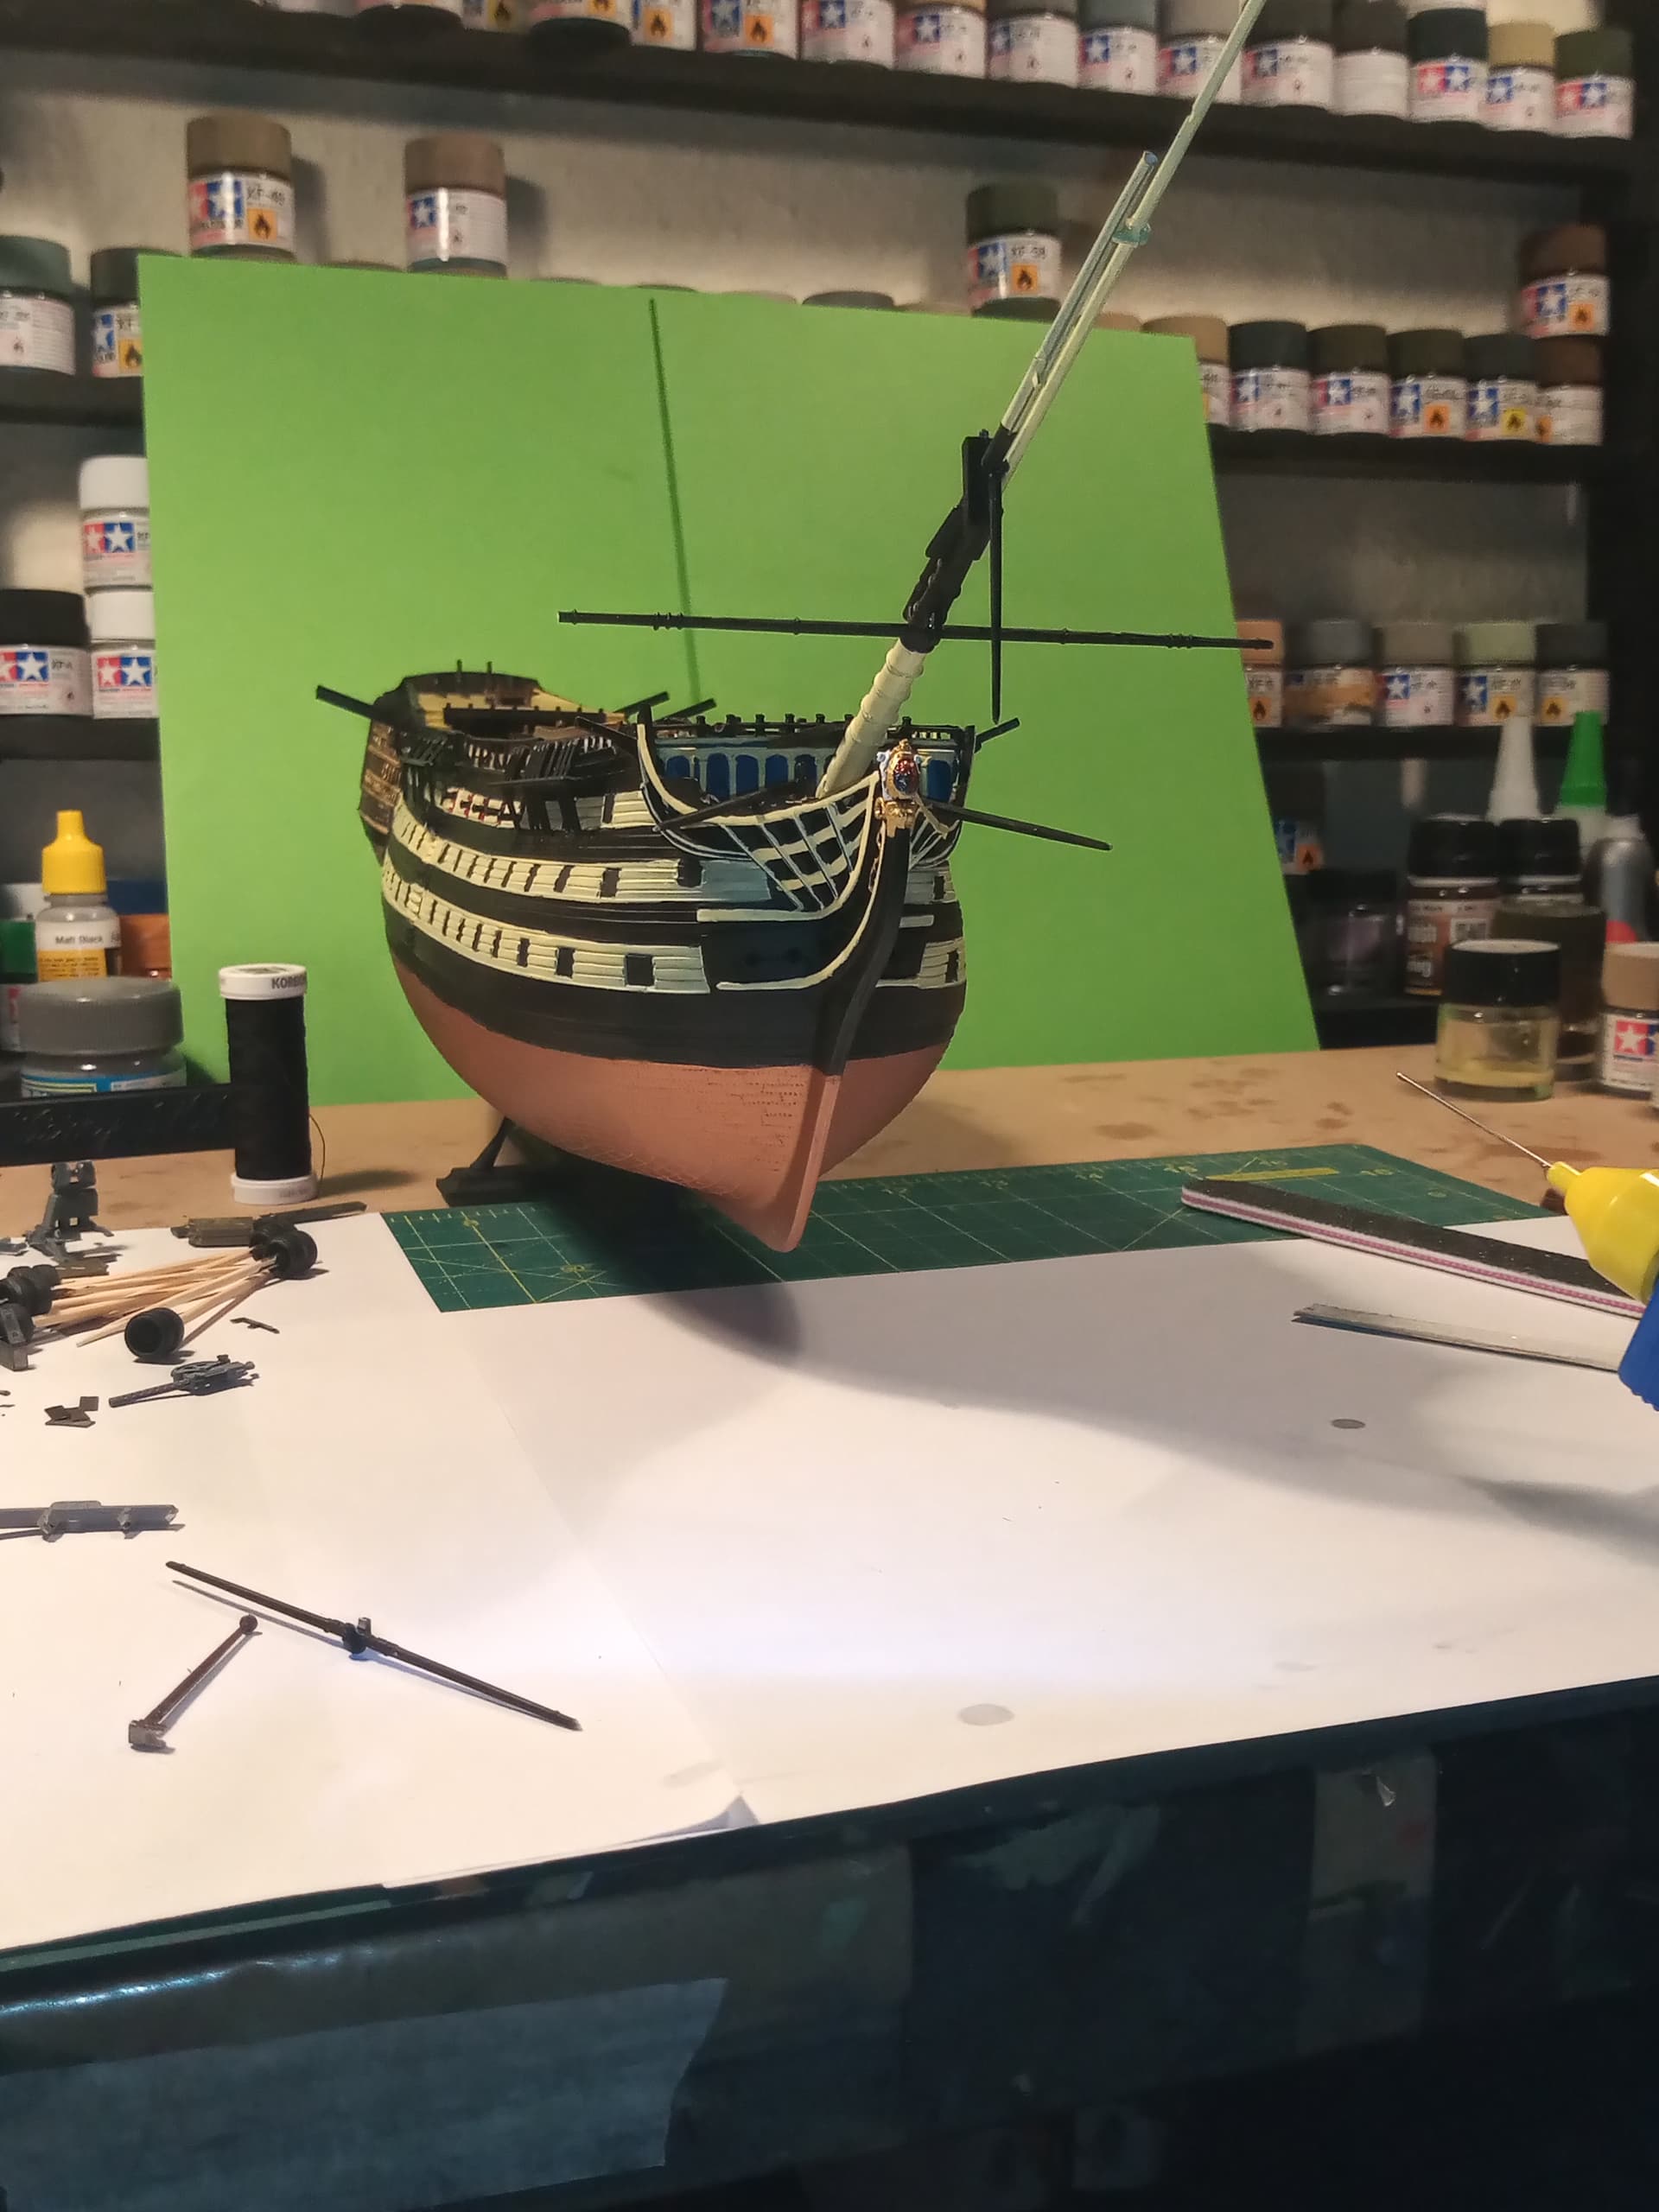
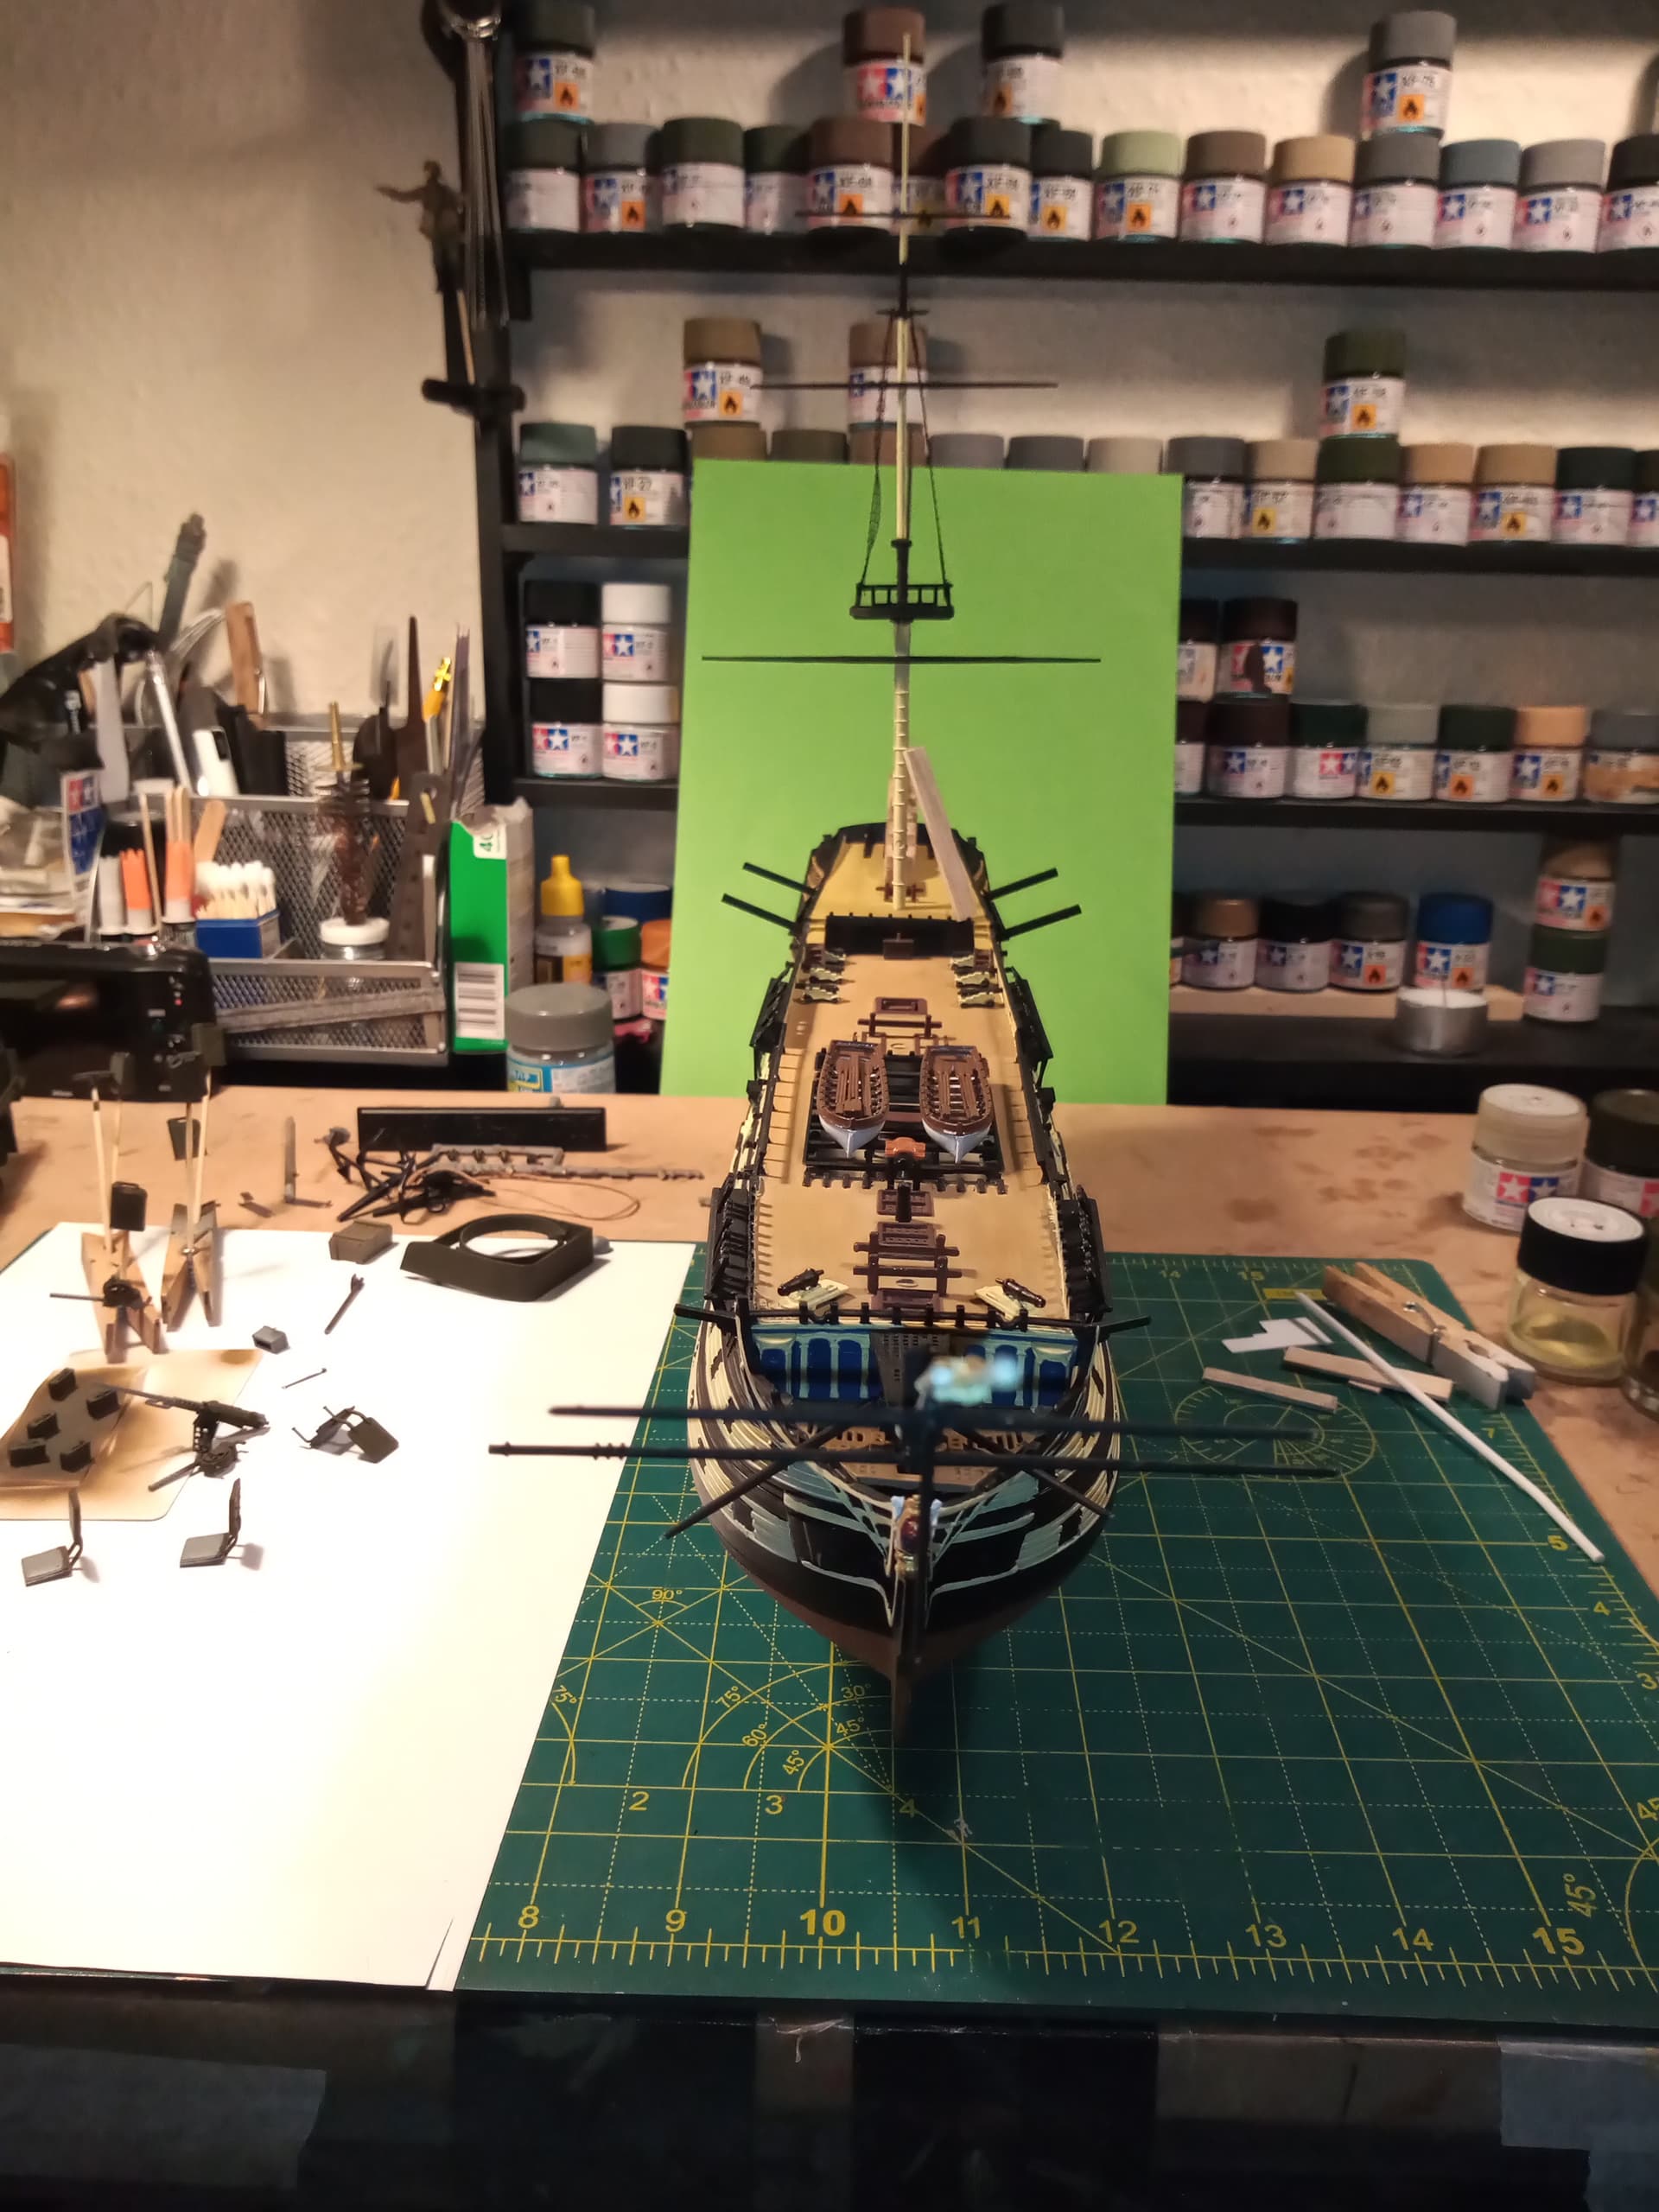
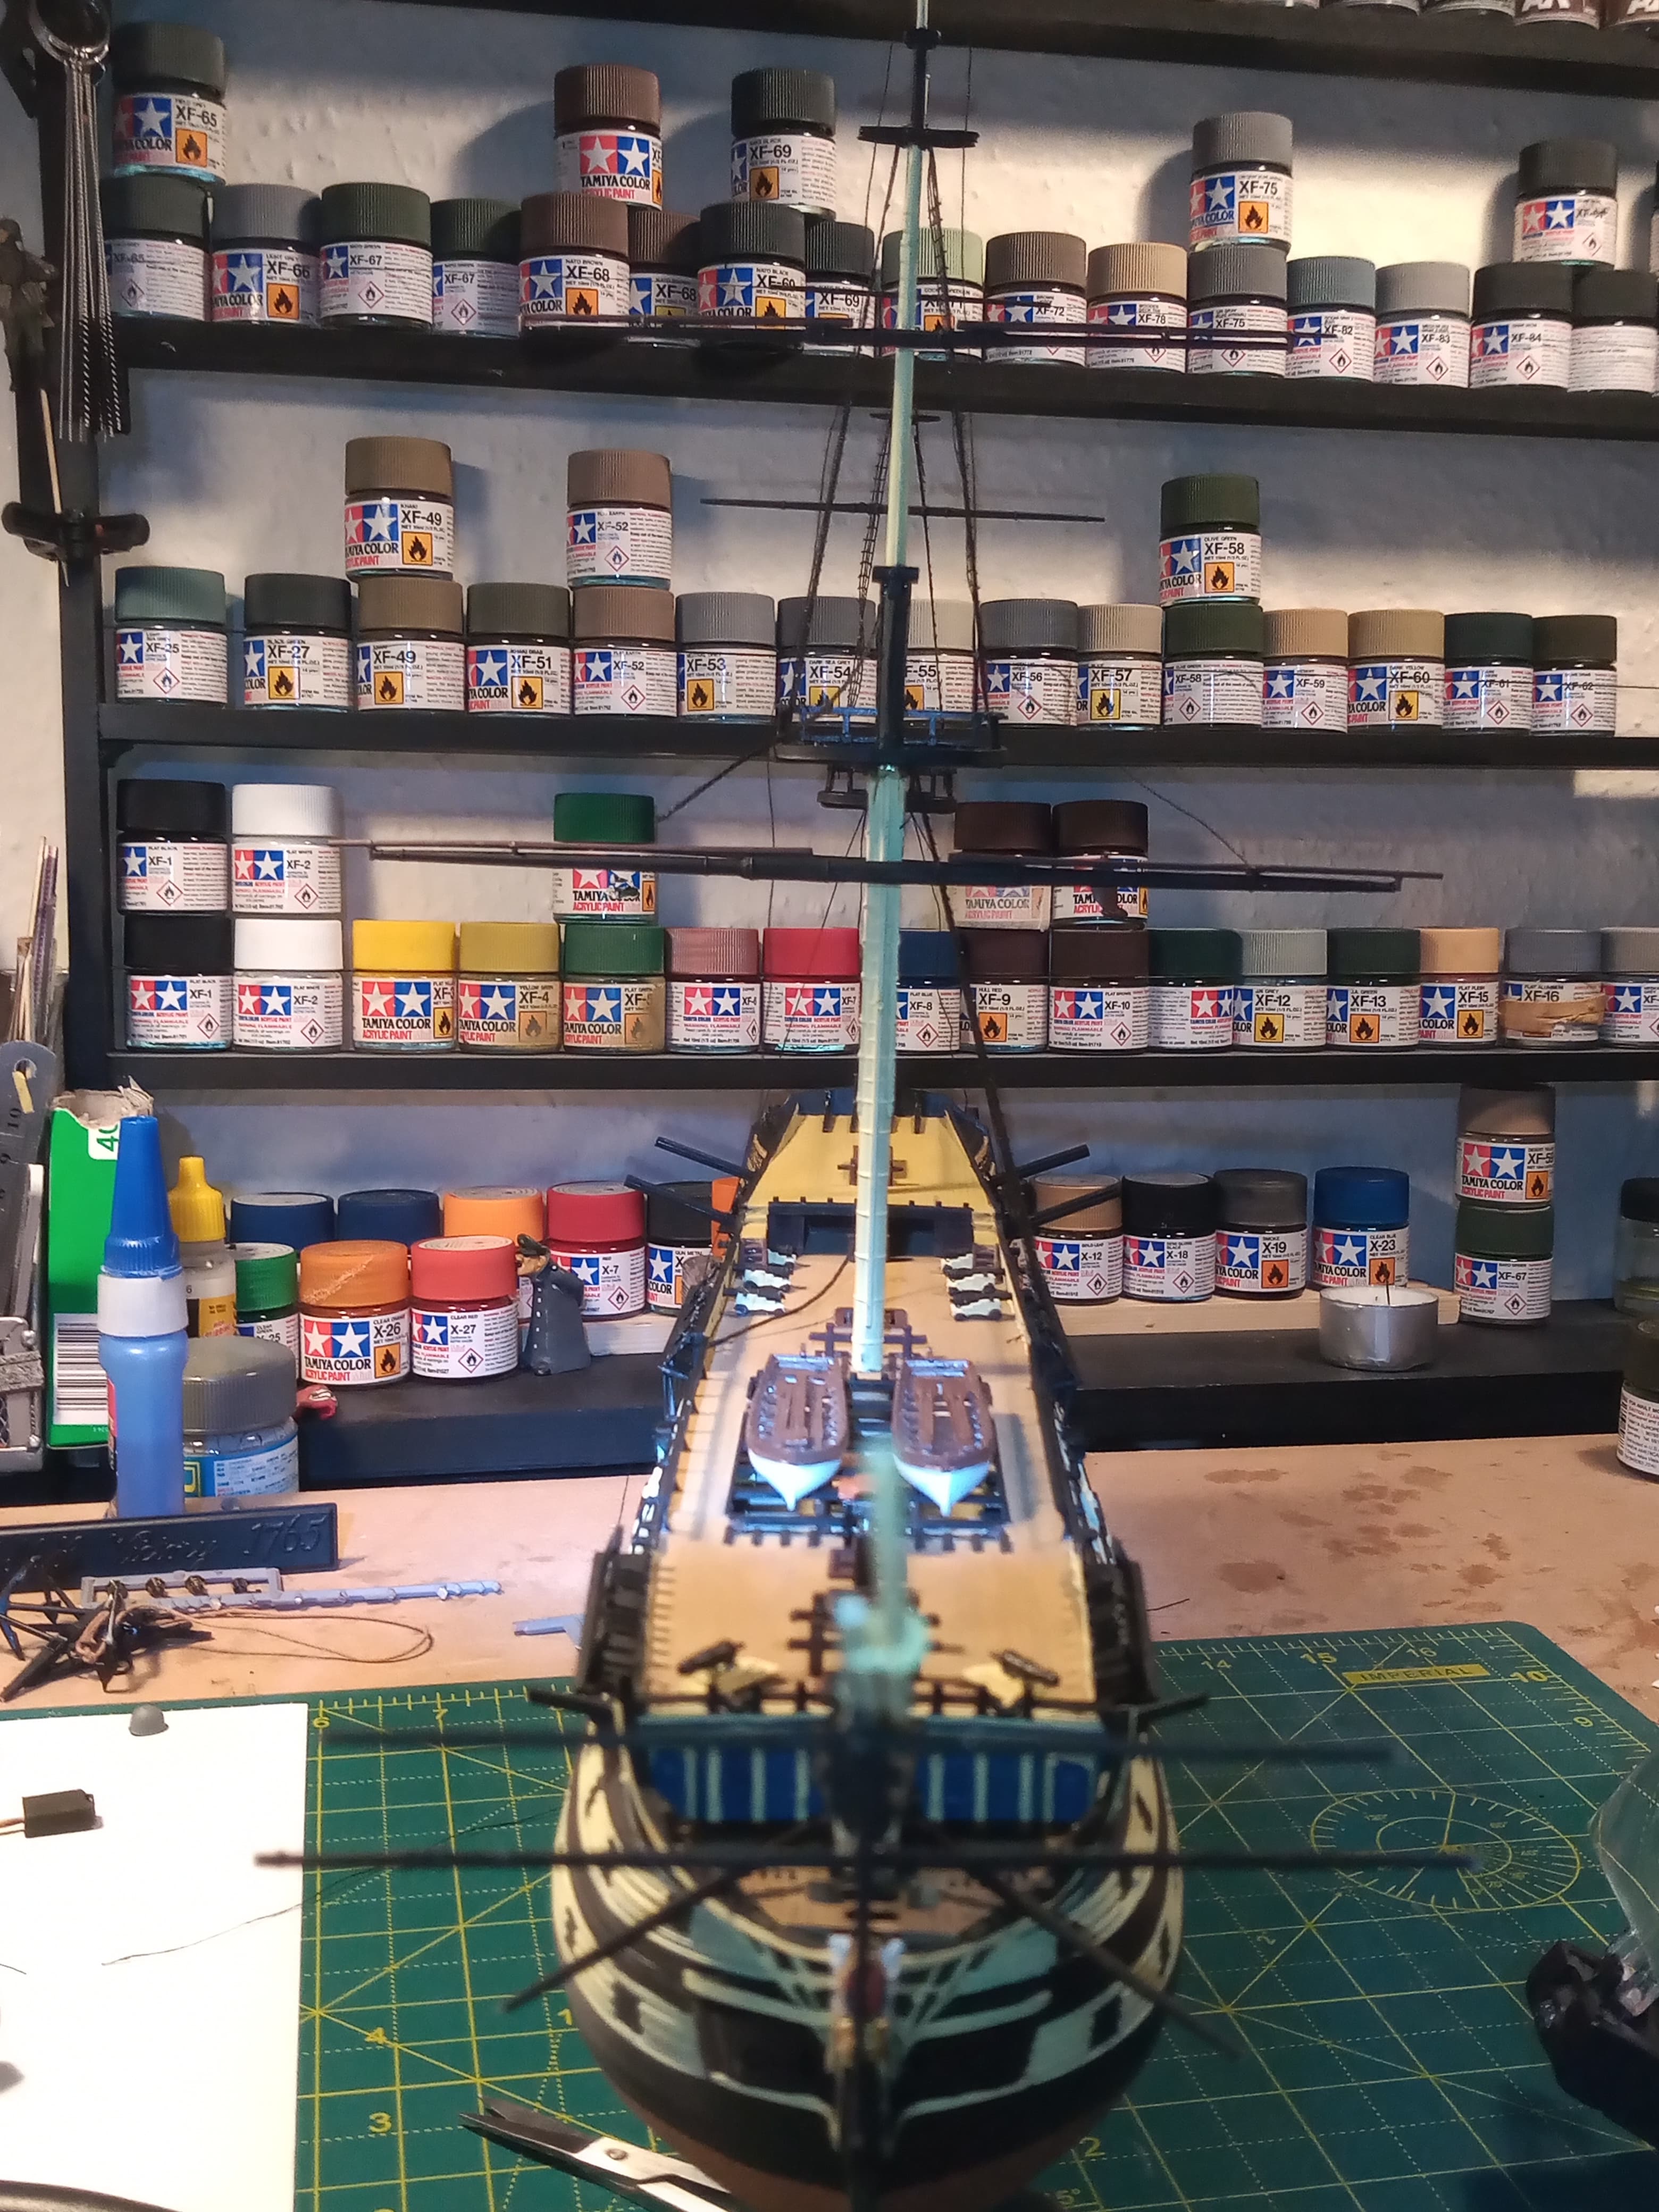
A quick shot from the front, and thankfully it all looks pretty mirrored… God knows how I achieved that lol.

And a bit more from the side so you can see all the bowsprit and jib boom.

I did a quick image of the mast brace which has now set, the method looks a bit unorthodox but also seems to have worked.
All in all, I got about 35cm of usable length, so quite happy with that.
4 Likes
Upper mizzen shroud C6 is now done and in the storage box, along with another 35cm of 6 cotton strands into 1 for the mast bracing.
2 Likes
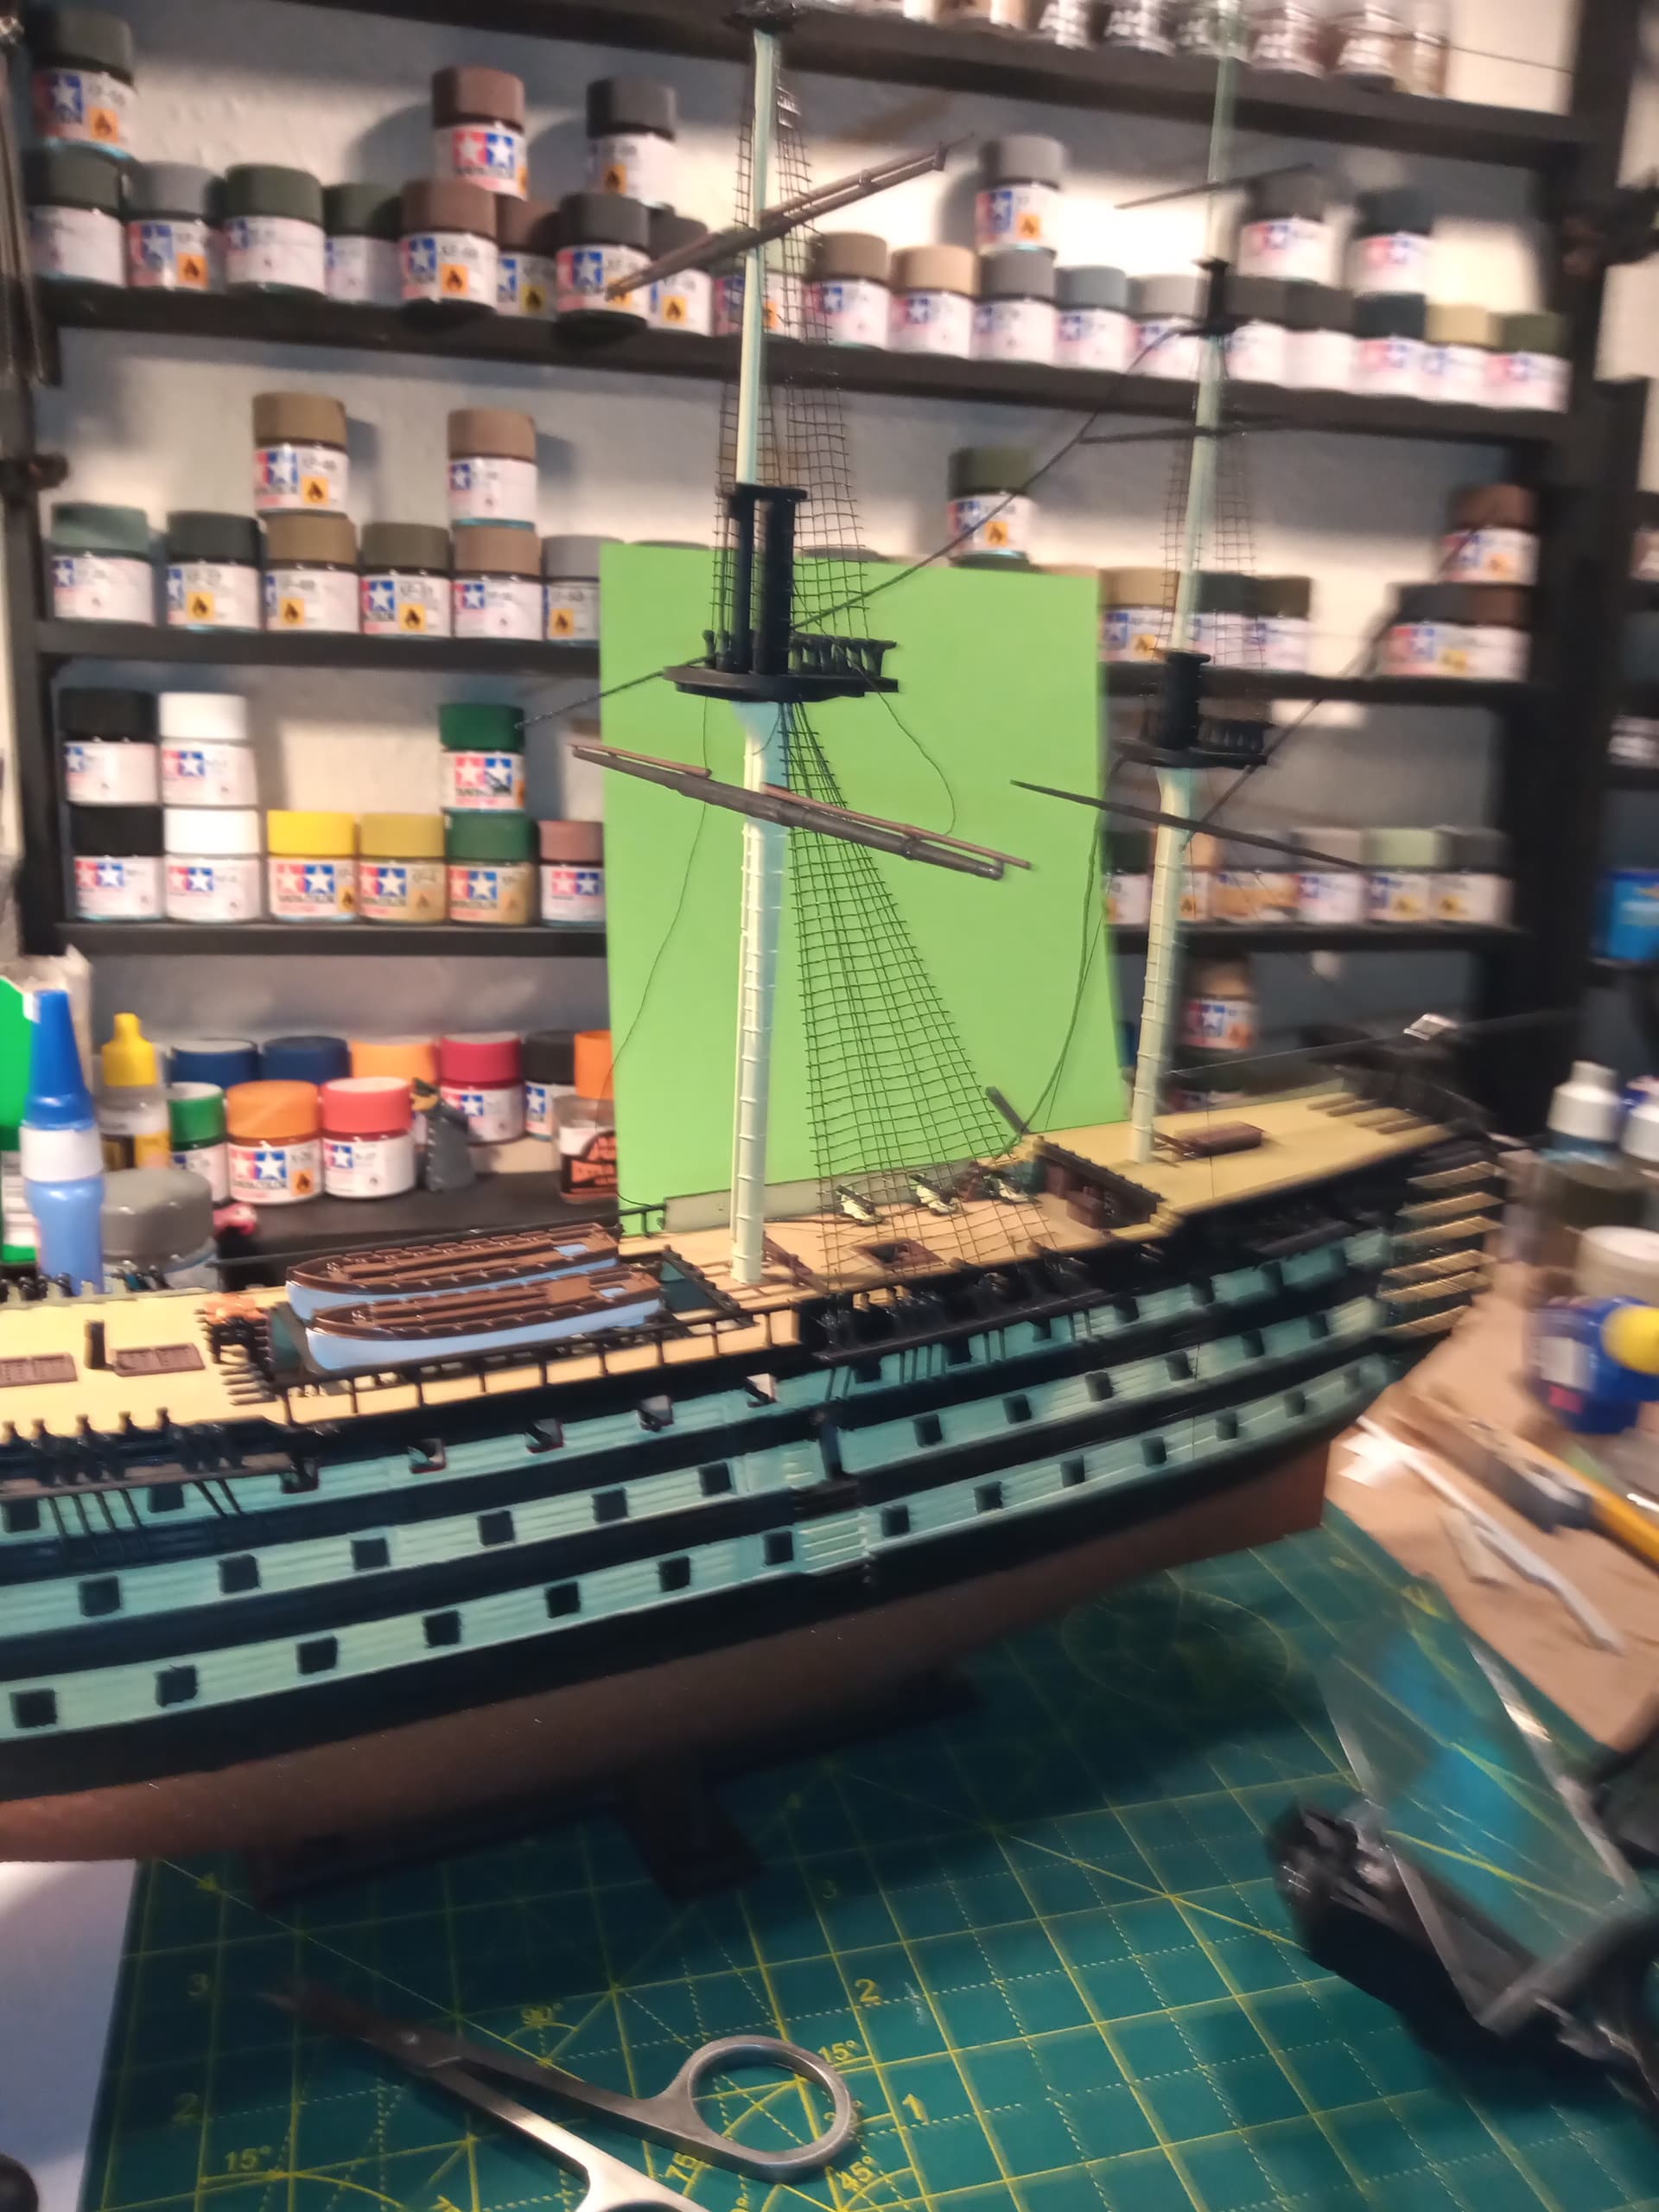
Hooray…the shrouds are on, well 6 are anyway… Better than a poke in the eye with a sharp stick lol
Mizzen upper.

Main upper
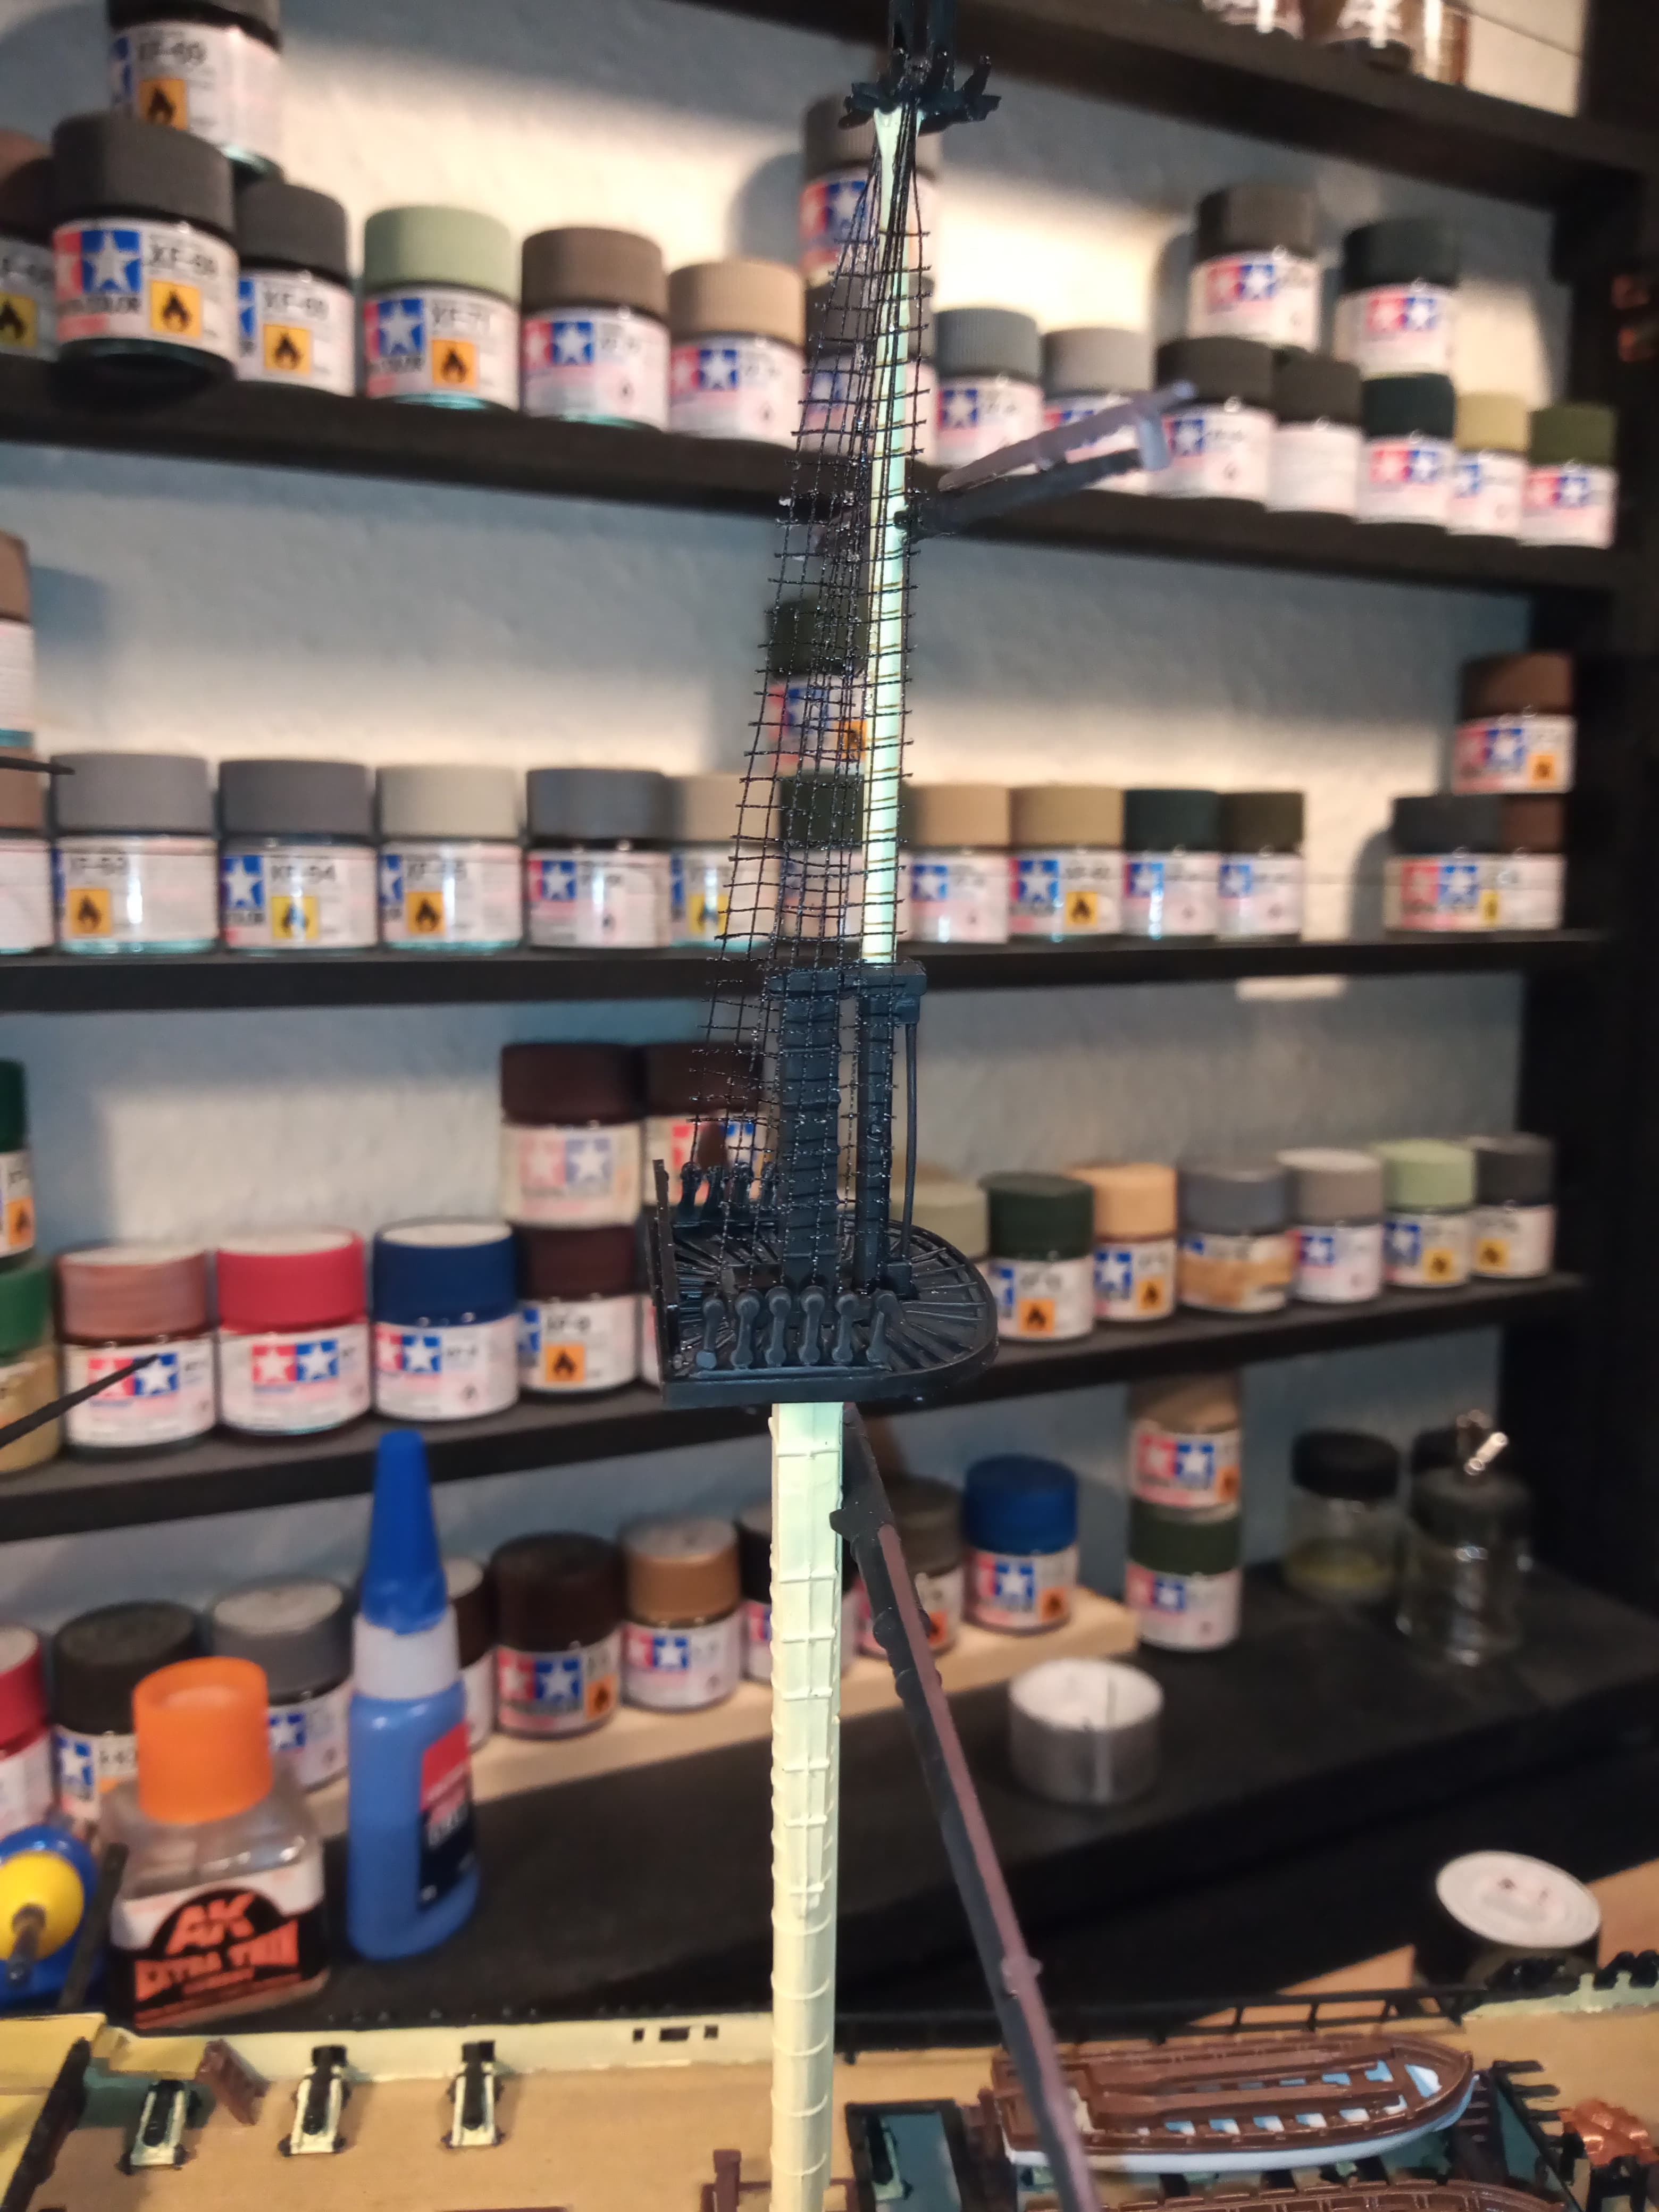
And fore upper.

There still needs to be some areas trimmed a bit finer, and lost ratlines added, but will be a 5 minute job once masts are set in place.
Started the last shroud assembly… C 2, the main mast lower.
Once that’s done, will get all the masts secured and straight and true front to back…
7 Likes
All shrouds done. Just waiting for the clear on the main lower to set
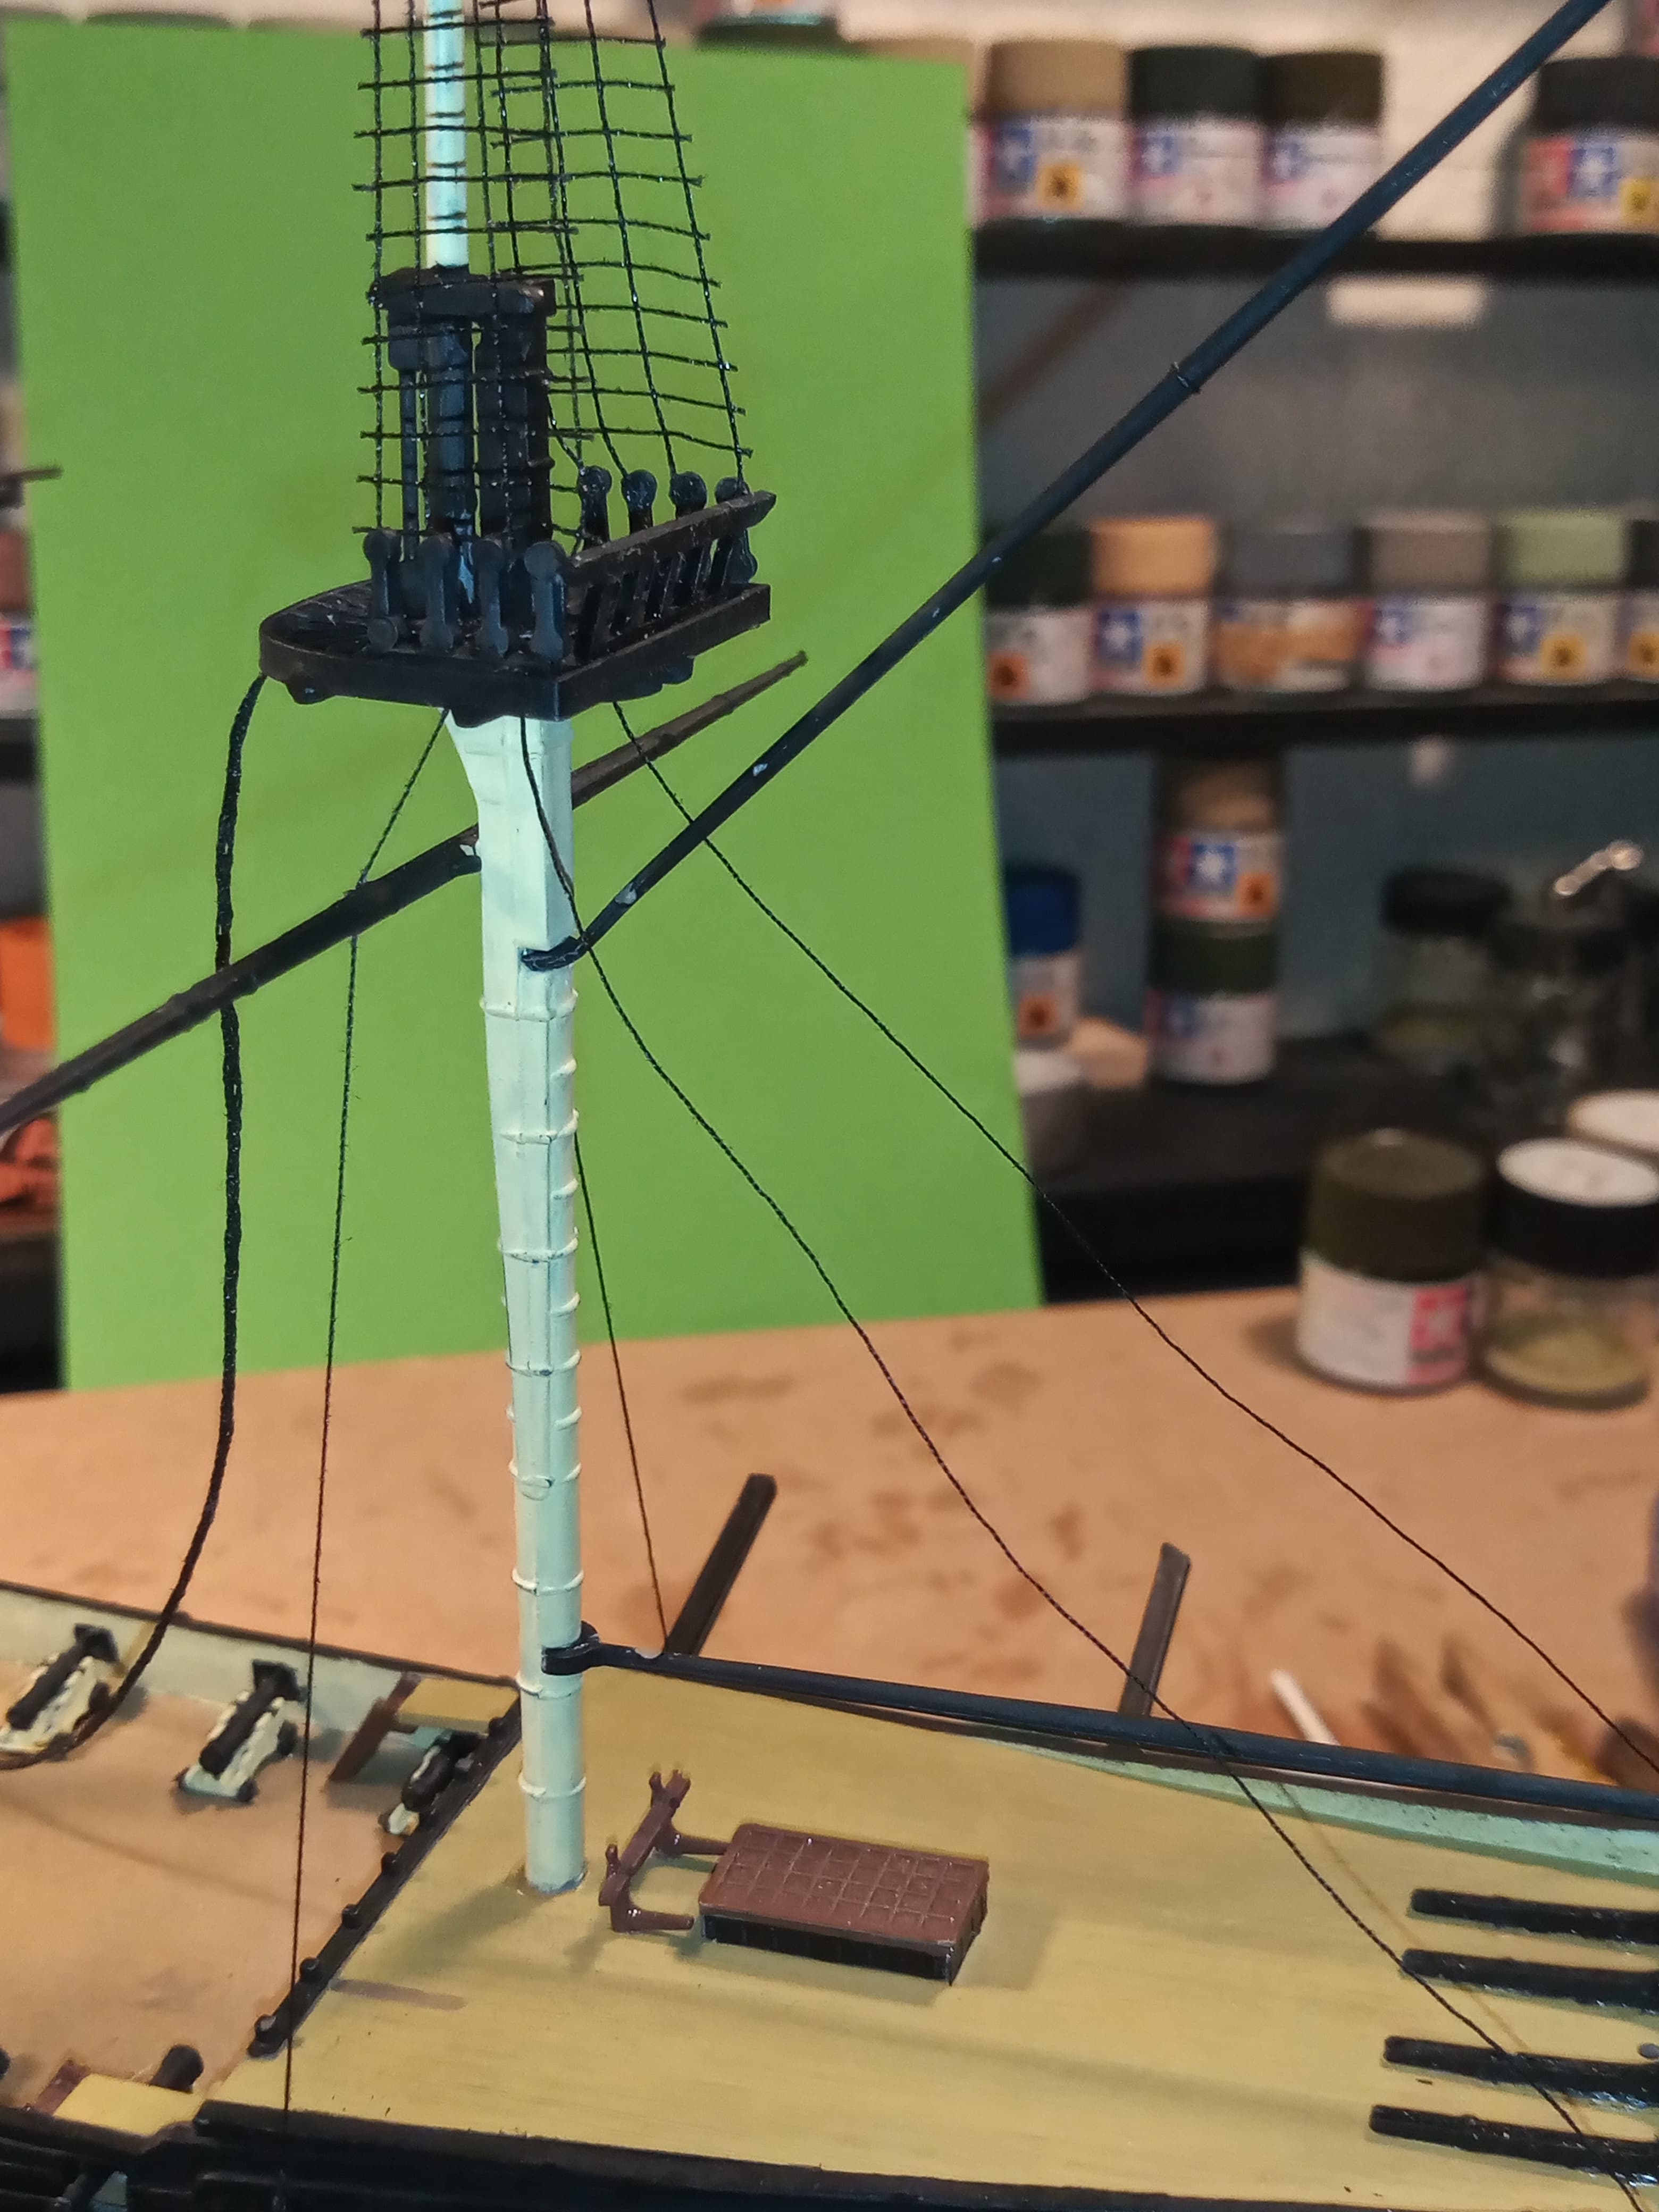
Have started on the mast fixing. Begun with the mizzen mast… After a lot of faffing about, I eventually got it straight and even left to right…
Sadly I think this will be a job that is one mast per night… the male/female connection points are not the best, the mizzen one is very loose, the main has a slight angle when the mast is in, and the fore is very tight but almost straight which is a bonus…each will take a bit of work…
5 Likes
A few ups and downs today …
I put the main mast in this afternoon and thought everything was ok, but when I checked fore to aft, the mizzen mast had developed a list which I rectified and will go over later.
When I did the main mast, that was leaning to the starboard so I decided to add the port side shroud to try and bring the mast back into true.
This is a close up of the end of the shrouds going into the holes I drilled through the deadeyes.
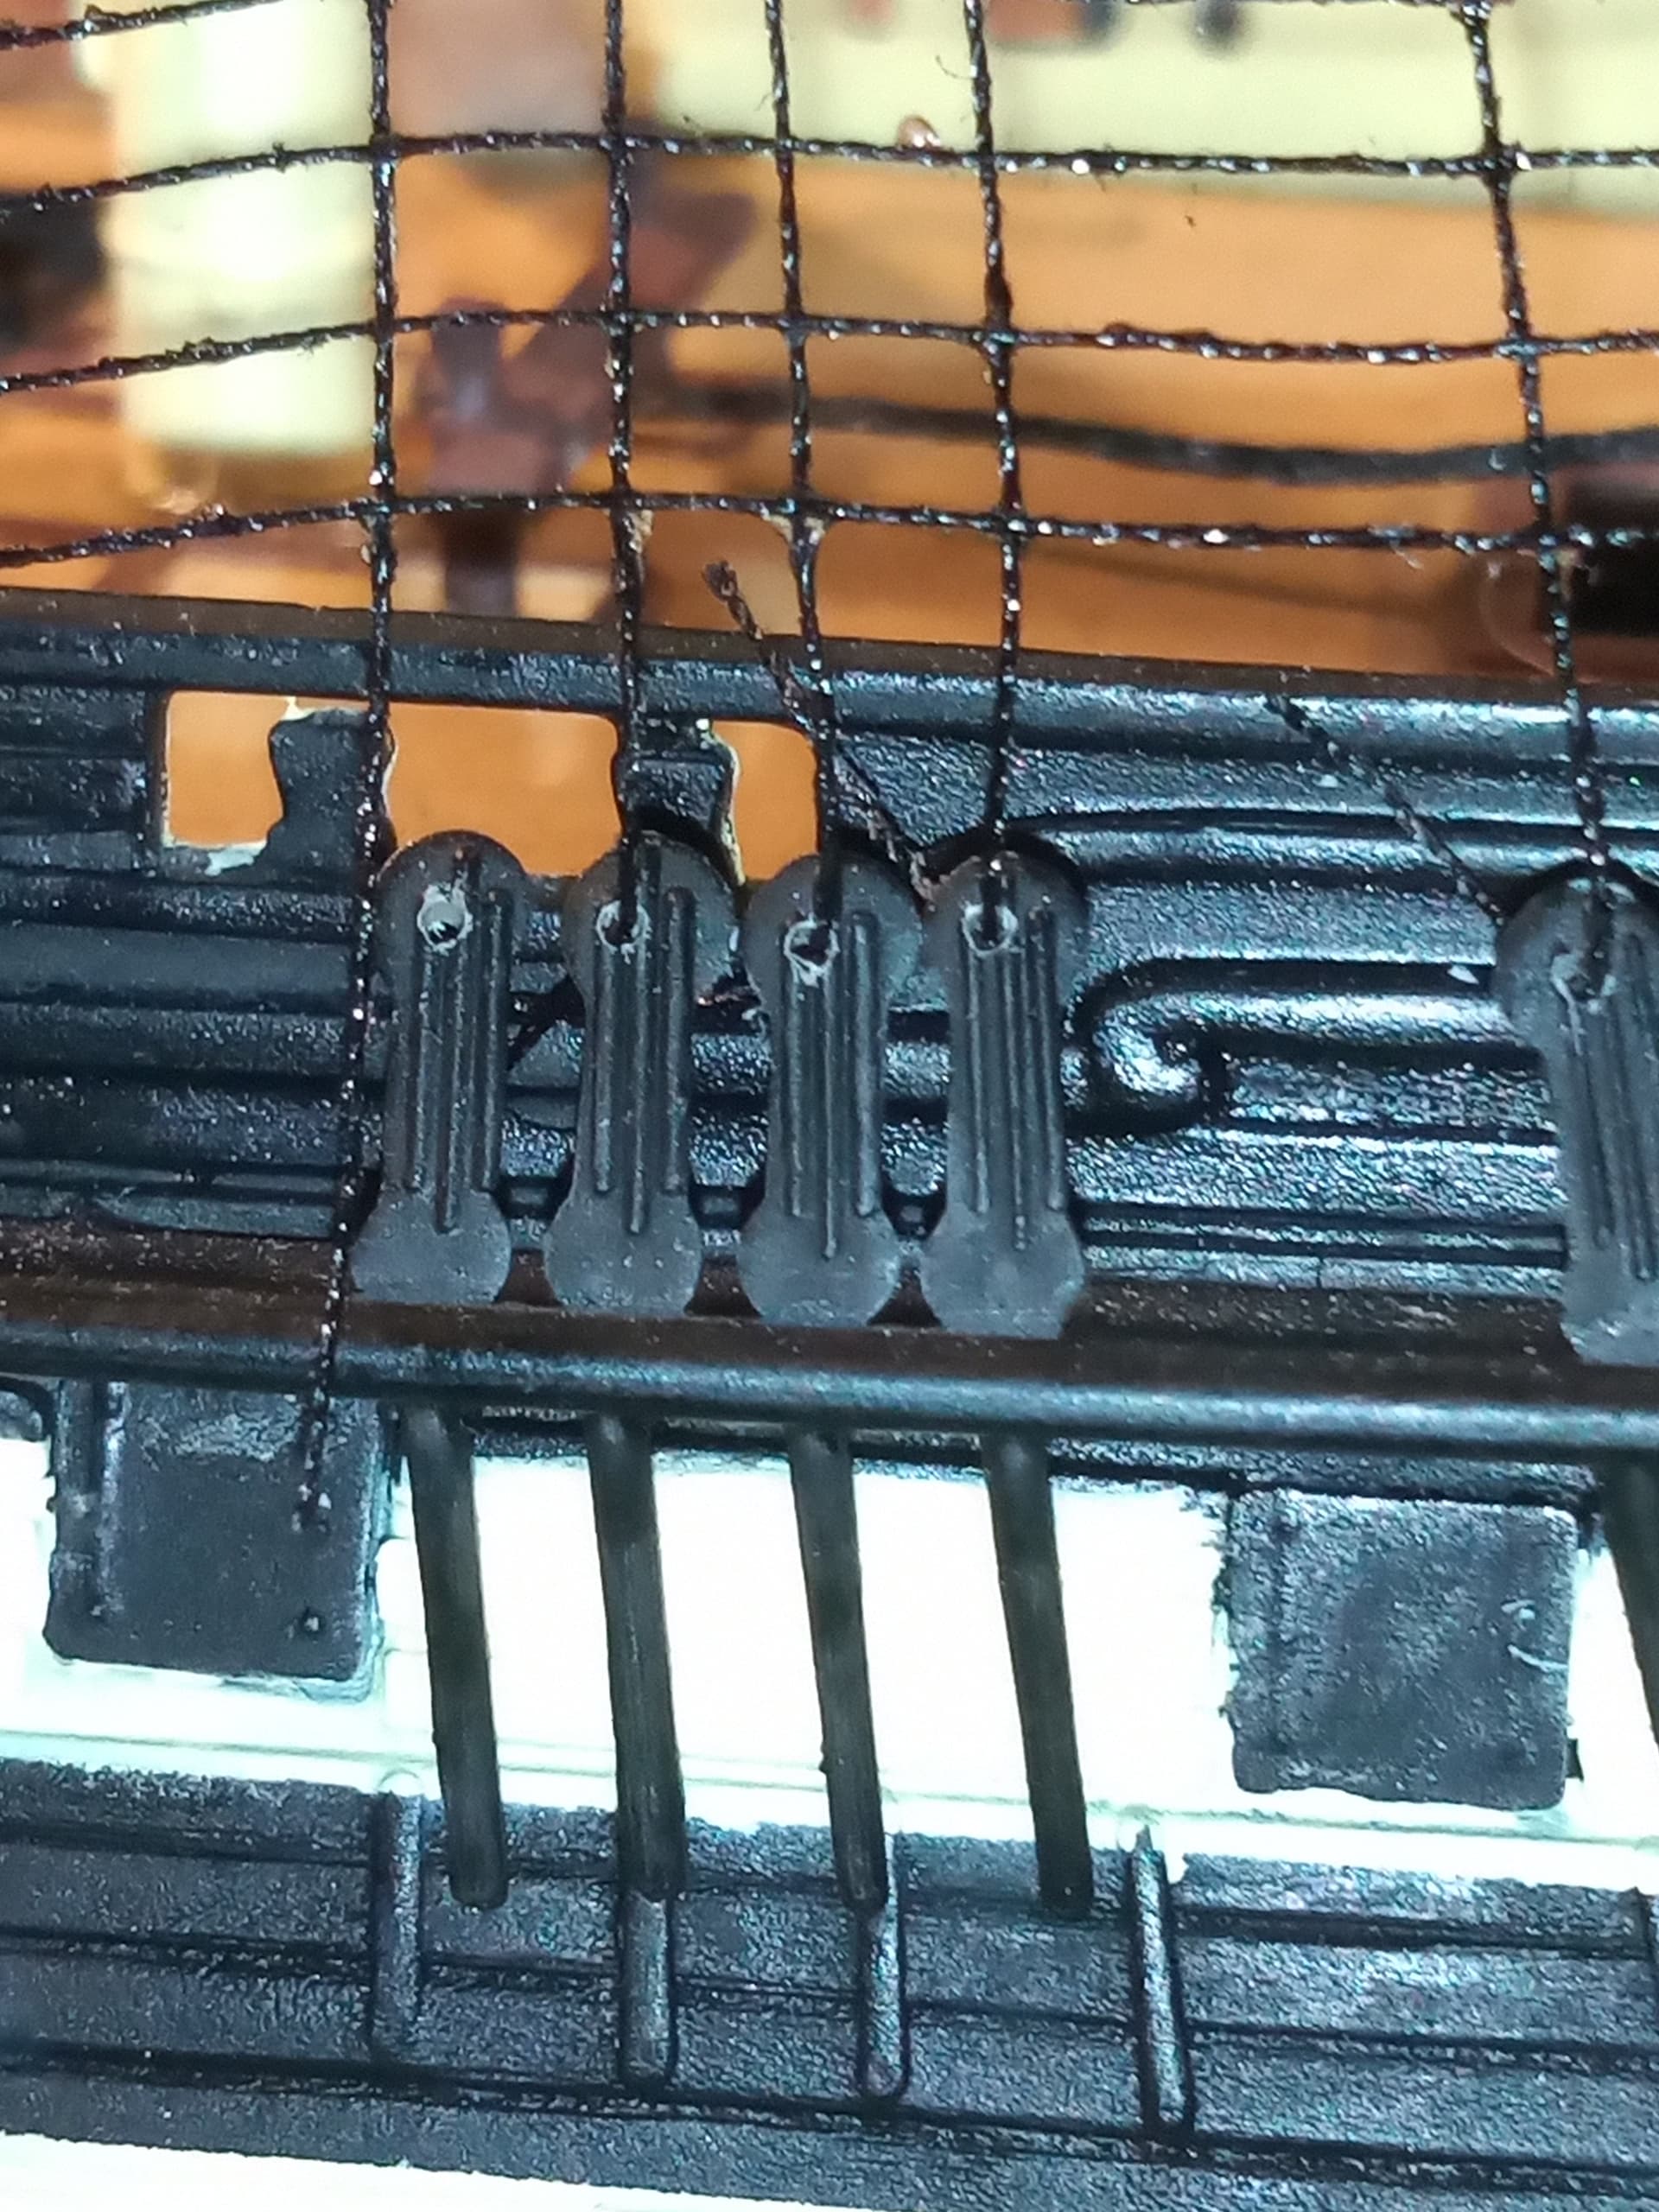
And how it looked with them all bar one through and glued off.

Doing that was enough to bring the mast back in line.
I also added to the 2 brace lines from the mizzen which will go onto the main mast.
Just a close up of the brace line.

To correct the mizzen lean, I introduced a line of (made up artistic license rigging) rigging from the first platform on the mizzen, and tightened that around a piece of the timber coming out the side of the upper hull, and super glued it. Then just added another piece of rigging to the other side to mirror it.
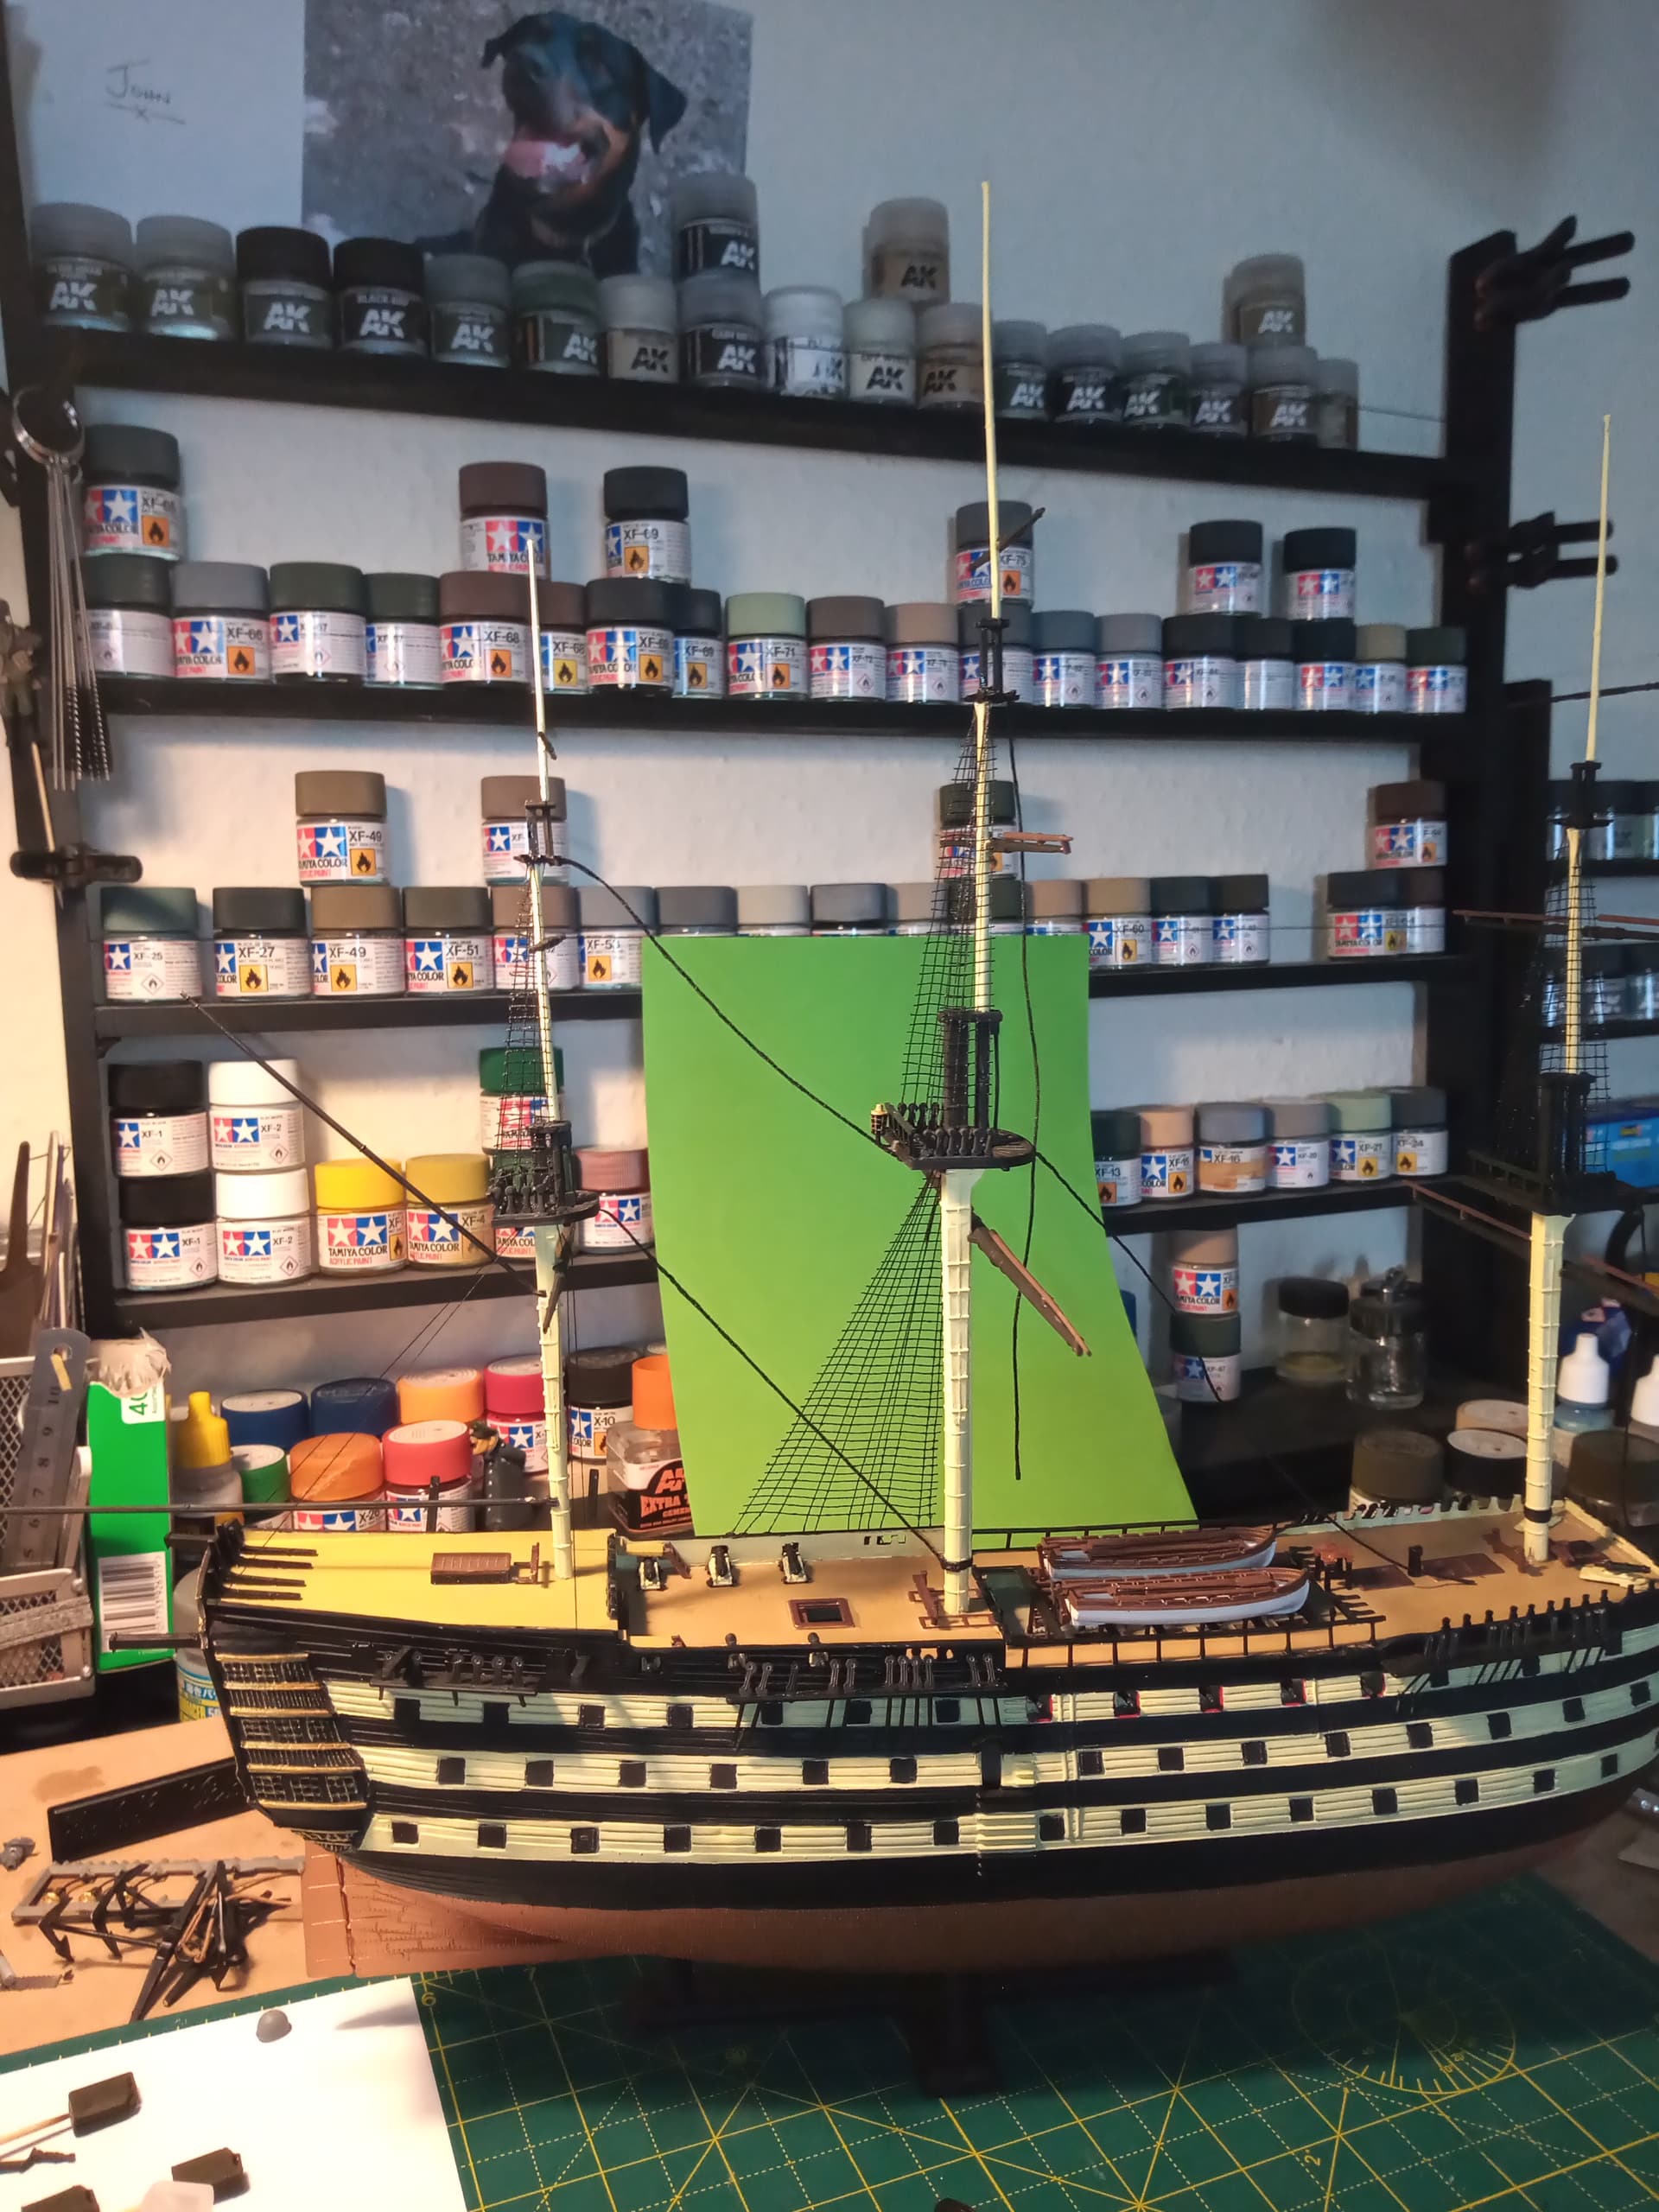
This is with the main mast fitted and all the leans corrected.
Another shot showing the main and the lower shroud in place and the correctional rigging.
Now, the braces from the mizzen to the main mast.with even the slightest pressure on the upper brace, it pulls the upper mizzen well forward with an obvious bend.
To counter this I introduced some more fictional rigging ( sorry to all the nautical die hards but I’m afraid needs must on this occasion)
Again from the first platform on the mizzen, I have secured a length of cotton (rope rigging)
And they have been pulled just taught and they are secured to the 2 long timber beams that come out from the upper stern…
Anyway, eventually it all fell into place…
Oh , and during all this, I knocked it off its stand, and one yardarm broke off the Bowsprit and an unknown part snapped off the mizzen…all now repaired lol…![]()
![]()
6 Likes
Just as well it was this and an easy repair, not the M3A1 and all that etch to go ping !!
Looking very nice indeed John.
1 Like
Thanks Peter… It’s coming along ok I think. Not perfect by any means, but I’m content …
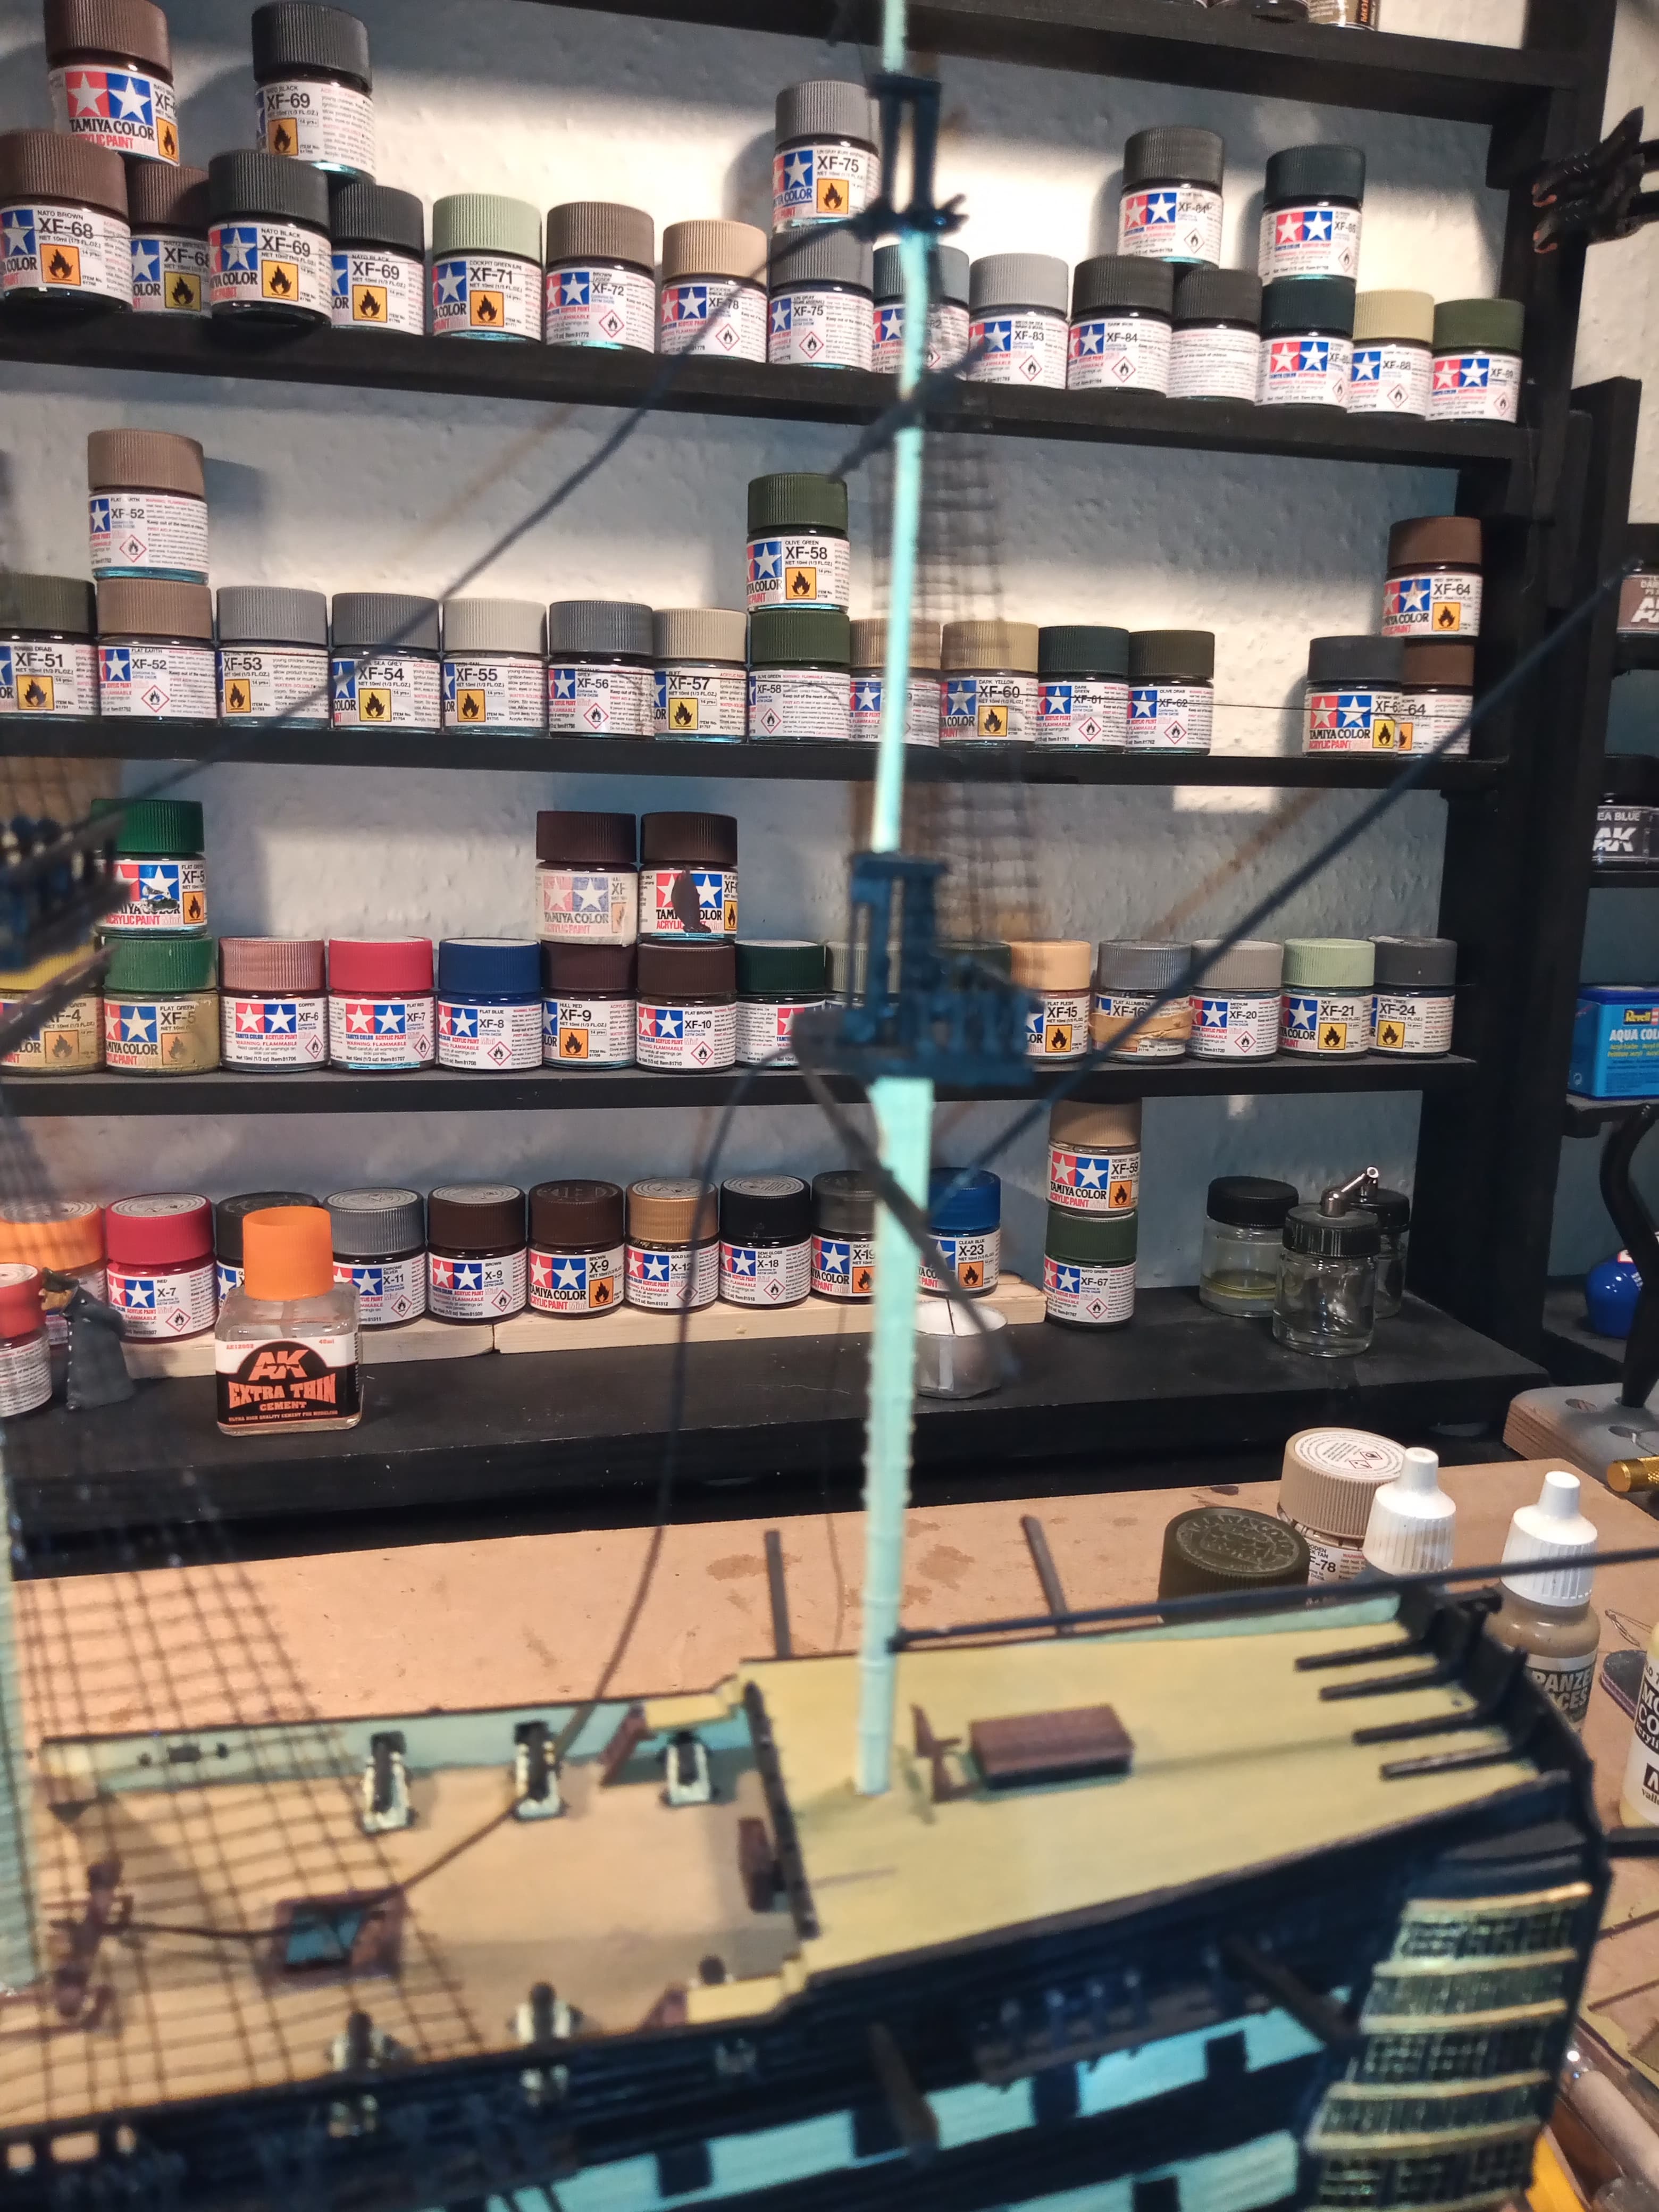
Started to put the braces on the mizzen , main and fore mast.
Obviously fore mast is now in and squared. No problems with this one at all, easiest of the lot
The upper brace on the mizzen looks a little slack, but this gets taken up when the brace from the middle main gets secured to the lower foremast.
Before I secured the fore mast I secured the 2 main braces onto it, that end up on the Bowsprit…
Hopefully by tonight the fore mast will be secure and most of the remaining lower shrouds will be fitted… Then it’s the single line rigging…
4 Likes
Also, if anyone has any insight, I’m not sure whether to stay with the black colour for the single strand rigging or go with a normal rope colour ???
Black color for standing rigging - that which is stationary and structural - the color is from the preservatives coating it .
Natural for running rigging - those lines that were used to control booms , yards and sails etc . The movable lines that had to be run through blocks , belayed , tied off etc.