Probably dont want to hear this. (Or maybe it has already been discussed here.)
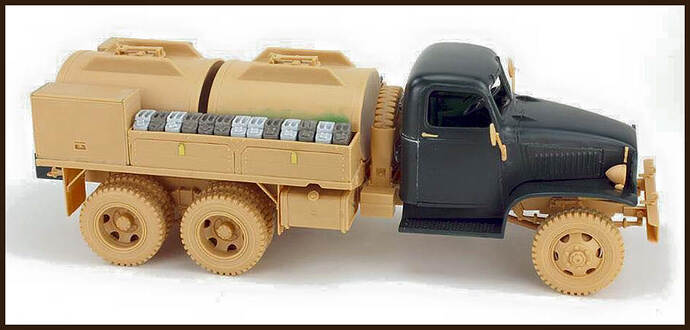
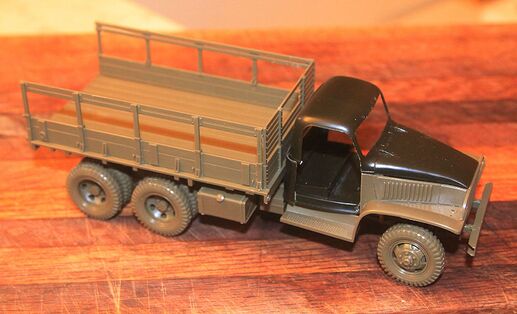
The proportions on the HB hard cab are incorrect throughout the entire line of HobbyBoss CCKW trucks. Best to find an Italeri hard cab water truck and make the swap.
Overall length of vehicle is correct but fenders and hood are too long and therefore cab has been squashed front to back to make up for the fender/hood mistakes.
There are several articles in the archives covering this.
… among them one that describes the build of the model that now has this faucet, see link further up in this thread.
Peter
1 Like
Hi Mike,
Yep - as I said at the start, I knew of the errors but chose to use the kit cab anyway. I must say, if you don’t put it near a correct truck it looks OK…
(Bear in mind I got mine for less than half retail price knowing the issues as reported by many others, so I can’t complain too much! But I wouldn’t pay full-price for any HB kit these days.)
Maybe someday we will be blessed with an accurately-dimensioned fuel truck from Tamiya or Italeri.
1 Like
Comparison photo of Italeri (correct) fender length* and HobbyBoss (Incorrect) fender length. This error in HB’s first “Bofers” CCKW gun truck has continued to infect their entire line of Deuce and a Halfs!
The overly long fenders also means the hood to too long and while the overall total hood-cab length is correct for the vehicle, the cab had to be “punched in the face” to make up for HB’s earlier mistakes. Instead of fixing the problem when they introduced their brand new Deuce line they instead tried to “Bully” their way through the problem as though it did not exist. ~ Very sad.
Not to worry though all those squashed cabs will work perfectly when you are scratch building some of the British Bedfords. They are perfect for that!
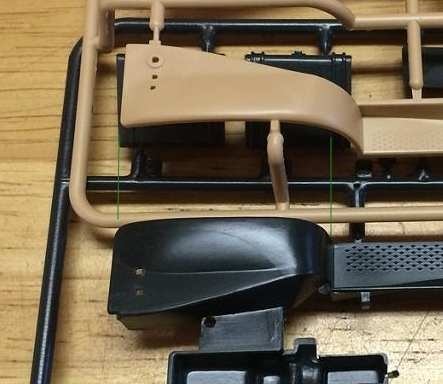
Photo courtesy of John Hale
p.s. The Tamiya and Italeri cab and fender structures match each other almost perfectly and are nearly interchangeable. Not so with the HB version.
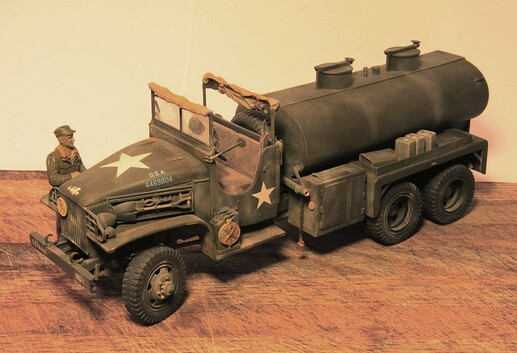
Here is John Hale’s rendition of the HB fuel truck using the hard cab taken for the Italeri water truck of old. (These kits are easily available online and I believe Italeri has once again started to produce these.) Their popularity comes for the most part from all the modelers buying them up in order to steel the very nice hard cab.
Again photo & model by John Hale
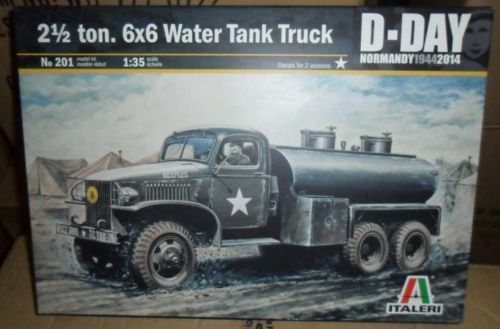
I believe this is Italeri’s latest boxing of their venerable old water truck model.
2 Likes
Tom, I am a GMC Deuce fanatic and I absolutely hate what HobbyBoss has done to that cab. And then that they continue to produce even more variants all still with that same abortion of a cab.
I apologize as it is very difficult for me to get past the cab issue to admire the beautiful work you have done here on your model!
I do need to build this model myself (making the alterations as listed above) and I need to order about a half dozen of those great looking HB decal sheets for all the fuel browsers and fuel trailers I have either under construction on in the planning stages.
I very much like how you treated the engine and how you made serious improvements to the manhole hatches and to the large drain valve!
Thank you for these comparisons between italeri and HB.
Pascal76
As I have said earlier the Italeri and Tamiya parts are almost interchangeable, but certainly this is NOT true of the incorrect HB parts.
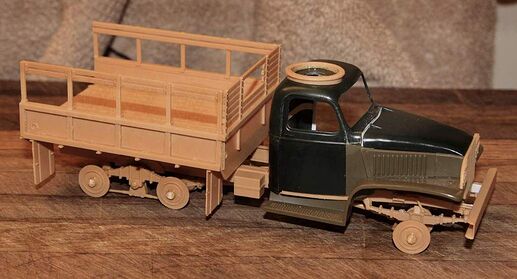
Here is a basic Tamiya LWB CCKW build with the Italeri hard cab parts dropped in. (The Italeri cab floor did require some cutting and slight reshaping to make it work with the tamiya firewall.)
Then here is the HobbyBoss SWB CCKW with the Tamiya fenders and the Italeri hard cab.
(I don’t recommend doing this three kit combo as there was a lot of cutting and matching to do.) I suggest just using the entire Italeri cab and fenders with the HB chassis and load box.
All else about the HB offering is excellent! (HB offers the best CCKW firewall in the business!)
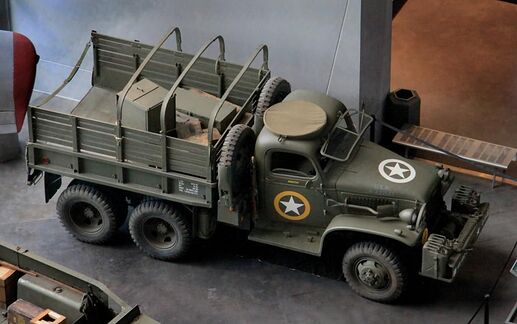
I chose here to use one of my Italeri “Gun Truck” hard cabs as something just a little bit different. Some trucks had the hole in the roof but lost their gun mount somewhere along the way - or it was never installed.
My photo from New Orleans WWII Museum
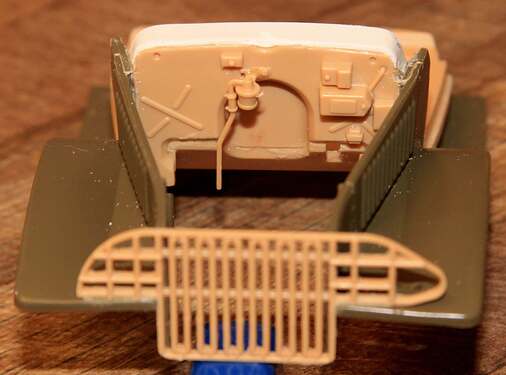
As said - the HB firewall is the best in the business. (I cut the Italeri hood open so I did not lose all this great engine and firewall detail! ~ Voltage regulator, fuel line and filter, circuit breakers/relays and bead roll strengthening ribs. ~ Very nice!)
2 Likes
Hi Mike,
I agree with you on the HB cab issues, but on your fuel truck there are length issues with the tanks and bed too! And it bothers me to have to sacrifice a decent Italeri kit to harvest just the cab - all that frame going to waste… (The water trucks are a bit scarce here at the moment, and command a high price - Italeri needs to dump another big run on us so they can flood ebay and go cheap!)
I was out of town at a conference, hence the delay…
1 Like
Very little gets wasted around here, though I have no qualms to buy two kits (or three) to build one vehicle.
I had extra Water Truck tanks and chassis (obviously) so I put one of the left over Tamiya open cabs to work here for something slightly different.
Then an Italeri water truck will one day become a fuel browser:
(There is already a resin conversion out there for this that works with either the open of closed cab trucks.)
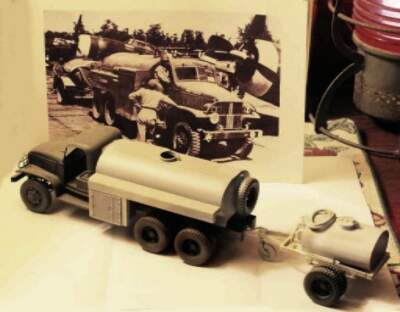
And it is going to take two water tanks to build this fuel trailer:
(no photos yet)
It is my understanding that Italeri HAS re-released the water truck due to its’ popularity so you should be seeing some additional kits hit the market.
Buying the water truck is still the cheapest way to get your hands on the correct hard cab.
1 Like
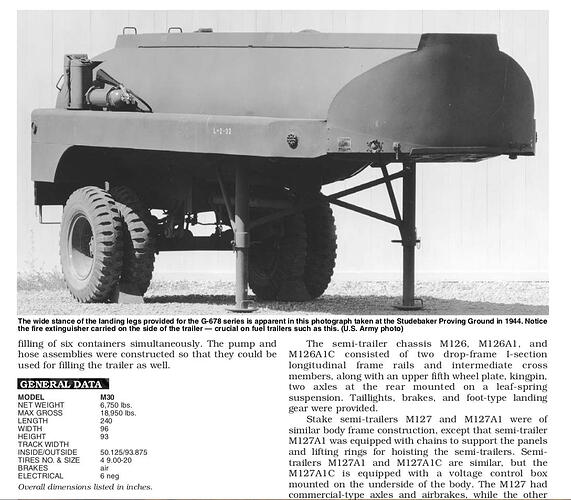
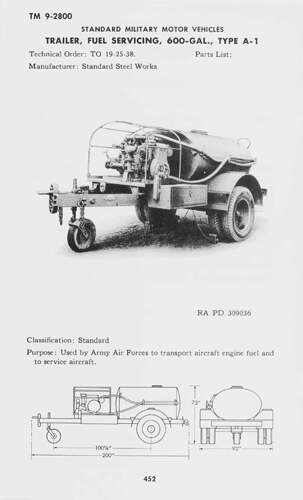
Do you have dimensions (length, width, height) of the tank on that A1/A3 trailer? I’ve looked but only found overall dimensions for the entire trailer.
Tom are you referring to the M30 fuel trailer?
I don’t have anything specific to the tank itself. I figure if I get to being within the framework of these overall dimensions I will be close enough.
Oh wait ~ you are referring to the small fuel trailer:
Both from Doyle’s “Standard Catalog of US Military Vehicles”
Note: In the model photo above I am, for now, using the smaller water tank trailer’s tank but it is my intention to build the larger fuel tank from scratch. Also I have purchased a resin model of the fuel trailer that uses the larger tank because I want to show the fuel truck as pulling more than one trailer.
It was the latter one - I can scratch the frame easy enough, but need to get the tank size right first.
that’s why I have stock in italeri.
Pascal76
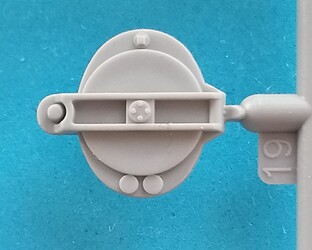
I’ve improved my HB fuel tank lids: After reducing their diameter near the hinges, I cemented 0.5 x 0.5mm Evergreen strip to the sides and sanded everything down. A slice of plastic tubing was added on the lid as “fusible plug” and a padlock installed on an arch of stretched sprue.
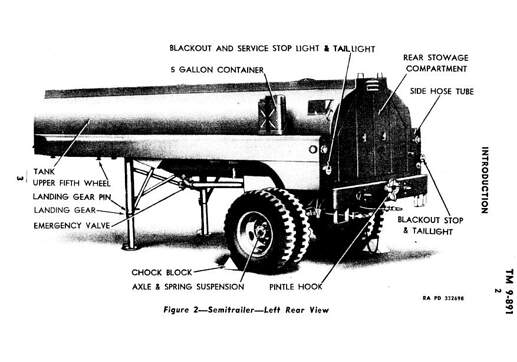
And here’s ICM’s version of that part - compare that to the TM illustration in post 13 above.
4 Likes
Not sure what pharmaceuticals the HB patternmakers were using when they designed that manhole cover…
2 Likes
酷爱饮料 (Kù’ài yǐnliào, Kool-Aid)
1 Like
The lid looks greart. As to how the kit part can be that far off is easy - model companies do a lot of their design based on photos. If they cn’t get an area like the top of the lid, they’ll go with the best guess. In this case it was might have been based on a similar lid someone saw on his way to work.
1 Like
Thank you - but as I stated in a “survey” a long while ago, I’m a builder, not a painter: The very thought of using my airbrush scares me senseless, and the results are corresponding, so I’m unable to produce multi-color coats on my models, let alone weather them. Like the girl said, nobody’s perfect.
2 Likes

